meckanik
Member
- First Name
- Jeff
- Joined
- Nov 24, 2021
- Threads
- 5
- Messages
- 15
- Reaction score
- 44
- Location
- Des Moines, WA
- Vehicle(s)
- 2017 JKUR
- Occupation
- Software dev
- Thread starter
- #1
This modification came about from the factory (optional) steel bumper not having a provision for a hard shackle. There are some aftermarket solutions to add hard shackle support, but they are rather expensive.
This mod will work best with a soft shackle and will eliminate the ability for the strap or cable to slip off of the factory hook.
I bought 20 pieces of the Swage Stud hardware and have 9 pairs of studs and bolts left. If people are interested in a
set of the hardware, I can sell for cost + shipping; pm for details.
Parts:
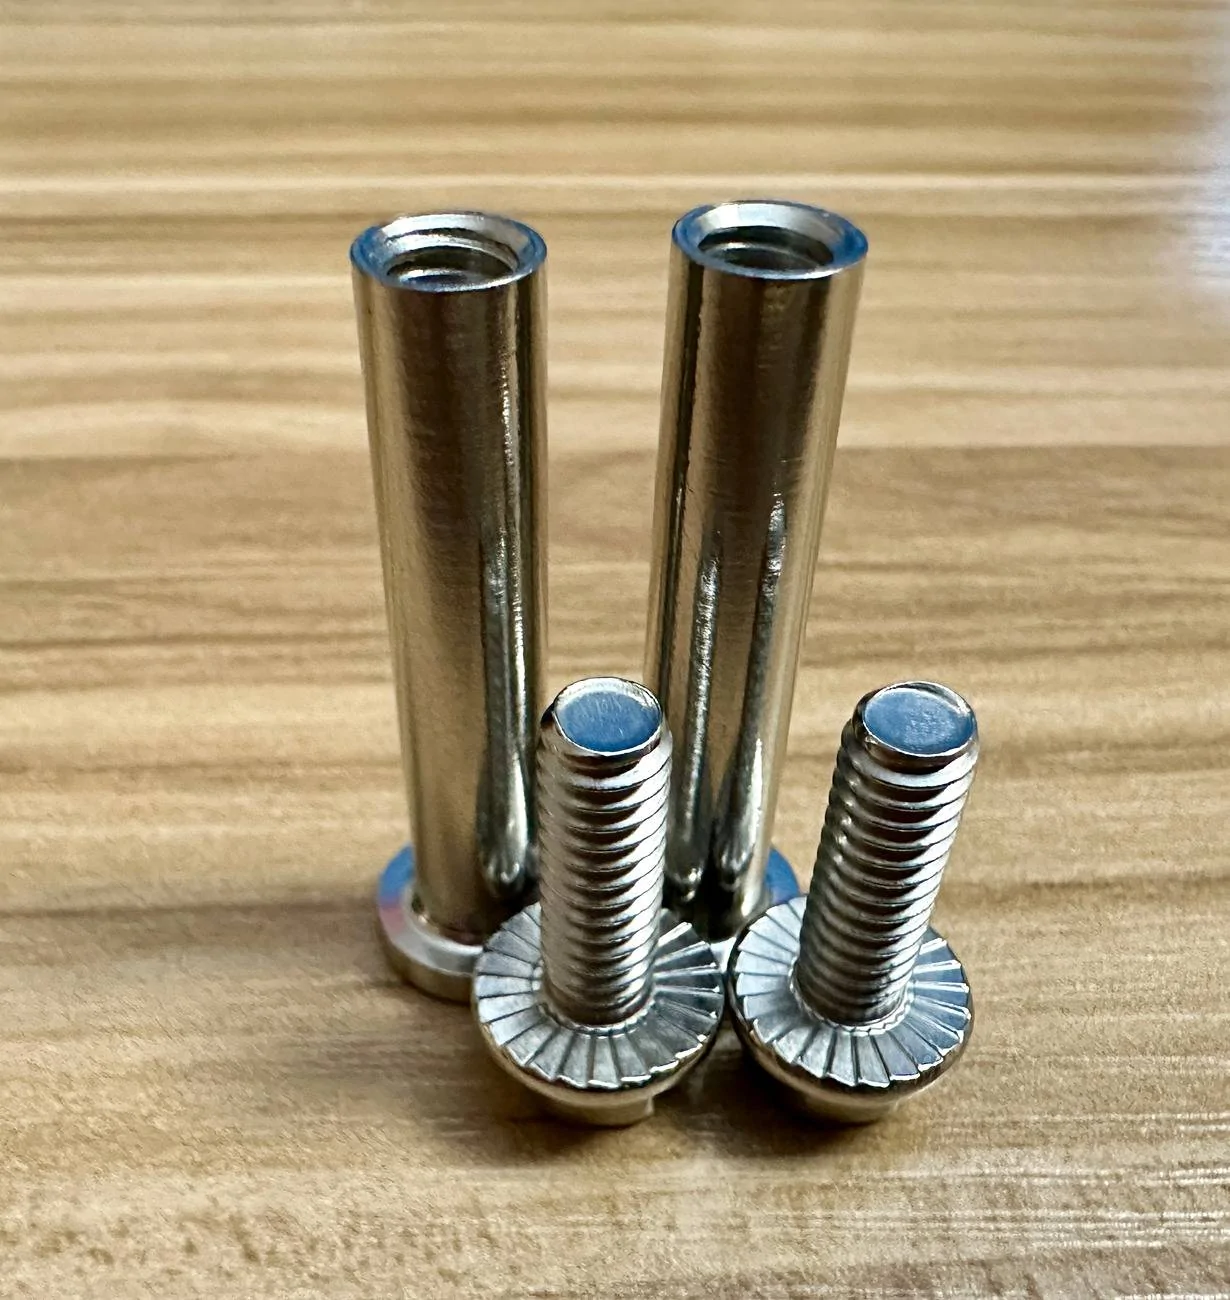
1/4-20 x .75" Stainless Flanged Hex Head Bolts
3/16 Stainless Swage Stud End (from an invisible cable railing kit)
Tools:
Drill
13/64" or 1/4" drill bit + pilot and step-up bits
Center Punch
3/8" Stubby / Micro Combination wrench
5mm Allen Bit / Wrench
6" Extension for Allen Bit (1/4" or 3/8" Drive)
Rachet for Allen Bit (1/4" or 3/8" Drive)
Sharpie
Blue Threadlocker
Alcohol
Black Touchup Paint
Small file
No Tap:
1/4" Drill bit (not verified)
To Tap (Optional):
1/4" Drive 5.5mm Socket for tap (may vary by brand)
6" 1/4" Drive Extension
13/64" Drill Bit (plus small bits to step up with)
1/4-20 Tap
Why tap the hole?
I tapped the hole because the upper fastener has a relatively thin wall and I wanted the smallest possible opening for the Swage Stud to have maximum support against the bumper for stability and strength.
Instructions:
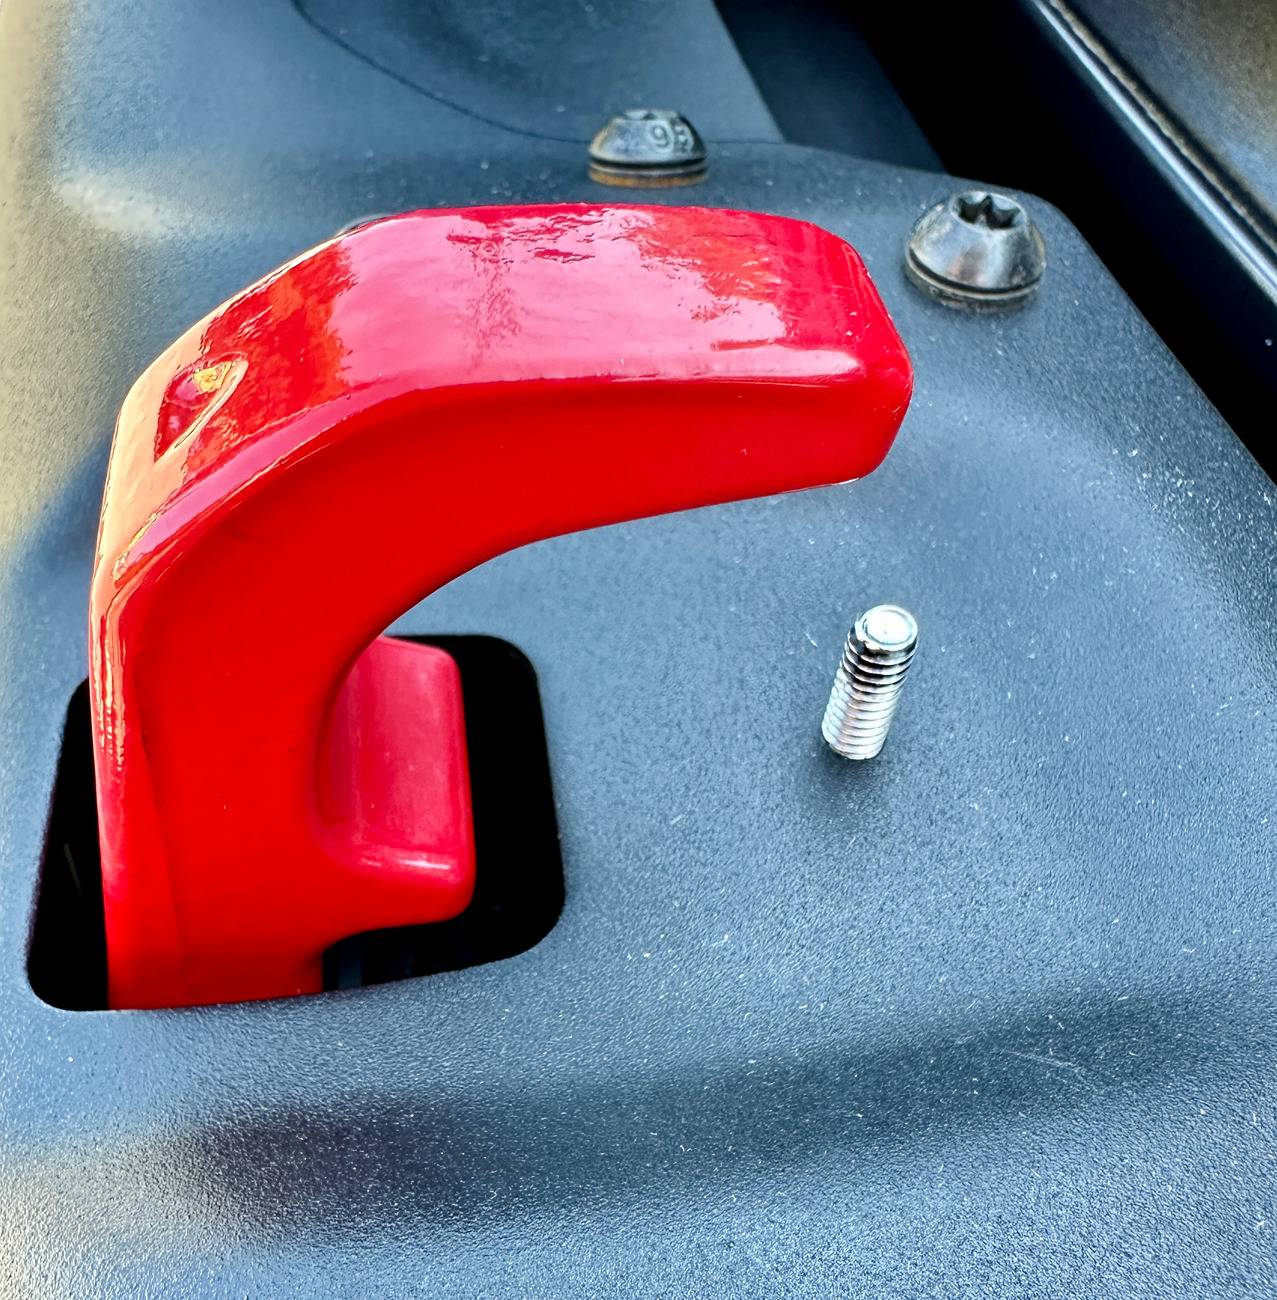
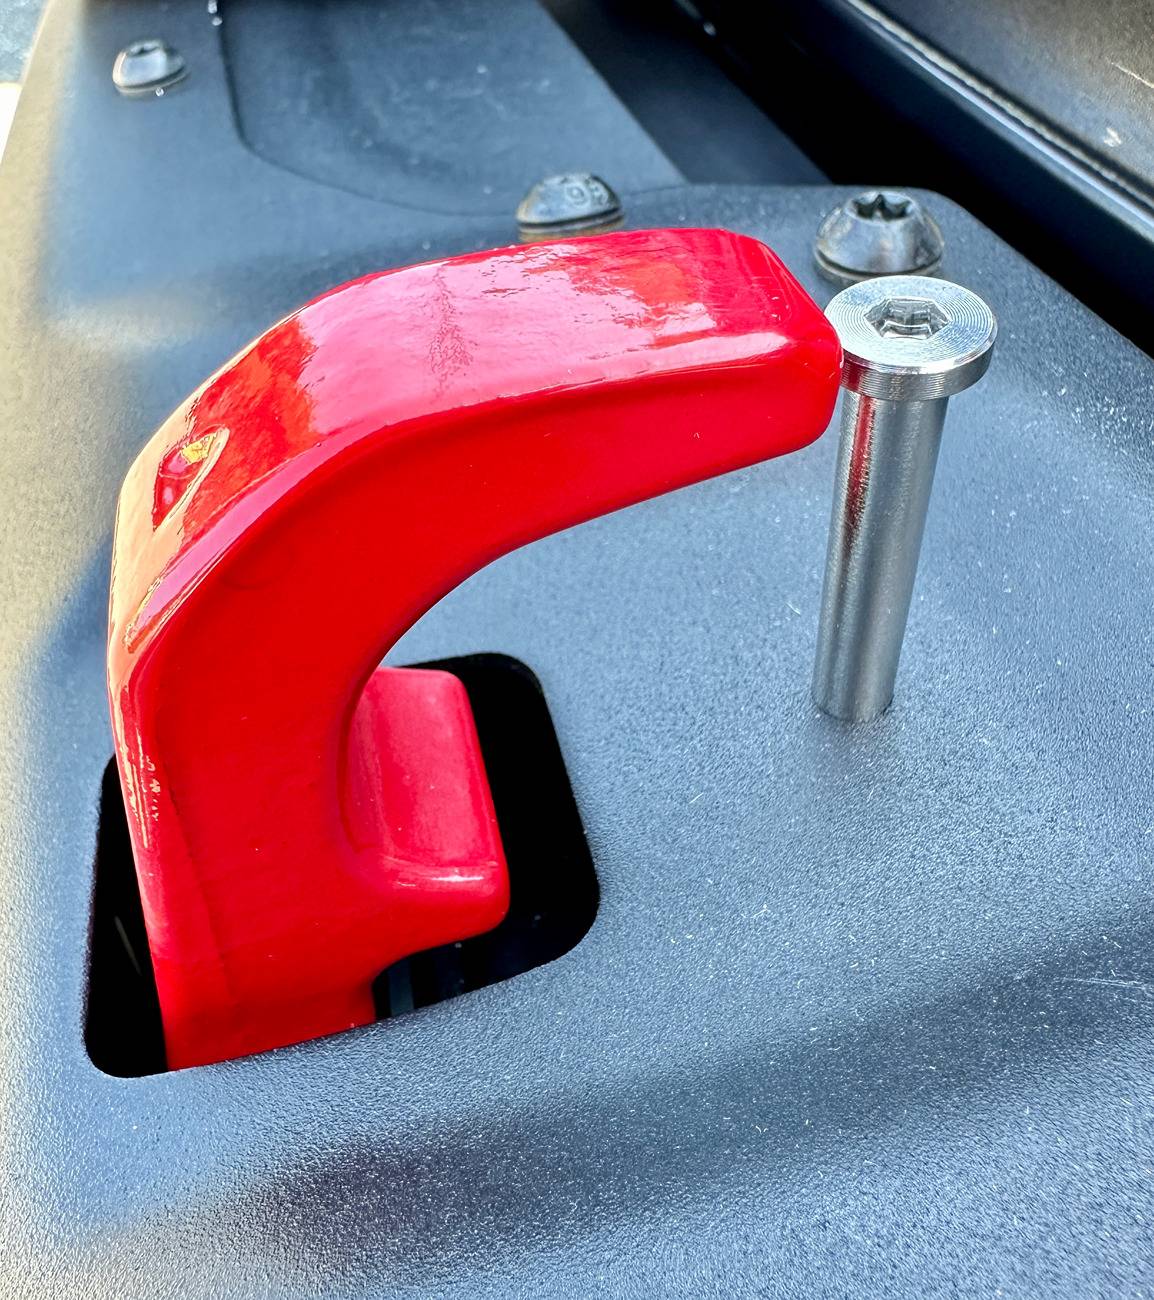
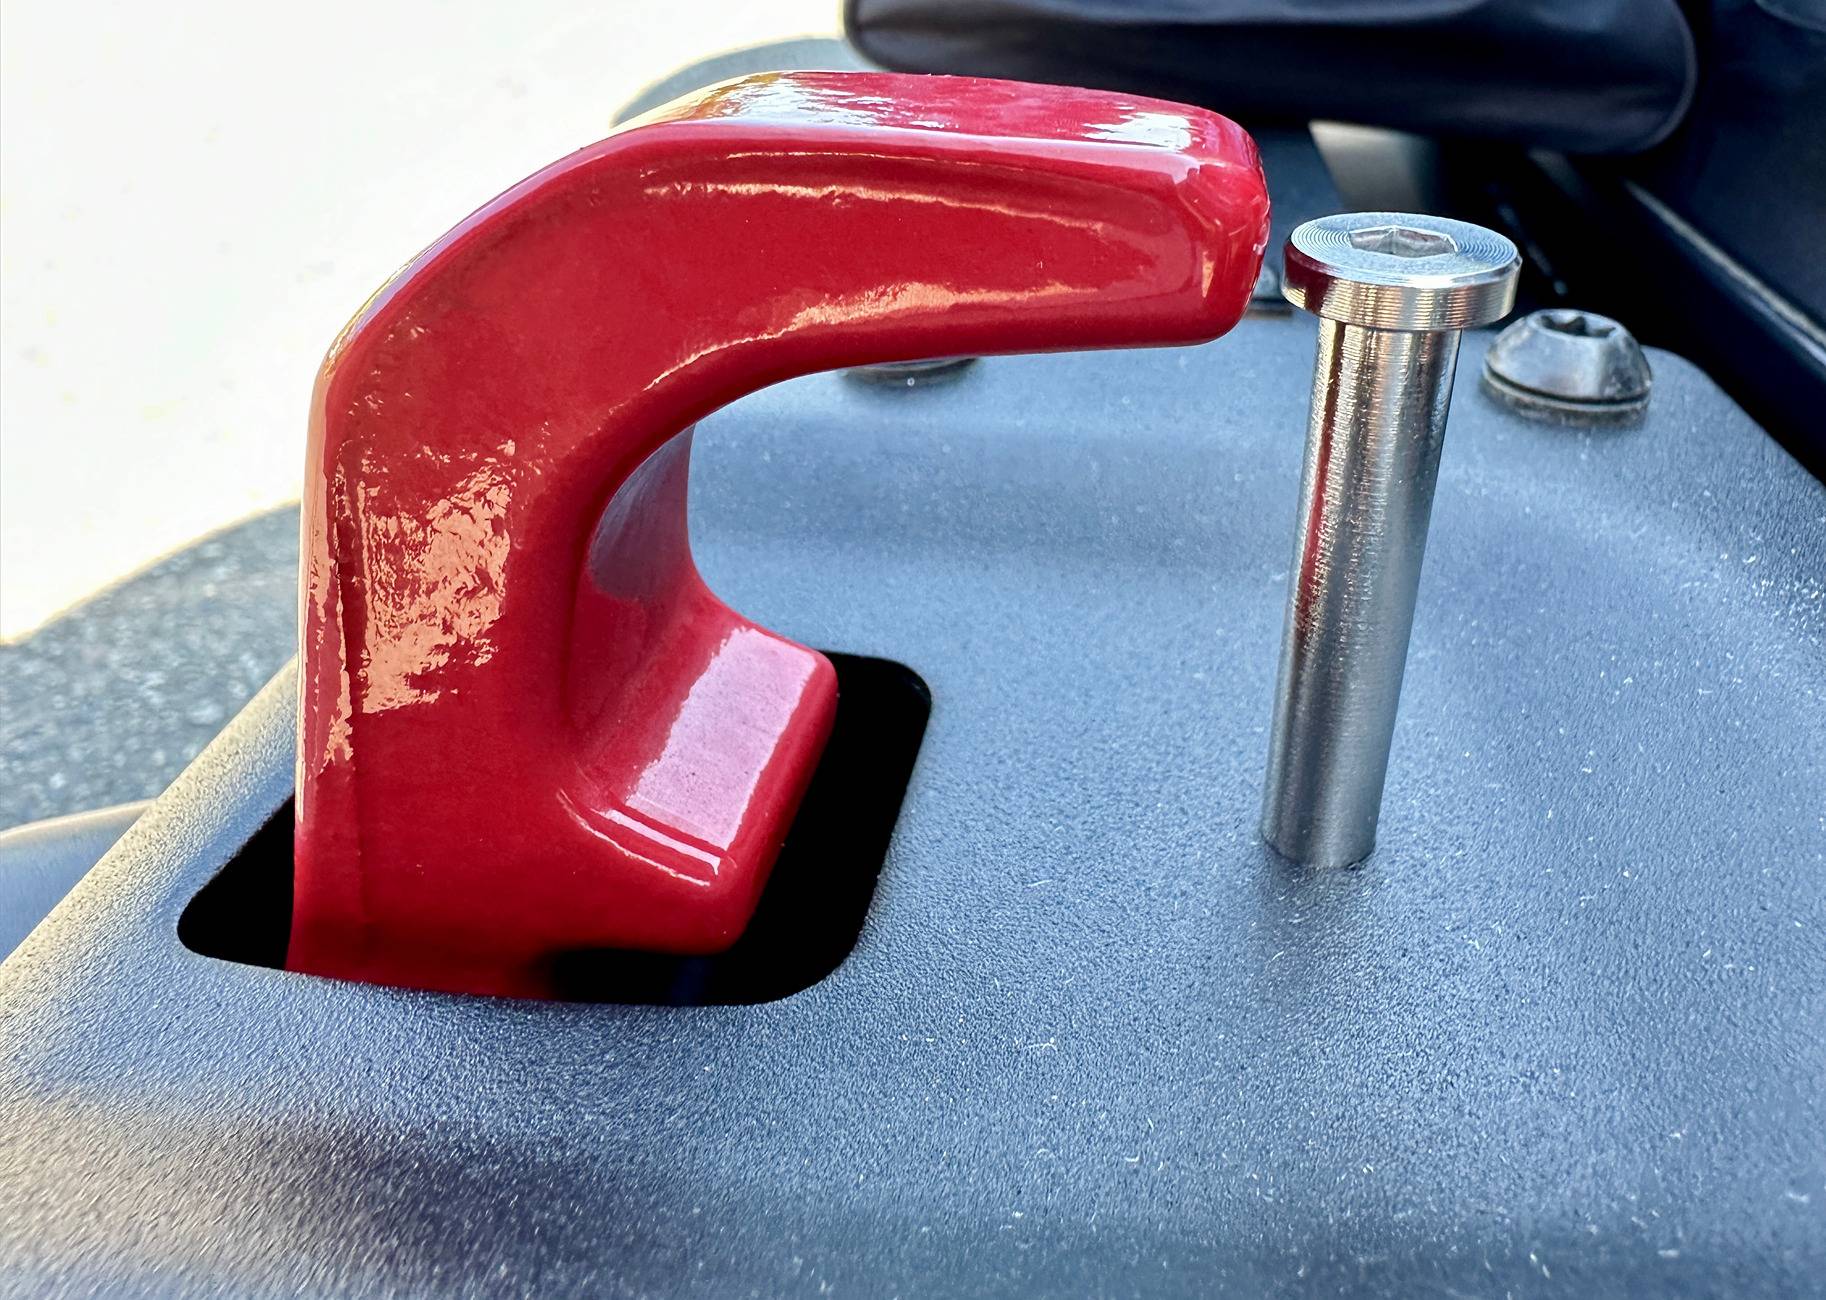
Take the Swage Stud and locate it in front of the tow hook with a small gap between the end of the hook and the head of the stud (see pics).
Carefully hold the stud in place and draw a circle around the base of the stud.
Locate the punch dead in the middle of the circle and punch a starter dimple.
Pilot the hole and step up to desired size (13/64" to tap or 1/4").
If tapping:
Tap the hole, deburr with file then verify the threads with the bolt to be used.
Clean threads with alcohol, then apply touch-up paint to the threads and let dry.
Thread the bolt up from underneath and snug (these threads will be weak so don't go full gorilla).
To Finish:
Apply blue threadlocker to 1/4-20 bolt and/or the inside of the Swage Stud.
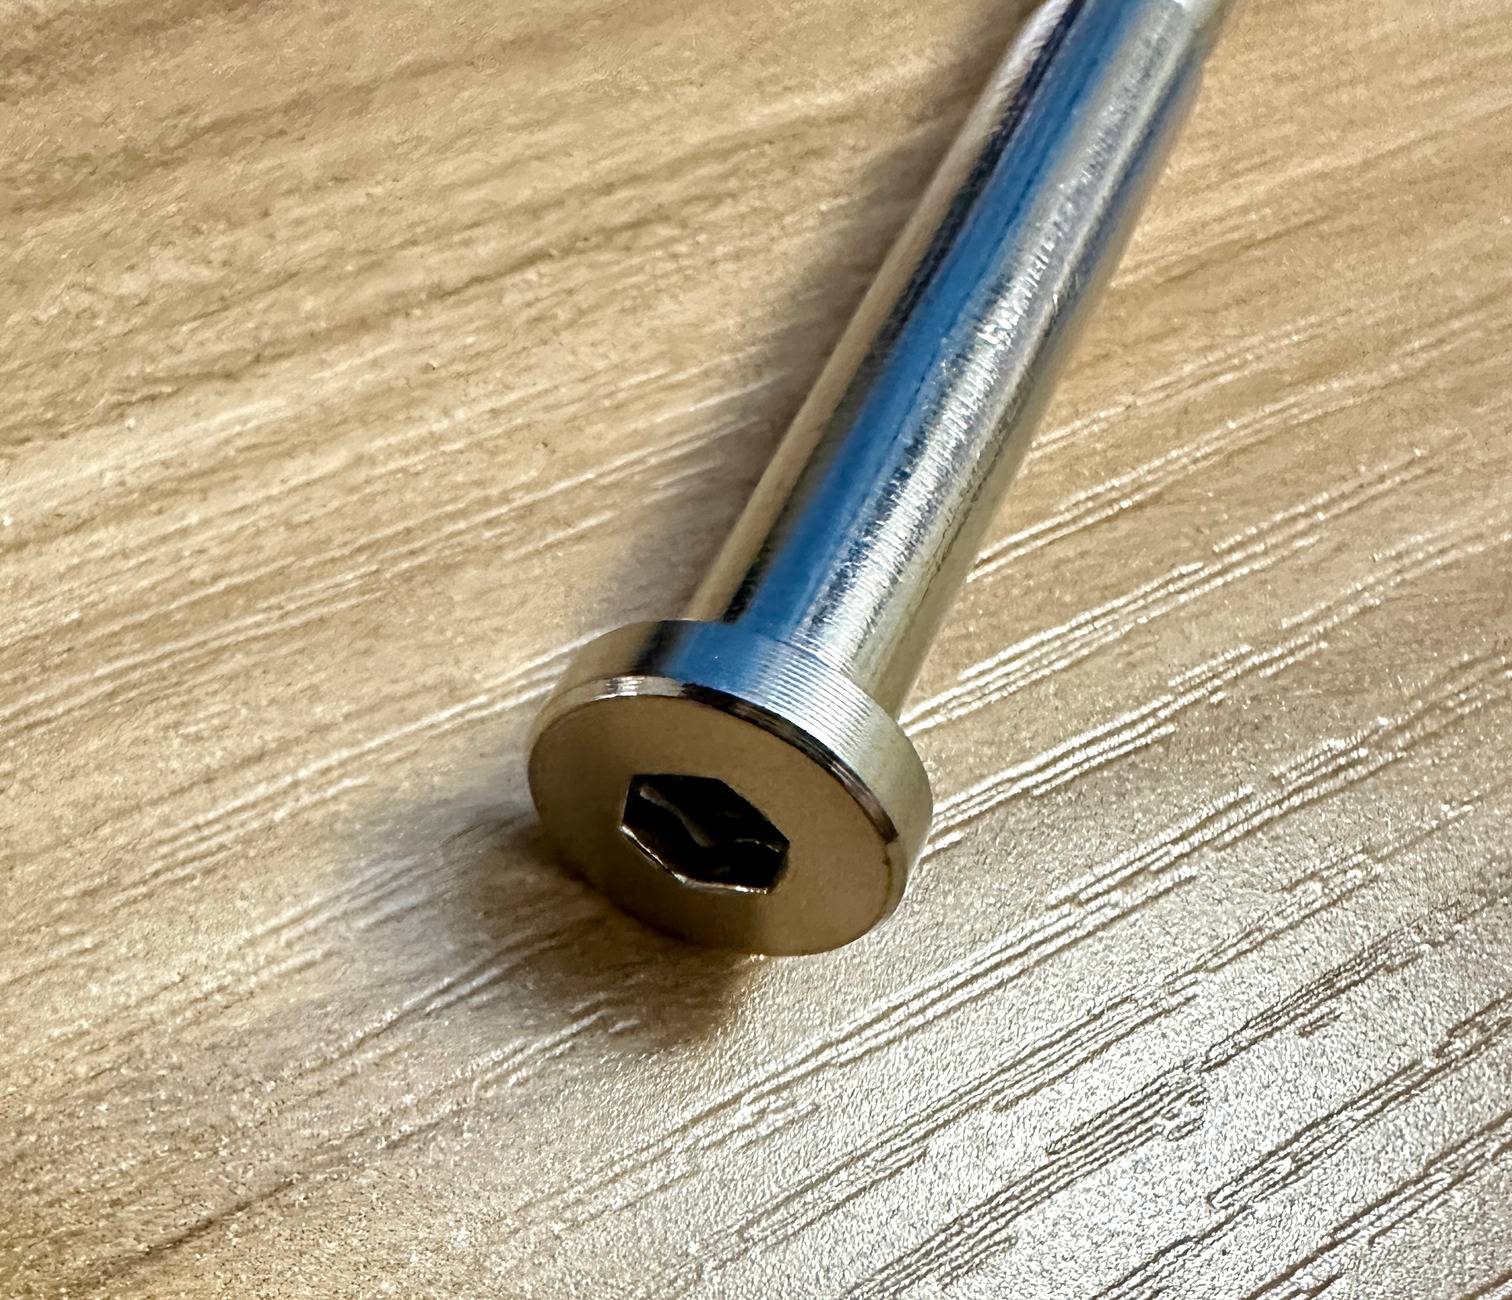
Thread the Swage Stud onto the 1/4-20 bolt and tighten with 5mm hex bit/wrench.


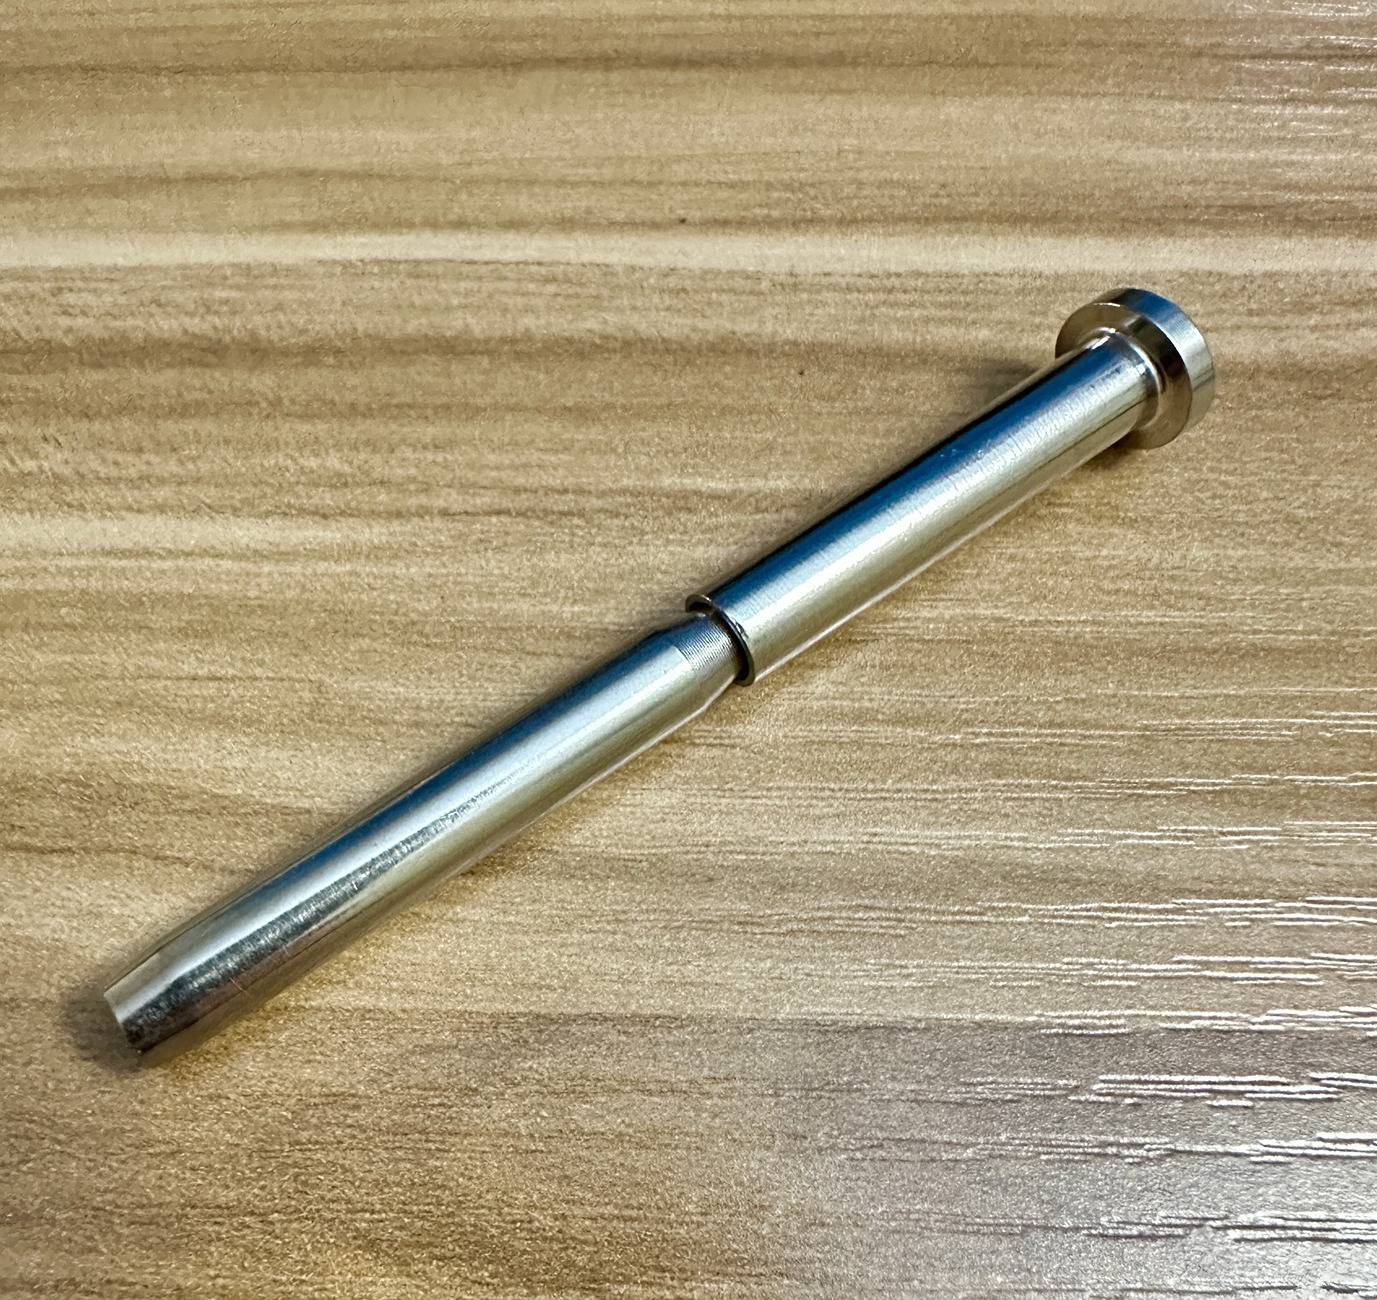
This is how the Swage Stud arrives in the kit. We don't use the lower part.

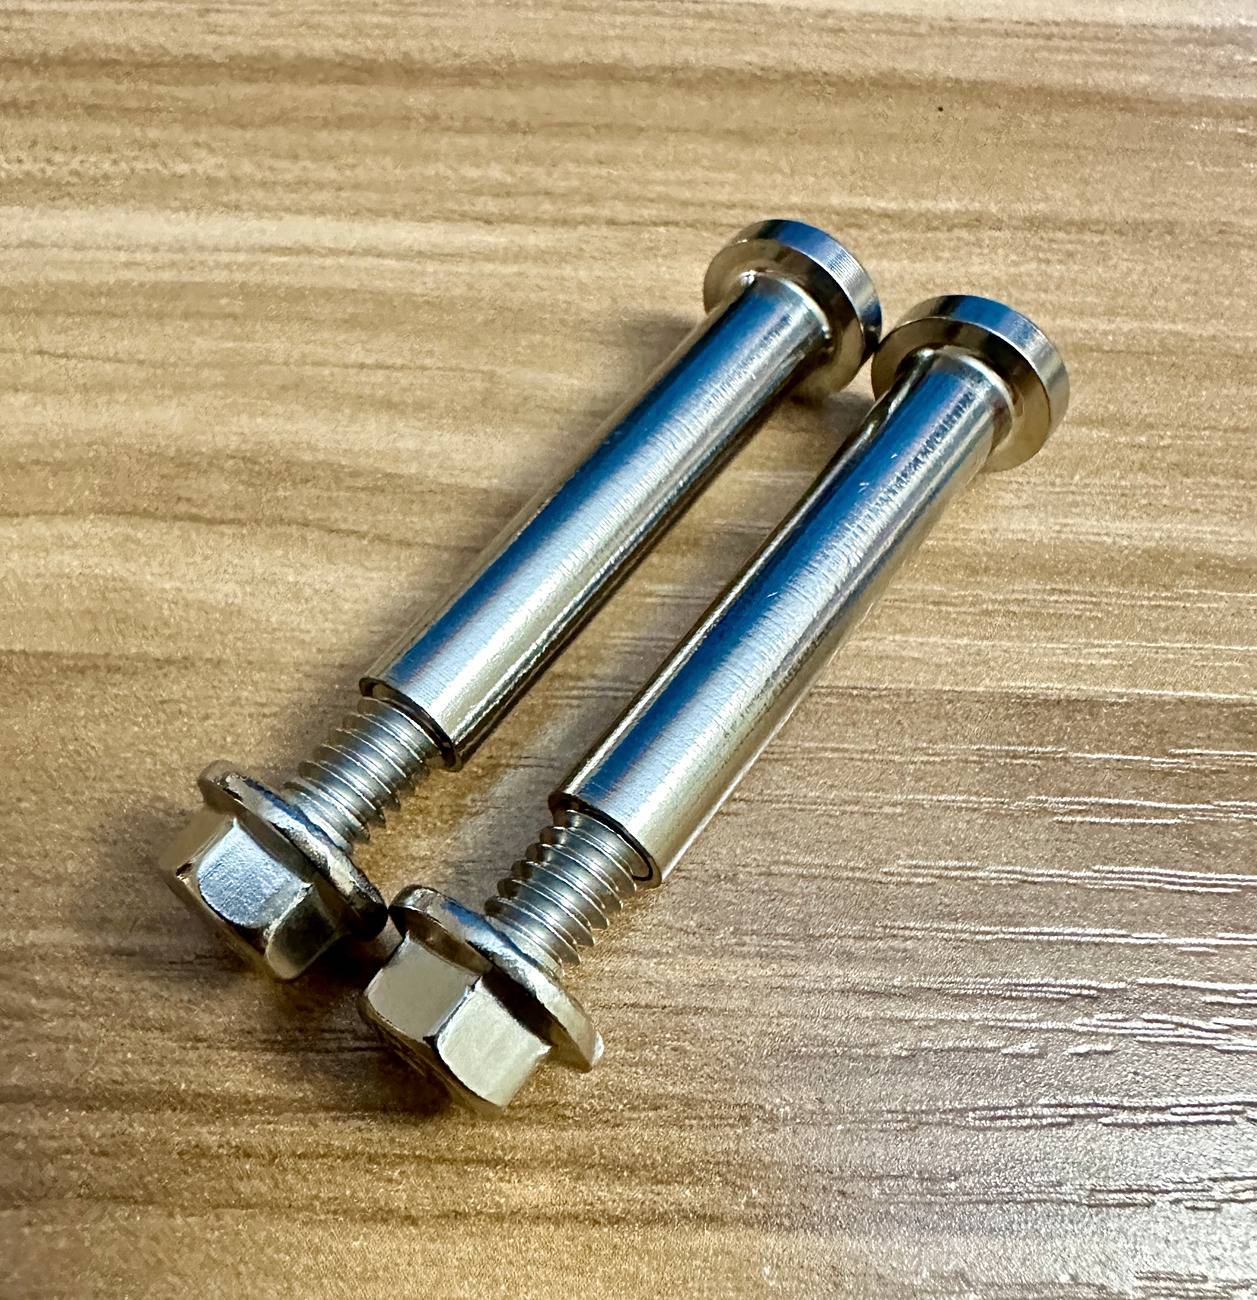
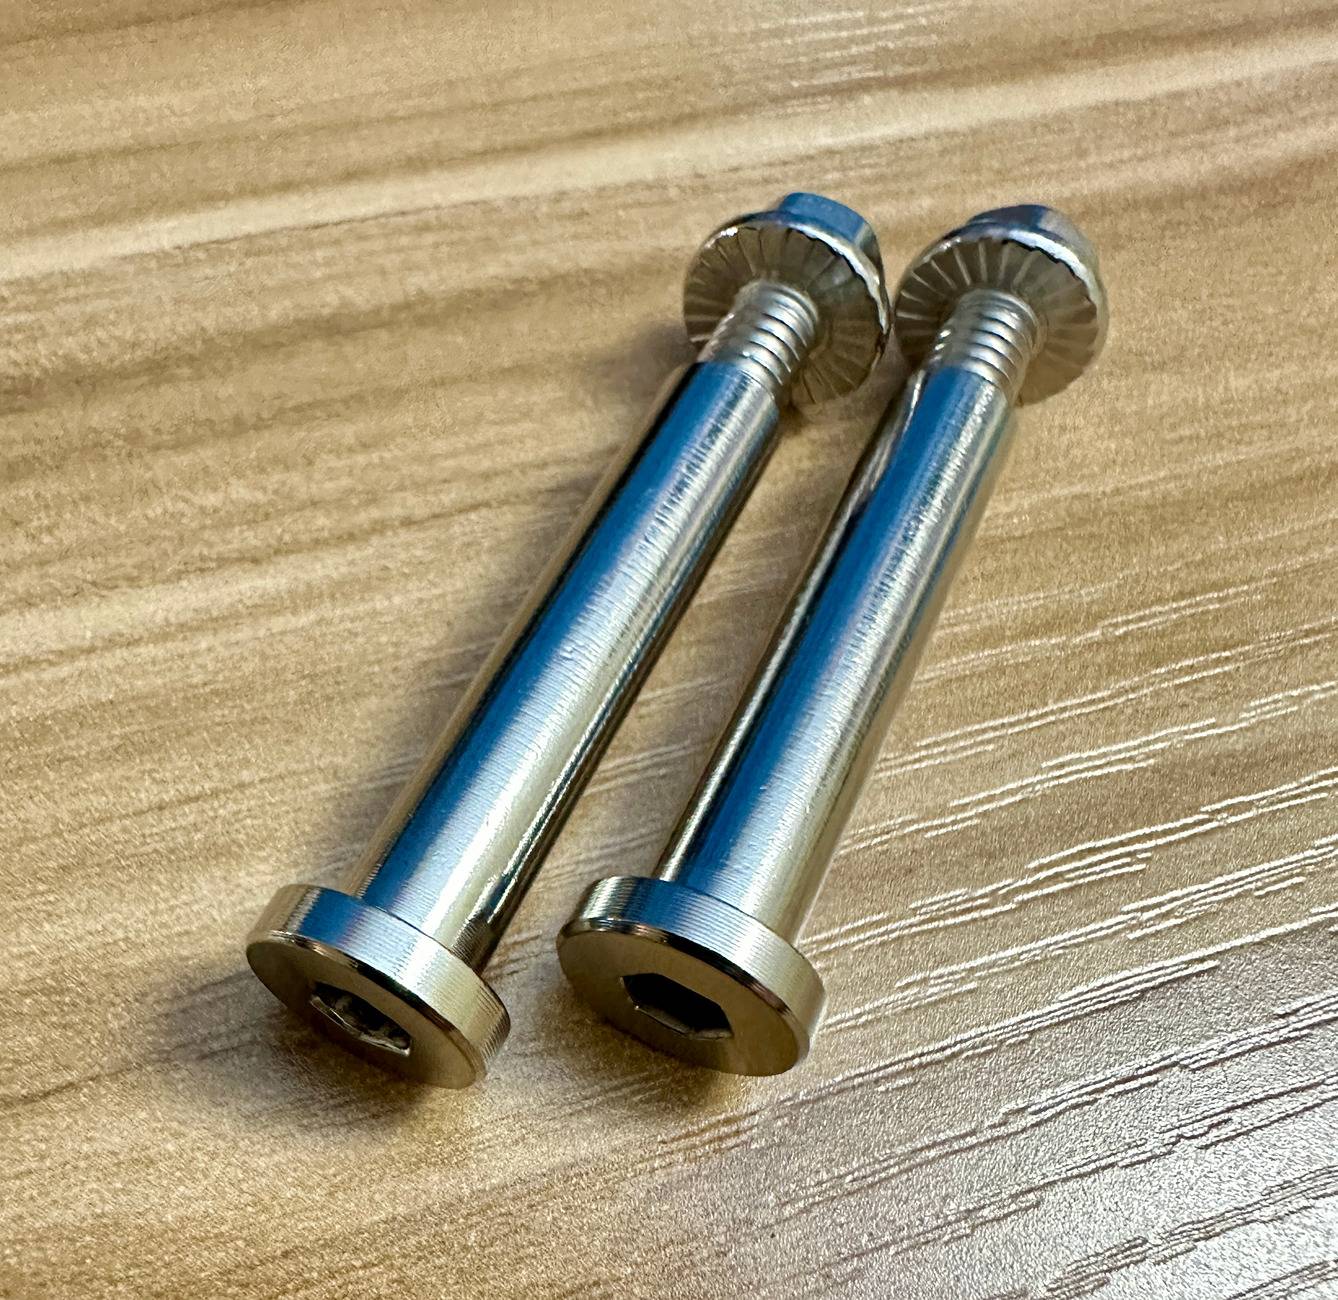
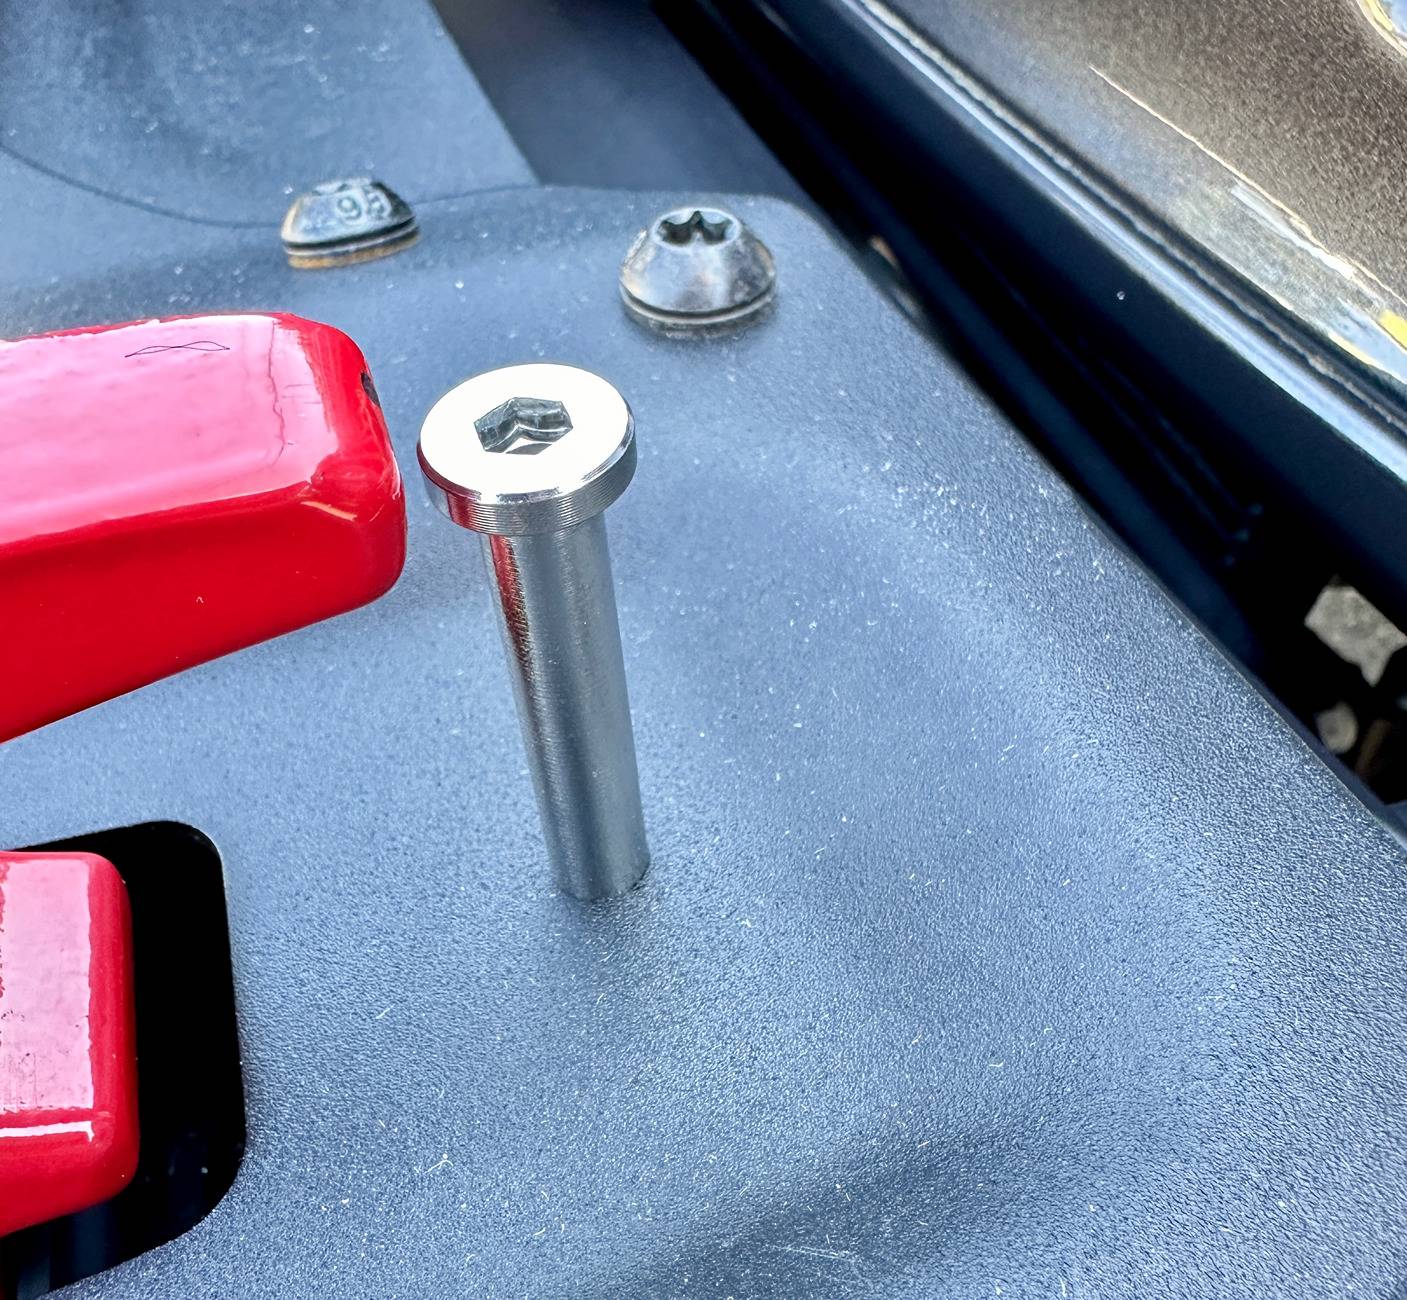
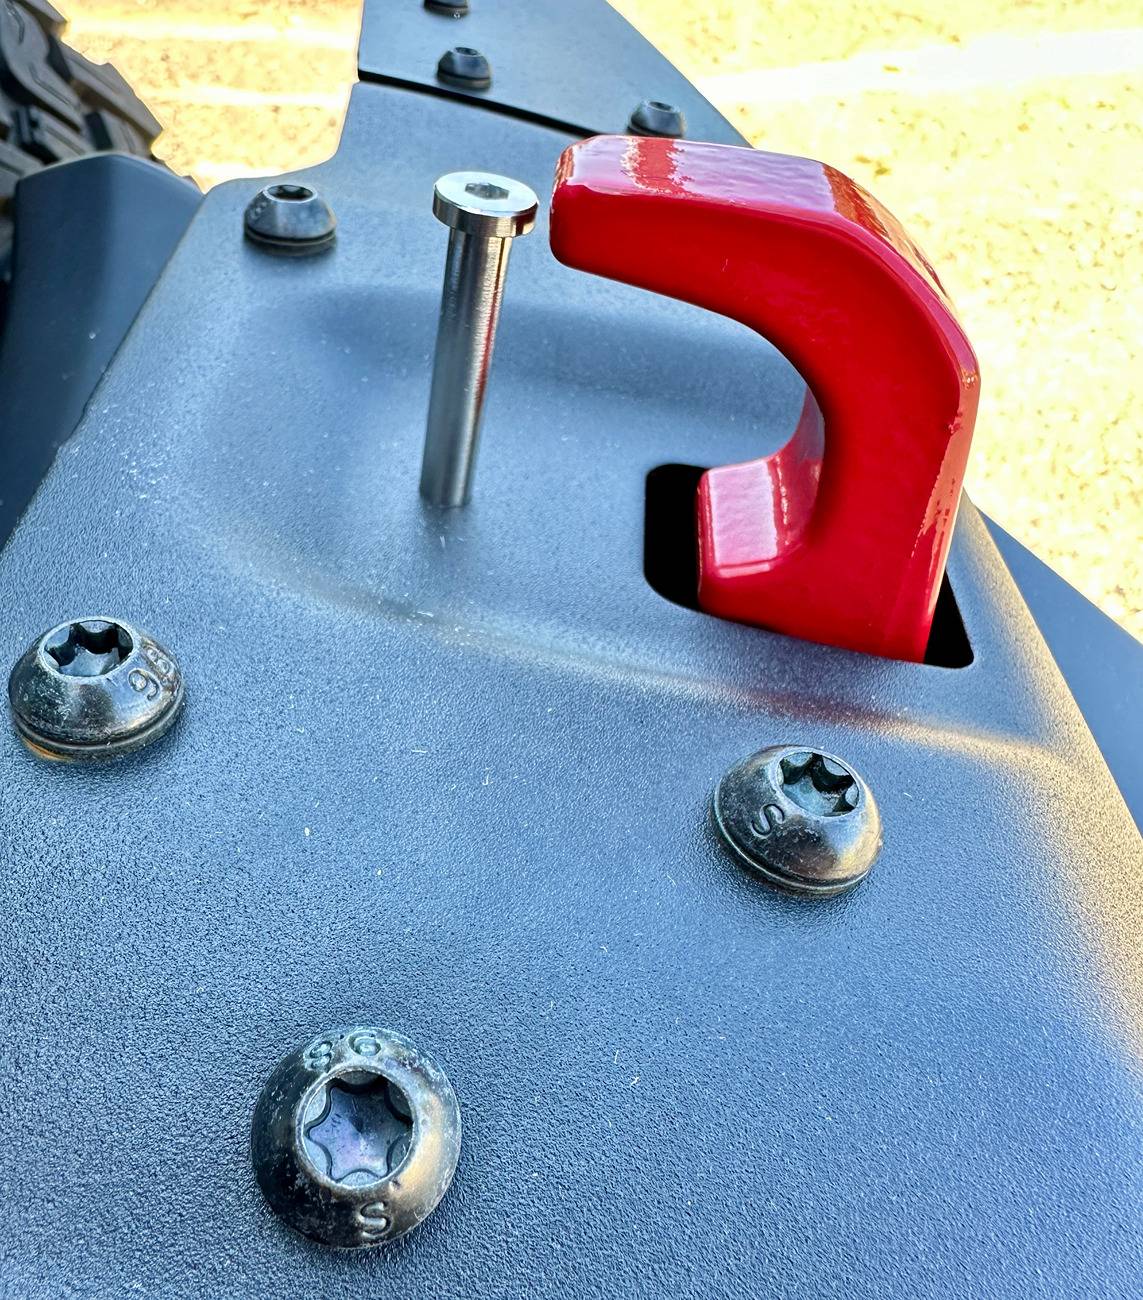
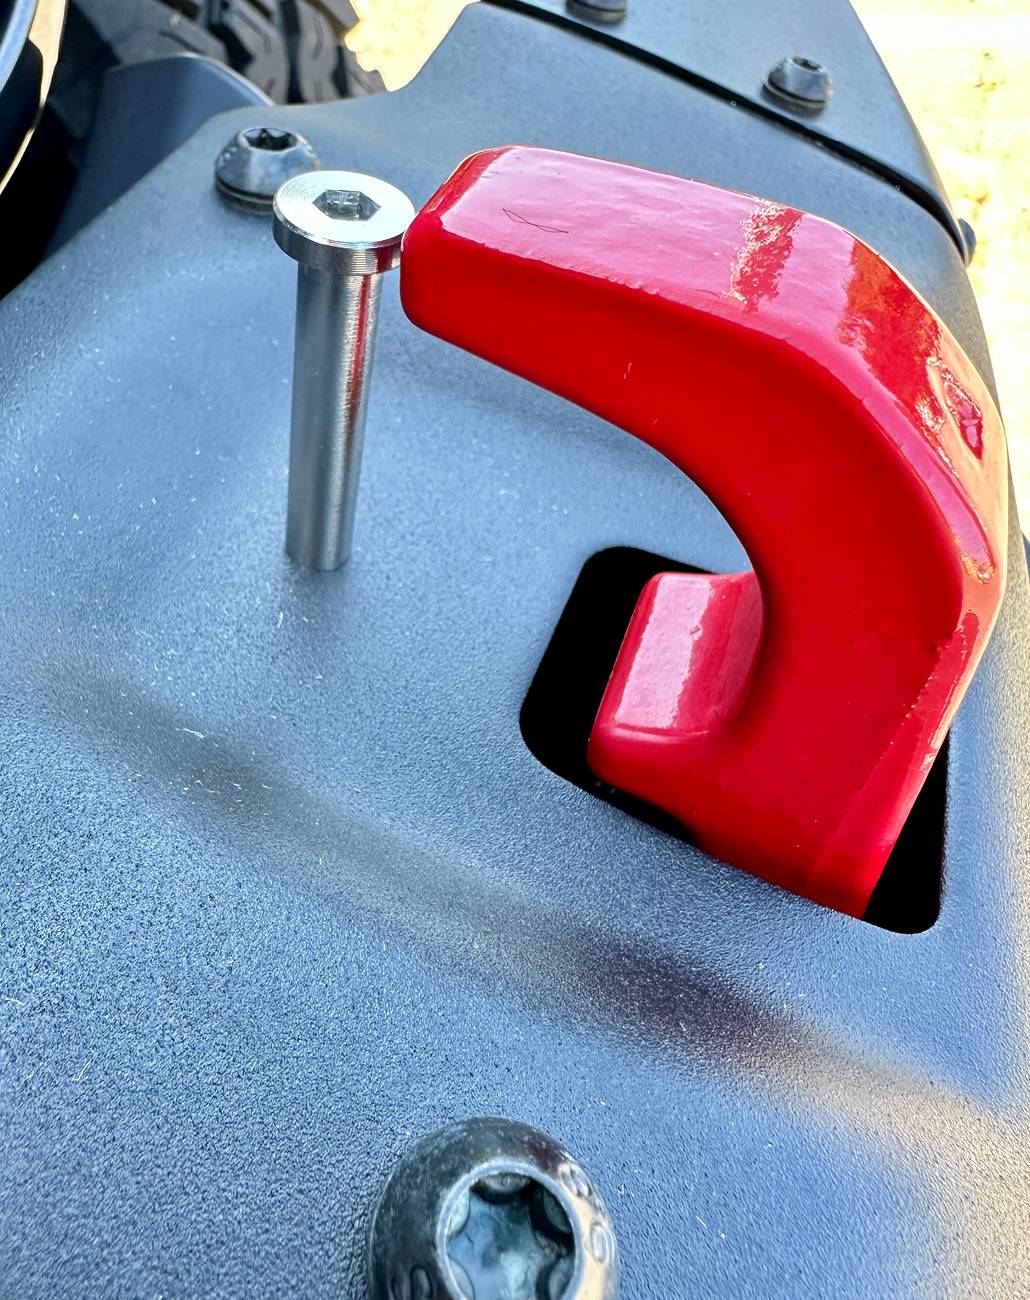
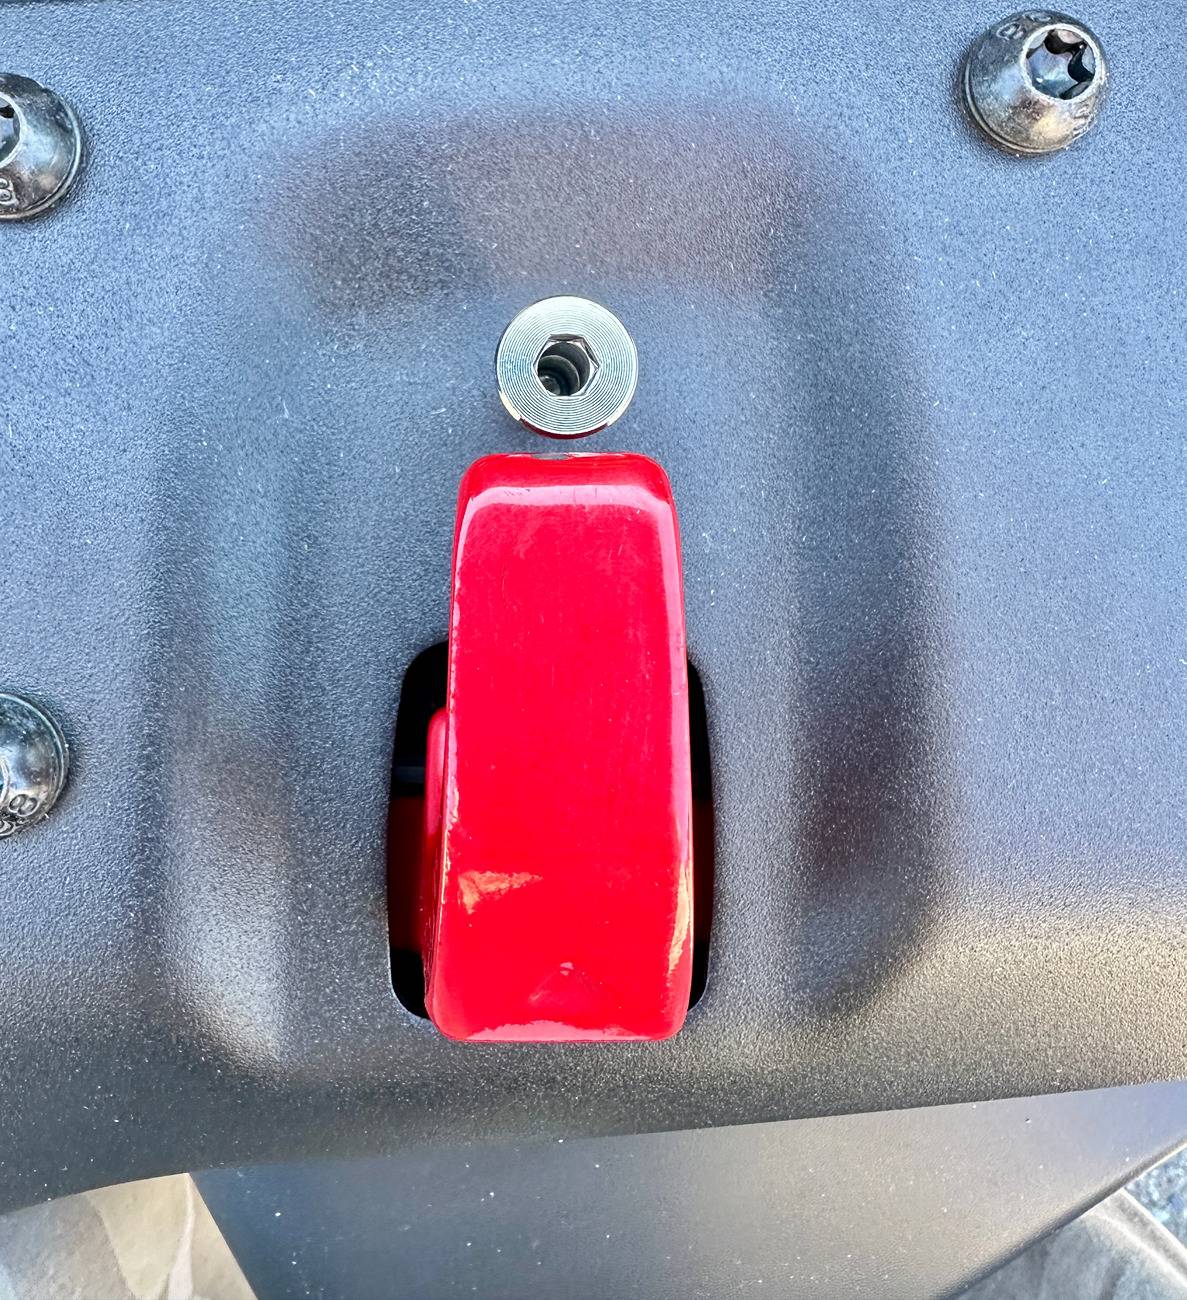
Drilled, tapped and 1/4-20 bolt installed.


This mod will work best with a soft shackle and will eliminate the ability for the strap or cable to slip off of the factory hook.
I bought 20 pieces of the Swage Stud hardware and have 9 pairs of studs and bolts left. If people are interested in a
set of the hardware, I can sell for cost + shipping; pm for details.
Parts:
1/4-20 x .75" Stainless Flanged Hex Head Bolts
3/16 Stainless Swage Stud End (from an invisible cable railing kit)
Tools:
Drill
13/64" or 1/4" drill bit + pilot and step-up bits
Center Punch
3/8" Stubby / Micro Combination wrench
5mm Allen Bit / Wrench
6" Extension for Allen Bit (1/4" or 3/8" Drive)
Rachet for Allen Bit (1/4" or 3/8" Drive)
Sharpie
Blue Threadlocker
Alcohol
Black Touchup Paint
Small file
No Tap:
1/4" Drill bit (not verified)
To Tap (Optional):
1/4" Drive 5.5mm Socket for tap (may vary by brand)
6" 1/4" Drive Extension
13/64" Drill Bit (plus small bits to step up with)
1/4-20 Tap
Why tap the hole?
I tapped the hole because the upper fastener has a relatively thin wall and I wanted the smallest possible opening for the Swage Stud to have maximum support against the bumper for stability and strength.
Instructions:
Take the Swage Stud and locate it in front of the tow hook with a small gap between the end of the hook and the head of the stud (see pics).
Carefully hold the stud in place and draw a circle around the base of the stud.
Locate the punch dead in the middle of the circle and punch a starter dimple.
Pilot the hole and step up to desired size (13/64" to tap or 1/4").
If tapping:
Tap the hole, deburr with file then verify the threads with the bolt to be used.
Clean threads with alcohol, then apply touch-up paint to the threads and let dry.
Thread the bolt up from underneath and snug (these threads will be weak so don't go full gorilla).
To Finish:
Apply blue threadlocker to 1/4-20 bolt and/or the inside of the Swage Stud.
Thread the Swage Stud onto the 1/4-20 bolt and tighten with 5mm hex bit/wrench.
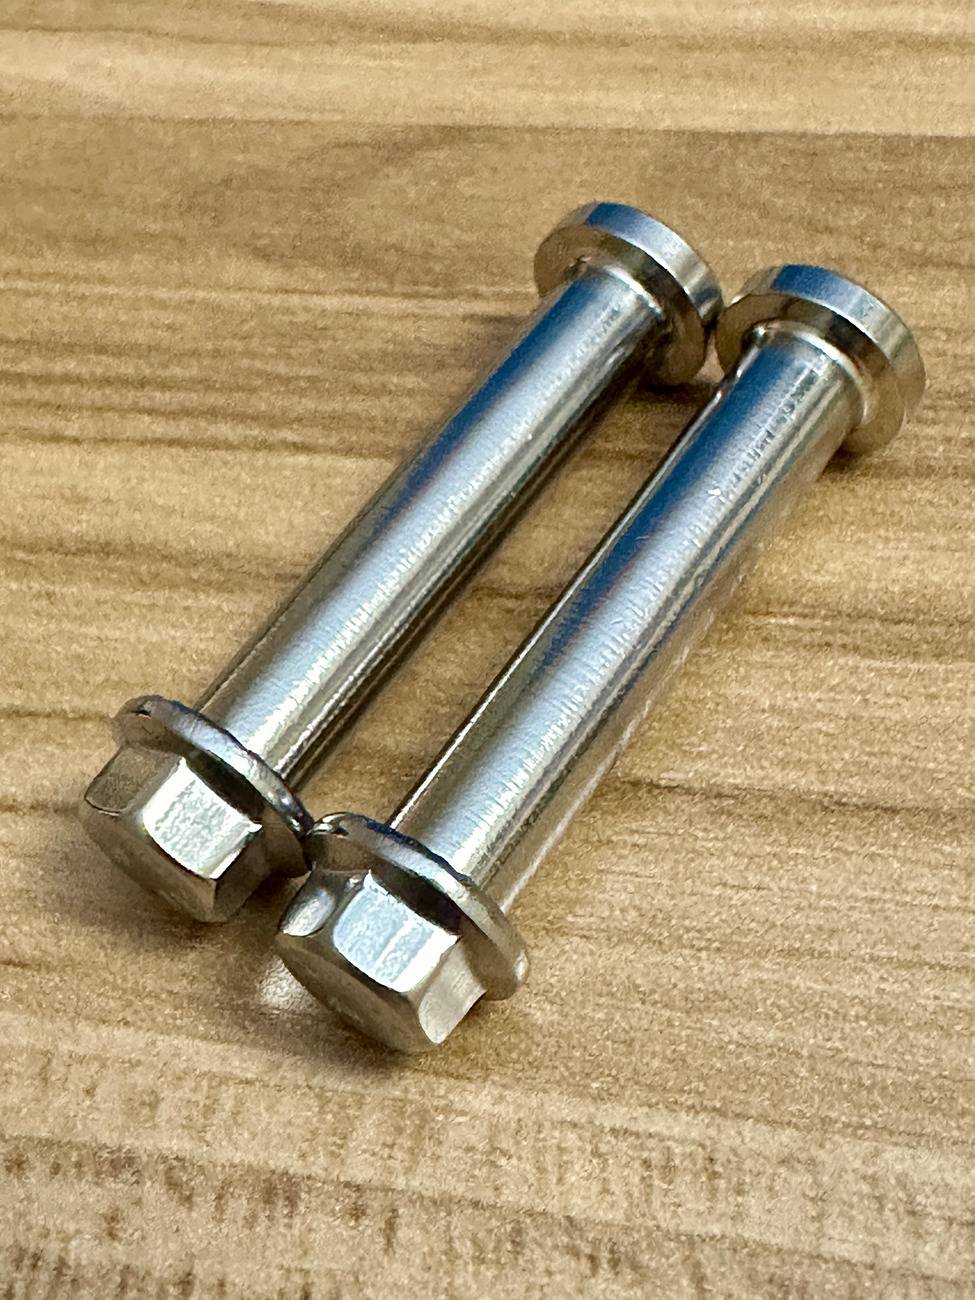
This is how the Swage Stud arrives in the kit. We don't use the lower part.
Drilled, tapped and 1/4-20 bolt installed.
Sponsored