Yoshi
Active Member
- Thread starter
- #1
Adjusting Gladiator Headlights Up/Down
Type 1 (LED)
Long shaft #2 Philips head screw driver
Type 2 (Halogen)
Ball end 6mm Hex Key
People have used other screw drivers but it’s always good to use the right tool for the specific bolt to lessen the danger of “wallering” it out.
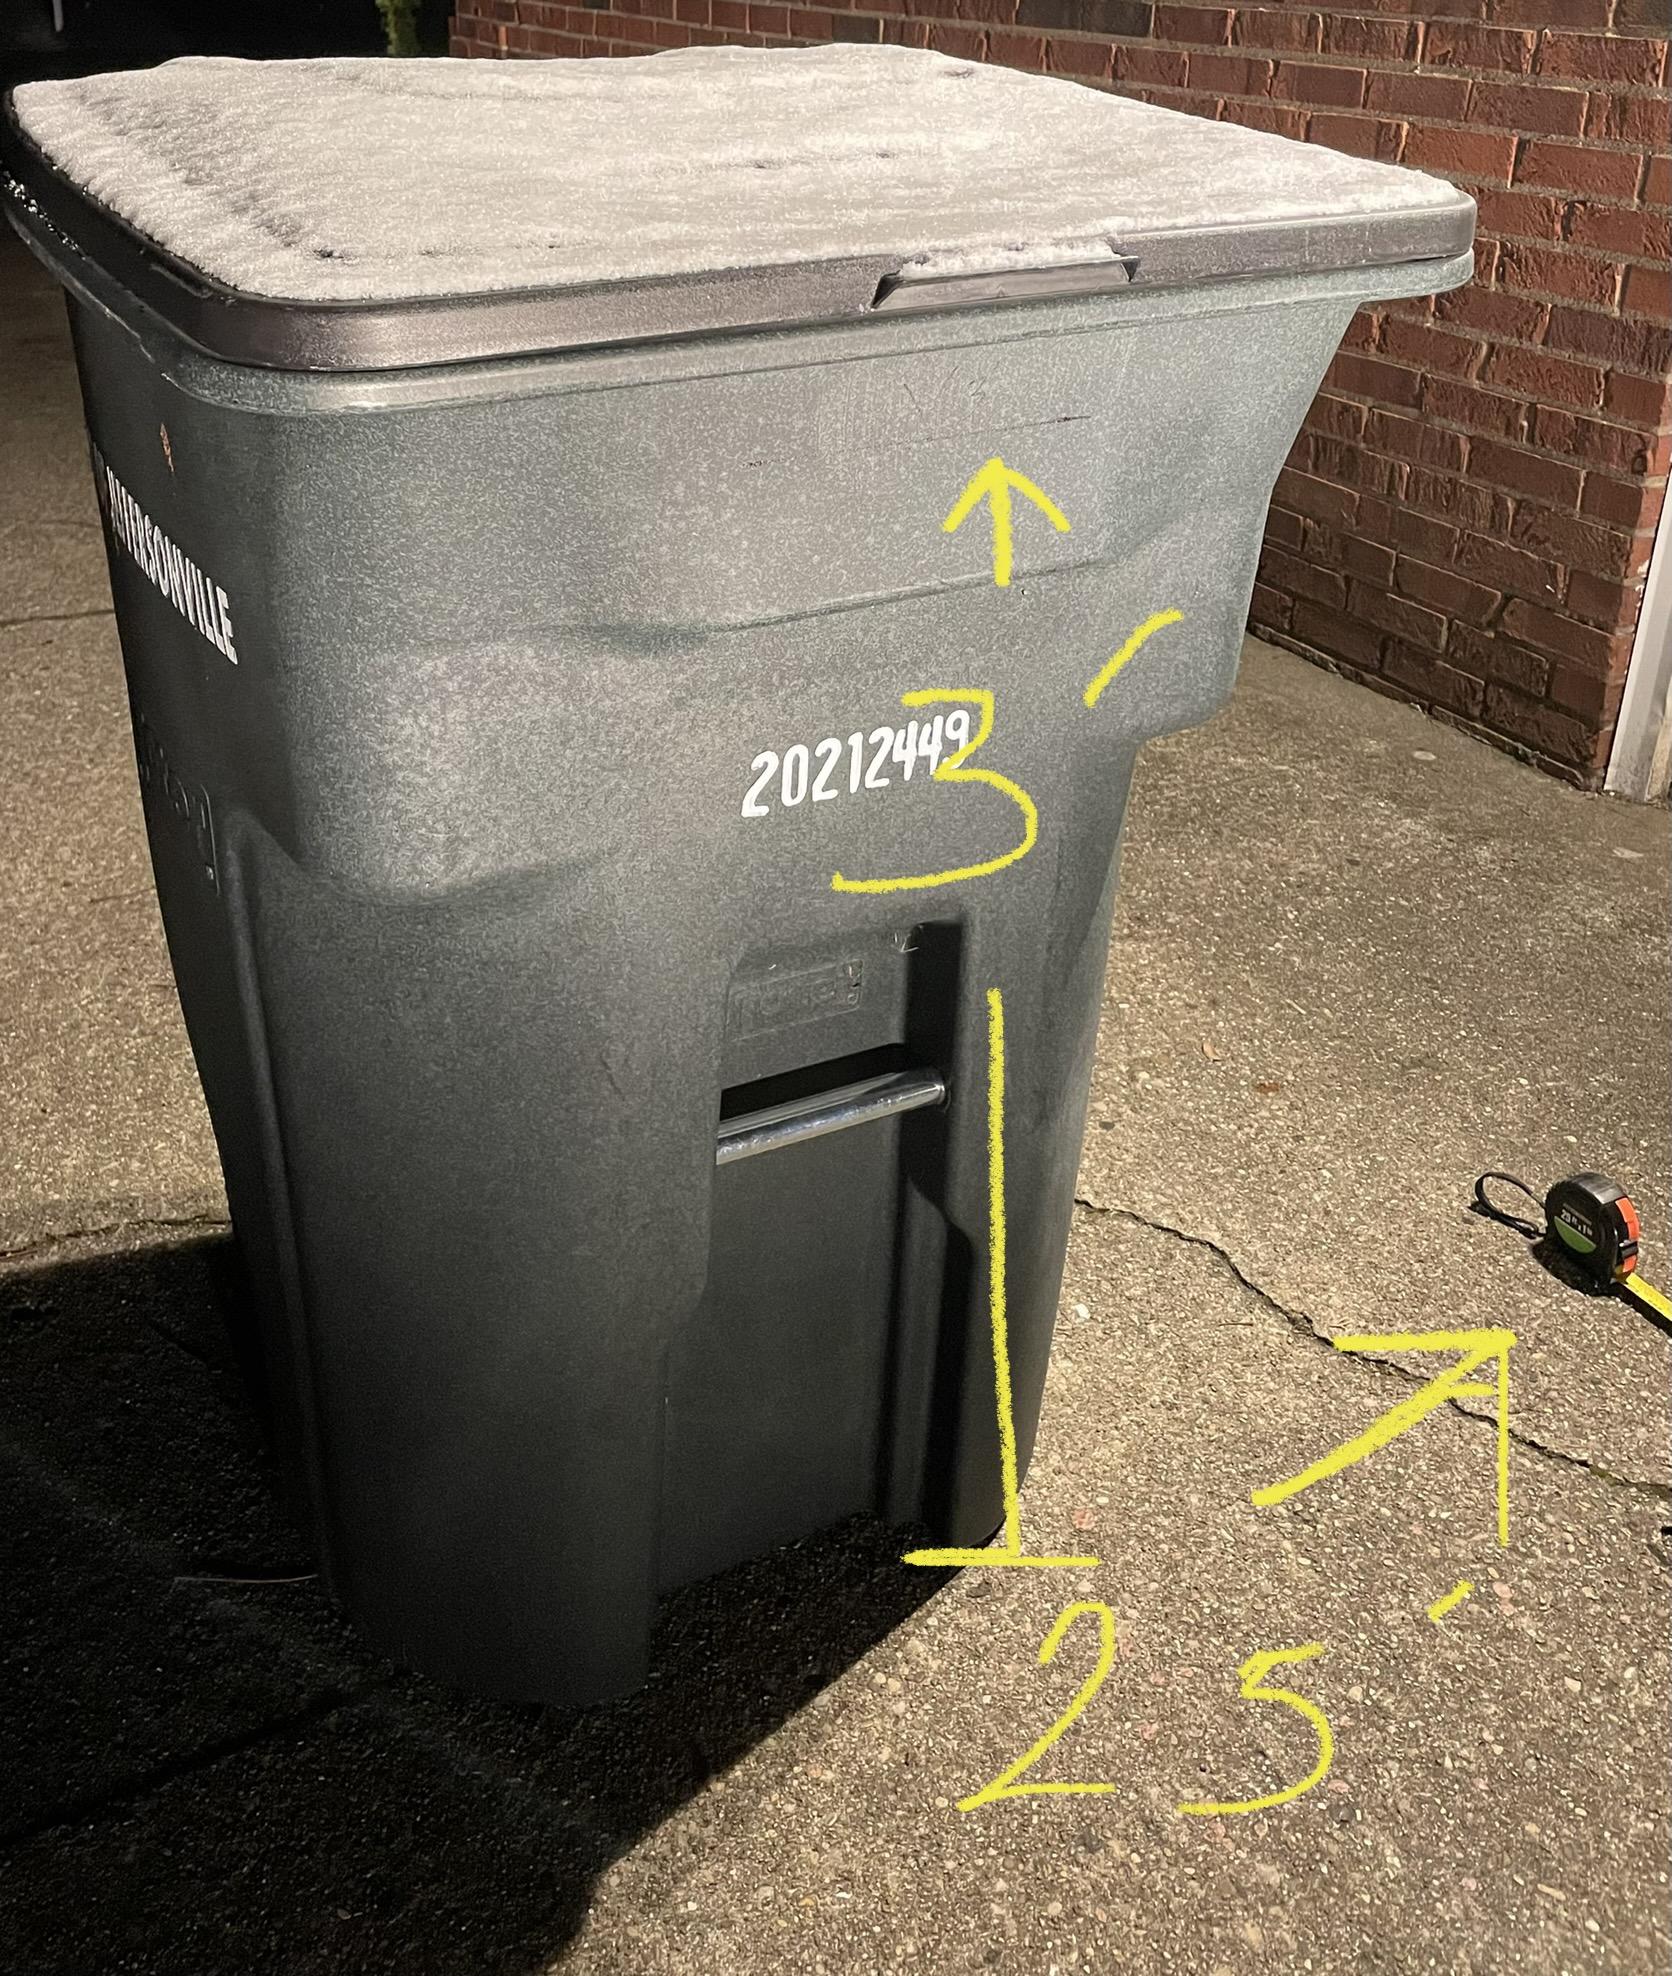
3’ high
25’ distance
type 1
Counter clockwise=beam down
clockwise=beam up
type 2
Clockwise=Light down
Counter clockwise=Light up
So all of this has been covered in separate posts and videos but I wanted to combine them so there would be less… maybe more… confusion.
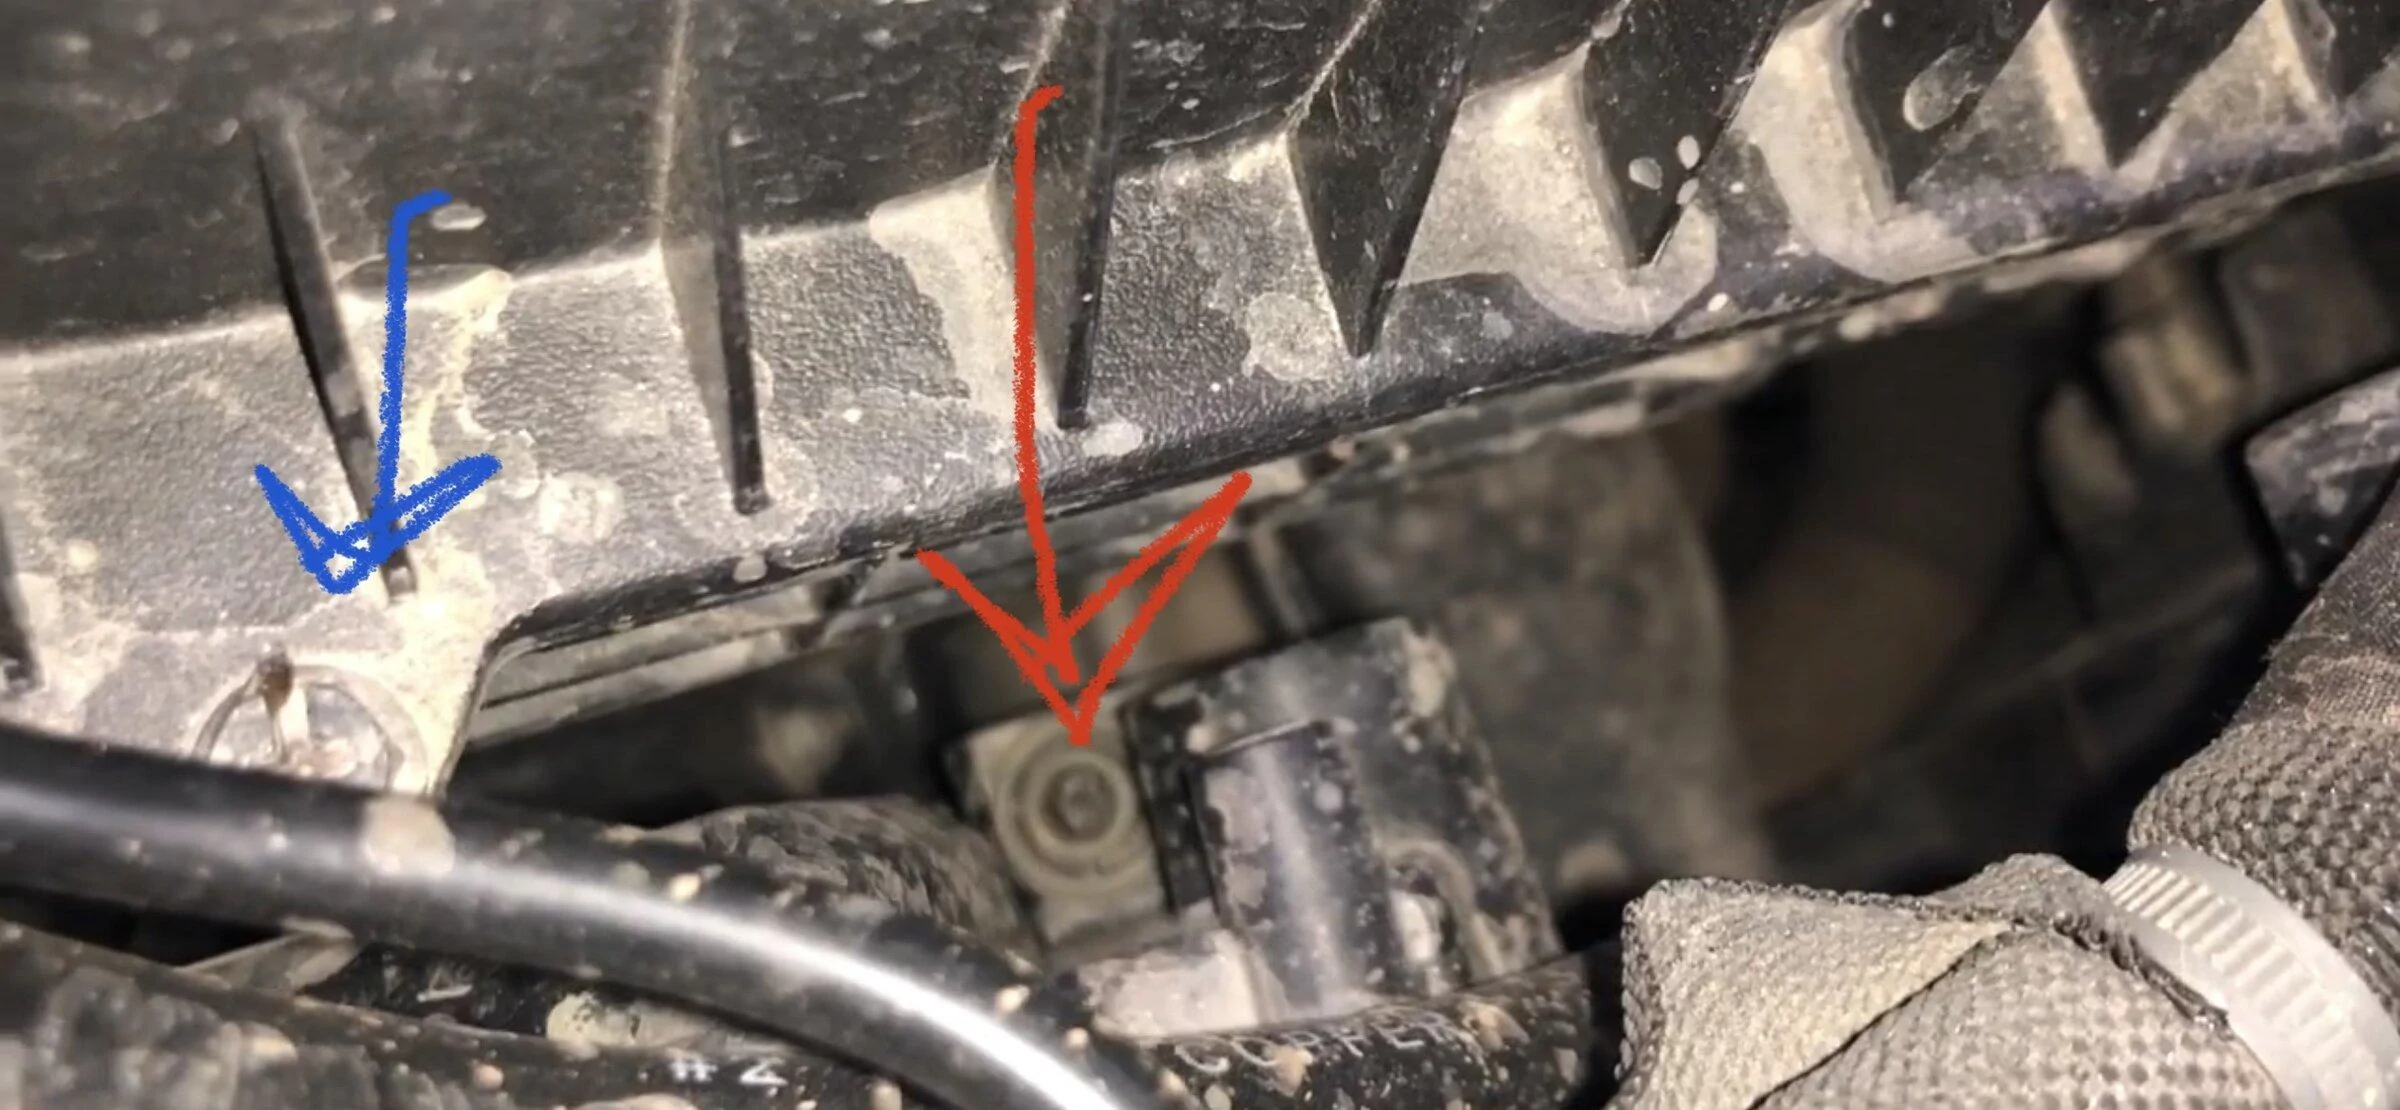
There are 2 different headlight set ups in the stock Gladiator lights. They have different spots where the adjuster is located.
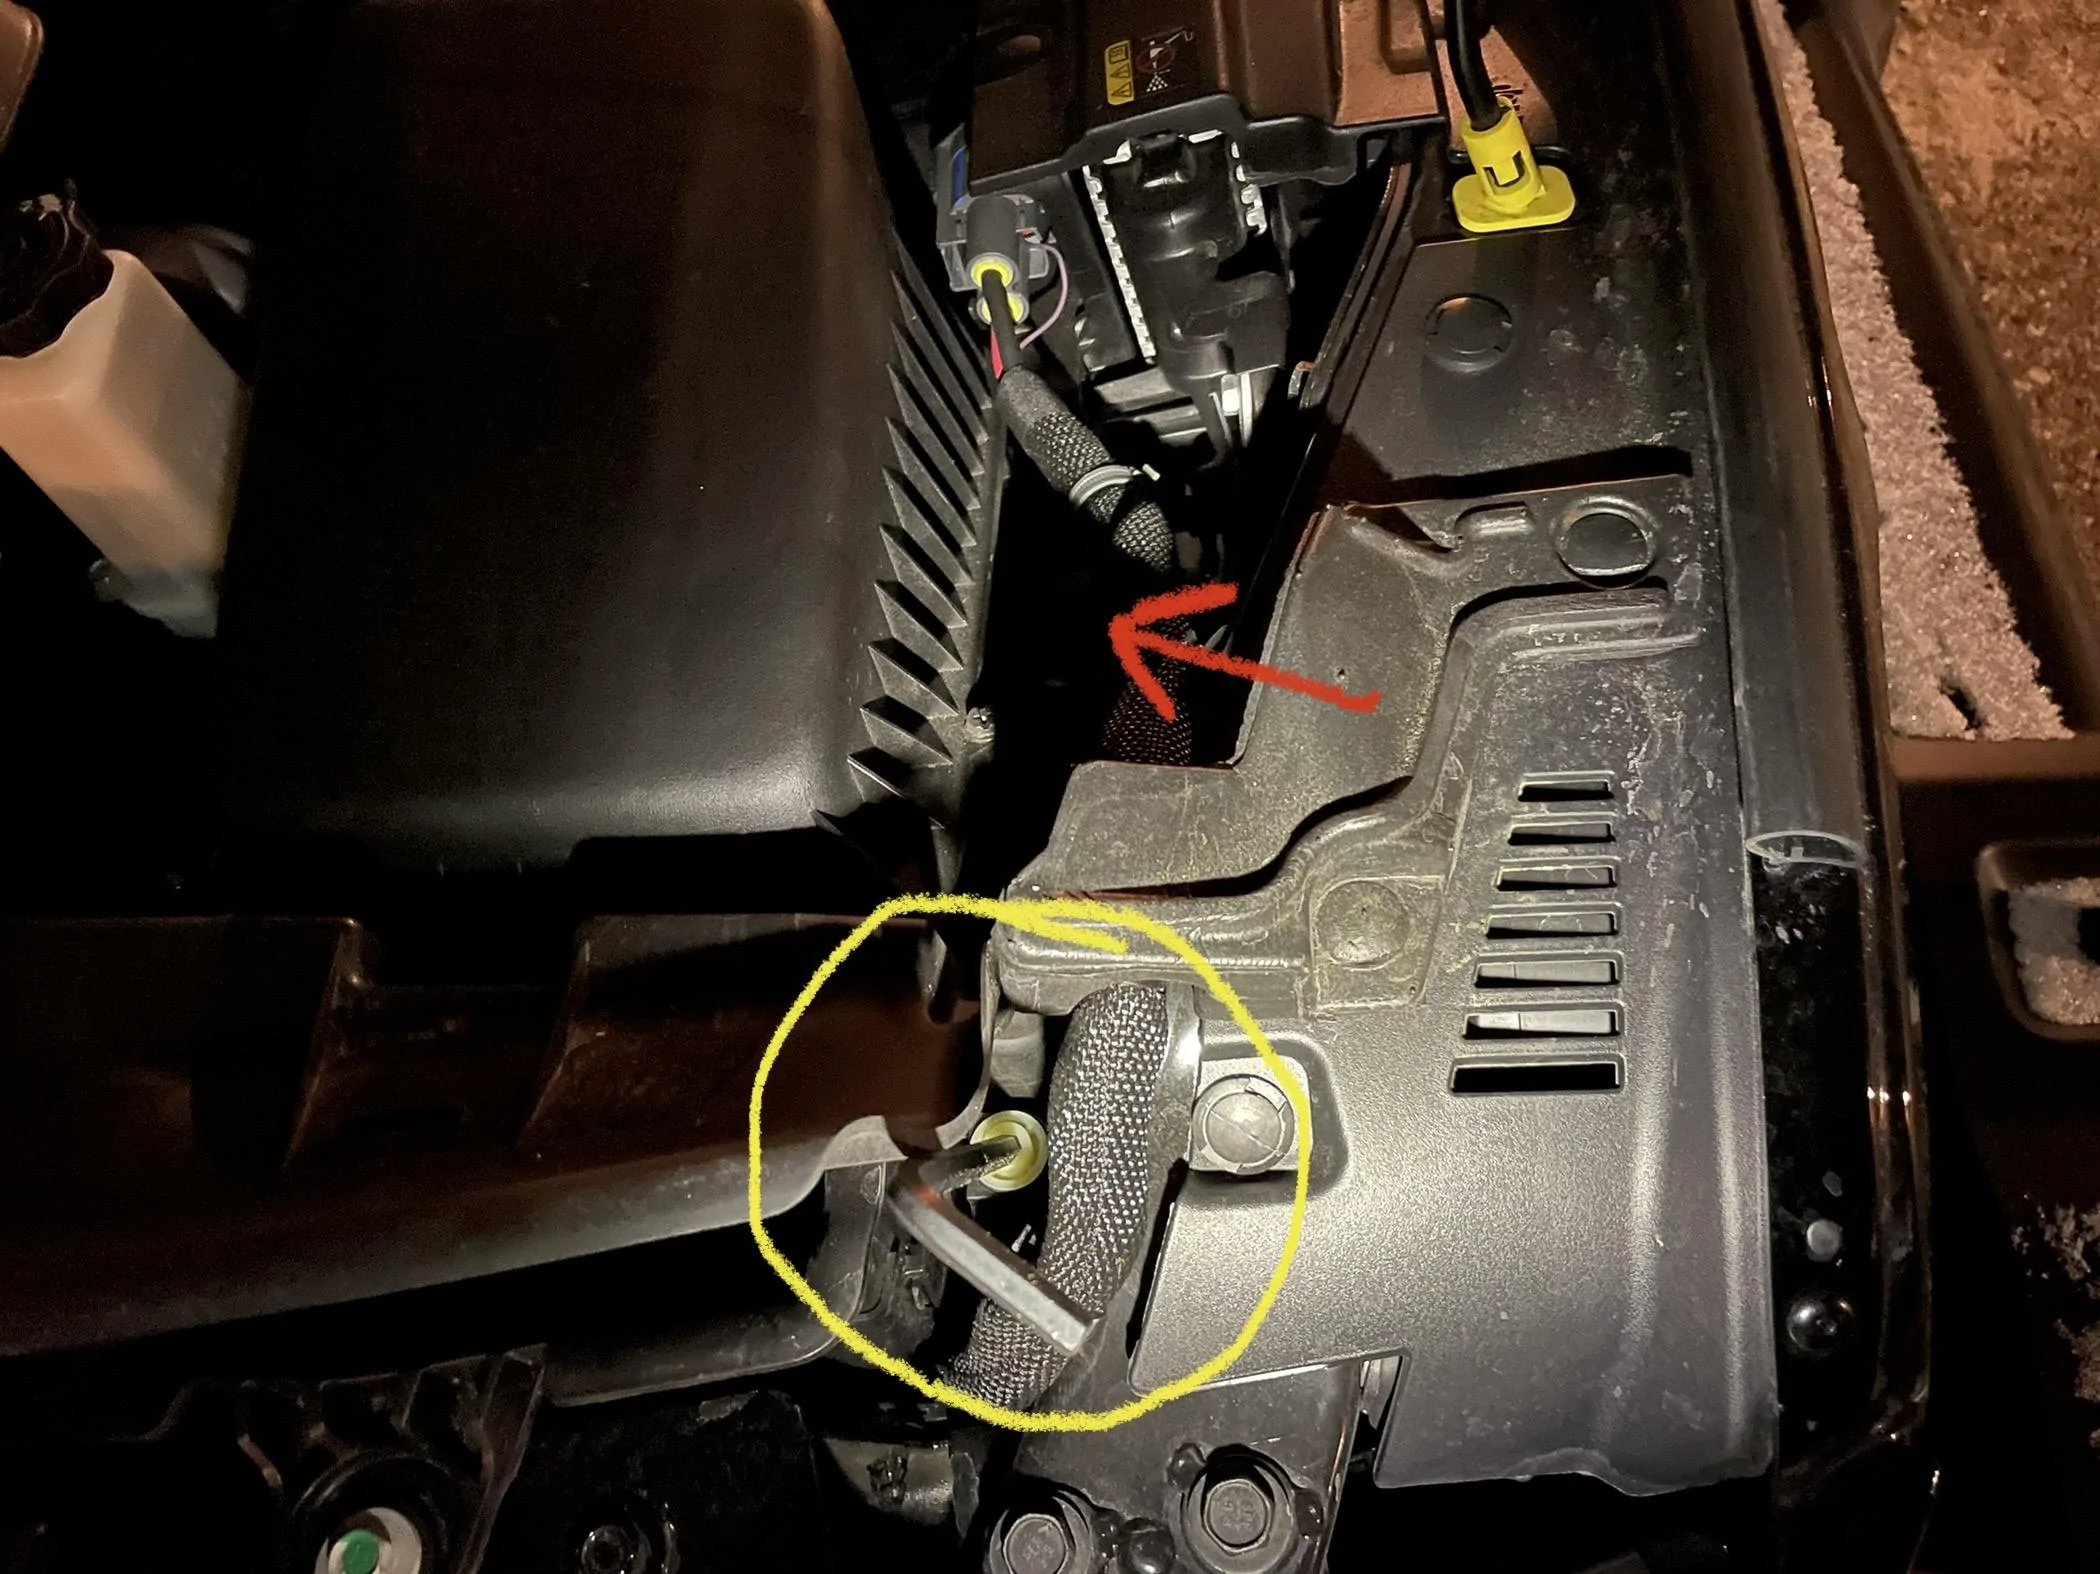
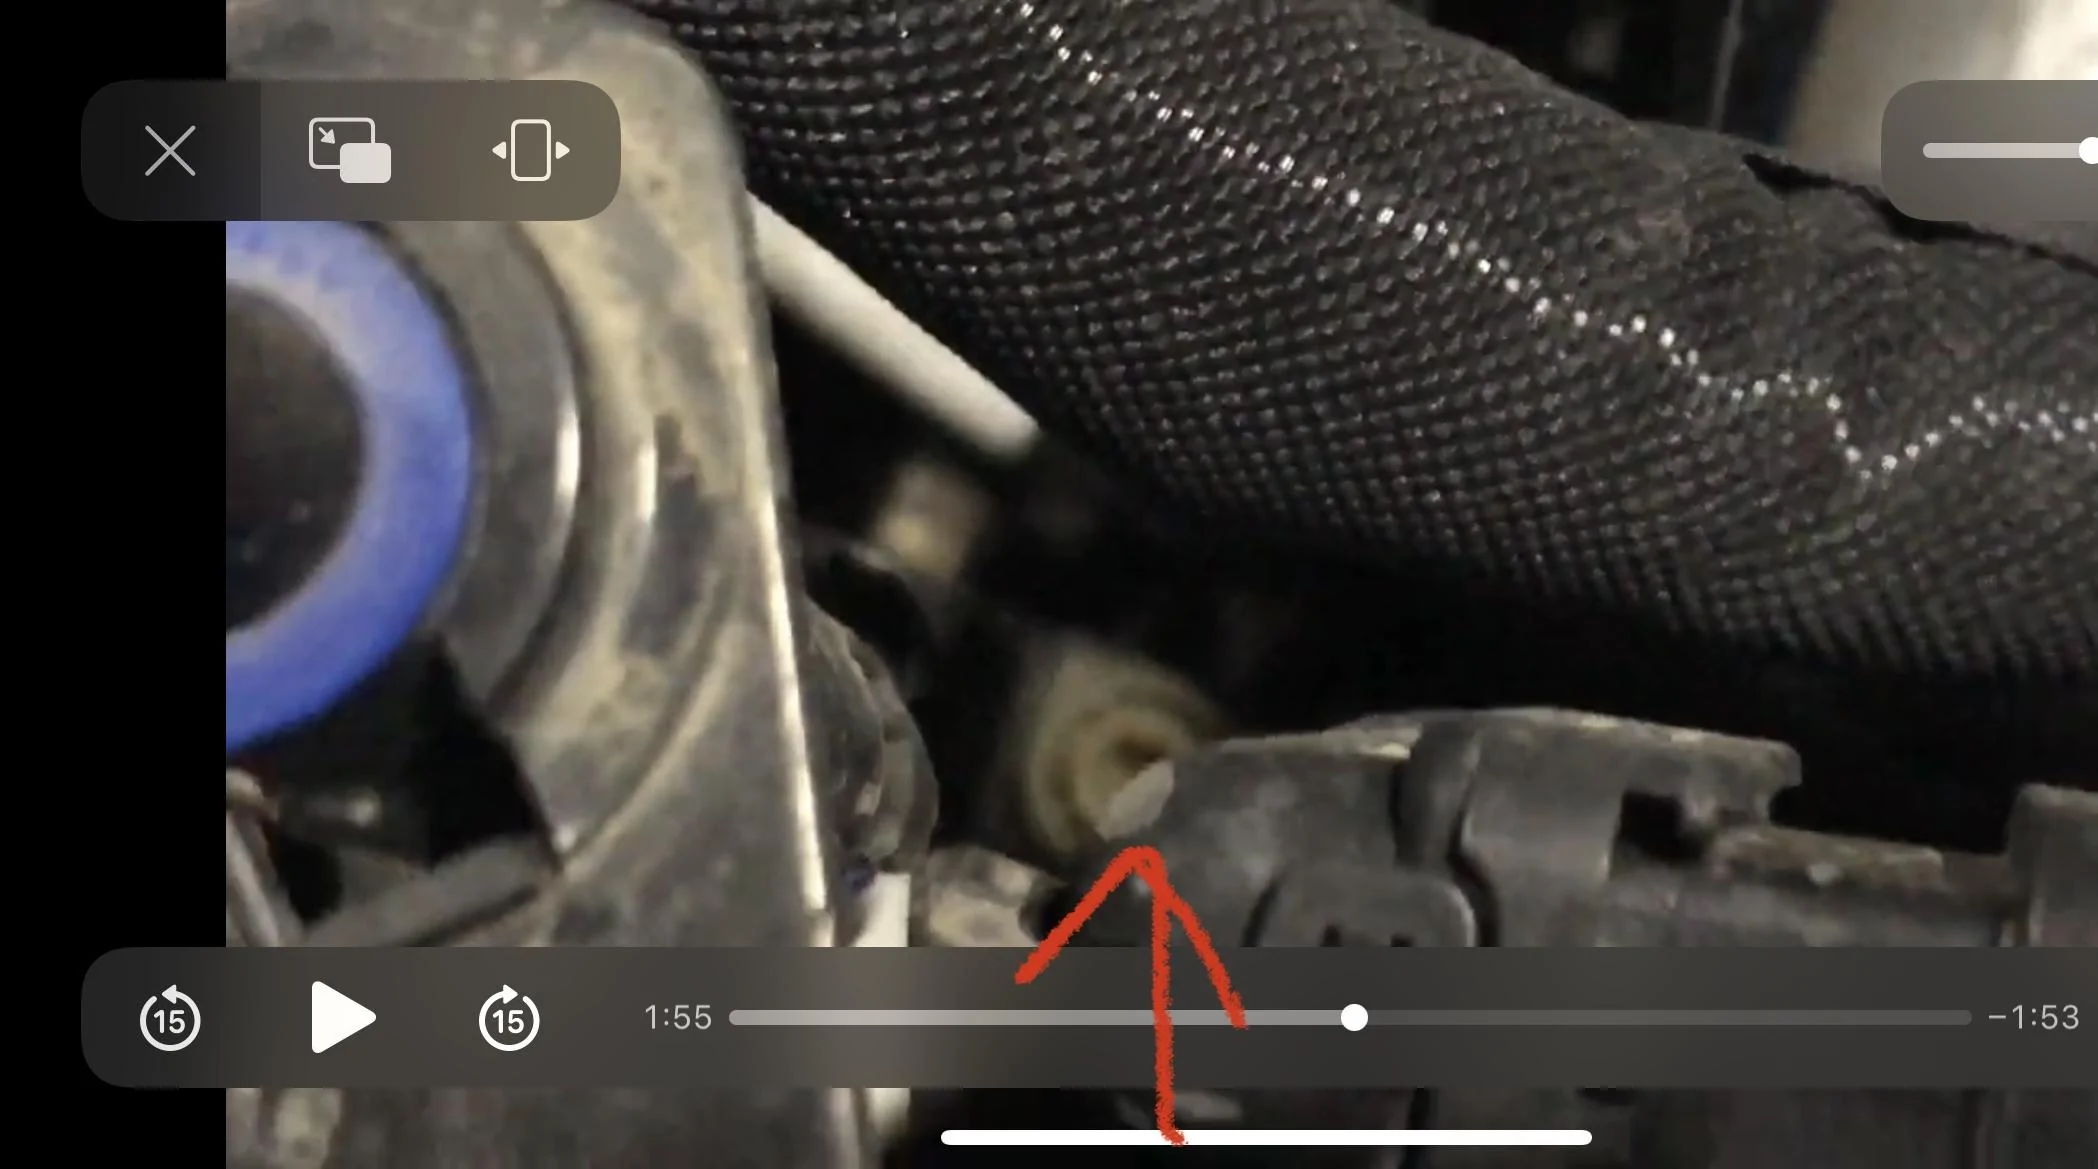
Type 1 is marked in red. This is also the type that has a lot of videos covering it. The bolt is more to the center of the light housings and deeper (towards the ground) into the engine bay.
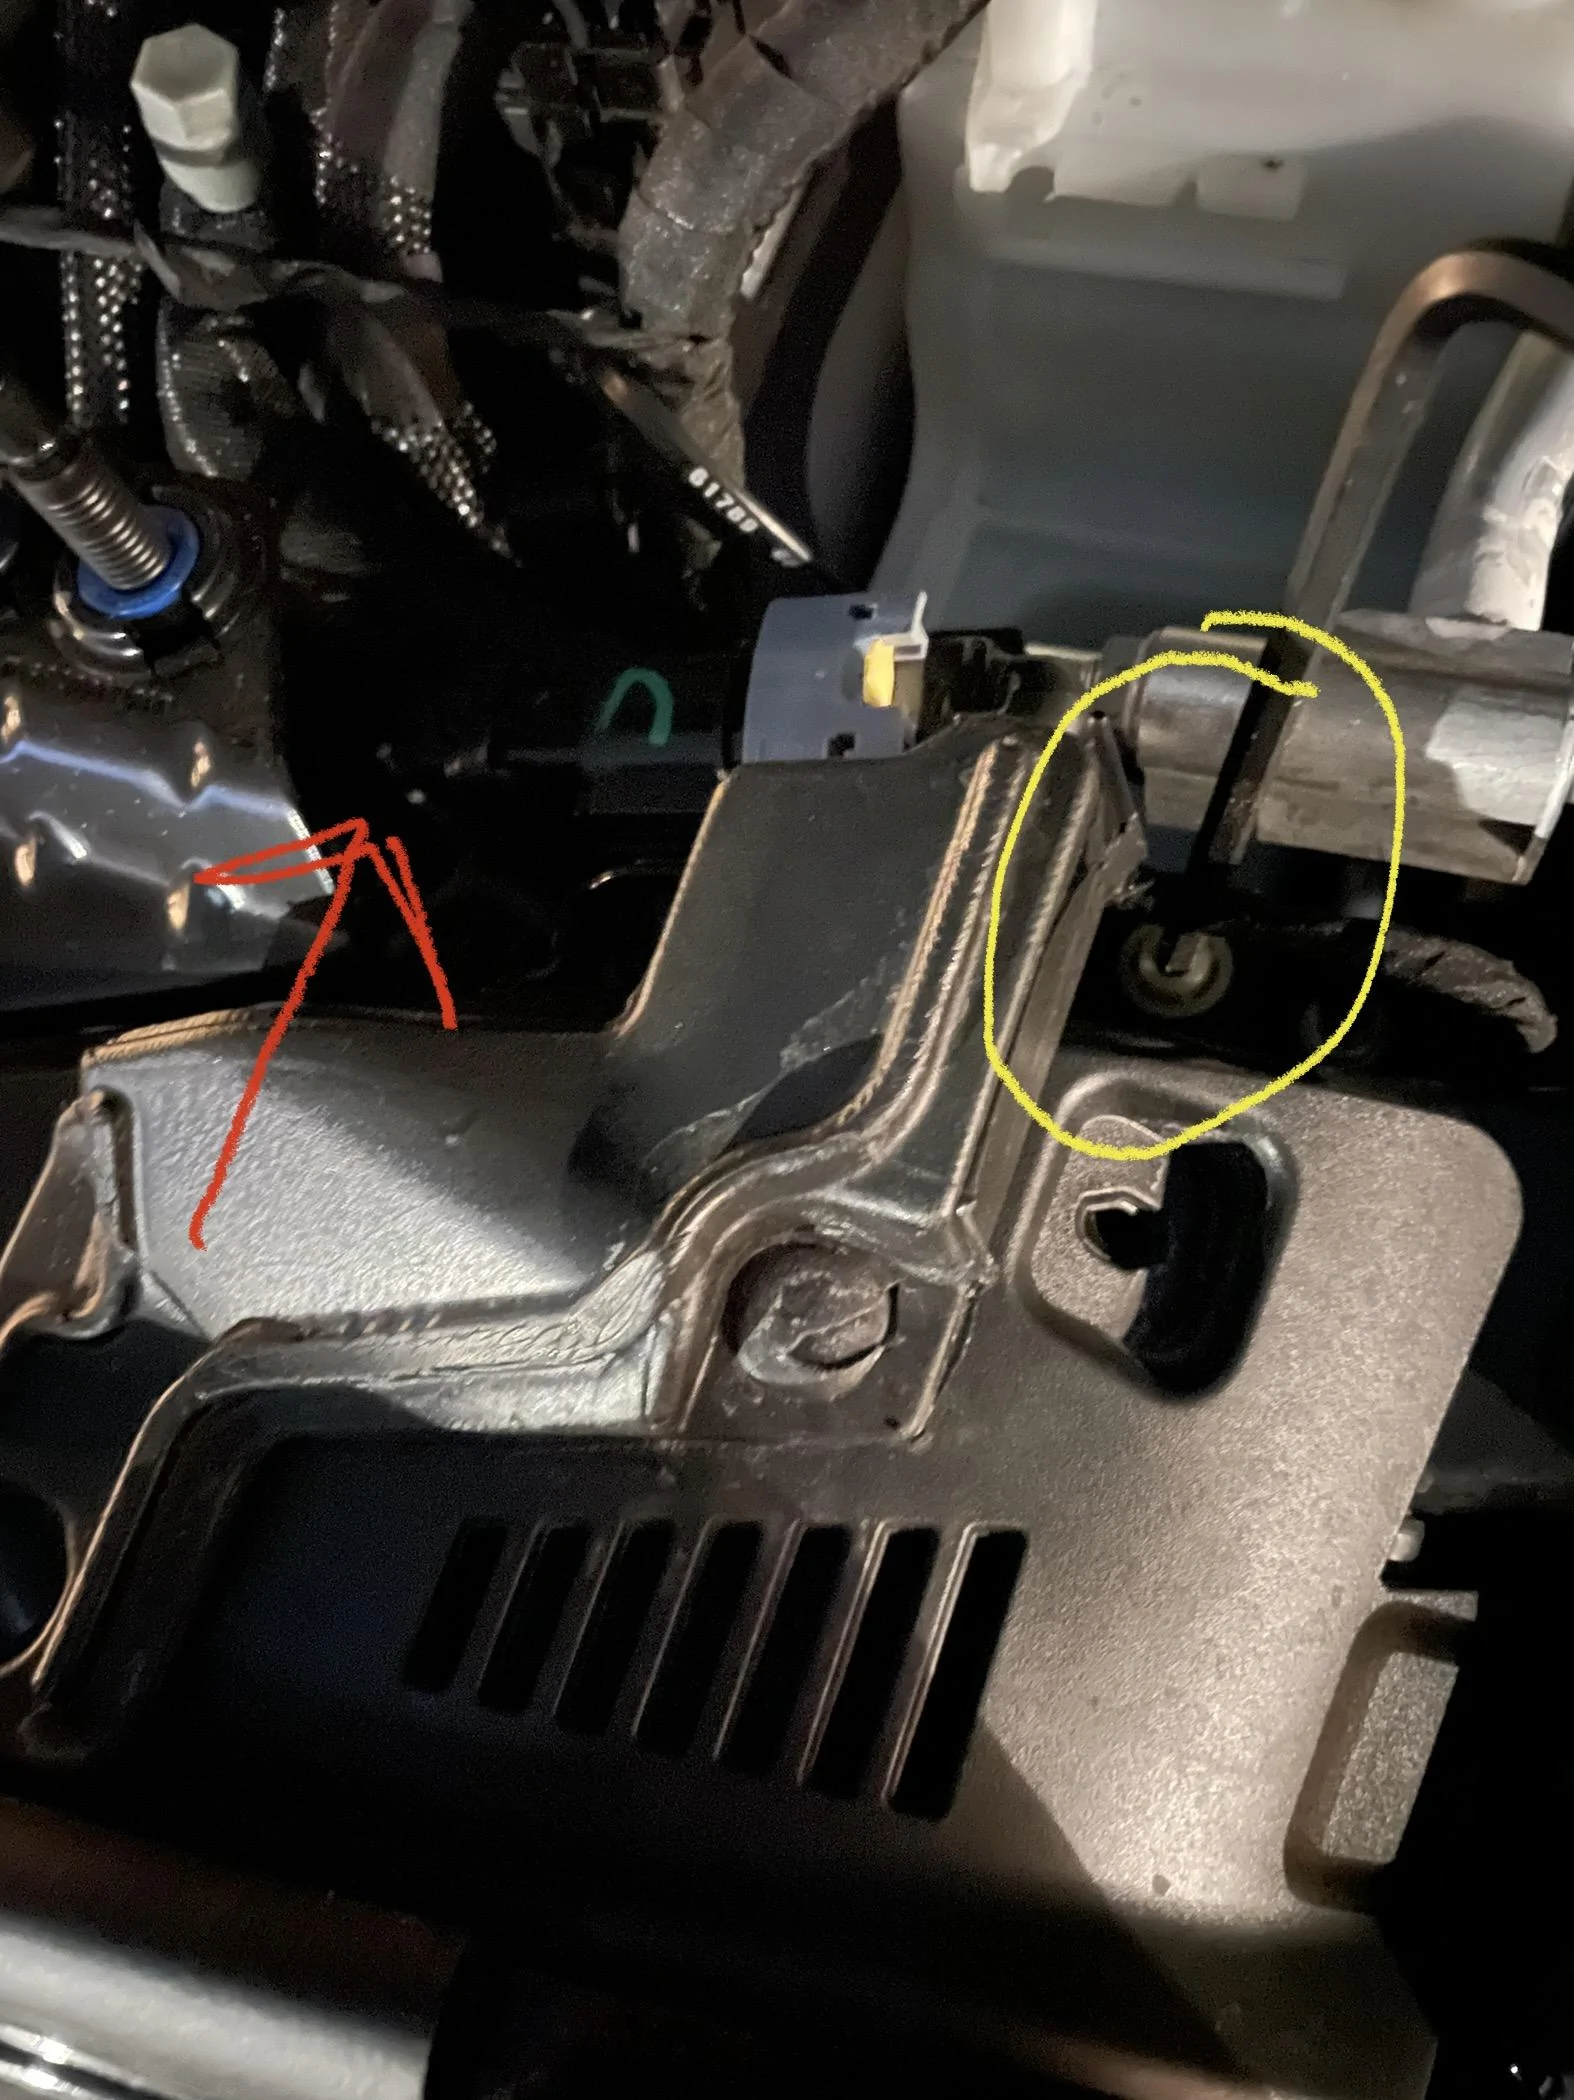
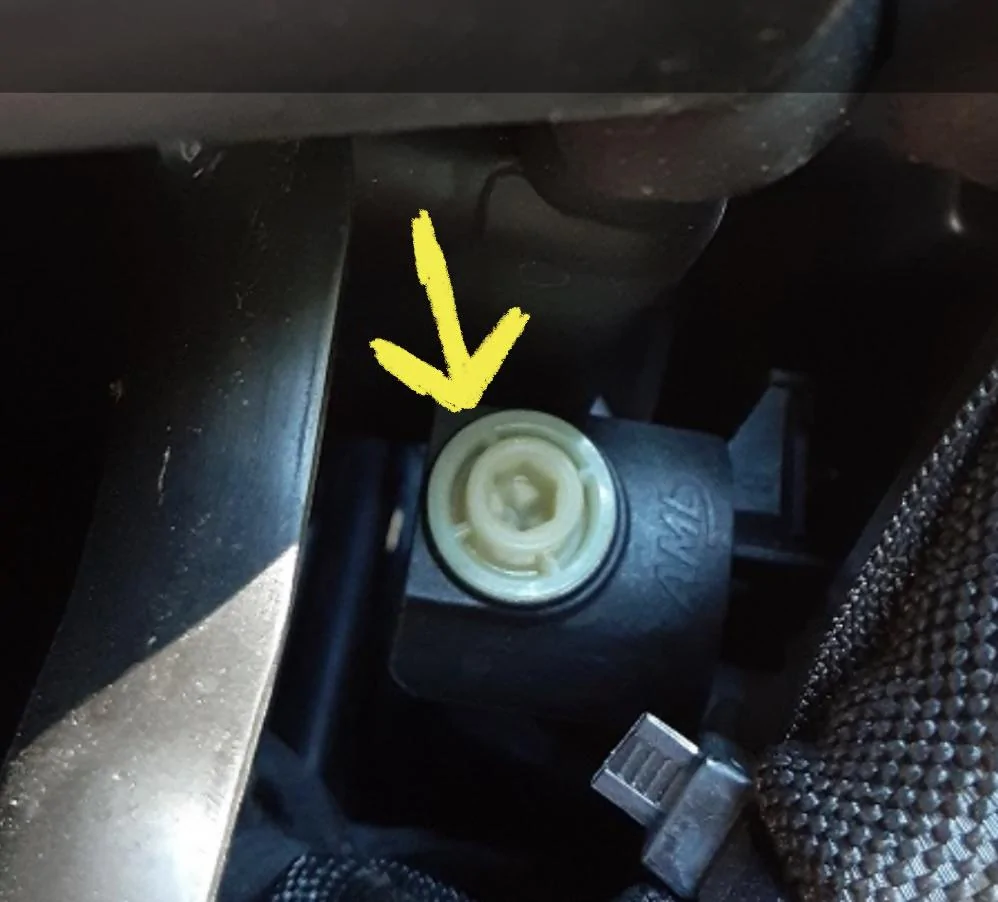
Type 2 marked in yellow are more to the outside of the housings and is pretty close to the top (shallow) of the engine bay.
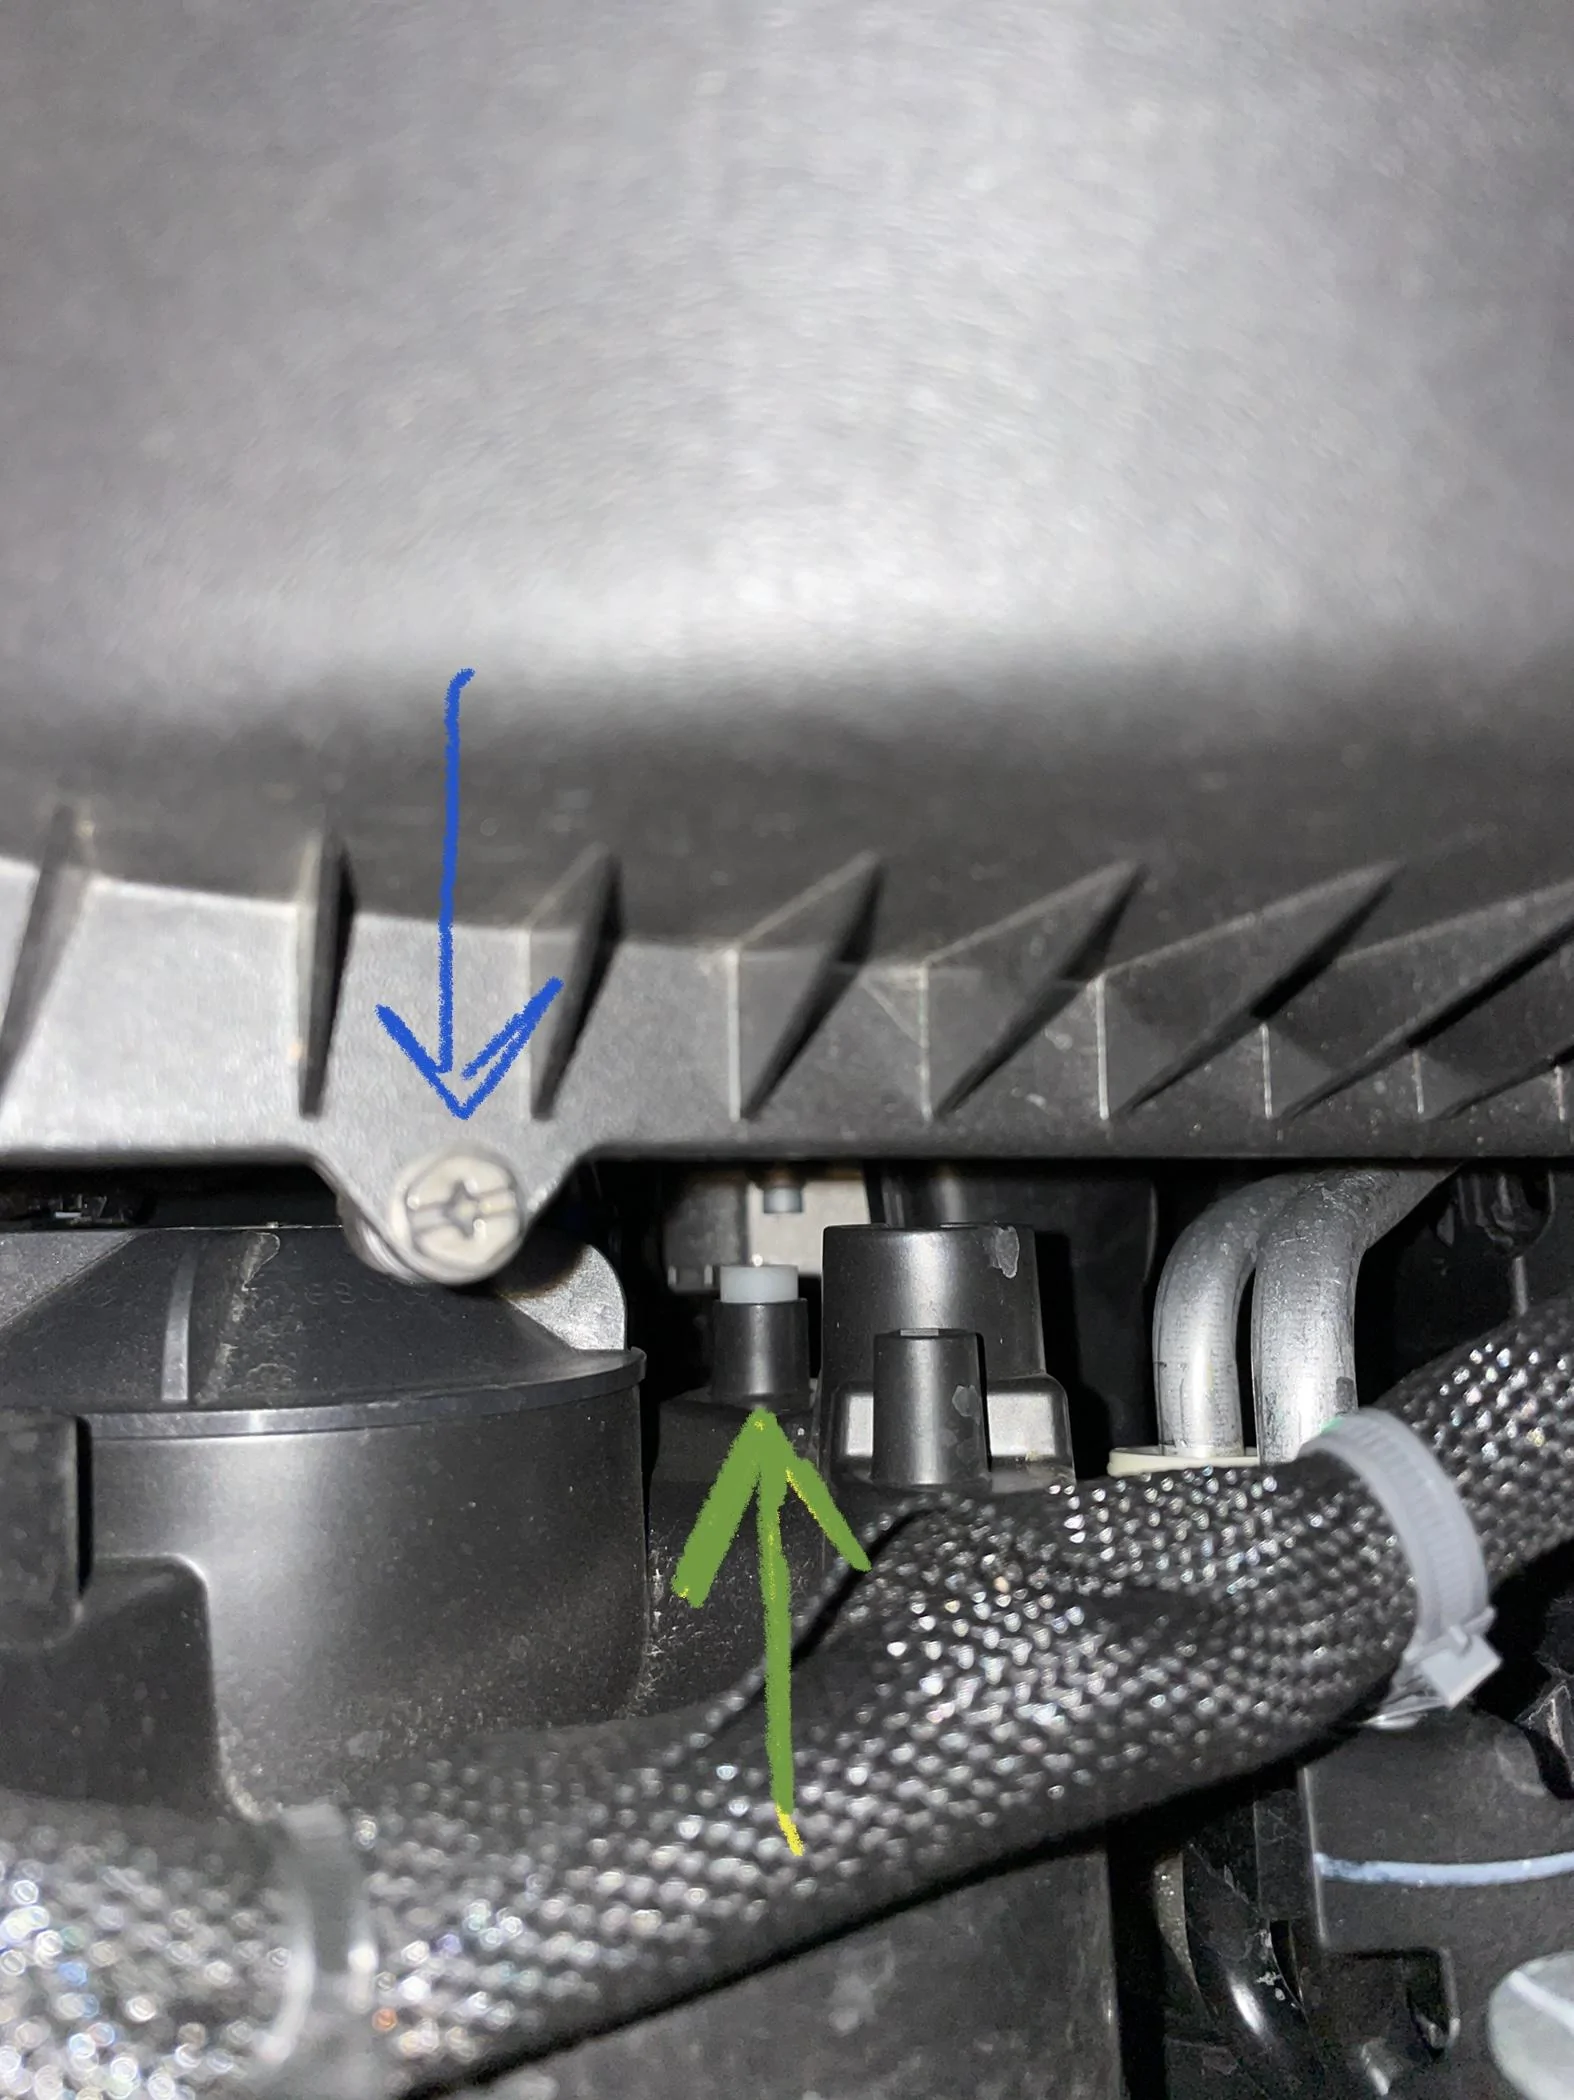
If you have a type 2 then you will see what looks like a little white plug of plastic where the screw would be located on a type 1. These are the green arrows.
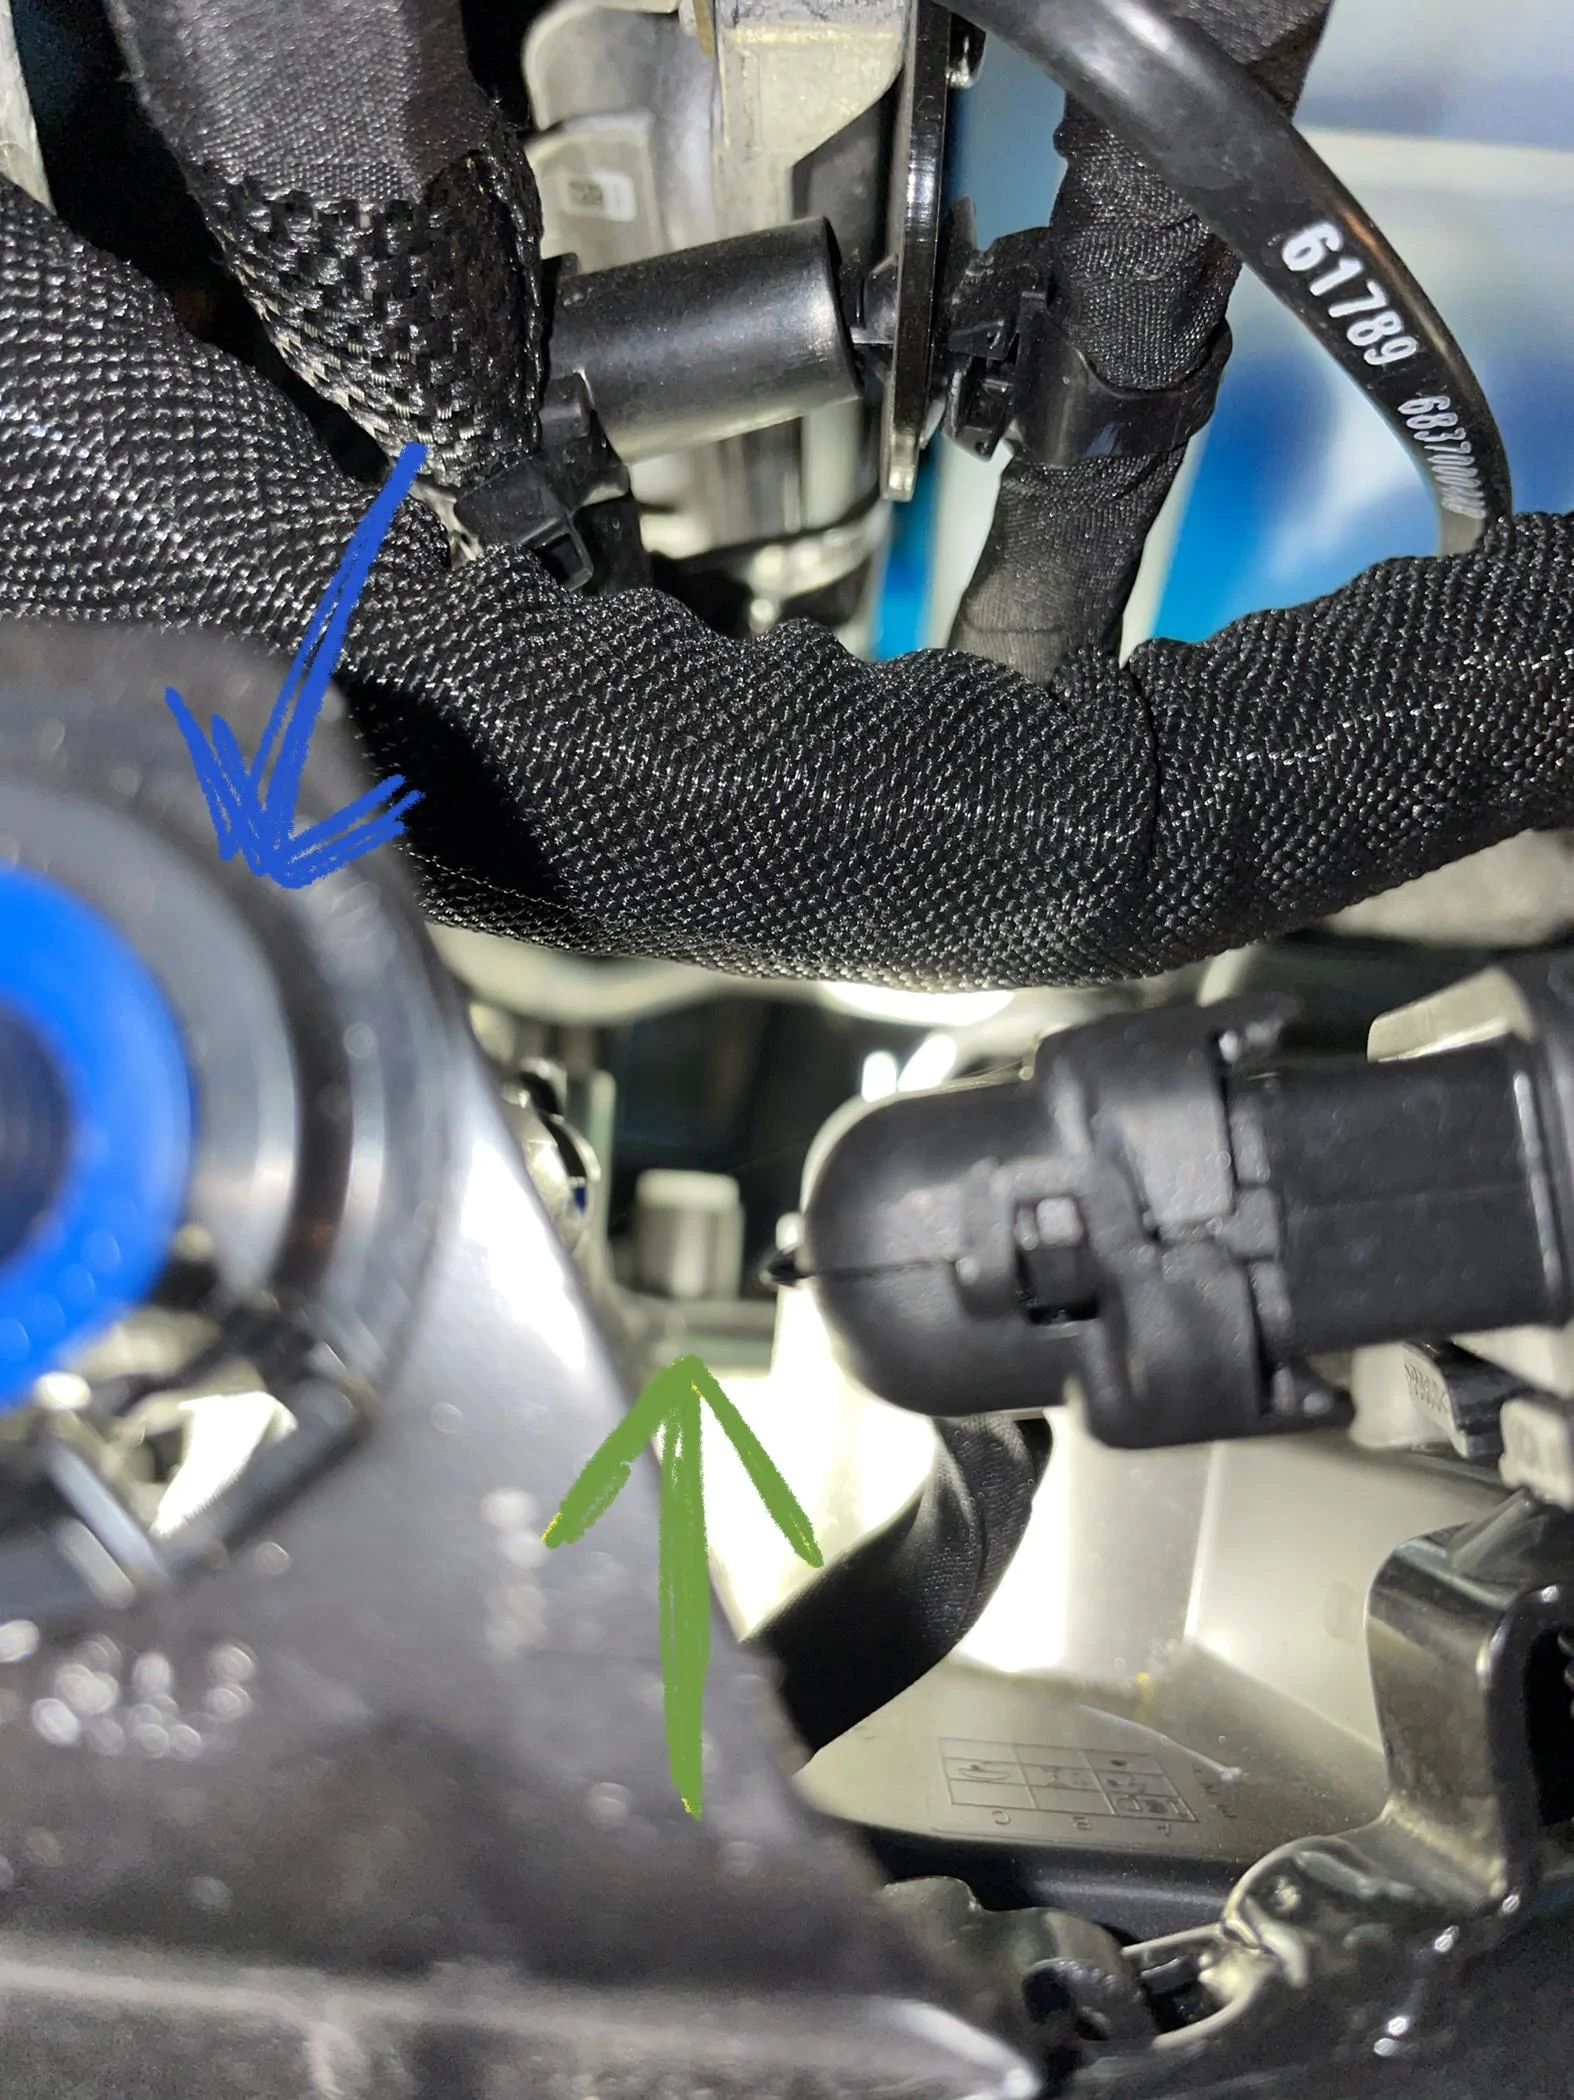
The blue arrows are what I used to reference where the type 1 screws would be. One is the screw on the air box and the other are the 2 blue washer looking things on the driver side (I’m sure someone will tell what those are)
Once you locate the correct adjustment points just use your tool to turn clockwise to lower the beam or counter clockwise to raise the beam.
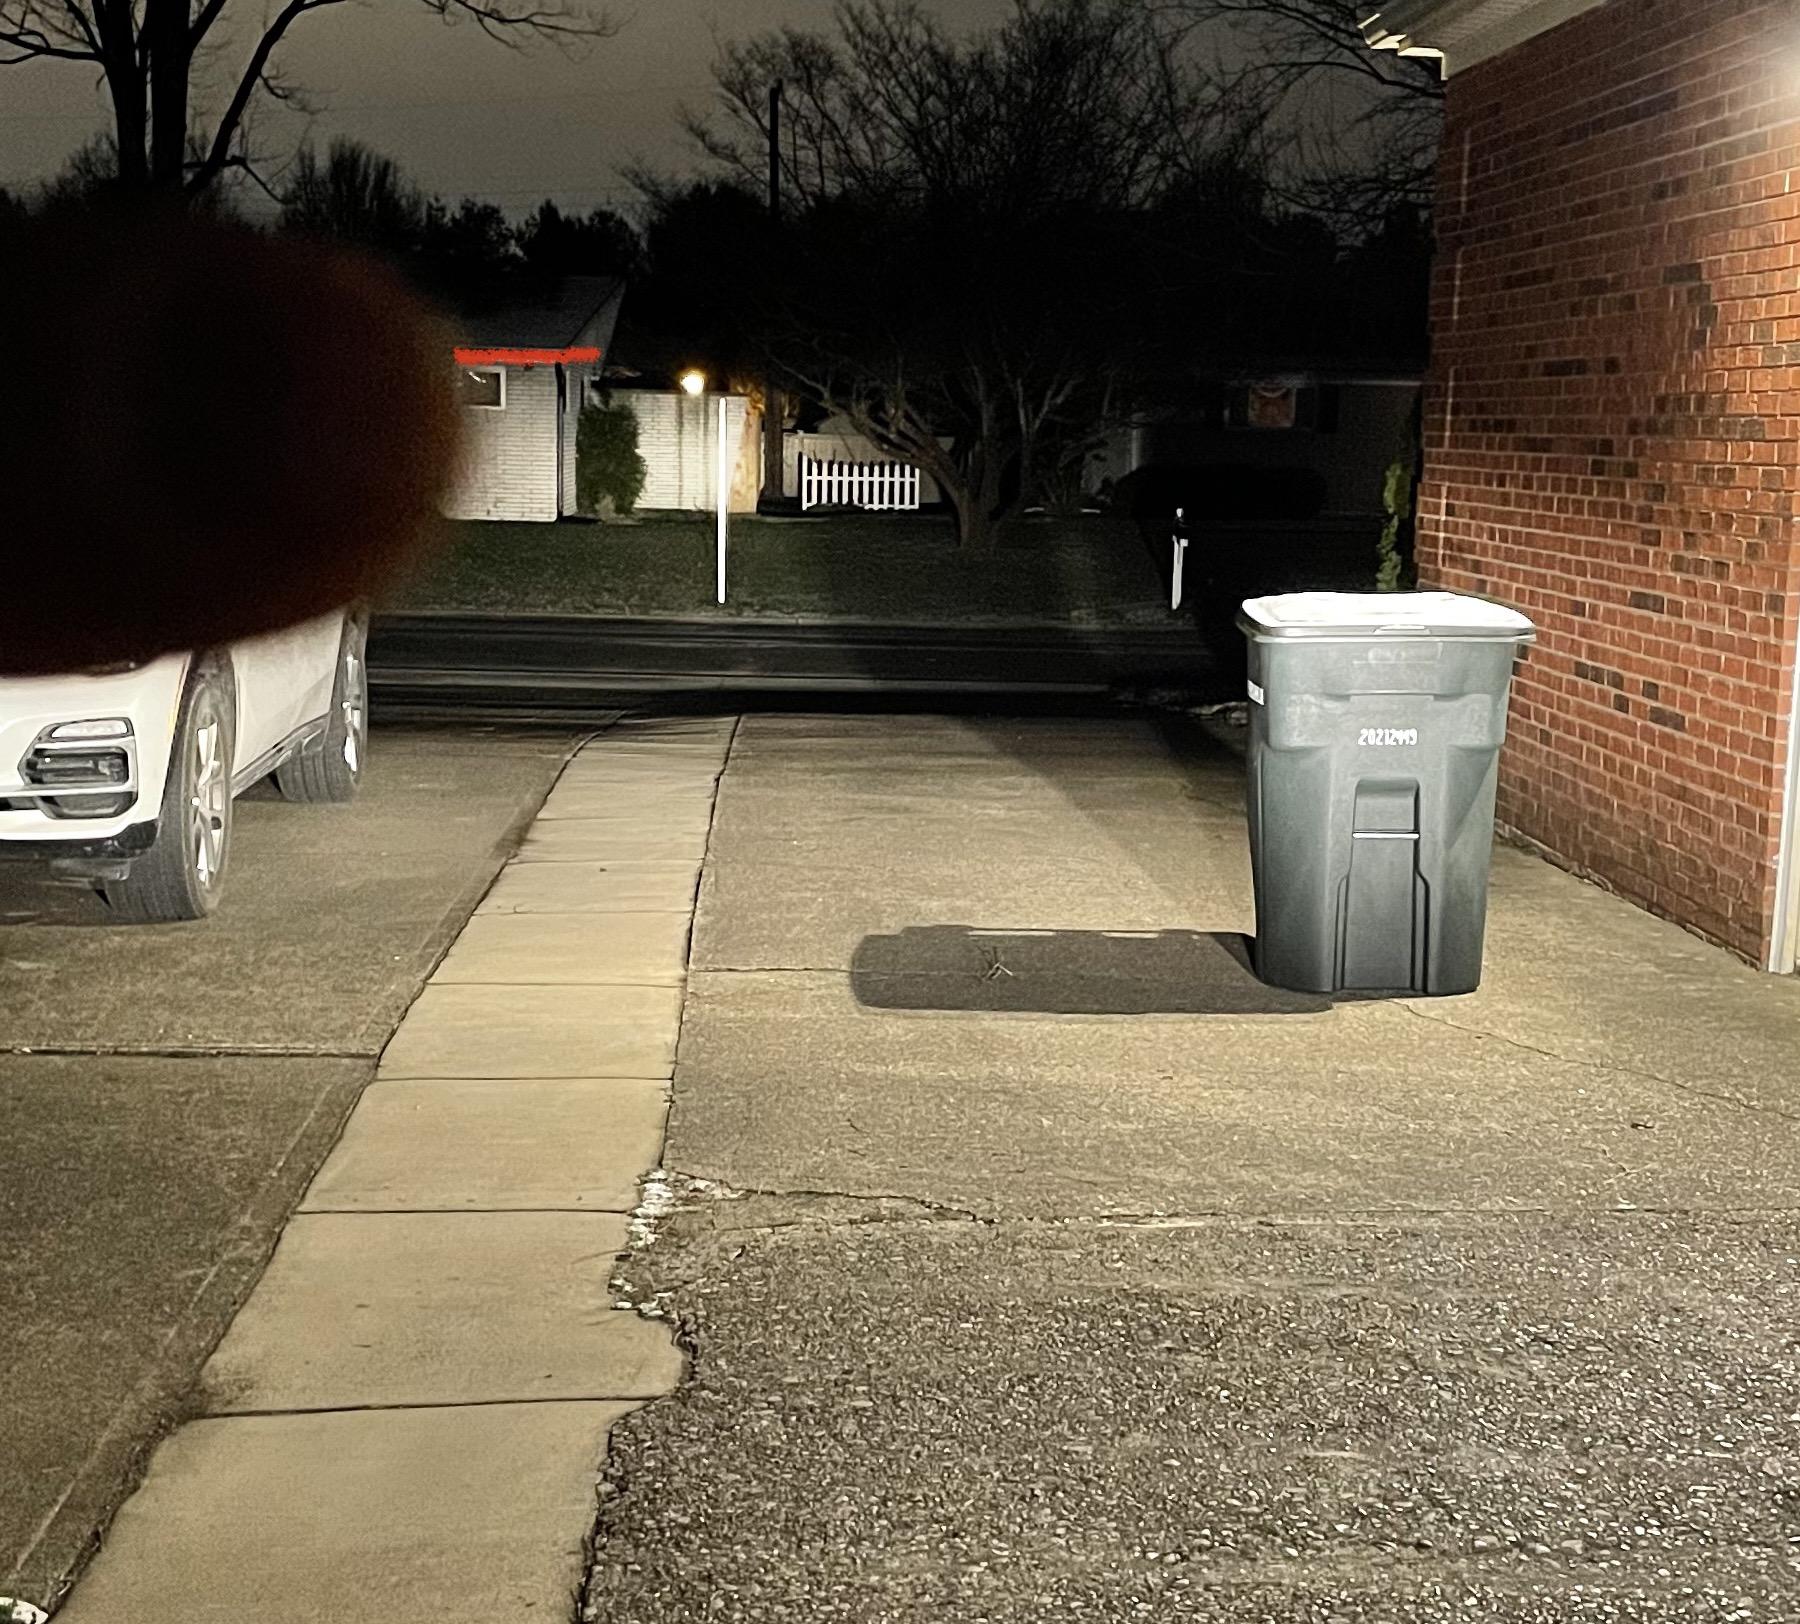
I used a trashcan with a mark 3’ up 25’ away from the truck.
The 2 pictures are my high and low lights after adjustment.
Before adjustment my low beam was a little above the high beam setting after adjustment.
Guess I was melting peoples faces these past couple of weeks. Oops.
Hope this helps.


Type 1 (LED)
Long shaft #2 Philips head screw driver
Type 2 (Halogen)
Ball end 6mm Hex Key
People have used other screw drivers but it’s always good to use the right tool for the specific bolt to lessen the danger of “wallering” it out.
3’ high
25’ distance
type 1
Counter clockwise=beam down
clockwise=beam up
type 2
Clockwise=Light down
Counter clockwise=Light up
So all of this has been covered in separate posts and videos but I wanted to combine them so there would be less… maybe more… confusion.
There are 2 different headlight set ups in the stock Gladiator lights. They have different spots where the adjuster is located.
Type 1 is marked in red. This is also the type that has a lot of videos covering it. The bolt is more to the center of the light housings and deeper (towards the ground) into the engine bay.
Type 2 marked in yellow are more to the outside of the housings and is pretty close to the top (shallow) of the engine bay.
If you have a type 2 then you will see what looks like a little white plug of plastic where the screw would be located on a type 1. These are the green arrows.
The blue arrows are what I used to reference where the type 1 screws would be. One is the screw on the air box and the other are the 2 blue washer looking things on the driver side (I’m sure someone will tell what those are)
Once you locate the correct adjustment points just use your tool to turn clockwise to lower the beam or counter clockwise to raise the beam.
I used a trashcan with a mark 3’ up 25’ away from the truck.
The 2 pictures are my high and low lights after adjustment.
Before adjustment my low beam was a little above the high beam setting after adjustment.
Guess I was melting peoples faces these past couple of weeks. Oops.
Hope this helps.

Sponsored
Last edited: