TheHops
Well-Known Member
- Thread starter
- #1
I have been wanting to add in additional bed lighting for a while, as the stock Gladiator ones really never cut it for me. After having added my RSI SmartCap along with a set of BuiltRight rails and panels, the lighting situation became even worse. This is my DIY on wiring aux lighting to the bed off of the stock circuit. My application is unique to my build, however the overall process would be the same as far as running wires and tapping in to the circuit. I have pictures for both sides intermixed here, but the process is more or less the same on driver and passenger, though it is much easier to maneuver on passenger due to the absence of an exhaust system.
What I used (your application may vary):
-Set of lights (with approximately 20ft of wiring)
-Fasteners for the lights (either double sided tape, or screws)
-Four red Posi-Taps
-Heat shrink
-Heat gun
-Wiring pliers
-Zip ties
-Wire hanger
-Tape
I found this set of lights on amazon:
https://www.amazon.com/gp/product/B07YZFN925/ref=ppx_yo_dt_b_asin_title_o06_s00?ie=UTF8&psc=1


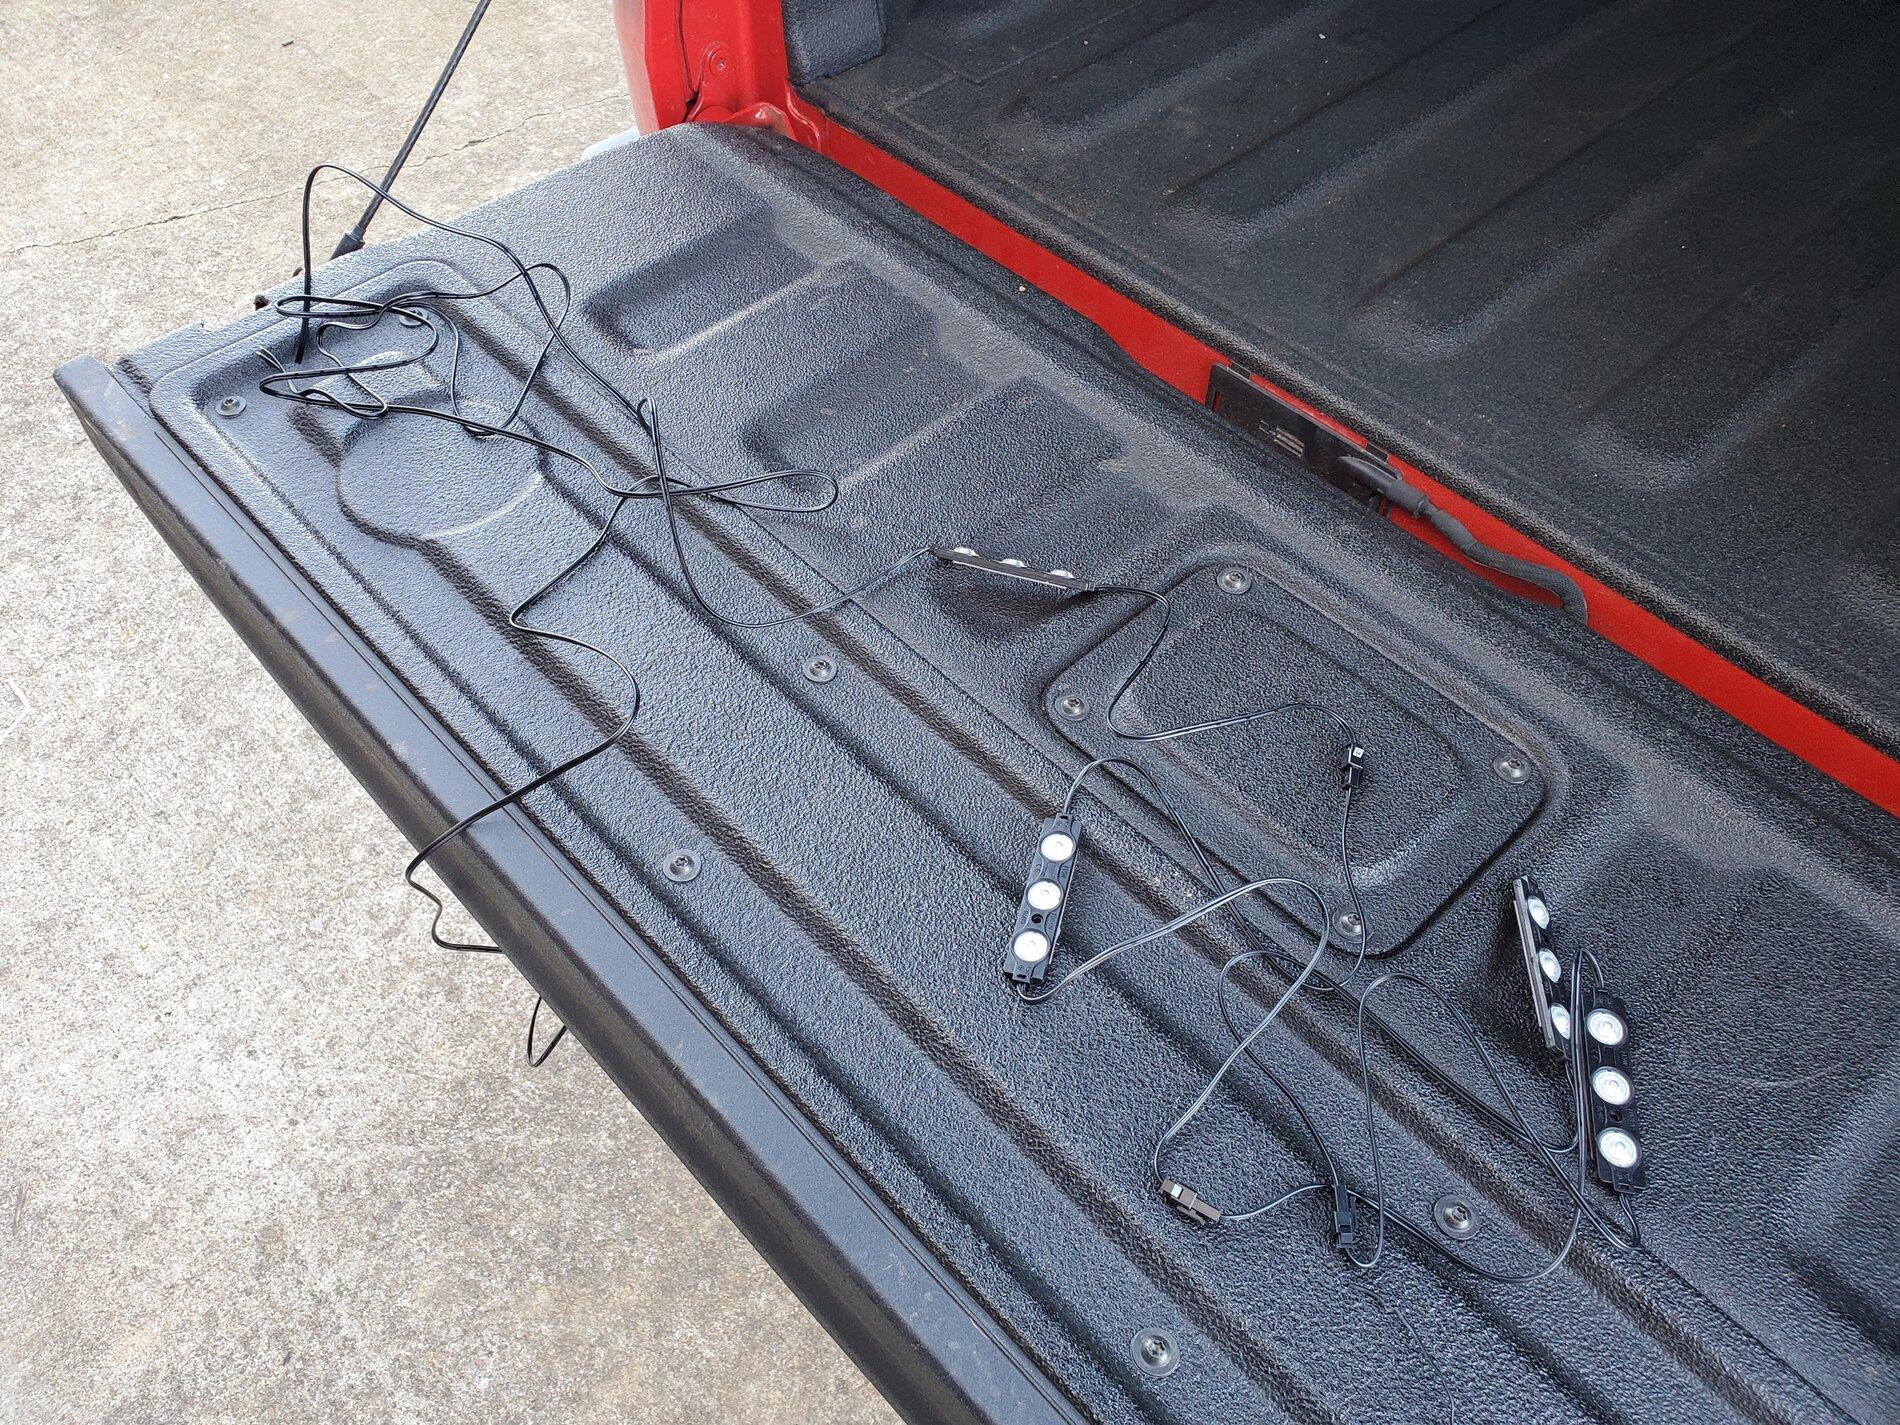
The package came with 8 total lights, two sets of 4 lights that are wired together. They are backed with double sided adhesive tape. The lights are very light, and the tape holds solid. They also come with a 2 year warranty. I was pleasantly surprised by the overall quality. This is the first set of lights that I ordered to try for my application, and they ended up fitting perfectly. This whole project cost me less than $20.
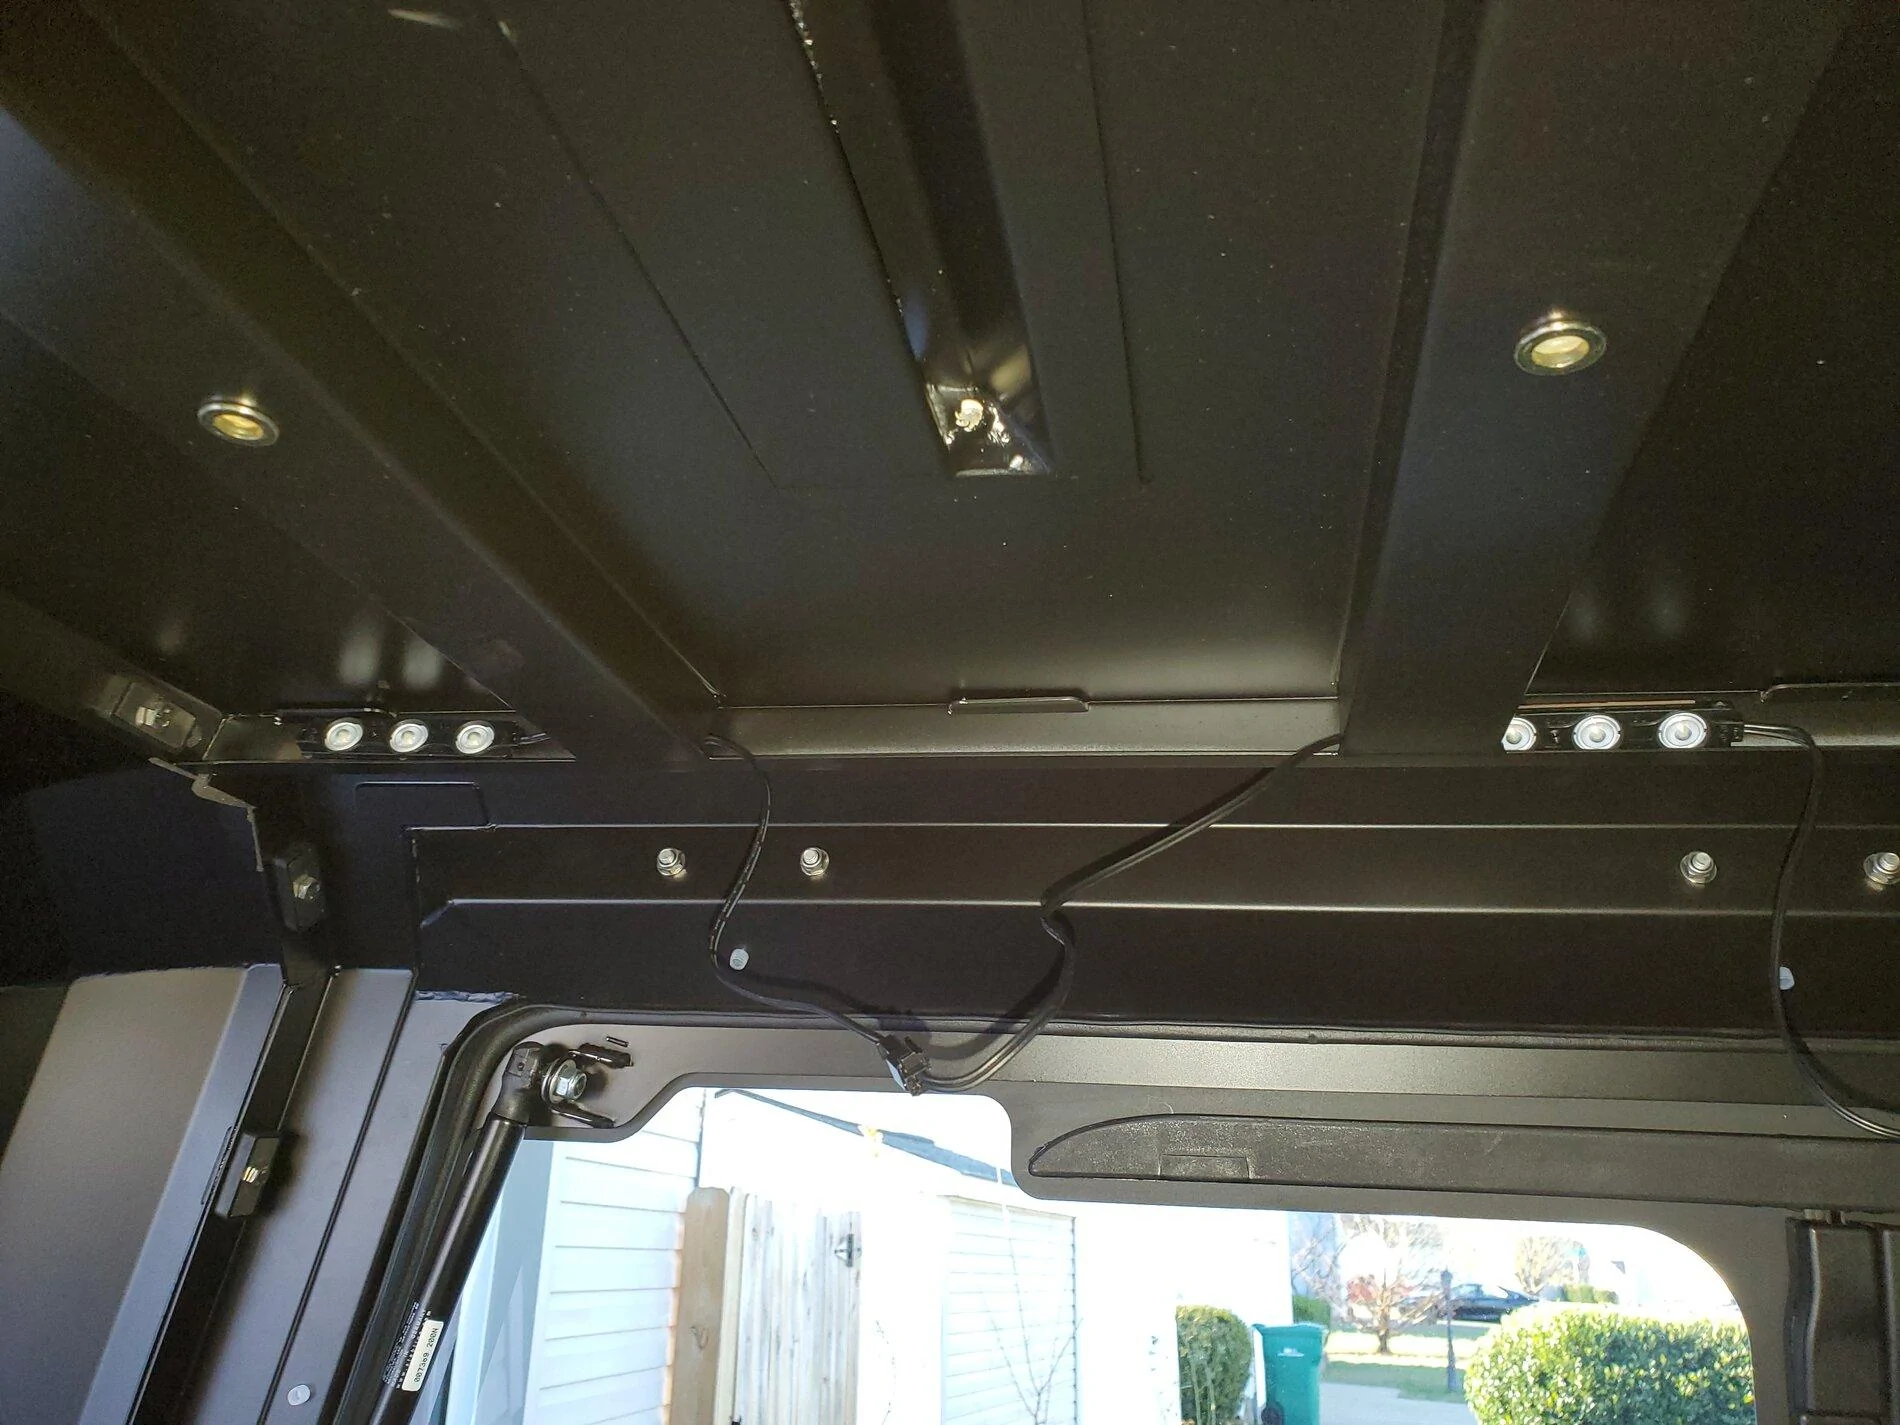
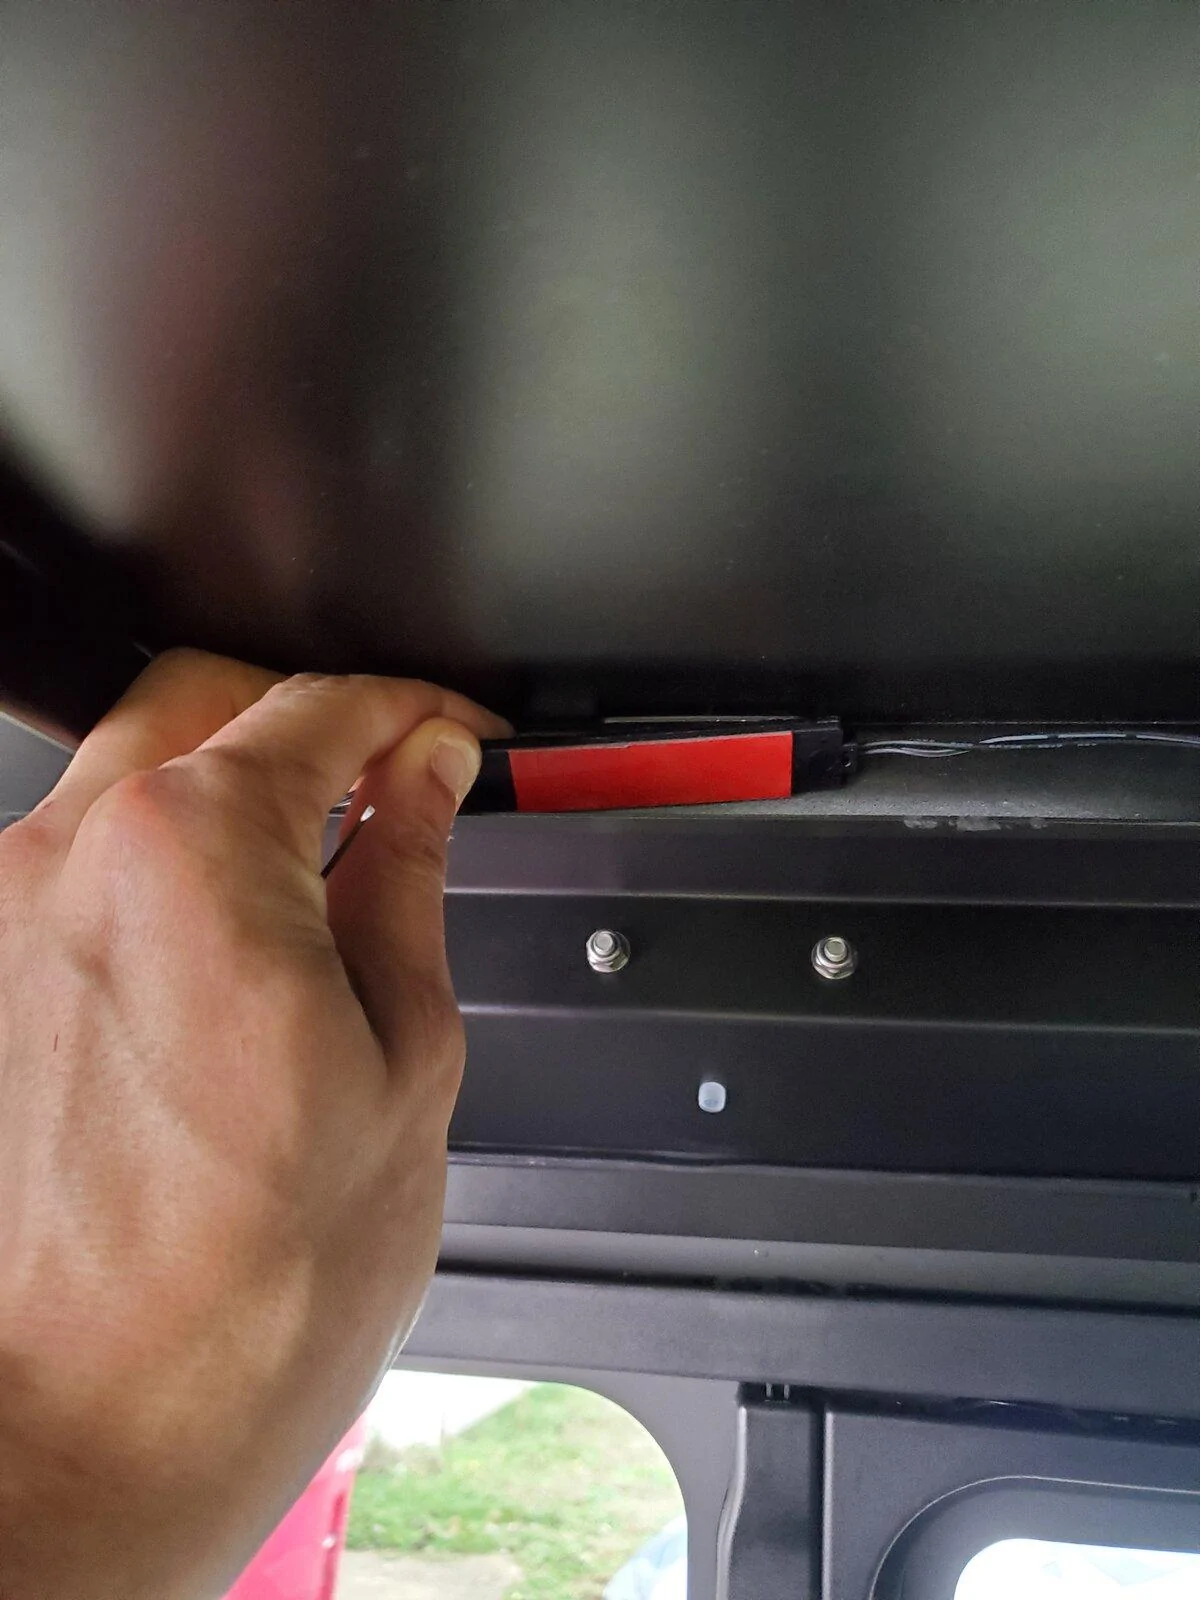
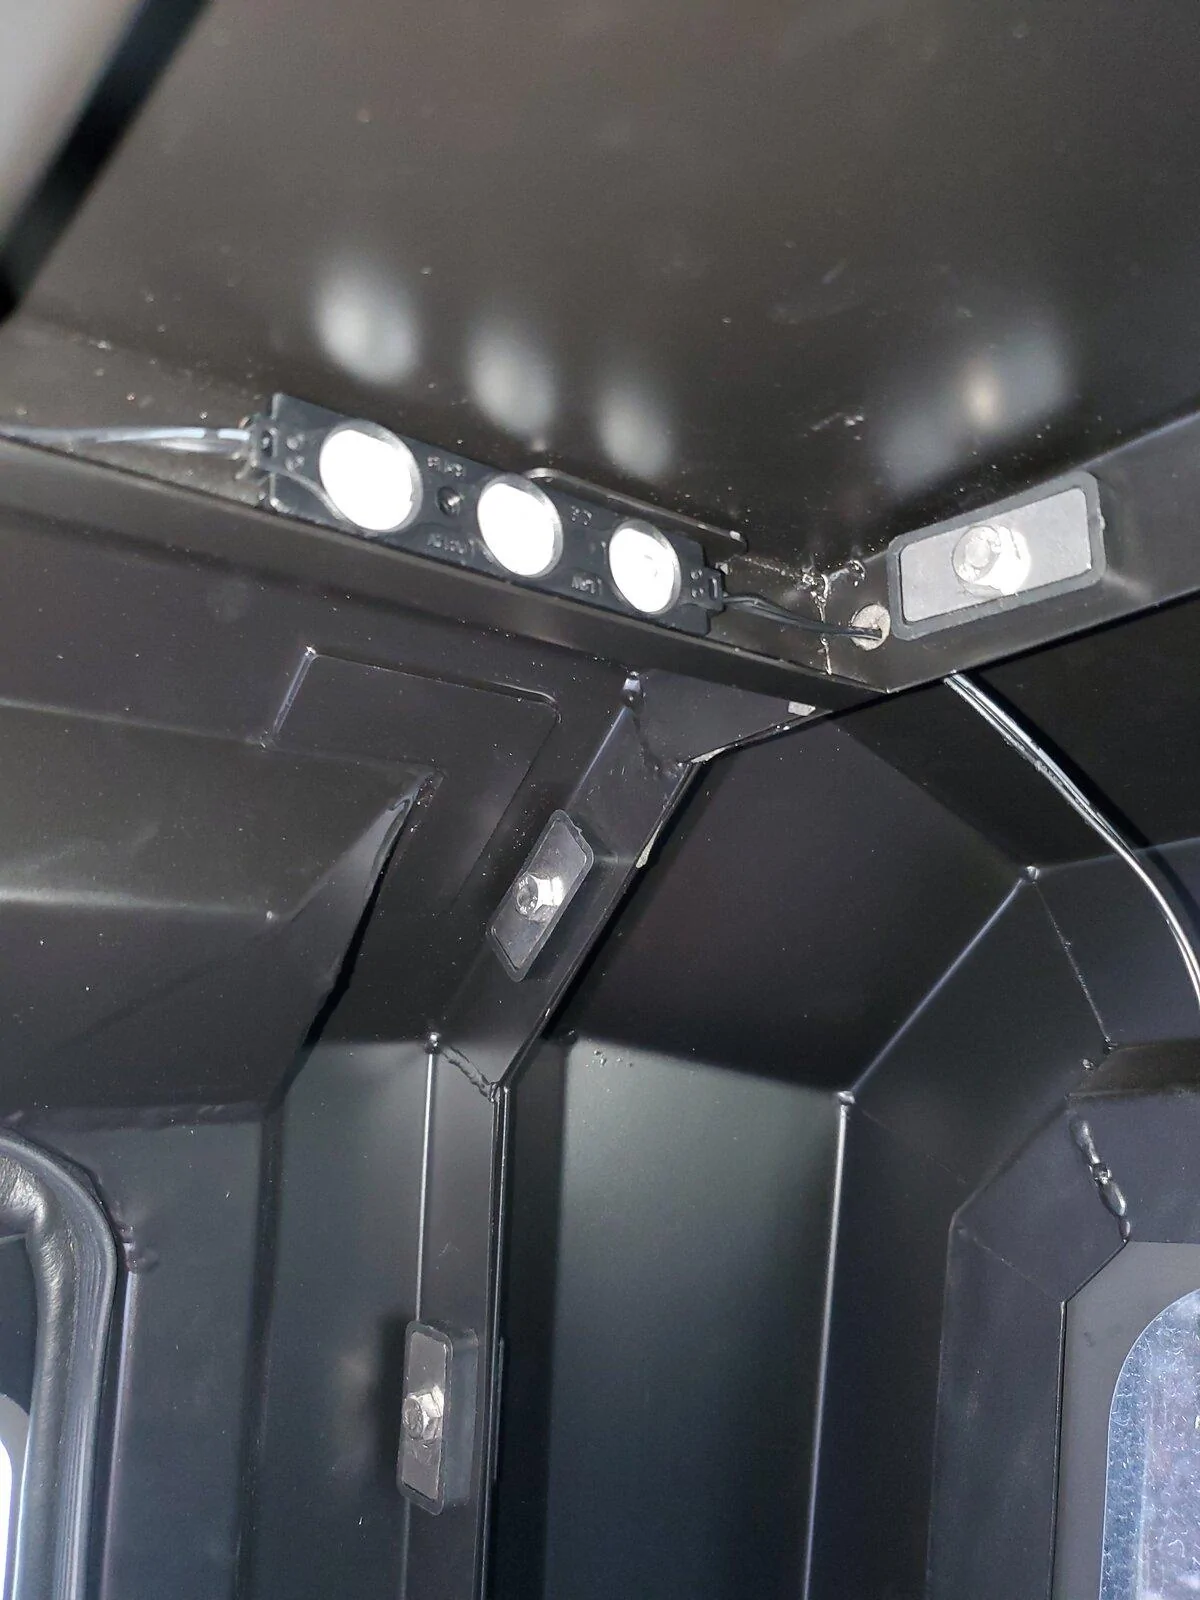
I started off by choosing a location. I knew I wanted the lights up high for an evenly distributed, diffused pattern over the cargo area, so I went straight to the ceiling of my SmartCap. There is a lip that runs the length of the roof, which also happens to have pass-throughs between hollow crossmembers. This ended up working perfectly, because I could route the wiring in between these pass-throughs, and tuck all excess cordage inside of the hollow crossmembers.
Before sticking down the lights, I tapped the leads on to a spare battery to ensure that output and spread was sufficient in this location. I tested during daylight, and after sunset. These lights pump out a surprising amount of light, as the entire bed was illuminated. Having checked that, I began sticking down the lights and routing the wiring.
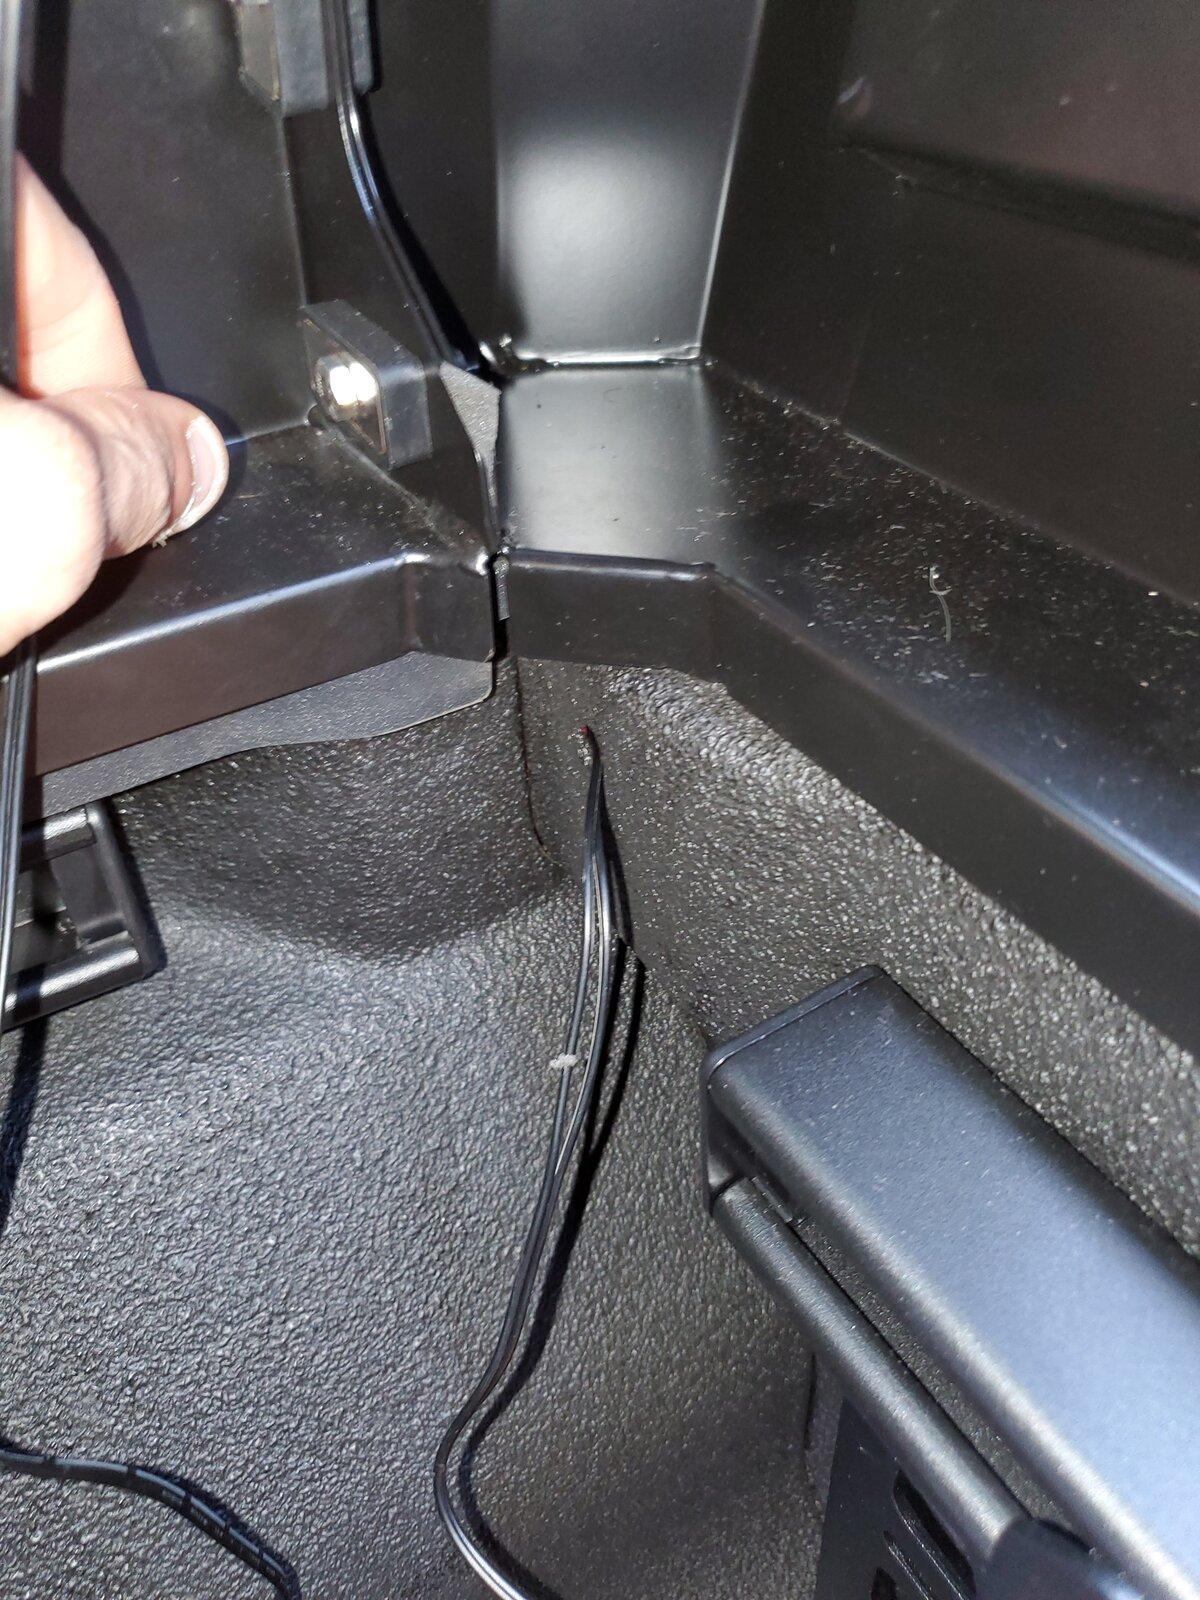
I ran the wiring along the ceiling, and then through an existing hole in my RSI Smart Cap. I punched a hole through the gasket, and dropped the wires down to hide behind the front flange of the shell, before routing the wires out of another existing hole in the bed.
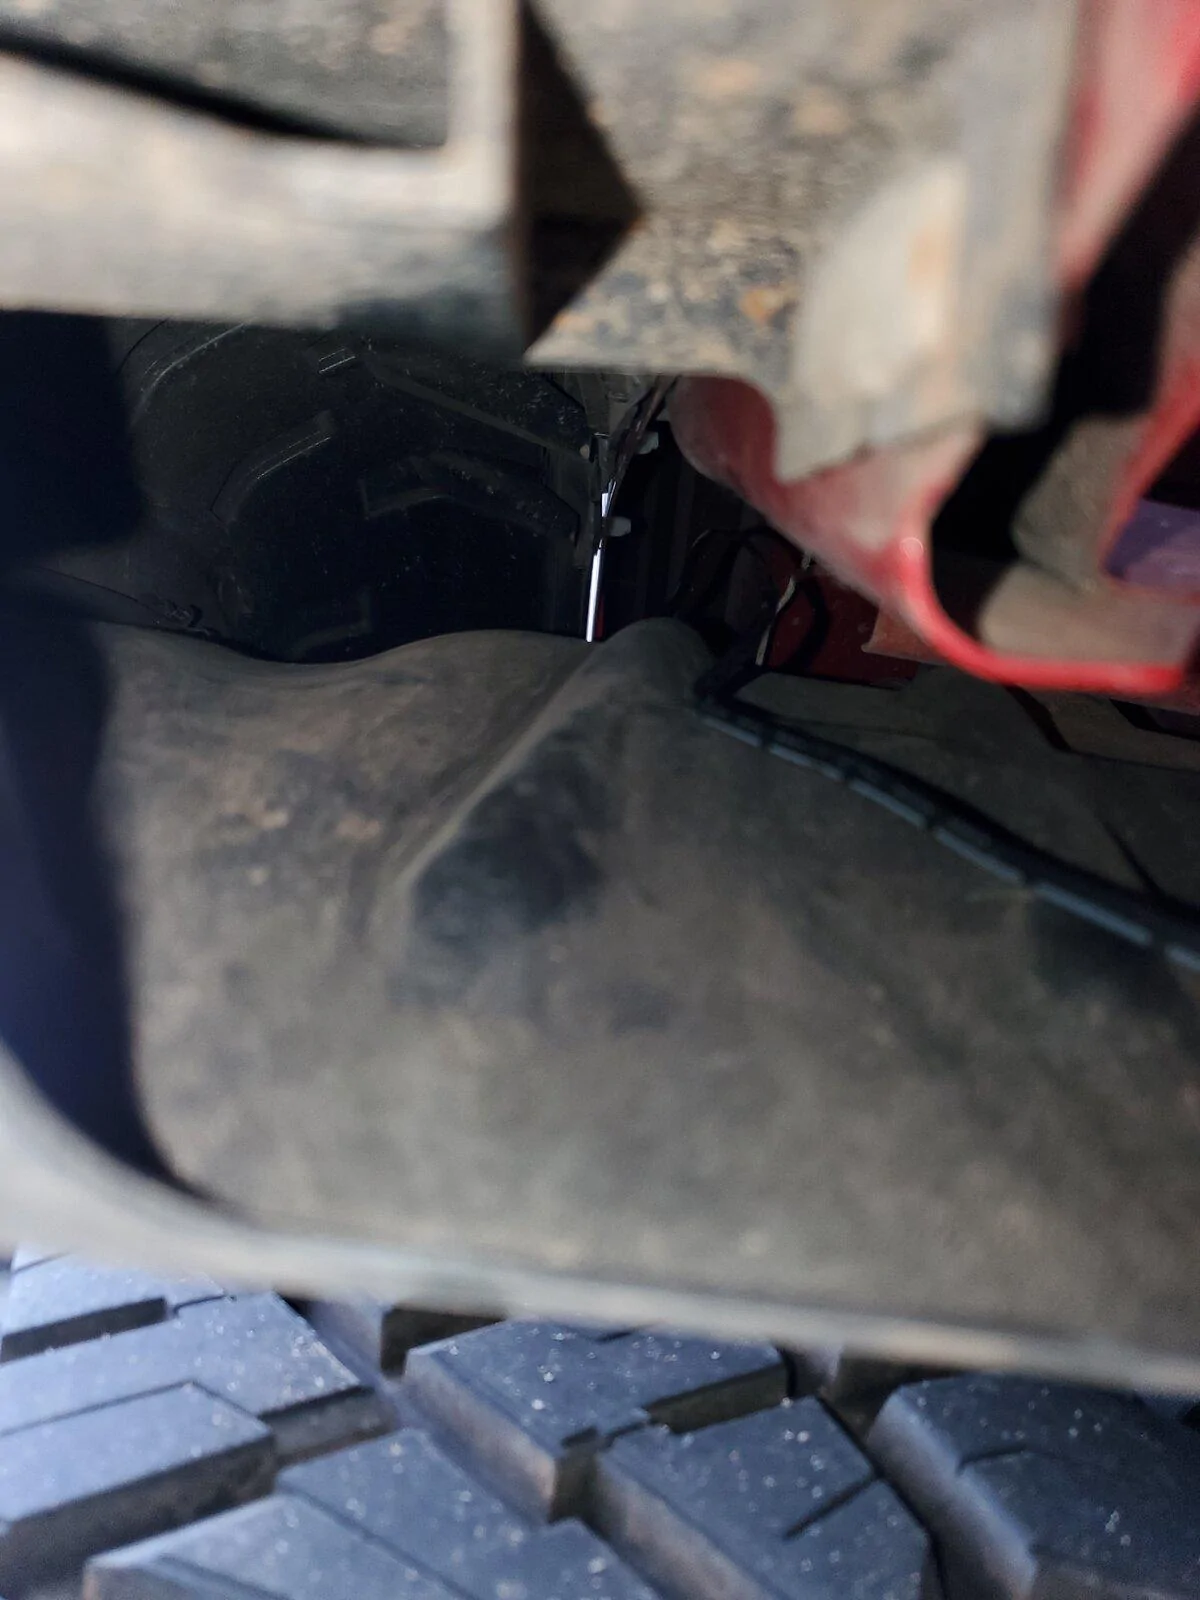
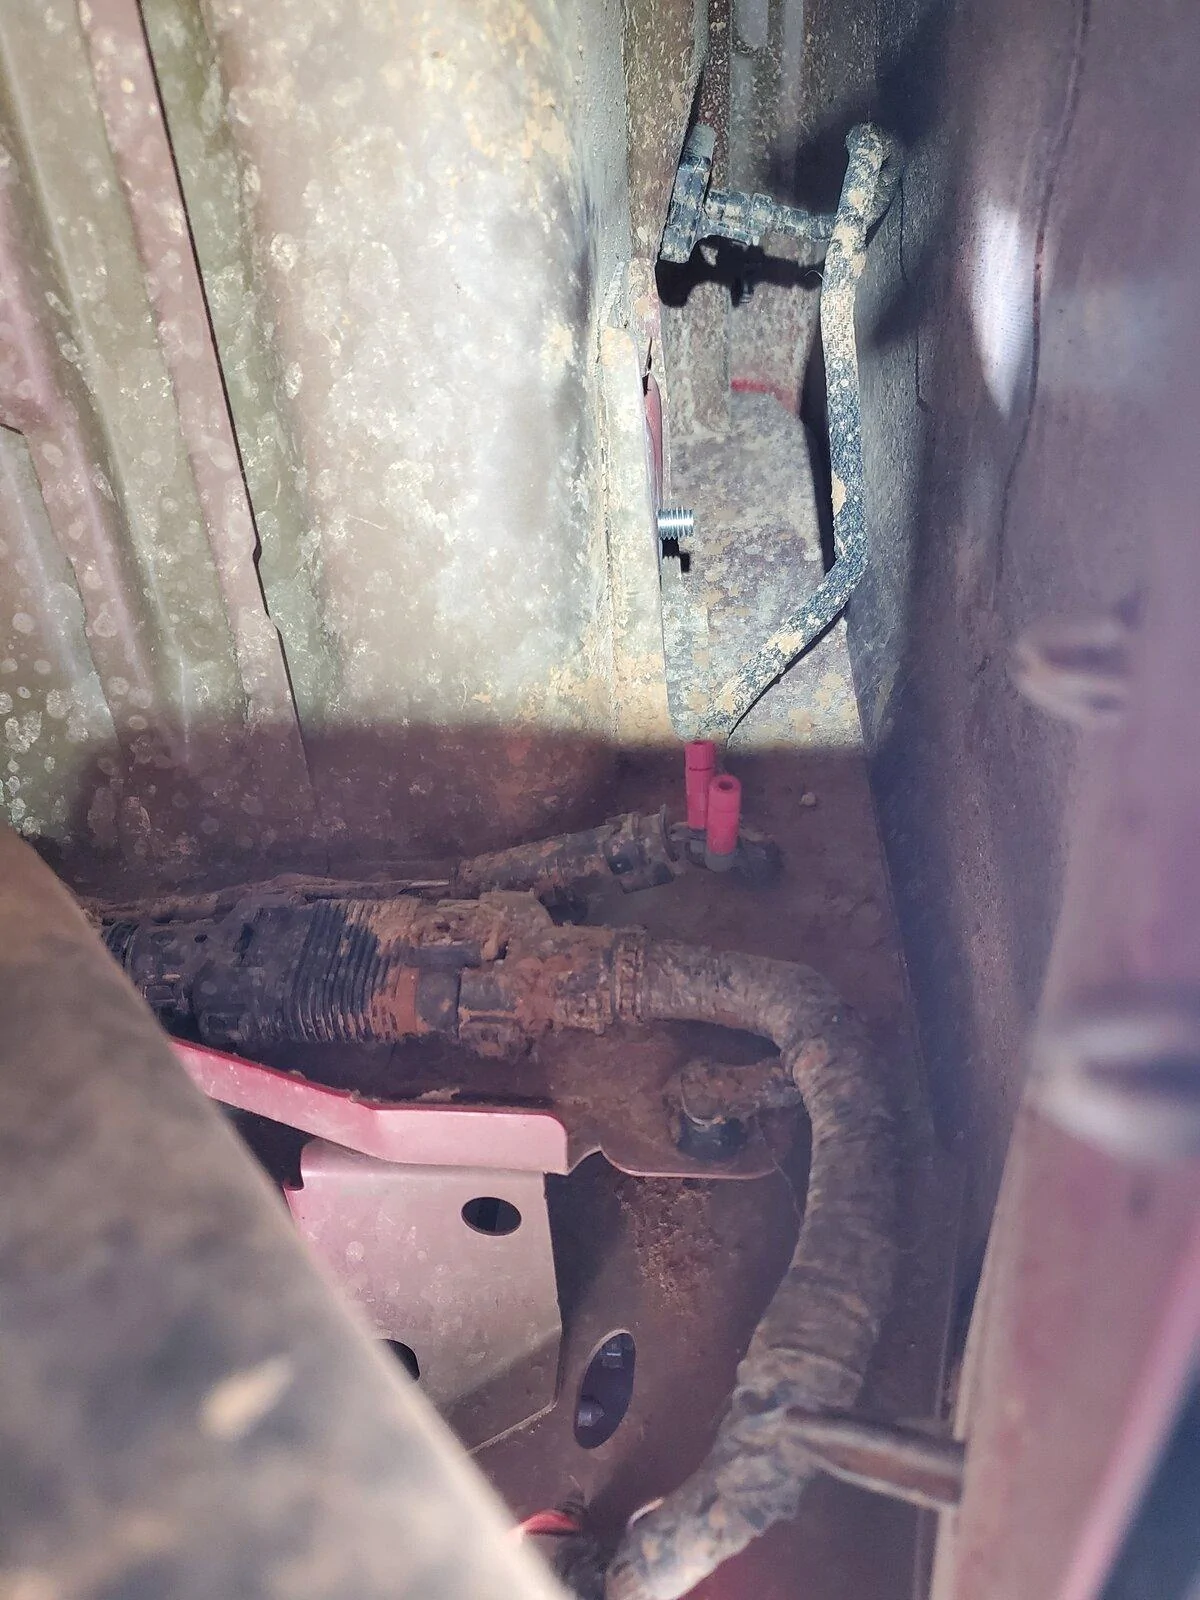
From there, the wires dropped between the bed and the cab. I fished them out and down to the ground with a hook on the end of a wire hanger, and decided how to route. Riding across the inside of the plastic fender liner seemed to be the best way, as it would keep the wires hidden and protect the wiring from debris. With my trusty wire hanger in hand, I taped the leads, made a slight bend, and fished up through the fender well.
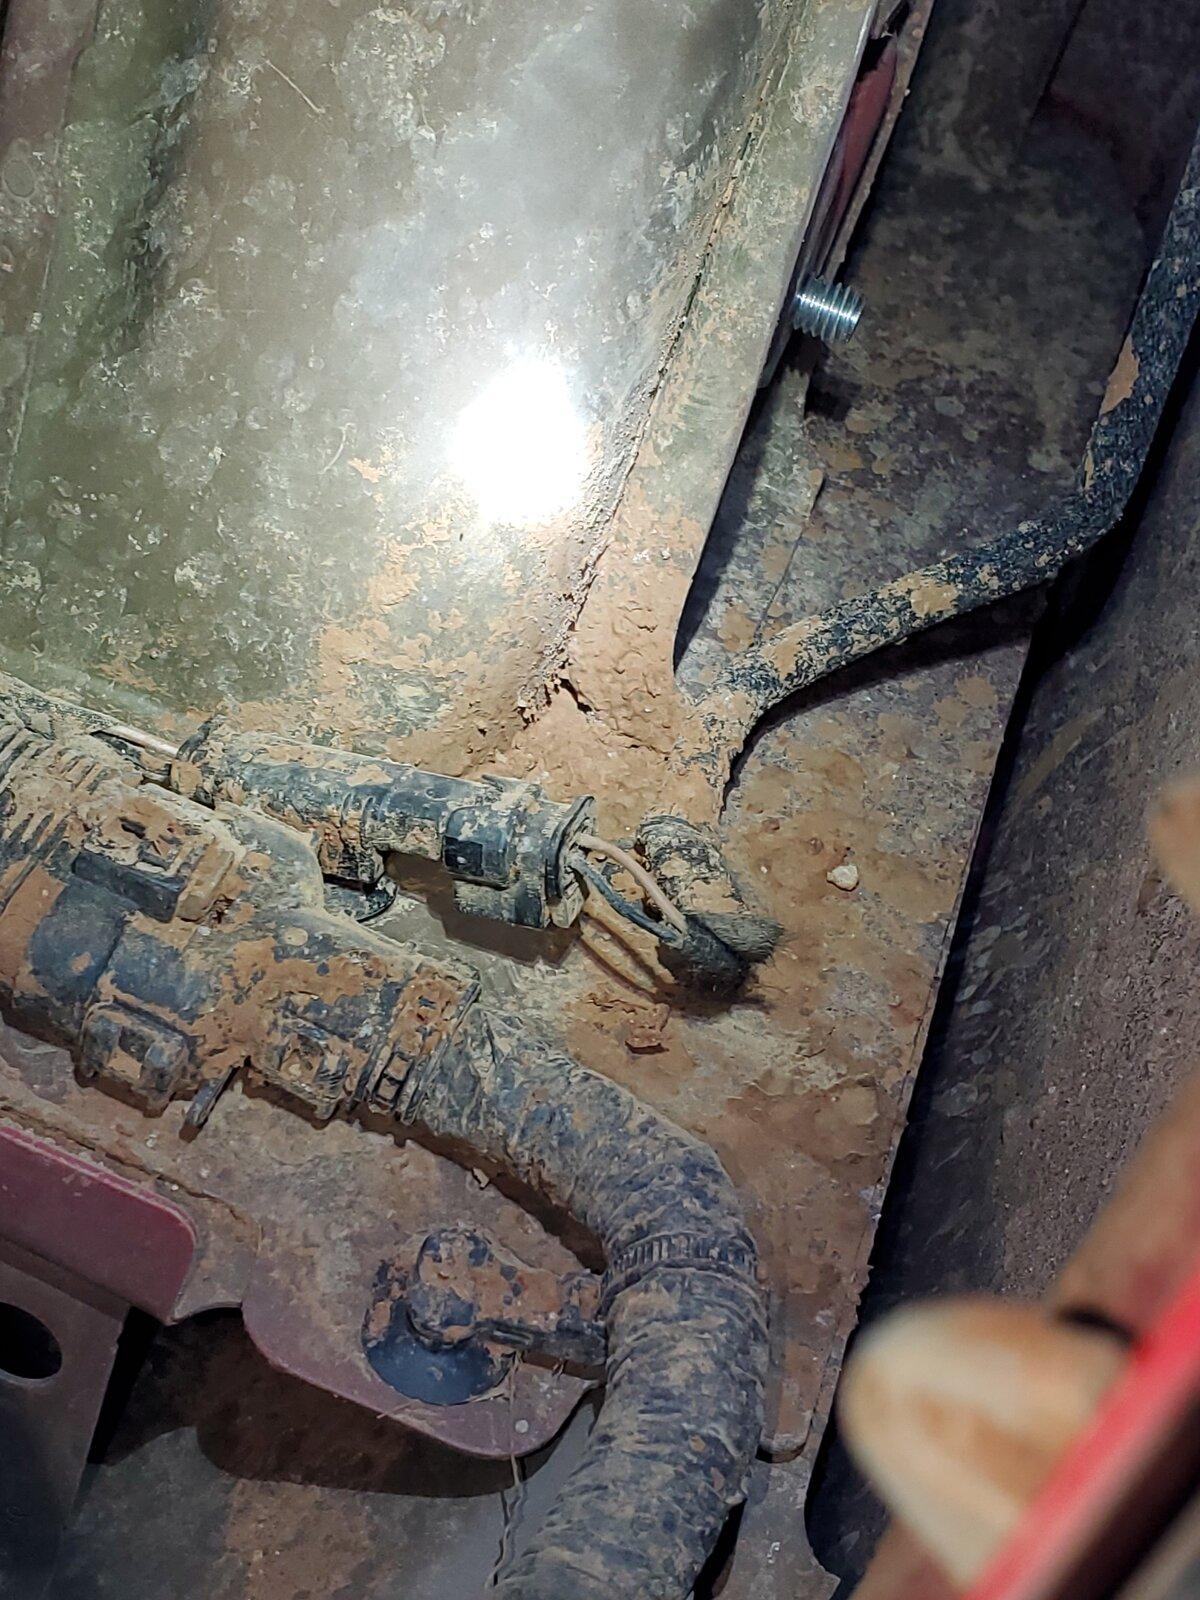
Once the leads were on the rear side of the fender well, I identified the bed light/cargo light harness. It's very easy to find--just follow from where the light is. It is the only harness leading to that location, and there are only two wires associated with it. On the driver side, your positive is brown-ish/yellow-ish (I had a hard time telling through the mud), and ground is black. On your passenger side, the positive is red, and the ground is black.
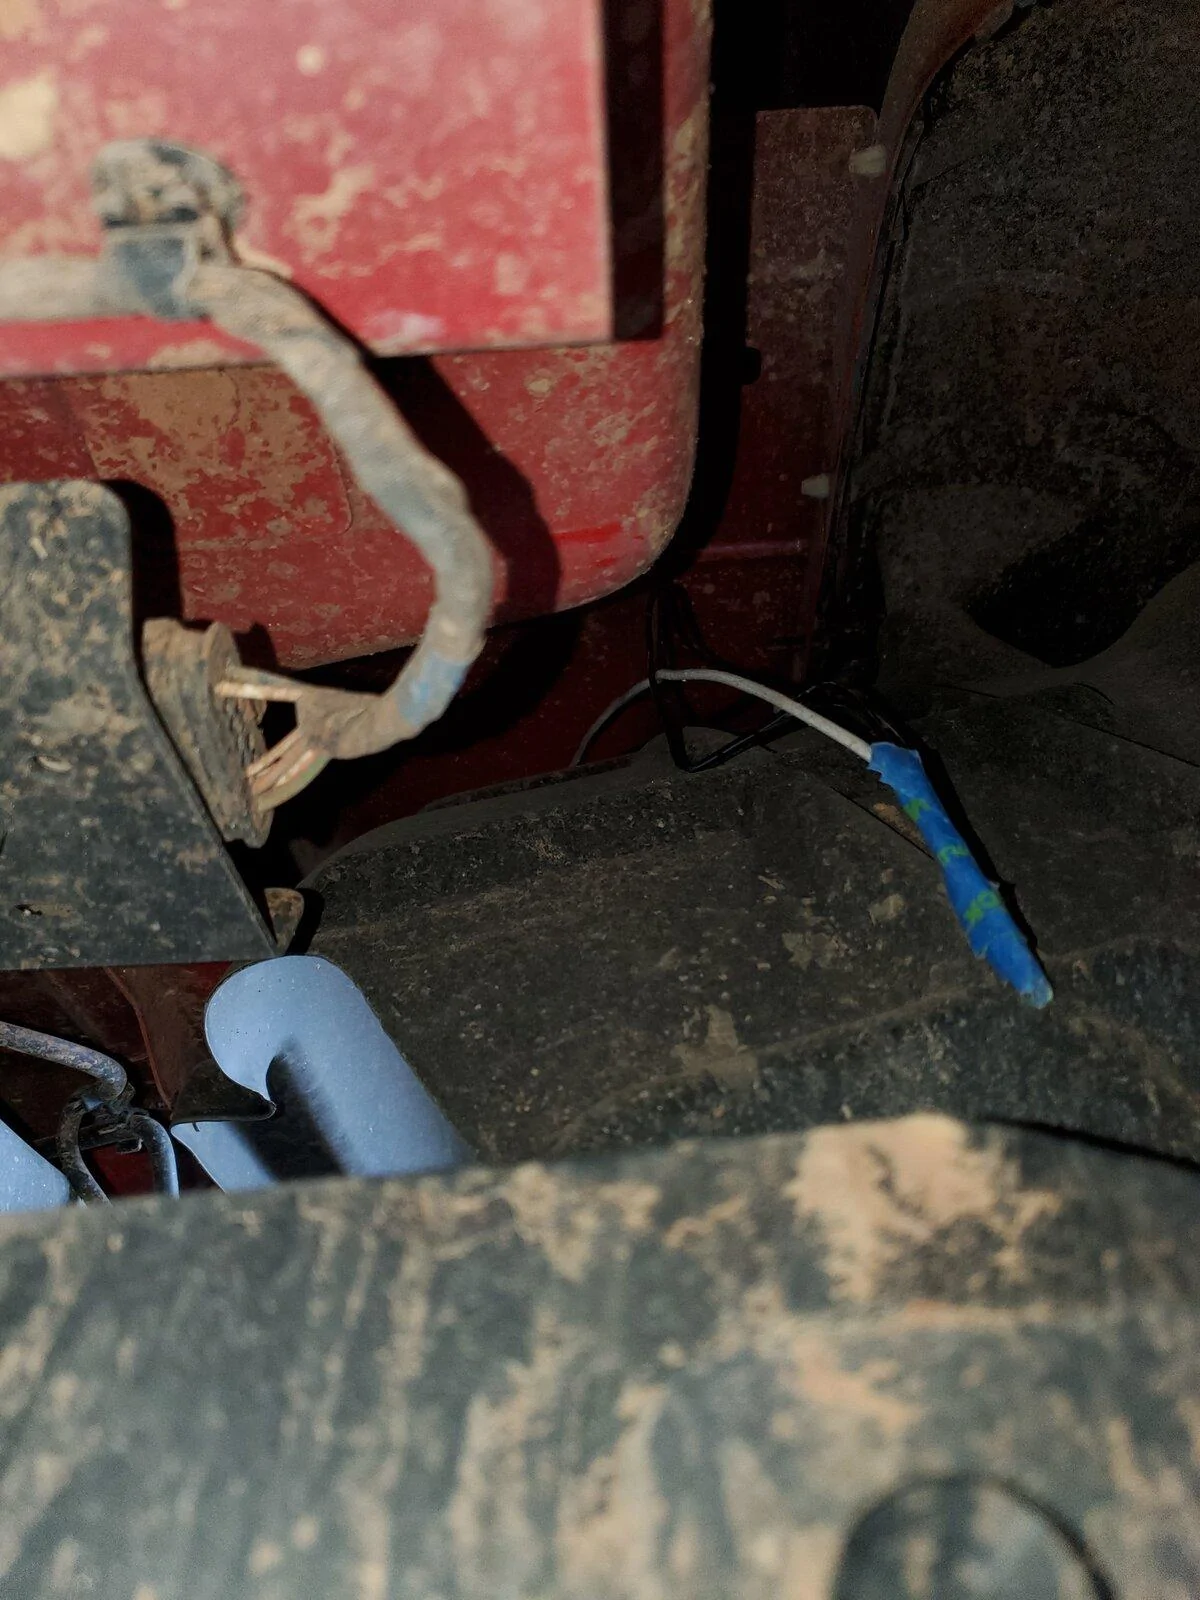
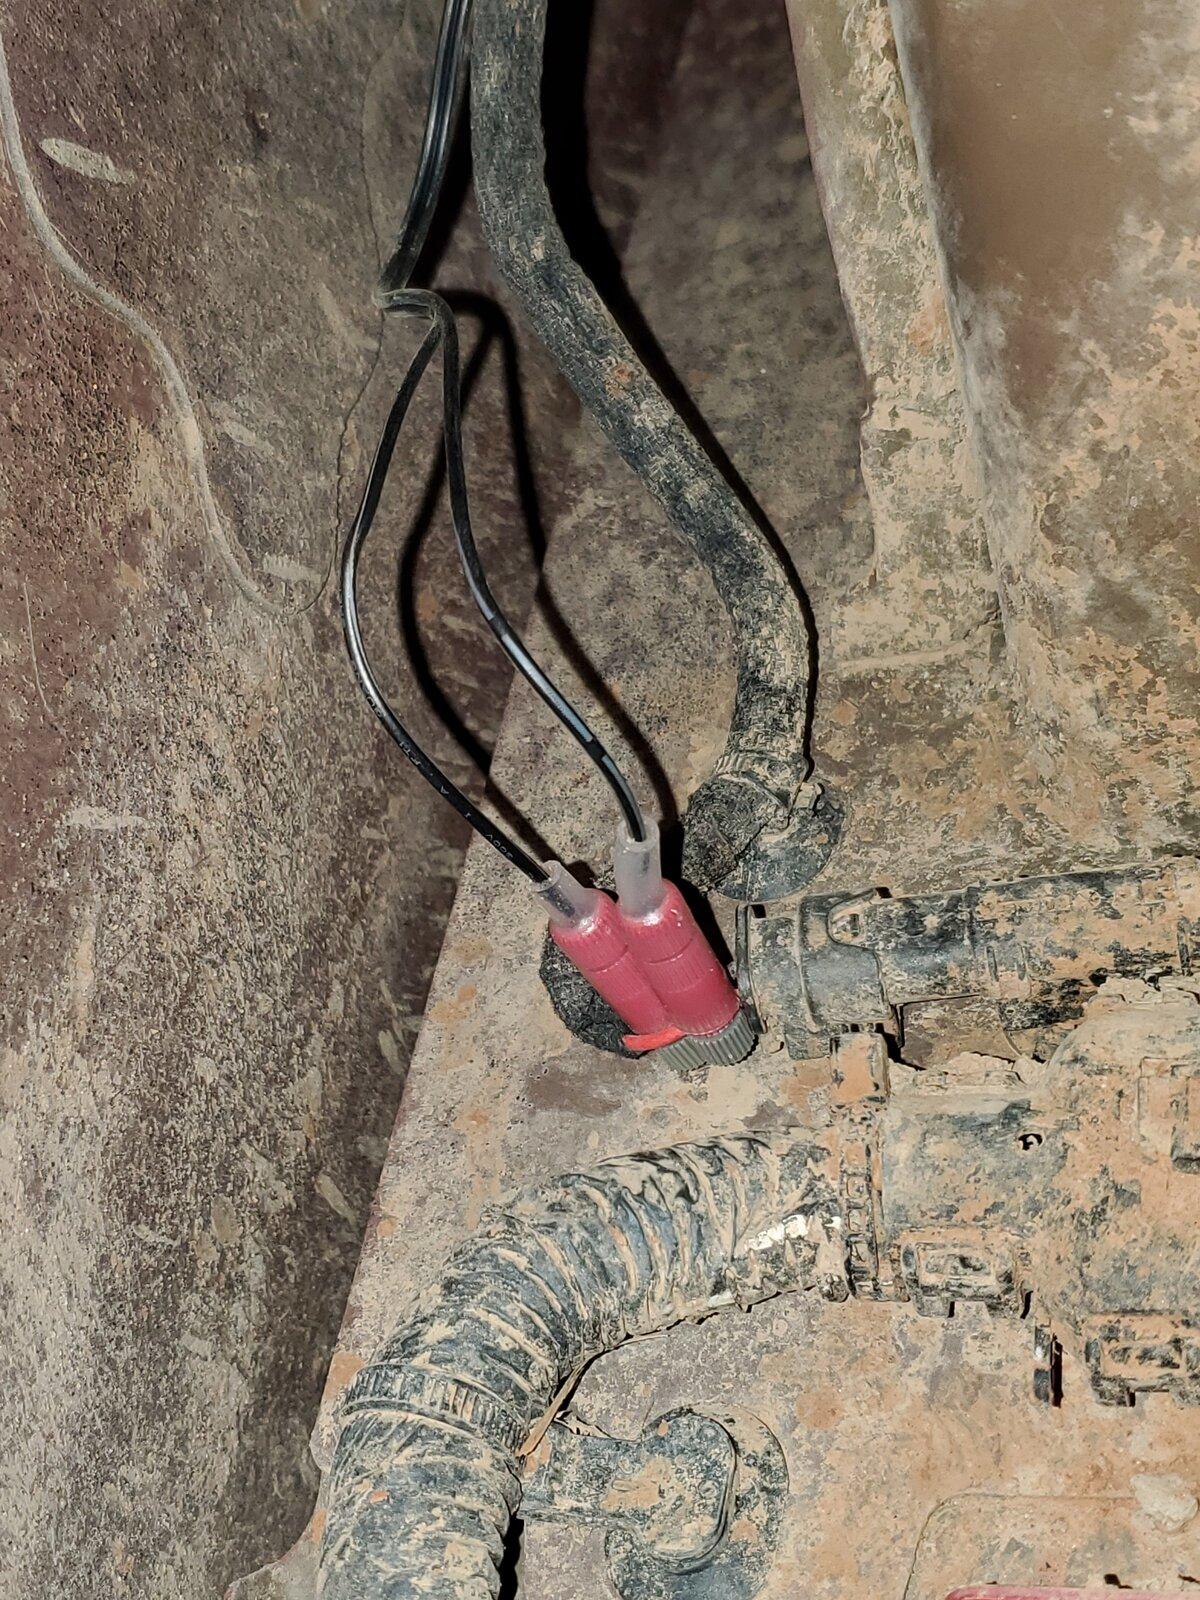
Once identifying the correct harness, I got the Posi-Taps ready. I set up one on each wire to ensure I had the correct positive and negative wires. I verified with my my multimeter by hitting the unlock button on the key fob to activate the cargo lights.
Once I was sure that I had good connections, I cut the new light wires to length, being sure to leave about a half a foot of slack, then zip tied them to the stock harness to keep them out of the way and make them easier to identify in the future. I connected them to the Posi-Taps and tested the new lights by hitting the key fob again, and once I ensured everything was good, I hit them with heat shrink. Though it's not a 100% waterproof connection, it's pretty damn close, and I don't anticipate any issues, even though I seem to get a fair bit of mud and grit in this location. The good thing about Posi-Taps is that they're easy to remove, so if I have any issues I can rehab the connection and reuse the same connector.
After repeating the process on both sides, I made sure I trimmed my two zip ties, checked all wiring for tolerance and tucked everything away. The end result is a completely hidden install off of the stock function that provides plenty of light output, even during the day.
What I used (your application may vary):
-Set of lights (with approximately 20ft of wiring)
-Fasteners for the lights (either double sided tape, or screws)
-Four red Posi-Taps
-Heat shrink
-Heat gun
-Wiring pliers
-Zip ties
-Wire hanger
-Tape
I found this set of lights on amazon:
https://www.amazon.com/gp/product/B07YZFN925/ref=ppx_yo_dt_b_asin_title_o06_s00?ie=UTF8&psc=1

The package came with 8 total lights, two sets of 4 lights that are wired together. They are backed with double sided adhesive tape. The lights are very light, and the tape holds solid. They also come with a 2 year warranty. I was pleasantly surprised by the overall quality. This is the first set of lights that I ordered to try for my application, and they ended up fitting perfectly. This whole project cost me less than $20.
I started off by choosing a location. I knew I wanted the lights up high for an evenly distributed, diffused pattern over the cargo area, so I went straight to the ceiling of my SmartCap. There is a lip that runs the length of the roof, which also happens to have pass-throughs between hollow crossmembers. This ended up working perfectly, because I could route the wiring in between these pass-throughs, and tuck all excess cordage inside of the hollow crossmembers.
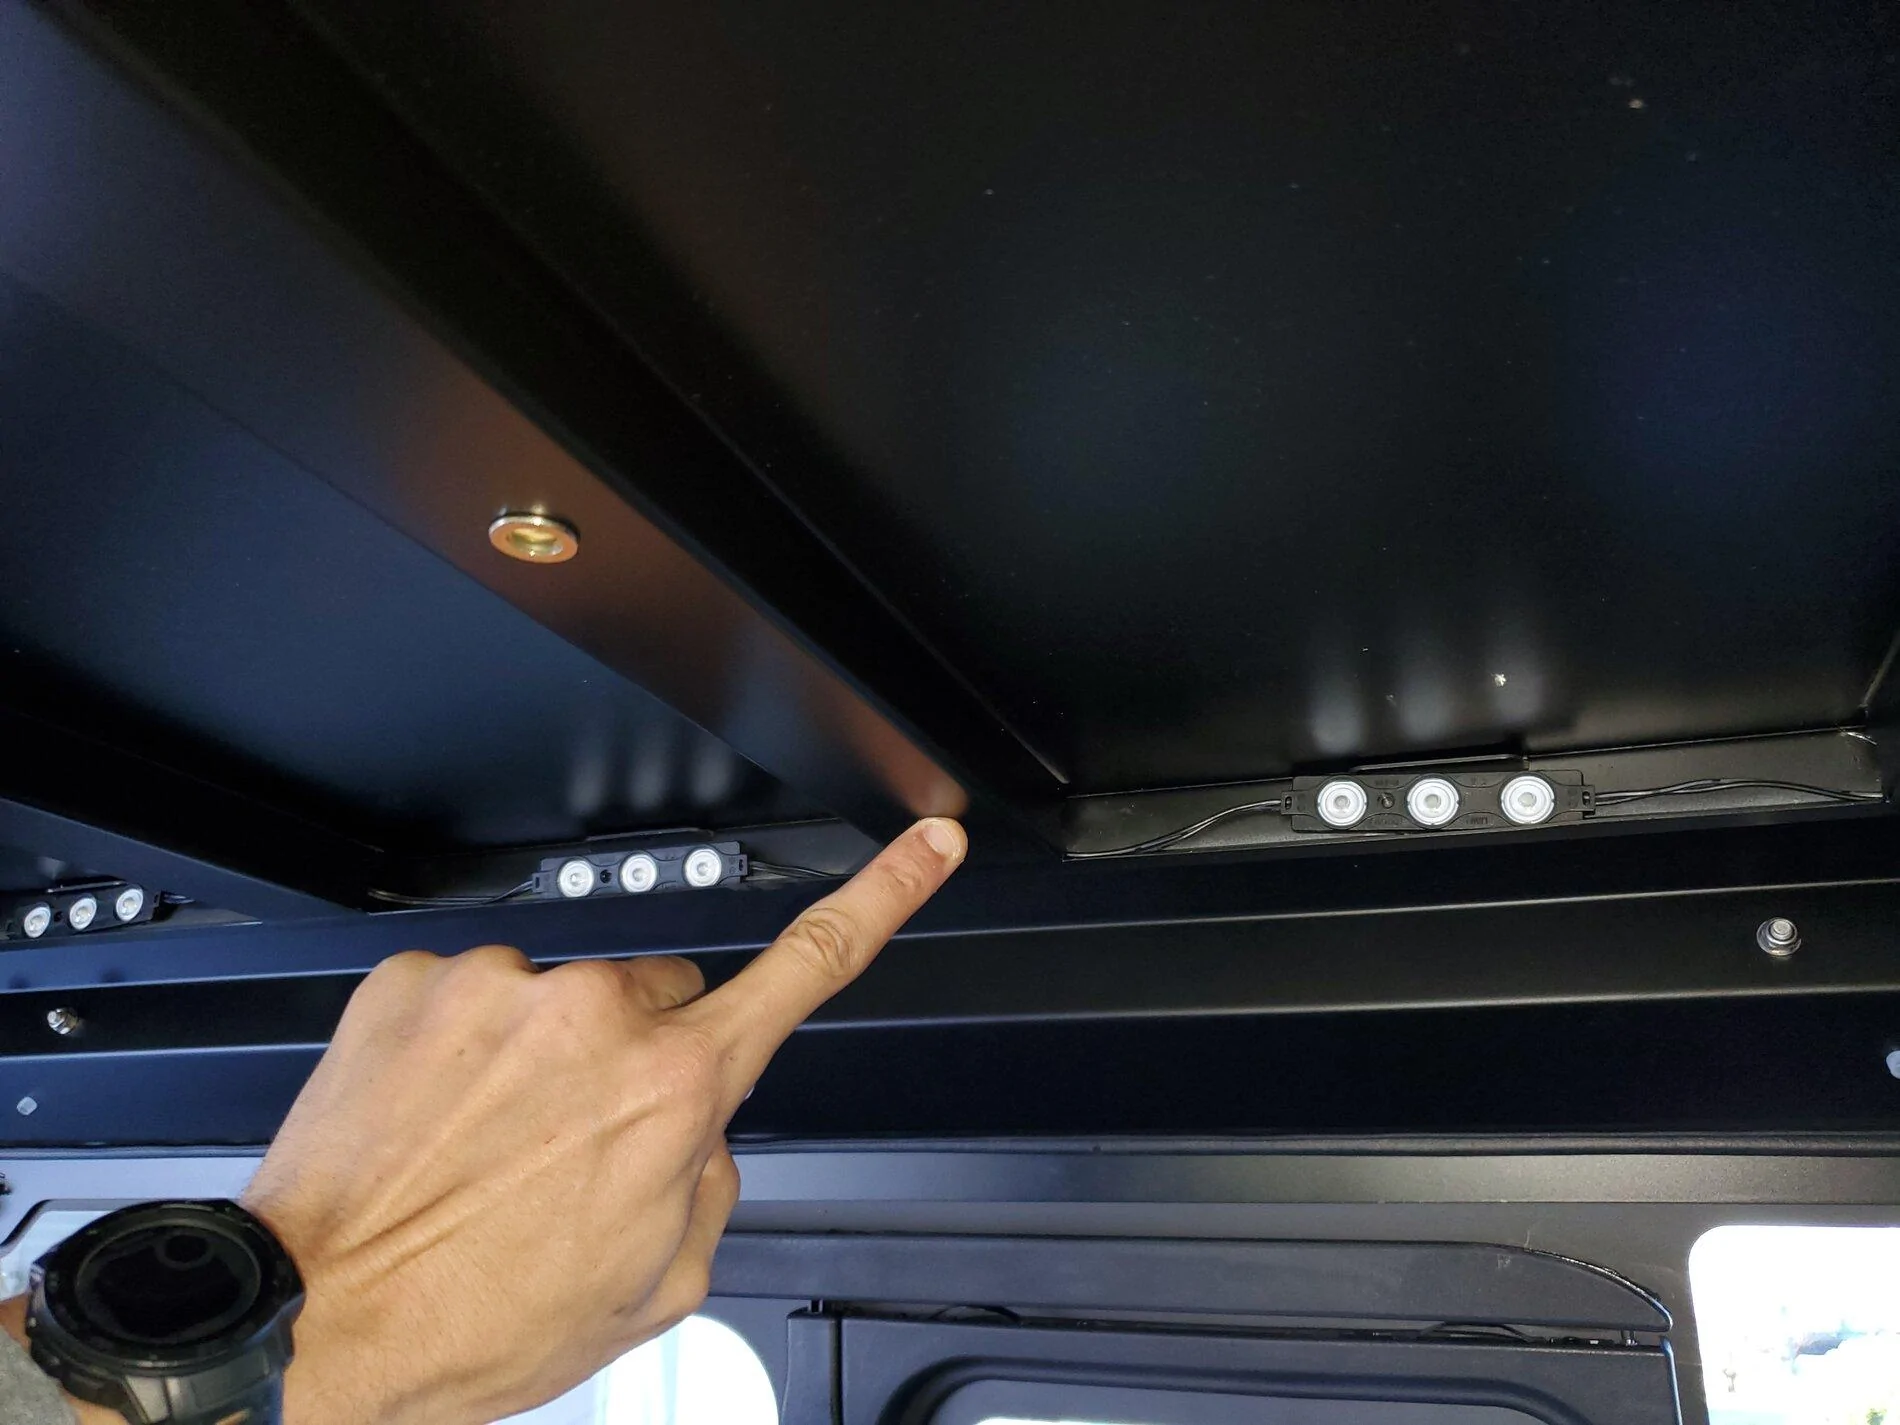
Before sticking down the lights, I tapped the leads on to a spare battery to ensure that output and spread was sufficient in this location. I tested during daylight, and after sunset. These lights pump out a surprising amount of light, as the entire bed was illuminated. Having checked that, I began sticking down the lights and routing the wiring.
I ran the wiring along the ceiling, and then through an existing hole in my RSI Smart Cap. I punched a hole through the gasket, and dropped the wires down to hide behind the front flange of the shell, before routing the wires out of another existing hole in the bed.
From there, the wires dropped between the bed and the cab. I fished them out and down to the ground with a hook on the end of a wire hanger, and decided how to route. Riding across the inside of the plastic fender liner seemed to be the best way, as it would keep the wires hidden and protect the wiring from debris. With my trusty wire hanger in hand, I taped the leads, made a slight bend, and fished up through the fender well.
Once the leads were on the rear side of the fender well, I identified the bed light/cargo light harness. It's very easy to find--just follow from where the light is. It is the only harness leading to that location, and there are only two wires associated with it. On the driver side, your positive is brown-ish/yellow-ish (I had a hard time telling through the mud), and ground is black. On your passenger side, the positive is red, and the ground is black.
Once identifying the correct harness, I got the Posi-Taps ready. I set up one on each wire to ensure I had the correct positive and negative wires. I verified with my my multimeter by hitting the unlock button on the key fob to activate the cargo lights.
Once I was sure that I had good connections, I cut the new light wires to length, being sure to leave about a half a foot of slack, then zip tied them to the stock harness to keep them out of the way and make them easier to identify in the future. I connected them to the Posi-Taps and tested the new lights by hitting the key fob again, and once I ensured everything was good, I hit them with heat shrink. Though it's not a 100% waterproof connection, it's pretty damn close, and I don't anticipate any issues, even though I seem to get a fair bit of mud and grit in this location. The good thing about Posi-Taps is that they're easy to remove, so if I have any issues I can rehab the connection and reuse the same connector.
After repeating the process on both sides, I made sure I trimmed my two zip ties, checked all wiring for tolerance and tucked everything away. The end result is a completely hidden install off of the stock function that provides plenty of light output, even during the day.

Sponsored

