OP
OP
chorky
Well-Known Member
- First Name
- Chad
- Joined
- Feb 26, 2022
- Threads
- 175
- Messages
- 3,466
- Reaction score
- 3,801
- Location
- Montana
- Website
- www.youtube.com
- Vehicle(s)
- '22JTR, '06 LJ, '06 TJ GE
- Build Thread
- Link
- Occupation
- GIS Specialist
- Thread starter
- #16
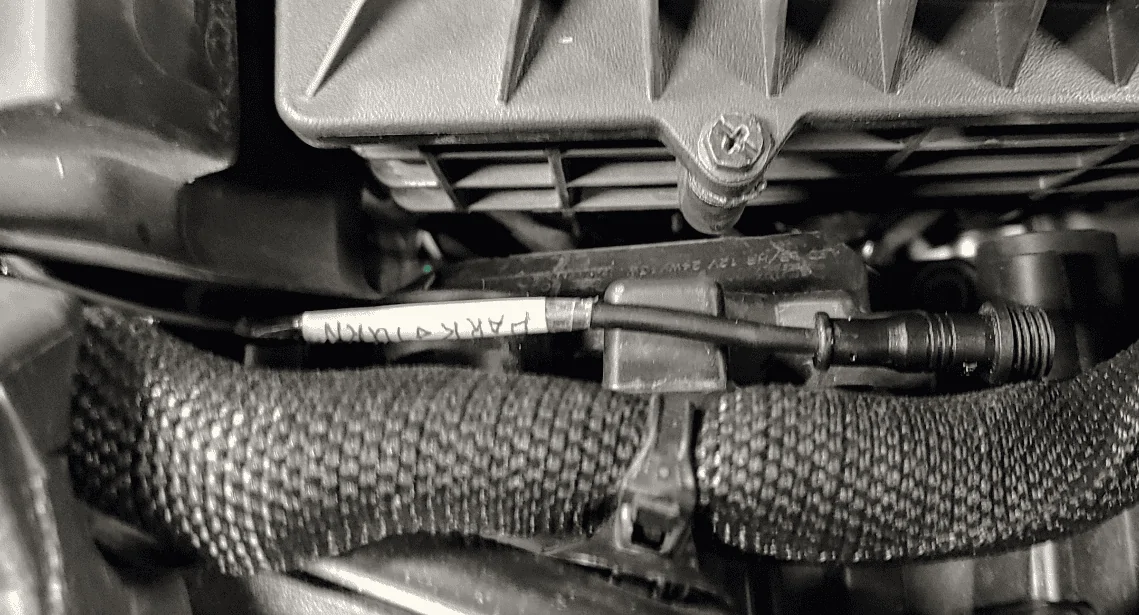
funny. This part doesnt exist on their website. So I called them and they were all kinds of confused and didnt understand. They suggested I send them a picture. Lol. So I guess I will screenshot the forum and discussion you had on the other thread and email them. sounds like it might have been a one off build kinda situation.You have to get up to the connector between the fender liner and body, about straight up from the top of the shock.
I'll know more tomorrow.
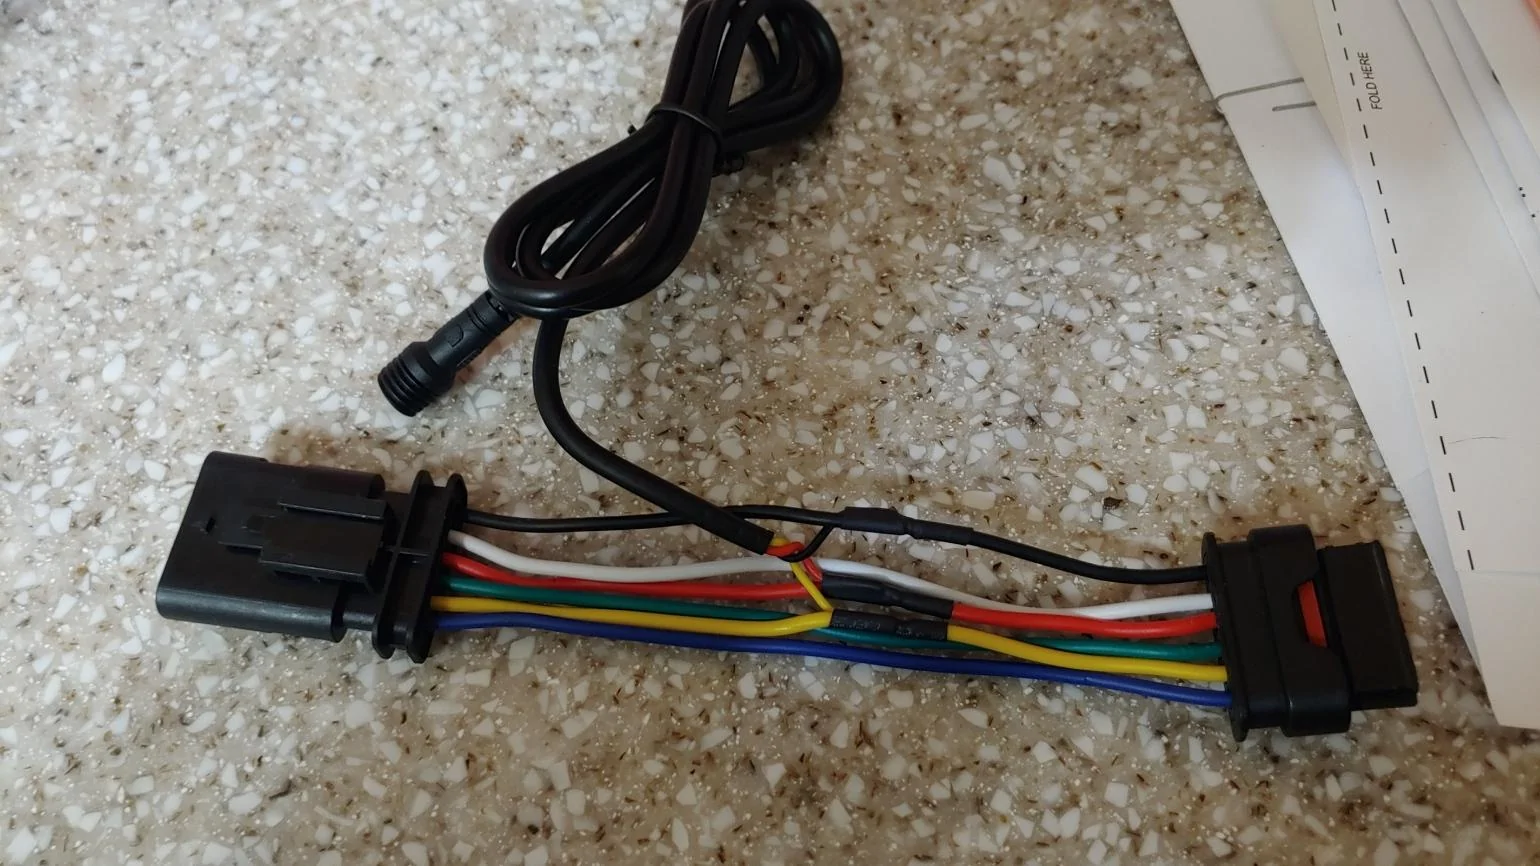
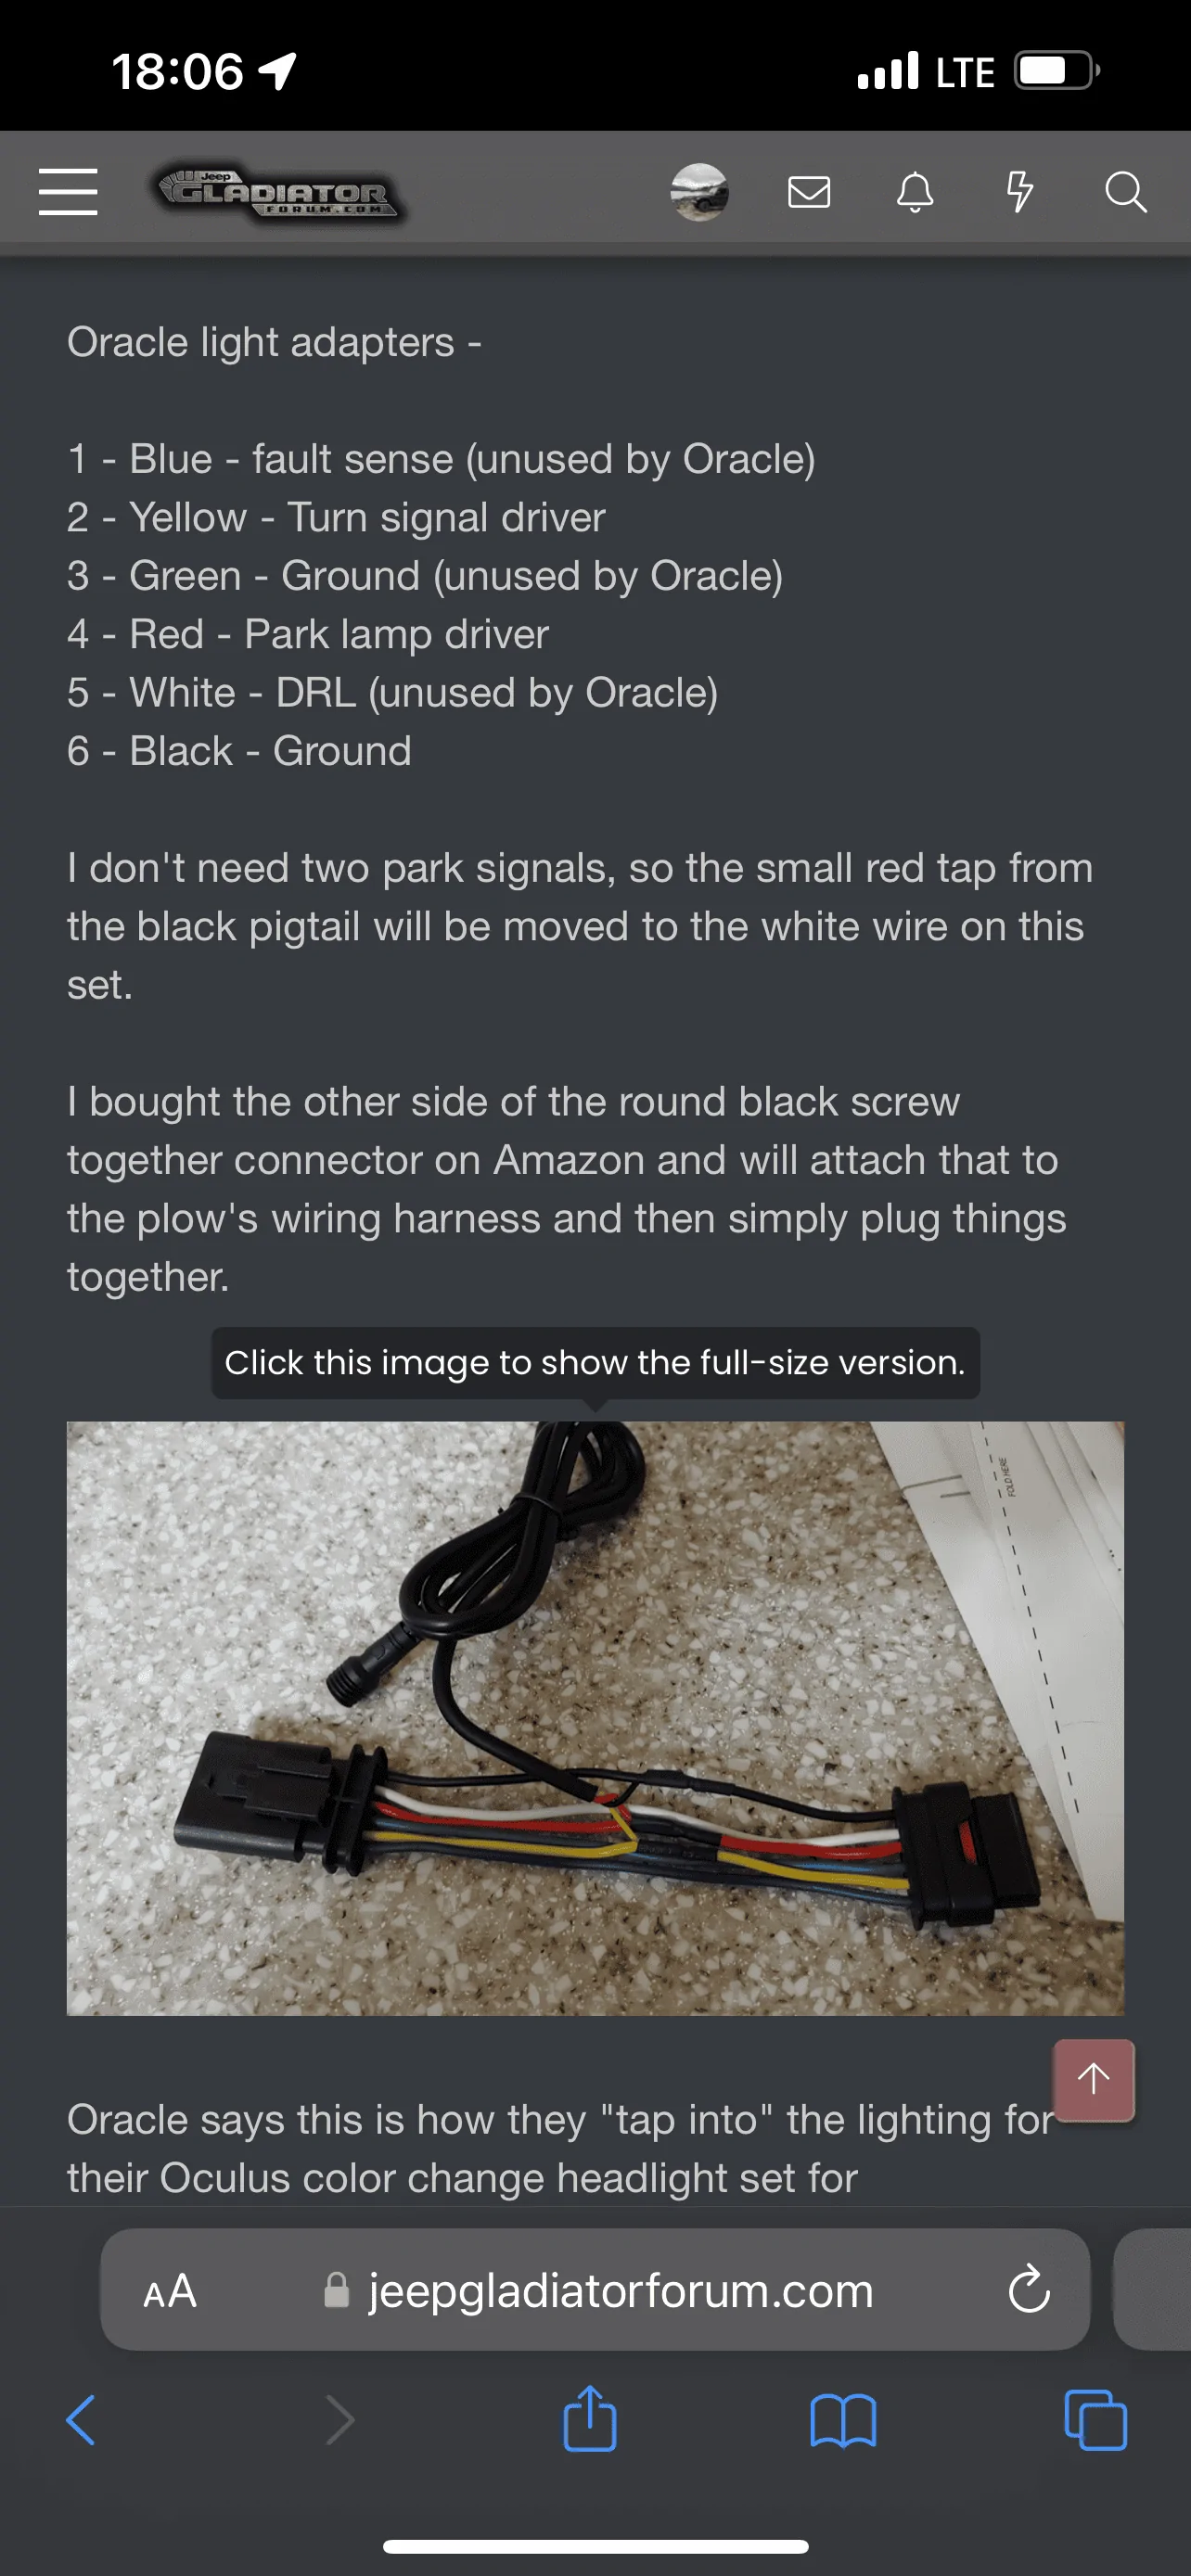
I don't know if this is their official part number or not but the packing slip I got says:
ADPTR-SWB
Description:
switchback adapters for 9" Oculus
Sponsored