B34c0n
Well-Known Member
- First Name
- Ian
- Joined
- Aug 14, 2023
- Threads
- 6
- Messages
- 77
- Reaction score
- 104
- Location
- Where the redwoods are
- Vehicle(s)
- 2023 Gladiator Sport S, 1997 Wrangler Sport
- Build Thread
- Link
- Occupation
- Making electrons move in an organized fashion
- Thread starter
- #1
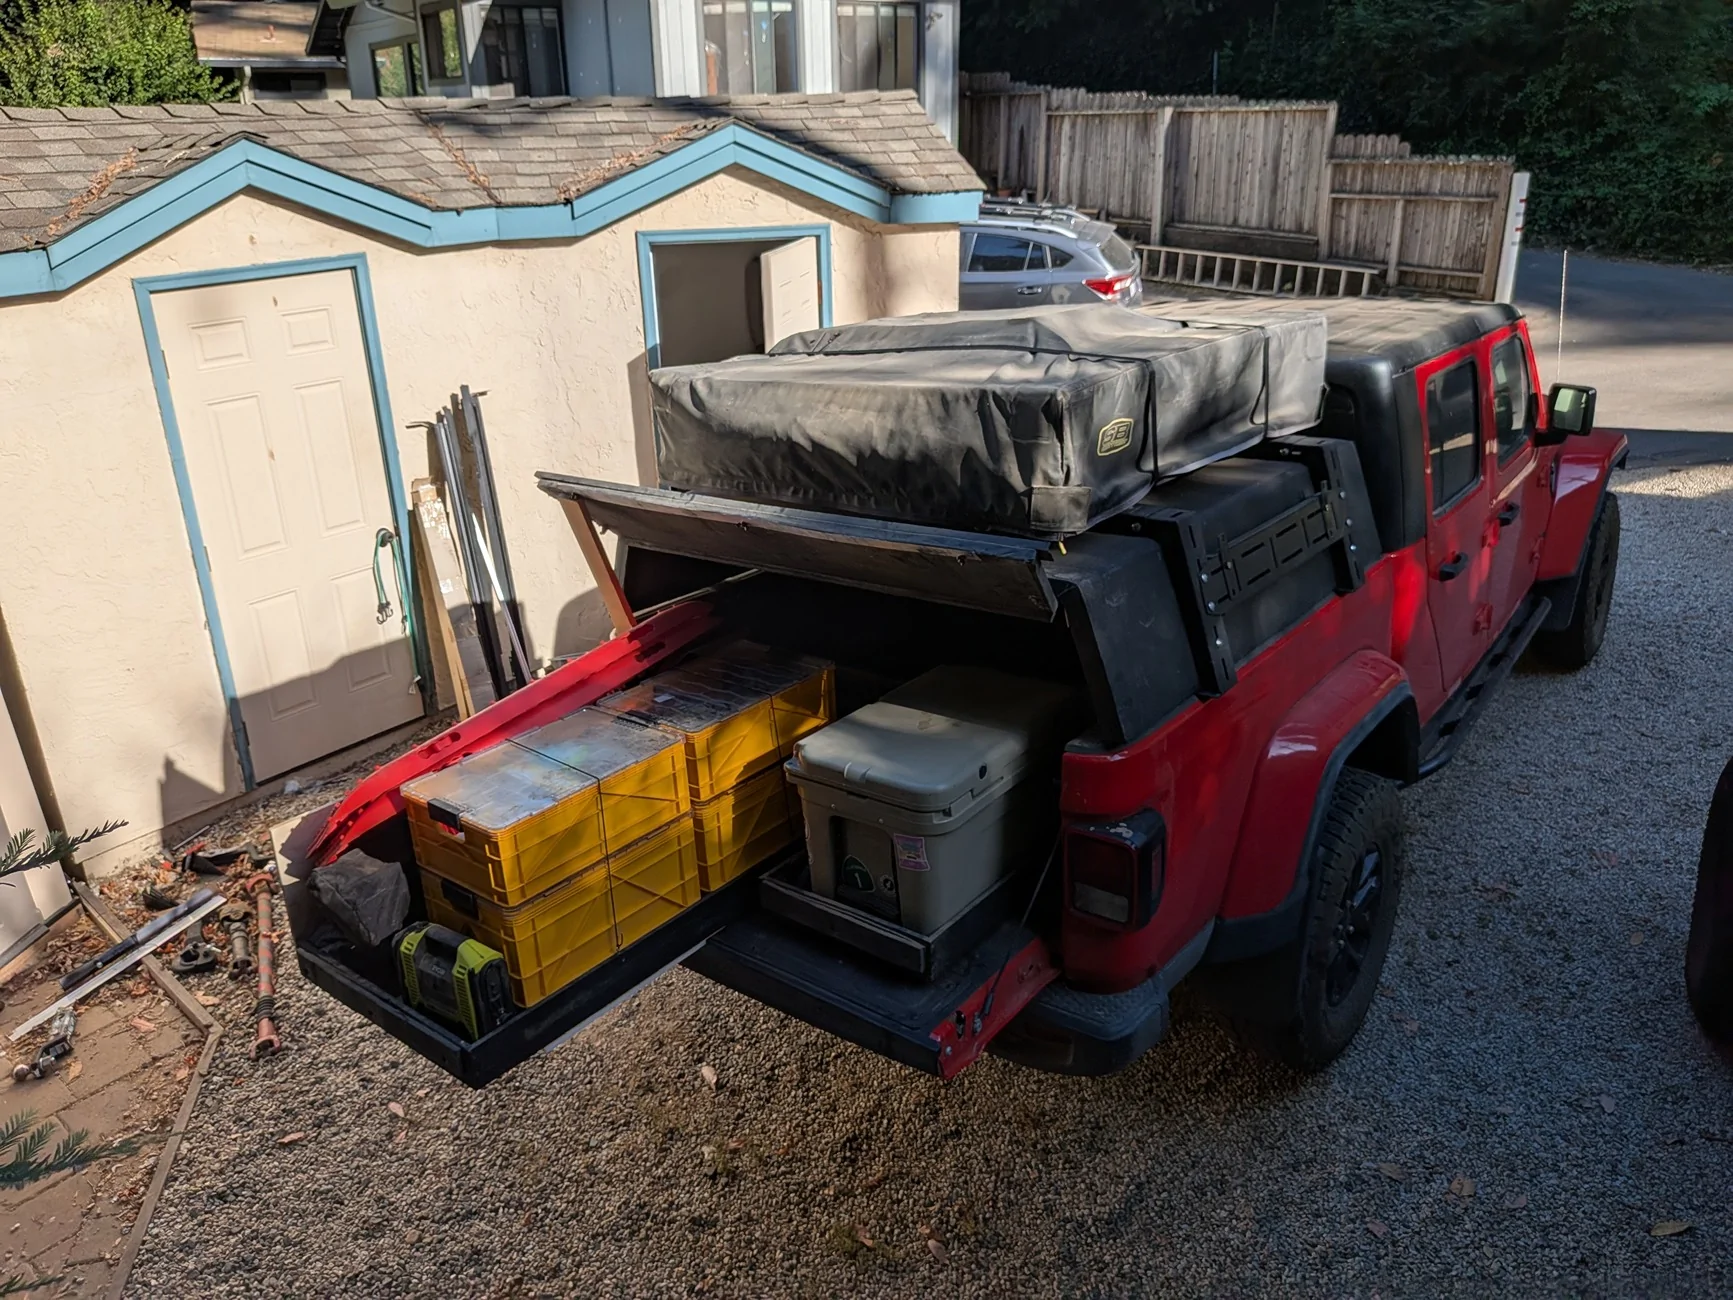
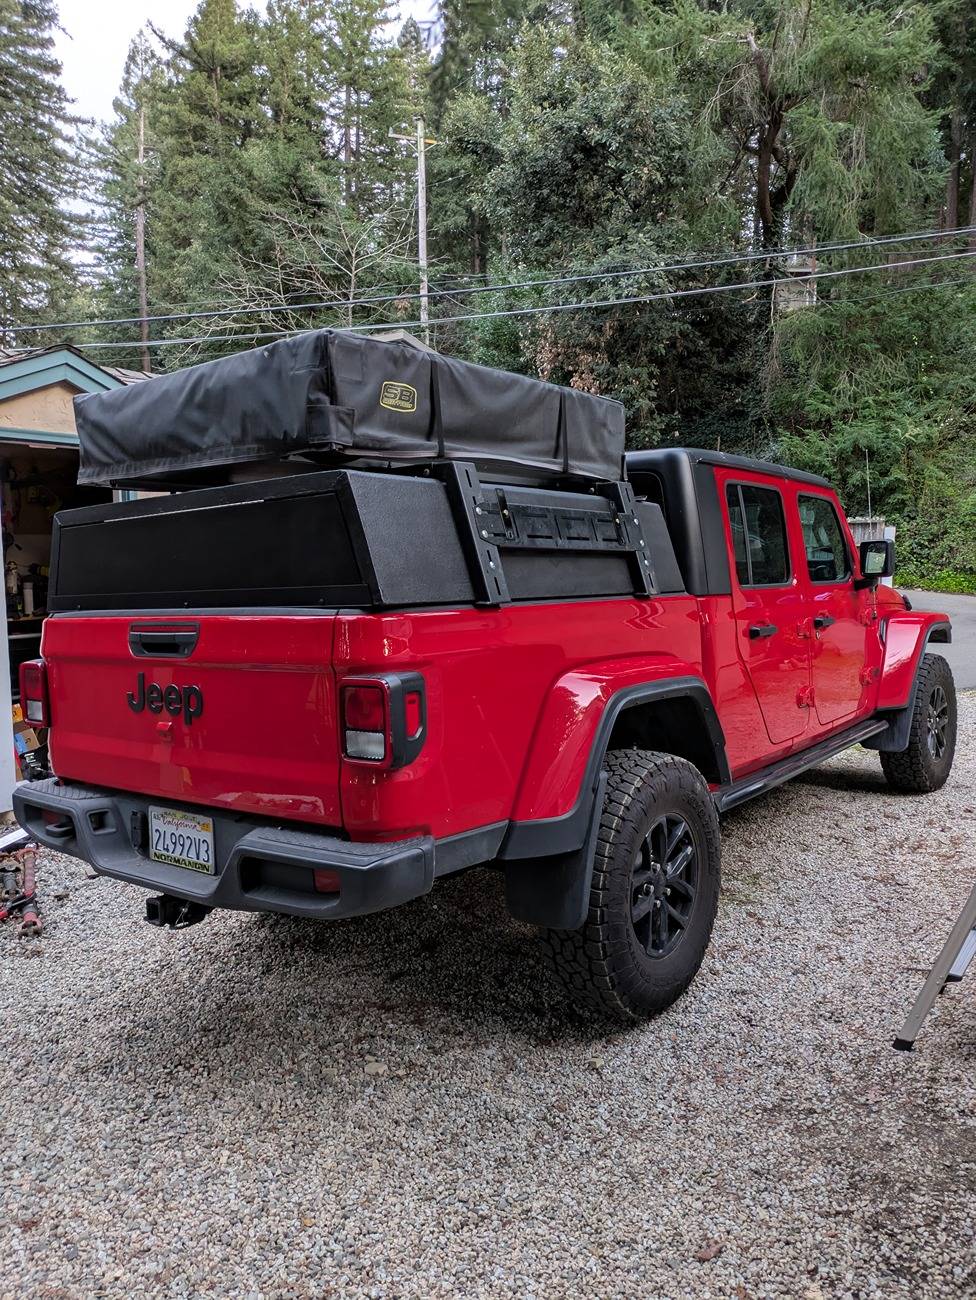
I realized it may be helpful to others so I'll post here! I posted about it in my build thread. This is my DIY camper shell. The shell itself is around $250 and weighs so little one person can pick it up and take it off. The outer metal shell is heavier but still manageable by one person.

The intent was to build an overland shell to more easily fit gear and keep grubby hands off my stuff. But when I'm not camping I use my truck as a truck and so it can't be so hard to take off like a typical fiberglass shell.
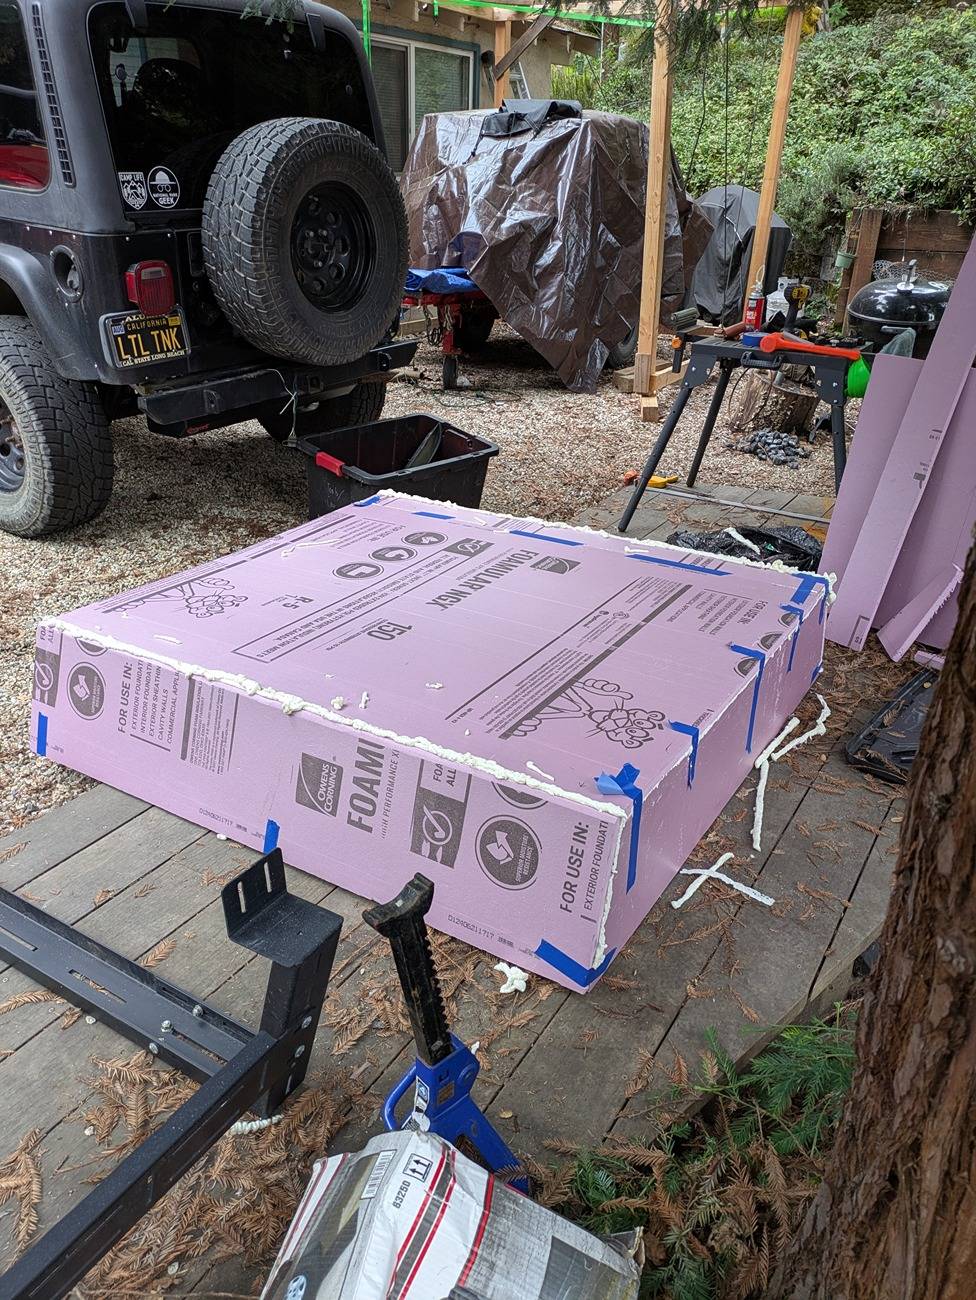
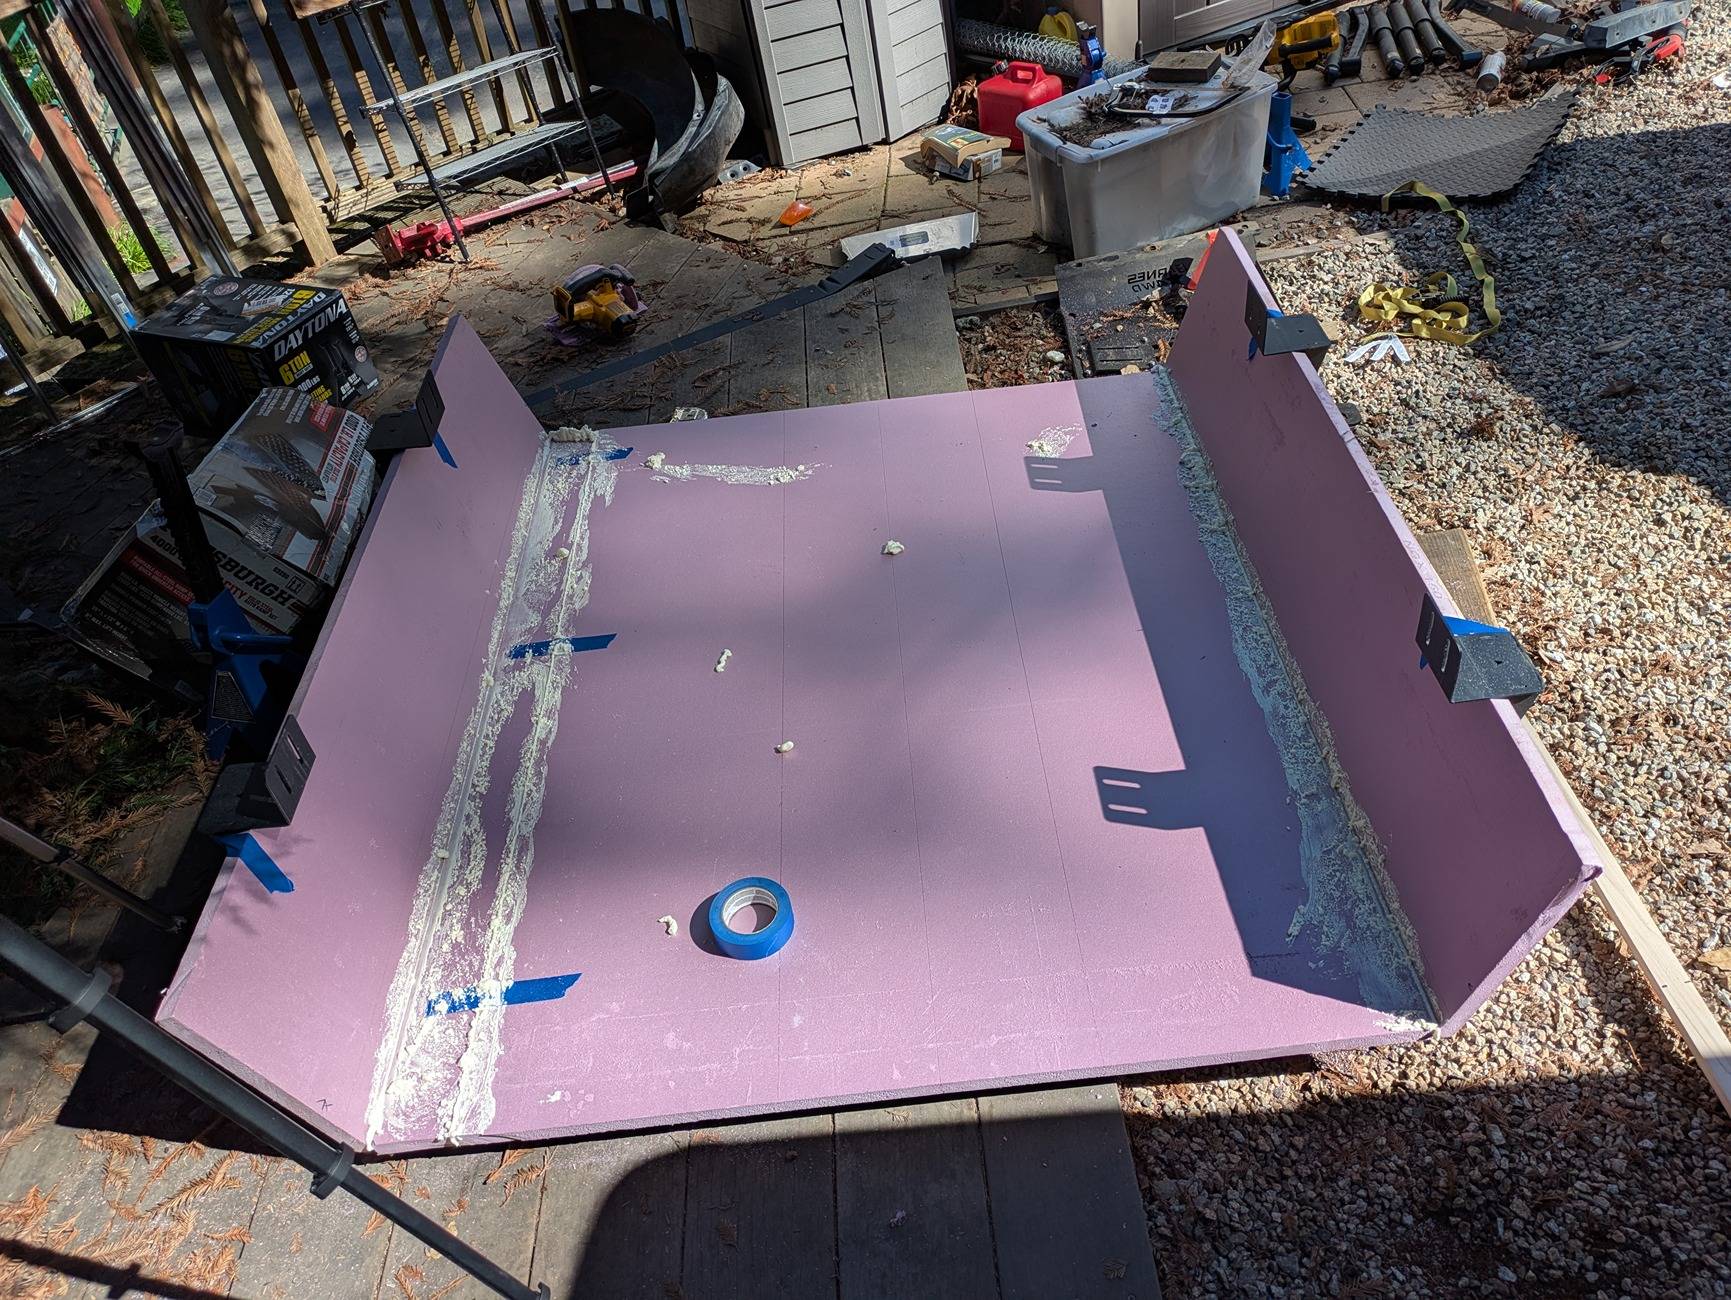
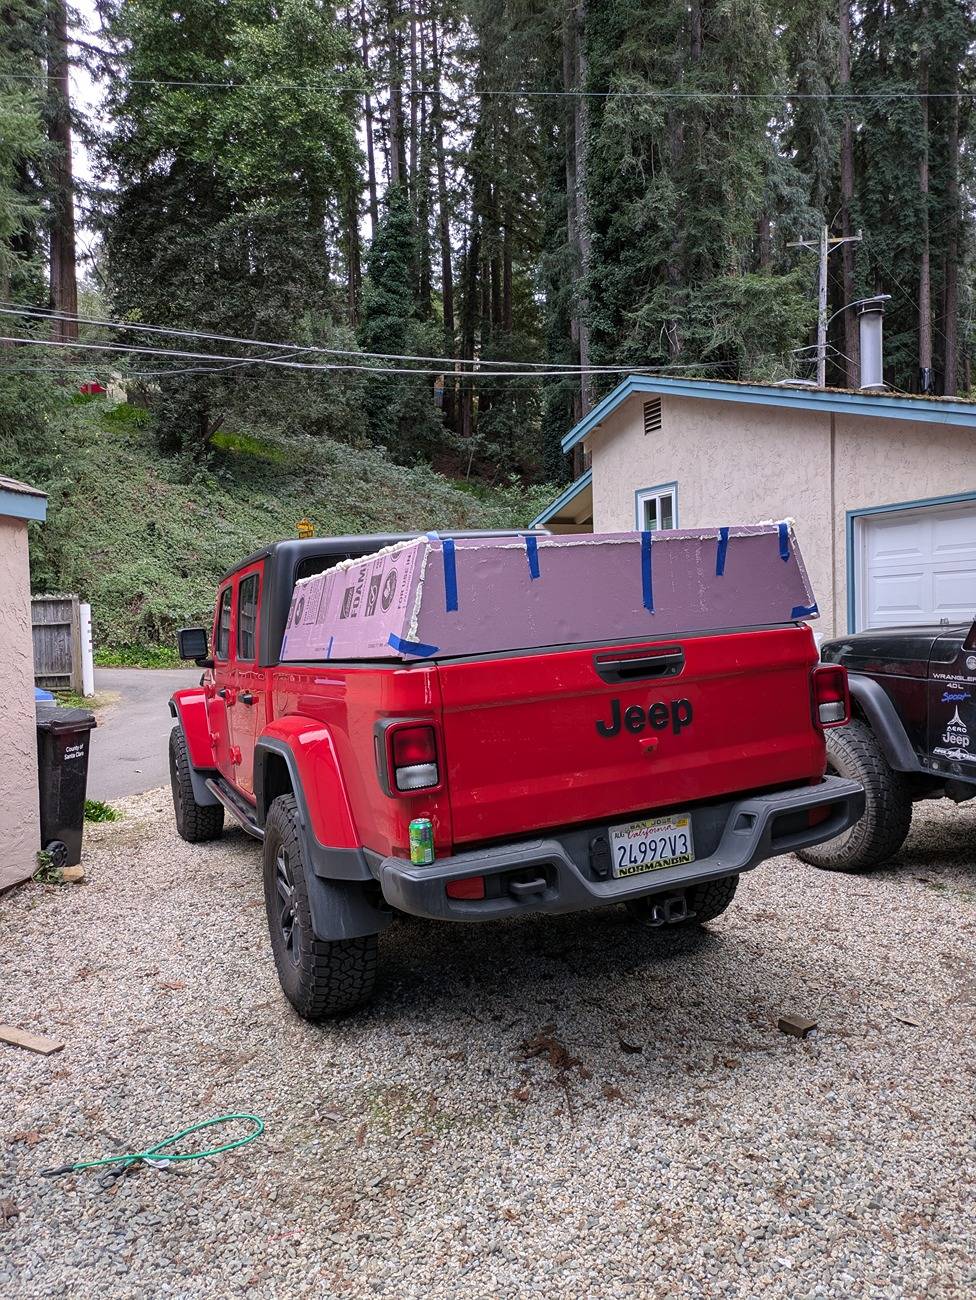
The base of the shell is made with XPS home insulation. I used expanding foam as "glue" to tie the insulation pieces together and fill the cracks.

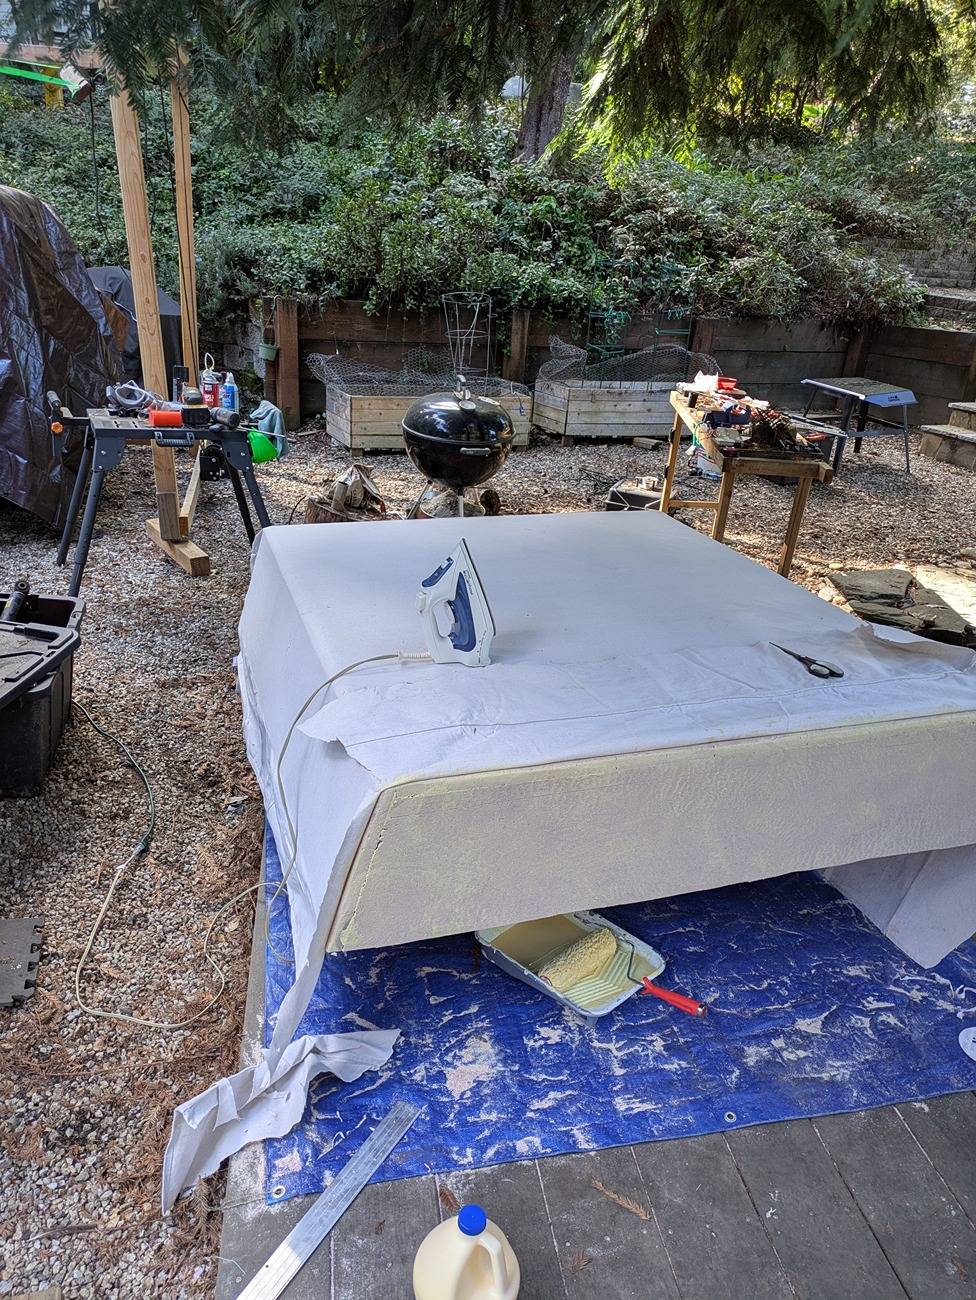
After you have the main body complete you use some canvas and type 2 wood glue. While type 3 wood glue is fully water proof, type 2 can be reshaped with heat and critically, glues to itself. Titebond ii is type 2 wood glue.
Anyway, you roll on wood glue and lay the canvas over top. You can use and iron to set the glue quickly and iron out wrinkles in one go.
Once dry you cover it in watered down exterior paint. The reason for watering it down is so that the paint itself seeps into the canvas and makes a full waterproof layer. I did 2 watered down layers and gave it a sanding to smooth out the fabric texture. Then one more layer of paint but this time it wasn't watered down. Then I hit it with spray on bed liner.
For the bed liner it was CRITICAL to make sure the foam was completely sealed or covered since the bed liner spray actually dissolves the foam!
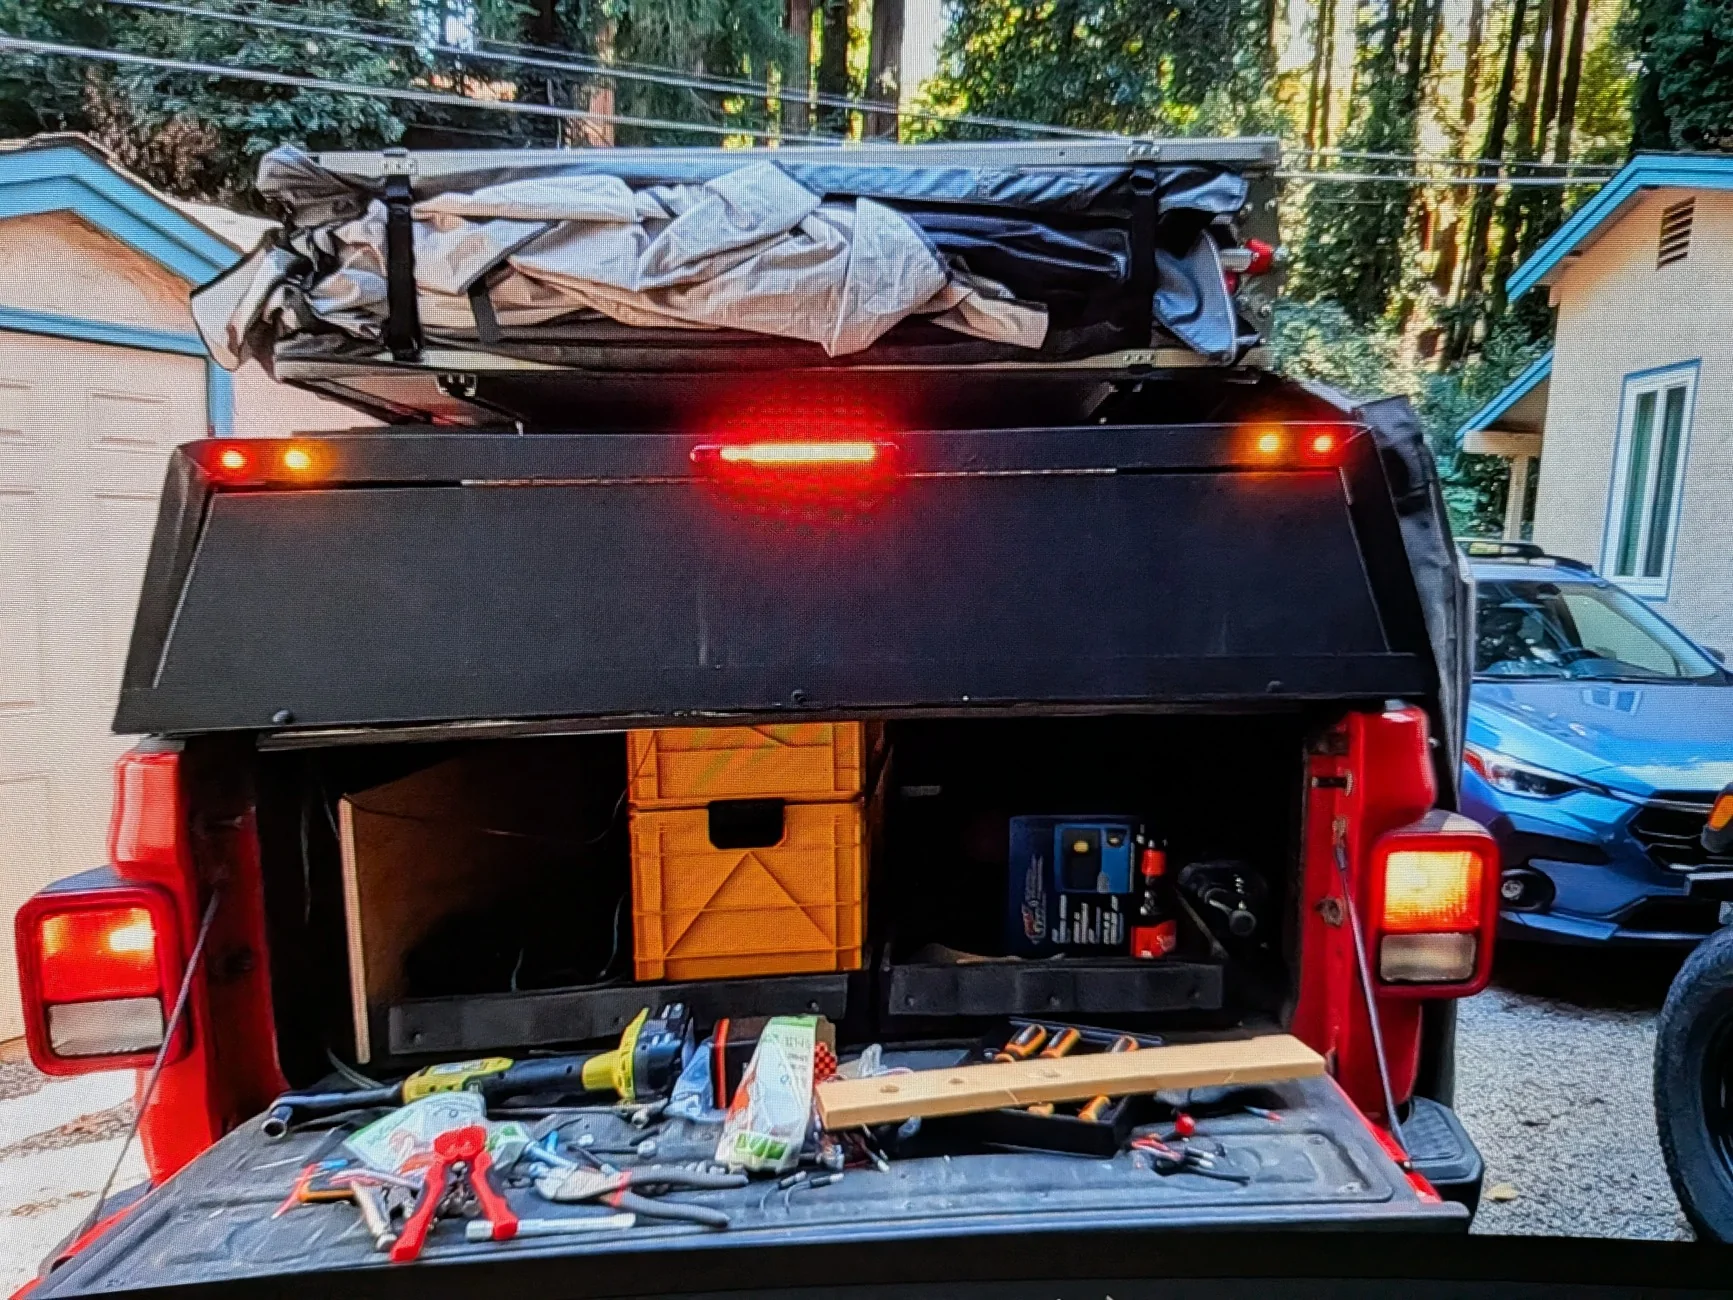
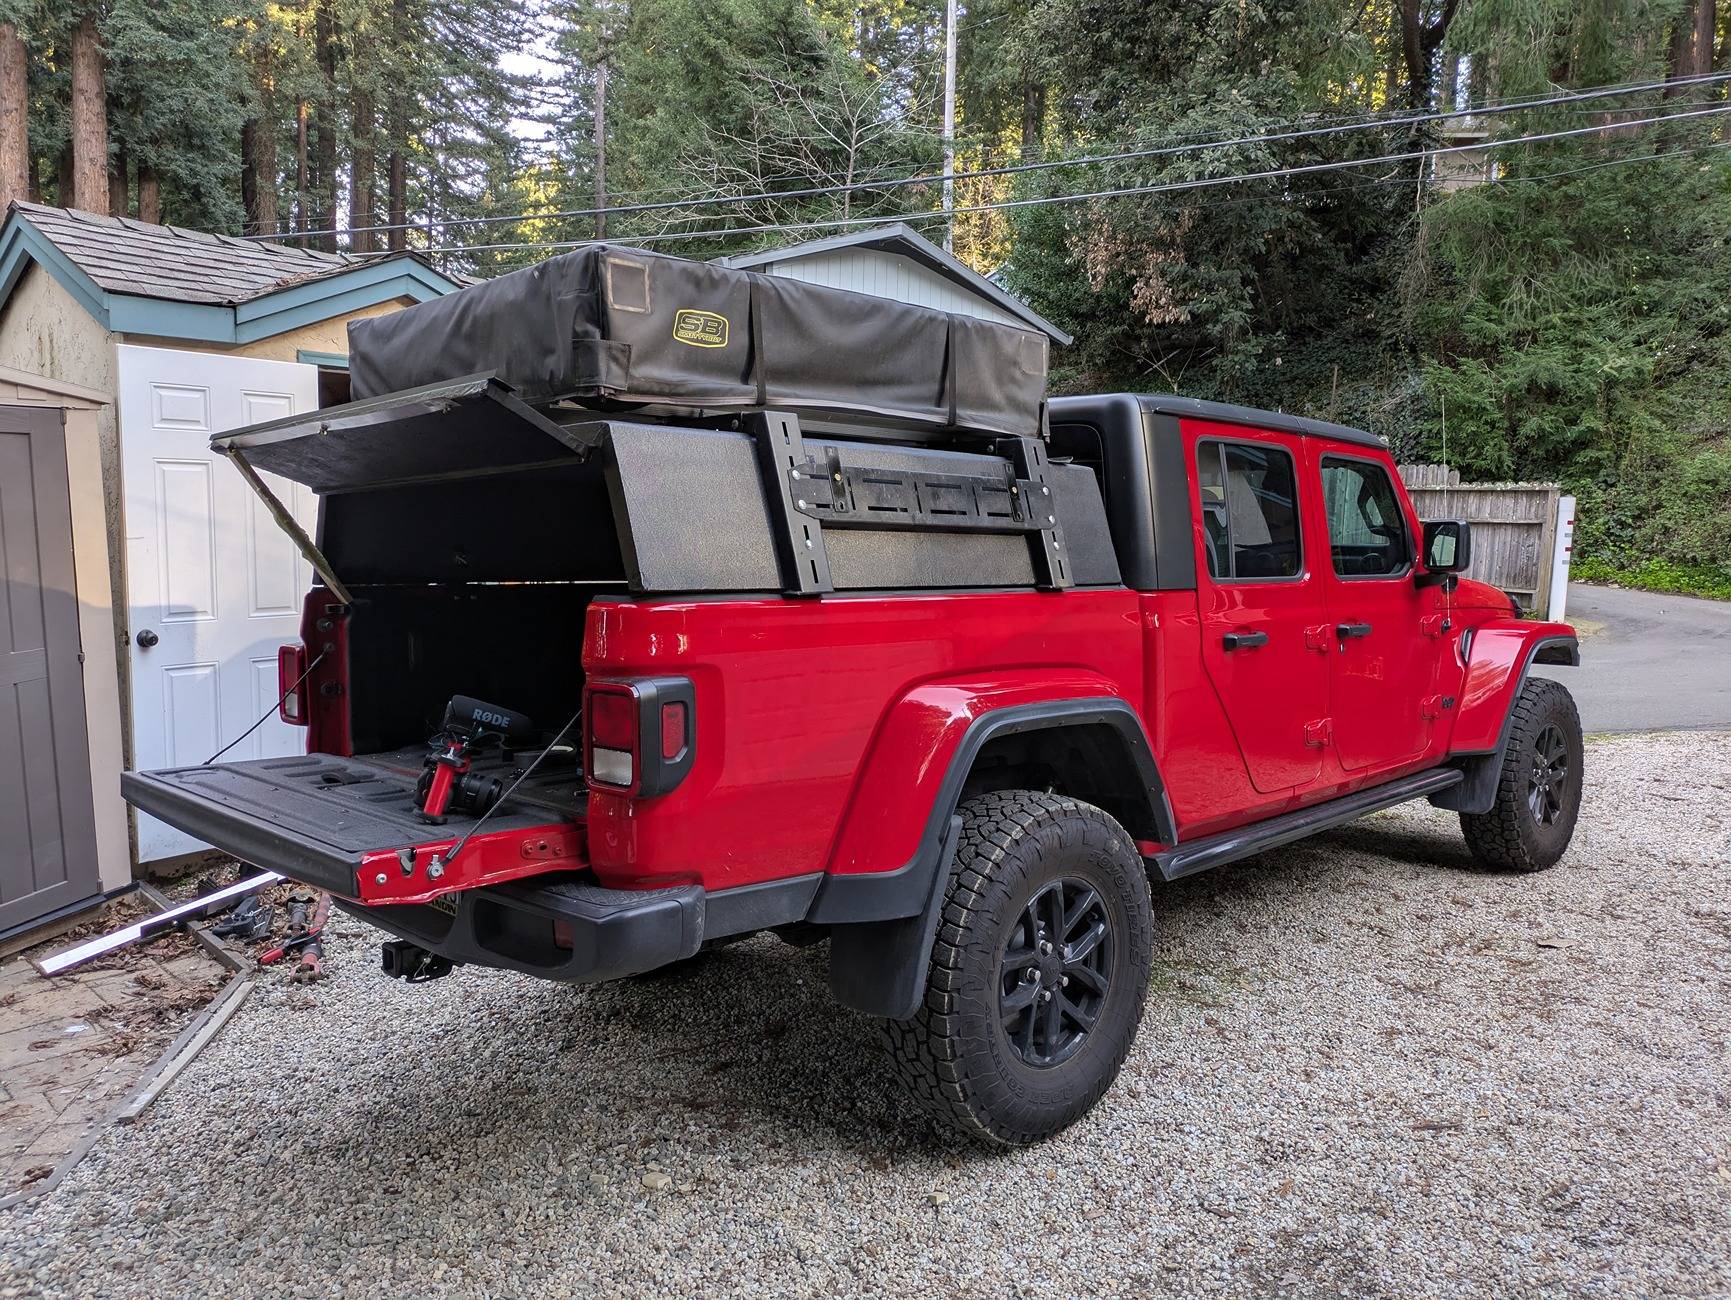
For the hinge section I used a wooden frame on the inside of the camper shell and had the canvas cover the wood as well to give a solid screw in point. In a follow on post I'll get a picture of the door prop I finally installed and lights!
The shell was made to fit within the JCR adventure rack and has a couple of through bolts to hold it in. This way the shell is only there to keep my gear safe and dry. The metal frame carries the weight of the RTT.
The intent was to build an overland shell to more easily fit gear and keep grubby hands off my stuff. But when I'm not camping I use my truck as a truck and so it can't be so hard to take off like a typical fiberglass shell.
The base of the shell is made with XPS home insulation. I used expanding foam as "glue" to tie the insulation pieces together and fill the cracks.
After you have the main body complete you use some canvas and type 2 wood glue. While type 3 wood glue is fully water proof, type 2 can be reshaped with heat and critically, glues to itself. Titebond ii is type 2 wood glue.
Anyway, you roll on wood glue and lay the canvas over top. You can use and iron to set the glue quickly and iron out wrinkles in one go.

Once dry you cover it in watered down exterior paint. The reason for watering it down is so that the paint itself seeps into the canvas and makes a full waterproof layer. I did 2 watered down layers and gave it a sanding to smooth out the fabric texture. Then one more layer of paint but this time it wasn't watered down. Then I hit it with spray on bed liner.
For the bed liner it was CRITICAL to make sure the foam was completely sealed or covered since the bed liner spray actually dissolves the foam!
For the hinge section I used a wooden frame on the inside of the camper shell and had the canvas cover the wood as well to give a solid screw in point. In a follow on post I'll get a picture of the door prop I finally installed and lights!
The shell was made to fit within the JCR adventure rack and has a couple of through bolts to hold it in. This way the shell is only there to keep my gear safe and dry. The metal frame carries the weight of the RTT.
Sponsored