JeepDadiator
Well-Known Member
- First Name
- TJ
- Joined
- Jul 5, 2020
- Threads
- 11
- Messages
- 52
- Reaction score
- 88
- Location
- Conifer, Colorado
- Vehicle(s)
- 2020 JTR
- Occupation
- Engineer
- Thread starter
- #1
As noted in my thread for the ARB Bondi Deluxe installation I had unfortunately had some front end damage and was able to work a deal on upgrades vs. replacing with OE parts. One of the impacted components was the Right Front Fender Flare with damage to the middle inner liner that wraps around the side; as well as a broken OE LED DRL. I decided I would also install liners at this time to gain some clearance for future larger tires as well as clean up the look after removal of the damaged liner. There are many fender liners on the market so I started by identifying my specific selection criteria:
- Total weight 5lbs per side 10lbs total
Note: I did not weigh the removals; I may do later for a full analysis of the overall impact – the OE fender with all the liners, lights and plastic was actually heavier than expected.
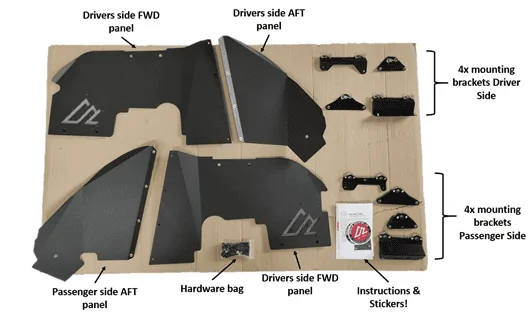
What was included in the box?

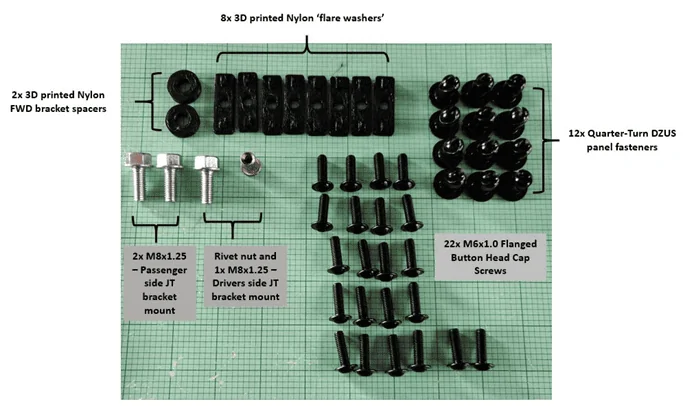
Detail of the hardware bag contents:

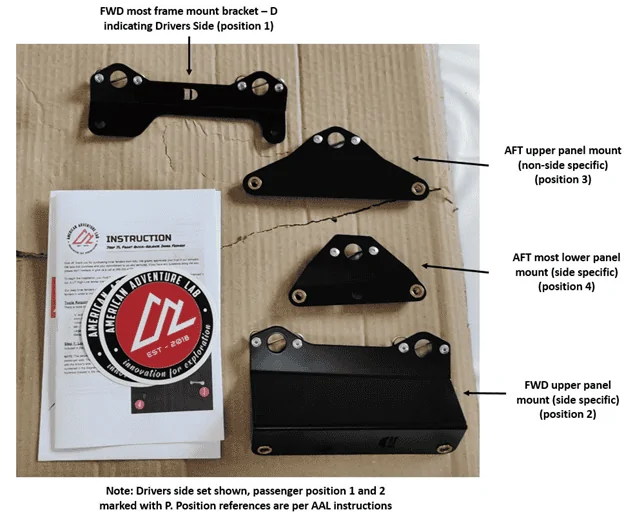
Mounting brackets:

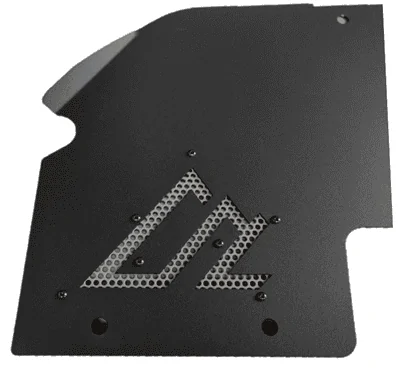
Close-up of the color match logo mesh:

Installation Steps & Photos:
Removal of the Factory liner and flare in preparation is relatively easy I recommend the fishbone Off-road video here. After you remove the flare some off jeep disassembly is required and looks like this:

Final Thoughts:

- Minimally obtrusive company logo (this is just personal preference)
- Installation without drilling or modifying the jeep extensively
- Rapid removal for addition of future upgrades (wire routing, access)
- Rapid removal for cleaning and maintenance
- OE appearance – blends in with overall design aesthetic of the Jeep
- High quality finish and reputation for quality
- Passenger side Front/Rear main sheet metal panels: 4.4lbs
- Drivers side Front/Rear main sheet metal panels: 4.4lbs
- Passenger side mounting brackets (set of four): .6lbs
- Driver side mounting brackets (set of four): .6lbs
- Total weight 5lbs per side 10lbs total
Note: I did not weigh the removals; I may do later for a full analysis of the overall impact – the OE fender with all the liners, lights and plastic was actually heavier than expected.
What was included in the box?
Detail of the hardware bag contents:
Mounting brackets:
Close-up of the color match logo mesh:
Installation Steps & Photos:
Removal of the Factory liner and flare in preparation is relatively easy I recommend the fishbone Off-road video here. After you remove the flare some off jeep disassembly is required and looks like this:
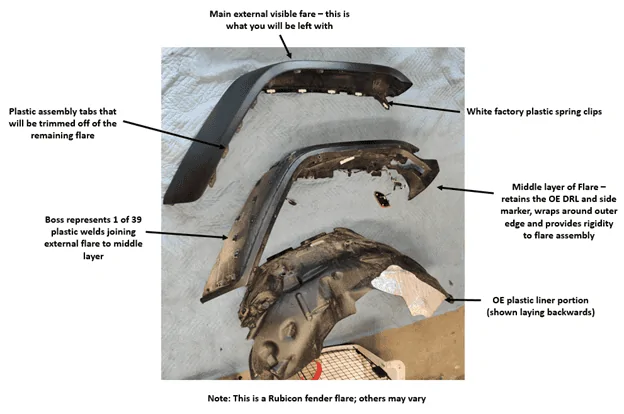
- Removal and disassembly of the flare, while straightforward, does come with some challenges. For me most if not all of the black plastic trim rivets/attachments broke during removal these are not required for re-installation so be most careful with the white spring clips and sigh heavily while damaging parts on your year old jeep…
- Another item of note is that the OE light is attached with both fasteners and double sided tape on the inside of the fender so when you remove the hardware it will still feel firmly attached – gentle prying with a trim tool will help here as well.
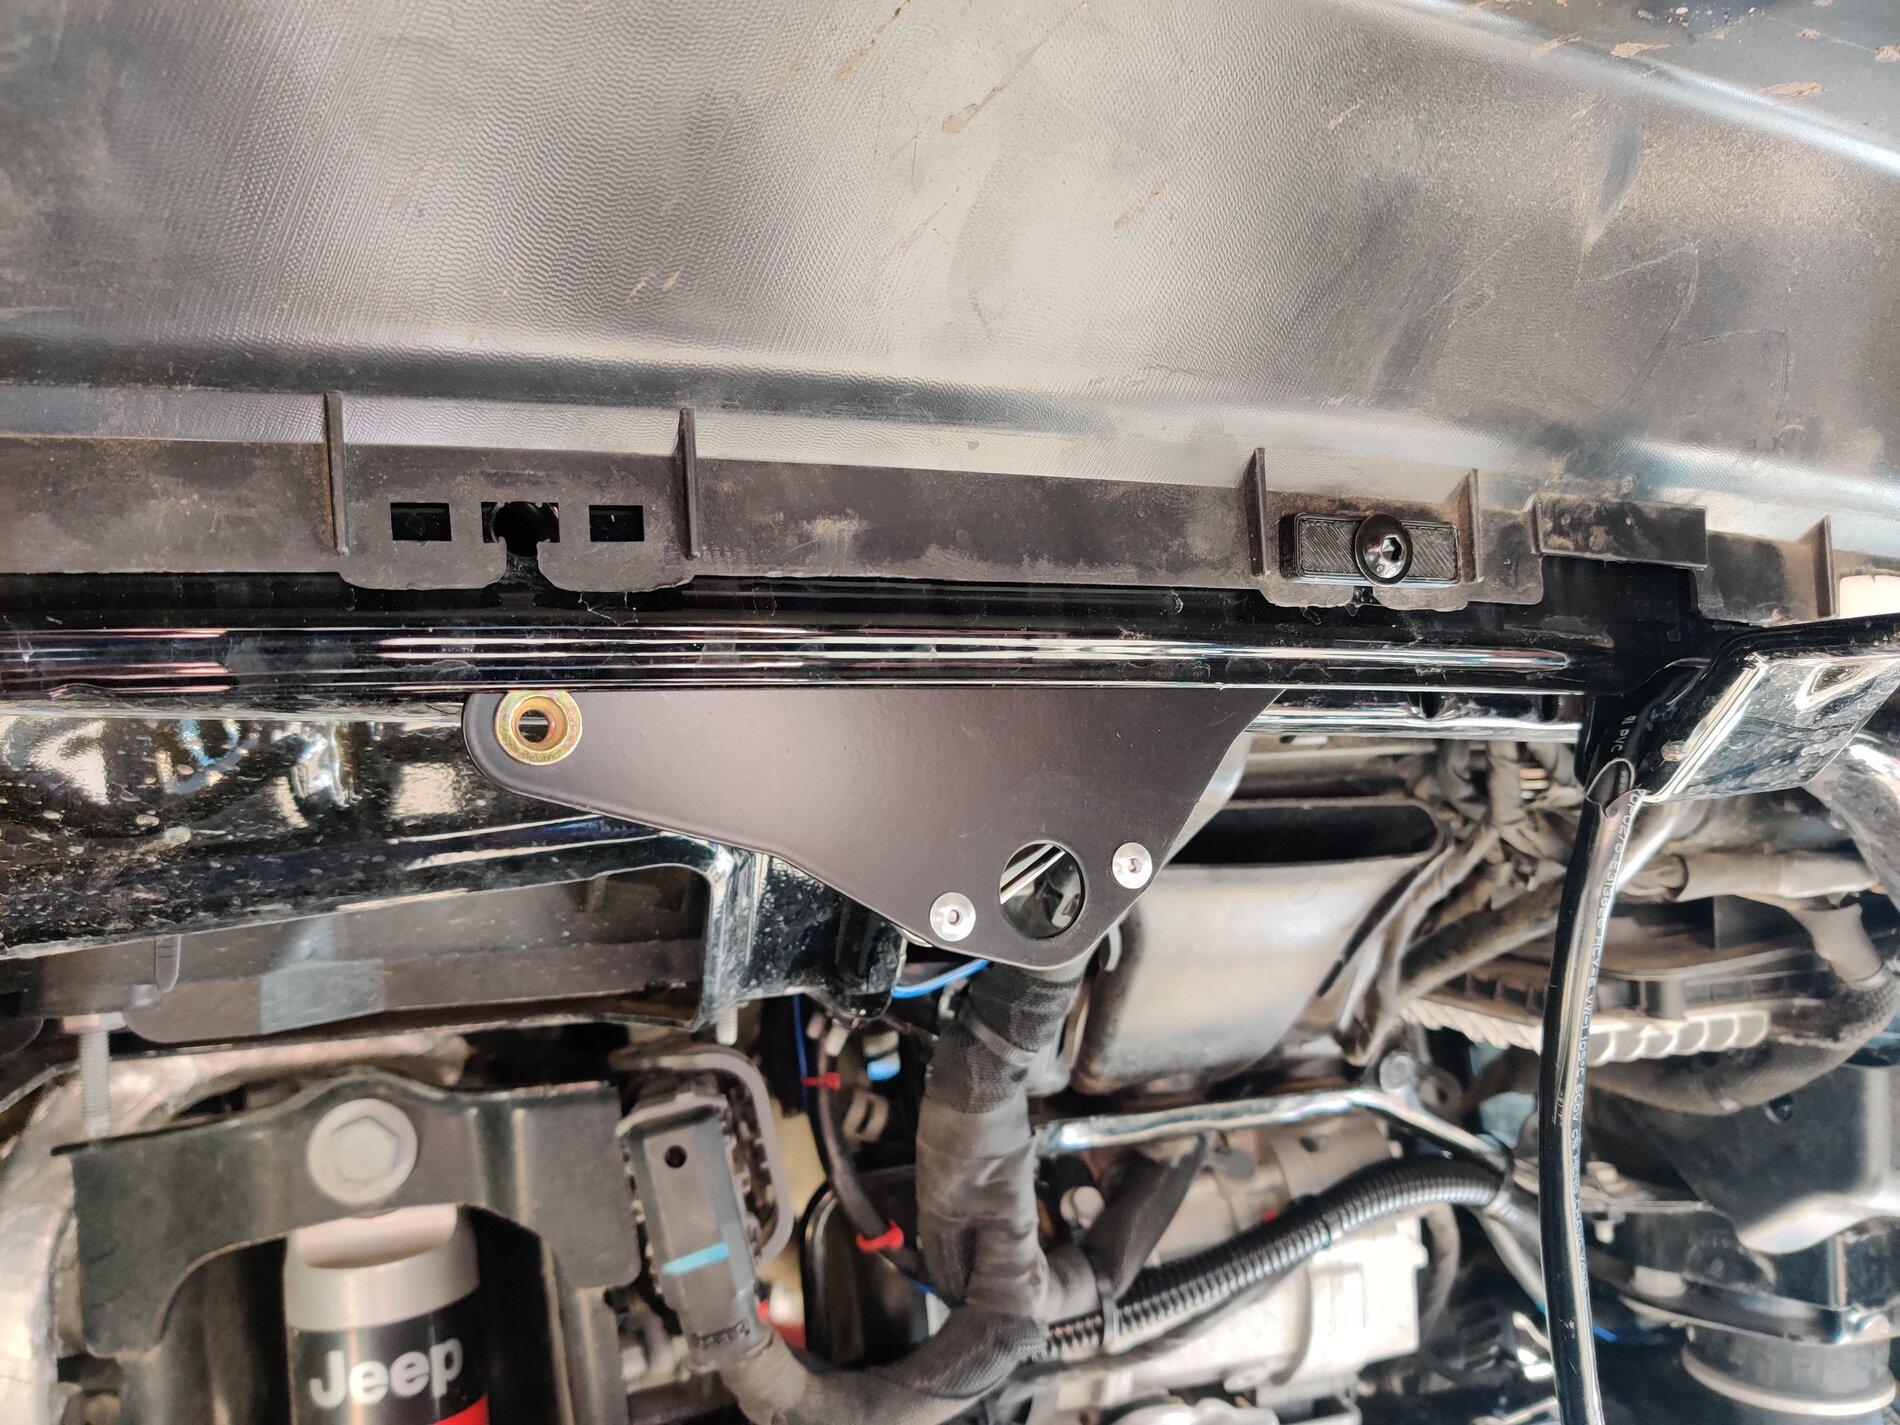
- Next you can position the tabs per the AAL instructions - AAL brackets behind the sheet metal as shown below.
- Then (I used a ¼ impact driver) attach the FWD most bracket to the frame using the self-tapping M8 screws. *This is where the instructions differ for JL vs JT. On the JT one hole on the driver’s side requires an M6 rivet nut be installed vs. the self tapping M8.
Final Thoughts:
- Installation does require cannibalization of the factory inner fender liners – there is no going back as you will break 39 plastic welds and trimming off plastic tabs so be committed but not scared. The welds break easy with set of trim removal tools and some caution. My flares are not factory paint matched but I have heard that breaking these welds on painted flares, if not careful, can craze the paint so be careful!
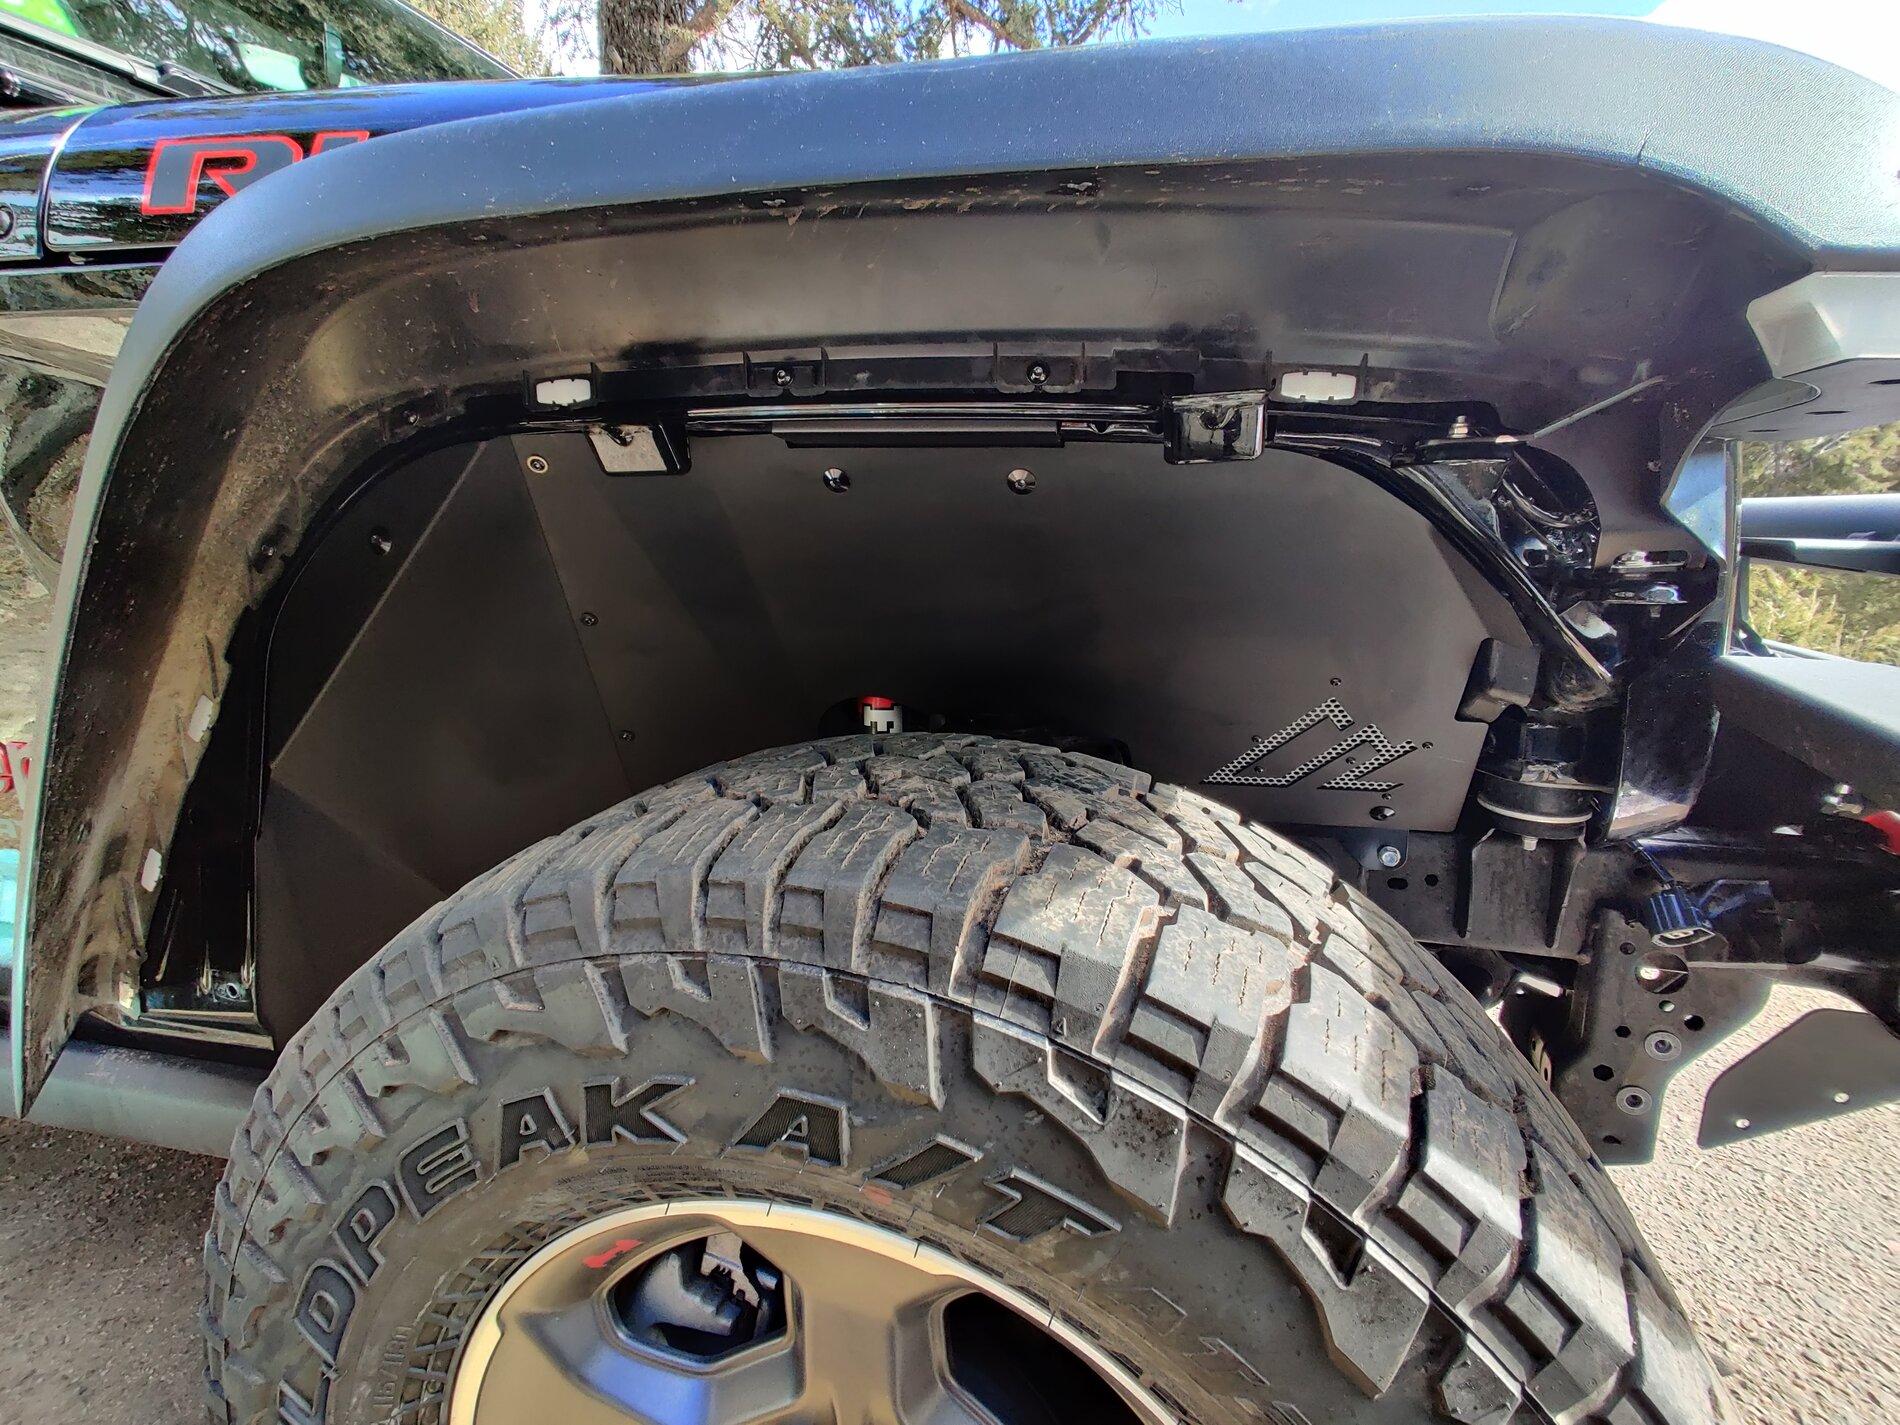
- I has previously stripped my liners for the QUAKE DRL fender chop and the flare that is left felt a bit loose being only retained by the factory (white) snap clips. The provided 3D printed fender washers / brackets worked very well to return the flare to a firm confident attachment. AAL offers these as a stand-alone kit for this purpose and I may add these to all flare attach points at a later date to ensure the flare is retained.
- Installation was very easy! I recommend leaving the FWD/aft panels slightly loose for first fit/check then attach all DZUS fasteners and finally tighten the 4 per side M6 panel to panel fasteners
- The instructions were very straight forward with only one hiccup – the hardware shipped was JT specific but the instructions indicated there was an Addendum applicable to the JT – this was not included but a quick email to Katie at AAL resolved any questions immediately and honestly the instructions were not entirely necessary as one can figure it out with the parts in hand.
- I did receive my fender liners ~3wks after order; however I will not say that is an issue as I did order during the holiday break and I selected an less frequent (not in stock) textured black powder – so I will not complain there! Just something to consider if you plan on ordering!
- These liners absolutely met my expectations for quality and appearance they blend in nicely with the jeep in the black textured finish (very close match to the ARB bumper)
- AAL overall gets a very high grade from me for meeting what I consider to be my stringent quality & packaging expectations. Where they really shine is customer service as well! Each time I contacted them they were very responsive and friendly! I am looking forward to adding more AAL products to my JT.
Sponsored
