jnack
Well-Known Member
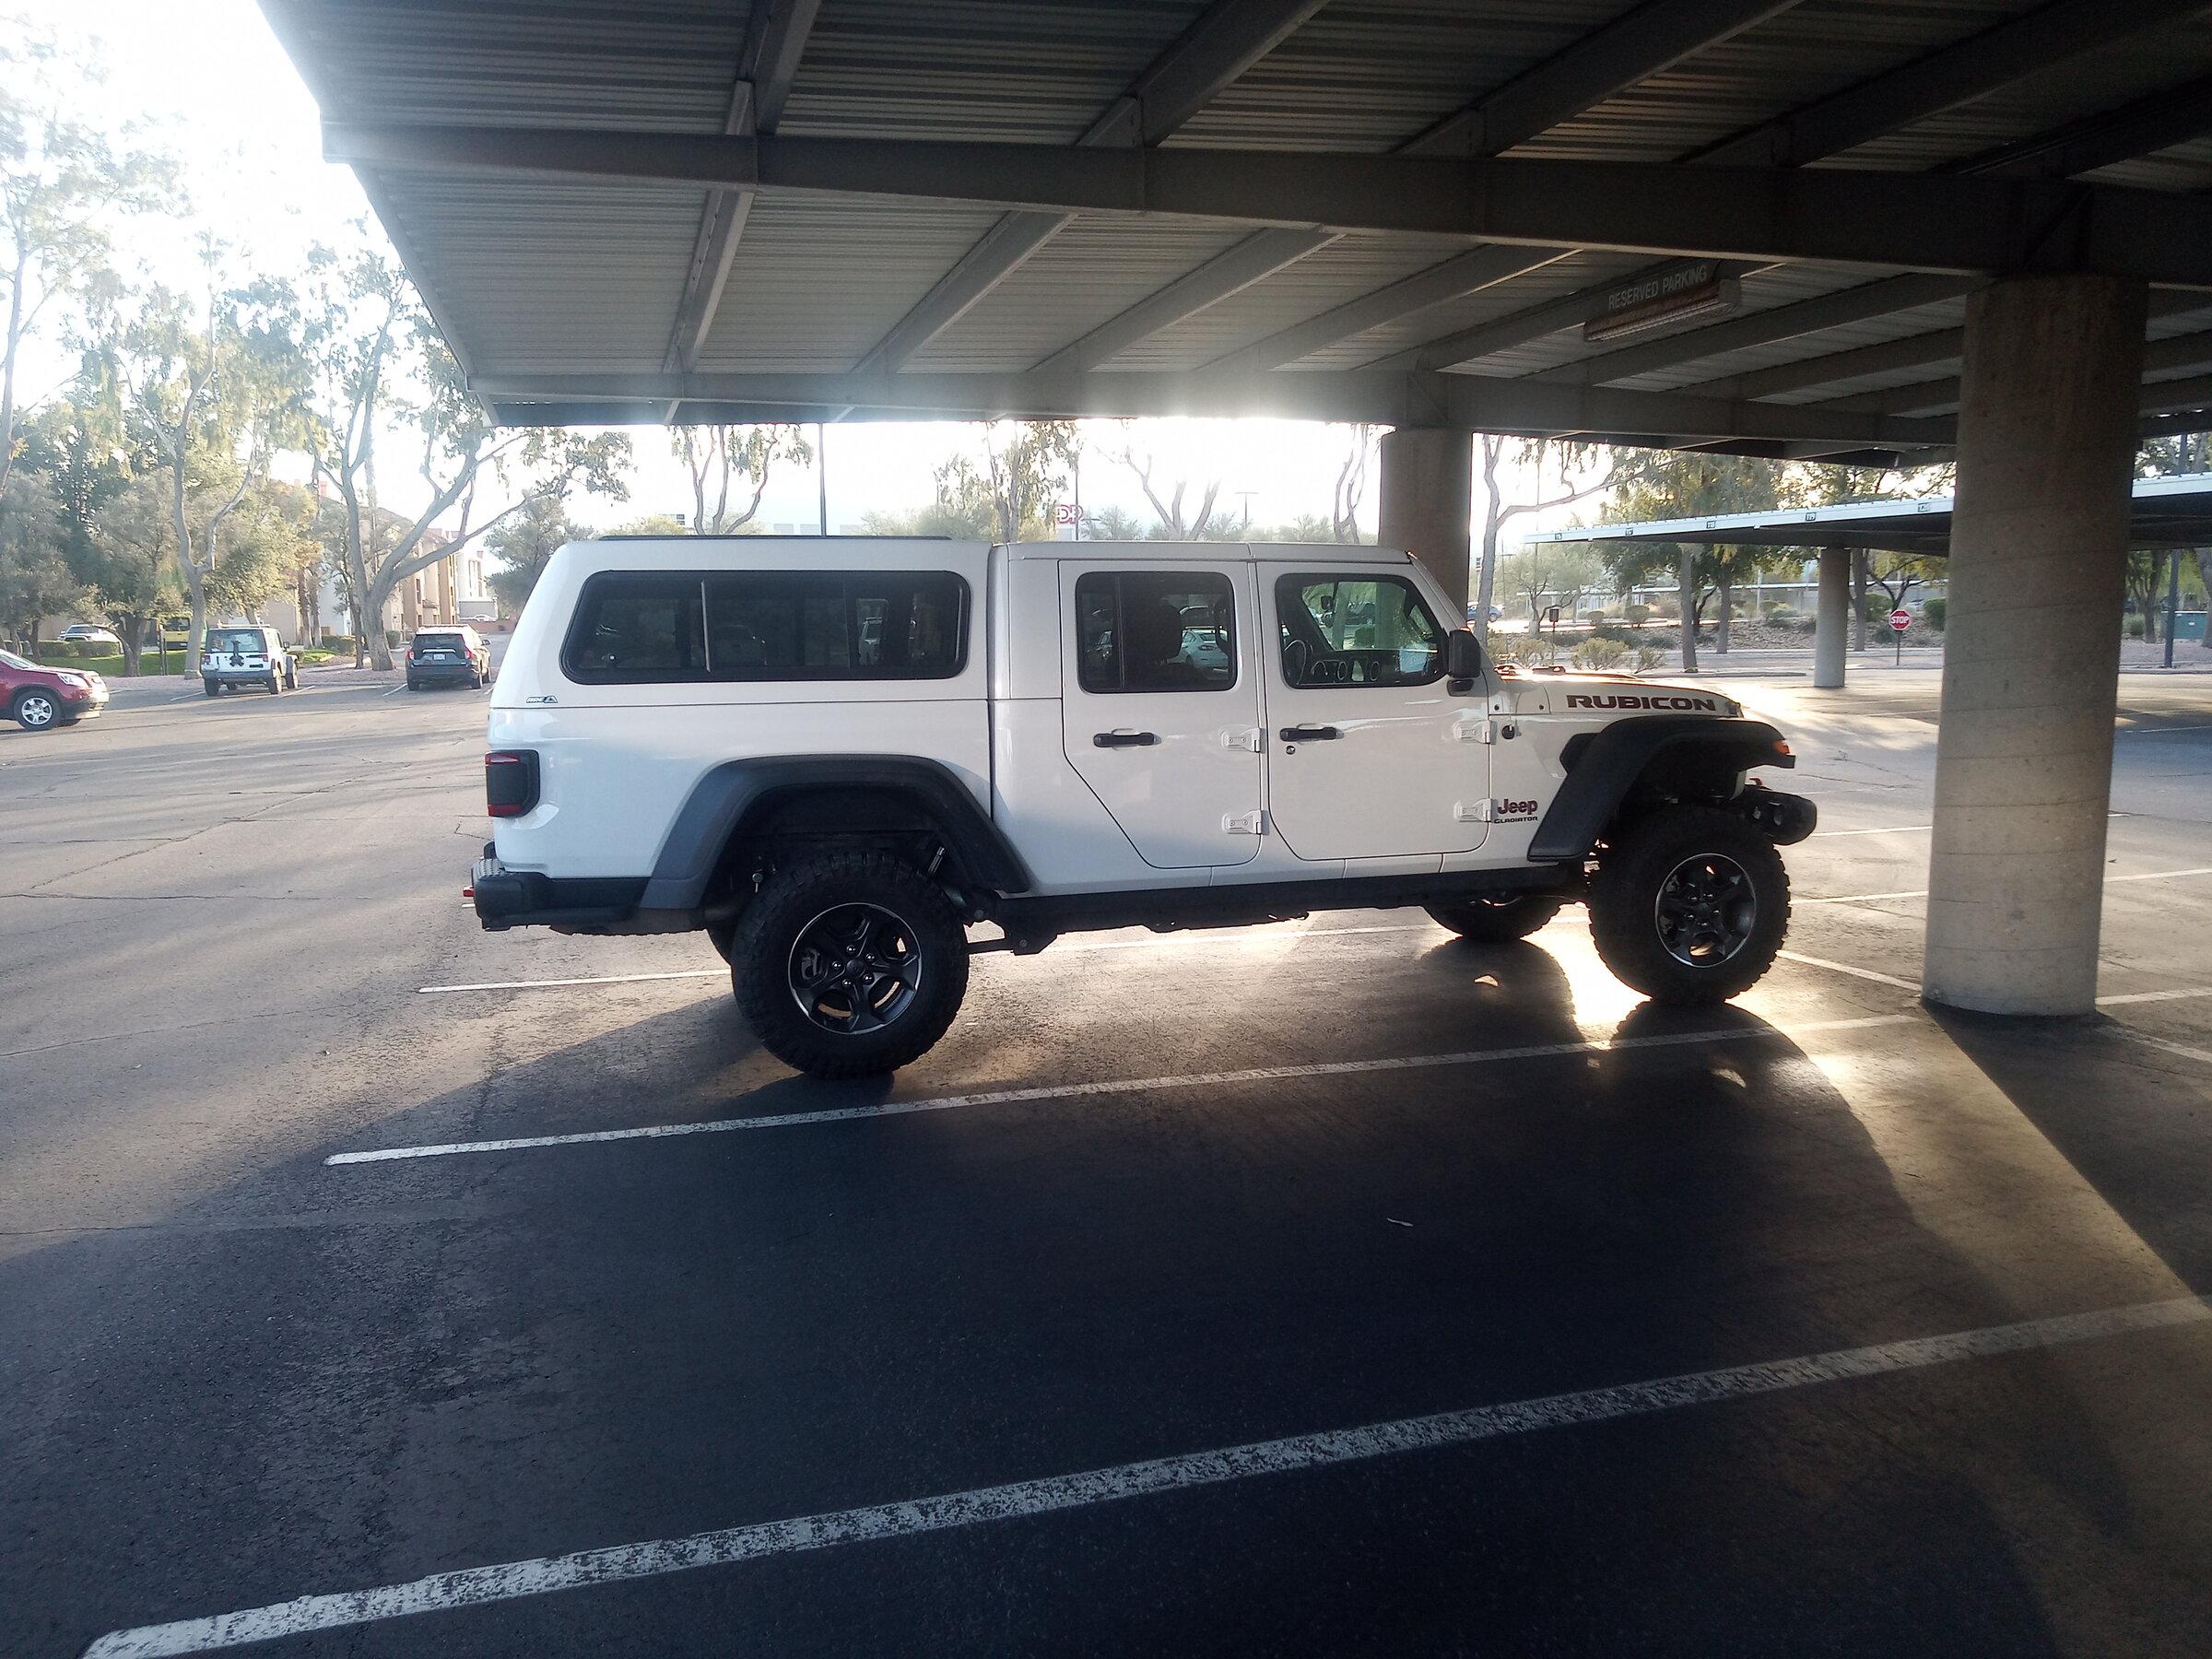
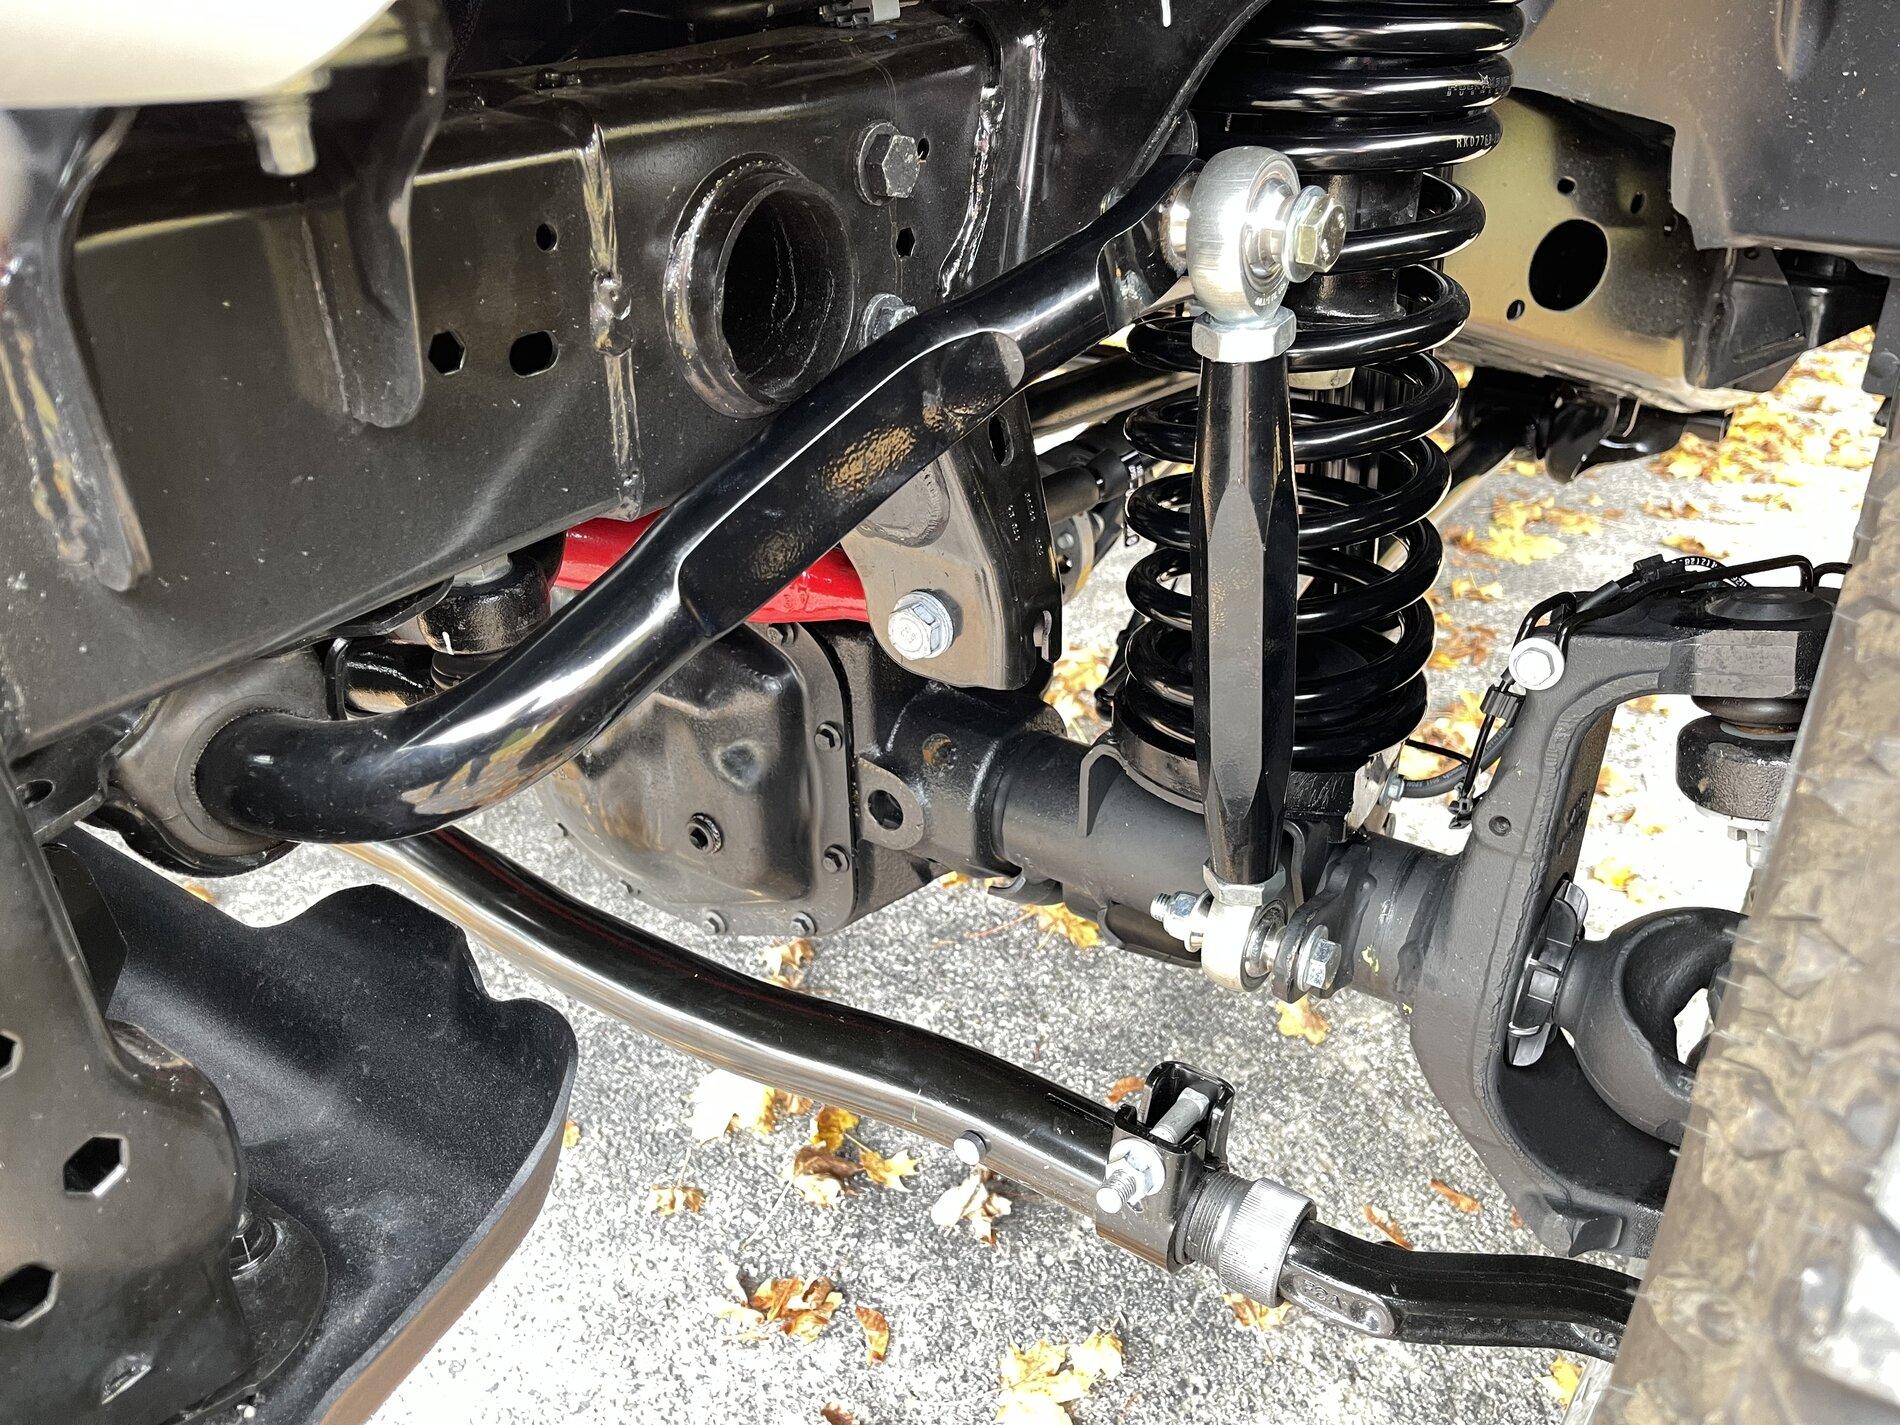
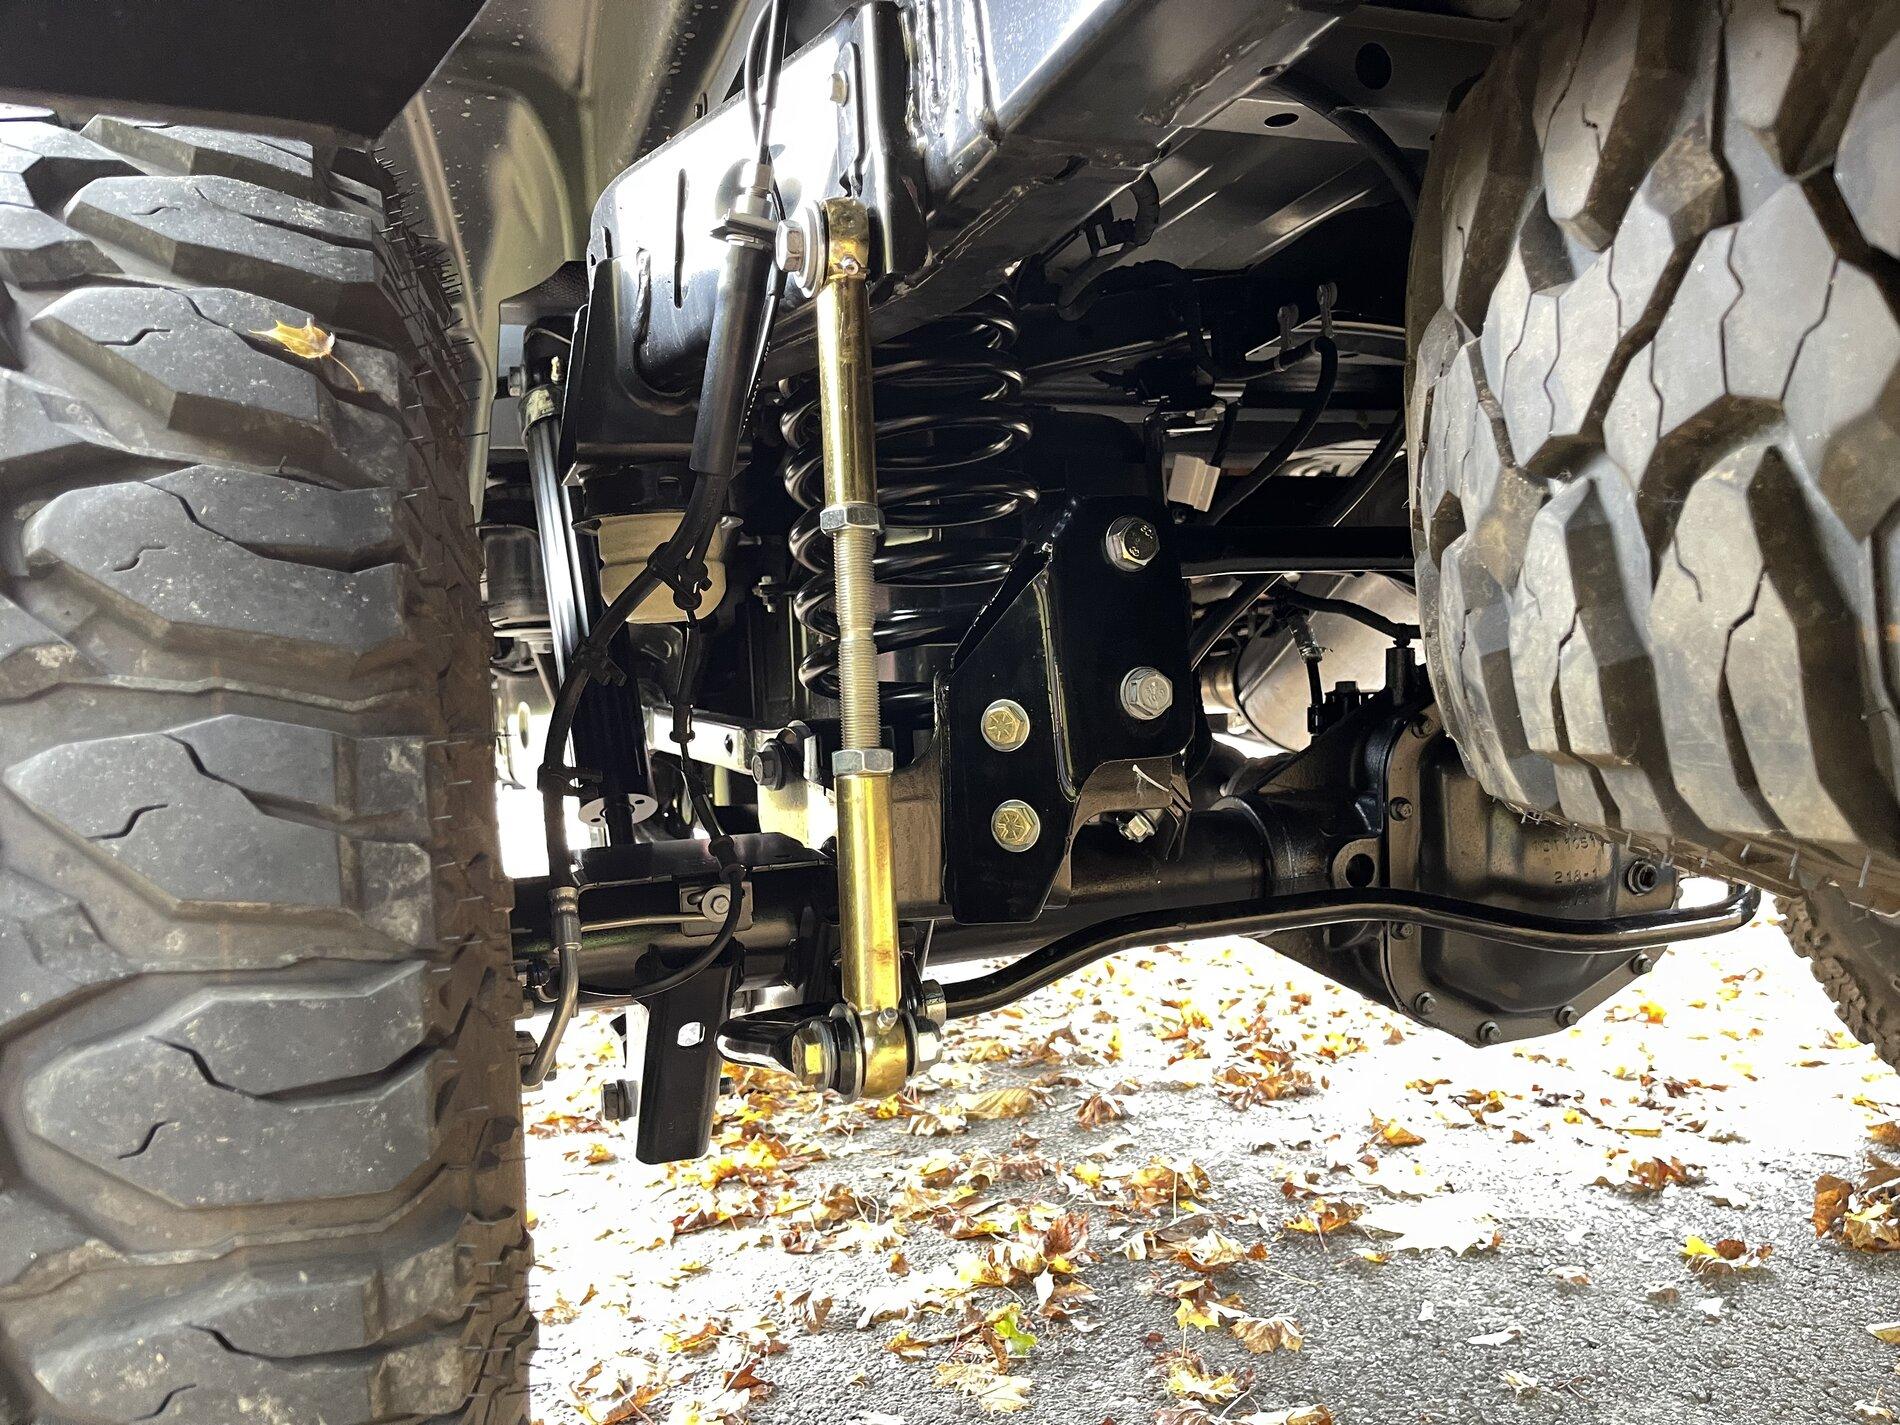
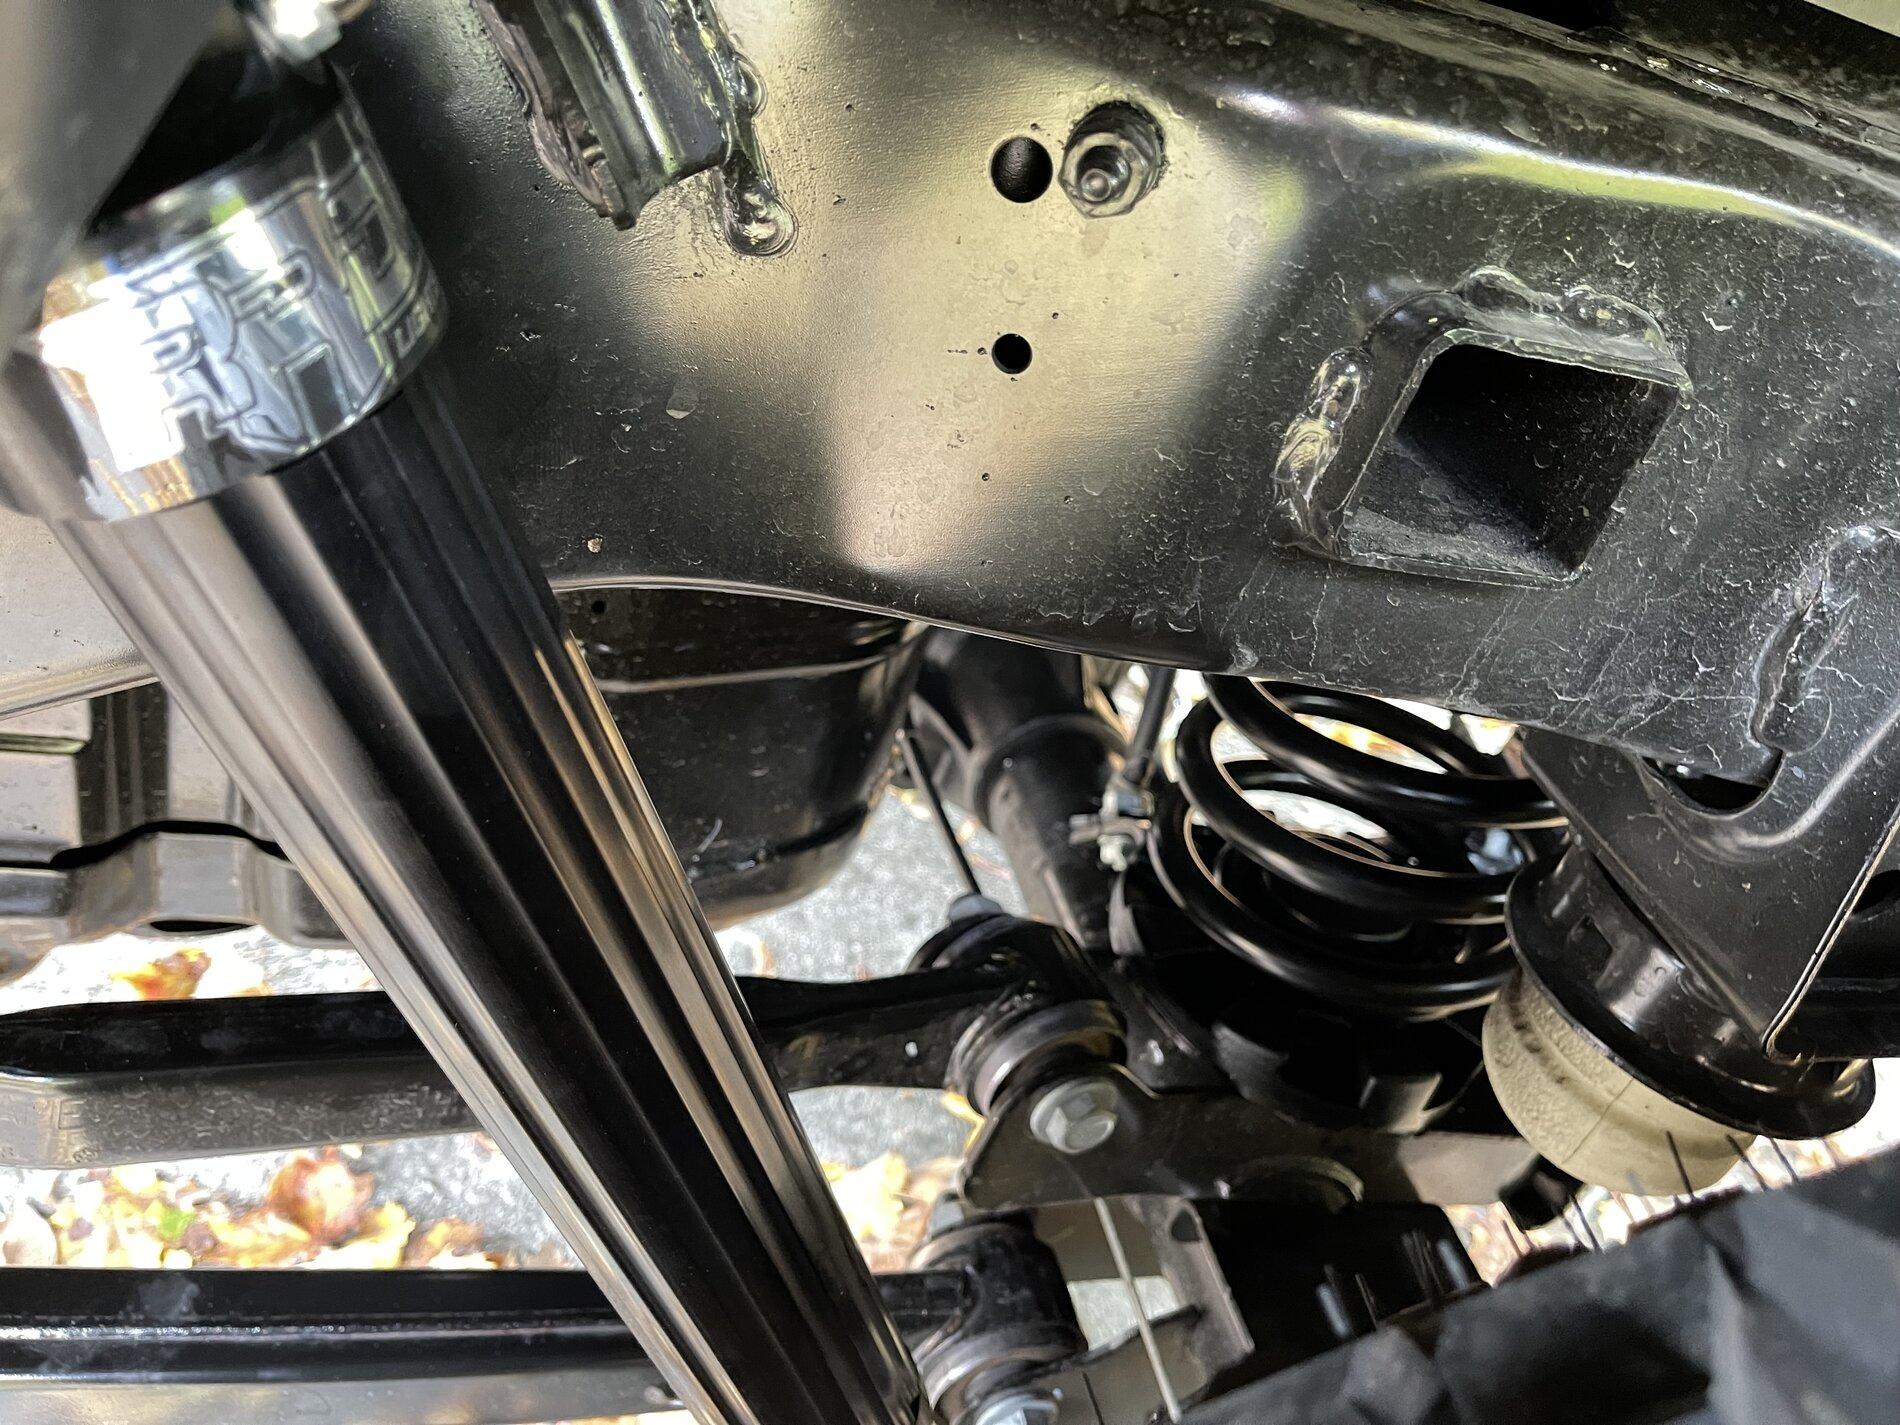
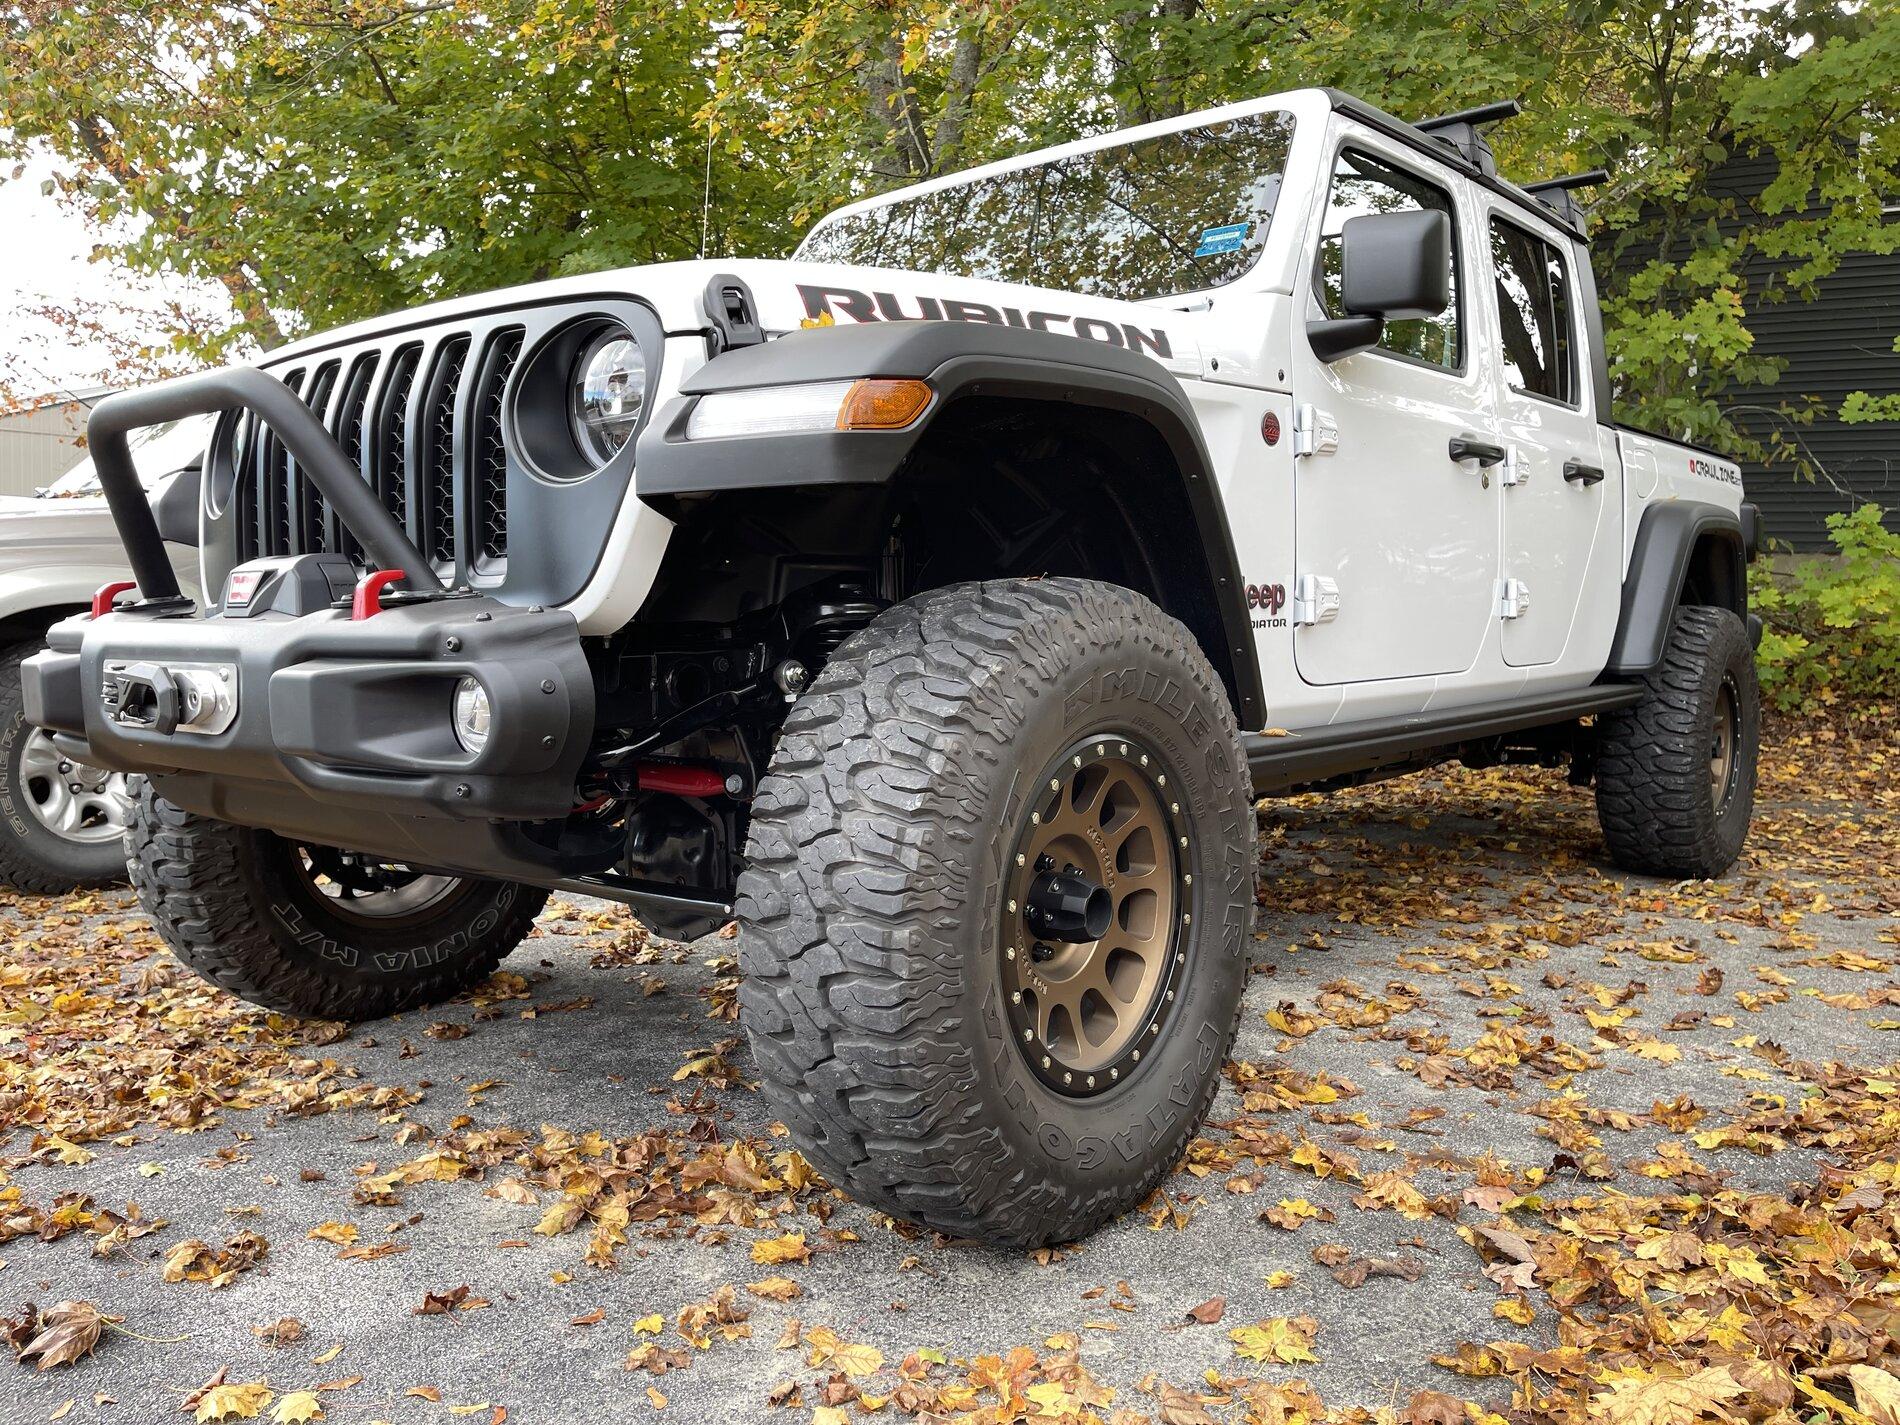
curious if you've had a chance to see how to does flexed out a bit even if just a driveway test? I had an issue with Rusty diesel springs bowing into the lip of the bump stop holder on both sides of the front (they're going to send me a new pair to see if it was a 1 off issue). would be really curious to see what the RK front springs look at full compression and full extensionSo I know a lot of folks were waiting for me to install the RK lift and to let them know the results. My hubby and I installed it on the weekend. It took a while as we don't have a vehicle lift, so we used jackstands on the frame and two regular car jacks.
We are no strangers to doing a lift. We have done our 3 other Jeeps. One MetalCloak 4.5" lift on my other half's 2007 Rubi, one metalcloak 3.5" lift on my 13' Rubi, one RK 2.5" adventure series on our 2021 JL Rubi overlander.....I also had a gas JT for a short period of time with the Mopar 2.5" lift (until the dealer wanted it back).
Here is a link to the system we ordered: https://rockkrawler.com/jt-3-0-inch-diesel-adventure-no-limits-system-stage-1/
The system listed above shows bump stops, but you have to buy them separately.......I was able to purchase this system for a lot less by using a discount code......
Installation was pretty straight forward.....although their instructions cover all their lifts....so you have to go through and re-read and verify, to make sure you are installing everything correctly.
The only thing I couldn't verify was the pucks they use to level out the JT. The front are the same. The backs have different heights. It said to install the taller of the two on the rear passenger's side.....now on my 2021 JL, it is a gasser and that's how we installed it, but there was no indication to install these any other way for the diesel......being a diesel I would think you would want the taller of the two on the driver's side because of the fuel tank.
We decided to follow the instructions and installed the taller one on the pass side. Can Rock Krawler chime in and confirm? @Rockkrawler
Other than that, everything else went smoothly.
Measurements before and after the lift:
Front: Before: 25" on both sides. After 28.5"
Rear: Before: 25" on both sides. After 29"
We adjusted the front track bar, checked the toe, and moved the steering wheel back to center.
The nose of the JT is now actually up, instead of the nose dive it did have.
Took the JTR out for the first test drive. It took a little bit for the new RK shocks to get pumped up.
Overall, the ride is really nice. It drives just as straight as it did when it was stock. The triple rate coils give a firm, yet non bone jarring ride. The shocks take the bumps great. Hitting dips in the roads no longer make the truck bounce up and down twice in the back end. It makes it drive with a lot more control.
We did some testing as if we were going side to side like we were trying to miss the orange cones in the middle of the road. It actually surprised both of us at how responsive the truck was and how the body roll handled. It was much better than expected.
Very happy with the results so far.
We will check the track bar again once we get home, just to make sure it didn't move....sometimes they do once they settle in. (We did use a steer smarts track bar that we had, instead of the RK track bar. No reason other than we had that one out of the box and why not use it.)
I will be posting a video on our YouTube channel about this JTR build. You can check out our page Crawlzone207 at: https://www.youtube.com/results?search_query=crawlzone207

Sponsored