Sponsored

Mopar Aux Switch Installation

bobjohnson26

Active Member
First Name
Bob
Joined
Oct 8, 2019
Threads
3
Messages
38
Reaction score
34
Location
PA
Vehicle(s)
2020 Sting Grey JT
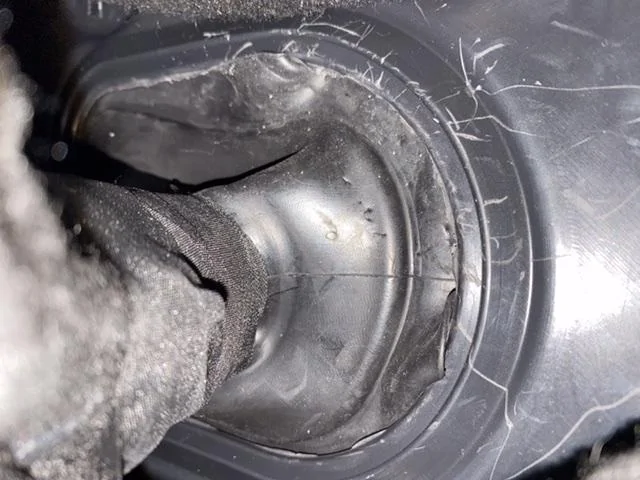
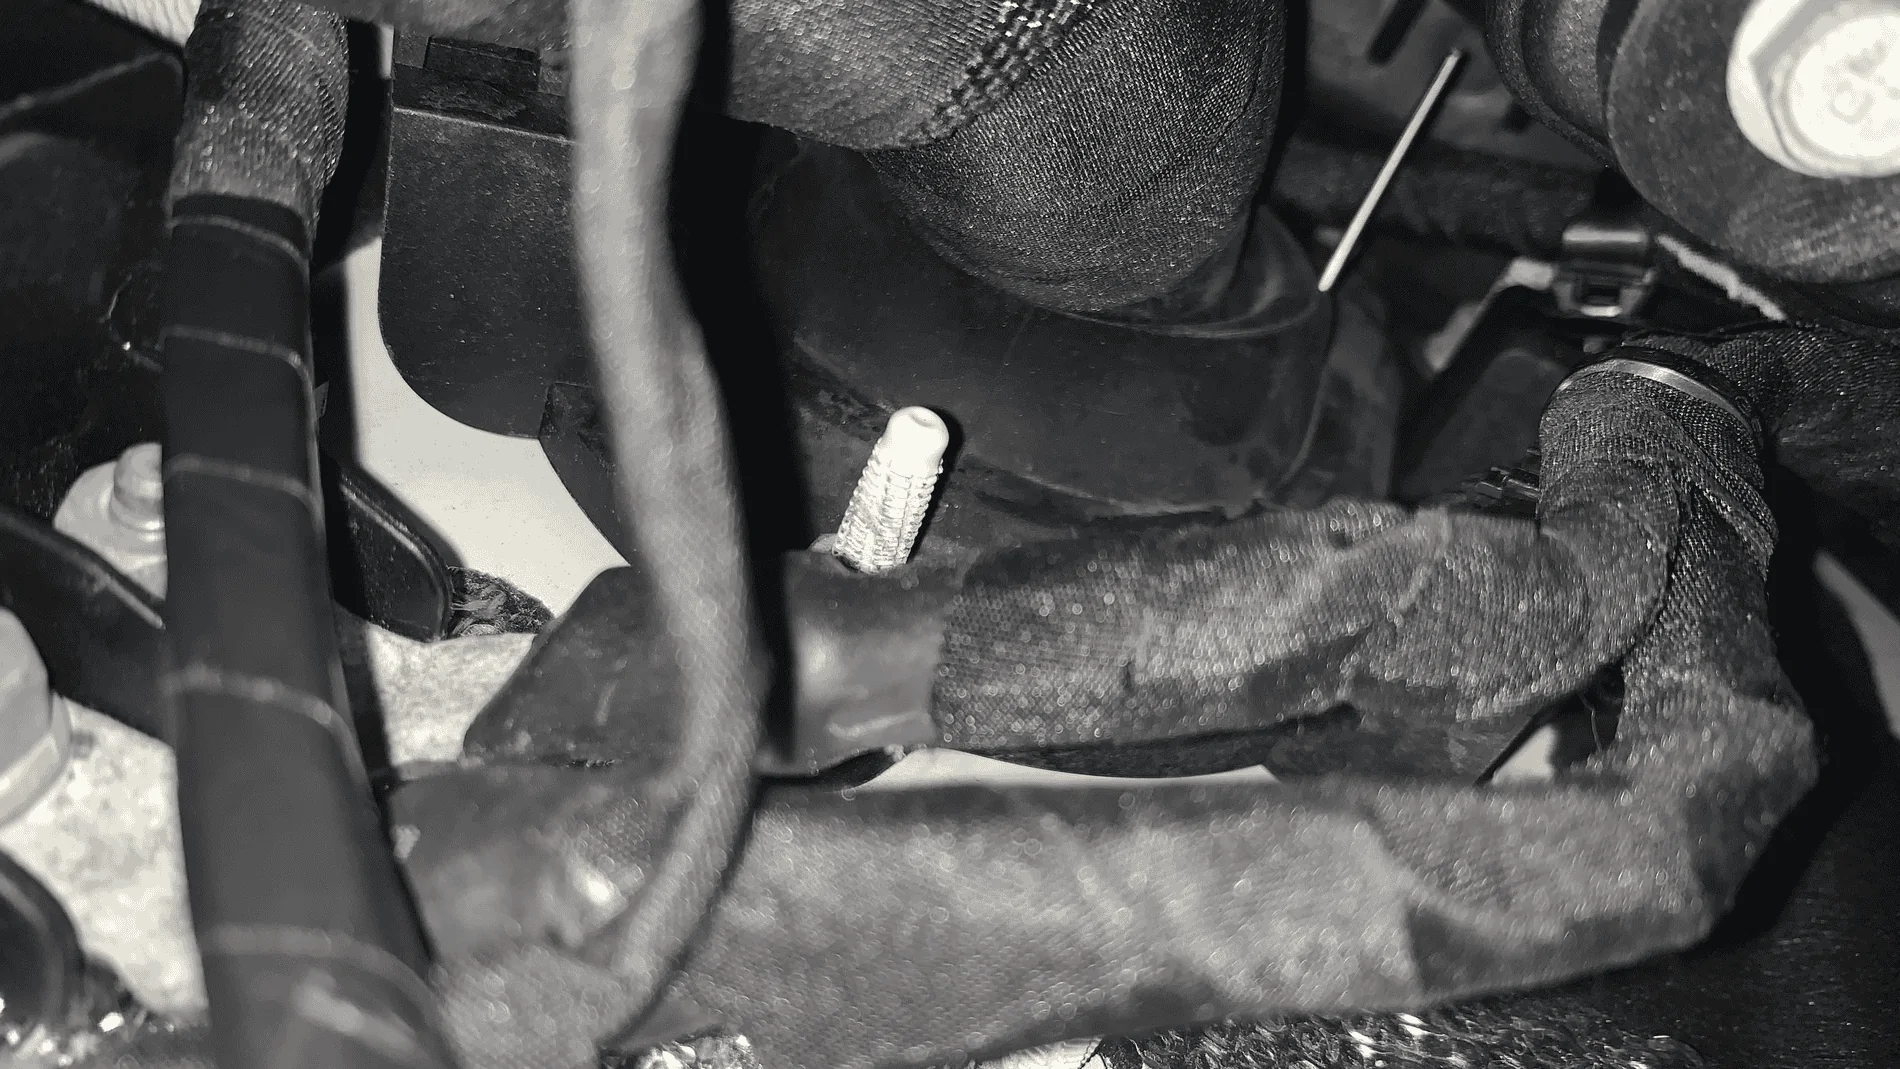
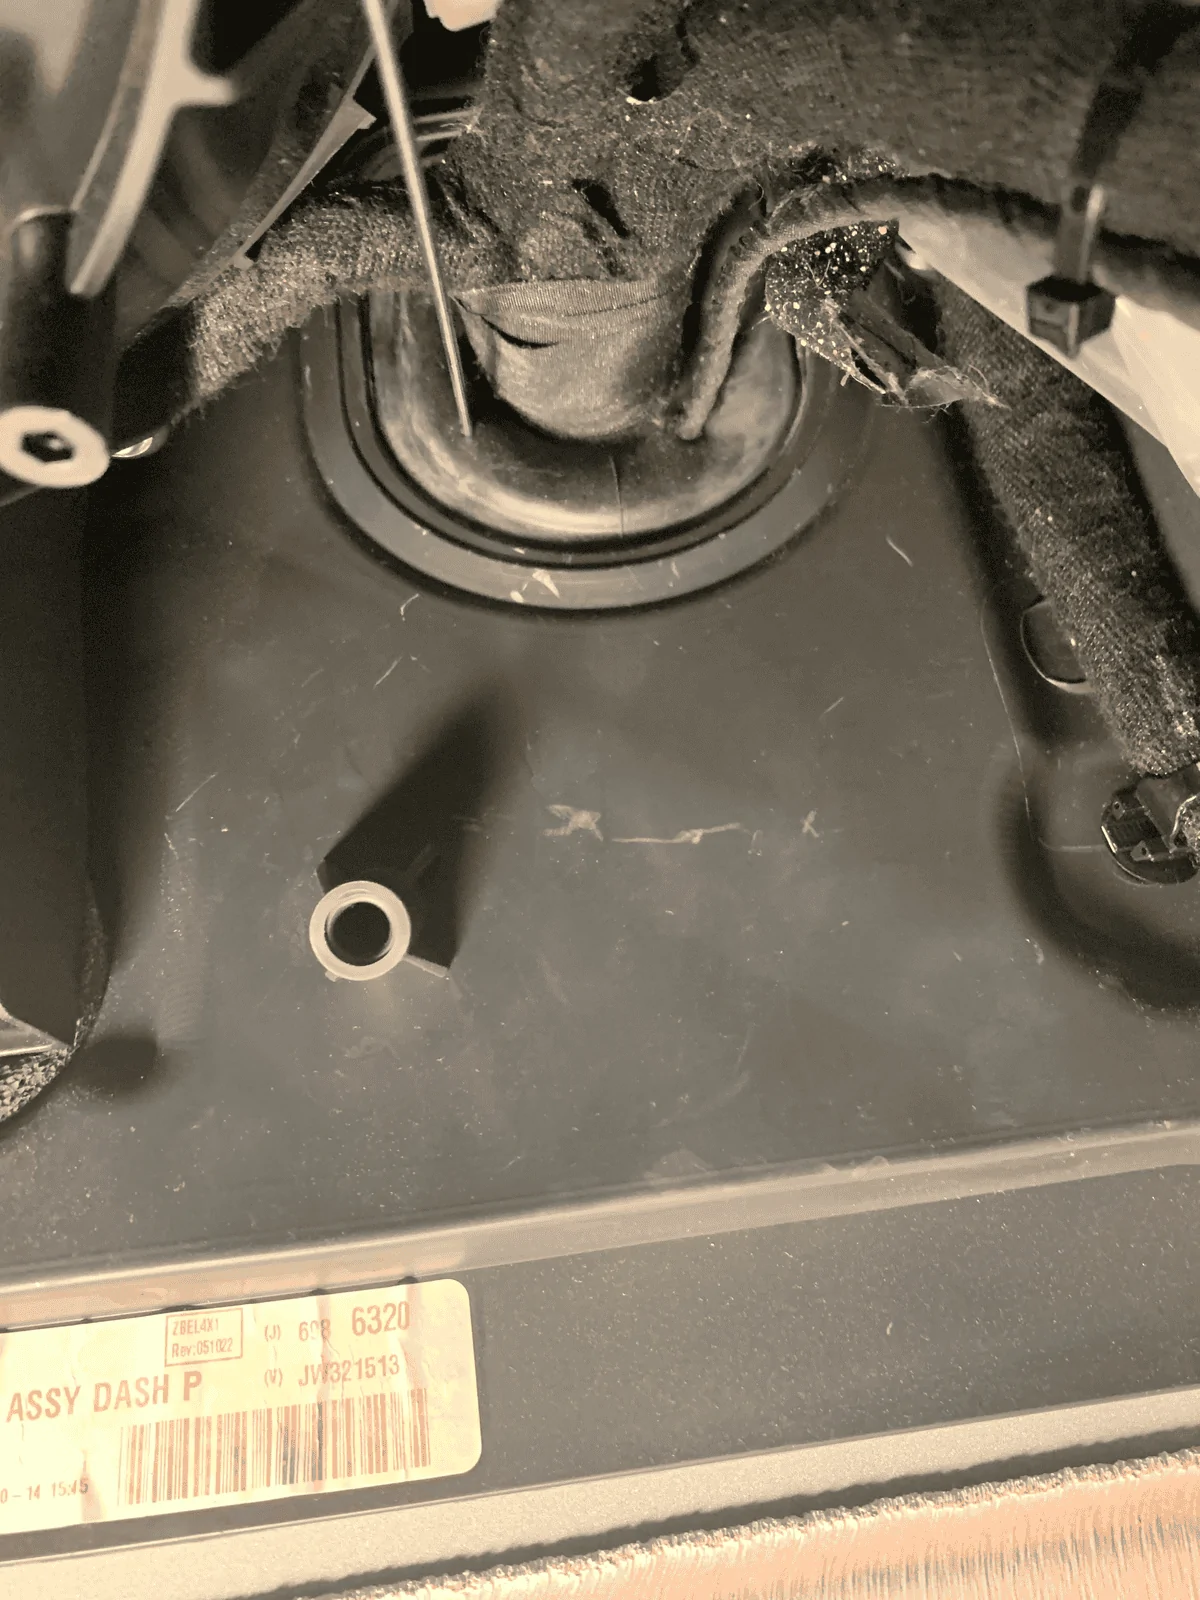
I am 'trying' to install the Mopar Aux Switches (key word is trying). I have watched multiple videos and they all show a simple 'pass through the firewall grommet' portion. But, I have been having a ton of trouble routing the wires from the engine bay to the interior on the passenger side. It seems like there are two grommets - one on the engine side and one inside. I don't think they are straight across from one another, but offset. I cannot tell which one is higher, lower, etc. Has anyone done this - - any guidance? Anything I am missing?
Sponsored


JRobes

Well-Known Member
Joined
Oct 27, 2019
Threads
10
Messages
934
Reaction score
1,468
Location
South Dakota
Vehicle(s)
2020 JT Sport S Max Tow, 2004 WJ Overland
Occupation
Enginerd
Here's my experience that I put in another thread...

Hardest part was getting a hole cut into the rubber grommet and whole harness fed through it, it definitely helps to have 2 people for this step so one can poke a coathanger or wire through the grommet from the cab and have the other person laying under the wheelwell looking up towards that area for the wire to protrude. I found that poking the wire through on the left side of the wire bundle (when looking at it from inside the cab) was the best route since the wire bundle immediately hooks to the right when it gets into the engine bay from the rubber grommet. There's a few more complex steps like depinning/pinning a couple harnesses, but the instructions are pretty straightforward. I'd recommend getting a depinning tool for the harness in the passenger footwell, I ended up just using a very narrow tweesers for that step to get the pin out of the harness. Remember to quadruple check all your wiring. When wrapping up, you also need to reinsert some plastic rivets into your wheel well liner; my steel/alum riveter didn't have a big enough grip set for the plastic rivets, so I had to get creative with a plyers to set the rivets, but I'm sure the dealership could just quick rivet those in place when you take it in to get your computer flashed to allow the buttons to actually work.
 
OP
OP
bobjohnson26

bobjohnson26

Active Member
First Name
Bob
Joined
Oct 8, 2019
Threads
3
Messages
38
Reaction score
34
Location
PA
Vehicle(s)
2020 Sting Grey JT
Thanks for the response, but this thing is killing me. Just to see if we are talking about the same grommet - please see the photo below. Is this what you went through from the cab?

6BFDC6FB-F3B3-4F8F-A934-E6B6DF87FCD0.jpeg
 
OP
OP
bobjohnson26

bobjohnson26

Active Member
First Name
Bob
Joined
Oct 8, 2019
Threads
3
Messages
38
Reaction score
34
Location
PA
Vehicle(s)
2020 Sting Grey JT
You can see i am beating up the area with the end of the coat hanger....
 

JRobes

Well-Known Member
Joined
Oct 27, 2019
Threads
10
Messages
934
Reaction score
1,468
Location
South Dakota
Vehicle(s)
2020 JT Sport S Max Tow, 2004 WJ Overland
Occupation
Enginerd
Yes, looks like the same grommet. It goes through the firewall just above the passenger footwell and towards the batteries in the engine bay. It sucks to get through it, no doubt and yes it's double walled.
 

Sponsored

JRobes

Well-Known Member
Joined
Oct 27, 2019
Threads
10
Messages
934
Reaction score
1,468
Location
South Dakota
Vehicle(s)
2020 JT Sport S Max Tow, 2004 WJ Overland
Occupation
Enginerd
Make sure you're not stabbing your coat hanger into the wiring loom, someone accidentally did that with a knife and had to bring it into the dealership for a very expensive repair.
 
OP
OP
bobjohnson26

bobjohnson26

Active Member
First Name
Bob
Joined
Oct 8, 2019
Threads
3
Messages
38
Reaction score
34
Location
PA
Vehicle(s)
2020 Sting Grey JT
Damaging the loom is a concern of mine - but I have tried to limit the poking. Did you push through on the left or the right side of the grommet (right being closest to the passenger door)?
 

JRobes

Well-Known Member
Joined
Oct 27, 2019
Threads
10
Messages
934
Reaction score
1,468
Location
South Dakota
Vehicle(s)
2020 JT Sport S Max Tow, 2004 WJ Overland
Occupation
Enginerd
Left side of the loom when inside the cab, see my original reply
 
OP
OP
bobjohnson26

bobjohnson26

Active Member
First Name
Bob
Joined
Oct 8, 2019
Threads
3
Messages
38
Reaction score
34
Location
PA
Vehicle(s)
2020 Sting Grey JT
THANKS! Hoping I have better luck on that side!
 

Bbannongmu

Well-Known Member
First Name
JTR.Spartacus
Joined
Jan 18, 2020
Threads
26
Messages
1,876
Reaction score
2,159
Location
Earth
Website
m.facebook.com
Vehicle(s)
2020 Jeep Gladiator Rubicon
Build Thread
Link
Occupation
Certified Emergency Manager
Vehicle Showcase
1
Watching this since aux switch add on is on my upgrade list. Any updates?
 

Sponsored

OP
OP
bobjohnson26

bobjohnson26

Active Member
First Name
Bob
Joined
Oct 8, 2019
Threads
3
Messages
38
Reaction score
34
Location
PA
Vehicle(s)
2020 Sting Grey JT
I decided to bag it. I struggled for a while and could not get the hanger through the firewall. Hard to see what is in there and was getting worried about cutting the loom - heard nightmares about that. So, changed course and will at some point add an sPOD.
 

Bbannongmu

Well-Known Member
First Name
JTR.Spartacus
Joined
Jan 18, 2020
Threads
26
Messages
1,876
Reaction score
2,159
Location
Earth
Website
m.facebook.com
Vehicle(s)
2020 Jeep Gladiator Rubicon
Build Thread
Link
Occupation
Certified Emergency Manager
Vehicle Showcase
1
I decided to bag it. I struggled for a while and could not get the hanger through the firewall. Hard to see what is in there and was getting worried about cutting the loom - heard nightmares about that. So, changed course and will at some point add an sPOD.
Not a good sign... Sorry to hear this.
 

jspadea3

New Member
First Name
Joe
Joined
Jan 19, 2021
Threads
0
Messages
1
Reaction score
2
Location
Canton
Vehicle(s)
2018 Jeep JL MOAB
Not a good sign... Sorry to hear this.
After watching the videos I too got pretty frustrated. Thanks to JRobes, I cut the folded end off the hanger and poked a hole all the way through both walls in the grommet (I was very careful to go horizontal. I took Quadratech's video advice and pulled a 12 gage stranded wire through, and then taped the crap out of the harness, greased it up and pulled it through that tiny hole easily! I took some pictures of the hanger piercing the grommet from both sides

Exterior Hanger Through Grommet.png


Interior Hanger Through Grommet.png
 

JRobes

Well-Known Member
Joined
Oct 27, 2019
Threads
10
Messages
934
Reaction score
1,468
Location
South Dakota
Vehicle(s)
2020 JT Sport S Max Tow, 2004 WJ Overland
Occupation
Enginerd
Nice pics of each side of the grommet. For others' clarification, his first pic is of the engine bay side of the grommet (looking up from below the vehicle) and the second pic is looking at it straight on from inside the passenger foot well.
 

Bbannongmu

Well-Known Member
First Name
JTR.Spartacus
Joined
Jan 18, 2020
Threads
26
Messages
1,876
Reaction score
2,159
Location
Earth
Website
m.facebook.com
Vehicle(s)
2020 Jeep Gladiator Rubicon
Build Thread
Link
Occupation
Certified Emergency Manager
Vehicle Showcase
1
Different purpose - Zautomotive forward camera but I used a razor knife and a piece of Rolex to get through. About 1:12 here
Sponsored


Top