ritem123
Member
- First Name
- Rick
- Joined
- May 17, 2021
- Threads
- 2
- Messages
- 5
- Reaction score
- 4
- Location
- Centerton Arkansas
- Vehicle(s)
- 2021 Gladiator
- Occupation
- Construction Inspector
- Thread starter
- #1
April 2021, I purchased a 2021 - 80th anniversary model. Sleeping on the ground was NOT an option anymore for me! I installed a Front Runner Extreme Roof Rack and a Smittybilt Overland Roof Top Tent. IMHO, great products! The Front Runner was short the 8 front support spacers, I had to call Front Runner and they overnighted spacers to me. Along with spacers, and during installation, I noticed the 8 bolts used at spacers were missing. Being in the middle of installation, not wanting to wait, I went to Lowe's and purchased required metric bolts.
Layout ALL Front Runner fasteners, guessing, there's 50-100 bolts, washers, spacers, nuts, caps, etc. Know that 100 mm equals about 4", 20 mm equals about 3/4", and sort out exactly where they all go, find out what may be missing!
Both are engineered nicely for the gladiator, however, Front Runner and Smittybilt products are not completely compatible but I worked around! The slats on FR rack are too wide to accommodate Smittybilt flat bars that secure tent bottom rail to slats. I used a grinder to cut steel angles to 5” long pieces.
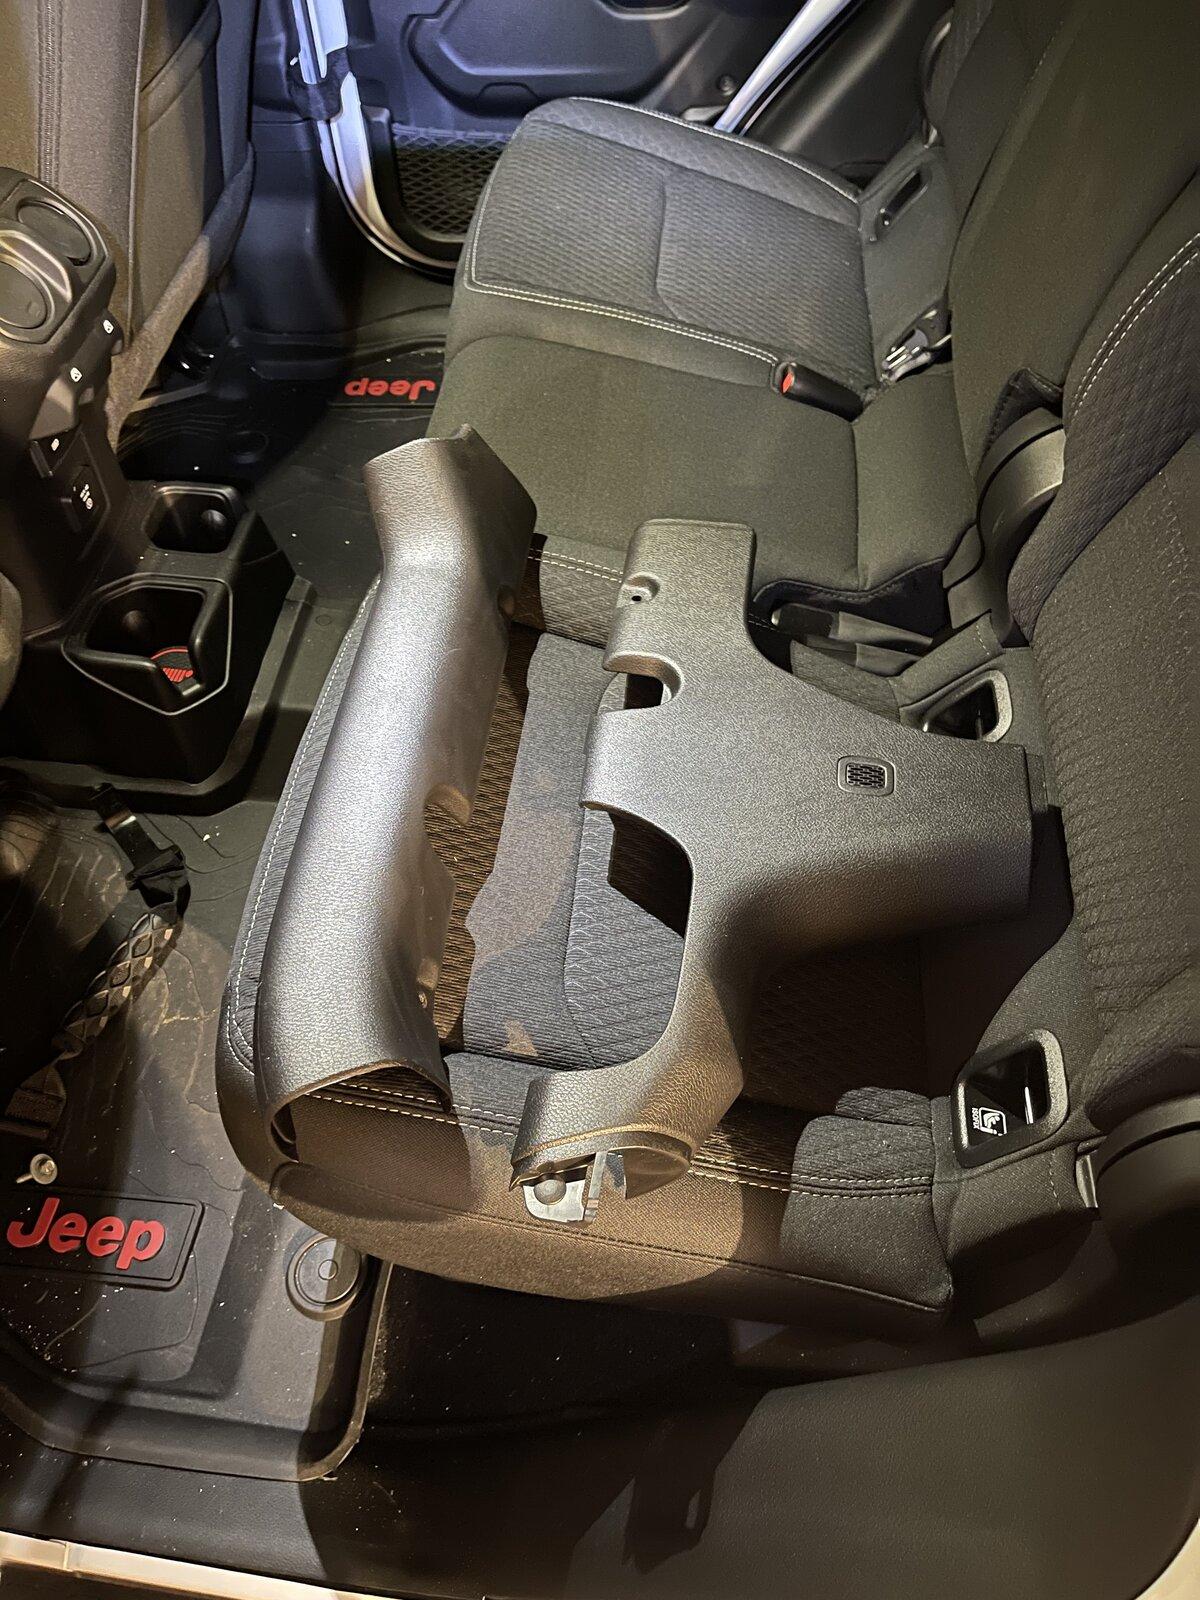
2 pieces of interior trim have to be removed from each side and speaker bolt removed to install carrier brackets to underside of rail beam
IMHO, Front Runner is quality. I was nervous when it came to drillin 4 - 13/16” holes in the top! But all aligned properly! Install back brackets first, temporary secure in place, then align front bracket to carrier, and drill. I drilled 13/16”holes and dia matched bushing/spacer dia. The first roof bracket took 3 hours to install just because of triple checking everything and not wanting to make any mistakes prior to drilling holes. Other roof bracket took 30 min to install, learning curve! Front brackets were tricky to install. Remove front two roof panels. There’s bout 1” high spacing to secure nuts on bottom side of rail beam. Bracket bolts were bout 7” back. I used a 4 prong claw to hold nut back to bottom of mounting screw to start threading. An open end wrench was long enough to tighten.
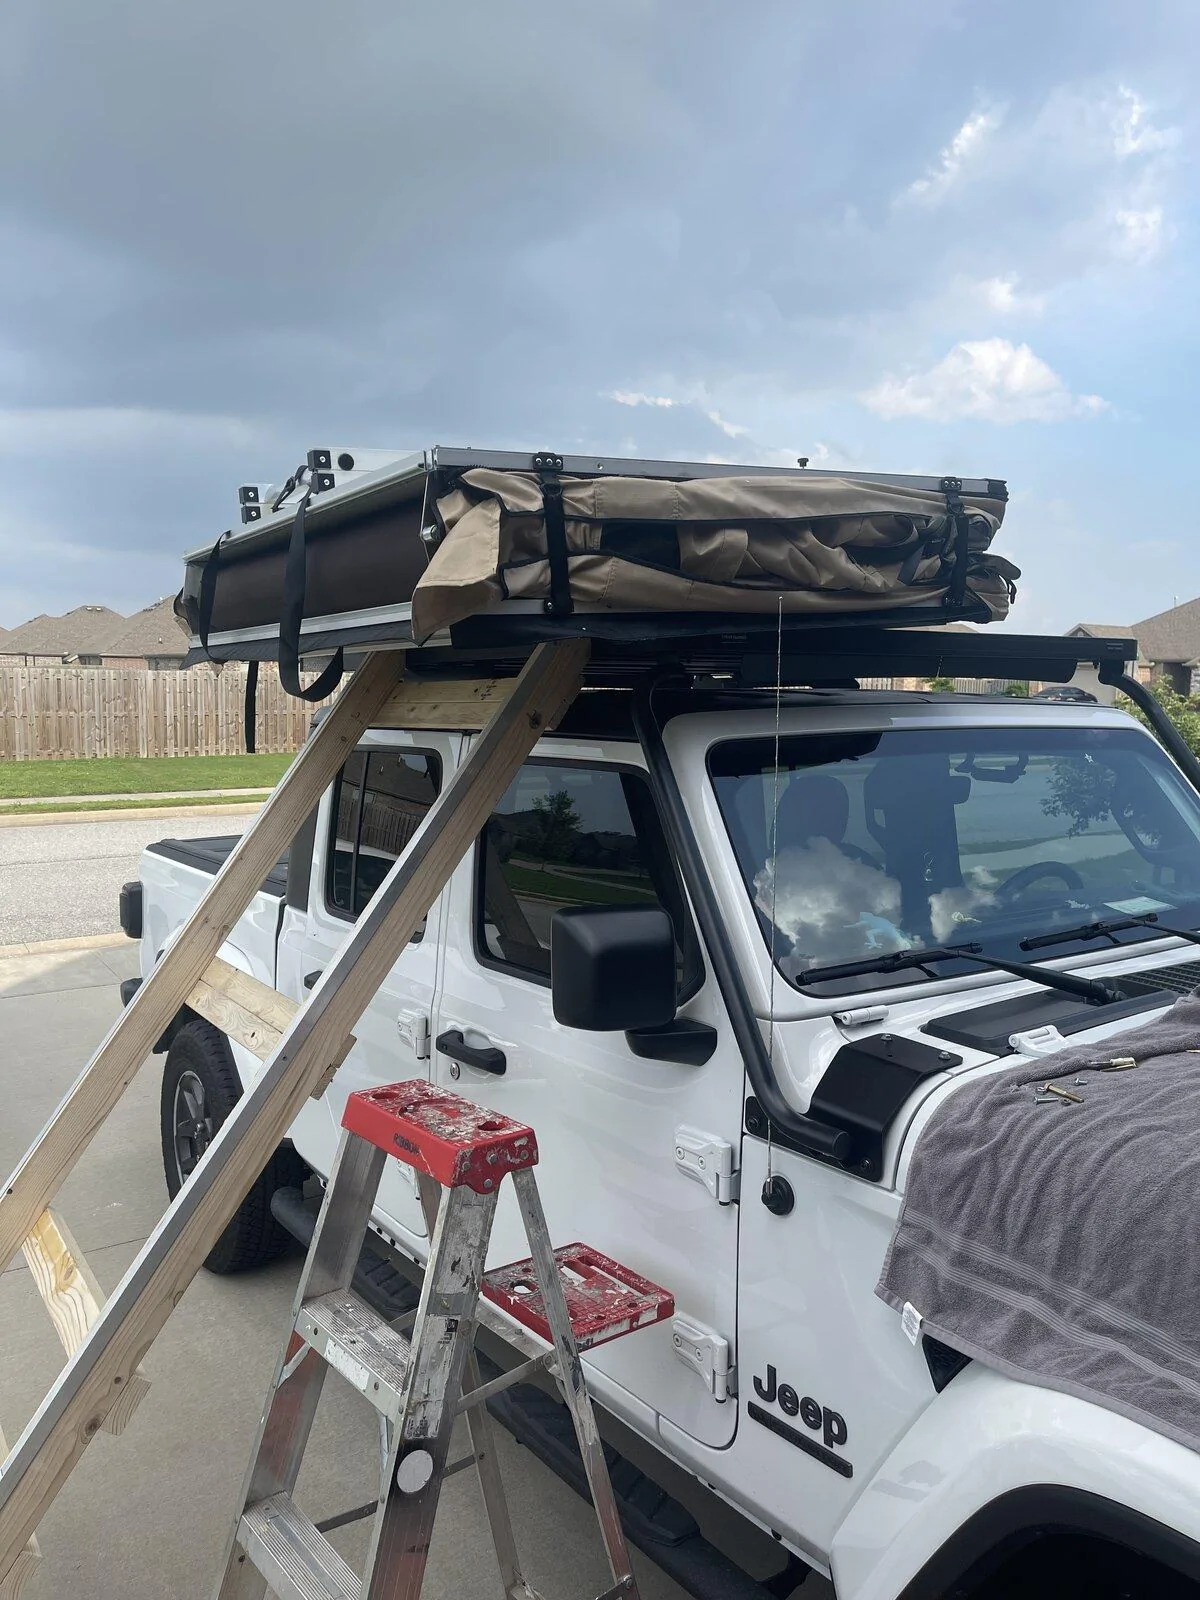
I designed a ladder ramp to slide Smittybilt up and onto top. I’m 65, effort was easy breezing considering contraption weighs just over 100 lbs. Bringing Smittybilt down, no problem.
I slept in tent that night. Nice foam pad, pockets to stow bottle waters or whatever.
I store Smittybilt on a roller dolly in garage, roller dolly works well moving RTT back and forth.

Trim came off fairly easy. Don't force off, take your time wiggle & jiggle.
Drill and temporary secure back bracket first, then position front bracket and drill.
Smittybilt strap (center) wasn't long enough to extend beyond width of Front Runner carrier slats, I used a grinder to cut angle iron down making a longer strap.
Bottom three rungs of ladder ramp supported my 180 lb body just fine as I slid Smittybilt to top.
I move Smittybilt to ladder ramp to from garage on a roller dolly.
At 65 years young, I had no problem pushing Smittybilt to top. Course I've kept a workout regiment for the last 40 years!
I plan to keep a 4 foot step ladder in jeep for Smittybilt placement. Prior to bringing Smittybilt down, extension ladder is handy to secure straping that secures folded Smittybilt in place. Extension ladder is also handy to install steel rods on each side of tent that stretch out fly and opening coverings.
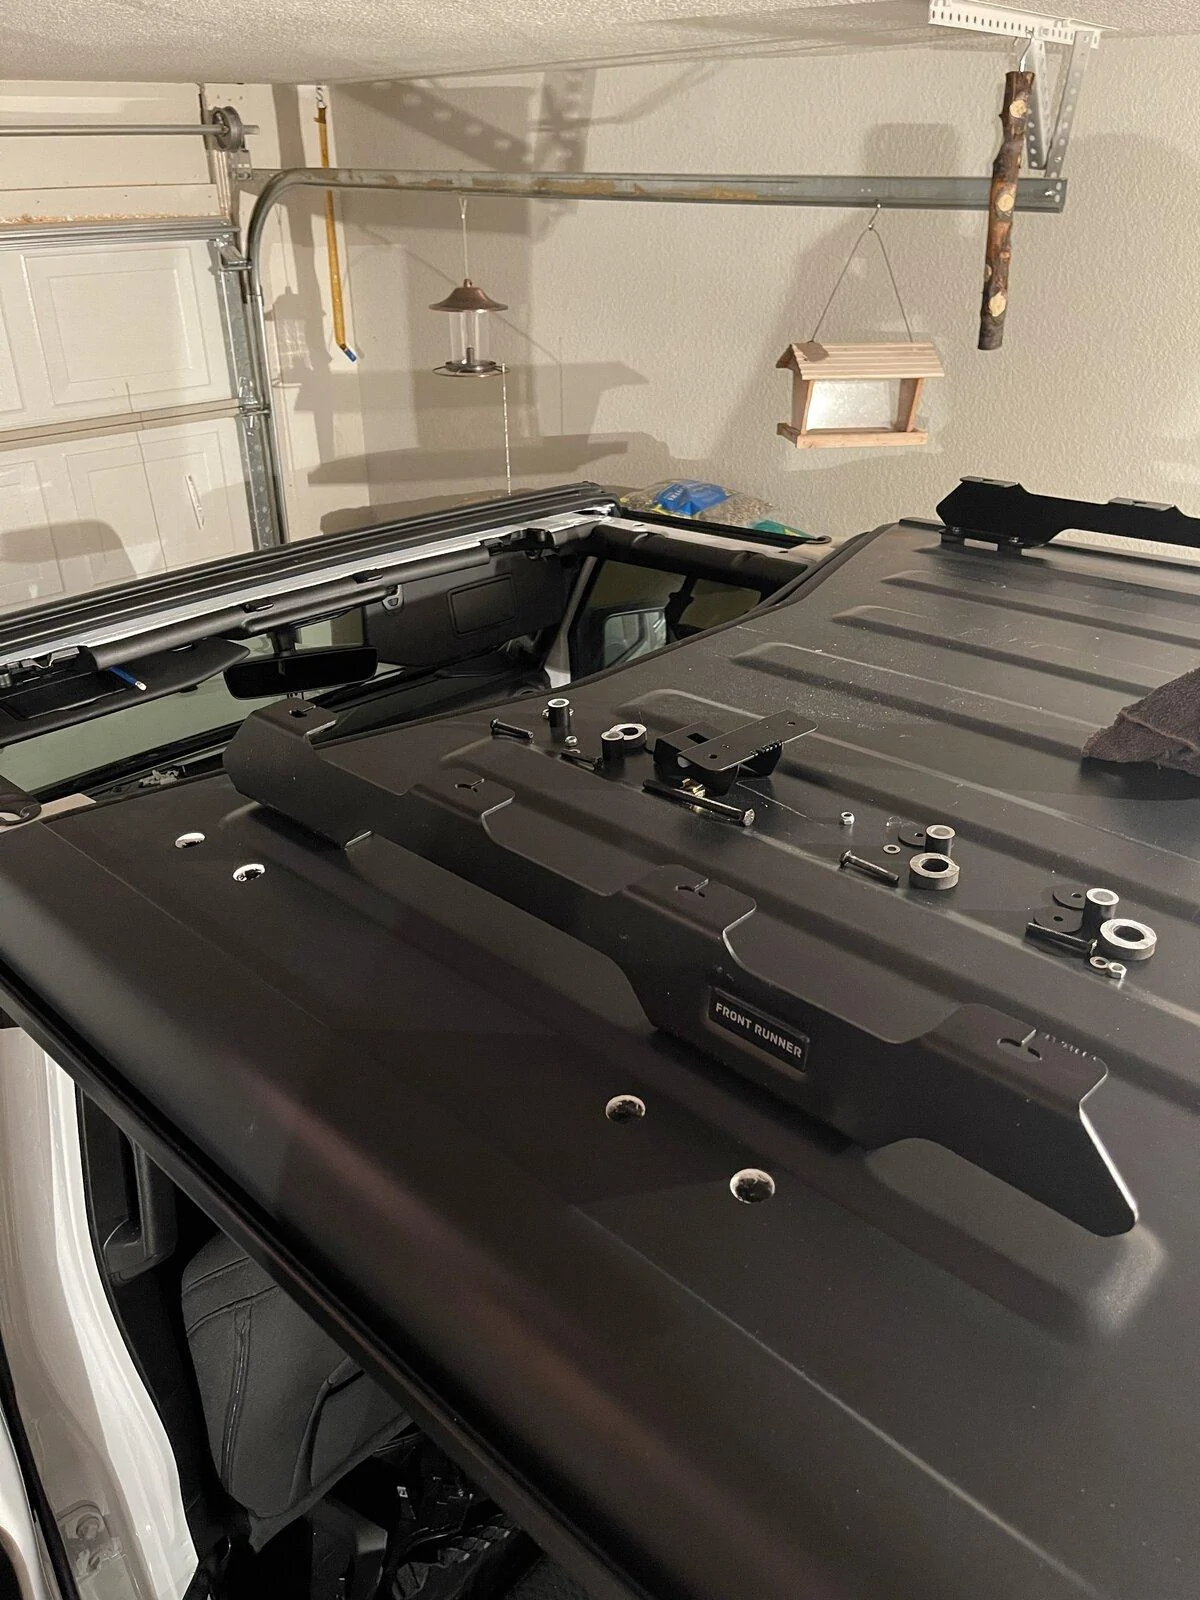
View of brackets I fabricated to secure ladder rack to Front Runner. Make sure bracket fasteners are flush. I used a grinder to grind down fastener heads used at wood. Brackets are not so much structural but used to keep ladder rack from shifting
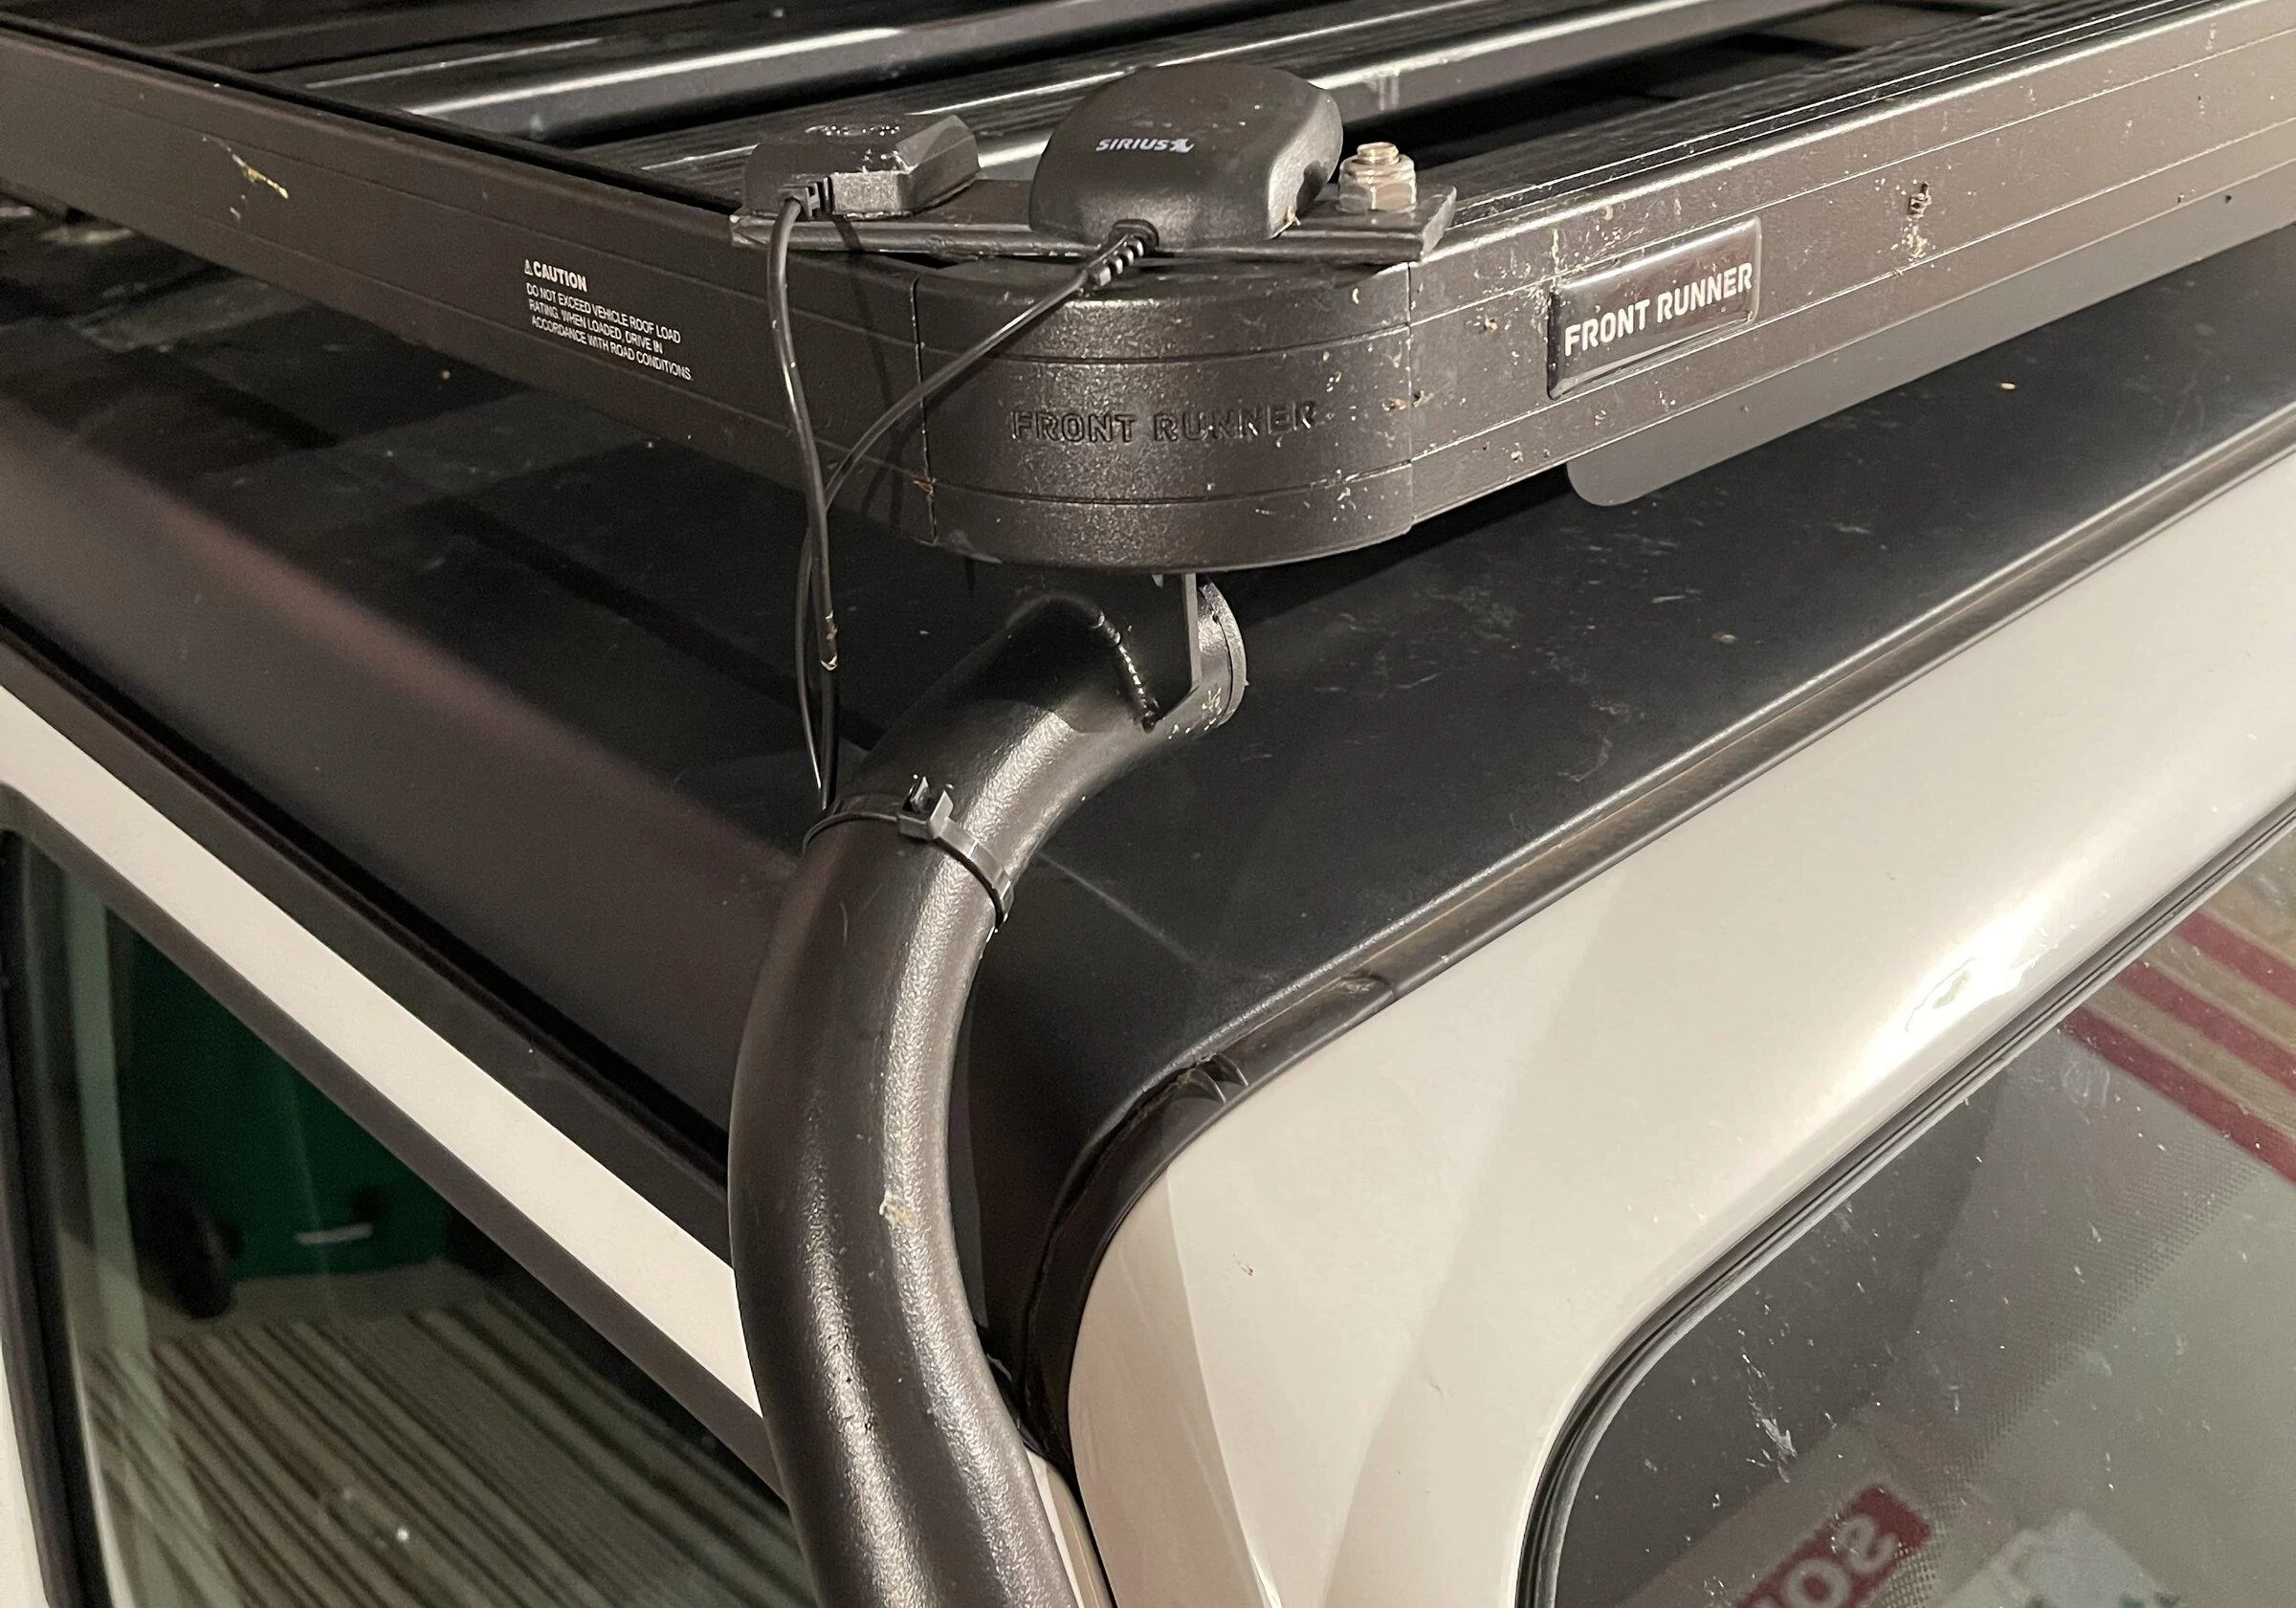
Profile view of Front Runner. There's 4 Front Runner badges on sides of rack. Badge adhesive is not that good and badges were crooked. I spread a thin layer of quik set JB Weld to better adhere badge to framing.
Smittybilt being stored in garage. There is a heavy duty rubberized covering that is placed over during road travel, I plan to place road cover over Smittybilt while in storage.
Layout ALL Front Runner fasteners, guessing, there's 50-100 bolts, washers, spacers, nuts, caps, etc. Know that 100 mm equals about 4", 20 mm equals about 3/4", and sort out exactly where they all go, find out what may be missing!
Both are engineered nicely for the gladiator, however, Front Runner and Smittybilt products are not completely compatible but I worked around! The slats on FR rack are too wide to accommodate Smittybilt flat bars that secure tent bottom rail to slats. I used a grinder to cut steel angles to 5” long pieces.
2 pieces of interior trim have to be removed from each side and speaker bolt removed to install carrier brackets to underside of rail beam
IMHO, Front Runner is quality. I was nervous when it came to drillin 4 - 13/16” holes in the top! But all aligned properly! Install back brackets first, temporary secure in place, then align front bracket to carrier, and drill. I drilled 13/16”holes and dia matched bushing/spacer dia. The first roof bracket took 3 hours to install just because of triple checking everything and not wanting to make any mistakes prior to drilling holes. Other roof bracket took 30 min to install, learning curve! Front brackets were tricky to install. Remove front two roof panels. There’s bout 1” high spacing to secure nuts on bottom side of rail beam. Bracket bolts were bout 7” back. I used a 4 prong claw to hold nut back to bottom of mounting screw to start threading. An open end wrench was long enough to tighten.
I designed a ladder ramp to slide Smittybilt up and onto top. I’m 65, effort was easy breezing considering contraption weighs just over 100 lbs. Bringing Smittybilt down, no problem.
I slept in tent that night. Nice foam pad, pockets to stow bottle waters or whatever.
I store Smittybilt on a roller dolly in garage, roller dolly works well moving RTT back and forth.
Trim came off fairly easy. Don't force off, take your time wiggle & jiggle.
Drill and temporary secure back bracket first, then position front bracket and drill.
Smittybilt strap (center) wasn't long enough to extend beyond width of Front Runner carrier slats, I used a grinder to cut angle iron down making a longer strap.
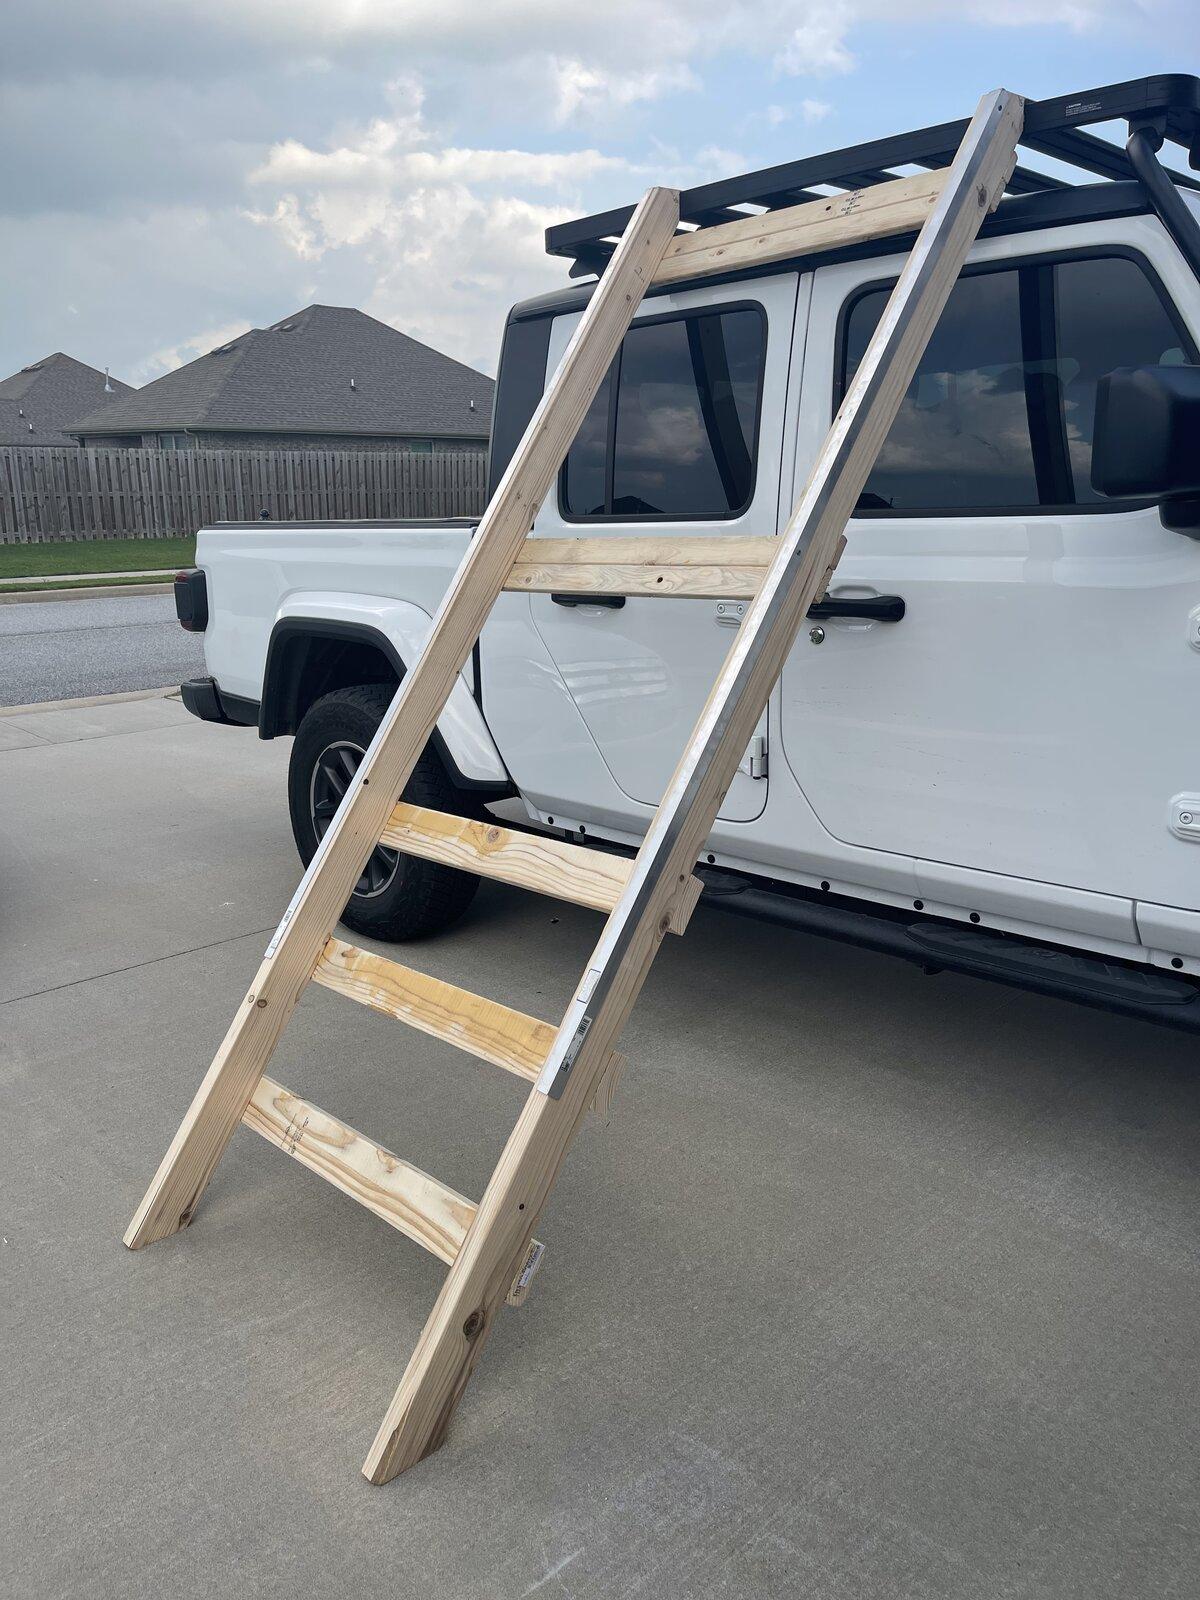
Bottom three rungs of ladder ramp supported my 180 lb body just fine as I slid Smittybilt to top.
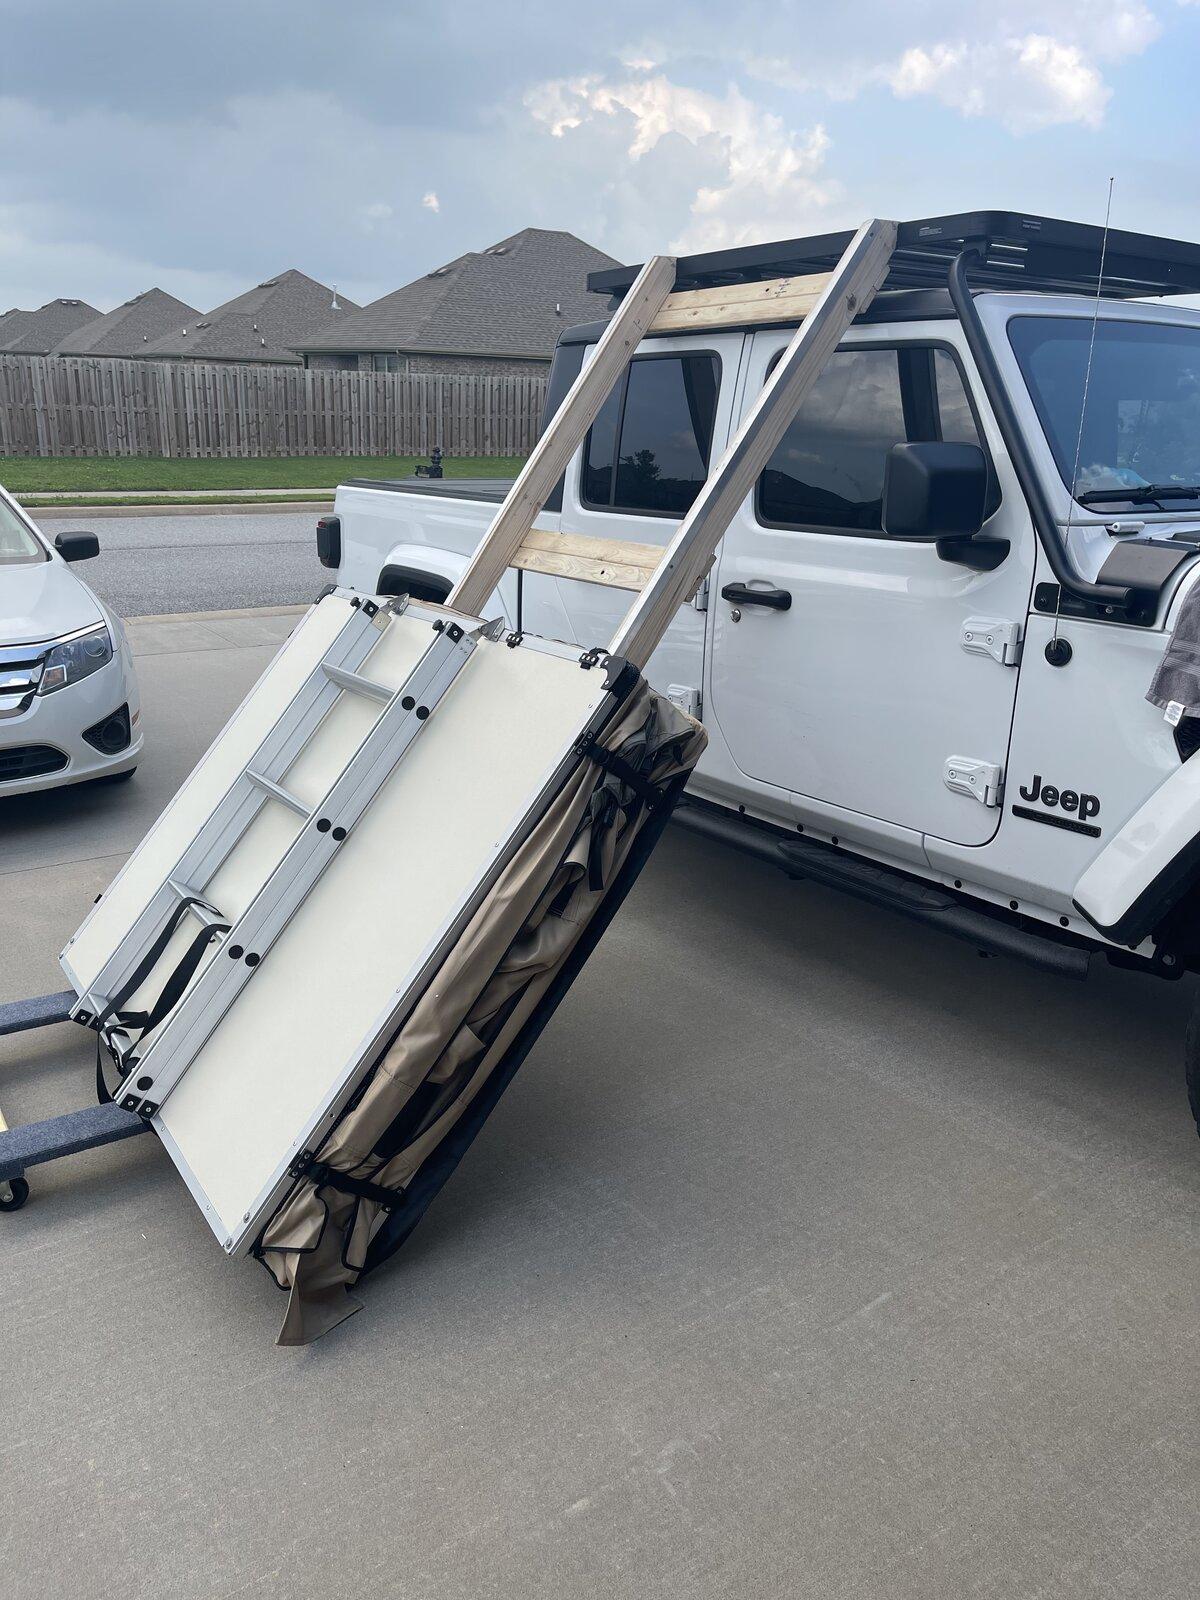
I move Smittybilt to ladder ramp to from garage on a roller dolly.
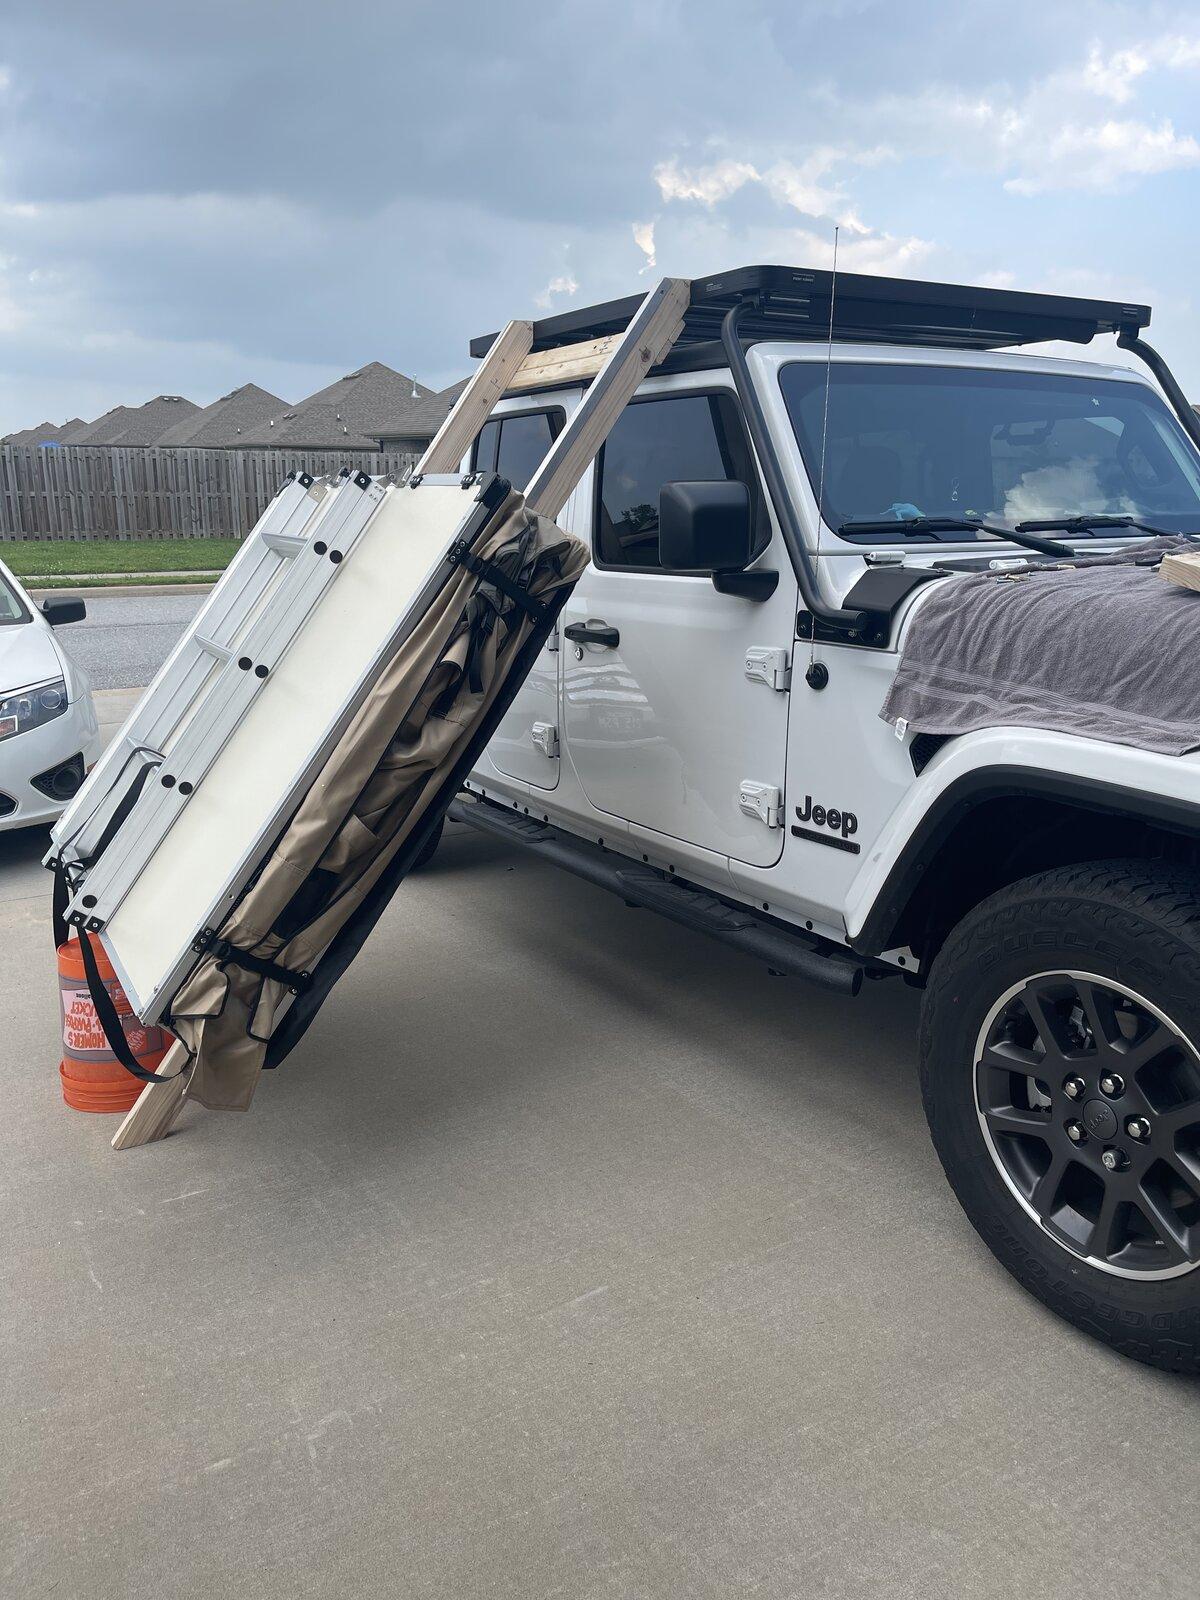
At 65 years young, I had no problem pushing Smittybilt to top. Course I've kept a workout regiment for the last 40 years!
I plan to keep a 4 foot step ladder in jeep for Smittybilt placement. Prior to bringing Smittybilt down, extension ladder is handy to secure straping that secures folded Smittybilt in place. Extension ladder is also handy to install steel rods on each side of tent that stretch out fly and opening coverings.
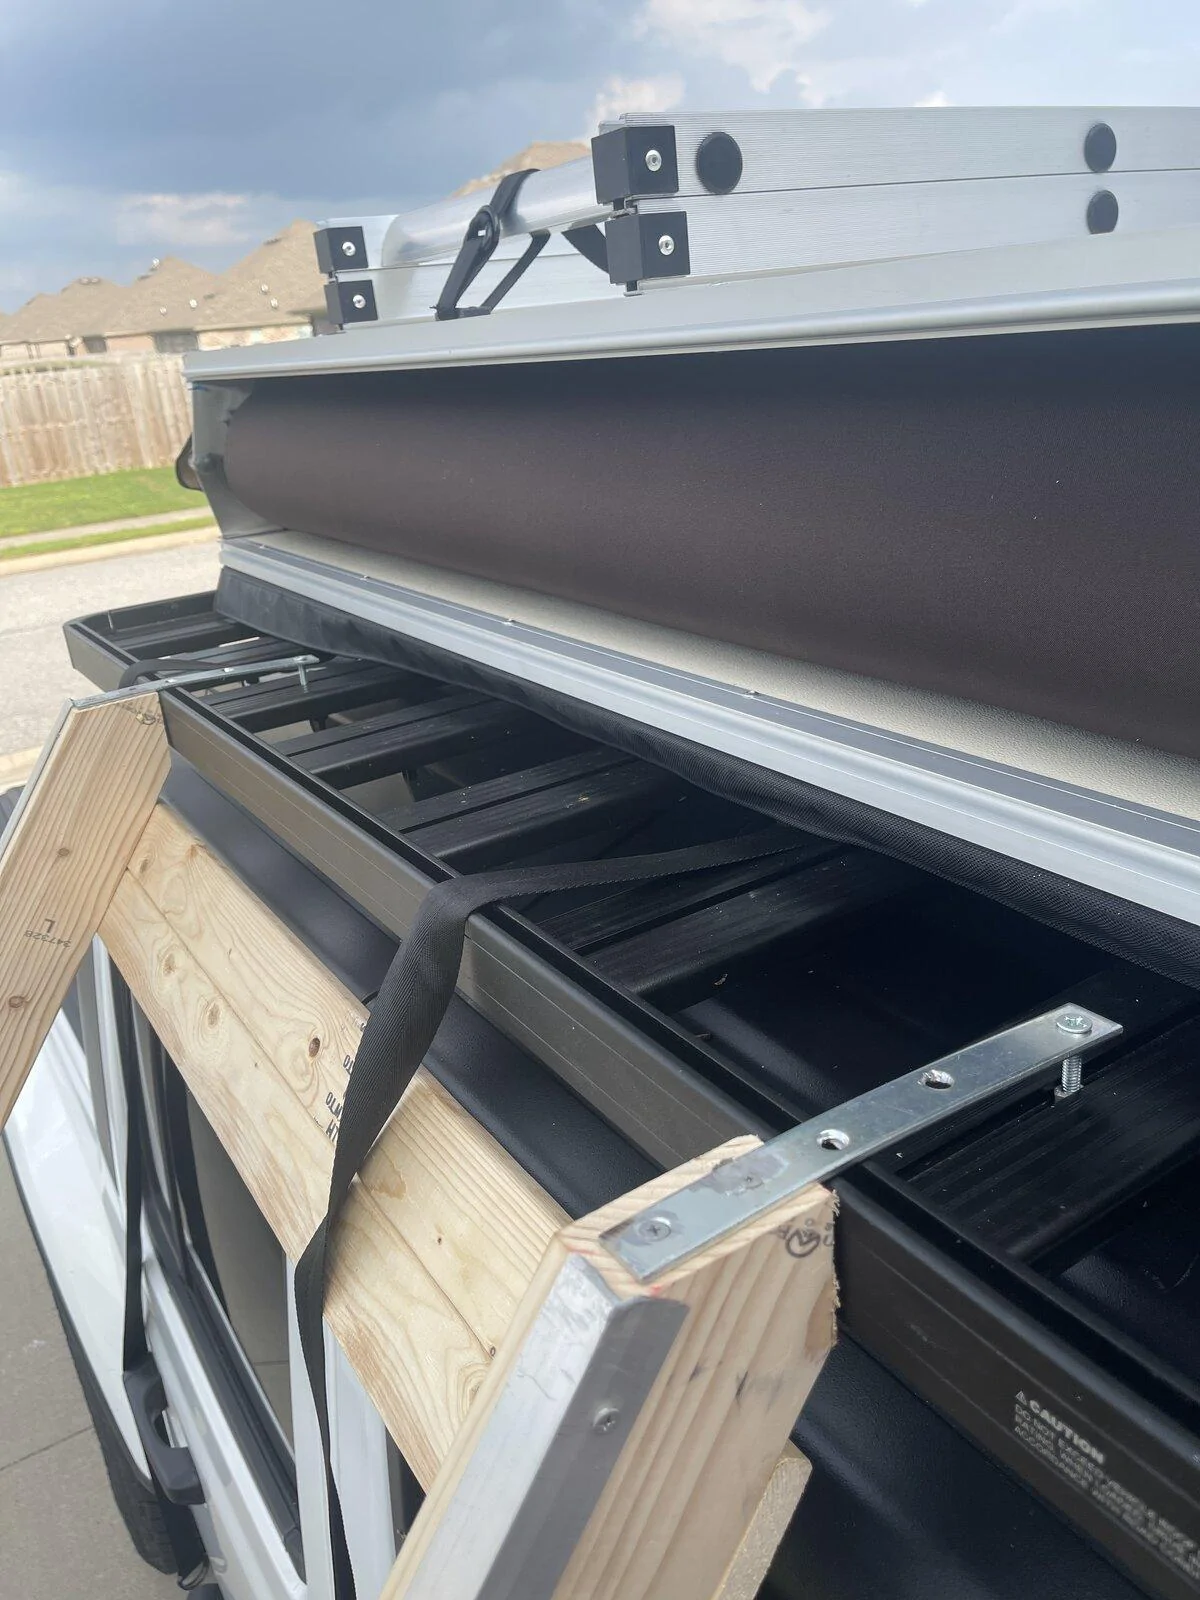
View of brackets I fabricated to secure ladder rack to Front Runner. Make sure bracket fasteners are flush. I used a grinder to grind down fastener heads used at wood. Brackets are not so much structural but used to keep ladder rack from shifting
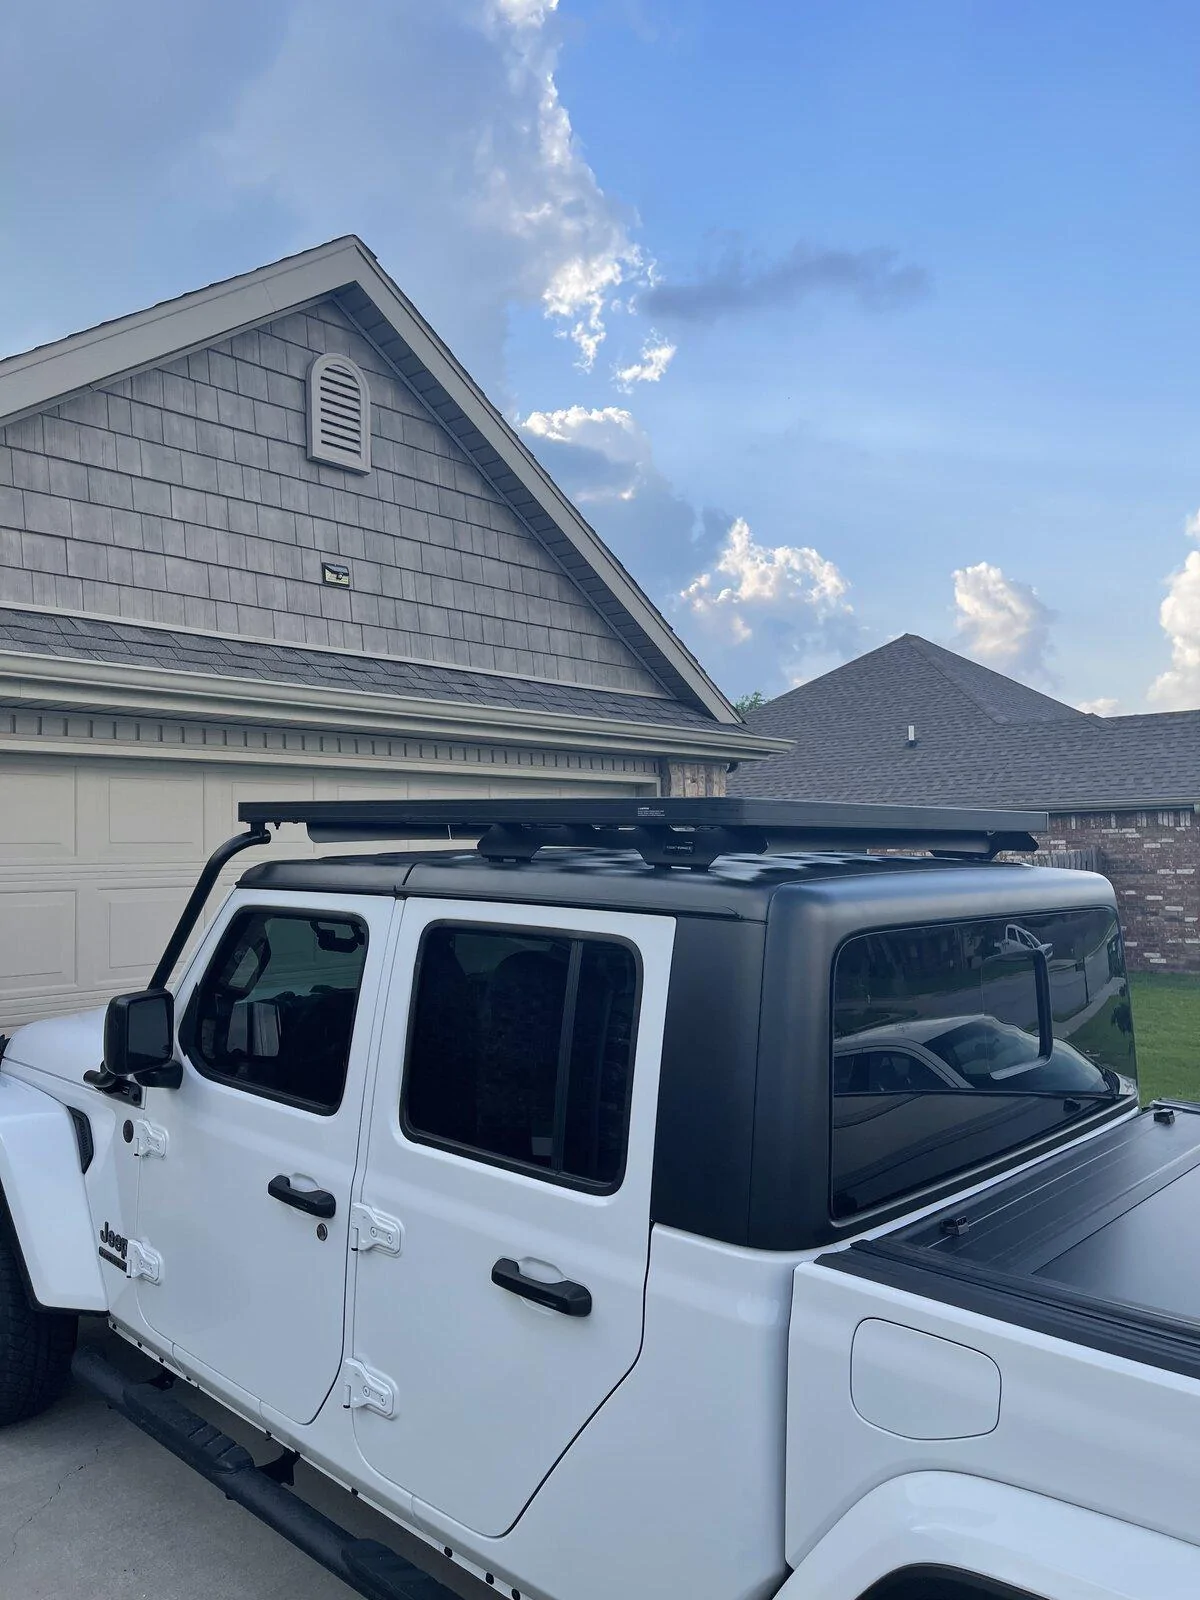
Profile view of Front Runner. There's 4 Front Runner badges on sides of rack. Badge adhesive is not that good and badges were crooked. I spread a thin layer of quik set JB Weld to better adhere badge to framing.

Smittybilt being stored in garage. There is a heavy duty rubberized covering that is placed over during road travel, I plan to place road cover over Smittybilt while in storage.
Sponsored
Attachments
-
1,020.1 KB Views: 183
Last edited: