ChrisNLA
Well-Known Member
- Thread starter
- #1
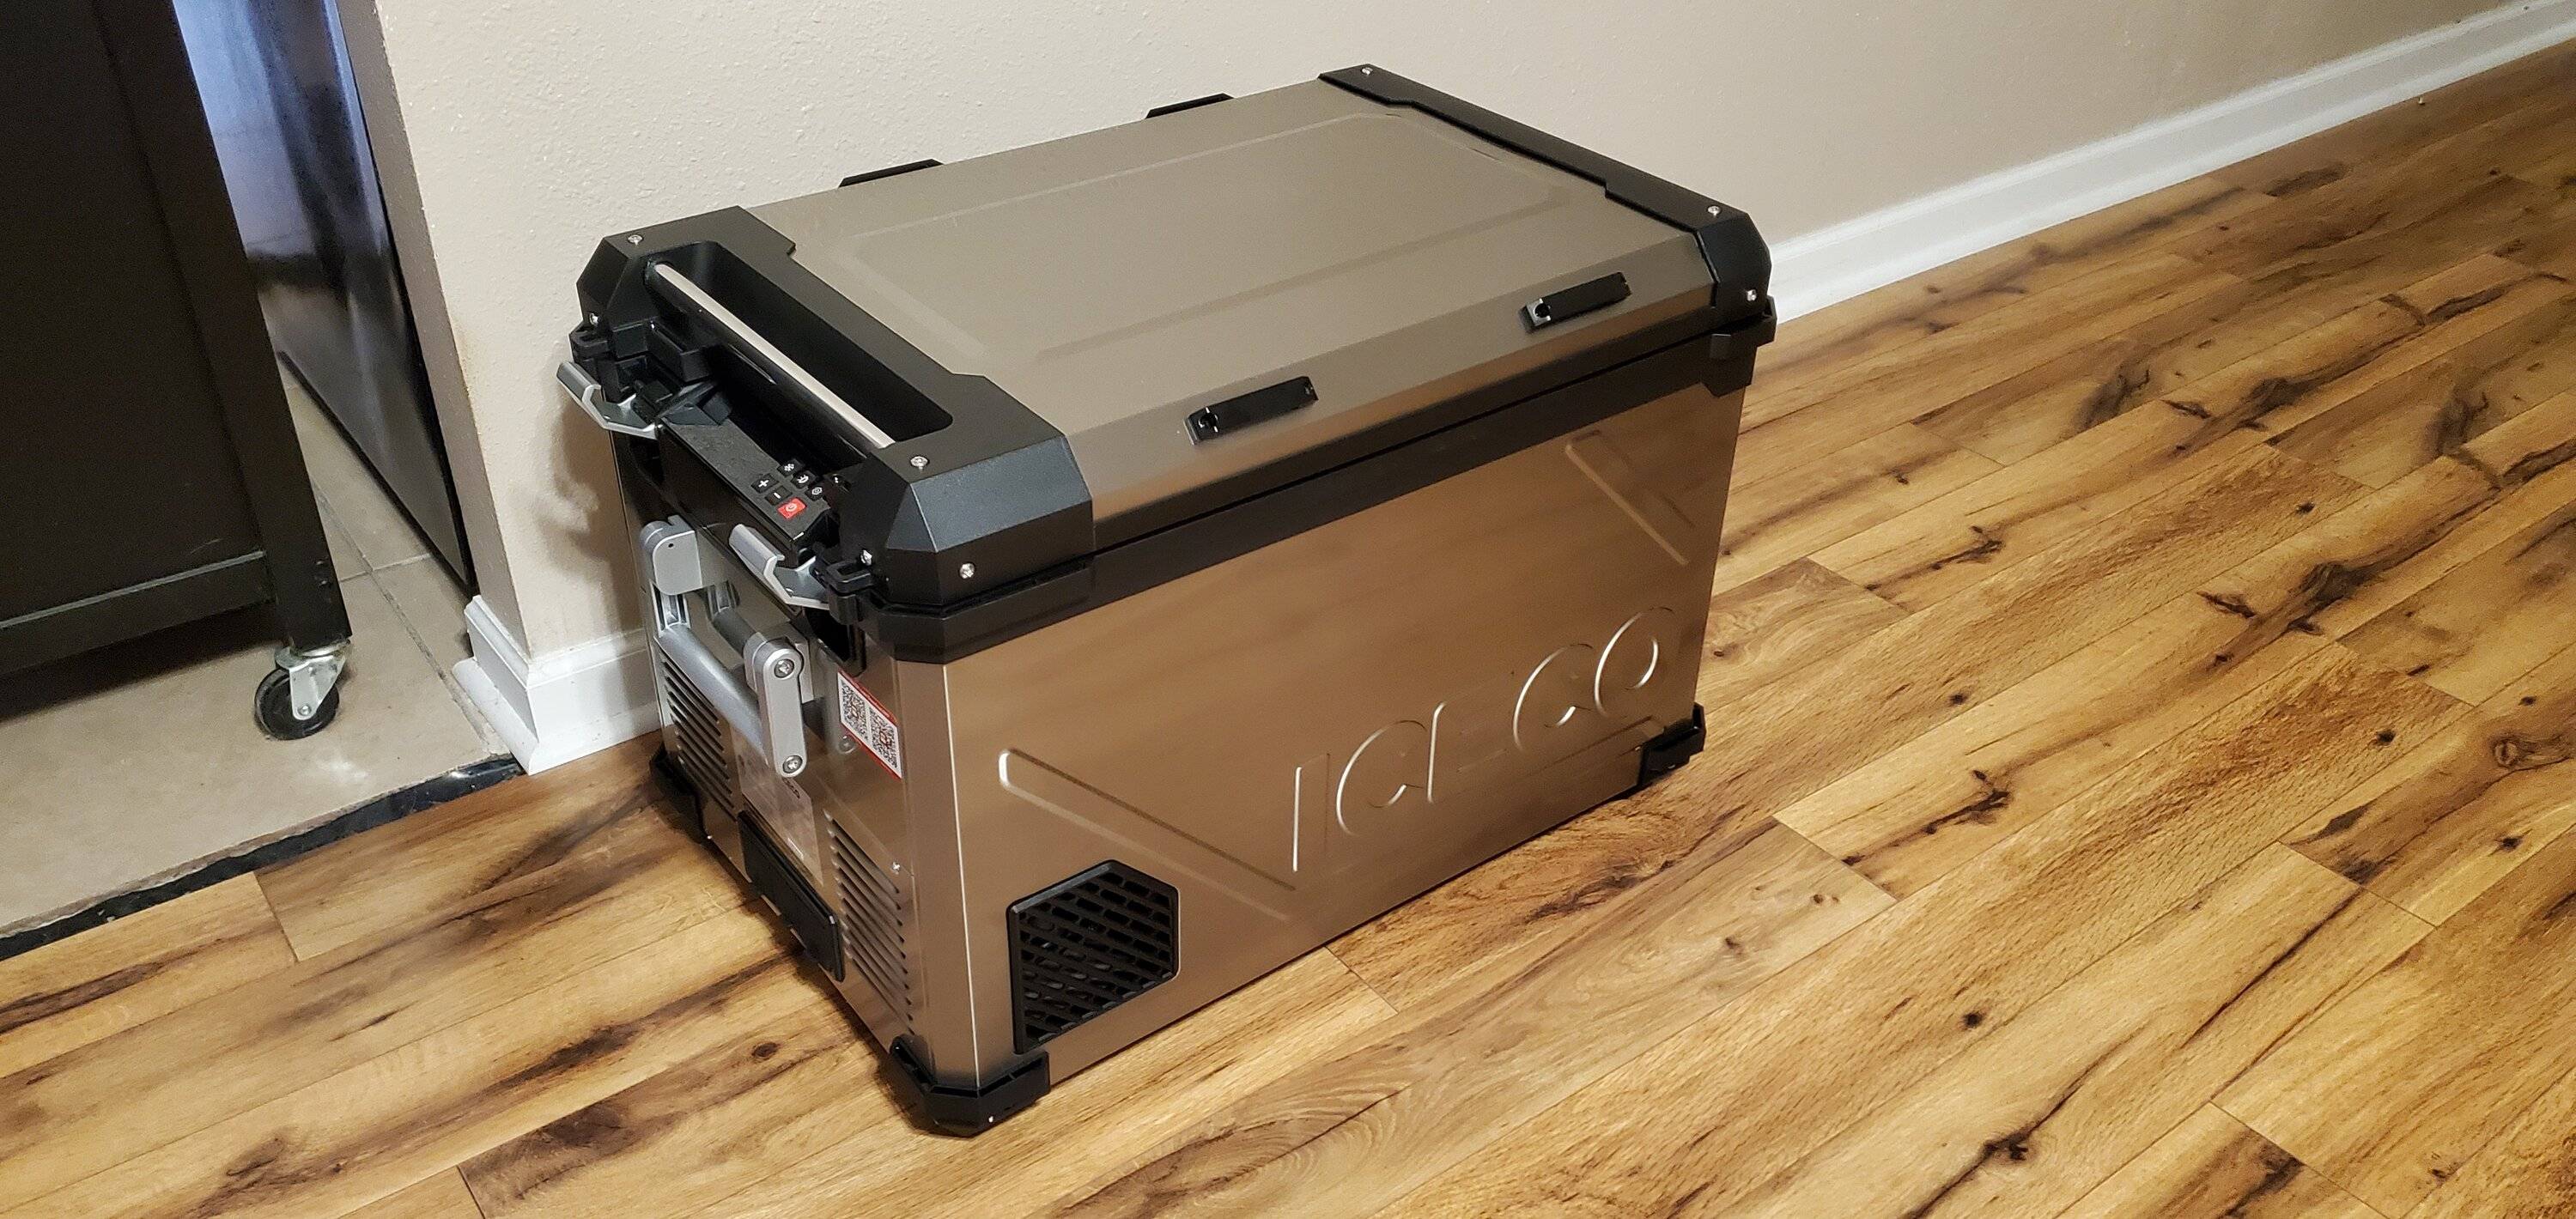
So, my new Iceco APL55 finally arrived. I ordered the most recent silver (plain stainless) version on a pre-sale before it was available to ship.

My plan was to install it in the bed of my truck in a manner that would:
- Allow me to fully remove it with no obstructions remaining in the bed
- Cause minimal modifications to the truck bed
- Allow me to add additional electrical modifications to the truck with (maybe) relative ease.
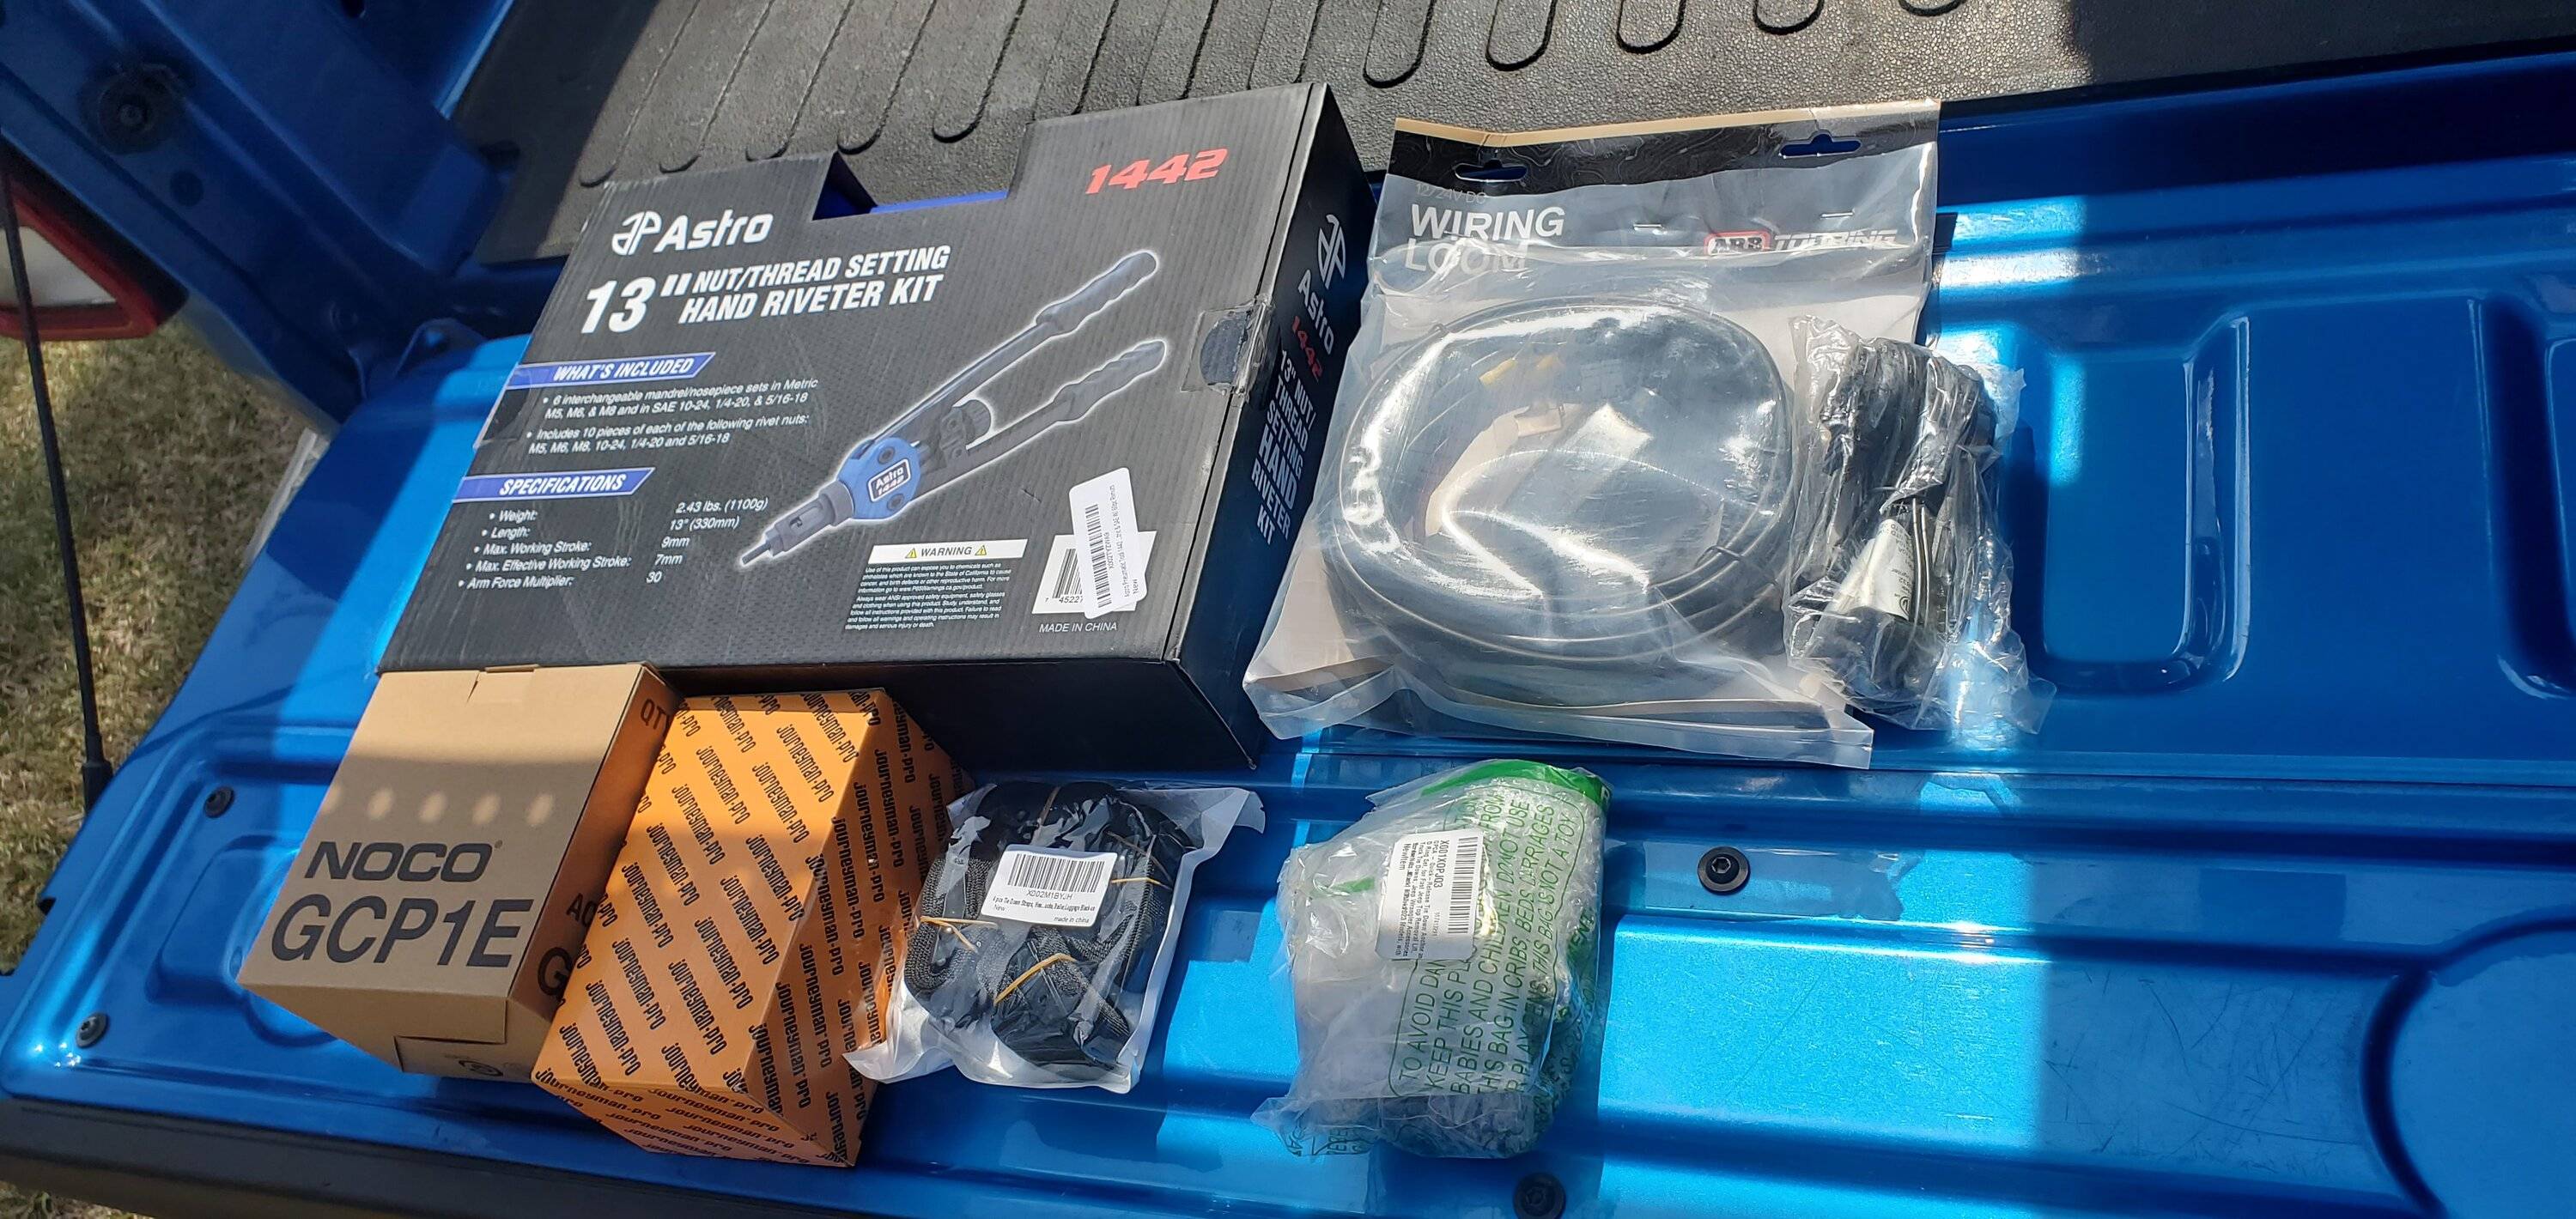
Here is my pile of stuff:
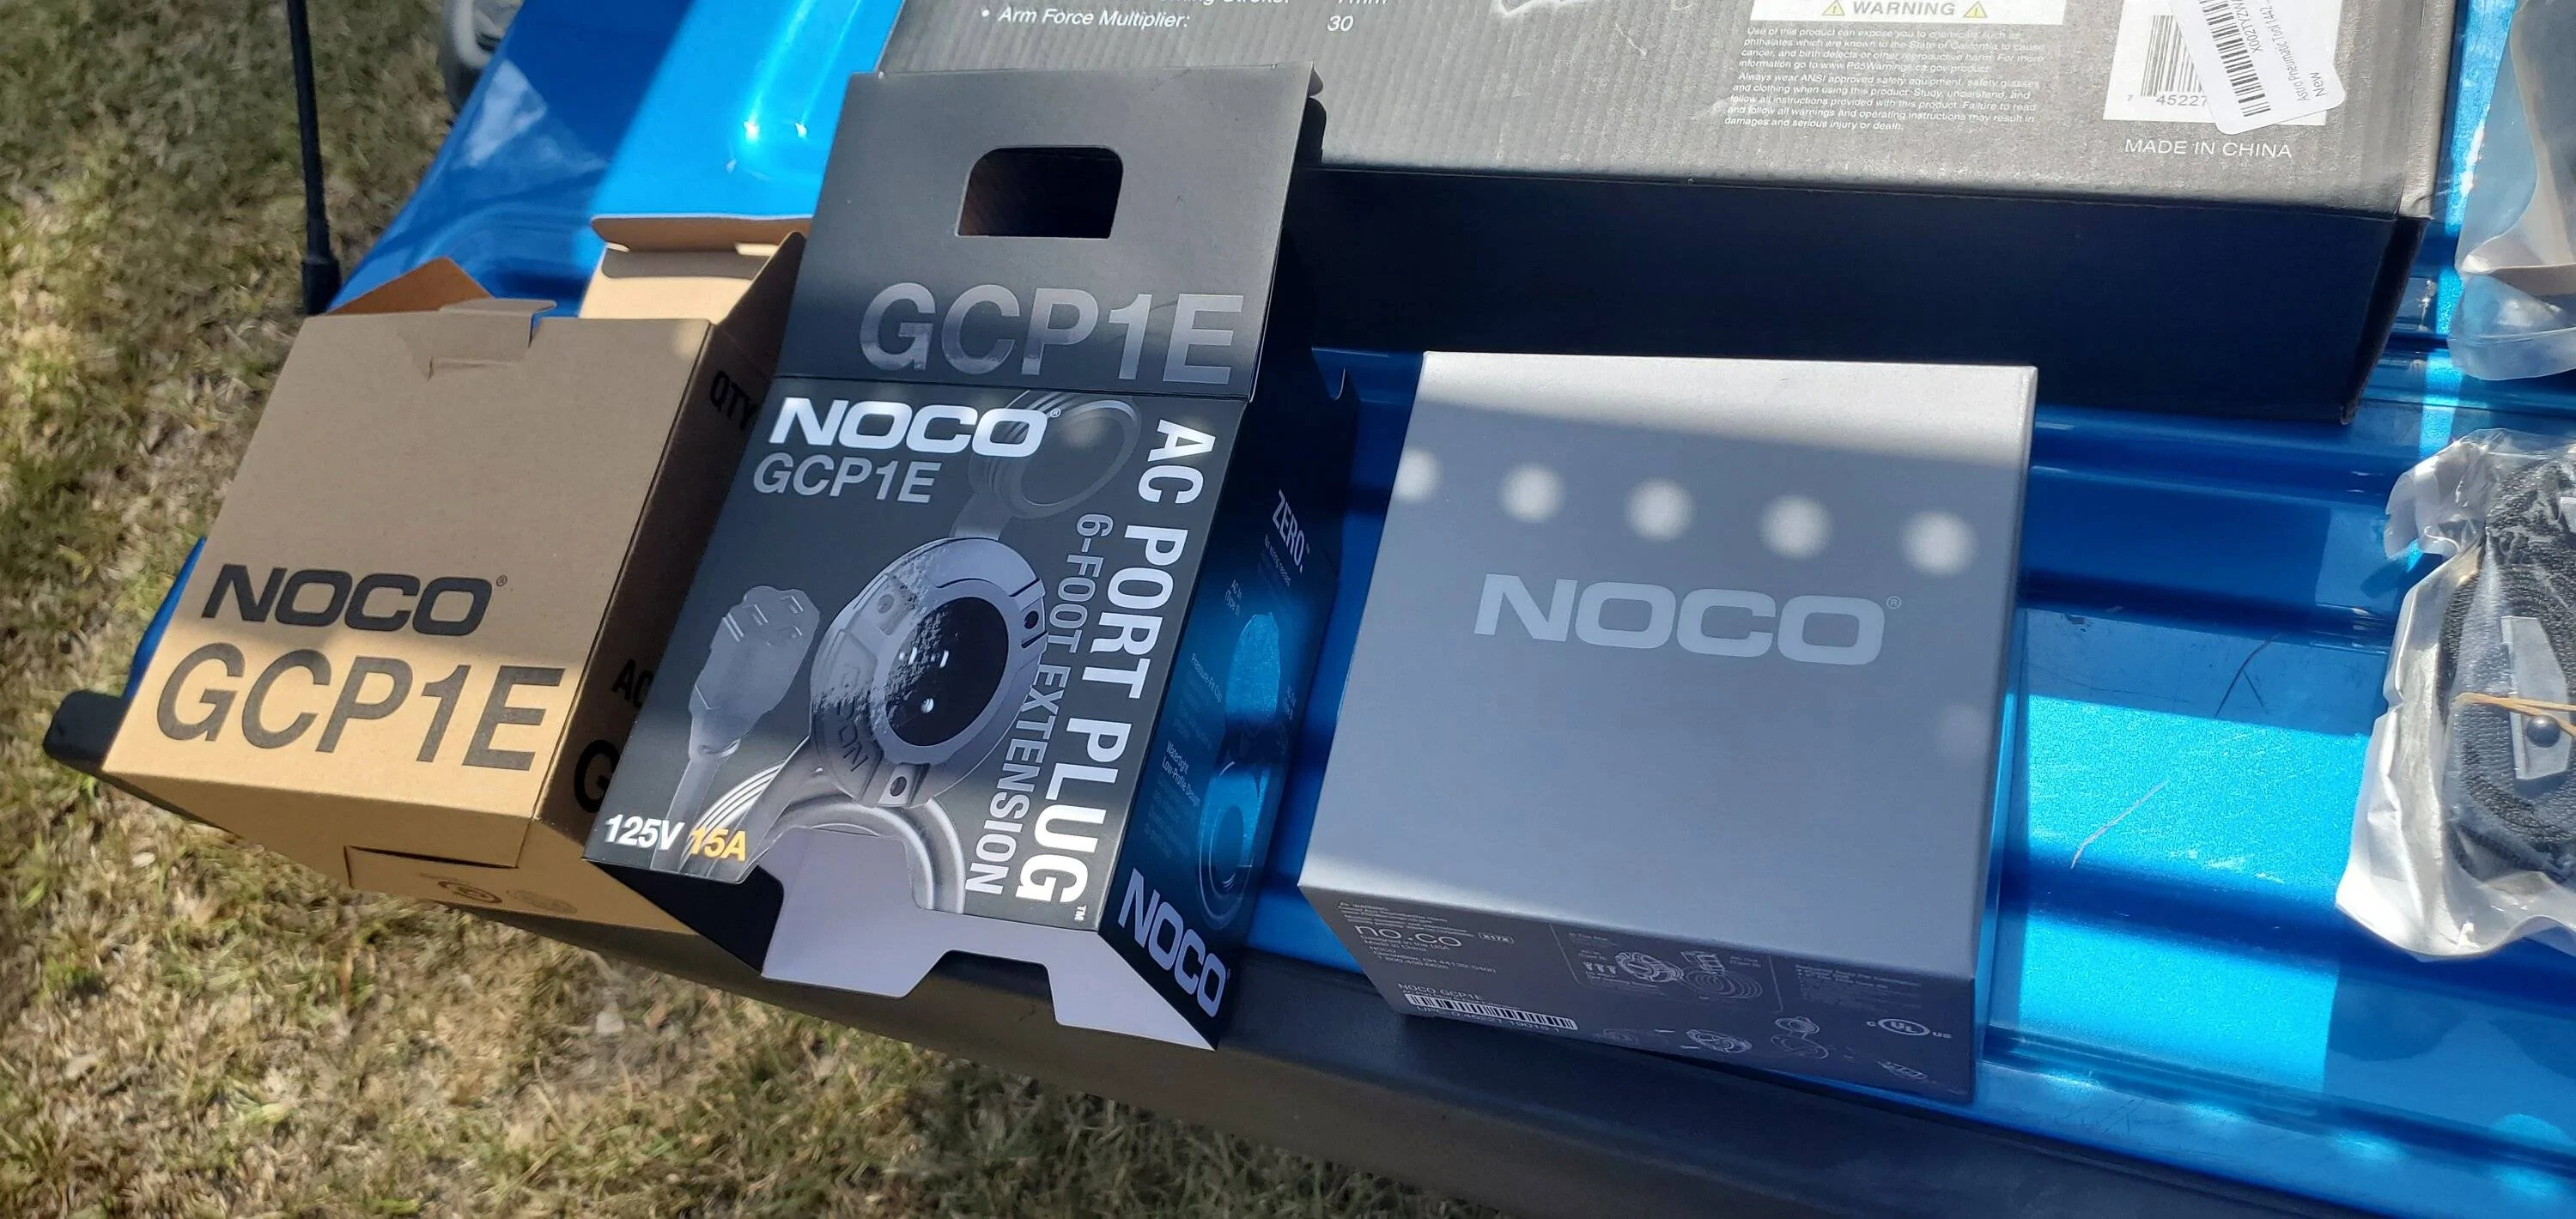
- A Noco 15A/120V shore inlet
- A 15A/120V single outlet
- An ARB fridge wiring kit
- An ARB fridge cord
- Cam buckle straps
- D rings
- T handle knobs
- Nut cert tool
Not sure why it was necessary to pack the inlet like a nesting doll, lol.
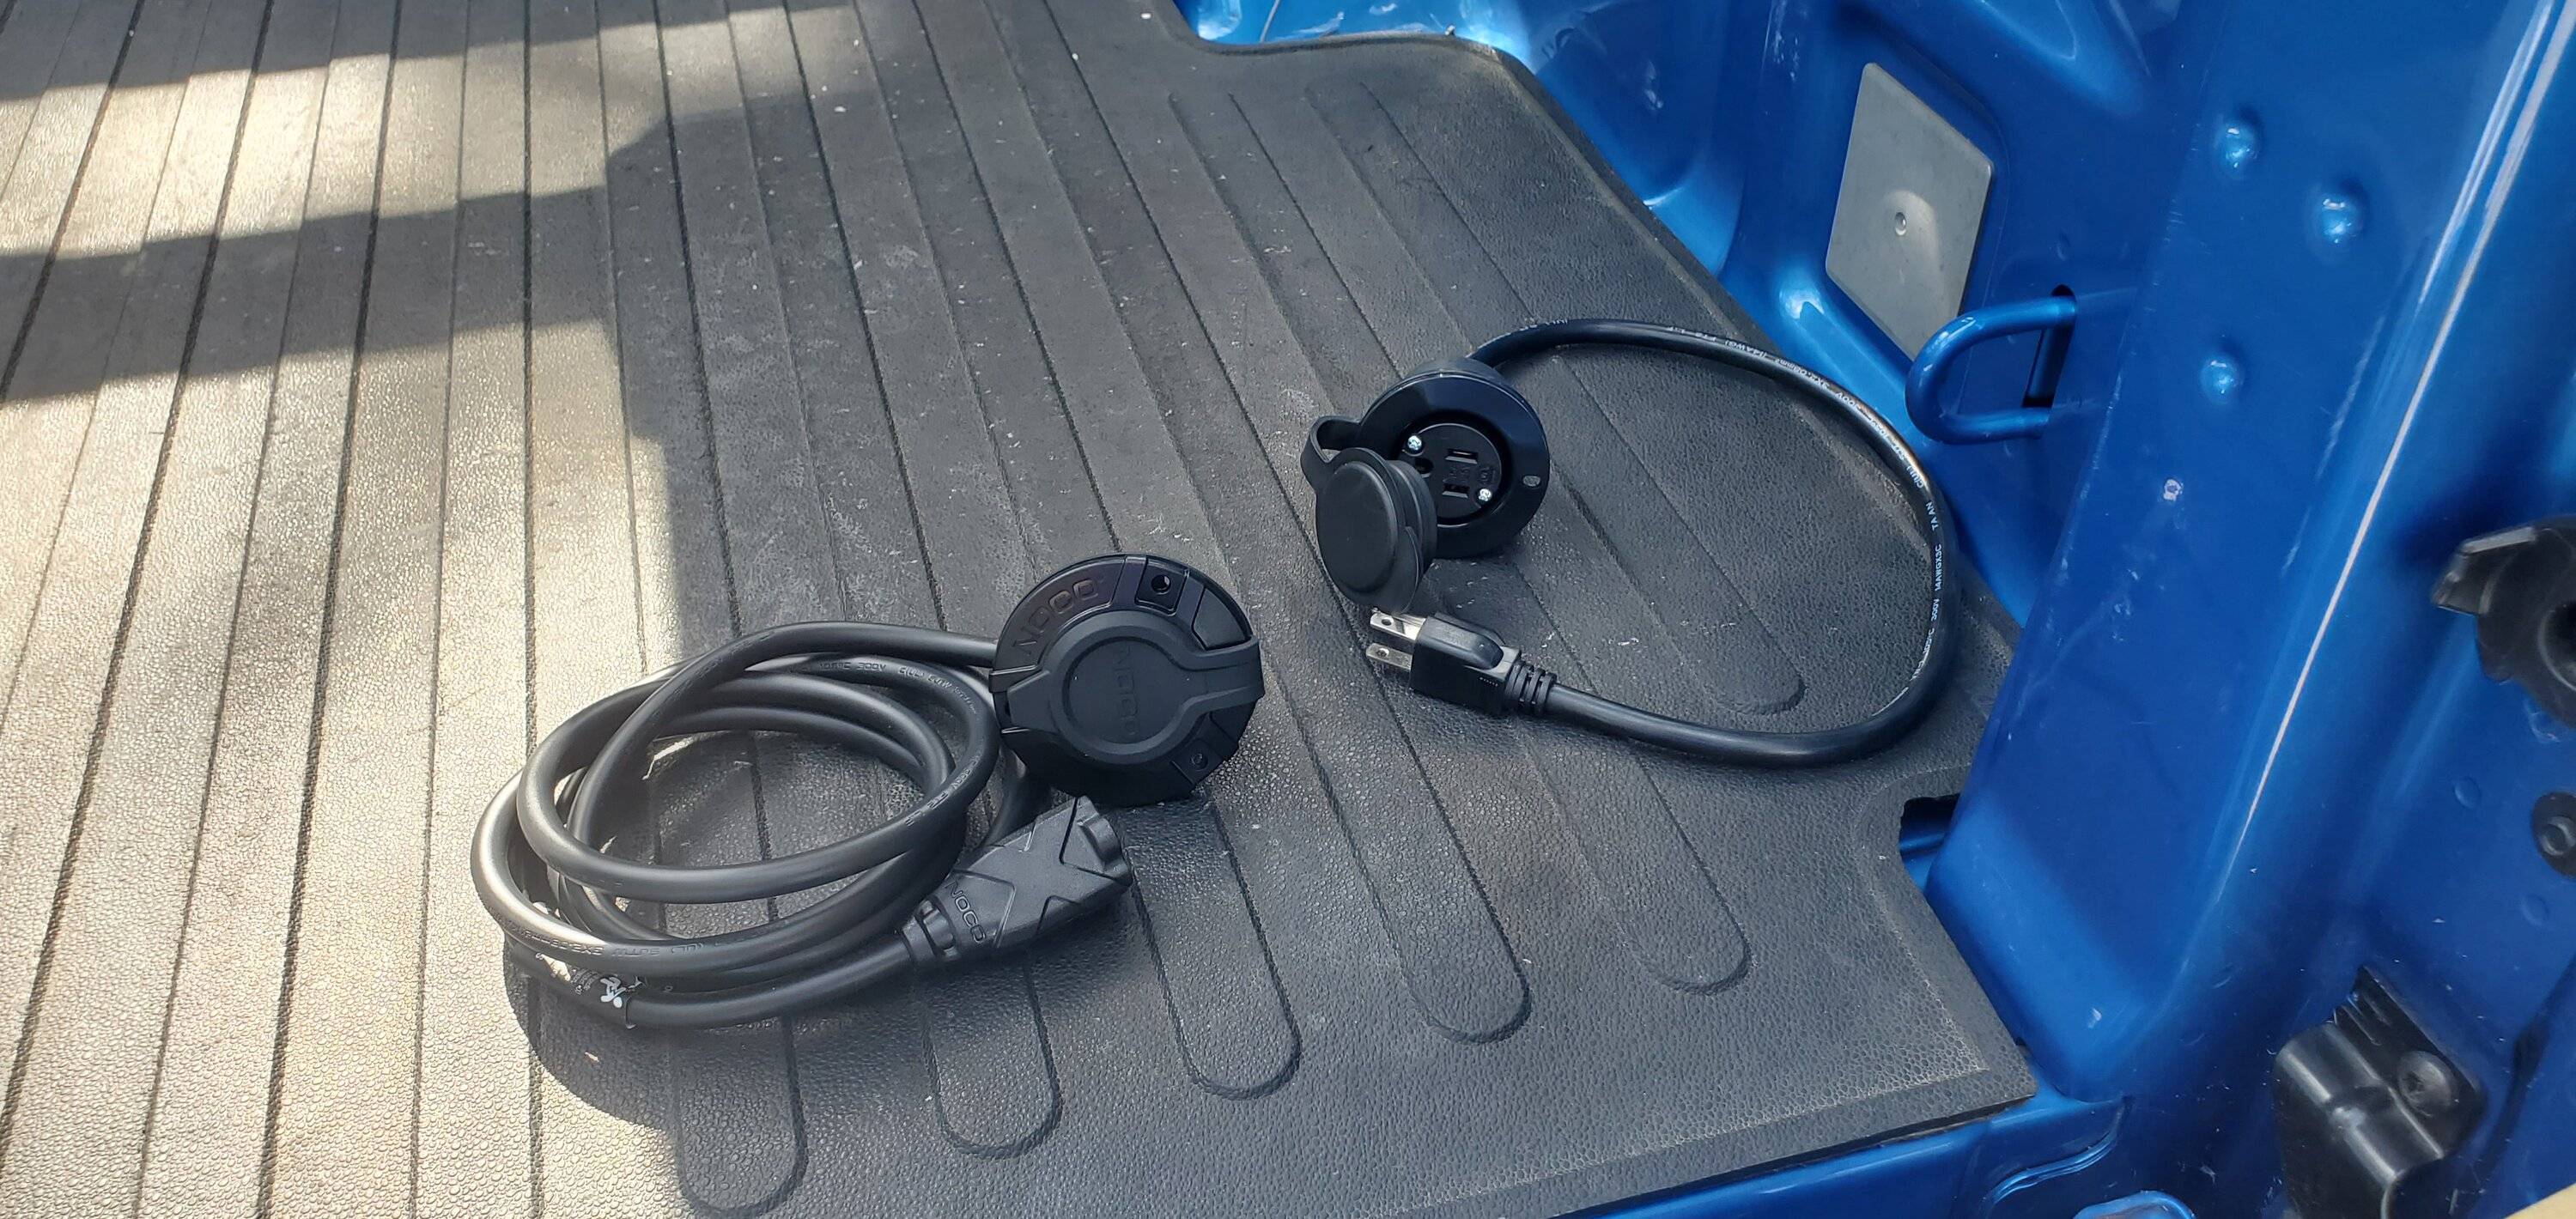
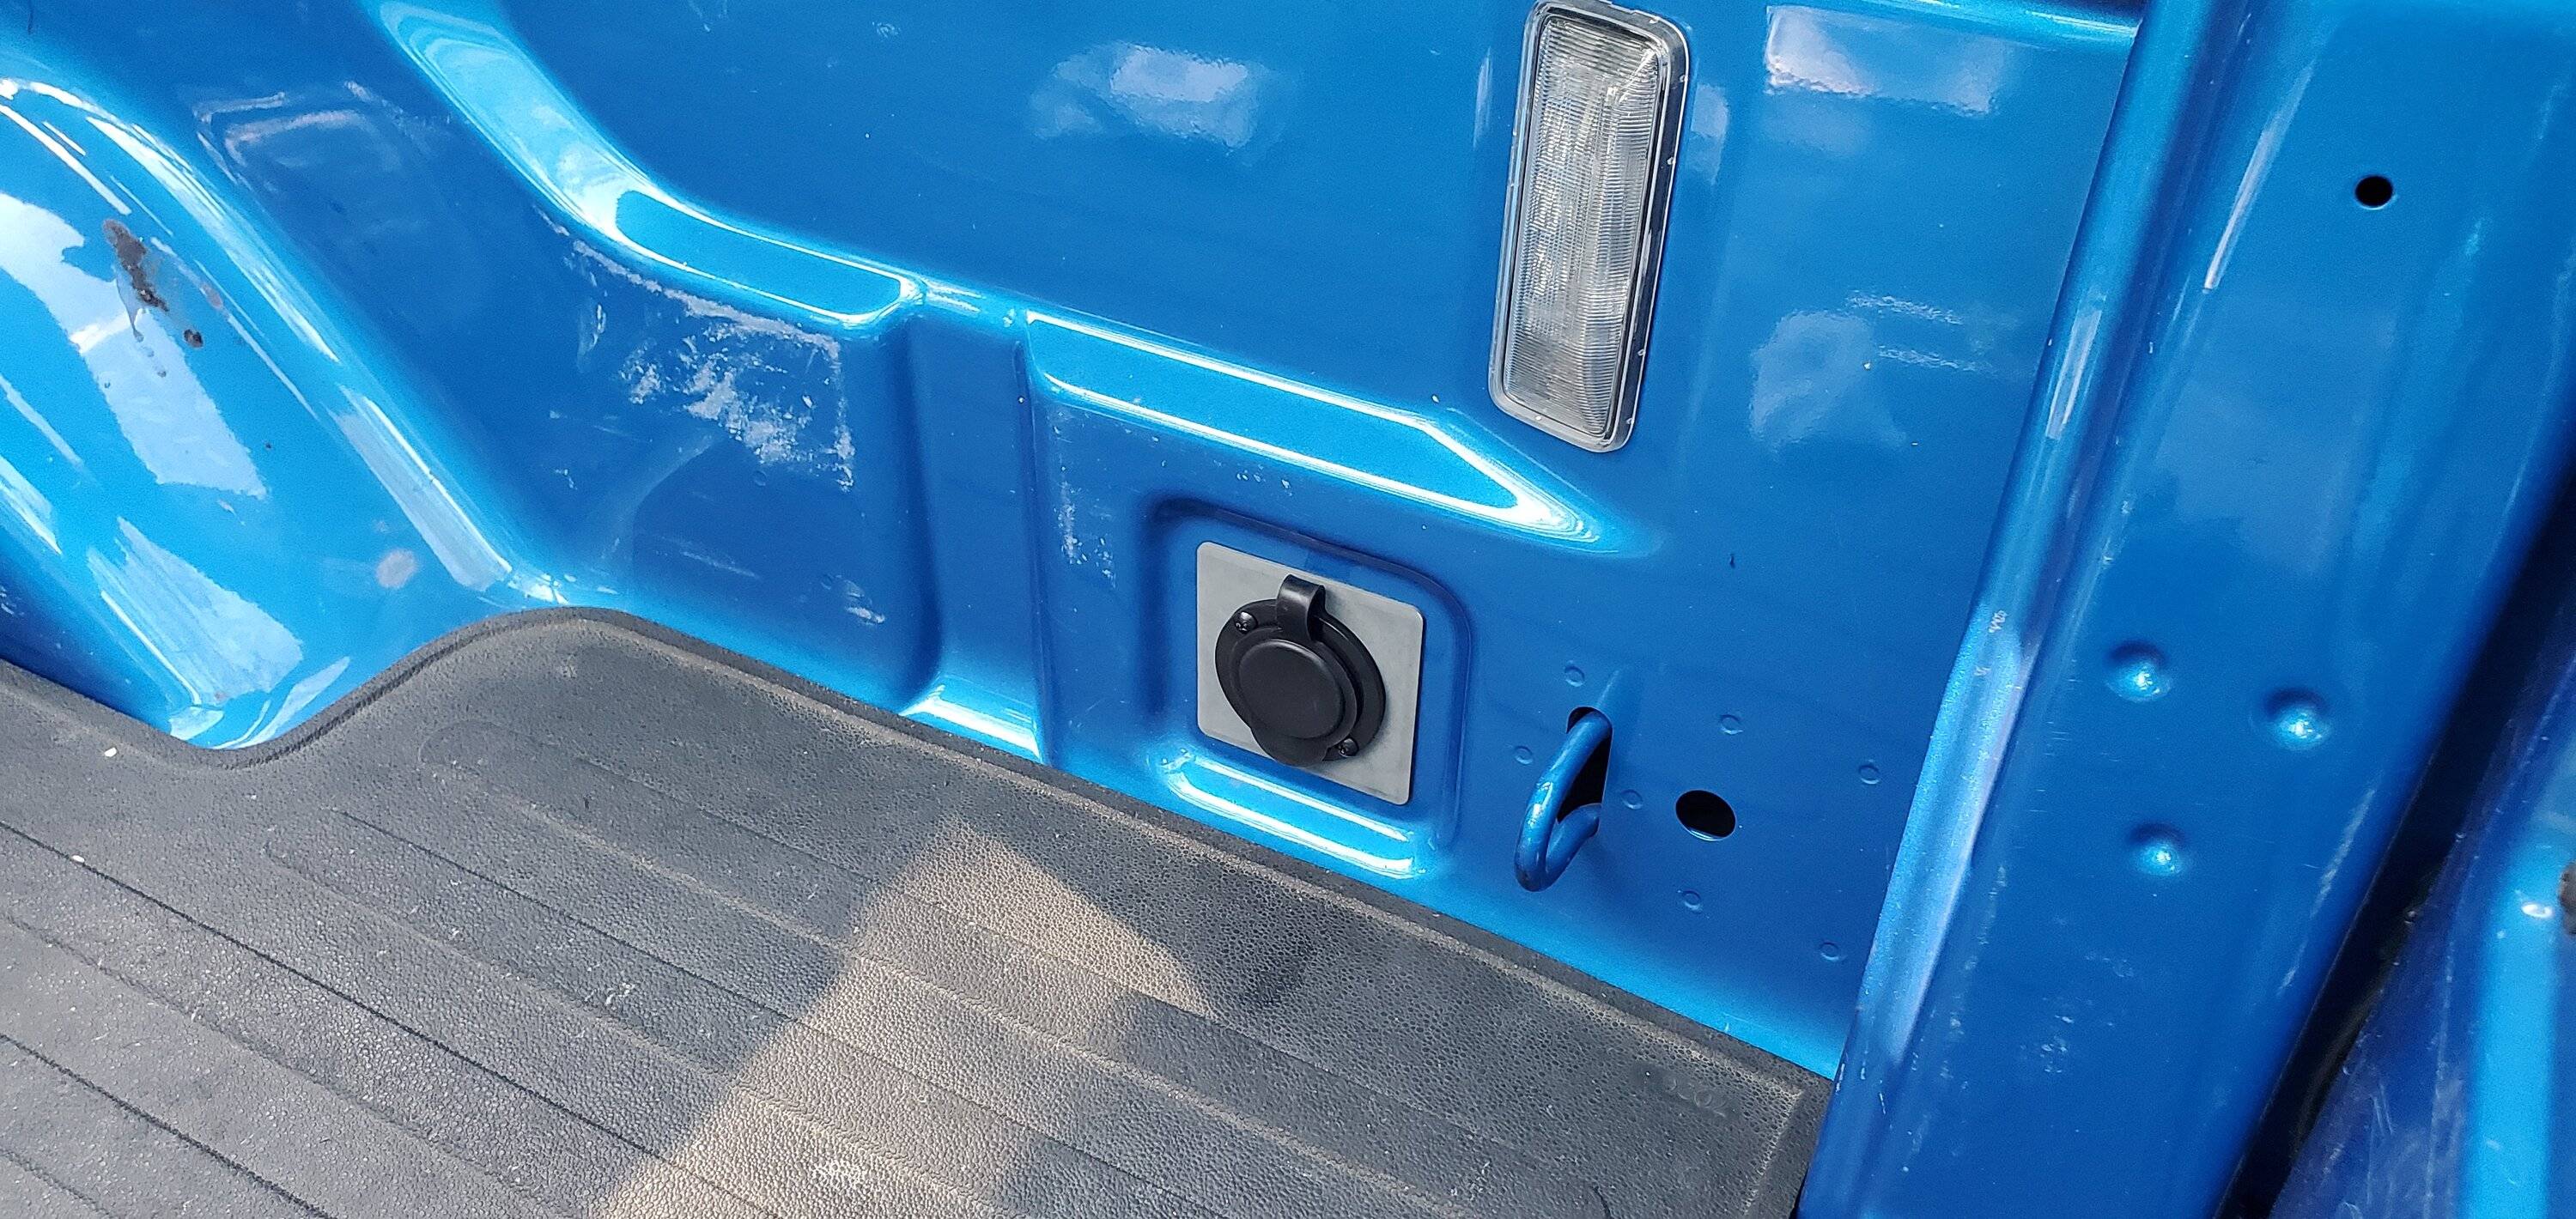
The inlet is going to go in my rear bumper. The outlet is going to go in the filler panel in the bed since my truck does not have the factory 120V outlet. This will allow me to plug the fridge 120V cord into the bed outlet, that leads to the bumper mounted inlet. This gives me a no fuss way to allow the fridge to run off my house when the truck is parked at home - not wear on my battery. The fridge defaults to 120V when both it and 12V are connected at the same time.
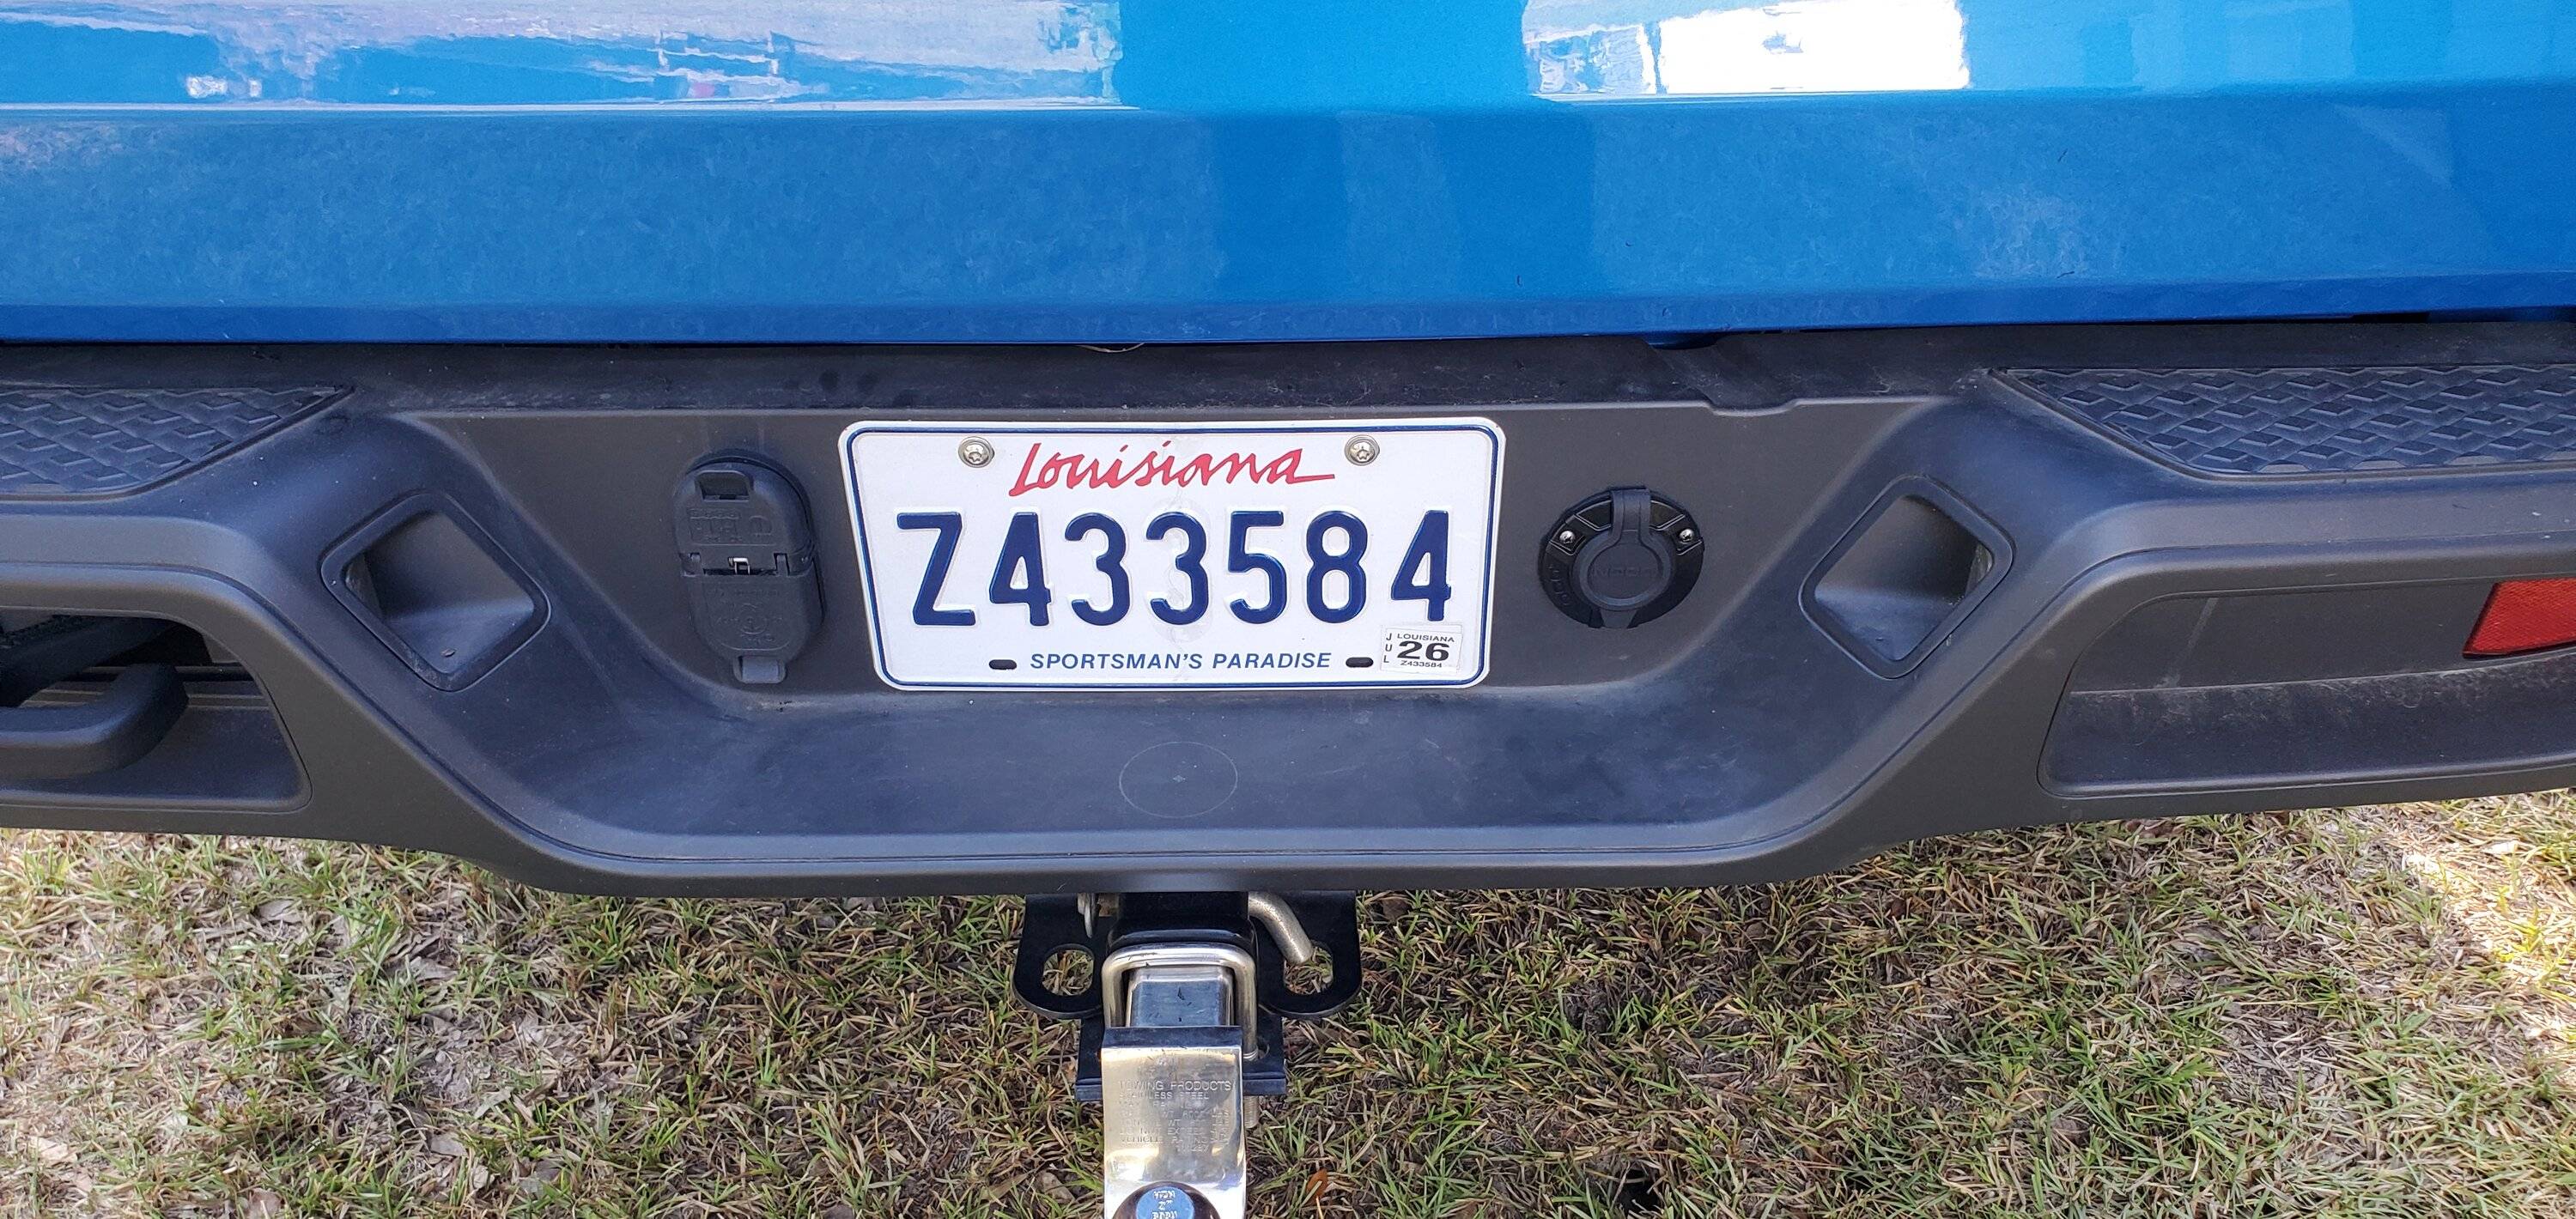
I used a basic hole saw set from Harbor Freight (bought is several years ago) to drill the hole in the plastic filler panel as well as in the bumper. On a Sport the rear bumper is solid plastic in this area (to the right of license plate). Be careful not to drill through the license plate light wires. They are directly behind here.
I plan on using this shoreline arrangement later on to have a trickle charger on board the truck if I'm only running the existing batteries, or to add a larger charger if I add a house battery.
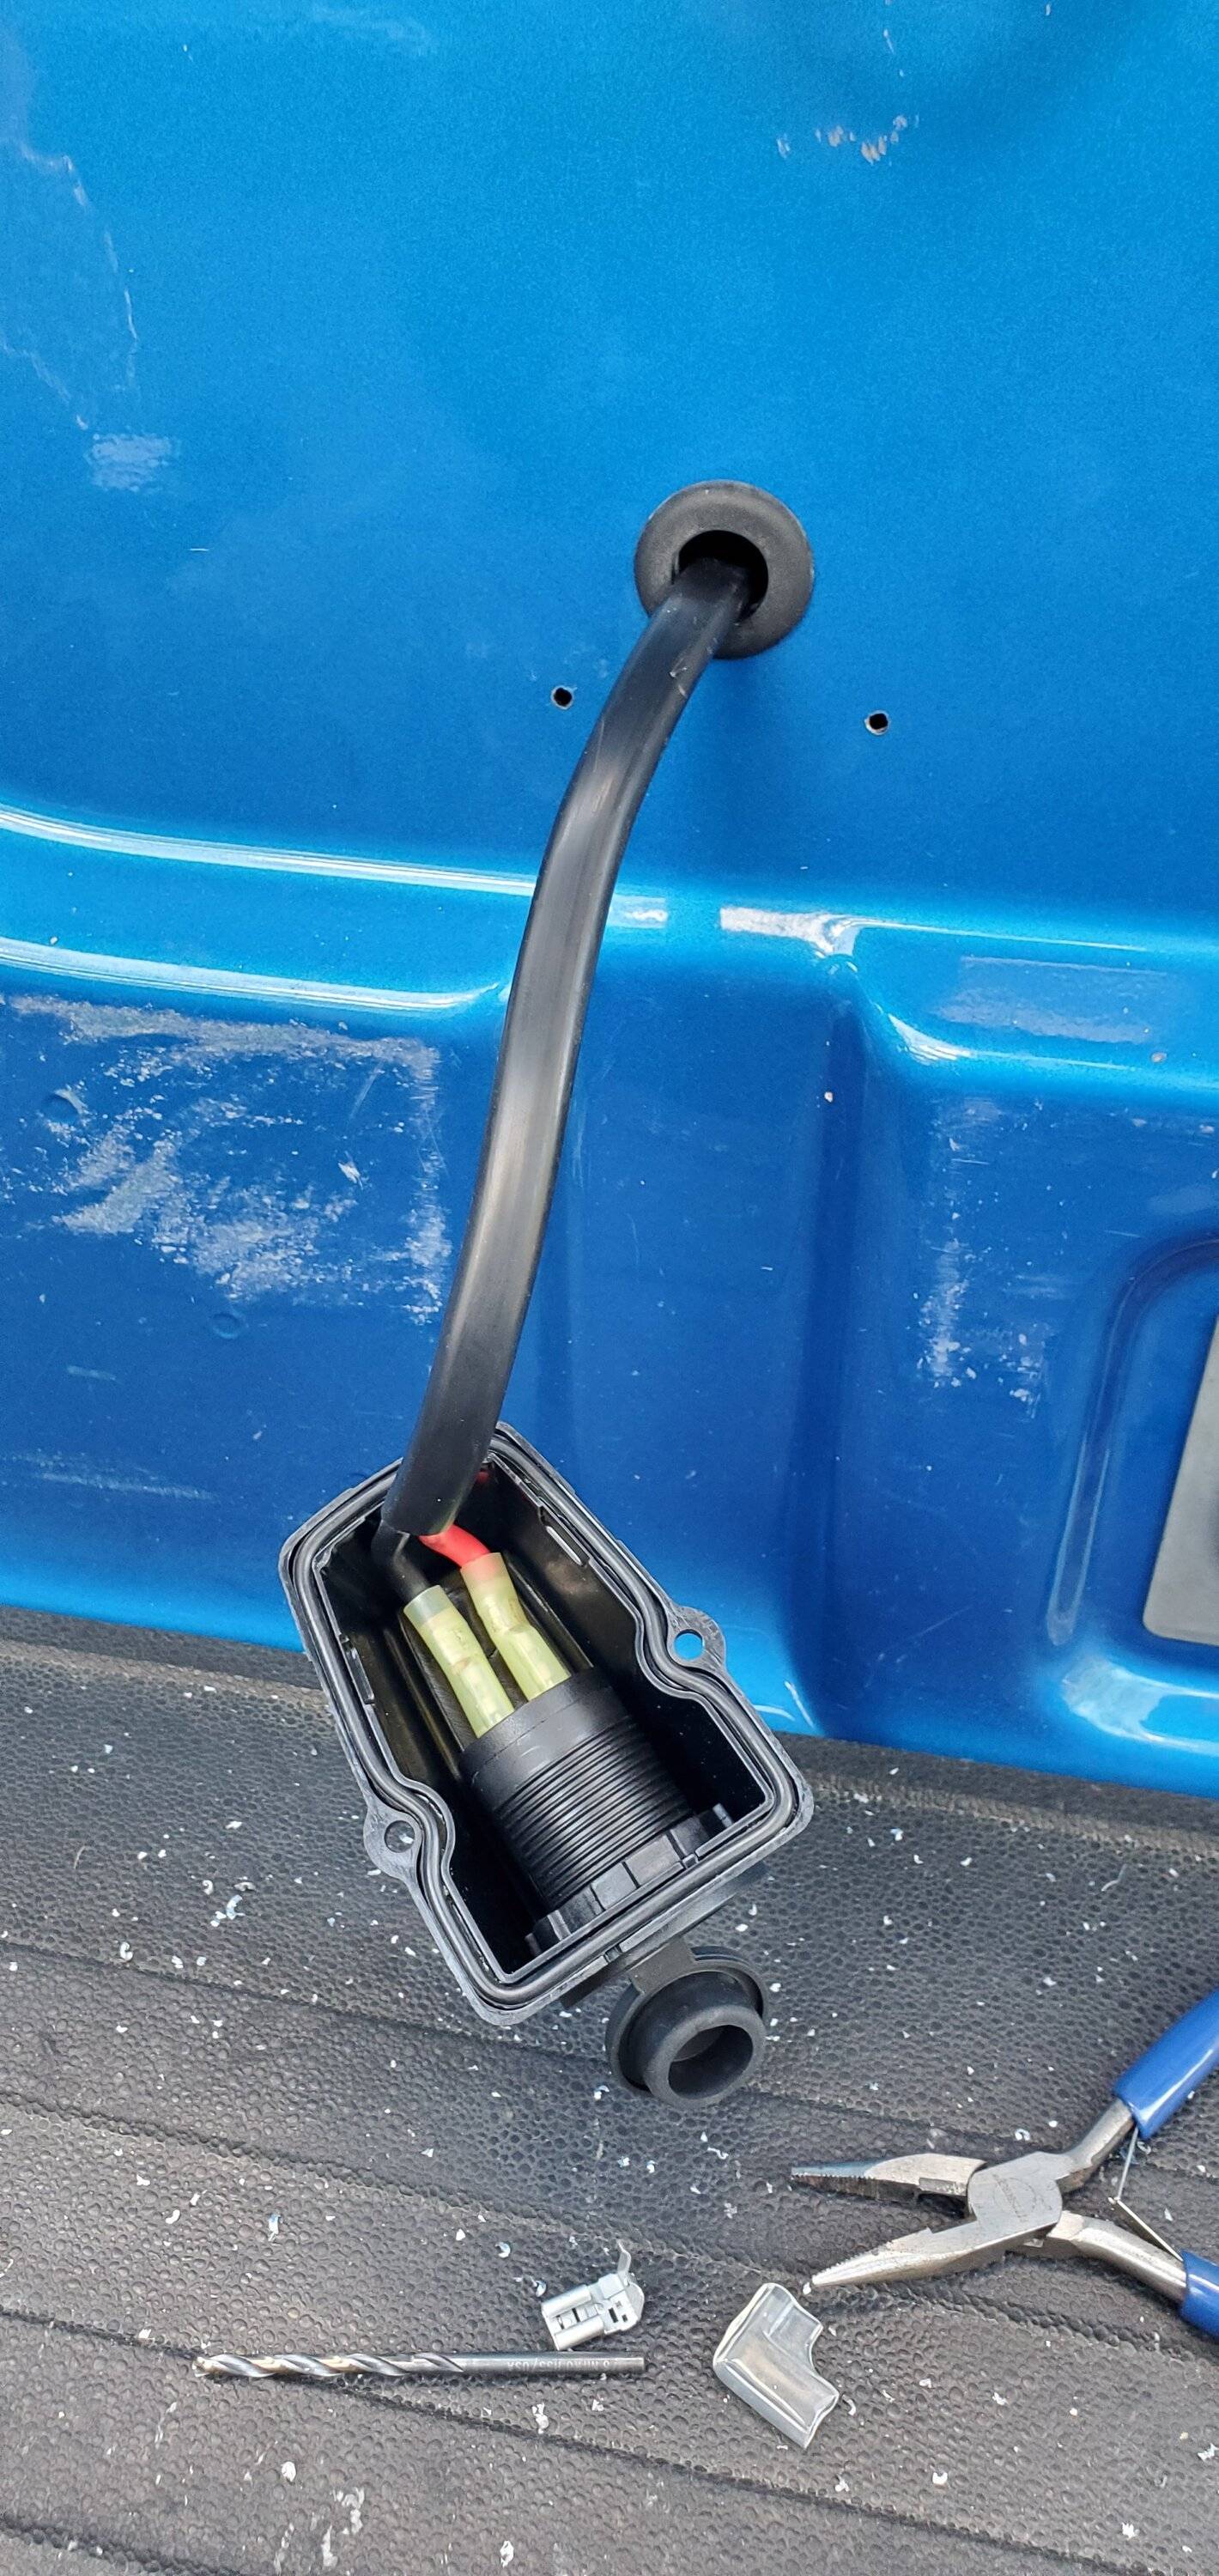
Here is the 12V arrangement. I will post wire routing under truck in the next post. The ARB fridge kit is barely long enough for a Gladiator. This is all the slack I had left after starting at the battery and running back to the bed. I didn't use the right angle spades that were included with the kid (annoying to fool with). There was room to use regular straight spades. Also, grommet in the hole for no chaffing.

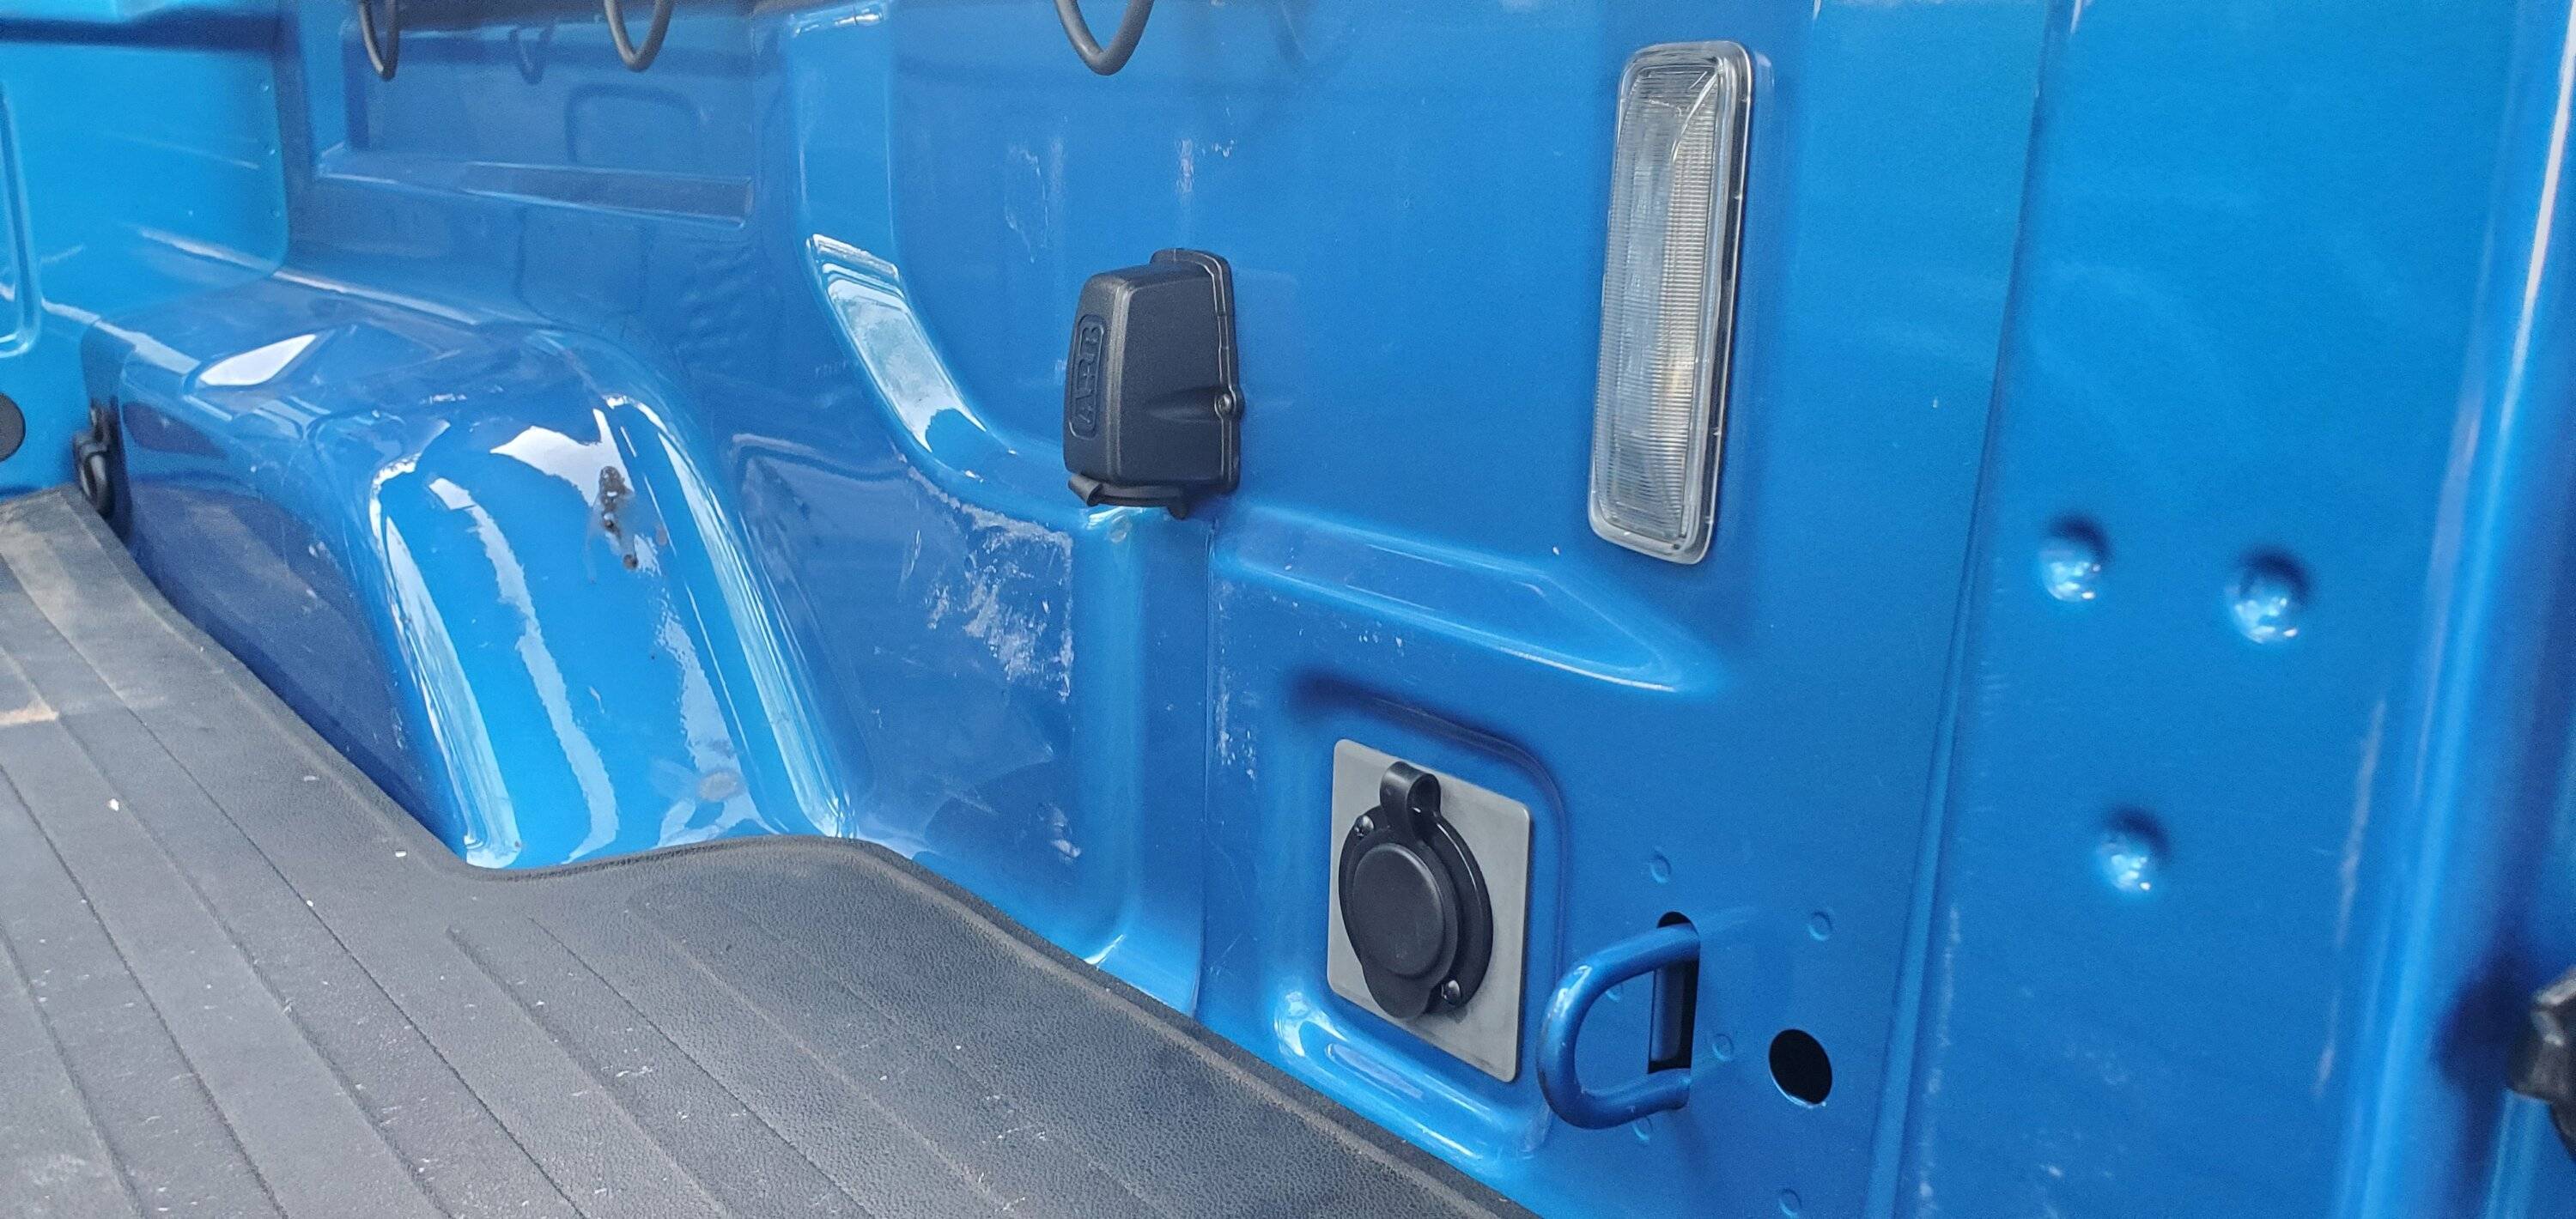
It is facing down on purpose, so that water cannot collect in the connection. I like the ARB kit because it is a screw type connection that cannot fall apart / disconnect itself on rough roads.
Holes drilled and nut certs installed. Nut cert is M8 size, pretty healthy. The bed is very thick near the tailgate area due to a reinforcement channel underneath. Be careful in the area where the right side hole is. There is a metal box reinforcement under this spot and if not careful you can hit it and cause your hole / drill bit to deflect to one side. The bed is rather thin everywhere else. Slightly concerned the nut certs at the front could loosen up later - but I already have a plan to address this if needed.
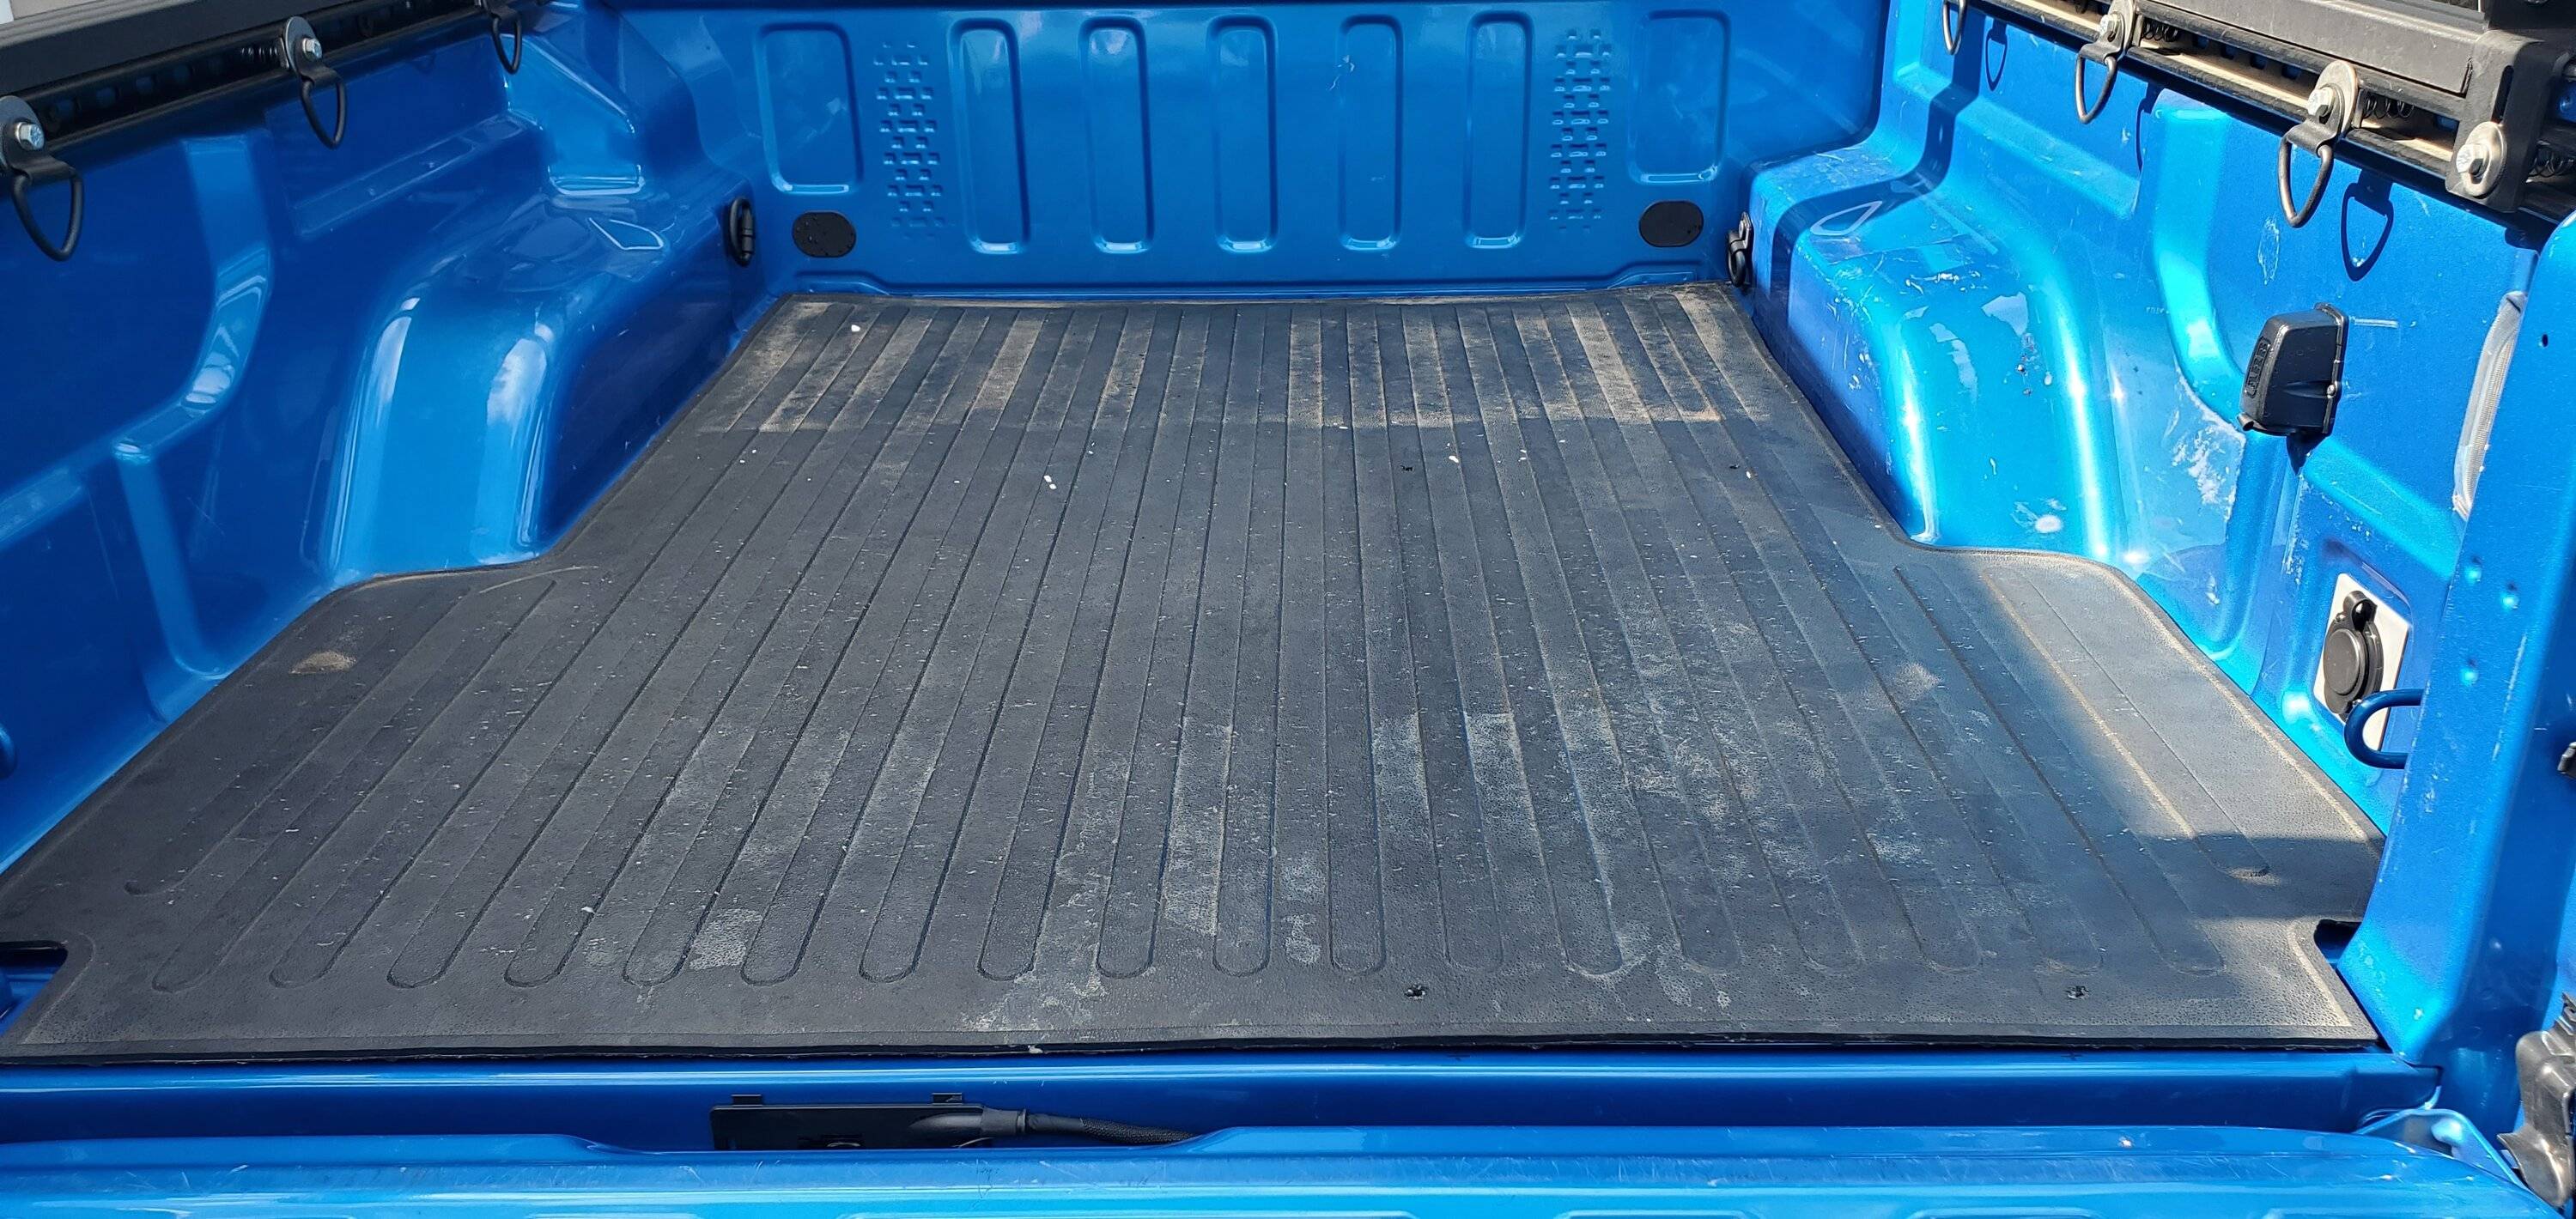
Bed mat is back again. Holes are hardly noticeable without the hardware.
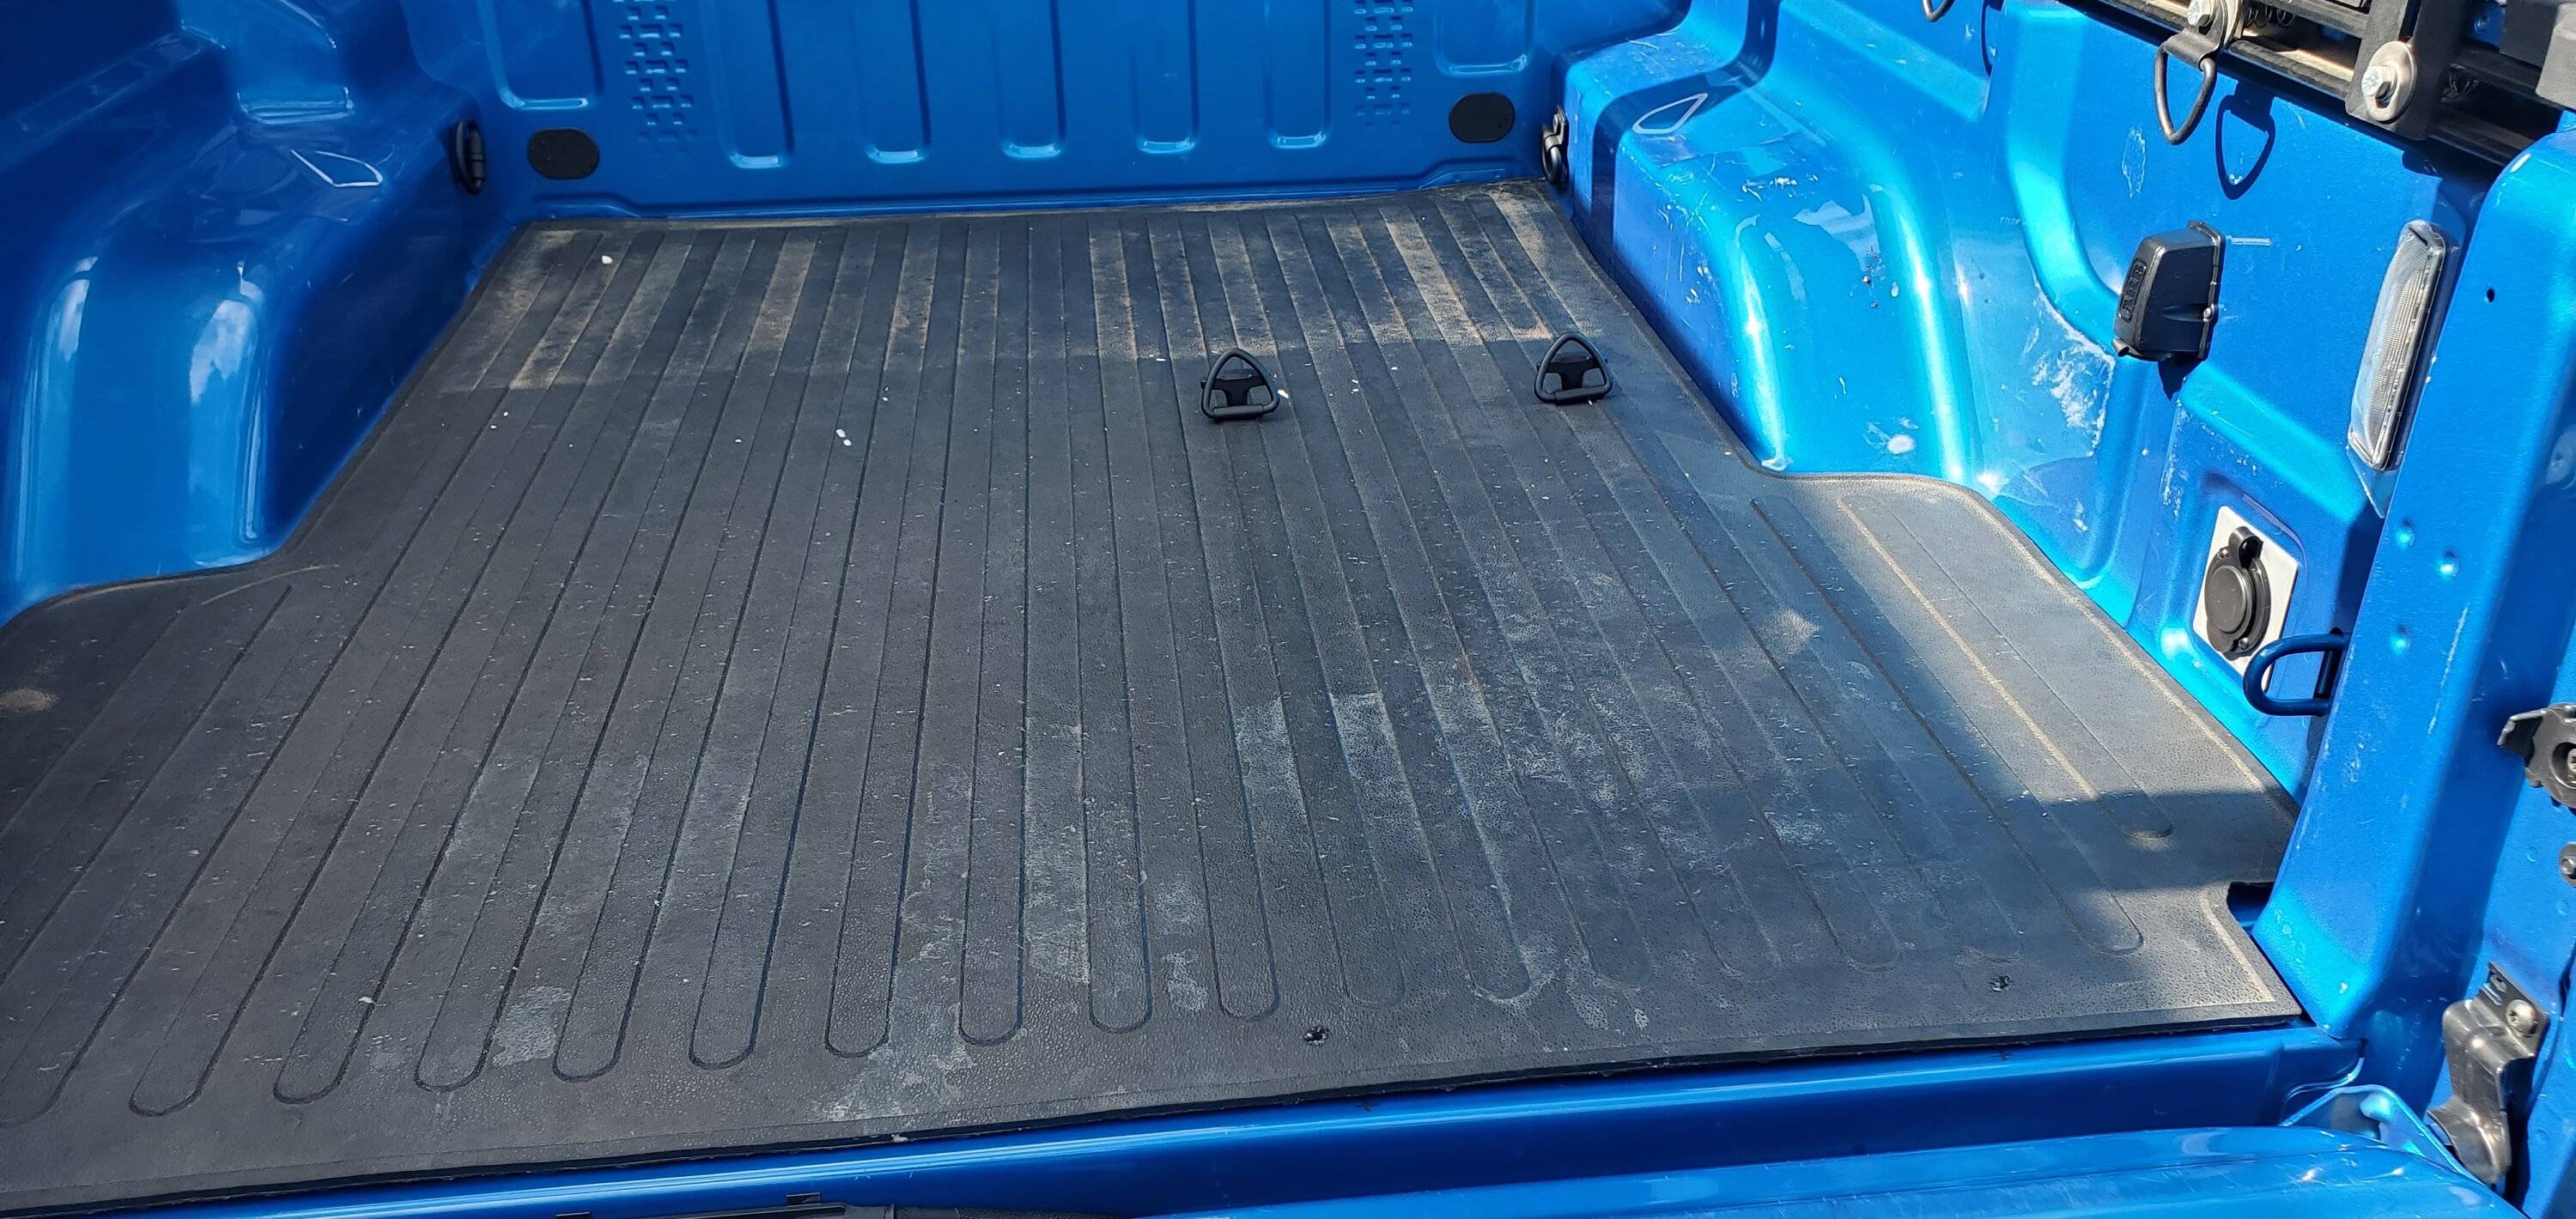
Two hooks in. Just use the thumb knobs to attach them. Quick and easy.
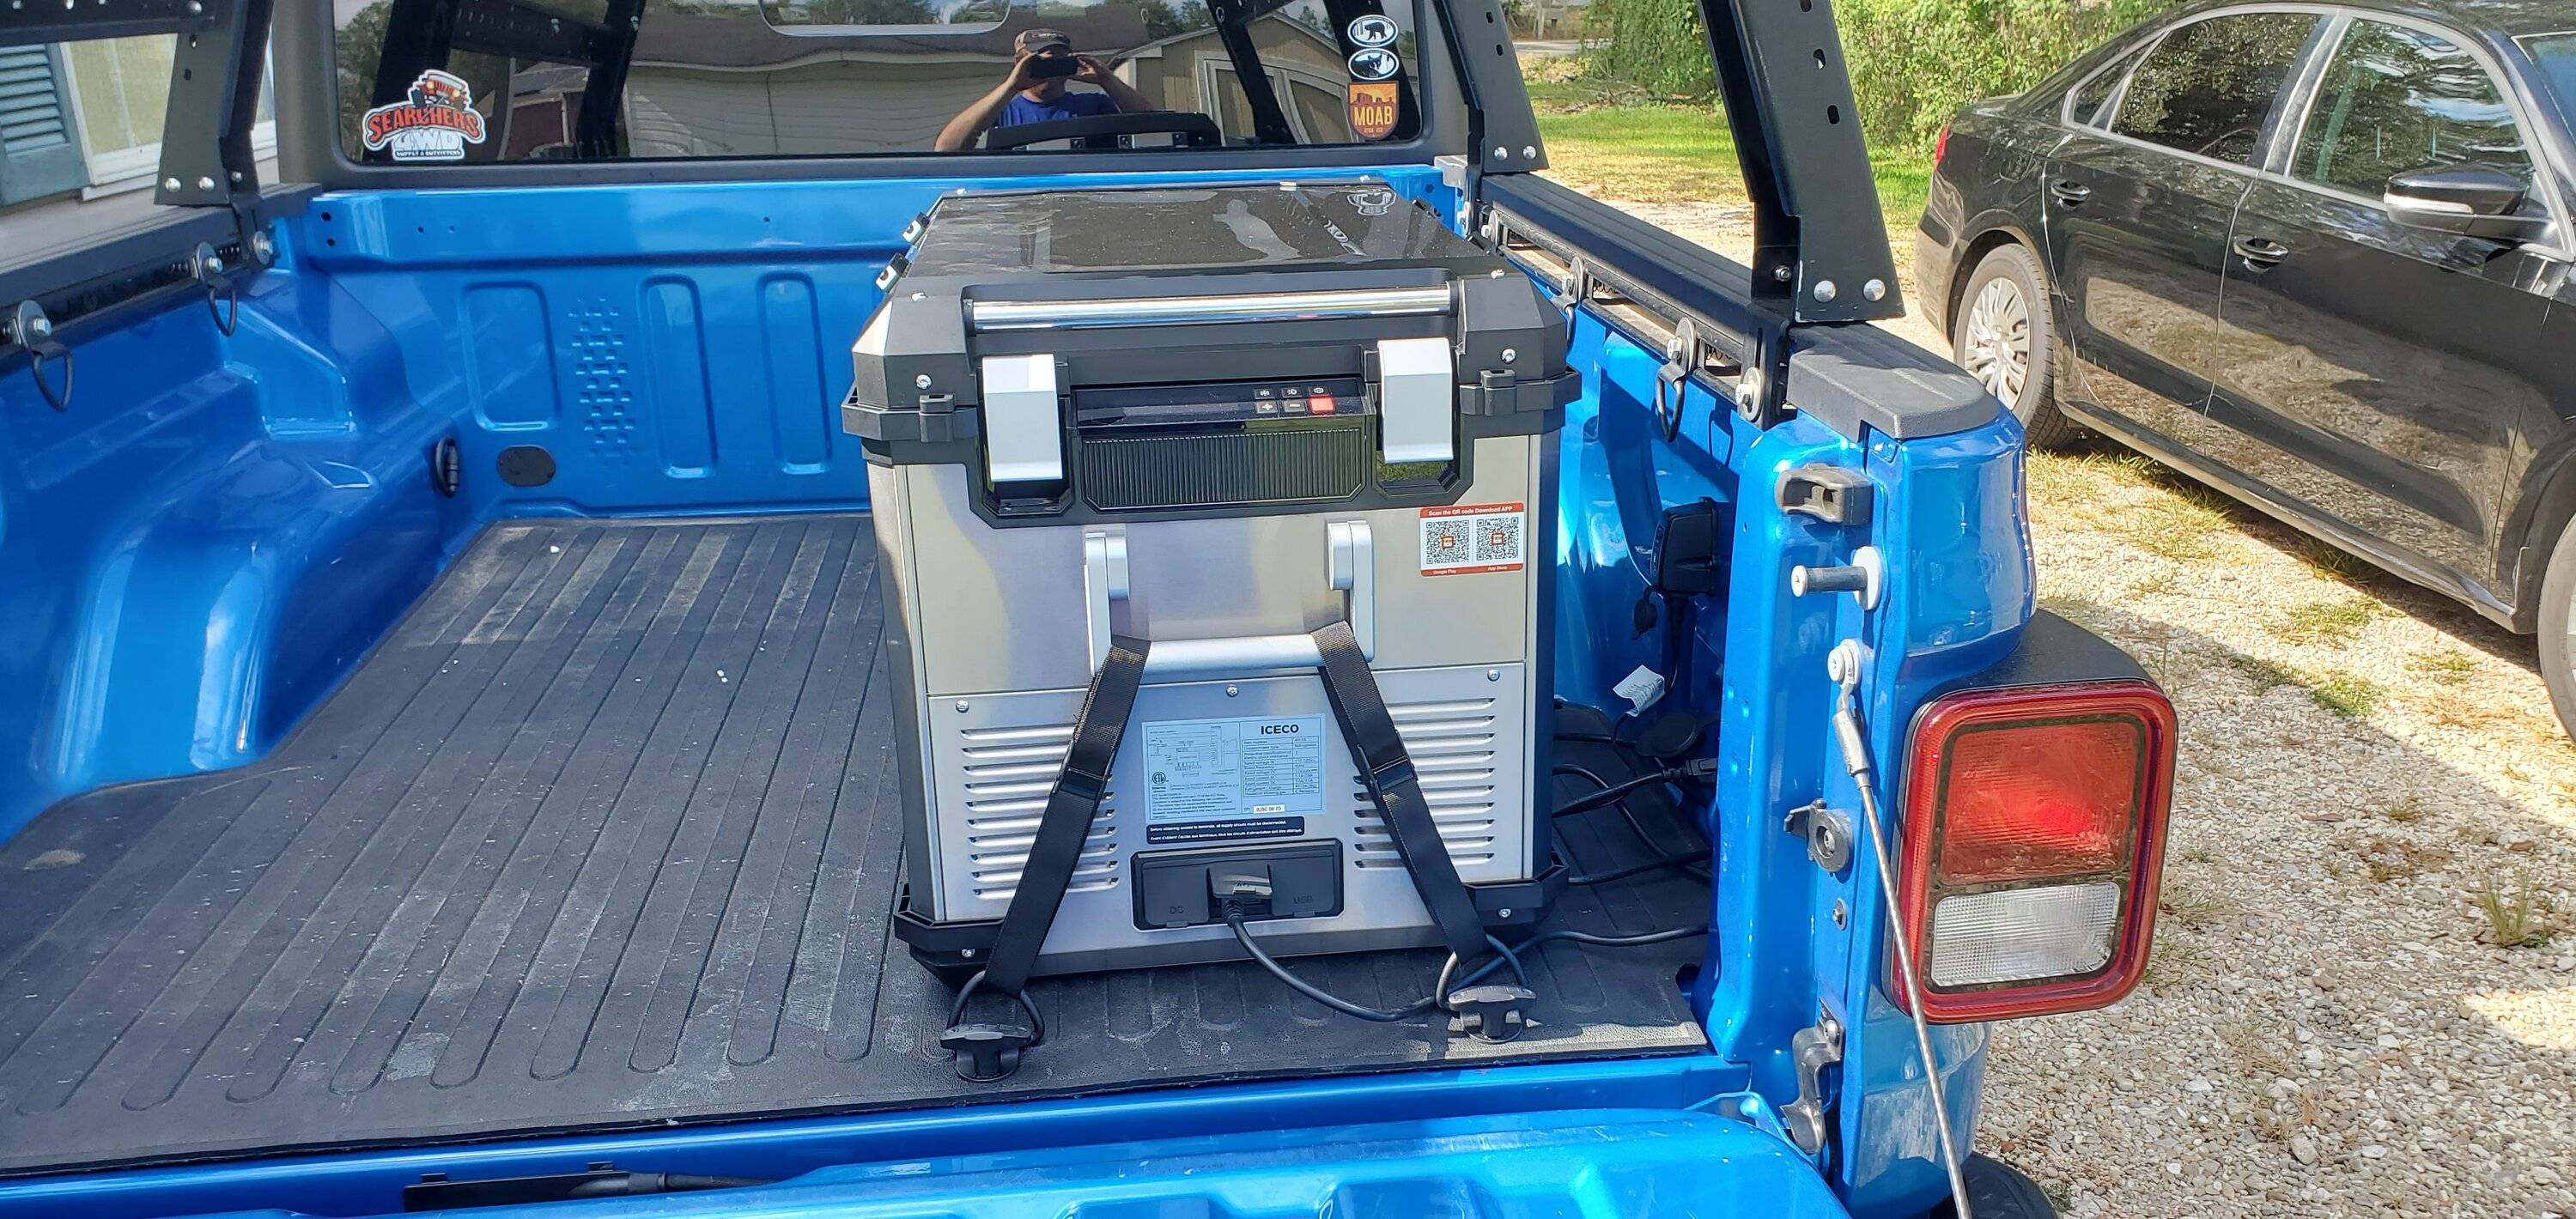
Fridge in place and connected.
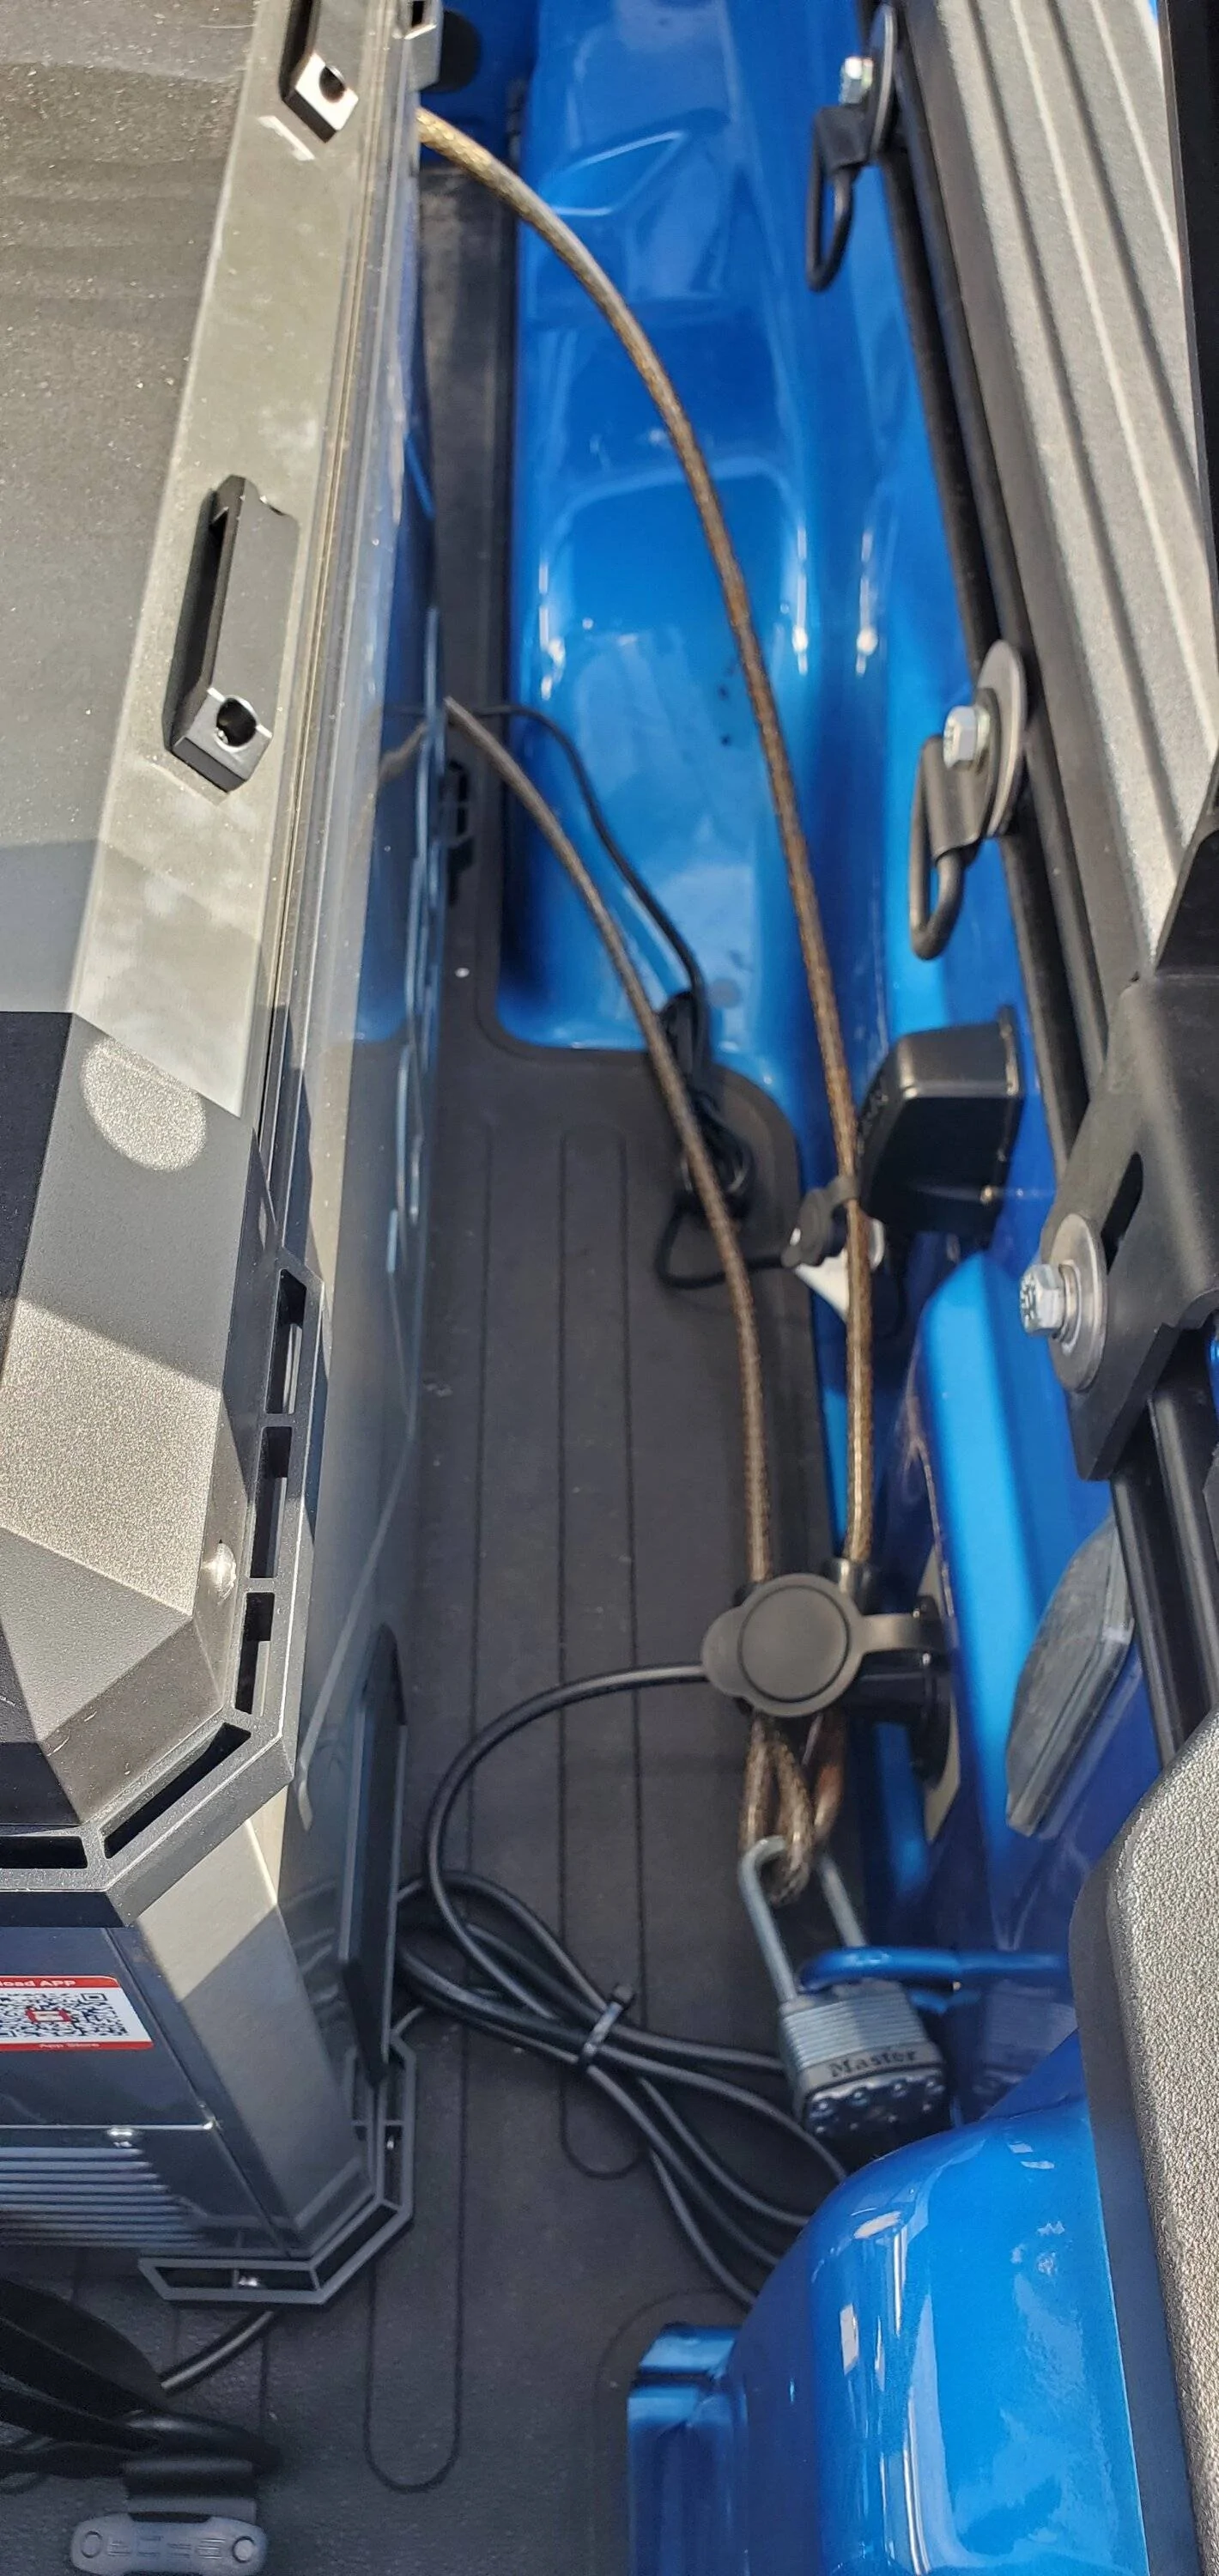
Wires tied up. Cable lock going through the back handle of the fridge and locked to the truck. Good enough to deter your average thief, anyway.
I am going to have a vinyl cover made for the fridge that will cover everything above the vents. That will keep it from getting UV damage from the sun and make it less conspicuous to passerby.
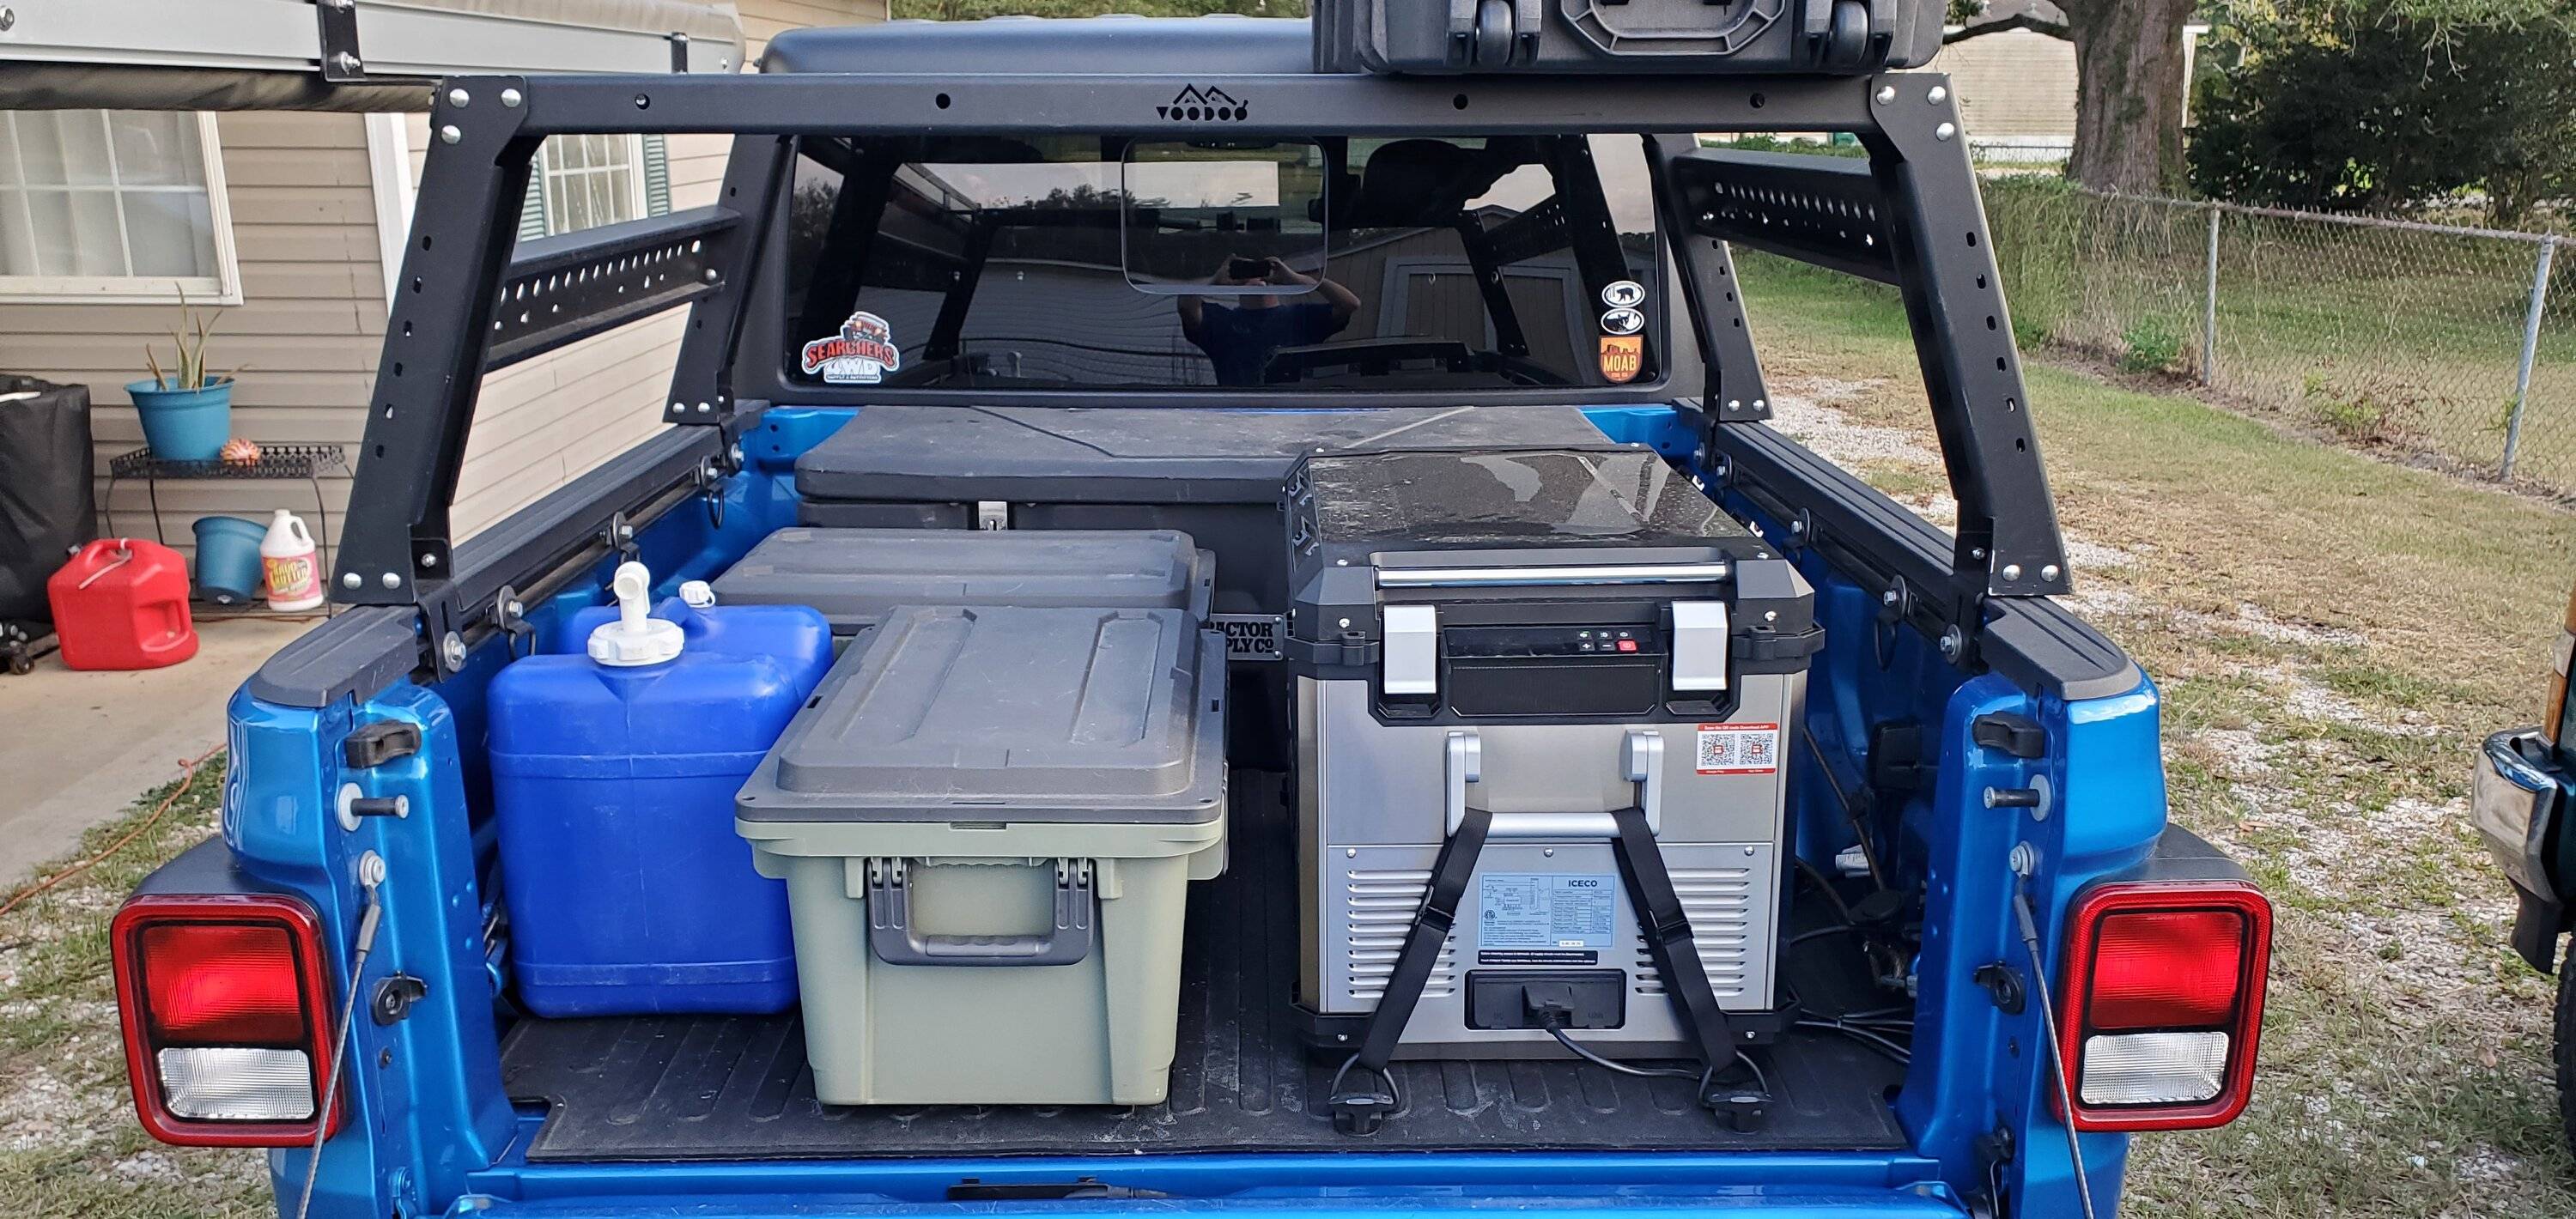
This is a typical load out for me for camping (minus either the RTT or Gazelle stored up top). I'd like to add a removable rail down the center of the bed to give me a tie down point for securing the boxes now.
My plan was to install it in the bed of my truck in a manner that would:
- Allow me to fully remove it with no obstructions remaining in the bed
- Cause minimal modifications to the truck bed
- Allow me to add additional electrical modifications to the truck with (maybe) relative ease.
Here is my pile of stuff:
- A Noco 15A/120V shore inlet
- A 15A/120V single outlet
- An ARB fridge wiring kit
- An ARB fridge cord
- Cam buckle straps
- D rings
- T handle knobs
- Nut cert tool
Not sure why it was necessary to pack the inlet like a nesting doll, lol.
The inlet is going to go in my rear bumper. The outlet is going to go in the filler panel in the bed since my truck does not have the factory 120V outlet. This will allow me to plug the fridge 120V cord into the bed outlet, that leads to the bumper mounted inlet. This gives me a no fuss way to allow the fridge to run off my house when the truck is parked at home - not wear on my battery. The fridge defaults to 120V when both it and 12V are connected at the same time.
I used a basic hole saw set from Harbor Freight (bought is several years ago) to drill the hole in the plastic filler panel as well as in the bumper. On a Sport the rear bumper is solid plastic in this area (to the right of license plate). Be careful not to drill through the license plate light wires. They are directly behind here.
I plan on using this shoreline arrangement later on to have a trickle charger on board the truck if I'm only running the existing batteries, or to add a larger charger if I add a house battery.
Here is the 12V arrangement. I will post wire routing under truck in the next post. The ARB fridge kit is barely long enough for a Gladiator. This is all the slack I had left after starting at the battery and running back to the bed. I didn't use the right angle spades that were included with the kid (annoying to fool with). There was room to use regular straight spades. Also, grommet in the hole for no chaffing.
It is facing down on purpose, so that water cannot collect in the connection. I like the ARB kit because it is a screw type connection that cannot fall apart / disconnect itself on rough roads.
Holes drilled and nut certs installed. Nut cert is M8 size, pretty healthy. The bed is very thick near the tailgate area due to a reinforcement channel underneath. Be careful in the area where the right side hole is. There is a metal box reinforcement under this spot and if not careful you can hit it and cause your hole / drill bit to deflect to one side. The bed is rather thin everywhere else. Slightly concerned the nut certs at the front could loosen up later - but I already have a plan to address this if needed.

Bed mat is back again. Holes are hardly noticeable without the hardware.
Two hooks in. Just use the thumb knobs to attach them. Quick and easy.
Fridge in place and connected.
Wires tied up. Cable lock going through the back handle of the fridge and locked to the truck. Good enough to deter your average thief, anyway.
I am going to have a vinyl cover made for the fridge that will cover everything above the vents. That will keep it from getting UV damage from the sun and make it less conspicuous to passerby.
This is a typical load out for me for camping (minus either the RTT or Gazelle stored up top). I'd like to add a removable rail down the center of the bed to give me a tie down point for securing the boxes now.
Sponsored
