aegiscpo
Well-Known Member
- Joined
- Feb 8, 2020
- Threads
- 13
- Messages
- 111
- Reaction score
- 27
- Location
- Virginia Beach
- Vehicle(s)
- 2020 Gladiator
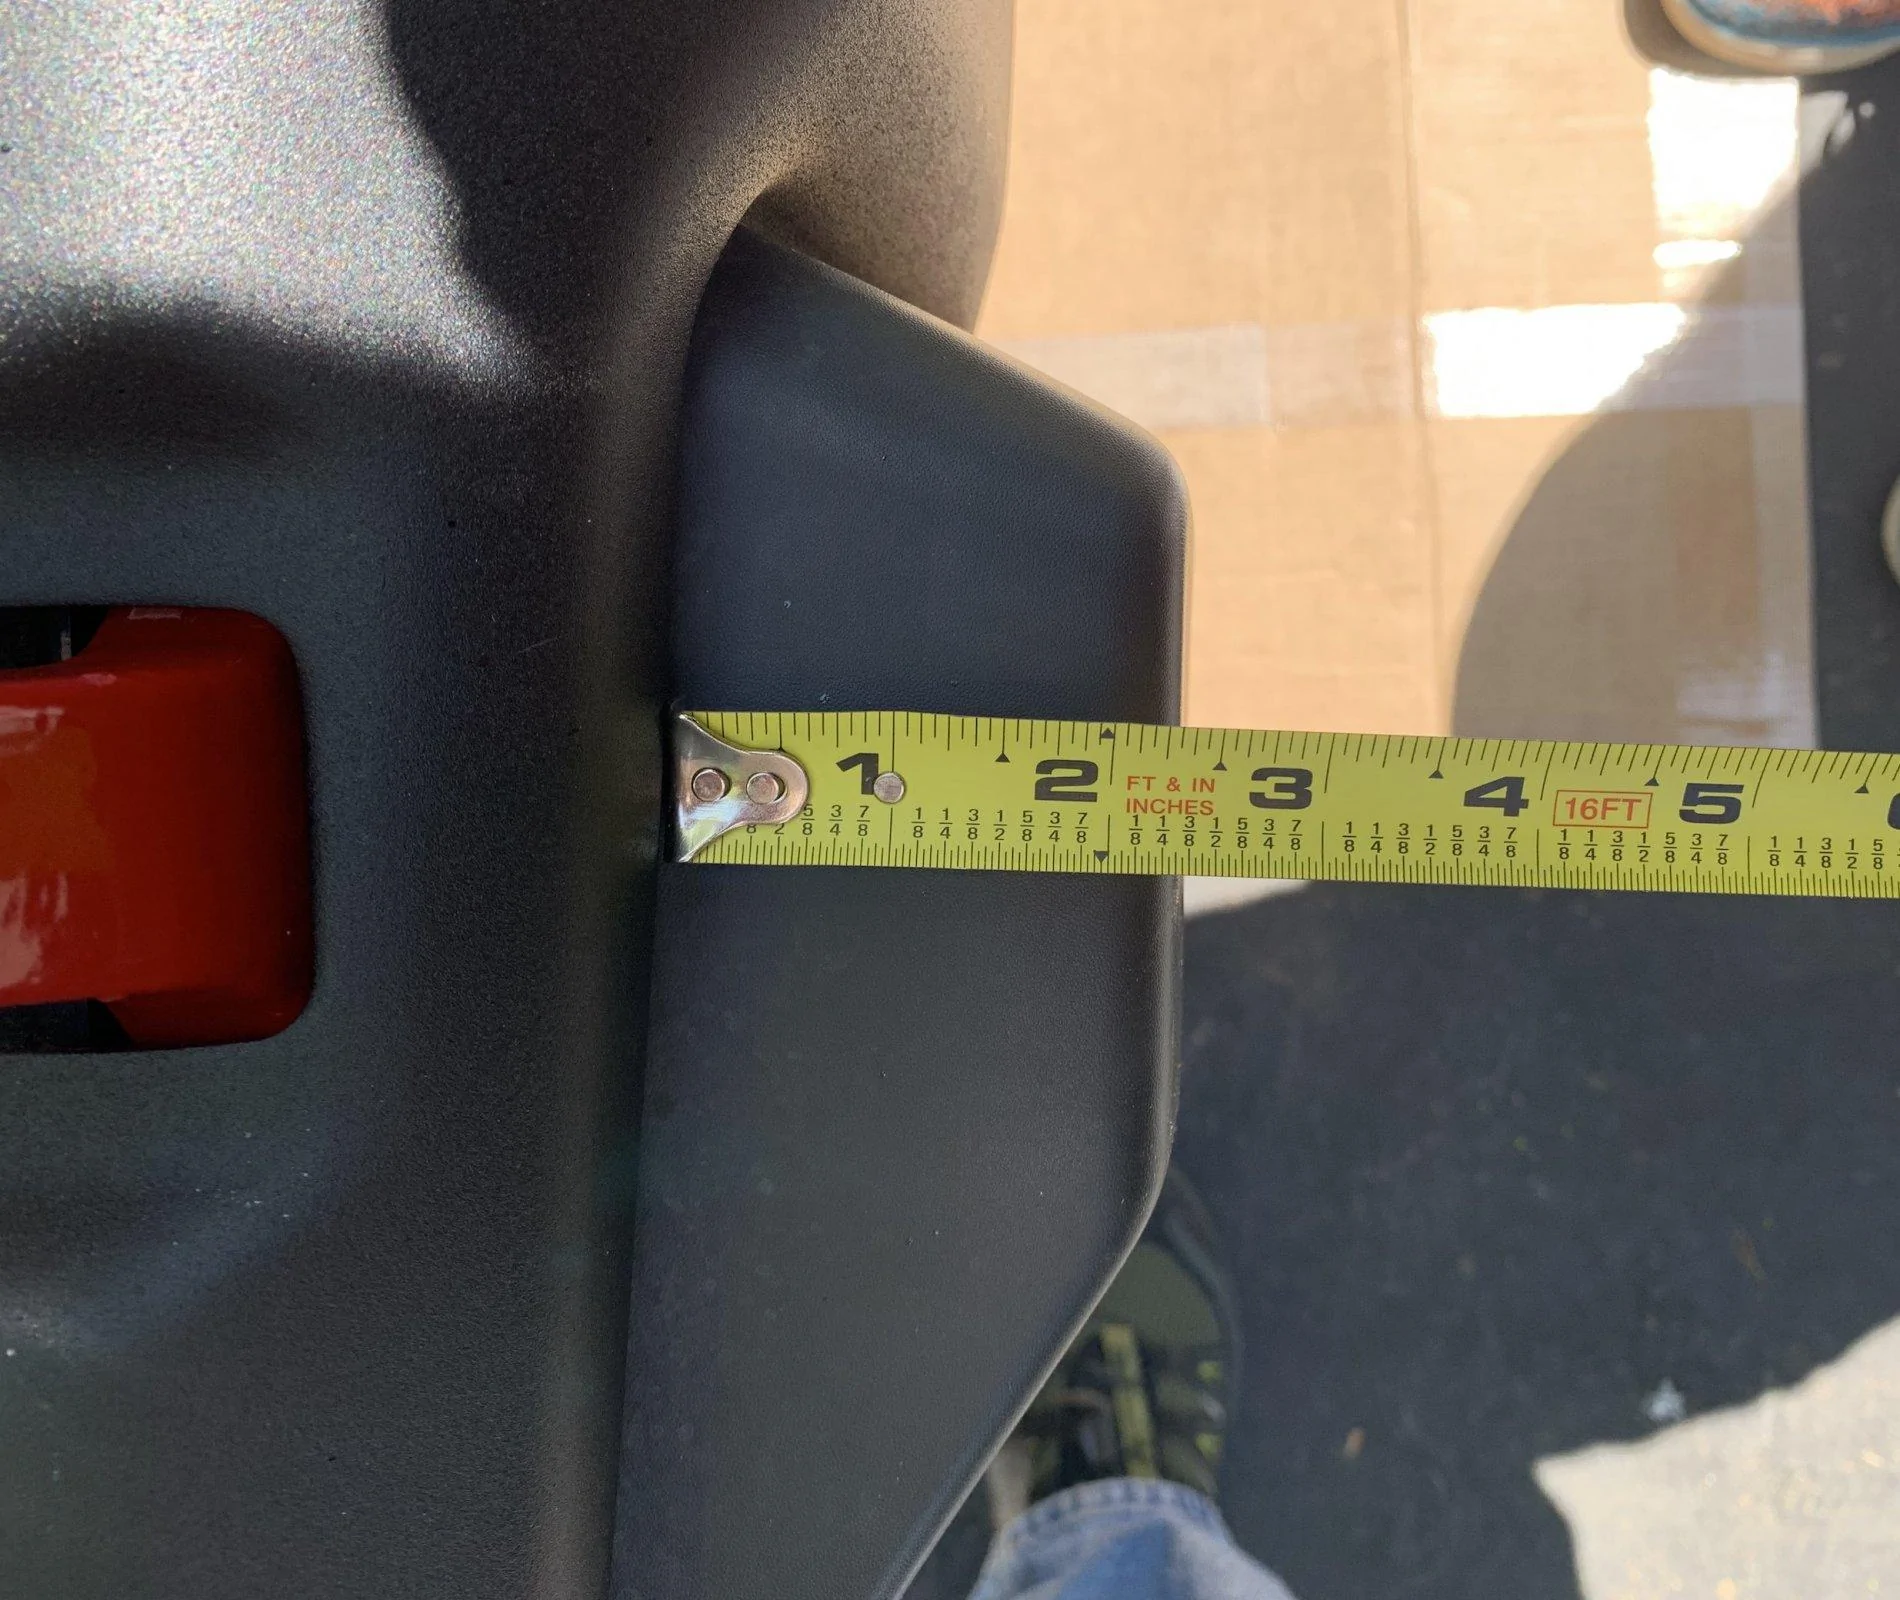
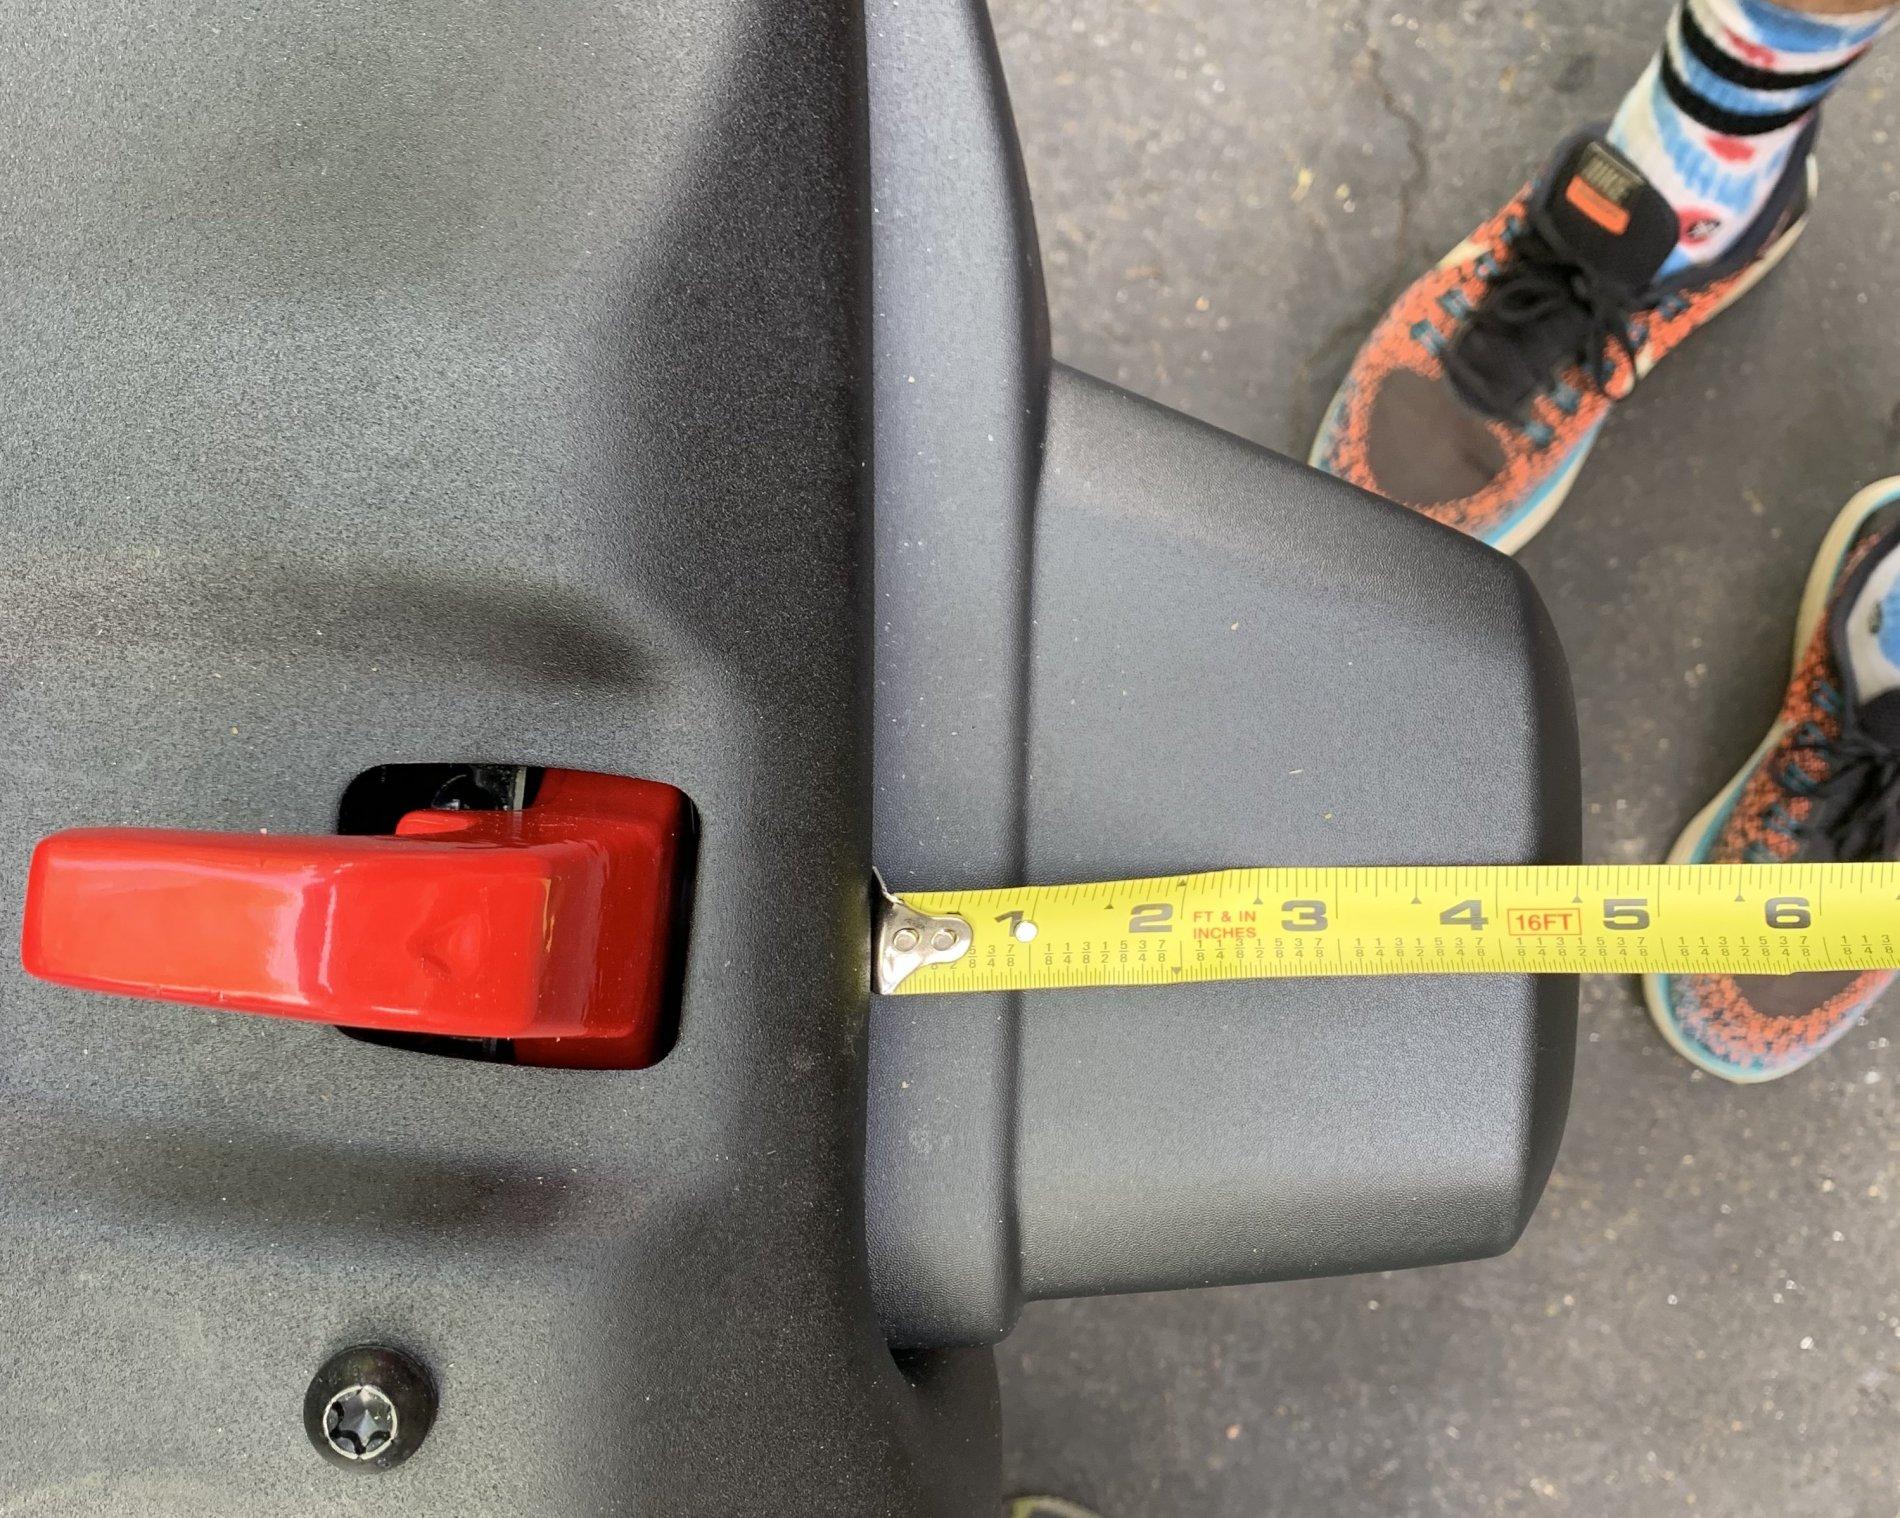
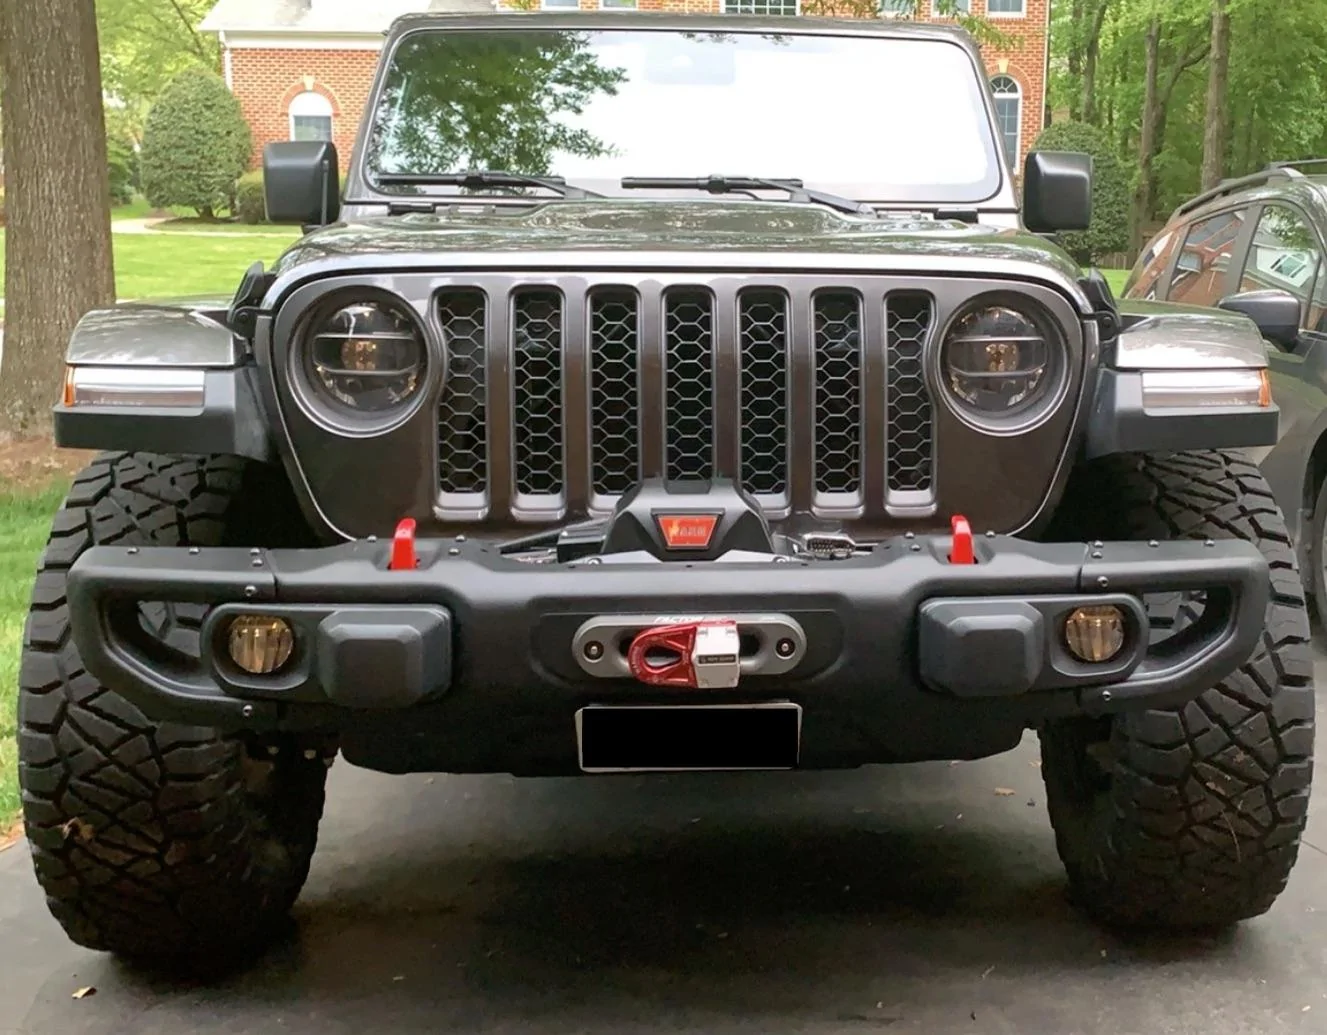
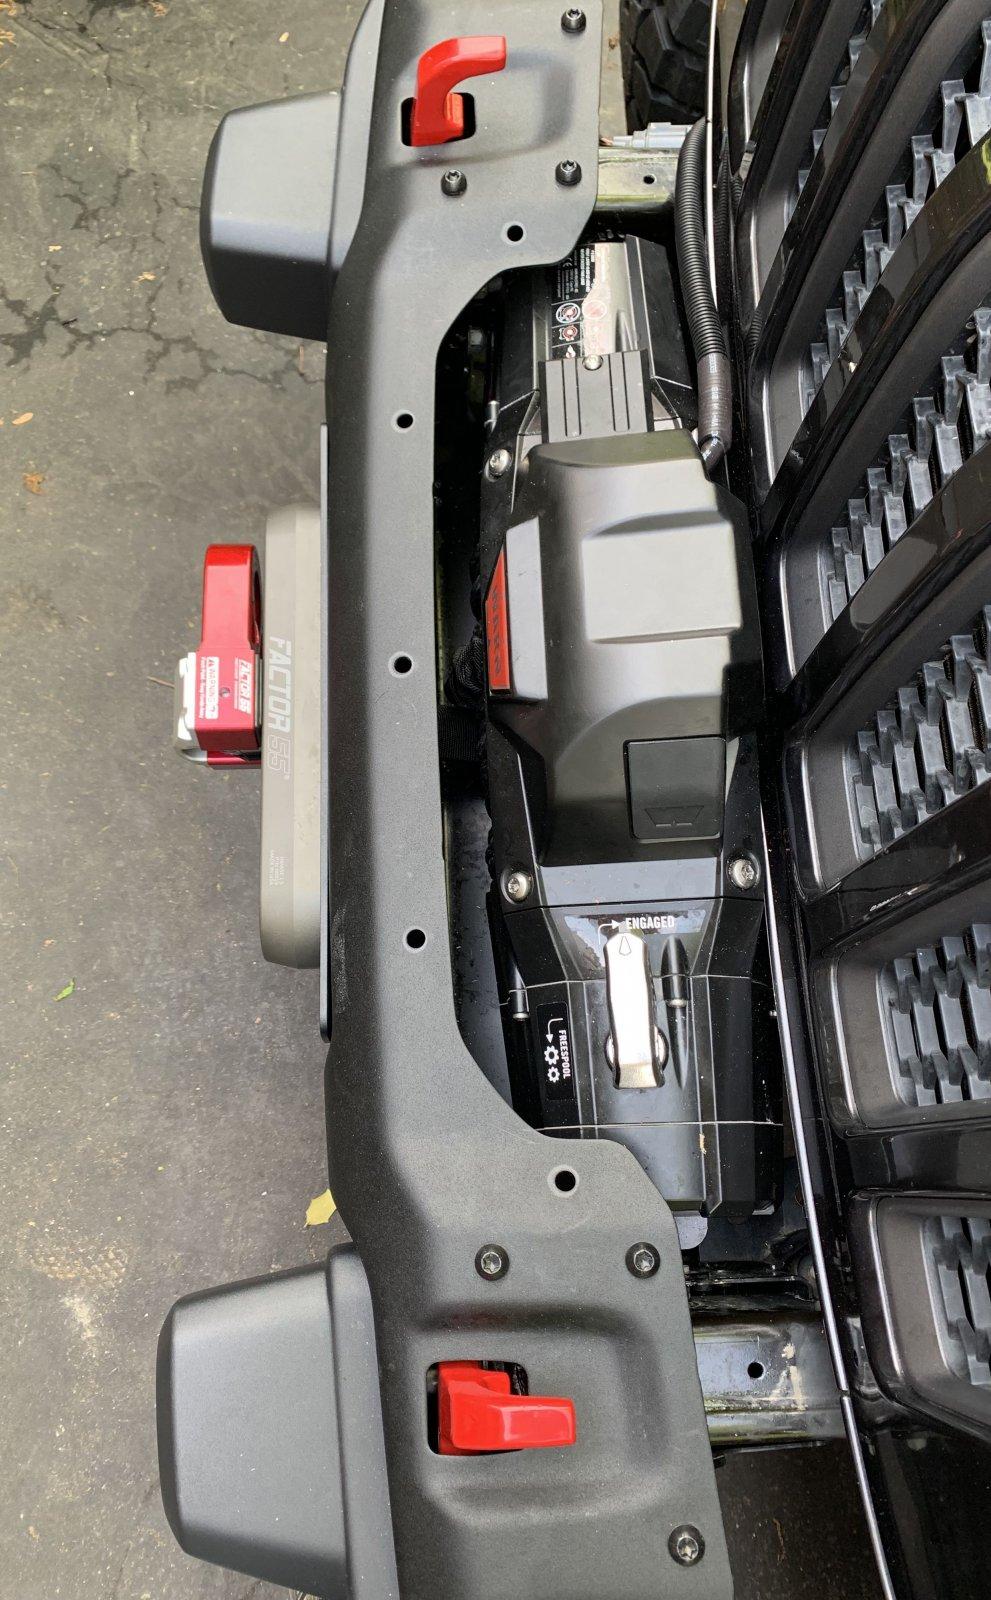
Thats the ones I was thinking to use... it does look like its going to be a tight fit... I did pull the plate as far forward as I could, I cheated by tightening down the fairlead bolts to draw it up close to the bumper. Everything is torqued to spec, Probably over the weekend I might remove the bumper and attempt the install. Did you have room in front of the winch to re-tighten all the fairlead bolts? How much of a pain were they to get to?I used the left holes. It seems tight against the grill but you really need to pull the plate all the way forward and it will fit.
I do appreciate your reply.
Sponsored

")