notquiteflotsam
Well-Known Member
- First Name
- Marcus
- Joined
- Mar 4, 2022
- Threads
- 5
- Messages
- 71
- Reaction score
- 63
- Location
- Austin, TX
- Vehicle(s)
- 2022 JT Mojave; 2011 JKU Sport (retired)
- Thread starter
- #1
After searching here, I didn't find a write up on how others had done this before so thought I'd add this here for the next person who wants to do the same.
My objective was to wire the Oracle Reverse Bumper lights directly to the Aux switch, and not into the reverse lights themselves. The reason is that we live in a neighborhood and I didn't want to blind my neighbors every time we backed out of the driveway. Instead, we wanted to be able to use them selectively when conditions warrant it.
This wasn't hard, but having read some other threads I know some folks can be intimidated by wiring. I'm no electrician, but this seems to have worked.
IF you're looking to wire yours to the reverse lights, my set of lights came with the extra harness. I'm not going to use this but can pass on to a member who could use it for a nominal price. DM me if you're interested.
My objective was to wire the Oracle Reverse Bumper lights directly to the Aux switch, and not into the reverse lights themselves. The reason is that we live in a neighborhood and I didn't want to blind my neighbors every time we backed out of the driveway. Instead, we wanted to be able to use them selectively when conditions warrant it.
This wasn't hard, but having read some other threads I know some folks can be intimidated by wiring. I'm no electrician, but this seems to have worked.
- Remove the reflectors and install the lights per the Oracle online instructions.
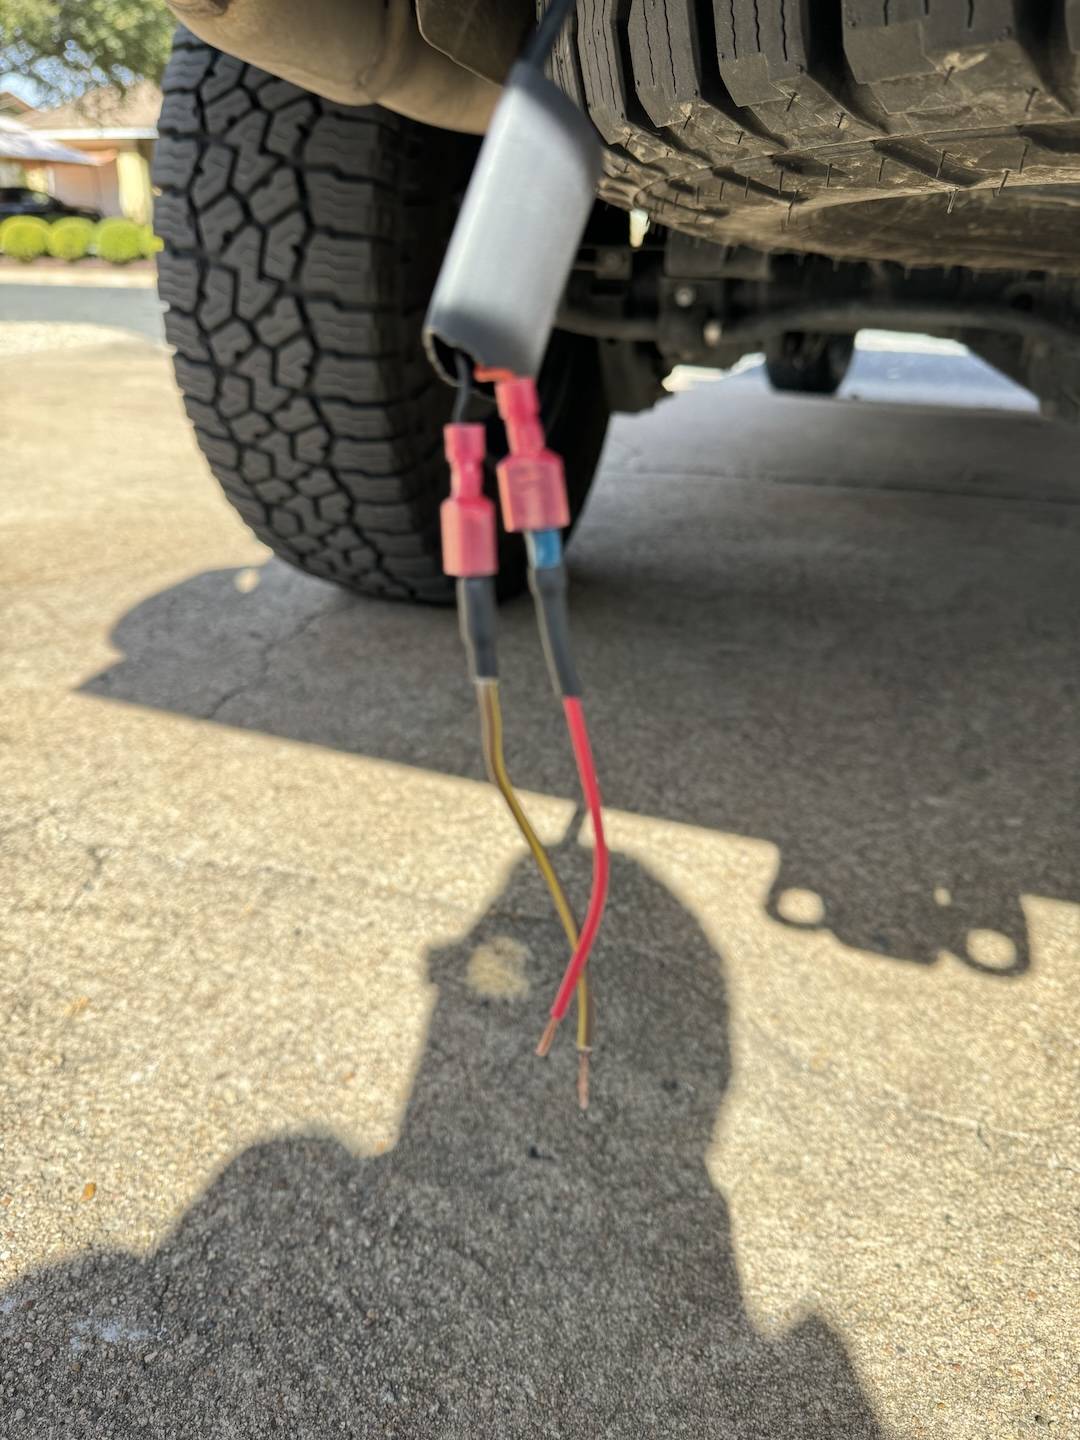
- That left us with the female slot connector ends (black and red) hanging from each light as they come. I had on hand the male ends which I attached to some extra pieces of trailer light wire (I think 16 ga wire) that I had. The wire on the factory lights is tiny and I wasn't sure I had a butt connector that would fit. I wanted things to be water tight so I applied marine shrink tubing to my connections. I also put a larger single piece of shrink tubing on the lines, but didn't seal that one. Here's where I am so far, for left and right.
- NOTE: in hindsight I should have added some dialectic grease to the connectors to help keep water at bay prior to heating the shrink wrap over the connectors but perhaps the glue in these will suffice.

- Repeat this on the other side. Note I didn't use much extra wire as I'm joining them in the next step in the middle and there was plenty of wire to do that on the lights themselves.
- Make note of what colors you're using. In my example, I matched red from the light to red wire I had, and black from the light to the brown/yellow trailer wire I had.
- NOTE: in hindsight I should have added some dialectic grease to the connectors to help keep water at bay prior to heating the shrink wrap over the connectors but perhaps the glue in these will suffice.
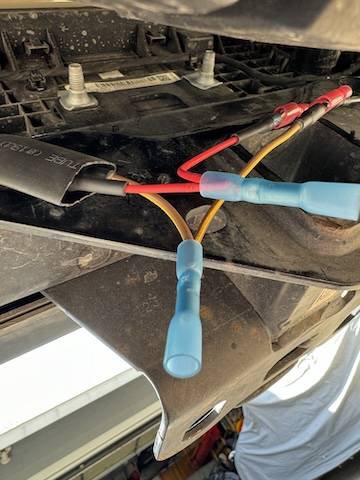
- Next step was to connect the lights to each other and to a single wire that I planned to run up to the aux pigtail (factory - installed aux switches). For this step, I used a blue (16-14 ga) marine butt connector. The Marine types have the heat shrink built in with some glue that is supposed to make them water tight. The two small 16ga wires I added fit the blue connector. On the other end of the connector, I used 14ga wire that I purchased for about $6 for a 20' roll at Lowes (one red, one white, because white is what they had in stock). 14 ga is probably overkill. I couldn't find what amp these lights draw anywhere, but 14ga would handle the 15amp limit of Aux4. At this point, things look like this:

- Note: the large heat shrink on the left of the image is also on the connectors on the right.
- The next step was to attach the ends of the long wires I intend to run to power and grounds, next to battery. Again, keep track of your colors. In my case I matched red to red, and white to brown/yellow.

- I then got out the heat gun and shrunk the heat shrink on all of these connections to seal things up. I wrapped a few ends in electrical tape to try to keep things tidy.
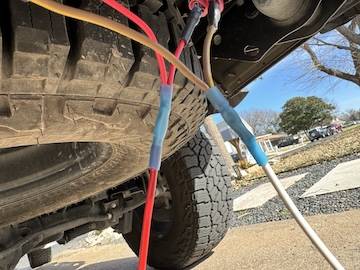
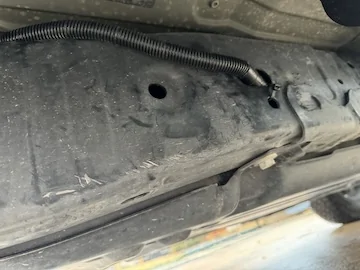
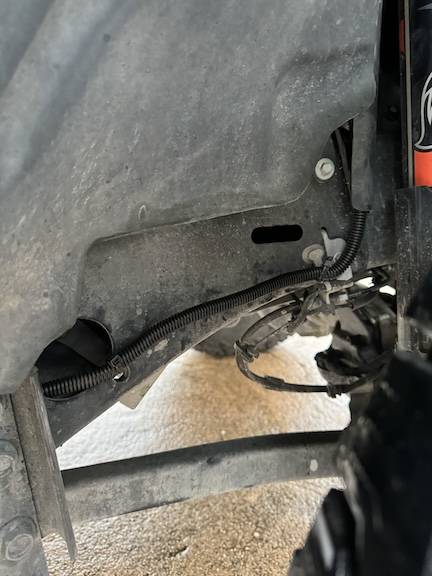
- At this point, I started zip-tying up the wires from the lights to an existing wire bundle behind the bumper. I then took the new red/white wires and wrapped them in split black cable tube to add some protection from abrasion and such. I routed these up above the axel, again, following and zip-tying to existing wiring that's under there. At about the point I got to the fuel tank on the right side, I dropped the cable tube down to start running into the frame tubing. I used a fish tape I had fed from the passenger wheel well back to this point to pull the wires through. the black gorilla tape in the picture is where I joined two pieces of tubing. I zip-tied this to the frame as shown.
- After pulling the wire through and out the frame rail, pushed & zip-tied this bundle up to the battery/pigtail behind the piece of steel next to the shock as shown.

- From here, it was simply wiring the red to Aux 4, and the white to ground. Don't mix this part up. I don't know for sure but this could cause damage to the lights given the LEDs are one-way diodes. I used a hoop style connector to put this on one of the ground studs, again heat shrink over the connector to keep things tidy.
IF you're looking to wire yours to the reverse lights, my set of lights came with the extra harness. I'm not going to use this but can pass on to a member who could use it for a nominal price. DM me if you're interested.
Sponsored
 That’s a good idea if you only need them for 30 seconds or whatever the timer is.

