Sponsored

Simple MO Beast

machstell

Member
First Name
Mark
Joined
May 13, 2020
Threads
1
Messages
20
Reaction score
23
Location
Saint Louis
Vehicle(s)
2020 Gladiator Overland
Build Thread
Link
Occupation
Computer Geek; Jeep Lover
Vehicle Showcase
1
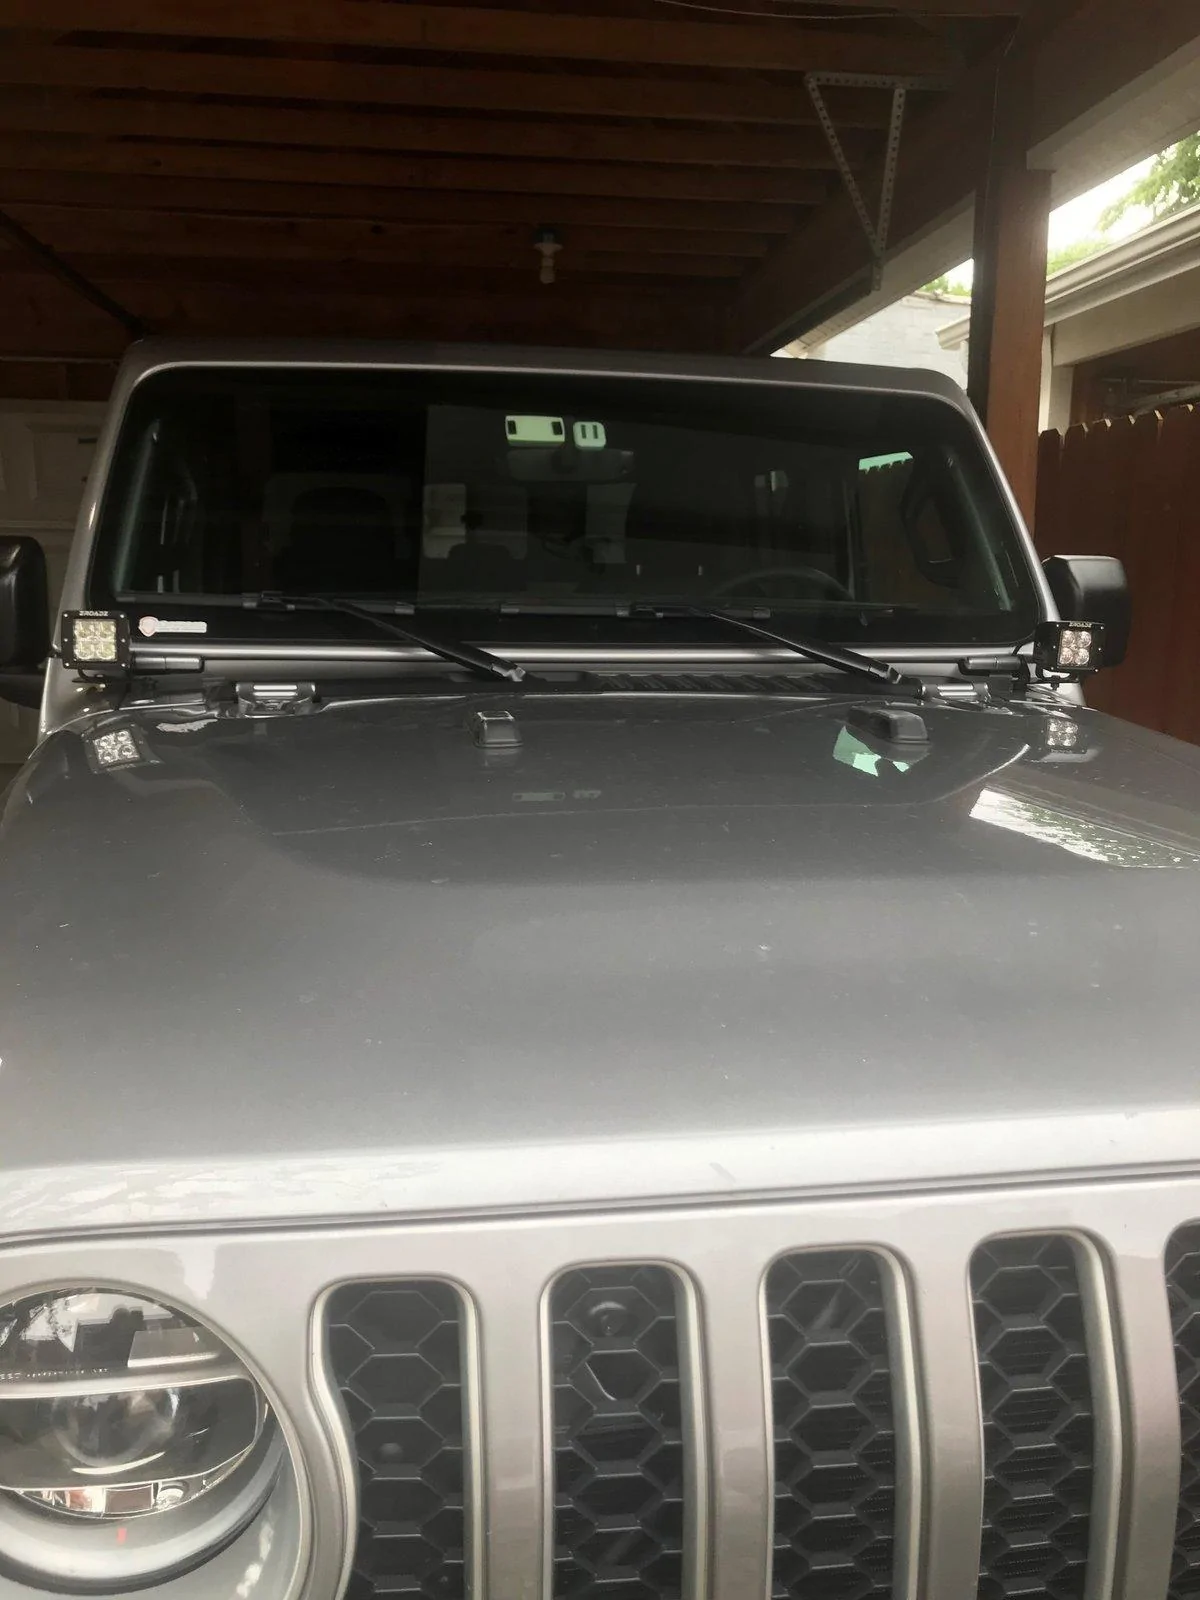
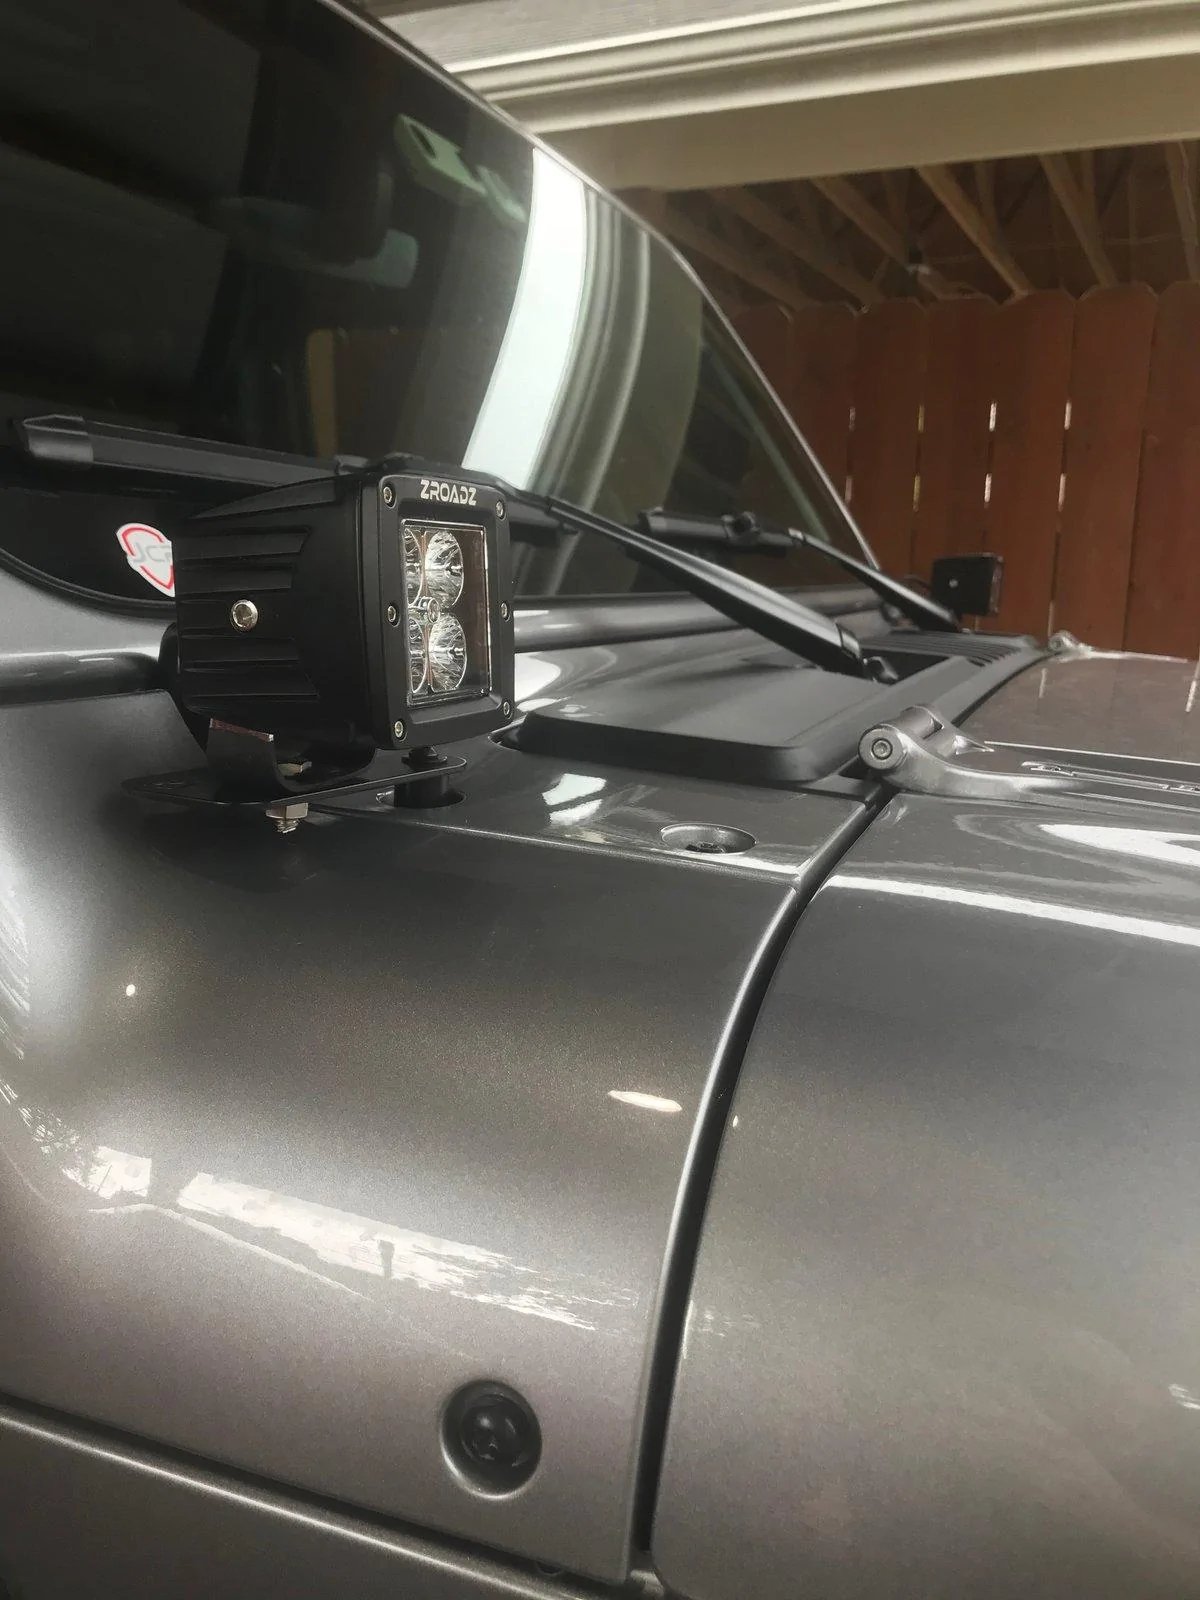
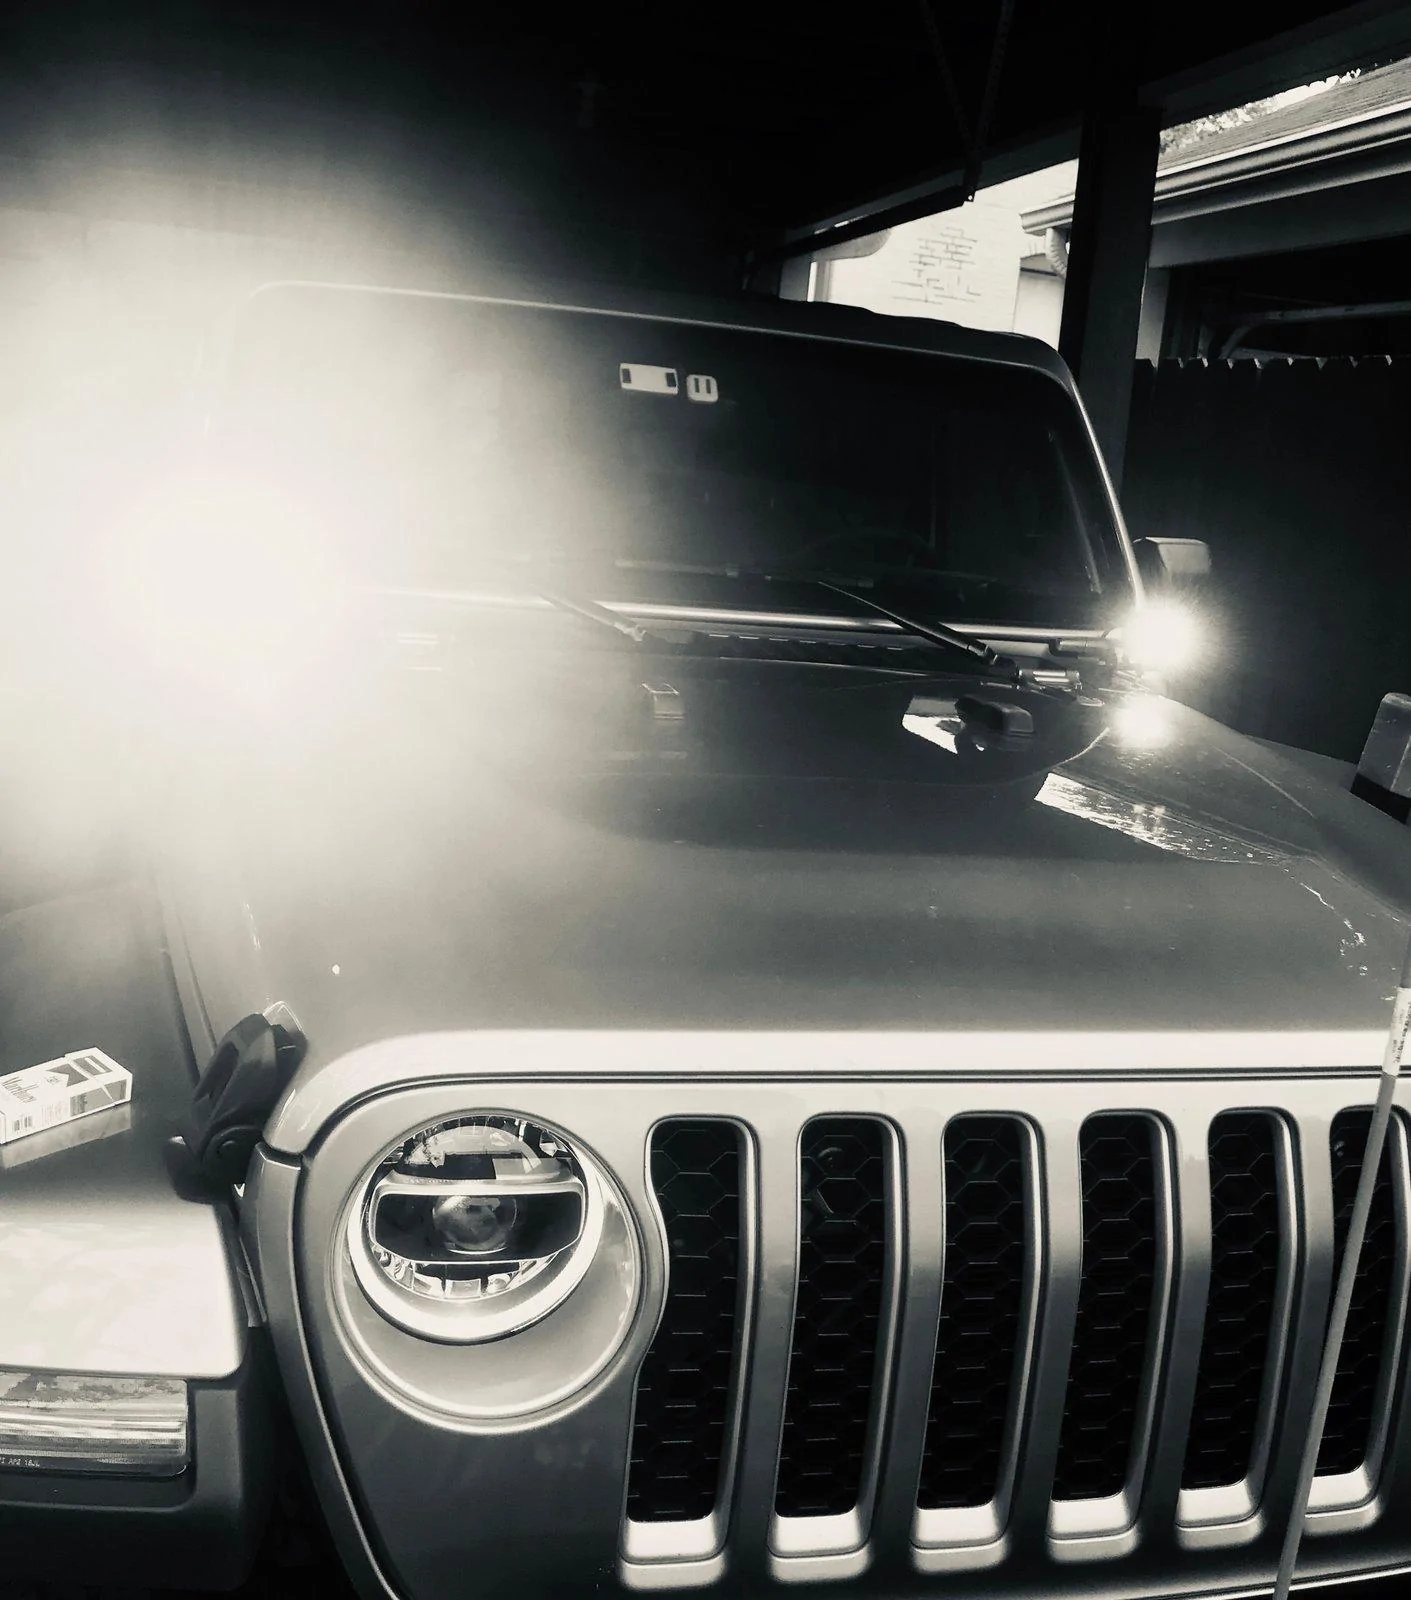
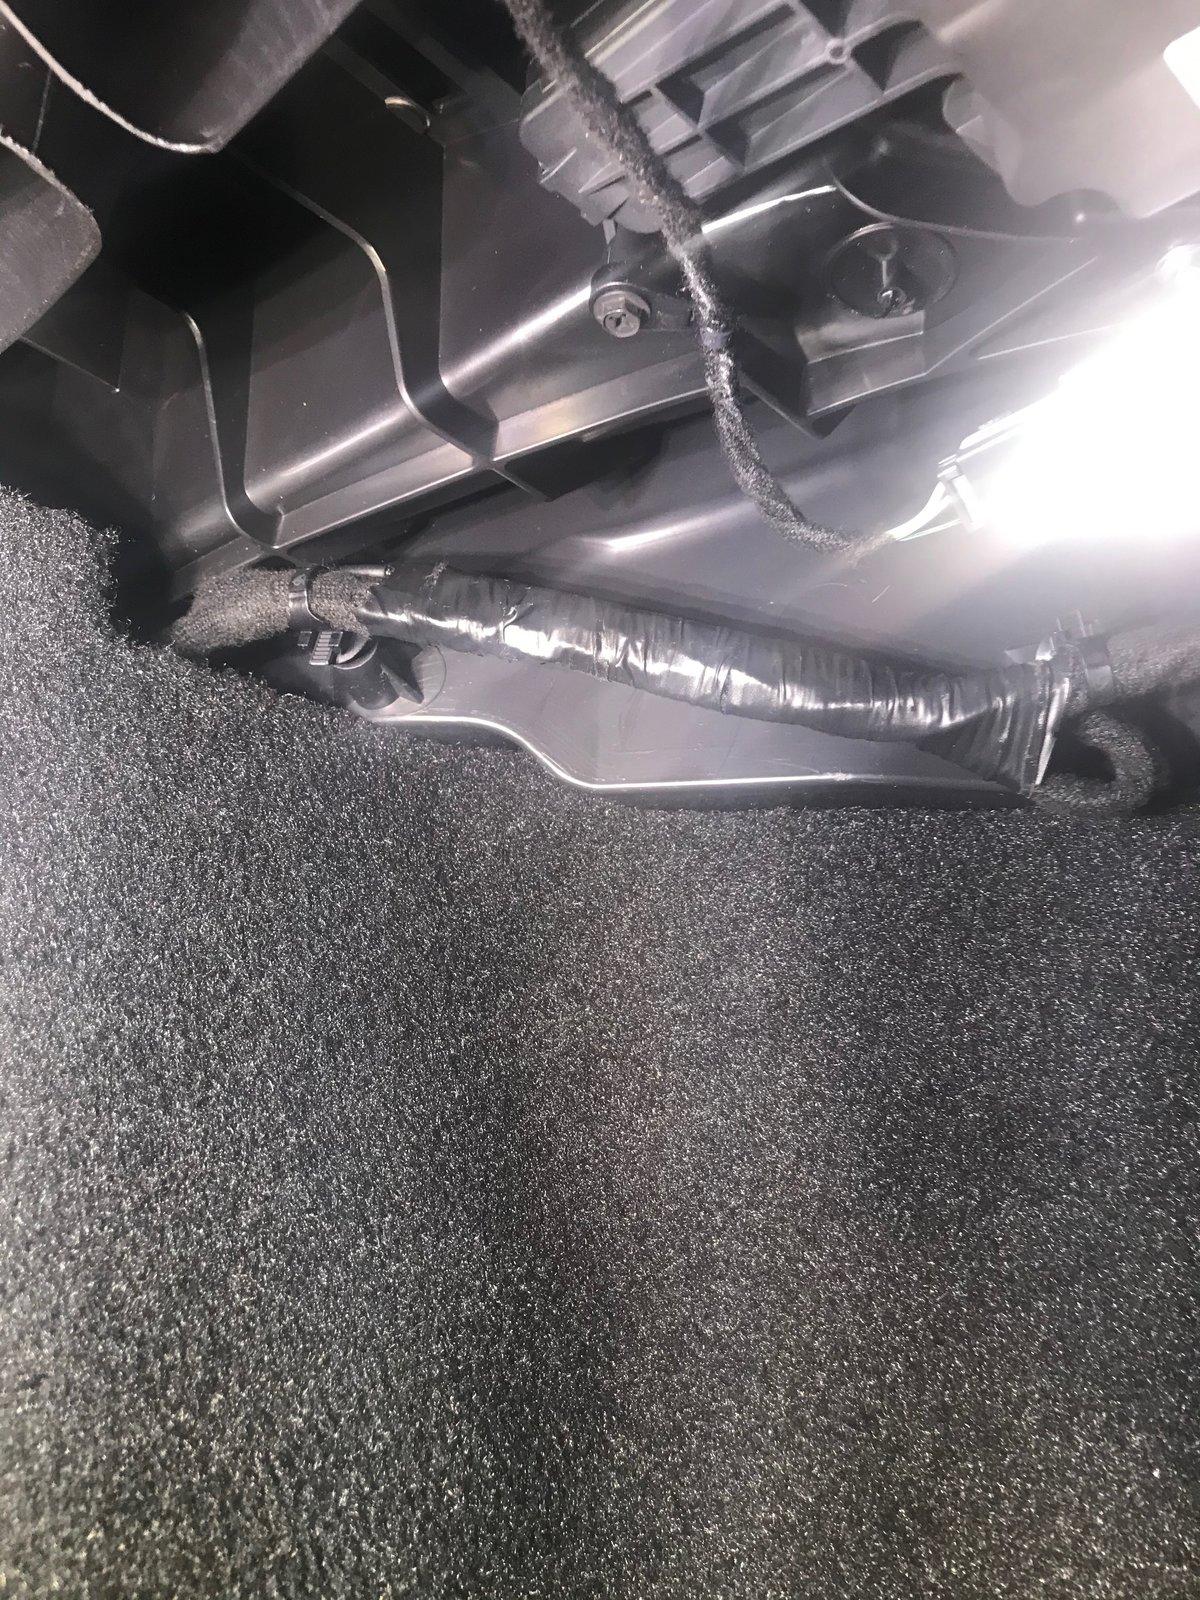
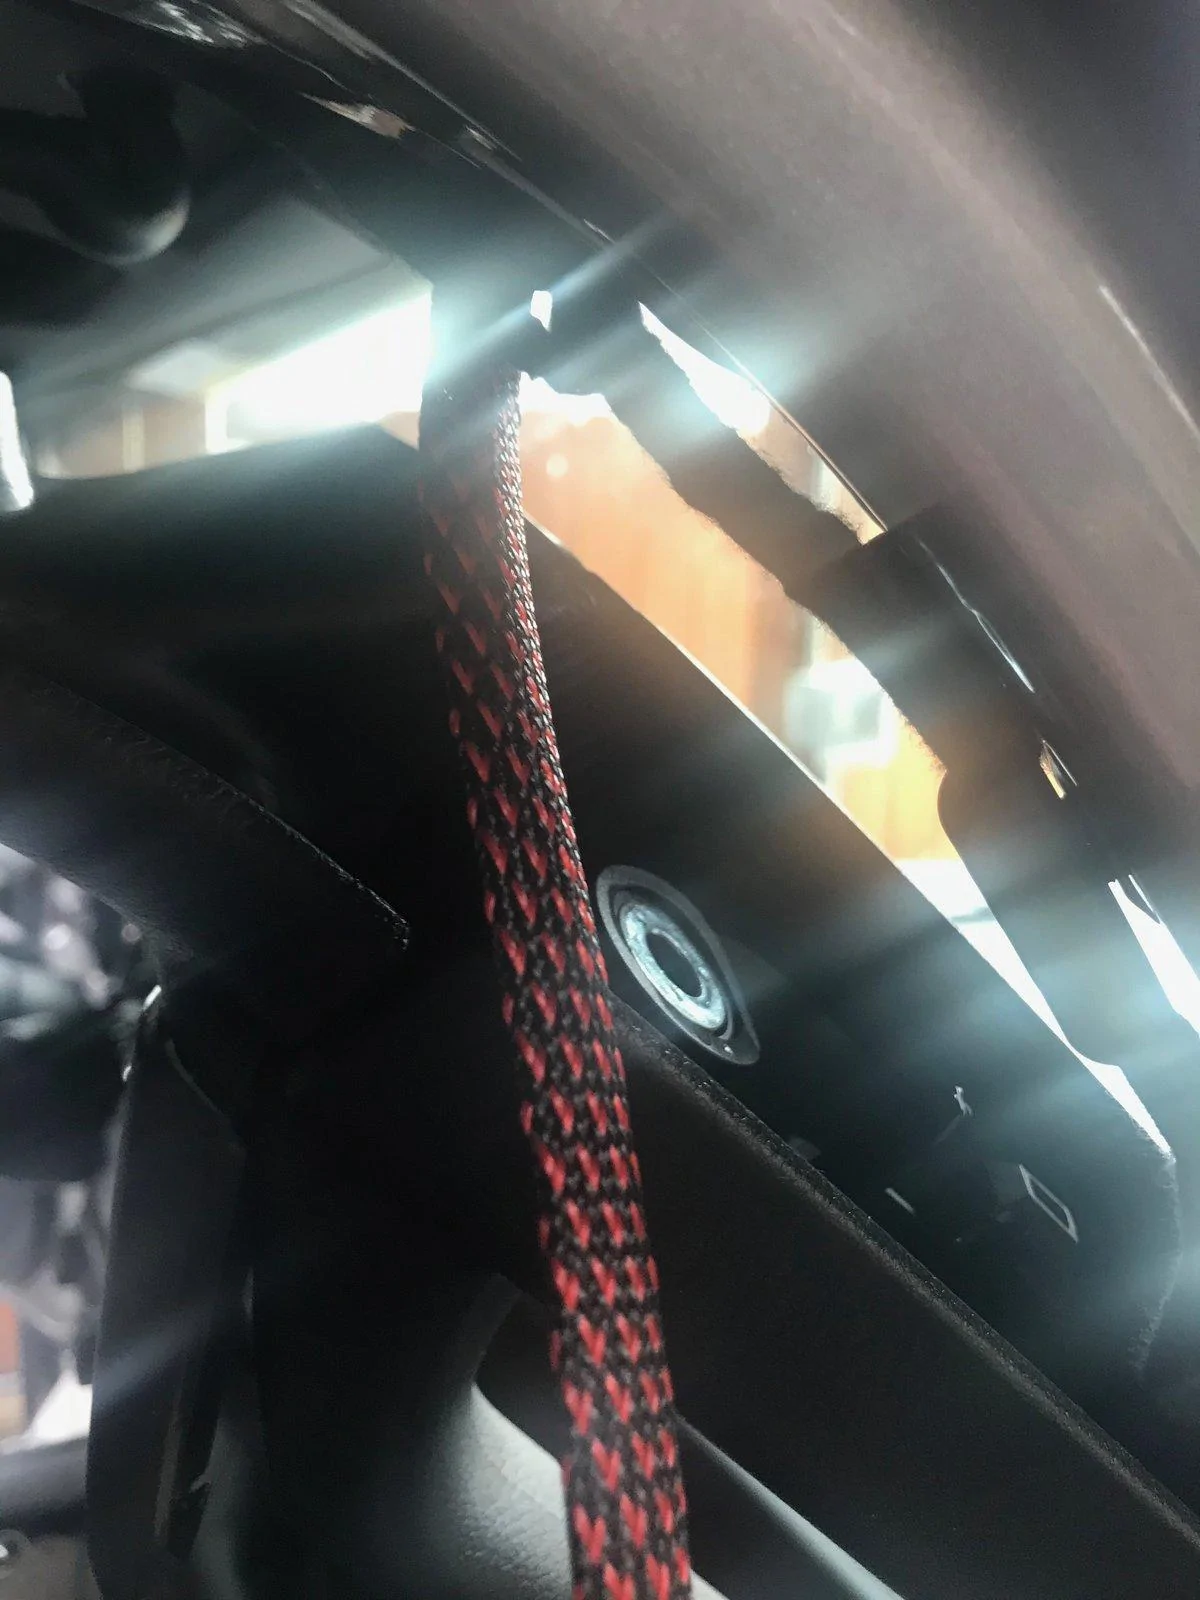
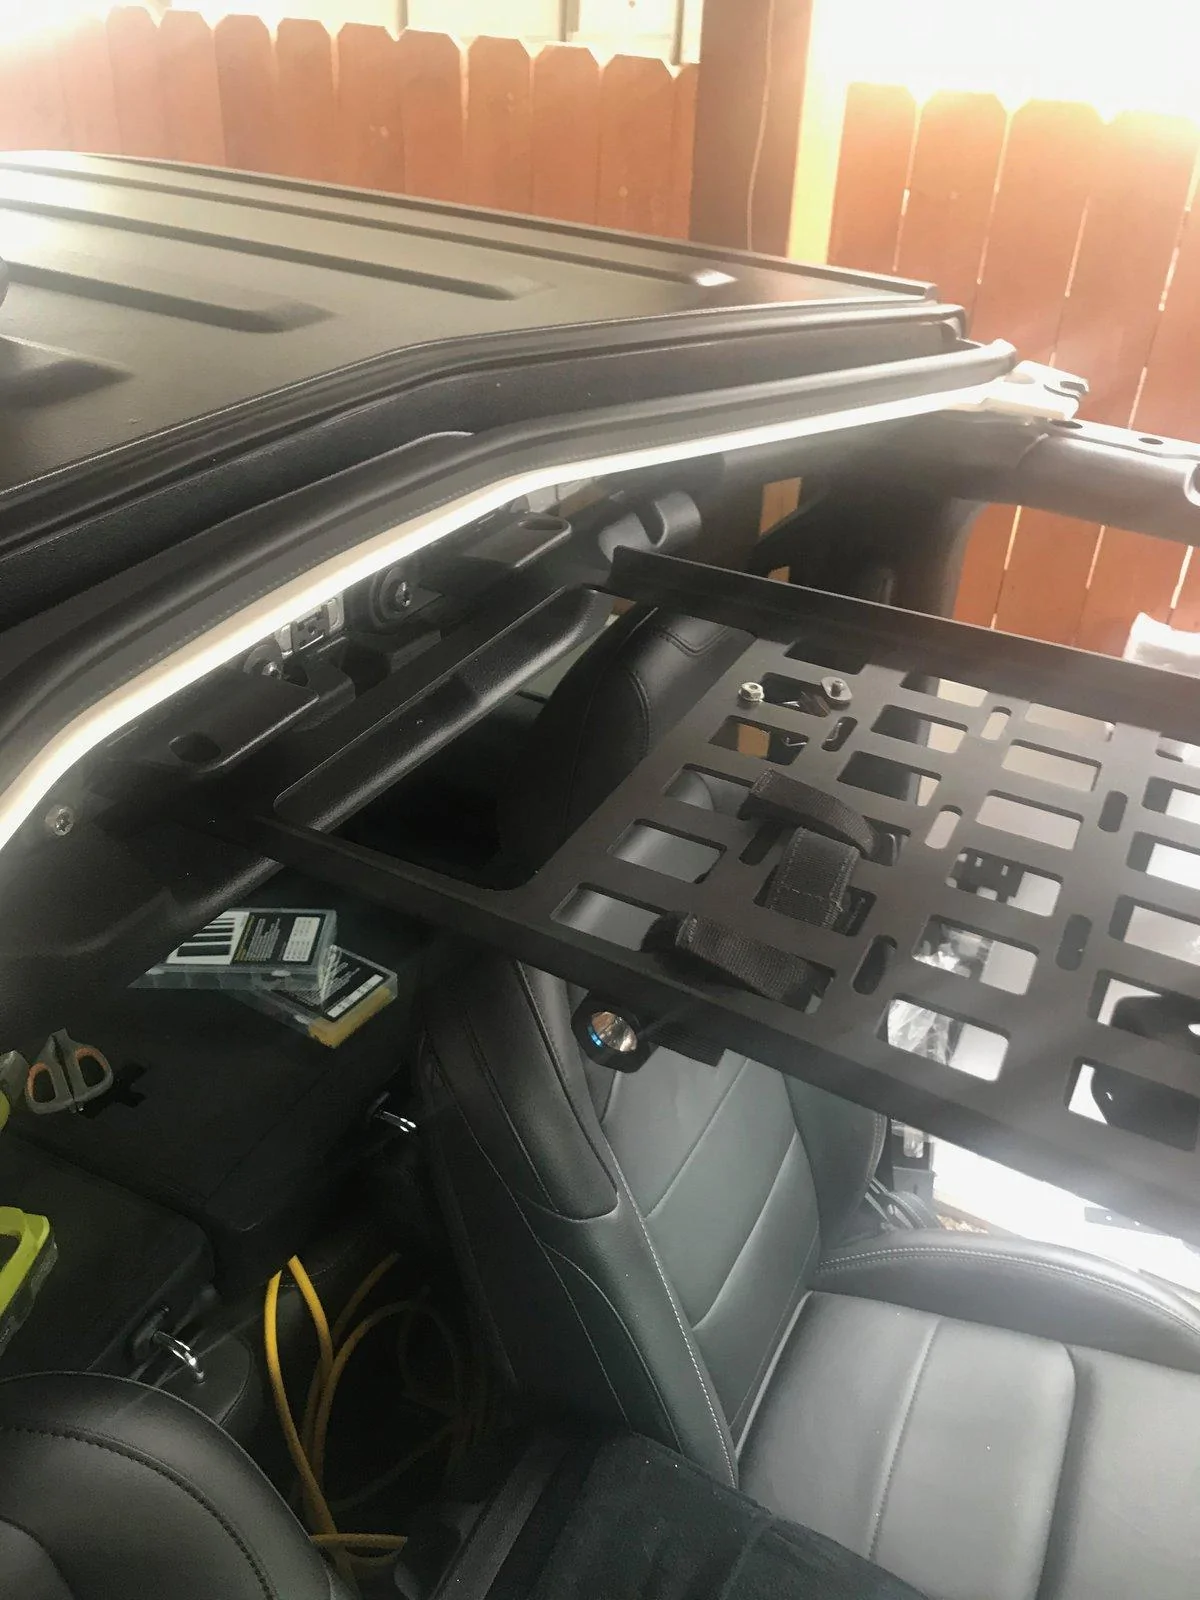
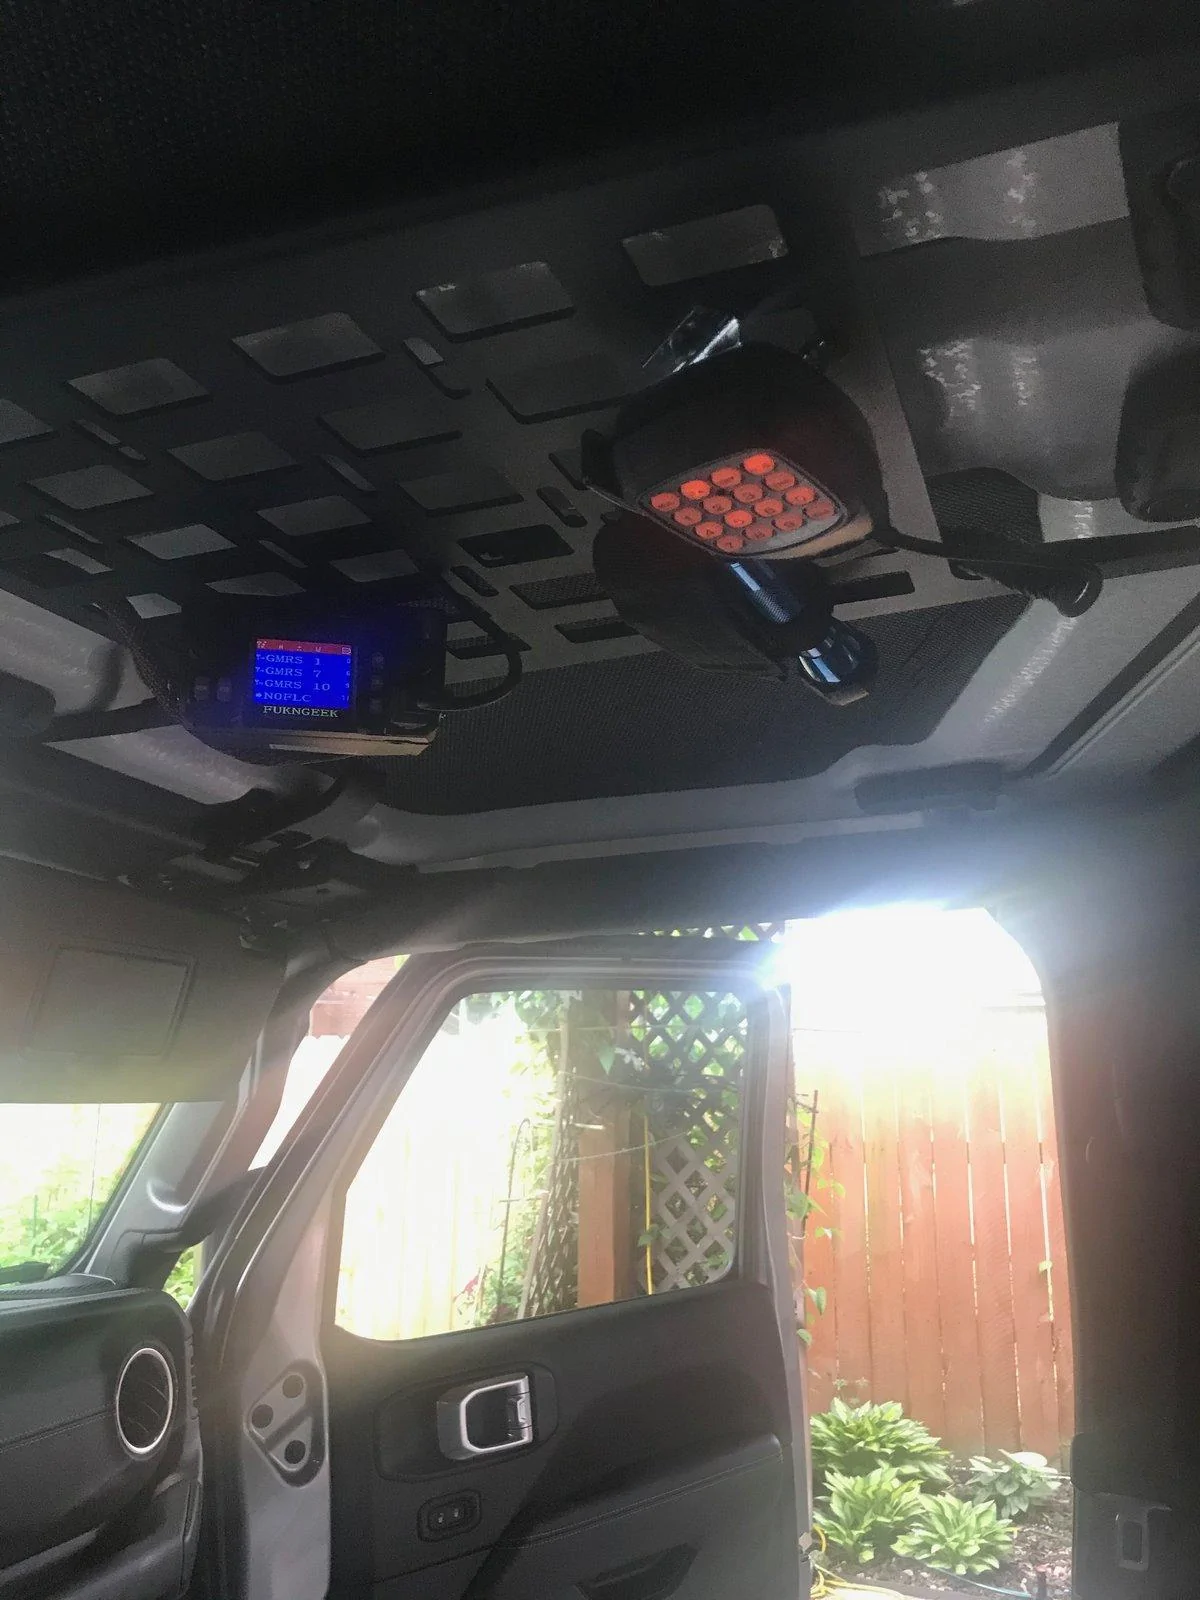
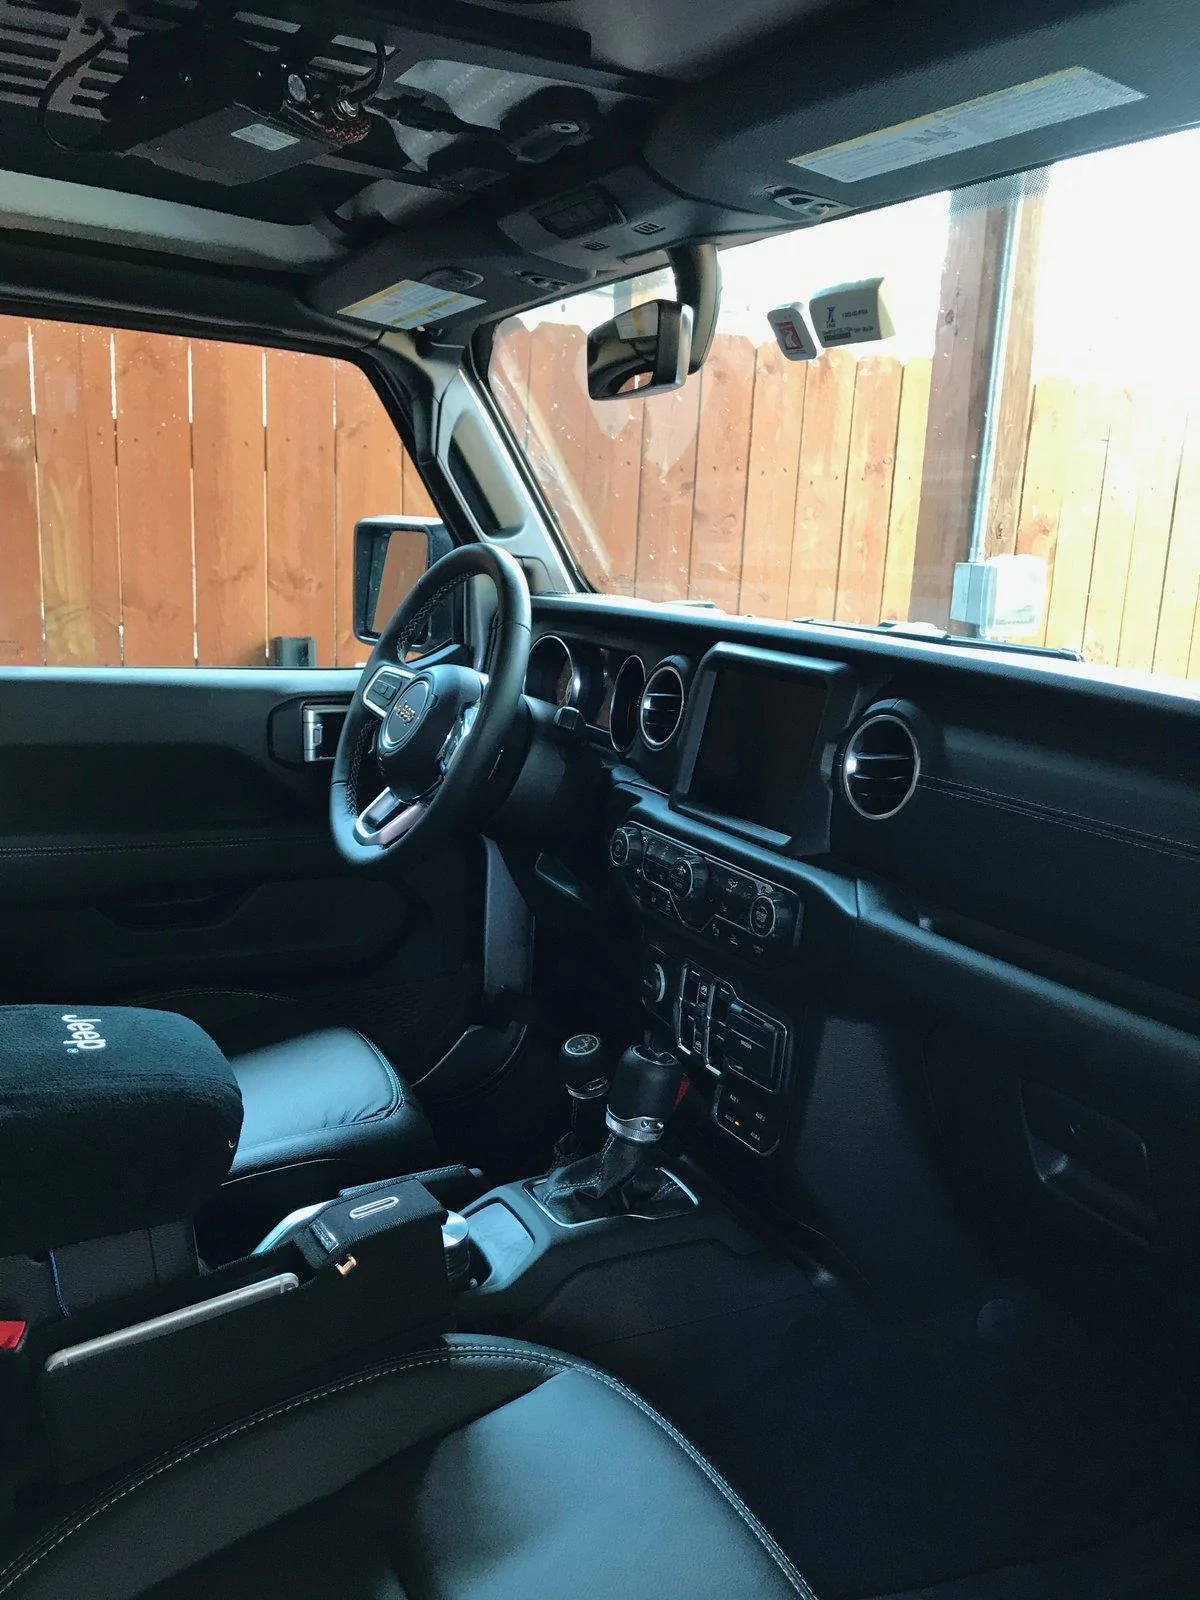
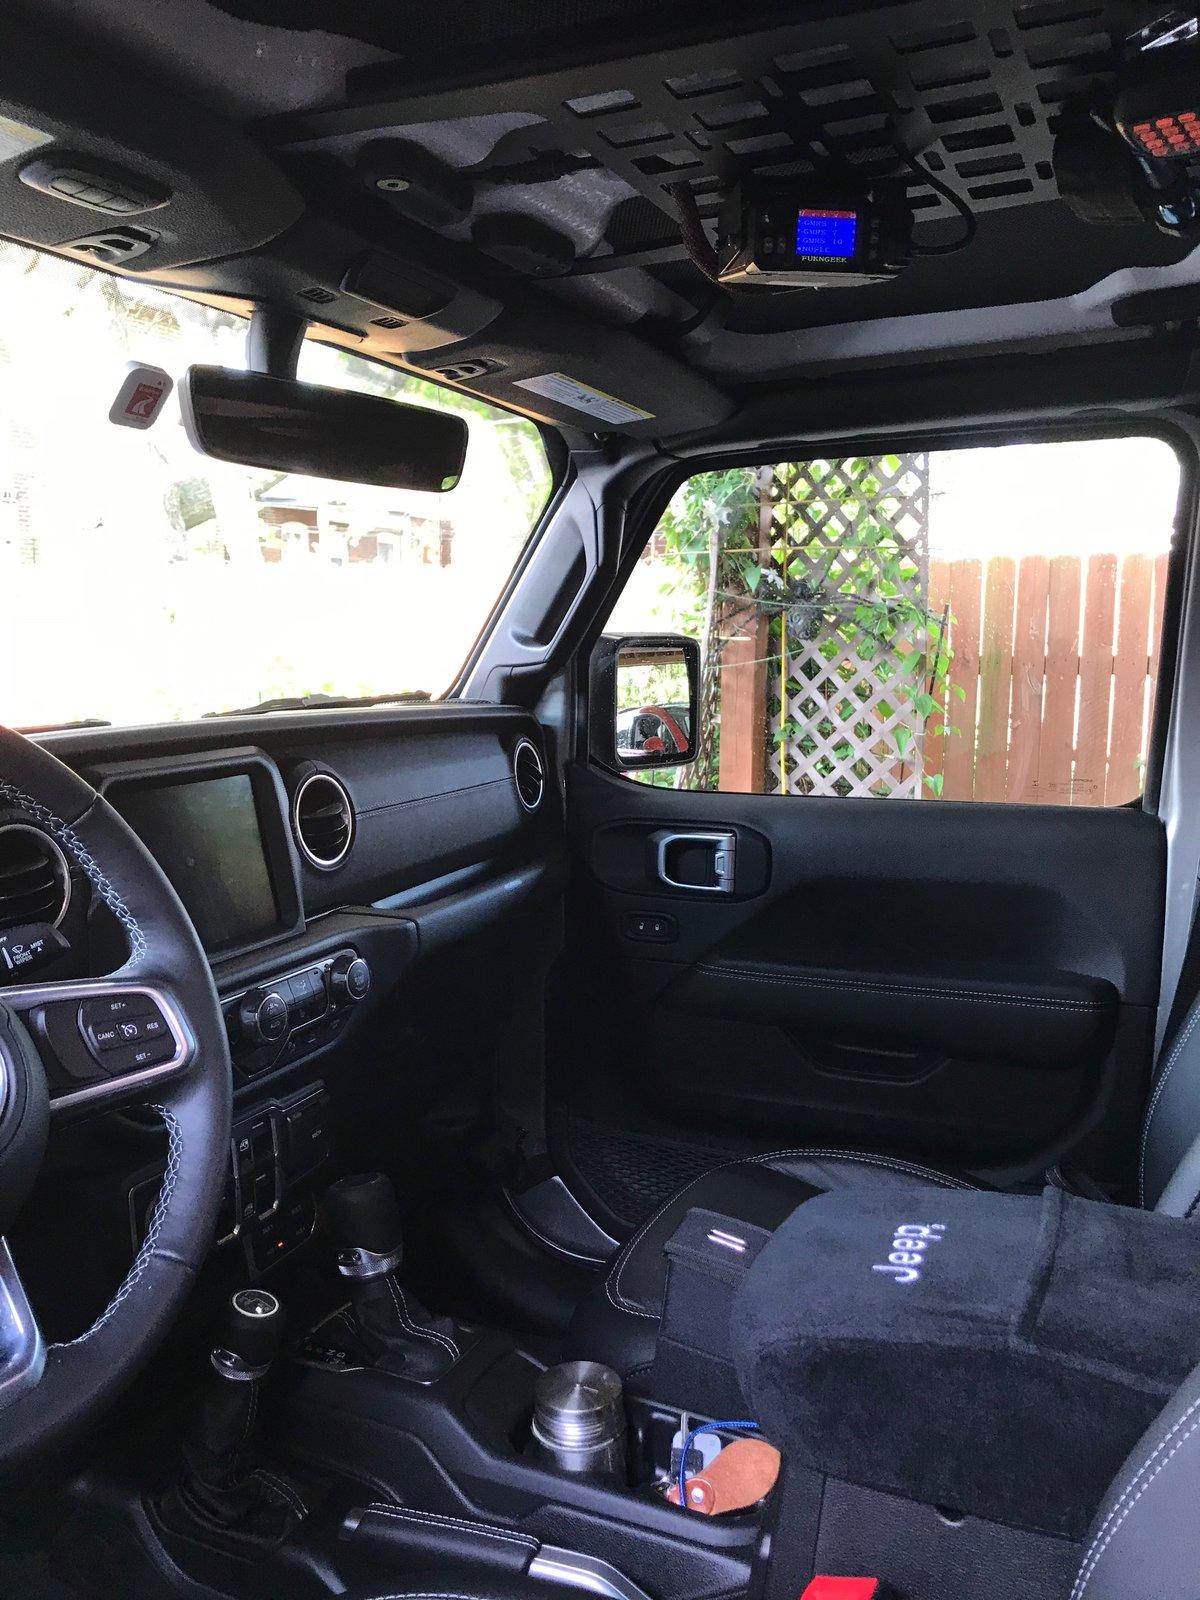
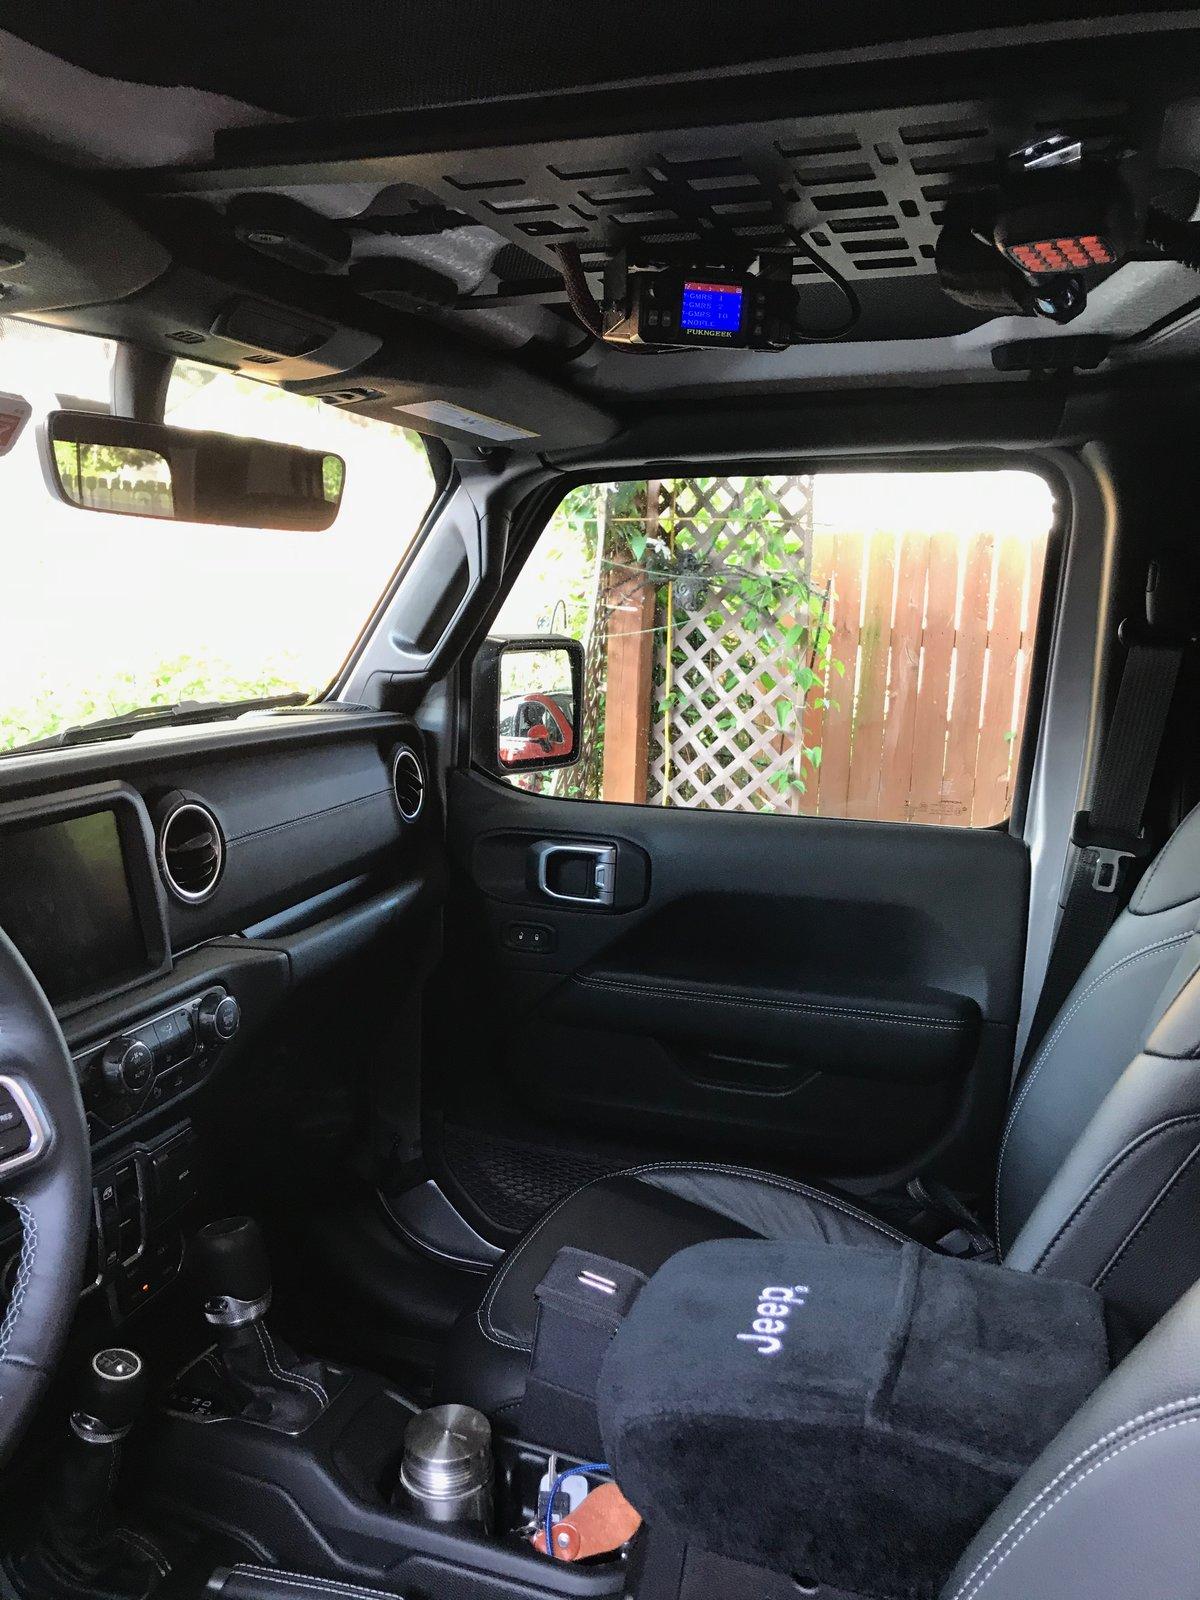
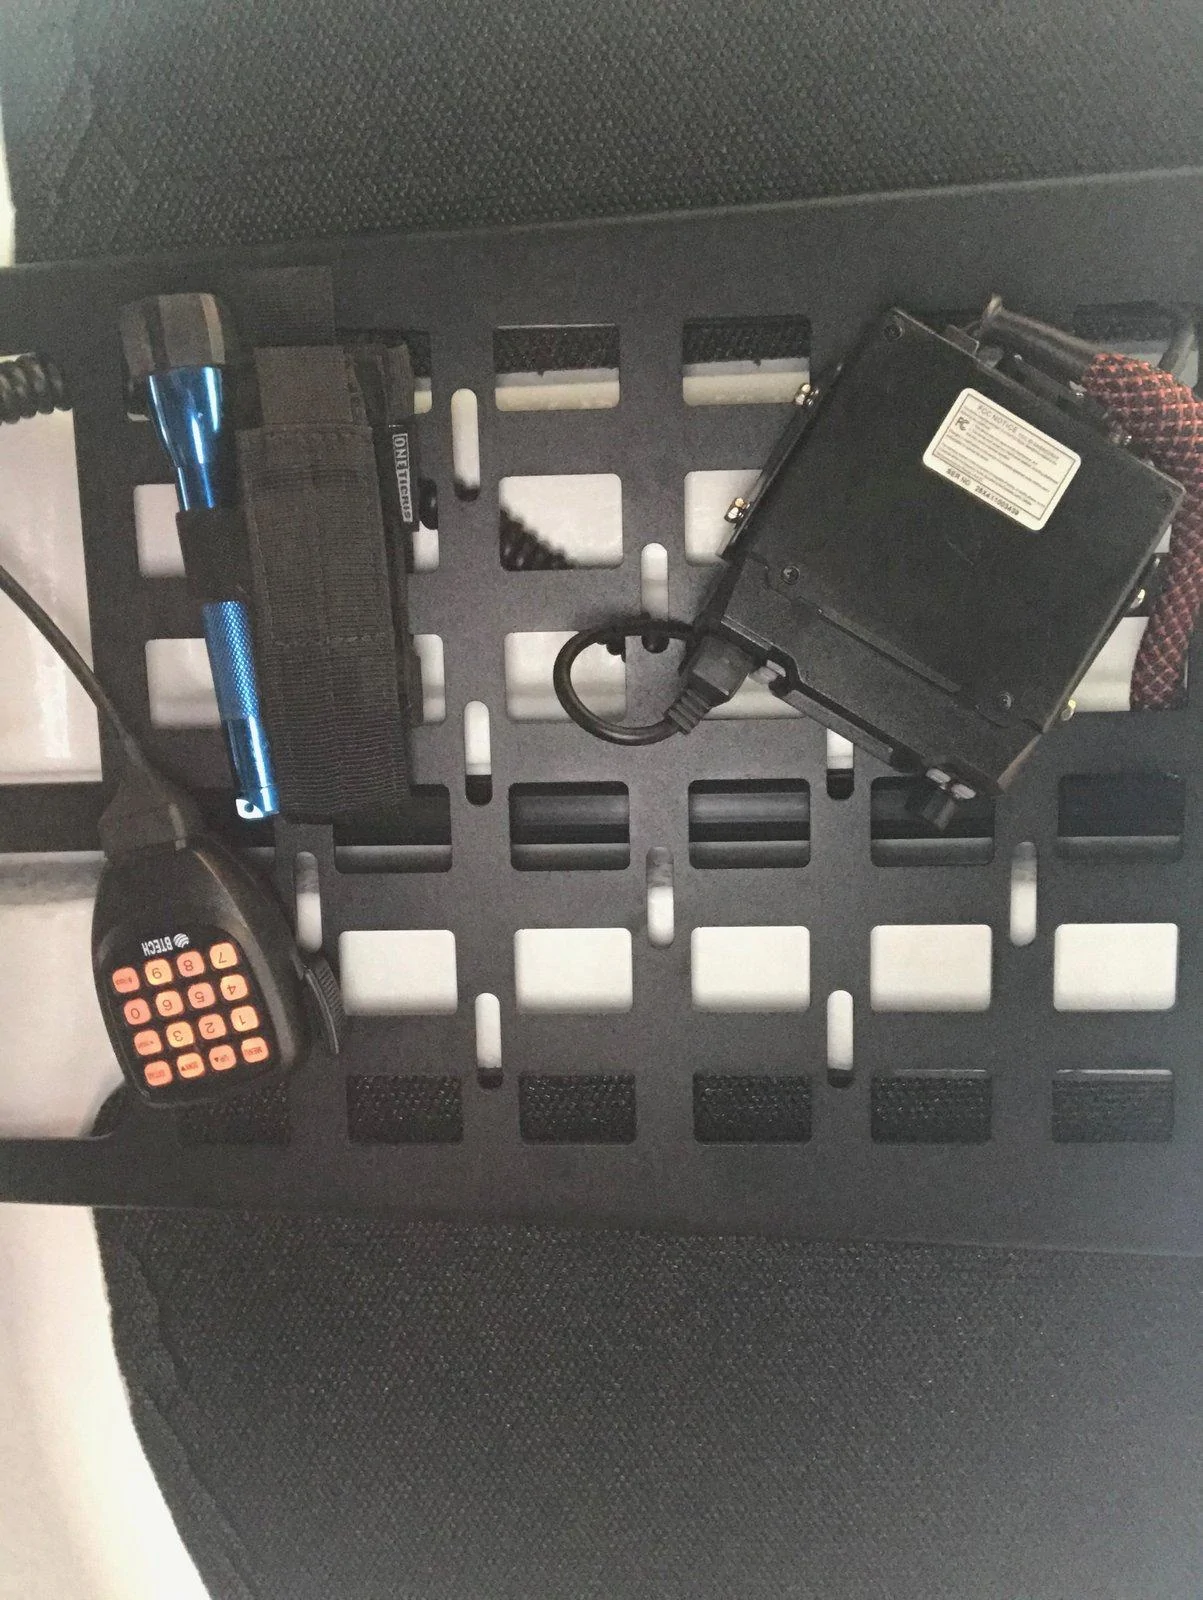
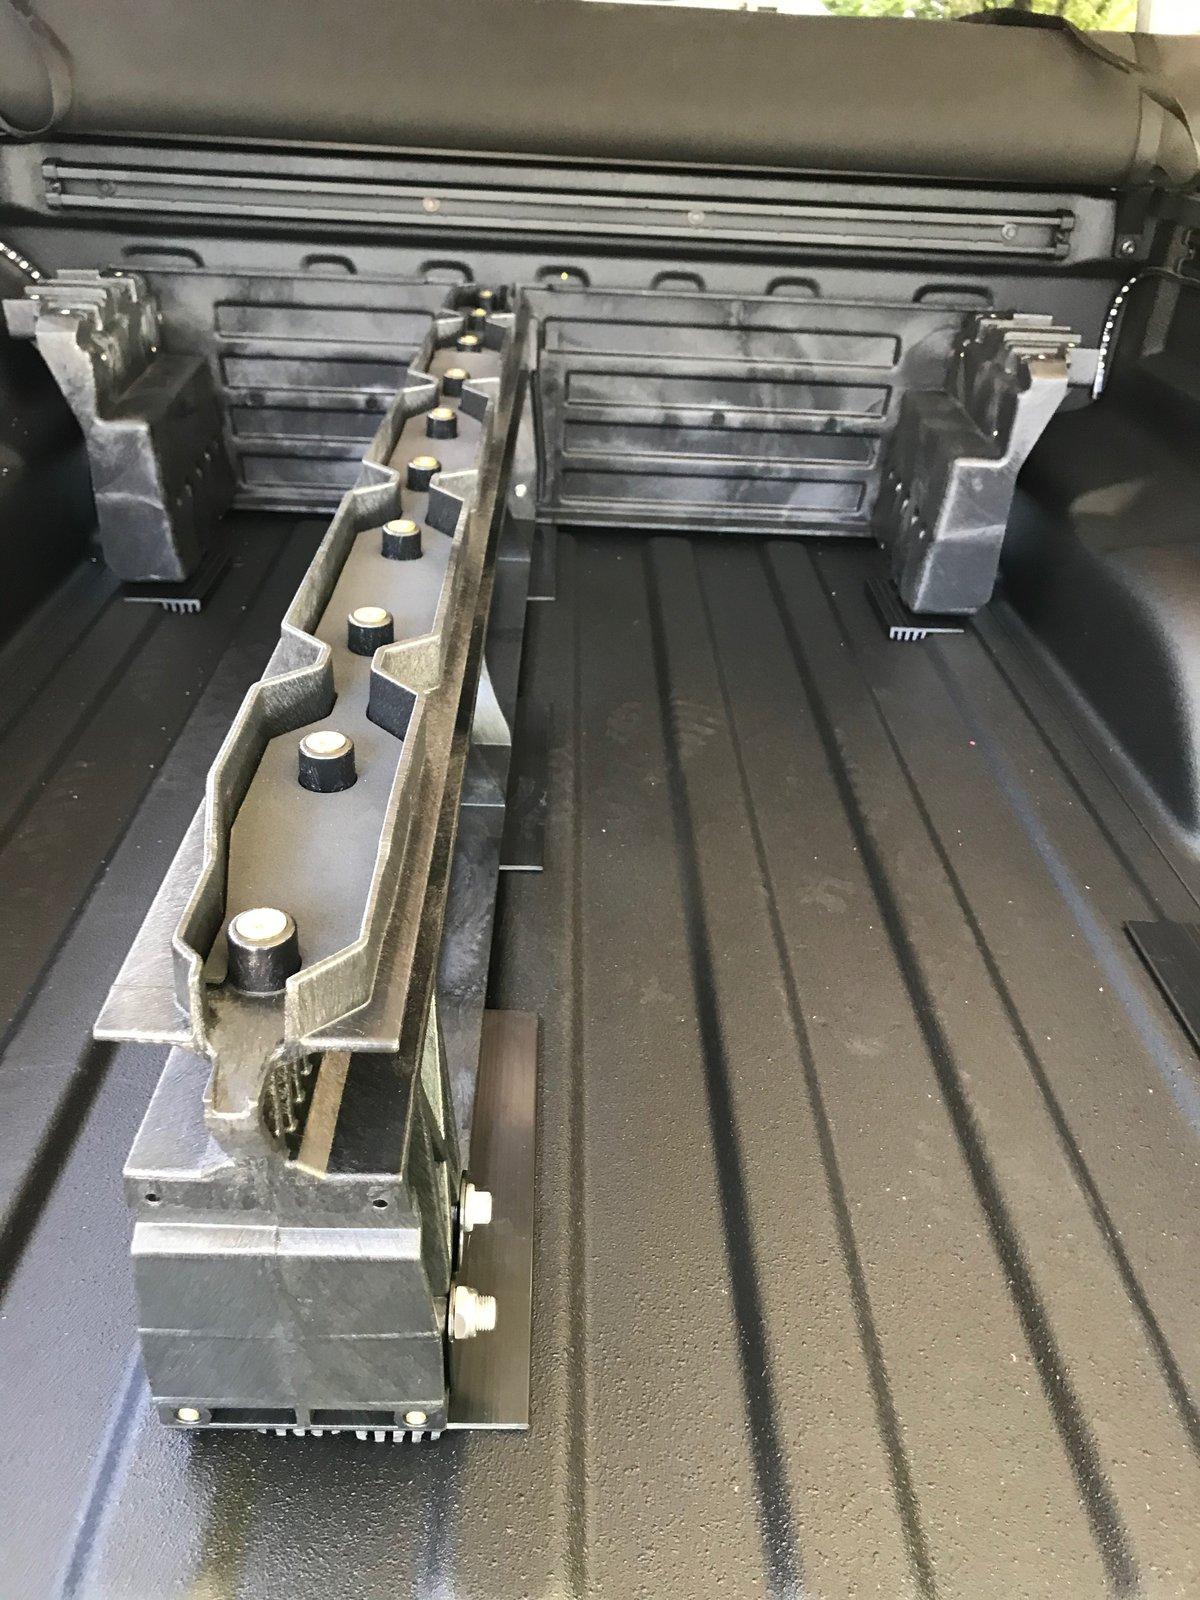
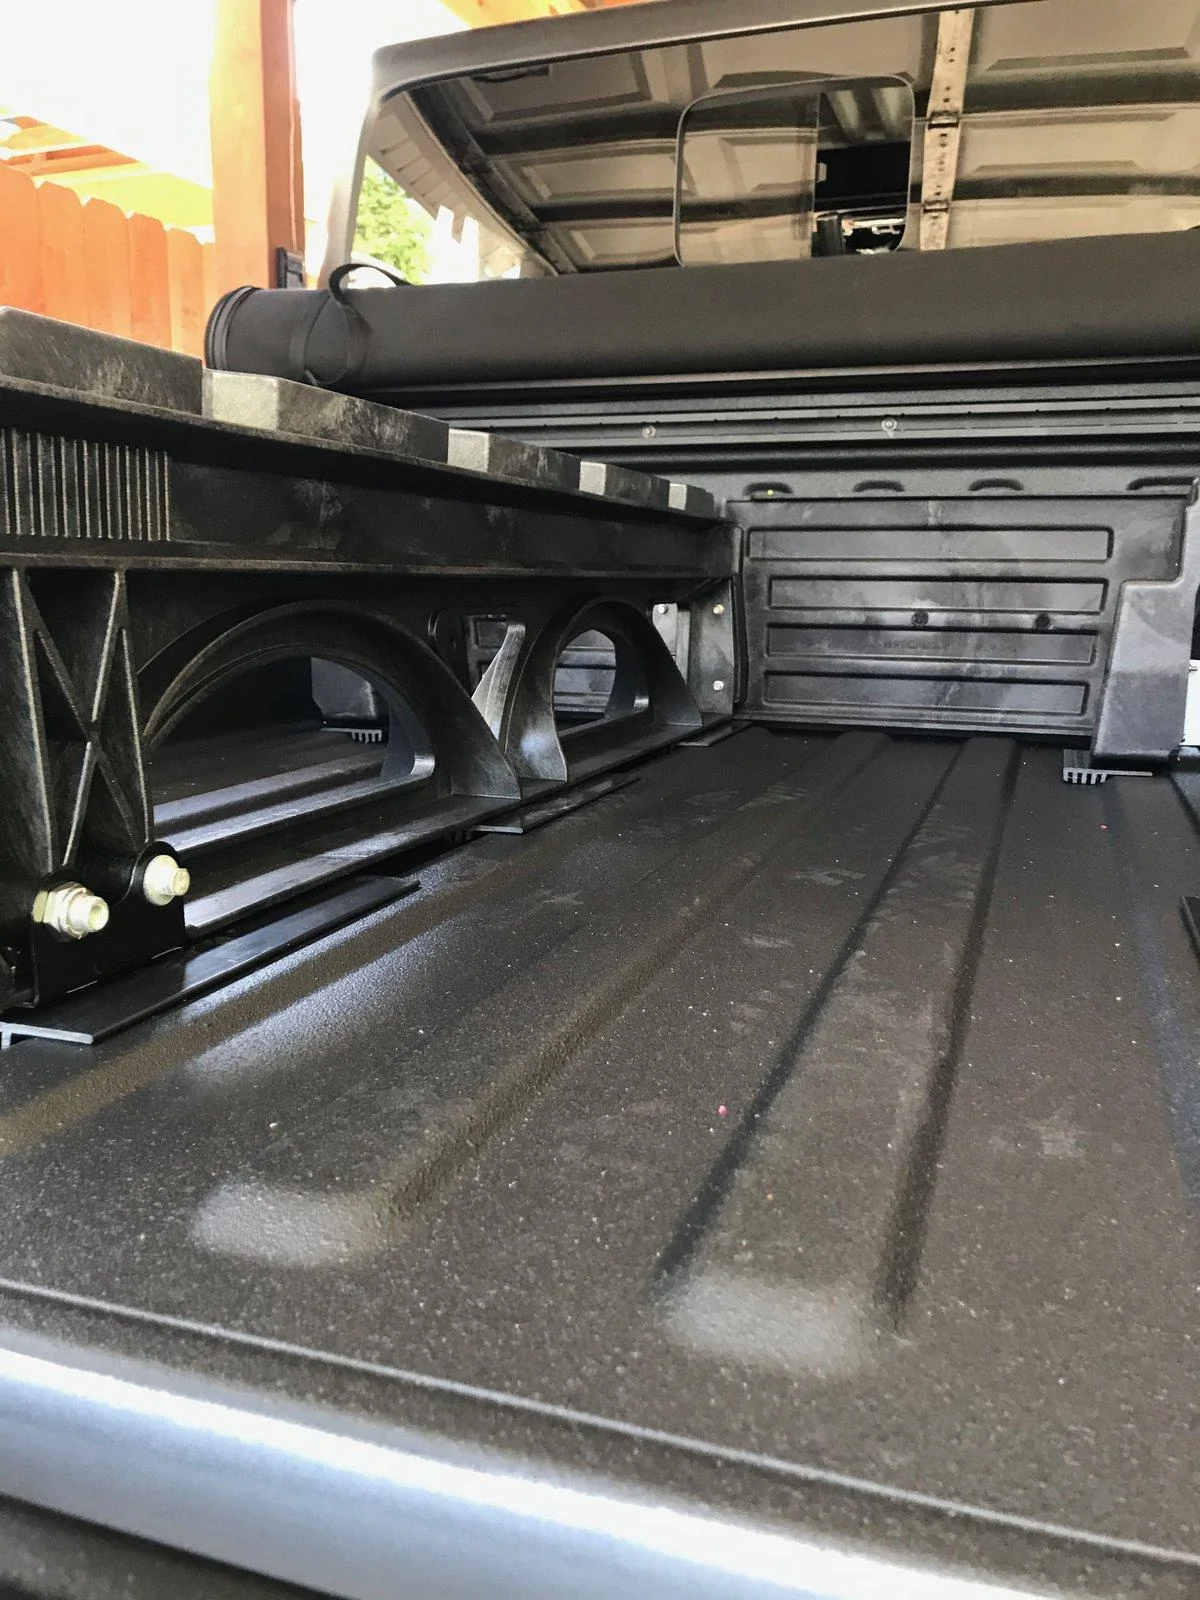
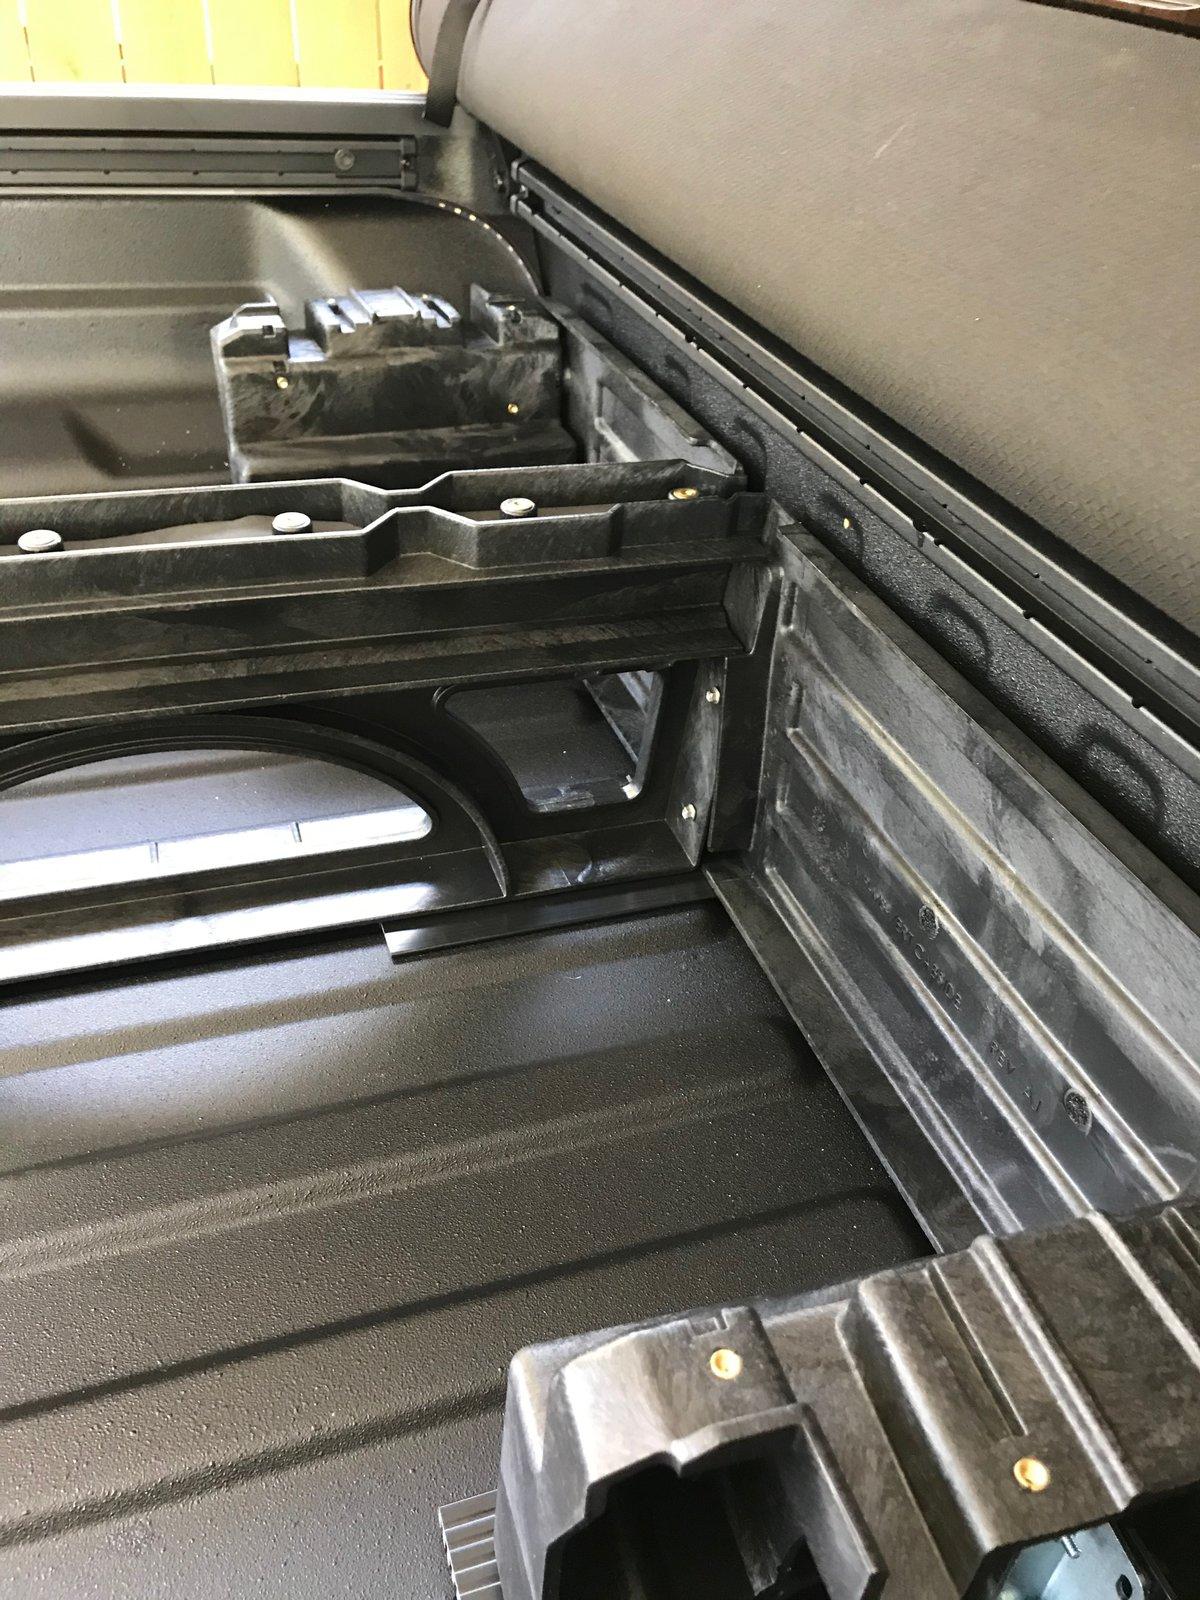
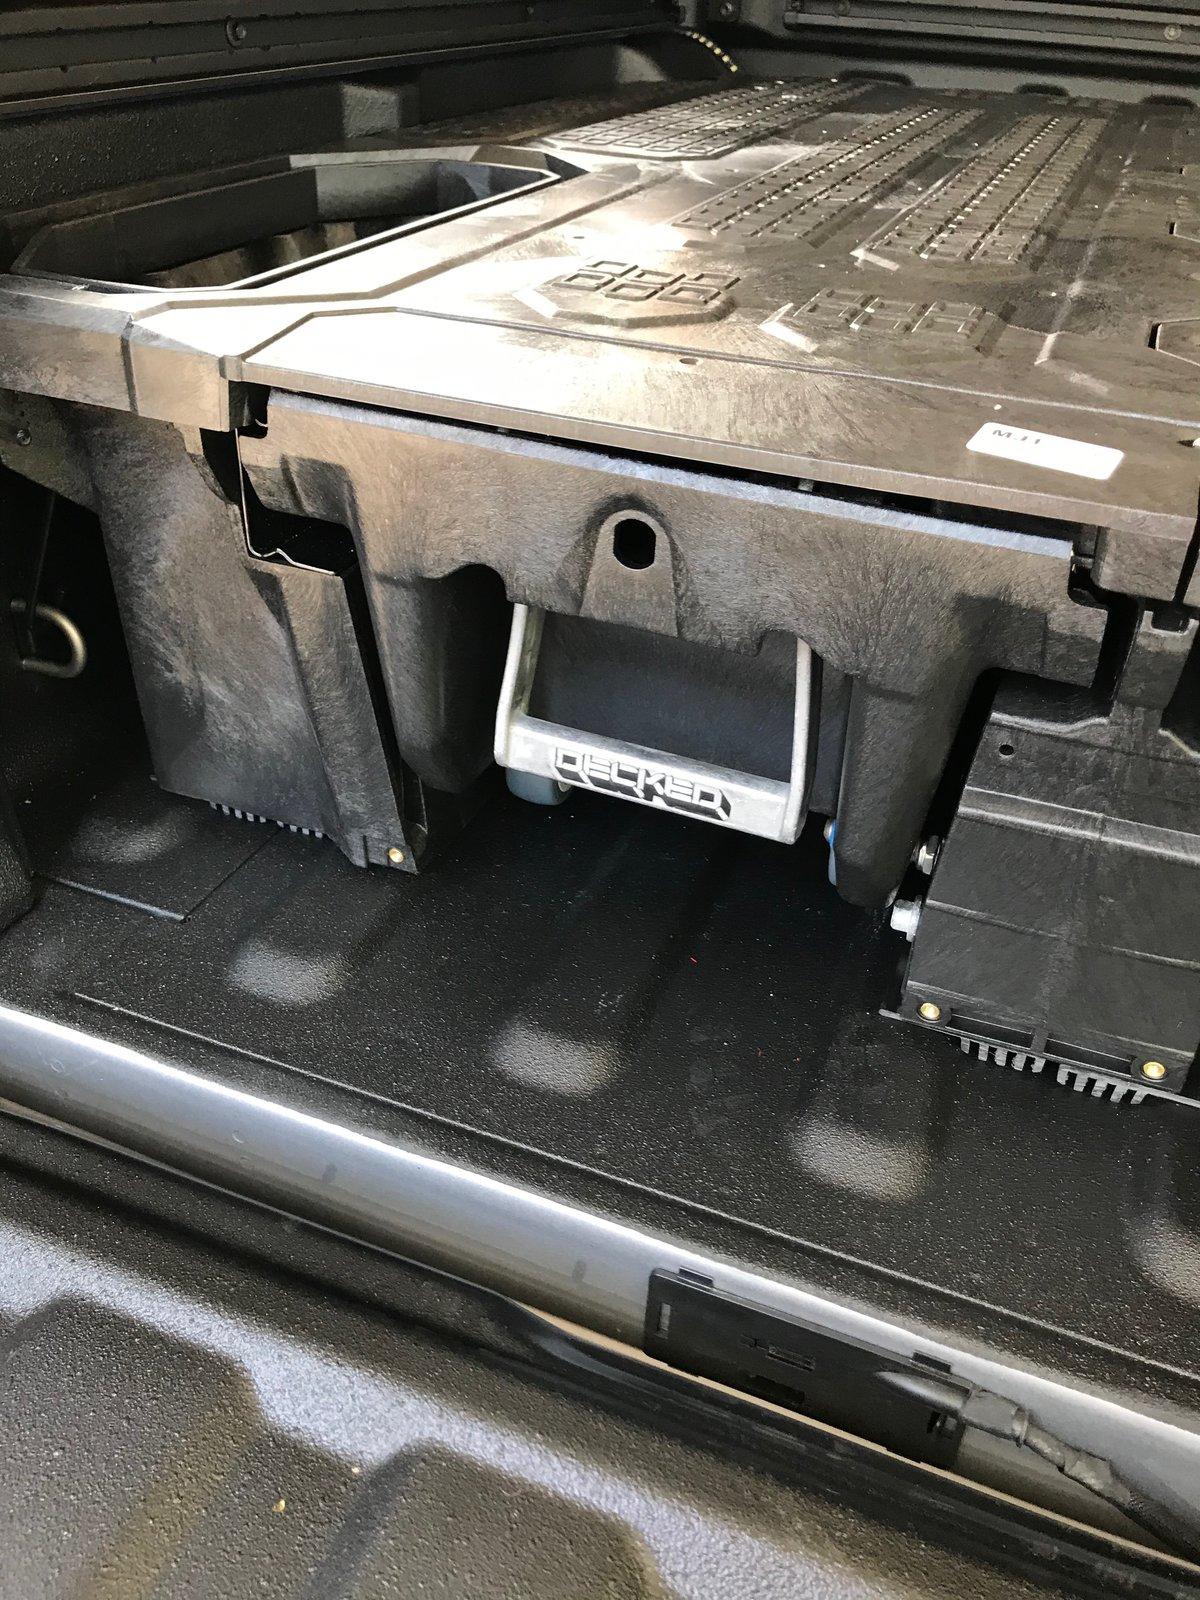
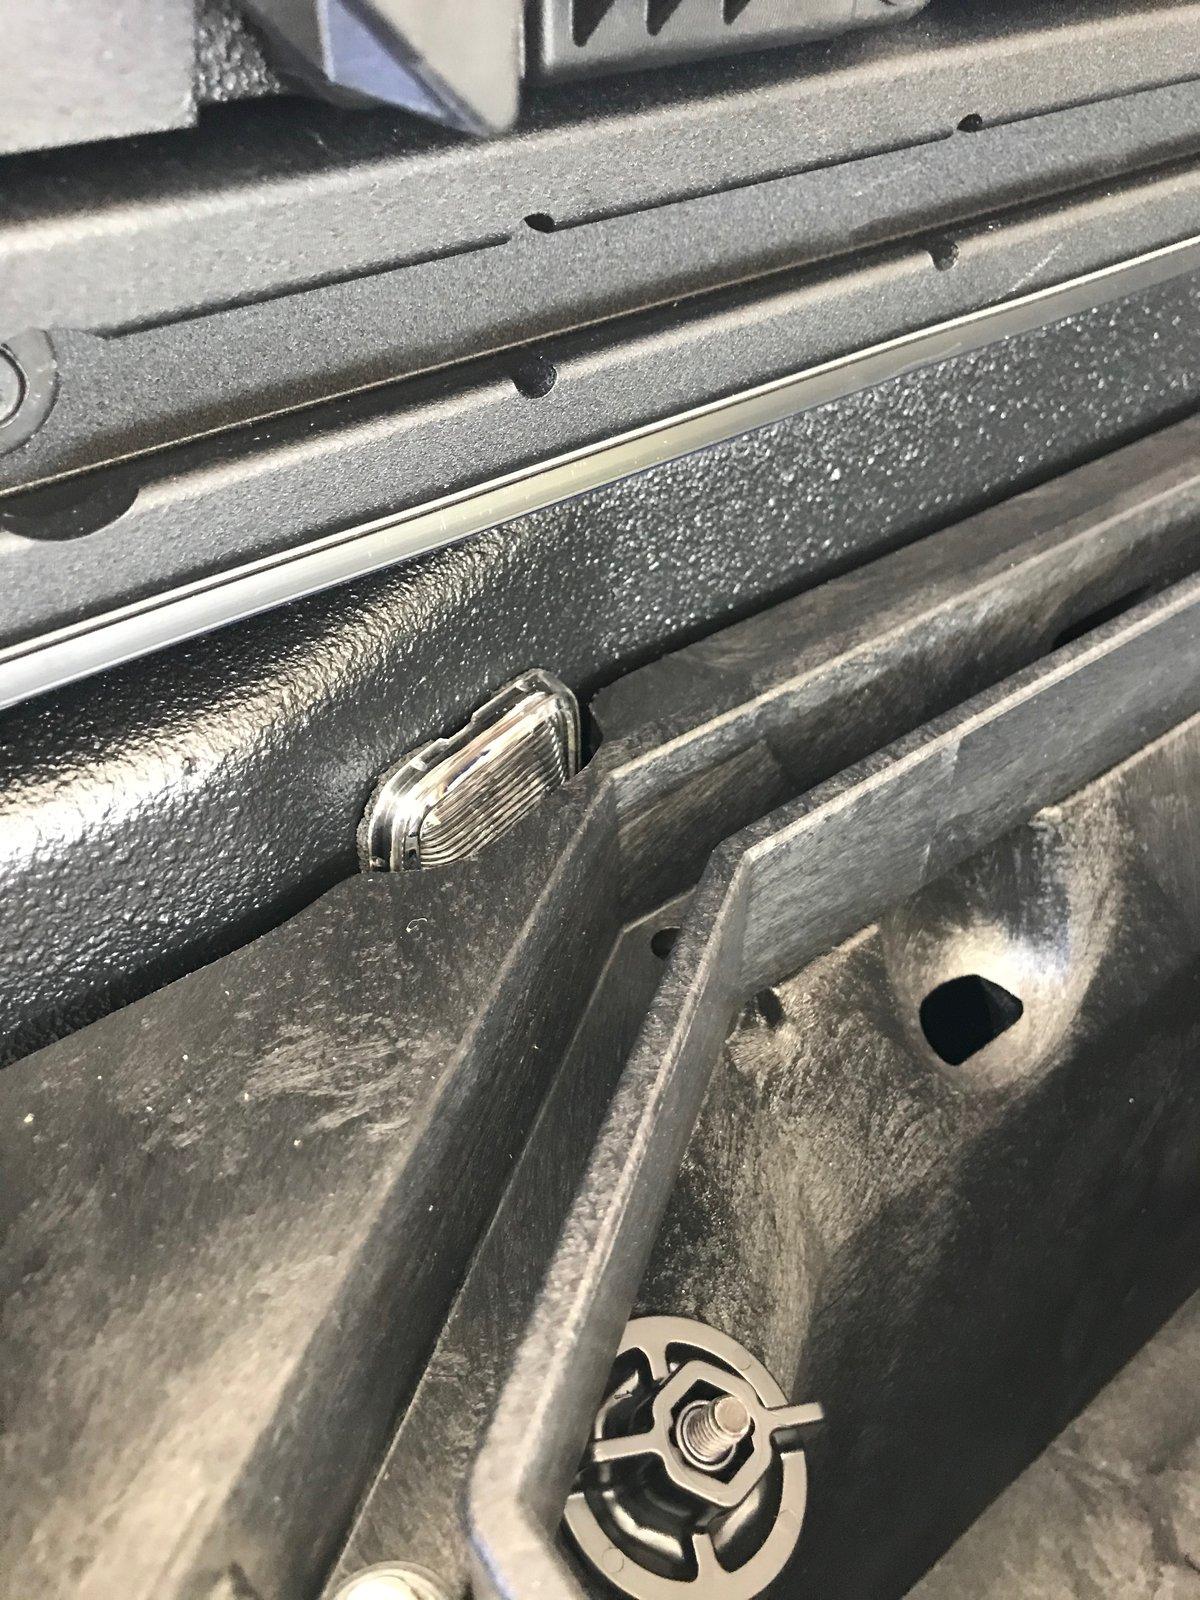
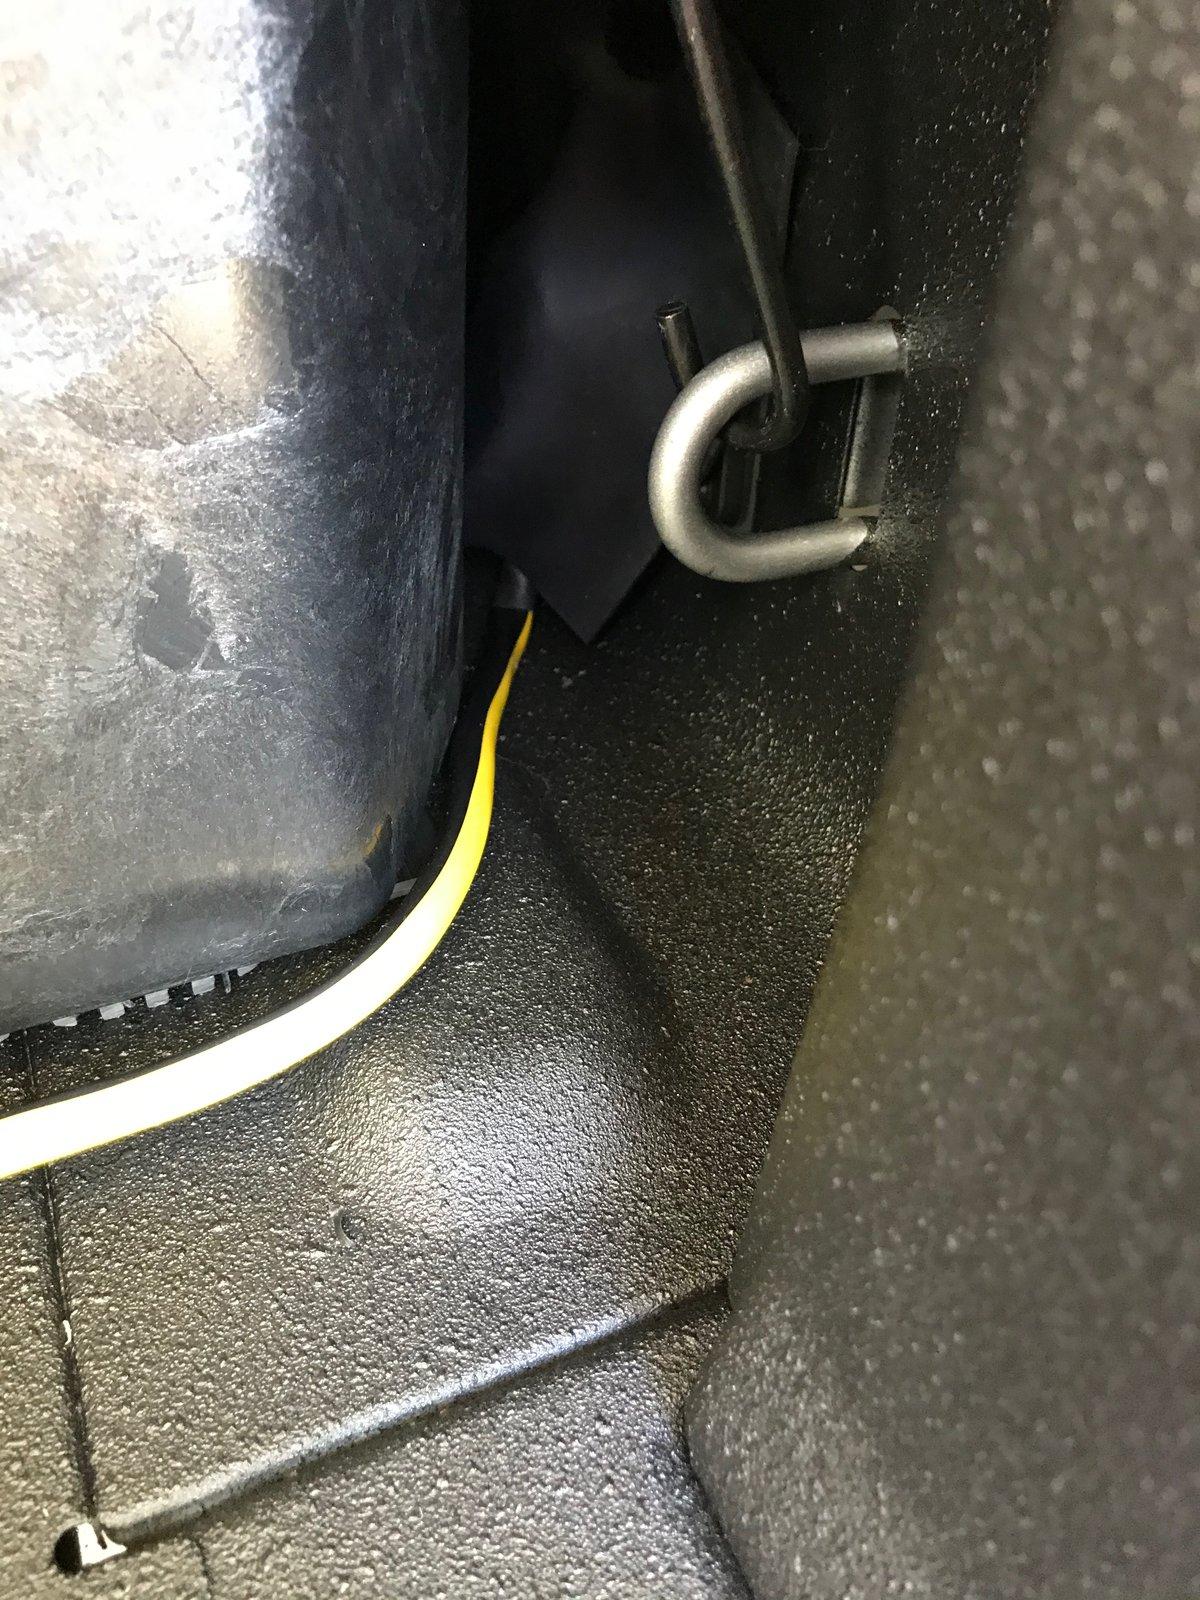
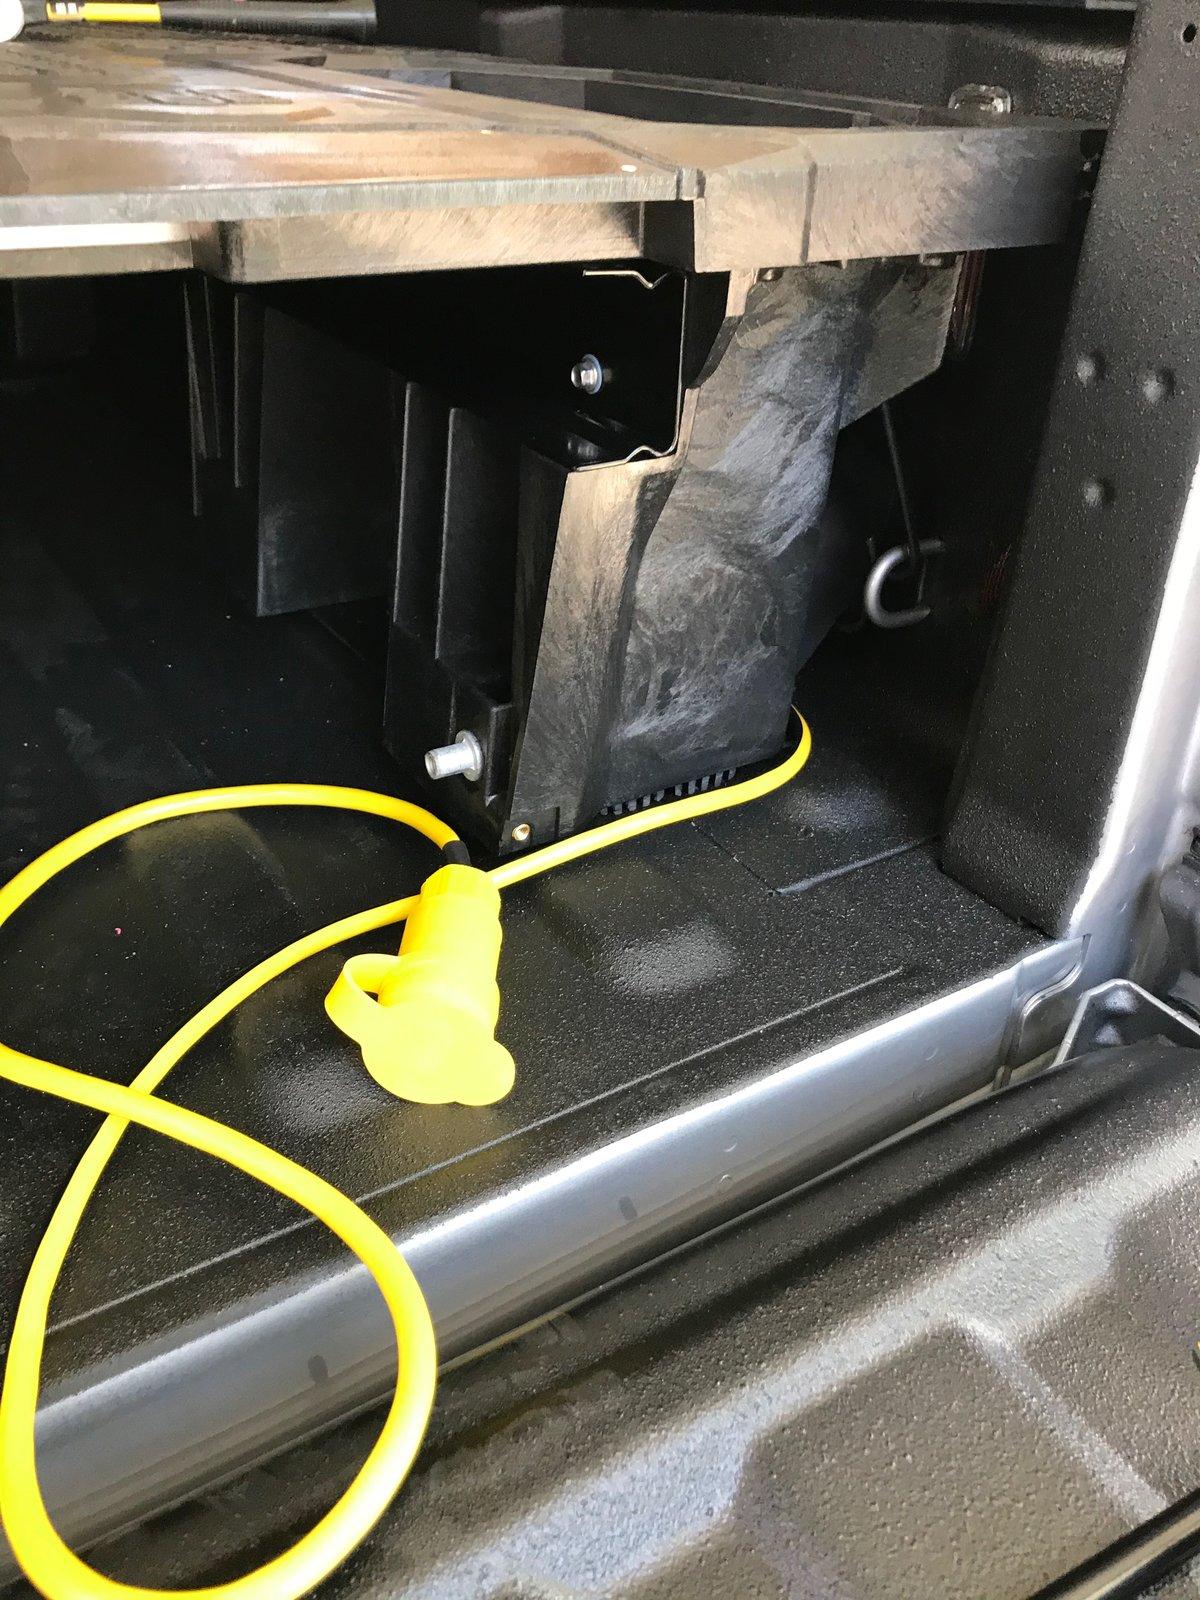
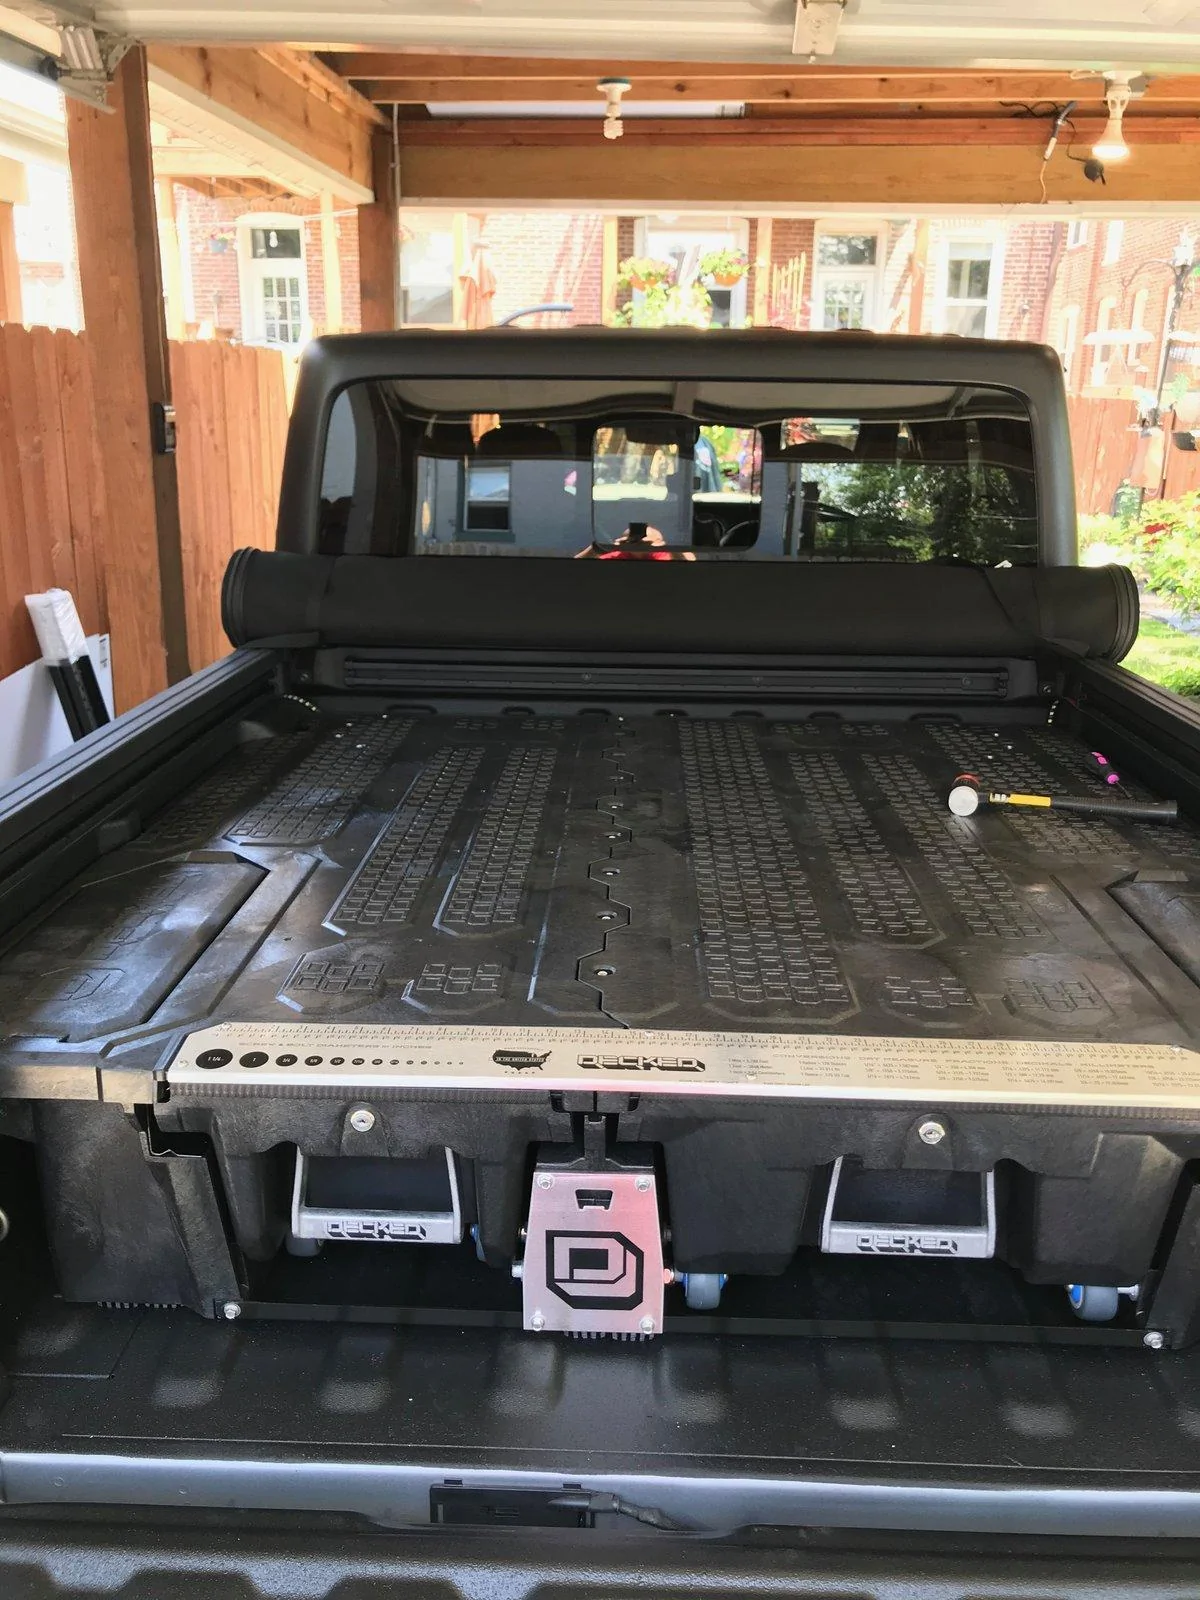
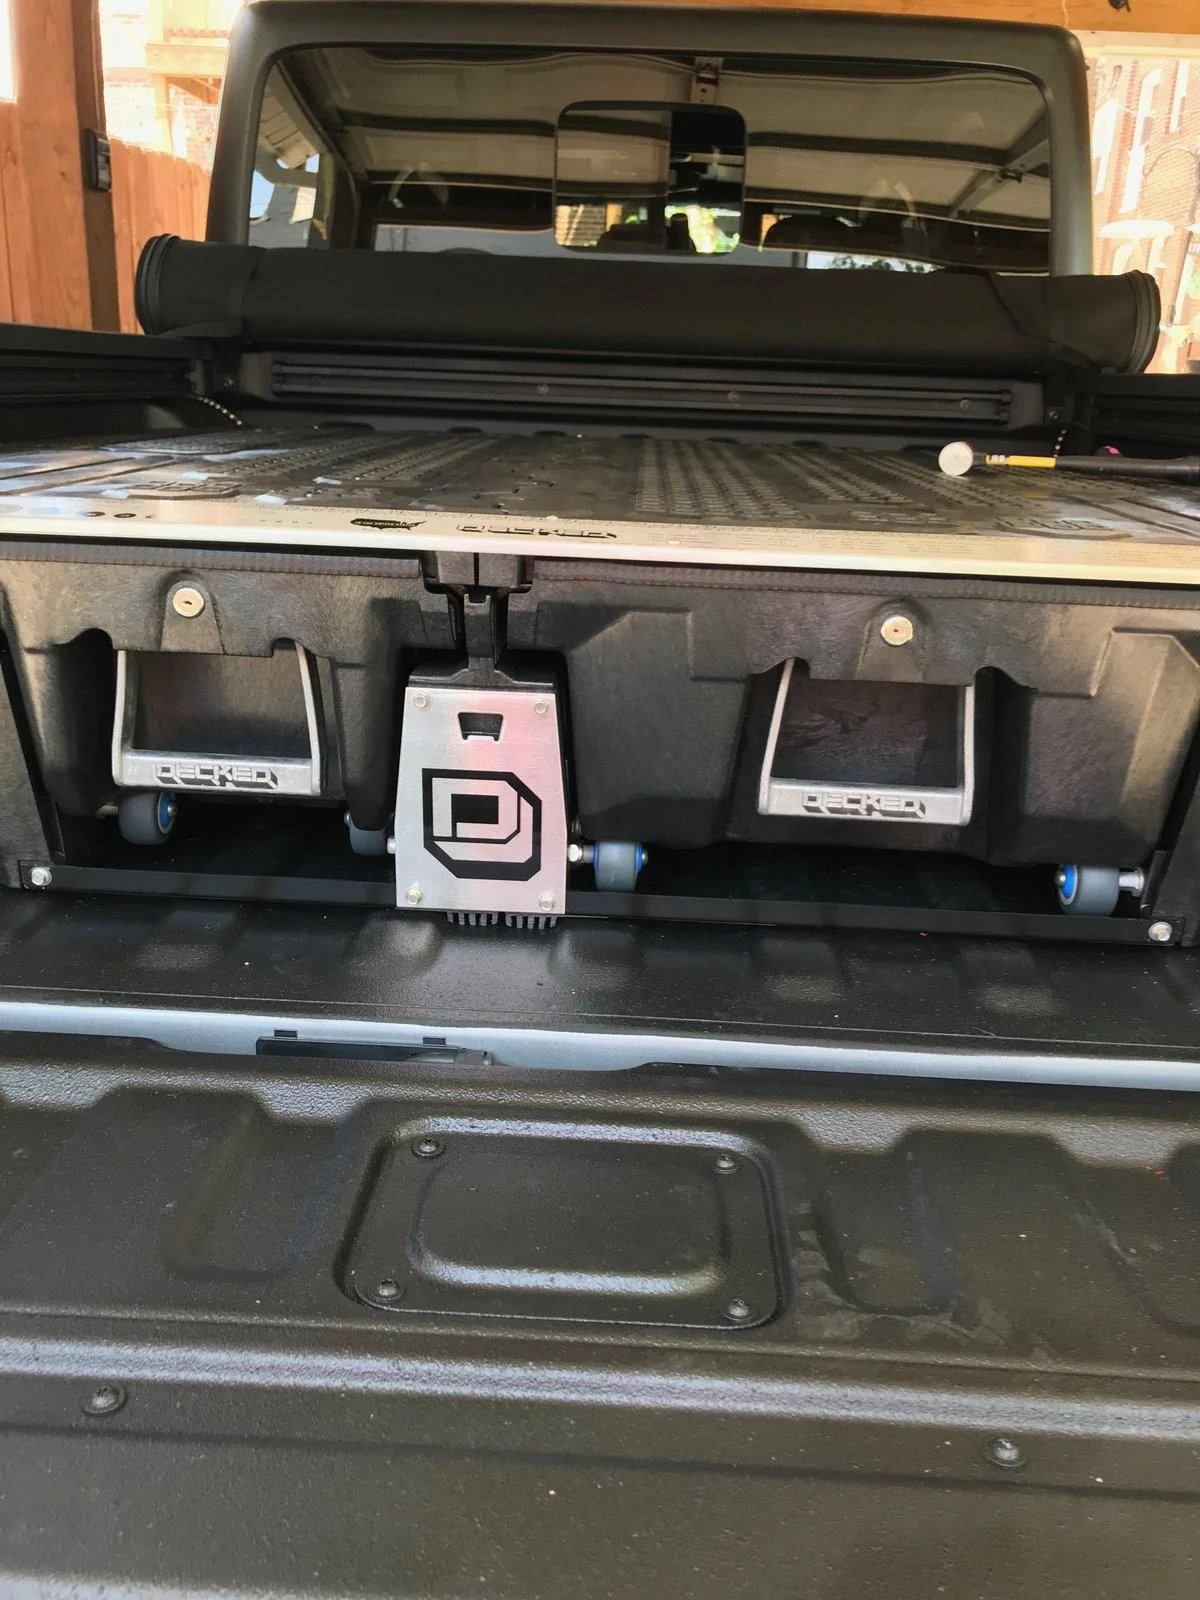
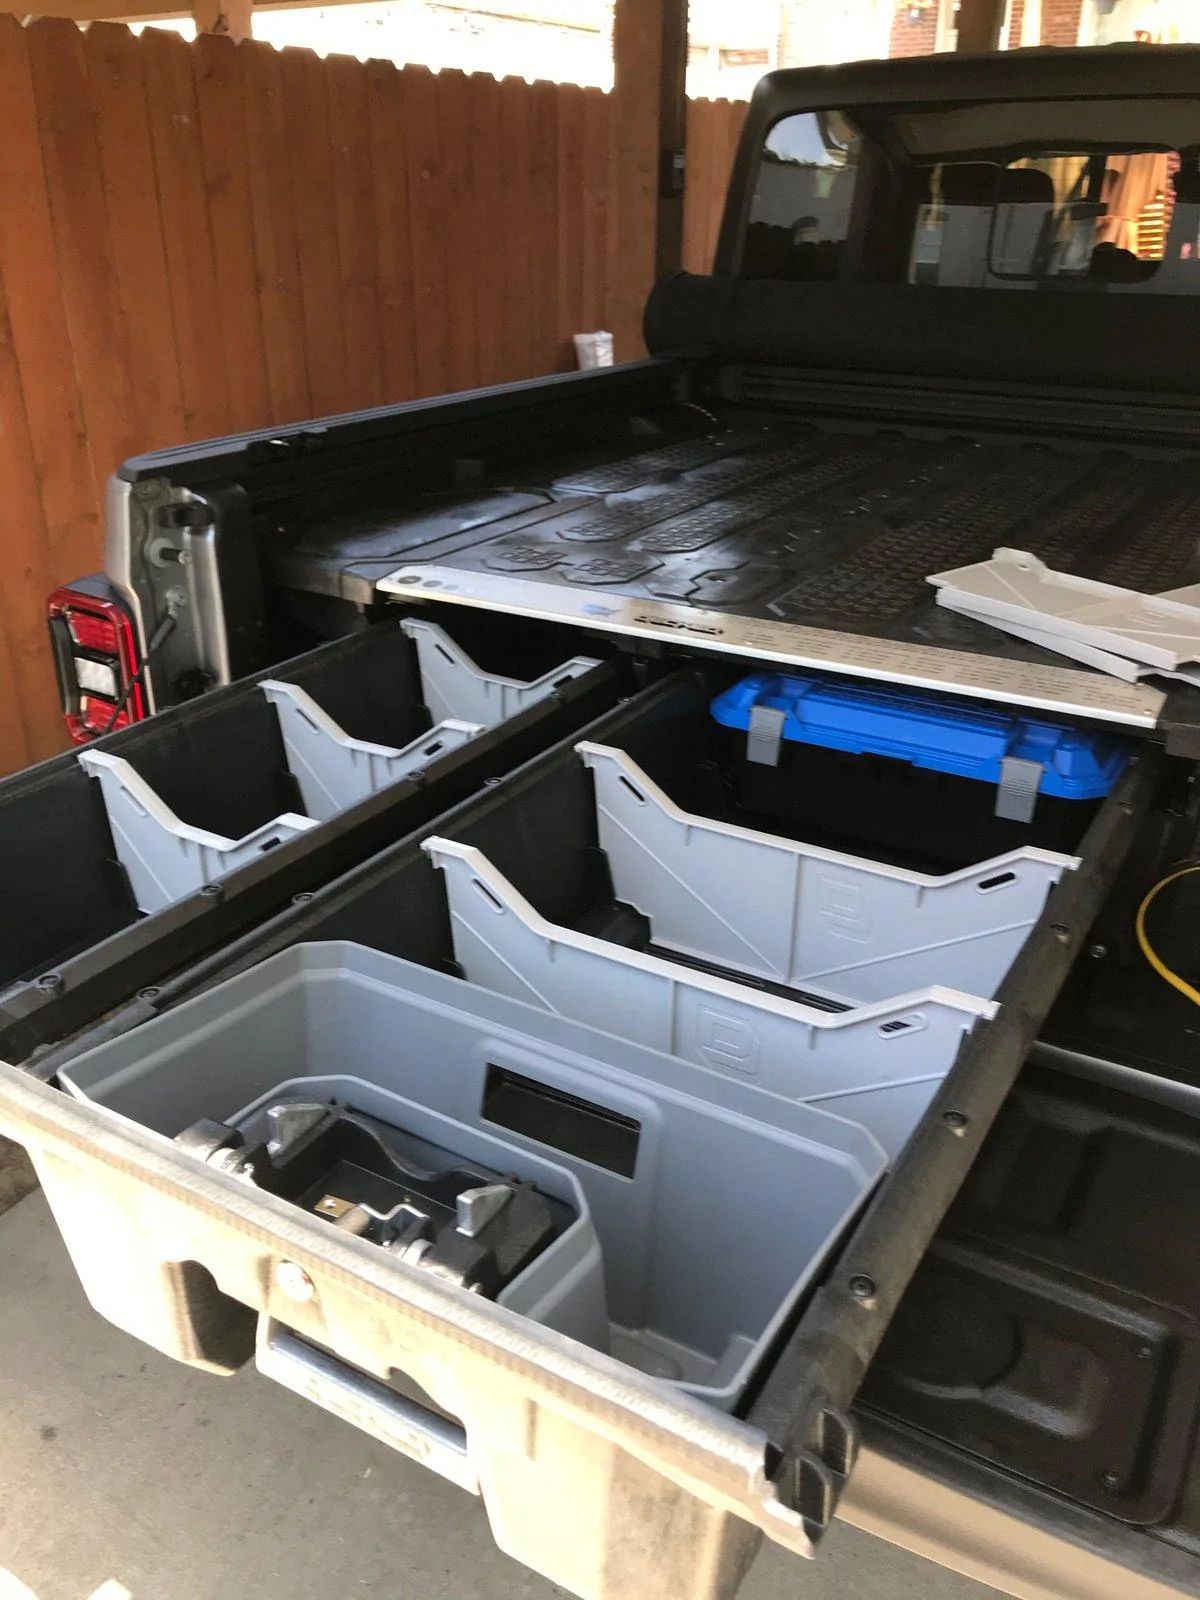
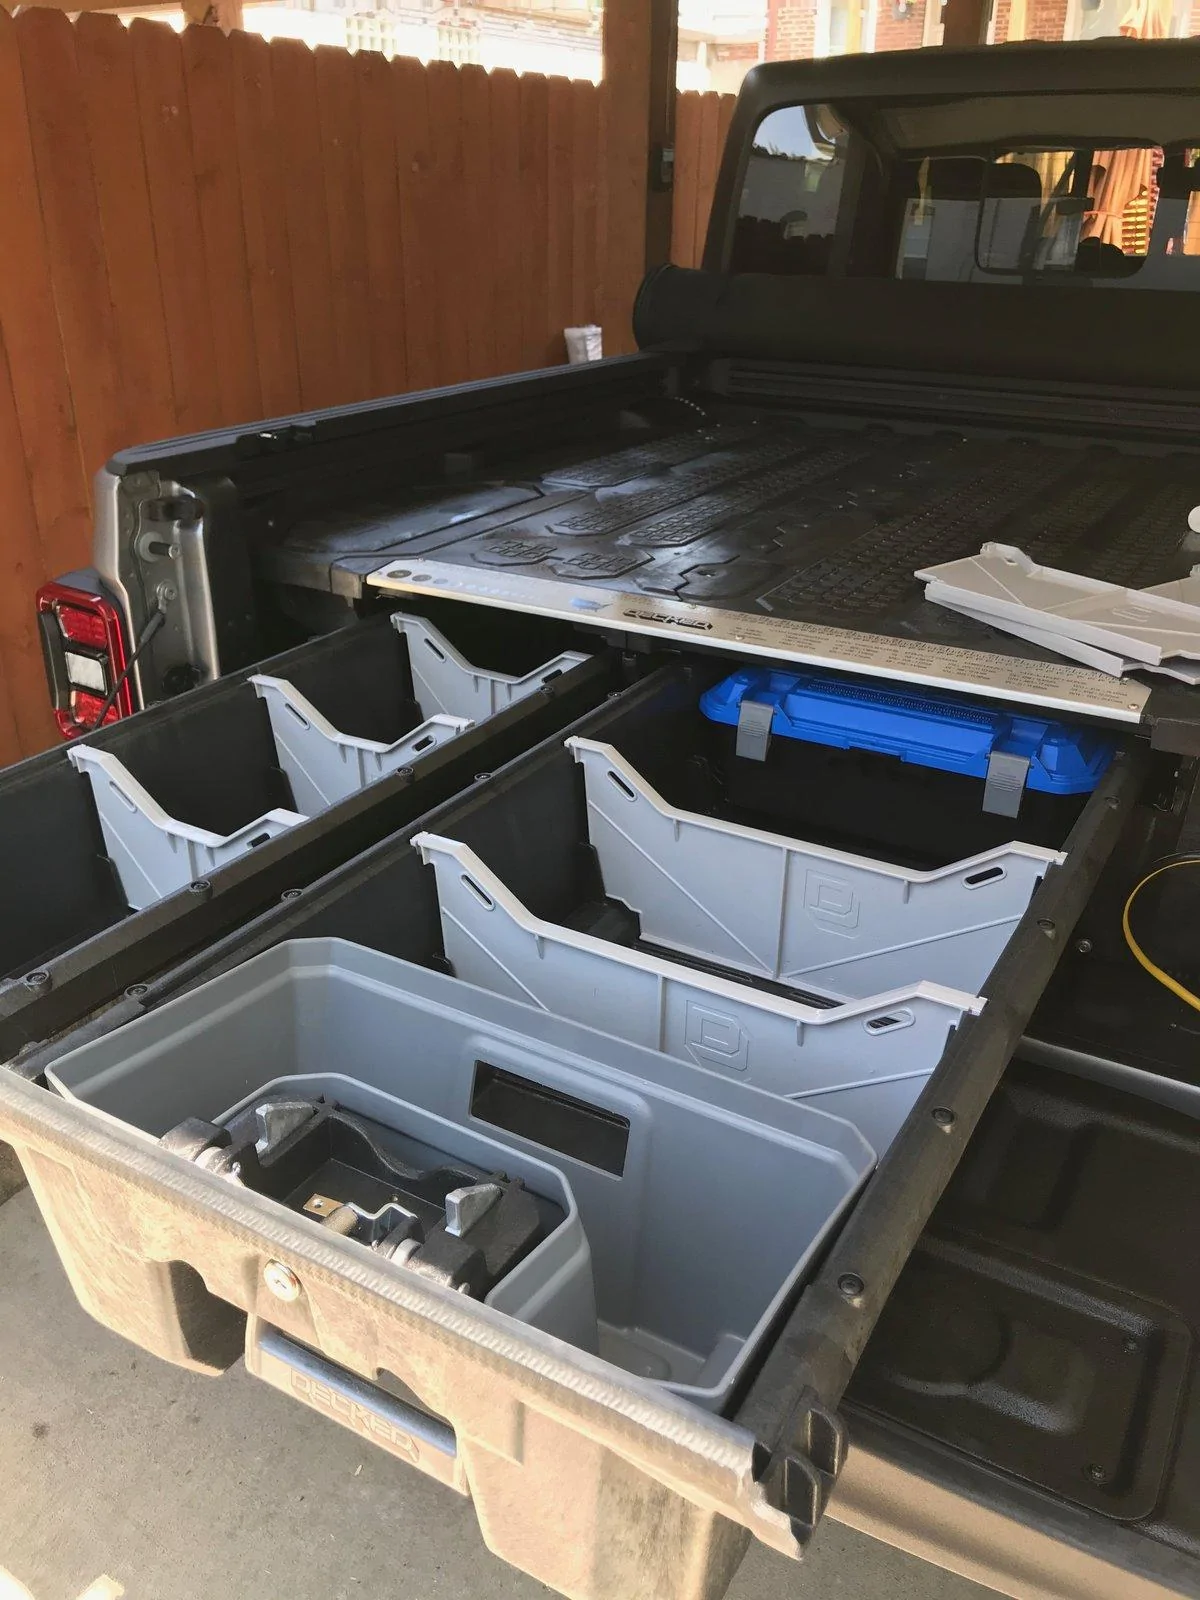
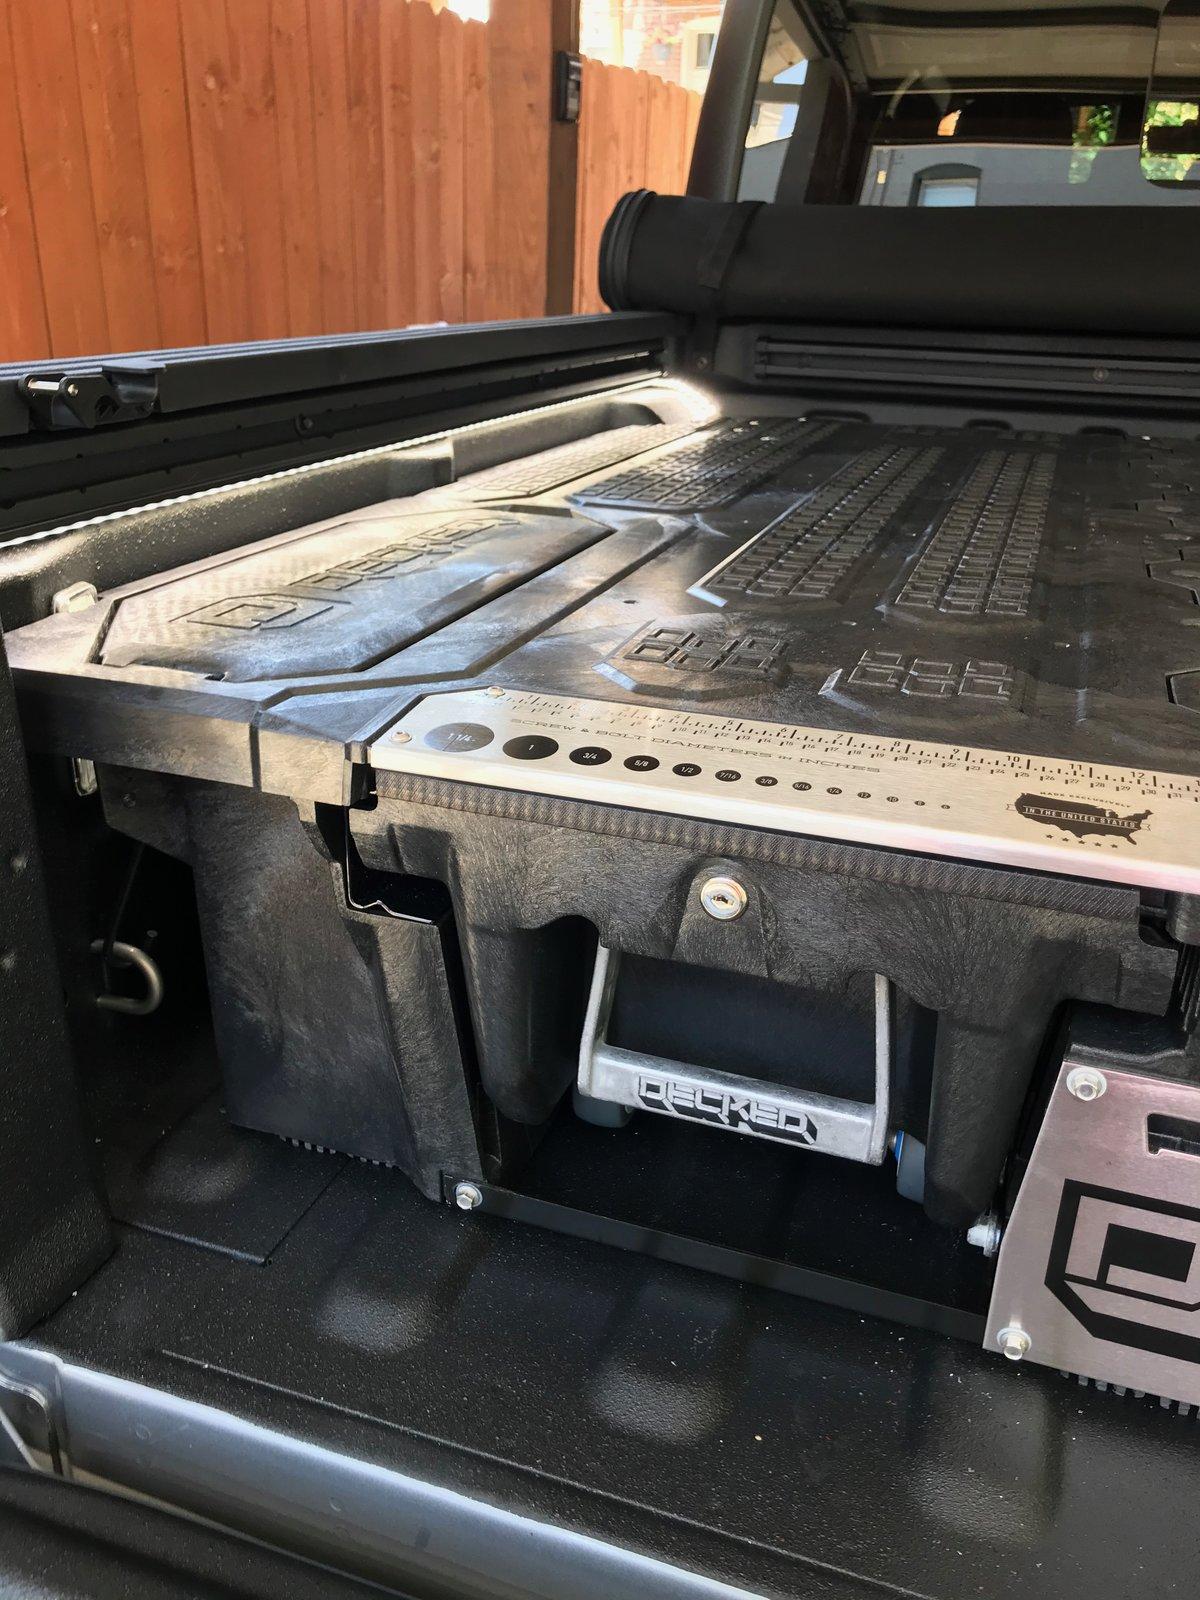
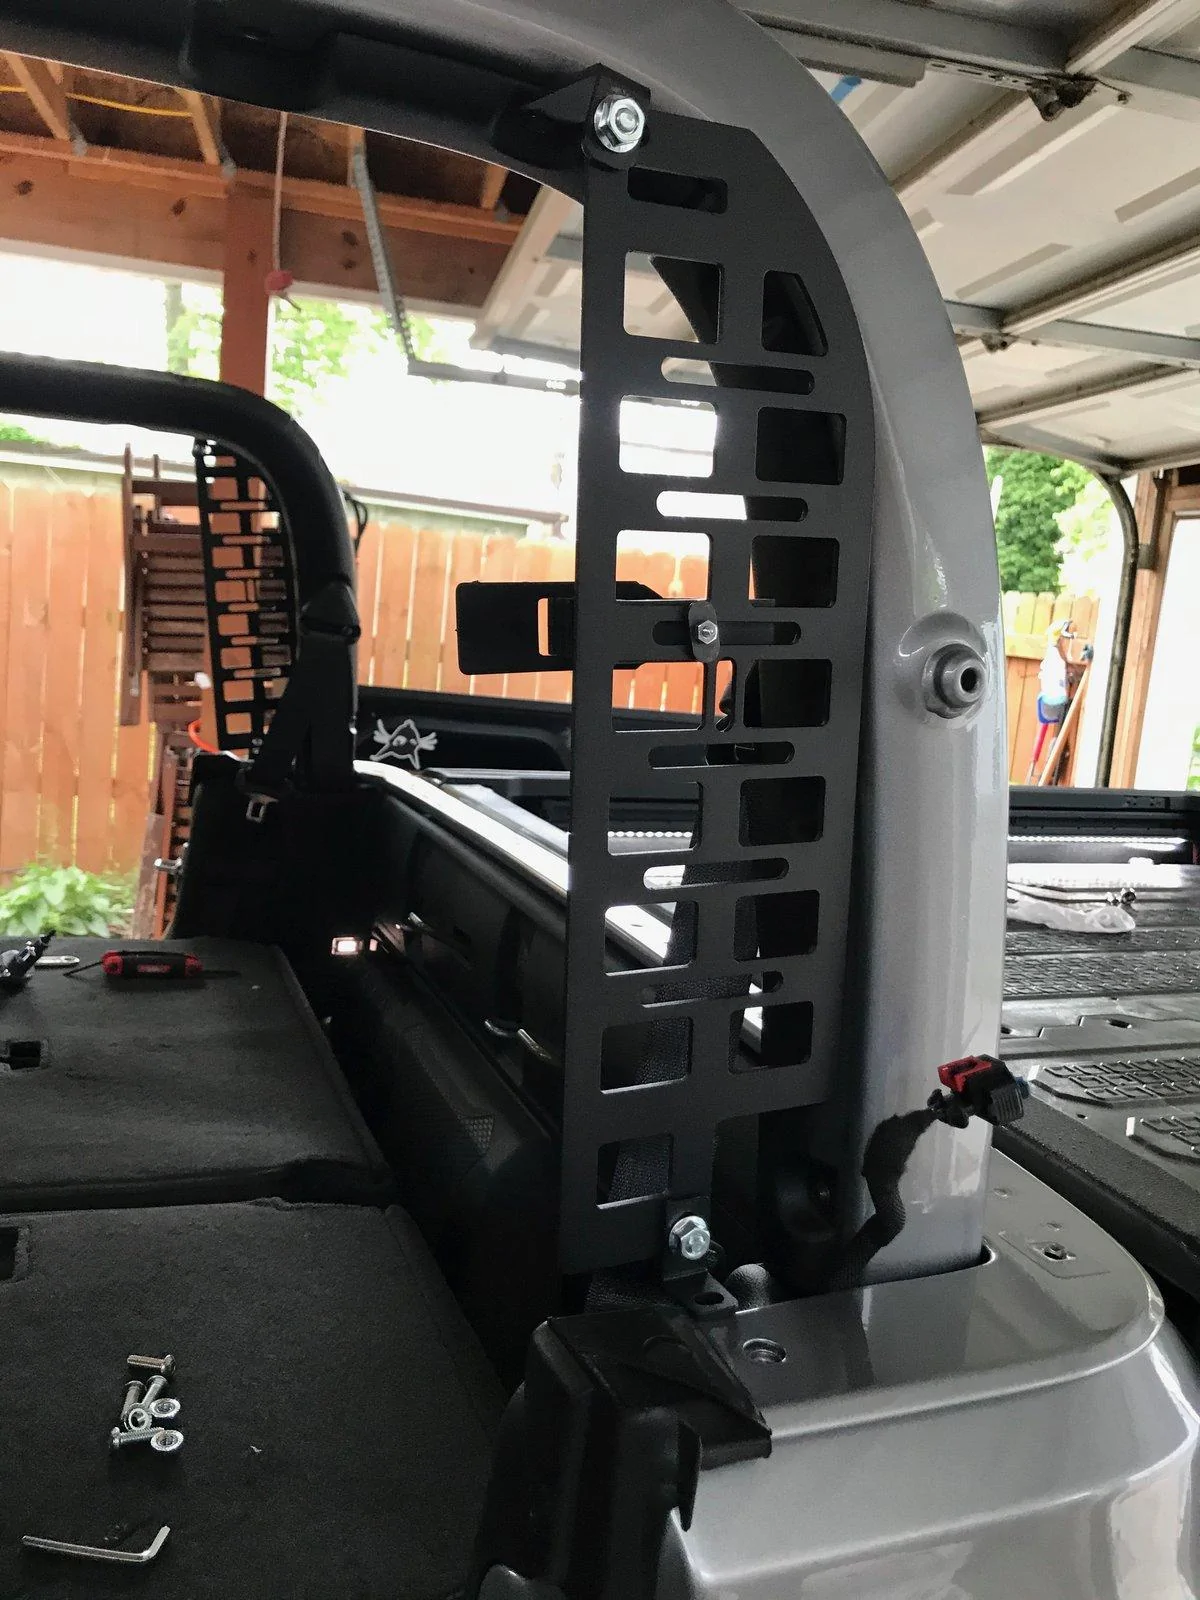
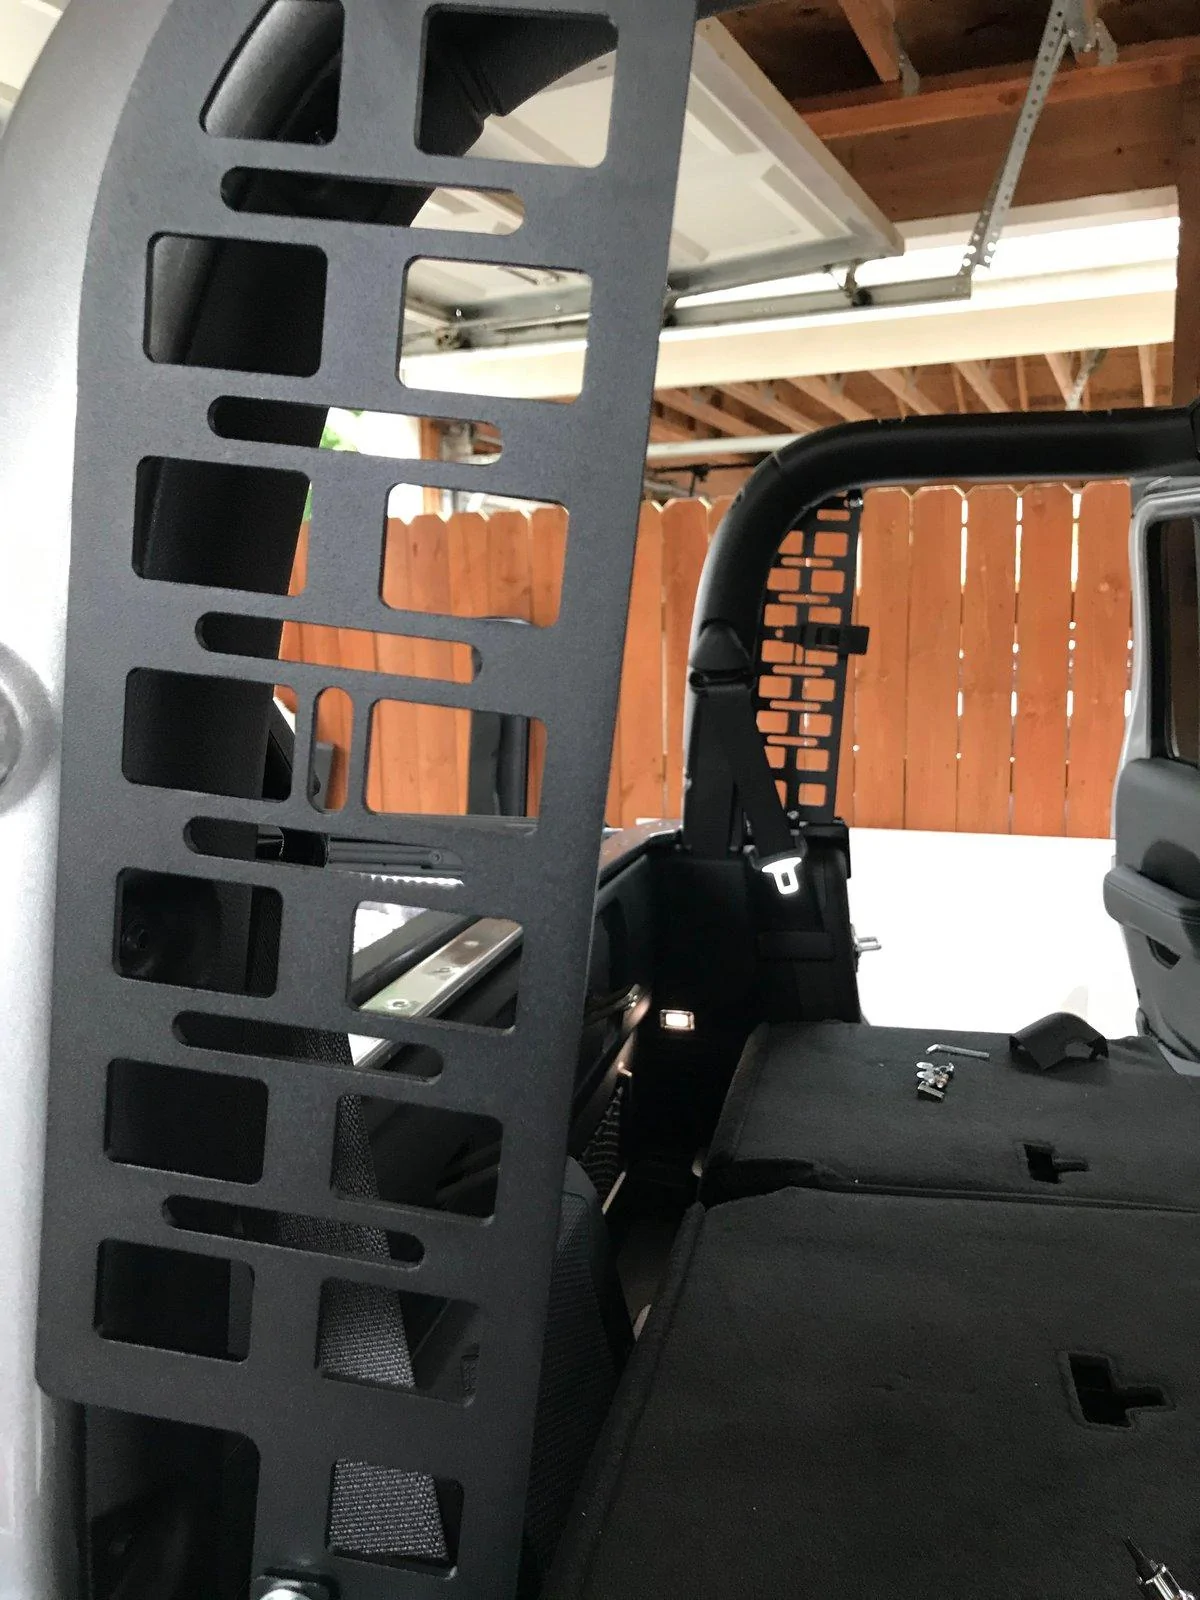
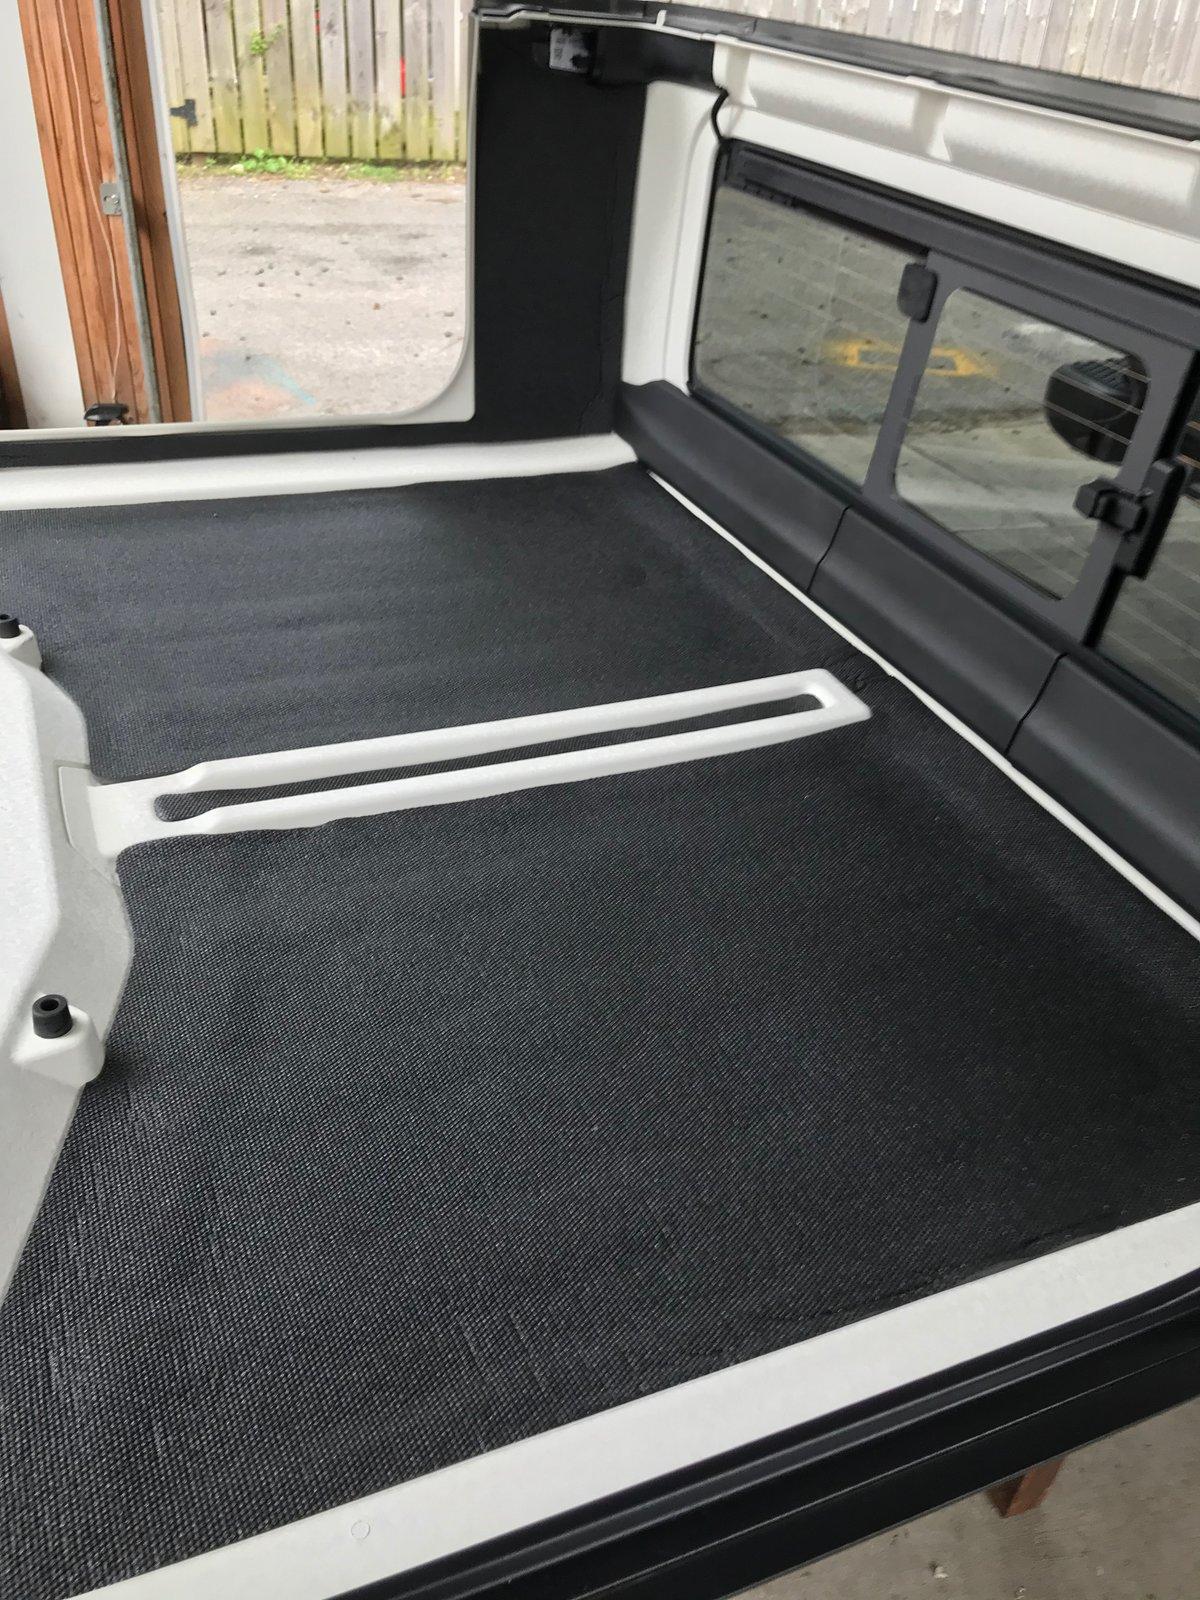
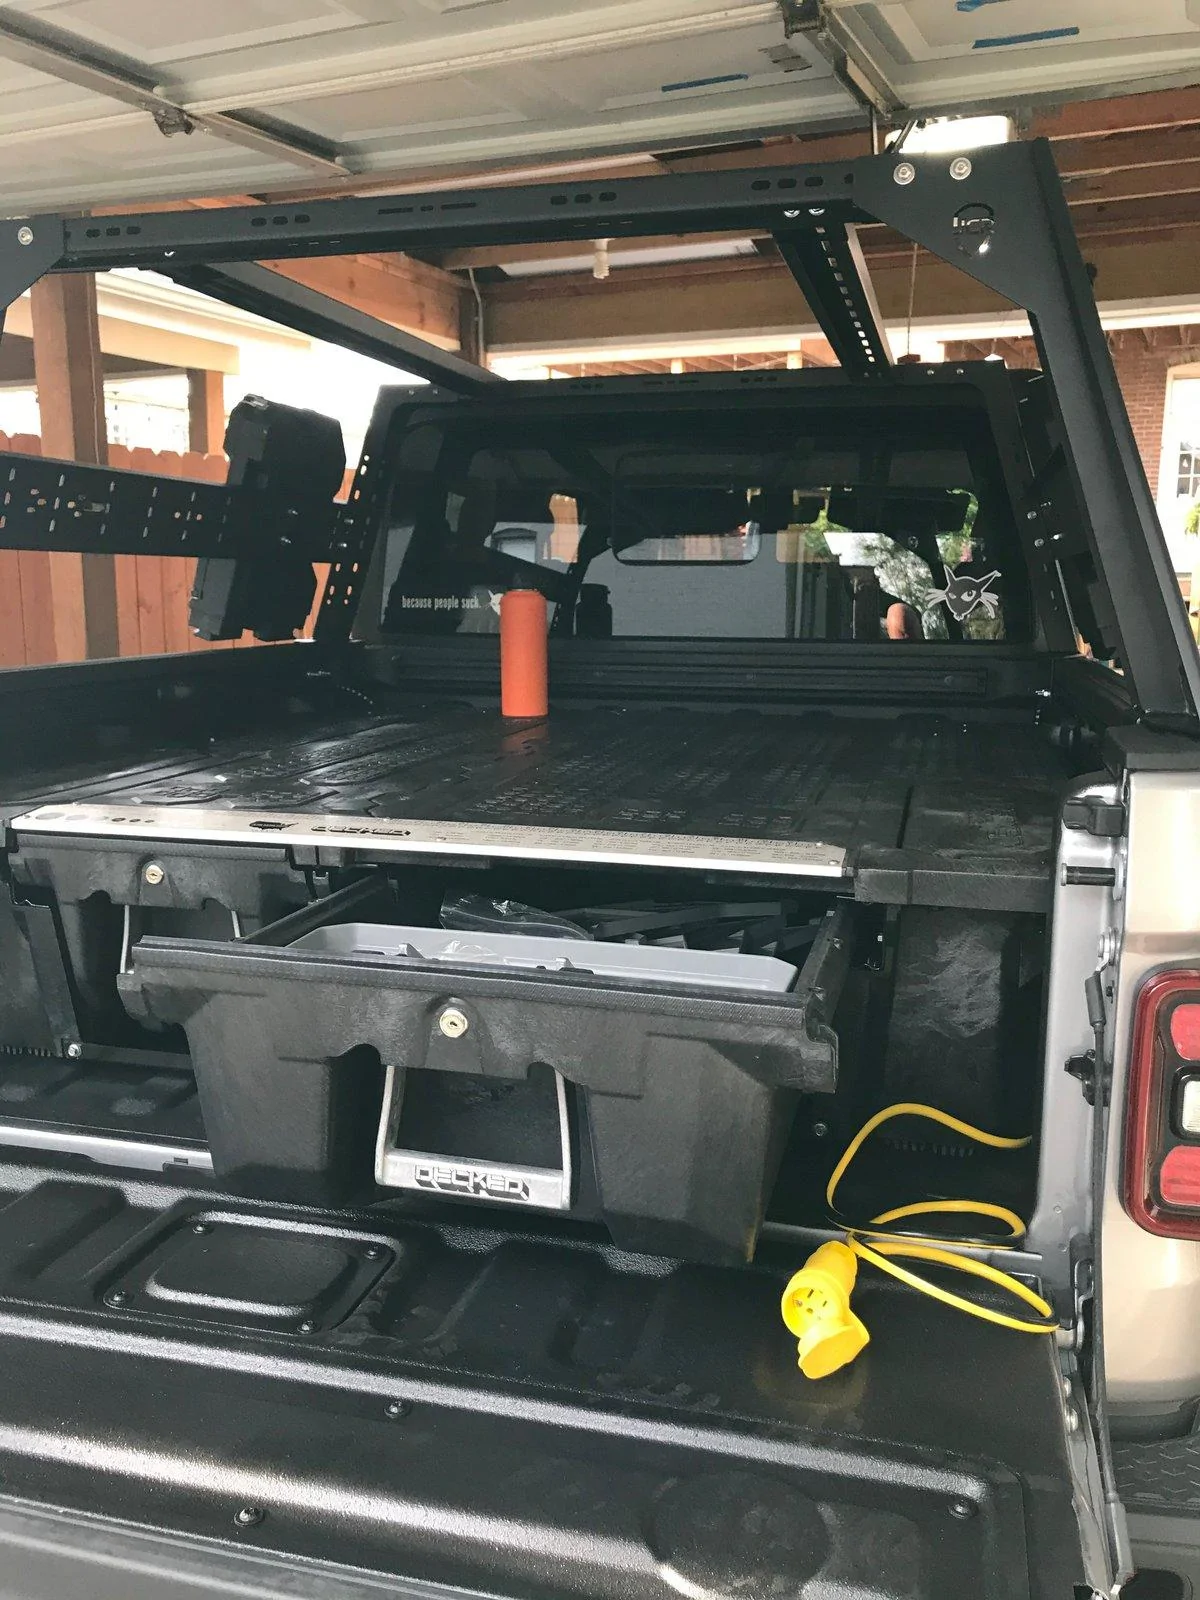
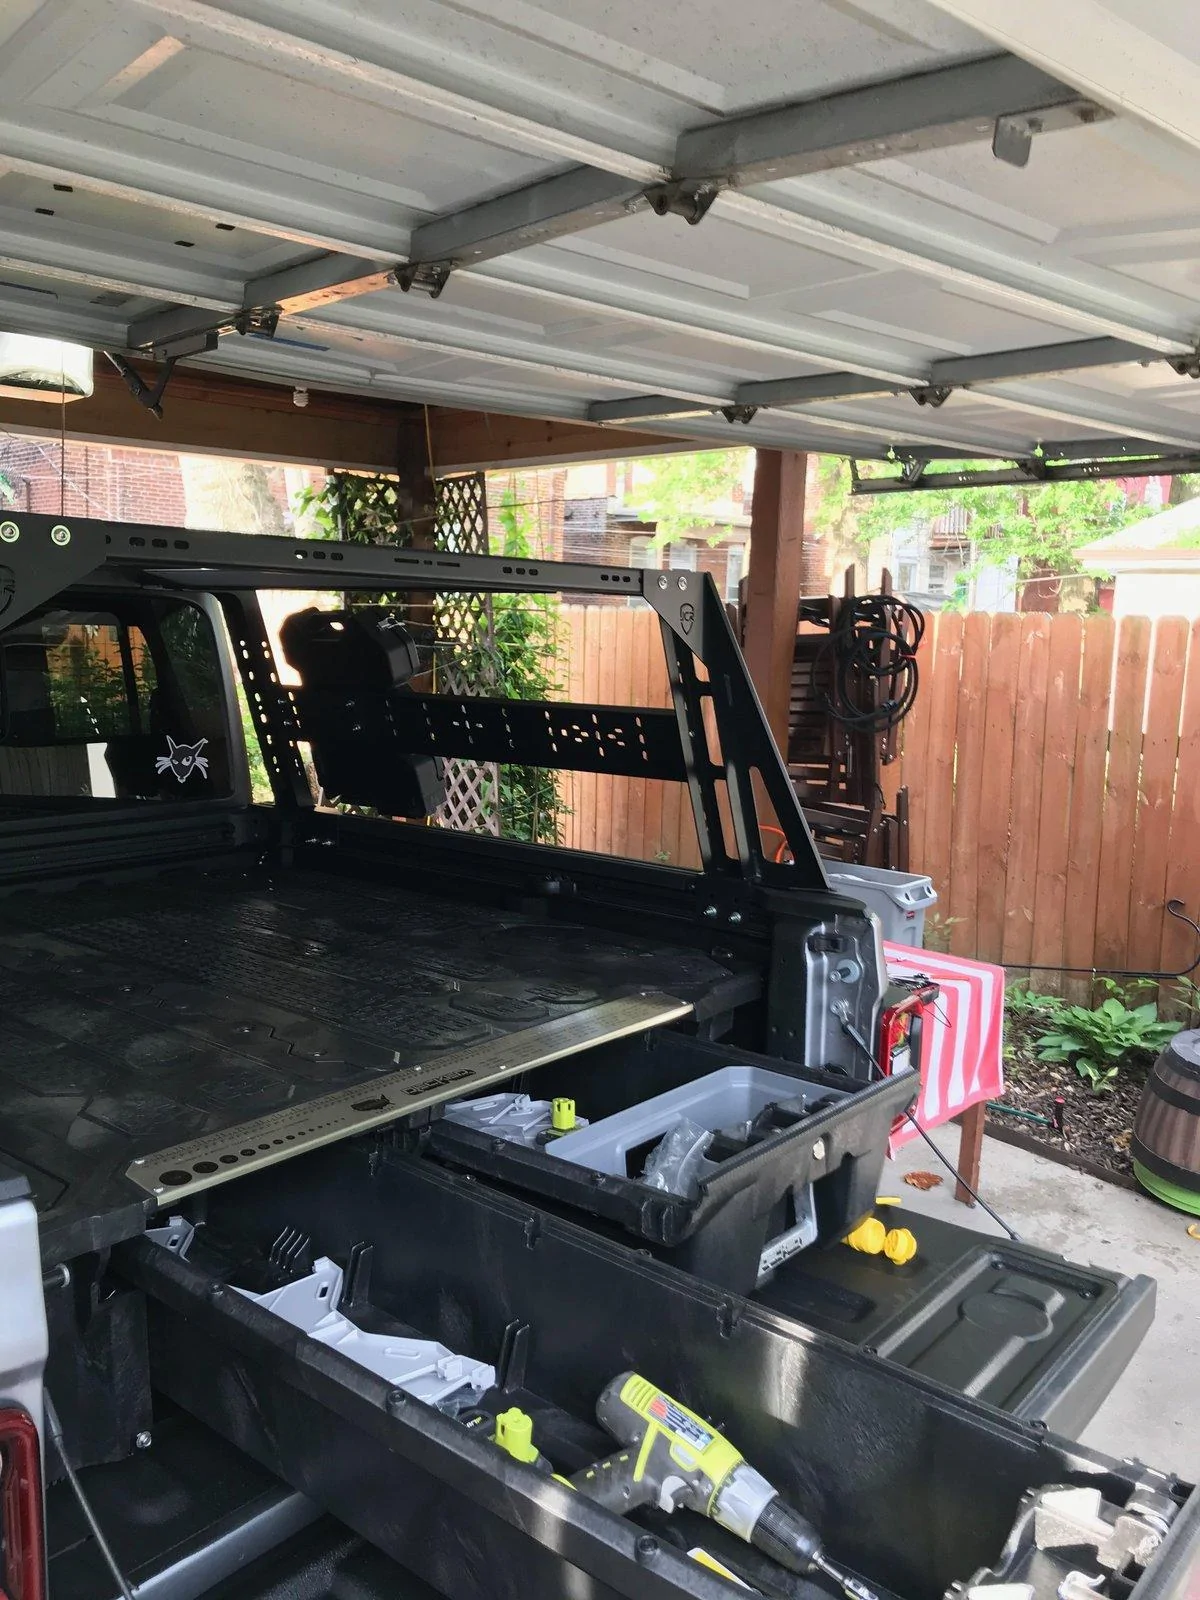
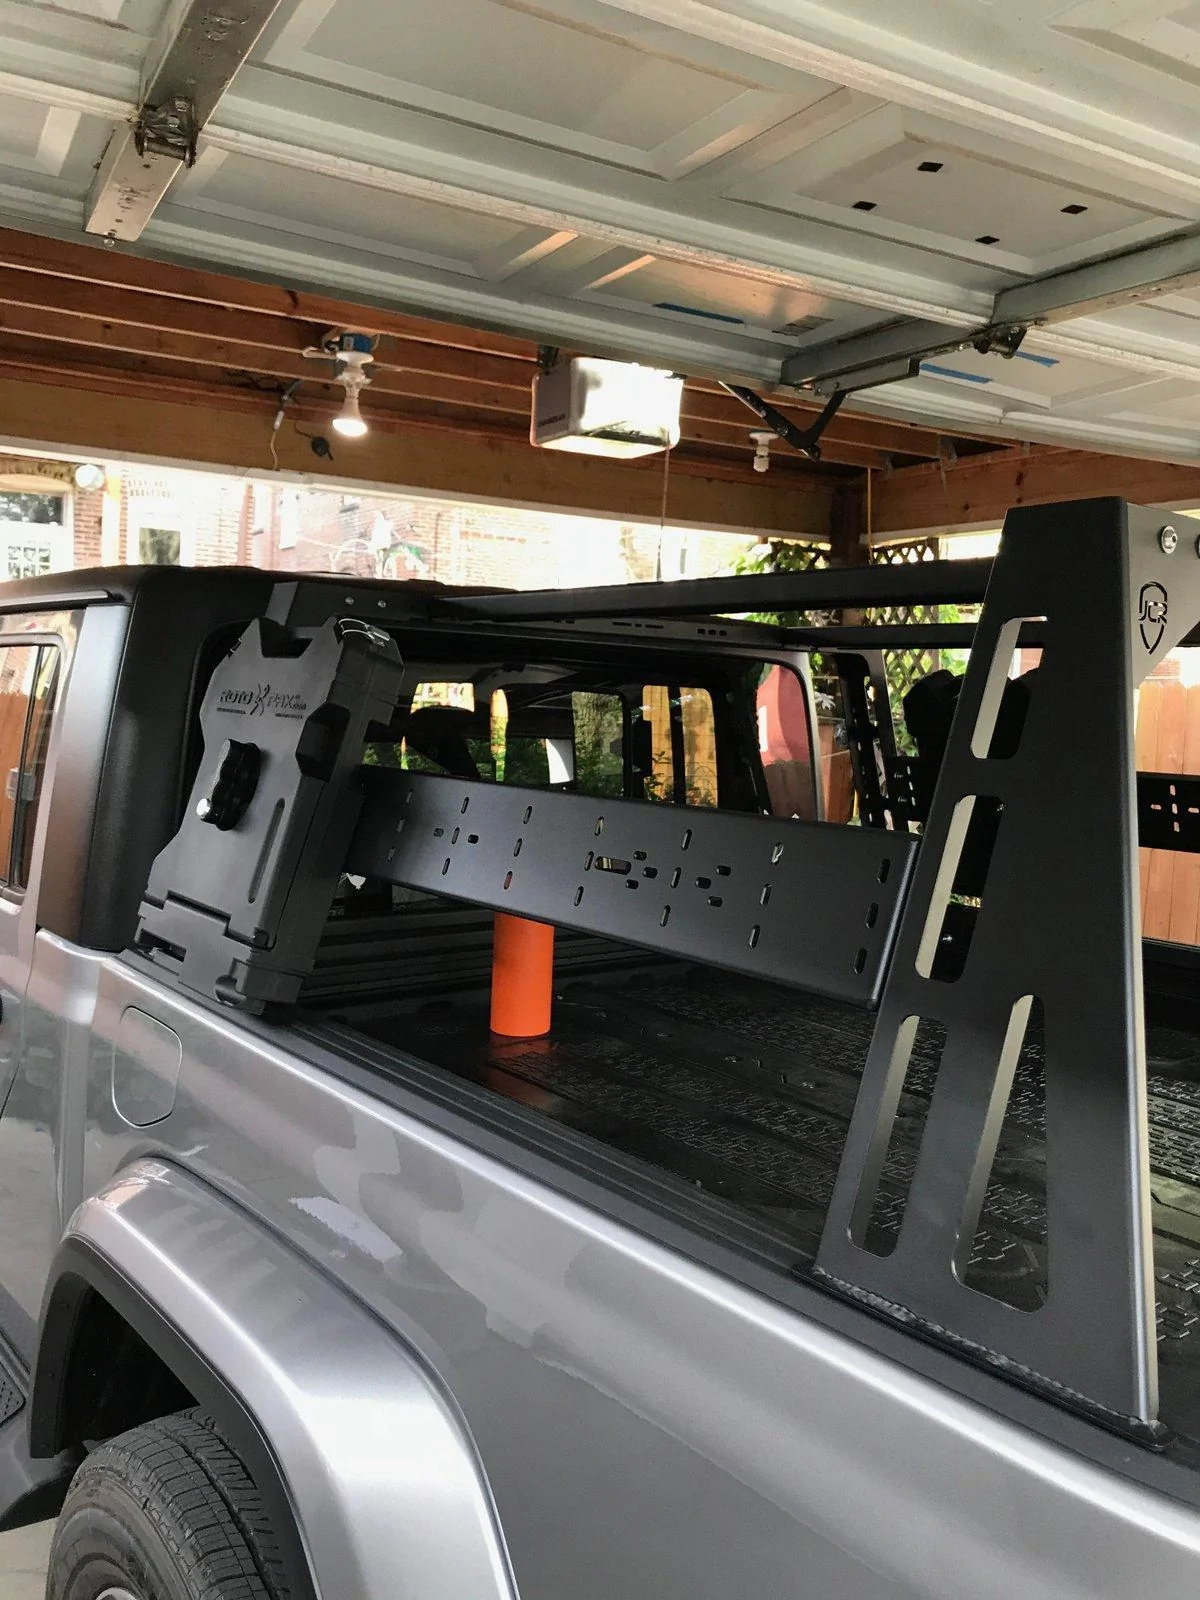
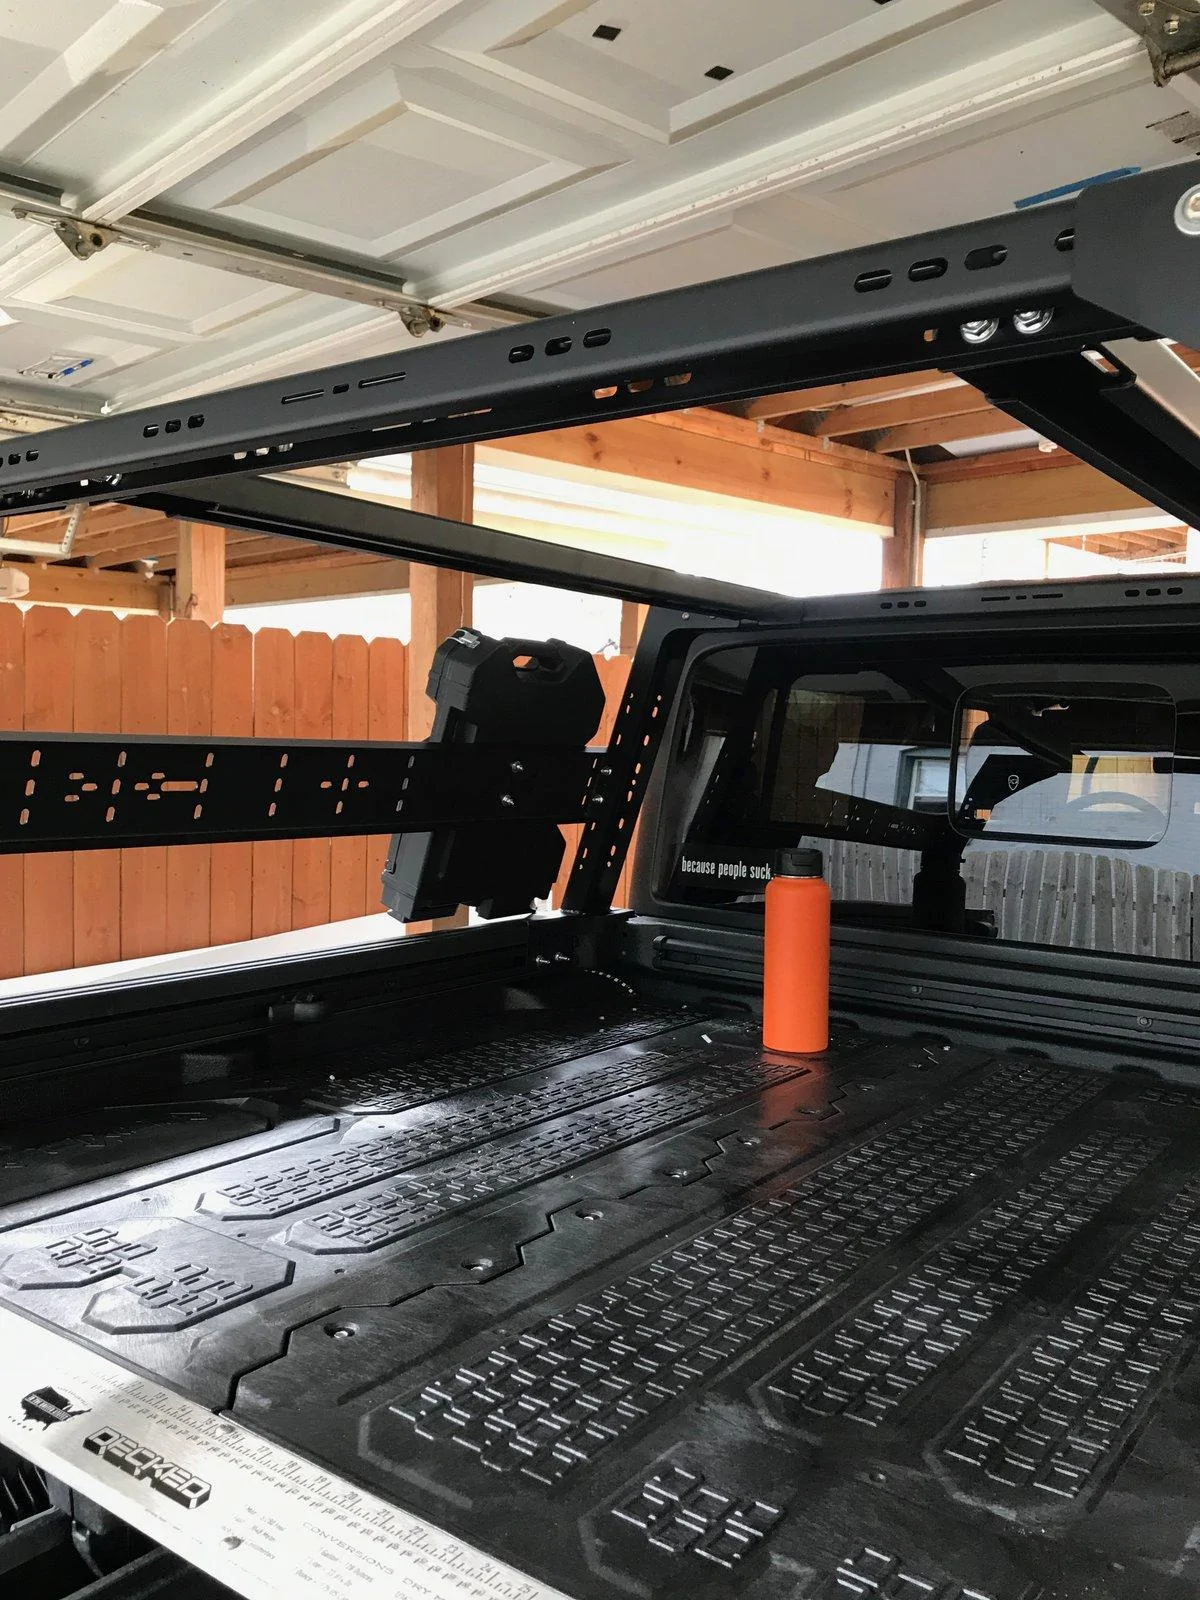
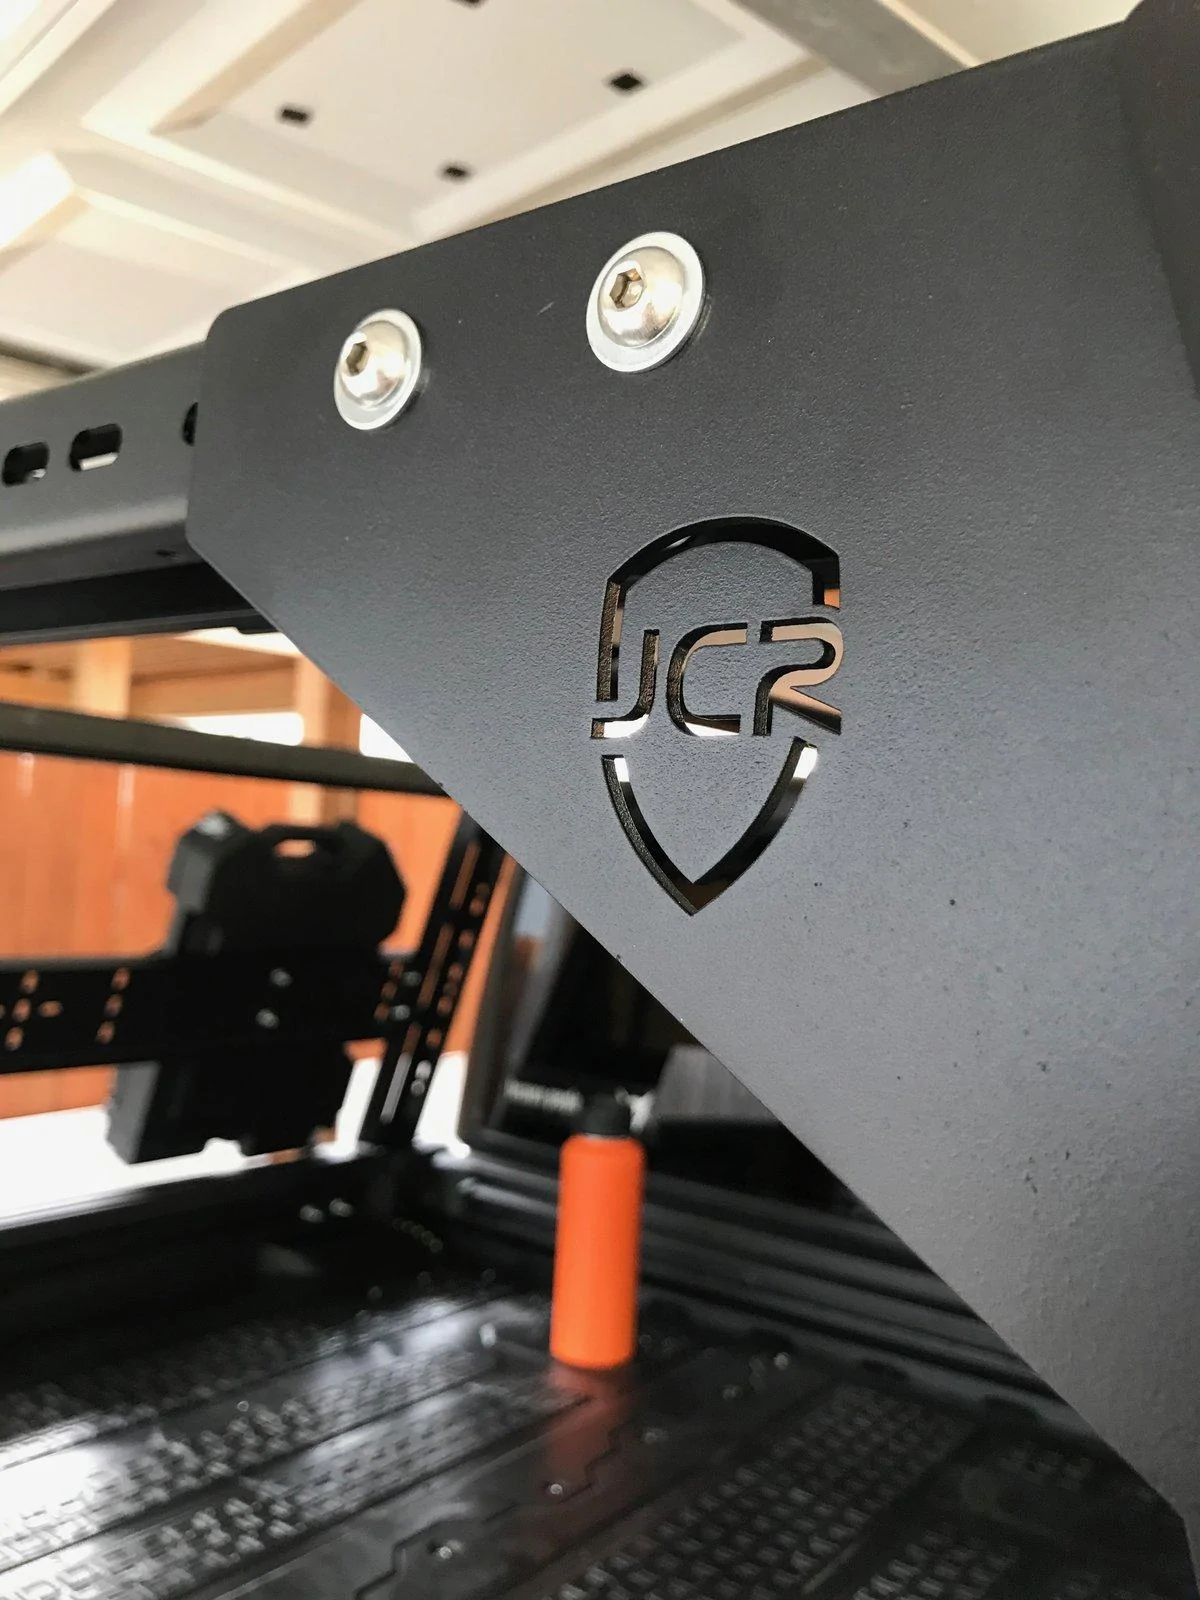
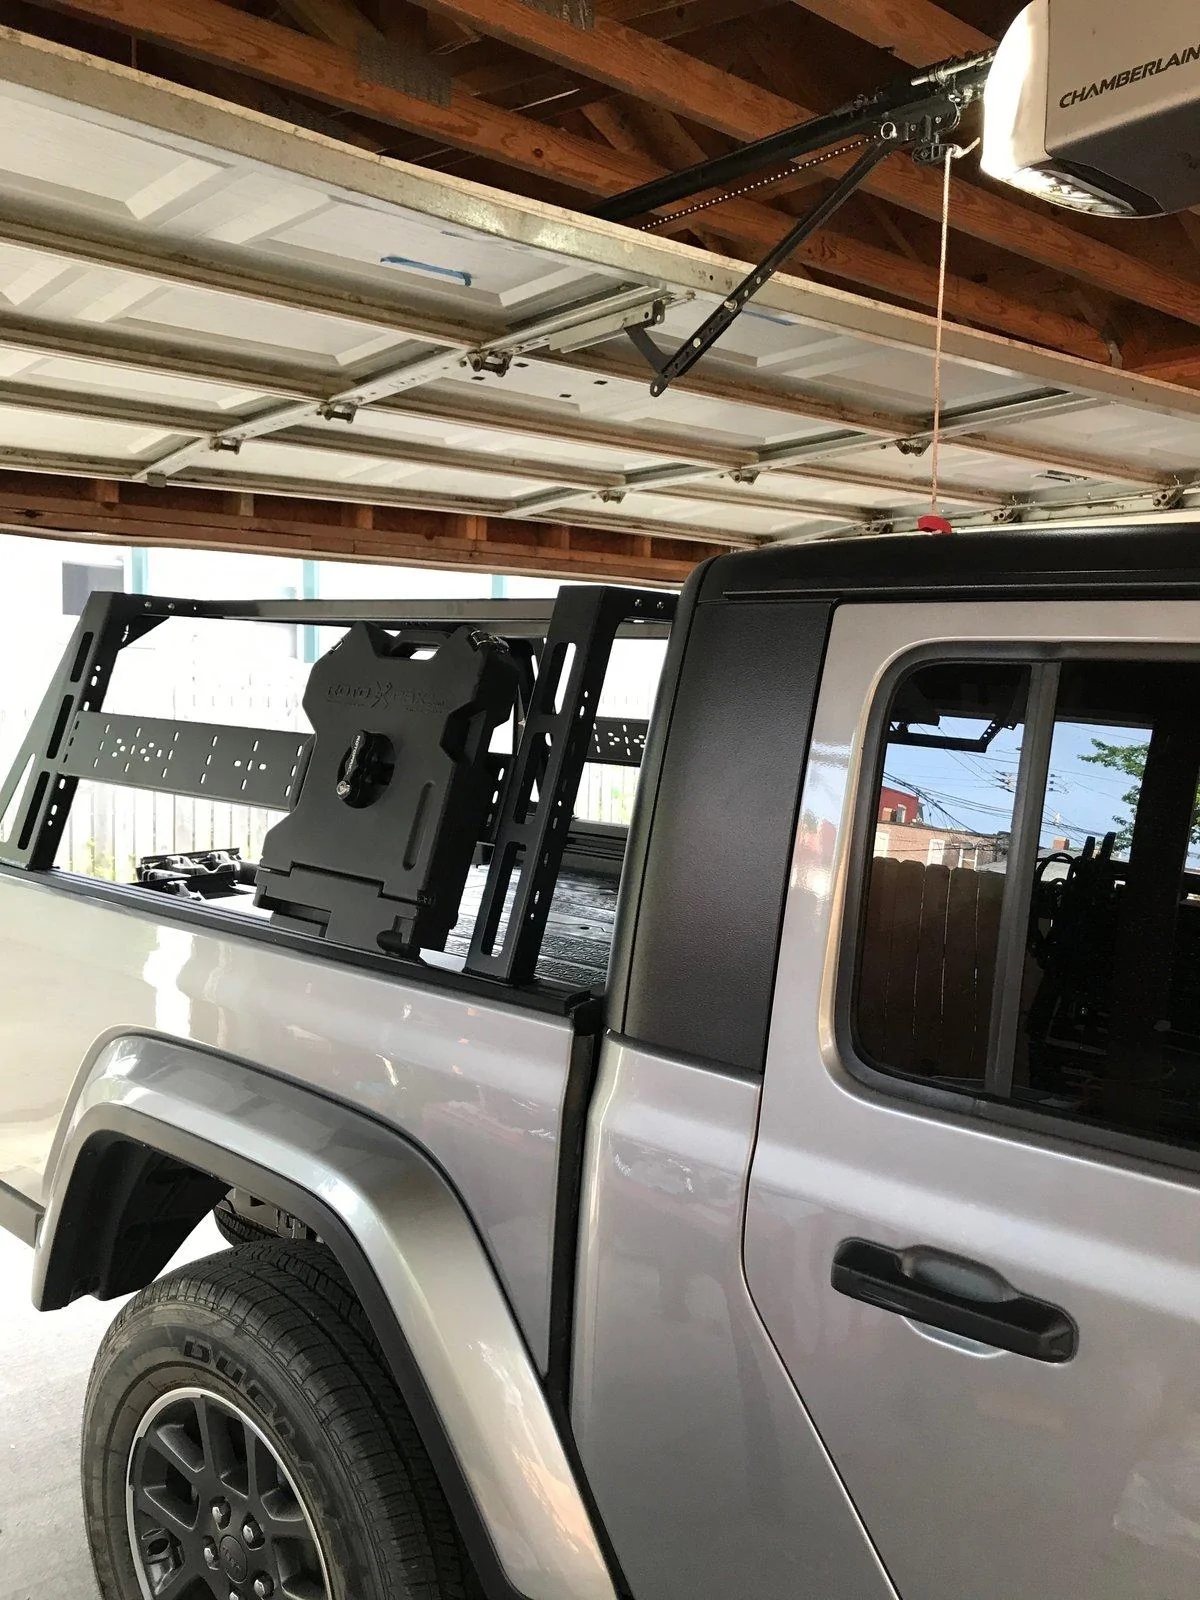
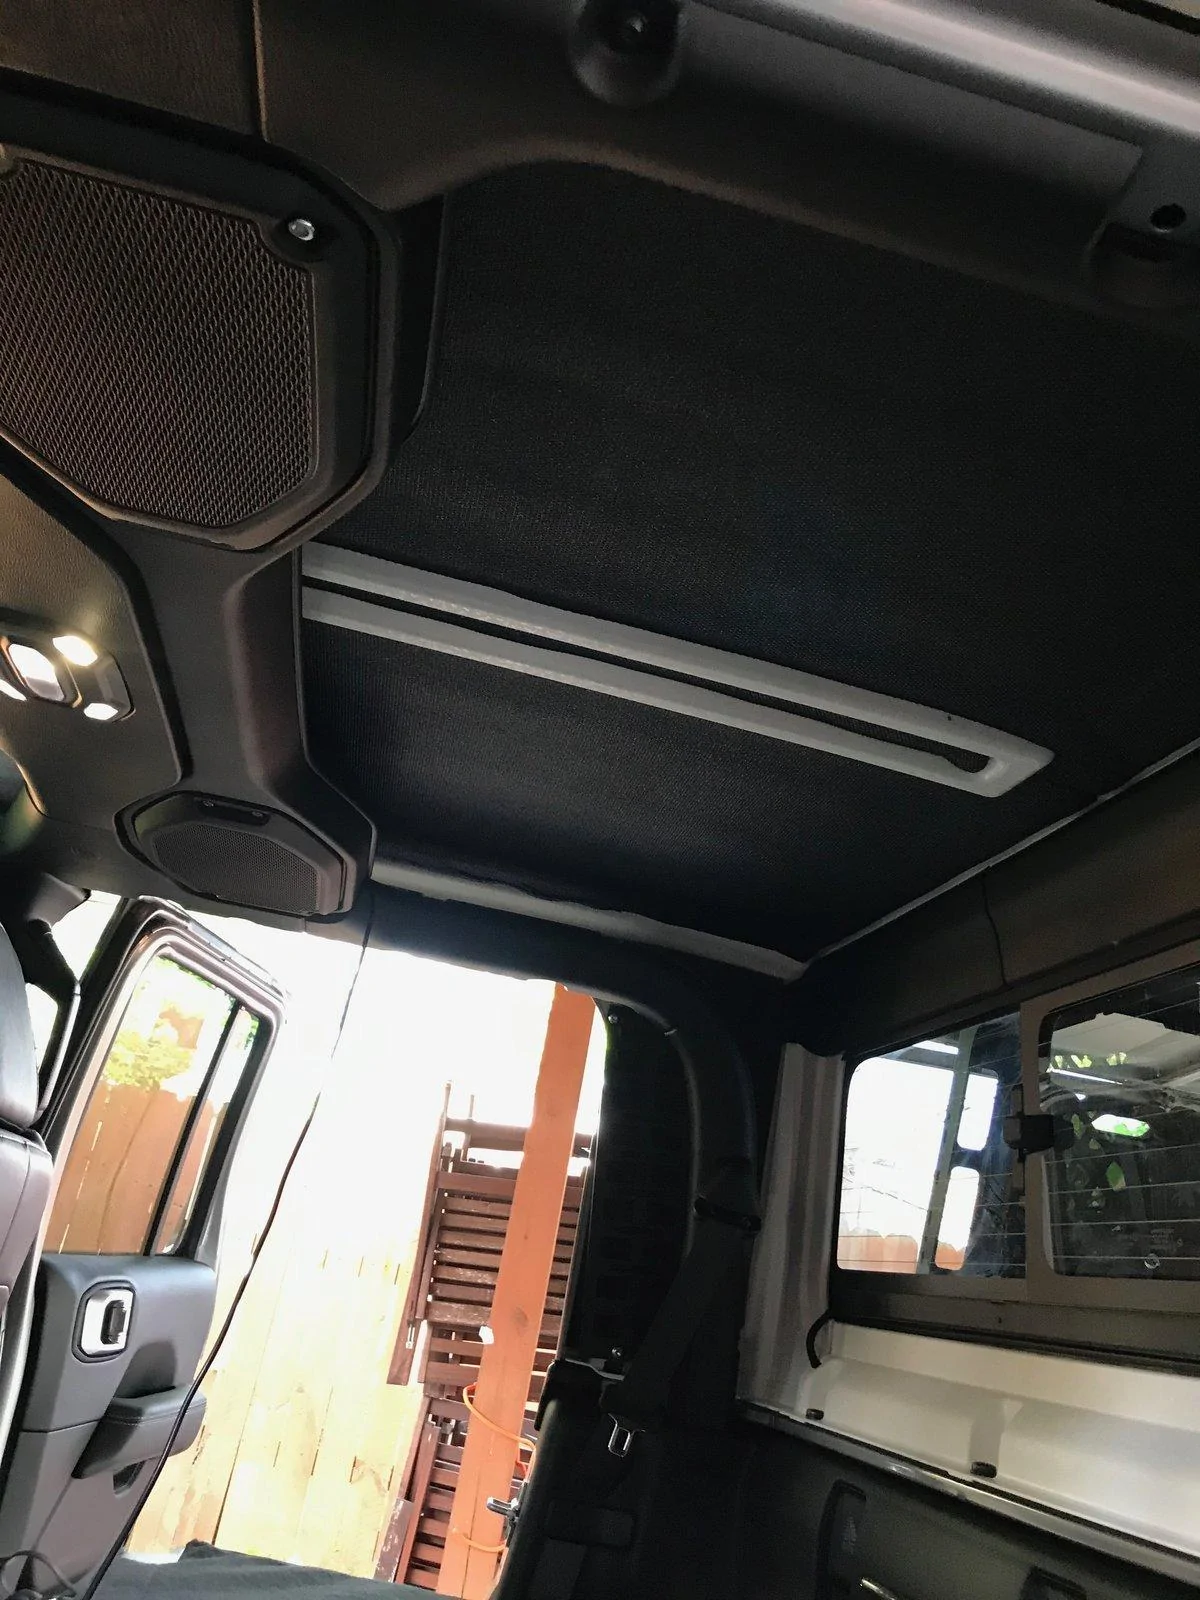
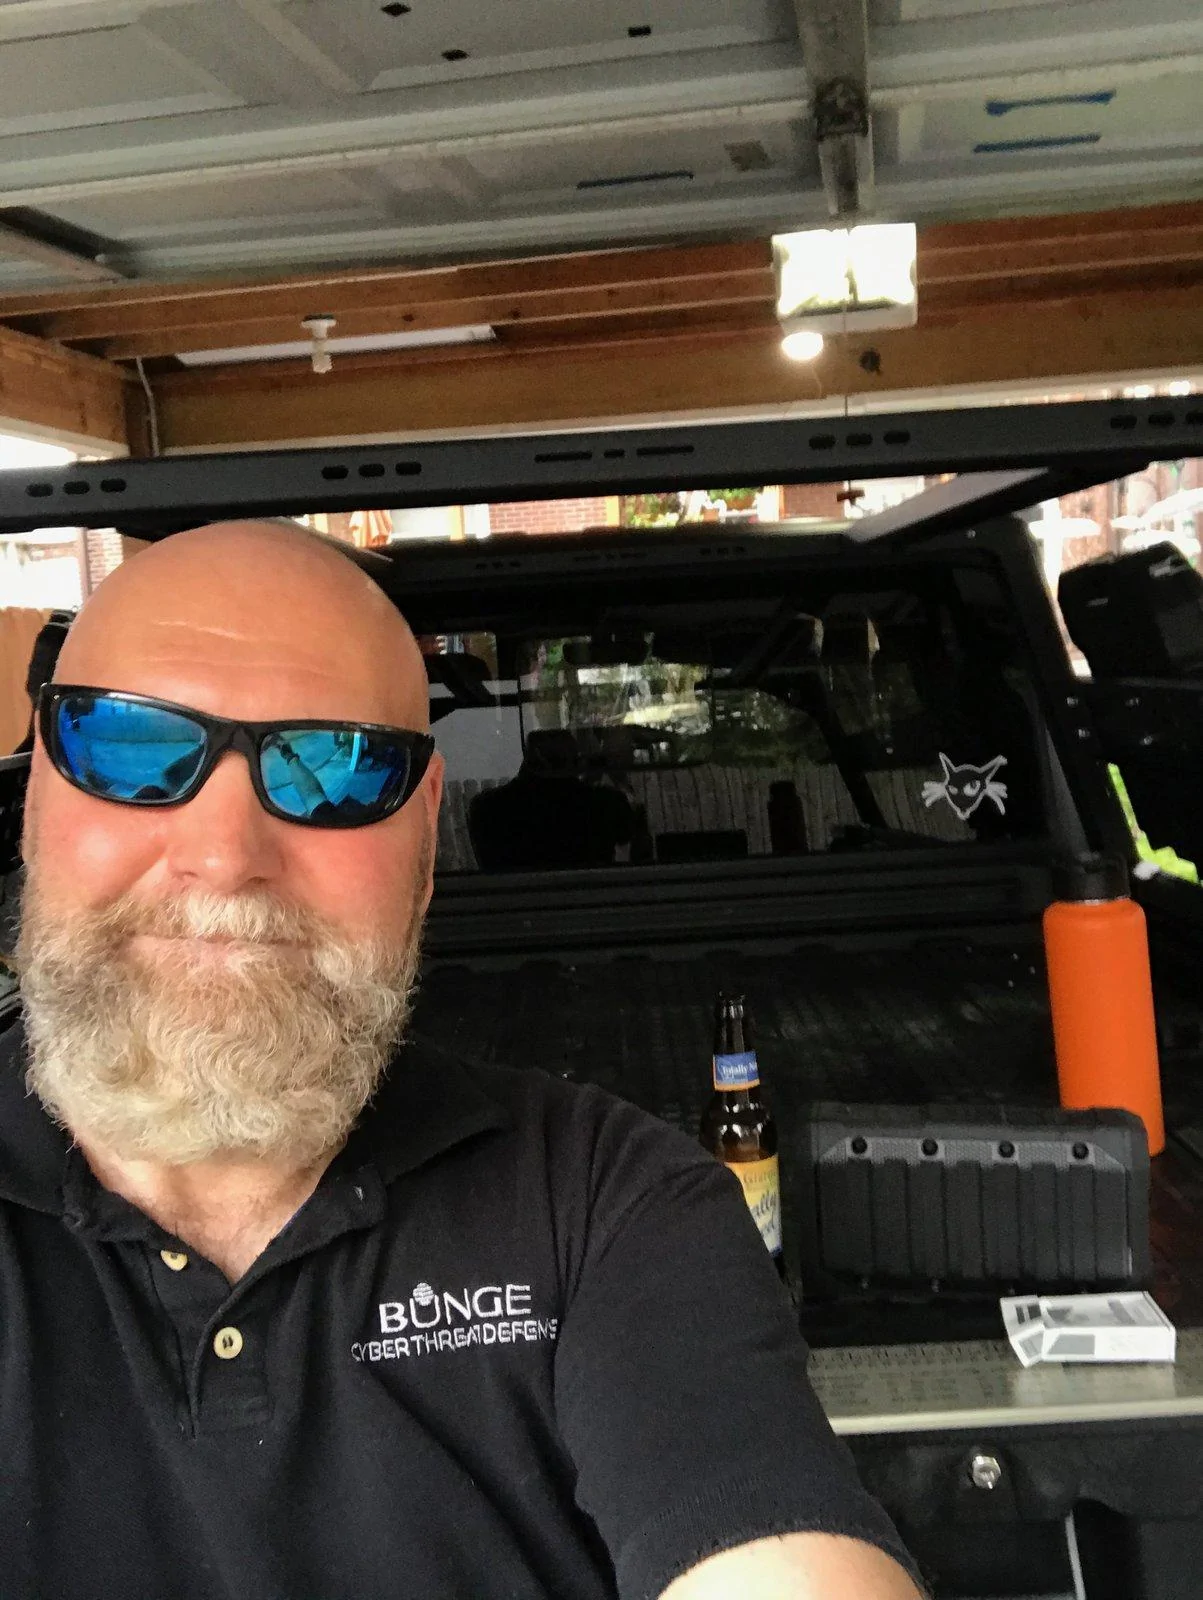
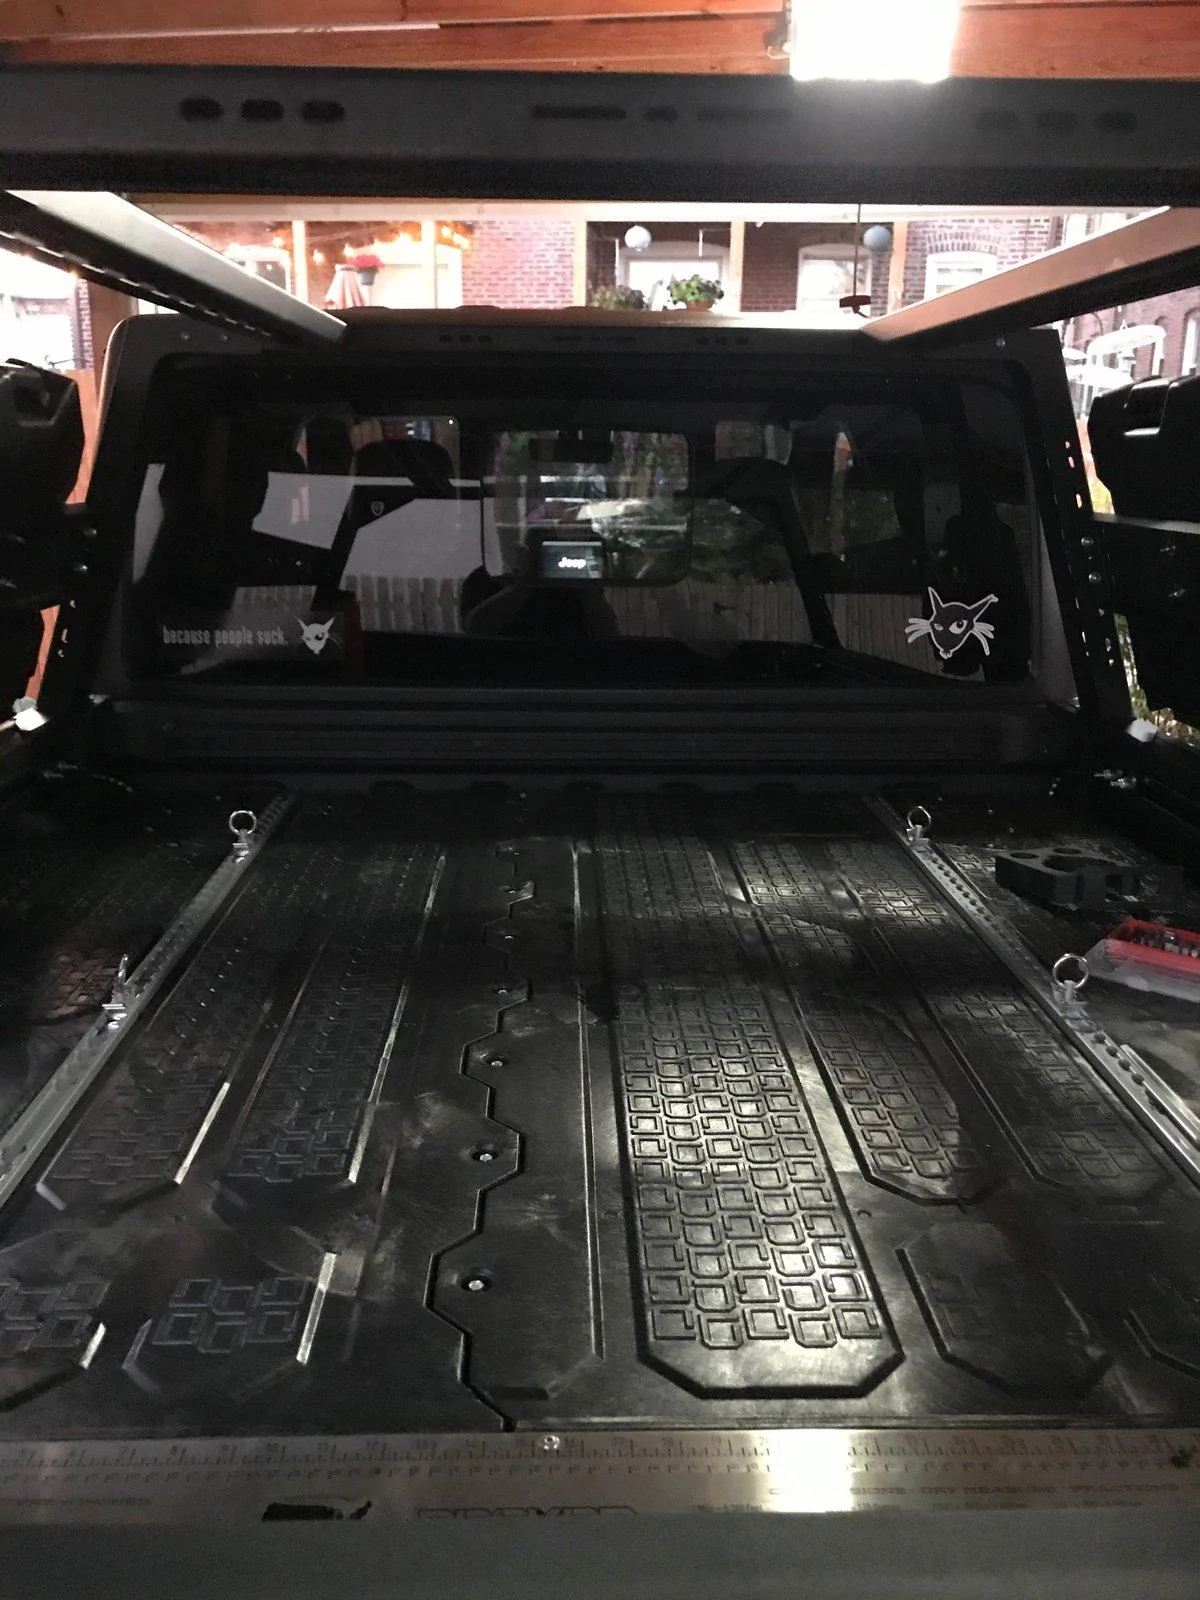
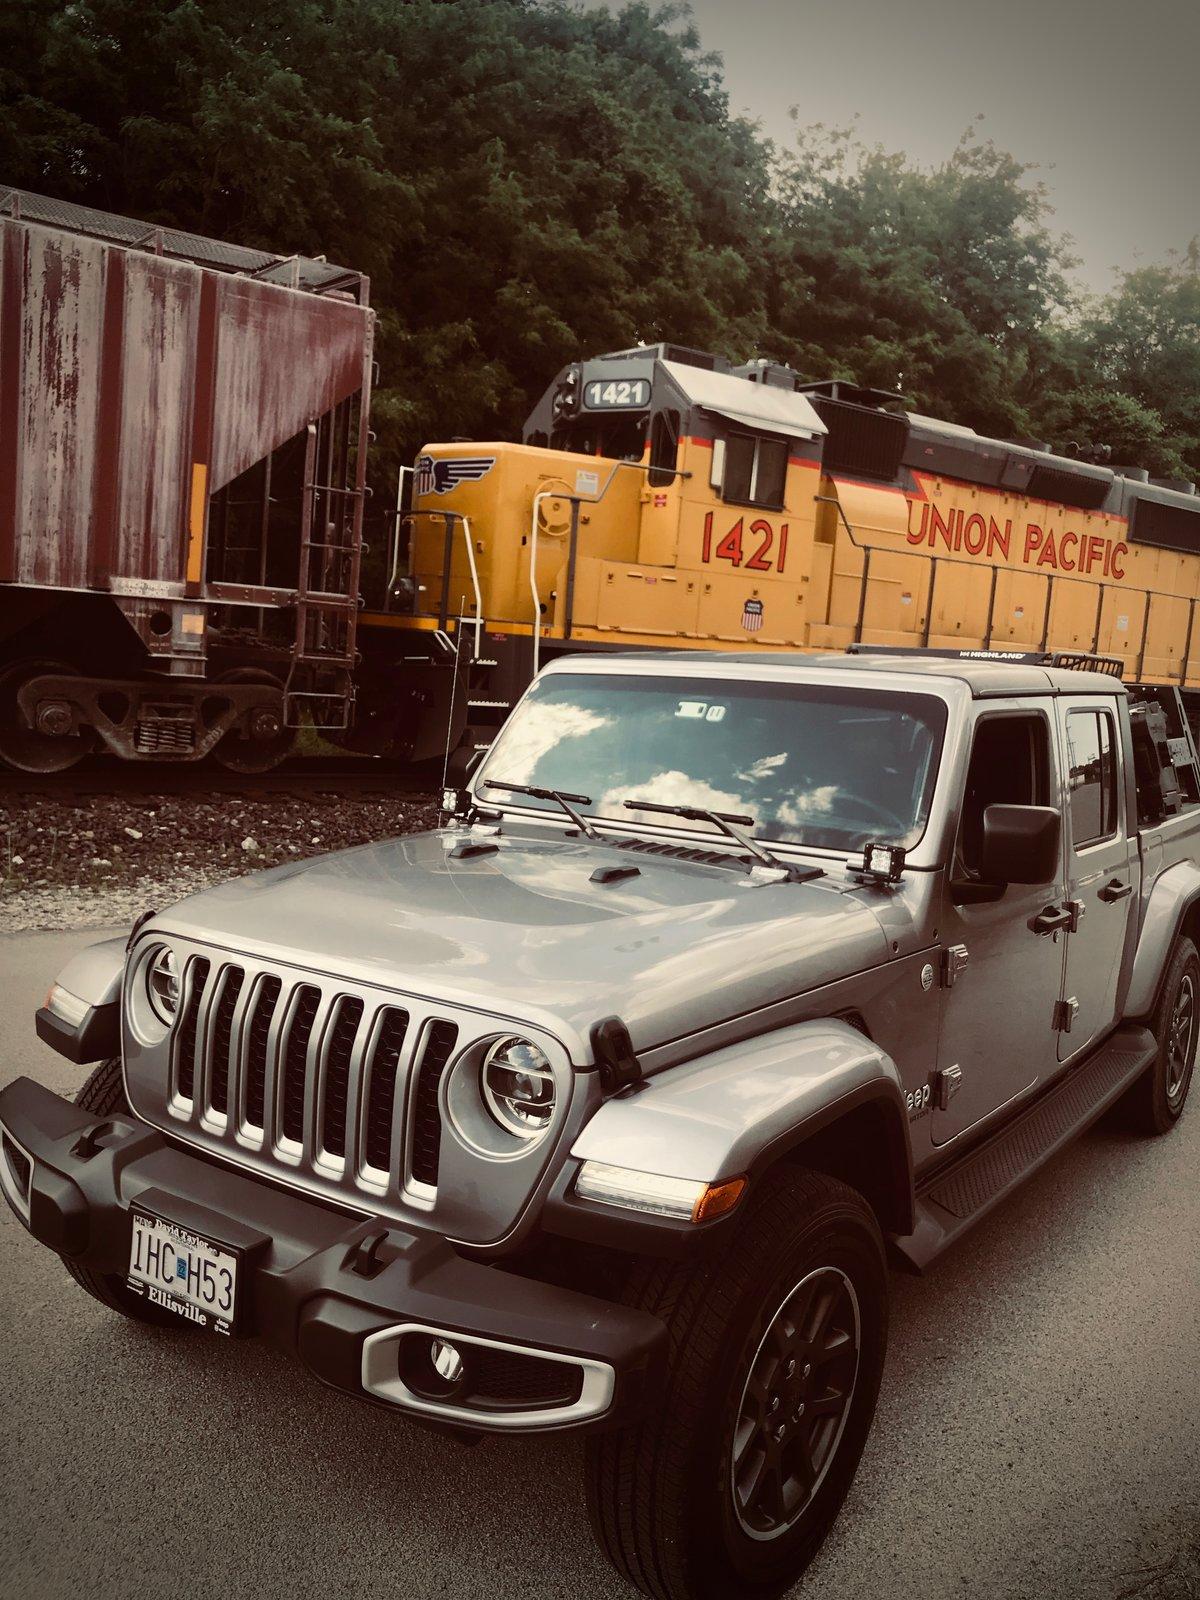
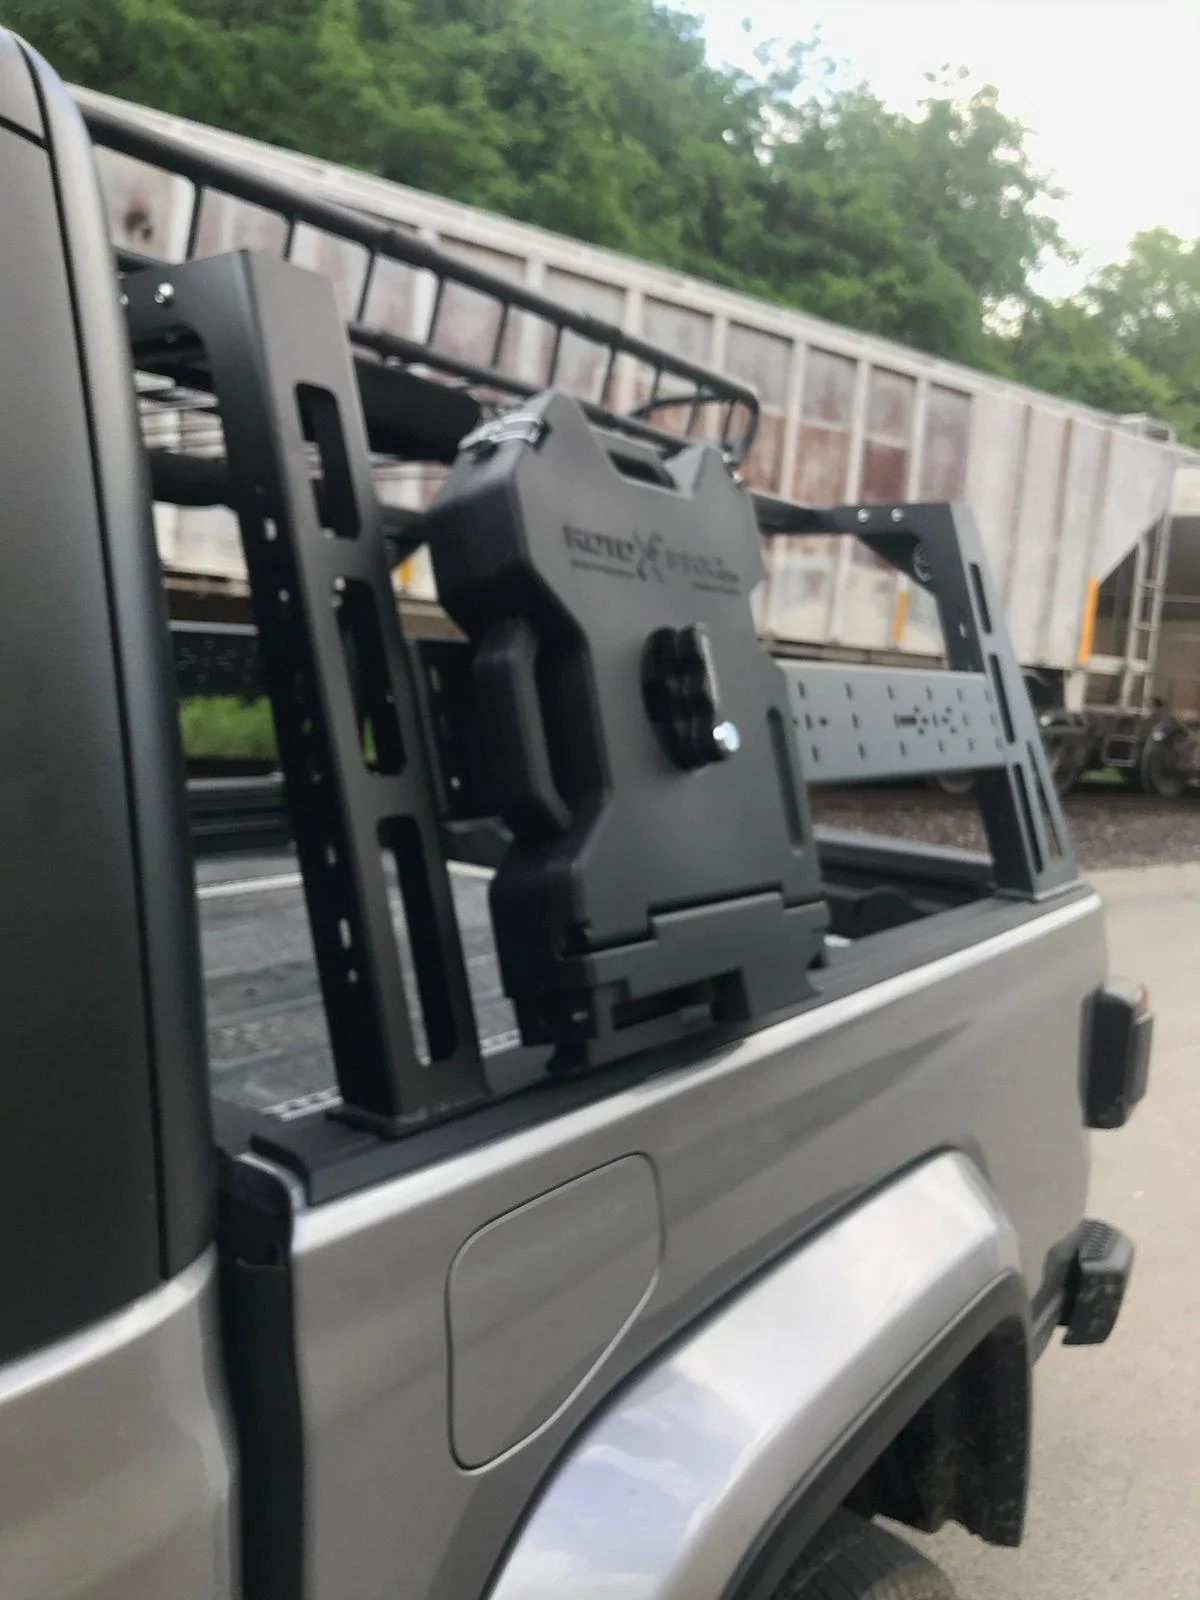
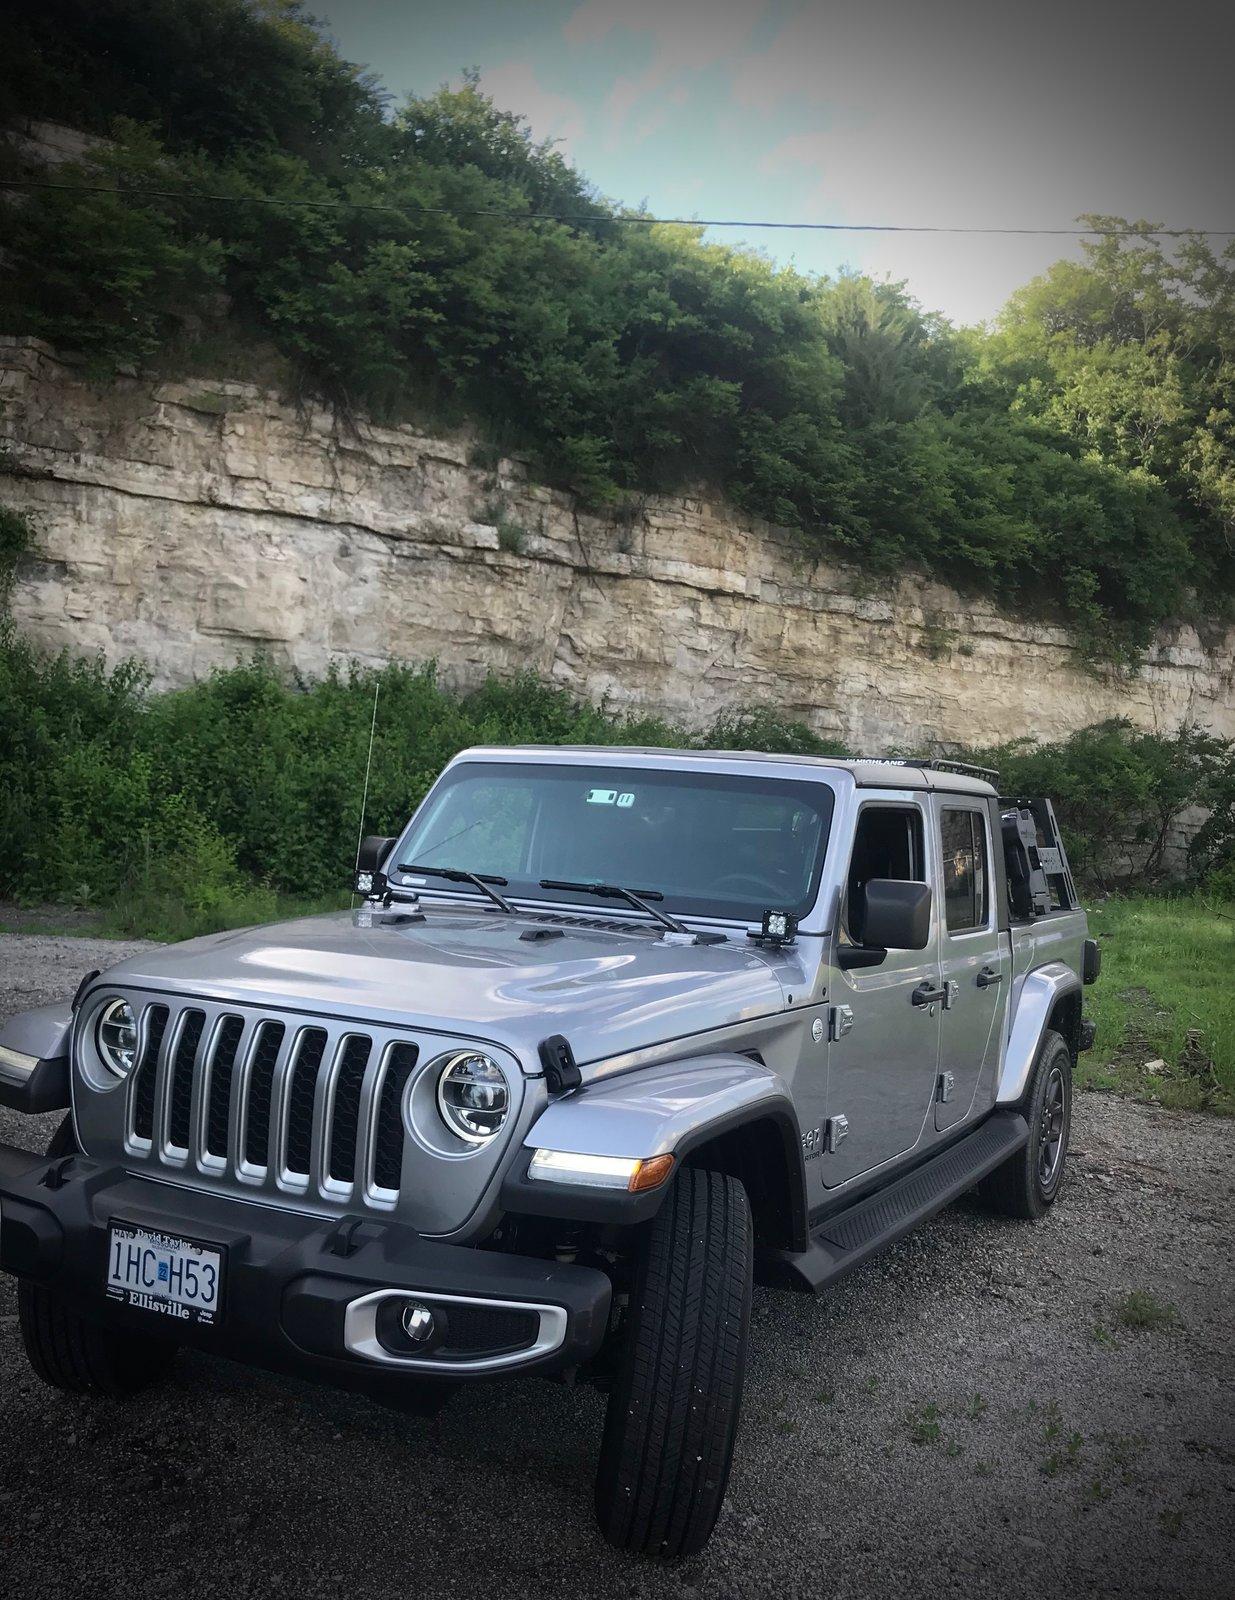
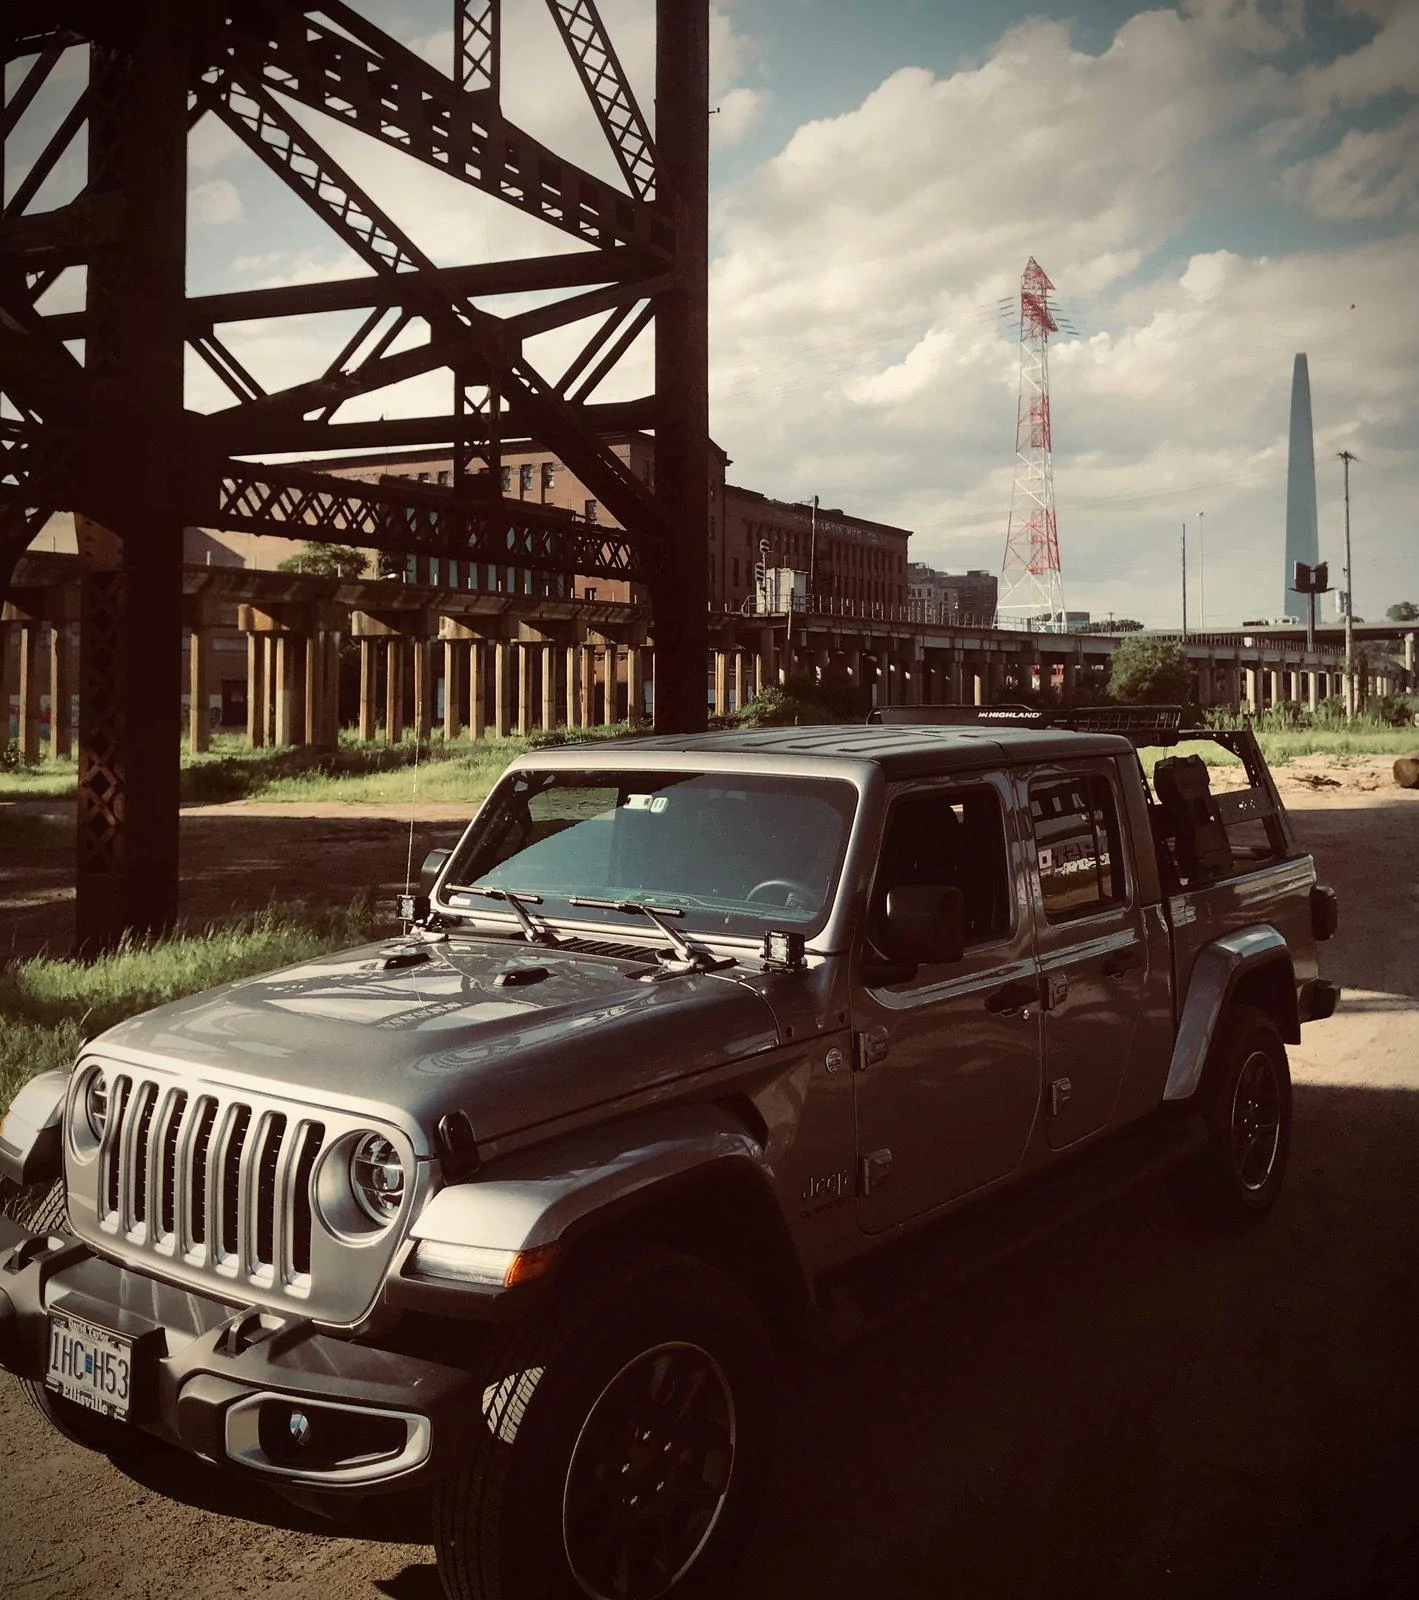
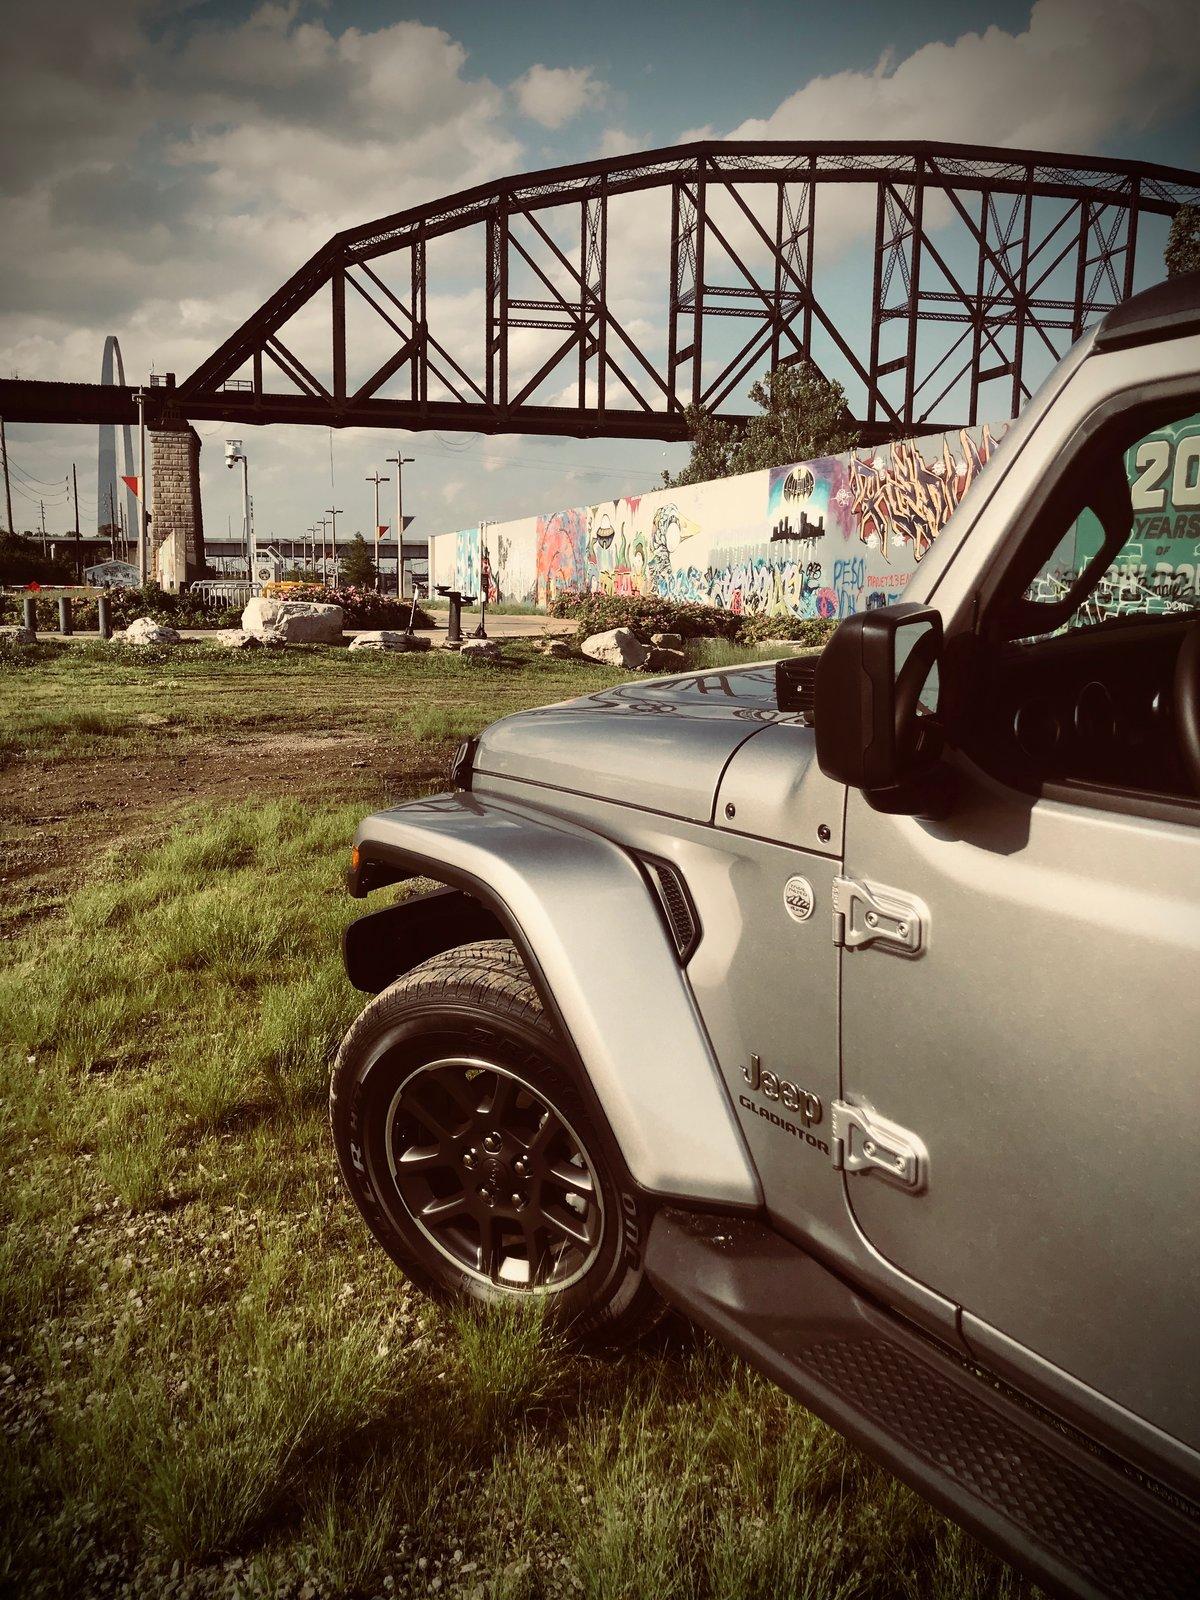
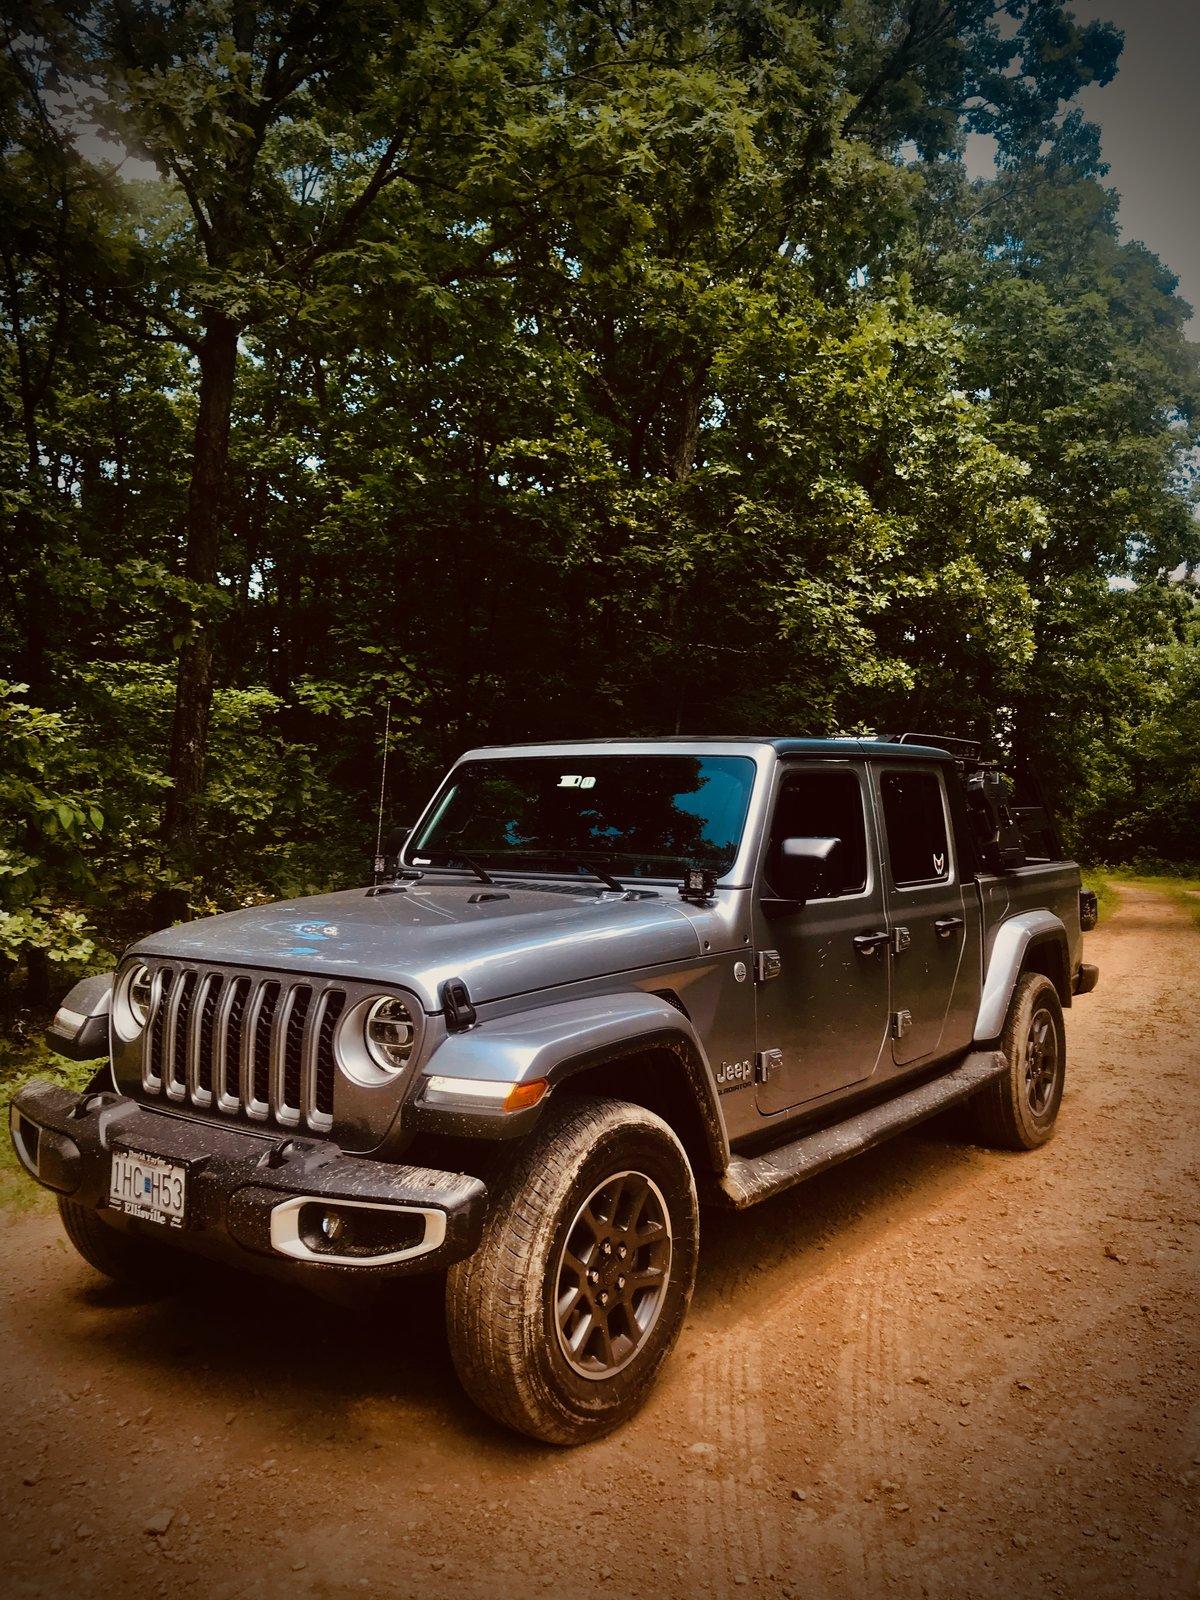
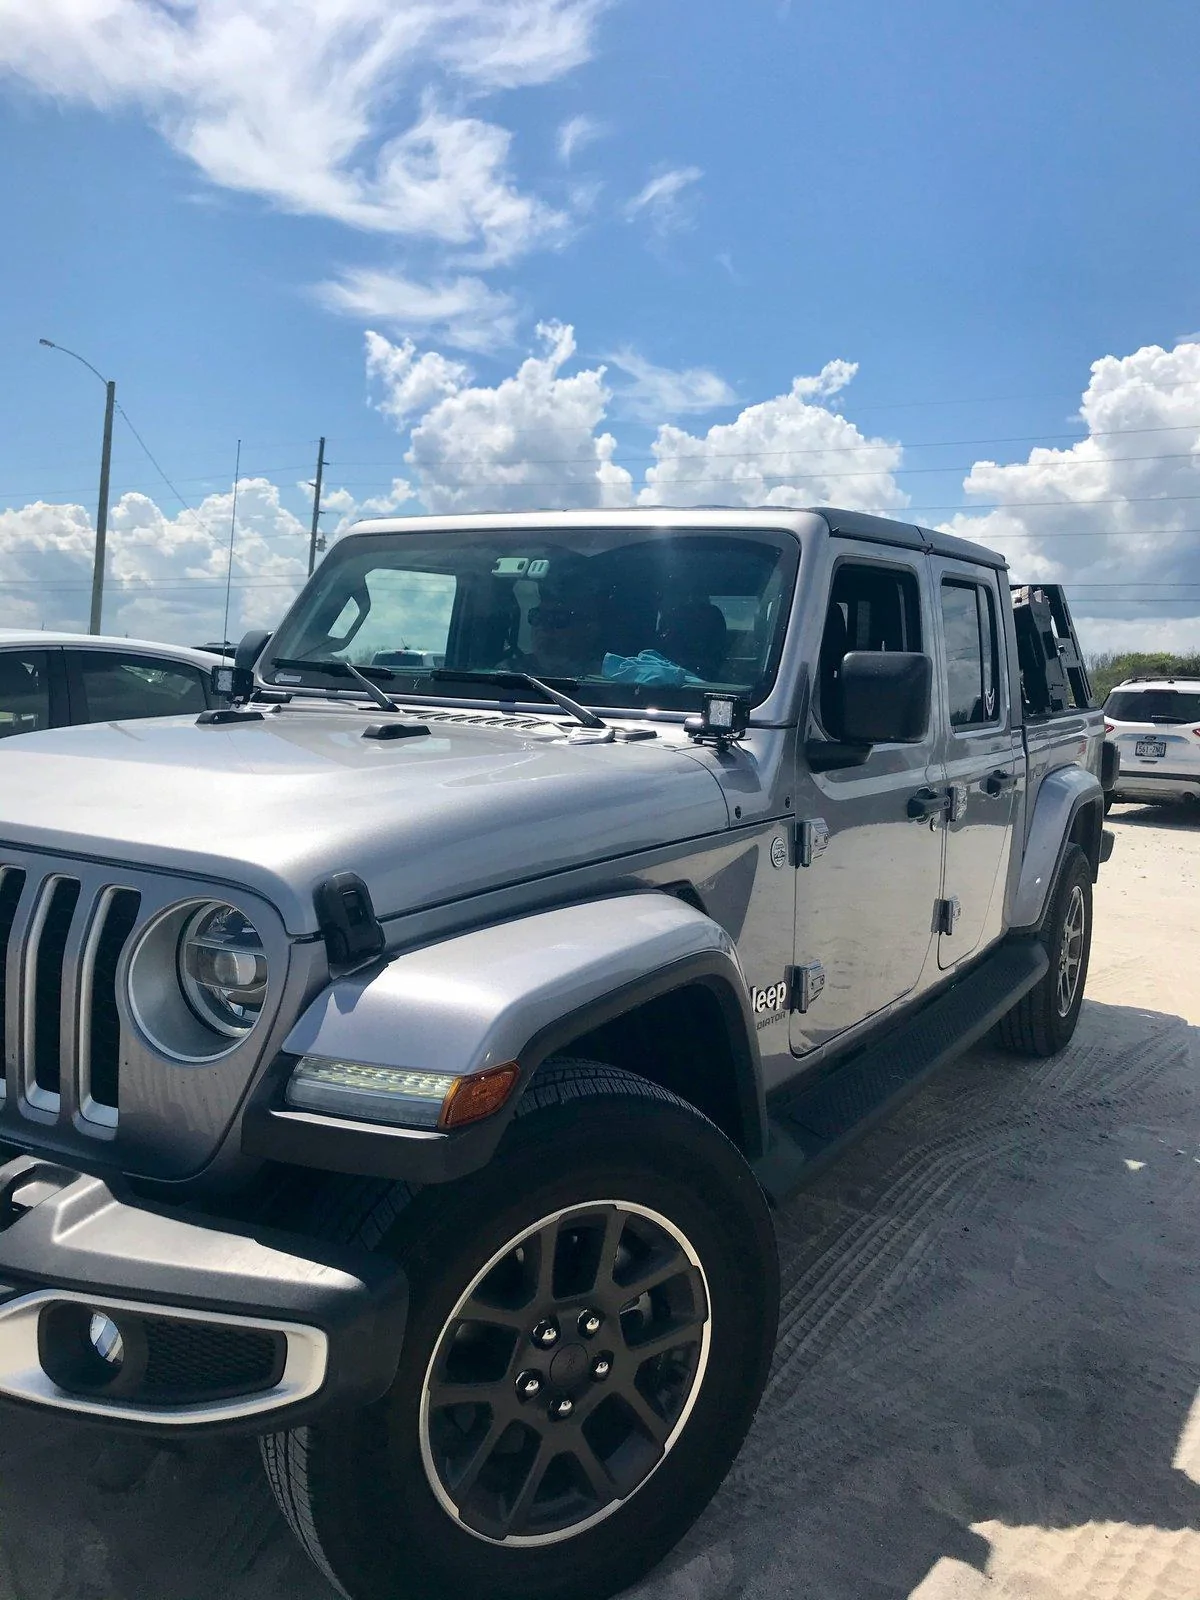
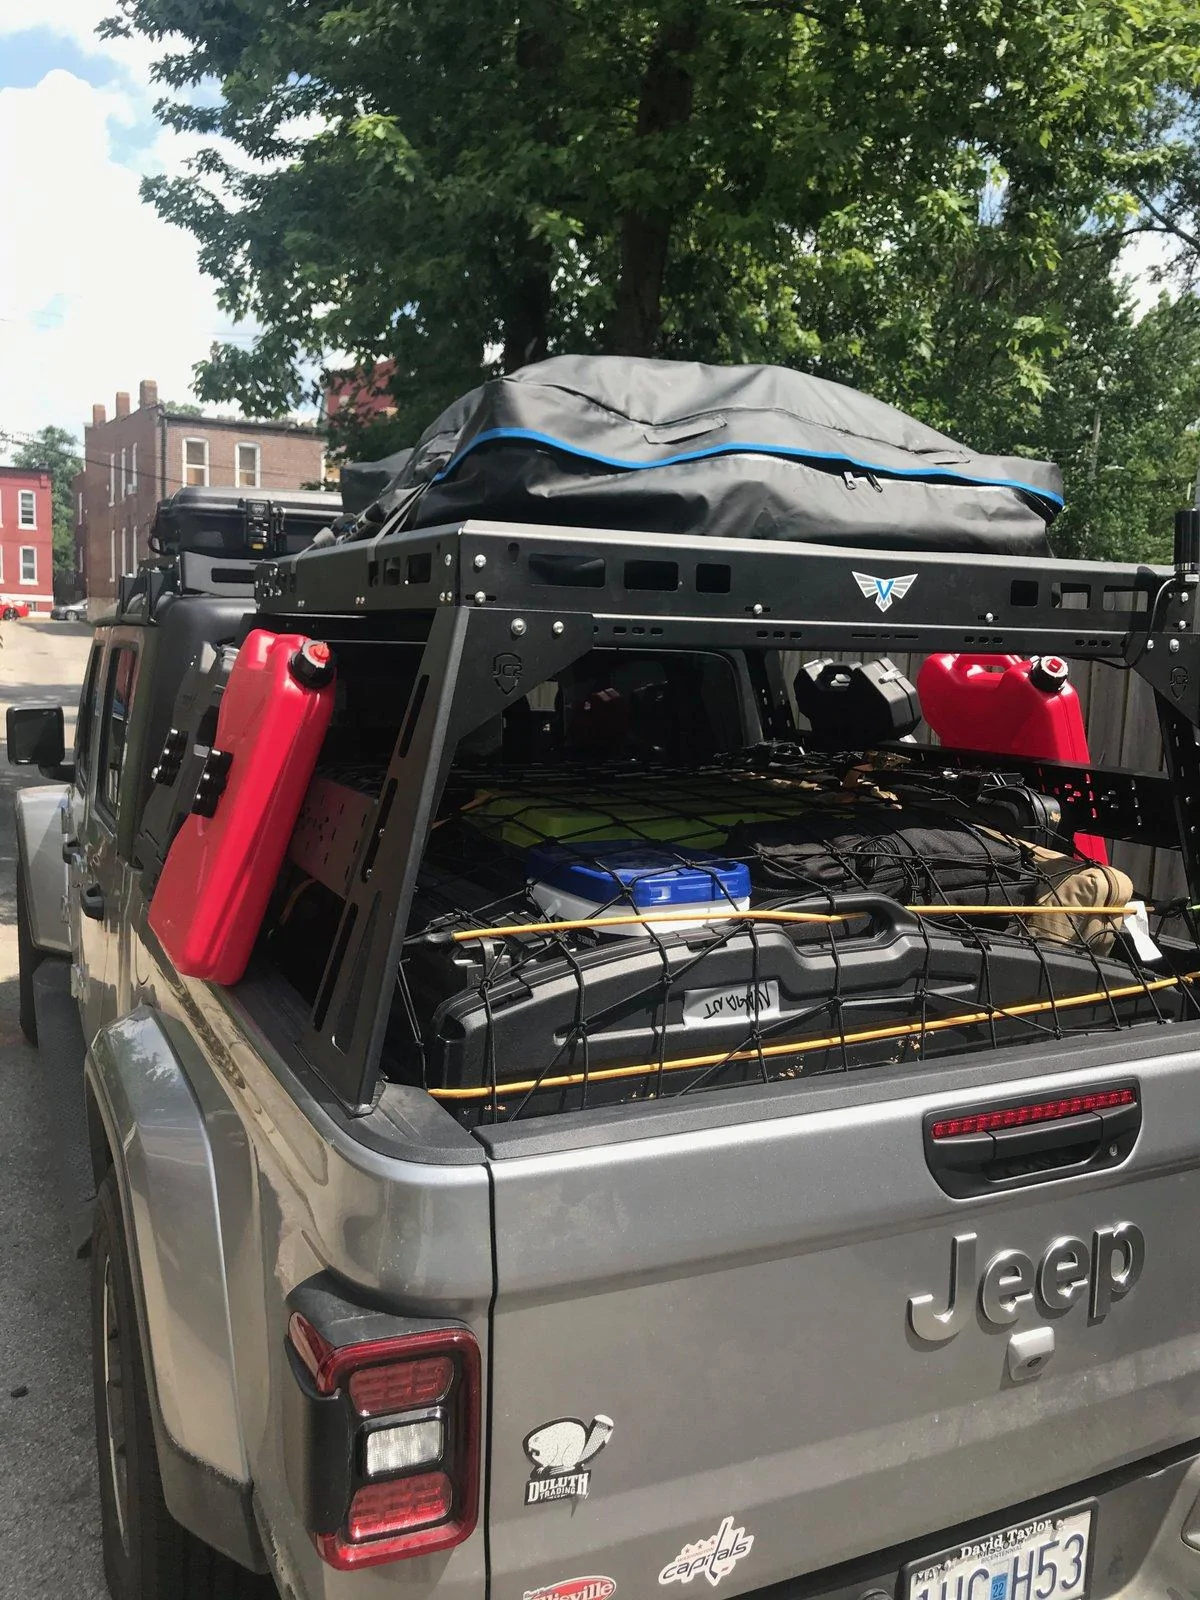
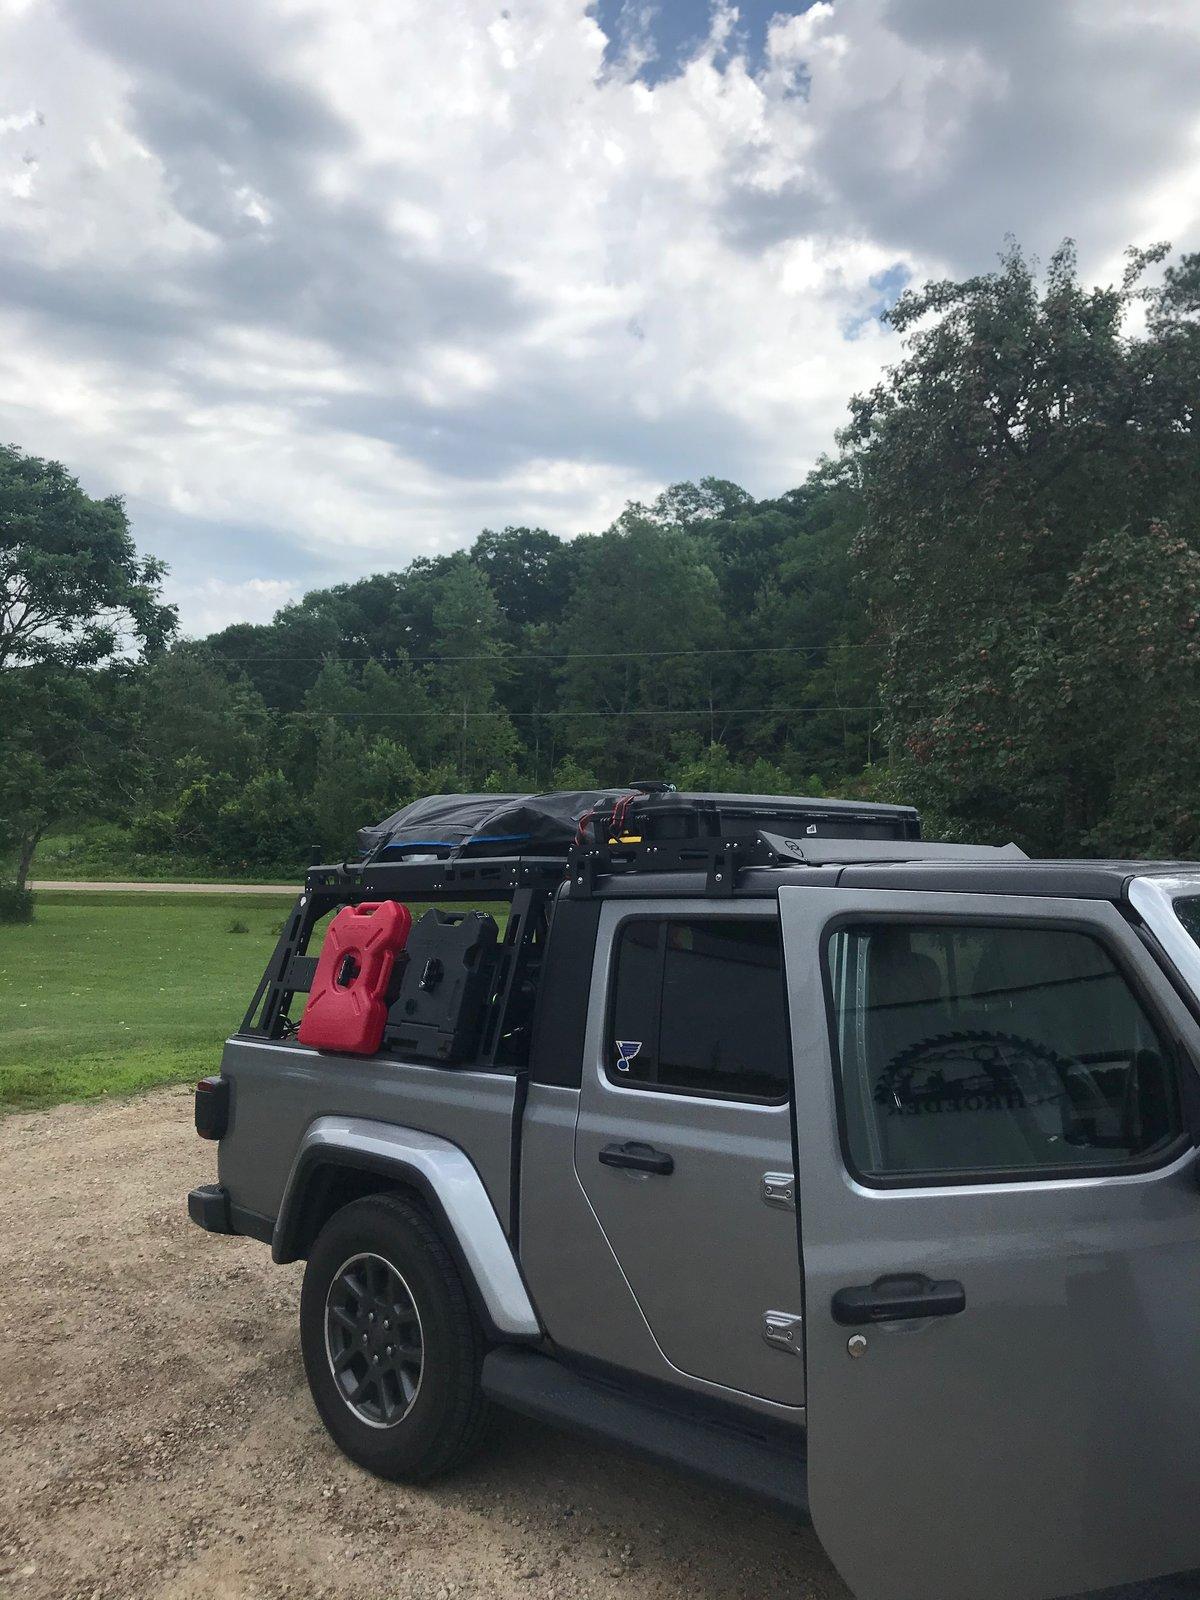
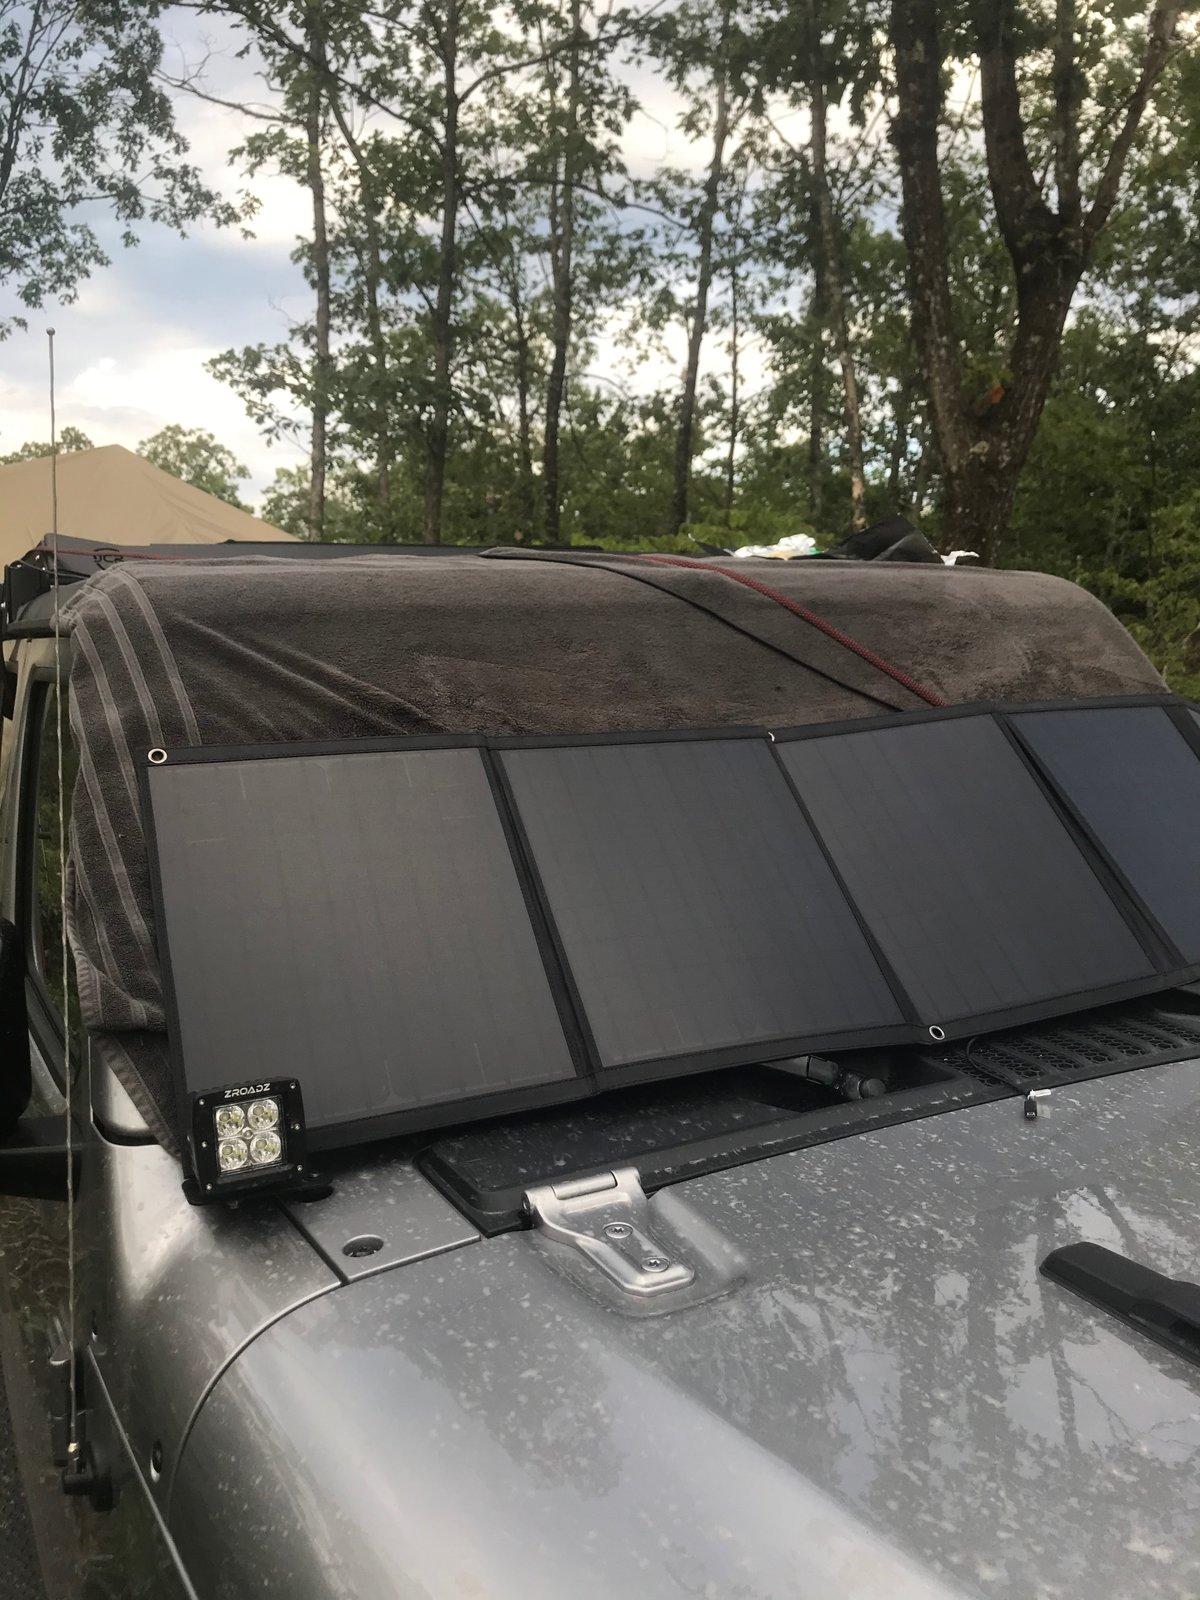
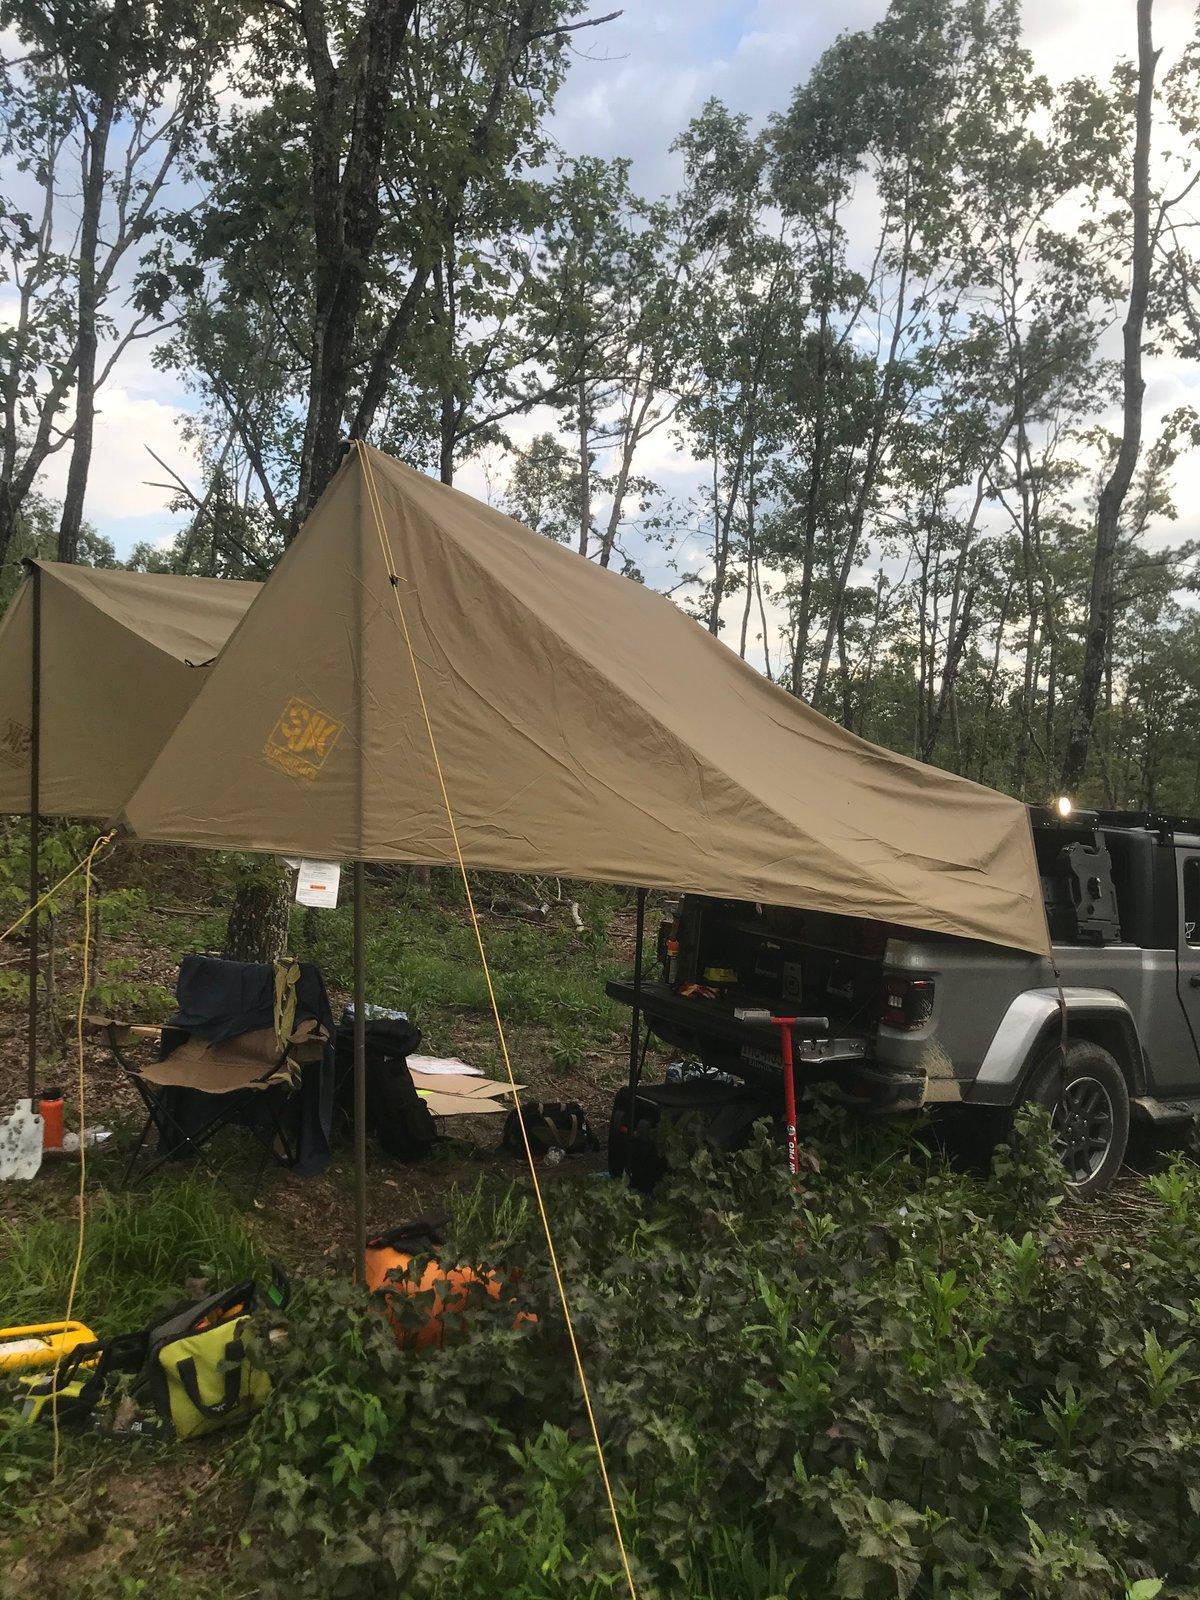
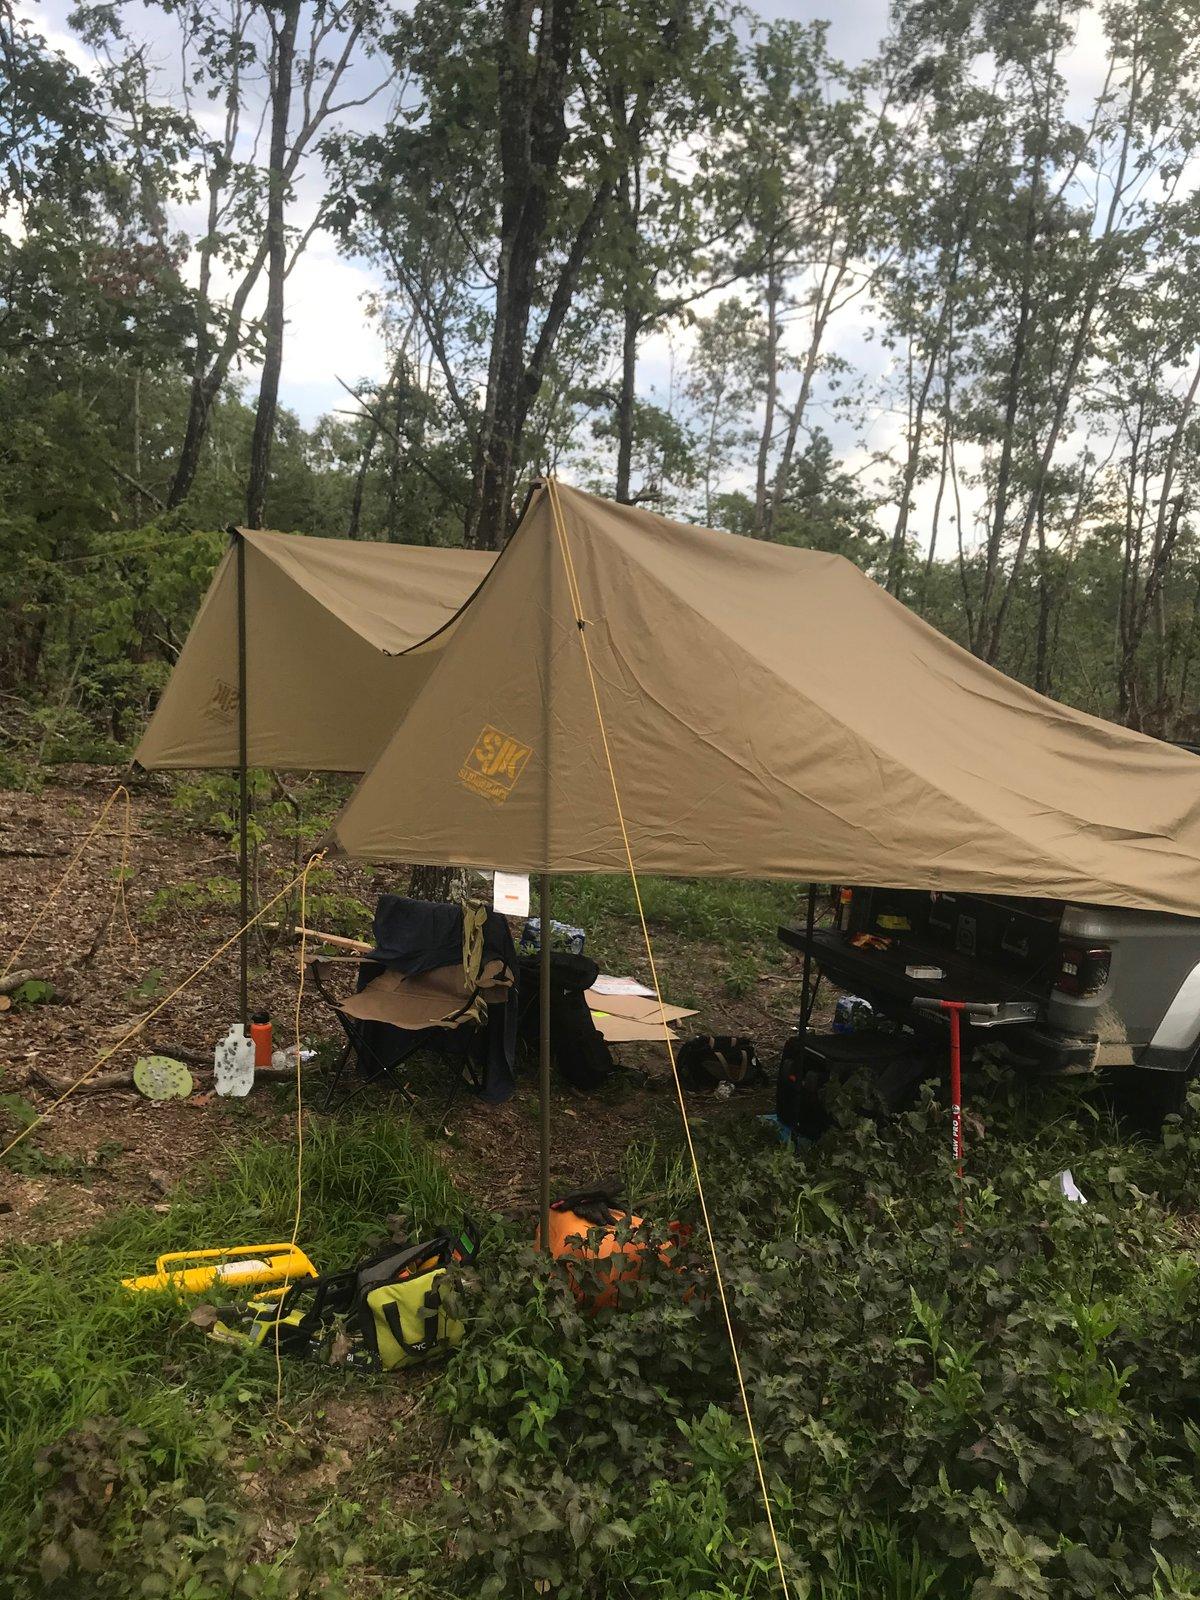
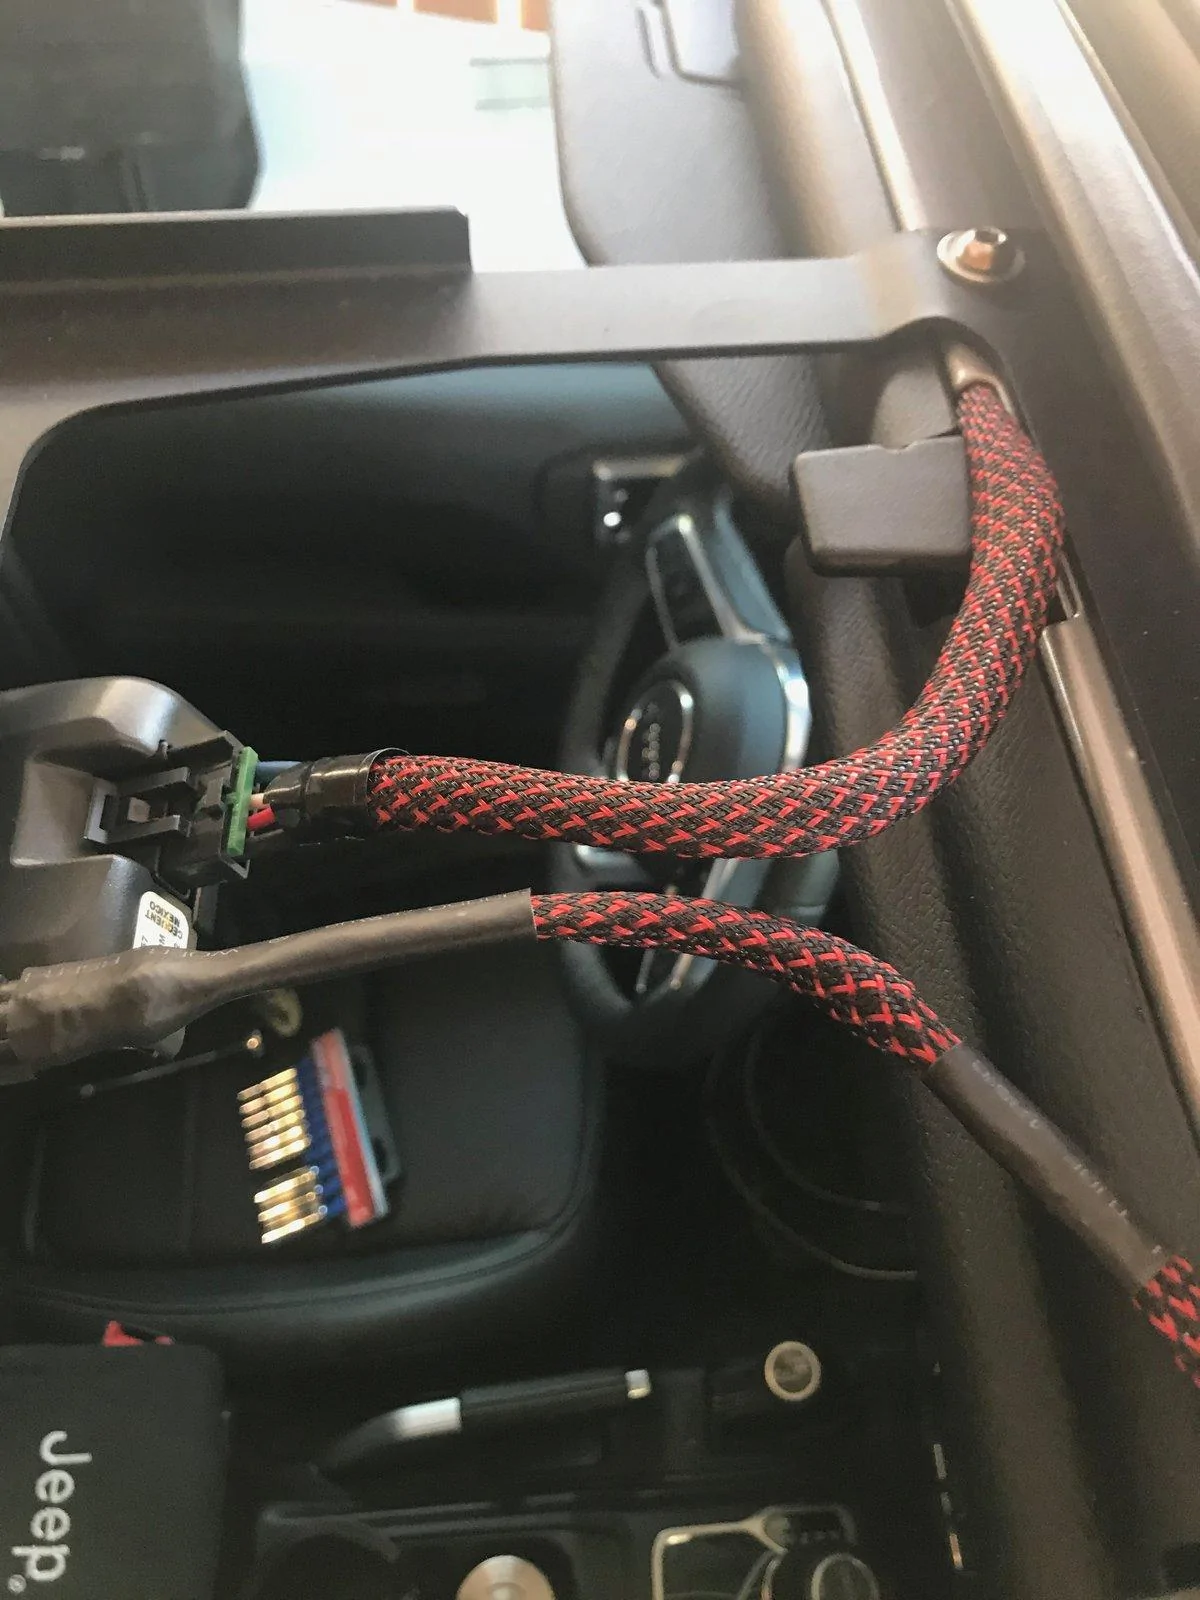
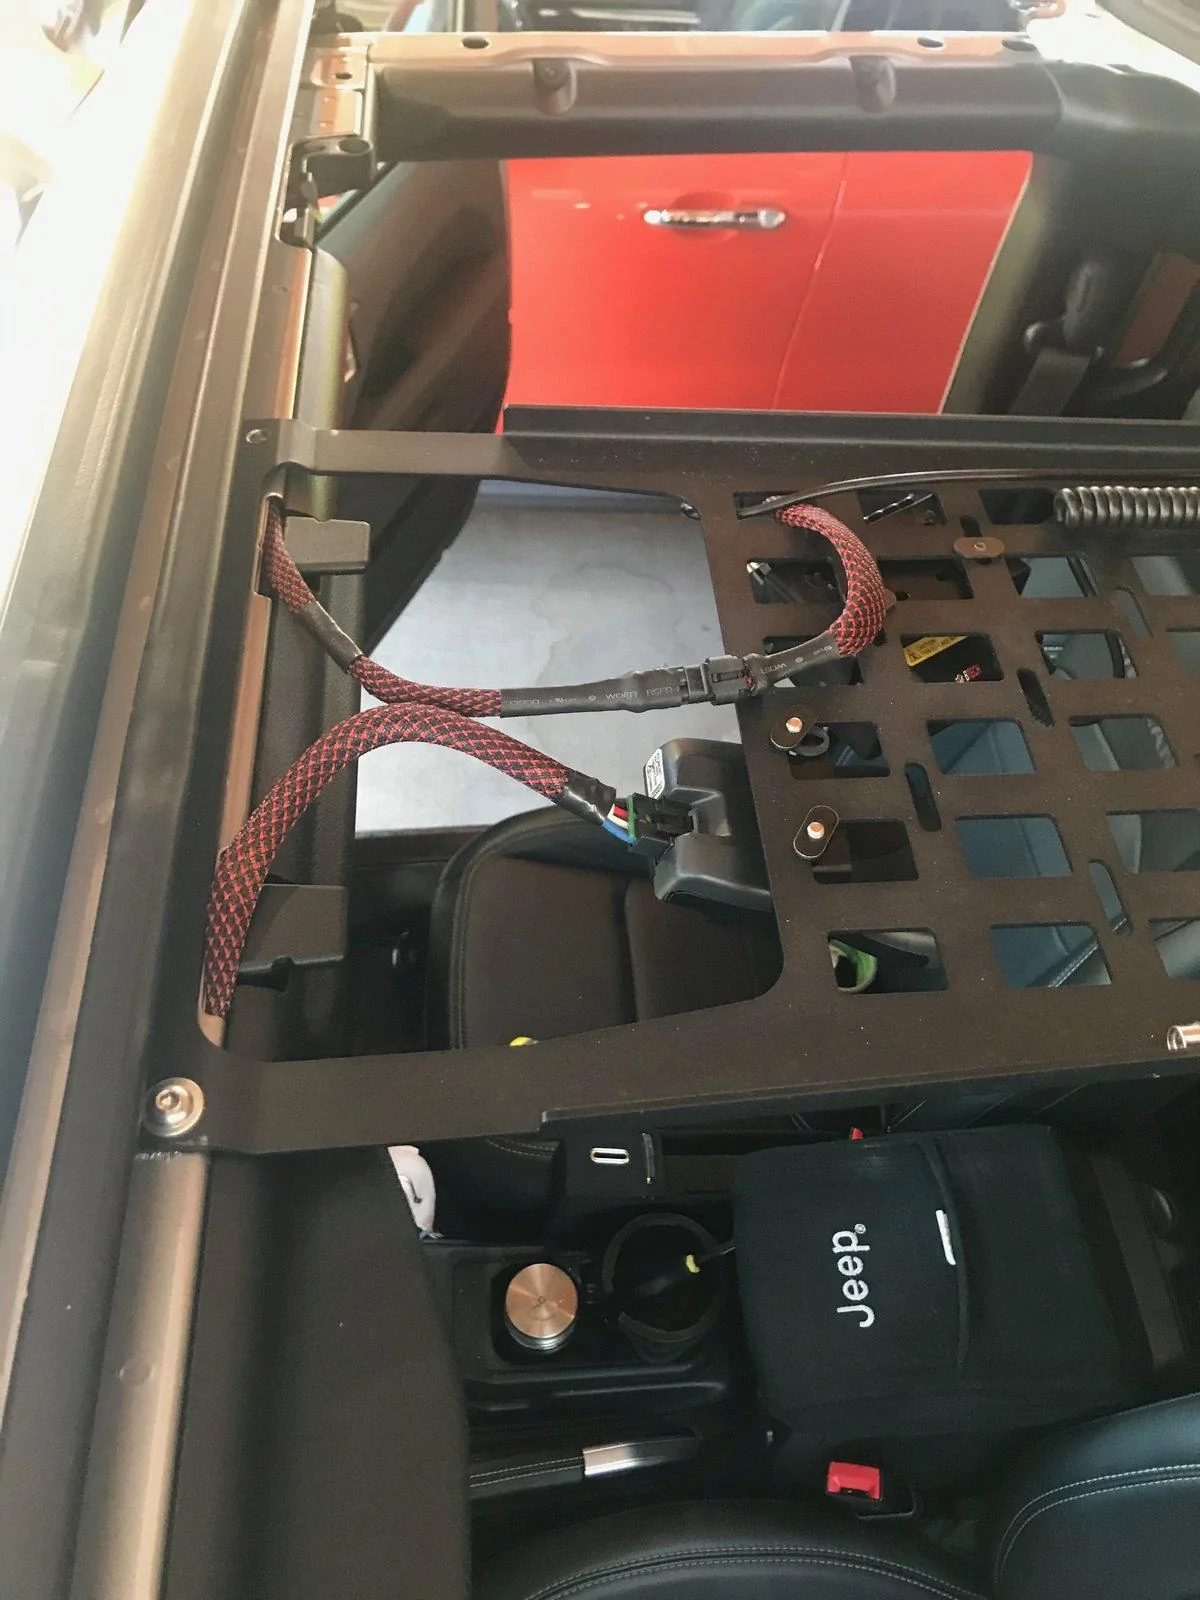
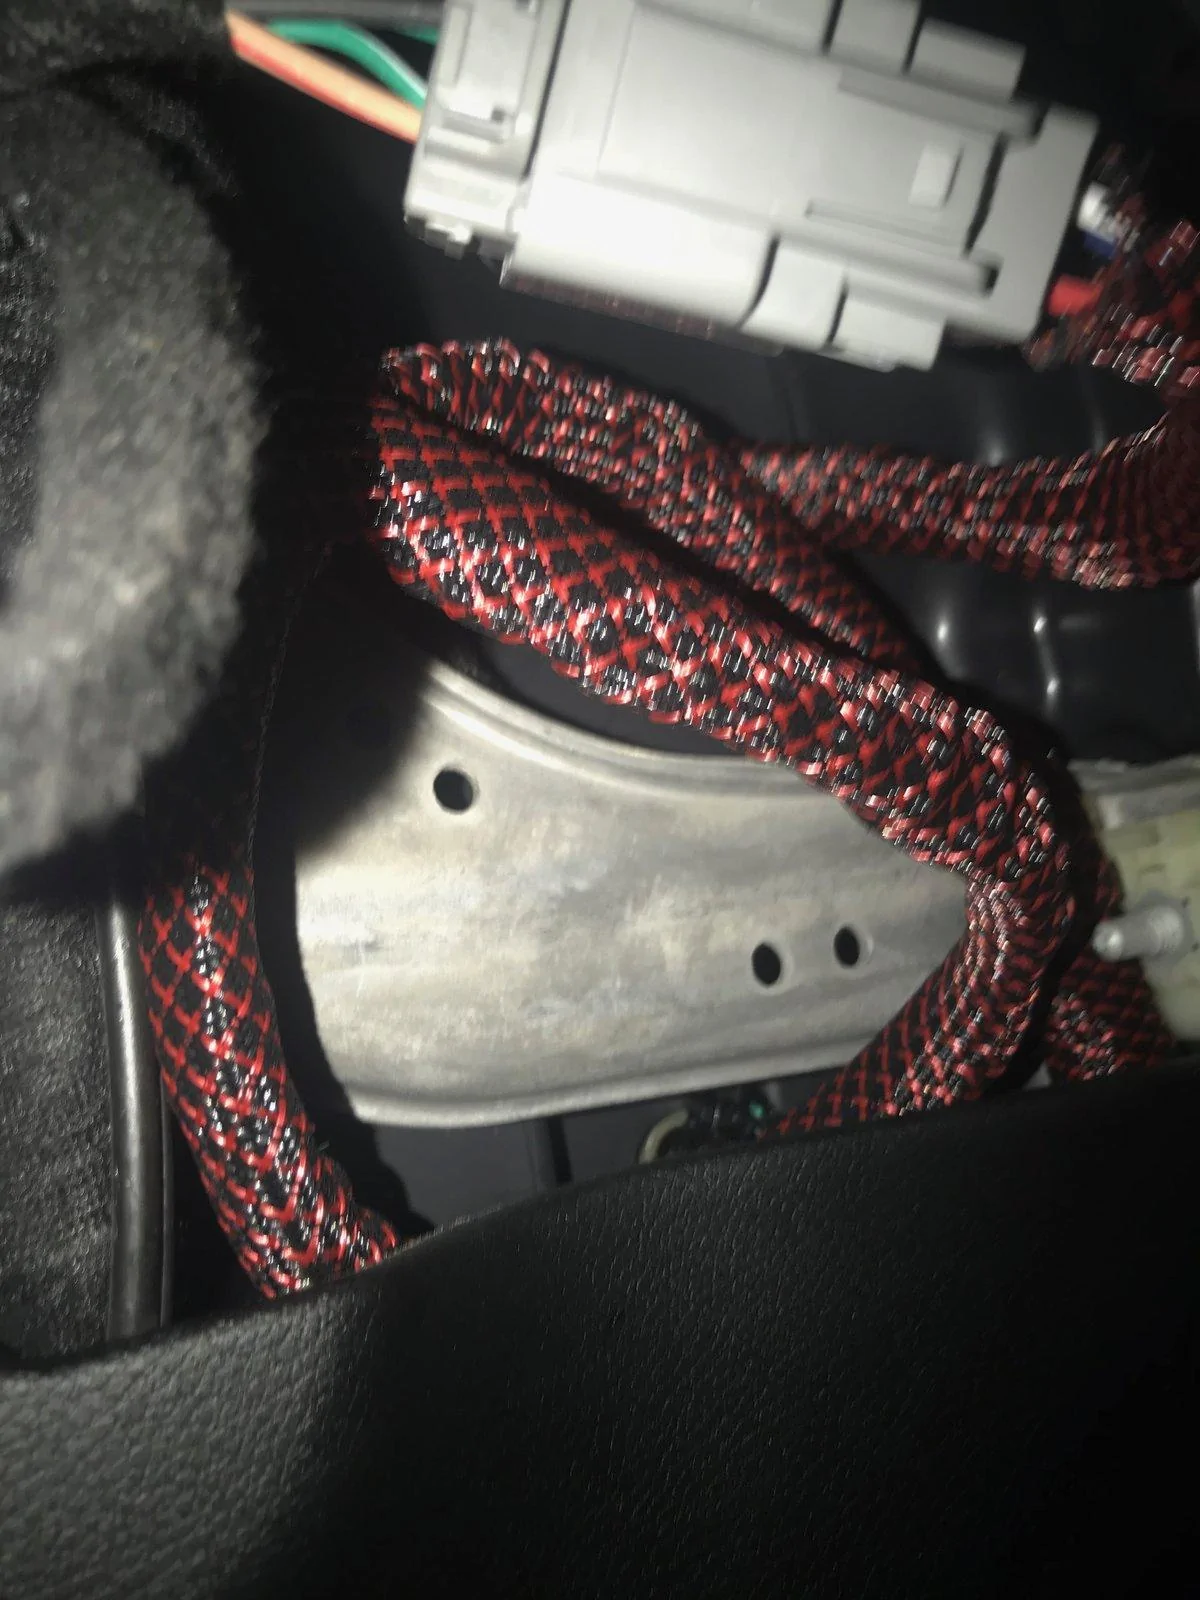
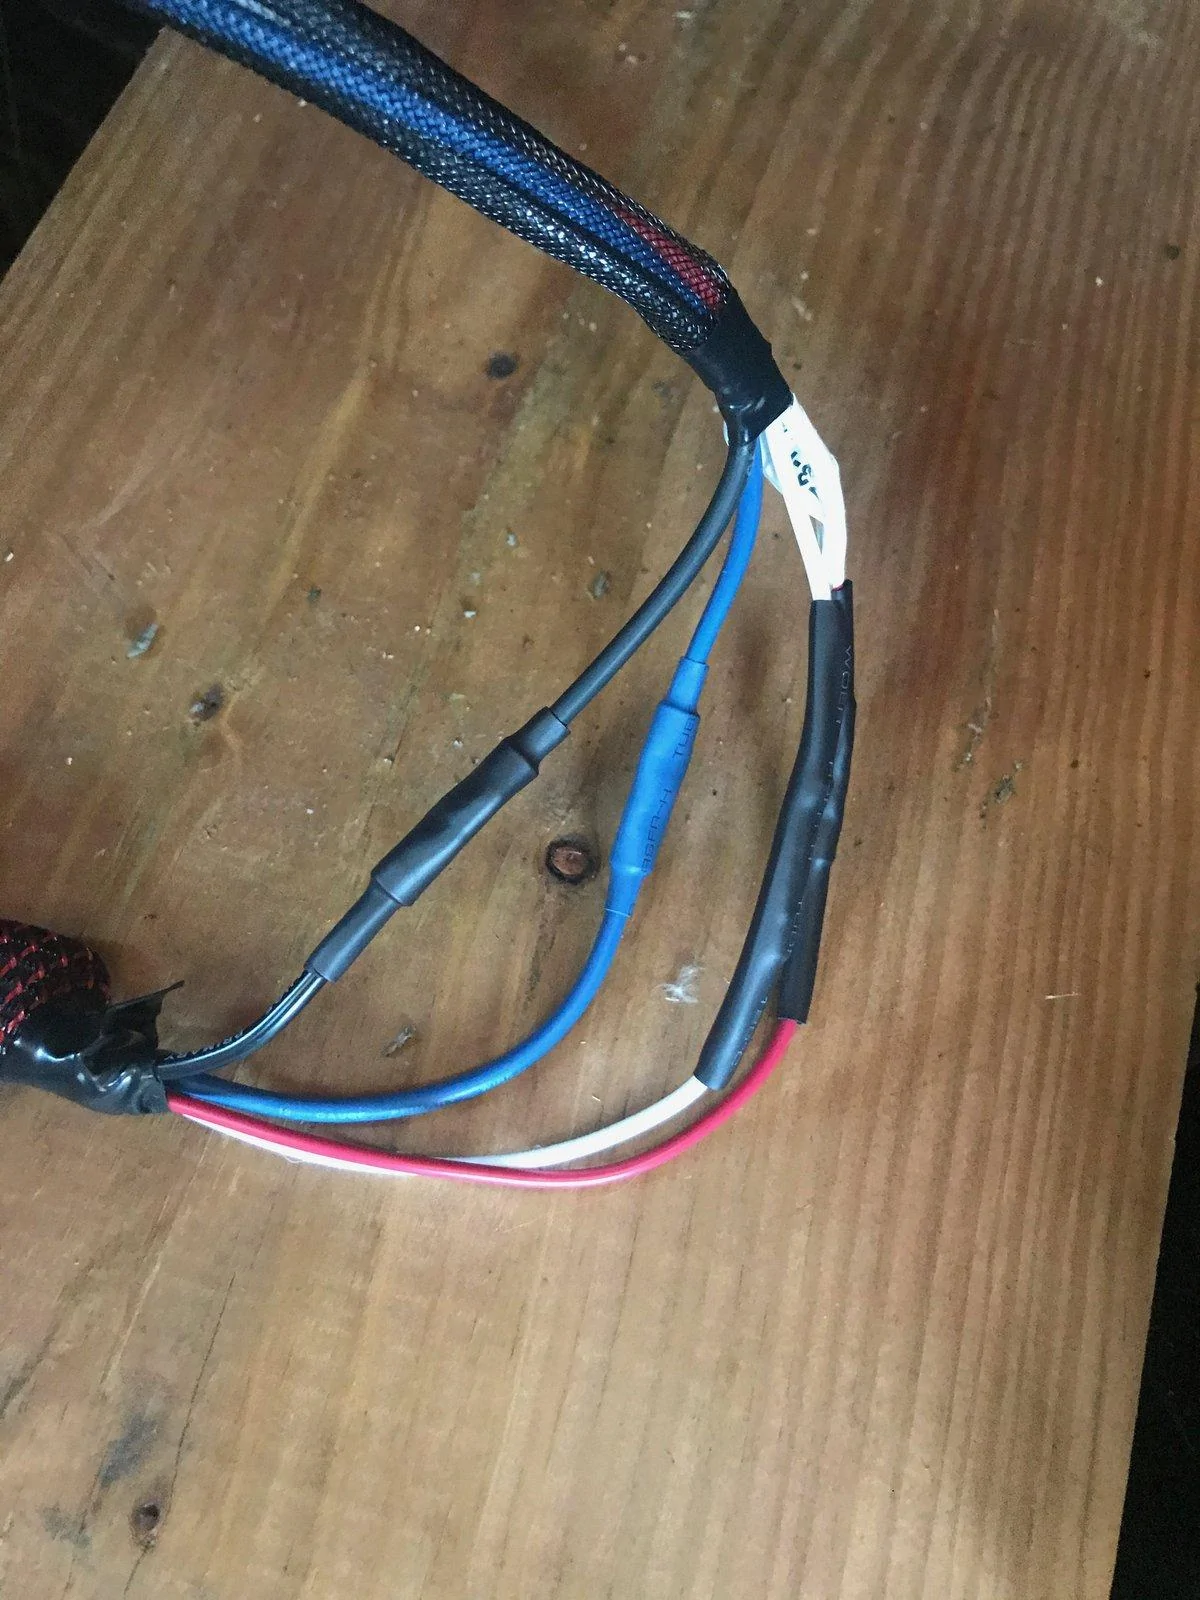
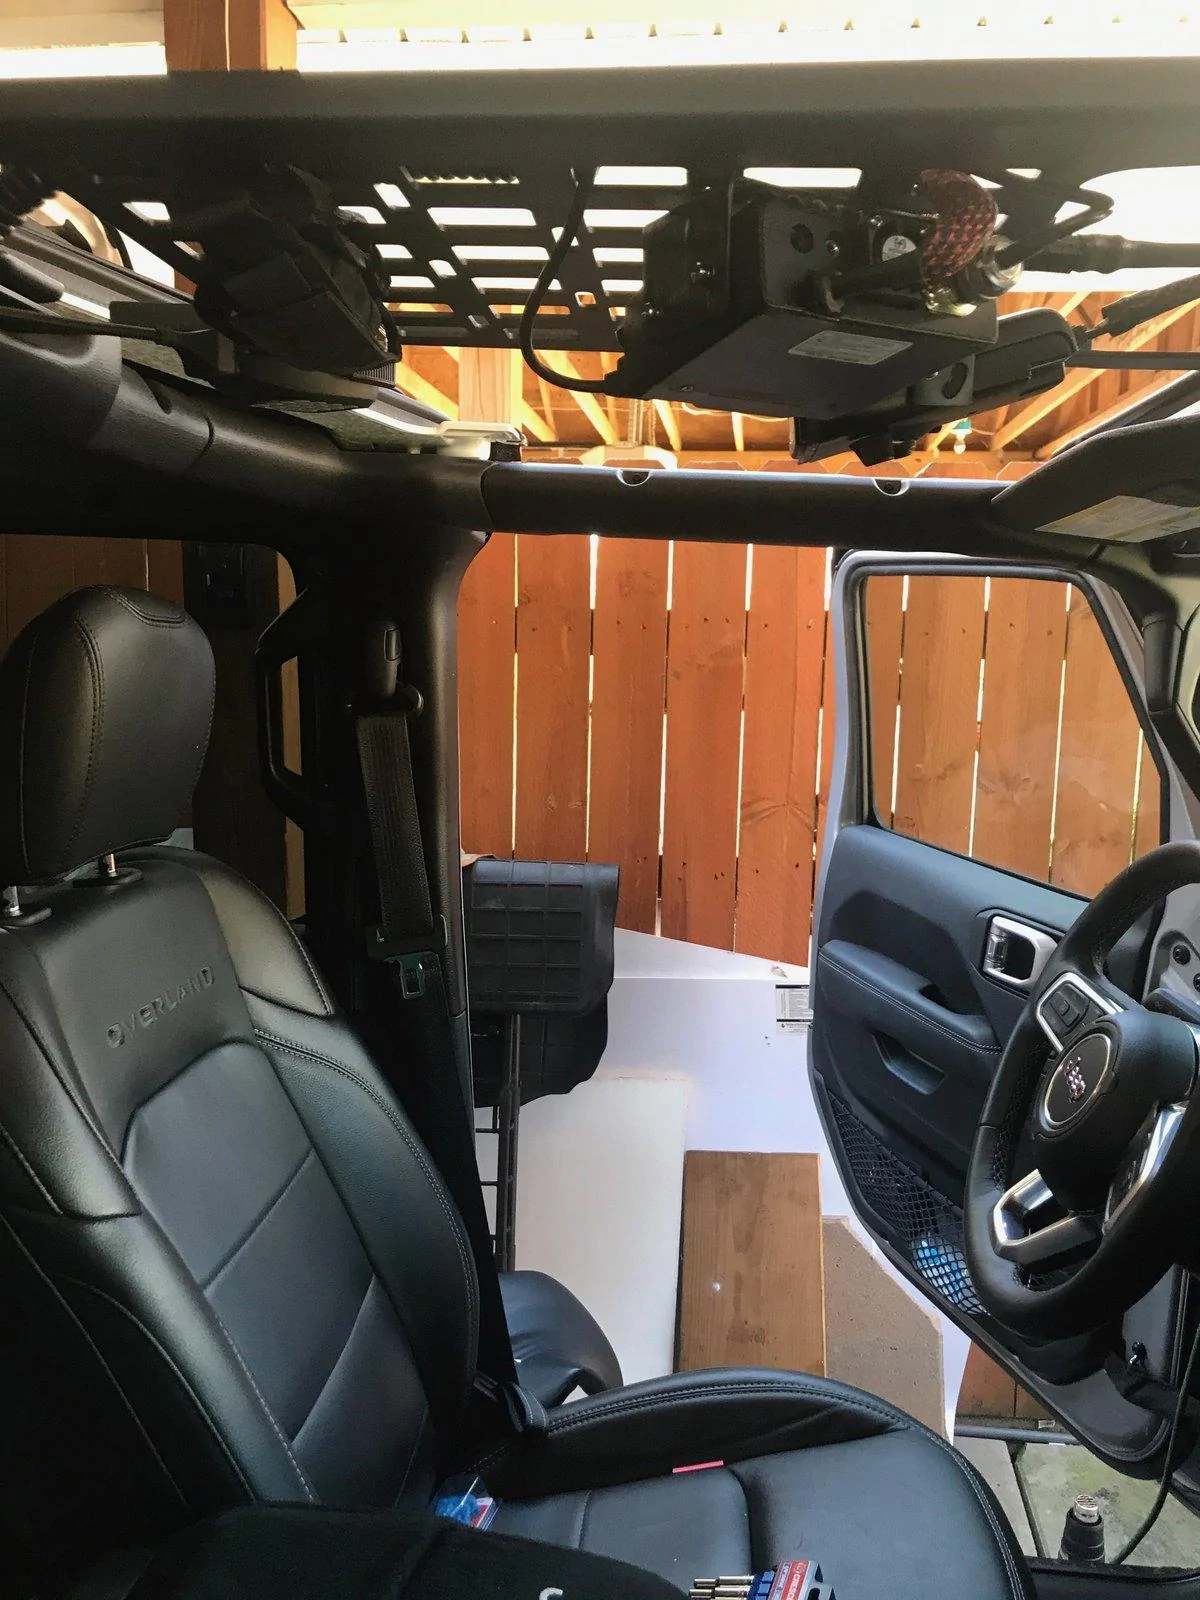
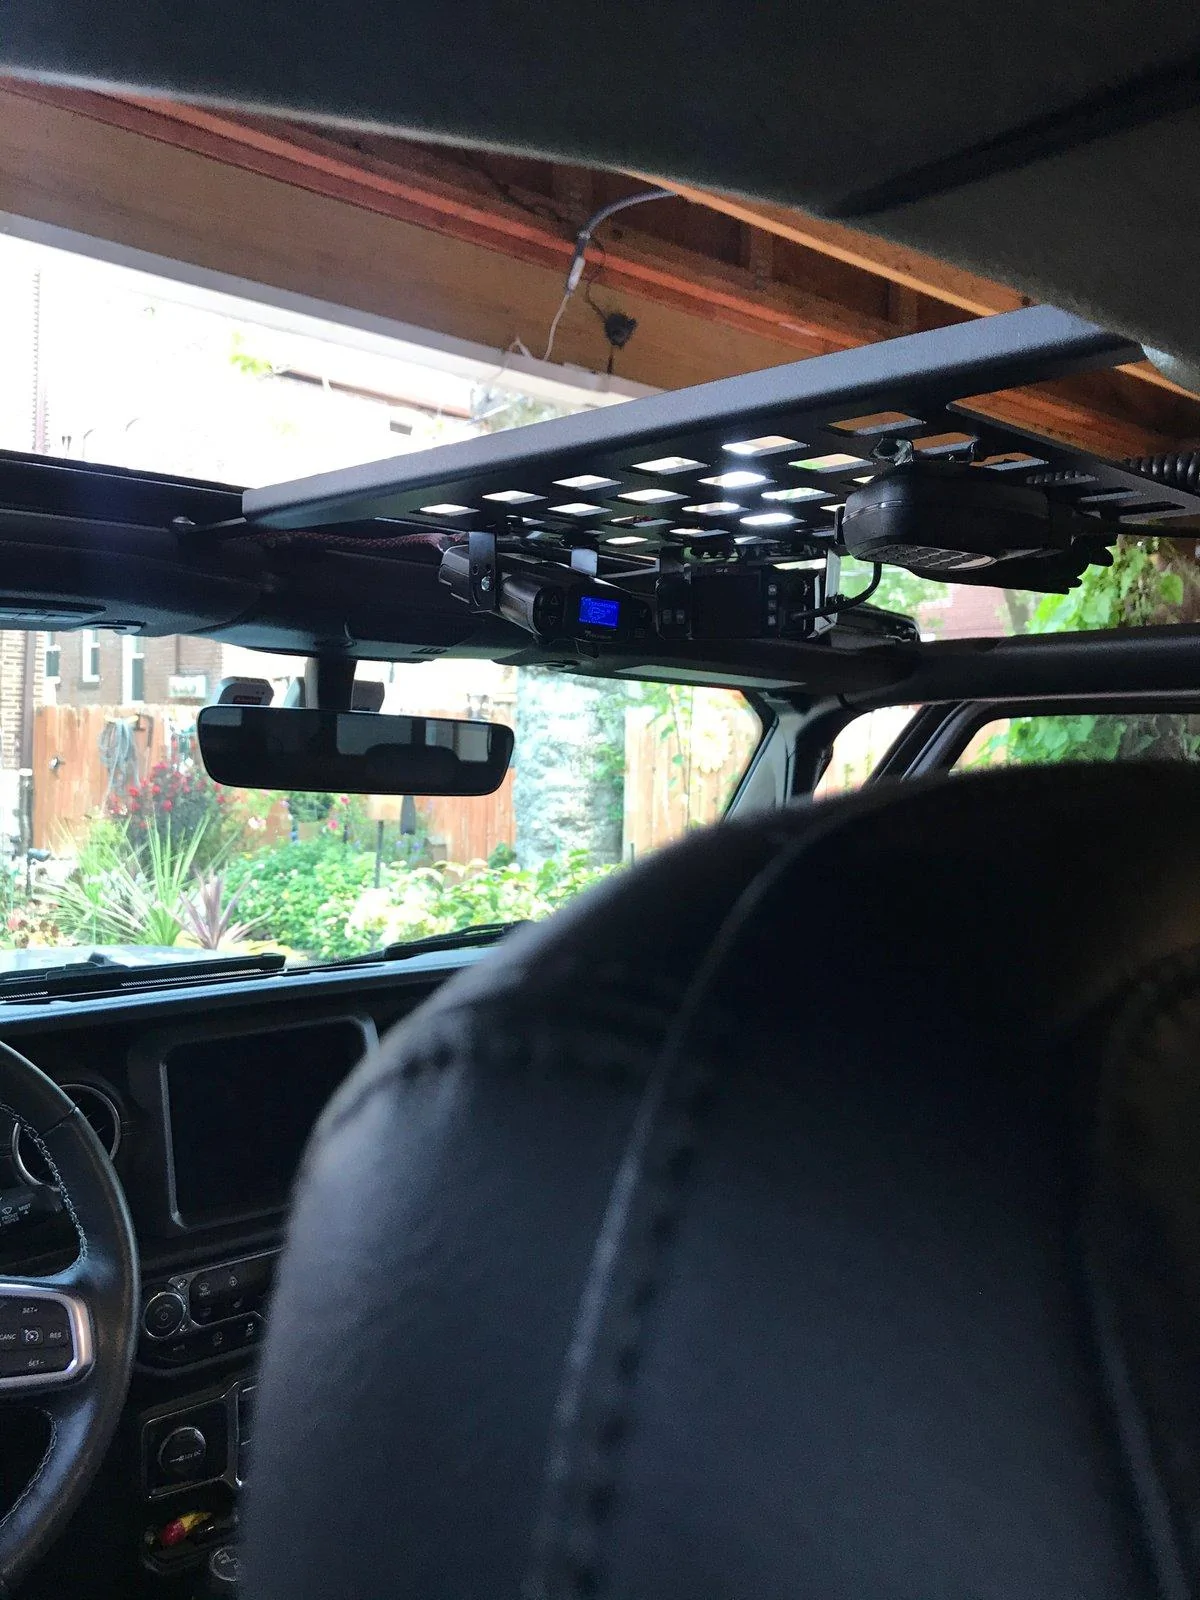
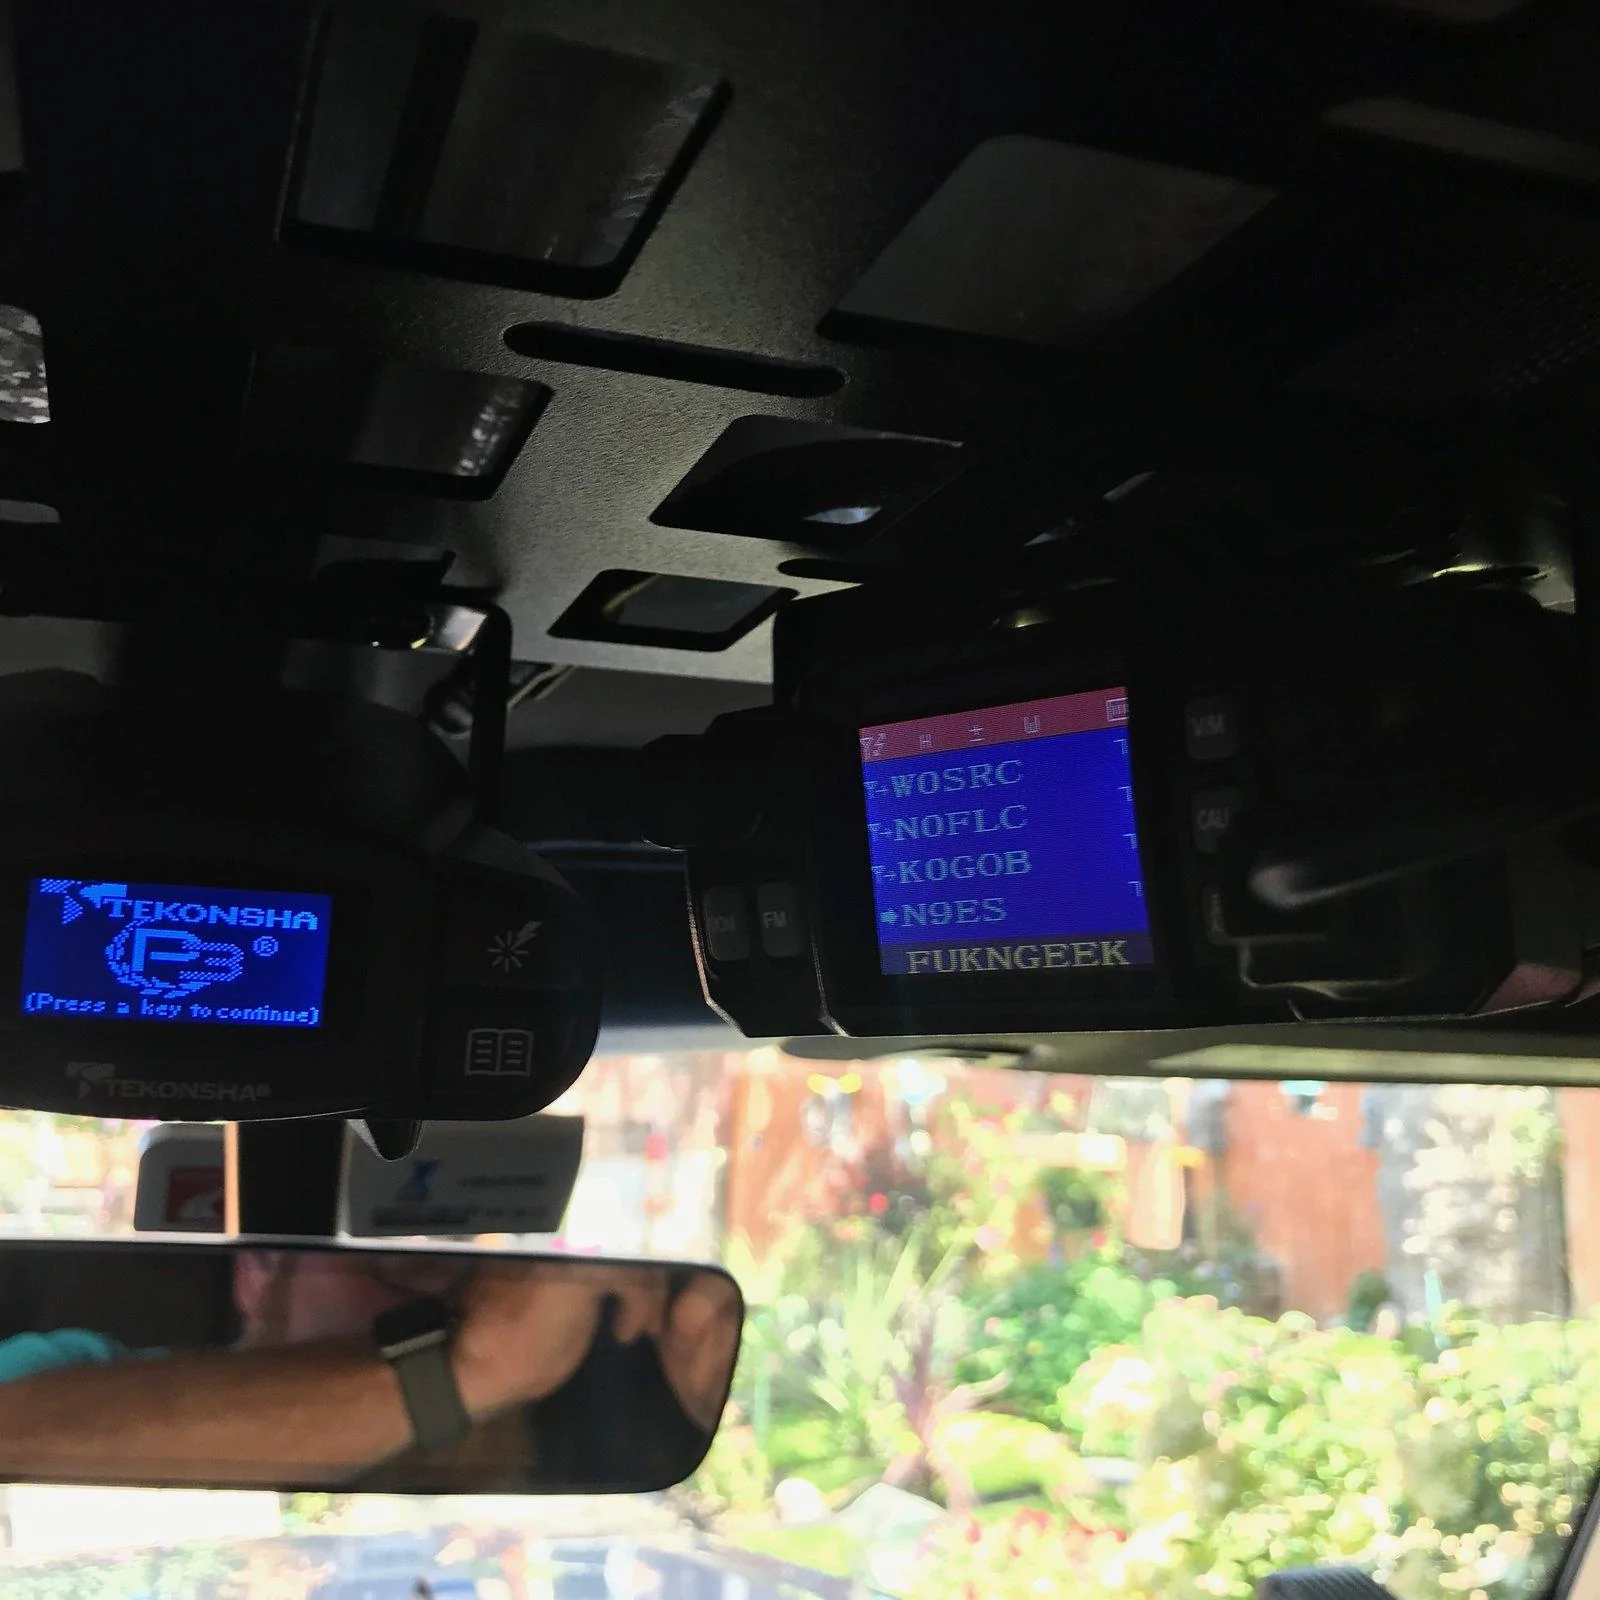
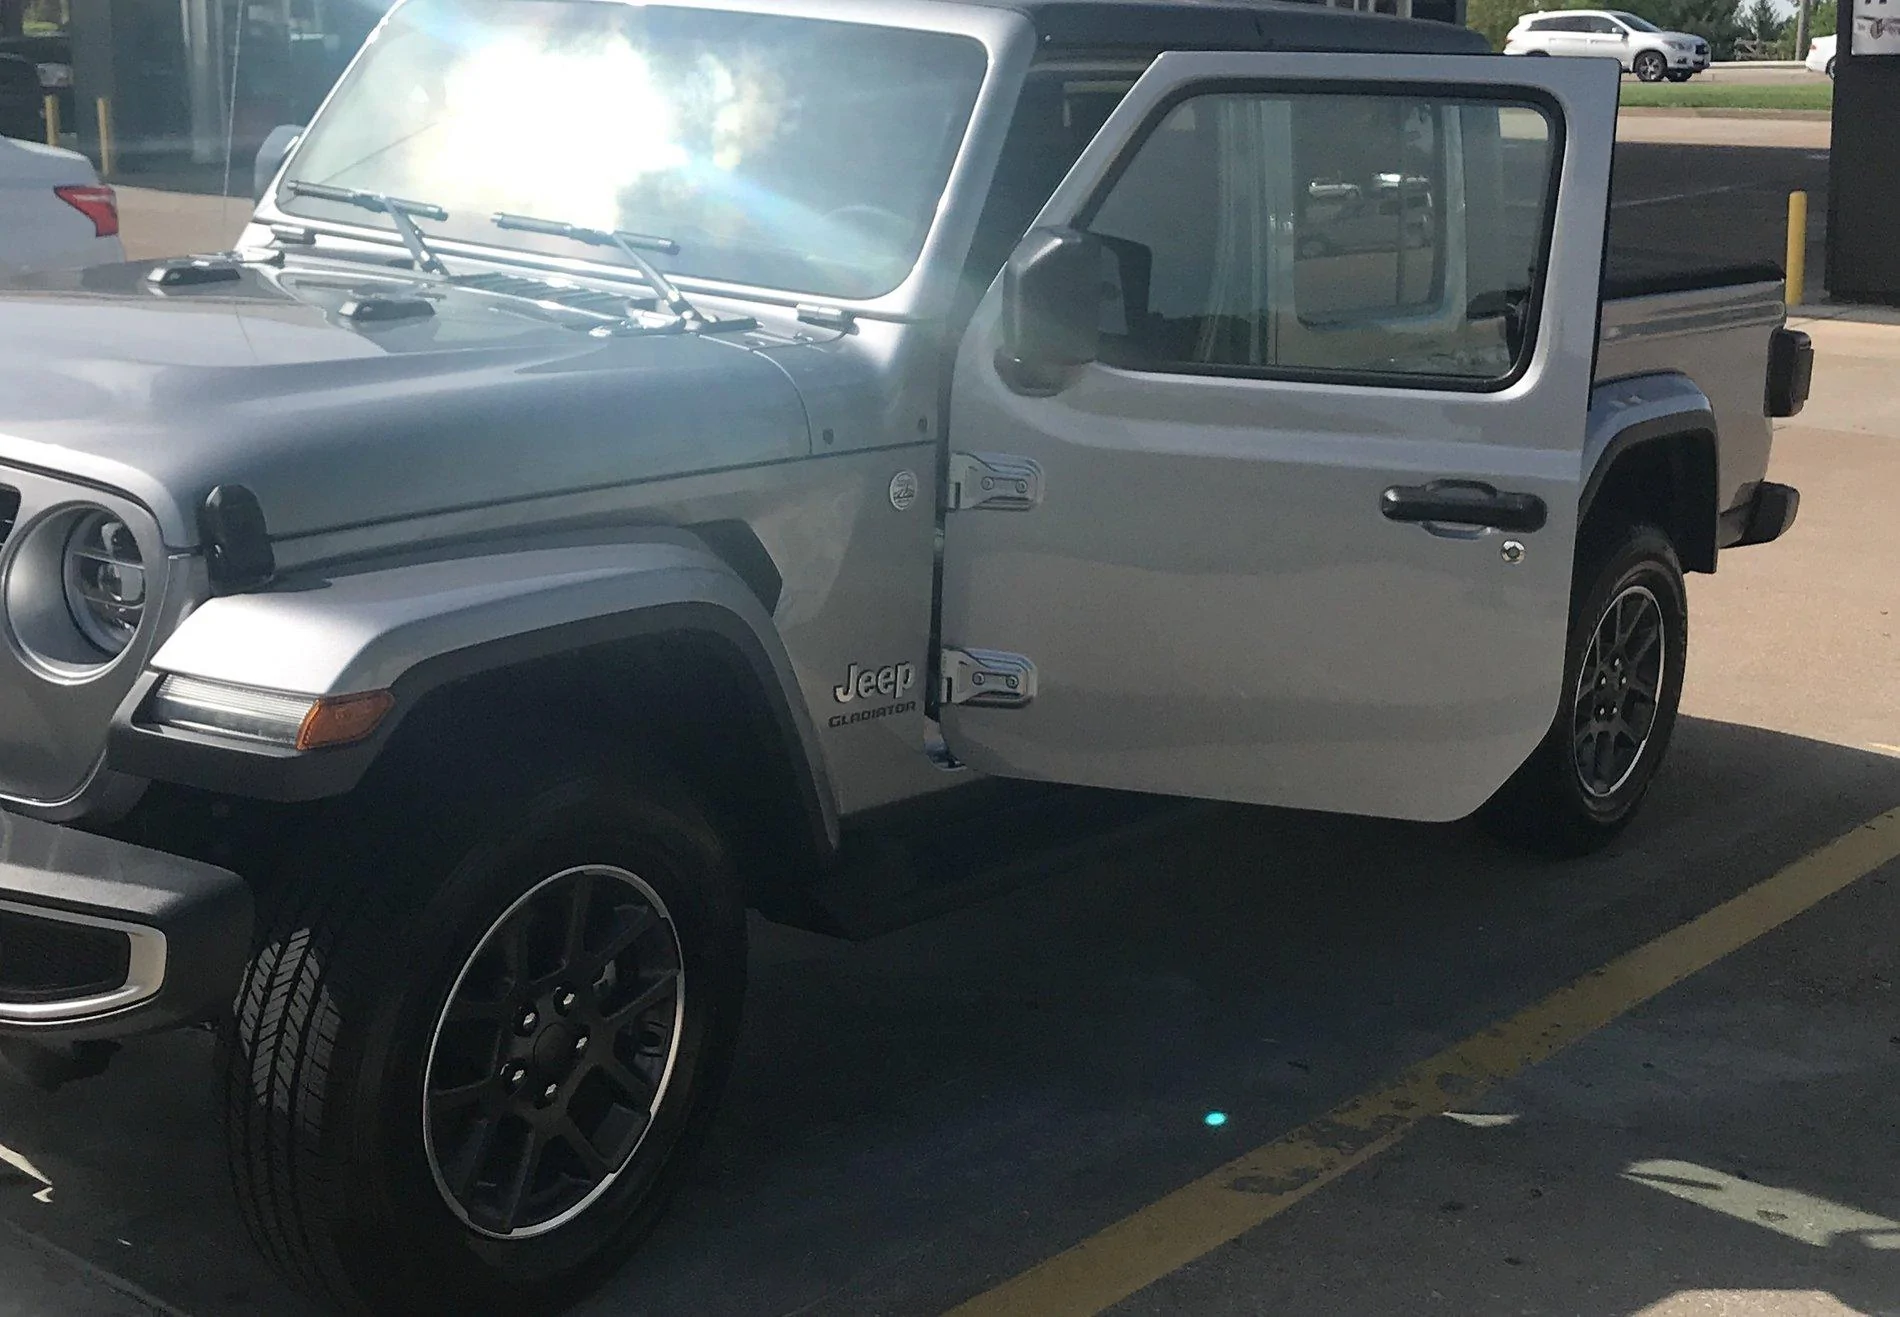
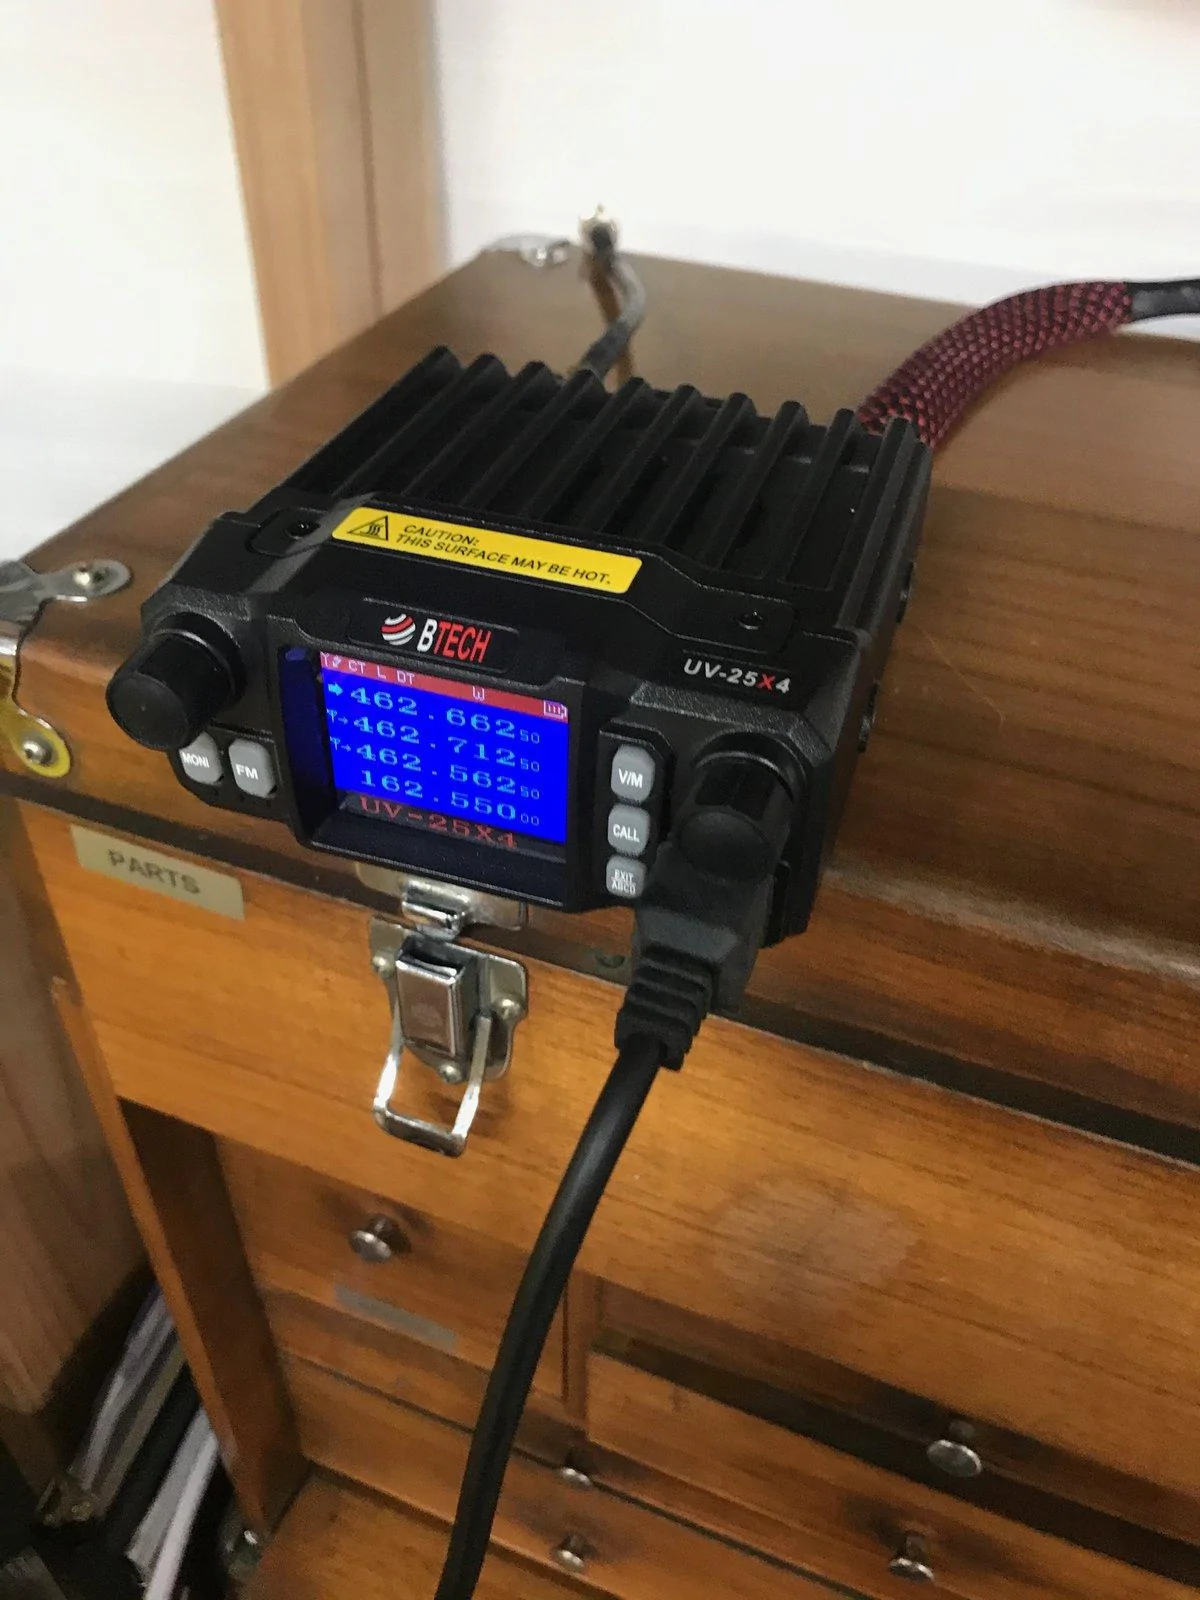
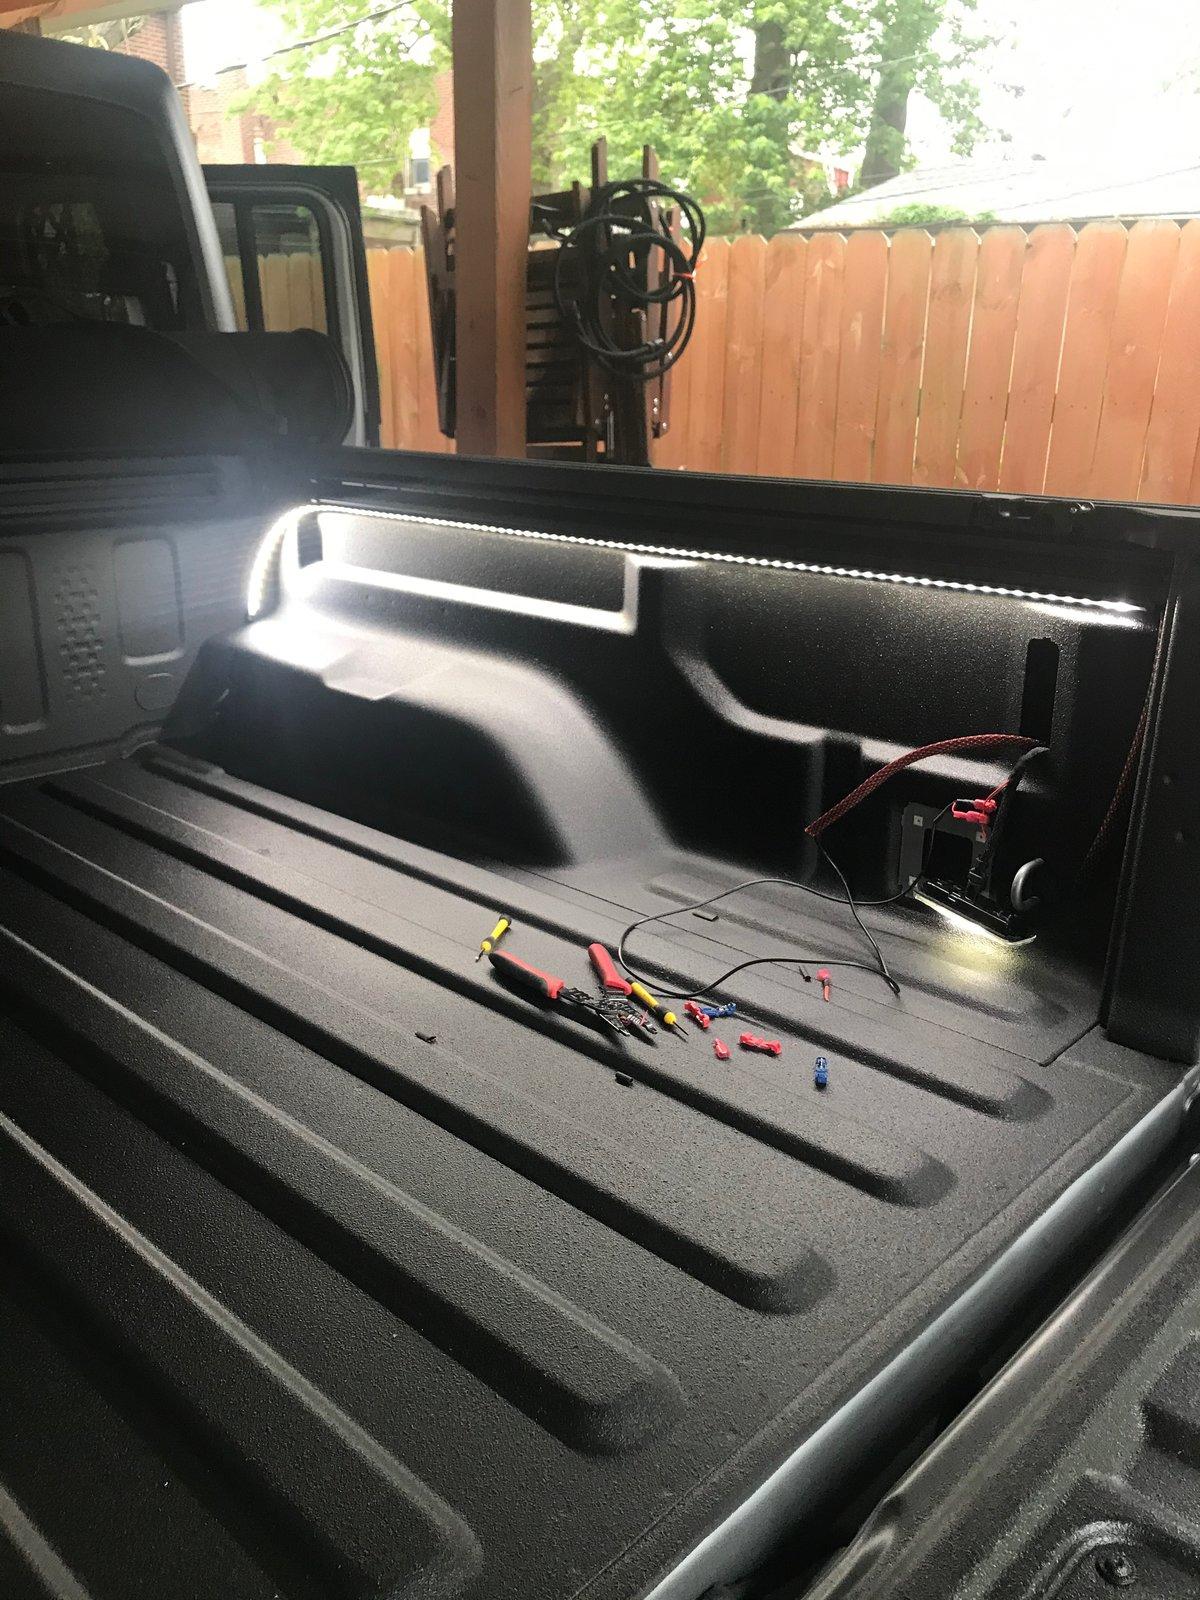
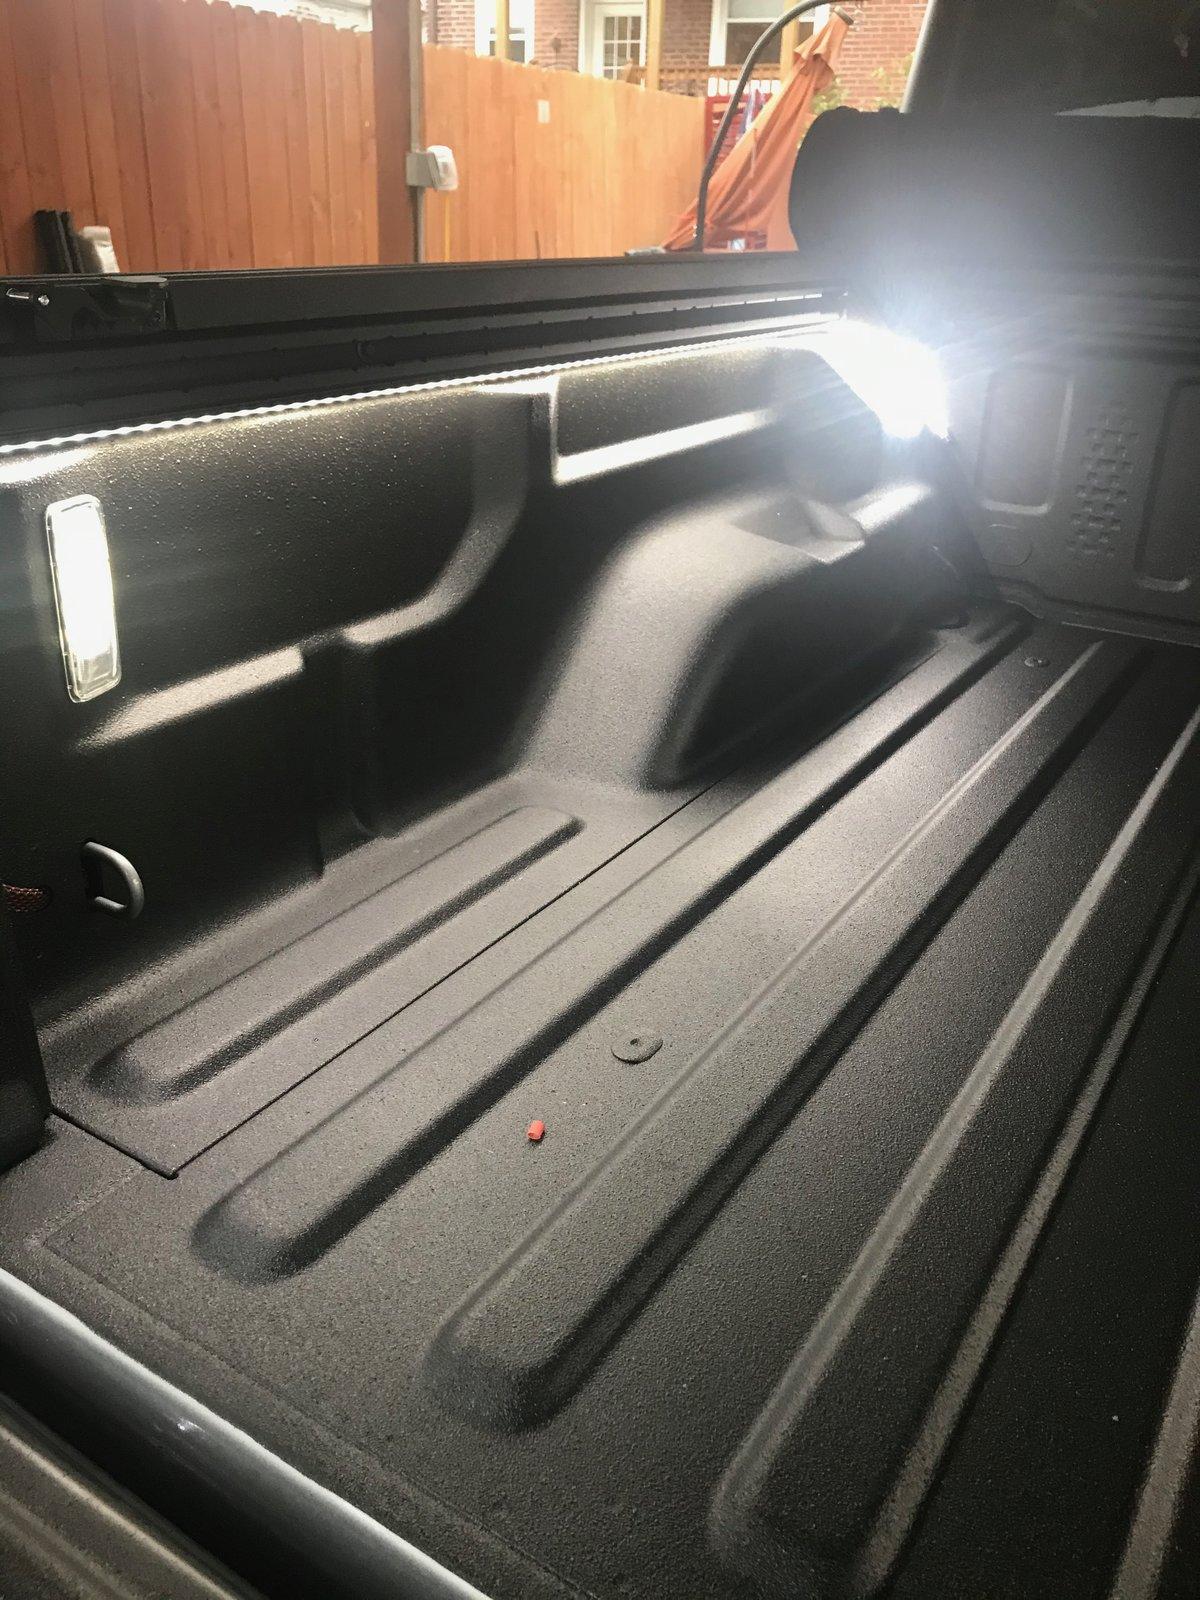
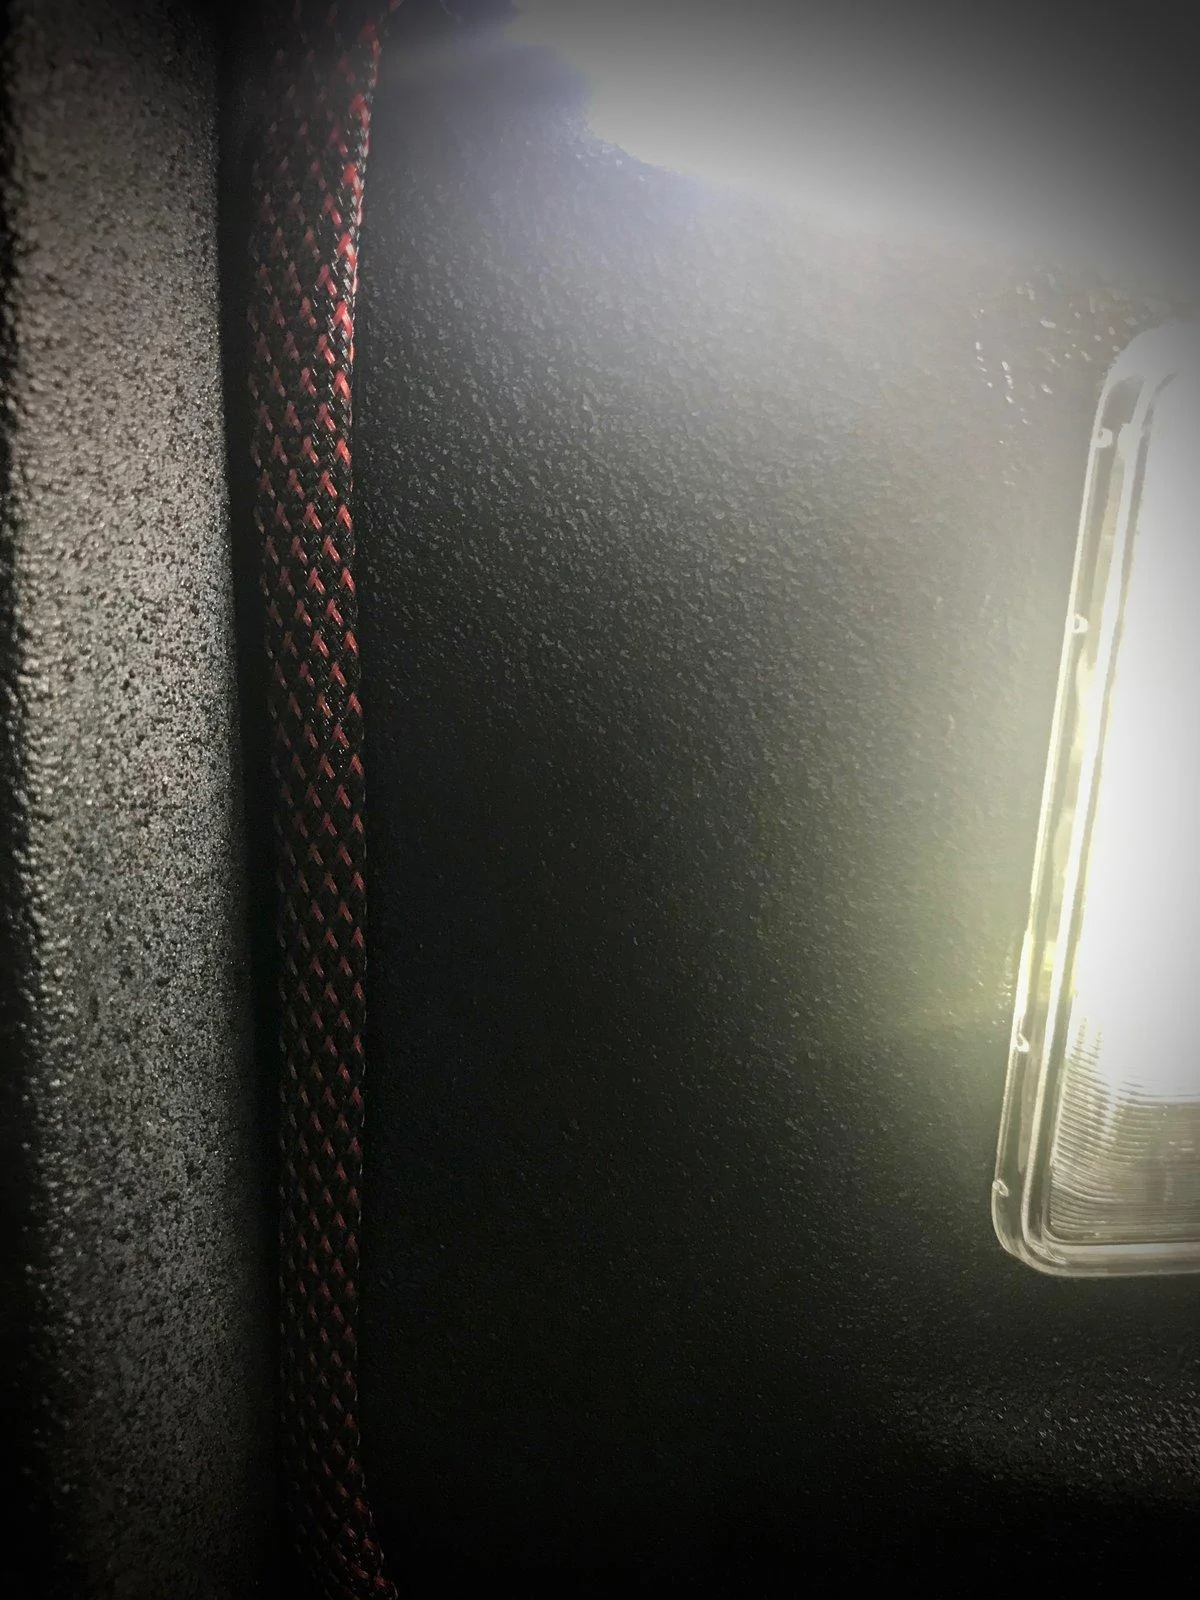
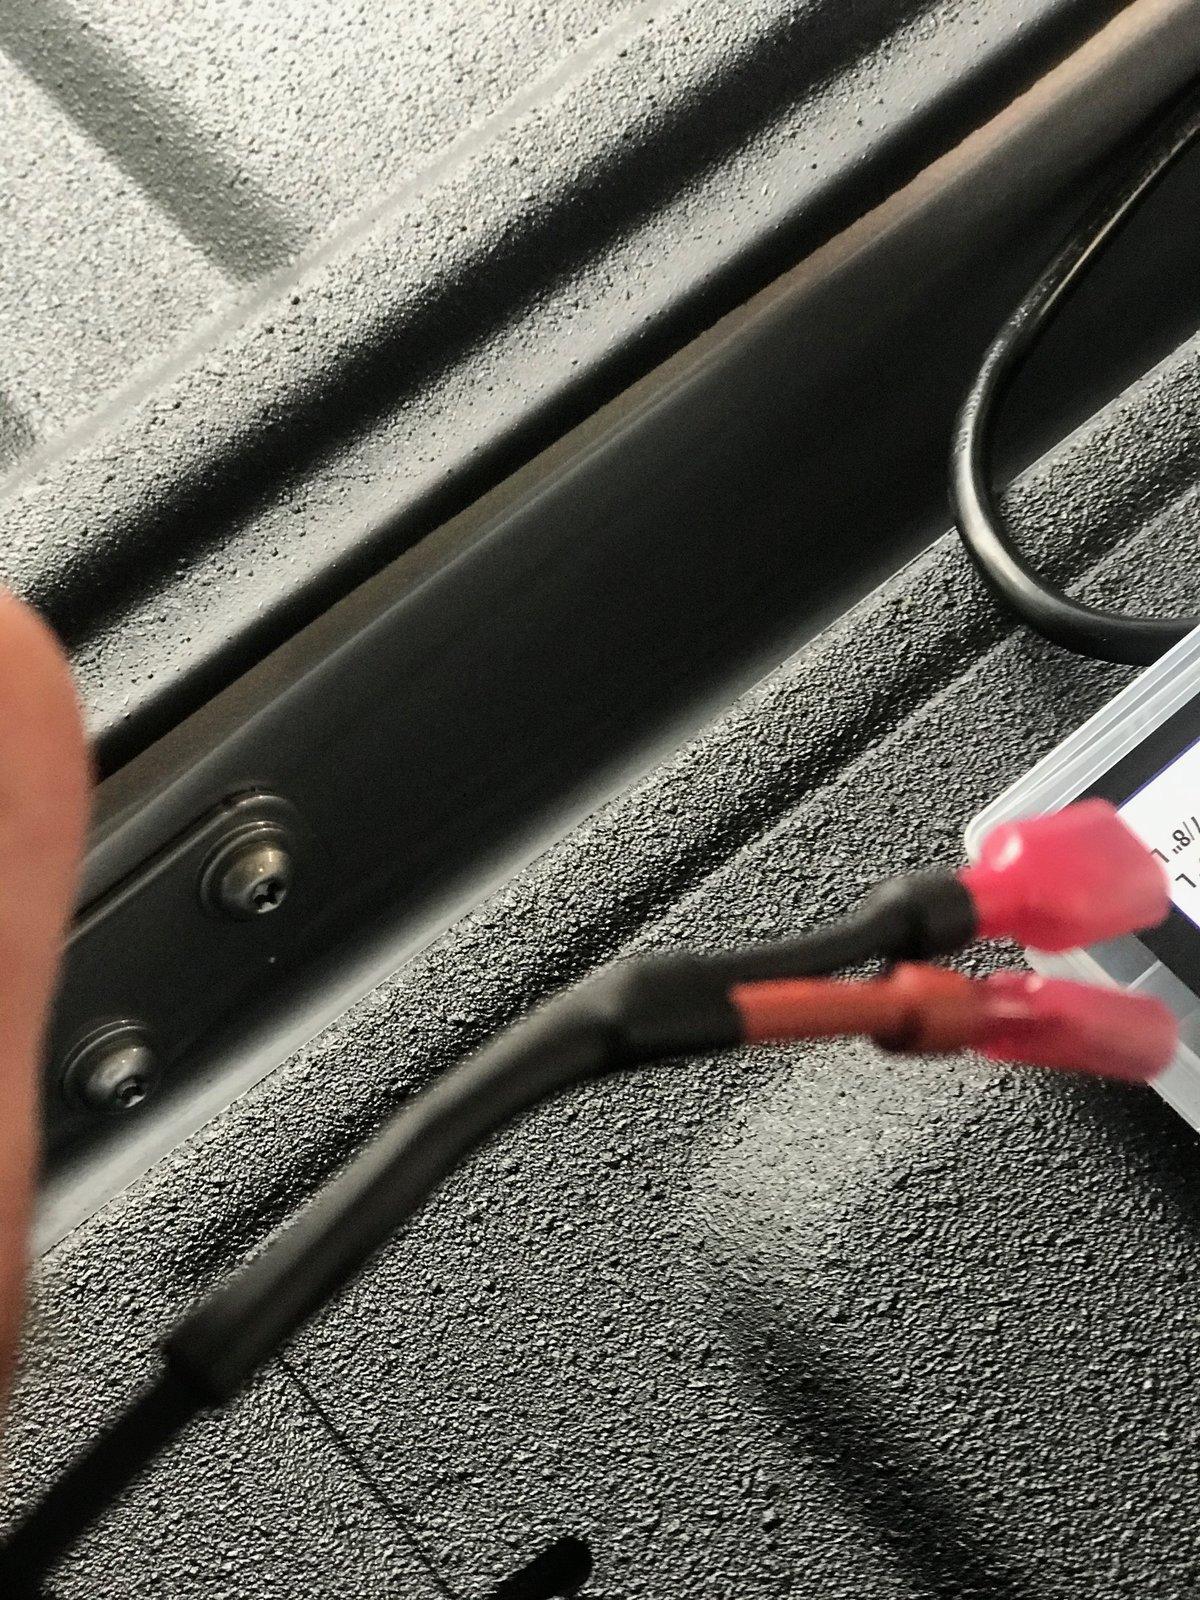
I hope this is the right spot for my build journal. Here I will post detailed photos on some of the projects I am doing to my 2020 JEEP Gladiator Overland.

IMG_2093.jpg


IMG_2112.jpg


IMG_2118.jpg


IMG_2119.jpg


IMG_2121.jpg


IMG_2122.jpg


IMG_2124.jpg
Sponsored

 
OP
OP
machstell

machstell

Member
First Name
Mark
Joined
May 13, 2020
Threads
1
Messages
20
Reaction score
23
Location
Saint Louis
Vehicle(s)
2020 Gladiator Overland
Build Thread
Link
Occupation
Computer Geek; Jeep Lover
Vehicle Showcase
1
Reposting full task list here with updates. ZROADZ 3" LED floods installed. Total time: 30-40 minutes all in. My experience level: Medium; Task difficulty: NOOB Easy; simple and clear direction. Purchased through Quadratech.

Just starting my "mild" Jeep project list. Mostly cosmetic upgrades (sill guards, console covers). The next couple of days will be the more substantial upgrades. Yesterday was task 1-3 of 7:
DONE PRO- 1. Install Rhino raptor bed liner (THANKS to the team over @ Axleboy Offroad)!!
DONE! DIY - 1A. Install 115V weather proof "pigtail" outlet with Kydex cover (you'll see why in task 5)
DONE! DIY - 2. Install Oracle auxiliary LED bed lighting (tie into existing bed lights)
DONE! DIY Install ZROADZ mini 3" LED floods and wired to AUX switch 3 (Orange wire)
DONE! DIY install JCR Offroad Overhead MOLLE Panel (along with BTECH 25x4 VHF/UHF Radio)
DONE! DIY install DECKED full bed cargo management system
DONE DIY install JCR Offroad FULL height bed rack (and run VHF-UHF antenna cable)
DONE! DIY install ROTOPAX mounts.

Jeep Gladiator Simple MO Beast IMG_2126


Jeep Gladiator Simple MO Beast IMG_2128


Jeep Gladiator Simple MO Beast IMG_2132
 
Last edited:
OP
OP
machstell

machstell

Member
First Name
Mark
Joined
May 13, 2020
Threads
1
Messages
20
Reaction score
23
Location
Saint Louis
Vehicle(s)
2020 Gladiator Overland
Build Thread
Link
Occupation
Computer Geek; Jeep Lover
Vehicle Showcase
1
UGH Not As easy as the videos!
FIRST: This was not as easy as the JCROFFROAD installation video looked like. I think the fundamental difference is that the dude in that video has done a gazillion installations and I have now done exactly...... one.

It also doesn't help that you are essentially ripping apart your brand new 2020 Gladiator that you haven't even made a payment on. So I was of course extremely hesitant and conservative when it came to "pulling and yanking" plastic interior lining panels out of their clip things. Of course, once down, you see where all the clips actually are, so re-assembly is easy and stress free. But you only learn that after the fact.

SECOND- Now I know why all the current videos regarding "AUX SWITCH Wiring" default to the EASY engine compartment wires. Open up the hood and BAM! they almost scream "Wire Me Up".


QUICK TIP: Get your smallest friend that you trust to do the under console wiring. At 6'2", 250 - that was not fun. At all.

THE INTERIOR AUX SWITCH LINING
is of course, the evil, angry, shy, angry cousin of the engine compartment wires. They hide WAAAY up behind the glove box - by the courtesy lite. YES - THAT BIG 7" LENGTH OF TAPE IS THEM! Mine were doubled up on some other main wire feeds so they actually ended towards the center line (console, inboard, whatever) of the compartment. Finding them is a minor victory and you find yourself saying "exactly how many miles of electrical tape does JEEP go ;through each year?"" Holy $%##^%$ there was a lot of tape. But the interior wires hold a special surprise for you.

Underneath all that electrical tape is another layer of some serious strong and resilient cloth/wool tape wrap stuff that has .4m plastic backing. YEP. you heard me. Some sort of wooly cloth tape with plastic backing (the stuff next to the wires). Definitely will hold up fording rivers in Yukon Territory - or Paris to DAKAR race - this $%##!@!@ will stand up to the journey. Thats also the problem.

Anyone wanting to use the interior wiring from the AUX SWITCH group will have to cut into that with a razor blade or something. Yes, cut into JUST the wrap around that tightly wrapped bunch of electrical wires........... hmmmm. Look. I love well designed and engineered machines just as much as the next guy. But holy hell in hand basket did they even think about how people would actually be able to use these wires?


BOTTOM LINE: SUCCESS after about 6 hours. That 6 hours was to mount the JCR Rooftop MOLLE panel (30 Minutes tops) and the BTECH 25x4 power cable (5hrs, 3 interior panels removed). The red/black braided stuff you see is PET expandable wrap. Its an GREAT alternative to split tube wrapping. The BEST benefits of using this stuff is: A) it give wires some "rigidity" that makes running through blind spots easier. and B) its flat, and holds your floppy round wire flat too. So its like a thin, firm flat cable run. TOO Easy! Enjoy the photos!

Jeep Gladiator Simple MO Beast IMG_2133


Jeep Gladiator Simple MO Beast IMG_2134


Jeep Gladiator Simple MO Beast IMG_2137


Jeep Gladiator Simple MO Beast IMG_2151


Jeep Gladiator Simple MO Beast IMG_2153


Jeep Gladiator Simple MO Beast IMG_2154


Jeep Gladiator Simple MO Beast IMG_2155


Jeep Gladiator Simple MO Beast IMG_2156
 
Last edited:
OP
OP
machstell

machstell

Member
First Name
Mark
Joined
May 13, 2020
Threads
1
Messages
20
Reaction score
23
Location
Saint Louis
Vehicle(s)
2020 Gladiator Overland
Build Thread
Link
Occupation
Computer Geek; Jeep Lover
Vehicle Showcase
1
What a day.. Lots done!
Today was an early start. Now that the rhino bed is well and truly cured (I know, but the jeep guy said give a a couple days to "really harden and cure"). Anyway. MORNING: Removed Tonneau cover brackets (anyone interested in buying?) and installed DECKED cargo management system. You might say "why spray coat the bed if your going to fill it up? As I said, I do appreciate "over engineering for hard work". Its done with and I'm happy so that's all that matters. OK, on to today's "what did I do to my jeep today"? status update:

Task 5: DIY DECKED cargo mangagement system with track tie down add-on. DONE! Best advice: Just read the directions. Literally. Page for page, step for step - just follow the directions they provide and DONT over think whats going on; and DONT presume you know where the direction are going. You don't; and if you try to assume and get "ahead" of the directions- you will curse yourself for being too stupid to JUST FOLLOW the Directions!. HATS off to the staff and crew over at DECK (No, I've never met any of them) But man, their directions are GREAT.

Then I actually finished the CAB with BOOM MAT sound deadening headliner install. I had done the front removable panels way earlier. Today was "get ^%&$* done day" so OFF came the rear roof. PRO TIP for BOOM Mat install: If you are a perfectionist, go get a pro to do your install. DIY'ers will, most likely (not everyone, just most) get slight puckers or wrinkles. Its the adhesive backing. Its seriously VHC bonding stuff. For the DIY'ers out there: TAKE Your Time.


Task 6 A: DIY JCR Offroad Rear Molle Panel. Its pretty easy with the TOP completely off, so. There is one suggestion that is different from the video. For Gladiators, the lower bracket is easier to install NOT attached to the panel. Instead, its easier access to the T45 bolt with the lower attach point swinging "free" and out of the way. Then all you are confronted with is using a thin box wrench and screwing the bolt into the (now) already secured bracket. You need to keep it loose to make sure you have proper alignment. But - easy peasy. Look at that, 30 minutes just passed by while the BOOM MAT sat there for "20 minutes to allow full adhesion".

So now, cap back on, good to go.


Task 6: DIY JCR Offroad full height Bed rack. Reasonably simple. PRO TIP: Listen to the video and ASSEMBLE OFF VEHICLE. This is heavy duty metal, these braces and brackets are heavy - no, not girly man heavy. I'm saying pretty heavy to hold in place, use one hand to push button head bolt through, other hand to start the washer and serrated wing nut. Yeah - did you count the hands - at least four. IF you do it on vehicle (like the video suggest that you can do if you really want to) MY suggestion - get a friend to help.

Task 7: DIY ROTOPAX installation. DONE!. Pretty straight forward. It may be a NOOB mistake on my part, but with all the pre-drilled holes on the JCR Bed rack believe it or not, only TWO will line up with the ROTOPAX mount bracket at any time. ROTOPAX has similar 4 carriage button bolts to use, only TWO will every line up at any given time on the JCR accessory panel.

IMG_2158.jpg


IMG_2159.jpg


IMG_2160.jpg


IMG_2161.jpg


IMG_2162.jpg


IMG_2163.jpg


IMG_2164.jpg


IMG_2168.jpg


IMG_2170.jpg


IMG_2171.jpg


IMG_2172.jpg


IMG_2176.jpg


IMG_2179.jpg


IMG_2181.jpg


IMG_2183.jpg


IMG_2187.jpg


IMG_2189.jpg


IMG_2190.jpg


IMG_2191.jpg


IMG_2192.jpg


IMG_2194.jpg


IMG_2195.jpg


IMG_2203.jpg


IMG_2208.jpg
 
OP
OP
machstell

machstell

Member
First Name
Mark
Joined
May 13, 2020
Threads
1
Messages
20
Reaction score
23
Location
Saint Louis
Vehicle(s)
2020 Gladiator Overland
Build Thread
Link
Occupation
Computer Geek; Jeep Lover
Vehicle Showcase
1
Some urban glamour shots.

IMG_2241.jpg


IMG_2245.jpg


IMG_2252.jpg


IMG_2259.jpg


IMG_2263.jpg
 

Sponsored

OP
OP
machstell

machstell

Member
First Name
Mark
Joined
May 13, 2020
Threads
1
Messages
20
Reaction score
23
Location
Saint Louis
Vehicle(s)
2020 Gladiator Overland
Build Thread
Link
Occupation
Computer Geek; Jeep Lover
Vehicle Showcase
1
ADDED- Terraflex 0-4" sway-bar quick disconnects. There are plenty of photos from other DIY'ers out there. I may get some posted. Definitely love the Terraflex "no drill" install/upgrade.
 

RedTRex

Well-Known Member
First Name
Rick
Joined
Aug 25, 2017
Threads
13
Messages
1,973
Reaction score
1,449
Location
Jacksonville, FL
Vehicle(s)
2013 JKU / 2014 WK2 Diesel
Very nice work Sir. One question, is the Btech waterproof or water resistant at all? And are worried about it getting wet? Or do you not have your tops off much? just curious as obviously that is a great location.
 
OP
OP
machstell

machstell

Member
First Name
Mark
Joined
May 13, 2020
Threads
1
Messages
20
Reaction score
23
Location
Saint Louis
Vehicle(s)
2020 Gladiator Overland
Build Thread
Link
Occupation
Computer Geek; Jeep Lover
Vehicle Showcase
1
Very nice work Sir. One question, is the Btech waterproof or water resistant at all? And are worried about it getting wet? Or do you not have your tops off much? just curious as obviously that is a great location.
Apologies for delayed response. While the Btech does not document any sort of water resistance in the manual, I can tell you, it appears to be a well designed UHF/VHF radio. it is a single cast body with only 1 real point of entry for dust and water - that is the 1" rear fan next to ANT jack. With it mounted under the JCRoffroad's molle overhead panel, its a low probability for me.

I have been caught in both NC and MO "afternoon sprinkles" that have doused the interior pretty good with the freedom panels off. And I do a fair amount "semi-topless" as they say.

I hope this helped! I'm still looking for ideas on how to run the rg58 cable from the bed to inside- without punching holes in the floor.
 
OP
OP
machstell

machstell

Member
First Name
Mark
Joined
May 13, 2020
Threads
1
Messages
20
Reaction score
23
Location
Saint Louis
Vehicle(s)
2020 Gladiator Overland
Build Thread
Link
Occupation
Computer Geek; Jeep Lover
Vehicle Showcase
1
SUMMERTIME FUN- at a distance in remote locations.

UPDATE: 5000+ miles
, trips to NC and Trip to WISCONSIN and I have a few more mods sprinkled in.

I added a JCR OFFROAD Universal Cargo Basket as well as replaced the stock plastic Swaybar skid plate with a really nice Aluminum skid plate from Quadtratec. The JCR install video for the universal basket is pretty much a joke - don't bother.

The quadratec installation took less time than a trip to the grocery store. I know, because I had to get it done while my wife picked up some things - it was the only way to get the whole garage to work in. Seriously, pretty easy installation and definitely gives me "peace of mind" for my shenanigans off-road.

For the most part, my focus has been shifting to my "overland pack-out" stuff. Day-trips and what-not in and around Mark Twain National Forrest. Certainly nothing like LiteBrite nation and multi-day true overland/back-country stuff. I'm not there...... yet. Just some fun MO back-roads and mild off-road opportunities. My current "backroads" trekking gear:
  • SLUMBERJack SJK Roadhouse Tarp. This is more than just a big tarp; this is lightweight "tent fly" thing that was designed specifically to attach to the back of a vehicle. The poles are close to 8 ft tall. The strap and retention system on the vehicle is great! Multiple configurations of the tarp itself. Keeps out rain and sun!
  • ICECO JP30 travel freezer/refrigerator: Yeah, because I'm old and I like cold stuff. I can power this all day long and all night. VERY quiet - hardly know its running.
  • BIGBLUE 100w solar panel. 4 USB ports on the panels direct charge 4 devices from the sun; with the DC to DC connector, I can directly power the ICECO JP30 OR I can "passthrough" via the BIGBLUE 250Wh portable power stationwith 110v Pure Sine wave or DC output.
    • With the 18v DC output from the panels patched directly into the DC charging port and combined with 12v DC output from the power station, I can charge the power station, power the JP30 and 4 other low voltage devices via USB without even using the additional DC capabilities of the power station.
    • En-route, simply plug the freezer/fridge into the 110 outlet in the bed of the beast.
The nice thing about this setup is when I park facing south, pour two bottles of water on a junk towel (under the solar panels) and Voila! long day of hot water SPLATTER BUG removal/soak - AND it acts as a sunshade to keep interior reasonable cool. Its like a trifecta win-win-win; power to chill, shade to cool, and a clean windshield to drive home at the end of the day!


Cheers!

Jeep Gladiator Simple MO Beast IMG_2312


Jeep Gladiator Simple MO Beast IMG_2329


Jeep Gladiator Simple MO Beast IMG_2332


Jeep Gladiator Simple MO Beast IMG_2360


Jeep Gladiator Simple MO Beast IMG_2371


Jeep Gladiator Simple MO Beast IMG_2392


Jeep Gladiator Simple MO Beast IMG_2394


Jeep Gladiator Simple MO Beast IMG_2397


Jeep Gladiator Simple MO Beast IMG_2428


Jeep Gladiator Simple MO Beast IMG_2429


Jeep Gladiator Simple MO Beast IMG_2431


Jeep Gladiator Simple MO Beast IMG_2432
 
Last edited:
  • Like
Reactions: aai
OP
OP
machstell

machstell

Member
First Name
Mark
Joined
May 13, 2020
Threads
1
Messages
20
Reaction score
23
Location
Saint Louis
Vehicle(s)
2020 Gladiator Overland
Build Thread
Link
Occupation
Computer Geek; Jeep Lover
Vehicle Showcase
1
END OF SUMMER UPDATE

As with many of all of you, we have a lot of disruption in our lives. I have turned my focus to my LiL Mo beast and some recreational land I purchased a couple months ago in southern MO. ANYWAY - that really isn't interesting to JEEP community. What may be interesting is the recent DIY mods.

INSTALLED Prodigy P3 Brake controller. My JEEP came with the TOW package so it had the pre-wiring of 7 & 4 pin connectors. Thanks to a couple of YouTube videos, having this connector (and wiring) in place is one of several "confirmation indications" that your Jeep does, in fact, have a tow package (there is debate on "max tow vs tow" which I will leave alone).

So of course, I needed to get me a camper for my 1-3 day excursion trips to my property. A couple of opinions that I would like to offer (I know the saying about opinions). BUT:


  • I find it ironic that a great deal of Jeep Gladiator marketing material has pictures of the Gladiator towing a trailer, camper or boat. The irony is that, to my knowledge, unless it is a Rubicon, you can't get factory installed BRAKE CONTROLLER with your Jeep. Essentially, JEEP marketing is promoting potentially illegal and definitely dangerous behavior. I know. eye roll - but it sort of pisses me off that they talk about towing capacity and getting out - but the majority of their vehicles aren't actually equipped to properly tow anything!
    • And don't even get me started on the OEM brake controller unit availability. That is most definitely a friggin Unicorn/BS marketing job.
  • Second issue- where the hell to install it when your "knee room" is already limited. To be clear, I ain't bitching about the JEEP design. I knew exactly what I was signing up for - and I still LOVE my JEEP. A lot of you out there have either installed the RED ARC or Prodigy RF unit as a means to preserve that precious "knee space". At 6'2" 250, every inch up front is precious.
    • Unfortunately due to COVID or Solar Flare or the alignment of the Sun, Moon and Uranus, THESE are difficult to get, and (for RED ARC) you have to do some freaky crossing of wires FOR GLADIATORS. Not something I wanted to temp fate with.
  • SO - Enter the PRODIGY P3 proportional unit. I got this and the "vehicle specific" wiring harness in 2 days from ETRAILOR.COM. Great place for this type of stuff.
    • This P3 Model supports either electric or hydraulic trailer braking systems (I'm talking to all you M1101 tow maniacs out there!). That is user configurable and takes about 6 seconds to switch between the modes.
    • All in all, a VERY capable system with lots of features. Check out the video over at Etrailor.com
    • Except getting reamed on the wiring harness. Take a look: Ford, Toyota, BMW - just about EVERY vehicle out there has an average cost of $10-15 dollars for the wiring adapter. And for the JEEP Gladiator harness? $110.00
Anyway - so I basically repeated my install for the HAM radio, but this time ran the kevlar shielded wires to the the driver side- down the pillar to connection point. THANK GOD for the JCR overhead MOLLE panel. It gives me that extra space so I don't have to give up any precious knee space! enjoy the pictures!

Jeep Gladiator Simple MO Beast IMG_2464


Jeep Gladiator Simple MO Beast IMG_2466


Jeep Gladiator Simple MO Beast IMG_2470


Jeep Gladiator Simple MO Beast IMG_2469


Jeep Gladiator Simple MO Beast IMG_2471


Jeep Gladiator Simple MO Beast IMG_2473


Jeep Gladiator Simple MO Beast IMG_2484
 
Last edited:

Sponsored

JBOverland

Well-Known Member
First Name
John
Joined
Nov 28, 2020
Threads
7
Messages
48
Reaction score
38
Location
Texas
Vehicle(s)
Overland Gladiator
Did you ever add any lift or larger tires? How support all the weight in the bed?
 
OP
OP
machstell

machstell

Member
First Name
Mark
Joined
May 13, 2020
Threads
1
Messages
20
Reaction score
23
Location
Saint Louis
Vehicle(s)
2020 Gladiator Overland
Build Thread
Link
Occupation
Computer Geek; Jeep Lover
Vehicle Showcase
1
Updates to follow soon
Jeep Gladiator Simple MO Beast E8C45C04-ACDA-4877-ABDA-6A78653C141B
Sponsored


Top