Wolf Island Diver
Well-Known Member
- Thread starter
- #1
Here’s my diesel heater build. It’s basically an improved clone of a Planar heater. Total cost was cheaper than a Planar but still $500+
First, some quick background. Wabasto had a patent on these heaters which lapsed years ago, hence the cheap Chinese knockoffs. Theres a lot out there and despite different ratings, they’re all basically the same unit. Output ratings are a function of the pump frequency and even those are basically the same when tested. I’m not going into the pros and cons of these or the process to build them because there’s a mountain if information out there.
If you want to build one you need to start with this gentleman’s YouTube page which goes in-depth on everything.
https://www.youtube.com/@johnmck1147
Another source I used is this page:
https://warmda.com/how-to-install-diesel-heater/
Here’s what I did thats notable and perhaps different than many of the ones I’ve seen out there.
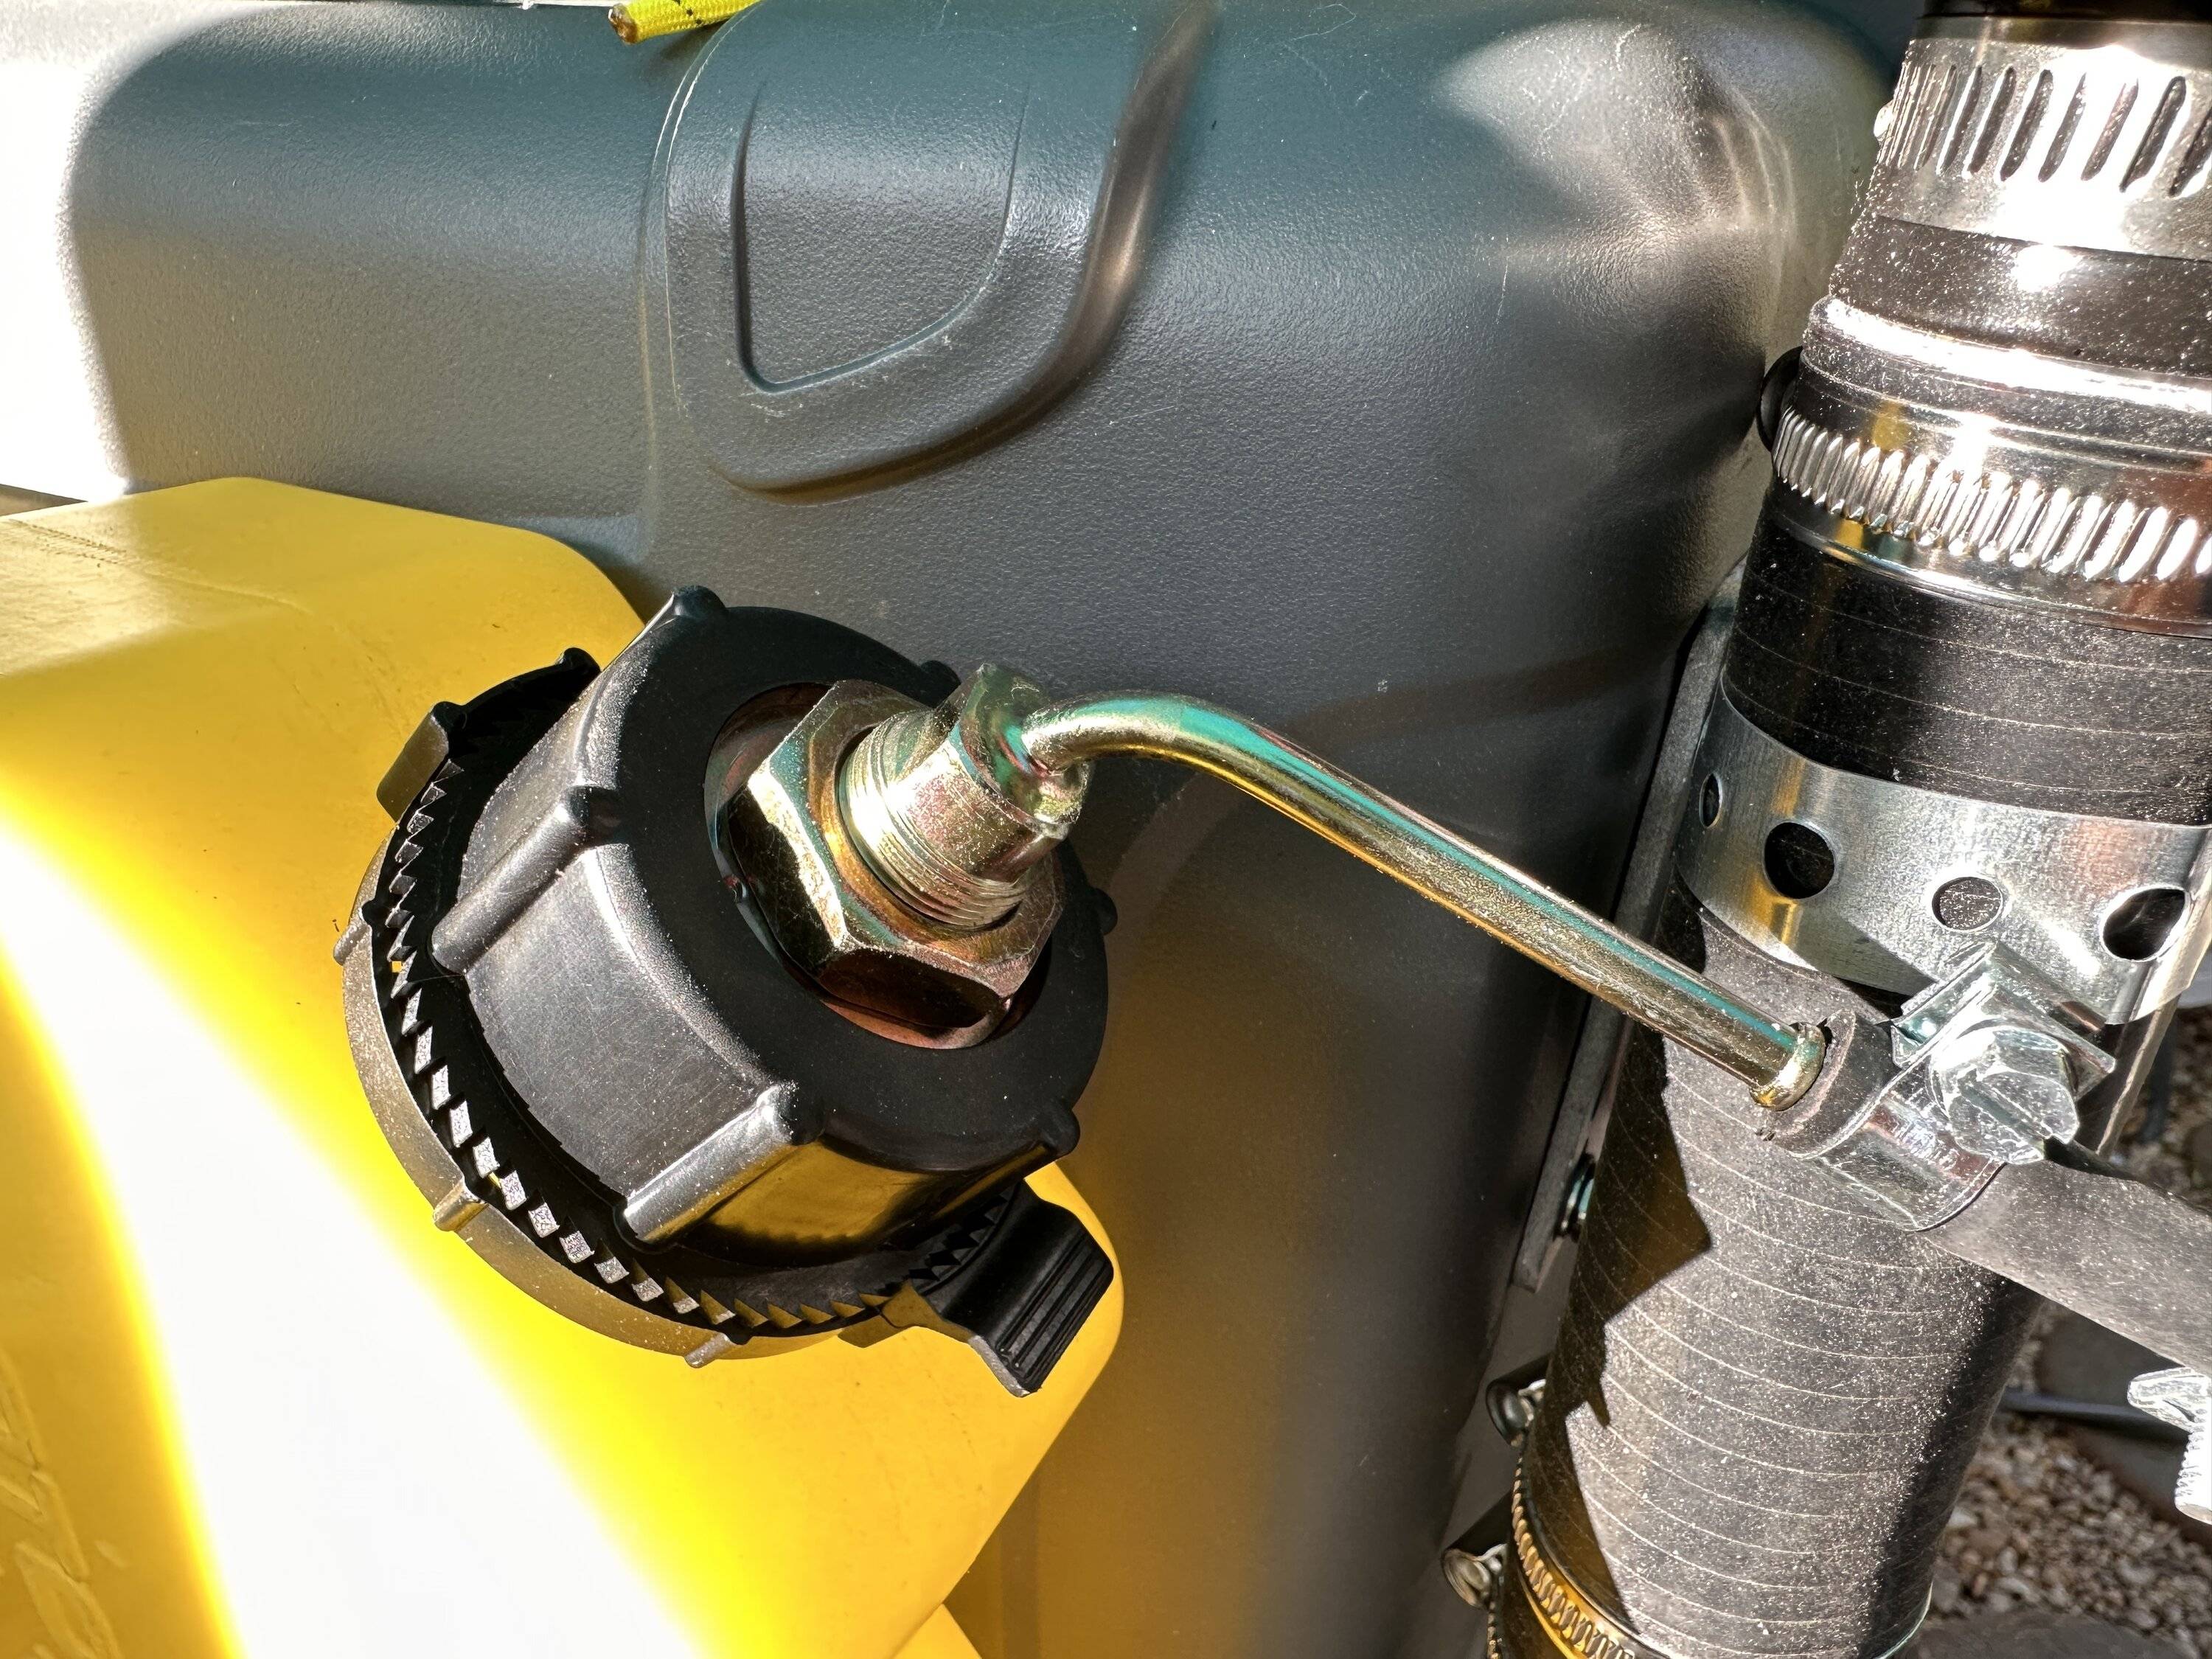
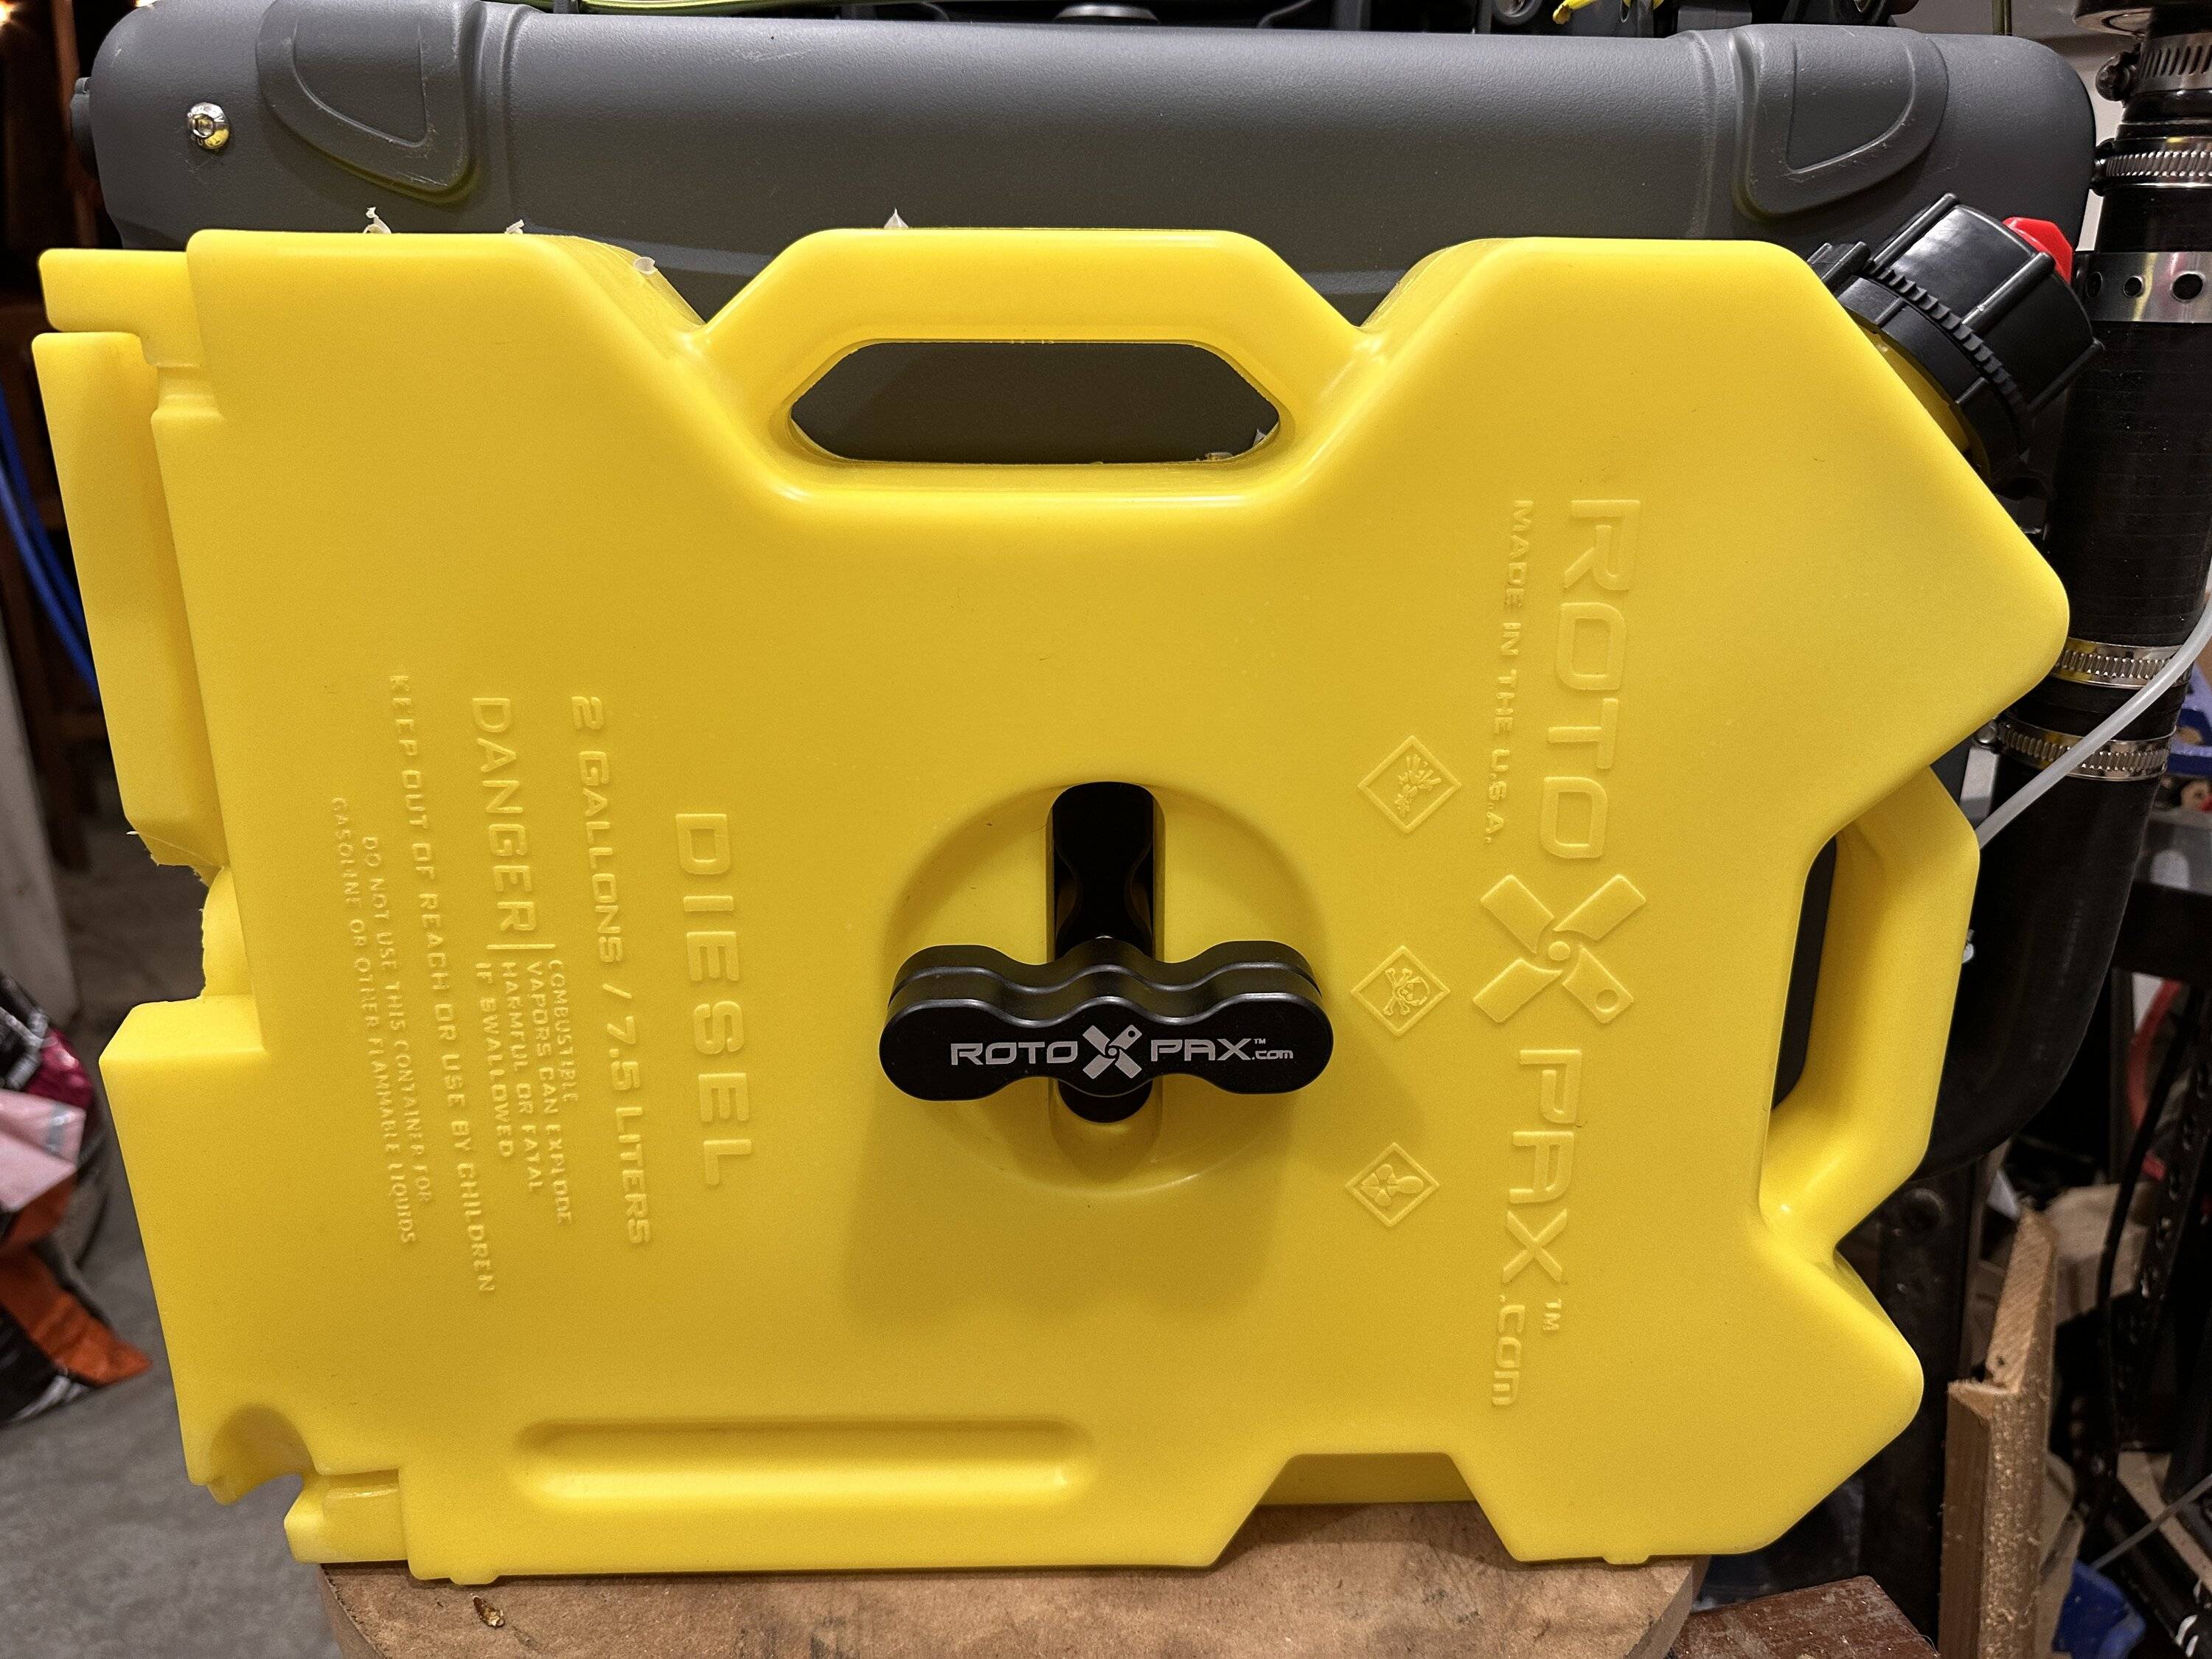
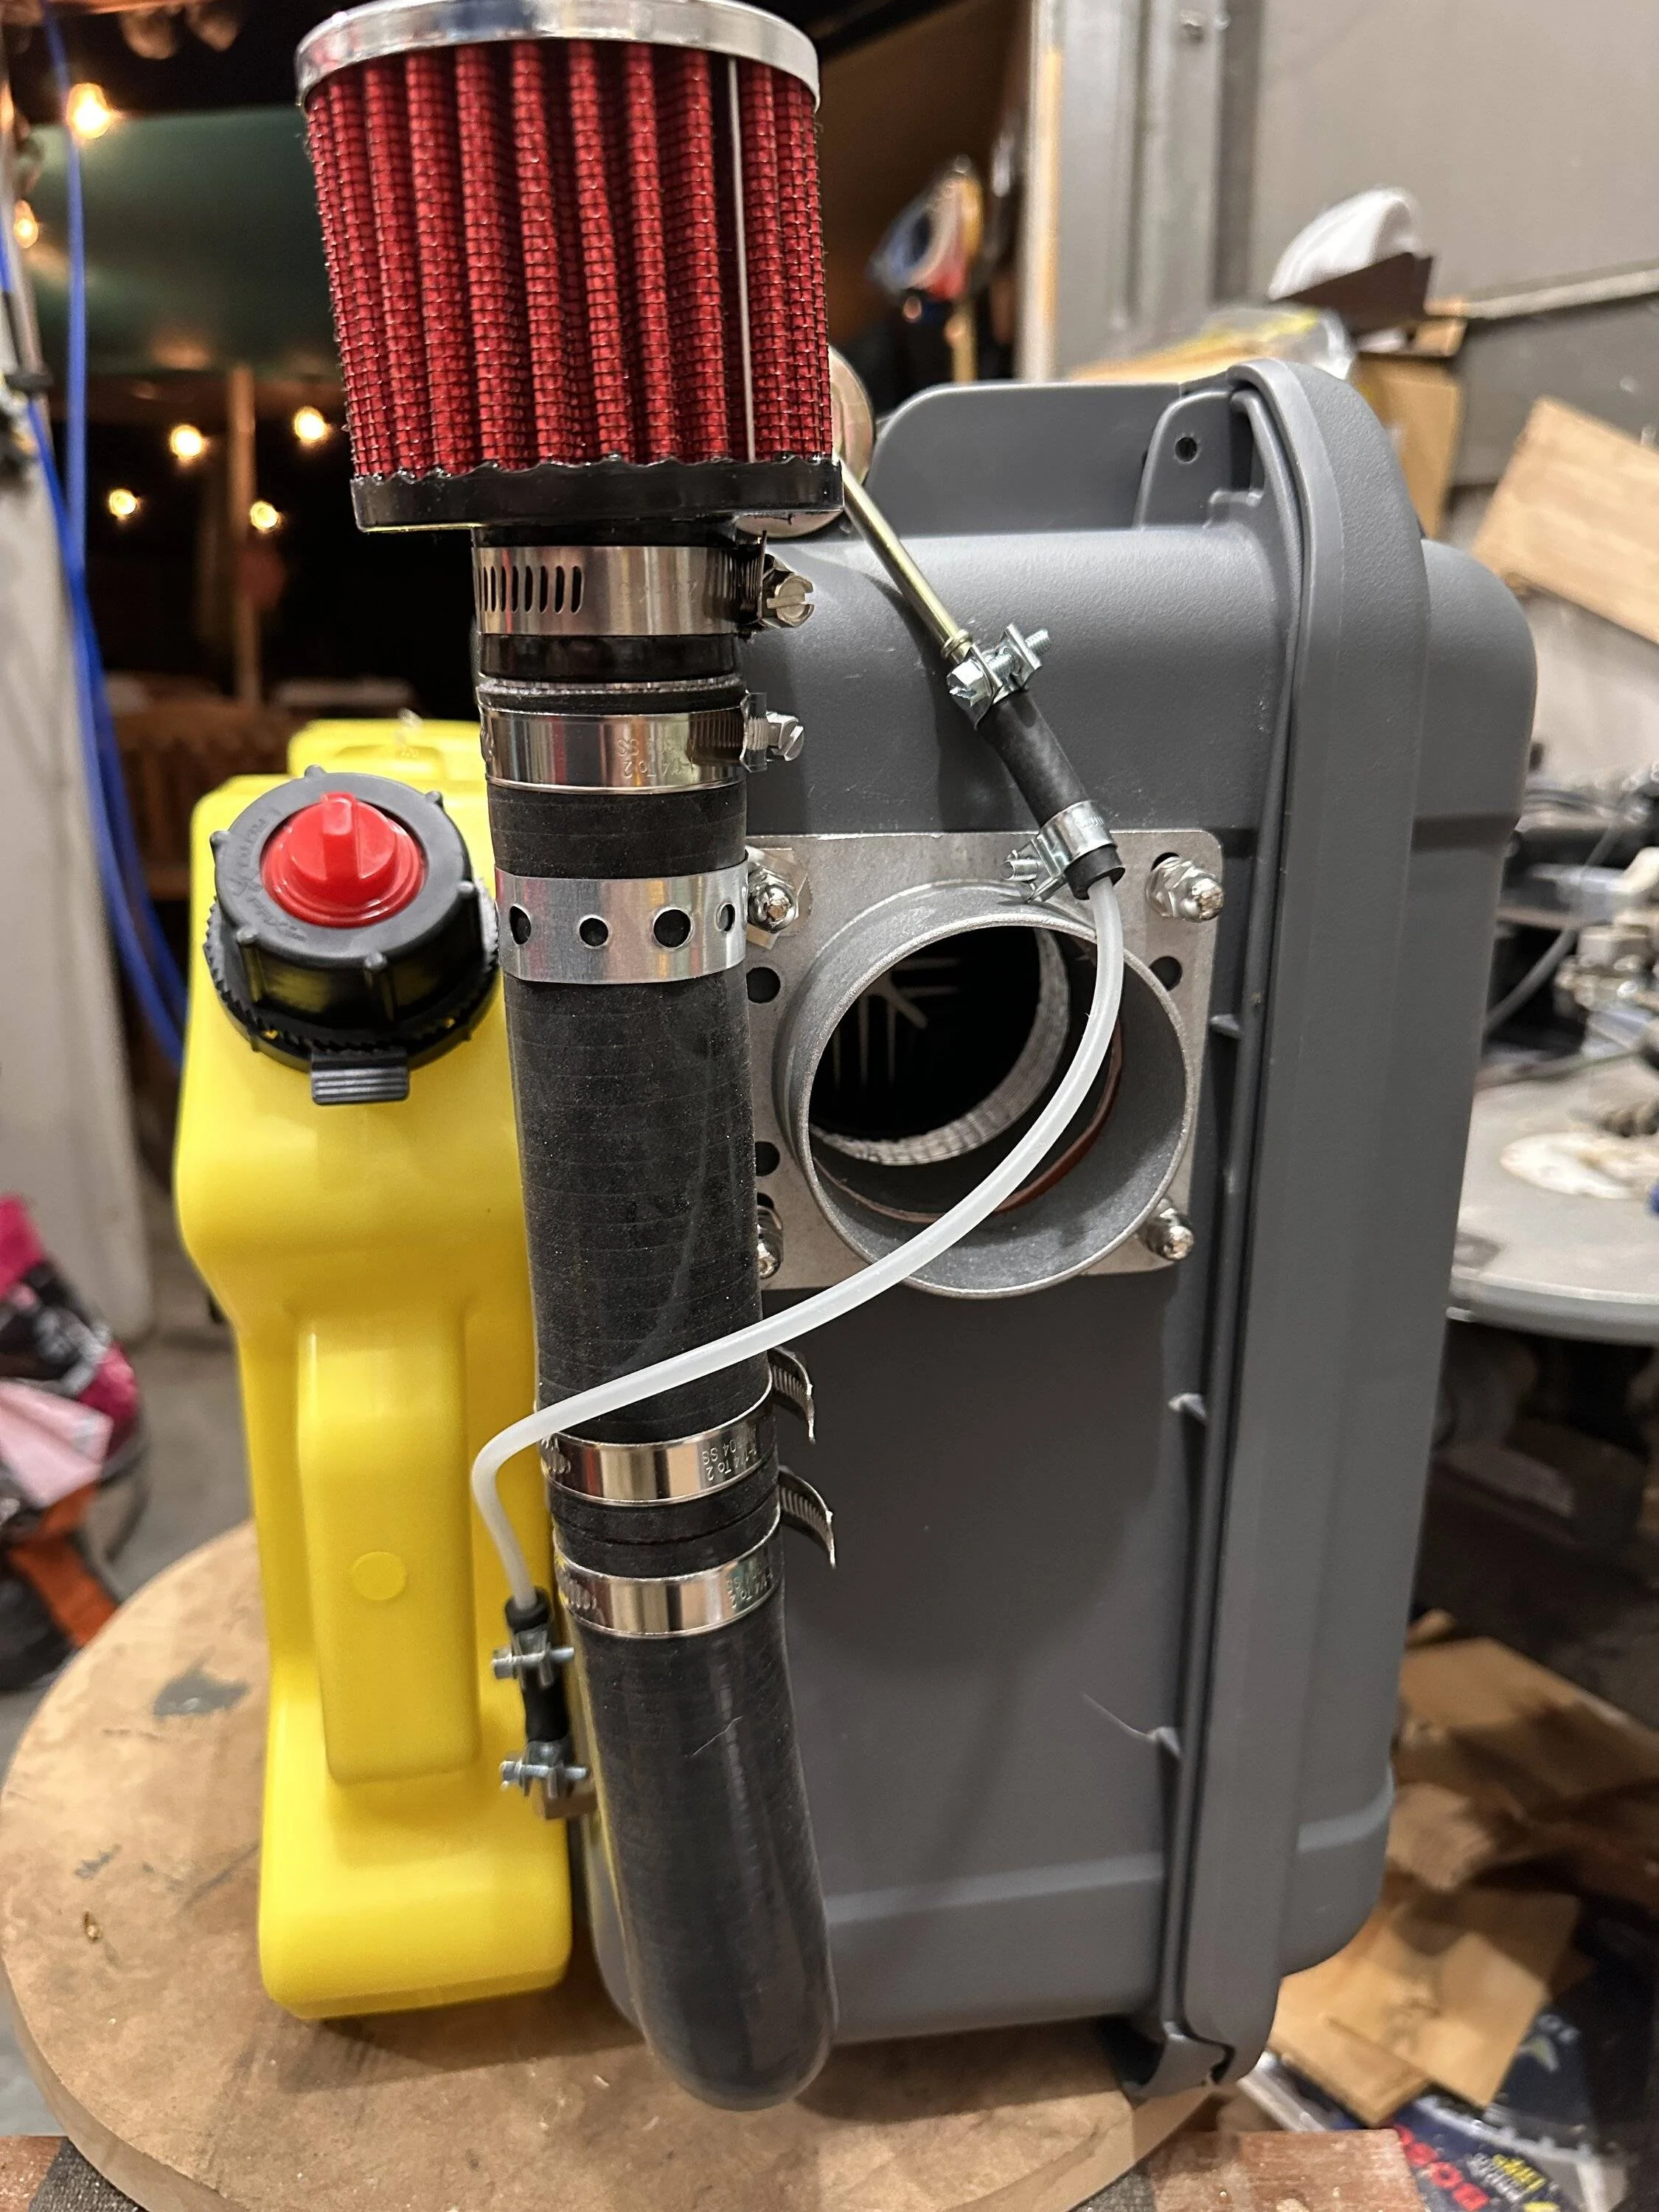
- RotoPax fuel tank. I didn’t want to use the included tank. For one I didn’t want to necessarily store the heater in the truck with the fuel. I also don’t want to have to pour fuel into the heaters tank at camp if I don’t have to. Lastly drilling a port on the bottom of the tank increases chances of a leak, and pulling fuel from the tank bottom where the crud is. My solution was to use a RotoPax and standpipe. This way my heater’s fuel rides mounted on the outside of the truck and I can put the heater wherever. I don’t have to pour fuel. Standpipes are just better and more flexible for alternative fuel sources or depth. It’s not shown inserted here, but when the standpipe is in the RotoPax in place of cap, it’s sealed. When not it use it’s secured on top. All of this is easier to replace and maintain as needed.

- The heater draws its heating air from inside. This is how heaters should work. If you can run a return from your tent, then it’s fine to penetrate the case and draw air from outside the case from the return. If you’re not running a return, you definitely don’t want to pull in cold ambient air to the heater. That can’t be easily avoided for the combustion air but for the heating (secondary side) air, I draw air in from vents on the case where it’s warmed up by the interior temperature of the box. This has the secondary effect of keeping the interior temperature under control, drawing it out of the case. The risk from CO is not significantly increased. Seal the exhaust well. There are other failure modes of these heaters internally that can create the risk of CO regardless of air source. These are safer than a Buddy heater, but they’re still using combustion. You should use a CO monitor with any combustion based heating including in your home. Additionally, this is essentially the same design as the Planar heater and other clones, which have been proven. This design significantly increases efficiency
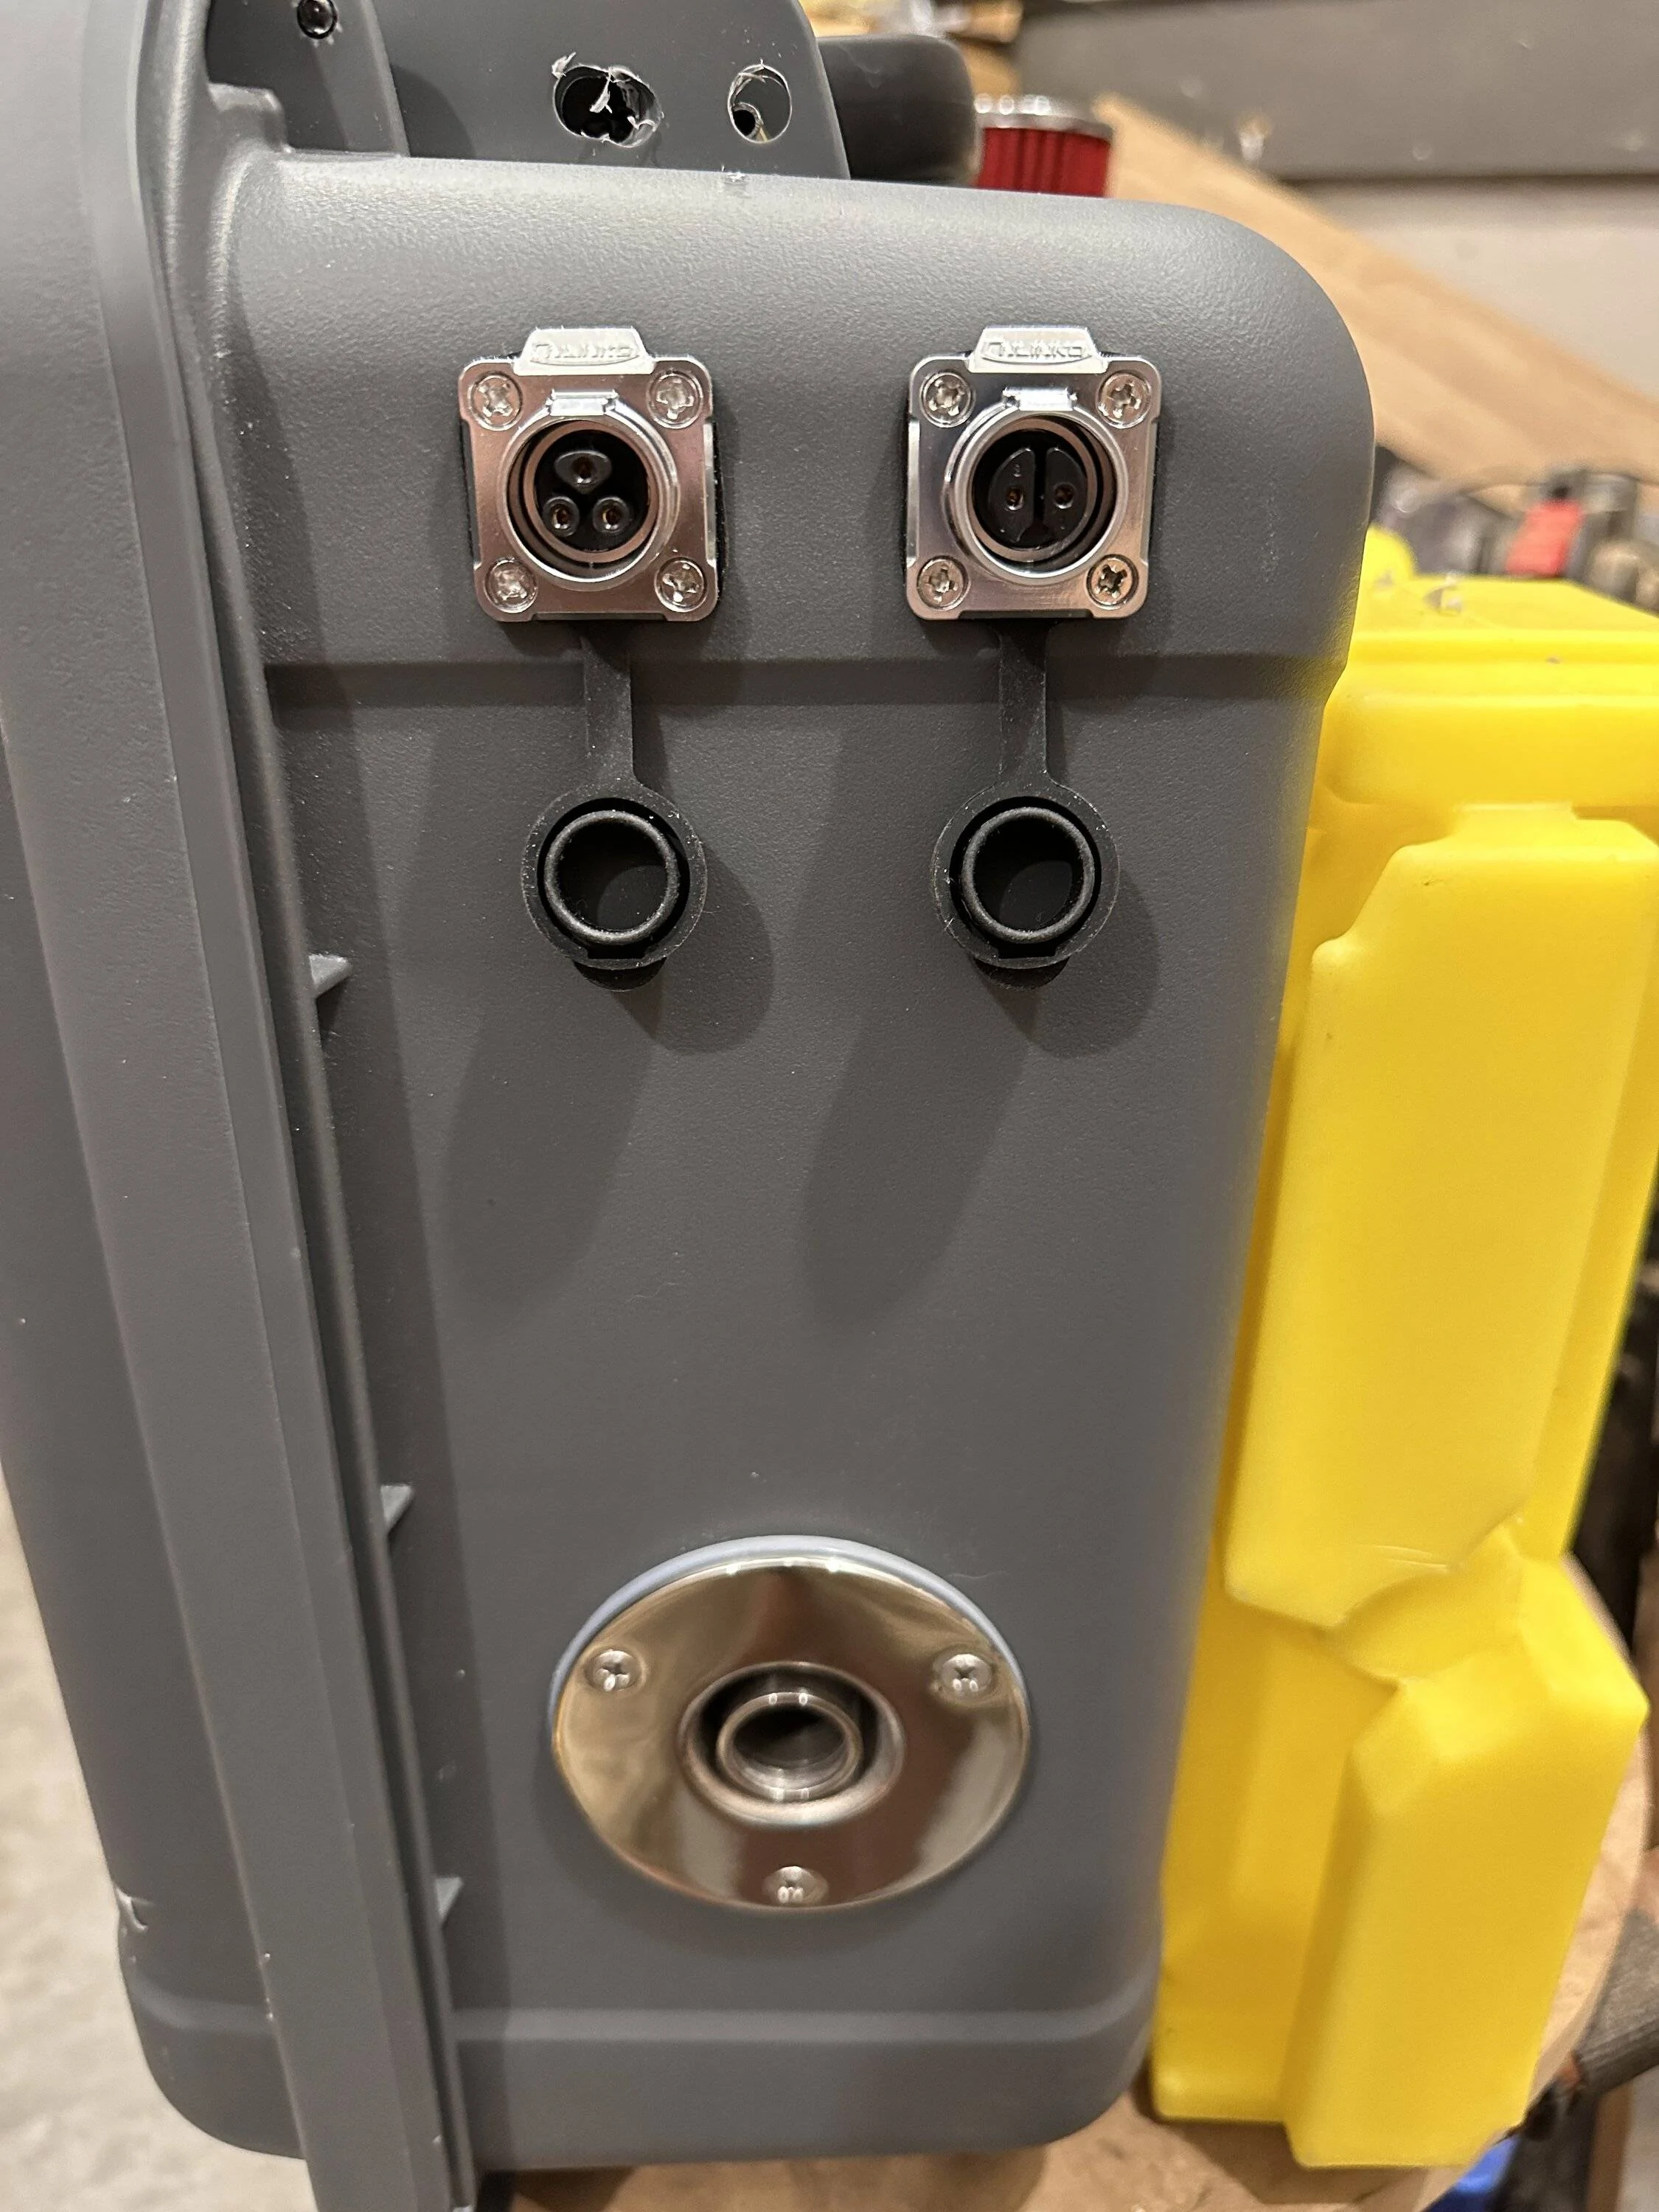
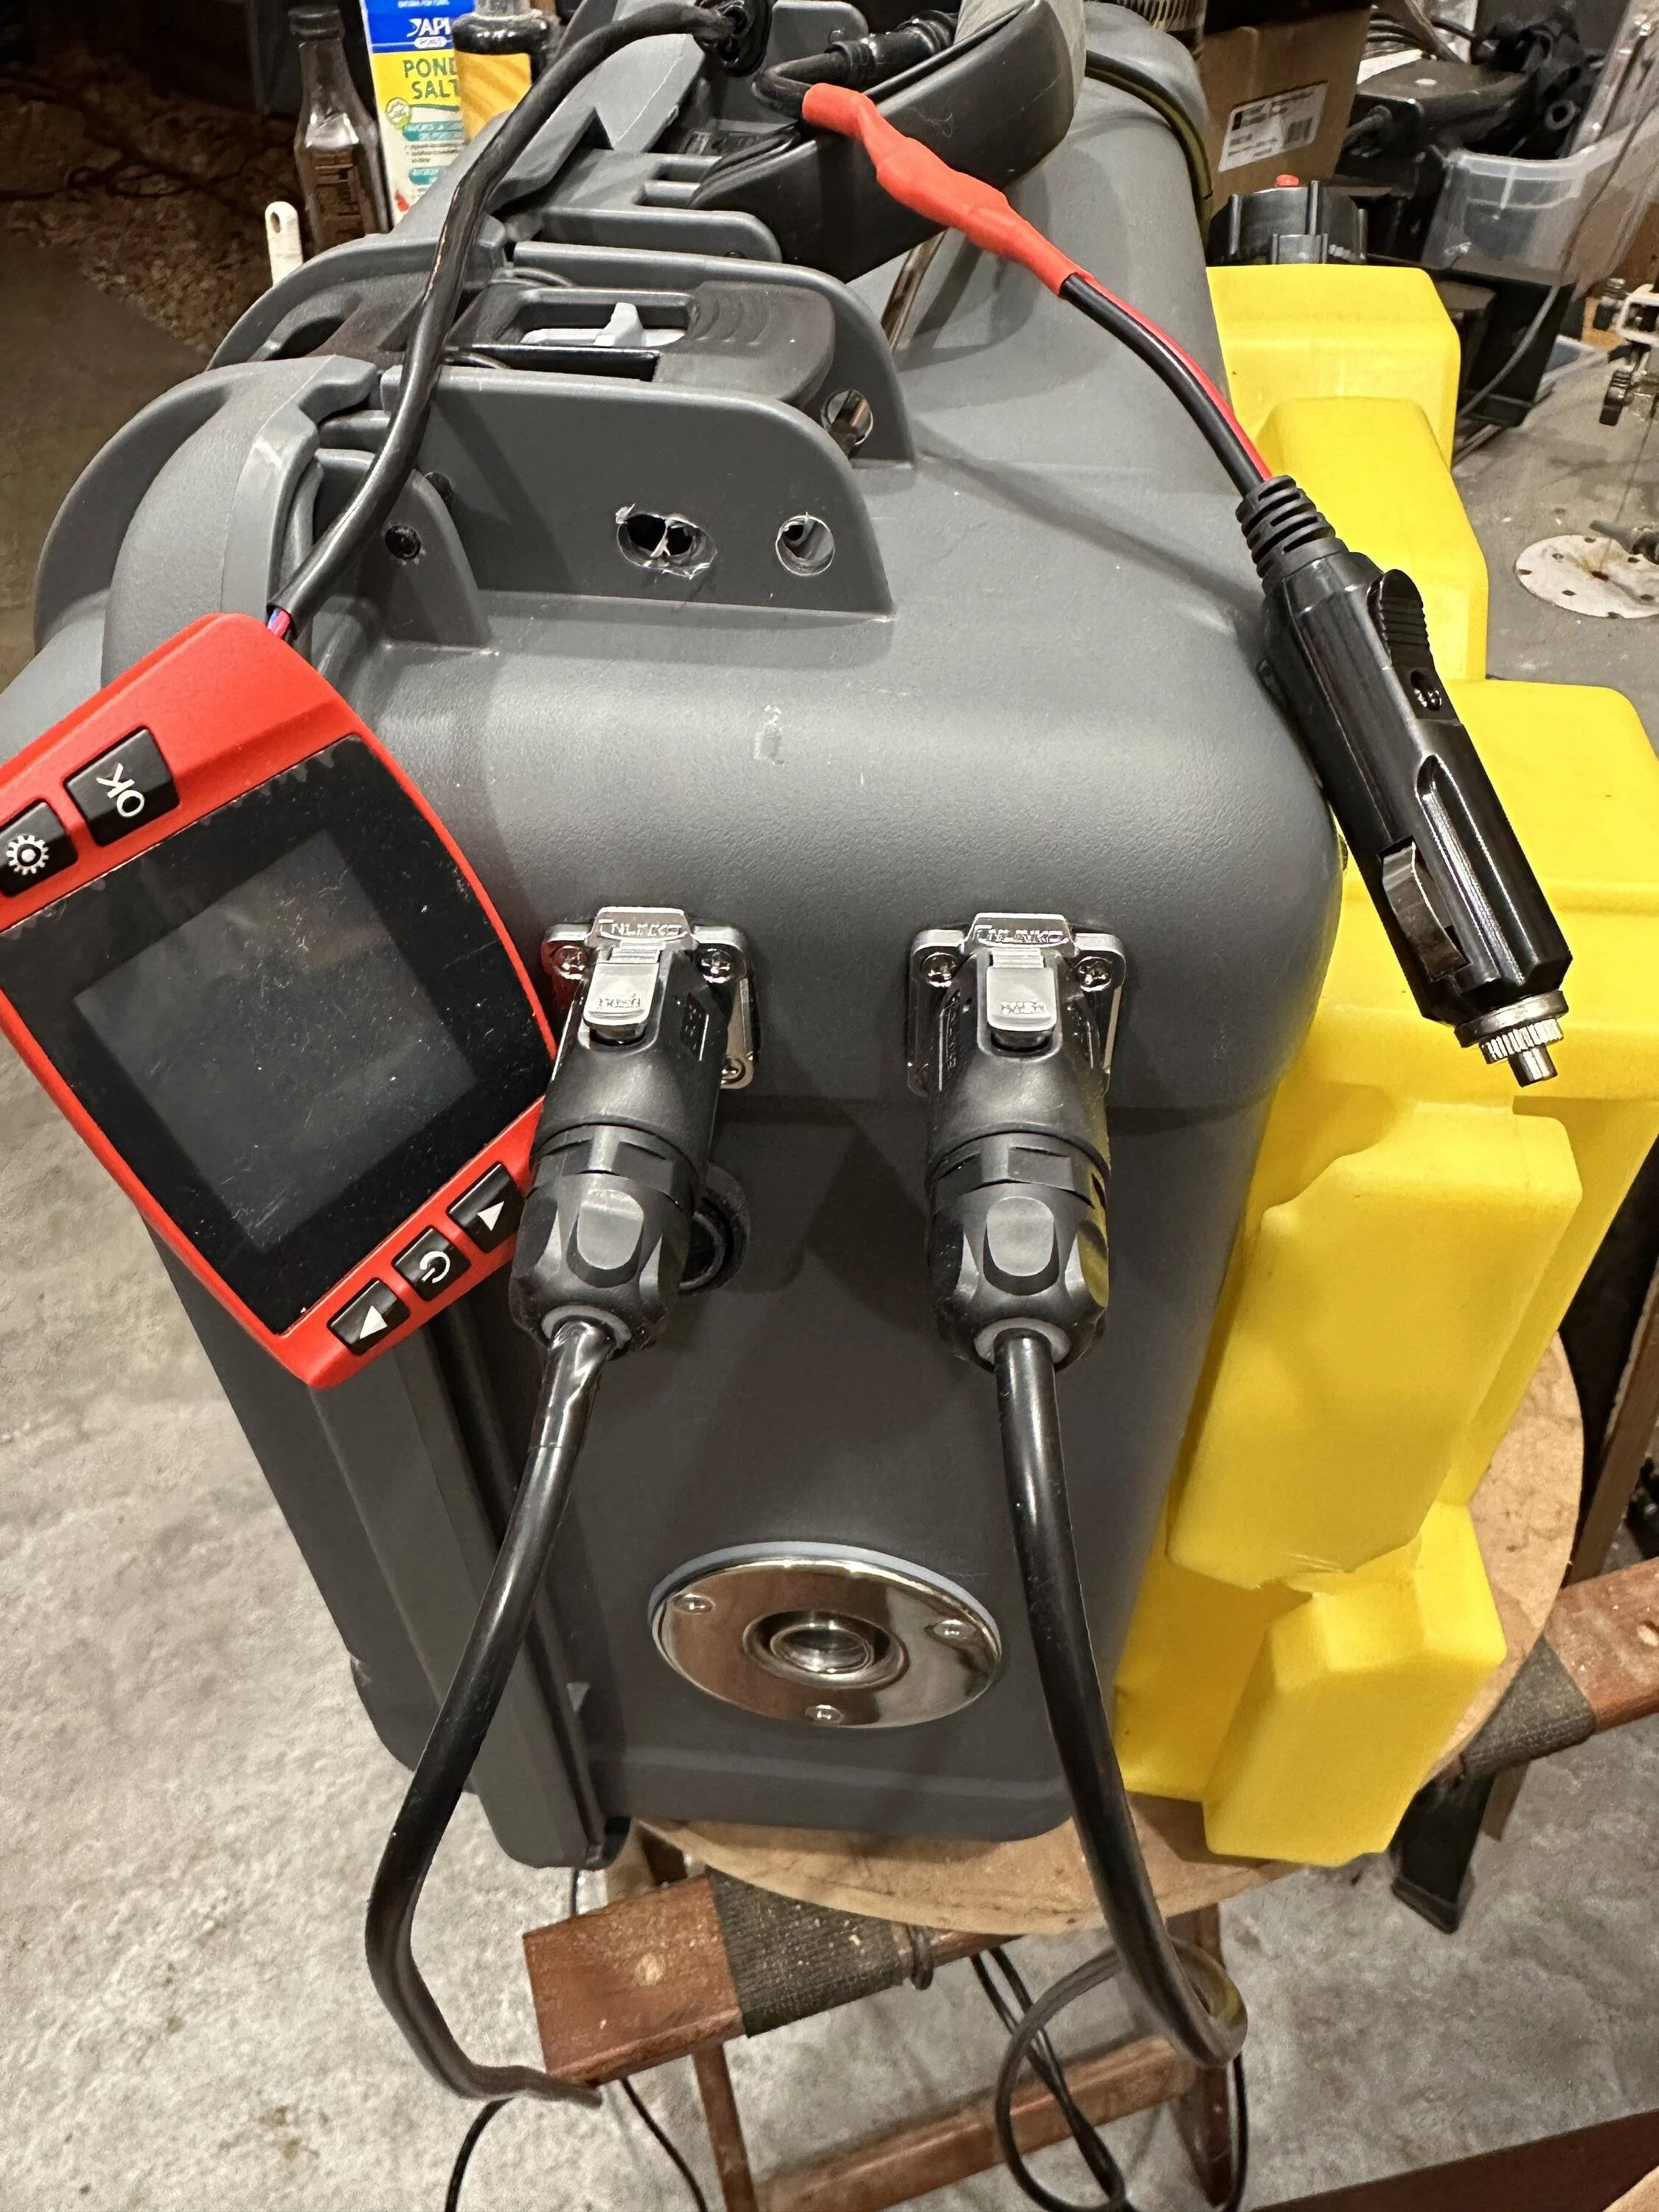
- Better wiring. I’m not the first to do this but my wiring for the remote and power cables are detachable through waterproof ports. Also I have nice long cables and they’re easier to store and replace. I also wired the plug end compatible with a 12v waterproof plug wired into the bed of the truck and a 12v power plug adapter for running off a Goal Zero

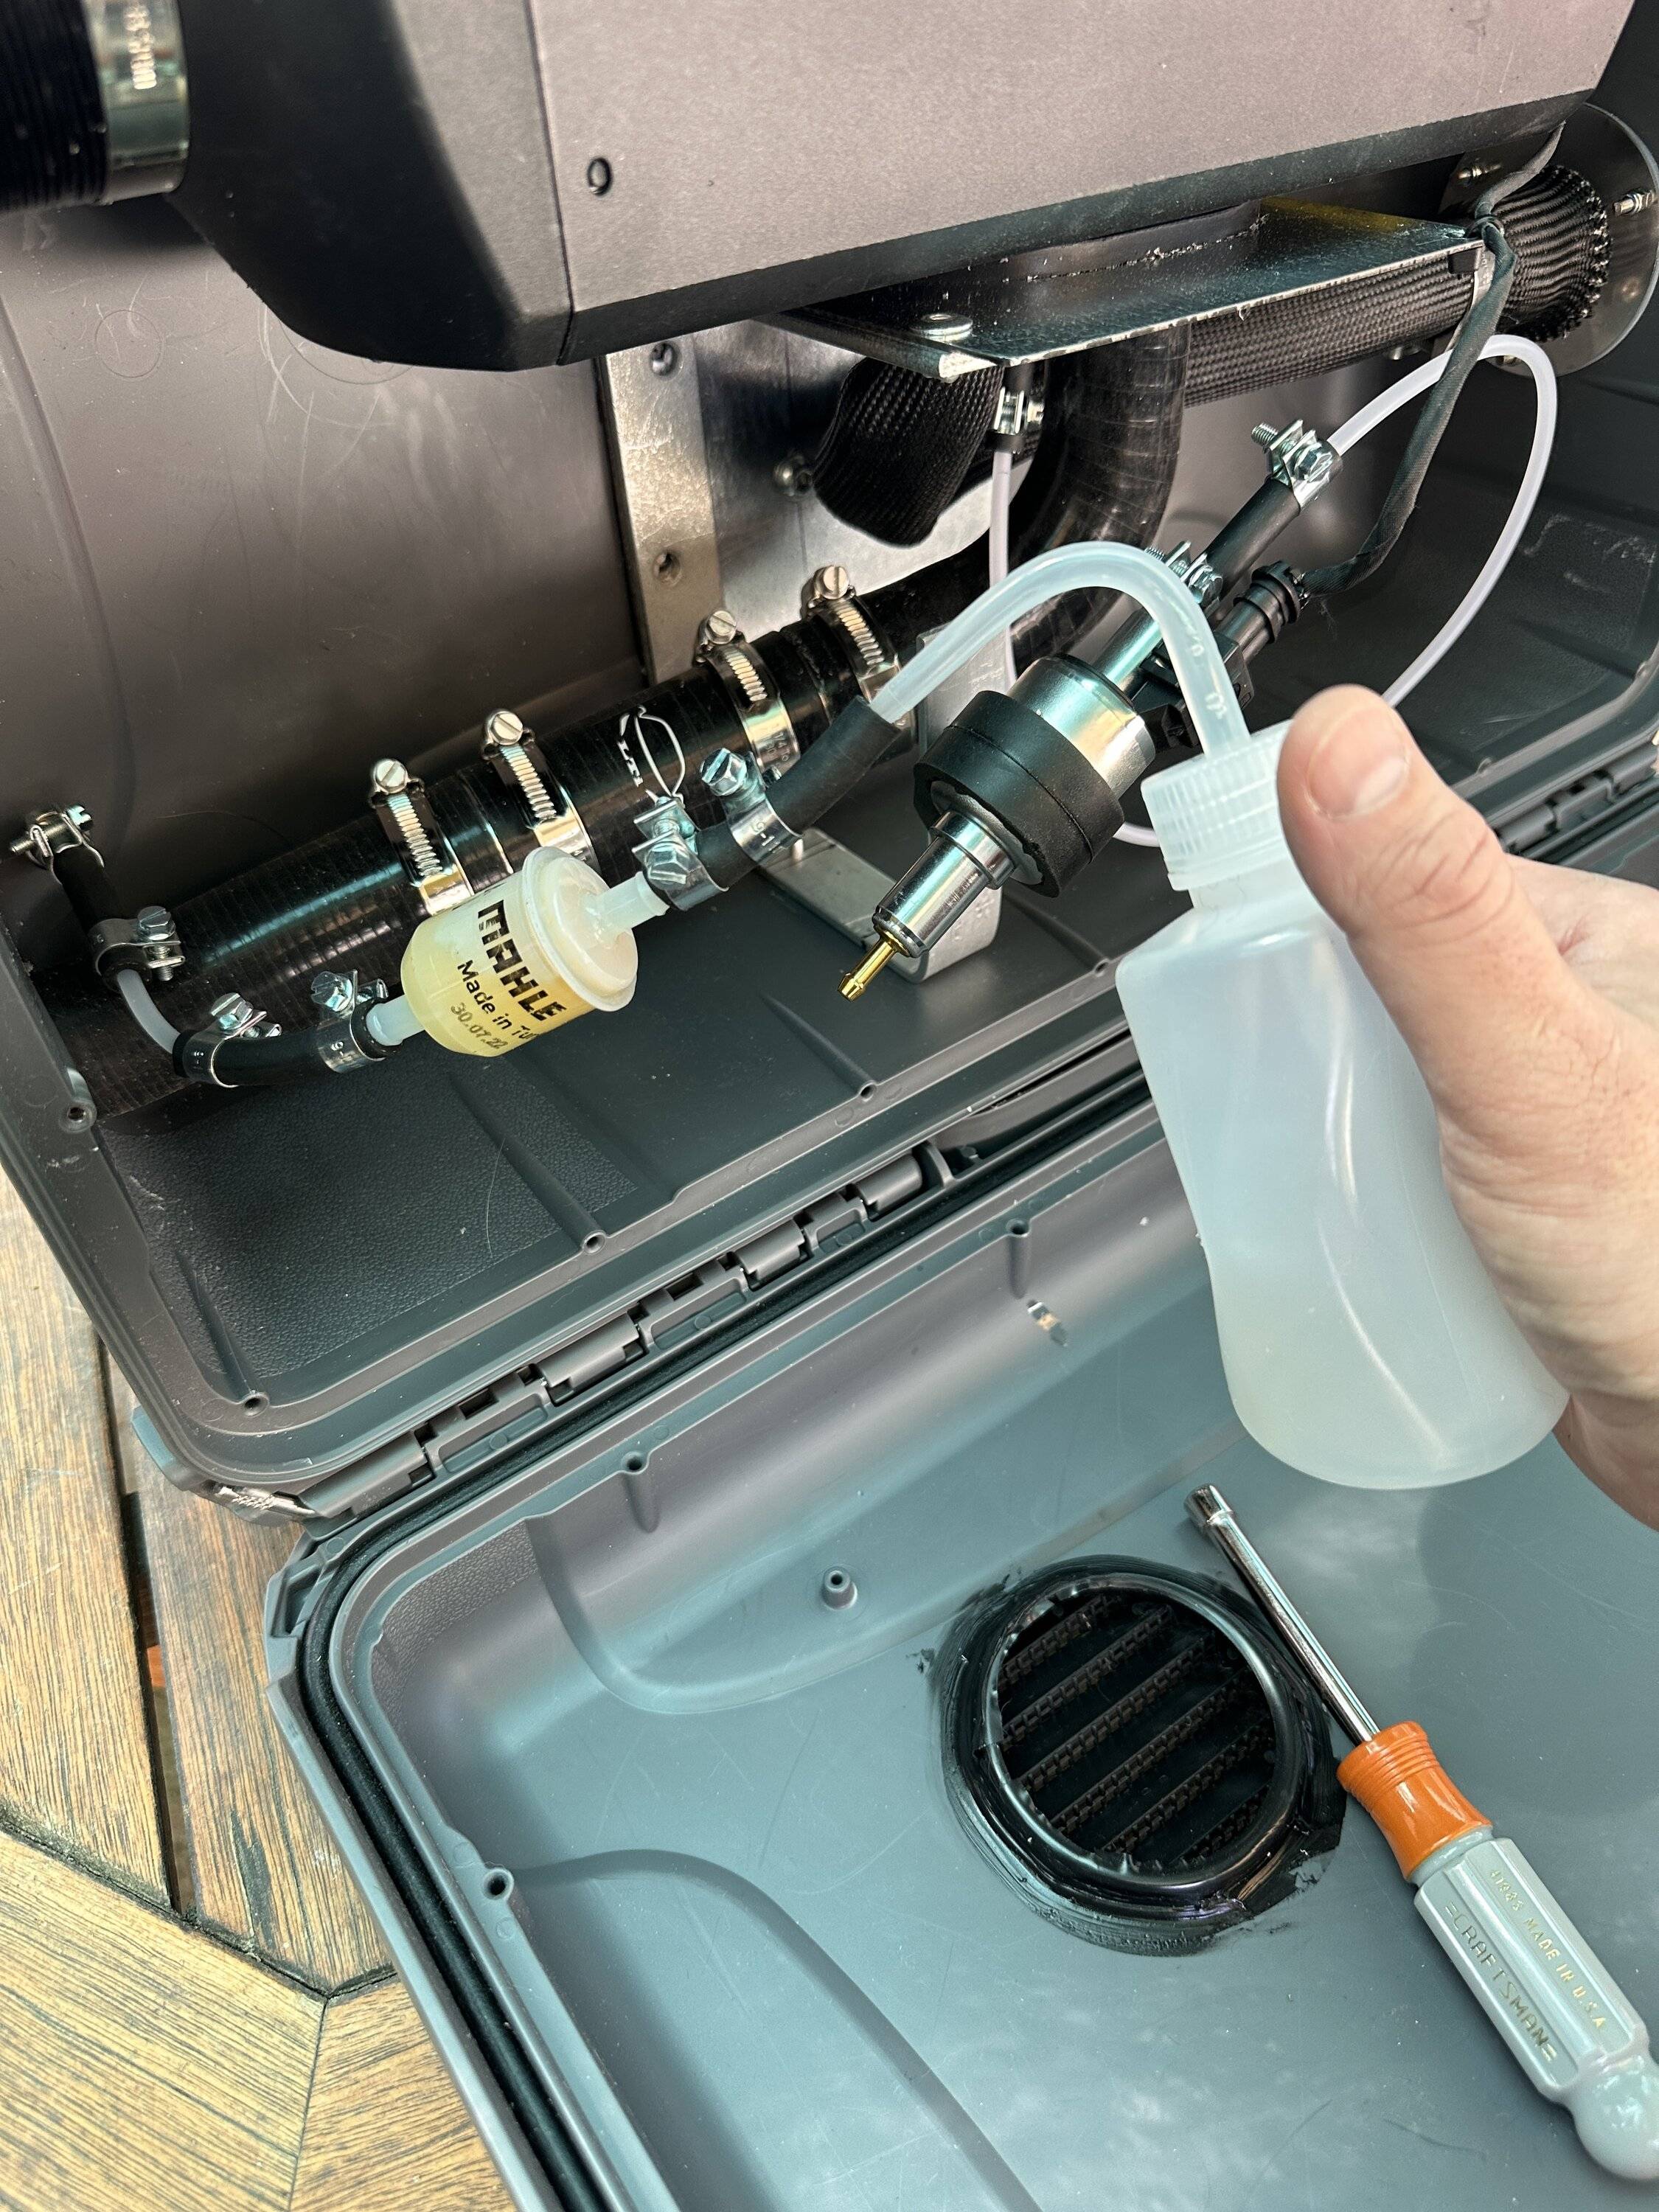
- Better Intake. The stock thing that comes with these heaters is not a filter. It’s more of a poor intake muffler. Throw it away. It actually promotes insects and debris getting in the heater which can damage it. I used a real filter and upgraded smooth radiator hose for the intake.
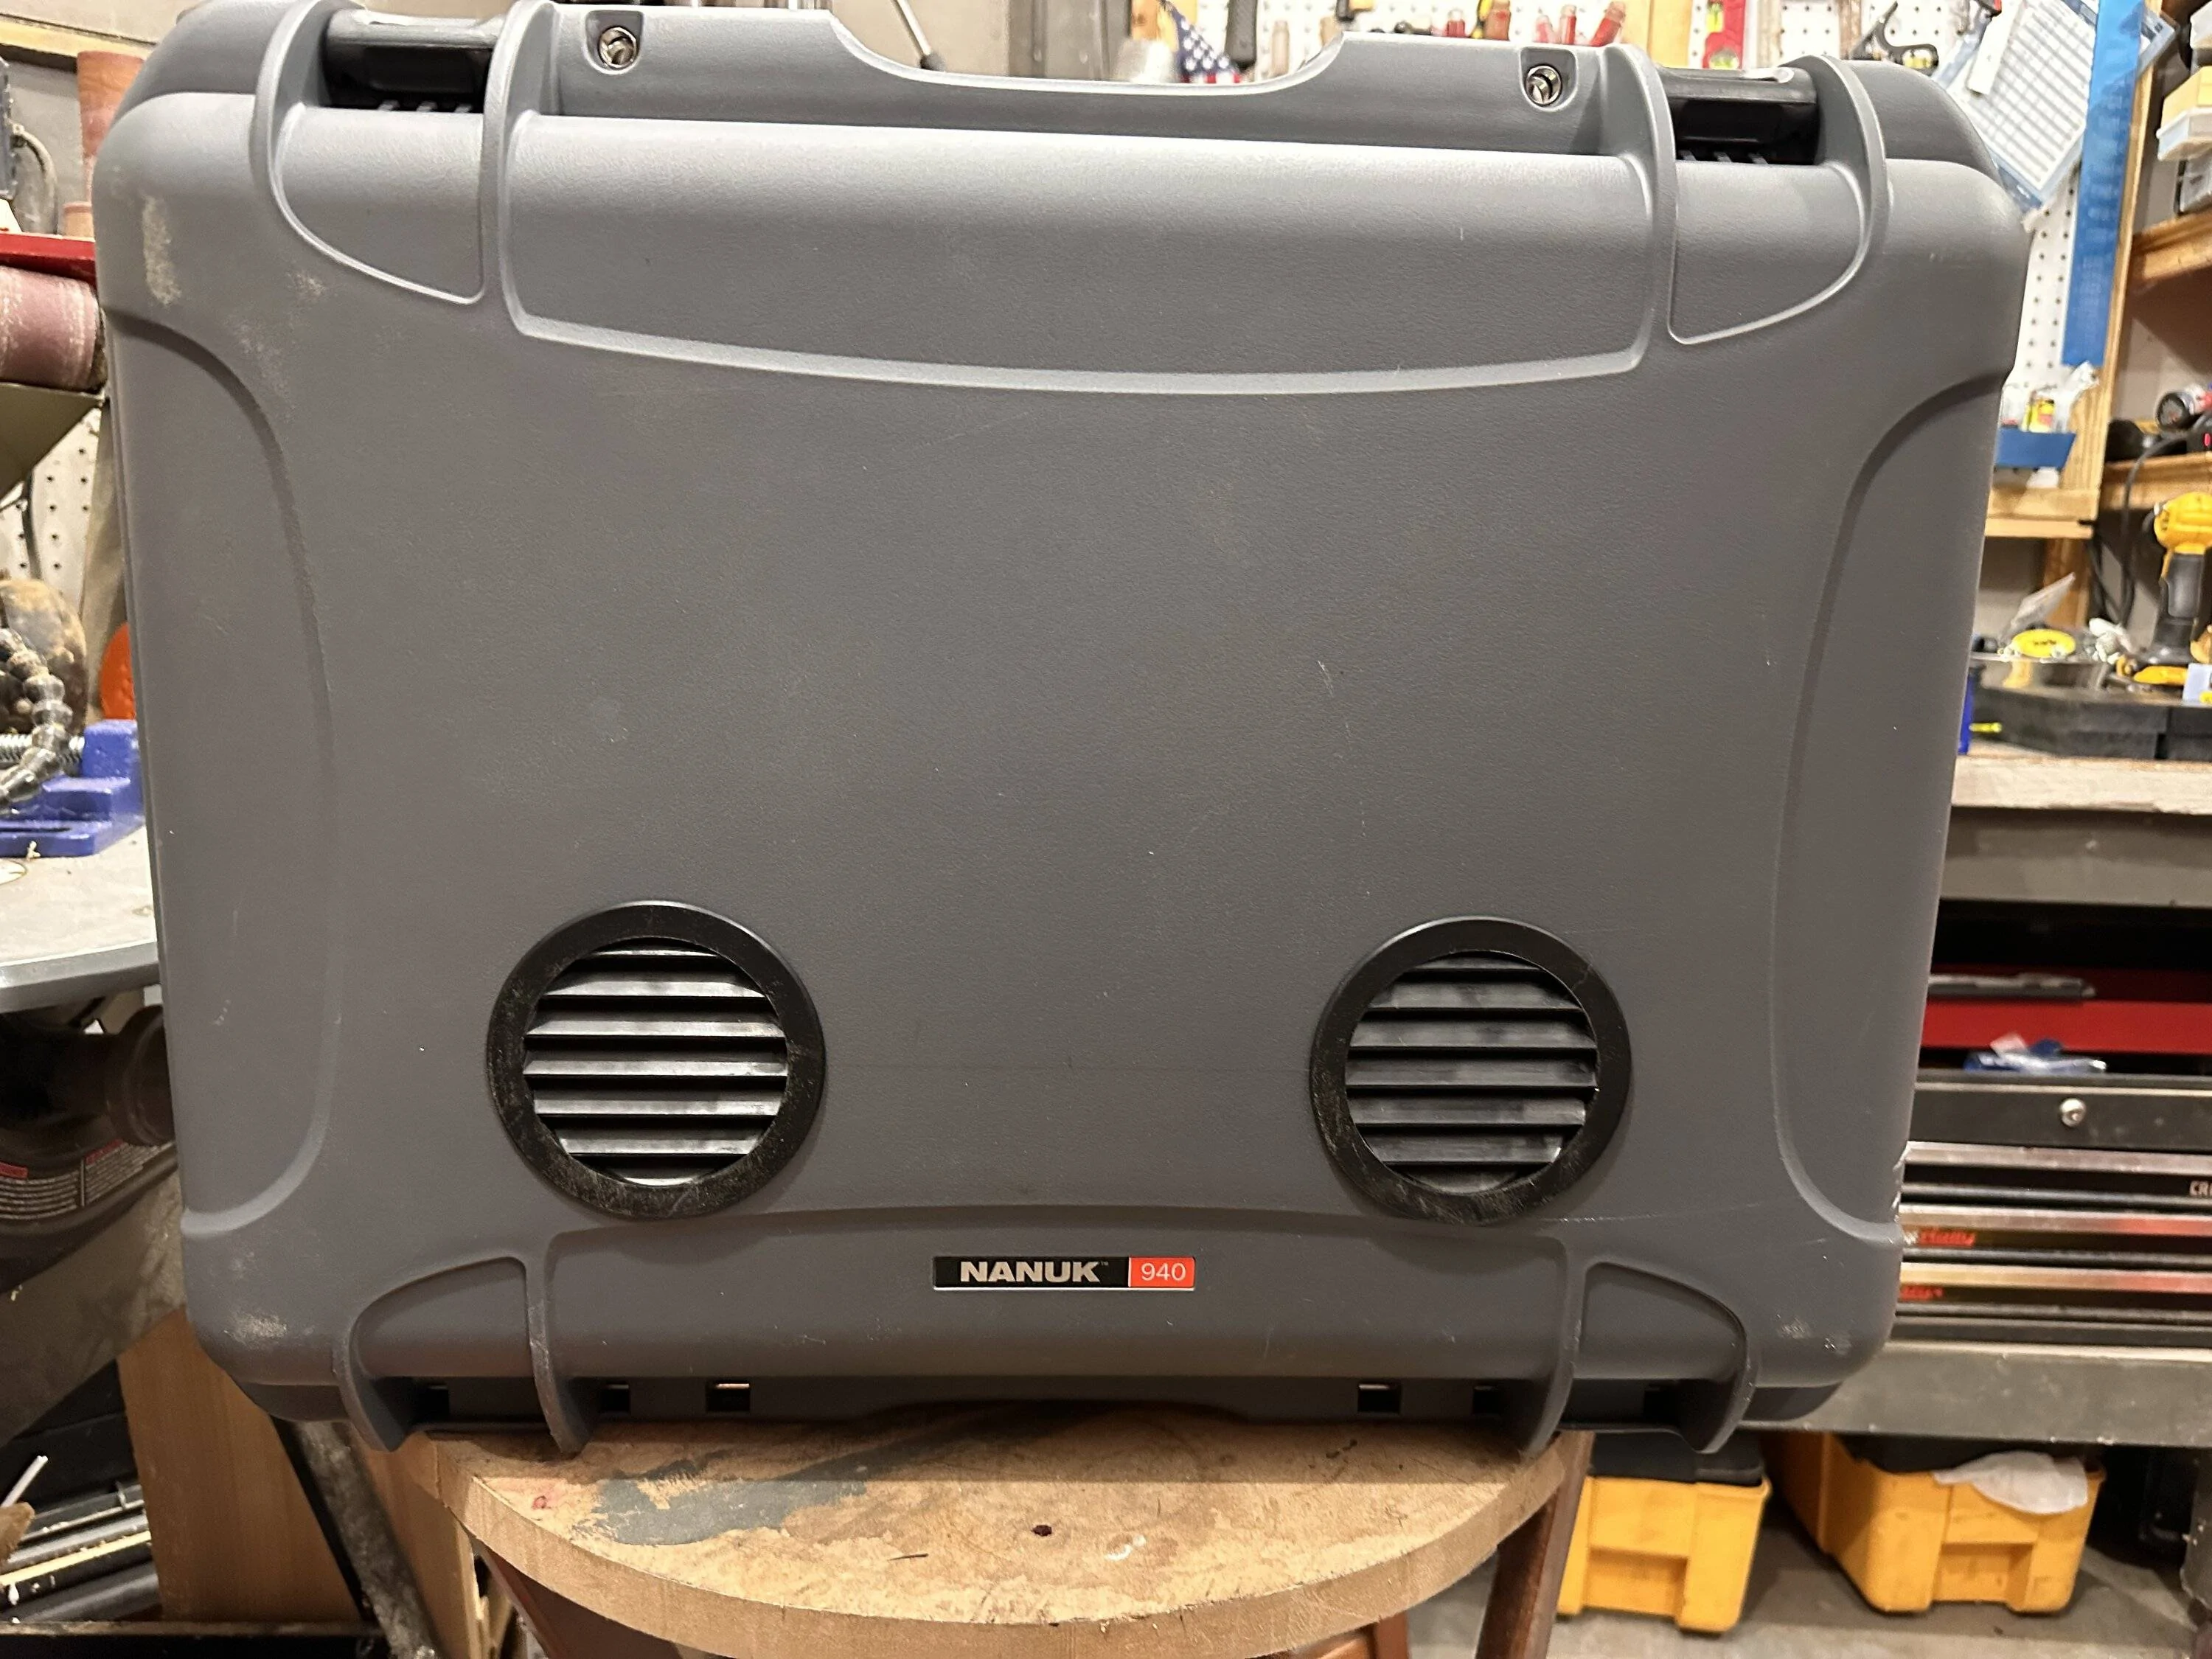
- Better components. I upgraded the exhaust hose and hose clamps (regular hose clamps are inadequate), fuel filter, mounting bracket with a custom fabricated one and screws/bolts
- Floating fuel pump mount. This moves the fuel pump away from the other components and into a better position, allows for easy maintenance and priming. You should manually prime the pump from the tank up through the filter. The pump is lubricated by the fuel, so you should minimize running it dry. It’s easy to remove the bottom connection from the pump.
- Better exhaust routing. Because condensation forms in the exhaust, you want to start high and move downwards. I’ve got plenty of room to run a good length exhaust pipe, muffler and tail pipe sloping downward without hitting the ground.

Sponsored