cgm
Well-Known Member
- Thread starter
- #1
Originally, I posted this in exterior mods... but this is really better here... so i deleted that thread.
Copying and pasting the pics from that thread to this caused problems. I re-linked the pics from imagur, i think they are all there. a few get re posted and i can't delete them. sorry for multiple photos.
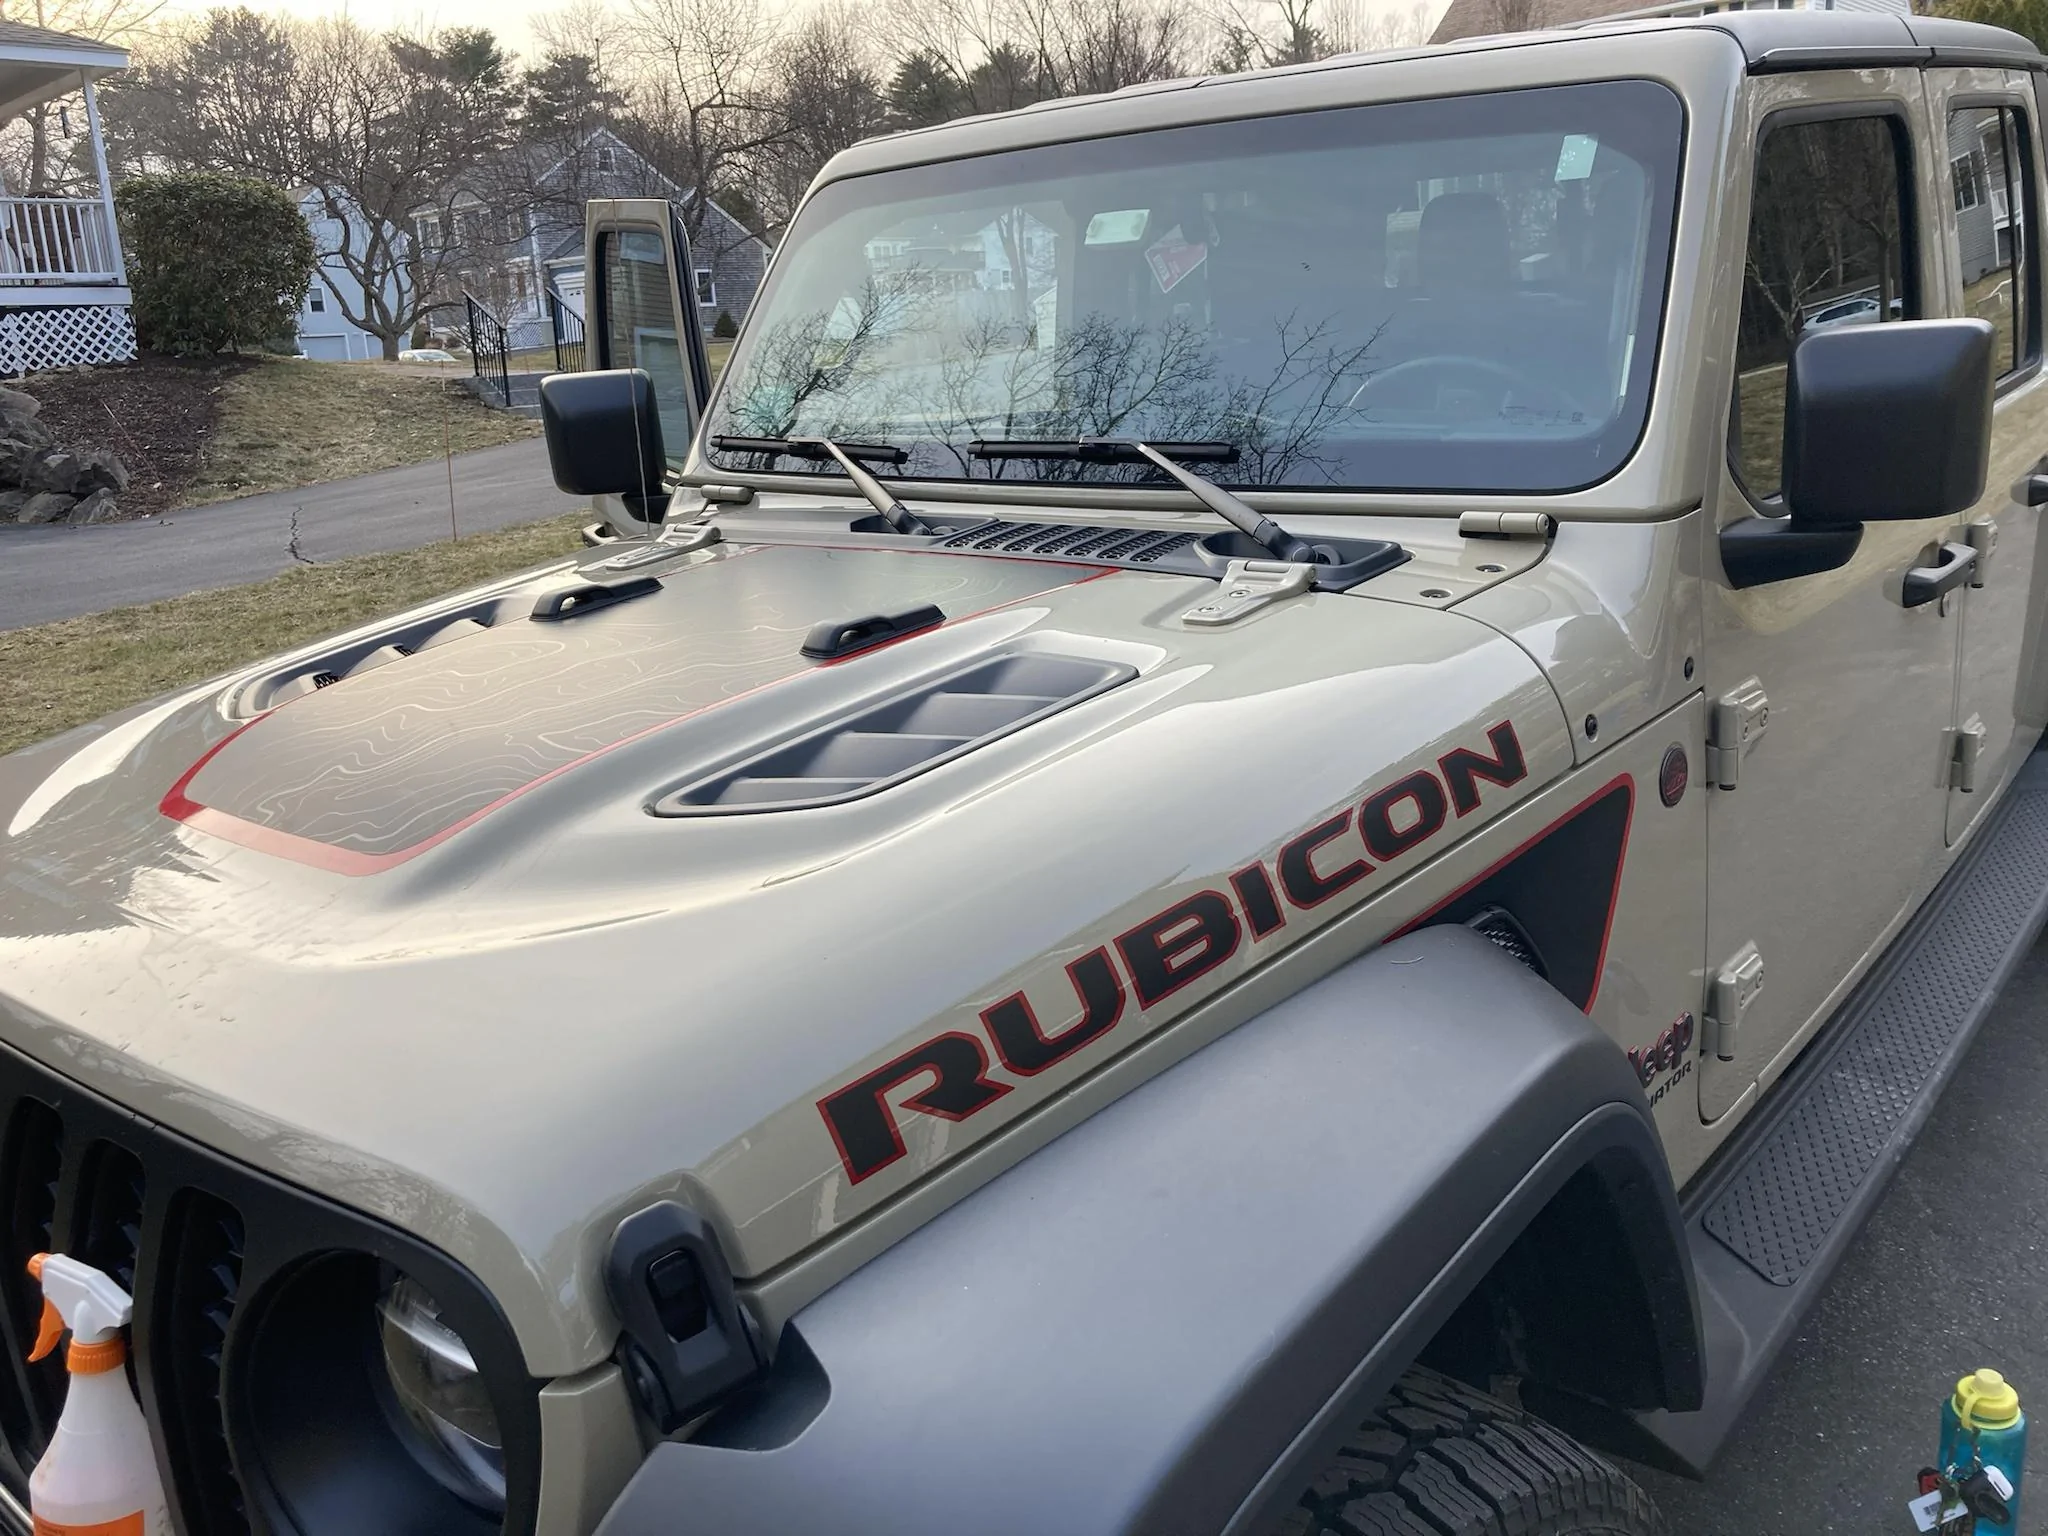
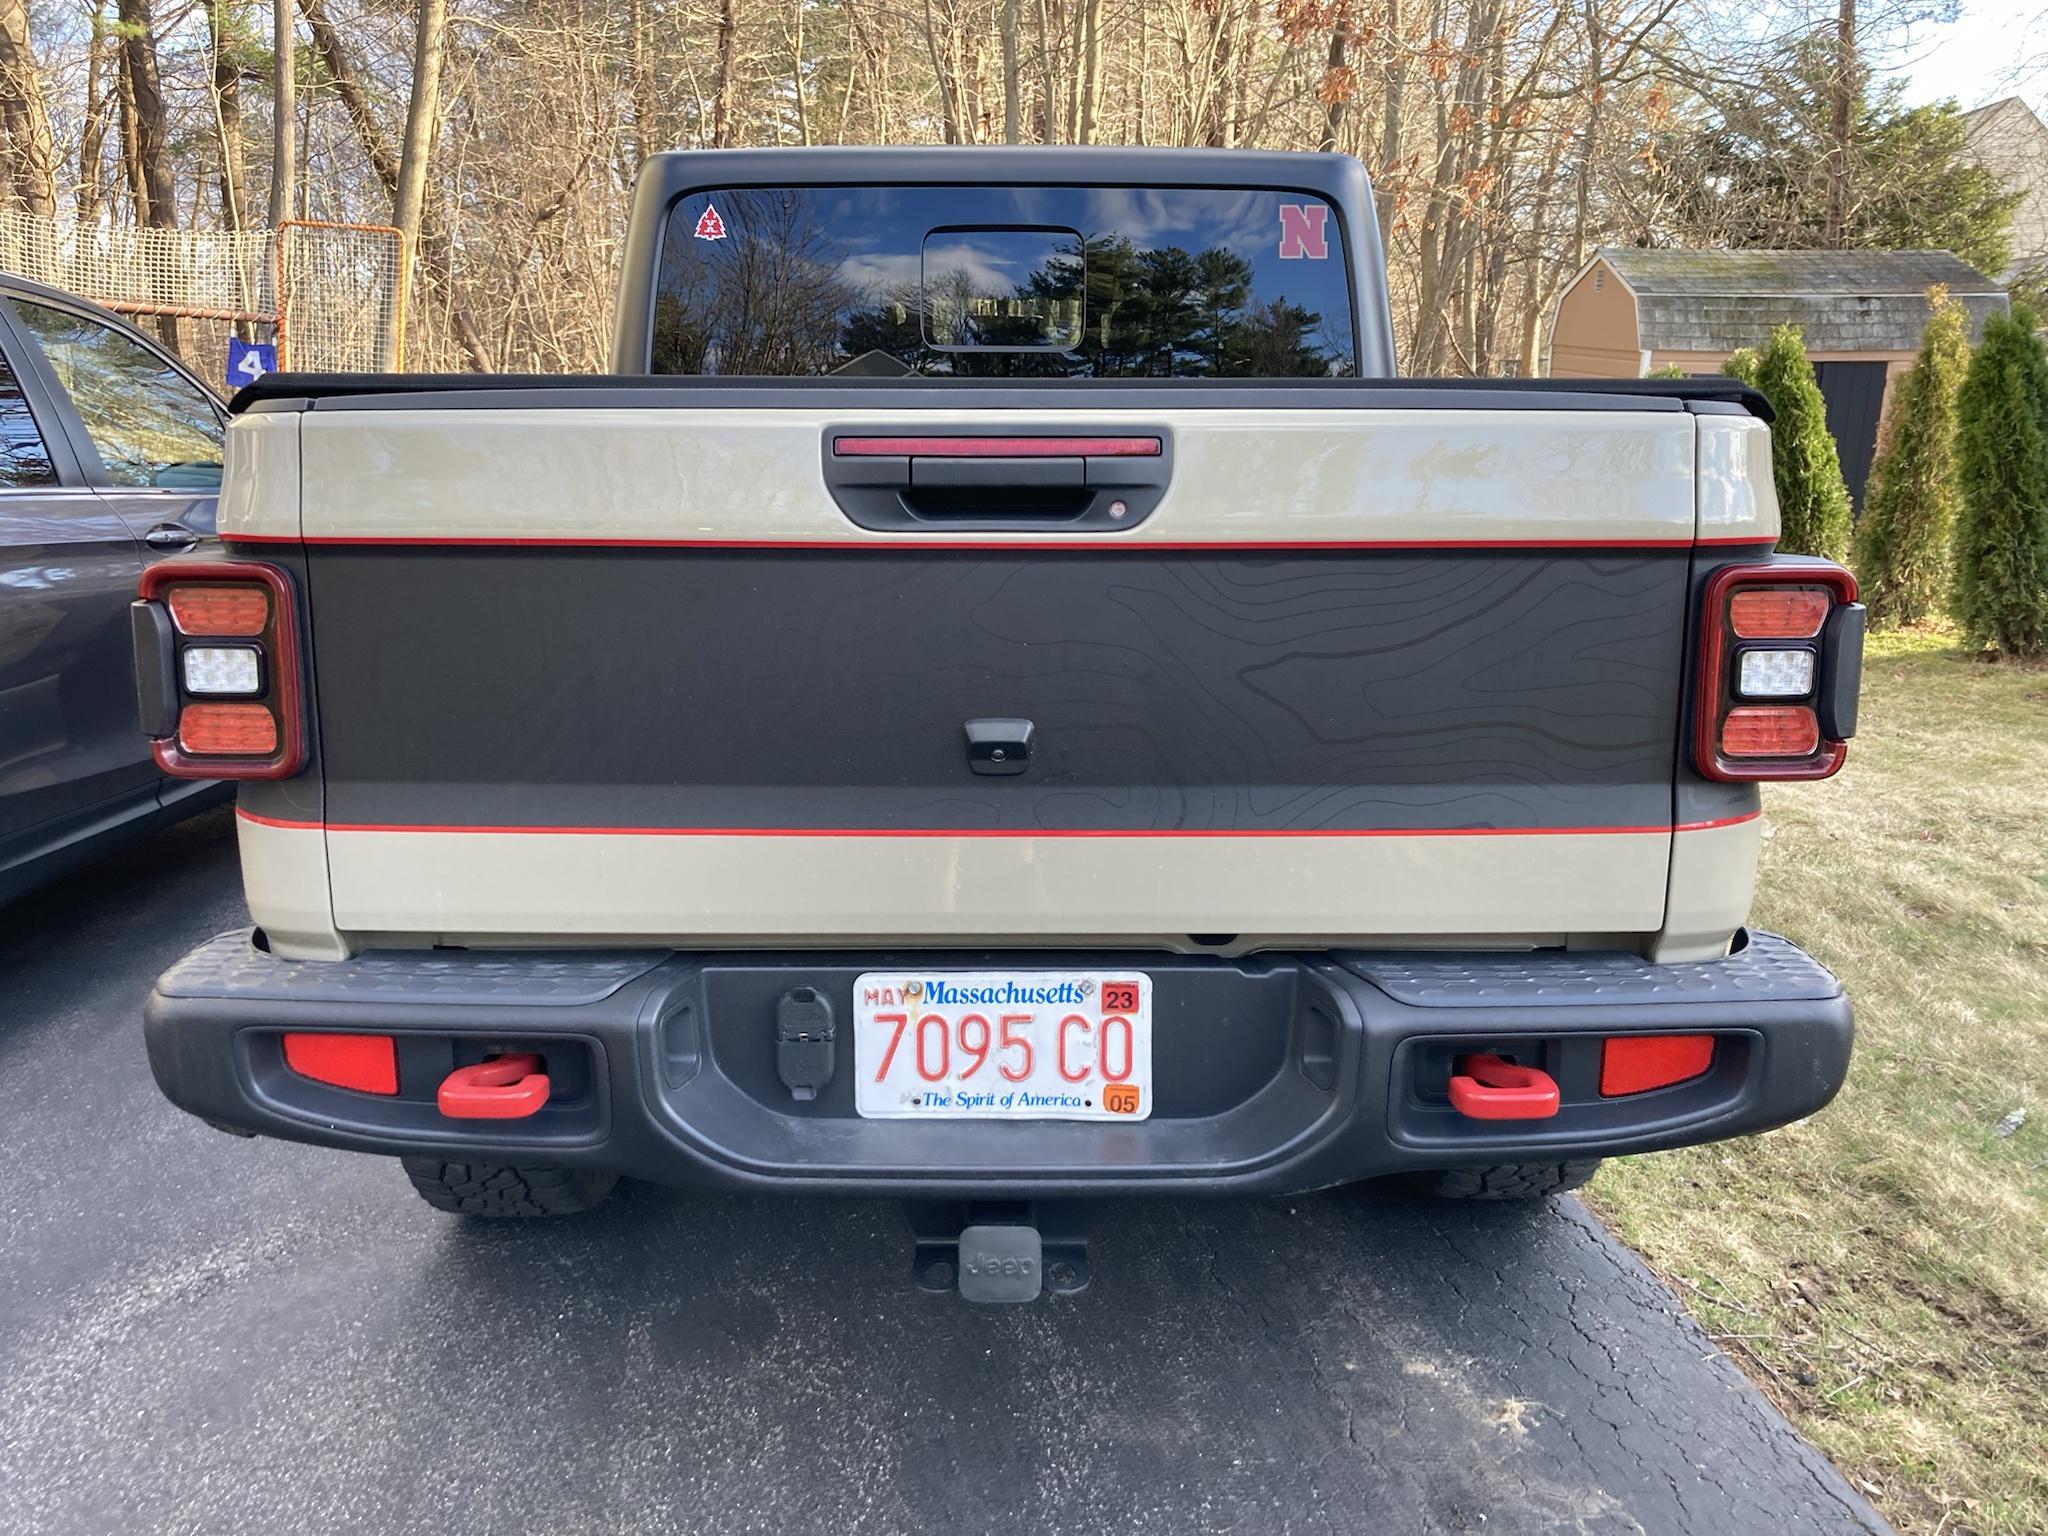
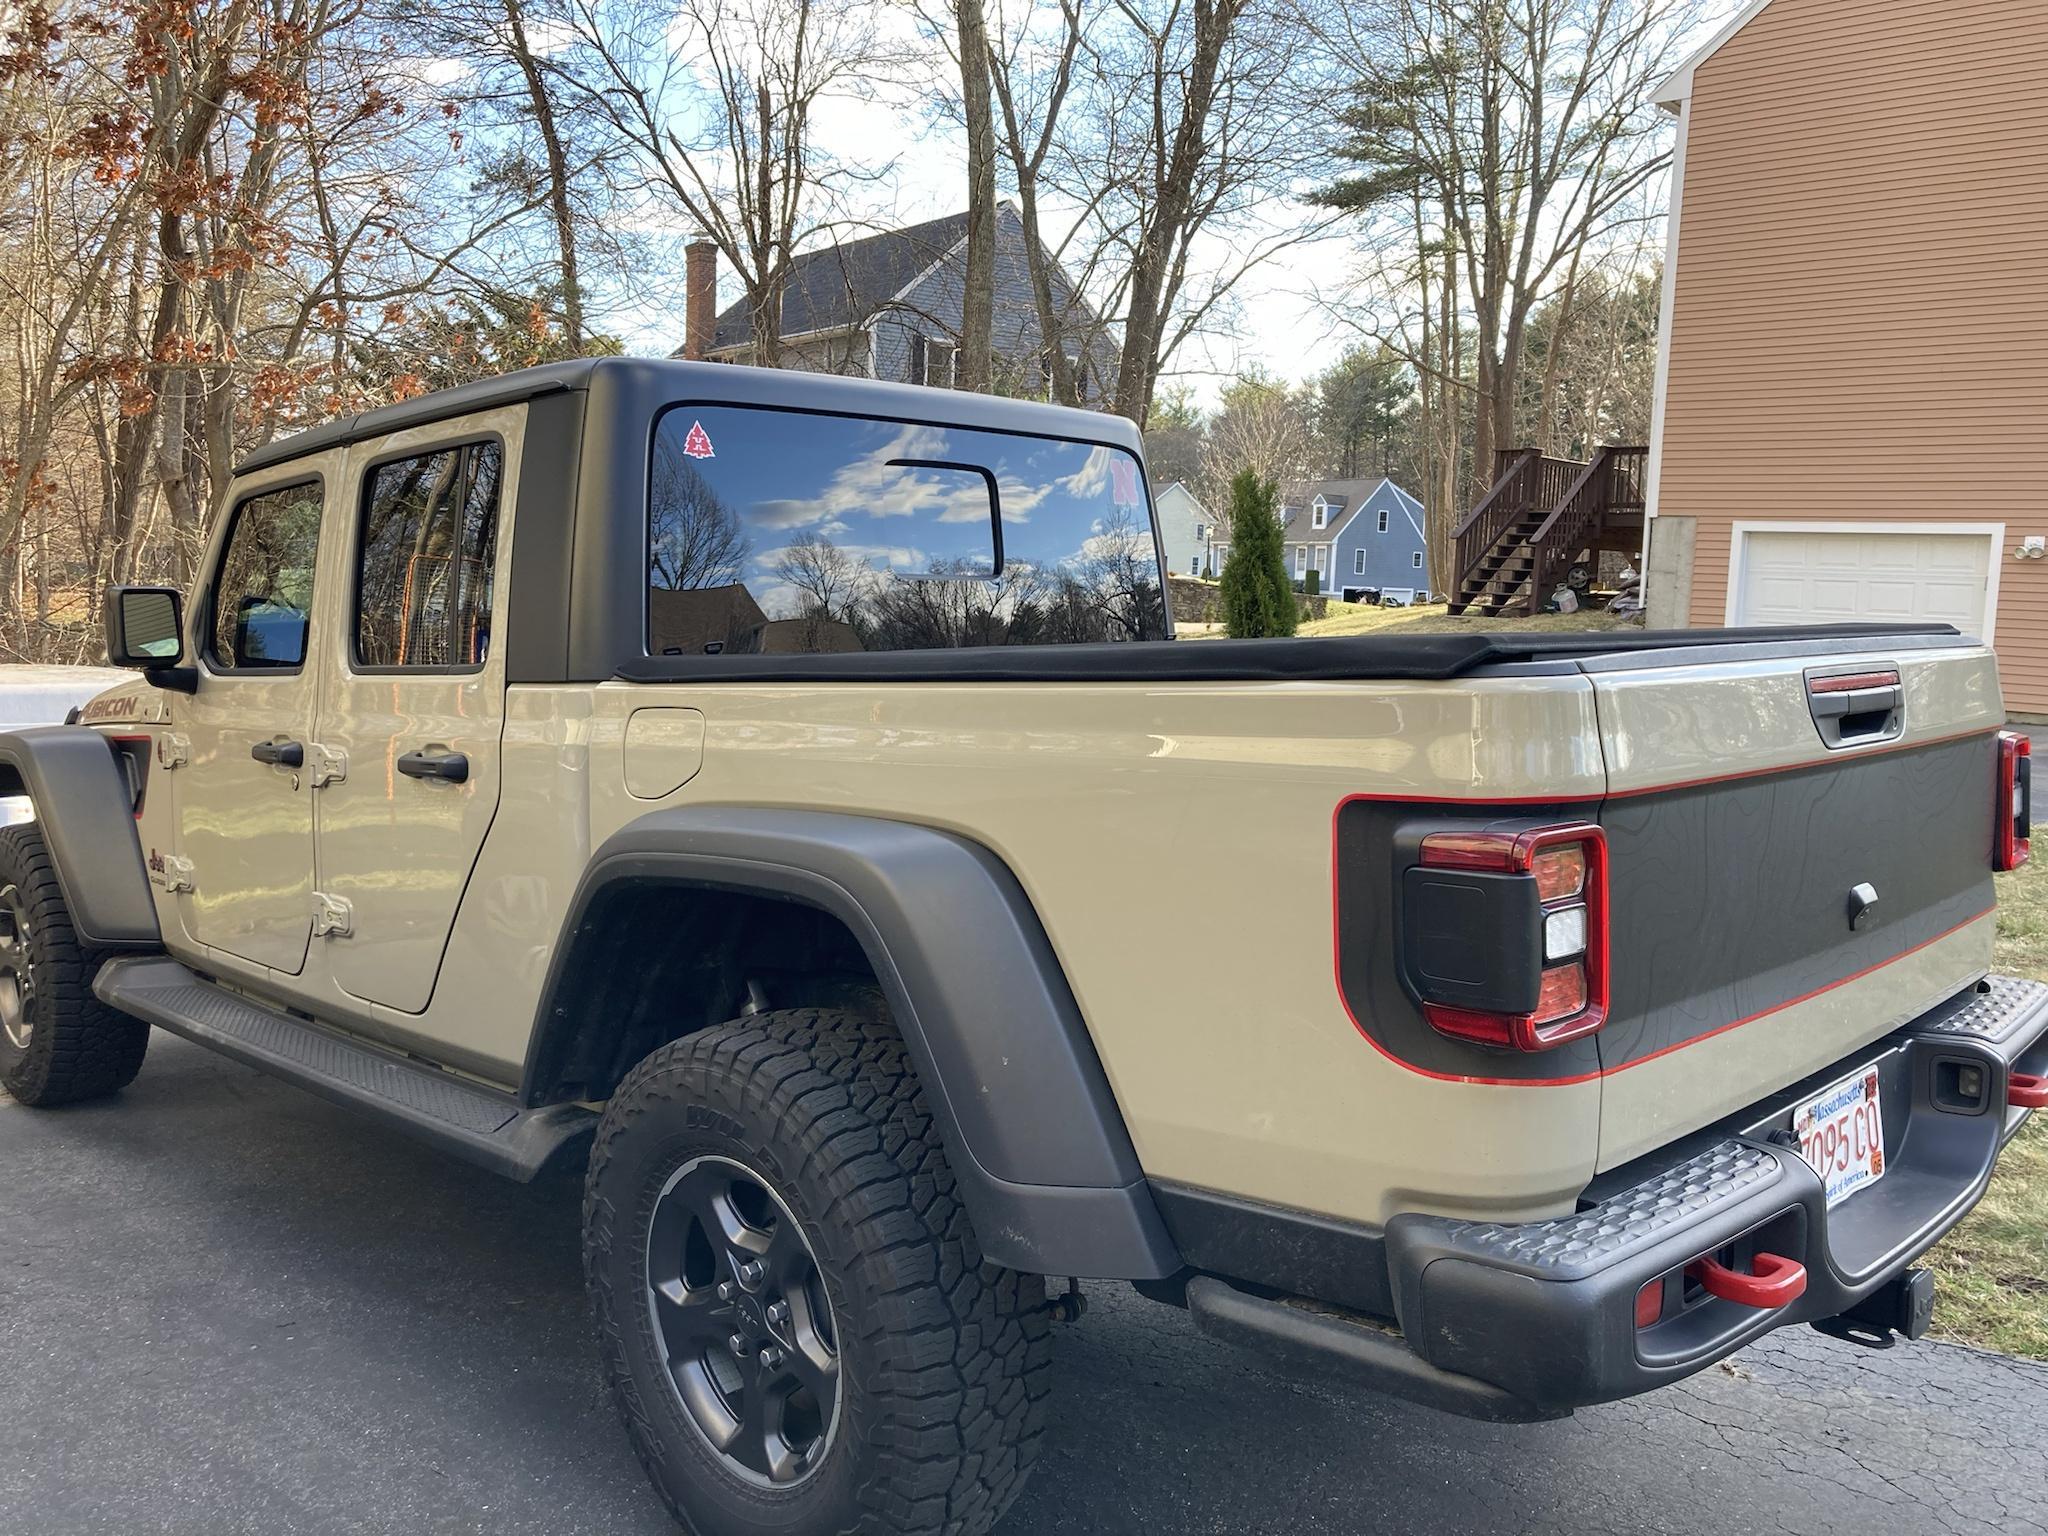
Could most of this post fit into a decal thread? Probably, but I was looking for a jeep with all of the vinyl I ordered and did not see one with all three types. here are a few pics of my Gobi Rubi with the decal package. I purchased the decals from Pixel Decals.
This is my first time using a heat gun to lay vinyl, it really wasn't a bad install at all. I didn't use much dish soap in my 10:1 water to Iso alcohol mix so the decals didn't slide much. On the other hand, I installed with the weather in the 50's becuase I was impatient and, well, so far so good! I am also pretty sure that I did not wait the hour + between decal layers, and once again, it worked great. No peeling, no issues since install. I realize that if it lifts, it is not PD's fault.
Some pics and then some thoughts of the process:
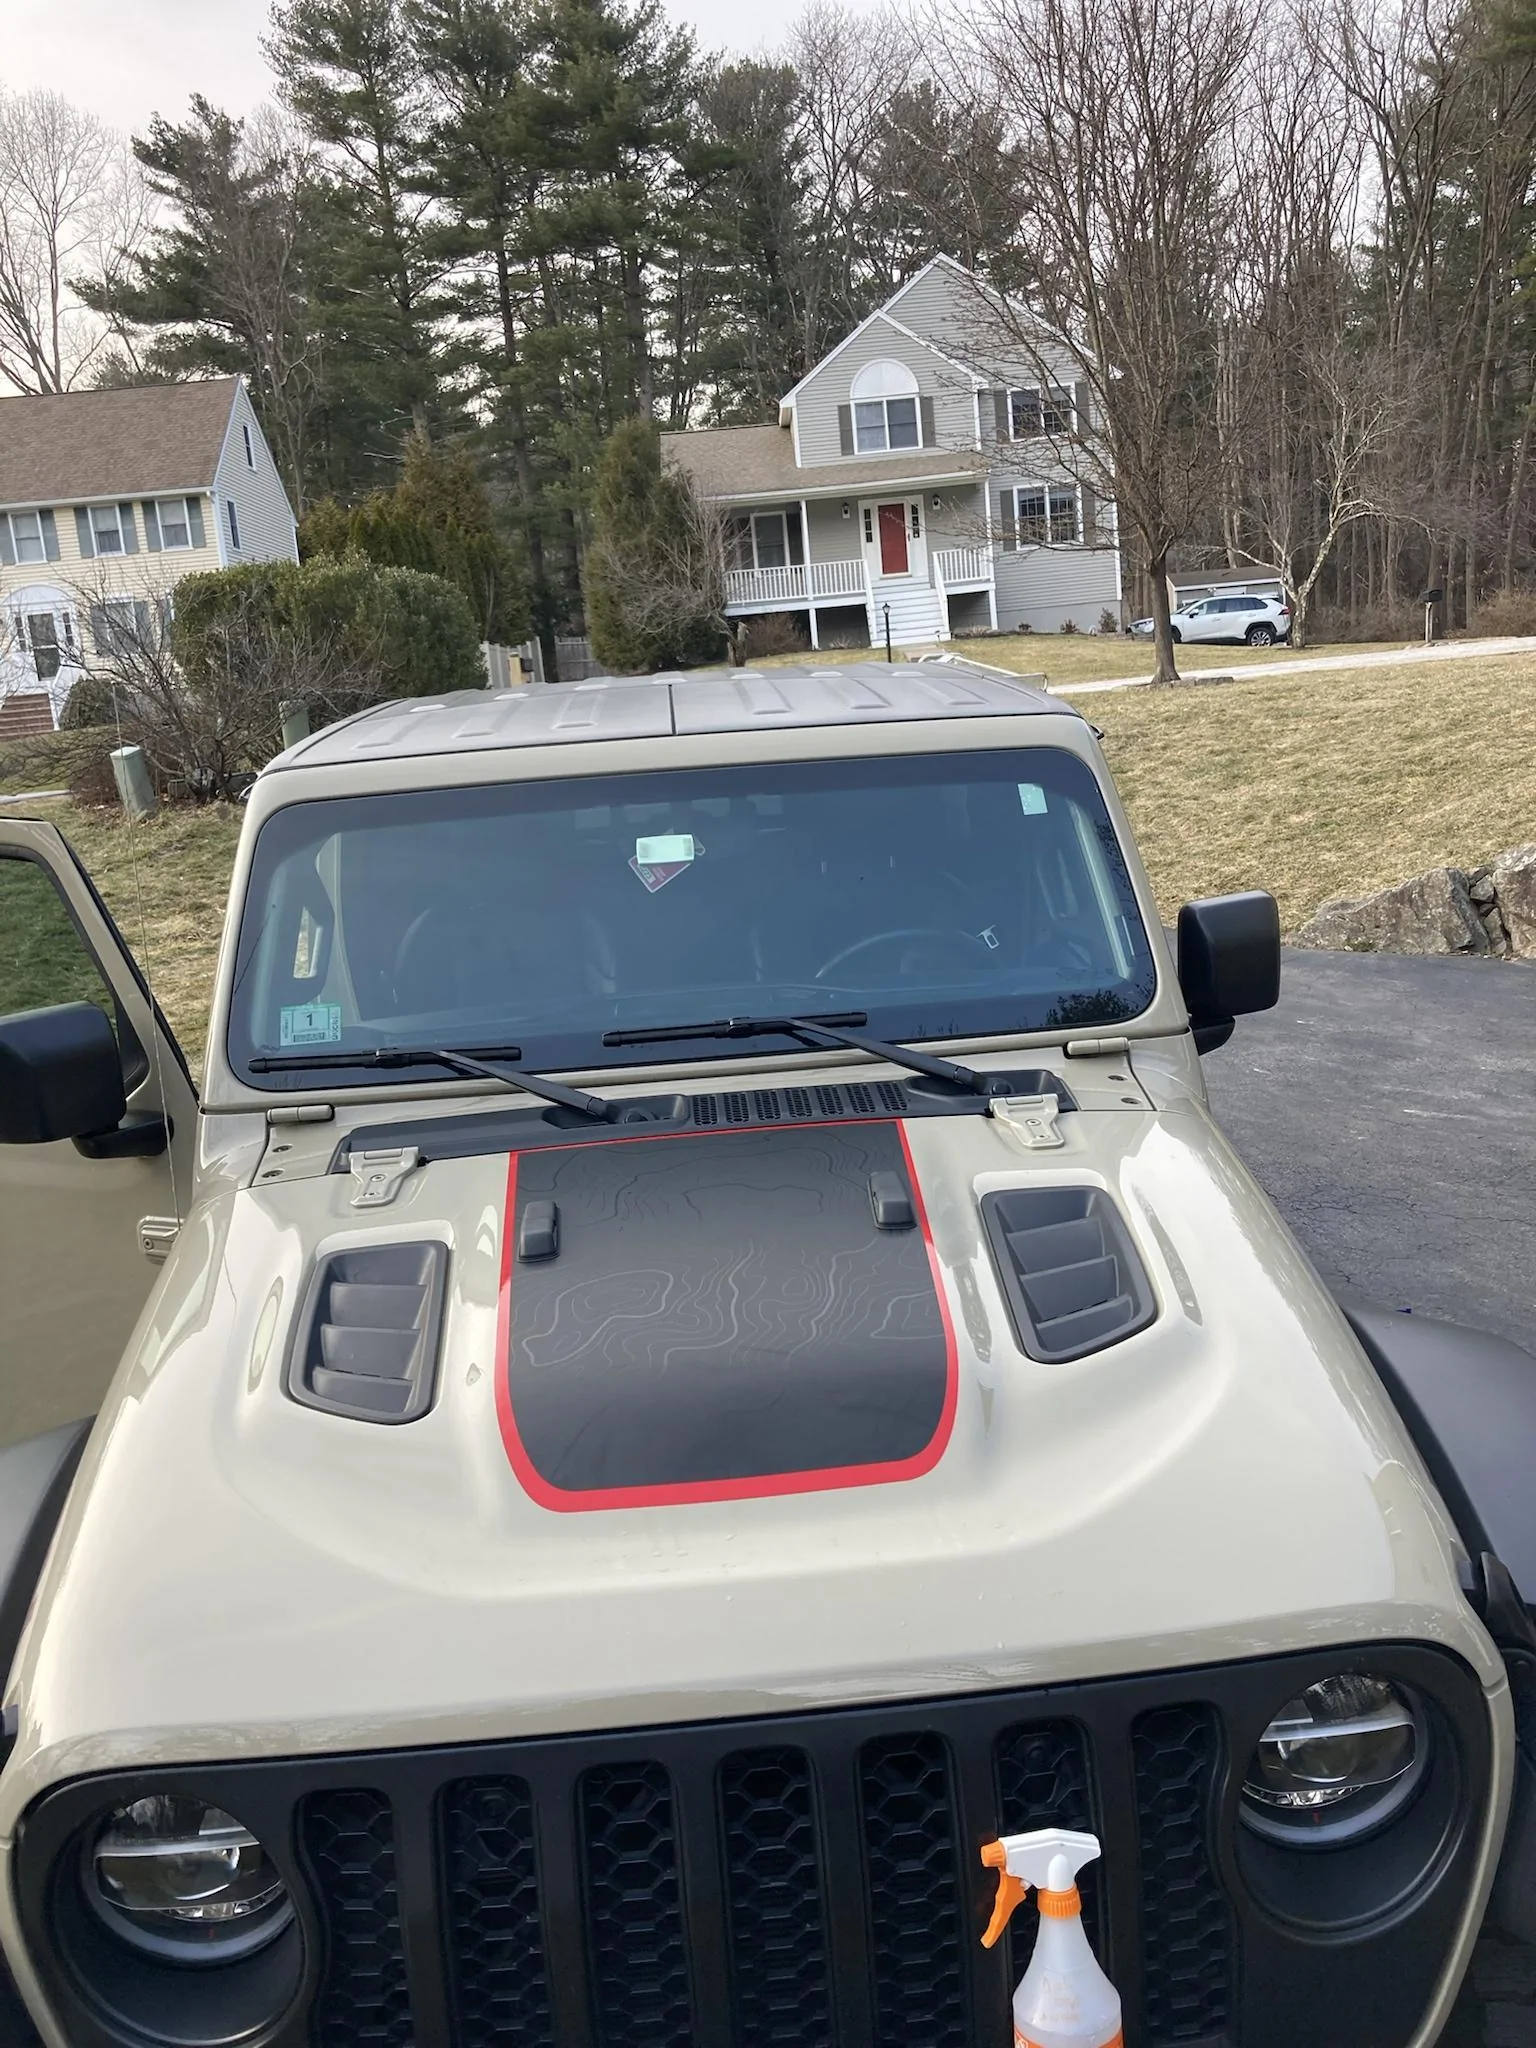
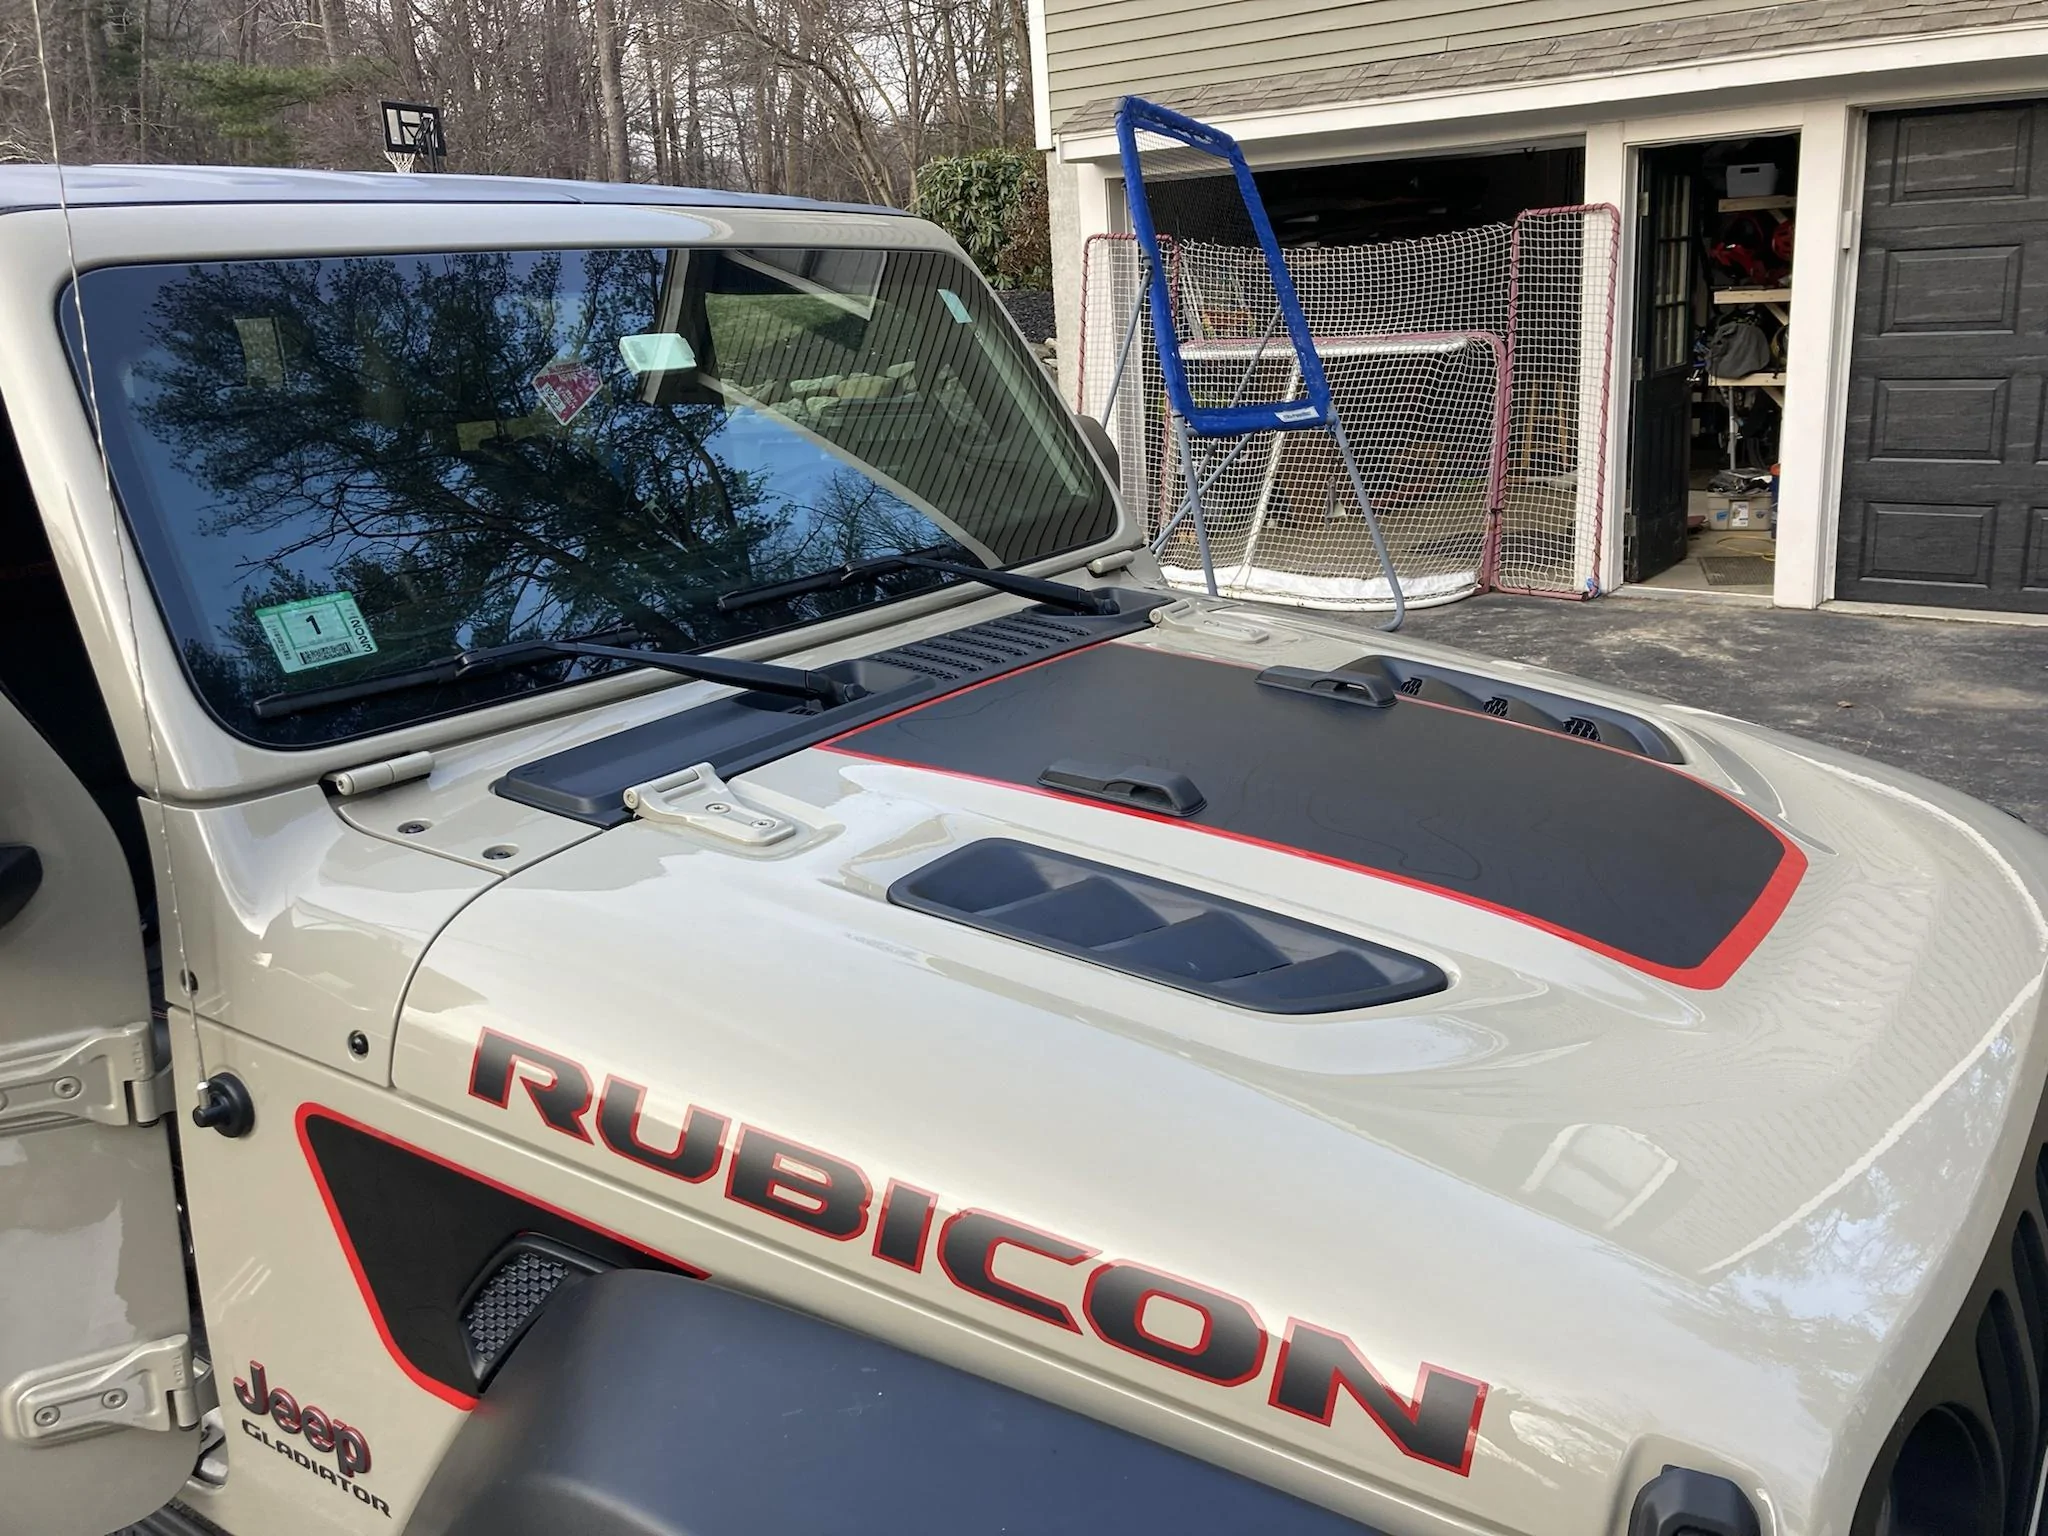
Hood:


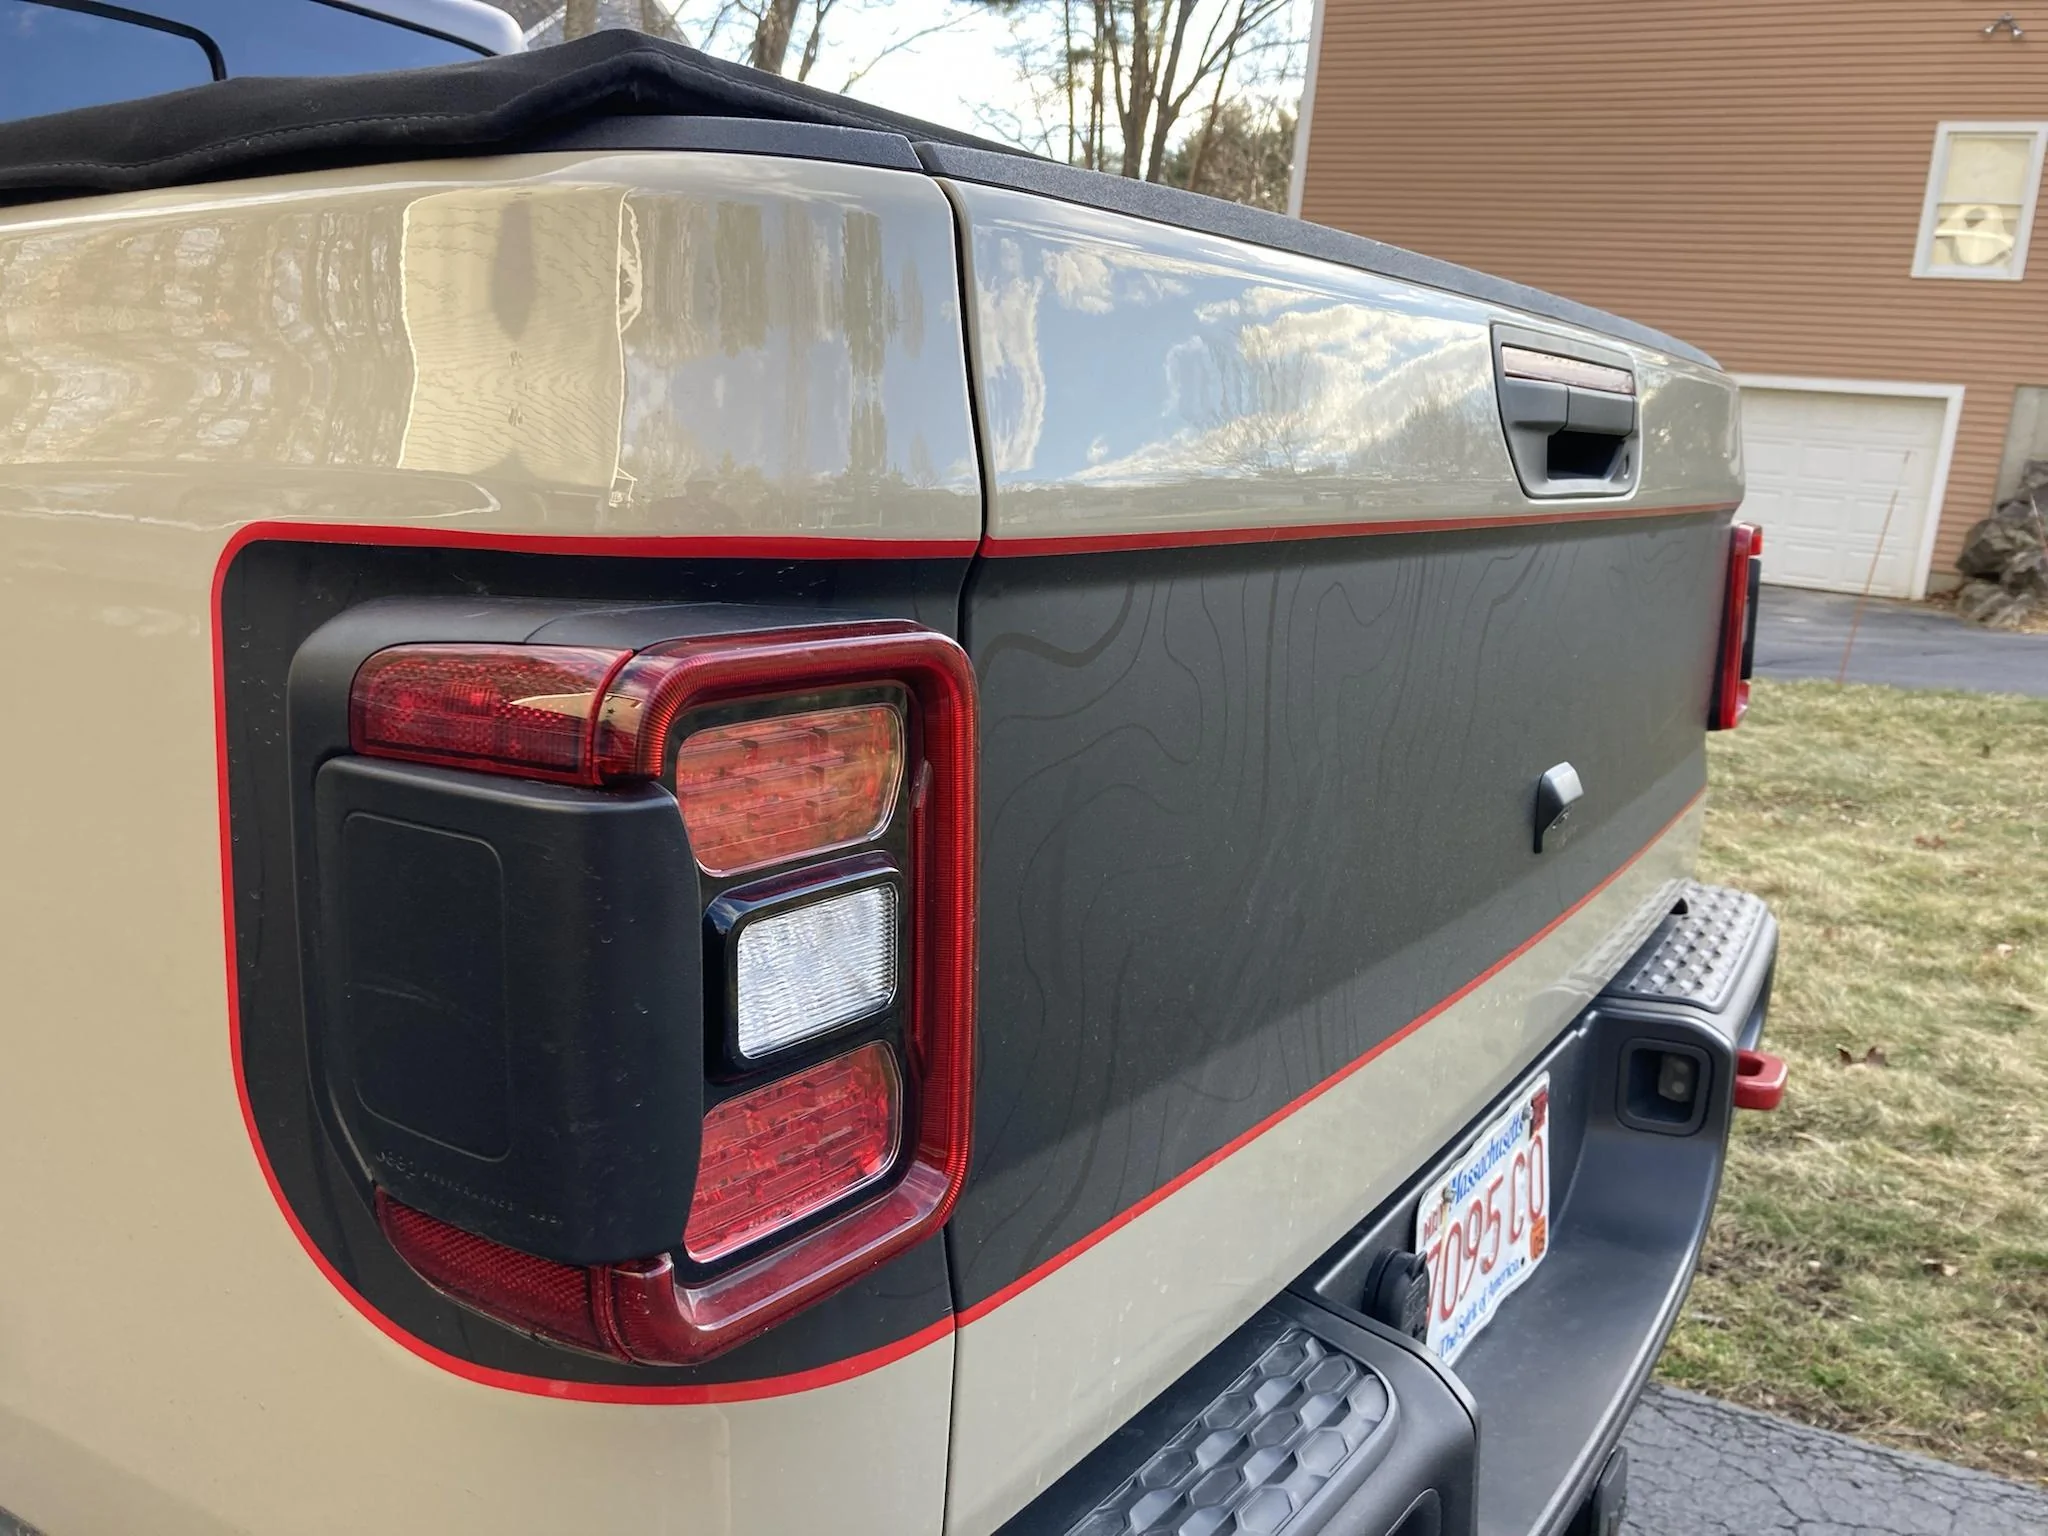
Tailgate: the jeep could have been cleaner in some of the pics... it rained the day before some pics.
View attachment 228447
View attachment 228448
View attachment 228449
Vents:
Up next, some thoughts of the install
The install wasn't bad, it wasn't perfect, but I am happy. The red film was by Avery. It was not nearly as nice to work with as the 3M topo vinyl. The 3M was super easy to heat, stretch, remove the soap, etc.
There are some great Youtube videos to show the install. Underground Graphics showed the dry method but were still really helpful. LJ Designs showed the wet method. I would not have been able to do this without the videos.
I started with the vents, and there are a couple of slight gaps. I couldn't really slide them and to me, an amateur, the cutout wasn't perfect to tuck under the vent.
you can see a slight gap on top of the vent. below was tucked in great. If I did these last, I probably would have been more confident with shrinking the vinyl to tuck it in the top of the vent. I think the next install would be perfect if i ever had to do it... I learned quite a bit from the corners of the tail light decals.
The hood was next. it was relatively easy. there was a bit of heating to match the hood, but not bad at all. I did this decal on a jk a decade ago, that one didn't need heat.
The taligate was easier than expected. I started with the middle section and worked my way out to the sides.
Honestly, my only issue, recommendation is for PD to make the center panel wider... like 1/4" would make a difference.
In the end, I will probably only be the one to notice this... but if the vinyl was longer, it would have made the install much easier.
The decal did cover the whole tailgate, but it wasn't quite long enough to wrap around both sides of the tailgate.
This looks perfect...
But it only wrapped around this much:
the other side, not as good... from the front, you can't see any gaps but at an angle, you can see some gobi
it wrapped around this much:
Just be aware of this when installing if you are doing the job. It wouldn;t have taken much more material to make this a non-issue.
On the corners, there was plenty of extra material.
View attachment 228462
View attachment 228463
The other sellers seem to provide more material for the talegate piece.
The camera was ok to wrap with the 3m topo because it is so easy to work with. I did it wet at first and messed it up, then i did it dry it was better. When heating to wrap behind, i heated it a tad to much and the vinyl ripped. I was able to lift and heat and make it serviceable. if I had another piece, I feel like I could do it well. I was told I would get a small piece of vinyl for the camera... there wasn't one, but because of the way PD cut the corner graphics, I could us the cut out piece from the center of the tail lights, so i had two tries! If you go with another vinyl company, ask for an extra piece of vinyl.
Now, I need to decide on the rear logo.
I don't mind the badgeless look, but I am sure at some point, the holes in the tailgate will show
I like the Hauk letters... but want to do something different. I really like the Heritage jeep logo... so this is the next project.
I converted a jpg to svg of the logo from the interwebs and uploaded into tinkercad and resized and re-aligned the letter spacing to give me some size options. I printed out pdfs so i can cut them out and decide on size before lazer cutting the logos, but I think 22" wide is the sweet spot
View attachment 228473
The orange version will probably be the right size to cover the holes in the tailgate. The red version is closer to the stock size logo.
The smaller dark blue version should be the right size to replace the logos on the front fenders to coordinate everything.
I need to finalize a design so I can get the logos cut.
I picked up 12"x12" 1/8" red acrylic for the base, I will laminate 1/16" gloss black acrylic on top. I need to pick up some Weldon #4 to do this, then a buddy will lazer cut the logos.
I got enough for two 12"x12" pieces of acrylic so i should have enough material if I make mistakes.
I am hoping for real subtle logos, the red should slightly poke out when viewed at an angle. If needed, I think I can rout a chamfer to expose more red. I am also wondering if I should order some 1/16th charcoal grey acrylic to use instead of the black,
Anyone have any thoughts?
Copying and pasting the pics from that thread to this caused problems. I re-linked the pics from imagur, i think they are all there. a few get re posted and i can't delete them. sorry for multiple photos.
Could most of this post fit into a decal thread? Probably, but I was looking for a jeep with all of the vinyl I ordered and did not see one with all three types. here are a few pics of my Gobi Rubi with the decal package. I purchased the decals from Pixel Decals.
This is my first time using a heat gun to lay vinyl, it really wasn't a bad install at all. I didn't use much dish soap in my 10:1 water to Iso alcohol mix so the decals didn't slide much. On the other hand, I installed with the weather in the 50's becuase I was impatient and, well, so far so good! I am also pretty sure that I did not wait the hour + between decal layers, and once again, it worked great. No peeling, no issues since install. I realize that if it lifts, it is not PD's fault.
Some pics and then some thoughts of the process:
Hood:


Tailgate: the jeep could have been cleaner in some of the pics... it rained the day before some pics.


View attachment 228447
View attachment 228448
View attachment 228449
Vents:


Up next, some thoughts of the install
The install wasn't bad, it wasn't perfect, but I am happy. The red film was by Avery. It was not nearly as nice to work with as the 3M topo vinyl. The 3M was super easy to heat, stretch, remove the soap, etc.
There are some great Youtube videos to show the install. Underground Graphics showed the dry method but were still really helpful. LJ Designs showed the wet method. I would not have been able to do this without the videos.
I started with the vents, and there are a couple of slight gaps. I couldn't really slide them and to me, an amateur, the cutout wasn't perfect to tuck under the vent.
you can see a slight gap on top of the vent. below was tucked in great. If I did these last, I probably would have been more confident with shrinking the vinyl to tuck it in the top of the vent. I think the next install would be perfect if i ever had to do it... I learned quite a bit from the corners of the tail light decals.

The hood was next. it was relatively easy. there was a bit of heating to match the hood, but not bad at all. I did this decal on a jk a decade ago, that one didn't need heat.
The taligate was easier than expected. I started with the middle section and worked my way out to the sides.
Honestly, my only issue, recommendation is for PD to make the center panel wider... like 1/4" would make a difference.
In the end, I will probably only be the one to notice this... but if the vinyl was longer, it would have made the install much easier.
The decal did cover the whole tailgate, but it wasn't quite long enough to wrap around both sides of the tailgate.
This looks perfect...
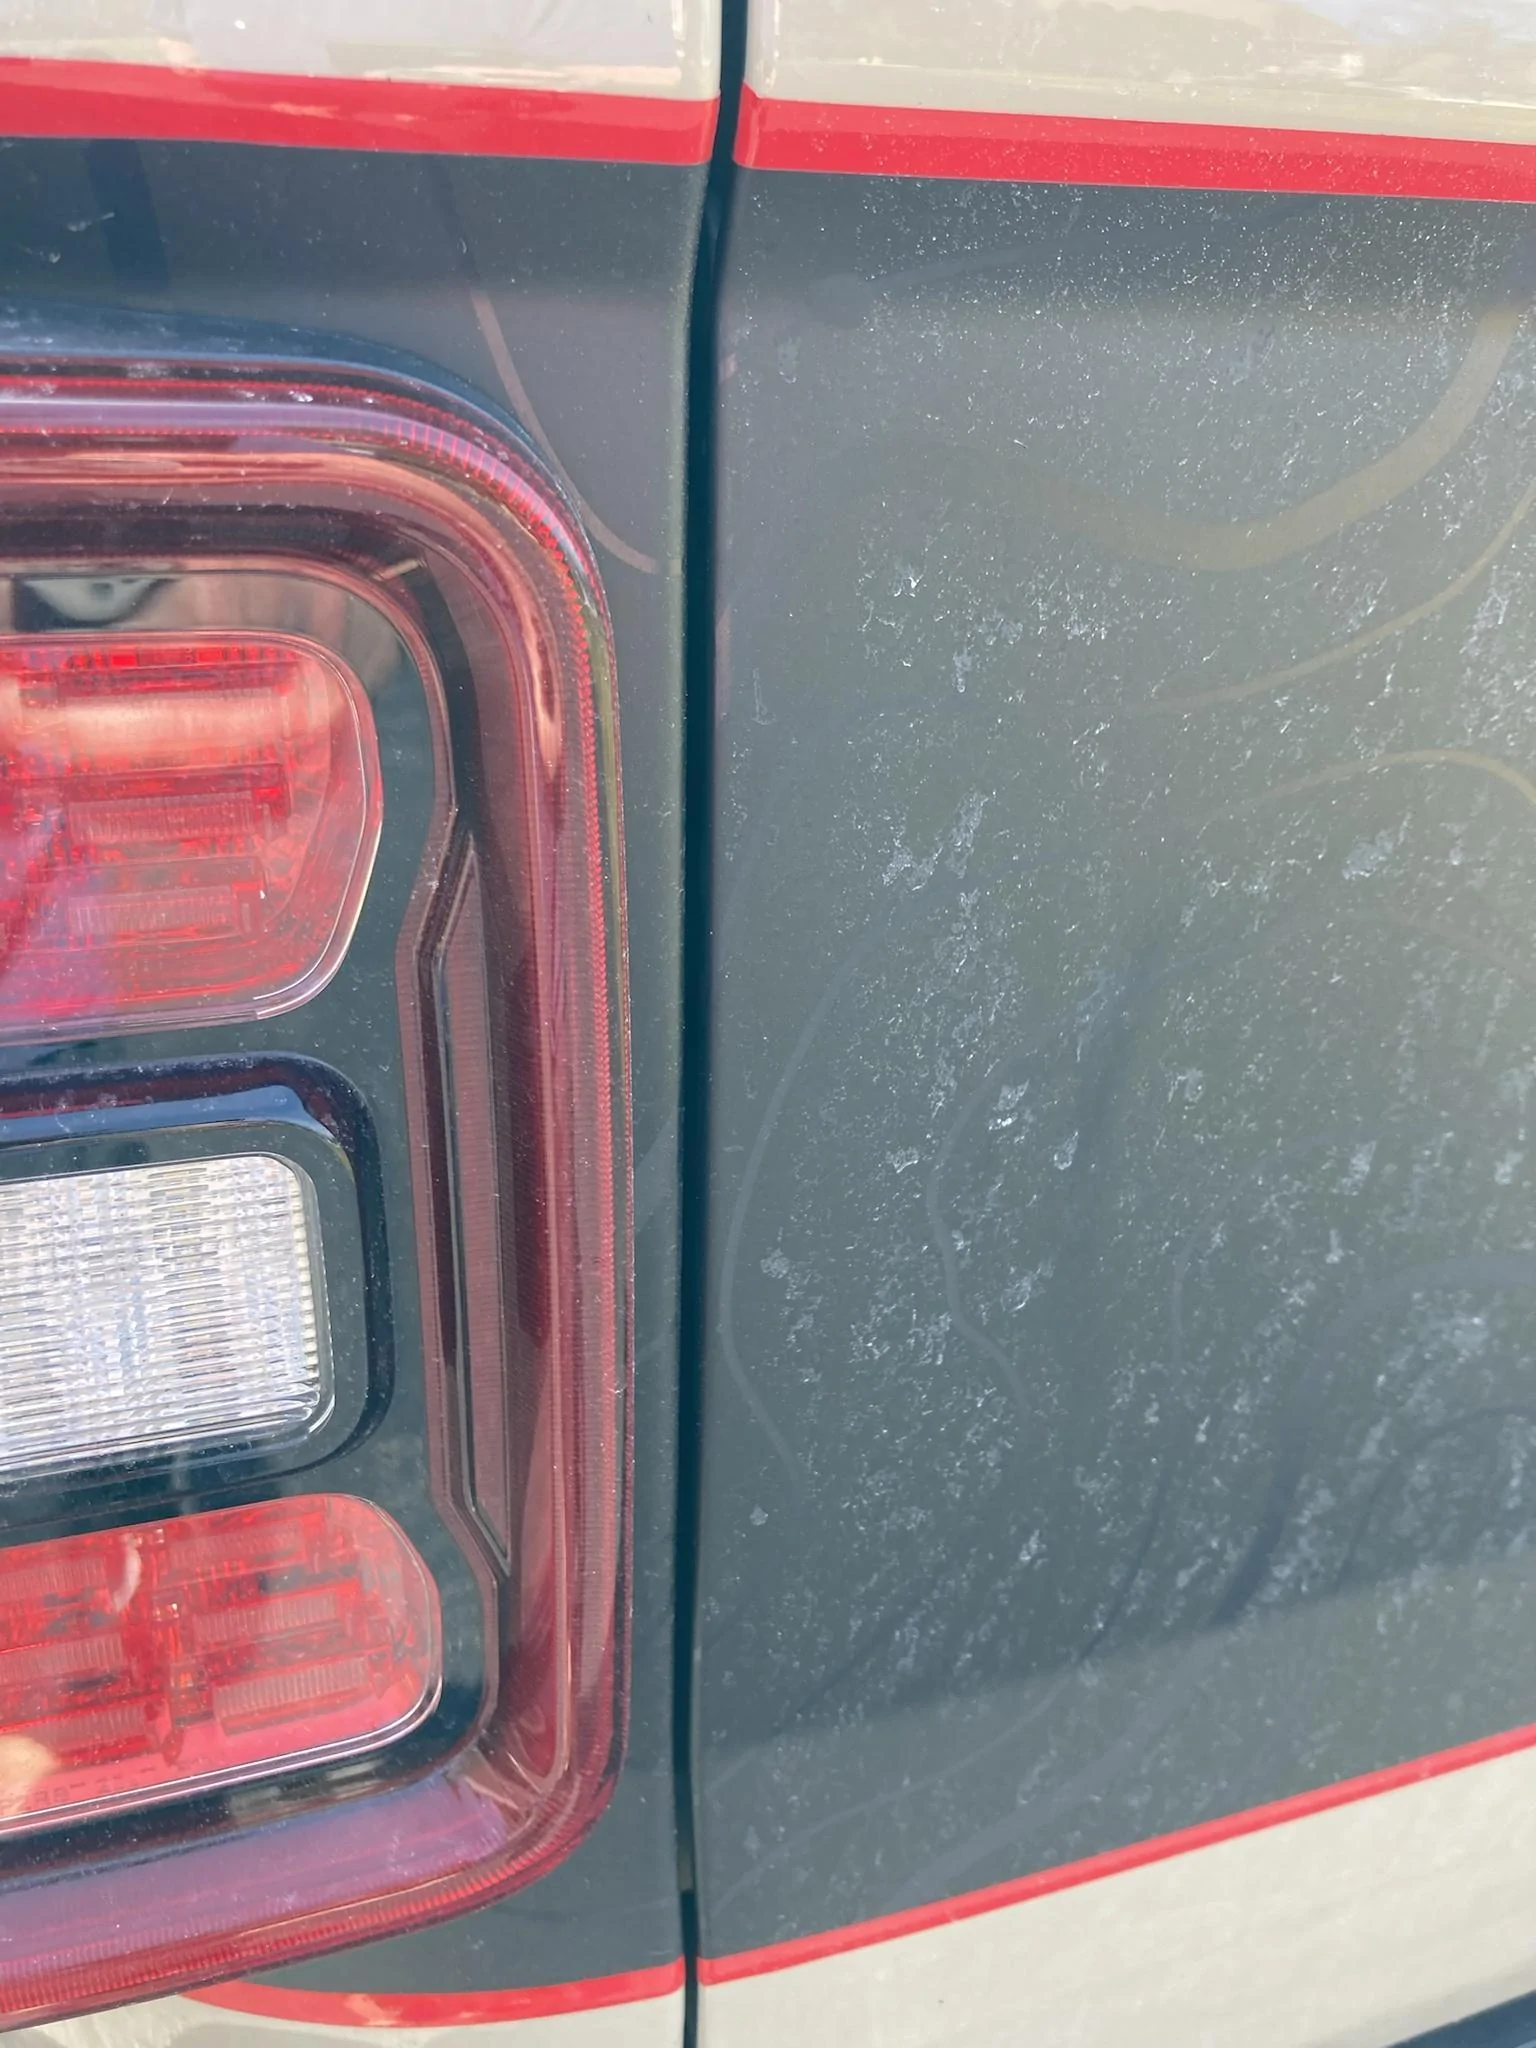
But it only wrapped around this much:

the other side, not as good... from the front, you can't see any gaps but at an angle, you can see some gobi
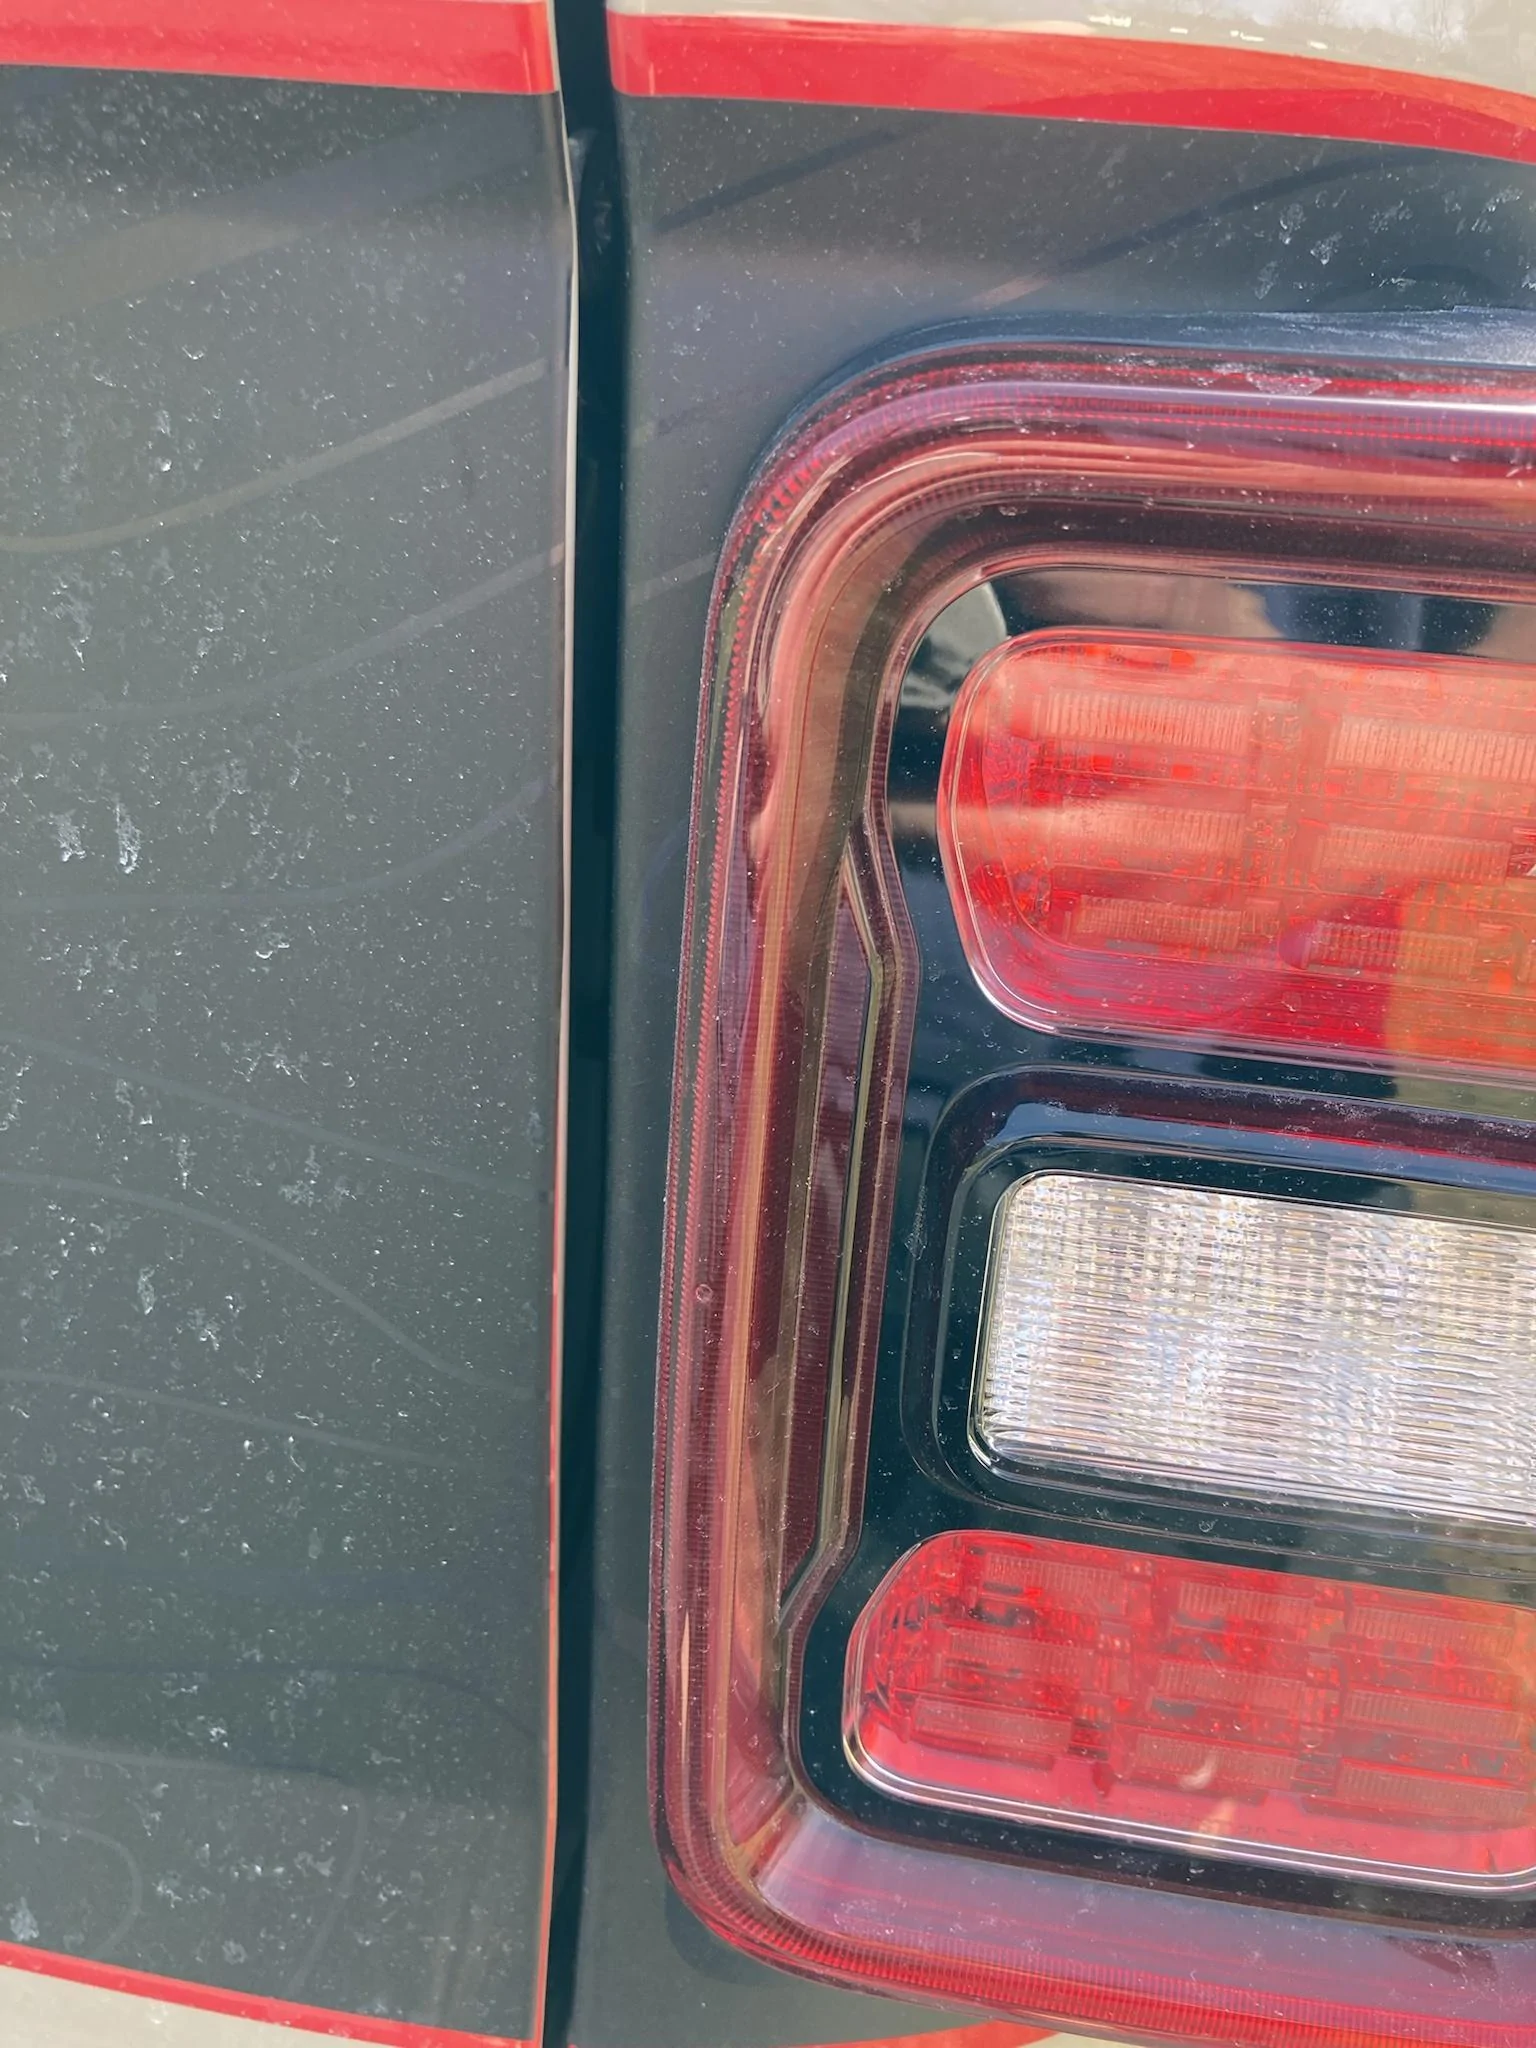
it wrapped around this much:

Just be aware of this when installing if you are doing the job. It wouldn;t have taken much more material to make this a non-issue.
On the corners, there was plenty of extra material.
View attachment 228462
View attachment 228463
The other sellers seem to provide more material for the talegate piece.
The camera was ok to wrap with the 3m topo because it is so easy to work with. I did it wet at first and messed it up, then i did it dry it was better. When heating to wrap behind, i heated it a tad to much and the vinyl ripped. I was able to lift and heat and make it serviceable. if I had another piece, I feel like I could do it well. I was told I would get a small piece of vinyl for the camera... there wasn't one, but because of the way PD cut the corner graphics, I could us the cut out piece from the center of the tail lights, so i had two tries! If you go with another vinyl company, ask for an extra piece of vinyl.
Now, I need to decide on the rear logo.
I don't mind the badgeless look, but I am sure at some point, the holes in the tailgate will show
I like the Hauk letters... but want to do something different. I really like the Heritage jeep logo... so this is the next project.
I converted a jpg to svg of the logo from the interwebs and uploaded into tinkercad and resized and re-aligned the letter spacing to give me some size options. I printed out pdfs so i can cut them out and decide on size before lazer cutting the logos, but I think 22" wide is the sweet spot
View attachment 228473
The orange version will probably be the right size to cover the holes in the tailgate. The red version is closer to the stock size logo.
The smaller dark blue version should be the right size to replace the logos on the front fenders to coordinate everything.
I need to finalize a design so I can get the logos cut.
I picked up 12"x12" 1/8" red acrylic for the base, I will laminate 1/16" gloss black acrylic on top. I need to pick up some Weldon #4 to do this, then a buddy will lazer cut the logos.
I got enough for two 12"x12" pieces of acrylic so i should have enough material if I make mistakes.
I am hoping for real subtle logos, the red should slightly poke out when viewed at an angle. If needed, I think I can rout a chamfer to expose more red. I am also wondering if I should order some 1/16th charcoal grey acrylic to use instead of the black,
Anyone have any thoughts?

Sponsored
Attachments
-
0 bytes Views: 0
-
0 bytes Views: 0
-
0 bytes Views: 0
-
0 bytes Views: 0
-
0 bytes Views: 0
-
0 bytes Views: 0
Last edited: