Sponsored
Ares - Build Thread

TheMirage
Active Member
After putting on my SmartCap, racks, and iKamper I‘m getting by on stock suspension but could use an upgrade to stiffen up the ride but have no clue what to do. Looking forward to your feedback.
OP
OP
TheHops
Well-Known Member
- Thread starter
- #153
Pretty much an identical situation on my end. The stock suspension has been sufficient, but does leave much to be desired with how heavy my rig is. My suspension is bone stock, with the exception of sumo springs in the rear, which were insanely helpful in keeping wallowing/sway to a minimum when loaded down.After putting on my SmartCap, racks, and iKamper I‘m getting by on stock suspension but could use an upgrade to stiffen up the ride but have no clue what to do. Looking forward to your feedback.
I've been trying to decide which way to go for probably two years now, and Clayton has always been at or near the top of my list, so I'm excited to implement this.
OP
OP
TheHops
Well-Known Member
- Thread starter
- #154
For quite some time now, I've been dealing with degraded signal due to my over-the-cab roof rack interfering with the stock sirius xm antenna. I finally got around to doing something about it, and I didn't really have any luck tracking down guidance online, so I figured I'd share my solution. This is specific to my set-up, which obviously has some aftermarket components involved, but the overall setup/routing should work for anyone else interested in doing this.
What I used:
Antenna: Tram 7754 Satellite Radio Antenna
Mount: Rago Fabrication Ditch Bracket Extension
Adapter: Fakra-SMB Adapter
I didn't want a tall antenna full-time on top of my rack, but I had to get it out in the open, so I decided on a mount near the hood. The issue is I had two pods on both ditch brackets already, so after a little research I came across these awesome little mounts by Rago Fabrication. They worked perfectly for my application, and I'll likely be using another one on the other side when I eventually incorporate a HAM setup. But, that's a post for another time...

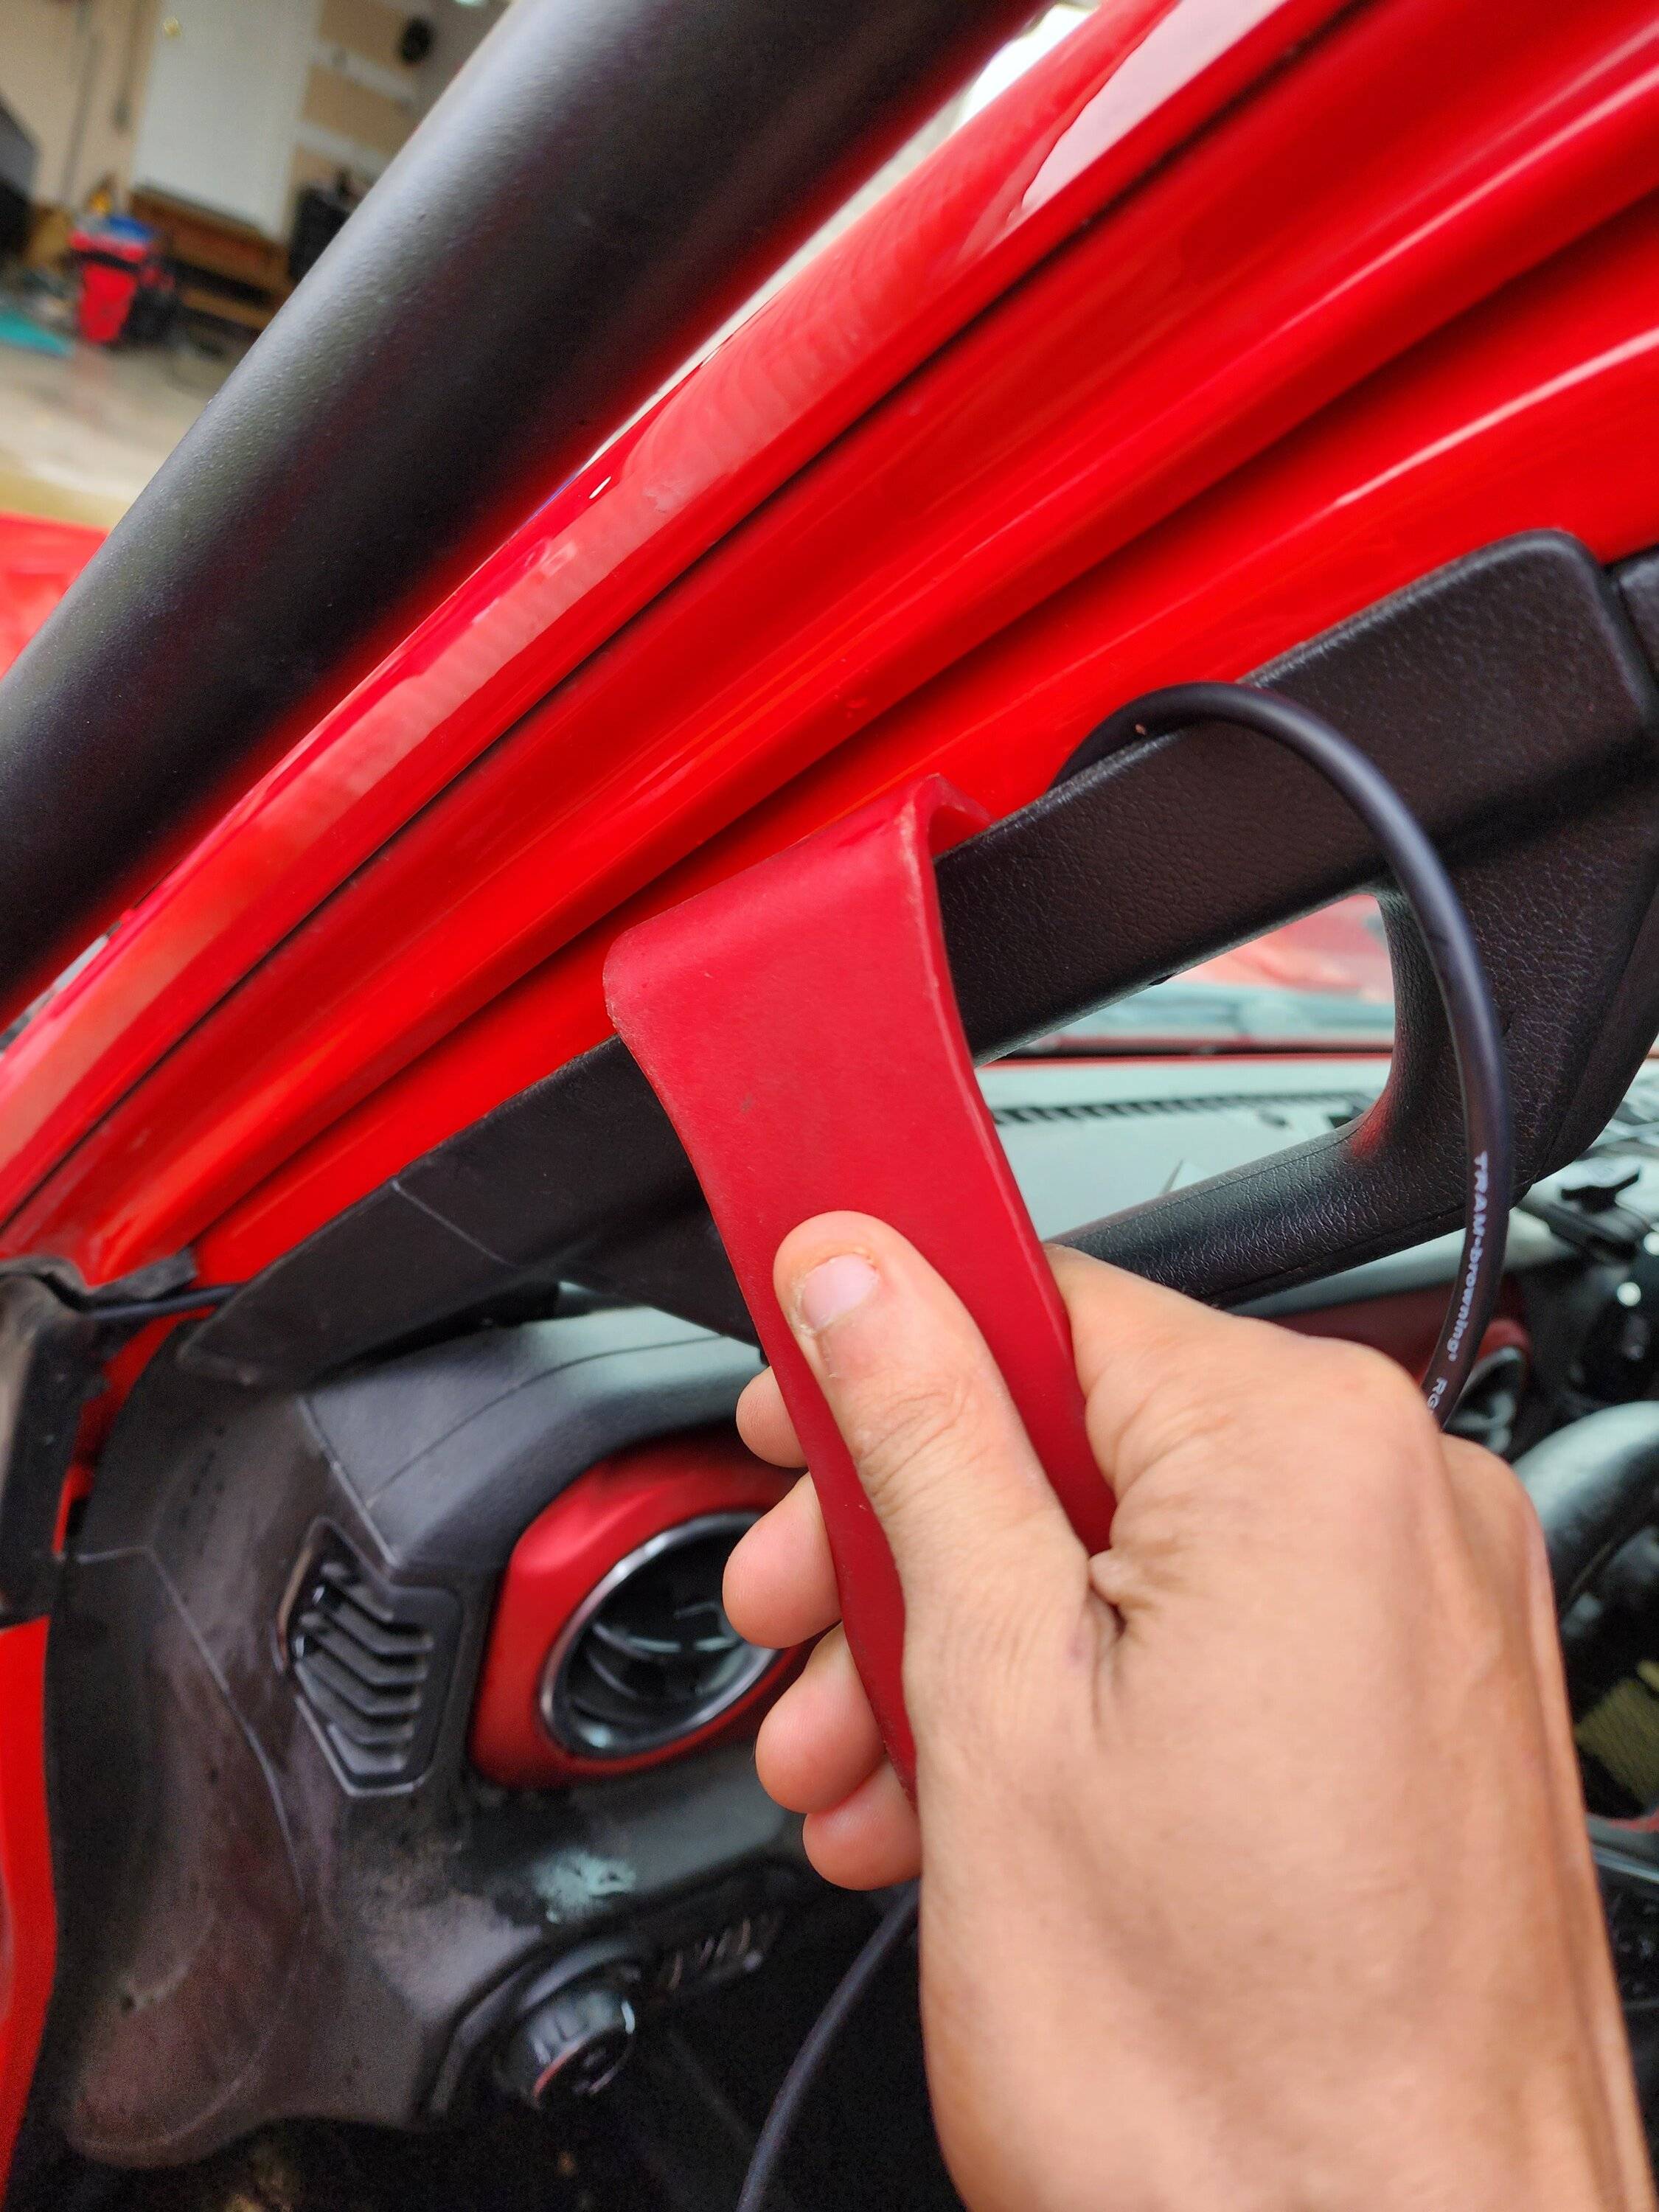
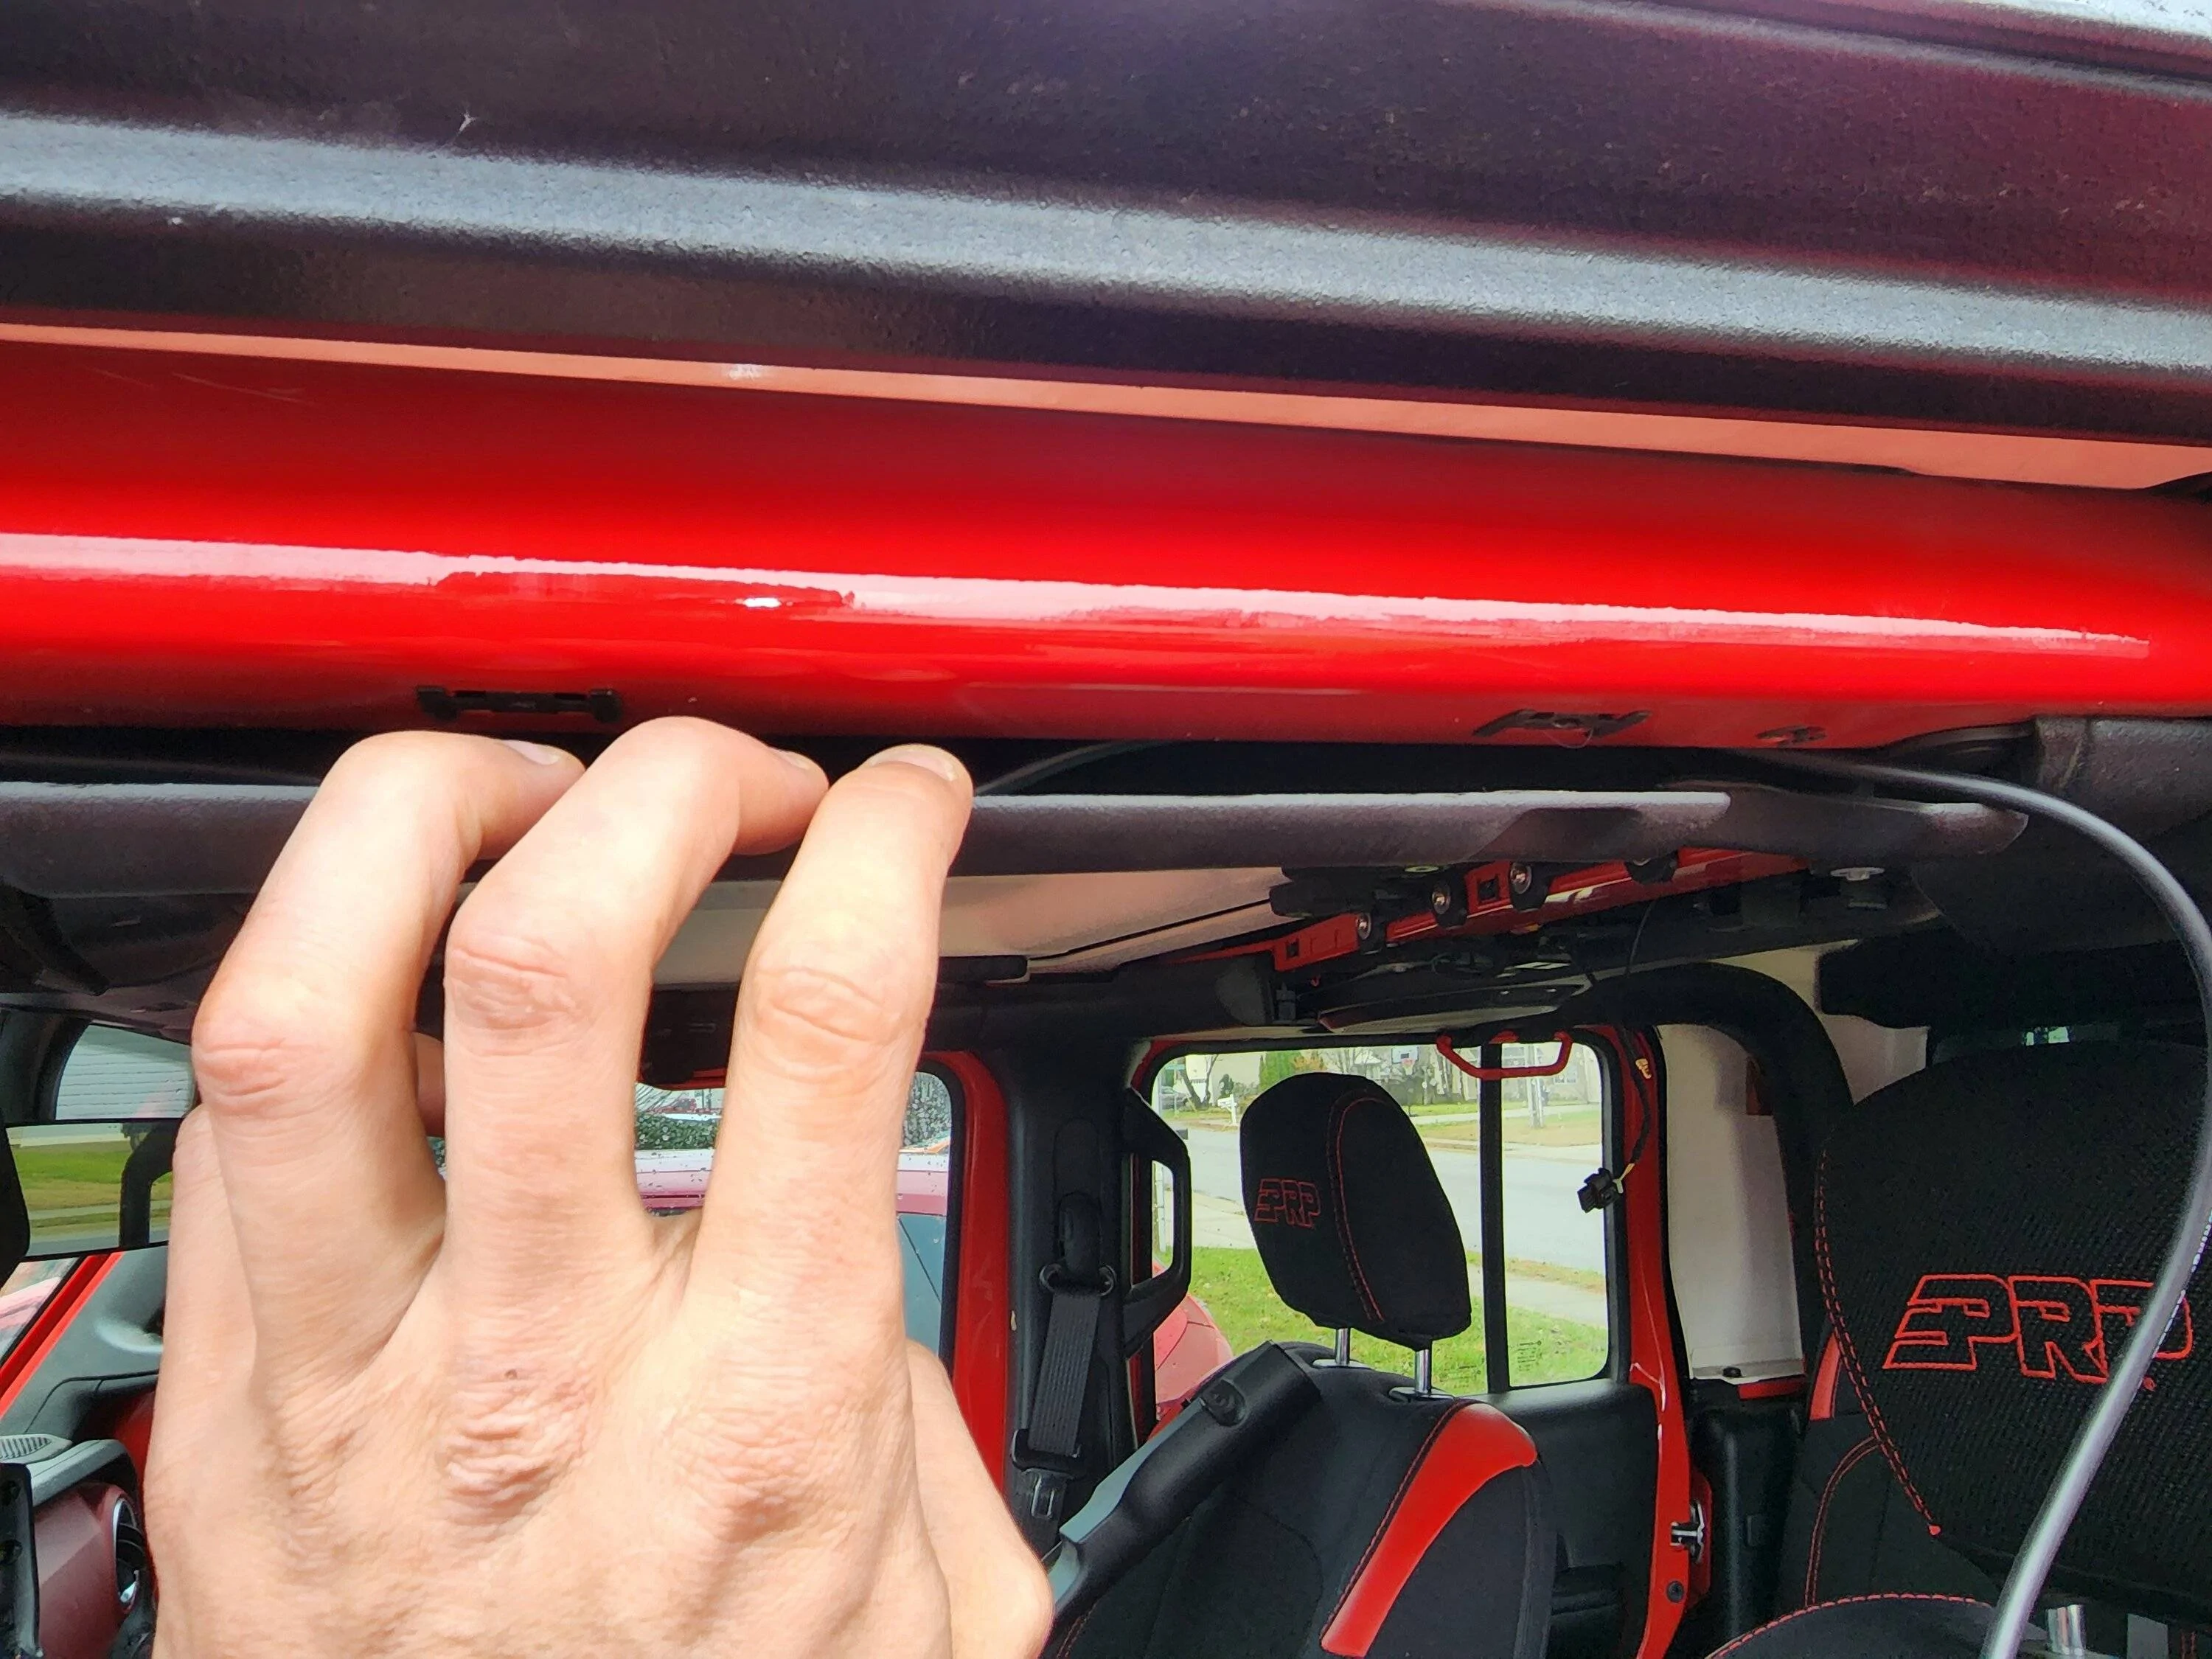
After mounting the extension bracket beneath my ditch light bracket on the far left, I routed the cable in through the cowl, and up along the driver's side windshield trim, making sure that it wasn't pinched anywhere. From there, I popped the driver's side overhead trim around the roll bar (held in place with pop clips and 4 small torx screws), the trim along the left side of the sound bar just above the driver's head rest, and dropped the sound bar trim (not the actual sound bar itself--not necessary for this) by popping out the clips and removing the three torx screws. The sound bar trim takes some convincing to get down. Just apply steady force and it will eventually come down.

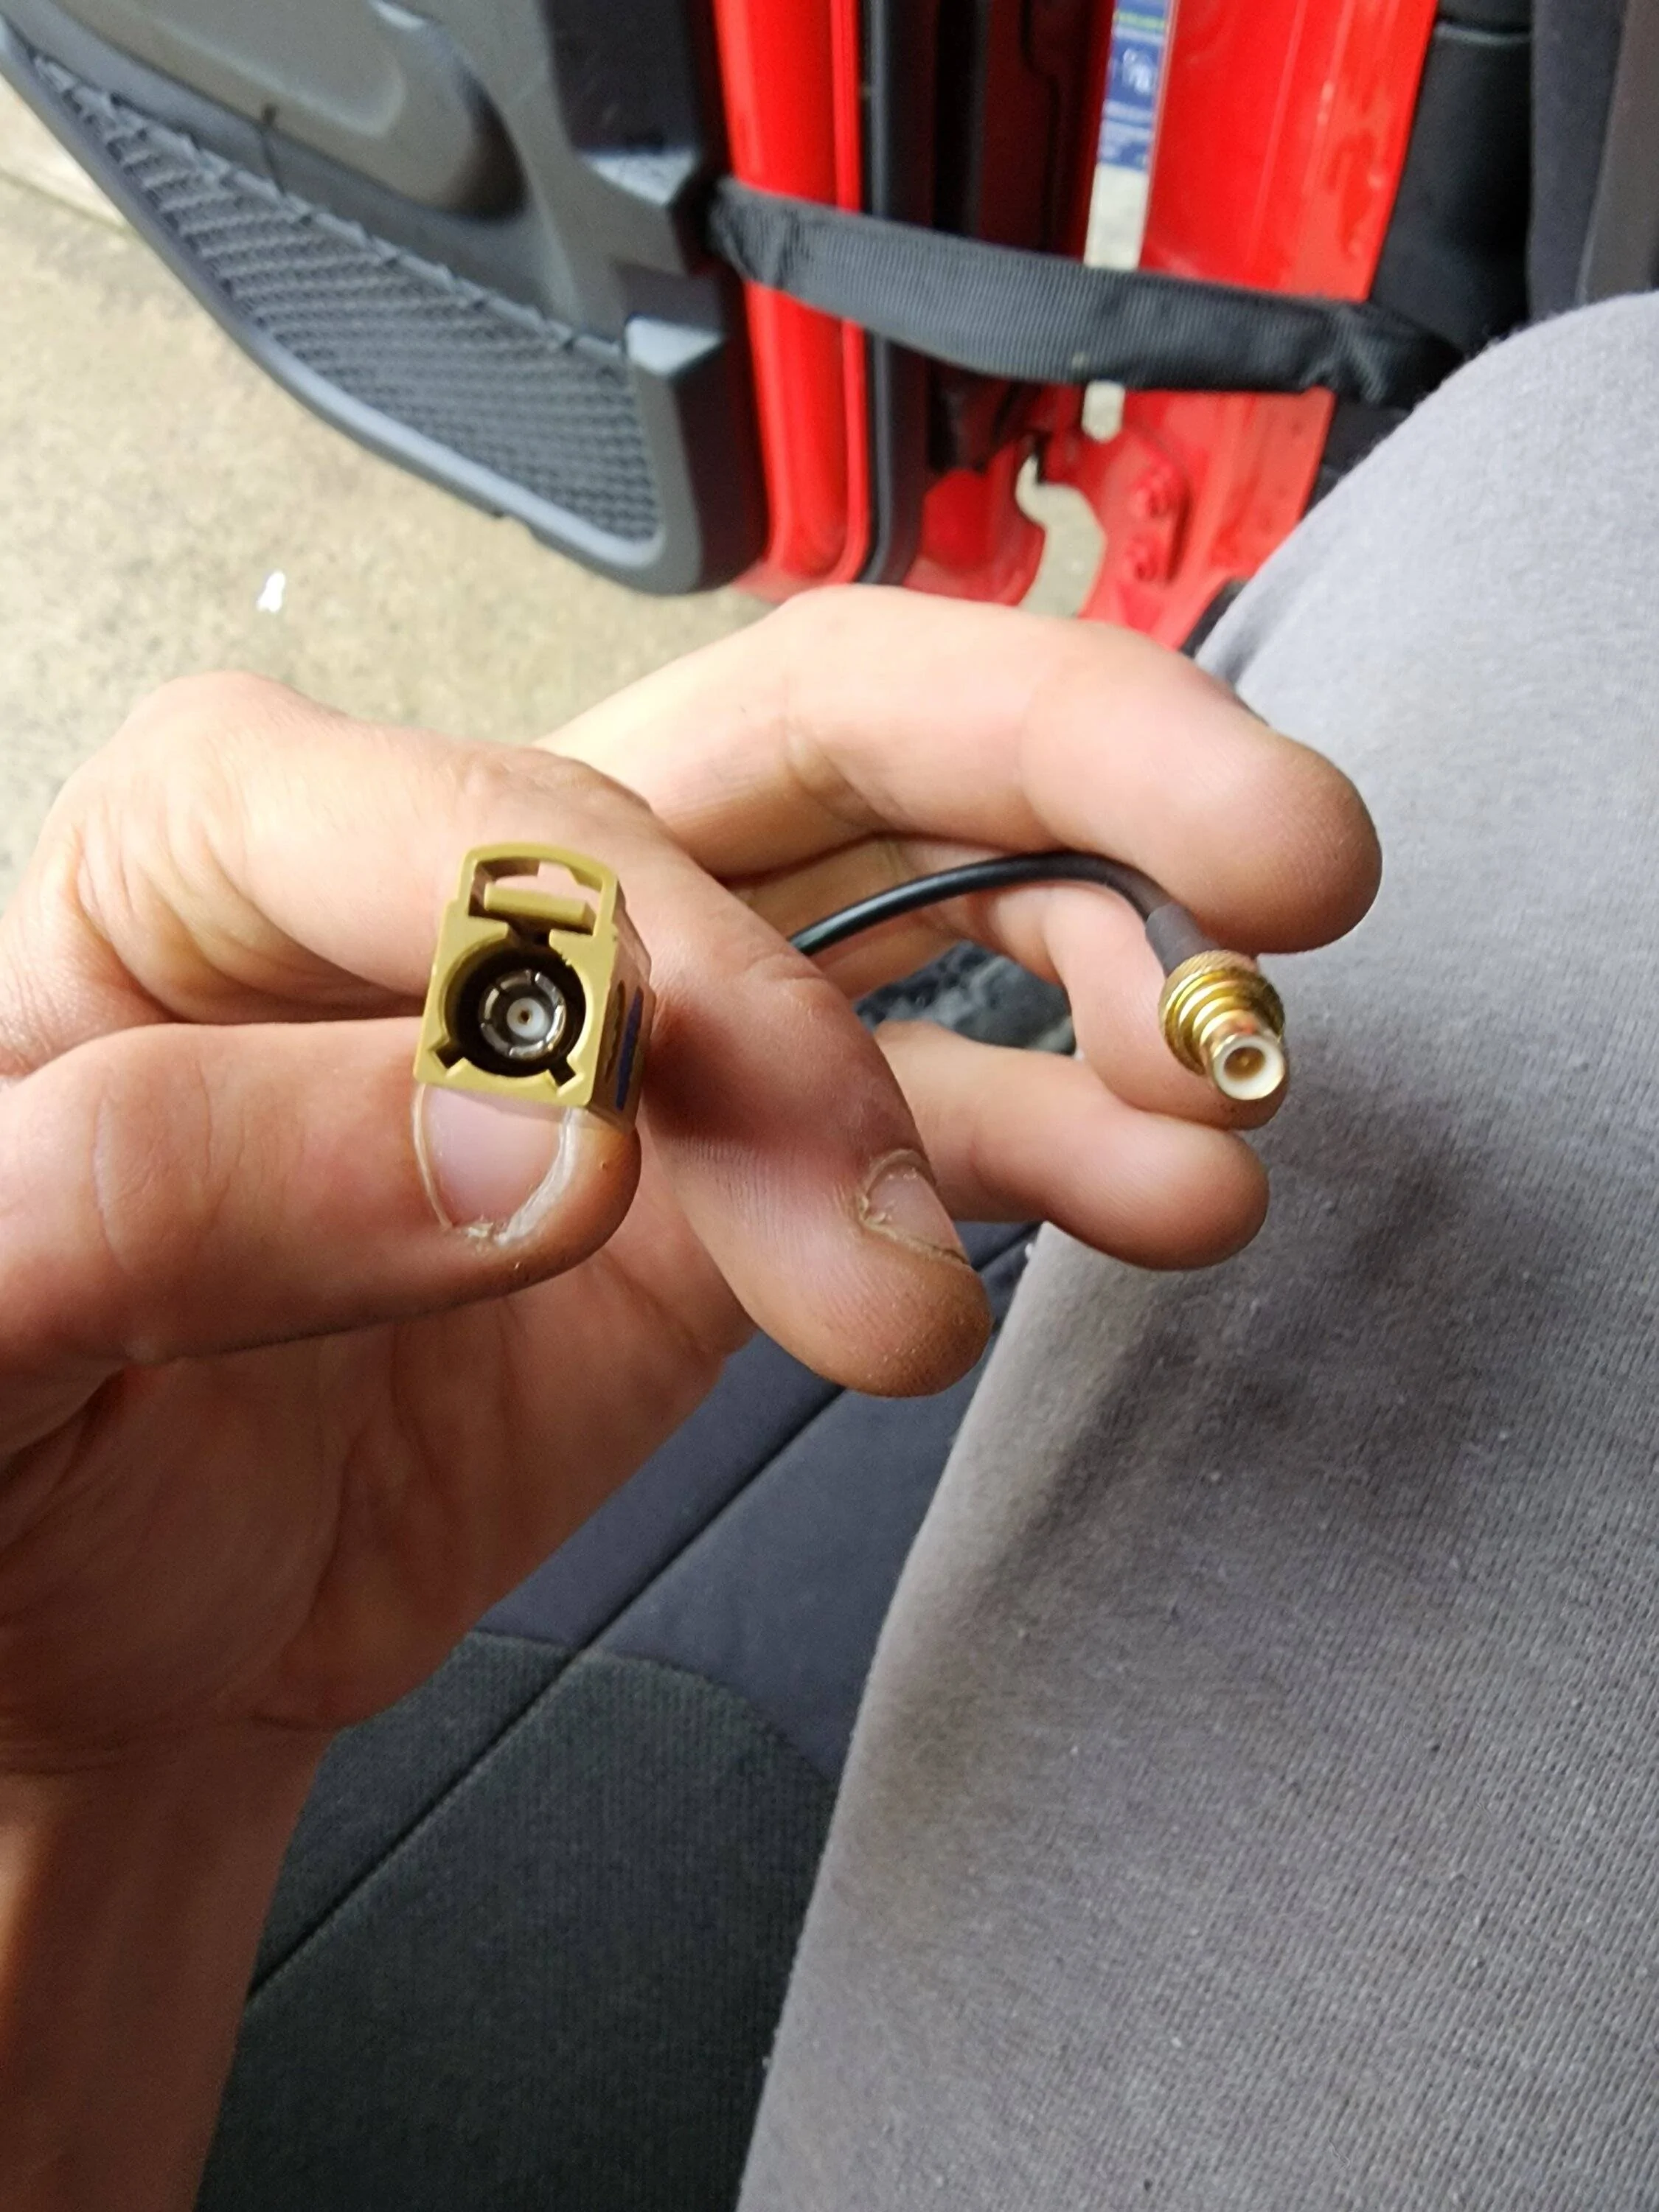
Once you get behind the sound bar trim, this is the plug that you're looking for:
The antenna includes 21' of cable, which is more than enough for this routing. I had to secure at least 8'-10' in the sound bar trim. Once you reach this plug, simply plug the aftermarket antenna cable into the adapter. Here's what the adapter looks like:
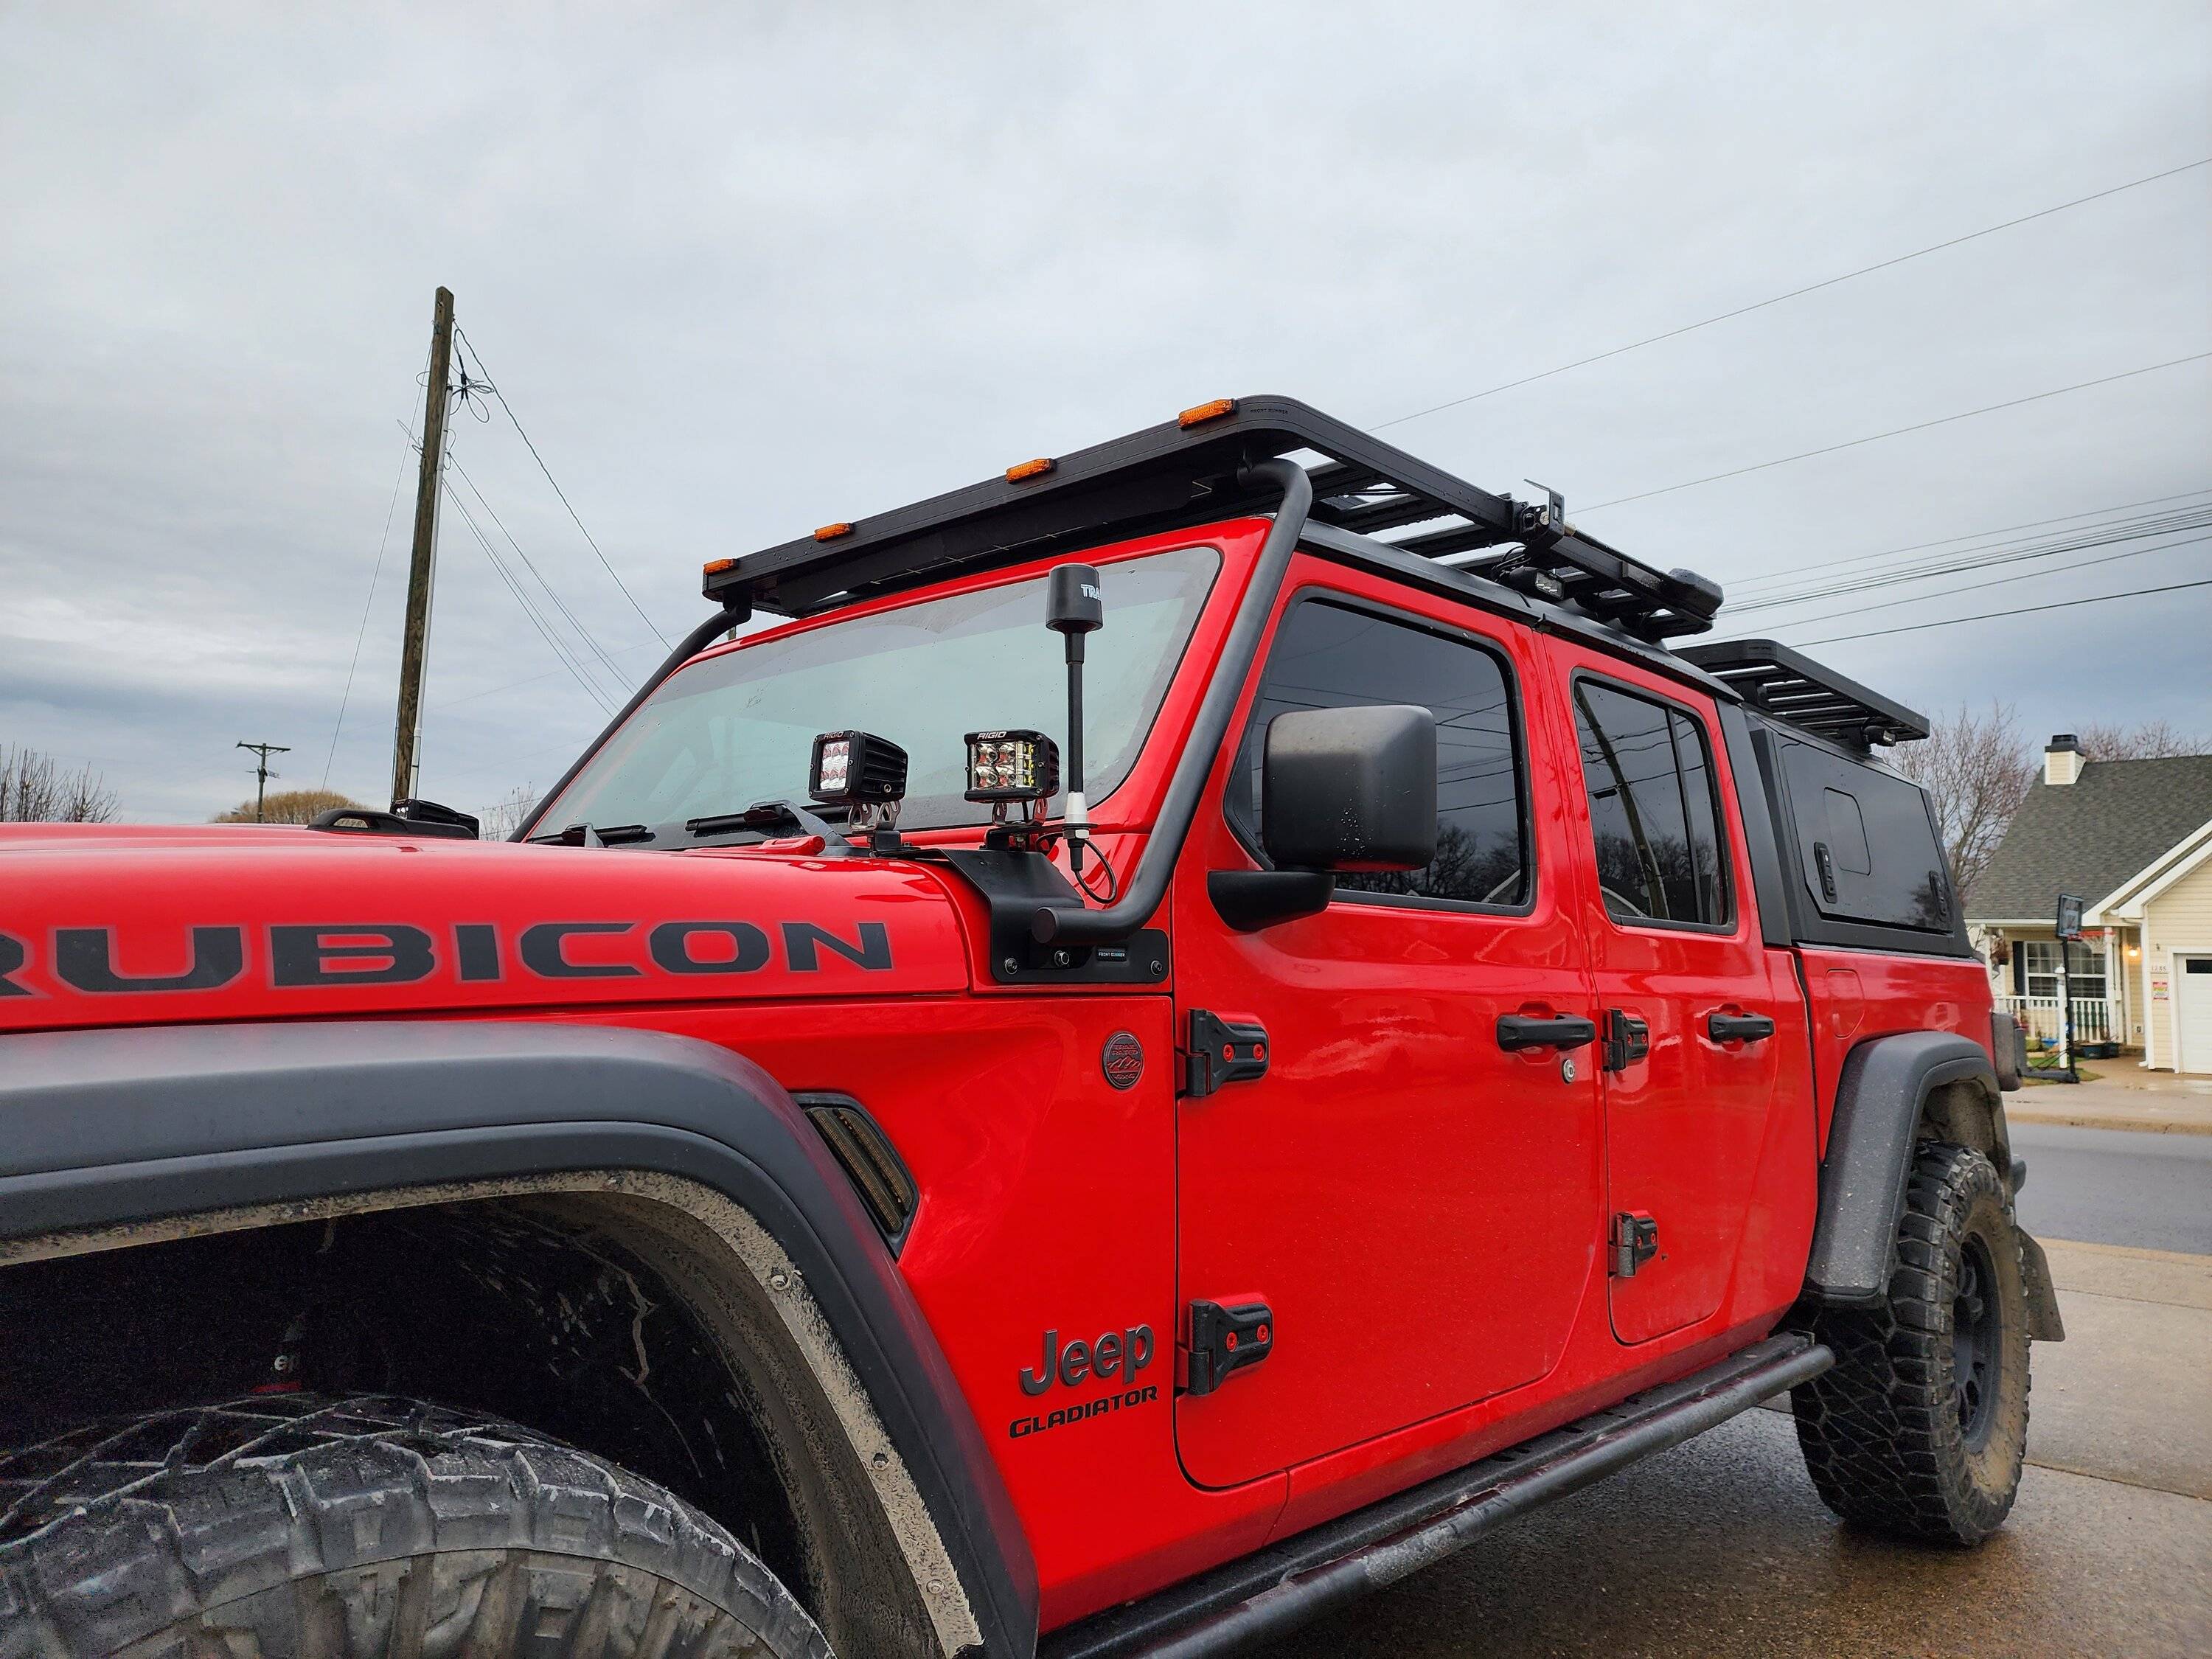
Plug the adapter into the stock harness (male end goes to new antenna, female end to stock harness), secure the excess, and replace the trim. Once I found the plug and the optimal routing to it, the rest was very simple. No more obstructed antenna! Reception is crystal clear. Here's the finished product from the outside:
I get that the look may not be for everyone, but this was done primarily for function. Having said that though...I kind of dig the look!
Hope the writeup helps someone! Feel free to post up any questions.
What I used:
Antenna: Tram 7754 Satellite Radio Antenna
Mount: Rago Fabrication Ditch Bracket Extension
Adapter: Fakra-SMB Adapter
I didn't want a tall antenna full-time on top of my rack, but I had to get it out in the open, so I decided on a mount near the hood. The issue is I had two pods on both ditch brackets already, so after a little research I came across these awesome little mounts by Rago Fabrication. They worked perfectly for my application, and I'll likely be using another one on the other side when I eventually incorporate a HAM setup. But, that's a post for another time...

After mounting the extension bracket beneath my ditch light bracket on the far left, I routed the cable in through the cowl, and up along the driver's side windshield trim, making sure that it wasn't pinched anywhere. From there, I popped the driver's side overhead trim around the roll bar (held in place with pop clips and 4 small torx screws), the trim along the left side of the sound bar just above the driver's head rest, and dropped the sound bar trim (not the actual sound bar itself--not necessary for this) by popping out the clips and removing the three torx screws. The sound bar trim takes some convincing to get down. Just apply steady force and it will eventually come down.
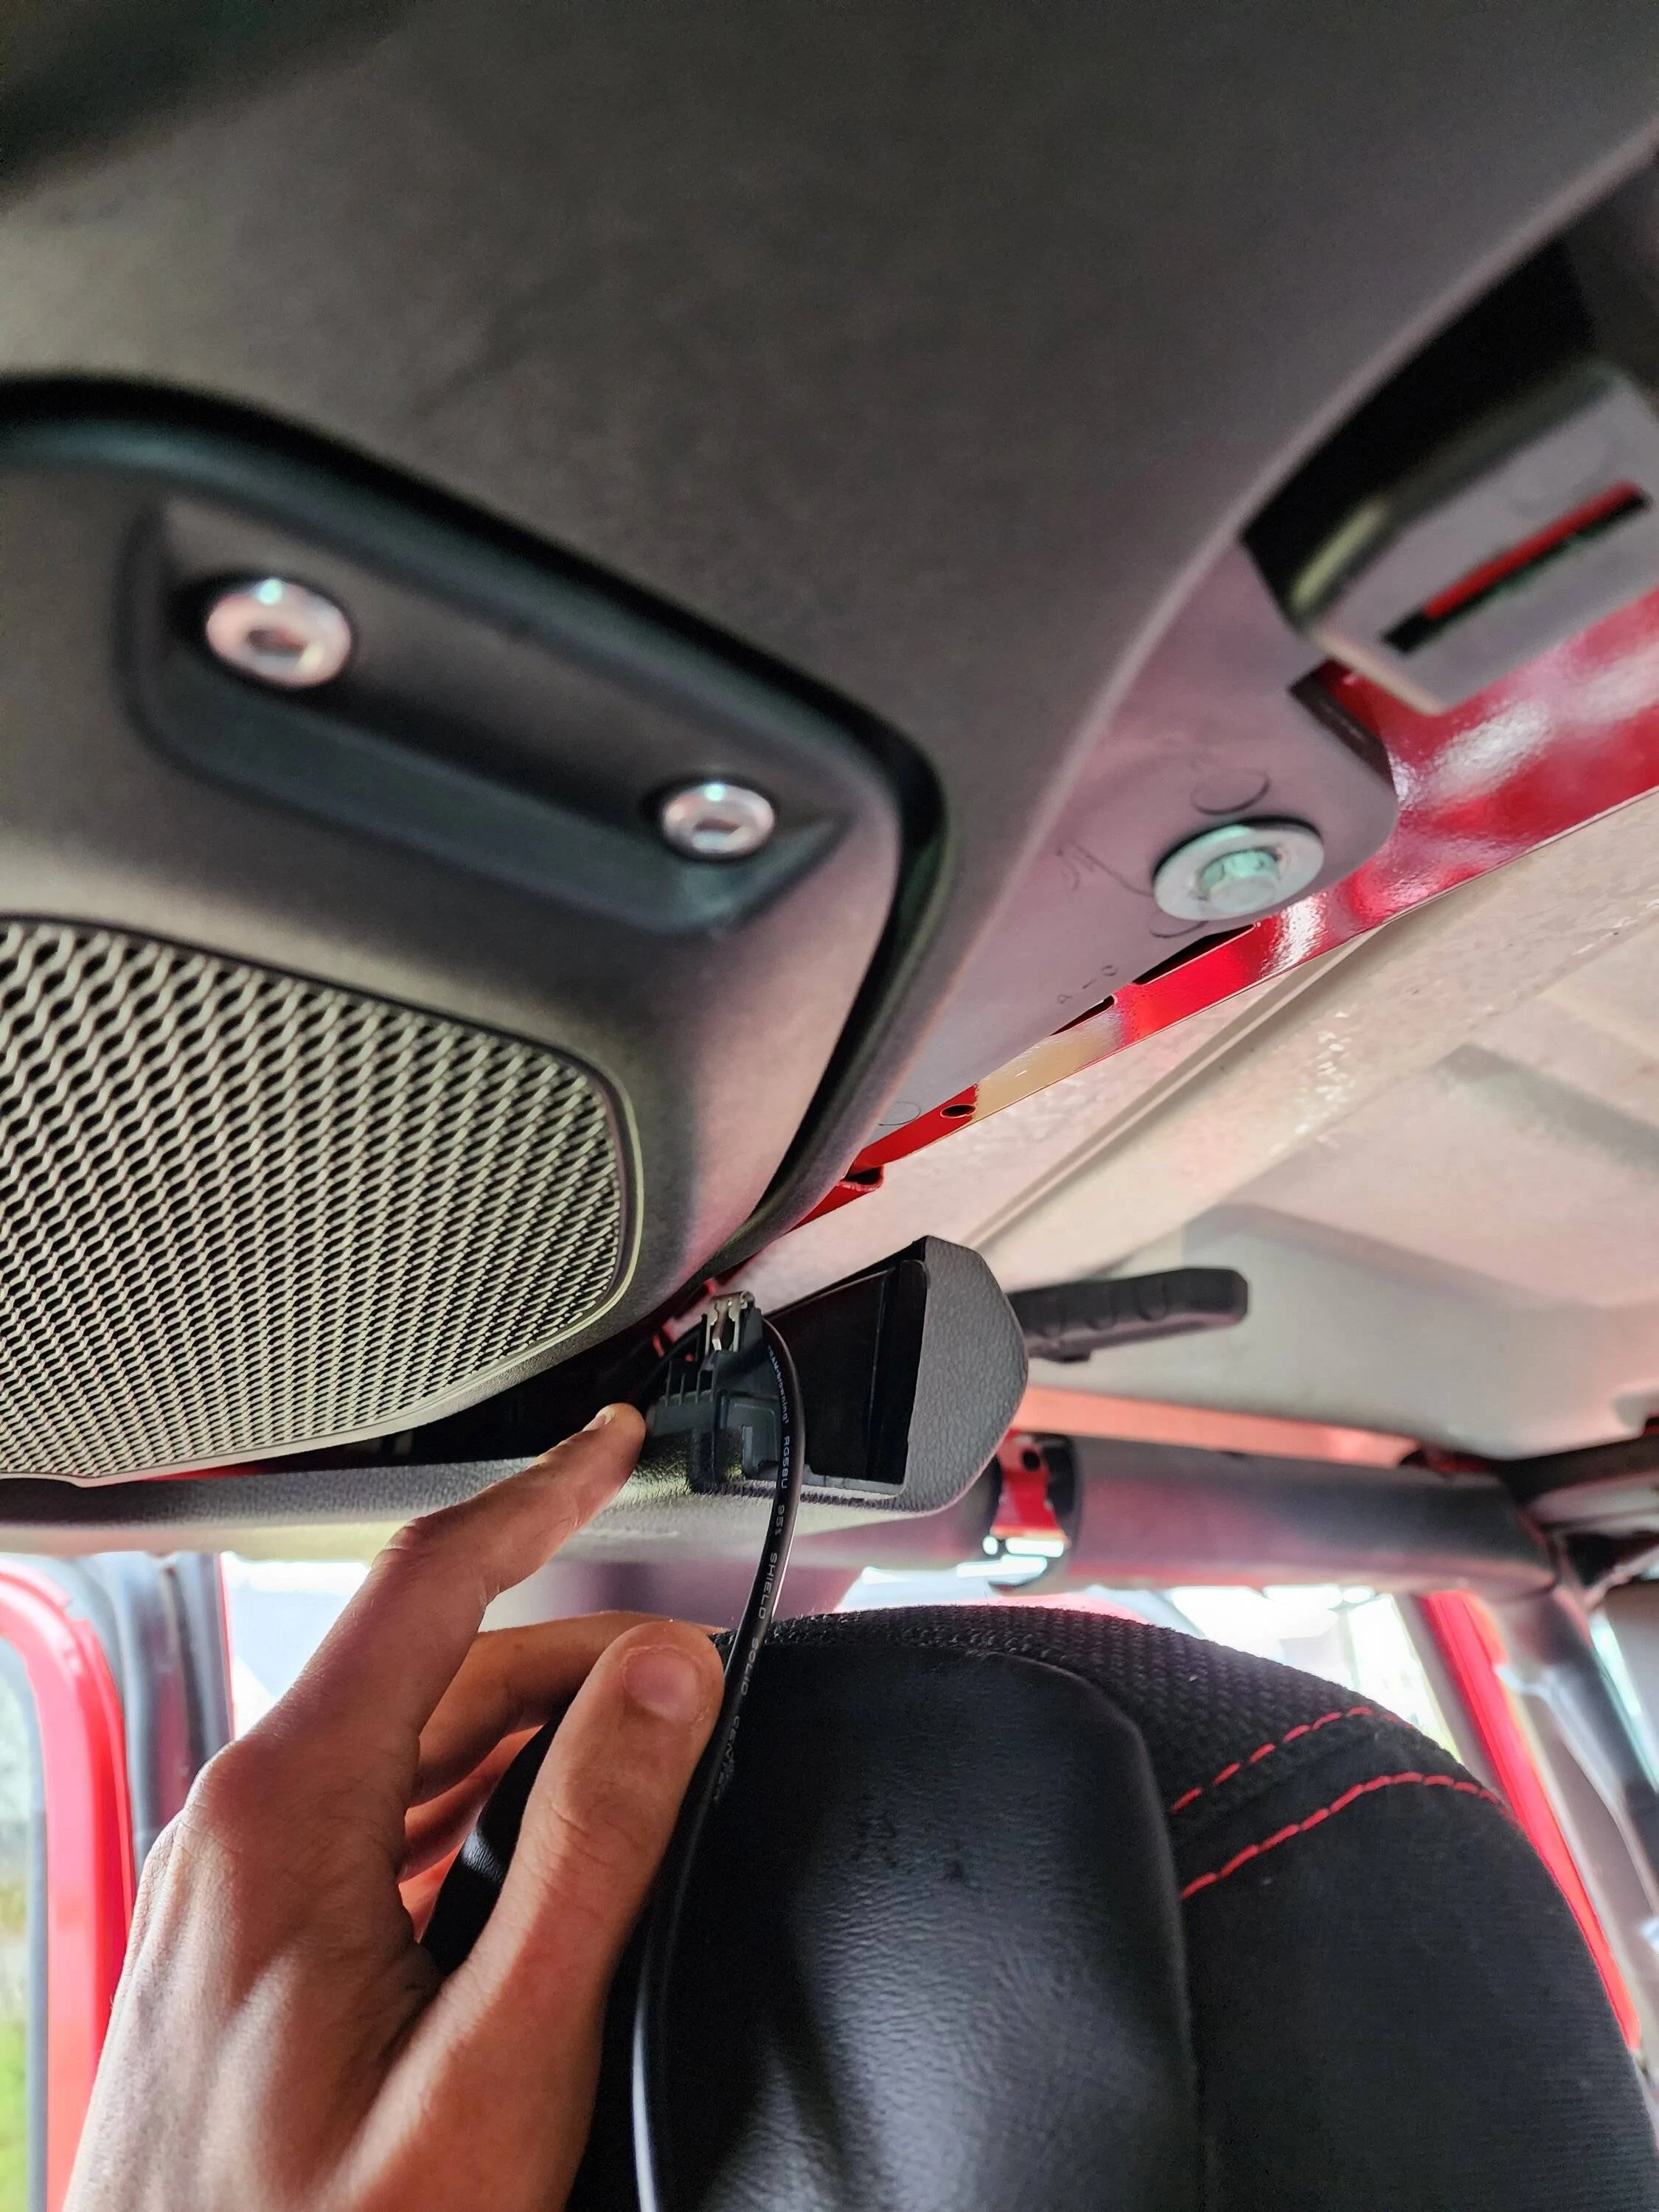
Once you get behind the sound bar trim, this is the plug that you're looking for:
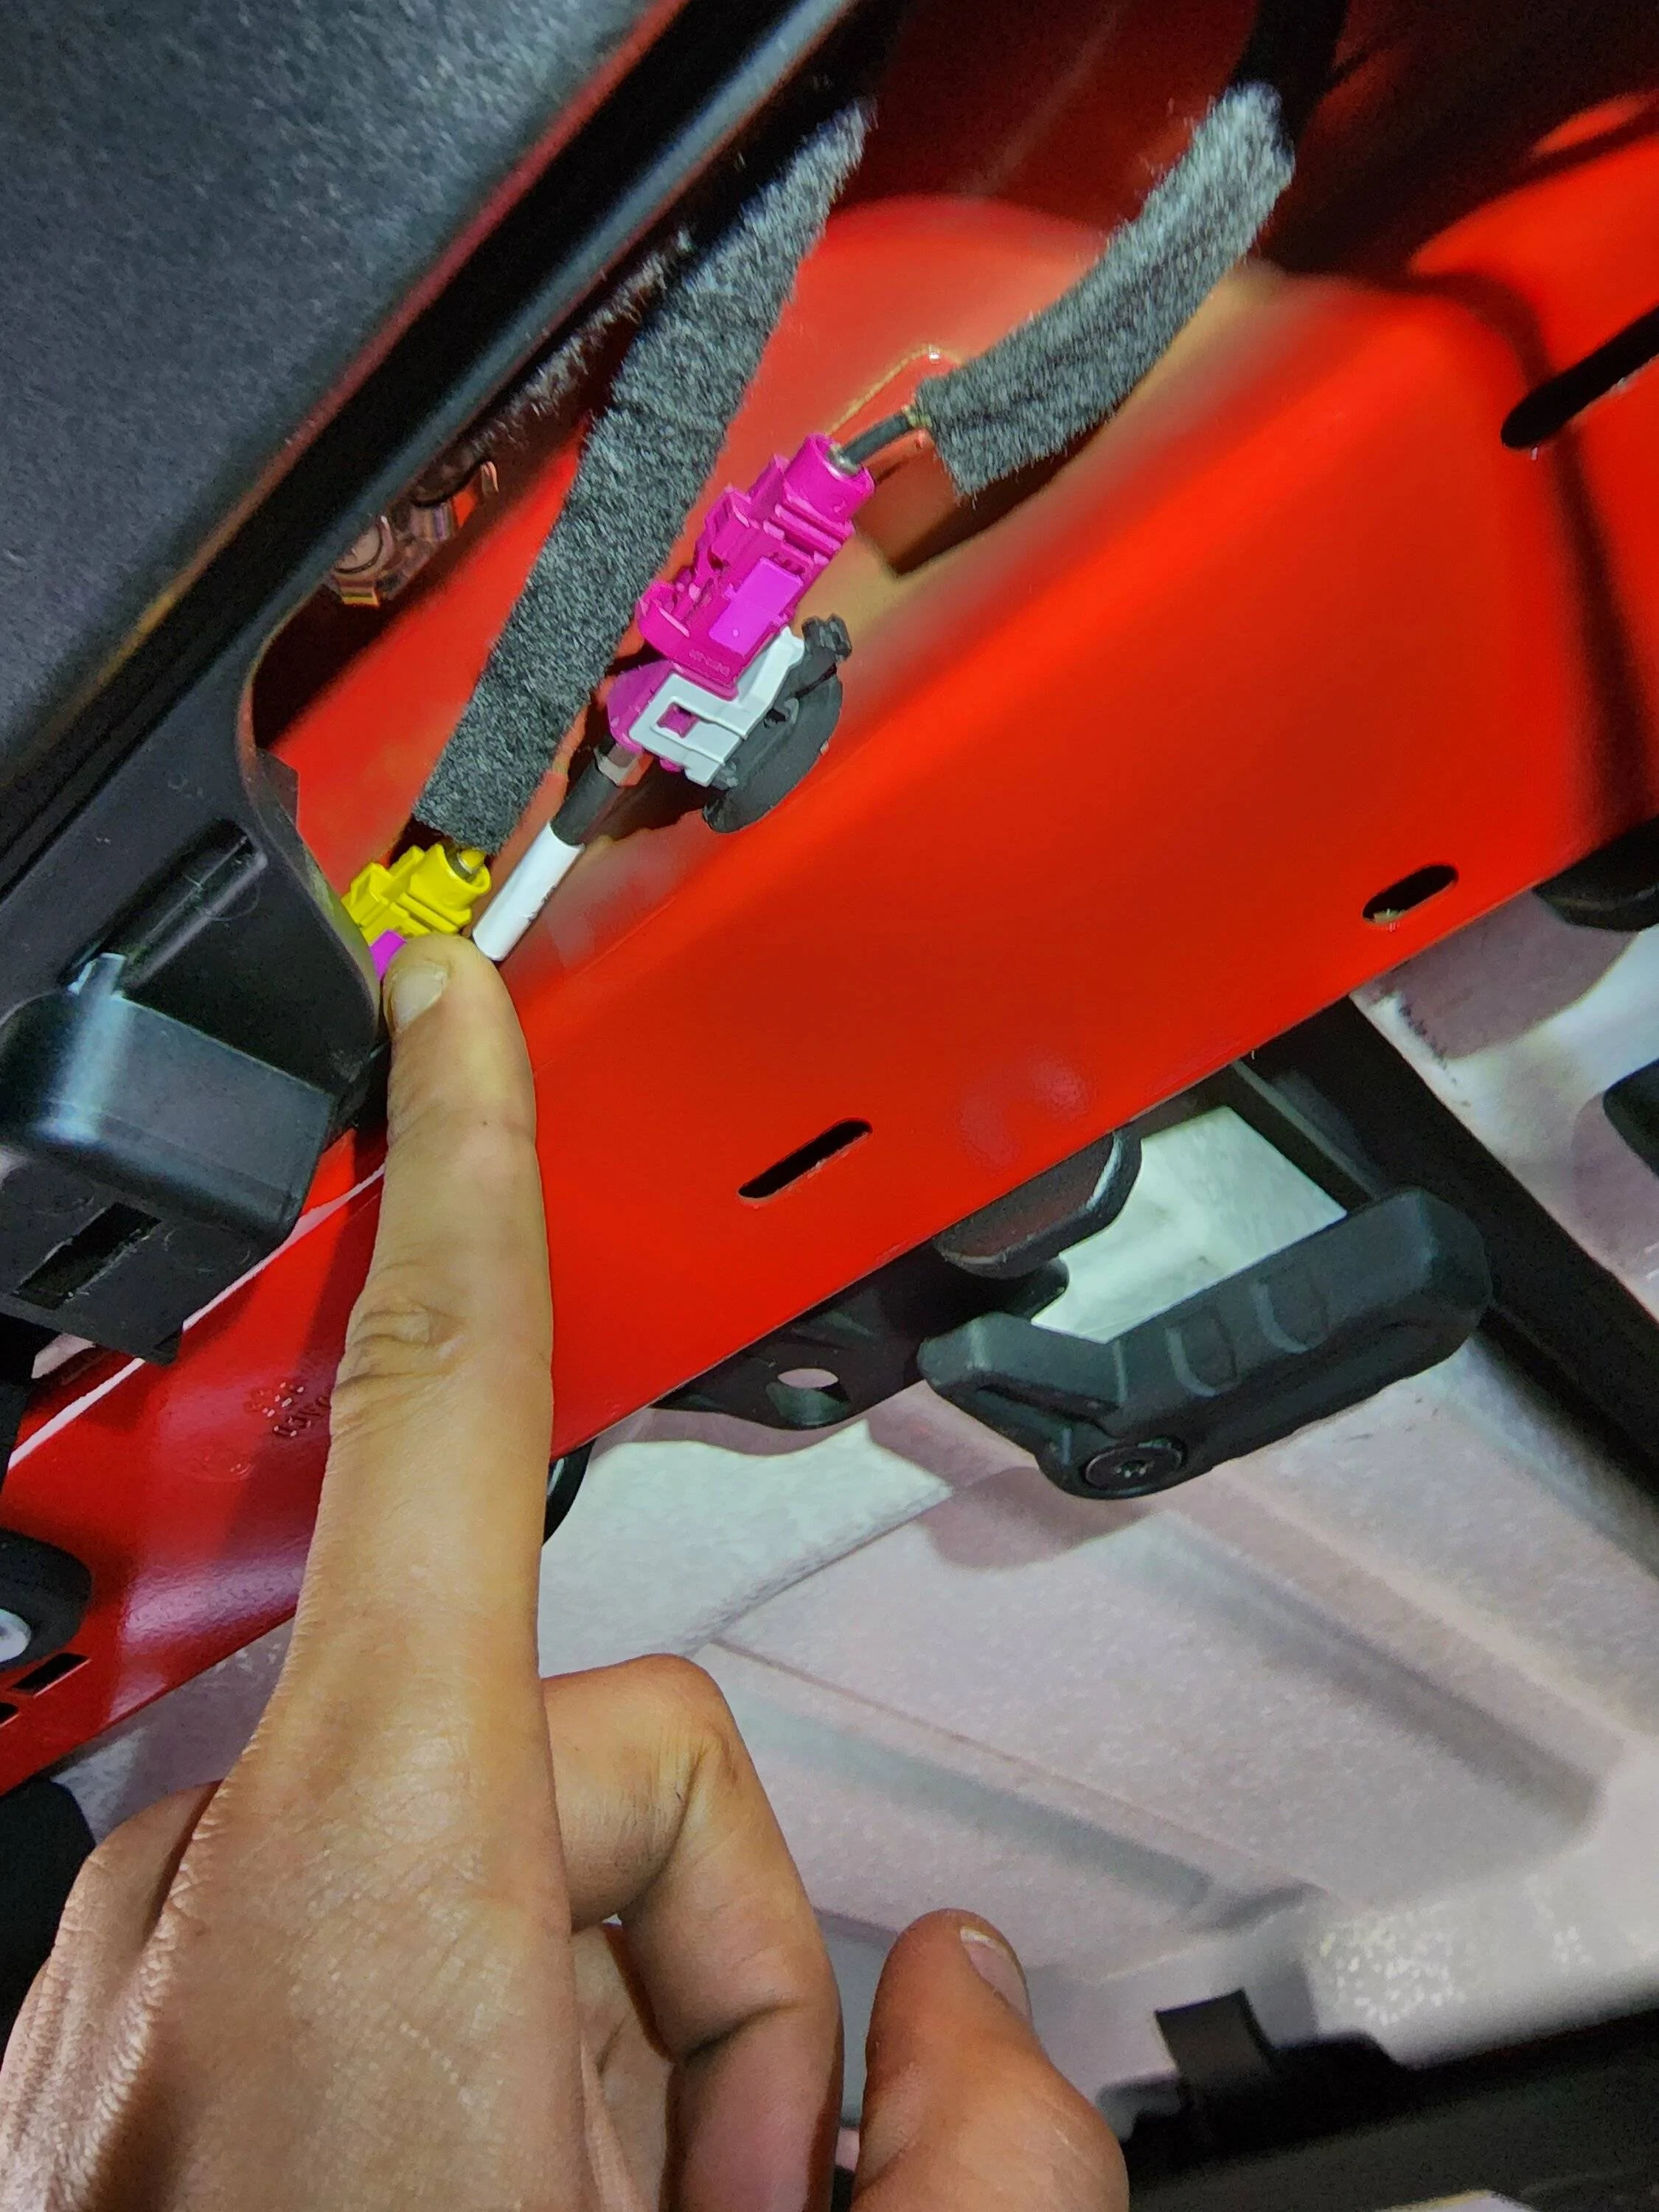
The antenna includes 21' of cable, which is more than enough for this routing. I had to secure at least 8'-10' in the sound bar trim. Once you reach this plug, simply plug the aftermarket antenna cable into the adapter. Here's what the adapter looks like:
Plug the adapter into the stock harness (male end goes to new antenna, female end to stock harness), secure the excess, and replace the trim. Once I found the plug and the optimal routing to it, the rest was very simple. No more obstructed antenna! Reception is crystal clear. Here's the finished product from the outside:
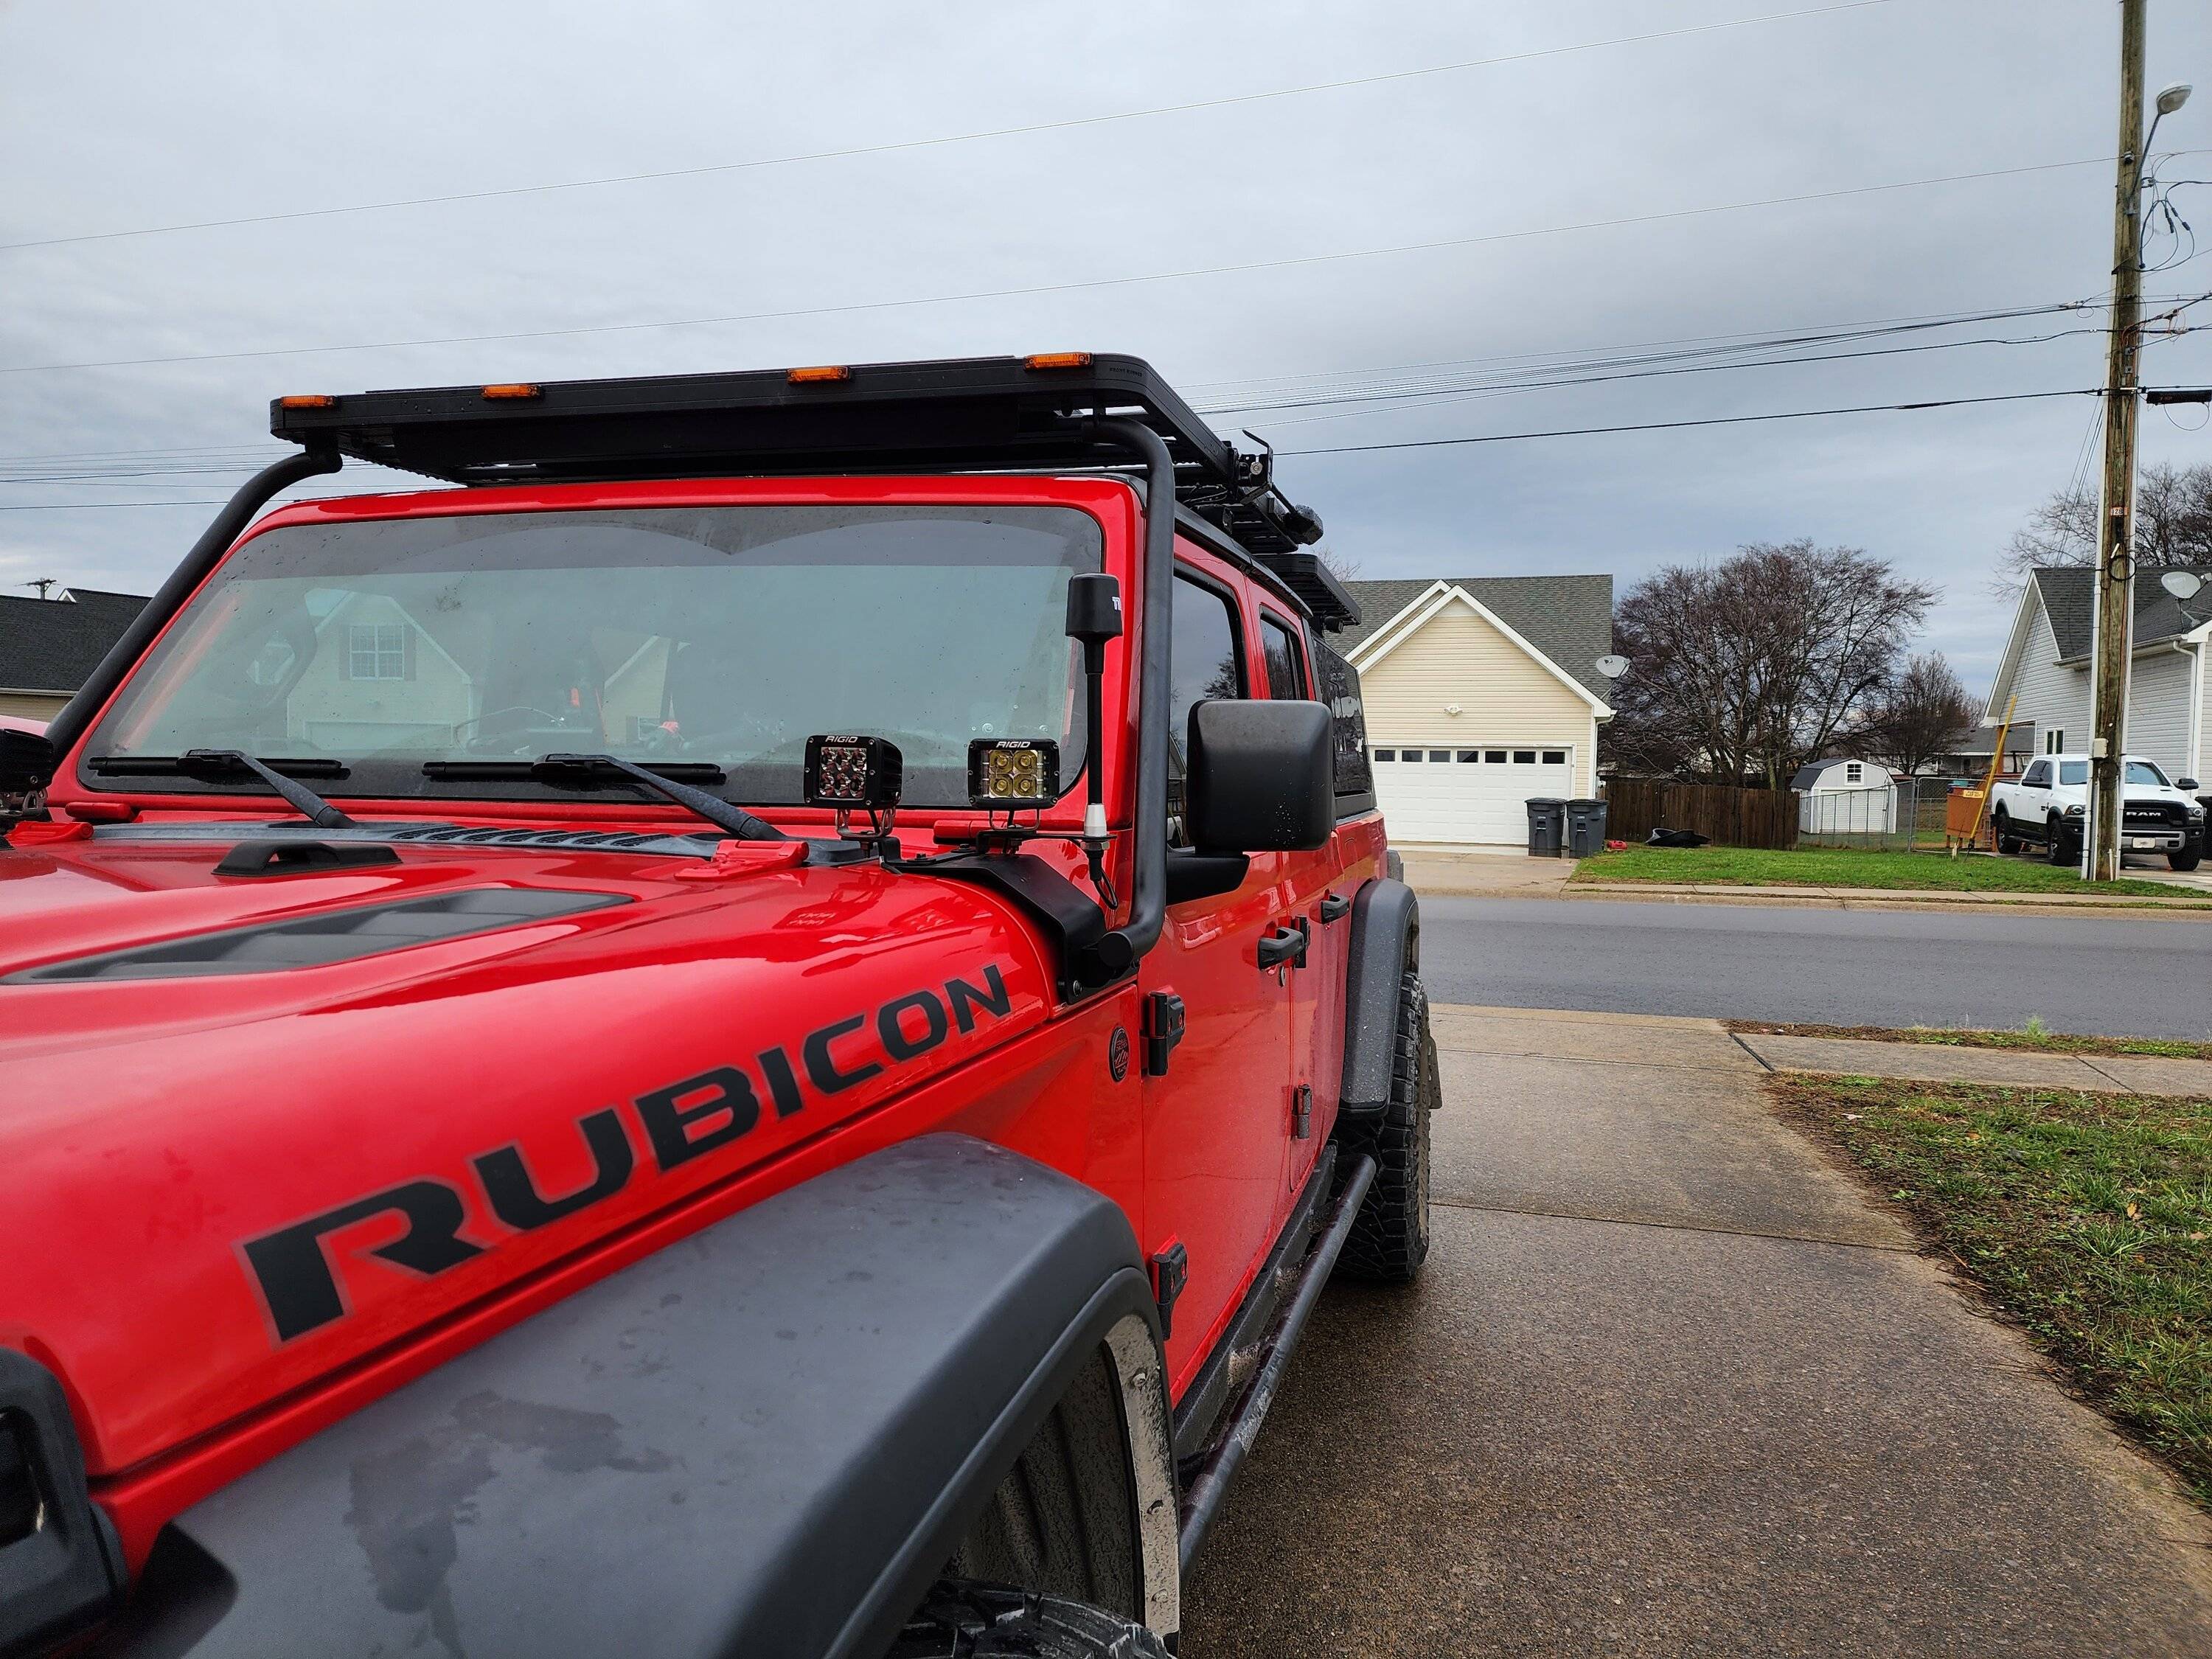
I get that the look may not be for everyone, but this was done primarily for function. Having said that though...I kind of dig the look!
Hope the writeup helps someone! Feel free to post up any questions.
Last edited:
OP
OP
TheHops
Well-Known Member
- Thread starter
- #155
Not much here in the way of the "build," but I did snag a great new addition to the camp gear over black friday. Can't wait to get out and put this grill through its paces. If you're into this kind of gear, feel free to check out my quick unboxing/impressions over on the youtubez.
Sponsored
TheMirage
Active Member
Just got this as well this BF minus the pot and pan version.
Picked up this hose to make connections a little easier but I keep the brass one in the bag just in case.
https://www.campchef.com/mountain-series-bulk-tank-hose-&-regulator-|-camp-chef/CC-MS40-6R.html
Picked up this hose to make connections a little easier but I keep the brass one in the bag just in case.
https://www.campchef.com/mountain-series-bulk-tank-hose-&-regulator-|-camp-chef/CC-MS40-6R.html
OP
OP
TheHops
Well-Known Member
- Thread starter
- #157
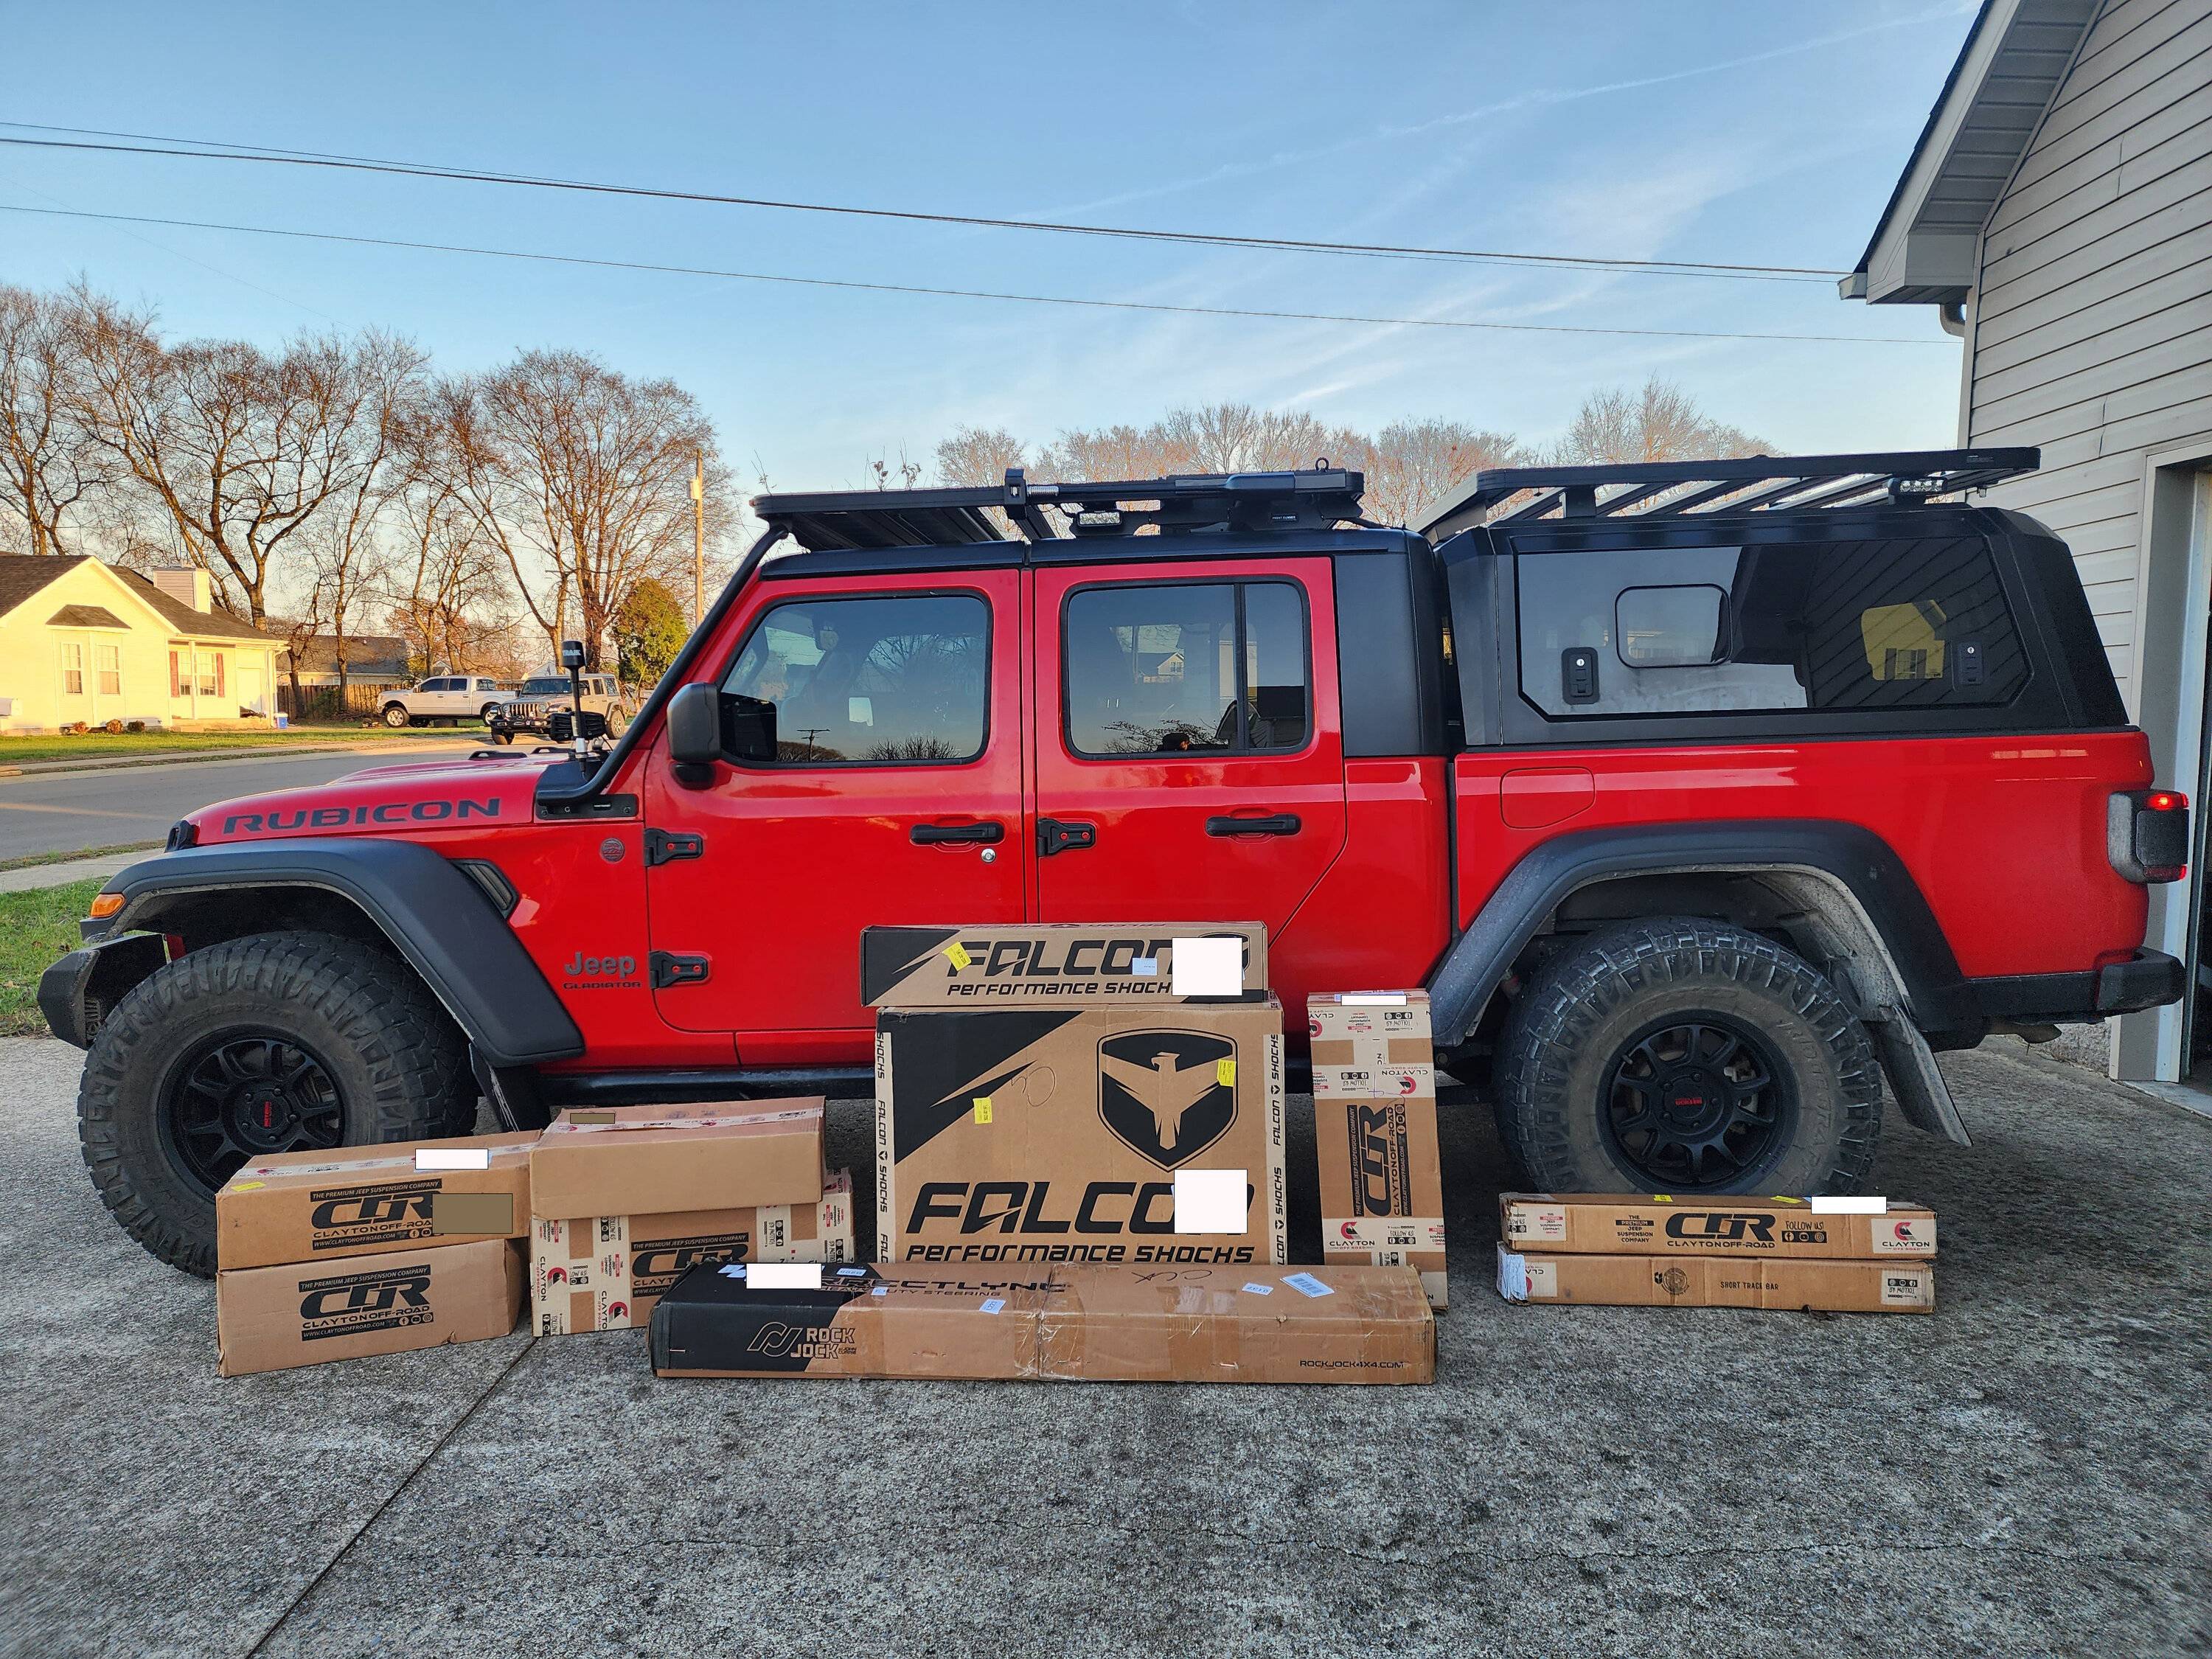
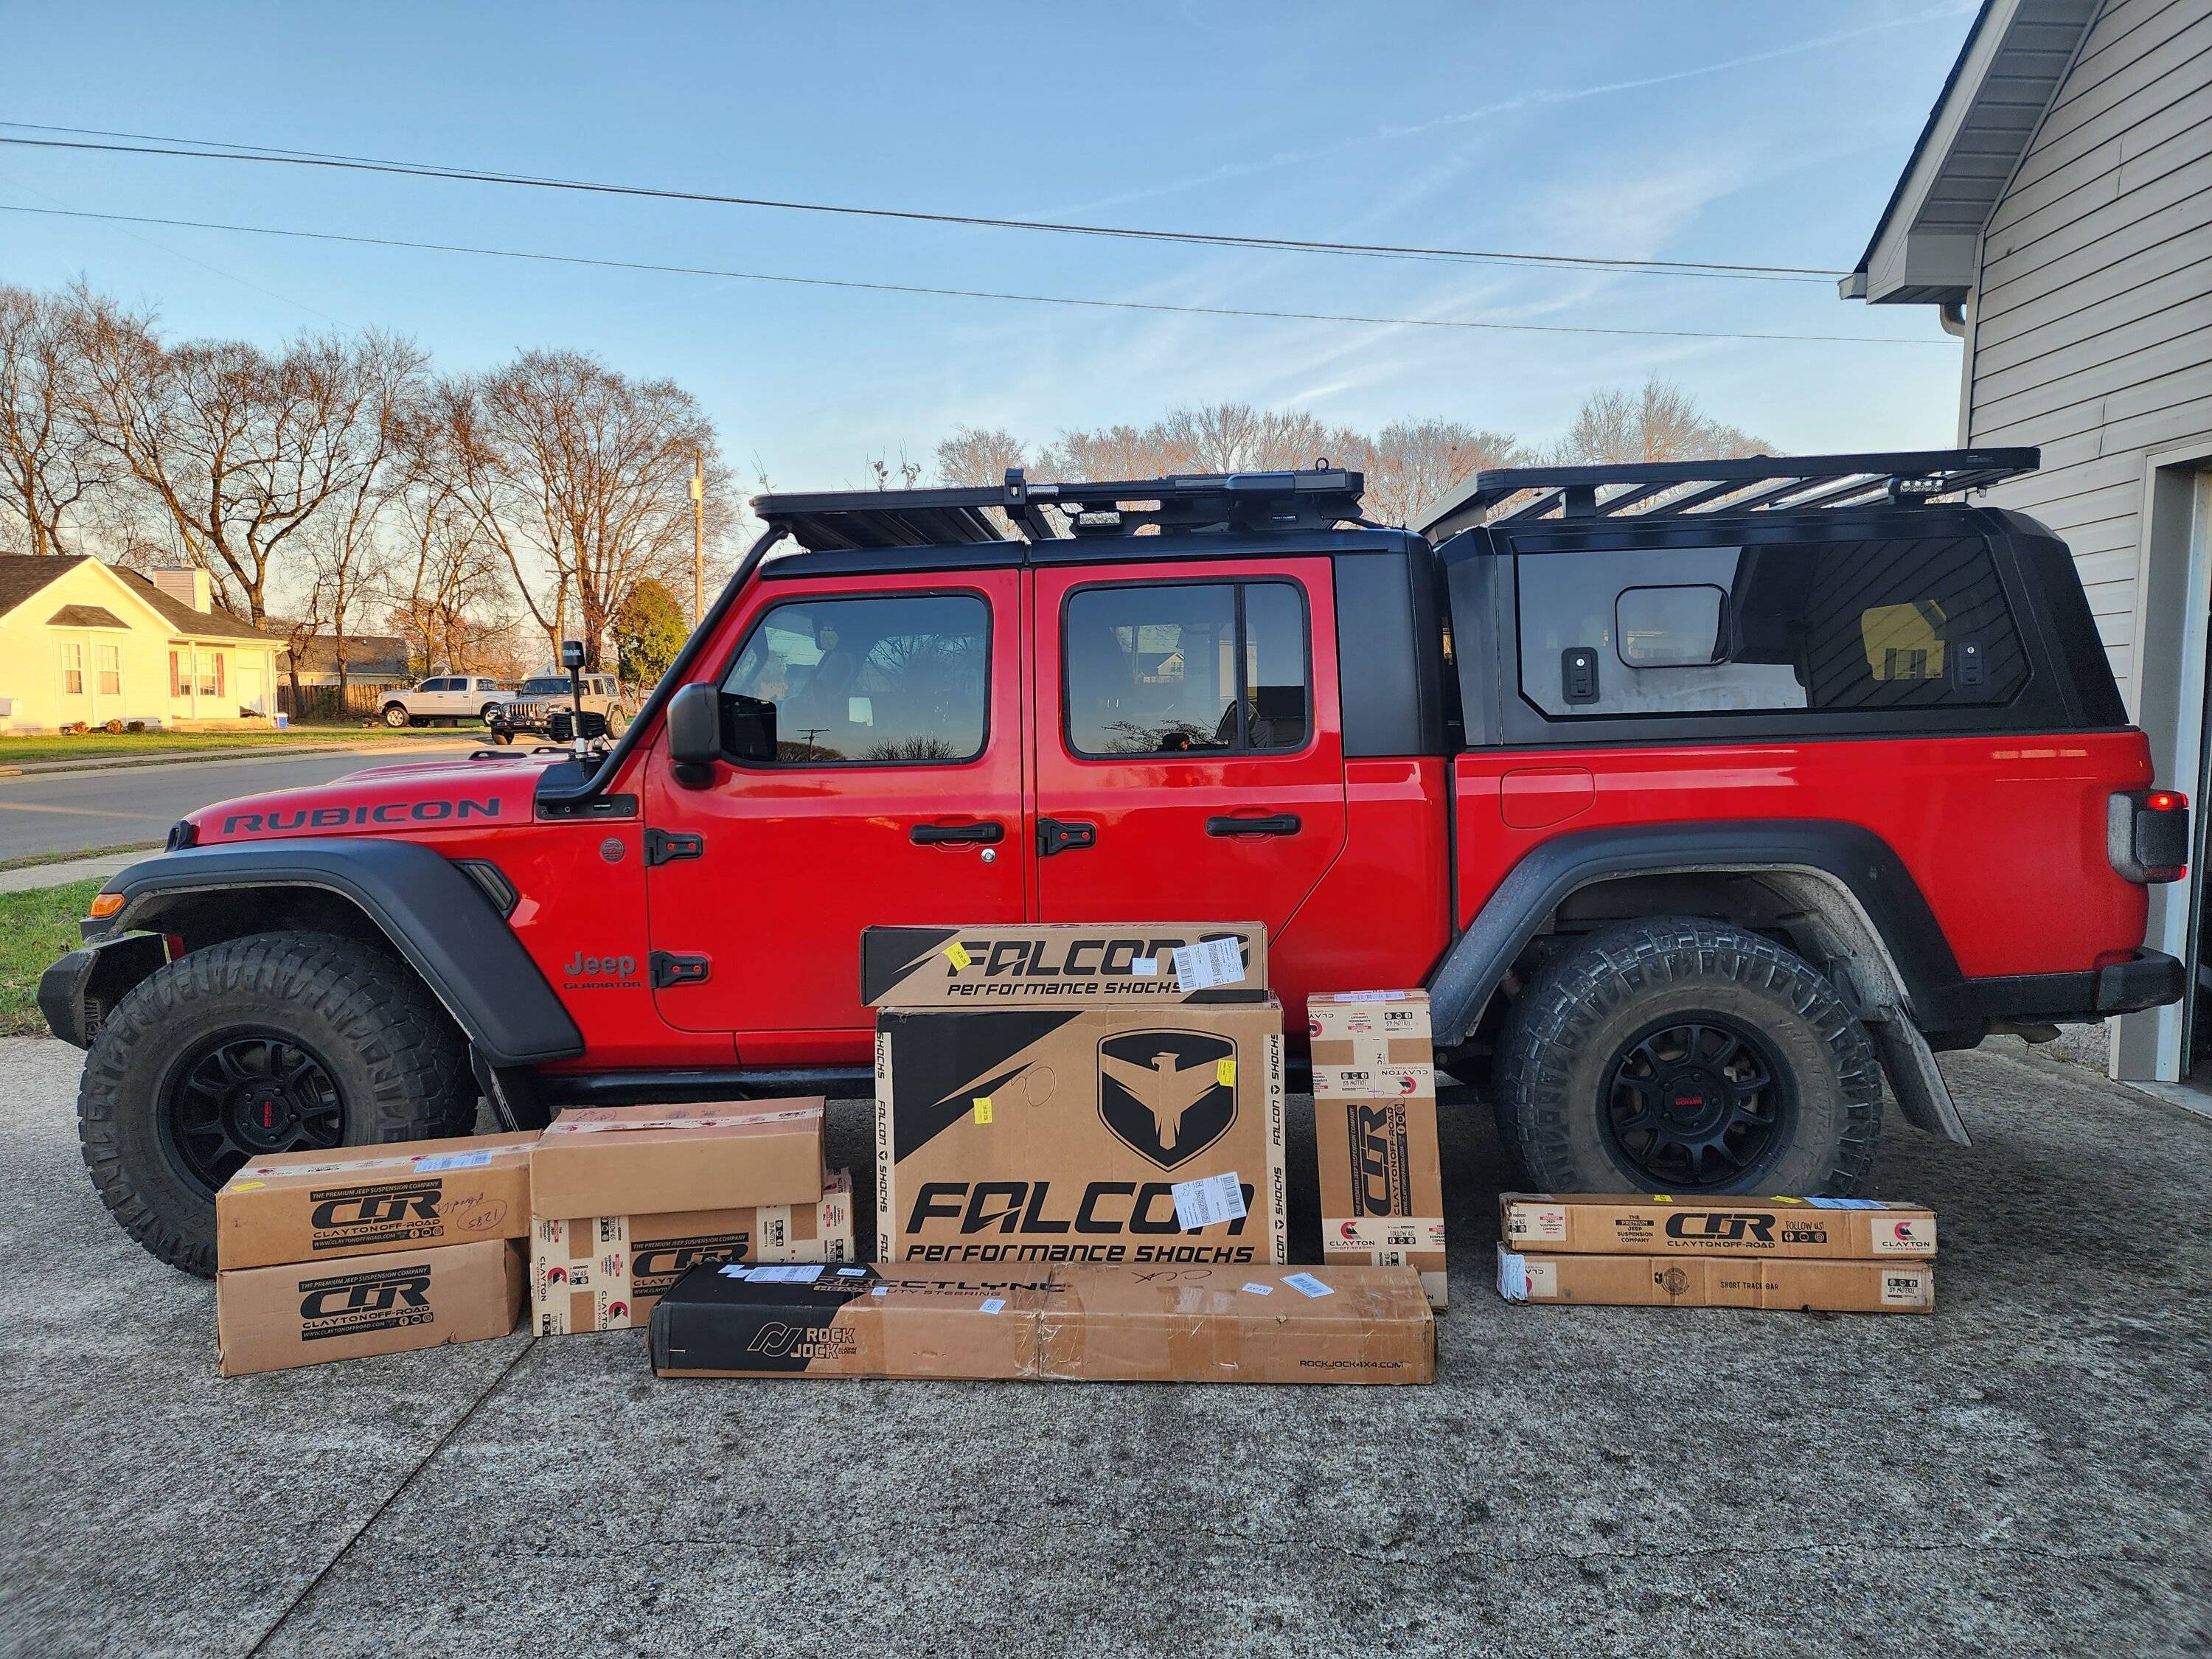
My big black friday purchase came in. Can't wait to get this bolted on. It's the Clayton 2.5" Overland Plus kit with Falcon SP2 3.3 shocks front and rear, a Falcon Nexus 2.2 steering stabilizer. and a Currie Currect-Lync steering system. I swapped the standard rear coils for their HD version to compensate for all of the excess weight on the rear end.
The plan is to set a few days aside over new years to get the install knocked out. This will essentially "complete" my build, as a lift/suspension was the last major checklist item to complete. Everything else will just be optimization/fine-tuning. Look forward to a writeup/review/video/comparison once I get it on!

The plan is to set a few days aside over new years to get the install knocked out. This will essentially "complete" my build, as a lift/suspension was the last major checklist item to complete. Everything else will just be optimization/fine-tuning. Look forward to a writeup/review/video/comparison once I get it on!
OP
OP
TheHops
Well-Known Member
- Thread starter
- #158
Haha nice. Great minds, and all that. I've had my eye on this grill for a long time. It's exactly what I want/need in my camp setup.Just got this as well this BF minus the pot and pan version.
Picked up this hose to make connections a little easier but I keep the brass one in the bag just in case.
https://www.campchef.com/mountain-series-bulk-tank-hose-&-regulator-|-camp-chef/CC-MS40-6R.html
Not a bad idea on that hose. I may have to check that out myself.
OP
OP
TheHops
Well-Known Member
- Thread starter
- #159
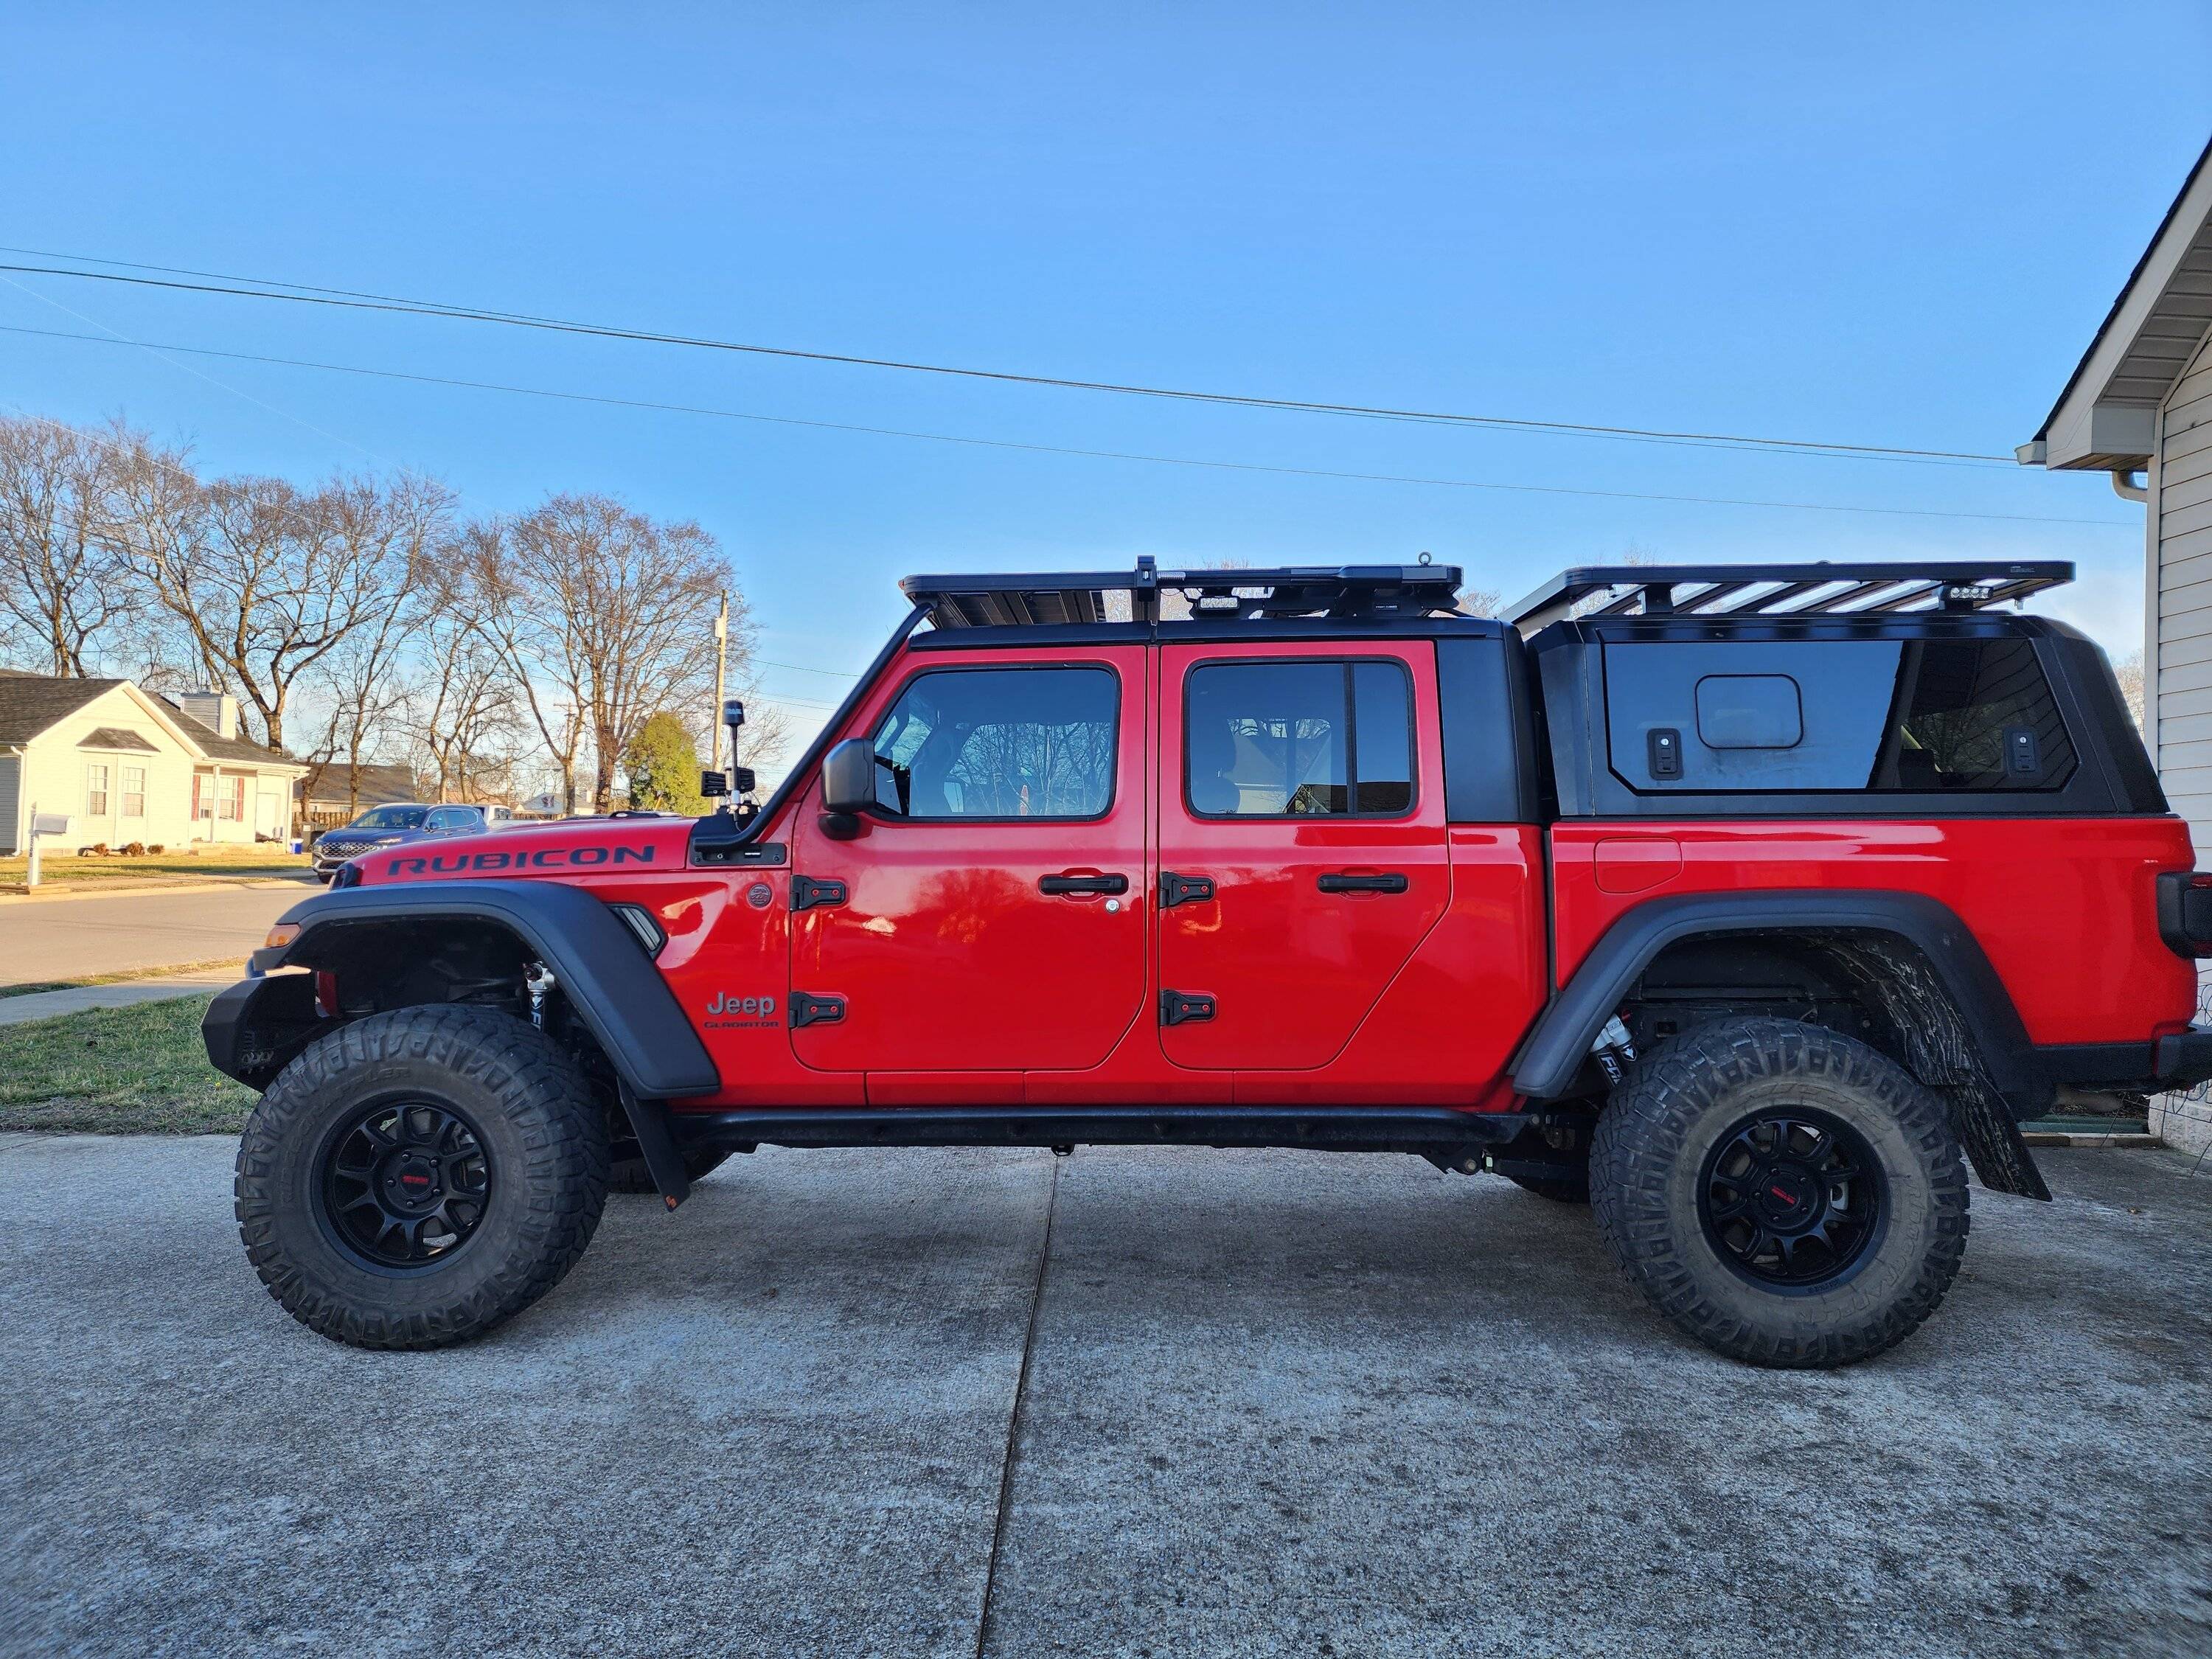
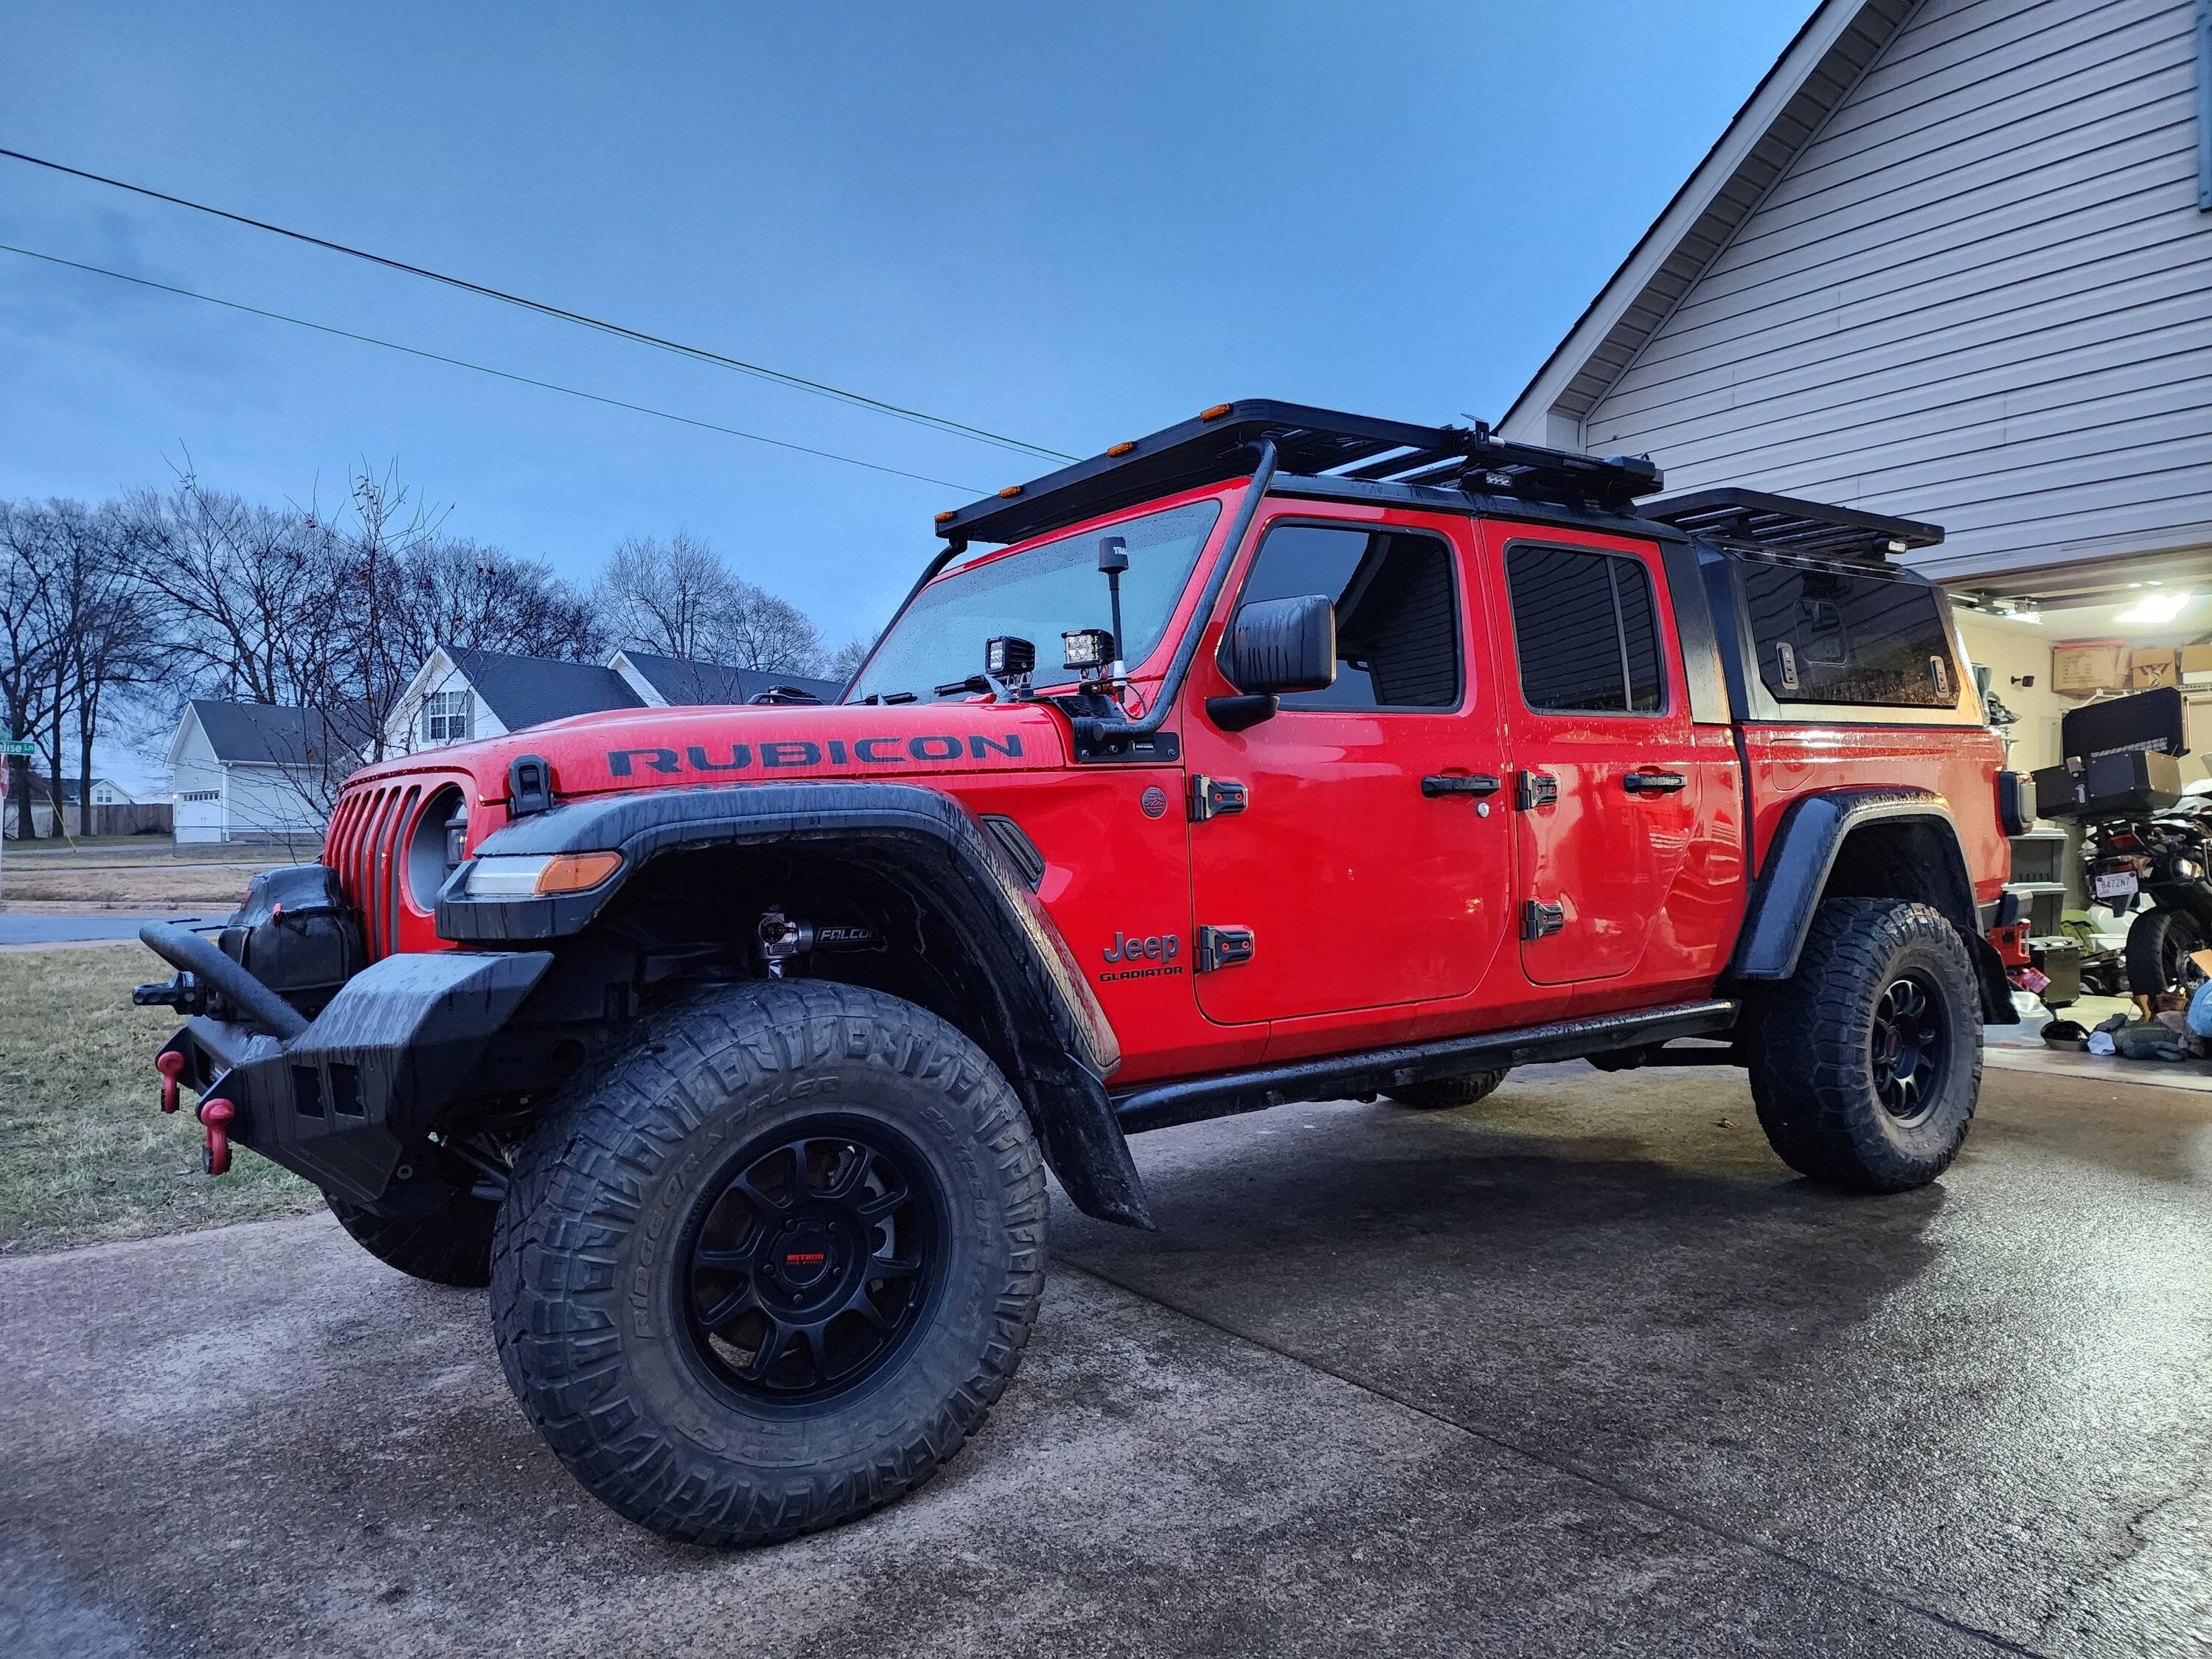
Ares got an upgrade!
Before:
After:
The Clayton 2.5" kit, initially, has yielded 4" of lift (from approx 39" ground to fender, to 43" on all 4 corners) I do expect (and hope) that it will continue to settle some, as it's just a bit more lift than expected, but so far it has been fantastic and I have zero regrets. The ride on the Falcon 3.3s is outstanding (currently running settings 2-2 front, and 2-4 rear), and steering feel is MUCH improved with the RockJock 4x4 CurrectLync kit and Falcon 2.2 steering stabilizer (firm setting) with a post-lift alignment.
The project took 4 days, solo, in my driveway. I'll be putting together a video of the install, and will have another with my impressions after a bit of use. Can't wait to get it out on the trails!
MikeInMo
Well-Known Member
I am curious to see how your lift settles in. The 4" you got is more than I am looking for (I had a similar result with my LJ).
In their main thread, Clayton just announced a 1.5" spring kit that should be available this summer. I may wait on that.
In their main thread, Clayton just announced a 1.5" spring kit that should be available this summer. I may wait on that.
Sponsored
KX L
Well-Known Member
- First Name
- KX
- Joined
- May 1, 2019
- Threads
- 21
- Messages
- 574
- Reaction score
- 777
- Location
- Lake St Louis MO
- Vehicle(s)
- 2017 CVO Street Glide; 2022 JT Mojave with 6MT
- Occupation
- Retired
Looks good but it also looks like you've overgrown your garage. Is that true? I personally won't do anything that puts me out of the garage.Ares got an upgrade!
Before:
After:
The Clayton 2.5" kit, initially, has yielded 4" of lift (from approx 39" ground to fender, to 43" on all 4 corners) I do expect (and hope) that it will continue to settle some, as it's just a bit more lift than expected, but so far it has been fantastic and I have zero regrets. The ride on the Falcon 3.3s is outstanding (currently running settings 2-2 front, and 2-4 rear), and steering feel is MUCH improved with the RockJock 4x4 CurrectLync kit and Falcon 2.2 steering stabilizer (firm setting) with a post-lift alignment.
The project took 4 days, solo, in my driveway. I'll be putting together a video of the install, and will have another with my impressions after a bit of use. Can't wait to get it out on the trails!
OP
OP
TheHops
Well-Known Member
- Thread starter
- #162
It was more than I wanted as well. I was hoping all of the weight I have would keep it down to 3" max, but I definitely don't hate it as it sits now. I figure I'll give it a few weeks and measure again to see where I'm at. I'll report any changes.I am curious to see how your lift settles in. The 4" you got is more than I am looking for (I had a similar result with my LJ).
In their main thread, Clayton just announced a 1.5" spring kit that should be available this summer. I may wait on that.
That sounds interesting! I would have had my eye on that if it were available.
OP
OP
TheHops
Well-Known Member
- Thread starter
- #163
Honestly, it had always been too big (long) for my garage. I've successfully parked it in there exactly once, and it made the garage essentially unusable. Had to open the garage door, walk outside, come in from the other side, and shimmy against the wall to do laundry. Personally, I've never had a vehicle that fit in the garage that I've had at that time, so that wasn't a huge deal to me haha. I get that though.Looks good but it also looks like you've overgrown your garage. Is that true? I personally won't do anything that puts me out of the garage.
chorky
Well-Known Member
- First Name
- Chad
- Joined
- Feb 26, 2022
- Threads
- 175
- Messages
- 3,466
- Reaction score
- 3,801
- Location
- Montana
- Website
- www.youtube.com
- Vehicle(s)
- '22JTR, '06 LJ, '06 TJ GE
- Build Thread
- Link
- Occupation
- GIS Specialist
How well has this been working for you lately? I'm curious.... I would have thought the antenna needs to be a specific one to work with Jeep's functions of Sirius and for the remote phone app. I'm assuming it is all done through this new sat antenna you put up? Any issues with it so far?For quite some time now, I've been dealing with degraded signal due to my over-the-cab roof rack interfering with the stock sirius xm antenna. I finally got around to doing something about it, and I didn't really have any luck tracking down guidance online, so I figured I'd share my solution. This is specific to my set-up, which obviously has some aftermarket components involved, but the overall setup/routing should work for anyone else interested in doing this.
What I used:
Antenna: Tram 7754 Satellite Radio Antenna
Mount: Rago Fabrication Ditch Bracket Extension
Adapter: Fakra-SMB Adapter
I didn't want a tall antenna full-time on top of my rack, but I had to get it out in the open, so I decided on a mount near the hood. The issue is I had two pods on both ditch brackets already, so after a little research I came across these awesome little mounts by Rago Fabrication. They worked perfectly for my application, and I'll likely be using another one on the other side when I eventually incorporate a HAM setup. But, that's a post for another time...
After mounting the extension bracket beneath my ditch light bracket on the far left, I routed the cable in through the cowl, and up along the driver's side windshield trim, making sure that it wasn't pinched anywhere. From there, I popped the driver's side overhead trim around the roll bar (held in place with pop clips and 4 small torx screws), the trim along the left side of the sound bar just above the driver's head rest, and dropped the sound bar trim (not the actual sound bar itself--not necessary for this) by popping out the clips and removing the three torx screws. The sound bar trim takes some convincing to get down. Just apply steady force and it will eventually come down.
Once you get behind the sound bar trim, this is the plug that you're looking for:
The antenna includes 21' of cable, which is more than enough for this routing. I had to secure at least 8'-10' in the sound bar trim. Once you reach this plug, simply plug the aftermarket antenna cable into the adapter. Here's what the adapter looks like:
Plug the adapter into the stock harness (male end goes to new antenna, female end to stock harness), secure the excess, and replace the trim. Once I found the plug and the optimal routing to it, the rest was very simple. No more obstructed antenna! Reception is crystal clear. Here's the finished product from the outside:
I get that the look may not be for everyone, but this was done primarily for function. Having said that though...I kind of dig the look!
Hope the writeup helps someone! Feel free to post up any questions.
OP
OP
TheHops
Well-Known Member
- Thread starter
- #165
Funny that you mentioned this when you did.How well has this been working for you lately? I'm curious.... I would have thought the antenna needs to be a specific one to work with Jeep's functions of Sirius and for the remote phone app. I'm assuming it is all done through this new sat antenna you put up? Any issues with it so far?
In terms of Sirius reception, it's fantastic. Far fewer drop outs than I used to have. However I realized about a week ago that I no longer have onboard GPS. I thought that the sirius and GPS antennae were separate, but now I'm not sure. I don't ever use the onboard GPS so I didn't notice whether or not it happened immediately after swapping out the antenna.
I'm out of town for work, but when I get home I'll probably plug the old antenna up to see if that fixes the GPS and will go from there.
Sponsored