mx5red
Well-Known Member
- Thread starter
- #1
Well, this spiraled out of control quickly!
I started by replacing the dash speakers of my Alpine stereo and saw a little improvement, and saw some people say they were impressed with the knee/sound bar upgrades as well…
For me, those upgrades were not worth the time and effort and permanent changes… so, then I was stuck. What started as an inexpensive upgrade snowballed out of control, and was a series of trial and error.
I think the Alpine stereo has some funny tuning to the channels which doesn’t sound right with aftermarket speakers, at least to my ears.
I first tried connecting a maestro interface to a discontinued Kenwood amp with DSP since it was just plug n play with harnesses. I either was too dumb to get the stuff wired correctly, or the amp didn’t play nice with the maestro (even confirming with maestro tech).
so then, I got a discontinued Rockford dsr-1 with harness, and another amplifier. This I was able to get working, and sounded pretty good because of the stronger amp.
BUT, it sounded freaking amazing after having a local shop tune the DSP. It completely transformed the soundstage.
Because I was still in the testing phase, I bought a cheap slim powered sub to try under my seat.

It sounded pretty decent especially for the price, and again sounded impressive after the DSP tune. However, it was now the weak point in the system.
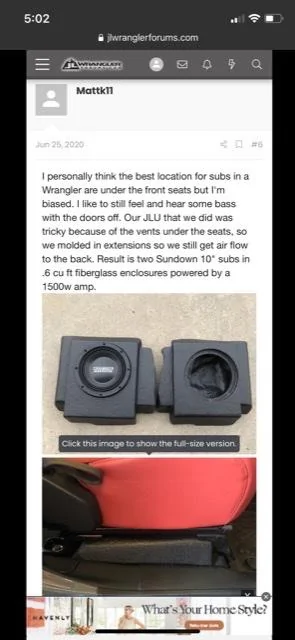
so, I set off on this debacle to build an under seat sub since nobody makes one, and aftermarket ones either wouldn’t fit or would stick 8 inches past the rear of the seat or something. Closest I could find was another custom box.

so this gave me a head start. Mind you I have pretty minimal woodworking skills and experience, but I had designed and helped build some home speakers 25 years ago so I had at least a clue what I was toying with.
The slim sub fit pretty easy under the seat; however, once I started looking at speakers to build around, either the depth or the volume needed were issues.
I may have gone overboard but ended up with this:
so off I went!
To get the volume needed I had to maximize every ounce of space, similar to the custom boxes above.
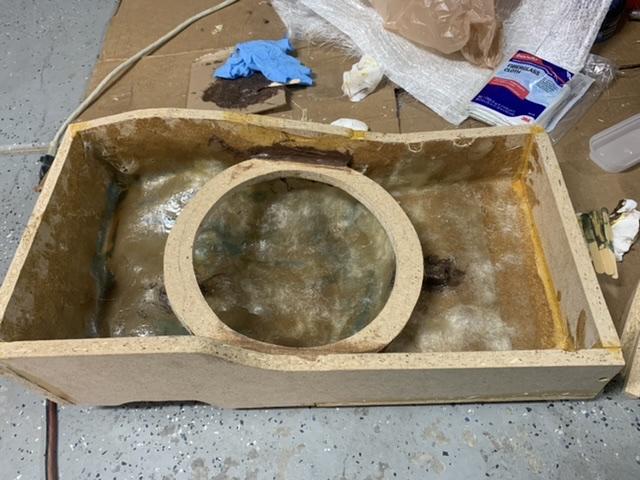
Problem was I’ve never laid fiberglass, so that’s another thing to screw up on top of my woodworking ?
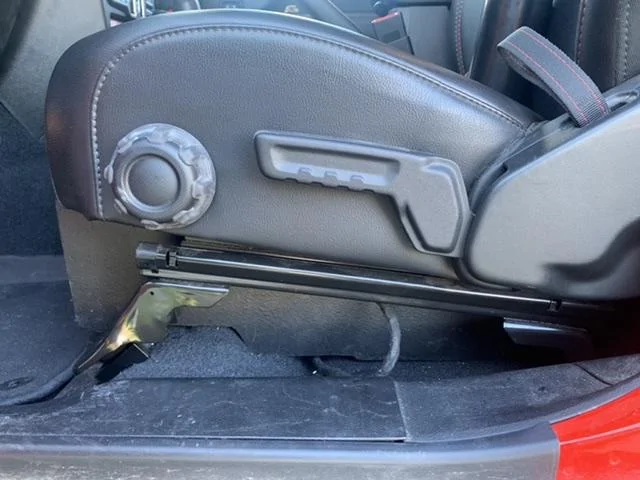
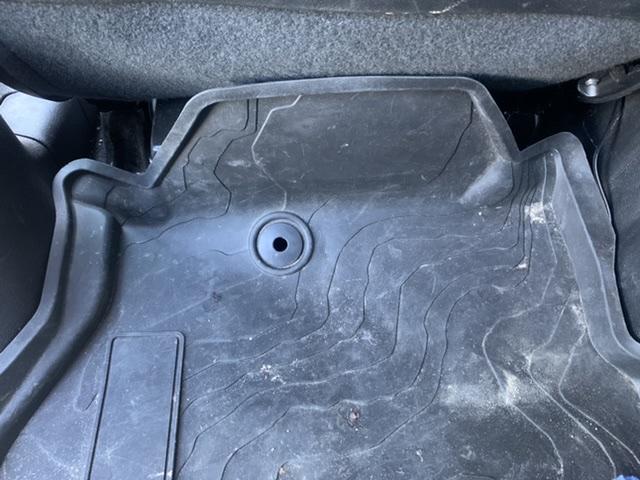
So I started by raising the carpet and seeing what I could improve. I cut off one screw poking up, and cut off the plastic vent so it ends up by the front footwell.
Then, I started trimming cardboard templates just inside the seat rails.
I think I spent hours trying to flip the seat up and down and fit things just right.
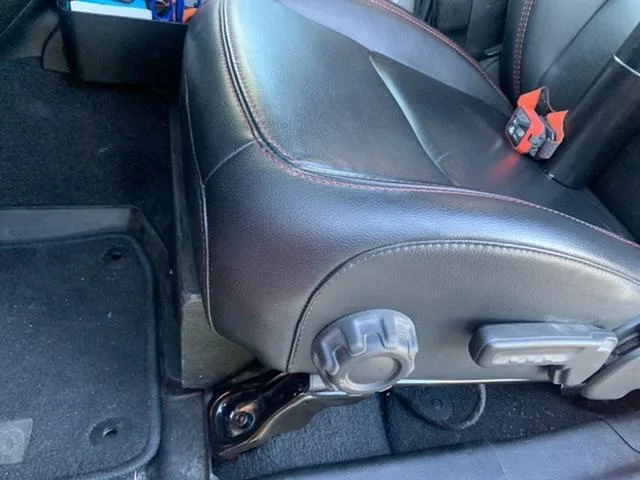
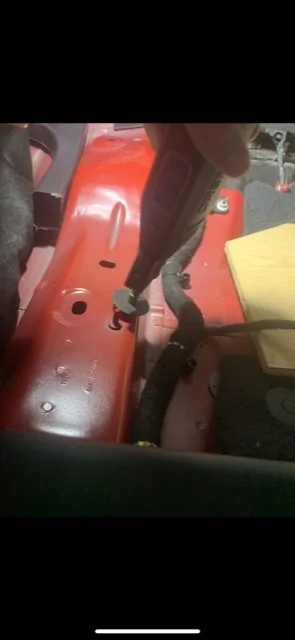
To get some extra space, I cut off the seat adjustment bar. This part is a little wtf ? , but ain’t nobody else driving my truck!
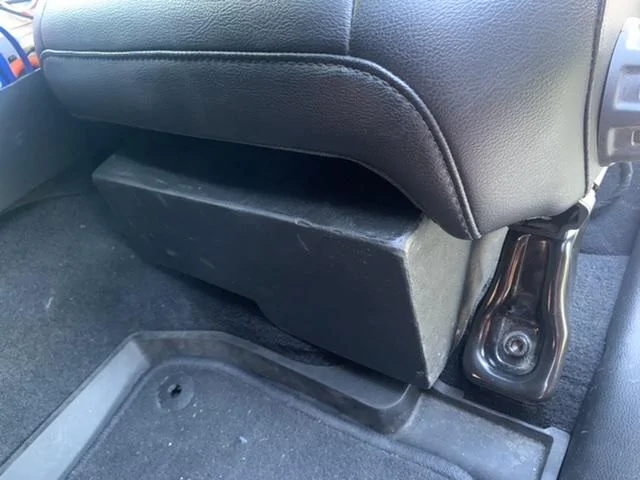
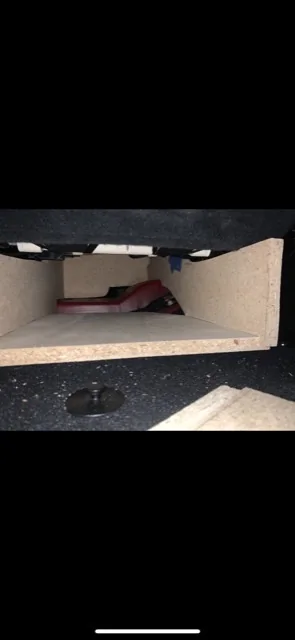
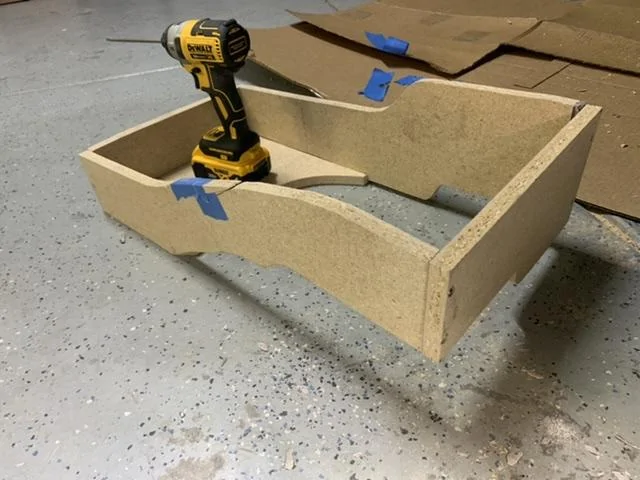
Then I built the basic box knowing the top and bottom would have to be molded.

I forgot to take some “finished” pics. I sprayed it with bedliner to look as inconspicuous as possible.
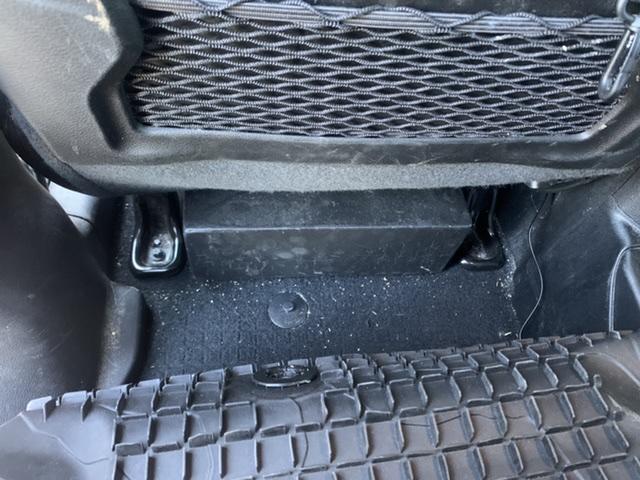
Drilled a couple holes and wired in binding posts that tuck in by the transmission tunnel.
I couldn’t measure the volume but from my measurements it should’ve been ~0.6ft, though I’m honestly hoping for 0.5 with lost measurements and internal bracing, which is what the JL was designed for. It might be less?
two things that could’ve been better:
1. my construction and fiberglass but I think it ended up well for being all sorts of irregular dimensions.
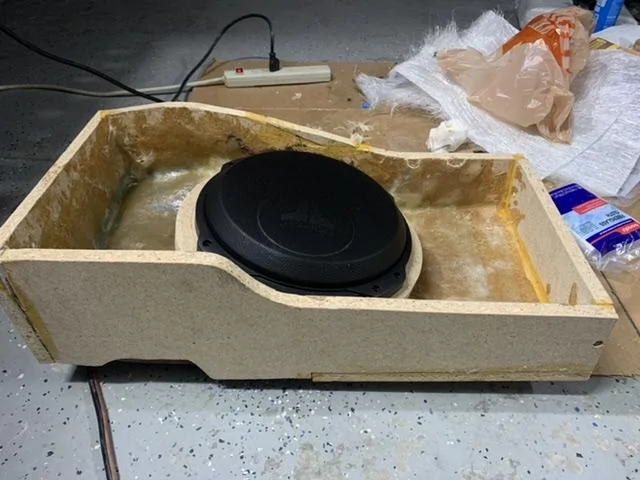
2. Also, I didn’t have the speaker when I started building a template and building the box. It is very shallow mount but it sticks out quite a bit.
So in order for it not to hit the bottom of the seat, I raised the seat a little with 0.75” seatjackers for a little extra room.
Wish it would’ve fit without adding this added expense.
I started by replacing the dash speakers of my Alpine stereo and saw a little improvement, and saw some people say they were impressed with the knee/sound bar upgrades as well…
For me, those upgrades were not worth the time and effort and permanent changes… so, then I was stuck. What started as an inexpensive upgrade snowballed out of control, and was a series of trial and error.
I think the Alpine stereo has some funny tuning to the channels which doesn’t sound right with aftermarket speakers, at least to my ears.
I first tried connecting a maestro interface to a discontinued Kenwood amp with DSP since it was just plug n play with harnesses. I either was too dumb to get the stuff wired correctly, or the amp didn’t play nice with the maestro (even confirming with maestro tech).
so then, I got a discontinued Rockford dsr-1 with harness, and another amplifier. This I was able to get working, and sounded pretty good because of the stronger amp.
BUT, it sounded freaking amazing after having a local shop tune the DSP. It completely transformed the soundstage.
Because I was still in the testing phase, I bought a cheap slim powered sub to try under my seat.

It sounded pretty decent especially for the price, and again sounded impressive after the DSP tune. However, it was now the weak point in the system.
so, I set off on this debacle to build an under seat sub since nobody makes one, and aftermarket ones either wouldn’t fit or would stick 8 inches past the rear of the seat or something. Closest I could find was another custom box.
so this gave me a head start. Mind you I have pretty minimal woodworking skills and experience, but I had designed and helped build some home speakers 25 years ago so I had at least a clue what I was toying with.
The slim sub fit pretty easy under the seat; however, once I started looking at speakers to build around, either the depth or the volume needed were issues.
I may have gone overboard but ended up with this:

so off I went!
To get the volume needed I had to maximize every ounce of space, similar to the custom boxes above.
Problem was I’ve never laid fiberglass, so that’s another thing to screw up on top of my woodworking ?
So I started by raising the carpet and seeing what I could improve. I cut off one screw poking up, and cut off the plastic vent so it ends up by the front footwell.
Then, I started trimming cardboard templates just inside the seat rails.
I think I spent hours trying to flip the seat up and down and fit things just right.
To get some extra space, I cut off the seat adjustment bar. This part is a little wtf ? , but ain’t nobody else driving my truck!
Then I built the basic box knowing the top and bottom would have to be molded.
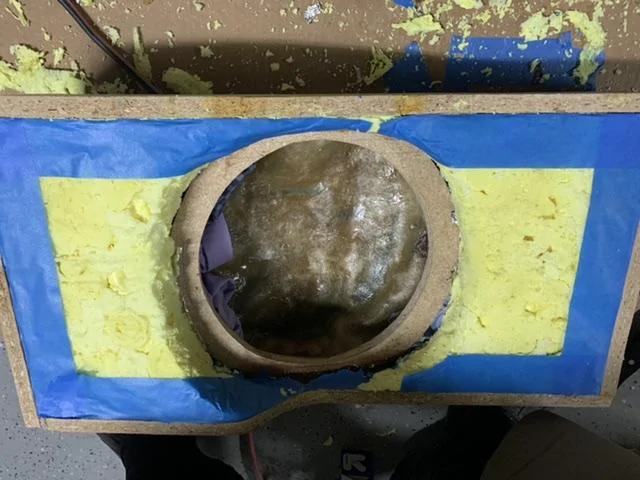
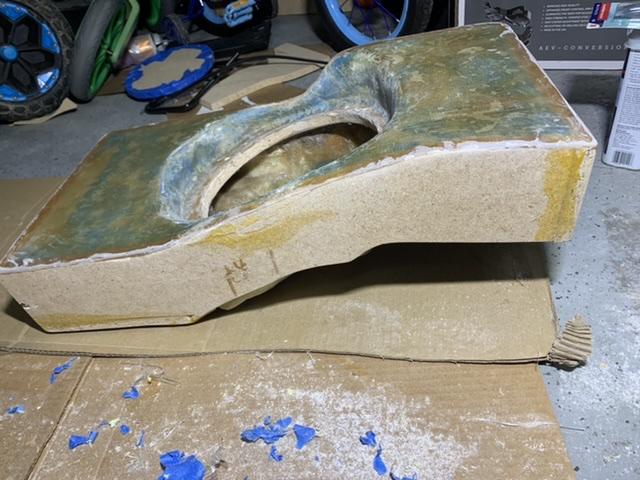
I forgot to take some “finished” pics. I sprayed it with bedliner to look as inconspicuous as possible.
Drilled a couple holes and wired in binding posts that tuck in by the transmission tunnel.
I couldn’t measure the volume but from my measurements it should’ve been ~0.6ft, though I’m honestly hoping for 0.5 with lost measurements and internal bracing, which is what the JL was designed for. It might be less?
two things that could’ve been better:
1. my construction and fiberglass but I think it ended up well for being all sorts of irregular dimensions.
2. Also, I didn’t have the speaker when I started building a template and building the box. It is very shallow mount but it sticks out quite a bit.
So in order for it not to hit the bottom of the seat, I raised the seat a little with 0.75” seatjackers for a little extra room.
Wish it would’ve fit without adding this added expense.
Sponsored