Sponsored

Jane, the JTR

OP
OP
SD Rider

SD Rider

Well-Known Member
First Name
Jeff
Joined
Jun 1, 2023
Threads
9
Messages
197
Reaction score
185
Location
Sandy Eggo, KA
Vehicle(s)
2023 Jeep Gladiator Rubicon
Build Thread
Link
Occupation
Location Specialist
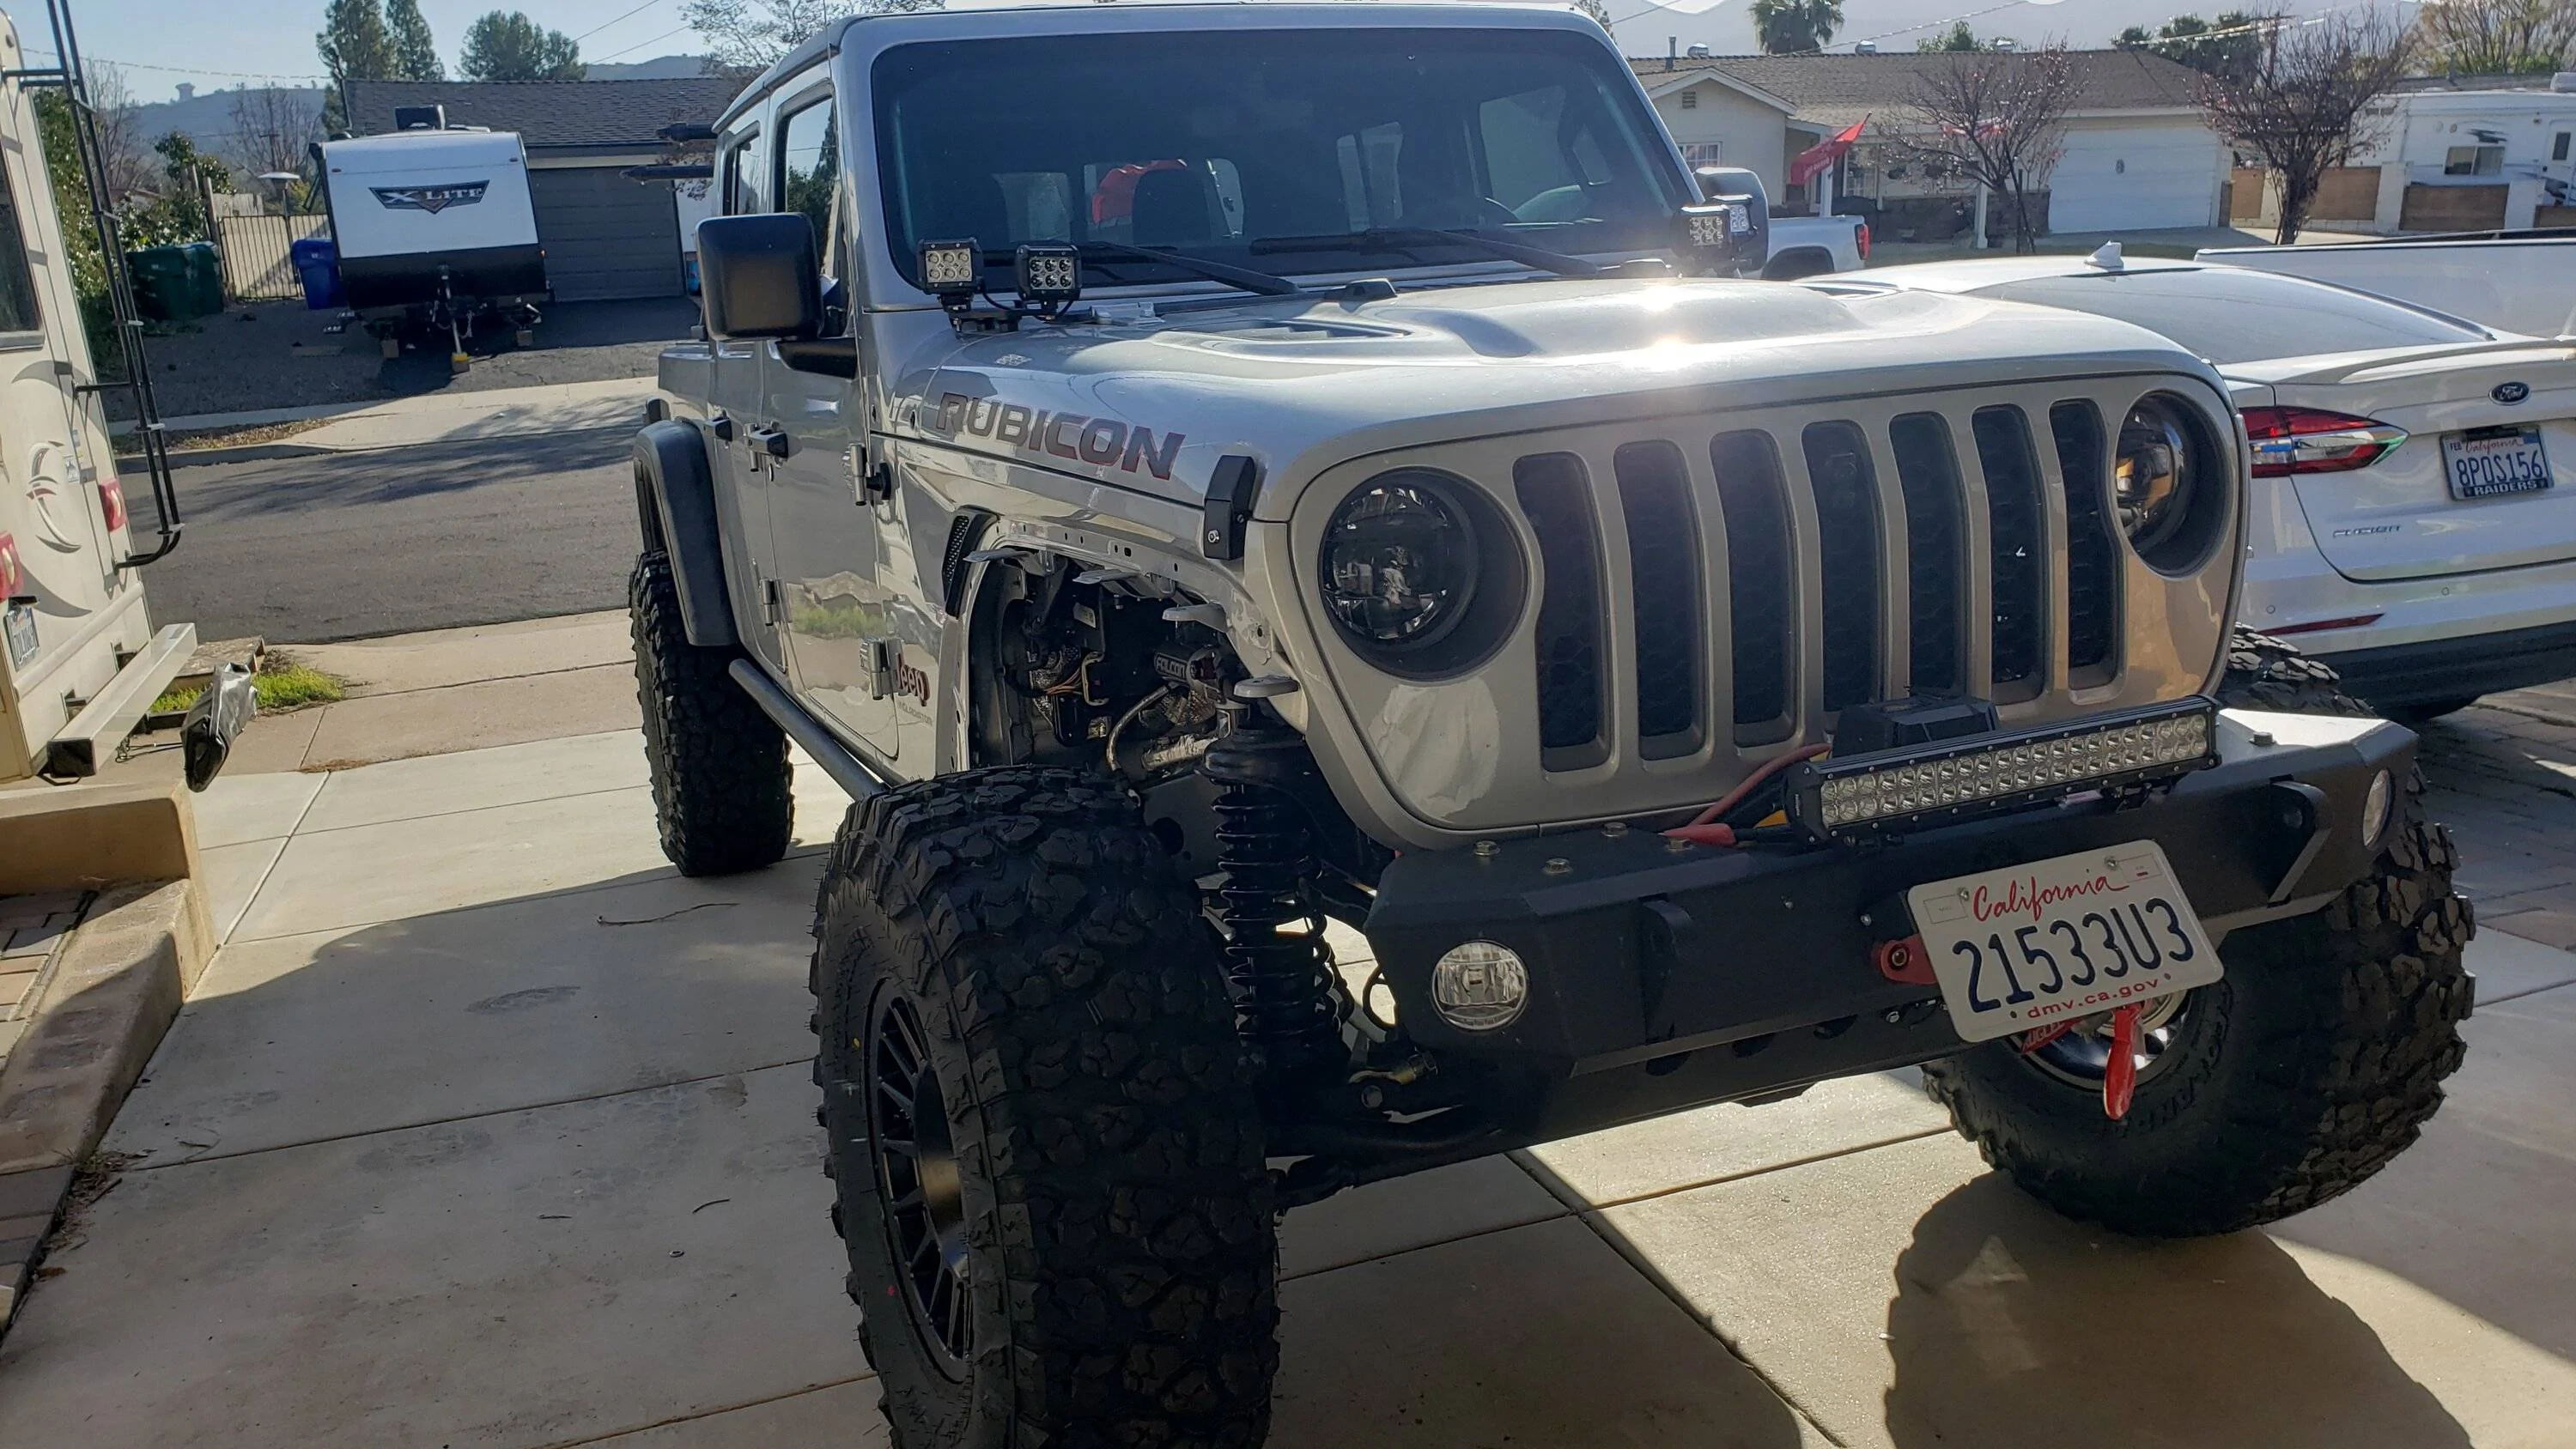
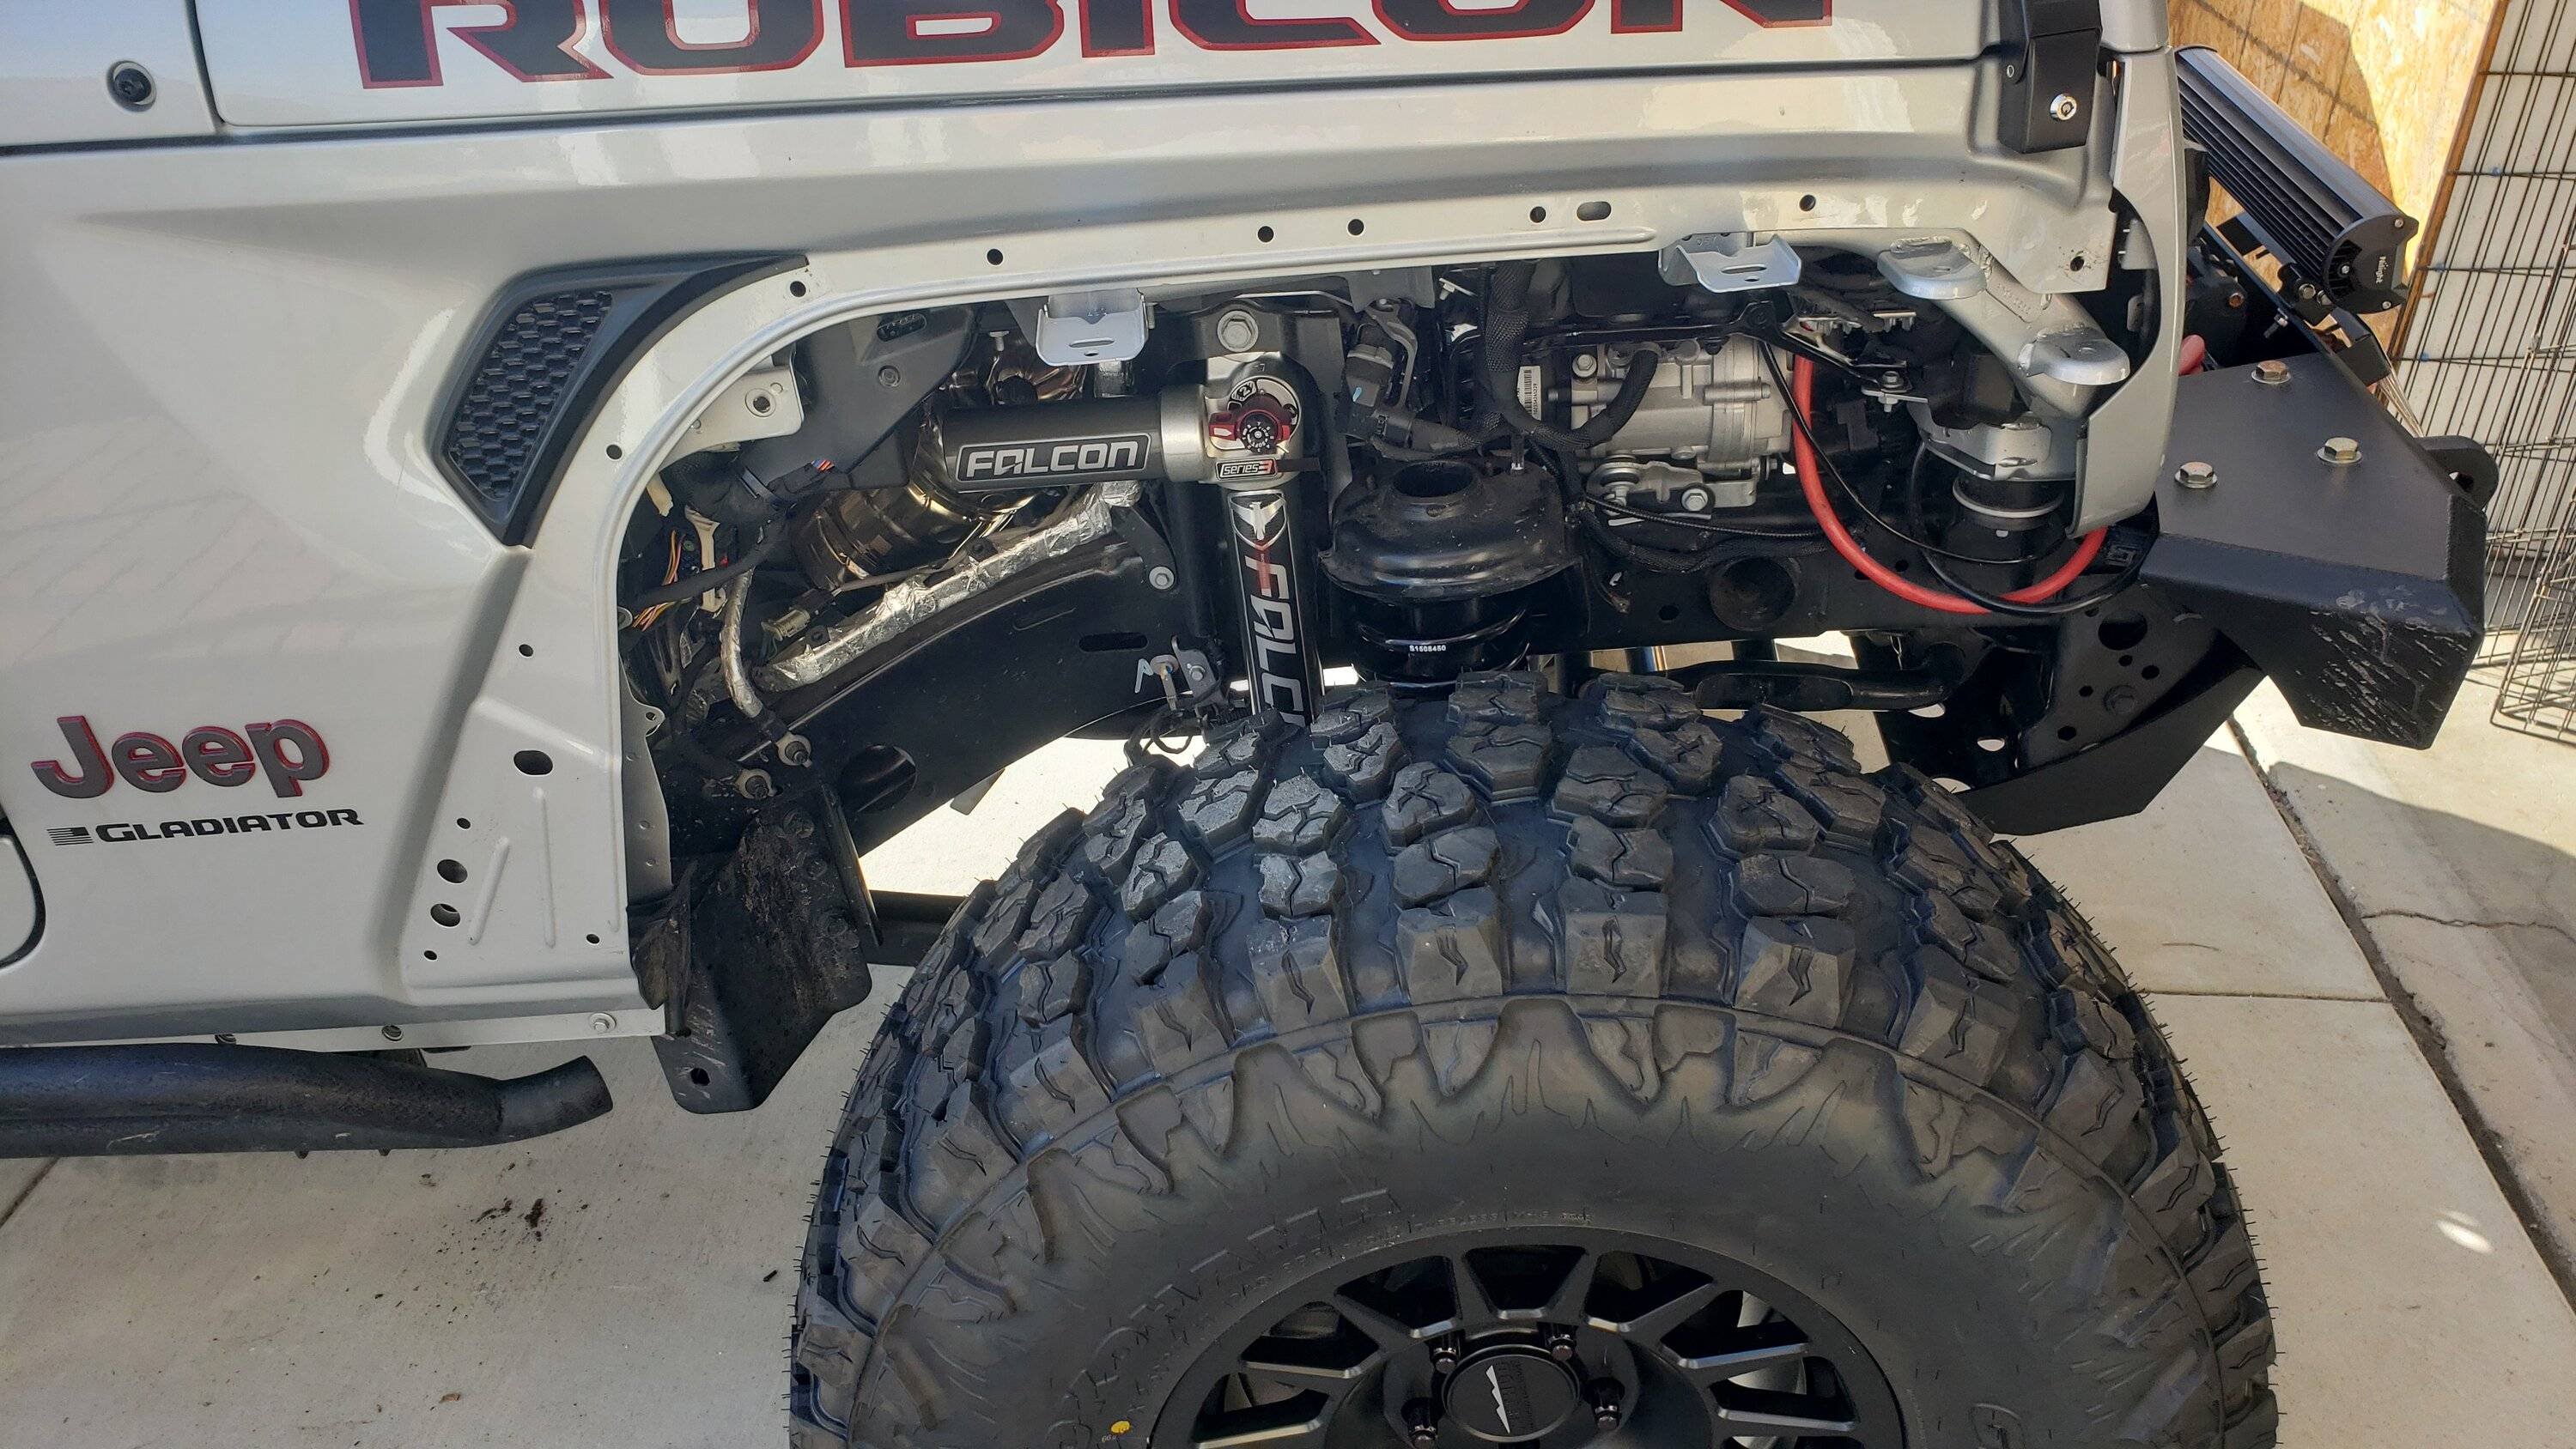
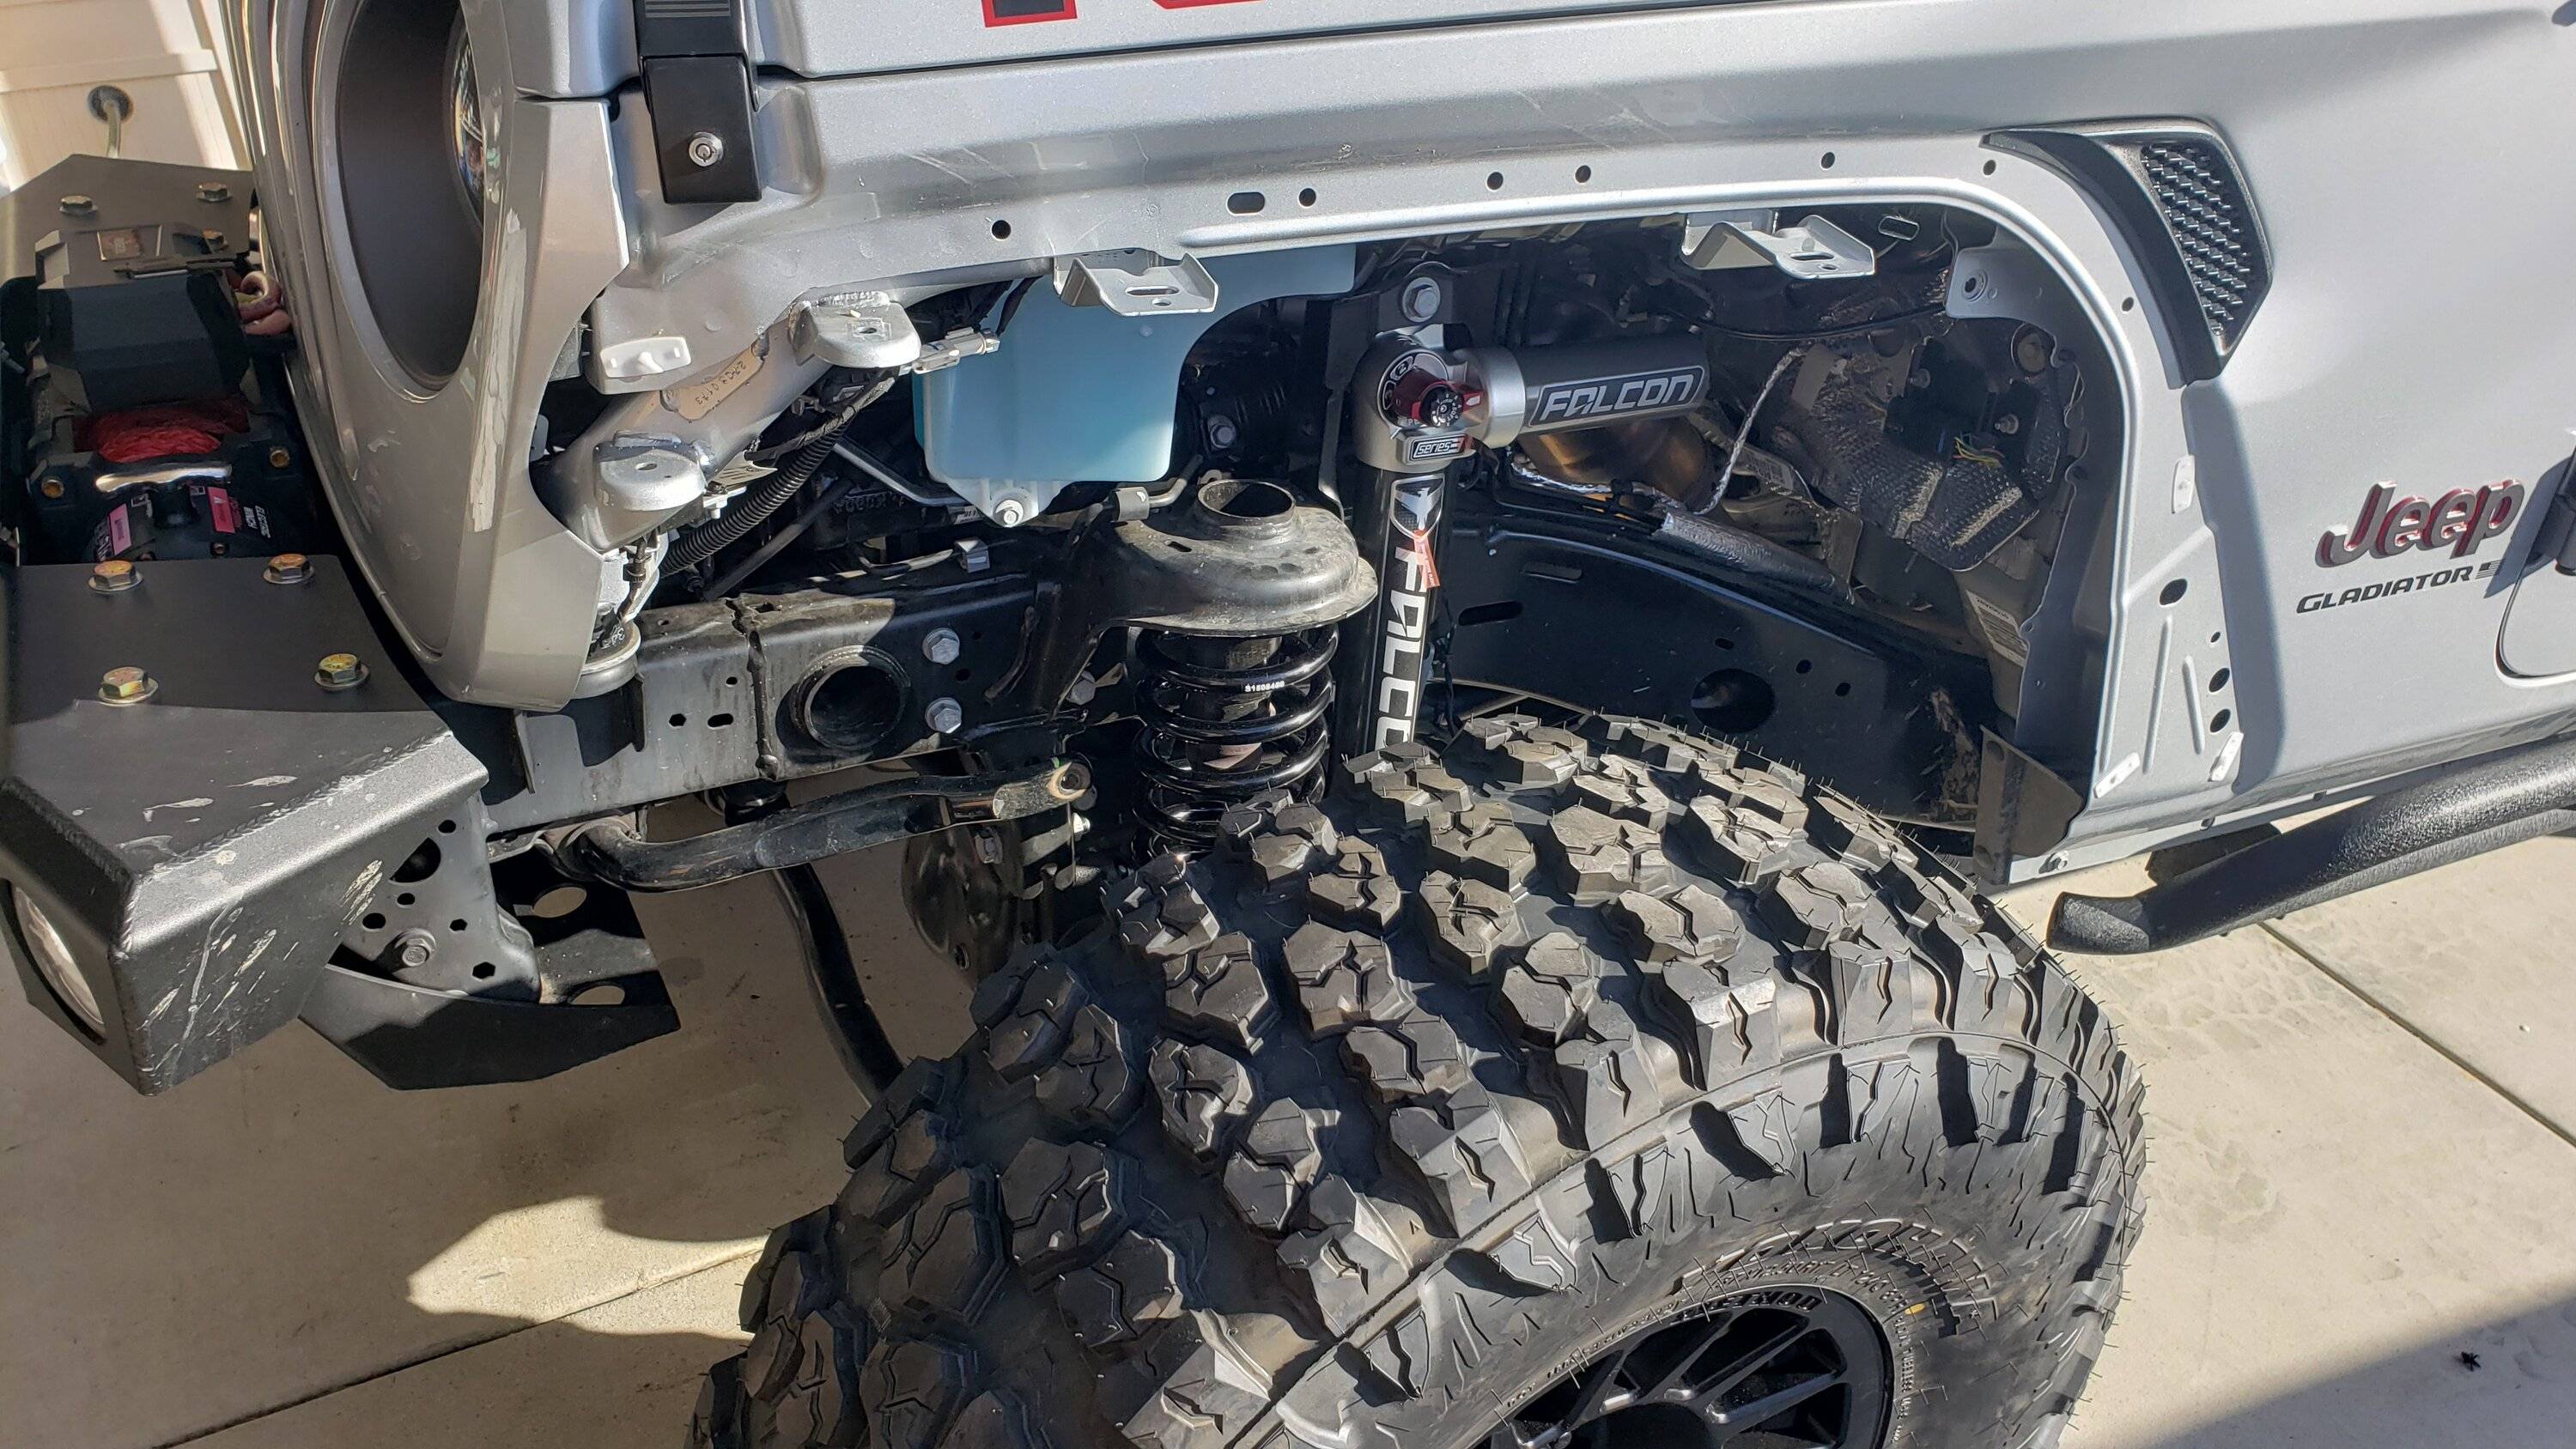
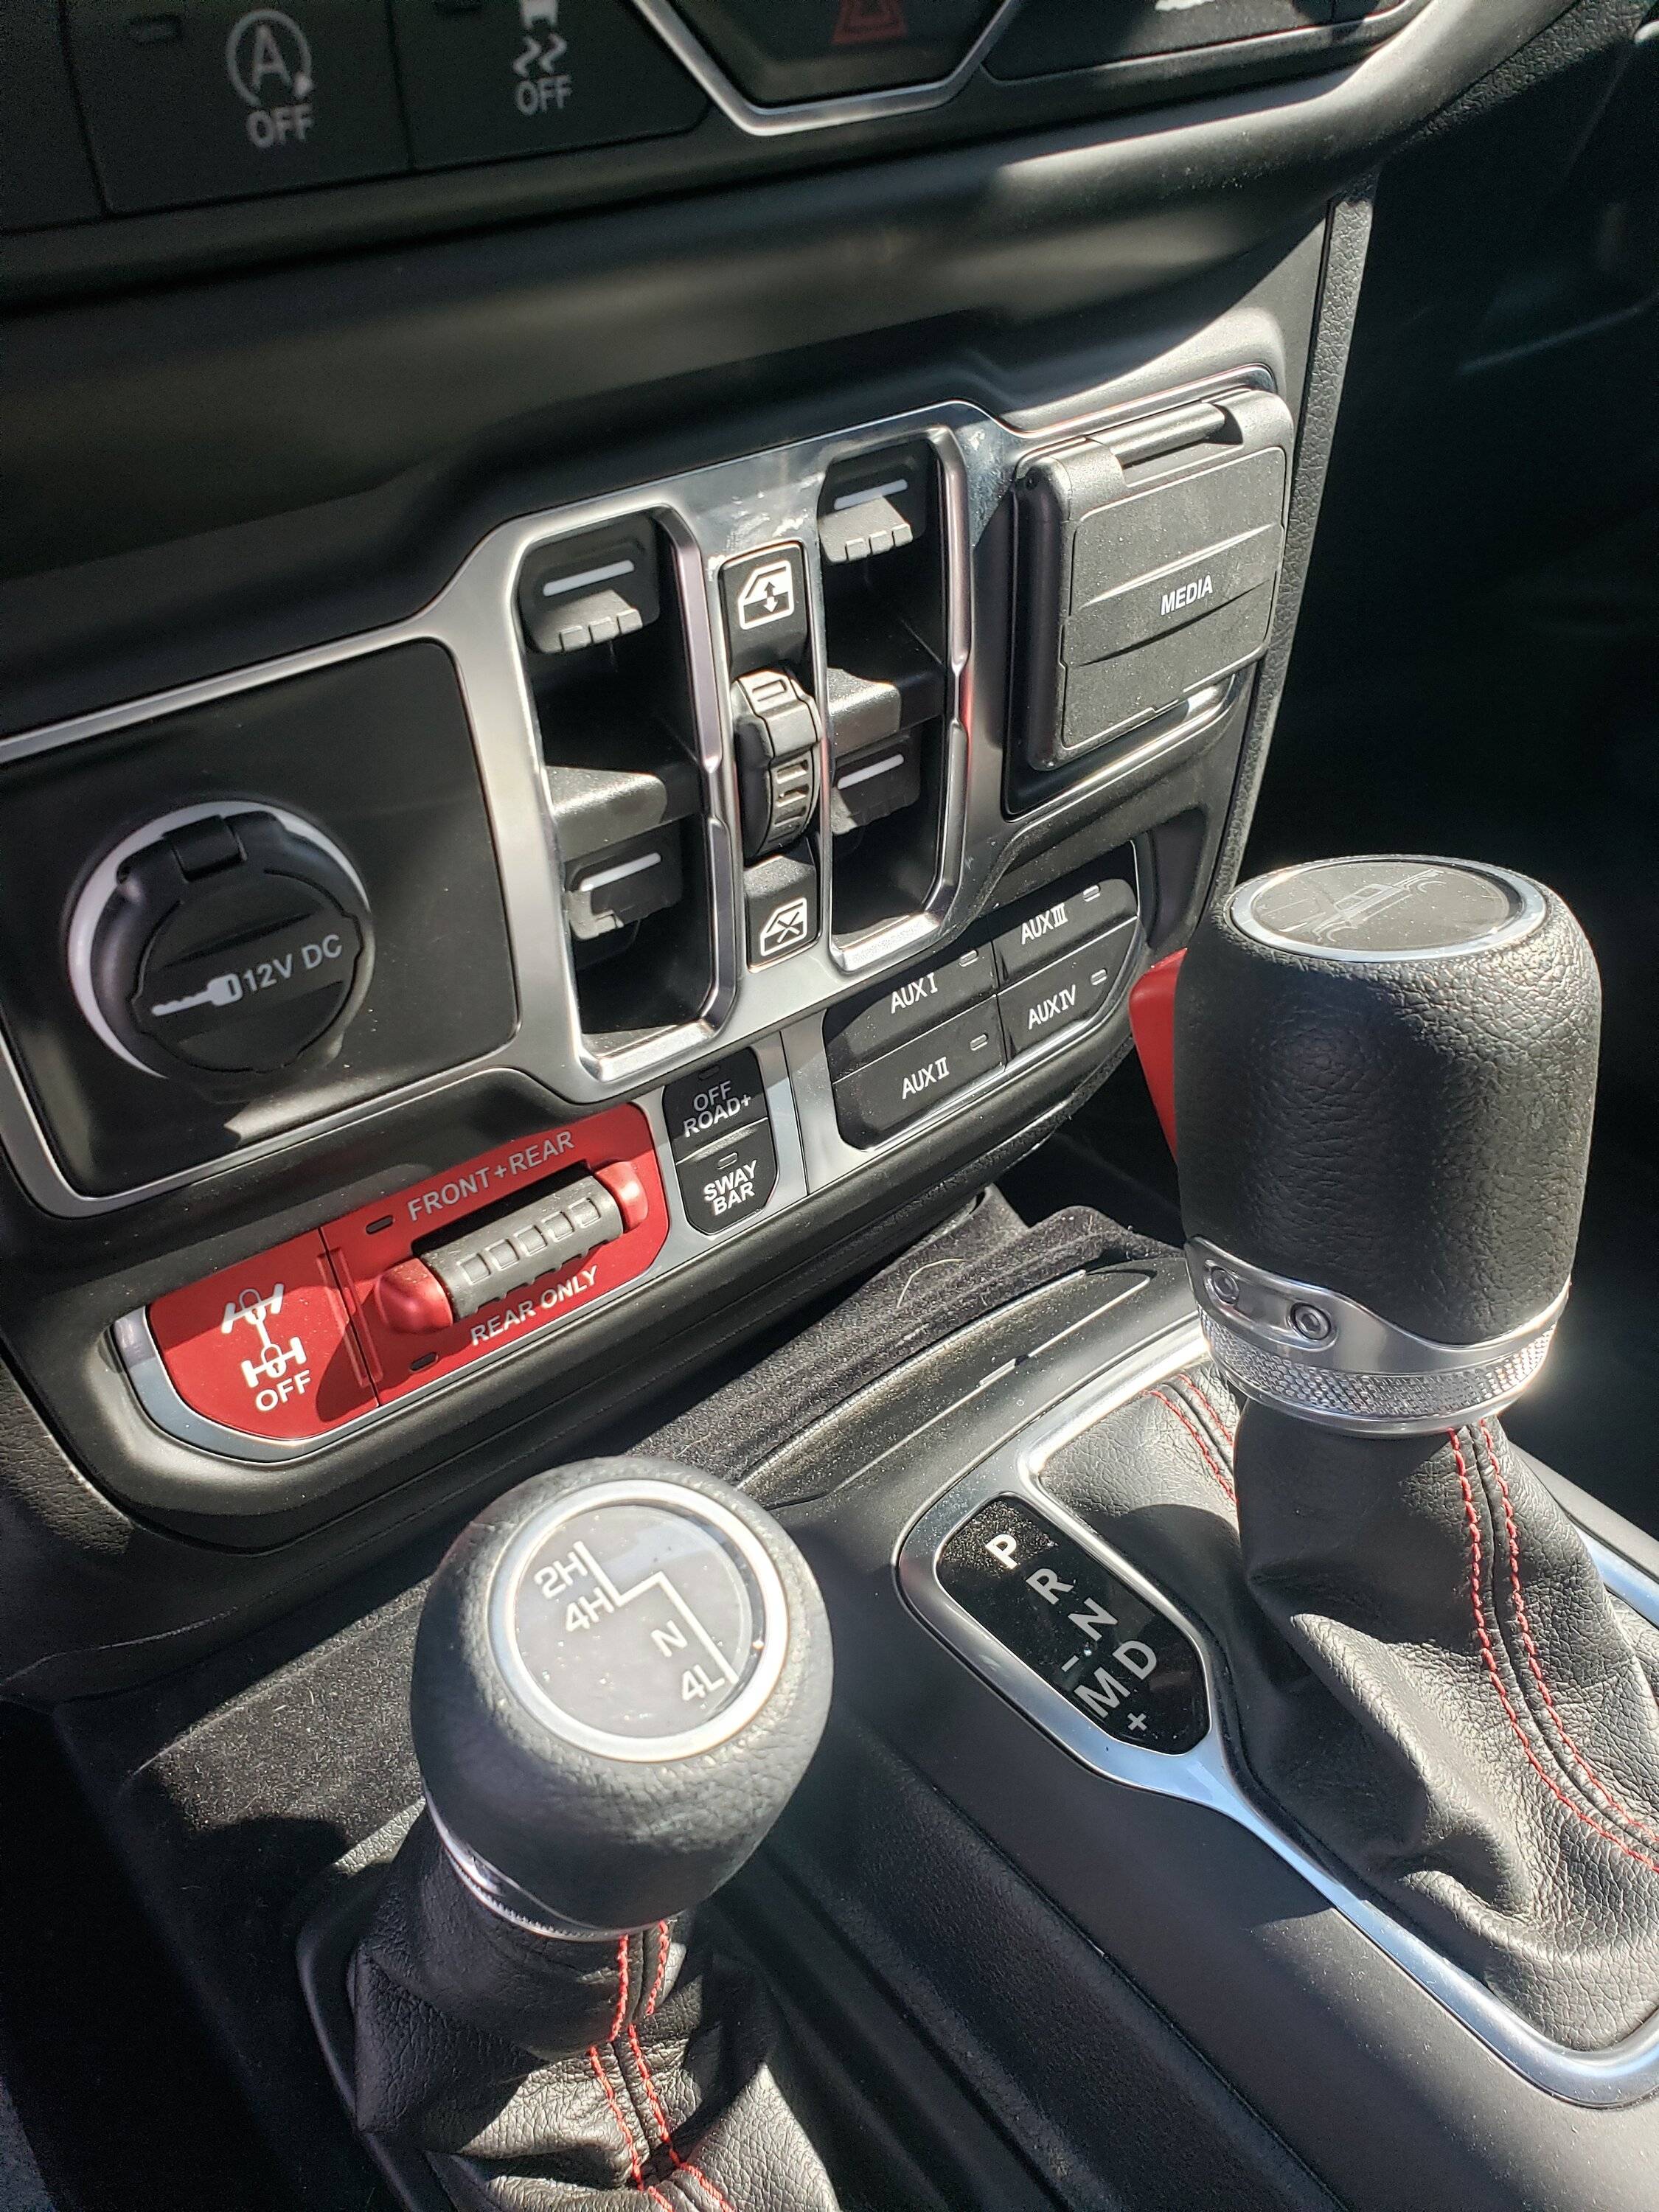
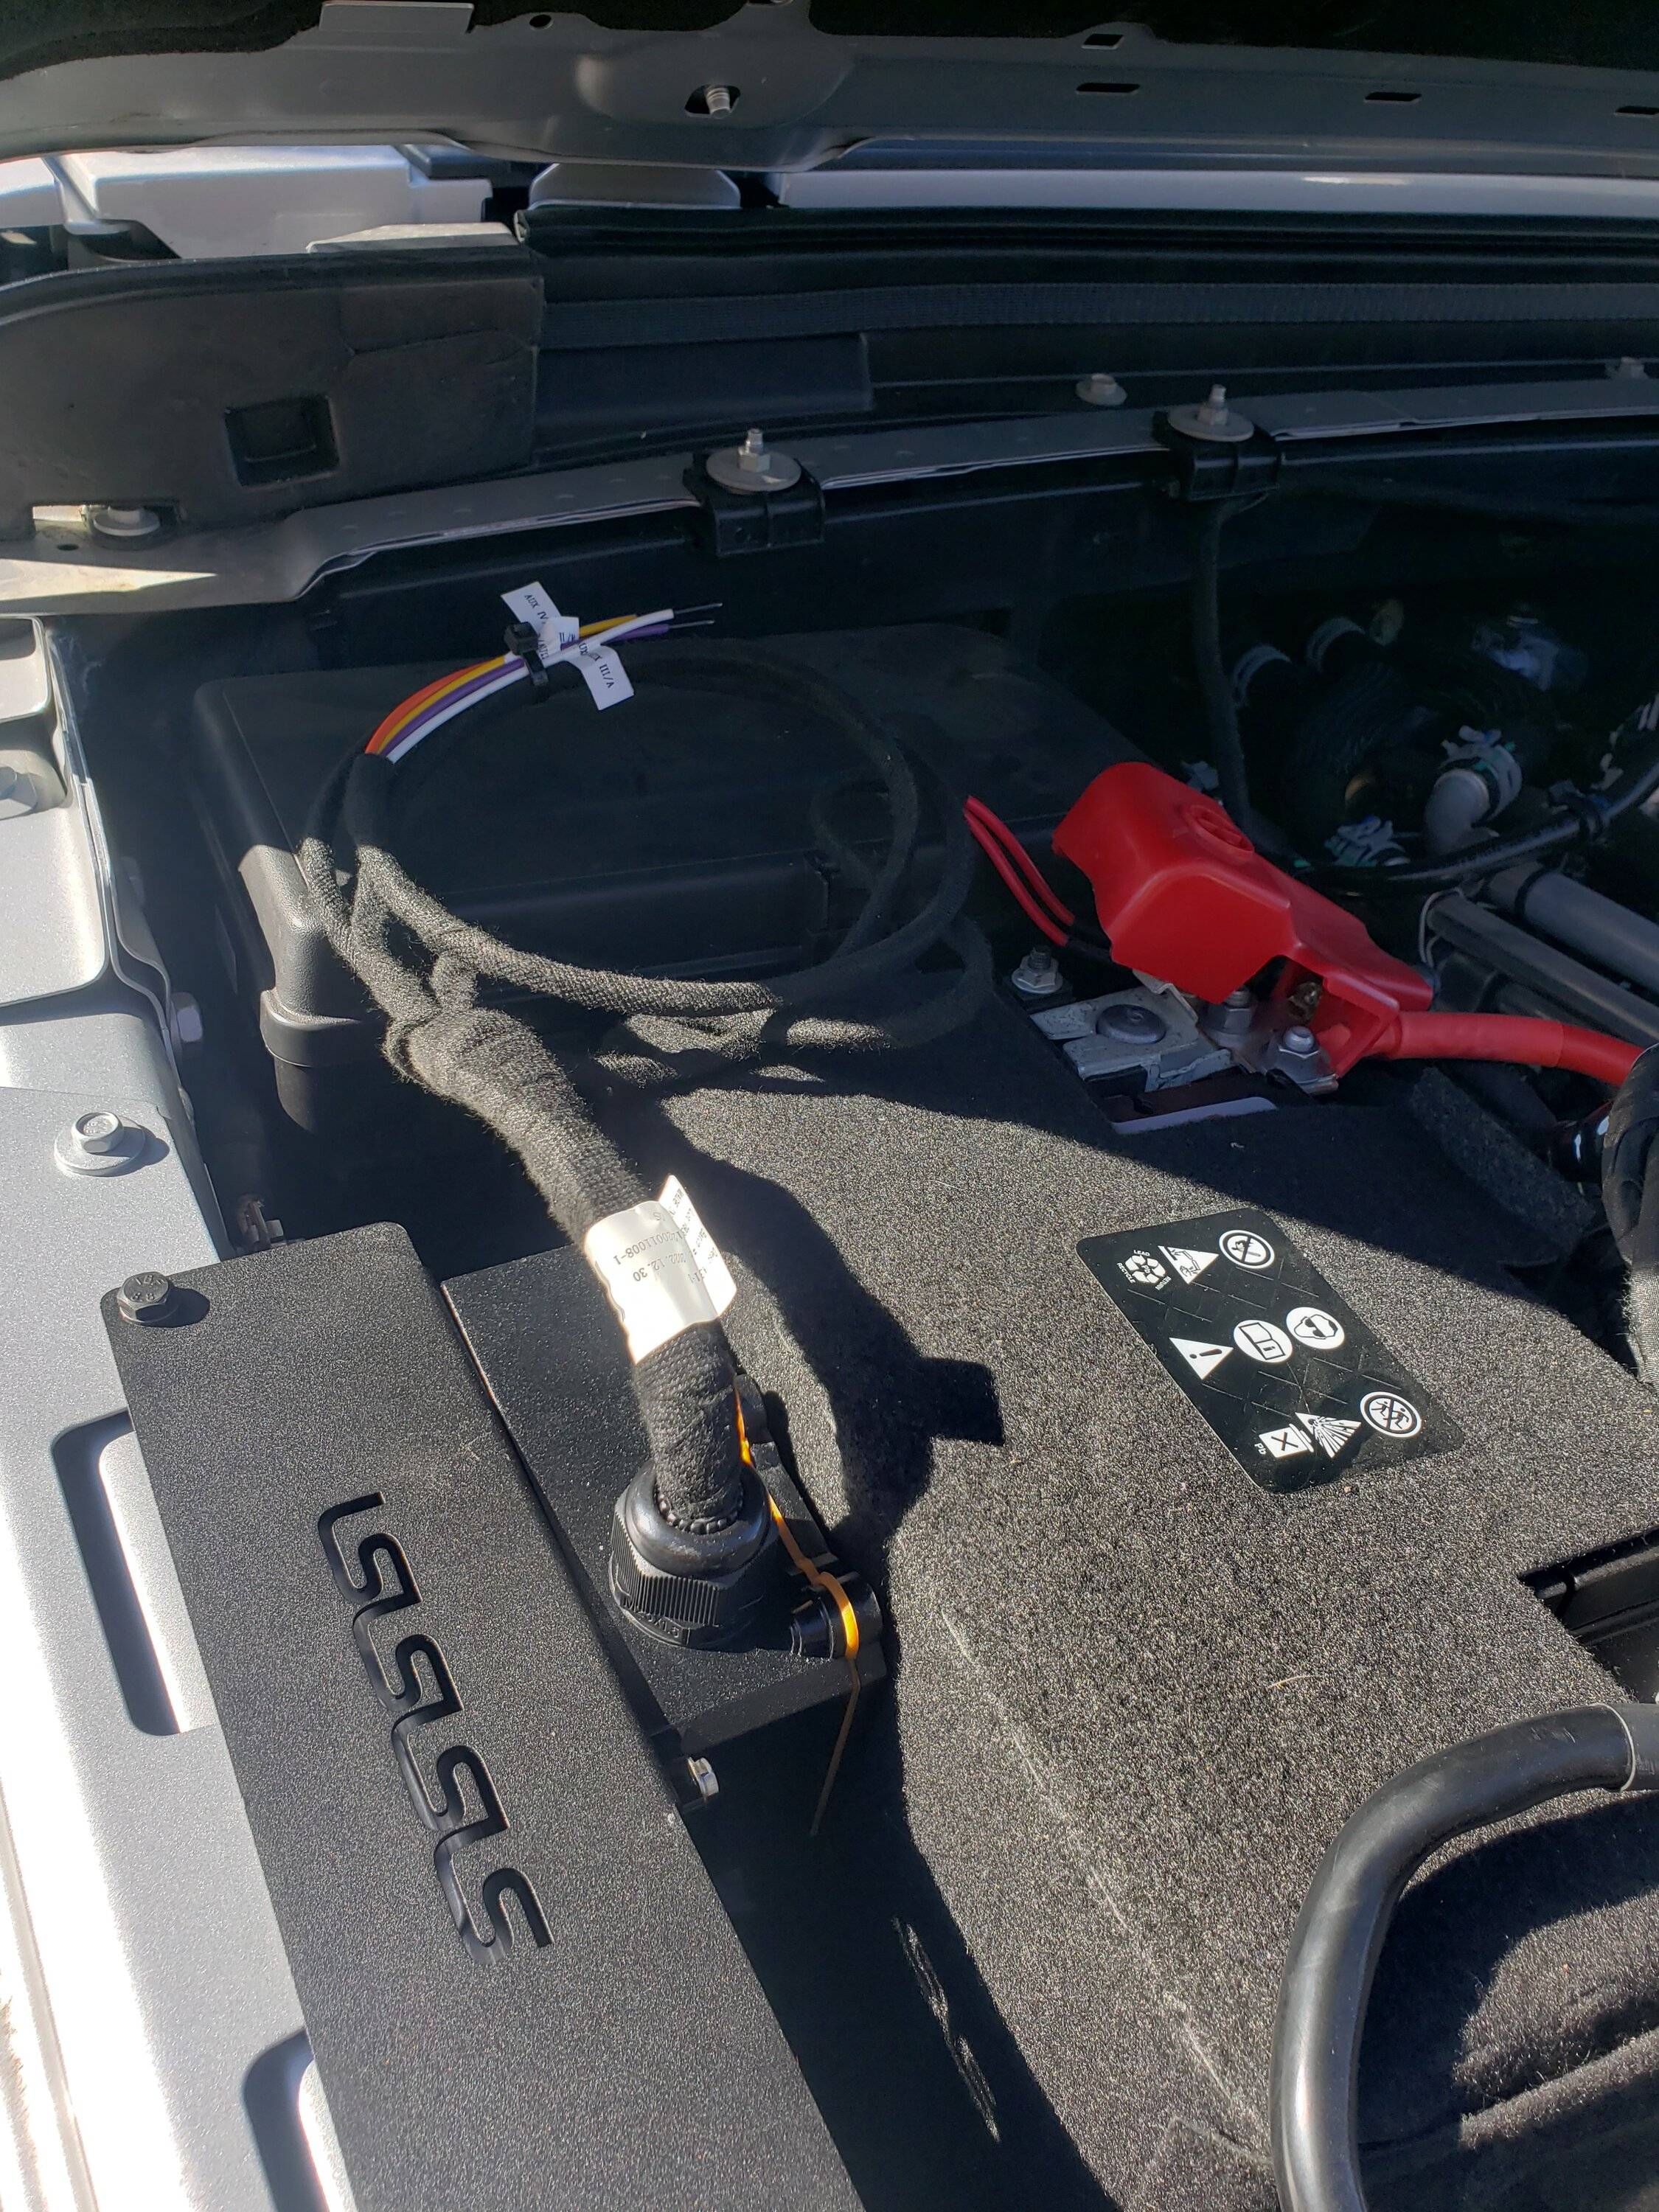
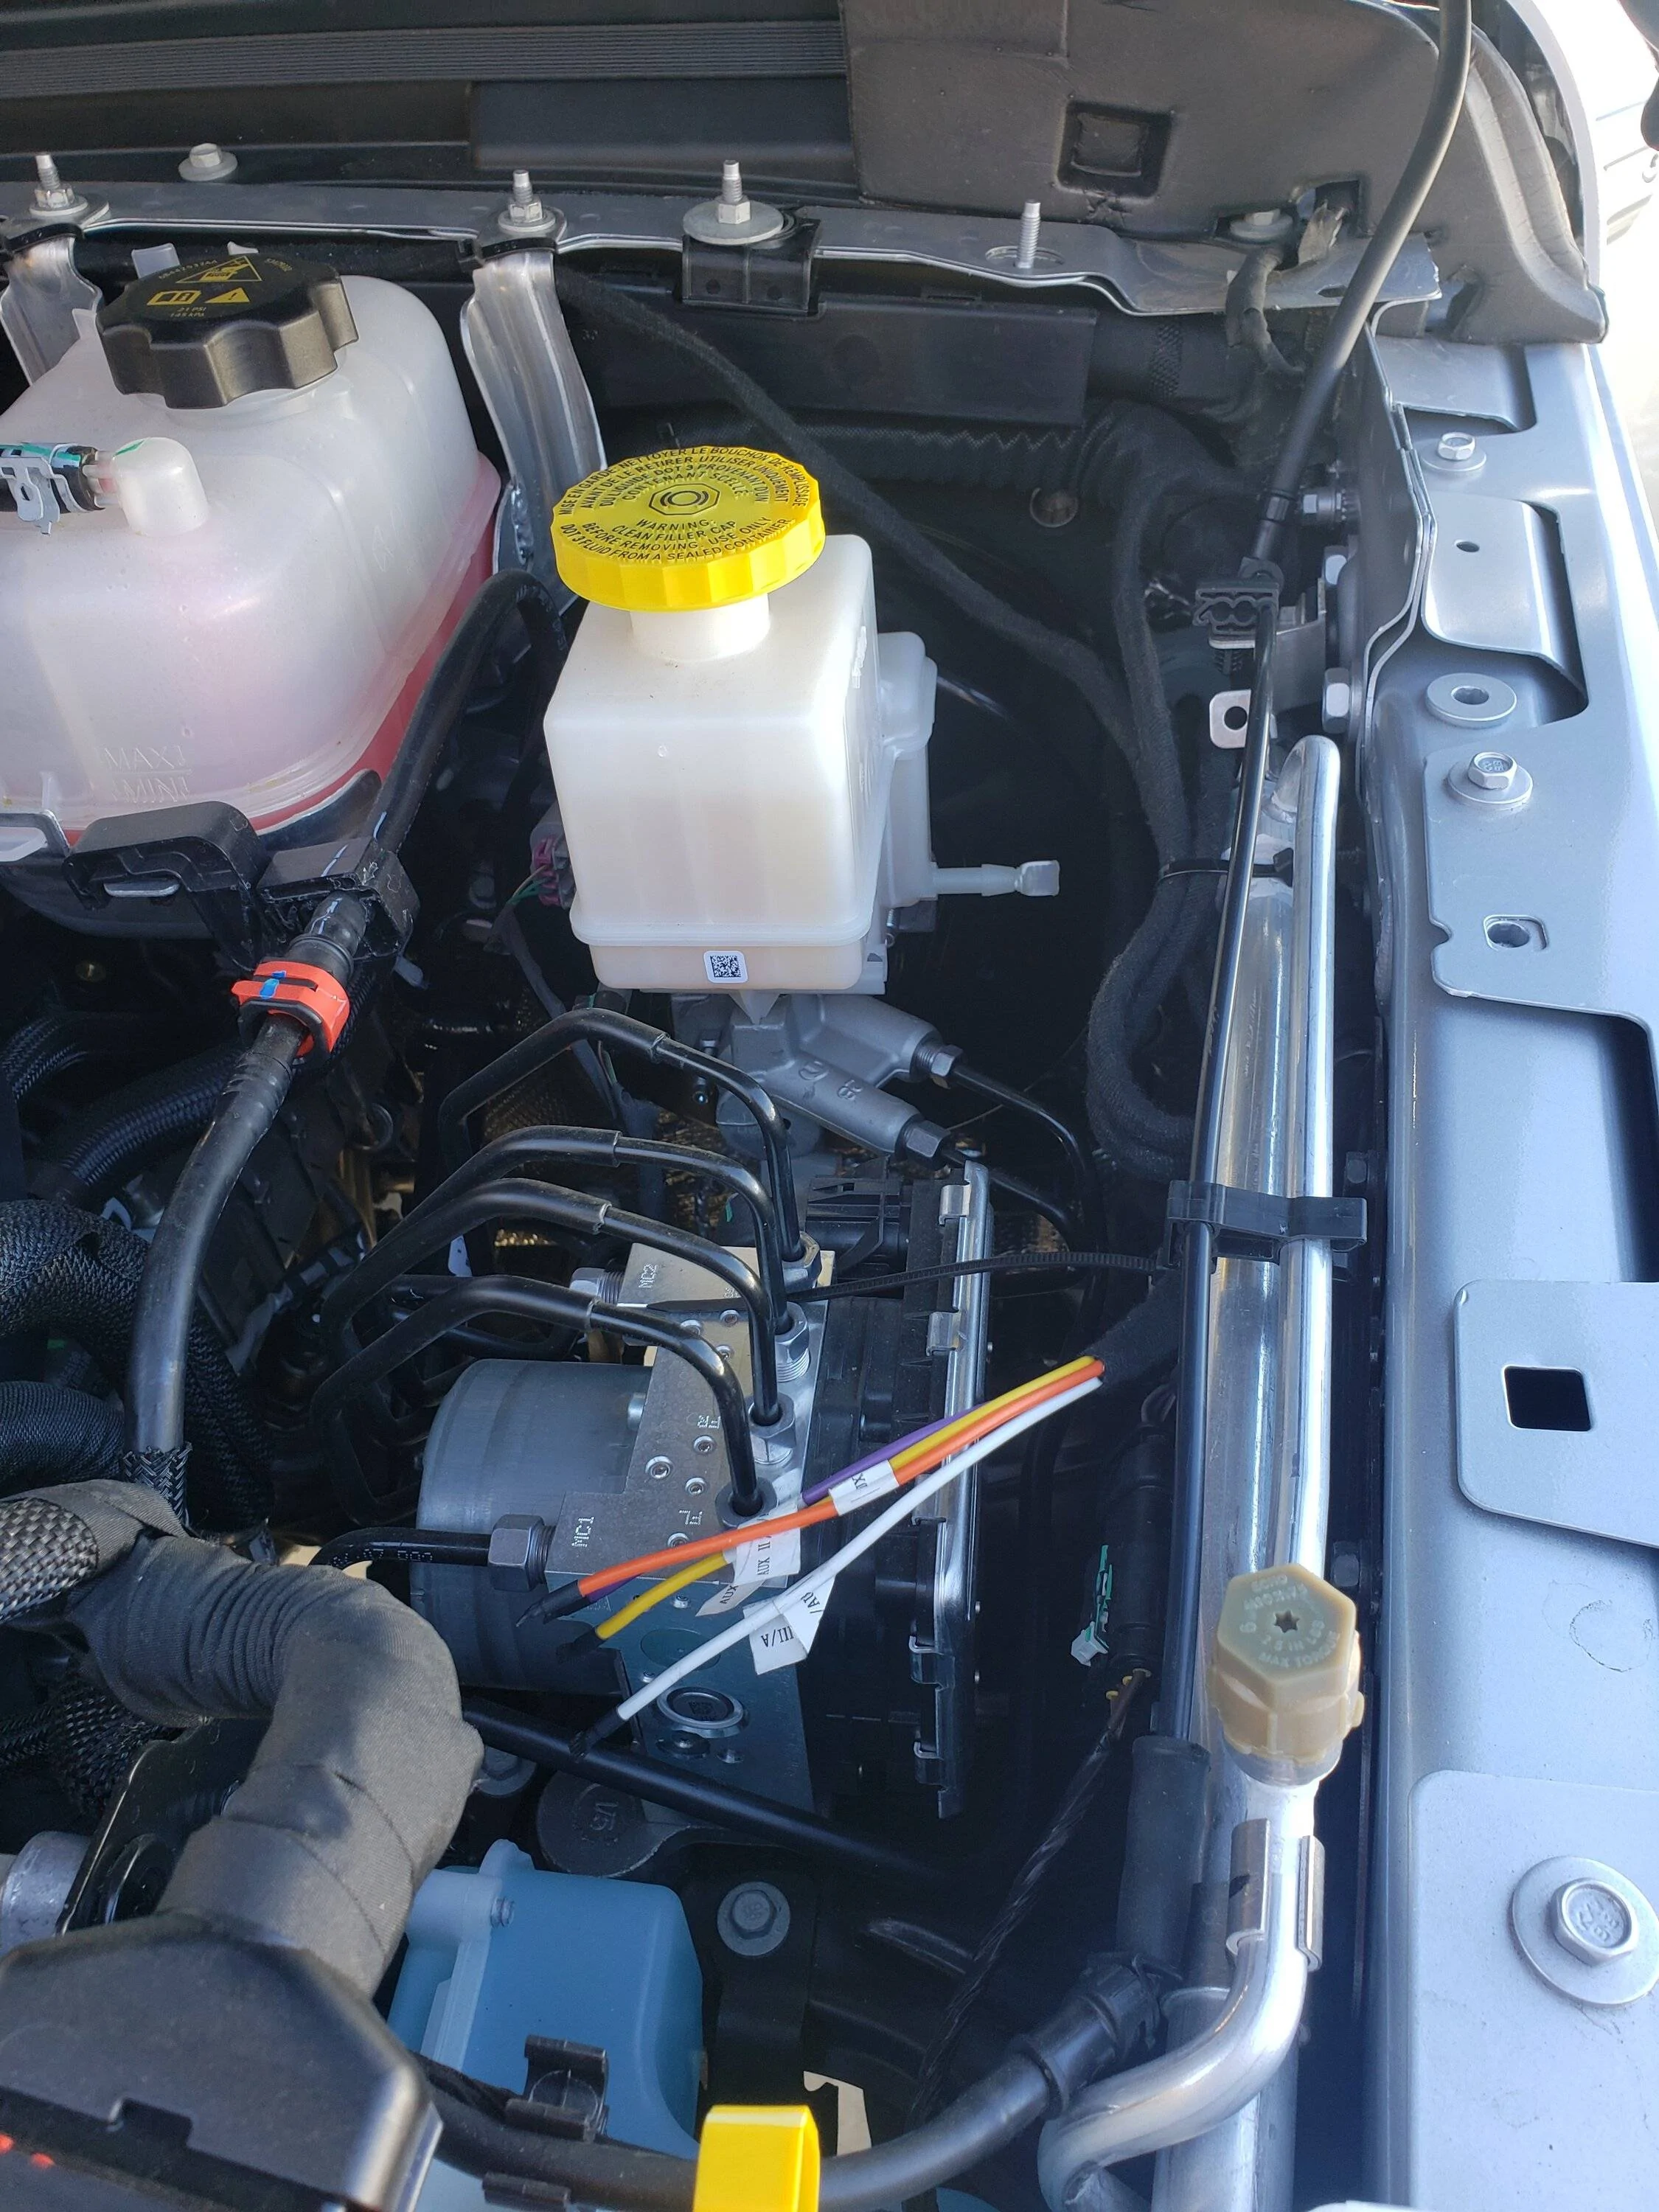
I realized I didn't post pics of the aux switch install...

Jeep Gladiator Jane, the JTR 20231007_094651


Jeep Gladiator Jane, the JTR 20231007_093637


Jeep Gladiator Jane, the JTR 20231007_093628
Sponsored

 
OP
OP
SD Rider

SD Rider

Well-Known Member
First Name
Jeff
Joined
Jun 1, 2023
Threads
9
Messages
197
Reaction score
185
Location
Sandy Eggo, KA
Vehicle(s)
2023 Jeep Gladiator Rubicon
Build Thread
Link
Occupation
Location Specialist
I was able to take a few days out to Lake Havasu. Got the stock 33s in dirt before the lift.

Jeep Gladiator Jane, the JTR 20231215_155649


Jeep Gladiator Jane, the JTR 20231215_155630


Jeep Gladiator Jane, the JTR 20231215_153704
 
OP
OP
SD Rider

SD Rider

Well-Known Member
First Name
Jeff
Joined
Jun 1, 2023
Threads
9
Messages
197
Reaction score
185
Location
Sandy Eggo, KA
Vehicle(s)
2023 Jeep Gladiator Rubicon
Build Thread
Link
Occupation
Location Specialist
Mounted my traction boards today!

Had to add a couple holes...but they look good. Hopefully they function well also!

Jeep Gladiator Jane, the JTR 20231221_113240


Jeep Gladiator Jane, the JTR 20231221_113245
 
OP
OP
SD Rider

SD Rider

Well-Known Member
First Name
Jeff
Joined
Jun 1, 2023
Threads
9
Messages
197
Reaction score
185
Location
Sandy Eggo, KA
Vehicle(s)
2023 Jeep Gladiator Rubicon
Build Thread
Link
Occupation
Location Specialist
Recruited my kids to help and got the rear 90% completed.

I'll have a bit of a writeup....more of a notice of differences from videos....but this is the only pic so far. Darkness and the need to close my garage door cut today's progress short.

Did already order 37 Yokos and Method Bead grips wheels. ?

Jeep Gladiator Jane, the JTR 20231231_170704
 

Sponsored

OP
OP
SD Rider

SD Rider

Well-Known Member
First Name
Jeff
Joined
Jun 1, 2023
Threads
9
Messages
197
Reaction score
185
Location
Sandy Eggo, KA
Vehicle(s)
2023 Jeep Gladiator Rubicon
Build Thread
Link
Occupation
Location Specialist
Method bead grips and Yoko 37s installed!

With the rain and life in the way the front lift is delayed. Rear is finished other than tightening the jam nuts. I don't have wrenches that big and will need to make a purchase. Did crack my 21mm impact socket. So need another before moving forward.

Work is taking over for a couple weeks so no progress until late January or February.

Oh...and the Yoko 37 spare fits in the stock location!!!

Pics!

Jeep Gladiator Jane, the JTR 20240106_161124


Jeep Gladiator Jane, the JTR 20240106_165225


Jeep Gladiator Jane, the JTR 20240106_173946
 
OP
OP
SD Rider

SD Rider

Well-Known Member
First Name
Jeff
Joined
Jun 1, 2023
Threads
9
Messages
197
Reaction score
185
Location
Sandy Eggo, KA
Vehicle(s)
2023 Jeep Gladiator Rubicon
Build Thread
Link
Occupation
Location Specialist
Making progress. Actually tried to tap out but my mechanic is too busy. ??

Fender liners and fenders pulled.
Starting on passenger side. Kicking my own ass....but doing it myself.

Jeep Gladiator Jane, the JTR 20240114_152740


Jeep Gladiator Jane, the JTR 20240114_152756
 

outdoor.adventures

Well-Known Member
First Name
Tyler
Joined
Apr 4, 2022
Threads
2
Messages
127
Reaction score
235
Location
Salt Lake City Metropolitan Area, Utah
Website
www.instagram.com
Vehicle(s)
2021 Gladiator Mojave
Build Thread
Link
Occupation
Software Engineer
Making progress. Actually tried to tap out but my mechanic is too busy. ??

Fender liners and fenders pulled.
Starting on passenger side. Kicking my own ass....but doing it myself.

20240114_152740.jpg


20240114_152756.jpg
Keep it up, lookin good!
 
OP
OP
SD Rider

SD Rider

Well-Known Member
First Name
Jeff
Joined
Jun 1, 2023
Threads
9
Messages
197
Reaction score
185
Location
Sandy Eggo, KA
Vehicle(s)
2023 Jeep Gladiator Rubicon
Build Thread
Link
Occupation
Location Specialist
outdoor.adventures said:
Keep it up, lookin good!
Thanks! Got stuck before it got dark. Upper Control arm (UCA) wasn't aligning. Double checked measurements... I'm going to try removing the UCA and LCA on the driver side. I think it may be holding it from aligning.
 

Sponsored

OP
OP
SD Rider

SD Rider

Well-Known Member
First Name
Jeff
Joined
Jun 1, 2023
Threads
9
Messages
197
Reaction score
185
Location
Sandy Eggo, KA
Vehicle(s)
2023 Jeep Gladiator Rubicon
Build Thread
Link
Occupation
Location Specialist
Sure enough. Removed driver side stock CAs and the passenger UCA slid into place.

One thing learned during this install. If something doesn't fit try raising or lowering the jack.

Found an incorrect measurement/typo for the front swaybar links so waiting for a response from @Clayton Off Road. Rear was only cut 1/4" each side of the rod. Front states to cut 3" each side. I'm betting its more like 1.5-2" each side.

Todo:
•Front swaybar links
•Artec inner fender liners, vented with Falcon cutouts.
•Reinstall fenders (new clips ordered)
•Heavy duty steering w/ Falcon stabilizer
•Torque everything down
•Alignment.

Jeep Gladiator Jane, the JTR 20240115_145328


Jeep Gladiator Jane, the JTR 20240115_145336


Jeep Gladiator Jane, the JTR 20240115_145344


Jeep Gladiator Jane, the JTR 20240115_145359
 

outdoor.adventures

Well-Known Member
First Name
Tyler
Joined
Apr 4, 2022
Threads
2
Messages
127
Reaction score
235
Location
Salt Lake City Metropolitan Area, Utah
Website
www.instagram.com
Vehicle(s)
2021 Gladiator Mojave
Build Thread
Link
Occupation
Software Engineer
Sure enough. Removed driver side stock CAs and the passenger UCA slid into place.

One thing learned during this install. If something doesn't fit try raising or lowering the jack.

Found an incorrect measurement/typo for the front swaybar links so waiting for a response from @Clayton Off Road. Rear was only cut 1/4" each side of the rod. Front states to cut 3" each side. I'm betting its more like 1.5-2" each side.

Todo:
•Front swaybar links
•Artec inner fender liners, vented with Falcon cutouts.
•Reinstall fenders (new clips ordered)
•Heavy duty steering w/ Falcon stabilizer
•Torque everything down
•Alignment.

20240115_145328.jpg


20240115_145336.jpg


20240115_145344.jpg


20240115_145359.jpg
Looks awesome. Love the look with the lift and the aggressive tires. Congrats and nice job!
 
OP
OP
SD Rider

SD Rider

Well-Known Member
First Name
Jeff
Joined
Jun 1, 2023
Threads
9
Messages
197
Reaction score
185
Location
Sandy Eggo, KA
Vehicle(s)
2023 Jeep Gladiator Rubicon
Build Thread
Link
Occupation
Location Specialist
outdoor.adventures said:
Looks awesome. Love the look with the lift and the aggressive tires. Congrats and nice job!
Thanks! Definitely sweat labor! ?
 

Clayton Off Road

Summit Sponsor (Level 3)
First Name
James
Joined
Jan 27, 2020
Threads
38
Messages
879
Reaction score
1,216
Location
Hamden, Ct
Vehicle(s)
2018 JLUR
Sure enough. Removed driver side stock CAs and the passenger UCA slid into place.

One thing learned during this install. If something doesn't fit try raising or lowering the jack.

Found an incorrect measurement/typo for the front swaybar links so waiting for a response from @Clayton Off Road. Rear was only cut 1/4" each side of the rod. Front states to cut 3" each side. I'm betting its more like 1.5-2" each side.

Todo:
•Front swaybar links
•Artec inner fender liners, vented with Falcon cutouts.
•Reinstall fenders (new clips ordered)
•Heavy duty steering w/ Falcon stabilizer
•Torque everything down
•Alignment.

20240115_145328.jpg


20240115_145336.jpg


20240115_145344.jpg


20240115_145359.jpg
Hey Jeff!

Truck looks great! I just wanted to chime in as I don't want you to experience any issues down the road. When trying to get the second upper control arm bolt hole to line up, the best thing to do is to just make a couple of turns on the adjuster in order to get the bolt through, rather than to try and remove anything or to try and shift the axle.

Basically due to the triangulation the front portion of the geometry has from the factory, you don't want to force the second upper into position as this will create a constant twisting force leading to premature bushing ware and suspension bind. The front uppers do not actually have to be the same exact length, as you only have to use one of the uppers to set your caster angle, and then just get the other one in even if it requires a couple of extra turns to the adjuster.

For the most updated version of the lengths and measurements, check out the "Quick Guide" located under the instructions on our kits. The sway bar measurements should be very accurate, but as long as you are able to position the actual sway bar just slightly above parallel you should be good to go!
 
OP
OP
SD Rider

SD Rider

Well-Known Member
First Name
Jeff
Joined
Jun 1, 2023
Threads
9
Messages
197
Reaction score
185
Location
Sandy Eggo, KA
Vehicle(s)
2023 Jeep Gladiator Rubicon
Build Thread
Link
Occupation
Location Specialist
Clayton Off Road said:
Hey Jeff!

Truck looks great! I just wanted to chime in as I don't want you to experience any issues down the road. When trying to get the second upper control arm bolt hole to line up, the best thing to do is to just make a couple of turns on the adjuster in order to get the bolt through, rather than to try and remove anything or to try and shift the axle.

Basically due to the triangulation the front portion of the geometry has from the factory, you don't want to force the second upper into position as this will create a constant twisting force leading to premature bushing ware and suspension bind. The front uppers do not actually have to be the same exact length, as you only have to use one of the uppers to set your caster angle, and then just get the other one in even if it requires a couple of extra turns to the adjuster.

For the most updated version of the lengths and measurements, check out the "Quick Guide" located under the instructions on our kits. The sway bar measurements should be very accurate, but as long as you are able to position the actual sway bar just slightly above parallel you should be good to go!
Thanks! I sent a pm with this information:

Front swaybar end links say to cut 3.031" off each end for an overall length of 9.063".

The bar is 13". Cut each end 3.031 = 6.062 off of a 13" bar = 6.938".
Sponsored


Top