Sponsored

Jane, the JTR

Clayton Off Road

Summit Sponsor (Level 3)
First Name
James
Joined
Jan 27, 2020
Threads
35
Messages
793
Reaction score
1,080
Location
Hamden, Ct
Vehicle(s)
2018 JLUR
Thanks! I sent a pm with this information:

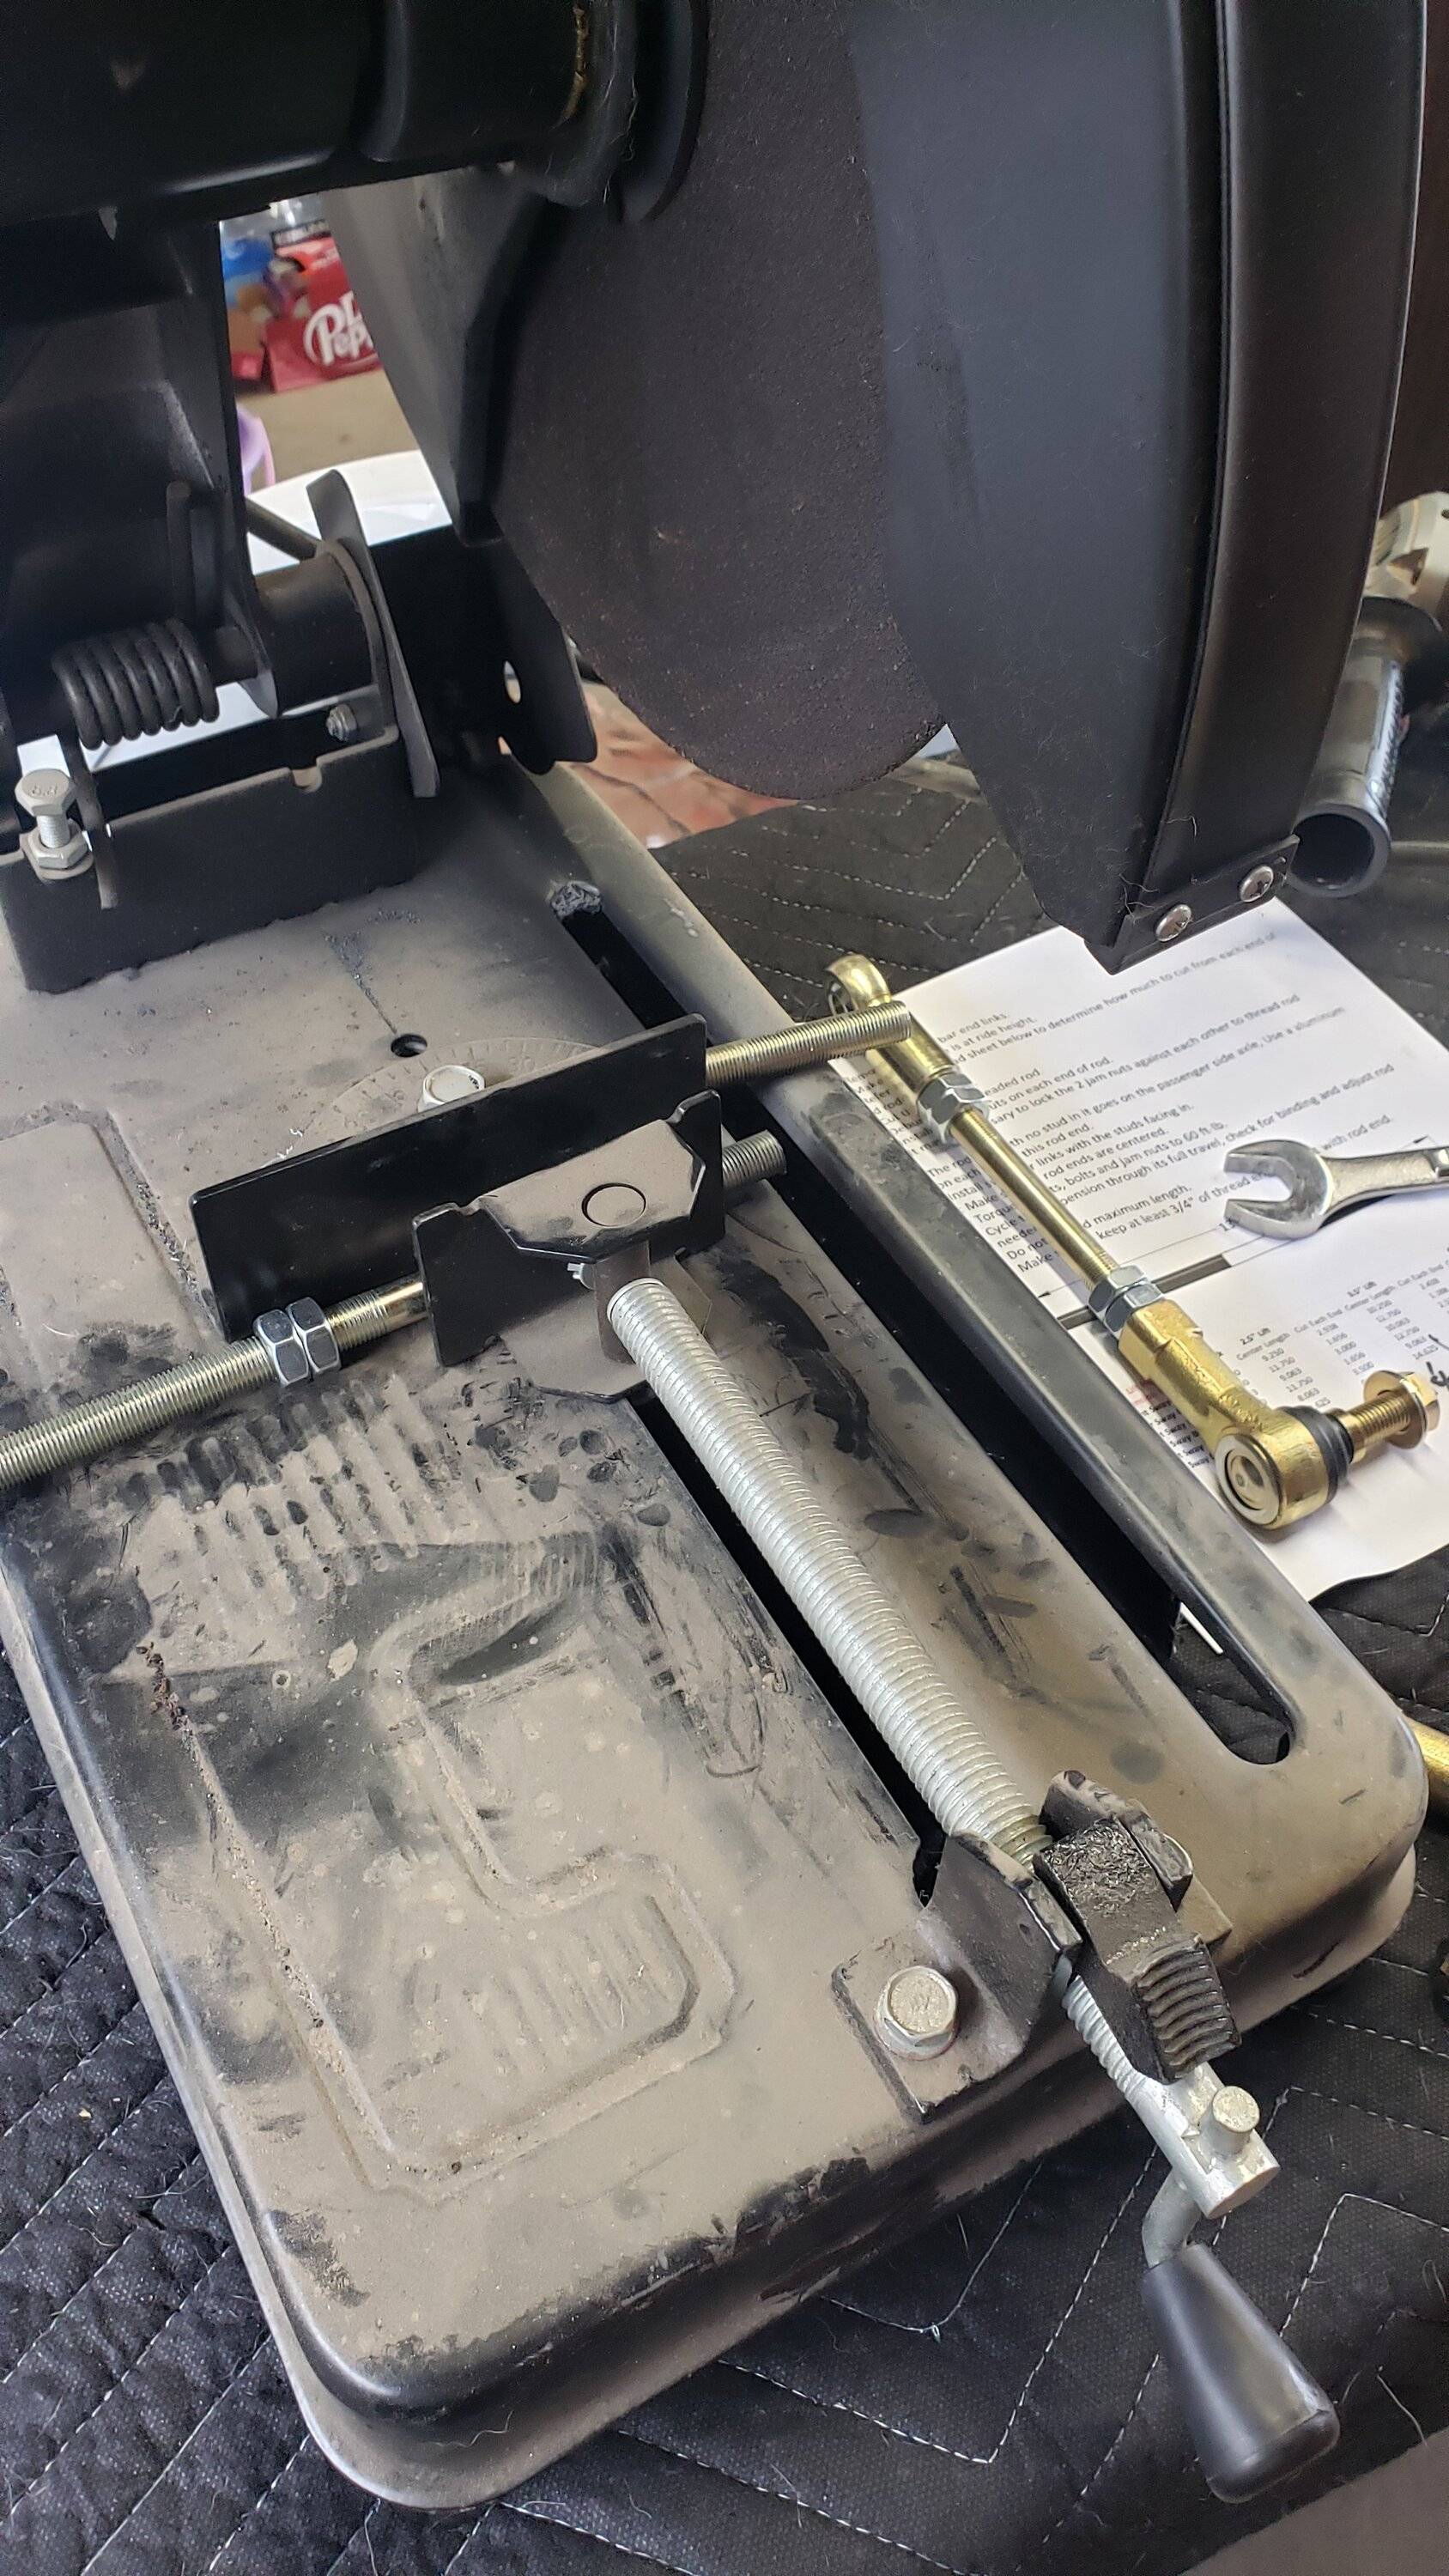
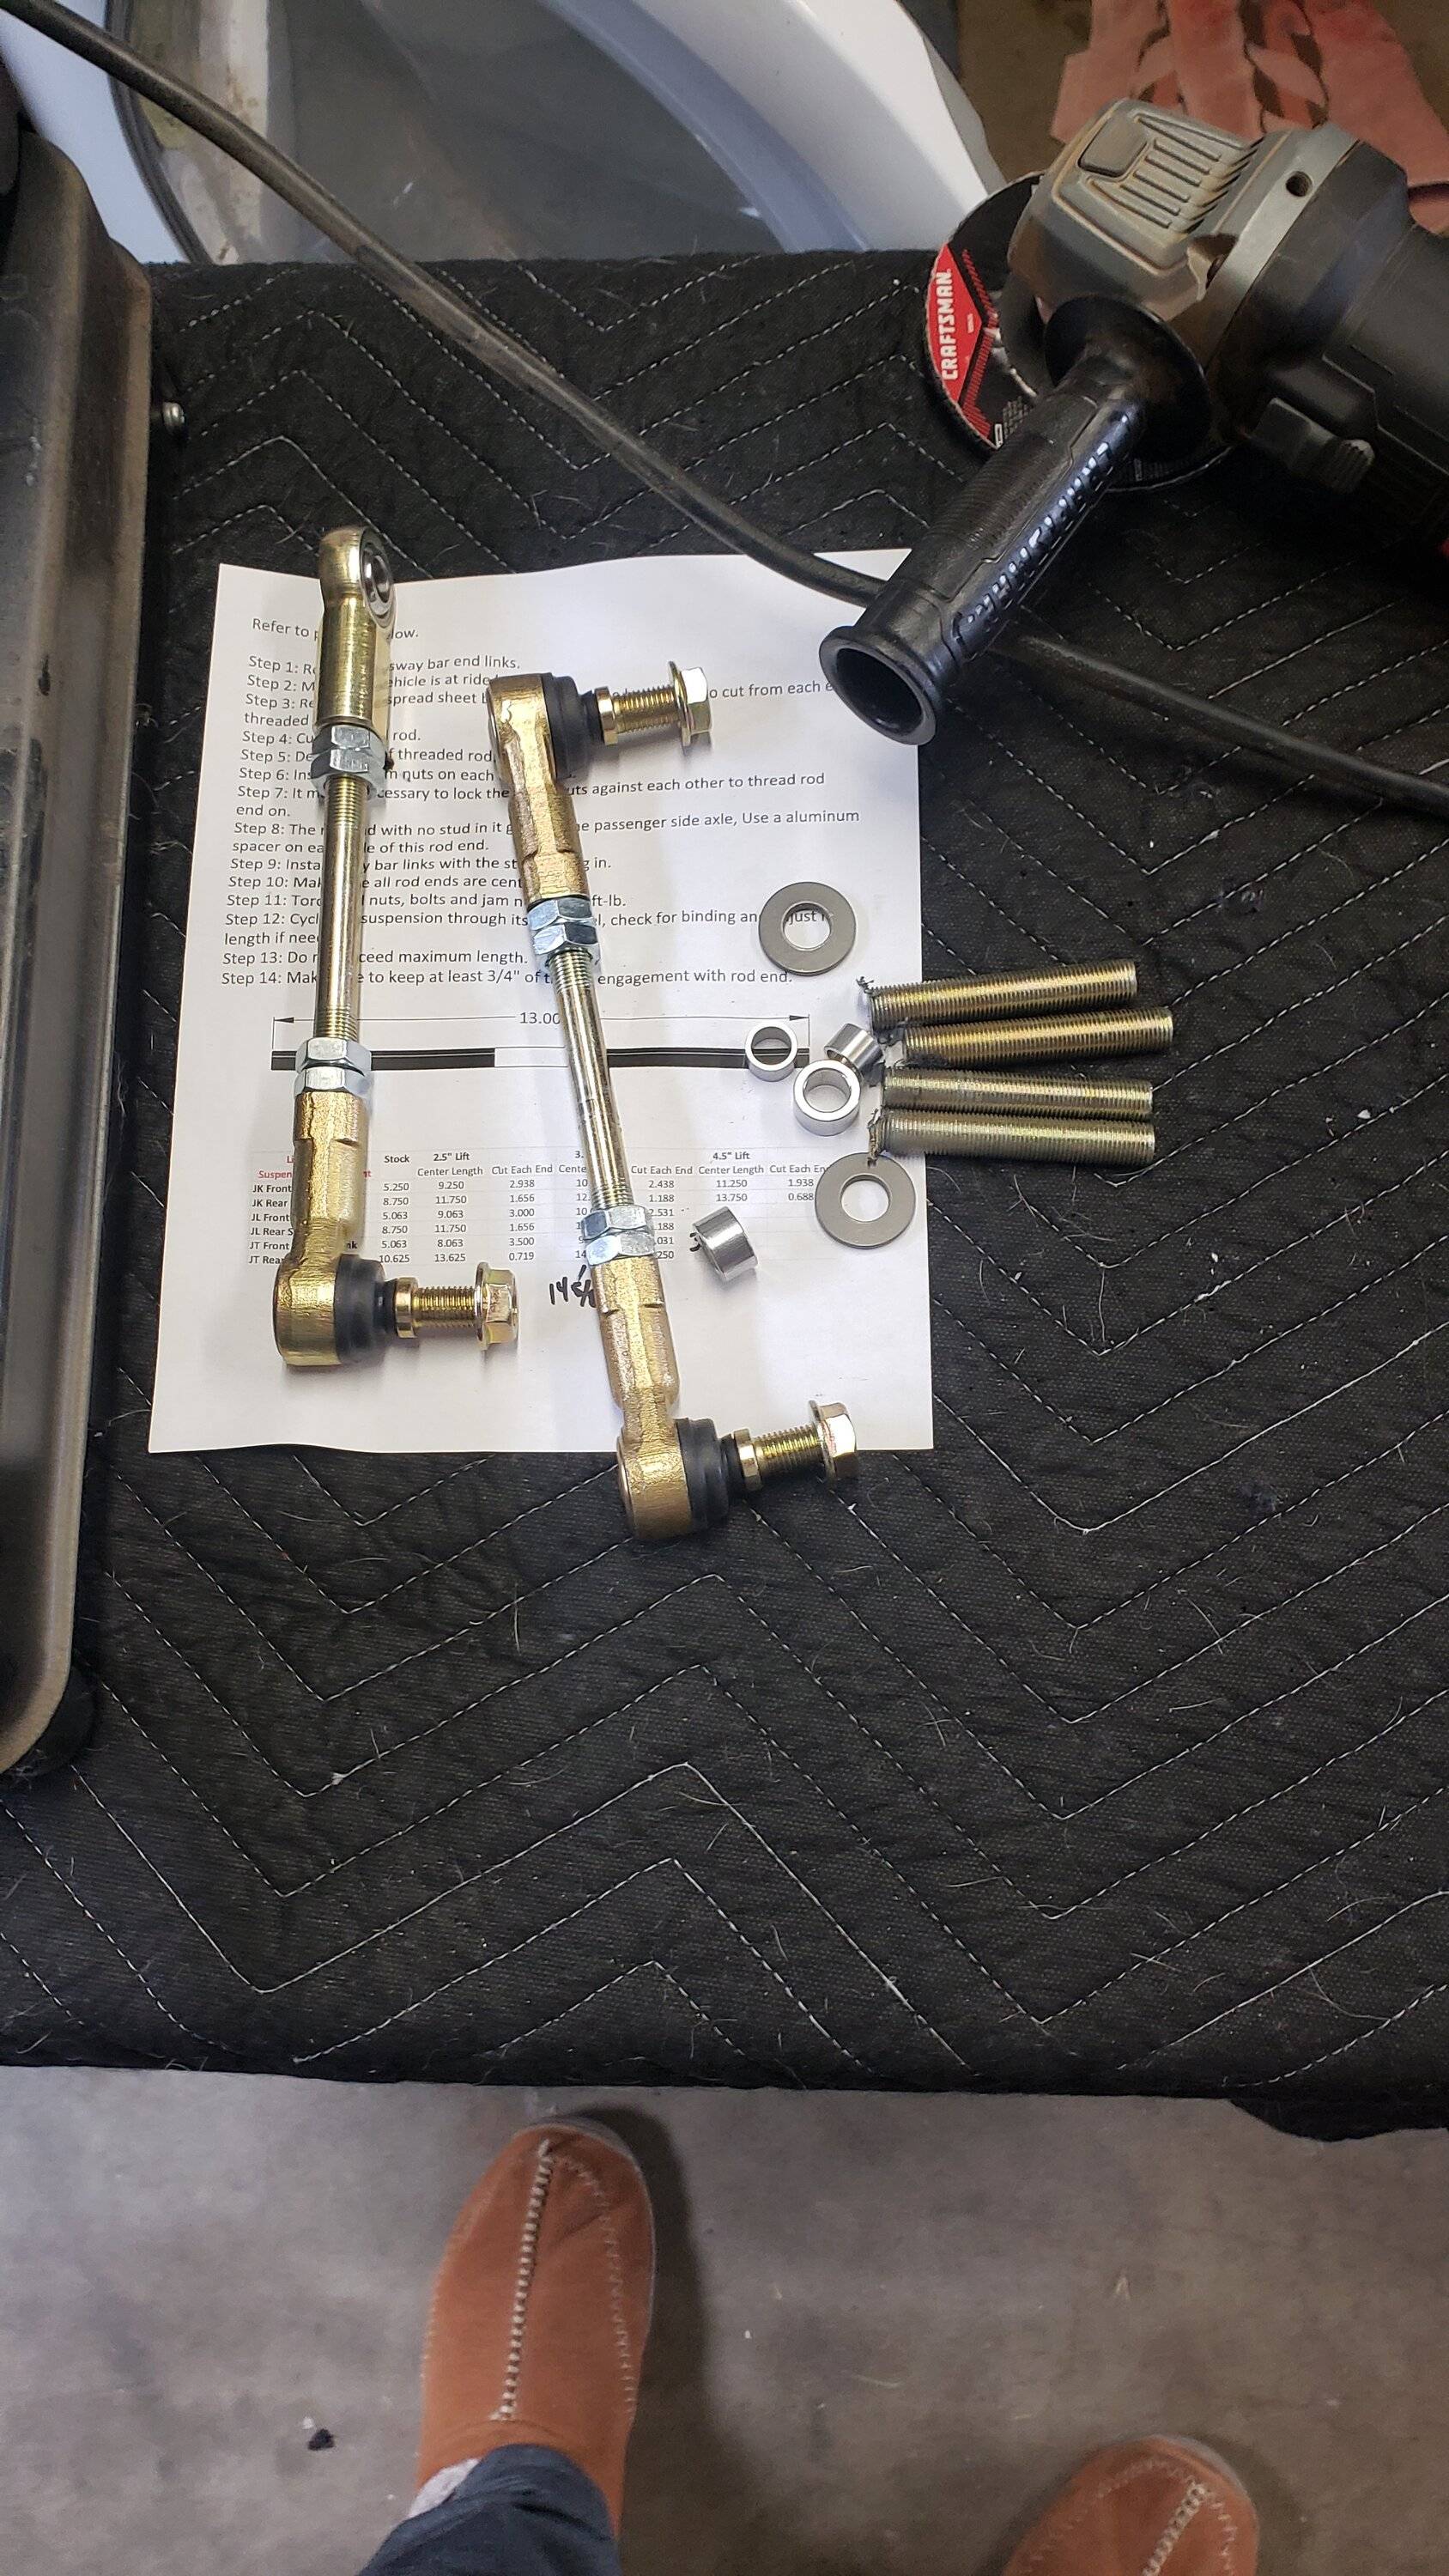
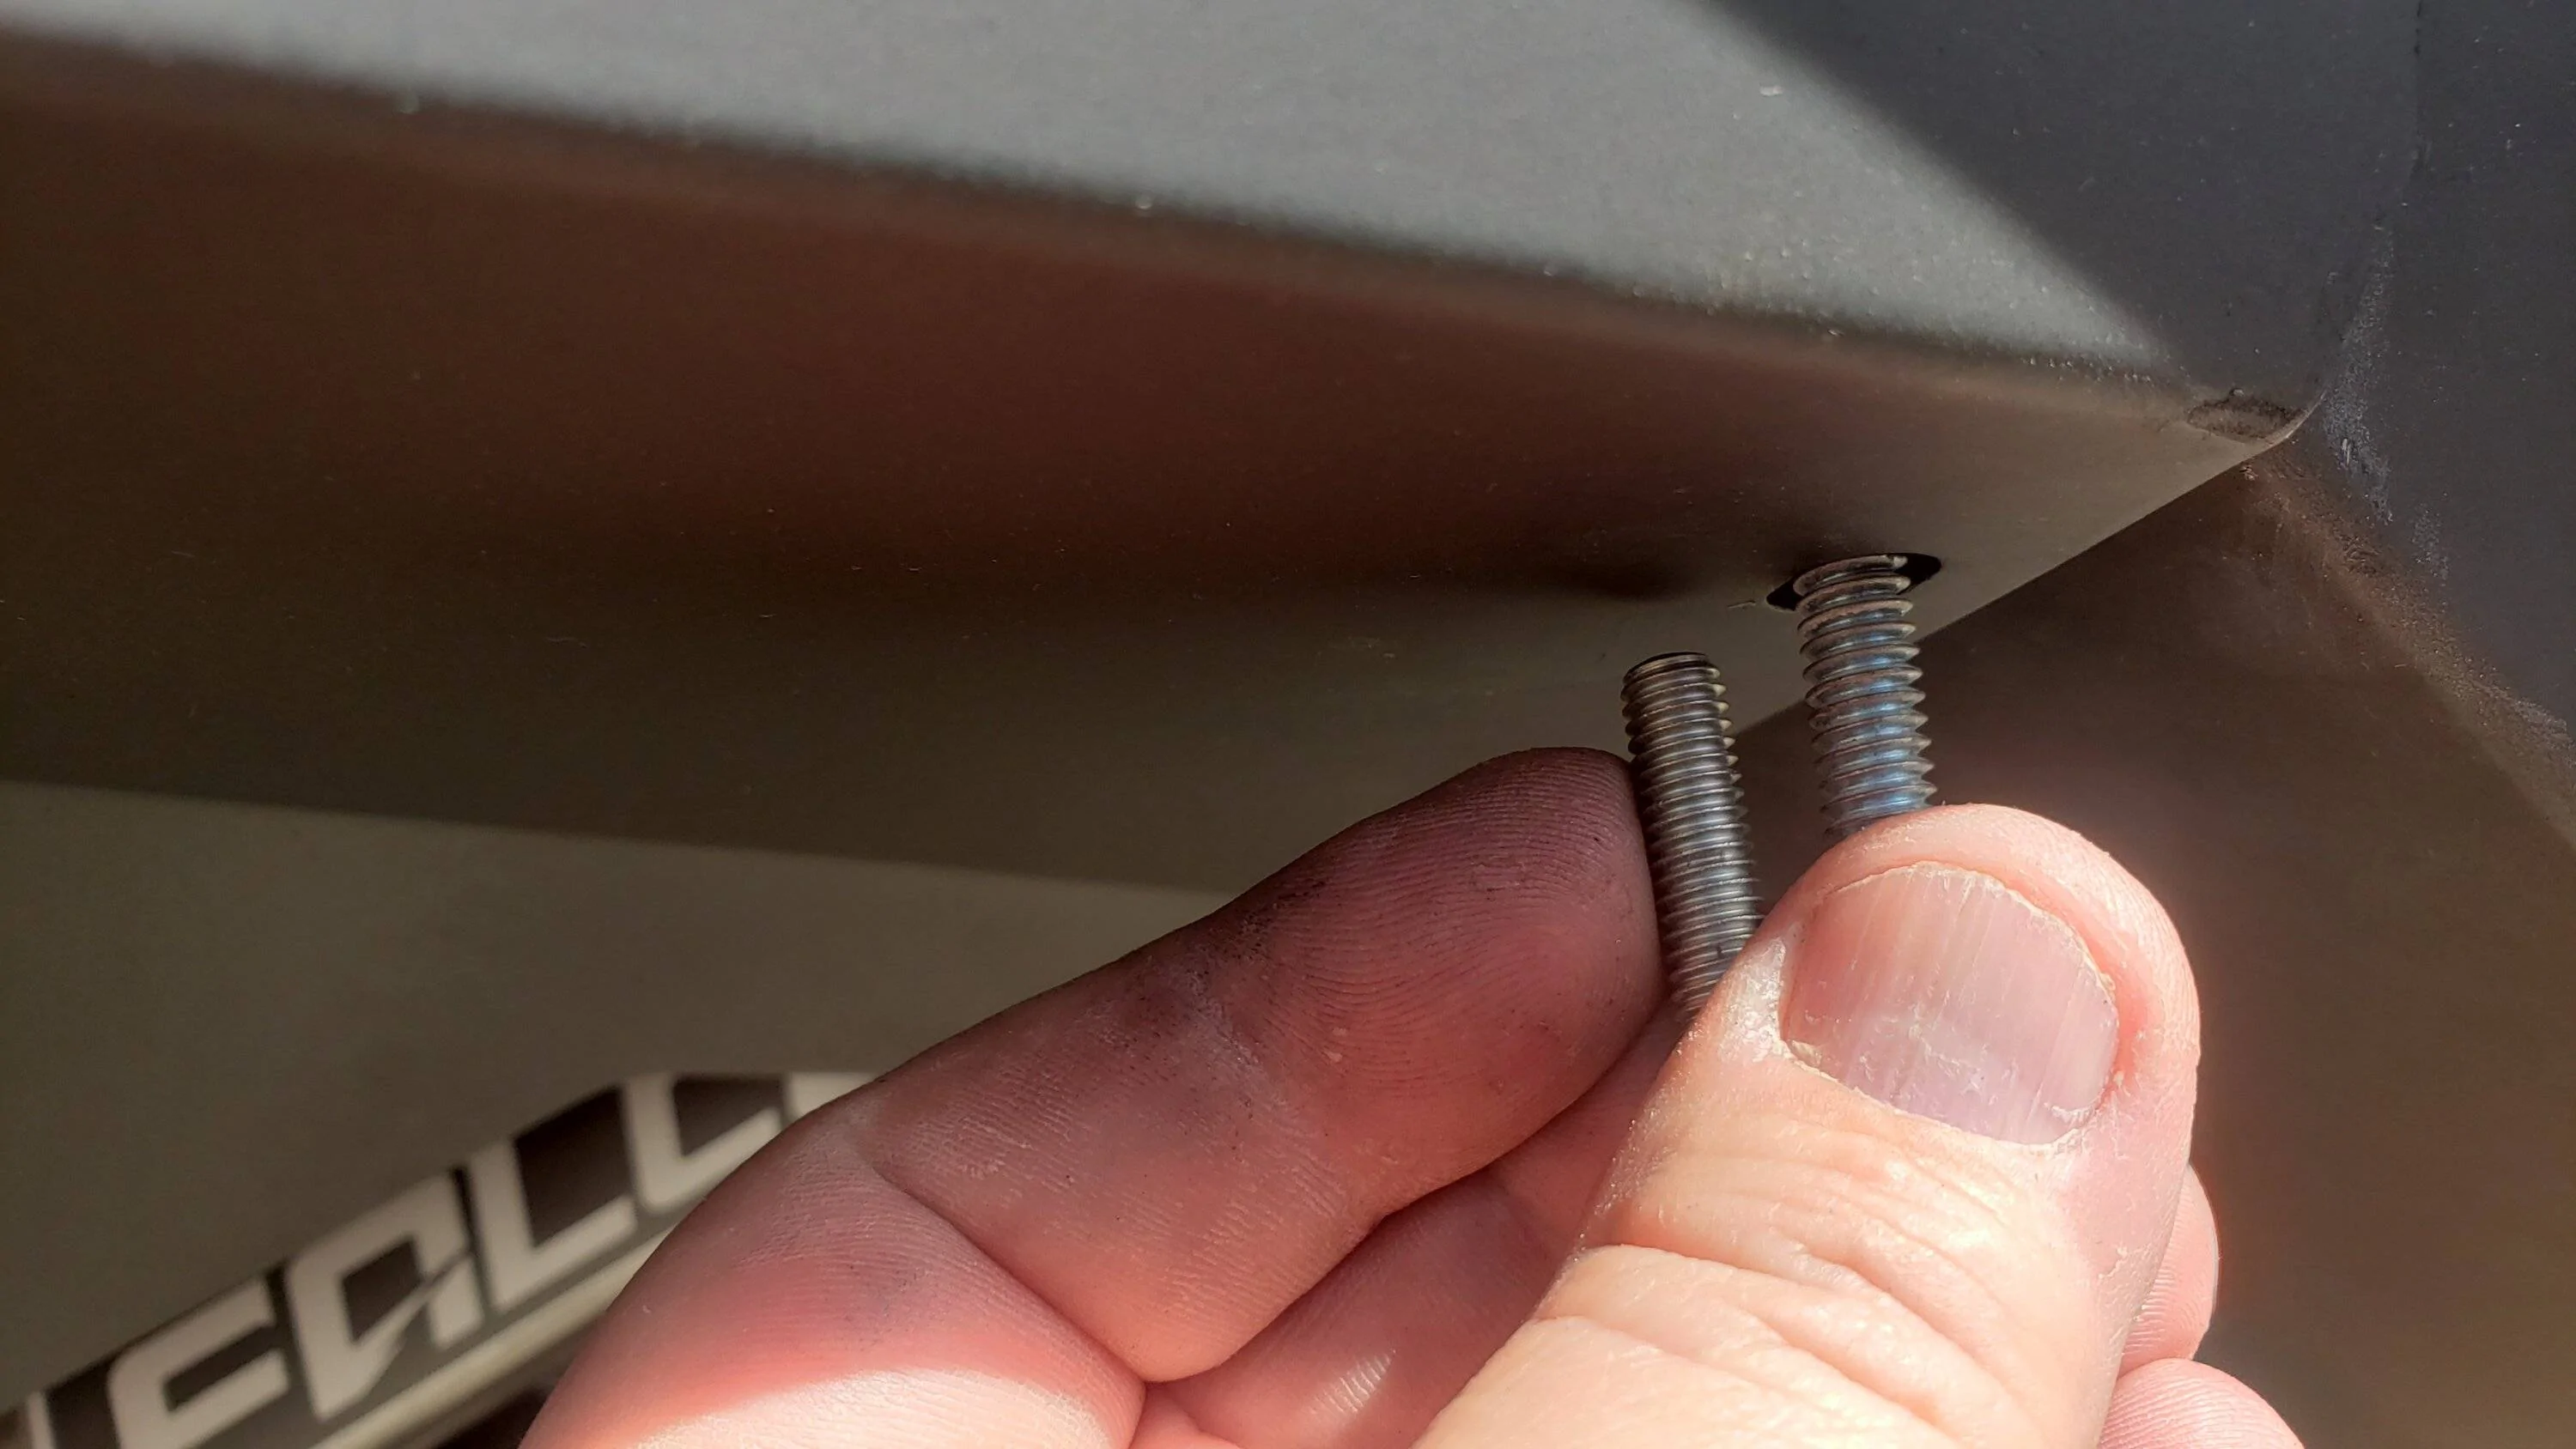
Front swaybar end links say to cut 3.031" off each end for an overall length of 9.063".

The bar is 13". Cut each end 3.031 = 6.062 off of a 13" bar = 6.938".
This can be confusing, the overall length is actually once the end pieces are on though! Hope that helps to clarify!
Sponsored

 
OP
OP
SD Rider

SD Rider

Well-Known Member
First Name
Jeff
Joined
Jun 1, 2023
Threads
8
Messages
172
Reaction score
159
Location
Sandy Eggo, KA
Vehicle(s)
2023 Jeep Gladiator Rubicon
Build Thread
Link
Occupation
Location Specialist
Clayton Off Road said:
This can be confusing, the overall length is actually once the end pieces are on though! Hope that helps to clarify!
Thanks! Cut today and set eye to eye at 9"

20240120_113810.jpg


20240120_114609.jpg
 
OP
OP
SD Rider

SD Rider

Well-Known Member
First Name
Jeff
Joined
Jun 1, 2023
Threads
8
Messages
172
Reaction score
159
Location
Sandy Eggo, KA
Vehicle(s)
2023 Jeep Gladiator Rubicon
Build Thread
Link
Occupation
Location Specialist
Also started @Artec inner fender liners after adding a 2nd coat of Rustoleum Black.

Fronts are on hold. Started to rain and I need to drill holes and install rivnuts.

20240120_111933.jpg


20240120_111926.jpg


20240120_122300.jpg


20240120_122306.jpg
 
OP
OP
SD Rider

SD Rider

Well-Known Member
First Name
Jeff
Joined
Jun 1, 2023
Threads
8
Messages
172
Reaction score
159
Location
Sandy Eggo, KA
Vehicle(s)
2023 Jeep Gladiator Rubicon
Build Thread
Link
Occupation
Location Specialist
@Artec. You should provide a symbol template if you don't already.. Tried to paint the symbol red... masking was a huge fail, so ordered some artist paint. Even bigger fail. Washed it off and leaving it all black.

Anyway to provide a painting template? It would look really great with a red symbol!
 
OP
OP
SD Rider

SD Rider

Well-Known Member
First Name
Jeff
Joined
Jun 1, 2023
Threads
8
Messages
172
Reaction score
159
Location
Sandy Eggo, KA
Vehicle(s)
2023 Jeep Gladiator Rubicon
Build Thread
Link
Occupation
Location Specialist
Finished the Fender Liner install today. The driver's was easier and lined up better than the passenger. Also installed my front sway bar end links.

All that's left for the lift is to do final torque, then I'll be ready for the road and shakedown runs.

Artec messed on one bolt and no spares, but luckily I had a 1/4-20 course thread that fit.

Oh...and I mistakenly installed the passenger fender. I forgot to take the stock fender liner, install and trim it. Hopefully that will be on the agenda, with final torque tomorrow.

If anyone is looking at these at the YT video for installation, I found it easier to drill using a step bit, then the final 25/64 bit for the rivnut installation.

I really wanted to paint the Artec symbol red, but the masking of that circular part was frustrating and too time consuming for a simple aesthetic mark, that will probably get dinged and chipped with rocks and road grime anyway.... I printable template would be a good thing.

Edit: One more tidbit. If you keep the factor fenders, like me...you need to clearance the liner at the top. I did a half-moon shape and padded the wiring with electrical tape to prevent future issues.


Jeep Gladiator Jane, the JTR 20240127_141212


Jeep Gladiator Jane, the JTR 20240127_141202
Jeep Gladiator Jane, the JTR 20240127_141222
Jeep Gladiator Jane, the JTR 20240127_151742
 

Sponsored

OP
OP
SD Rider

SD Rider

Well-Known Member
First Name
Jeff
Joined
Jun 1, 2023
Threads
8
Messages
172
Reaction score
159
Location
Sandy Eggo, KA
Vehicle(s)
2023 Jeep Gladiator Rubicon
Build Thread
Link
Occupation
Location Specialist
Working on my onboard air setup. Didn't want something permanent and this compressor has been working great for years. If it ever dies, I'll upgrade the compressor.

Plan is 8 AWG from the battery via CB/Fuse to a power block in the bed (12VDC Aux power, USB, and a readout, with switch, as I liked when I seen posted on another thread), with a relay at the aux switch #3 or (III) as the aftermarket is labelled.

Compressor is 30A max, but if I ever want to run an inverter in the bed for some reason I think the 8 AWG will be good for up to 40A.

Just picked up fittings and connectors. I've had the tank since the HF compressor died and had planned to use it years ago...so it has collected a bit of dust.

If anyone has done similar and can provide pics/tips, they'd be more than welcomed.

20240206_152228.jpg
 
OP
OP
SD Rider

SD Rider

Well-Known Member
First Name
Jeff
Joined
Jun 1, 2023
Threads
8
Messages
172
Reaction score
159
Location
Sandy Eggo, KA
Vehicle(s)
2023 Jeep Gladiator Rubicon
Build Thread
Link
Occupation
Location Specialist
Modifying my plans a bit after reading up on Aux Outlets and 15A limitation for most.
Going with a trolling motor connection rated for 40A and 8 AWG wire.

I already have a 40A automotive relay that I'll connect to an AUX switch to send power to the bed from the battery.

Downloaded the 3D print file for the bed plate cover.
https://www.thingiverse.com/thing:5739703/
Will have to do a couple mods in order to add a USB plug. I may have room for a voltmeter....we shall see.

Jeep Gladiator Jane, the JTR 1707333783454
 
OP
OP
SD Rider

SD Rider

Well-Known Member
First Name
Jeff
Joined
Jun 1, 2023
Threads
8
Messages
172
Reaction score
159
Location
Sandy Eggo, KA
Vehicle(s)
2023 Jeep Gladiator Rubicon
Build Thread
Link
Occupation
Location Specialist
It's been raining so time for interior upgrades.

20240207_143259.jpg
 
OP
OP
SD Rider

SD Rider

Well-Known Member
First Name
Jeff
Joined
Jun 1, 2023
Threads
8
Messages
172
Reaction score
159
Location
Sandy Eggo, KA
Vehicle(s)
2023 Jeep Gladiator Rubicon
Build Thread
Link
Occupation
Location Specialist
Bulletpoint mount system installed and awesome!!! May ditch the middle and get another grabber mount.

20240212_080140.jpg
 
OP
OP
SD Rider

SD Rider

Well-Known Member
First Name
Jeff
Joined
Jun 1, 2023
Threads
8
Messages
172
Reaction score
159
Location
Sandy Eggo, KA
Vehicle(s)
2023 Jeep Gladiator Rubicon
Build Thread
Link
Occupation
Location Specialist
Trip to the desert requires a flex pic!
Jeep Gladiator Jane, the JTR 1000004905
Jeep Gladiator Jane, the JTR 1000004906
 

Sponsored

OP
OP
SD Rider

SD Rider

Well-Known Member
First Name
Jeff
Joined
Jun 1, 2023
Threads
8
Messages
172
Reaction score
159
Location
Sandy Eggo, KA
Vehicle(s)
2023 Jeep Gladiator Rubicon
Build Thread
Link
Occupation
Location Specialist
Jane just got some bed steps to help my knees and back!

Jeep Gladiator Jane, the JTR Rear view of steps
Jeep Gladiator Jane, the JTR Steps on Bed
Jeep Gladiator Jane, the JTR rear steps
Jeep Gladiator Jane, the JTR side steps
 
OP
OP
SD Rider

SD Rider

Well-Known Member
First Name
Jeff
Joined
Jun 1, 2023
Threads
8
Messages
172
Reaction score
159
Location
Sandy Eggo, KA
Vehicle(s)
2023 Jeep Gladiator Rubicon
Build Thread
Link
Occupation
Location Specialist
Just added the RSE steps. You'll definitely need help when you lift these beasts on to your rig. I only had to shave the threads off the center driver side body mount bolt. The others were no problem. Just have to button up the electrical and zip tie the wiring and we should be good!
Jeep Gladiator Jane, the JTR 20240506_180028
Jeep Gladiator Jane, the JTR 20240506_180039
 
OP
OP
SD Rider

SD Rider

Well-Known Member
First Name
Jeff
Joined
Jun 1, 2023
Threads
8
Messages
172
Reaction score
159
Location
Sandy Eggo, KA
Vehicle(s)
2023 Jeep Gladiator Rubicon
Build Thread
Link
Occupation
Location Specialist
Electrical finished and RSE shipped extra rivets as I was missing 2 in my kit. Steps are awesome!

Also ordered the step lights from @Northridge4x4 .

20240520_084750.jpg


20240520_084805.jpg


20240520_085016.jpg
Sponsored


Top