Sponsored

JTR LE Build Up with No Letdown

OP
OP
WhatExit?

WhatExit?

Well-Known Member
First Name
Dan
Joined
Sep 13, 2018
Threads
54
Messages
1,944
Reaction score
2,663
Location
48th State
Vehicle(s)
2020 JT Rubicon Launch Edition - Granite Crystal Metallic | 2017 Ford Raptor SuperCrew - Metallic
Vehicle Showcase
3
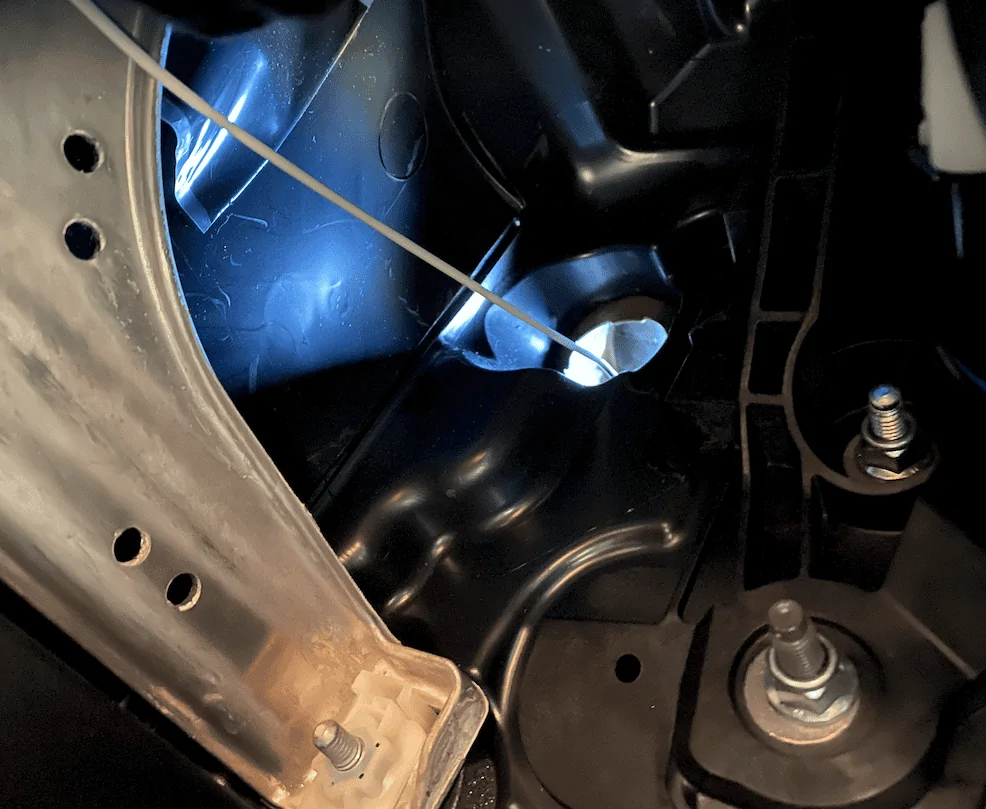
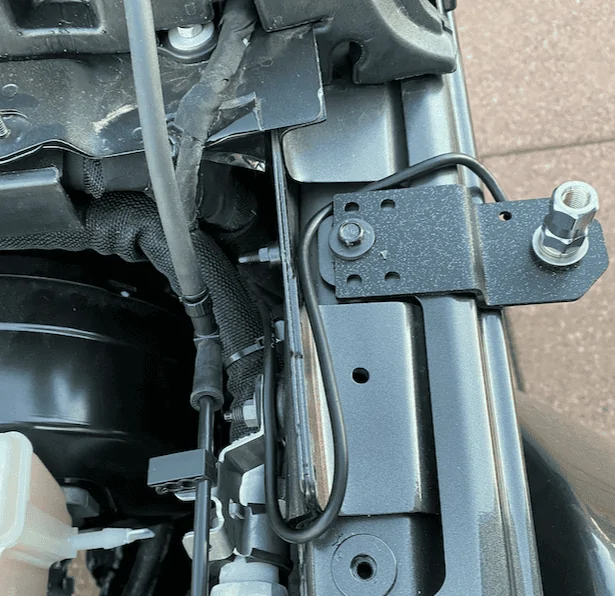
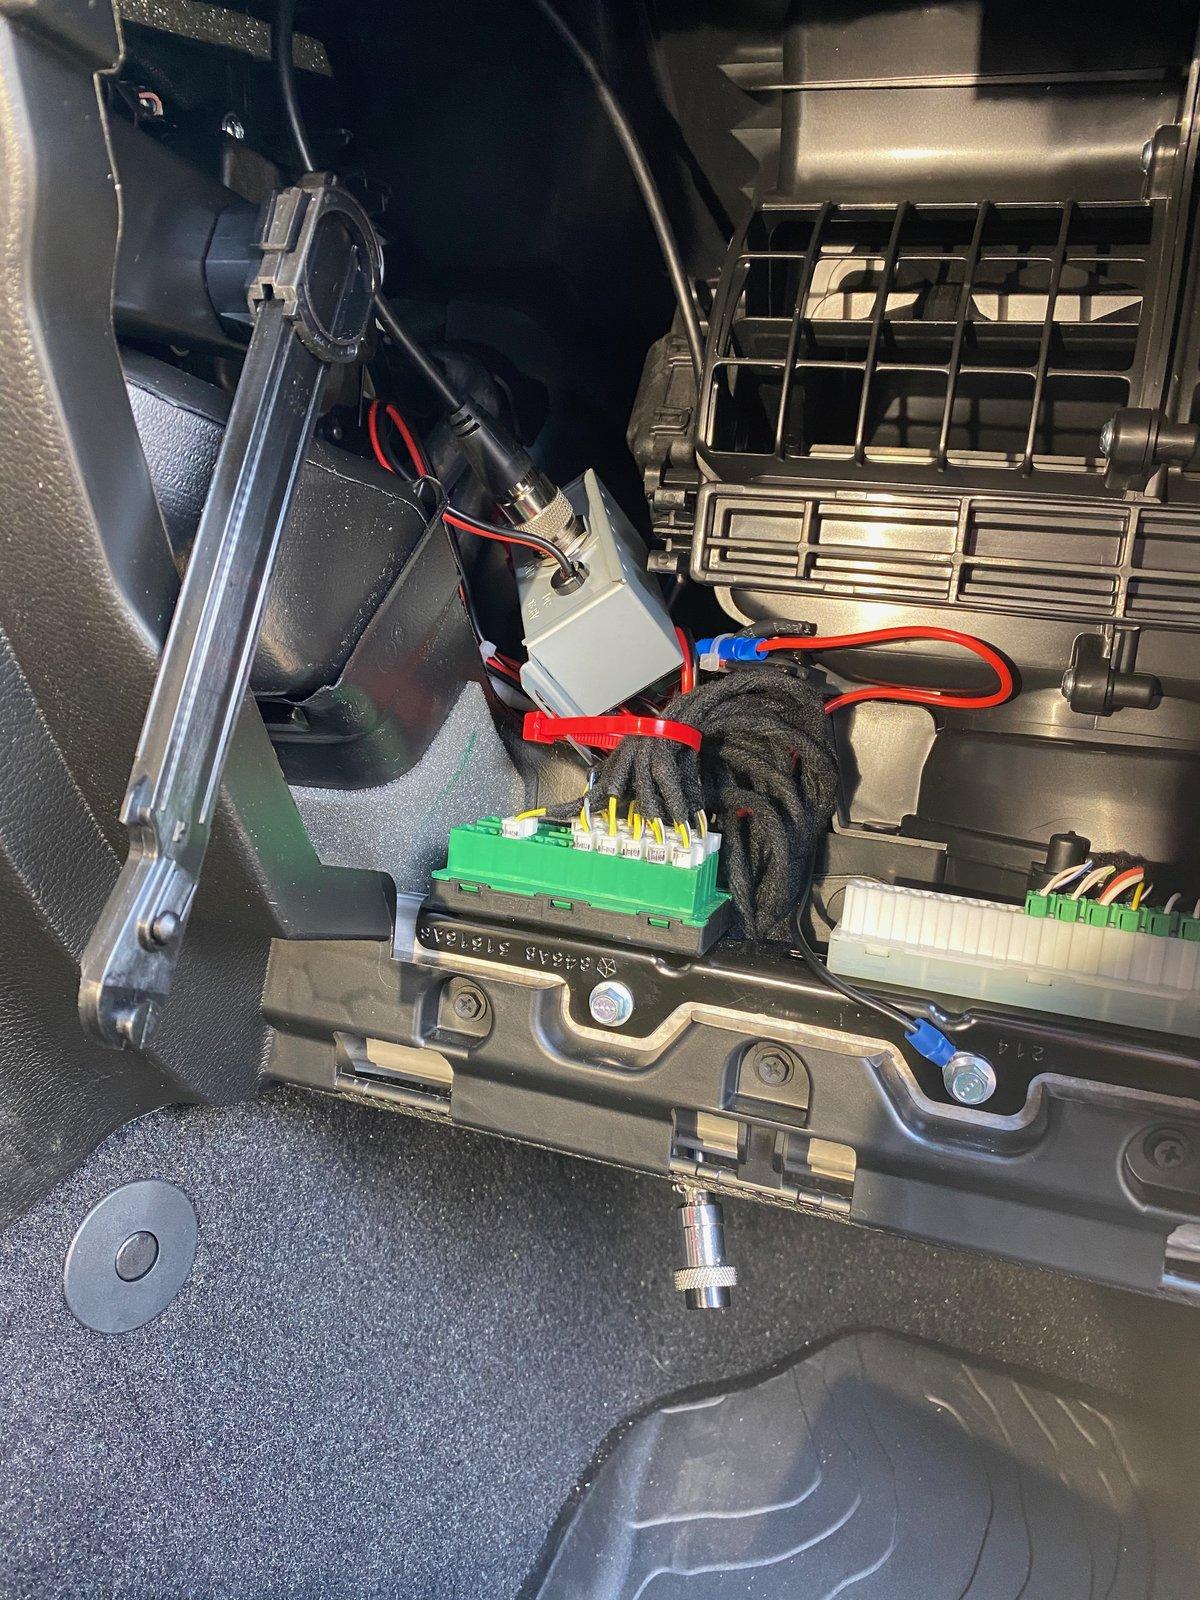
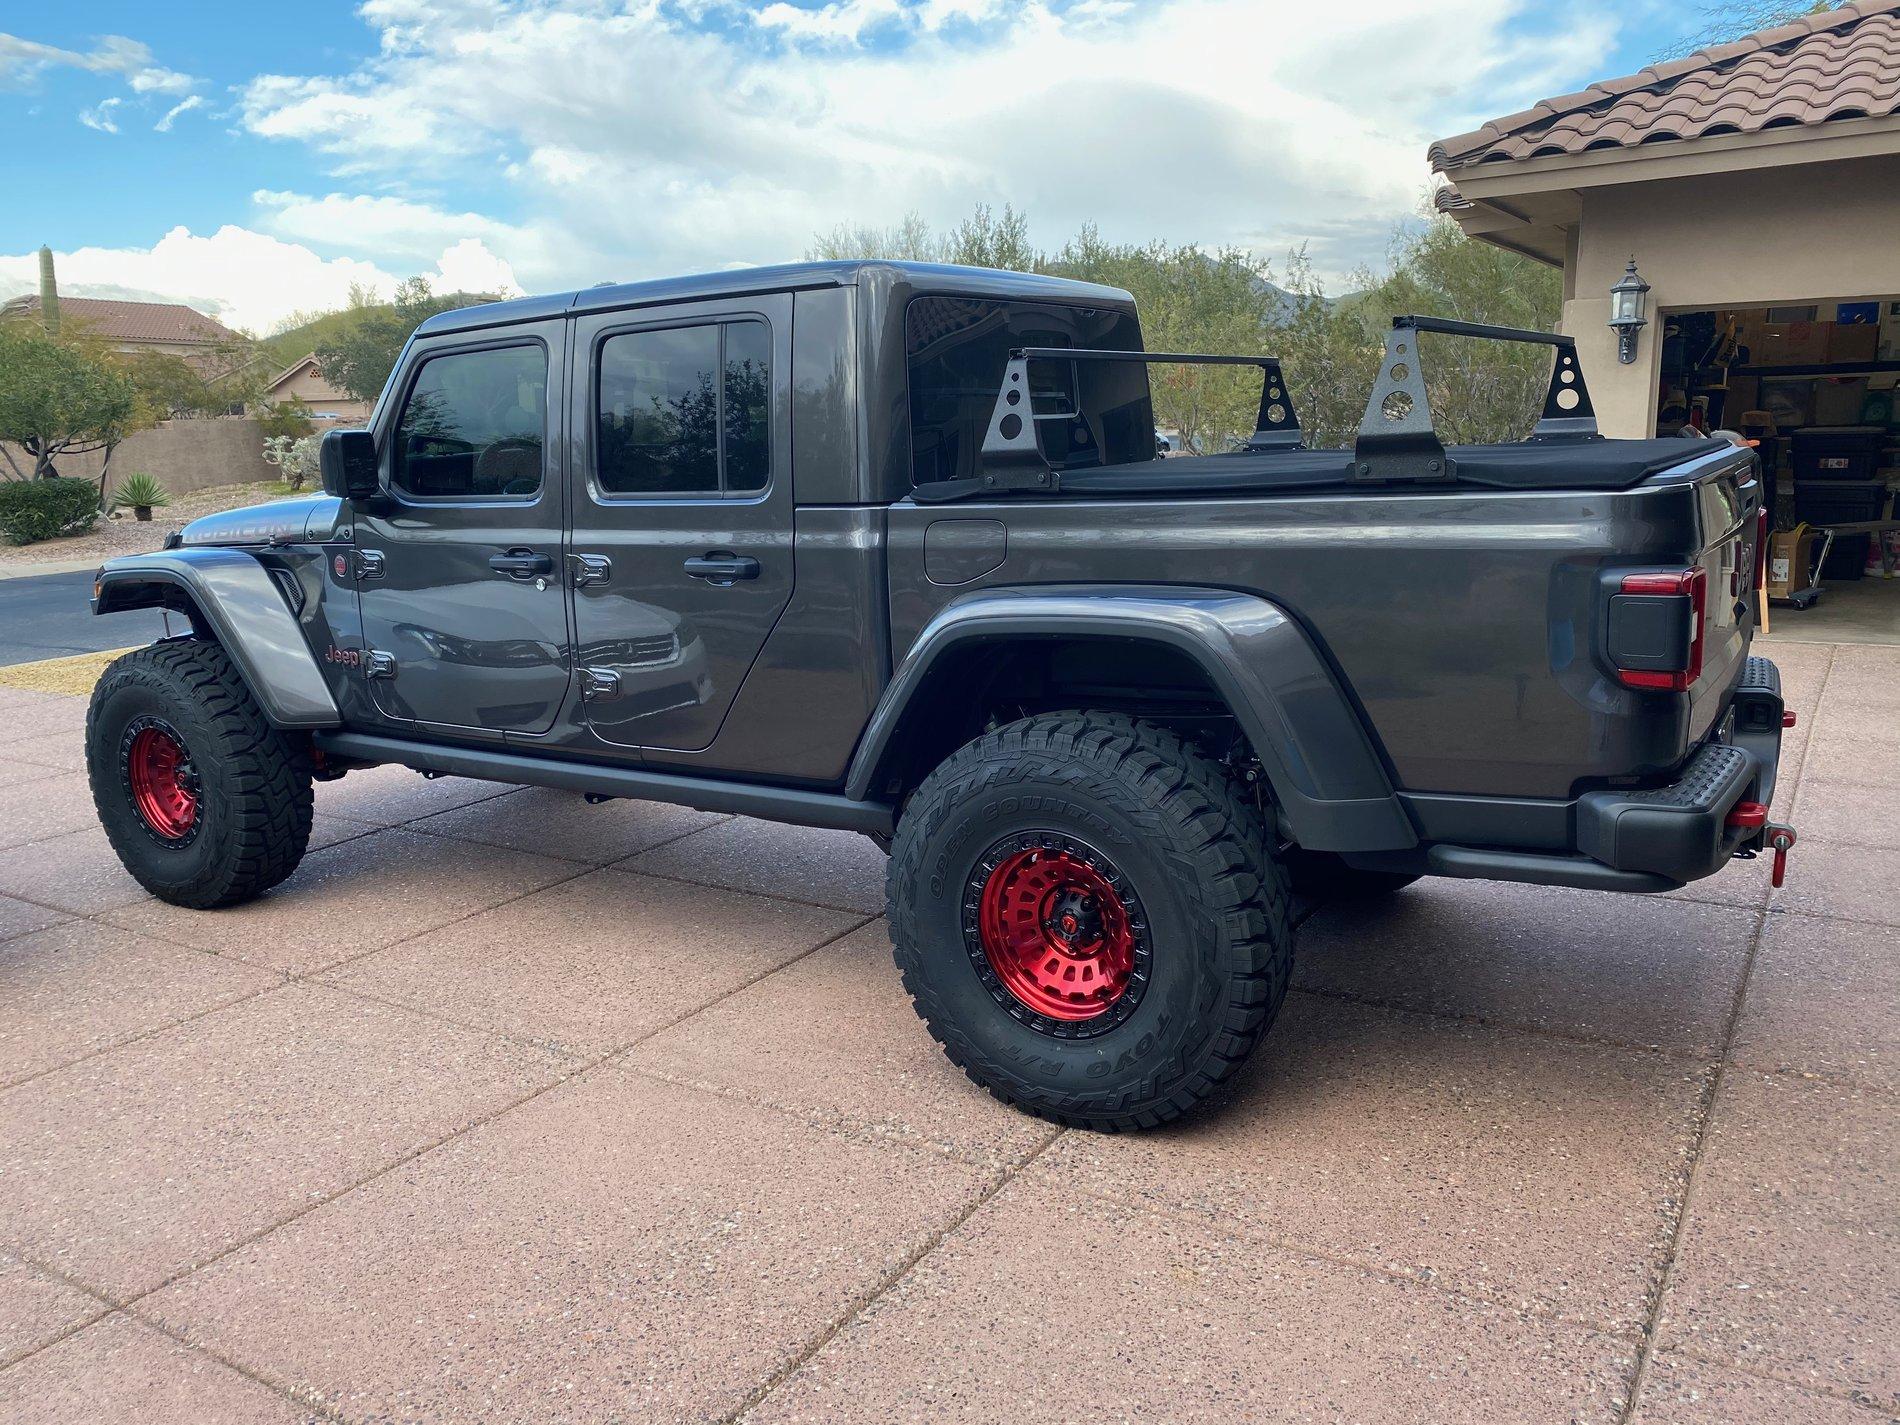
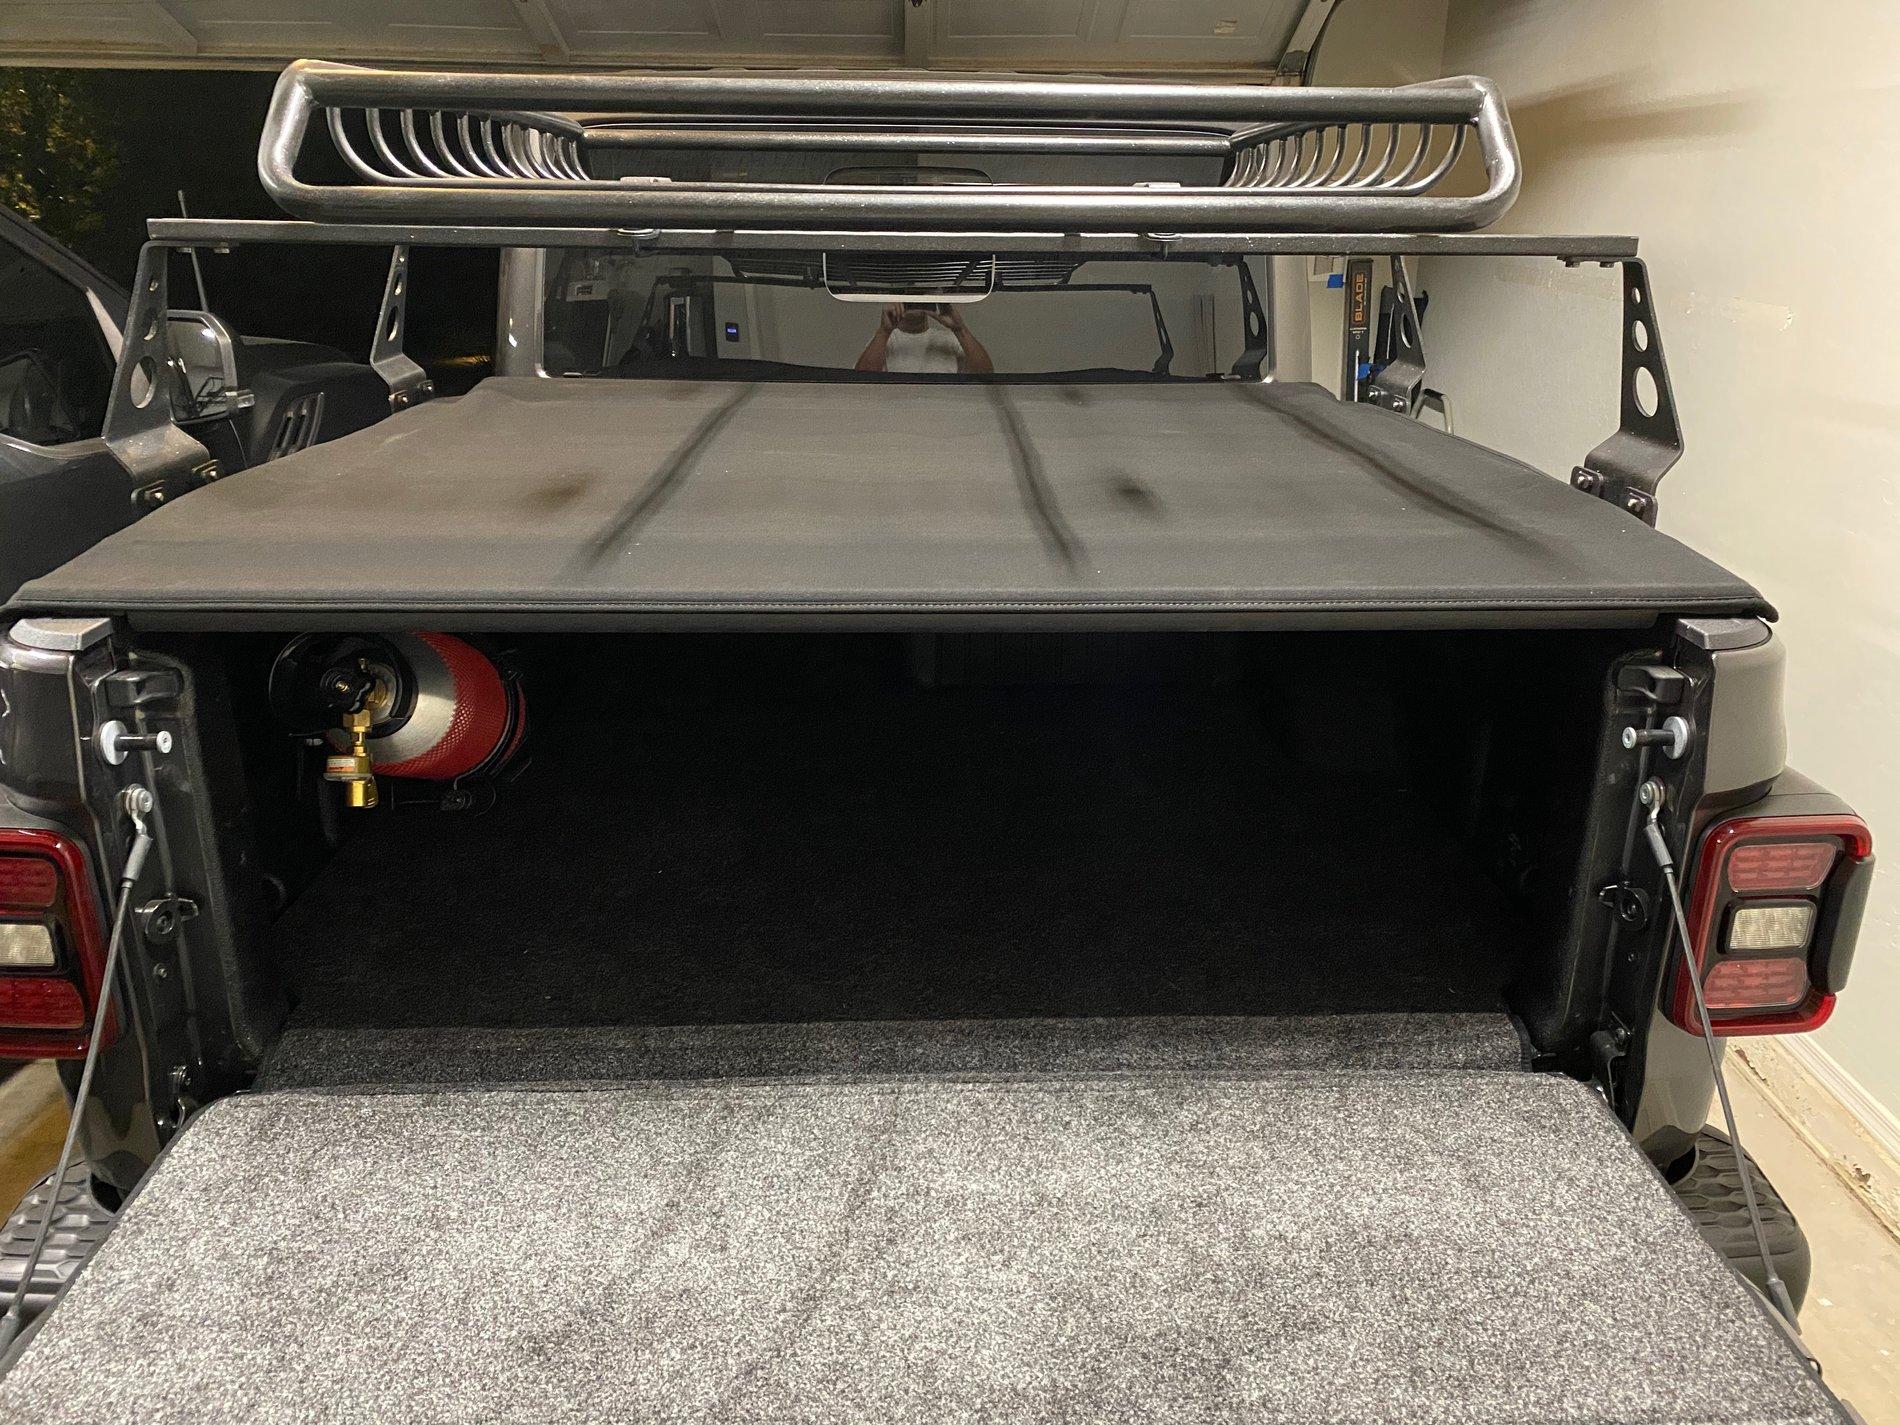
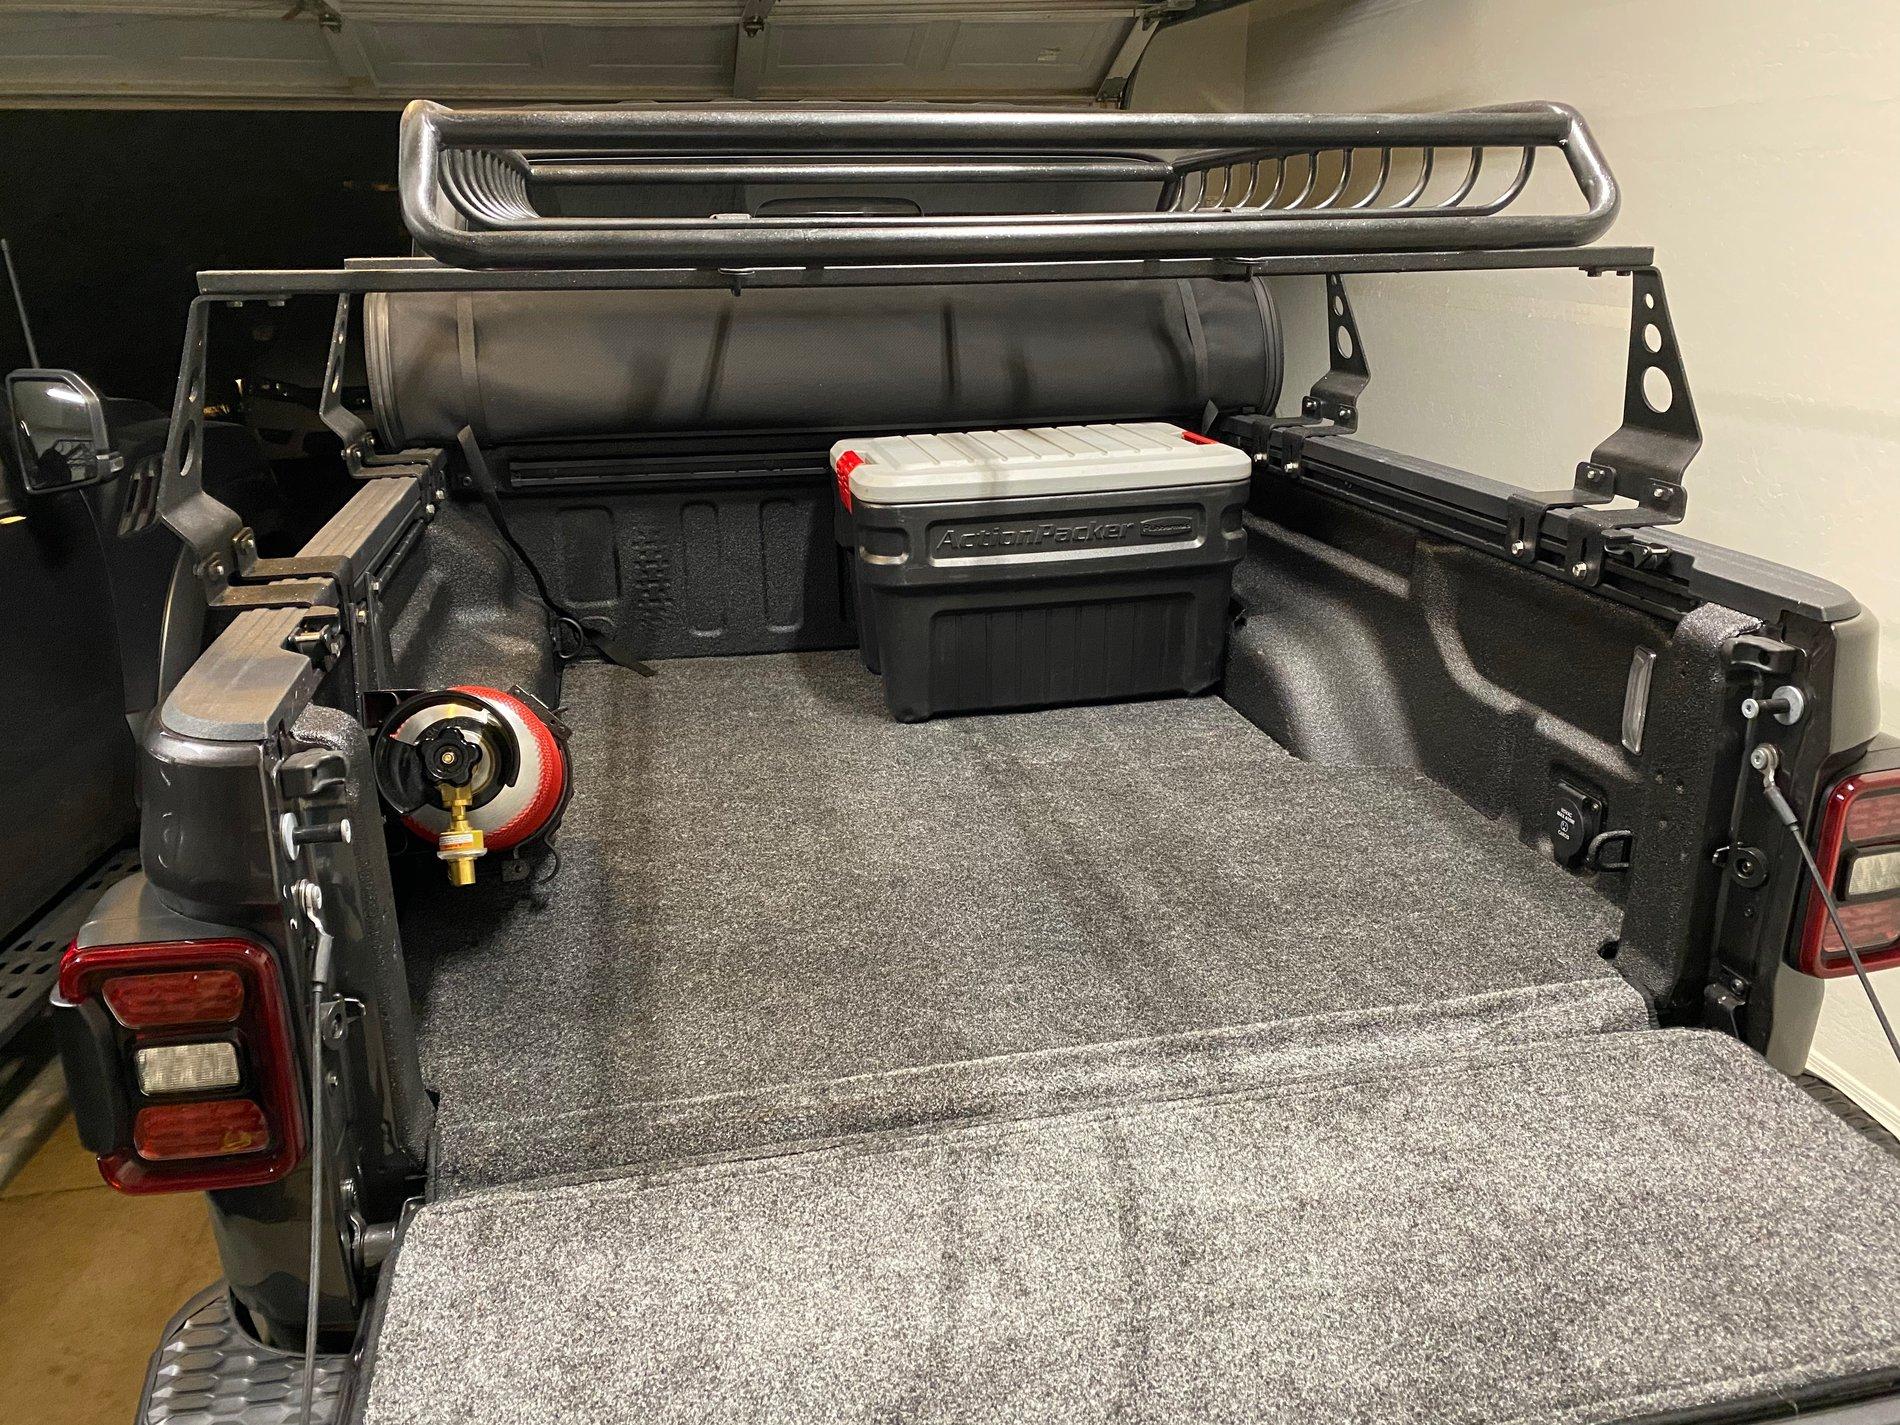
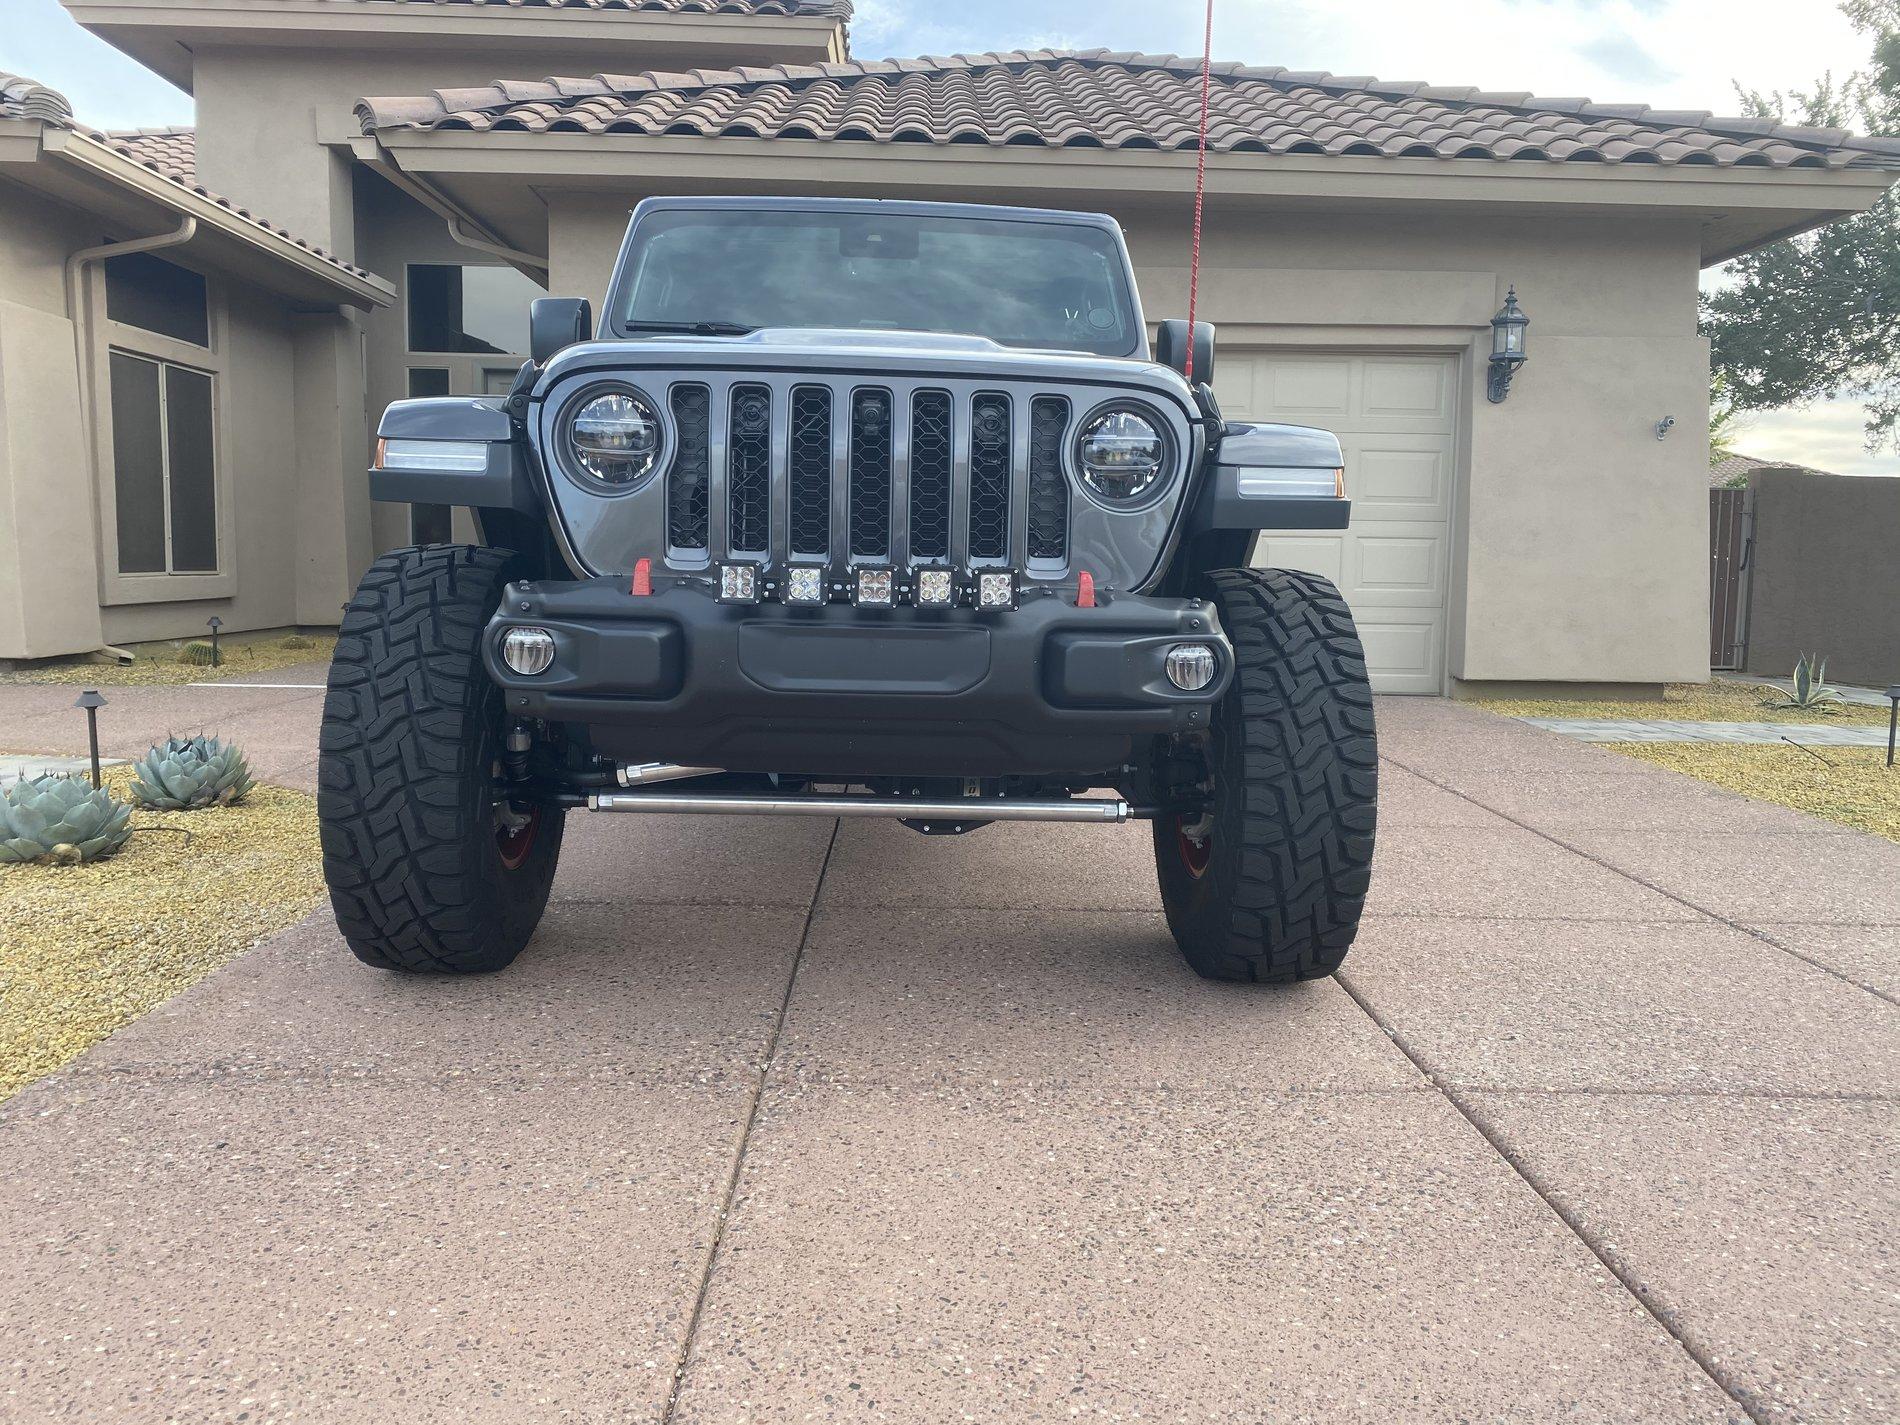
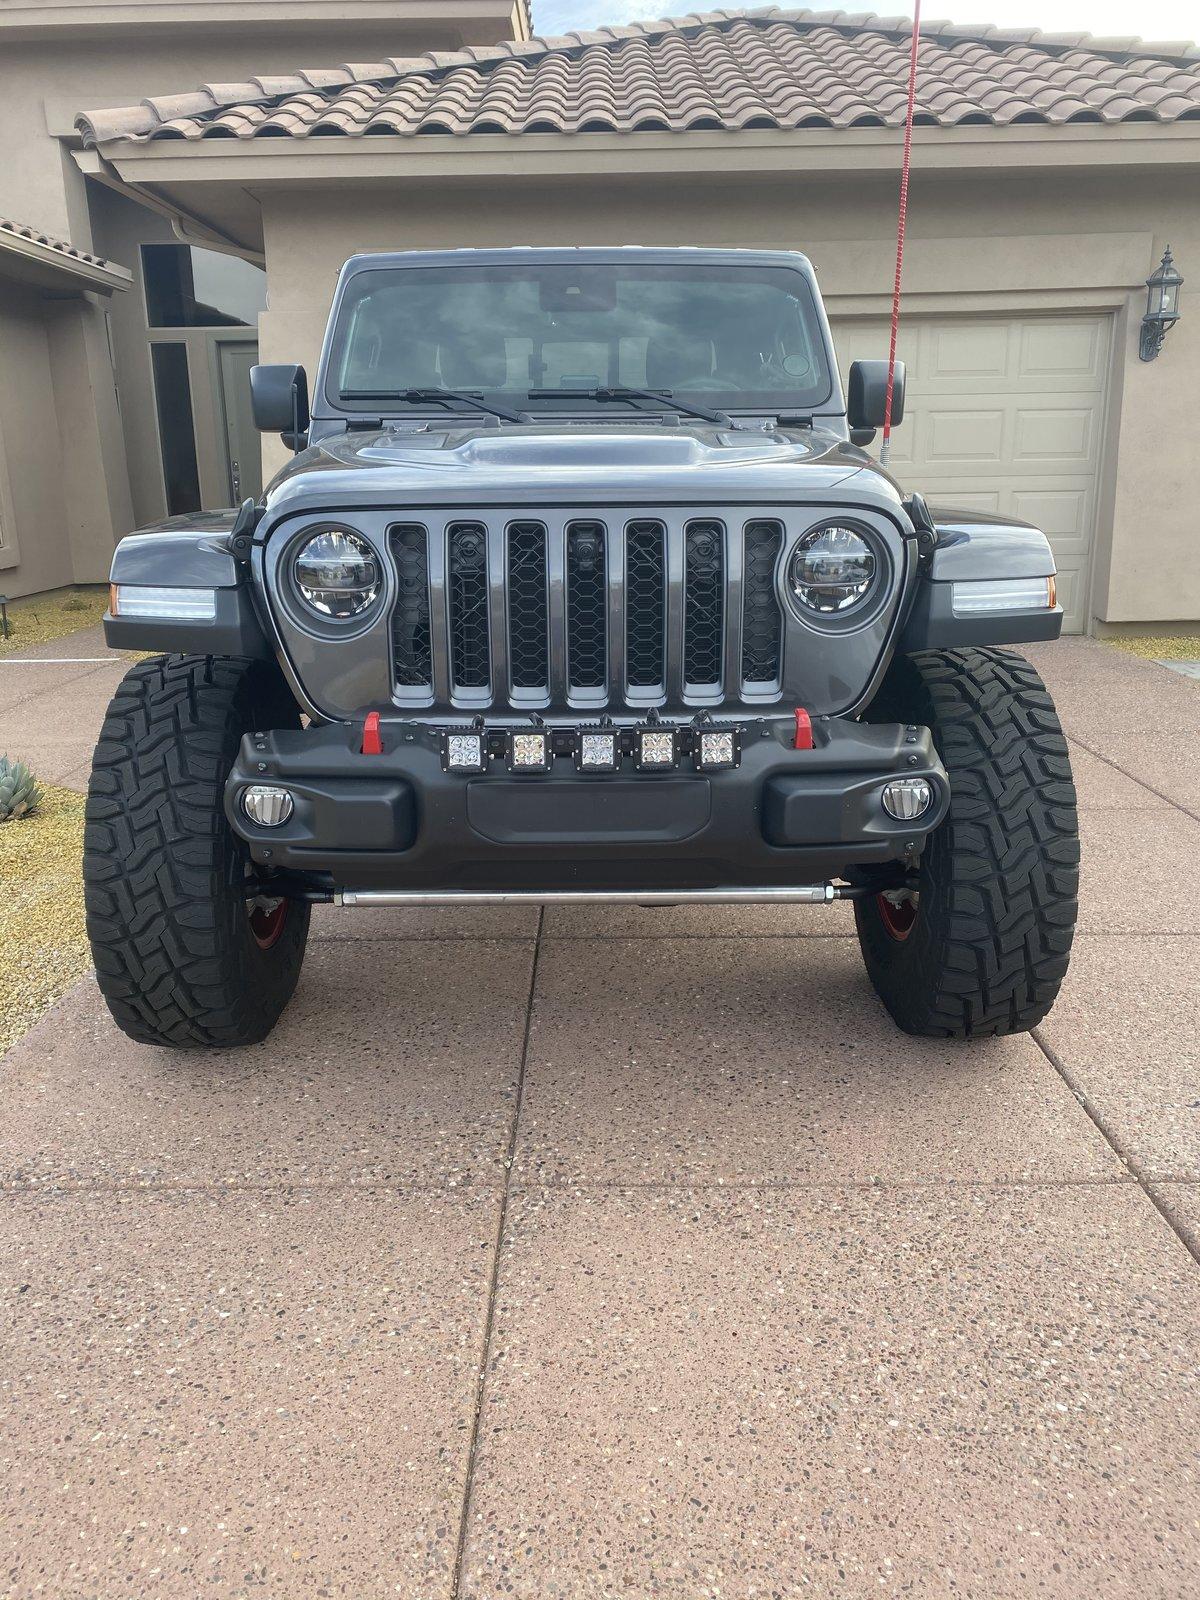
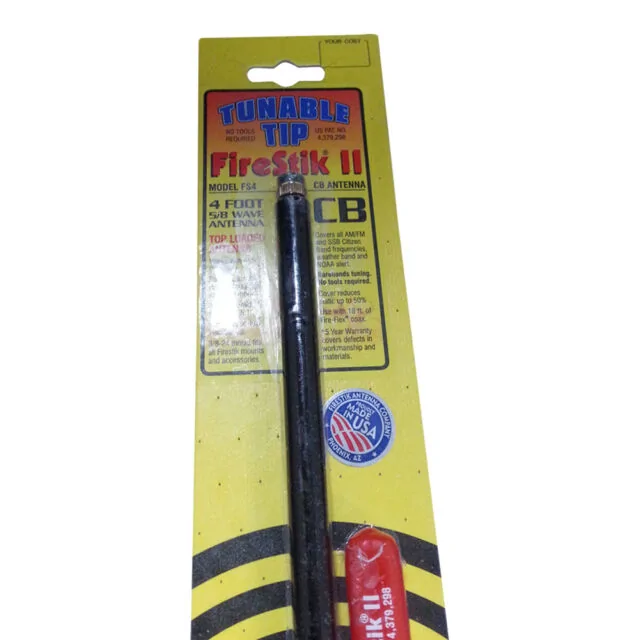
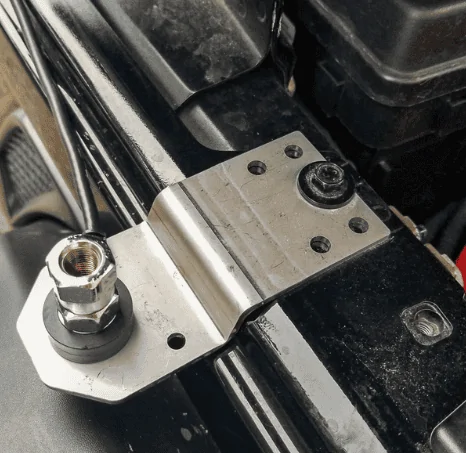
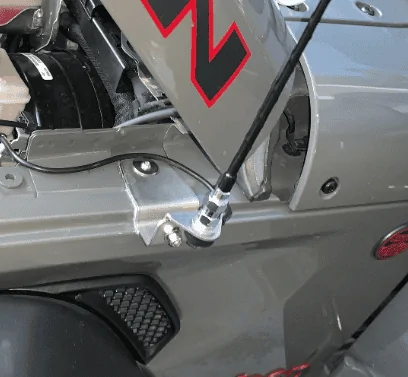
Today I removed the end caps from my steel Mopar bumper and added my Rigid lights to the front bumper for my upcoming off road (“overlanding”) trip to Death Valley. You can see the red Firestik CB antenna installed too...

82c88c50-ad55-4eb8-b11c-b809c8ae4177-jpeg.jpg


77d7dc65-1054-4643-ae6a-61b8ea95e683-jpeg.jpg
Sponsored

 
OP
OP
WhatExit?

WhatExit?

Well-Known Member
First Name
Dan
Joined
Sep 13, 2018
Threads
54
Messages
1,944
Reaction score
2,663
Location
48th State
Vehicle(s)
2020 JT Rubicon Launch Edition - Granite Crystal Metallic | 2017 Ford Raptor SuperCrew - Metallic
Vehicle Showcase
3
CB installation is another project I've just completed...
Full details here: https://www.jeepgladiatorforum.com/...ation-in-my-jeep-gladiator.27639/#post-448911

I'll be in Death Valley shortly for a 3 day off roading and camping trip (what is now called "overlanding" :party: 
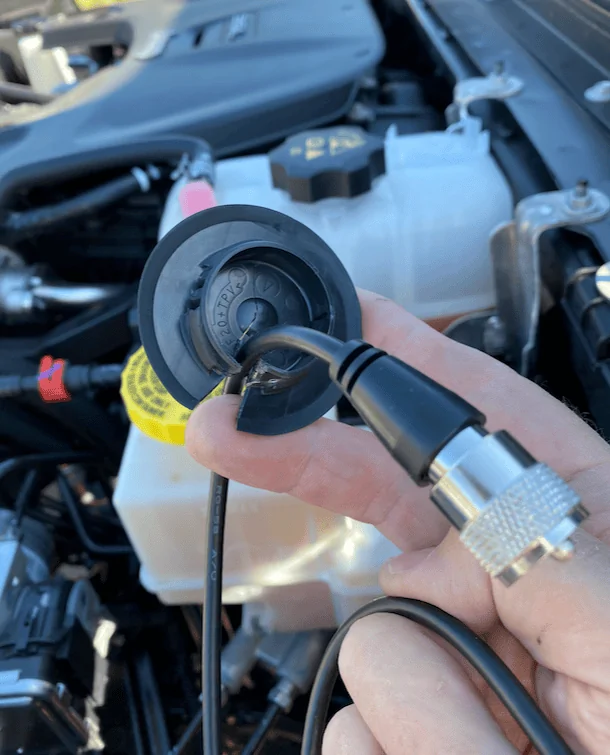
) with a great group of people who happen to still use CB radios to communicate. It works for communicating with all the Jeeps in the group so it's what I installed first.
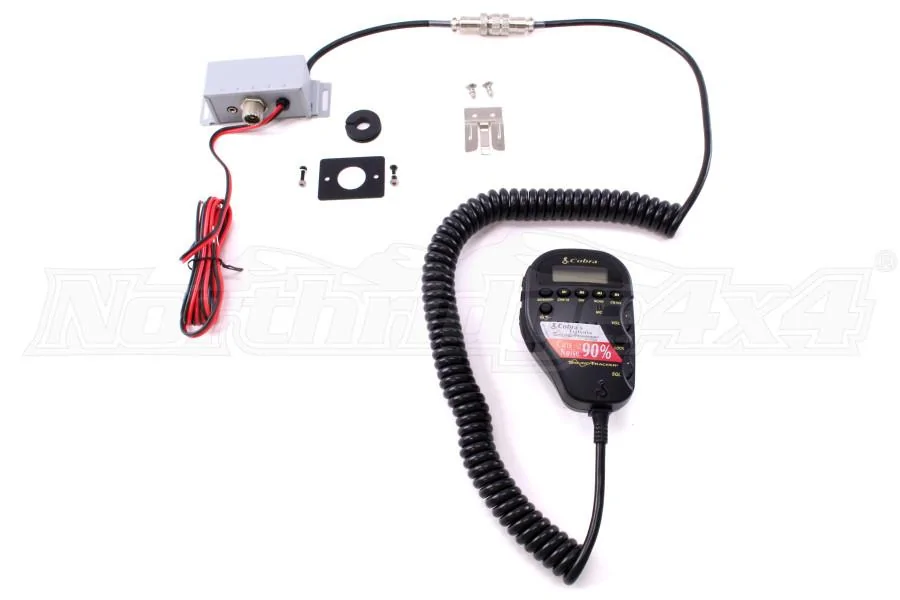
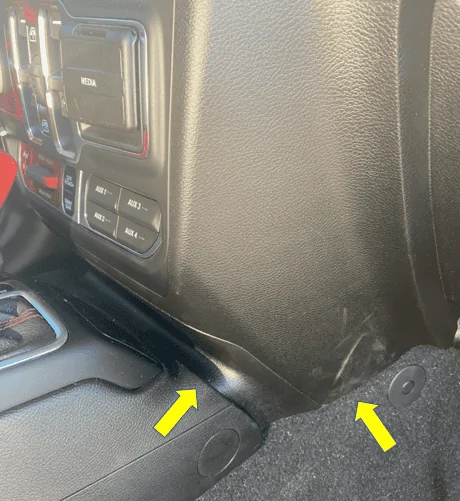
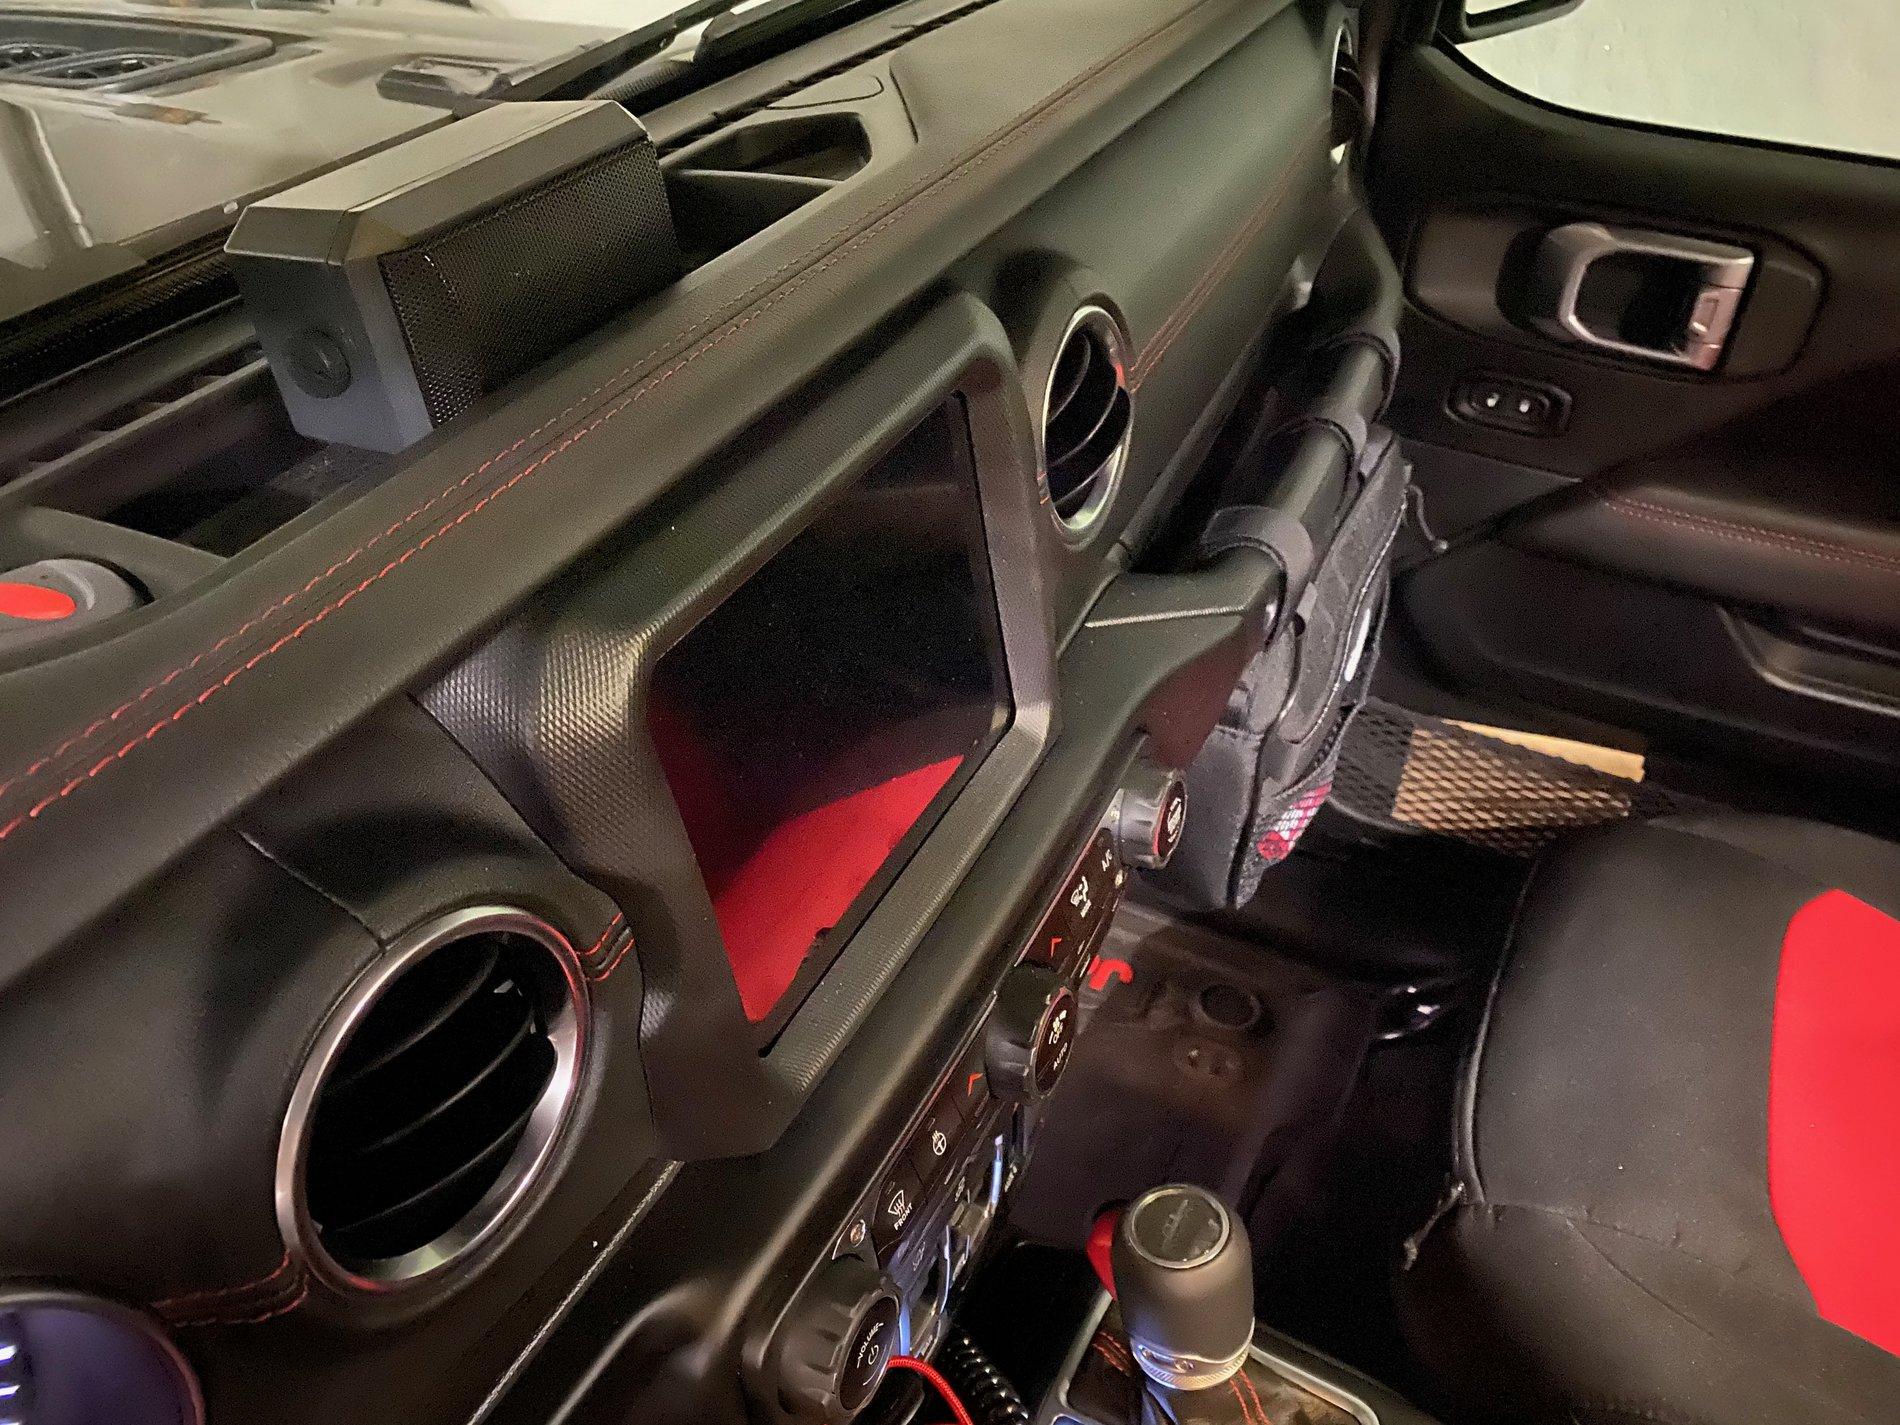
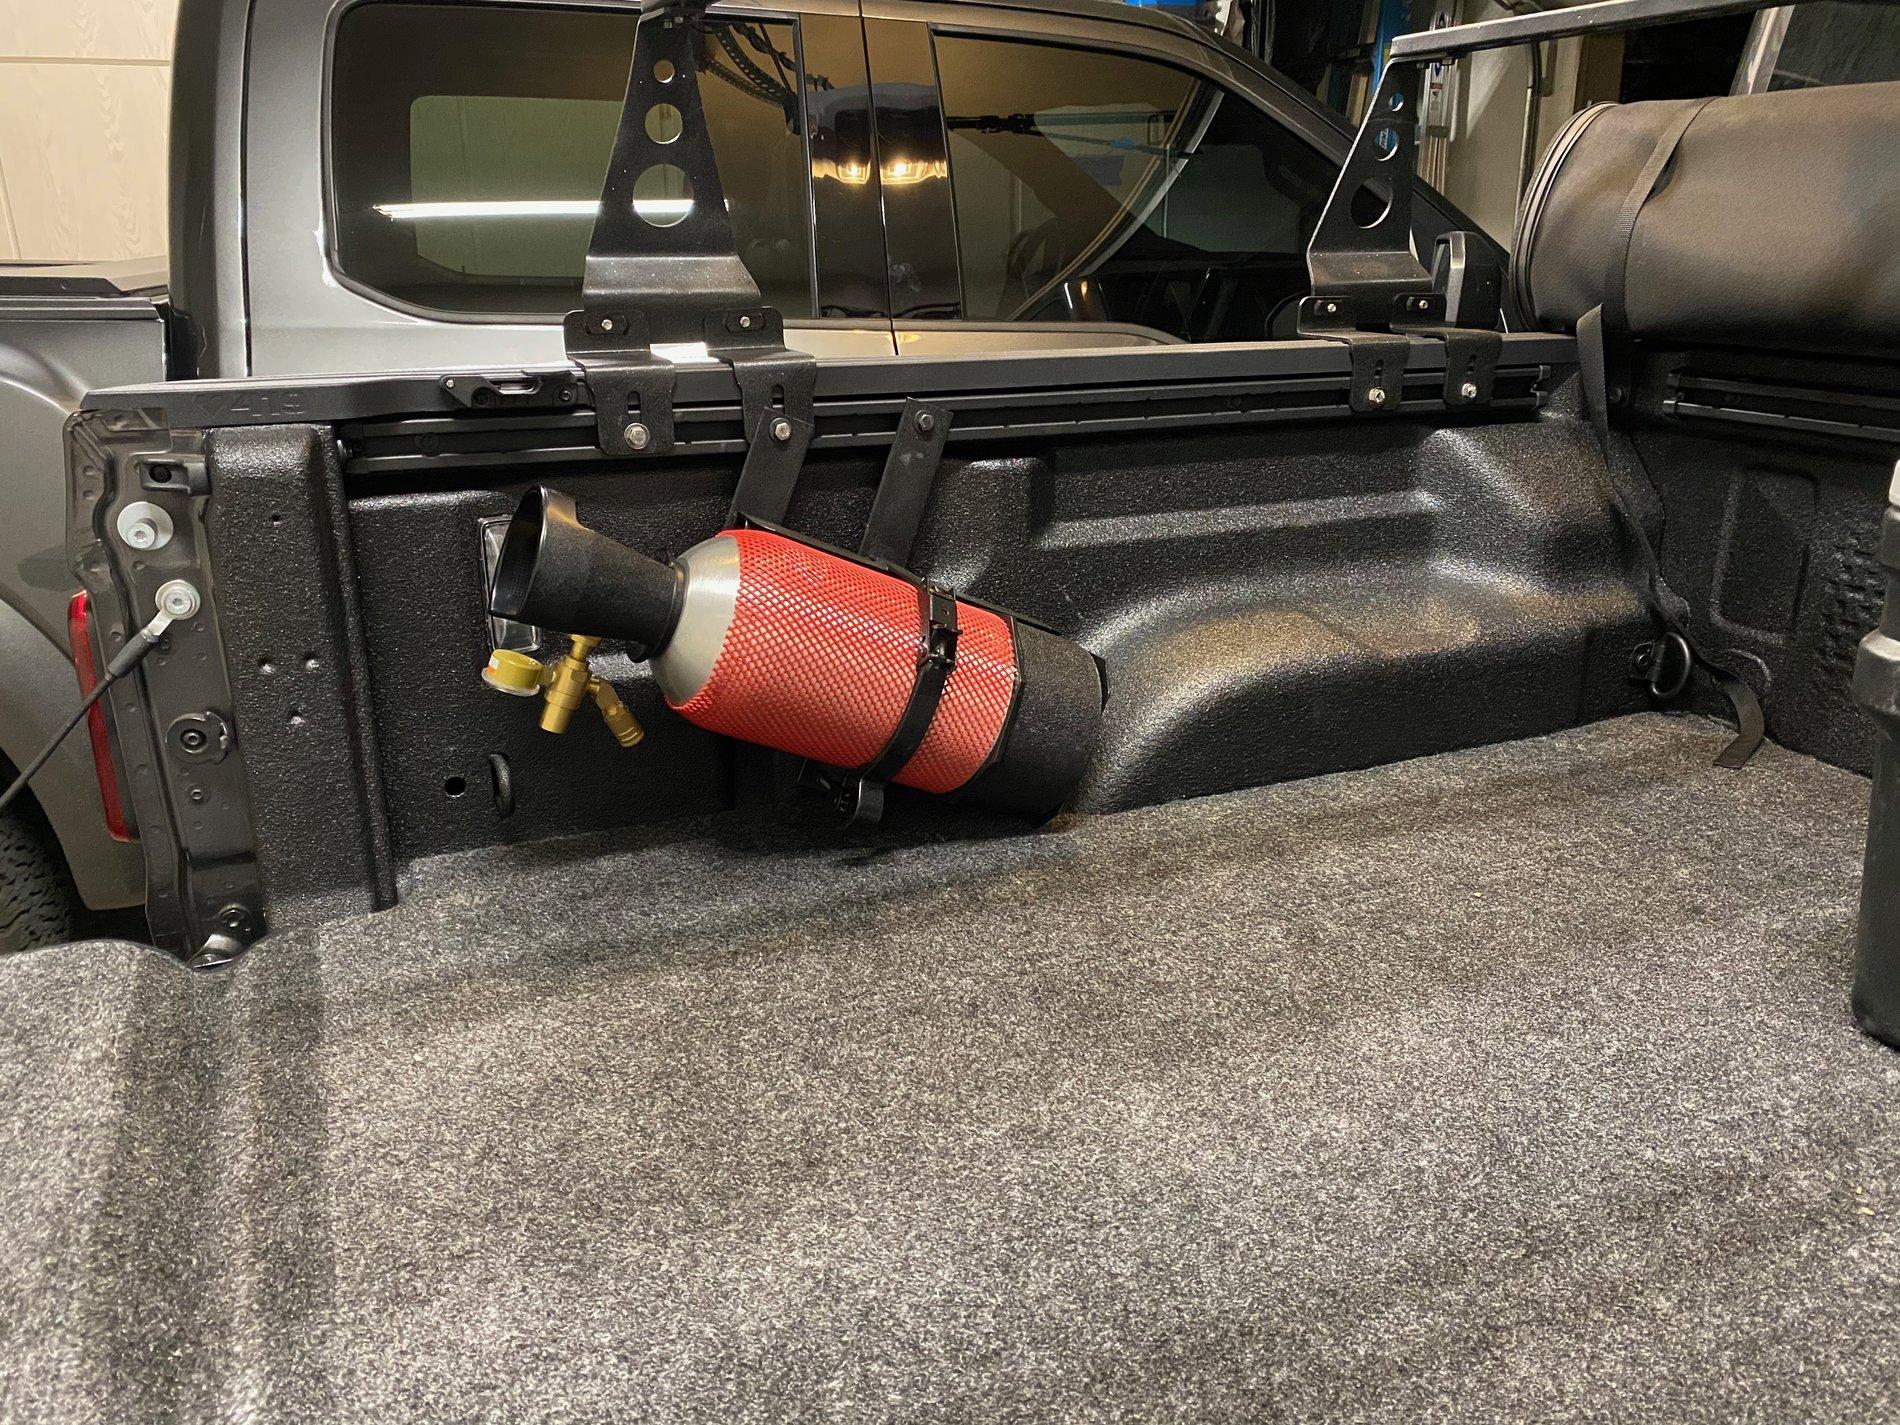
To start with here's a list of items I used:

CB - Cobra 75 WX ST - had one before and it works well and thanks to its design the unit is very small so it's easy to hide and install...
https://www.northridge4x4.com/part/...distributing-cobra-75-wx-st-40-channel-remote
cbdc75wxst_01-jpg.jpg


Firestik 4ft Firestik II FS Series Tunable Tip CB Antenna 900 Watts Red - Firestik FS-4RD
Available in different colors - I went with red - $22.99
https://www.amazon.com/gp/product/B000SB6SDE/ref=ppx_yo_dt_b_asin_title_o00_s00?ie=UTF8&psc=1
s-l640-jpg.jpg


Firestik SS-3H Heavy Duty Stainless Steel Antenna Spring
I've used this on my JKU Jeep and it works real well as a rigid antenna mount could help the antenna break when it hits a tree branch, etc.
https://www.amazon.com/gp/product/B00042LC9M/ref=ppx_yo_dt_b_asin_title_o01_s00?ie=UTF8&psc=1
screen-shot-2020-02-08-at-6-14-33-am-png.png


FireStik Antenna Company K8R9 9ft. W/pl259 & Firering Conn
I wanted to keep with the Firestik products and the 9' long cable was perfect for my installation as I'd rather not have 18' of cable which was the most common option. The cable terminations are attached and not small so it meant I'd either need to find a way to get the large CB end of the cable through the firewall or I'd need to cut and re-join the end to the cable. (I found an easy way through the firewall).
https://www.amazon.com/gp/product/B000X39TFG/ref=ppx_yo_dt_b_asin_title_o06_s00?ie=UTF8&psc=1
screen-shot-2020-02-08-at-6-19-04-am-png.png


Firestik K4R HEAVY-DUTY STUD MOUNT with 1.25 in. BOLT
Keeping with the Firestik products, i went with their Stud Mount Bolt - it works with the CB antenna cable, the bracket and the Firestik spring
https://www.amazon.com/gp/product/B00P9JEUFI/ref=ppx_yo_dt_b_asin_title_o05_s00?ie=UTF8&psc=1
screen-shot-2020-02-08-at-6-39-35-am-png.png


Topsy Products - JL Fender Mount CB Antenna Bracket
I found a great CB antenna bracket - really well made and it's Stainless Steel (I painted it anyway) and it's $19.99
https://topsyproducts.com/products/fender-mount-antenna-bracket
screen-shot-2020-02-08-at-6-37-04-am-png.png


There are other options including this one but you can probably see why I like Topsy's best.
screen-shot-2020-02-08-at-6-36-22-am-png.png


RoadPro RPSP-15 Universal CB Extension Speaker with Swivel Bracket, 2-3/4 x 4-1/2"
If there's any weakness with the Cobra CB it's the speaker that's in the handset/mic as it can be challenging to hear especially in a Jeep. So I chose this highly rated, small, external speaker. I haven't yet hooked it up so I can't comment on its quality but the reviews are good and the price is right :) I'll find a temporary place to put it as this isn't something I'll want in the Jeep full-time.
https://www.amazon.com/gp/product/B000ZIC18Q/ref=ppx_yo_dt_b_asin_title_o05_s01?ie=UTF8&psc=1
screen-shot-2020-02-08-at-6-22-17-am-png.png


So, that's the hardware now on to the installation...

Installation - Part 1

Where to put the base unit ("the little black (ok, silver) box")? Behind the glovebox is best as the cable for the mic connection can hang down just below the glovebox when the CB radio is needed - when it's not the mic cable connection can be tucked up out of the way.

So, step 1 is removing the glove box...
Open the glove box and look on the left hand side for the "arm" - lift up and then out on it and it will pop off. Take a look at the arm (flashlight will likely help a lot here and for sure the rest of the install) and you'll see the slot the glovebox tab is in so you can see how to lift up on the arm and pop it off the tab. You'll also need to depress the large plastic tab inside the glovebox at the top so the glovebox can fold all the way down. Once you've done that you can simply lift the glovebox out and set it aside.

Here's a screen capture from the video below showing the arm and the guy's finger on the glovebox tab.
screen-shot-2020-02-08-at-6-28-21-am-png.png

https://www.jlwranglerforums.com/forum/threads/glove-box-removal.17549/

Now you can find a good spot to put the Cobra CB radio control box - I put it on the far left inside the glovebox opening.
 
Last edited:
OP
OP
WhatExit?

WhatExit?

Well-Known Member
First Name
Dan
Joined
Sep 13, 2018
Threads
54
Messages
1,944
Reaction score
2,663
Location
48th State
Vehicle(s)
2020 JT Rubicon Launch Edition - Granite Crystal Metallic | 2017 Ford Raptor SuperCrew - Metallic
Vehicle Showcase
3
Step 2 - Power and Ground for the CB unit

Easy peasy - just used the auxiliary wire that's under the glovebox. I used the wire that is switched (on with the ignition). It wasn't entirely clear where the wire is as it's dark, a little tough to get in there and FCA uses a lot of this sticky black fabric tape/tube for bundling wires. I went online and found some Jeep owners (lot more info on this kind of stuff in the JL forums but not all of it is the same as most posts are for 2018 JLs, etc.) saying the wires are over to the right by the passenger kick panel. They're not.

The wires are underneath the glovebox near the footwell light. Look for a "loop" of bundle of fabric-covered wires - the wire bundle is looped back to itself. In this pic you can see the loop and the footwell light...

screen-shot-2020-02-08-at-6-44-58-am-png.png


You can remove the tape by hand but it's not easy to unwrap it so you could carefully snip the tape using scissors or wire dykes.

In this pic you can clearly see the loop and the footwell light...

screen-shot-2020-02-08-at-6-48-14-am-png.png


Loop pulled away...
screen-shot-2020-02-08-at-6-49-17-am-png.png


Once you've unwrapped the end of the wire bundle wrap you'll see the ends of the wires themselves. You can strip away the black wire ends rather than snip them off completely (which some have done).

screen-shot-2020-02-08-at-6-50-27-am-png.png


Here's what the manual provides...
screen-shot-2020-02-08-at-6-53-54-am-png.png

And this is the Wire Color Chart from the Owners Manual with circuit number, fuse/amps, wire color and locations (under dash and under hood)...
screen-shot-2020-02-08-at-6-54-53-am-png.png


For power I used the last item in the above list: Ignition so the CB radio's power is switched - on and off with the ignition.

I mentioned ground - some have gone to the passenger kick panel / side wall and grounded there. It's a good location but I used an easier one - with the glovebox removed you'll see some screws attached to a metal frame member. I loosened one of the screws and grounded the CB unit there. I'll try to take a pic today before I put the glovebox back in.
 
OP
OP
WhatExit?

WhatExit?

Well-Known Member
First Name
Dan
Joined
Sep 13, 2018
Threads
54
Messages
1,944
Reaction score
2,663
Location
48th State
Vehicle(s)
2020 JT Rubicon Launch Edition - Granite Crystal Metallic | 2017 Ford Raptor SuperCrew - Metallic
Vehicle Showcase
3
Step 3 (doesn't need to be in this order)...

Getting through the firewall - how I ran the CB antenna cable through the firewall with the large cable end connector.

Since I'm installing the antenna on the driver's side, I wanted to run the cable through the firewall on that side of the Gladiator. Here's a view under the hood of the firewall to the right of the brake system...

screen-shot-2020-02-08-at-7-01-33-am-png.png


In this similar pic to the above one, you can see the silver foil tape - the edge of it is reflecting light. Just below that is a large plastic, black, flat plug with two tabs on it - the tabs are at 3:00 and 9:00 as installed in the firewall...

screen-shot-2020-02-08-at-7-03-34-am-png.png


Using pliers, I grabbed one of the tabs and pulled it and it popped right out - viola! Plug out and it reveals a very nice, large hole through the firewall! Here's the plug...

screen-shot-2020-02-08-at-7-05-35-am-png.png


I used a white coat hanger wire and pushed it into the hole...

screen-shot-2020-02-08-at-7-07-17-am-png.png


I went around to the driver's side footwell and there it was - and look at the light shining through the firewall hole - this is perfect! The hole is large enough for the CB antenna cable end and anything else you might need to run through there...

screen-shot-2020-02-08-at-7-09-42-am-png.png


Since I didn't want to (didn't need to) drill a large hole through the plug, I used wire dykes to snip a 'V' shaped slot in the plastic plug. It was perfect for the CB antenna cable and I snapped the plug back into place...

screen-shot-2020-02-08-at-7-11-40-am-png.png


Running a CB antenna cable or any other wires through the Jeep Gladiator's firewall is pretty easy using this plug. Note that my Gladiator has an automatic transmission. This plug may be used on Gladiator's with manual transmission or it could be used for some other purpose on other Jeeps (YMMV).

Jeep Gladiator JTR LE Build Up with No Letdown {filename}


Here's the Topsy bracket after I painted and installed it on the driver's side...
Jeep Gladiator JTR LE Build Up with No Letdown {filename}
 
OP
OP
WhatExit?

WhatExit?

Well-Known Member
First Name
Dan
Joined
Sep 13, 2018
Threads
54
Messages
1,944
Reaction score
2,663
Location
48th State
Vehicle(s)
2020 JT Rubicon Launch Edition - Granite Crystal Metallic | 2017 Ford Raptor SuperCrew - Metallic
Vehicle Showcase
3
OK, some additional details and pics to wrap this CB radio and antenna installation up...

Once I had the CB antenna cable through the firewall I routed it above the pedals behind the dash. I tried fishing it behind the center radio/HVAC stack - I got a coathanger wire through there but couldn't get the CB radio connector through - it was just too large and I couldn't see back there to fish it through. Then it dawned on me that I could go around so i routed it around the base of the center stack tucking it behind the plastic panels - easy peasy and that was done - routed the cable to the glovebox area.

You can see where I routed the cable as the yellow arrows highlight the place where I tucked the cable..

Jeep Gladiator JTR LE Build Up with No Letdown {filename}


Then all that was left was to put the CB radio control unit back behind the glovebox and zip tie it in place. You can see that in this pic and you can also see the screw I used to ground the CB radio. Couldn't have been any easier to do that. The red wire is the hot wire for the CB radio and it's tied to the Ignition wire part of the group of wires that Jeep provided with the Auxiliary switch package. The silver connector screws to the CB radio mic cable. When I'm not using the CB I can tuck that connector up behind the glovebox so it's a stealth install...

Jeep Gladiator JTR LE Build Up with No Letdown {filename}
 

Sponsored

OP
OP
WhatExit?

WhatExit?

Well-Known Member
First Name
Dan
Joined
Sep 13, 2018
Threads
54
Messages
1,944
Reaction score
2,663
Location
48th State
Vehicle(s)
2020 JT Rubicon Launch Edition - Granite Crystal Metallic | 2017 Ford Raptor SuperCrew - Metallic
Vehicle Showcase
3
Final step - remote CB speaker installation...

I found a place for the external remote CB speaker. It fits great right in the recess in the top of the dash. I used 3M Command strips - their white color hook & loop stuff made for hanging pictures on the wall. I attached one to the back of the speaker and one to the back wall of the recess and viola! The speaker stays in place and it's easily removed after my off roading trips. I ran the wire along the base of the windshield and I popped the passenger side speaker cover up and ran the wire in/along there and then down along the door jamb. The wire is almost entirely hidden for a clean install that will take a couple minutes to remove until next trip...

Jeep Gladiator JTR LE Build Up with No Letdown {filename}


Jeep Gladiator JTR LE Build Up with No Letdown {filename}
 
OP
OP
WhatExit?

WhatExit?

Well-Known Member
First Name
Dan
Joined
Sep 13, 2018
Threads
54
Messages
1,944
Reaction score
2,663
Location
48th State
Vehicle(s)
2020 JT Rubicon Launch Edition - Granite Crystal Metallic | 2017 Ford Raptor SuperCrew - Metallic
Vehicle Showcase
3
Over the past months I've been looking at the available aftermarket racks and the racks that folks have had built. As you know there's lots of inspiration which helped me put together a plan for my Gladiator rack project. (Link to the complete rack build thread is at the bottom of this post or click here)

I was able to formulate my plan and get the components together as I've been spending the past couple weeks getting the Gladiator ready for the Death Valley trip. This weekend was Eat. Sleep. Jeep (mods).

My needs for a rack are pretty simple:
  1. It needs to be removable: Check! 8 bolts and it's off
  2. It needs to allow my factory tonneau cover to be completely functional: Check!
  3. It needs to allow me/my Gladiator carry more gear
  4. It needs to be functional and attractive: Check! It's very attractive to me
It doesn't need to hold a roof top tent (RTT) but I'm sure it could with a couple additional components.

I'll provide more details and pics but here's a sneak peak (it's only about half complete)...

Jeep Gladiator JTR LE Build Up with No Letdown rack-1-jpe


Here's the paint I used for many of the components including the brackets - both the ones that attach to the Trail Rail and the tall rack brackets (with the 3 holes in them) as well as all the stainless steel hardware (I really don't like to see silver bolt heads and washers, etc.), the CO2 tank bracket and the other steel components.

The primer is great - it dries very fast and can be painted over in a very short period of time. The Rustoleum paint is what was recommended online as being the closest rattle can spray to powder coat. It does that pretty well and more - it's metallic with silver flakes in it - very cool looking - I like it a lot. You can see the name on the can and on the back of the can near the bottom there's a little label that says, "Galaxy" that's the paint you'll want to check out...

Jeep Gladiator JTR LE Build Up with No Letdown Paint - 1


View attachment 60562


Edit: Adding a link to the thread on my rack...
https://www.jeepgladiatorforum.com/...dea-of-a-perfect-for-me-gladiator-rack.27705/
 

Attachments

  • 0 bytes Views: 0
Last edited:

SleepyJeep

Well-Known Member
Joined
Apr 3, 2019
Threads
53
Messages
814
Reaction score
794
Location
OH
Vehicle(s)
Mini Cooper S, Firecracker Red Gladiator LE
Step 3 (doesn't need to be in this order)...

Getting through the firewall - how I ran the CB antenna cable through the firewall with the large cable end connector.

Since I'm installing the antenna on the driver's side, I wanted to run the cable through the firewall on that side of the Gladiator. Here's a view under the hood of the firewall to the right of the brake system...

Jeep Gladiator JTR LE Build Up with No Letdown {filename}


In this similar pic to the above one, you can see the silver foil tape - the edge of it is reflecting light. Just below that is a large plastic, black, flat plug with two tabs on it - the tabs are at 3:00 and 9:00 as installed in the firewall...

Jeep Gladiator JTR LE Build Up with No Letdown {filename}


Using pliers, I grabbed one of the tabs and pulled it and it popped right out - viola! Plug out and it reveals a very nice, large hole through the firewall! Here's the plug...

Jeep Gladiator JTR LE Build Up with No Letdown {filename}


I used a white coat hanger wire and pushed it into the hole...

Jeep Gladiator JTR LE Build Up with No Letdown {filename}


I went around to the driver's side footwell and there it was - and look at the light shining through the firewall hole - this is perfect! The hole is large enough for the CB antenna cable end and anything else you might need to run through there...

Jeep Gladiator JTR LE Build Up with No Letdown {filename}


Since I didn't want to (didn't need to) drill a large hole through the plug, I used wire dykes to snip a 'V' shaped slot in the plastic plug. It was perfect for the CB antenna cable and I snapped the plug back into place...

Jeep Gladiator JTR LE Build Up with No Letdown {filename}


Running a CB antenna cable or any other wires through the Jeep Gladiator's firewall is pretty easy using this plug. Note that my Gladiator has an automatic transmission. This plug may be used on Gladiator's with manual transmission or it could be used for some other purpose on other Jeeps (YMMV).

Jeep Gladiator JTR LE Build Up with No Letdown {filename}


Here's the Topsy bracket after I painted and installed it on the driver's side...
Jeep Gladiator JTR LE Build Up with No Letdown {filename}
Very nice write up of the install. But, what I did was run it through the frame rail of the JT from the driver side and there is a plug in the driver side to pull the cable into the cabin. I didn't need to poke any holes...
 
OP
OP
WhatExit?

WhatExit?

Well-Known Member
First Name
Dan
Joined
Sep 13, 2018
Threads
54
Messages
1,944
Reaction score
2,663
Location
48th State
Vehicle(s)
2020 JT Rubicon Launch Edition - Granite Crystal Metallic | 2017 Ford Raptor SuperCrew - Metallic
Vehicle Showcase
3
Very nice write up of the install. But, what I did was run it through the frame rail of the JT from the driver side and there is a plug in the driver side to pull the cable into the cabin. I didn't need to poke any holes...
Thanks. I'm not sure where the plug is you're referring to. I didn't "poke any holes" - the plug is right there in the firewall and it pops right out and back in again.
 
OP
OP
WhatExit?

WhatExit?

Well-Known Member
First Name
Dan
Joined
Sep 13, 2018
Threads
54
Messages
1,944
Reaction score
2,663
Location
48th State
Vehicle(s)
2020 JT Rubicon Launch Edition - Granite Crystal Metallic | 2017 Ford Raptor SuperCrew - Metallic
Vehicle Showcase
3
Last edited:

Sponsored

OP
OP
WhatExit?

WhatExit?

Well-Known Member
First Name
Dan
Joined
Sep 13, 2018
Threads
54
Messages
1,944
Reaction score
2,663
Location
48th State
Vehicle(s)
2020 JT Rubicon Launch Edition - Granite Crystal Metallic | 2017 Ford Raptor SuperCrew - Metallic
Vehicle Showcase
3
Here's the rack completed...

Cargo basket mounted to the Superstrut cross rails. You can see the factory tonneau cover rolls all the way open!

8 bolts and the whole thing comes off and gets stored for the next trip...
Jeep Gladiator JTR LE Build Up with No Letdown {filename}


Jeep Gladiator JTR LE Build Up with No Letdown {filename}


Jeep Gladiator JTR LE Build Up with No Letdown {filename}
 
OP
OP
WhatExit?

WhatExit?

Well-Known Member
First Name
Dan
Joined
Sep 13, 2018
Threads
54
Messages
1,944
Reaction score
2,663
Location
48th State
Vehicle(s)
2020 JT Rubicon Launch Edition - Granite Crystal Metallic | 2017 Ford Raptor SuperCrew - Metallic
Vehicle Showcase
3
Here's the tonneau cover closed...

Jeep Gladiator JTR LE Build Up with No Letdown {filename}


Jeep Gladiator JTR LE Build Up with No Letdown {filename}
 
OP
OP
WhatExit?

WhatExit?

Well-Known Member
First Name
Dan
Joined
Sep 13, 2018
Threads
54
Messages
1,944
Reaction score
2,663
Location
48th State
Vehicle(s)
2020 JT Rubicon Launch Edition - Granite Crystal Metallic | 2017 Ford Raptor SuperCrew - Metallic
Vehicle Showcase
3
As noted previously I purchased a CO2 tank holder and I painted it with the Rustoleum Galaxy metallic paint to match everything else. I bought a piece of steel bar stock at Home Depot, cut it to size and drilled it and bolted those 2 pieces to the tank holder and then to the Trail Rail to hold it securely in place...

Jeep Gladiator JTR LE Build Up with No Letdown {filename}


Jeep Gladiator JTR LE Build Up with No Letdown {filename}


Jeep Gladiator JTR LE Build Up with No Letdown {filename}

I like the Built-Rite and JCR molle panels but the Trail Rails are so easy to work with I didn't need to spend all that money on molle panels to do this.

And again, a couple bolts and the holder and tank are out of the Jeep and in the garage until the next trip...

Jeep Gladiator JTR LE Build Up with No Letdown {filename}
 
OP
OP
WhatExit?

WhatExit?

Well-Known Member
First Name
Dan
Joined
Sep 13, 2018
Threads
54
Messages
1,944
Reaction score
2,663
Location
48th State
Vehicle(s)
2020 JT Rubicon Launch Edition - Granite Crystal Metallic | 2017 Ford Raptor SuperCrew - Metallic
Vehicle Showcase
3
Jeep Gladiator JTR LE Build Up with No Letdown {filename}


Jeep Gladiator JTR LE Build Up with No Letdown {filename}
 
OP
OP
WhatExit?

WhatExit?

Well-Known Member
First Name
Dan
Joined
Sep 13, 2018
Threads
54
Messages
1,944
Reaction score
2,663
Location
48th State
Vehicle(s)
2020 JT Rubicon Launch Edition - Granite Crystal Metallic | 2017 Ford Raptor SuperCrew - Metallic
Vehicle Showcase
3
The Rubbermaid ActionPacker 24-gallon box with lid fits perfectly under the factory tonneau. I have 4 of them I use when we go on our off roading/camping (aka "overlanding") trips...

Jeep Gladiator JTR LE Build Up with No Letdown {filename}


Jeep Gladiator JTR LE Build Up with No Letdown {filename}
Sponsored


Top