WillMiller87
Member
- First Name
- Will
- Joined
- Jan 6, 2020
- Threads
- 2
- Messages
- 24
- Reaction score
- 59
- Location
- Nashville, TN
- Vehicle(s)
- 2020 Gladiator Rubicon
Oh ok. No need to travel out here then. Seeing this thread led me to your build log. I like what you've done and will continue to watch, seems like you've got some great plans in store.I actually live a bit west, in Clarksville, but no one really knows where that is, so I tend to use Nashville haha. But anyway--I wouldn't be opposed to that, if you wanted to take a look.
Truthfully, I haven't done a whole lot locally. I prefer to take longer trips. LBL and Windrock tend to be big ones around here though. There are also tons of areas out along the Appalachians, and miles of trails through Smoky Mountain National Park. I've also heard good things about the Kentucky Adventure Trail, so I need to hit that one of these days.
Thanks for following along! For the most part, the core of the build is complete and I'll be starting to focus more on taking trips and fine-tuning the setup. Off of the top of my head, the only other big additions that I have planned are the front roof rack, suspension and the addition of a rear winch.Oh ok. No need to travel out here then. Seeing this thread led me to your build log. I like what you've done and will continue to watch, seems like you've got some great plans in store.
That Arkansas trip looked pretty cool. What resources do you use to plan a trip like that? How are you finding the public land to camp on? I grew up out west where its a lot easier to just hop in the jeep and go camp wherever. I've found it a little challenging to really find locations out here as so much land is privately owned. I also am interested in longer trips like the TAT and KAT
Good to know! I've used Gaia in a very simplistic manner so far. I need to dig in to all of the features.Thanks for following along! For the most part, the core of the build is complete and I'll be starting to focus more on taking trips and fine-tuning the setup. Off of the top of my head, the only other big additions that I have planned are the front roof rack, suspension and the addition of a rear winch.
No worries though. If I end up out that way any time soon I'll try to give you a heads up.
I primarily use Gaia. I have the premium subscription to it. It's well worth it in my opinion. The Land Use layer shows you the boundaries of private and state/federal lands. I use that in conjunction with satellite imagery/topographic maps to try to identify trails or open areas that lead to potential campsites. Basically, I just followed my planned route, broke it up in to 3 fairly even sections, and scanned for suitable sites on federal land within each section. Gaia is great because you can create waypoints and custom routes, so you can scout out spots and save them before even leaving home, then reference everything on a phone or tablet.
There are also some public sites that list established campsites on federal lands. The two wildlife management areas that I stayed in in AR had sites listed, so I chose and marked primary, secondary and tertiary sites on my GPS before heading out. I'm sure everyone has different methods, but that's what works for me personally.
So you wired this to the switch in the cab that operates the bed lights, correct? Those are not a 12V constant, correct?Since it pertains directly to the cap, here's my writeup on adding aux bed/cargo lighting, for anyone interested. This was necessary for me because, between the cap, and the recent addition of BuiltRight rails and side panels, the stock lights provided essentially zero illumination. Feel free to scroll to the very bottom if you just want to see the finished product!
What I used:
-Set of lights (with approximately 20ft of wiring)
-Fasteners for the lights (either double sided tape, or screws)
-Four red Posi-Taps
-Heat shrink
-Heat gun
-Wiring pliers
-Zip ties
-Wire hanger
-Tape
I found this set of lights on amazon:
https://www.amazon.com/gp/product/B07YZFN925/ref=ppx_yo_dt_b_asin_title_o06_s00?ie=UTF8&psc=1


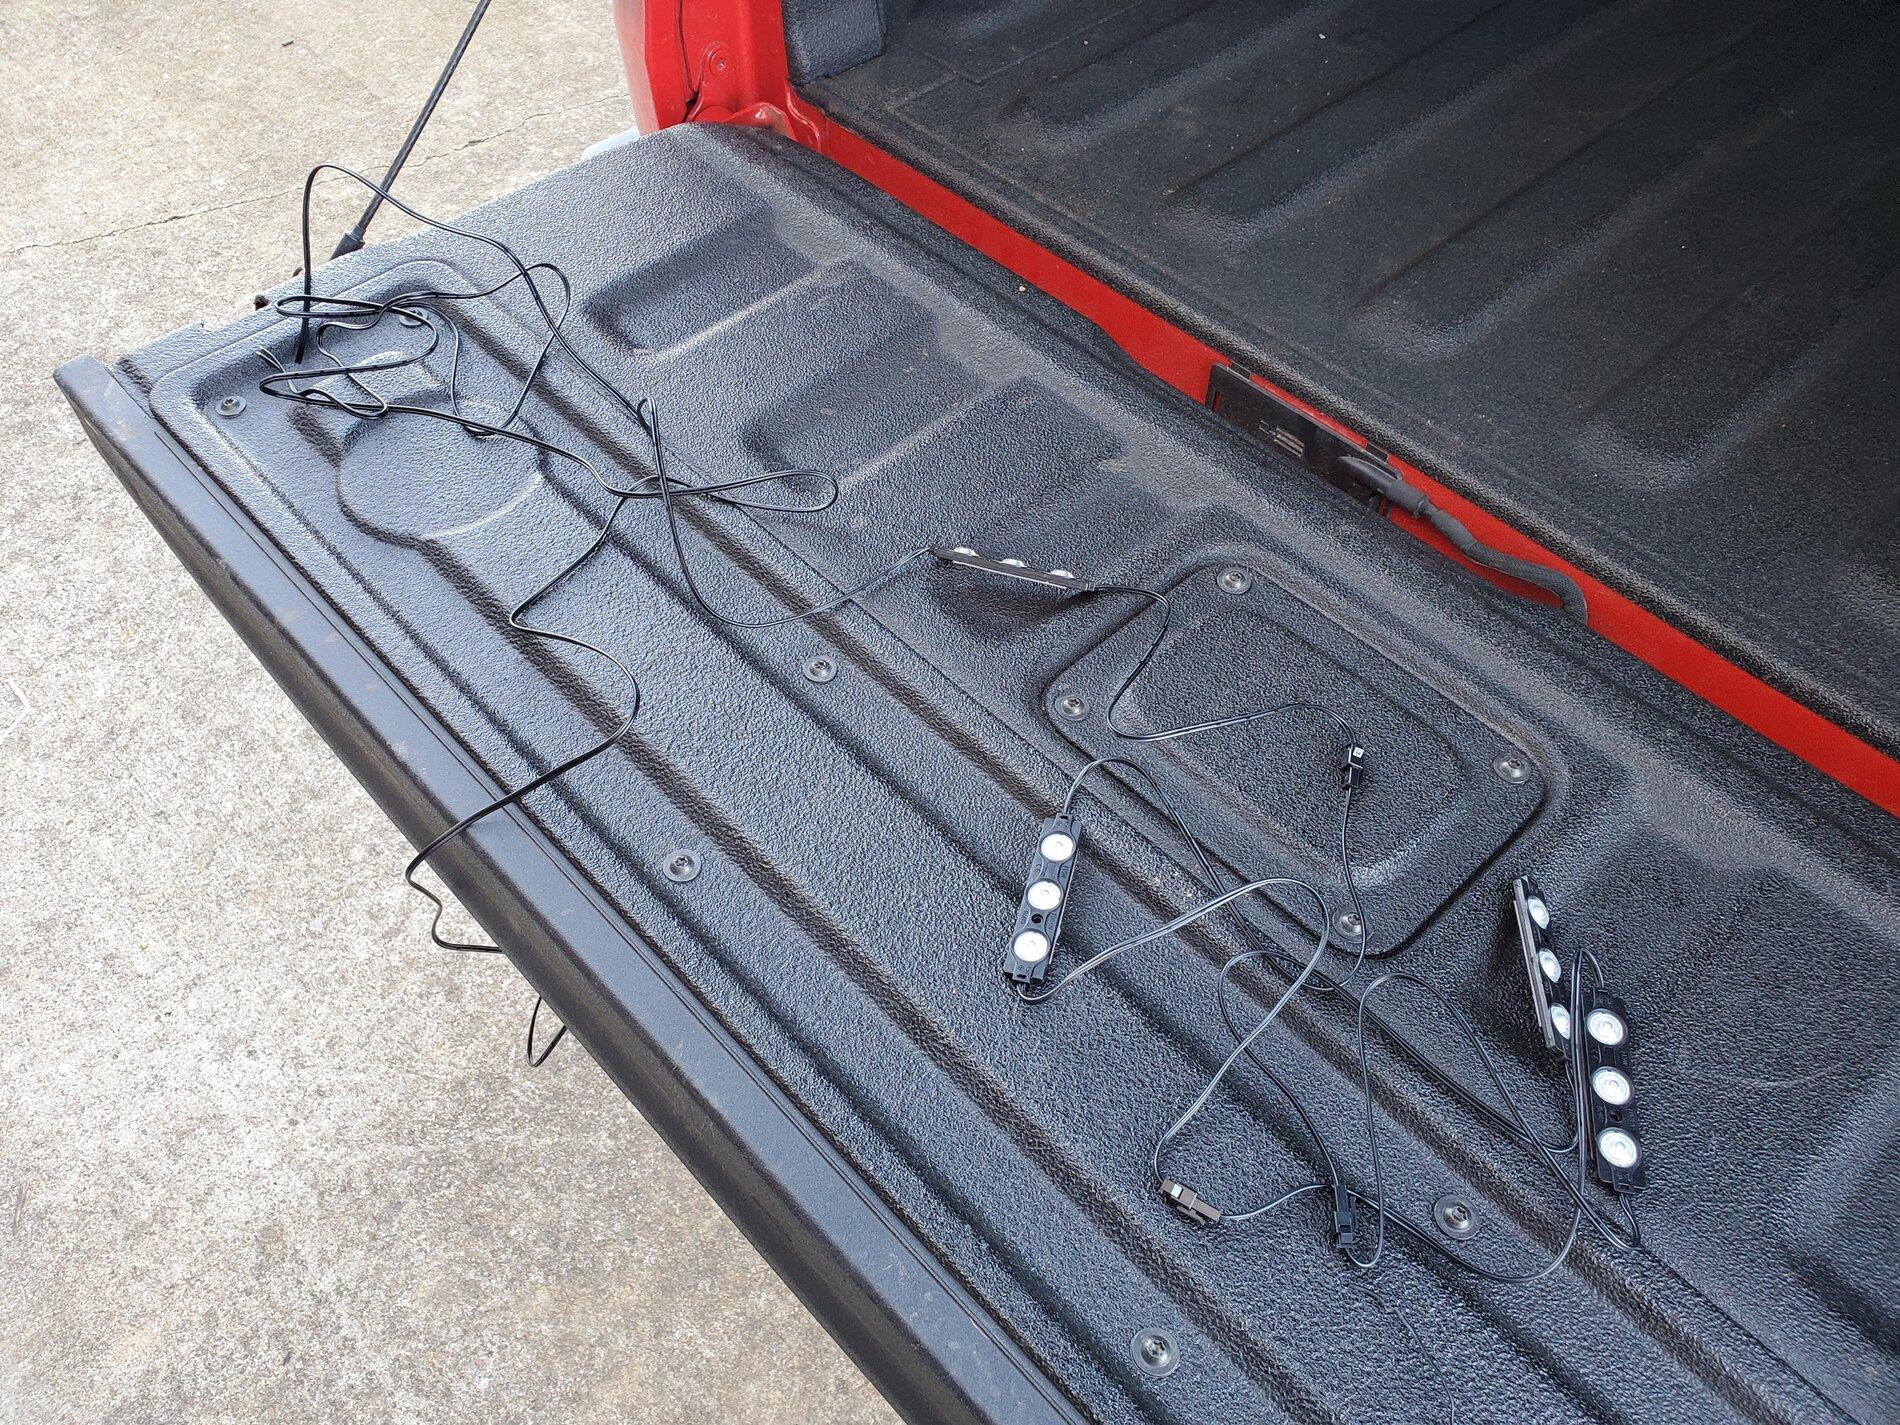
The package came with 8 total lights, two sets of 4 lights that are wired together. They are backed with double sided adhesive tape. The lights are very light, and the tape holds solid. They also come with a 2 year warranty. I was pleasantly surprised by the overall quality. This is the first set of lights that I ordered to try for my application, and they ended up fitting perfectly. This whole project cost me less than $20.
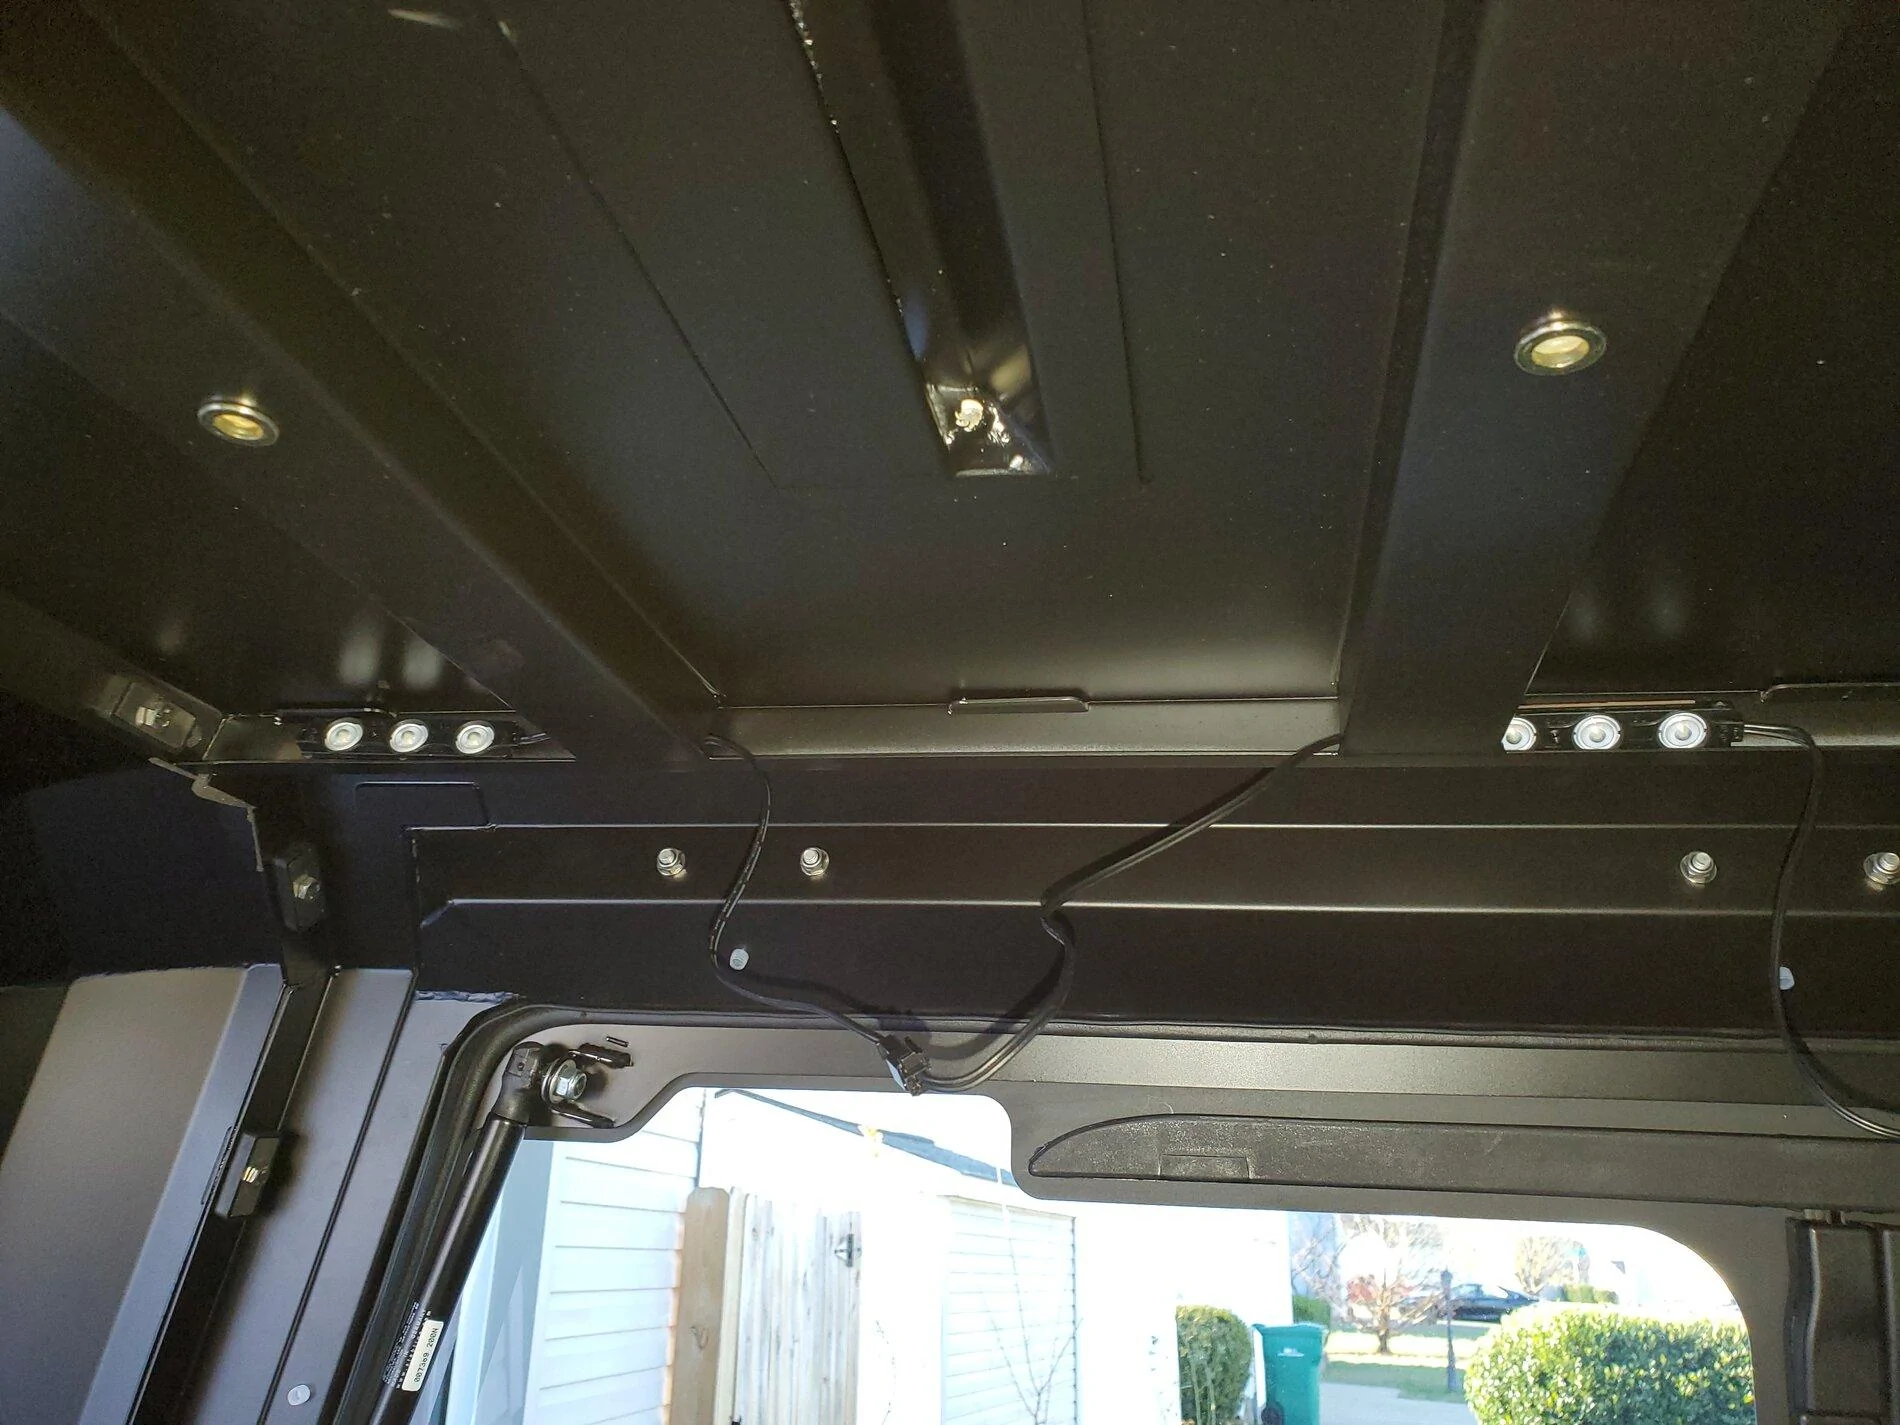
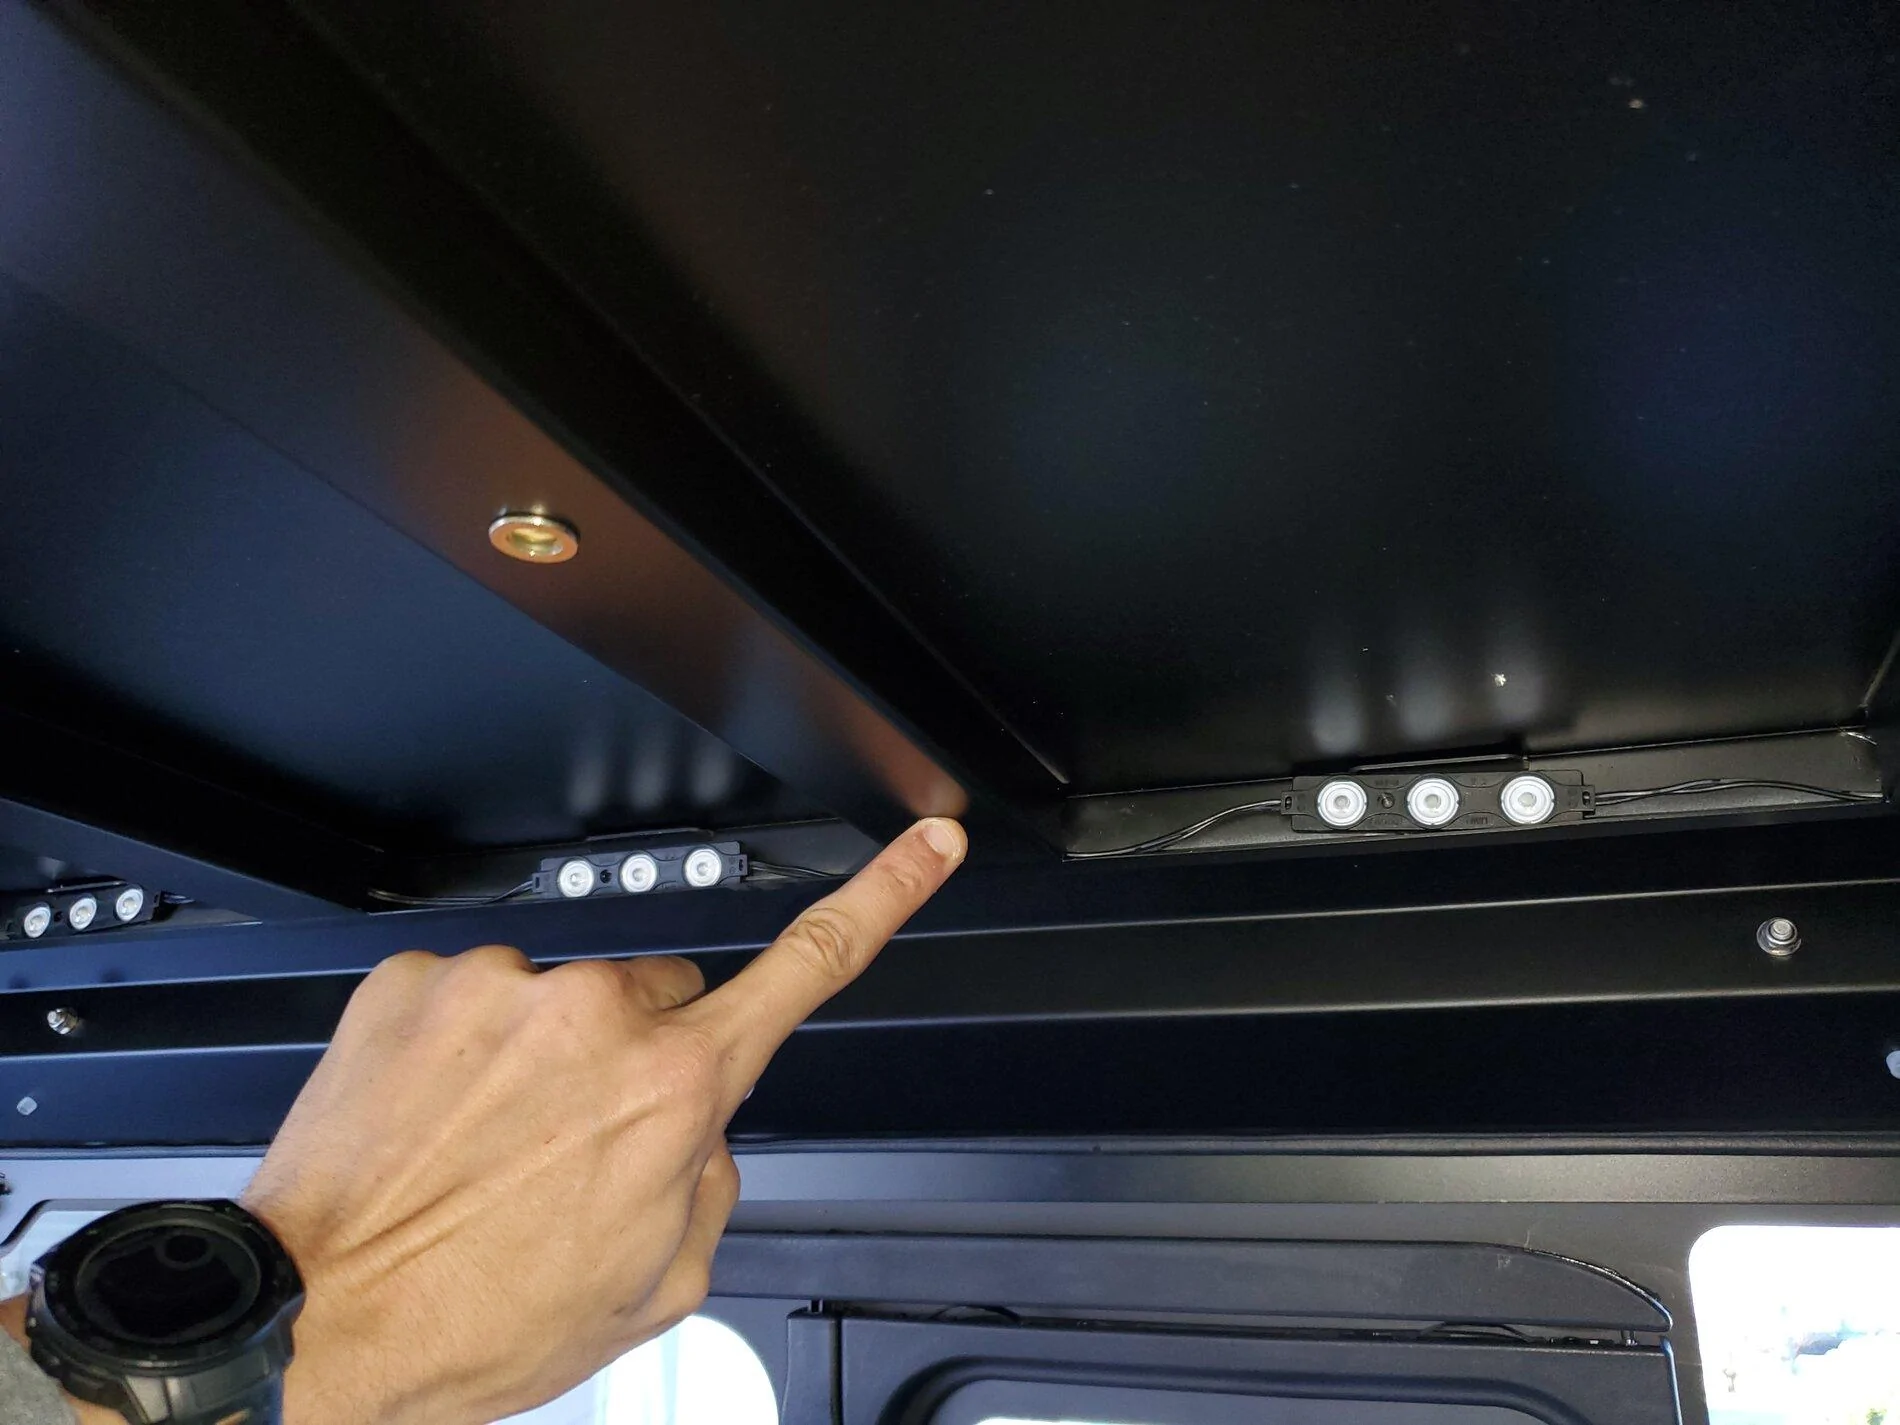
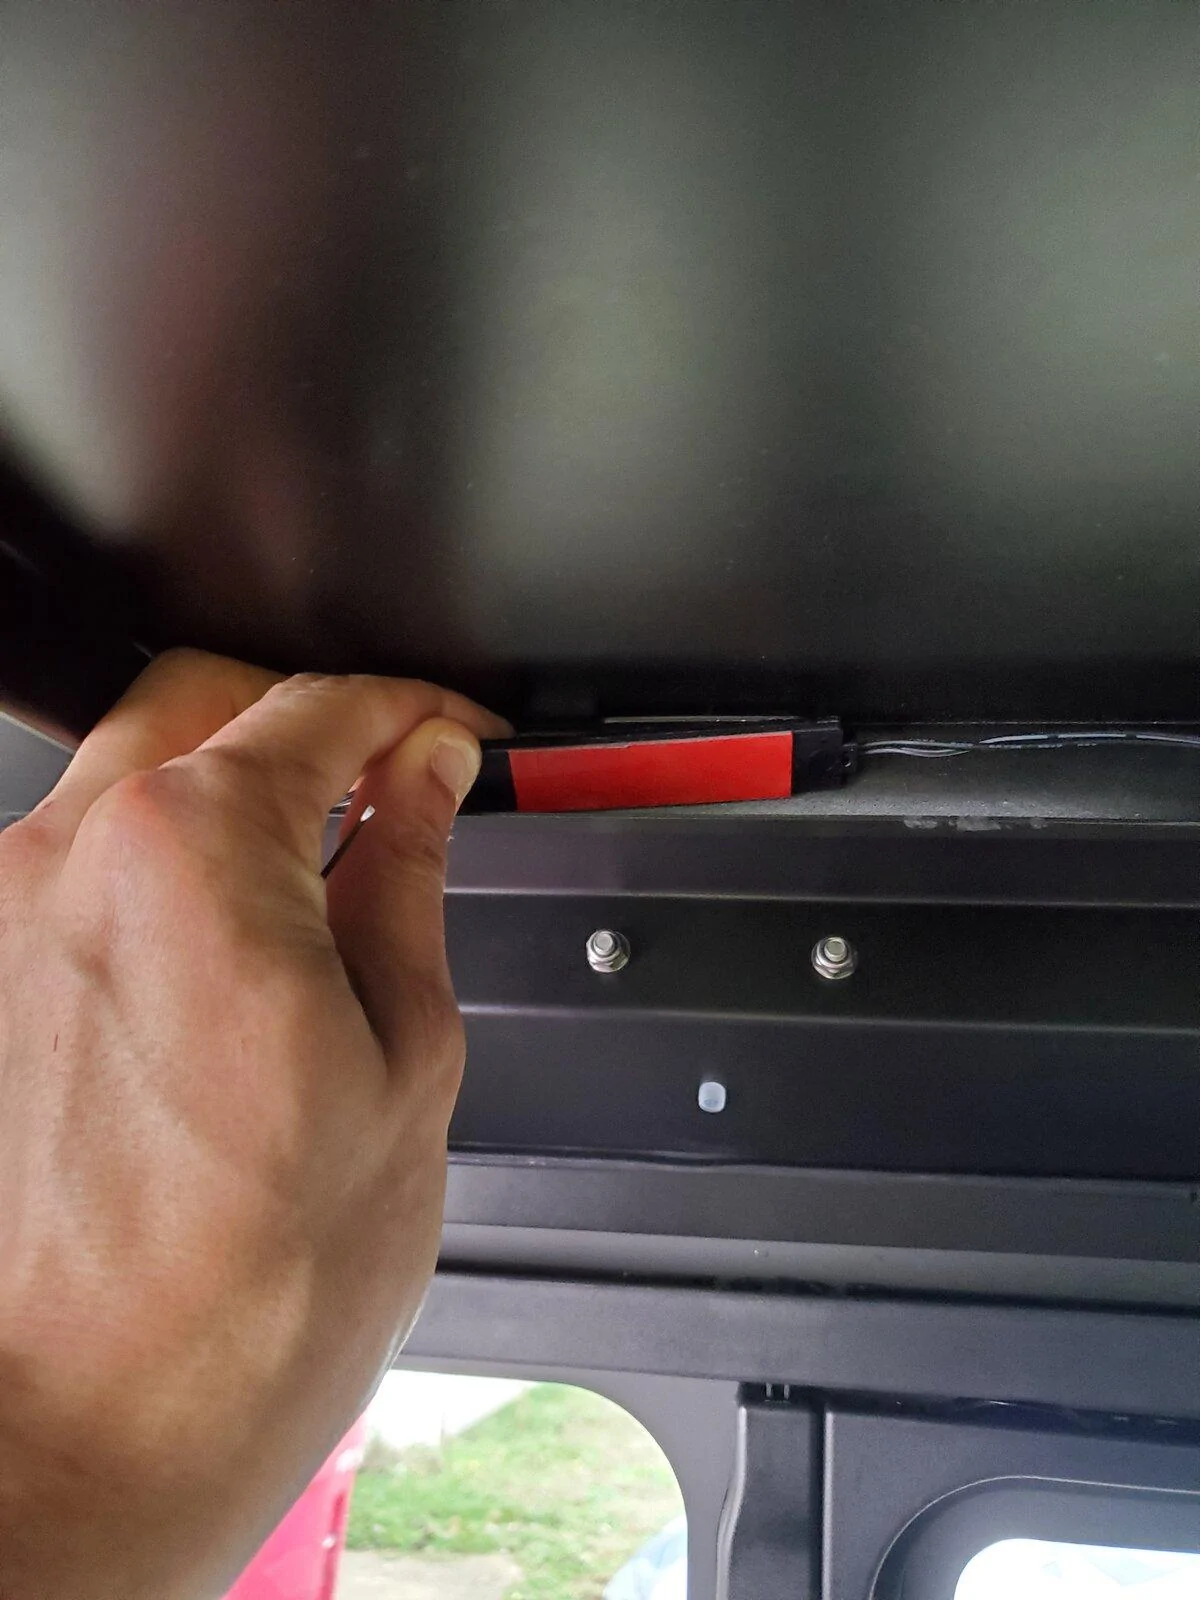
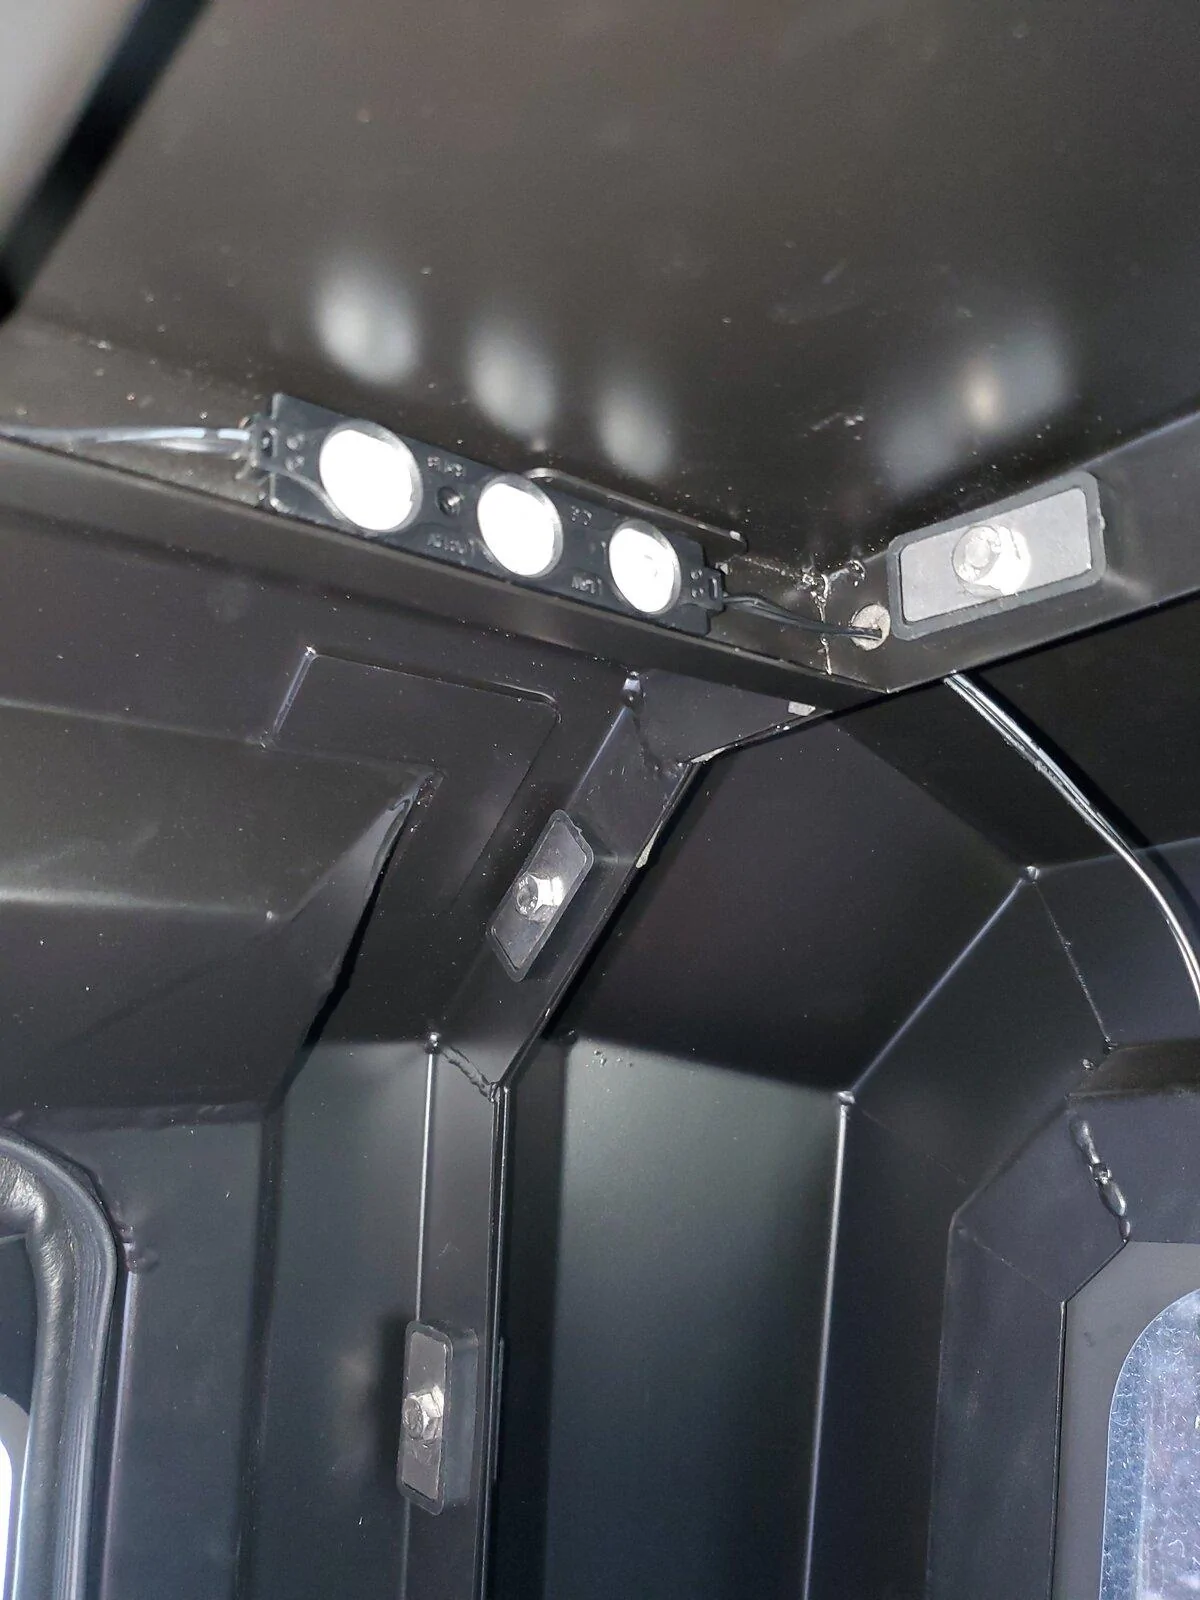
I started off by choosing a location. I knew I wanted the lights up high for an evenly distributed, diffused pattern over the cargo area, so I went straight to the ceiling of my SmartCap. There is a lip that runs the length of the roof, which also happens to have pass-throughs between hollow crossmembers. This ended up working perfectly, because I could route the wiring in between these pass-throughs, and tuck all excess cordage inside of the hollow crossmembers.
Before sticking down the lights, I tapped the leads on to a spare battery to ensure that output and spread was sufficient in this location. I tested during daylight, and after sunset. These lights pump out a surprising amount of light, as the entire bed was illuminated. Having checked that, I began sticking down the lights and routing the wiring.
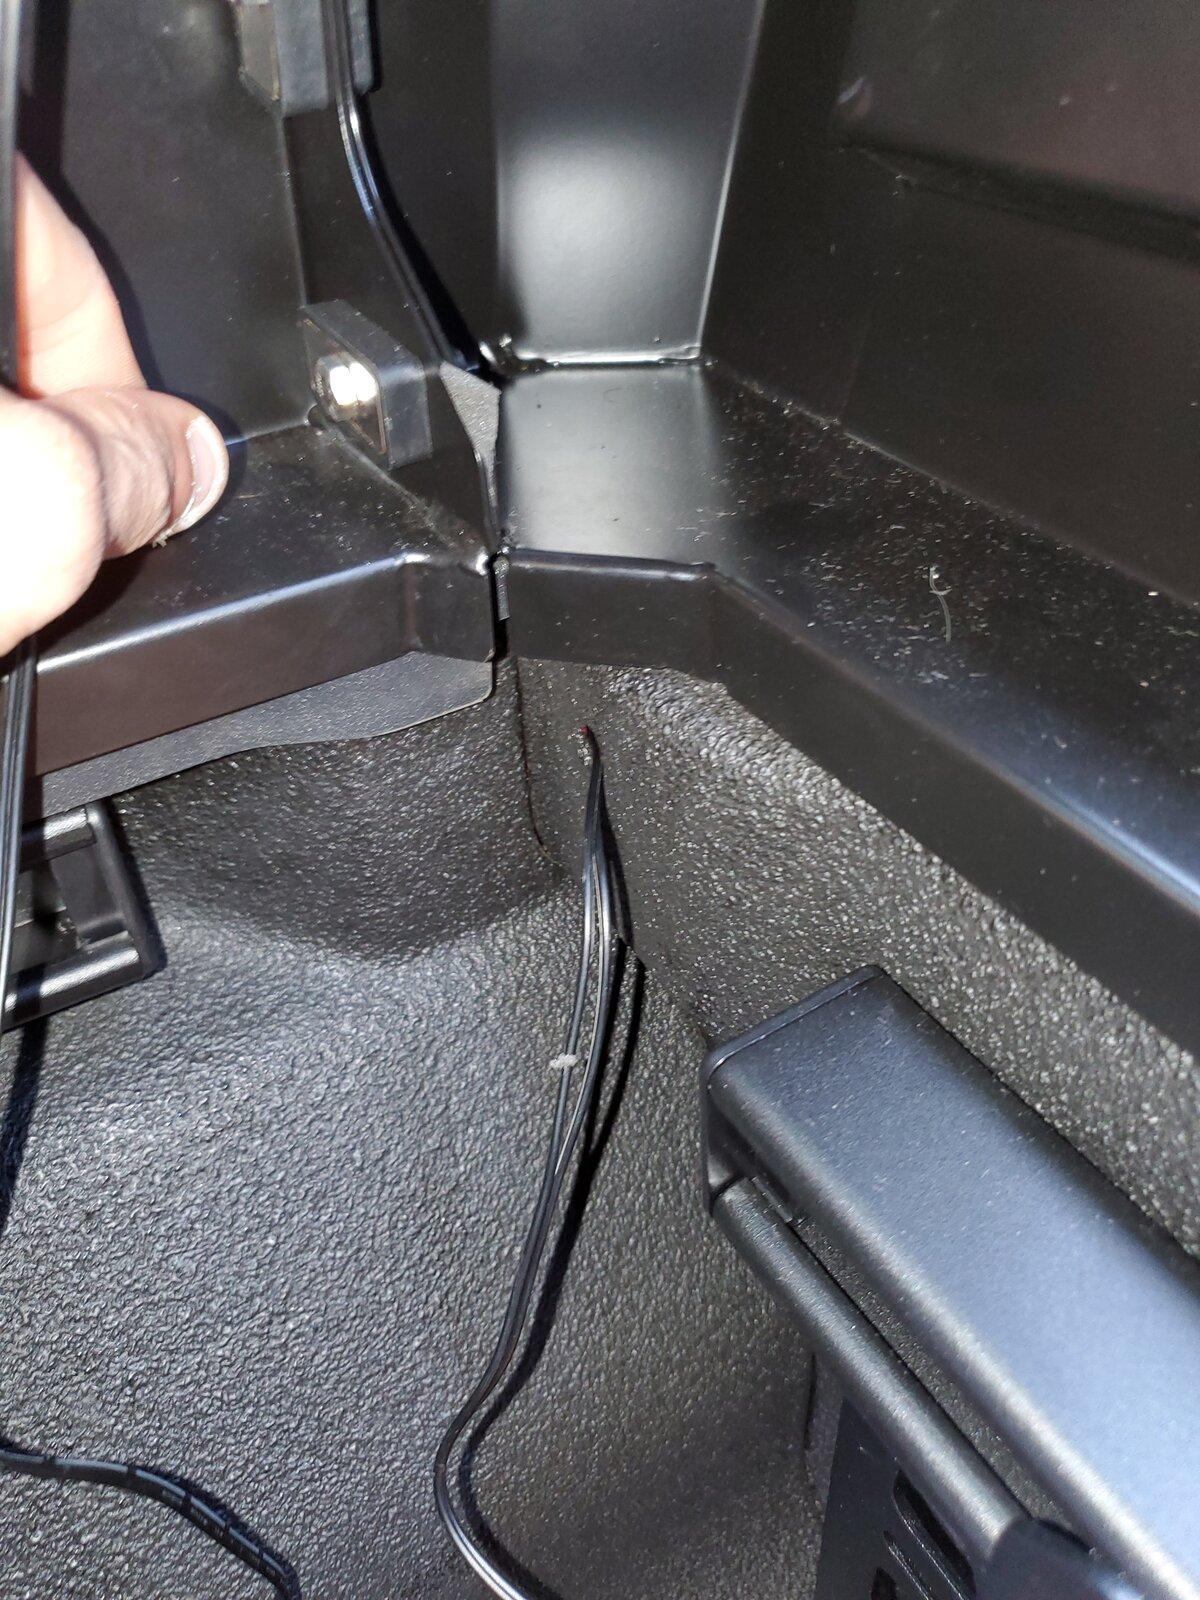
I ran the wiring along the ceiling, and then through an existing hole in my RSI Smart Cap. I punched a hole through the gasket, and dropped the wires down to hide behind the front flange of the shell, before routing the wires out of another existing hole in the bed.
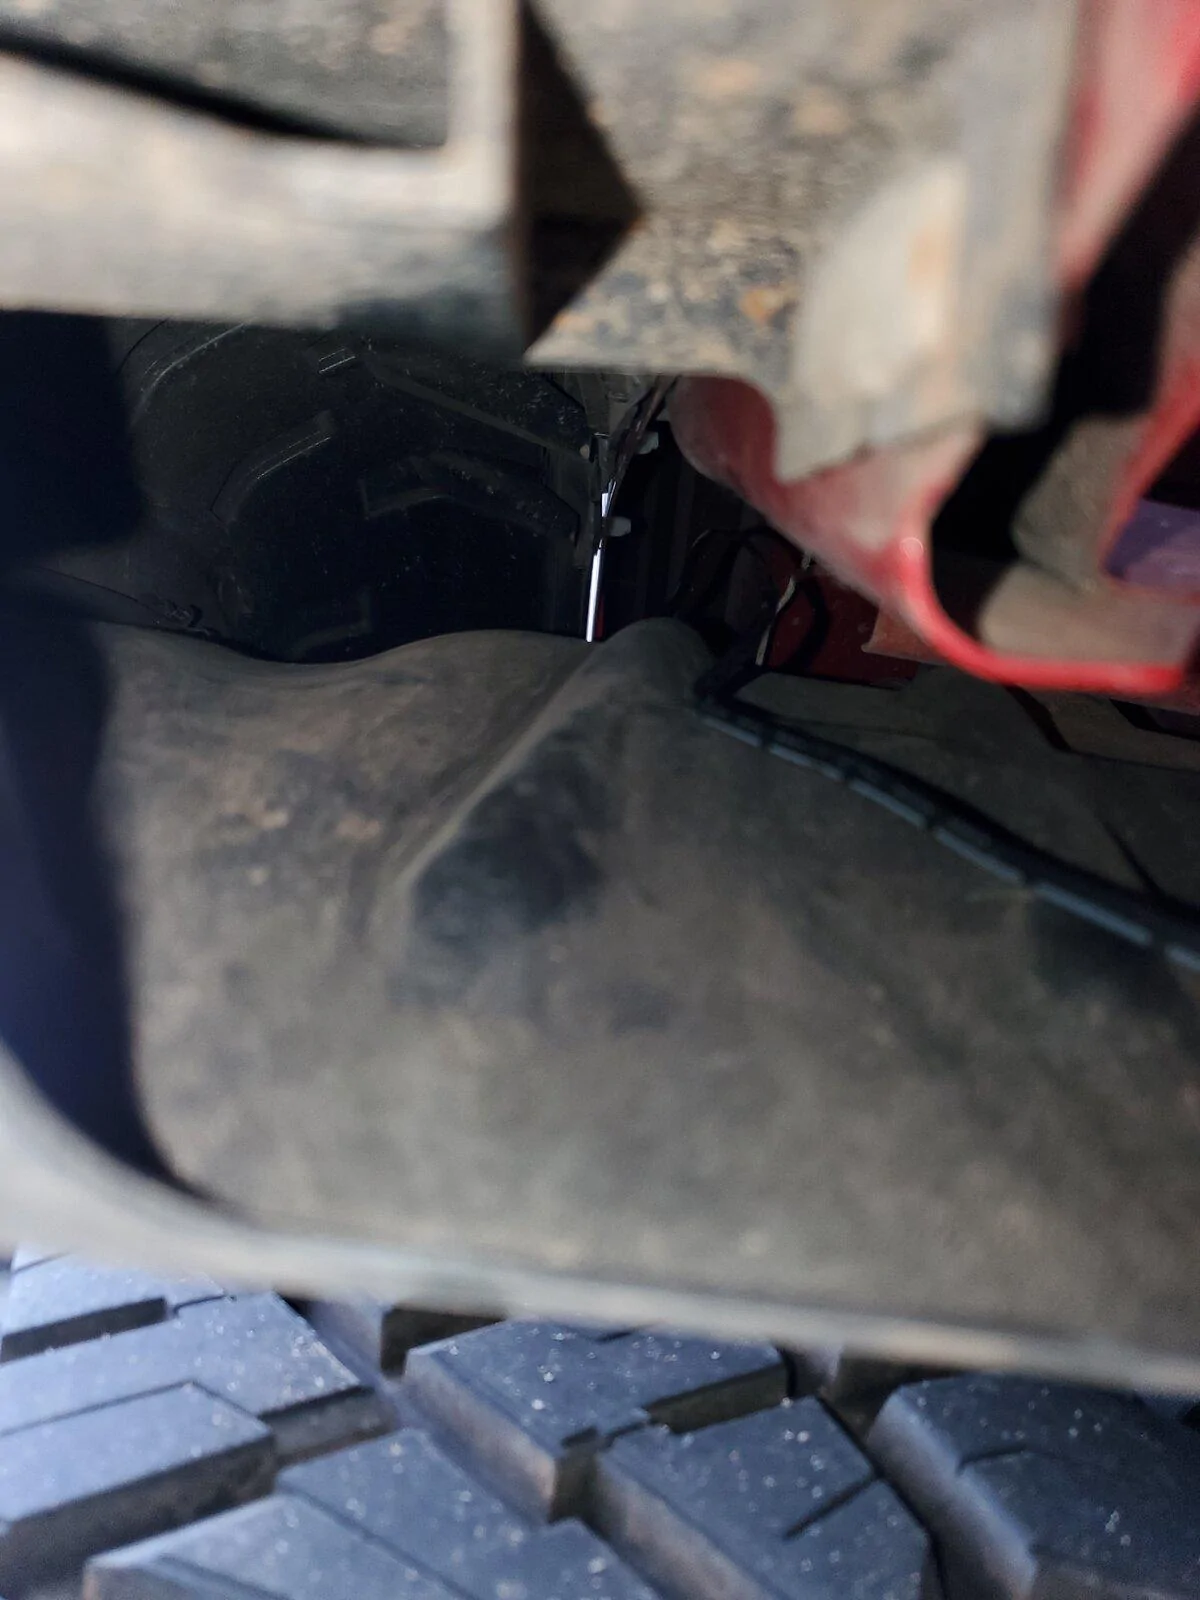
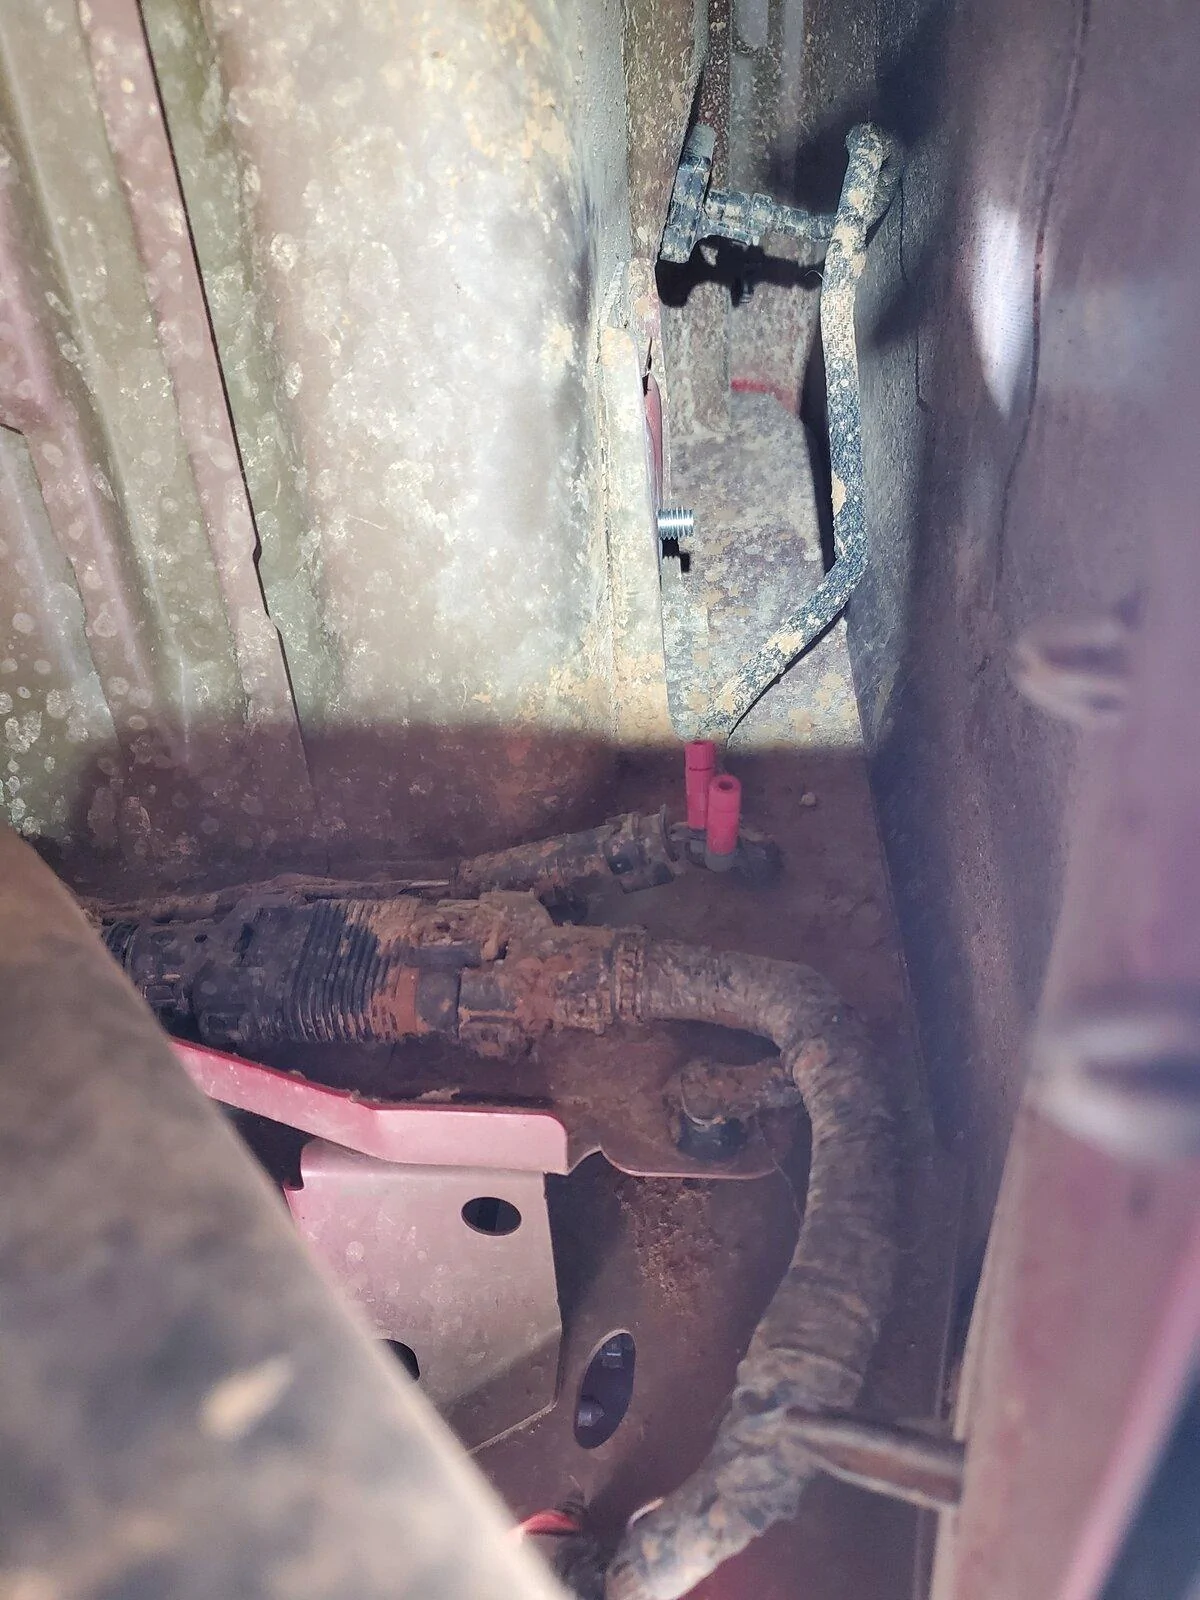
From there, the wires dropped between the bed and the cab. I fished them out and down to the ground with a hook on the end of a wire hanger, and decided how to route. Riding across the inside of the plastic fender liner seemed to be the best way, as it would keep the wires hidden and protect the wiring from debris. With my trusty wire hanger in hand, I taped the leads, made a slight bend, and fished up through the fender well.
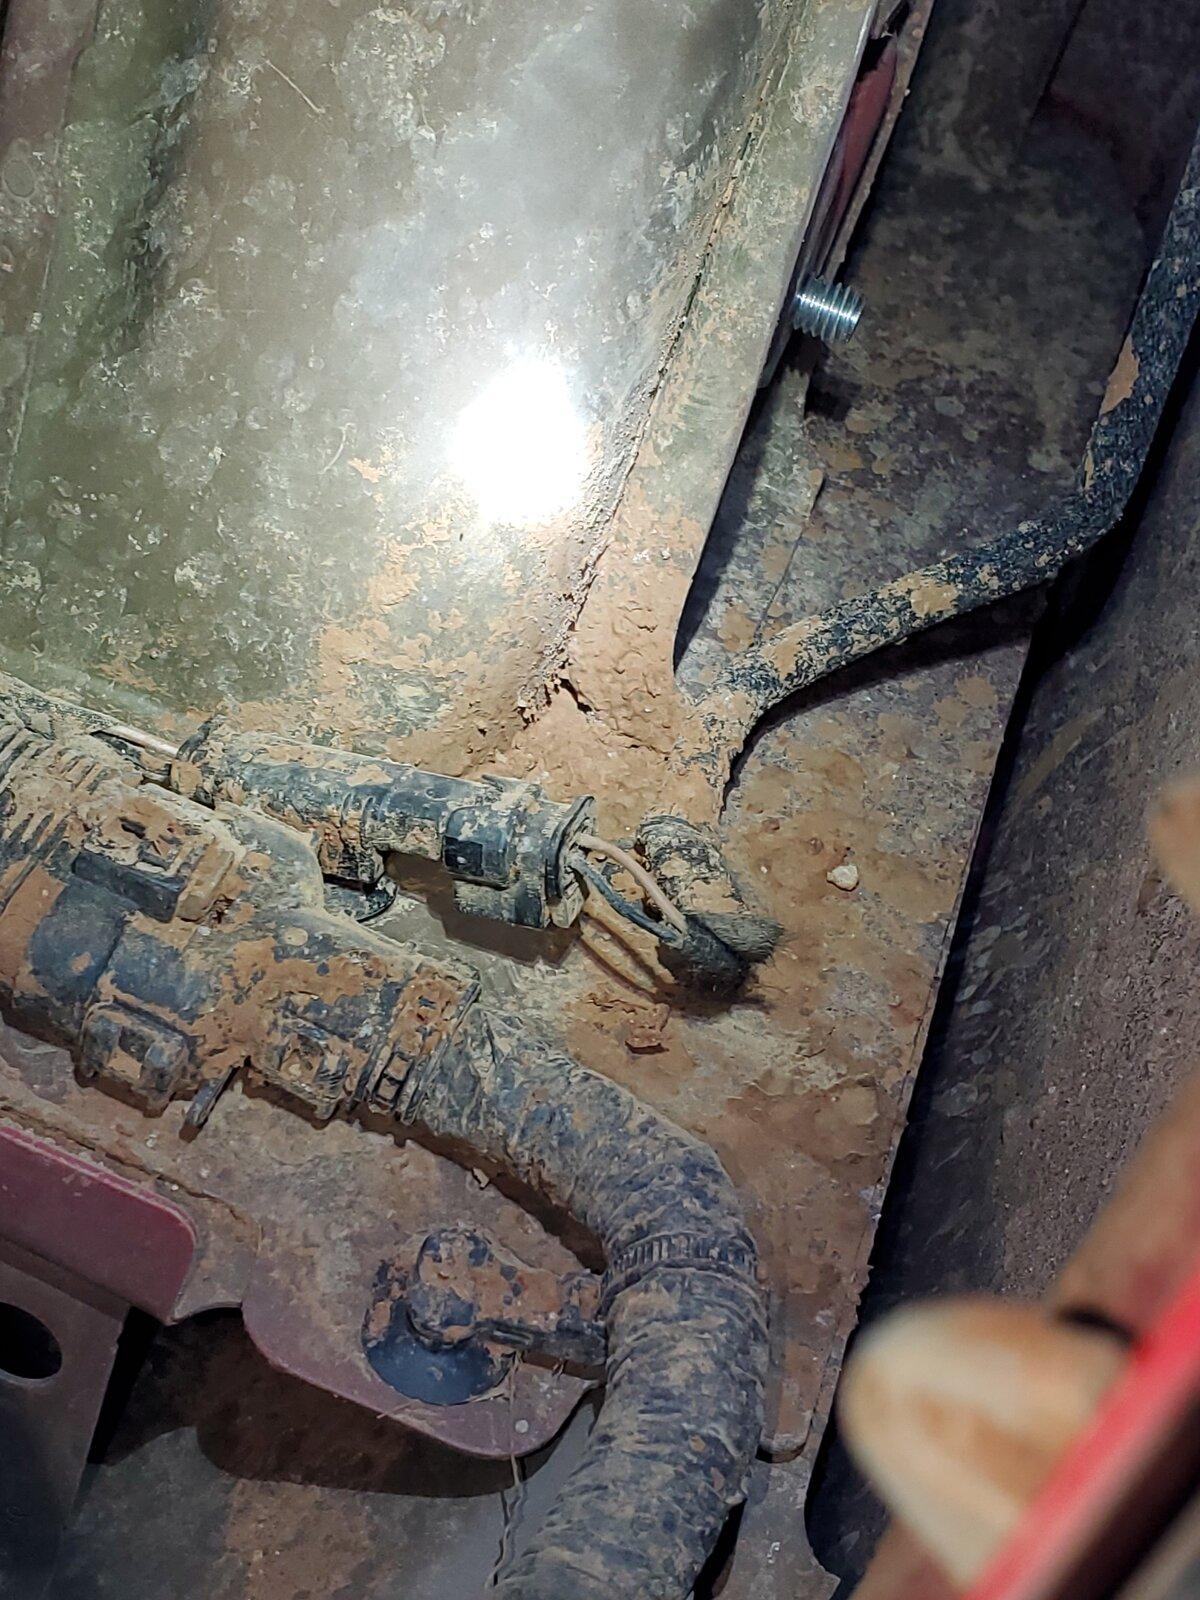
Once the leads were on the rear side of the fender well, I identified the bed light/cargo light harness. It's very easy to find--just follow from where the light is. It is the only harness leading to that location, and there are only two wires associated with it. On the driver side, your positive is brown-ish/yellow-ish (I had a hard time telling through the mud), and ground is black. On your passenger side, the positive is red, and the ground is black.
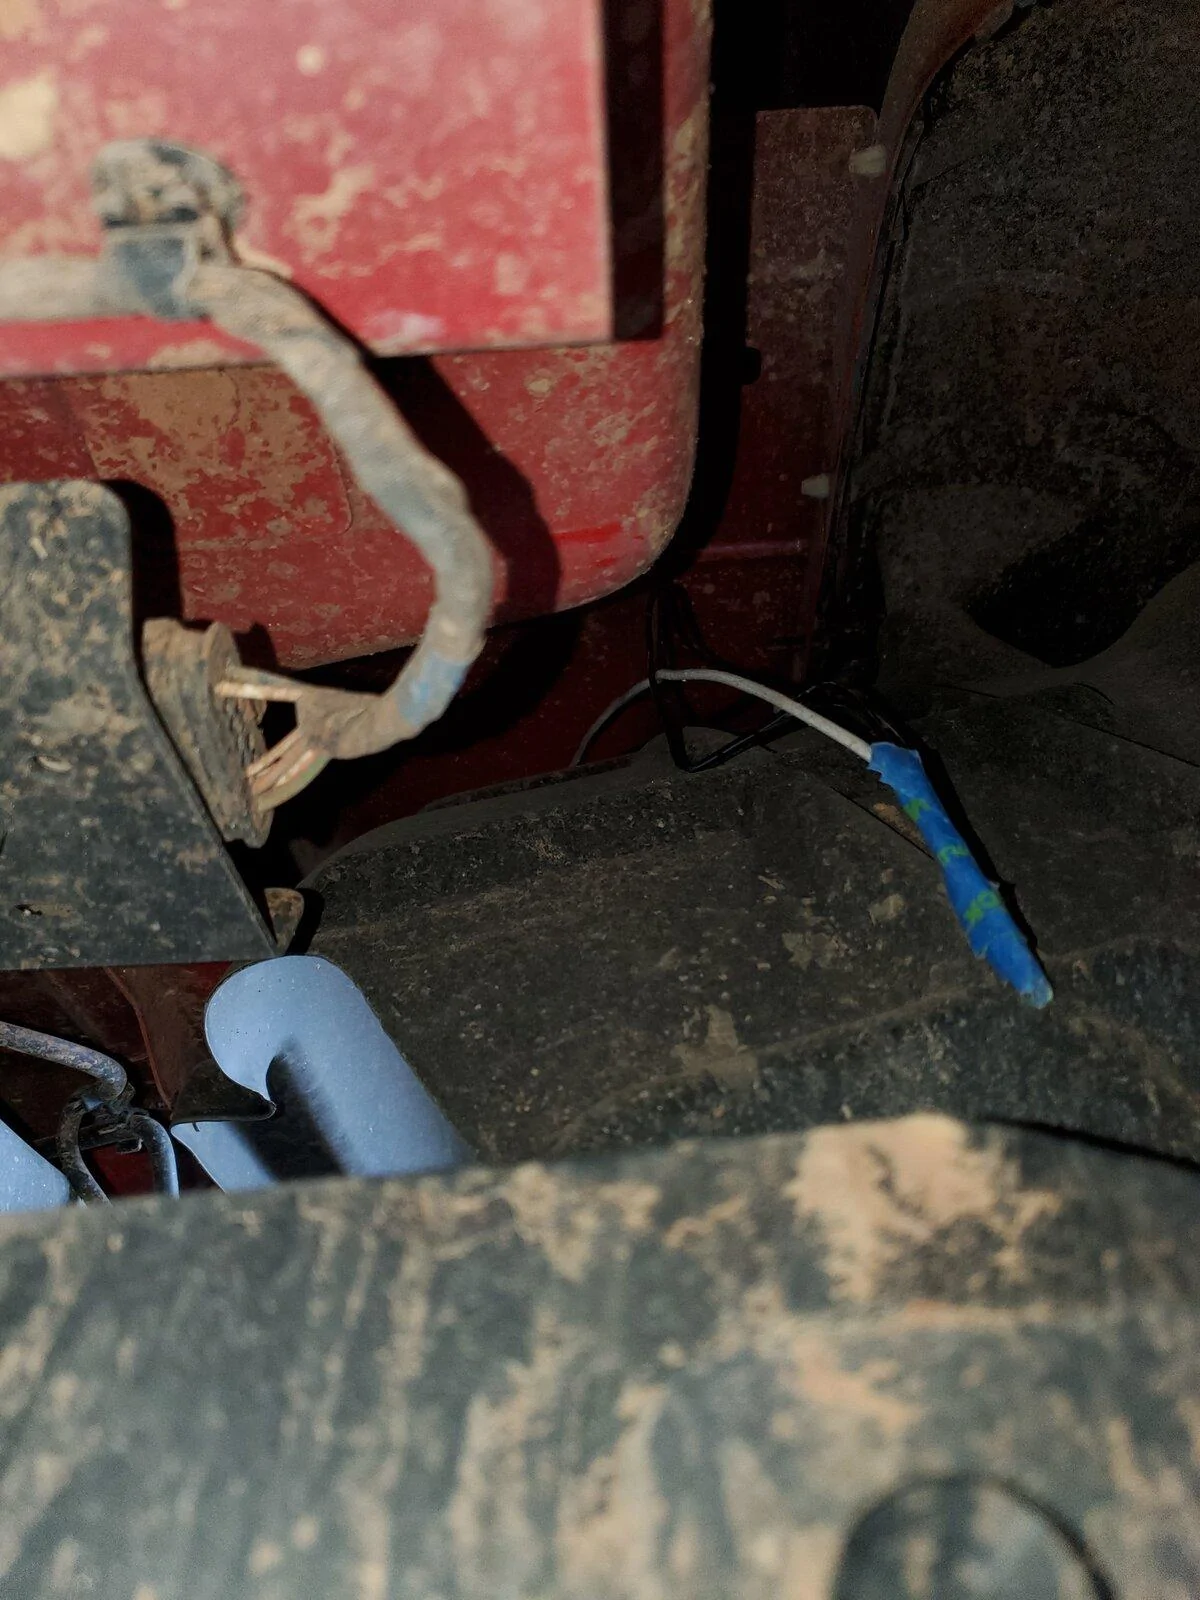
Once identifying the correct harness, I got the Posi-Taps ready. I set up one on each wire to ensure I had the correct positive and negative wires. I verified with my my multimeter by hitting the unlock button on the key fob to activate the cargo lights.
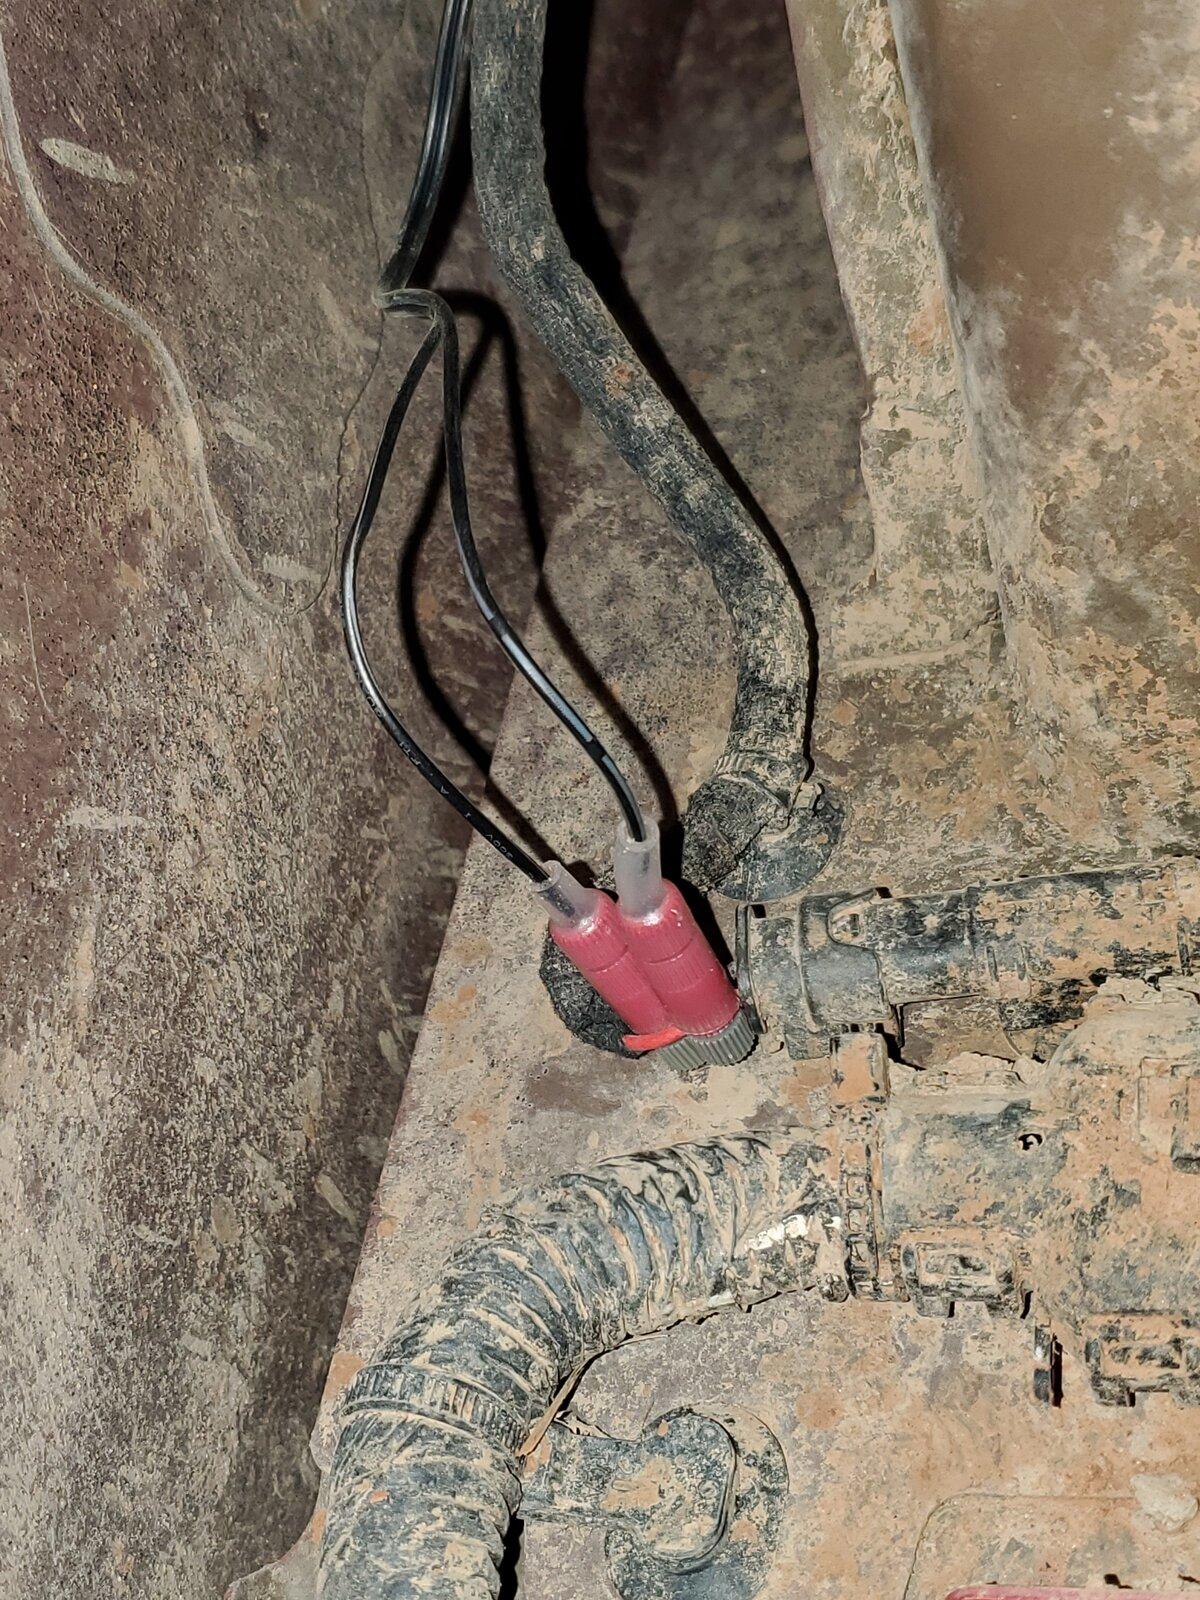
Once I was sure that I had good connections, I cut the new light wires to length, being sure to leave about a half a foot of slack, then zip tied them to the stock harness to keep them out of the way and make them easier to identify in the future. I connected them to the Posi-Taps and tested the new lights by hitting the key fob again, and once I ensured everything was good, I hit them with heat shrink. Though it's not a 100% waterproof connection, it's pretty damn close, and I don't anticipate any issues, even though I seem to get a fair bit of mud and grit in this location. The good thing about Posi-Taps is that they're easy to remove, so if I have any issues I can rehab the connection and reuse the same connector.
After repeating the process on both sides, I made sure I trimmed my two zip ties, checked all wiring for tolerance and tucked everything away. The end result is a completely hidden install off of the stock function that provides plenty of light output, even during the day.
I wired it directly to the bed light harness. But yes, it operates off of the switch--same as the standard bed lights do.So you wired this to the switch in the cab that operates the bed lights, correct? Those are not a 12V constant, correct?
Few beers and a brick ... DONE!...Is there a way to remove the side windows easily for an open air look?


Thanks! I'm loving it so far.@TheHops Love the look of the RSI cap! You're rig is lookin sweet! Thanks for posting the vids an pics! Is there a way to remove the side windows easily for an open air look?
The final verdict on weight was 170lbs.Appreciate your writeups here - and have subscribed to your YT channel. Nice content.
Thinking about getting one of these. What’s the weight of the cap? For the life of me i can’t see it listed anywhere on their website. The RSI site is pretty but has zero information on their products.
Appreciate the support!Appreciate your writeups here - and have subscribed to your YT channel. Nice content.
Thinking about getting one of these. What’s the weight of the cap? For the life of me i can’t see it listed anywhere on their website. The RSI site is pretty but has zero information on their products.
I think the BOL counts the pallet, etc. also. It’s important to note that the table weighs like 40 ish pounds and that mounts to roof. With that, a rack, etc. it can get pretty hefty. I honestly don’t like the way the stock suspension handles just that minor weight addition. It’s far from payload capacity but I still really feel it.Appreciate the support!
Looks like briandmiles beat me to it on the weight. Like he said, RSI came out and confirmed 170 pounds. My bill of lading showed 300 pounds, if I recall, so don't let that throw you off if you order one and yours also says something crazy.
True. I figured they may have just labeled them all for worst-case (in case of table, side-kitchen, etc). Mine was just the cap though and they still labeled it like that. I doubt I had a 130 pound pallet haha, but who knows!I think the BOL counts the pallet, etc. also. It’s important to note that the table weighs like 40 ish pounds and that mounts to roof. With that, a rack, etc. it can get pretty hefty. I honestly don’t like the way the stock suspension handles just that minor weight addition. It’s far from payload capacity but I still really feel it.