Sponsored

A new hope ... (build journal and component reviews)

OP
OP
cug

cug

Well-Known Member
First Name
Guido
Joined
Apr 1, 2023
Threads
13
Messages
602
Reaction score
664
Location
Christchurch, New Zealand
Vehicle(s)
JTR EcoDiesel, Land Cruiser 79, BMW R1250GS
Build Thread
Link
Occupation
Just keeping busy
Regarding ideas ...

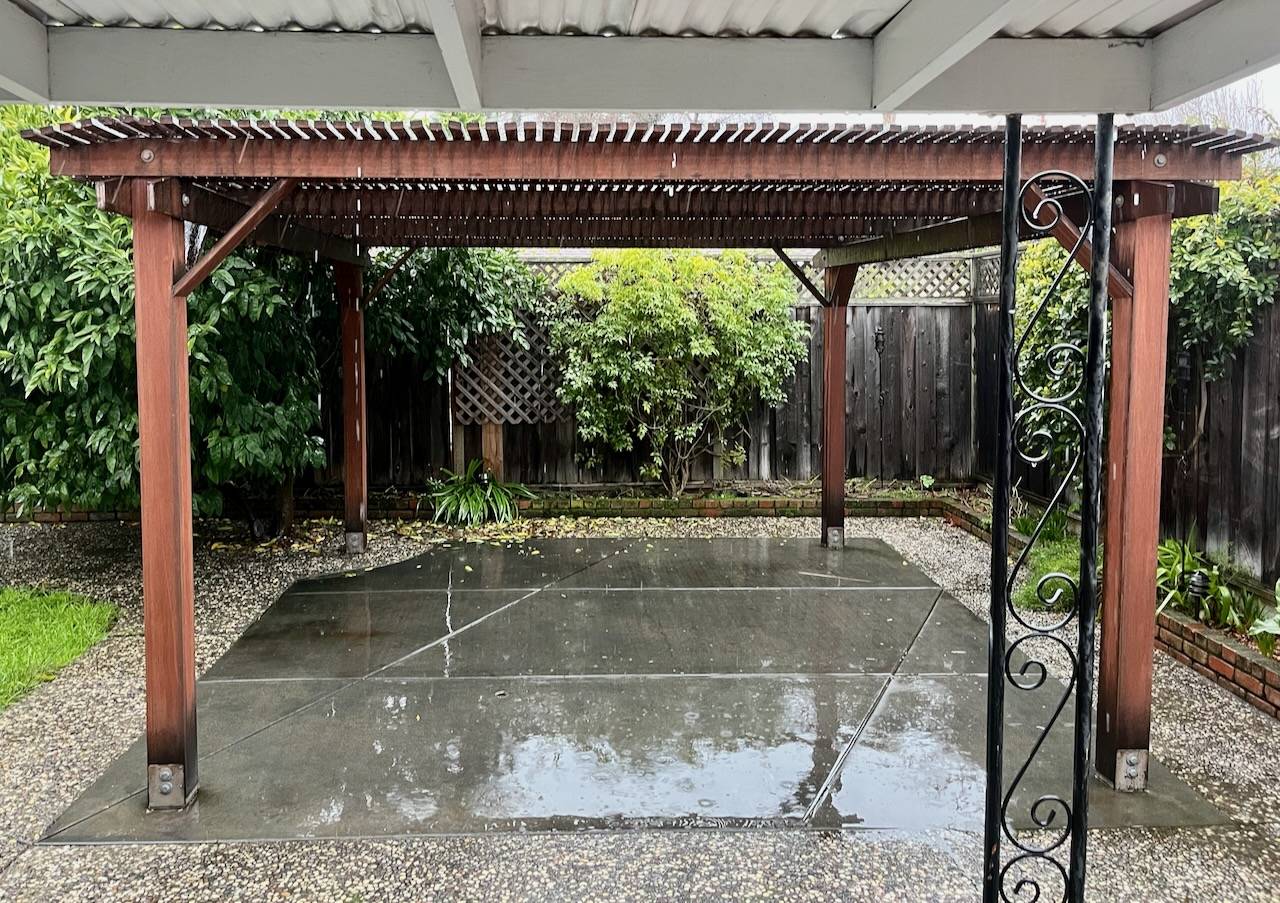
That's the good thing about the rainy weather we've had over the last few weeks: it gives us time to come up with different or new ideas and refine them until they are actually ready to implement. It all takes longer, but it's not that we could move all that faster, since we often have to wait a day or two for missing parts anyways and we've had some serious wet days here ...

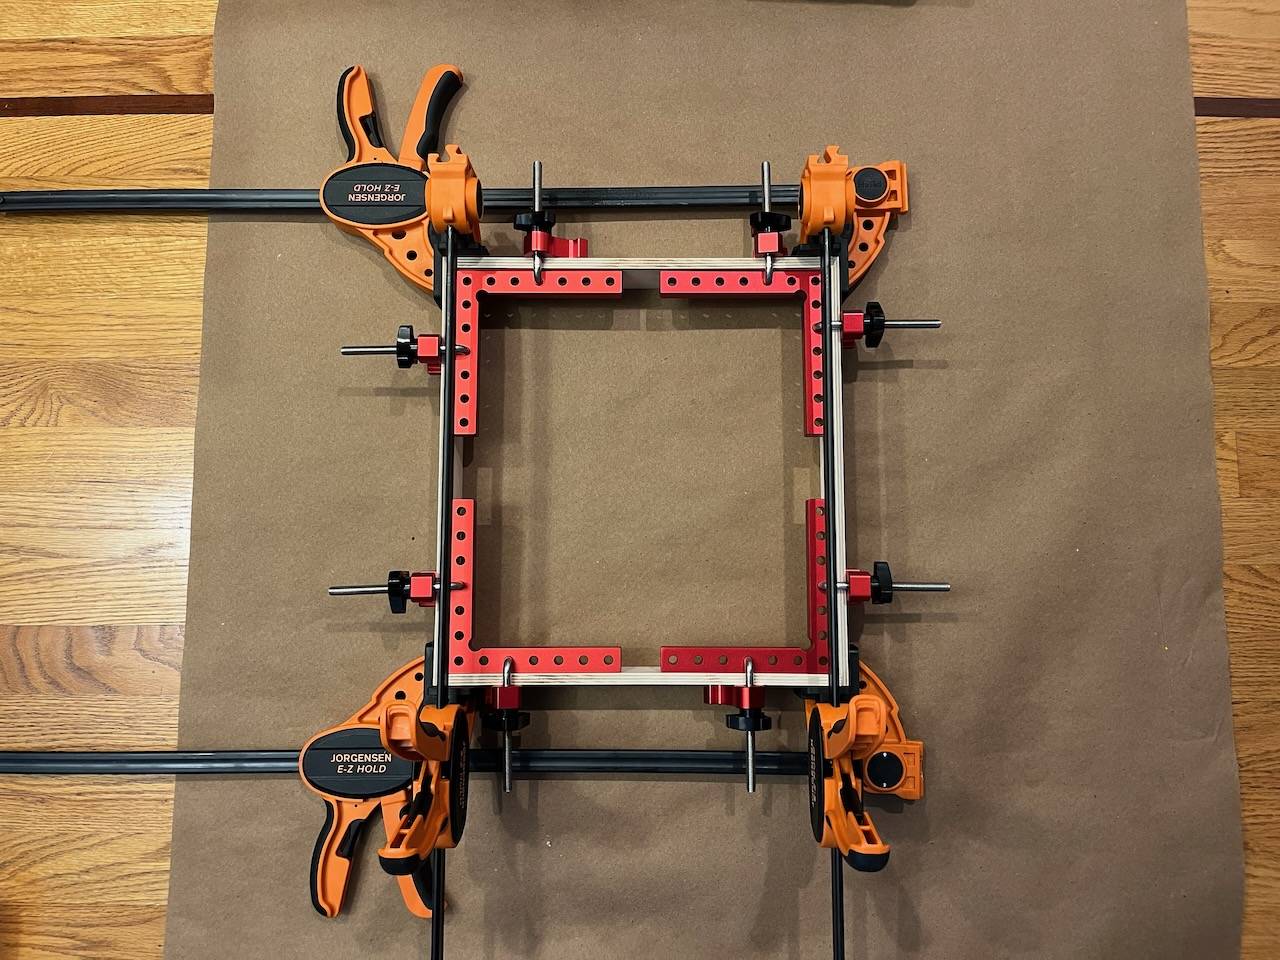
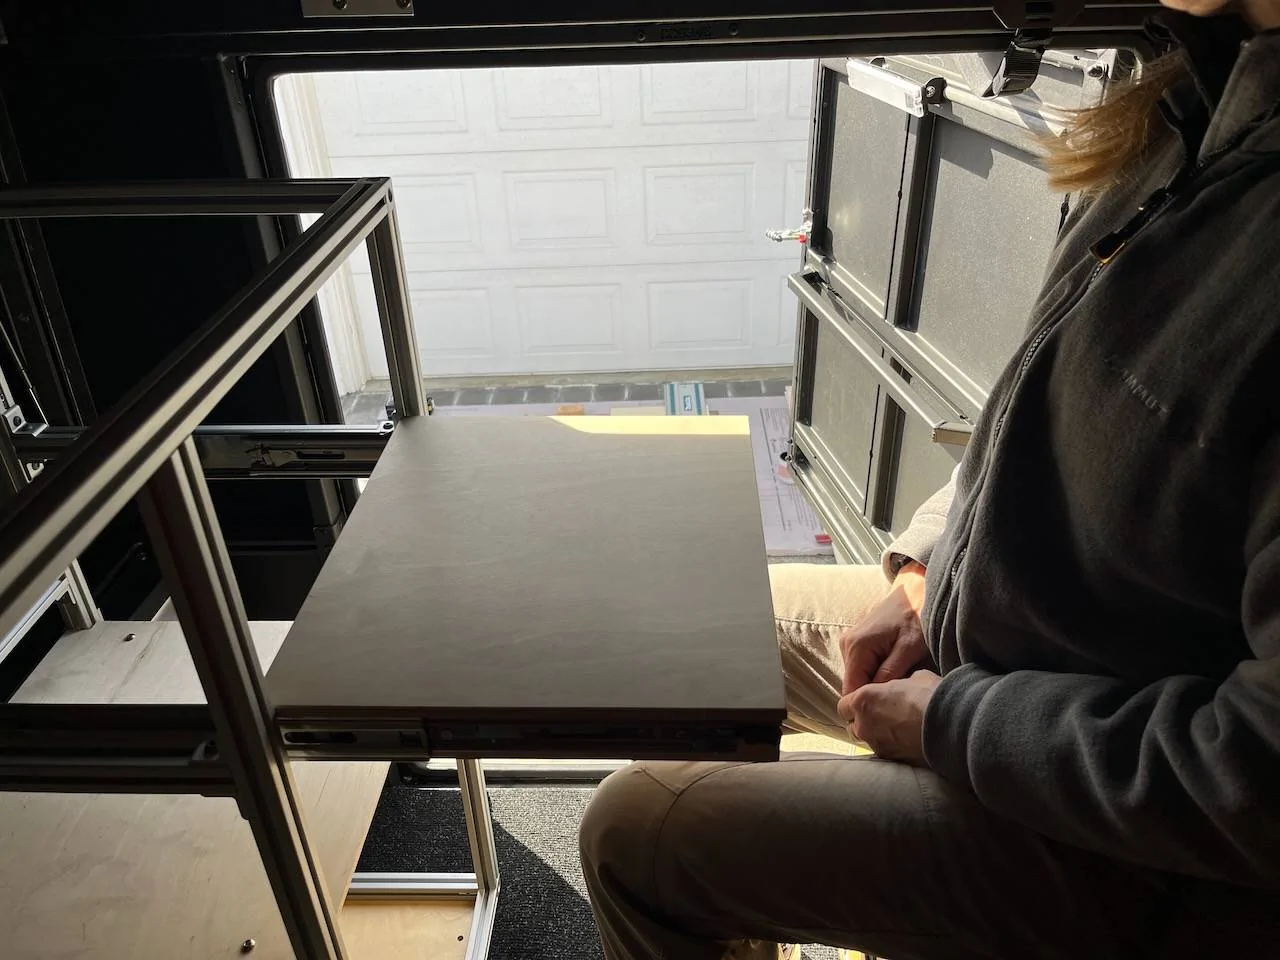
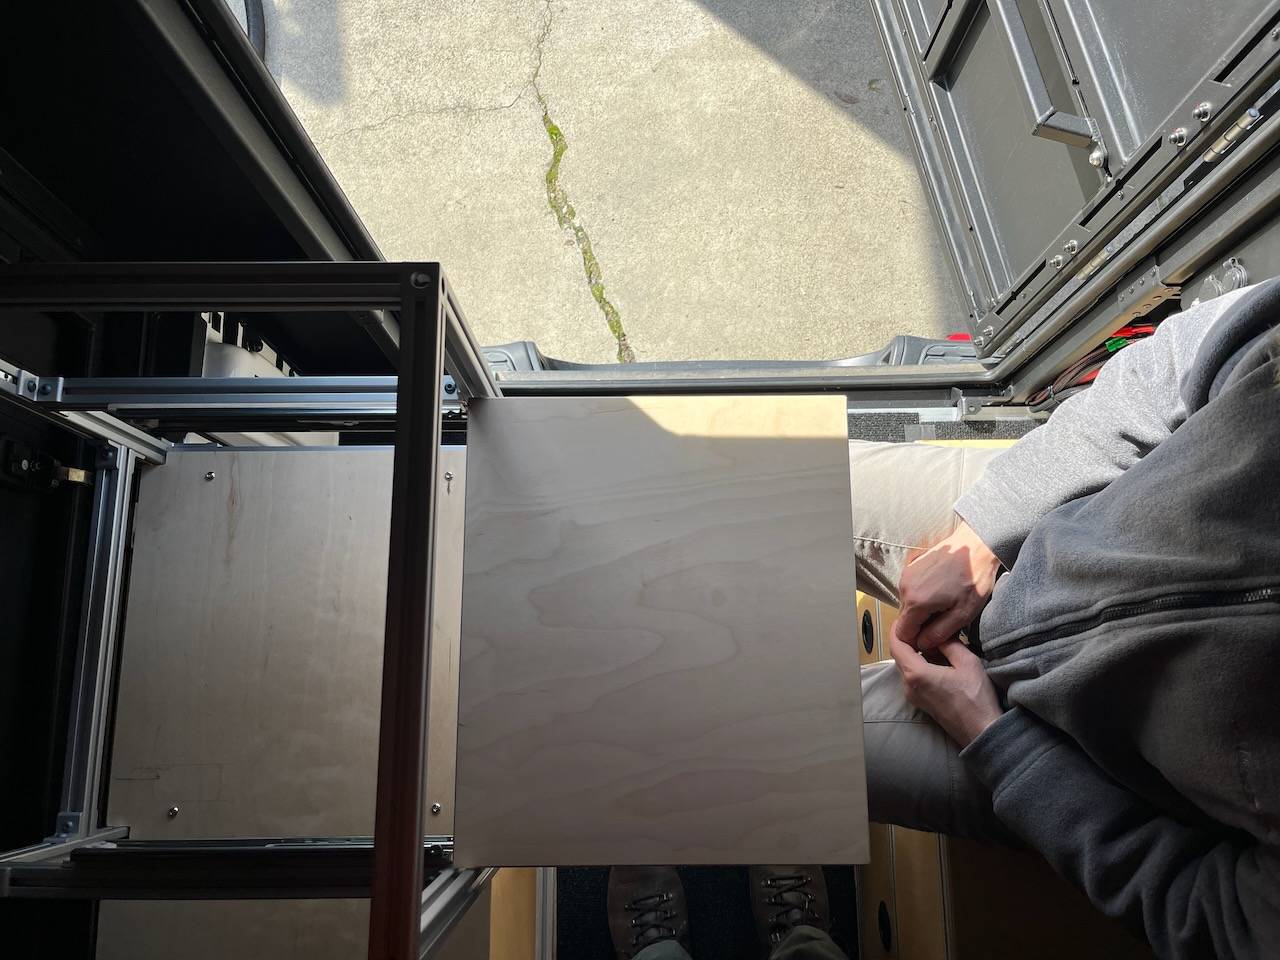
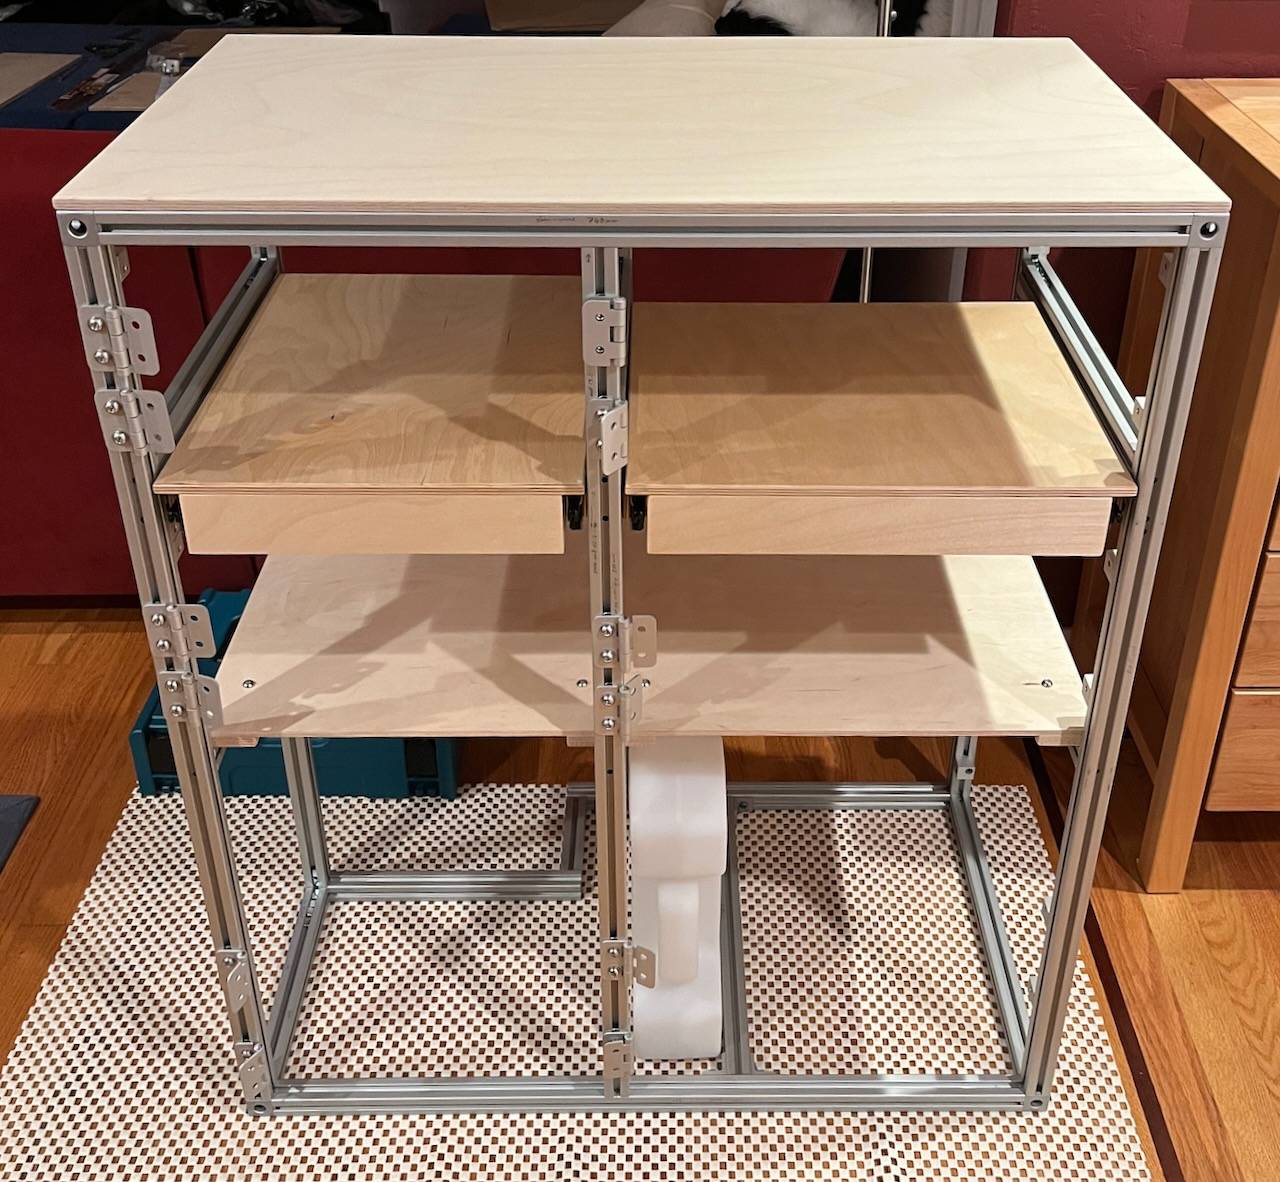
The table/drawer idea is one of these things that just had to simmer long enough to develop into something that we can likely live with. Over time we dismissed three different ideas until it has morphed into the one we are now building.

You can definitely see the progression in the way our furniture is built from the first piece to the last. And since we need to pull it all out again at some point to correct a few oversights here and there, we'll also probably implement a number of improvements that'll make our life easier down the road.
Sponsored

 
OP
OP
cug

cug

Well-Known Member
First Name
Guido
Joined
Apr 1, 2023
Threads
13
Messages
602
Reaction score
664
Location
Christchurch, New Zealand
Vehicle(s)
JTR EcoDiesel, Land Cruiser 79, BMW R1250GS
Build Thread
Link
Occupation
Just keeping busy
The frustrations of a "backyard/driveway workshop" ...

Jeep Gladiator A new hope ... (build journal and component reviews) IMG_6168


I wish we could work a full day on something, we'd be so much closer to getting the galley module done. Still waiting on some parts, but we could have done a lot of the prep work for all this. Bummer.
 
OP
OP
cug

cug

Well-Known Member
First Name
Guido
Joined
Apr 1, 2023
Threads
13
Messages
602
Reaction score
664
Location
Christchurch, New Zealand
Vehicle(s)
JTR EcoDiesel, Land Cruiser 79, BMW R1250GS
Build Thread
Link
Occupation
Just keeping busy
Roofrack is on:

Jeep Gladiator A new hope ... (build journal and component reviews) IMG_6169


And the drawer box is glued and drying:

Jeep Gladiator A new hope ... (build journal and component reviews) IMG_6172


Hopefully it ends up square ...
 
OP
OP
cug

cug

Well-Known Member
First Name
Guido
Joined
Apr 1, 2023
Threads
13
Messages
602
Reaction score
664
Location
Christchurch, New Zealand
Vehicle(s)
JTR EcoDiesel, Land Cruiser 79, BMW R1250GS
Build Thread
Link
Occupation
Just keeping busy
First ever drawer for us – still all very raw. The drawer will get a lid, which will then be a table for when we are sitting inside. There will be another one just like this right next to it in the narrower part of the cabinet.

First teaser:

 
Last edited:

Sponsored

OP
OP
cug

cug

Well-Known Member
First Name
Guido
Joined
Apr 1, 2023
Threads
13
Messages
602
Reaction score
664
Location
Christchurch, New Zealand
Vehicle(s)
JTR EcoDiesel, Land Cruiser 79, BMW R1250GS
Build Thread
Link
Occupation
Just keeping busy
As an explanation for the above videos/photos:

We've been out camping without this module installed and since it was either cold, rainy, or full of wasps/mosquitos, we spent a good amount of time in the evenings inside the camper.

During these times we desperately missed a surface for food/drinks, board games, cards, an iPad or laptop for a movie, etc. So we started thinking about how to solve this and the above is final result of these thoughts. I was super reluctant to build a drawer because I'm completely incompetent with regards to woodworking and drawers should be precise and square so that they run well in the slides.

Also, there isn't much space (height) since we need the height for other things in this cabinet. Therefore the drawer is exactly as high as it needs to be: the height of the drawer slides + the height of the lid which becomes a table. The bottom is bolted in with the angle brackets since it was the easiest way to install a bottom inside the frame – we could have tried a dado or another rabbet joint, but for a dado the drawer seemed too shallow and I didn't trust the glue surface of a rabbet joint to survive on rough roads.

Two mistakes were made with the first drawer: the slides are shitty Chinese thingies from Amazon and the rear mounting holes for adjustable mounting are unusable due to the locking mechnism. These #%#$%$#$ still include them and there is no note that they can't be used. We therefore had to drill new holes in the drawer and decided to just use the existing ones for the brackets. So, mistake one: test EVERYTHING and TRUST NOBODY. Mistake two: THINK FOUR TIMES before coming up with a workaround.

The second drawer-table will use the same bolts that hold the slides on the drawer to also hold the brackets. So far so good.

I'm pretty happy with how all this is turning out, we have a great amount of usable flat surfaces for when we want/need to spend time inside. It really becomes a micro-camper, not just a roughly outfitted metal canopy.
 
OP
OP
cug

cug

Well-Known Member
First Name
Guido
Joined
Apr 1, 2023
Threads
13
Messages
602
Reaction score
664
Location
Christchurch, New Zealand
Vehicle(s)
JTR EcoDiesel, Land Cruiser 79, BMW R1250GS
Build Thread
Link
Occupation
Just keeping busy
So, another item from my list is checked off:

The high pressure fuel pump recall is finally done!

On another note, to get this done we went to the dealer we bought the car from and used the opportunity for a short roadtrip. It was a good way of testing the impact of the new roof rack.

Impression: so far, so good. We did not put the Maxtrax on top, so impressions are with the rack only.
  • There doesn't seem much impact on noise levels, if anything it might be a bit quieter now.
  • There COULD be a fuel consumption impact, it's hard to tell without a longer trip and multiple fill-ups, but we got pretty impressive fuel mileage on this trip: 9.2L/100km or 25.5mpg. That was with a steady 60mph on cruise control.
I haven't noticed any additional noises or anything else. So, definitely happy with the rack so far. Time will tell how it works out.
 

Steven_B

Well-Known Member
First Name
Steven
Joined
Dec 20, 2020
Threads
8
Messages
480
Reaction score
749
Location
Federal Way, WA
Website
aroundthenw.com
Vehicle(s)
2018 WK2, 2001 XJ, 1993 YJ, 2021 JT EcoDiesel
Occupation
Digital Marketing Manager
So, another item from my list is checked off:

The high pressure fuel pump recall is finally done!

On another note, to get this done we went to the dealer we bought the car from and used the opportunity for a short roadtrip. It was a good way of testing the impact of the new roof rack.

Impression: so far, so good. We did not put the Maxtrax on top, so impressions are with the rack only.
  • There doesn't seem much impact on noise levels, if anything it might be a bit quieter now.
  • There COULD be a fuel consumption impact, it's hard to tell without a longer trip and multiple fill-ups, but we got pretty impressive fuel mileage on this trip: 9.2L/100km or 25.5mpg. That was with a steady 60mph on cruise control.
I haven't noticed any additional noises or anything else. So, definitely happy with the rack so far. Time will tell how it works out.
Even with the TREDPro boards on the rack, I didn't notice any wind noise.

I am still on the waiting list for the recall, guess I better check in with the dealership again.
 
  • Like
Reactions: cug
OP
OP
cug

cug

Well-Known Member
First Name
Guido
Joined
Apr 1, 2023
Threads
13
Messages
602
Reaction score
664
Location
Christchurch, New Zealand
Vehicle(s)
JTR EcoDiesel, Land Cruiser 79, BMW R1250GS
Build Thread
Link
Occupation
Just keeping busy
Unfortunate things happen sometimes. And unforeseen expenses come up ...

On our last roadtrip our truck was hit by a rock thrown up, ironically, by another Jeep on the freeway. Hit our windshield pretty hard, to the point that the crack was fairly long when we got home and I could feel the damage from inside the cabin ... bummer.

Today we got the windshield replaced. Went with the Gorilla Glass option, even though we had to cover about 50% of the total bill. Insurance will take care of the base glass and we opted to try out the supposedly stronger option.

Since we are planning on a long Alaska trip with looooong stretches of gravel roads, we have also decided to add a windshield protection film – will get that installed on Tuesday. Hopefully it brings us some peace for the next two or three years.

Jeep Gladiator A new hope ... (build journal and component reviews) IMG_6214


Call me crazy, but it's probably the same as the fact that when I do carry an umbrella it never rains as hard as when I forgot to bring one ... never fails. So, we're hoping for this to work the same way. Costs the same as a few replacements, but hopefully will also lasts the same time as these few replacements and will annoy us less ...
 

Sponsored

OP
OP
cug

cug

Well-Known Member
First Name
Guido
Joined
Apr 1, 2023
Threads
13
Messages
602
Reaction score
664
Location
Christchurch, New Zealand
Vehicle(s)
JTR EcoDiesel, Land Cruiser 79, BMW R1250GS
Build Thread
Link
Occupation
Just keeping busy
And for some entertainment:

While we waited for the diesel pump recall to be finished, we spent a day in Sacramento. Walked a lot and visited Old Town, the CA State Capitol (their guided tour is actually pretty good) and looked at some very cool murals. The best was this one, made from old trashcans:

Jeep Gladiator A new hope ... (build journal and component reviews) IMG_6201
 
OP
OP
cug

cug

Well-Known Member
First Name
Guido
Joined
Apr 1, 2023
Threads
13
Messages
602
Reaction score
664
Location
Christchurch, New Zealand
Vehicle(s)
JTR EcoDiesel, Land Cruiser 79, BMW R1250GS
Build Thread
Link
Occupation
Just keeping busy
It's raining again, so no work outside ... ?

Worked on the galley module today, it's coming together. We have done everything we know about on the 80/20 front. Next step, panels and doors:

Jeep Gladiator A new hope ... (build journal and component reviews) IMG_6215


It was a long day ... lots of measuring, thinking, 3D puzzles, etc. One hole ended up in the wrong place since we had too many markers on the extrusions and I marked while the wife drilled the holes. Damn misunderstanding ...

Since the weather is supposed to continue for the next few days, we'll do some track saw cutting in the garage, hopefully it won't be too messy, but the Makita tracksaw has really good dust collection when a vacuum is attached. We'll get some stuff done.

Still waiting for a faucet (from Germany, crazy enough, I know). Also need to think about routing the hot air hose for the diesel heater which will go through this cabinet, we have a plan, but now need the heater and other parts to keep working on it.

Getting there ...
 
OP
OP
cug

cug

Well-Known Member
First Name
Guido
Joined
Apr 1, 2023
Threads
13
Messages
602
Reaction score
664
Location
Christchurch, New Zealand
Vehicle(s)
JTR EcoDiesel, Land Cruiser 79, BMW R1250GS
Build Thread
Link
Occupation
Just keeping busy
More notes on building with 80/20:

I love 80/20. There is so much that can be done with it and it can be so easy to use. But, there is a flip side to all this: it can also get VERY complicated and even more expensive very quickly.

There are some things that are plain hard with 80/20:
  • If you want your cabinet doors flush with the extrusion [Picture 1, below], you can use flat hinges, 80/20 has some that work great (see photo above). But if you also want a flush latch, you're screwed. There is nothing in the 80/20 program to make that happen (that I could find). So, we are using Southco latches, which are awesome, but need serious additional effort to work. You have to install a latch keeper and a way to mount it. And a way to stop the door from just going through, etc. It's just a whole bunch of unexpected work from a simple design decision. [Picture 2, below].
  • Putting sidewalls into the extrusion for a furniture piece sounds awesome – and it is, for simple furniture. Once the furniture gets a bit more complex, it's a freaking nightmare to put together. And you can't access anything easily anymore without disassembling the cabinet. It looks good, but it was a stupid idea.
  • Sometimes you get yourself in situations when you just can't reach a bolt or nut anymore once you thought you have all the custom ideas sorted out. [Picture 3] Always keep in mind how to get to things when designing the furniture.
  • Precision is difficult AND it's crucial. If you want a square piece of furniture, you're better willing to put in the effort to be ultra-precise. We sometimes had to shave off 1/3 of a millimeter from a piece we cut too long to make it fit. And sometimes we had to improvise because we cut something too short to fit with internal connectors - that's easier to solve using a 90 degree angle bracket. But sometimes that makes the outside look shitty since you now have something intruding into that otherwise perfect opening ... there is a reason why the recommended method is to cut slightly long and mill to perfect length. Sorry, I don't have a mill here. I can only use my miter saw with a metal blade. But we learned that this thing CAN shave off half or even a third of a millimeter. It's a bit risky and we stand out of the way of possible teeth from the blade, but so far it worked. Best is to have dimensions planned beforehand and have 80/20 deliver cut to size pieces (at no extra cost, which is awesome).
  • Sometimes you have to get REALLY creative on how/where to mount a shelf or divider. Putting extrusion everywhere makes the whole thing too heavy, but sometimes there just isn't a choice. See picture 4 below.
  • If I had been less stubborn and just switched design in the middle of the build, I would have put the sidewalls of the last piece of furniture on the outside extrusion and be done with it. But I wanted to continue the look and therefore spent an exorbitant amount of mony on panel mounts (Picture 4, the little blocks). They can mount a panel flat onto the extrusion or 4mm recessed. We use them for recessed mounting. It's not the EXACT same look as the other furniture, but it's close enough. The problem: one of the little blocks is more than 8 USD! We've used 36 of them for just this one piece of furniture. That's over over 300 USD with tax and shipping ... damn. At least we get double use out of most of them as we can also use the other side of the mount thread for holding the door slam stops (Right word? My English is leaving me.).
  • It's just so freakishly expensive to build with this stuff ... see above. And it goes down a rabbit hole so quickly ...
Picture 1, doors flat on the straight on piece, doors on top on the right side:

Jeep Gladiator A new hope ... (build journal and component reviews) IMG_5927


Picture 2, working out how to install the latch keeper:

Jeep Gladiator A new hope ... (build journal and component reviews) IMG_5932


Trying to tighten a bolt/nut I can barely get to:

Jeep Gladiator A new hope ... (build journal and component reviews) IMG_5923


Getting creative with extrusion and filling gaps ...

Jeep Gladiator A new hope ... (build journal and component reviews) IMG_6217


To be continued ...
 
OP
OP
cug

cug

Well-Known Member
First Name
Guido
Joined
Apr 1, 2023
Threads
13
Messages
602
Reaction score
664
Location
Christchurch, New Zealand
Vehicle(s)
JTR EcoDiesel, Land Cruiser 79, BMW R1250GS
Build Thread
Link
Occupation
Just keeping busy
80/20 Thoughts and Recommendations, continued ...

So, with another drink in hand, I feel like I can continue down this line of thought.

Here are some real world recommendations learned from my own build:
  • If you think you can use 80/20 to make your build simpler, stop right here. Don't do it. It won't be simpler. Not even close. Building with wood only is as easy as you want it to be. Want it fancy? Use good plywood, work with dados, groves, custom joinery, whatever. Want it simple, use 1x2 and simple plywood. You can build wood furniture with a jigsaw and a drill. That's plain not possible with 80/20.
  • If you really want to use 80/20 but don't want to get carried away, design SIMPLE furniture. Box + door or lid. Done. Put wood covers/sidewalls on the outside. Plan sizes properly or work off an existing plan. Get parts delivered that are already cut to size. Don't dream up complicated furniture with many features, because it WILL get complicated. The galley module I'm working on right now has 7 doors (six towards the inside, one towards the camper side door), two drawers that double as interior table space, a sink and a grey water container ... don't get me started! It was a stupid idea to design this so complicated, but it also will be awesome when done!
  • Use compression latches like the onces on the Canopy Camper side doors. They are much easier to install. Just live with the fact that they sometimes can get jammed by something inside the cabinet.
  • Use internal connectors to keep it affordable. The 90 degree brackets get expensive!
  • If you can, work with someone who has used this stuff before and can brainstorm your design with you and prevent the common mistakes you WILL make if you do this alone.
  • Account for hardware in the cost calculation. The extrusion is cheap, the hardware will ruin you!
  • Also account for hardware in the weight calculation – that stuff gets heavy because you need so much.
  • Get ready to tap threads and to drill holes for internal hardware, because machining services at 80/20 are a) expensive and b) will add an exorbitant amount of lead time to your order. But be aware, this is a lot of work! The galley module above has over 50 M6 threads tapped into the aluminum ... plus over 20 access holes drilled (plus one that we don't need – grmbl).
  • Think about tools– if you already have a home shop, that's great. For the current build, we use:
    • Miter Saw (for aluminum and wood)
    • Powerdrill (2x) (one 18V, one compact 12V)
    • Jig Saw (and some good blades)
    • Track Saw (and track)
    • Router (and router bits, plunge base, maybe even a small router table to make life easier)
    • Angle Grinder (not really yet, but we have one anyways)
    • A metric ton of measuring and aligning tools (you can see a lot of them in the photos I'm posting from the build, individually they are not expensive, but you need so many and so diverse stuff to get the precision right, it gets expensive quickly)
    • A vise
    • A flat work table (we don't have one, we use our house floor as a reasonably flat surface)
    • Some kind of other work table if you don't want to kill your back (we are killing our backs most of the time, we don't have the space for a work bench, so we are using a small foldable one)
    • A shop vac (we are on our second, the first one gave up at some point)
    • Squares and clamps – we have six 6", two 12", and four 24" clamps
    • The typical tool kit you'd expect, plus a few extra allen keys
Also, you need a lot of time! There is no way to sugarcoat this, building with this stuff at home and with a certain degree of pride takes forever! FOREVER! Maybe longer.

Recommendation

So, take my recommendation and stick to marine grade plywood, some good precision woodworking tools, and learn that instead of getting into the extrusion game. Use the saved money for trips!

If I had to do the current build again, I'd use Baltic Birch in 9mm and some in 6mm for shelves and covers. good hinges and latches, and that's it. Lighter, cheaper, easier, and in the end faster to build.
 
OP
OP
cug

cug

Well-Known Member
First Name
Guido
Joined
Apr 1, 2023
Threads
13
Messages
602
Reaction score
664
Location
Christchurch, New Zealand
Vehicle(s)
JTR EcoDiesel, Land Cruiser 79, BMW R1250GS
Build Thread
Link
Occupation
Just keeping busy
I finally caved.

Organizers for M4 (left box, left side), M5 (left box, right side), and M6 (right box) hardware. Should have done this half a year ago ...

Jeep Gladiator A new hope ... (build journal and component reviews) IMG_6223


All the 80/20 stuff is already in one of the deep organizers ...
Sponsored


Top