JeepDadiator
Well-Known Member
- First Name
- TJ
- Joined
- Jul 5, 2020
- Threads
- 11
- Messages
- 52
- Reaction score
- 88
- Location
- Conifer, Colorado
- Vehicle(s)
- 2020 JTR
- Occupation
- Engineer
- Thread starter
- #1
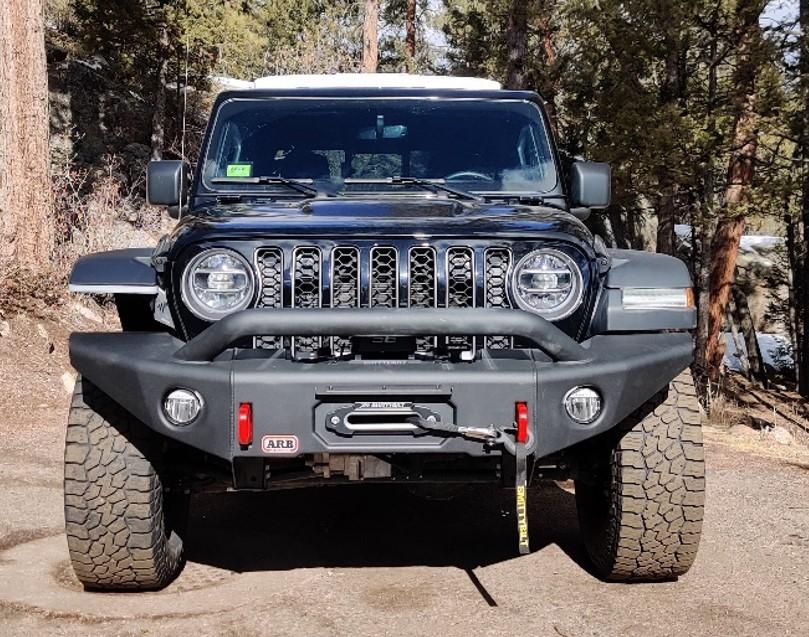
Due to some recent front end damage it was time to replace the OEM plastic Rubicon/LED fog light bumper with something more substantial. I had some criteria that a new bumper had to meet for my specific needs:
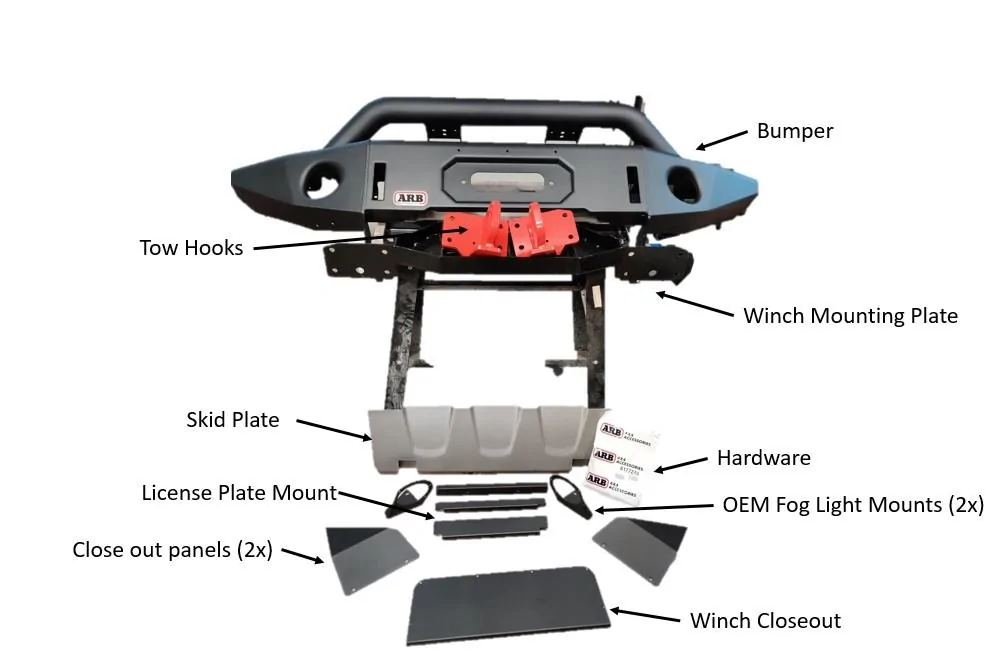
What is included in the box?


I would later learn there were not enough cage nuts included – needed 10 only received 4.
Starting Point with the Jeep:
I picked the Jeep up from a collision shop without the bumper or damaged fender flare by working a deal with them on doing upgrades vs. replacing with OEM parts – so my starting point was a bit different than most will encounter.

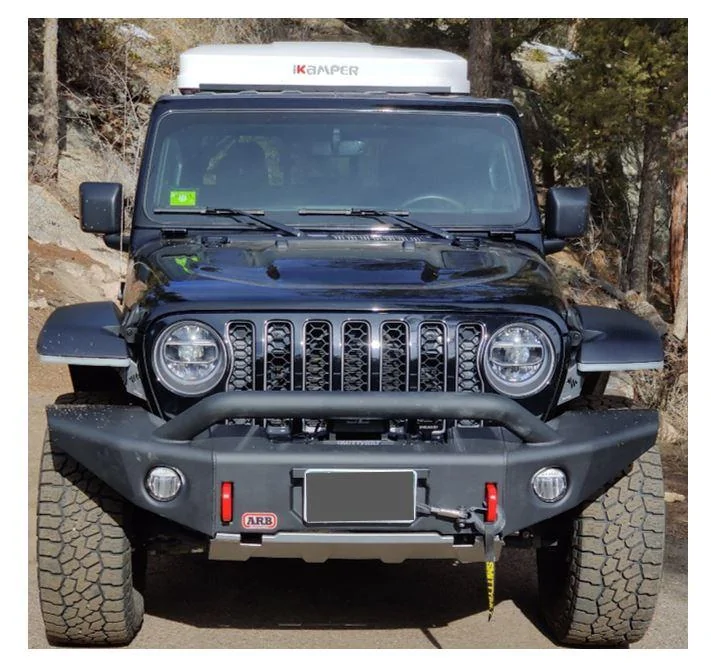
Note: In addition to the bumper I am chopping and installing the QUAKE DRL kit – so the following pictures intentionally show OEM LED with the bumper and the @QUAK DRL mod (@Mr Black ) – I wanted to see them side by side and personally prefer the chopped look!
Some pre-assembly was required to get the bumper ready for the jeep and I encountered some challenges (nothing too hard - and I would not at all call this a negative to the quality and fit of this bumper)
1. The first issue encountered were the hang tabs on the winch mounting tray:

Using a block of wood and a hammer I gently manipulated the hang tabs back to 90 degrees resulting in the holes lining up on both sides.
*do not tighten the bolt in the image until the bumper is in place it makes lining everything up easier!
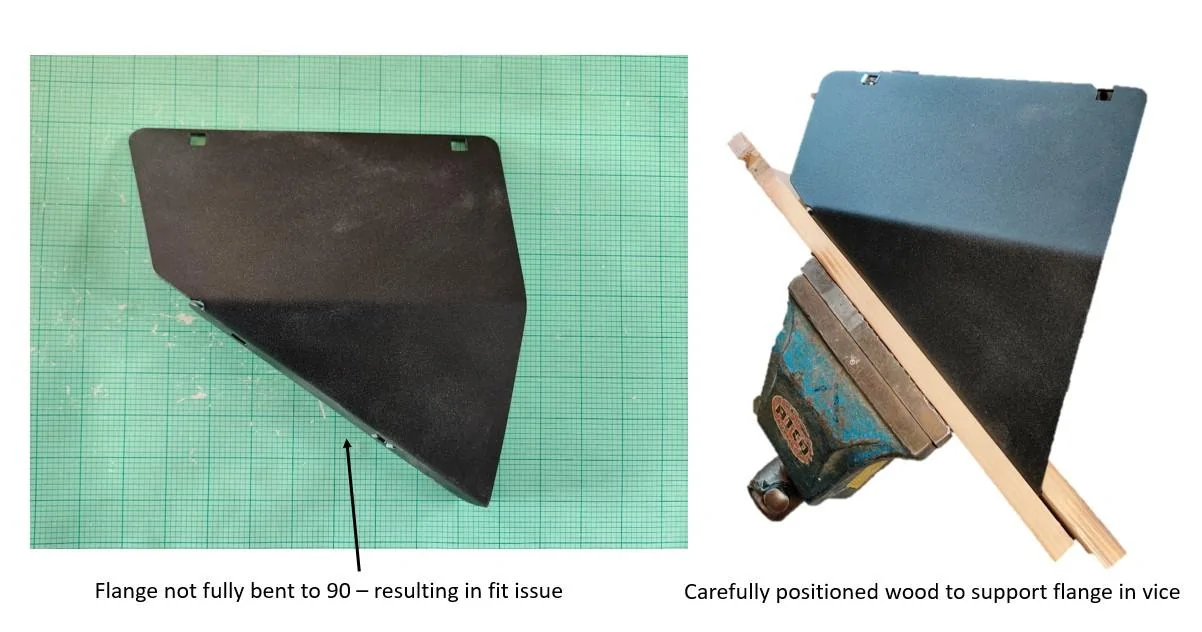
2. The next issue I encountered was the bumper close out panels, bent sheet metal with cage nut holes on two flanges, the RH side lined up perfectly but the LH side holes did not match the bumper holes. I was also missing the complete number of cage nuts required. After careful inspection of the two panels the discrepant component was not bent to the same final angle as the one that fit well. I remedied this by clamping the flange between some wooden blocks in a vice and gently bent the flange maybe ~1degree more – it then lined up perfectly.

3. Finally mounting the bumper – the 8 attachment bolts have to go through 4 components before lining up with the nuts in the bumper itself. After a few attempts I suggest making sure everything you can access is loose so there is movement permitting the bolts to line up. (I will add pictures and more content when I take the bumper off again)
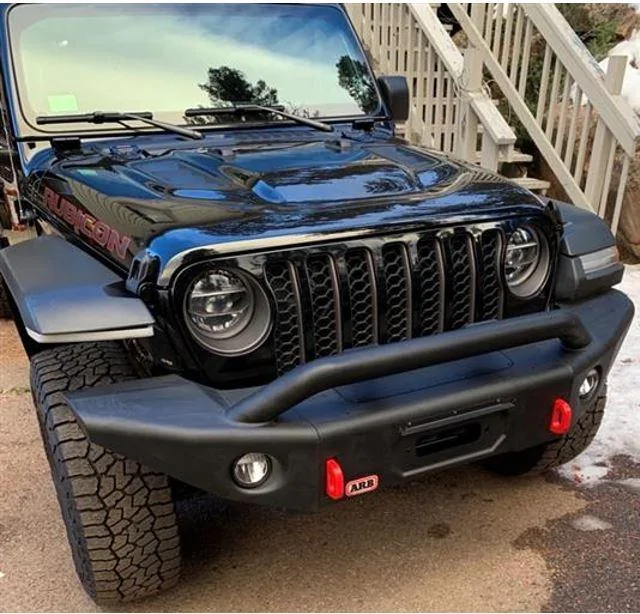
Note: Passenger side shows a temporary fit of the QUAKE DRL chop kit – not perfectly aligned yet. I will update this thread with more pictures of the final installation soon with final impressions.

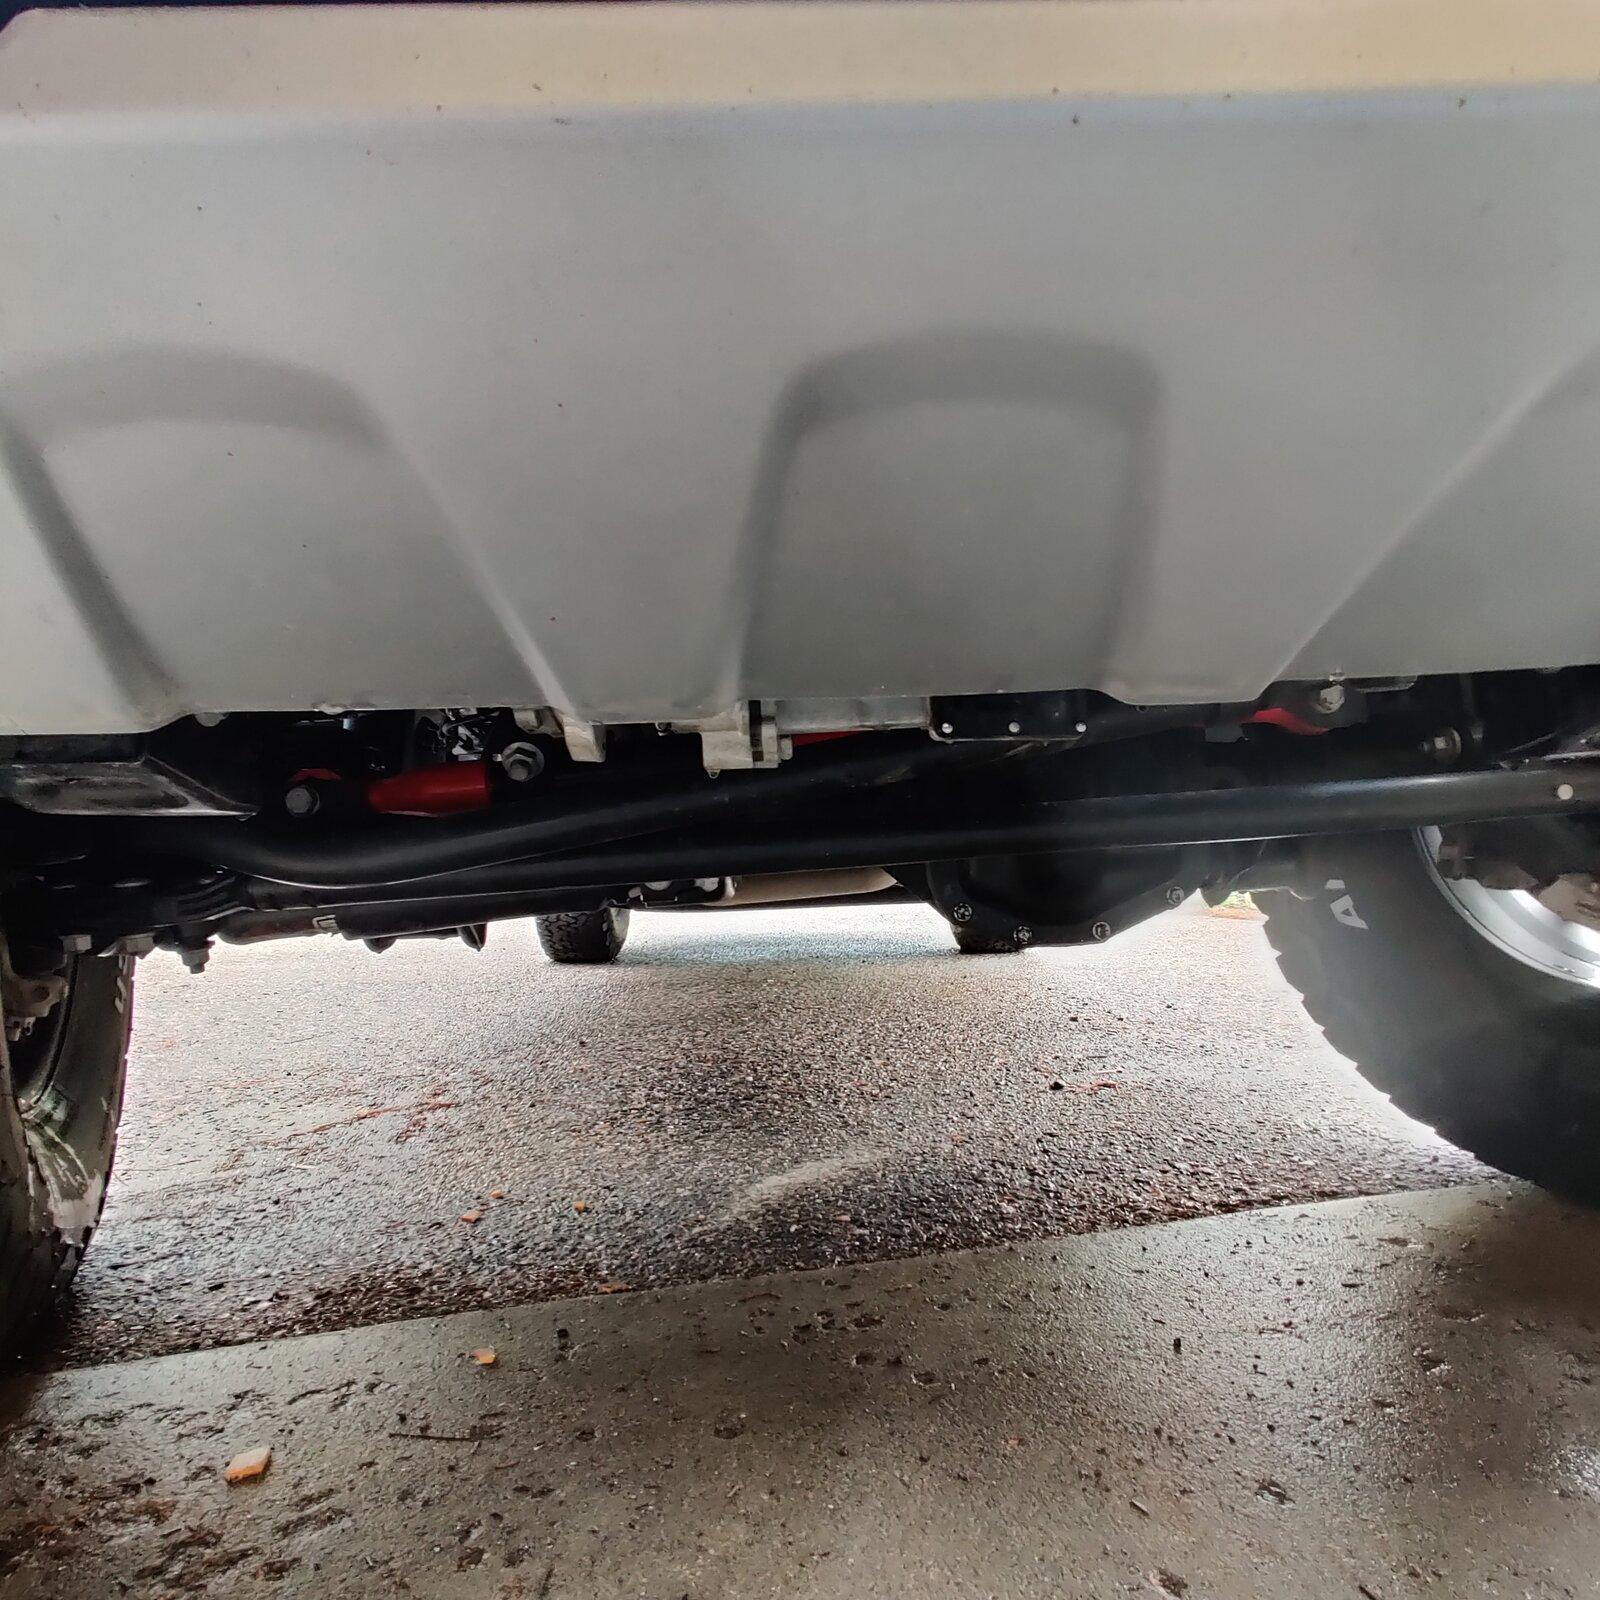
- Retain or replace the OEM front skid plate, replacement had to be included and not an after -thought
- Retain the OEM round LED FOG lights and include the necessary hardware
- Winch ready, recessed preferred to retain air-flow
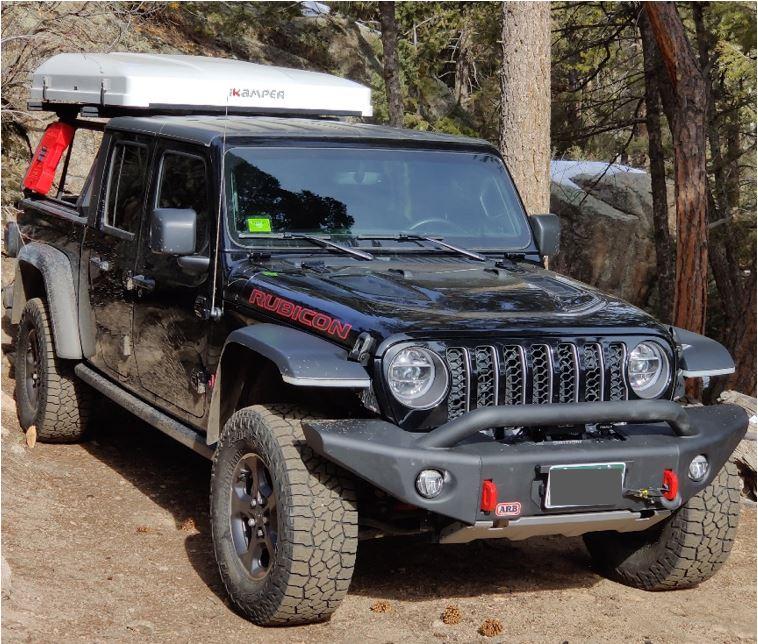
- Full-width (for me, since it’s a daily driver/overland build) maximum protection and hopefully less impact to MPG
- Comes finished/painted with a durable finish and reputation for quality
- Bumper alone: 68.8 lbs (without end caps, hardware, fog lights, tow hooks, license plate mount)
- Winch mounting plate: 20.2 lbs (without hardware)
- Skid Plate: 11 lbs (without hardware)
- Tow Hooks: 17.6 lbs Total (8.8lbs each)
- Winch Cover Plate: 3.4 lbs (without hardware)
What is included in the box?
Hardware bag contents: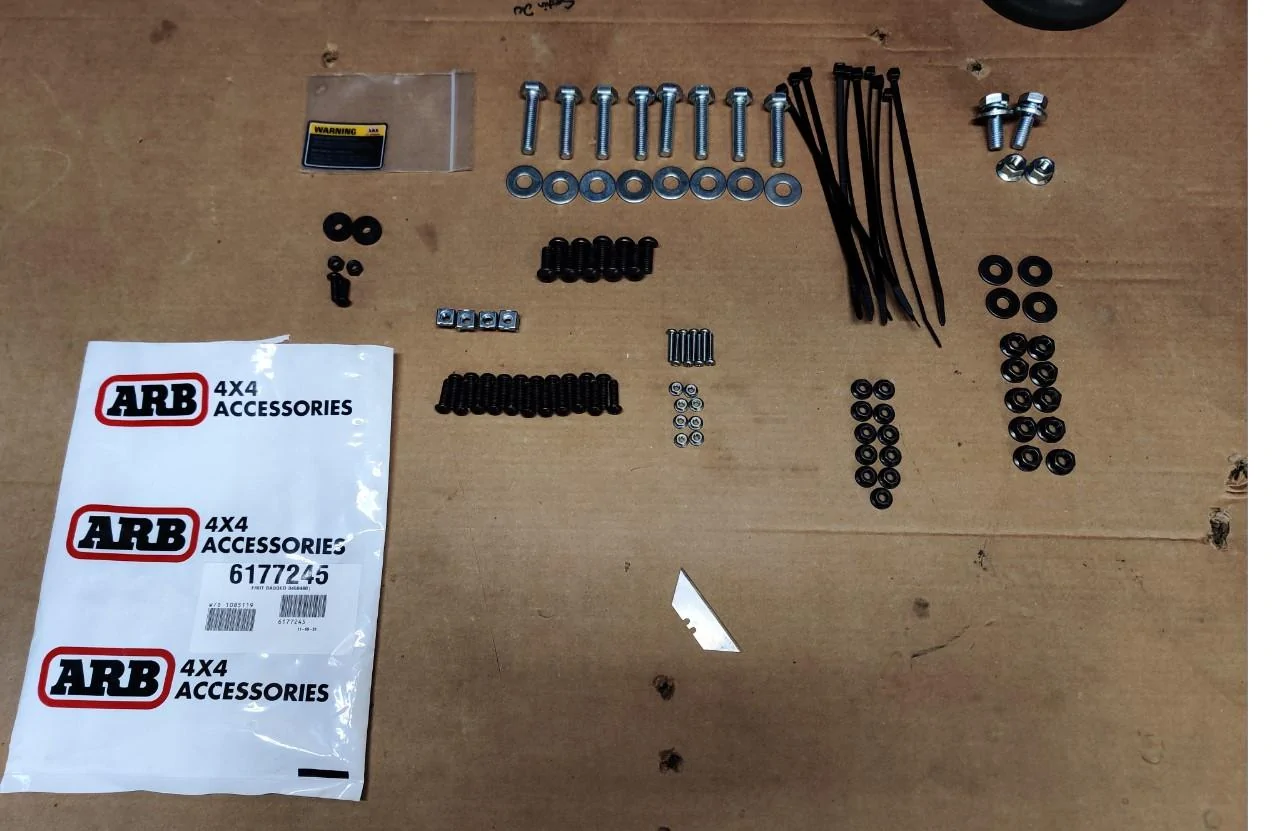
I would later learn there were not enough cage nuts included – needed 10 only received 4.
Starting Point with the Jeep:
I picked the Jeep up from a collision shop without the bumper or damaged fender flare by working a deal with them on doing upgrades vs. replacing with OEM parts – so my starting point was a bit different than most will encounter.

Note: In addition to the bumper I am chopping and installing the QUAKE DRL kit – so the following pictures intentionally show OEM LED with the bumper and the @QUAK DRL mod (@Mr Black ) – I wanted to see them side by side and personally prefer the chopped look!
Some pre-assembly was required to get the bumper ready for the jeep and I encountered some challenges (nothing too hard - and I would not at all call this a negative to the quality and fit of this bumper)
1. The first issue encountered were the hang tabs on the winch mounting tray:
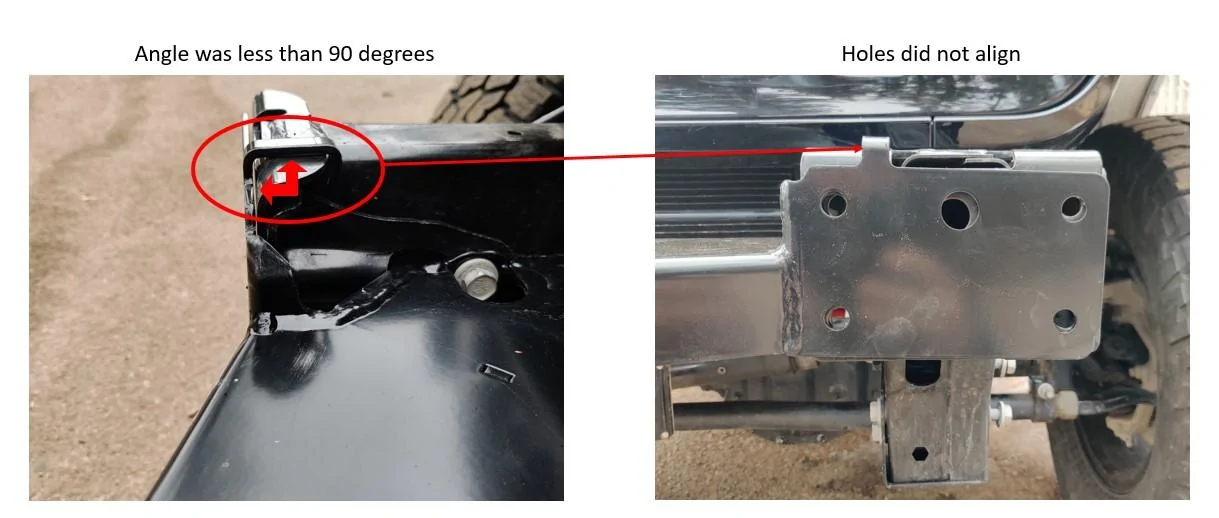
Using a block of wood and a hammer I gently manipulated the hang tabs back to 90 degrees resulting in the holes lining up on both sides.
*do not tighten the bolt in the image until the bumper is in place it makes lining everything up easier!
2. The next issue I encountered was the bumper close out panels, bent sheet metal with cage nut holes on two flanges, the RH side lined up perfectly but the LH side holes did not match the bumper holes. I was also missing the complete number of cage nuts required. After careful inspection of the two panels the discrepant component was not bent to the same final angle as the one that fit well. I remedied this by clamping the flange between some wooden blocks in a vice and gently bent the flange maybe ~1degree more – it then lined up perfectly.
3. Finally mounting the bumper – the 8 attachment bolts have to go through 4 components before lining up with the nuts in the bumper itself. After a few attempts I suggest making sure everything you can access is loose so there is movement permitting the bolts to line up. (I will add pictures and more content when I take the bumper off again)
Note: Passenger side shows a temporary fit of the QUAKE DRL chop kit – not perfectly aligned yet. I will update this thread with more pictures of the final installation soon with final impressions.
Sponsored
Last edited: