Sponsored
OP
OP
TheHops

TheHops

Well-Known Member
Joined
Dec 23, 2019
Threads
33
Messages
559
Reaction score
823
Location
Nashville
Vehicle(s)
2020 Jeep Gladiator Rubicon
Build Thread
Link
Vehicle Showcase
1
Another small project knocked out. I blame coronavirus.

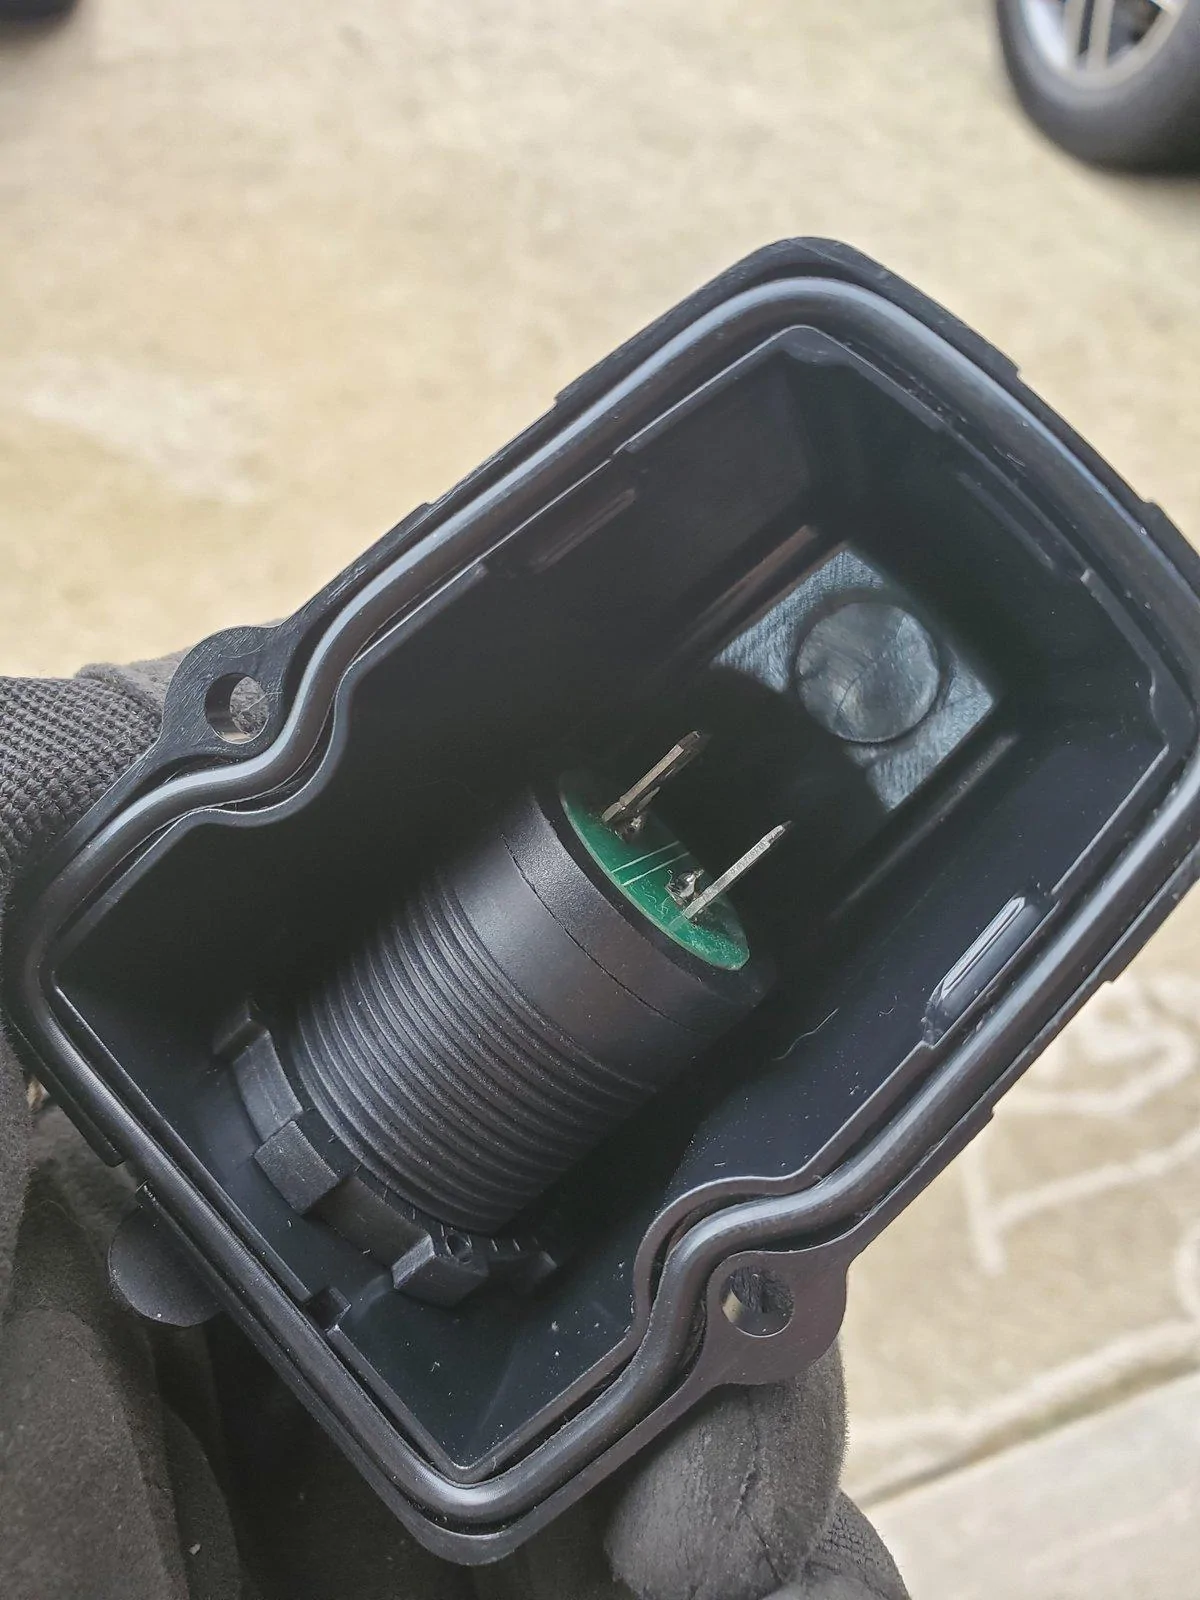
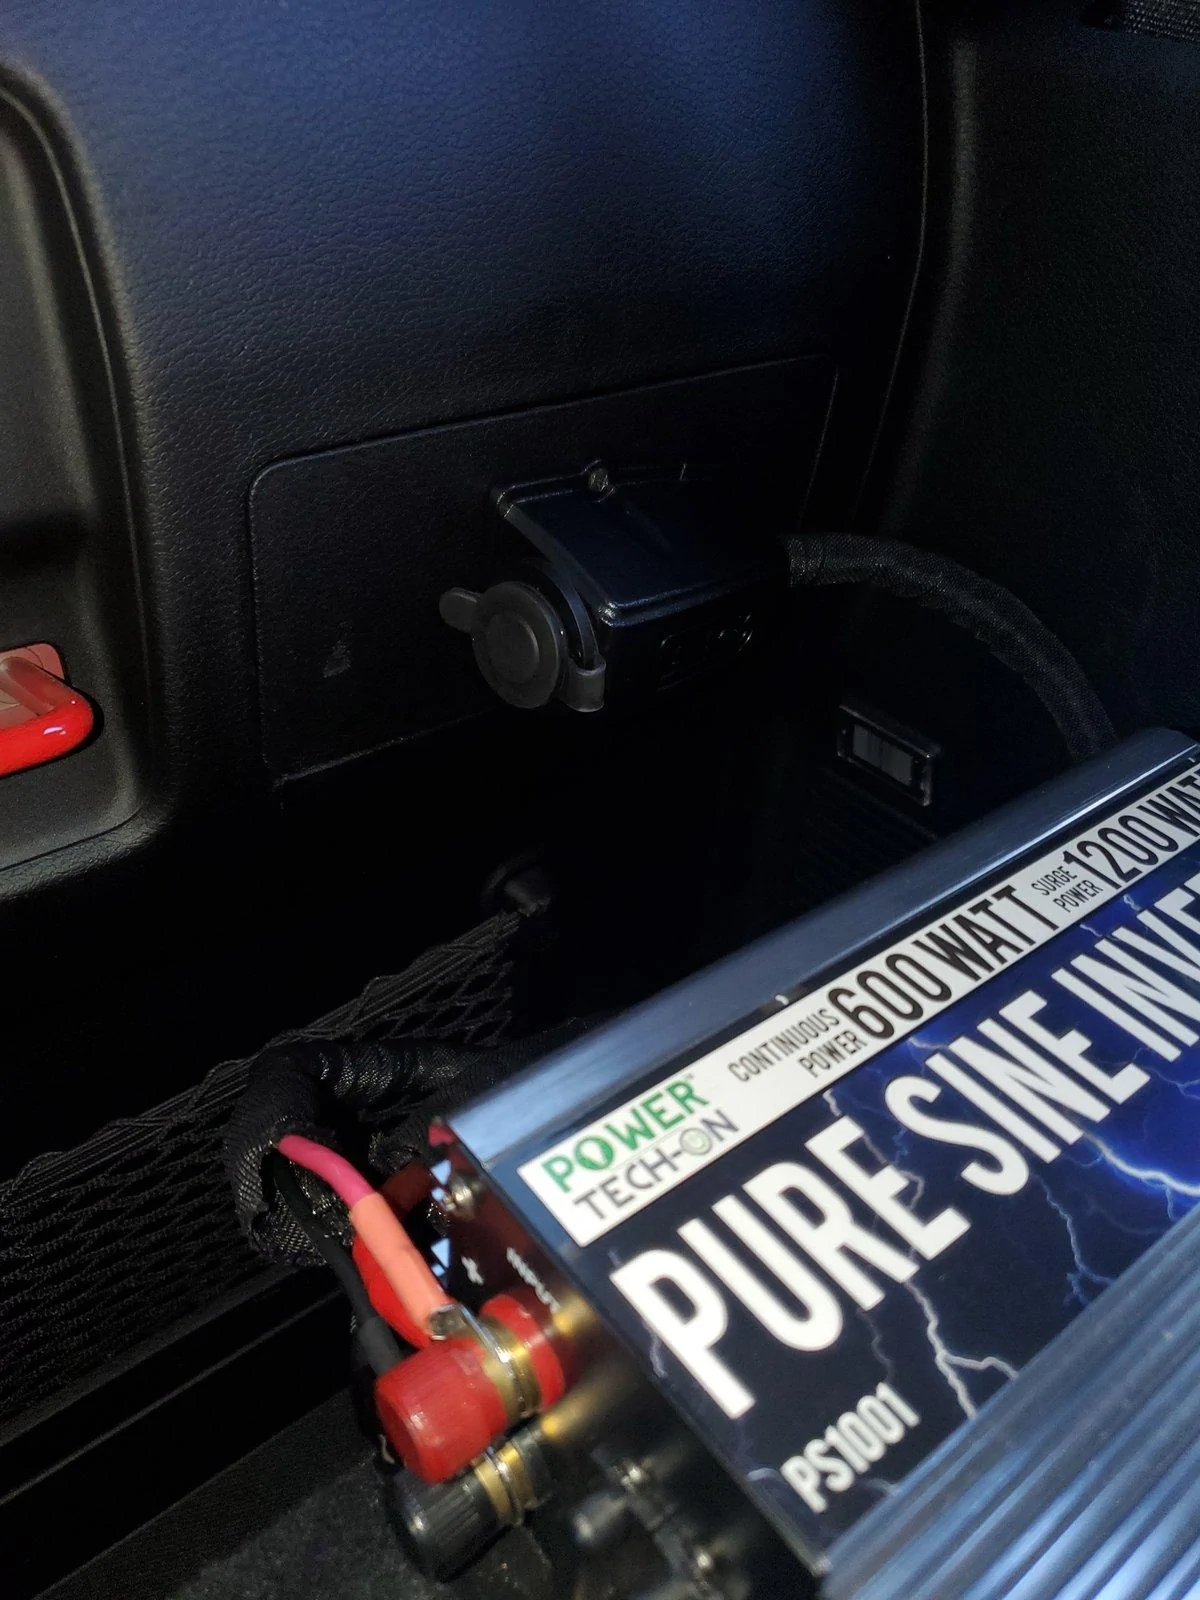
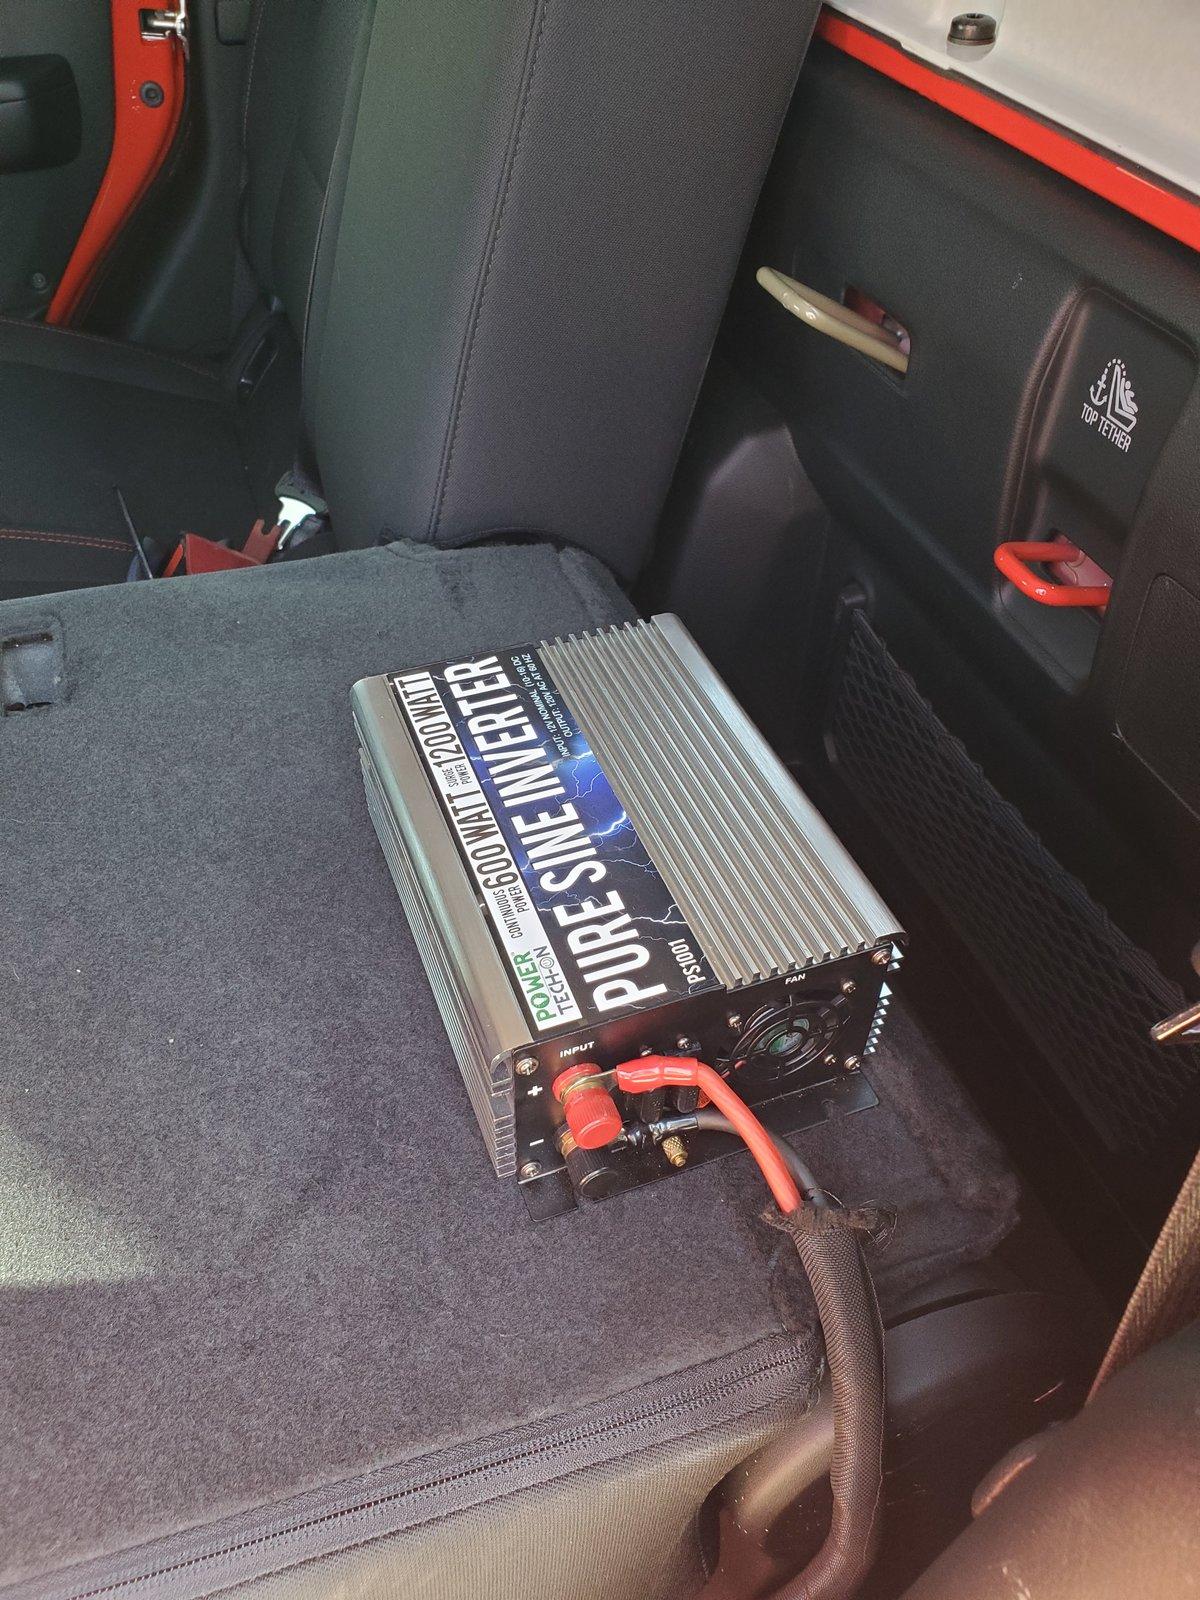
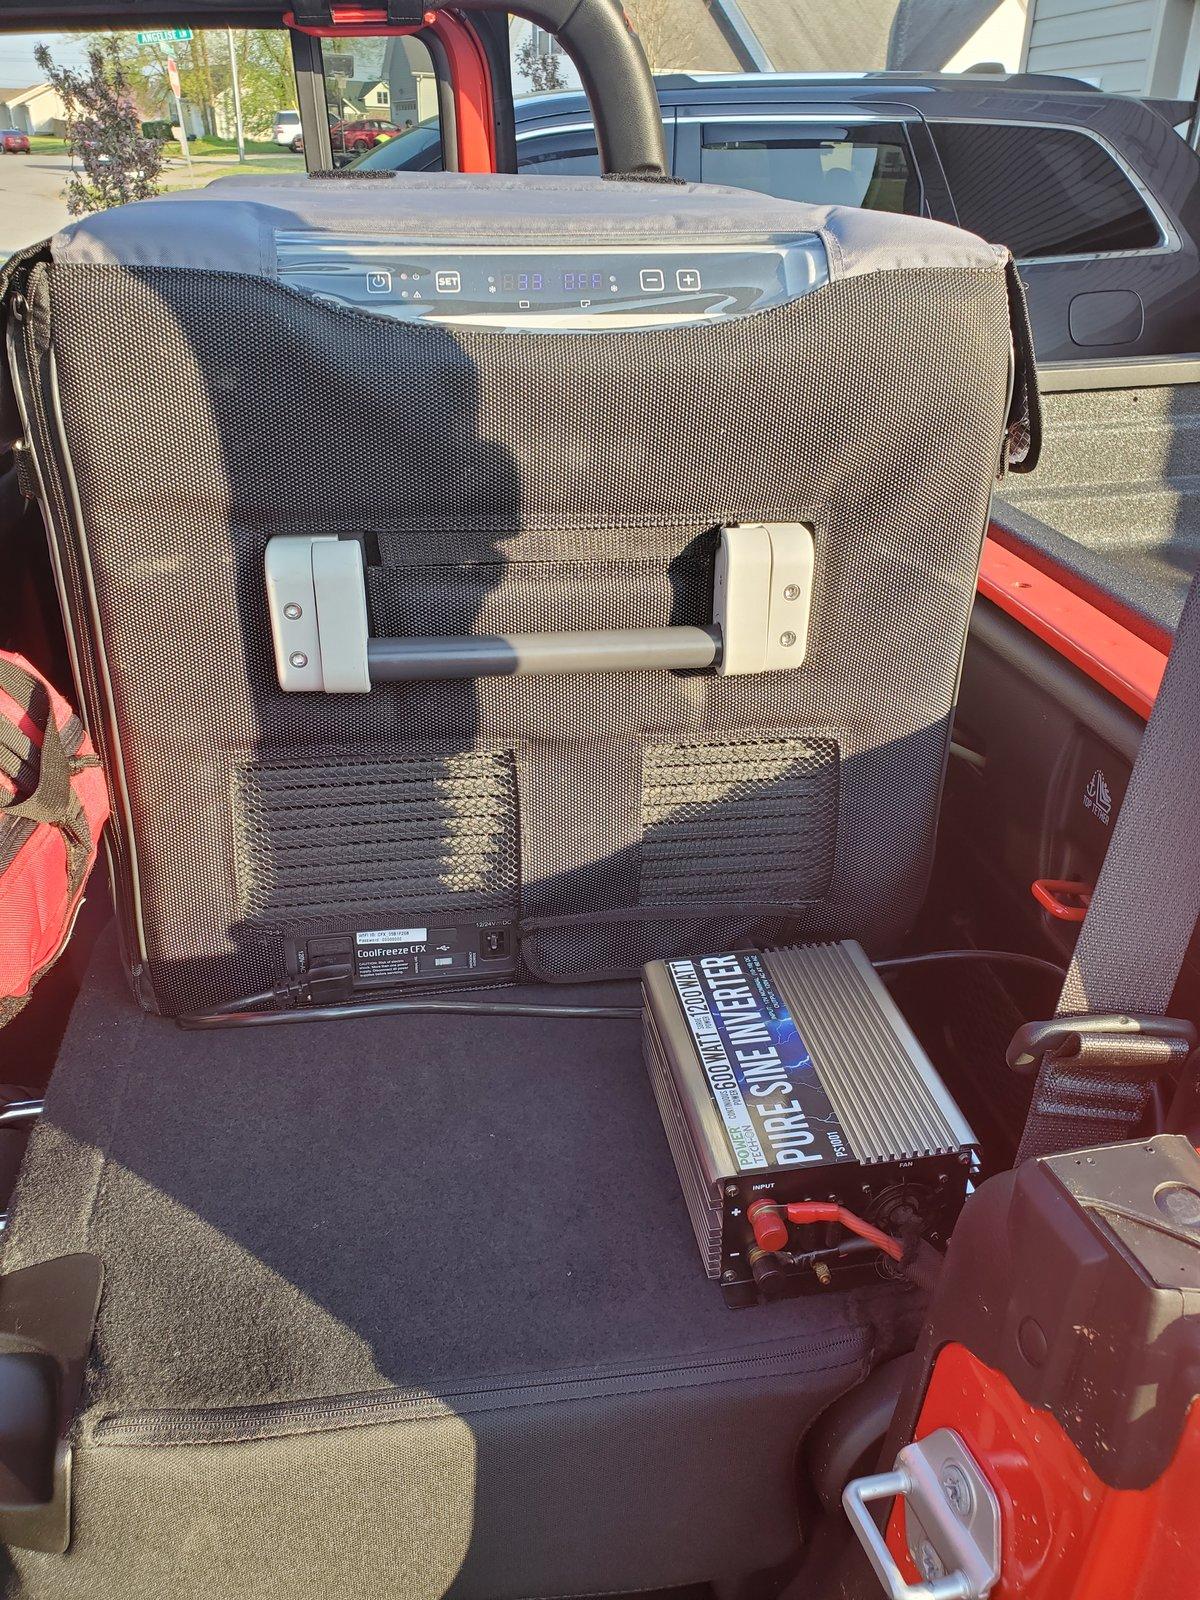
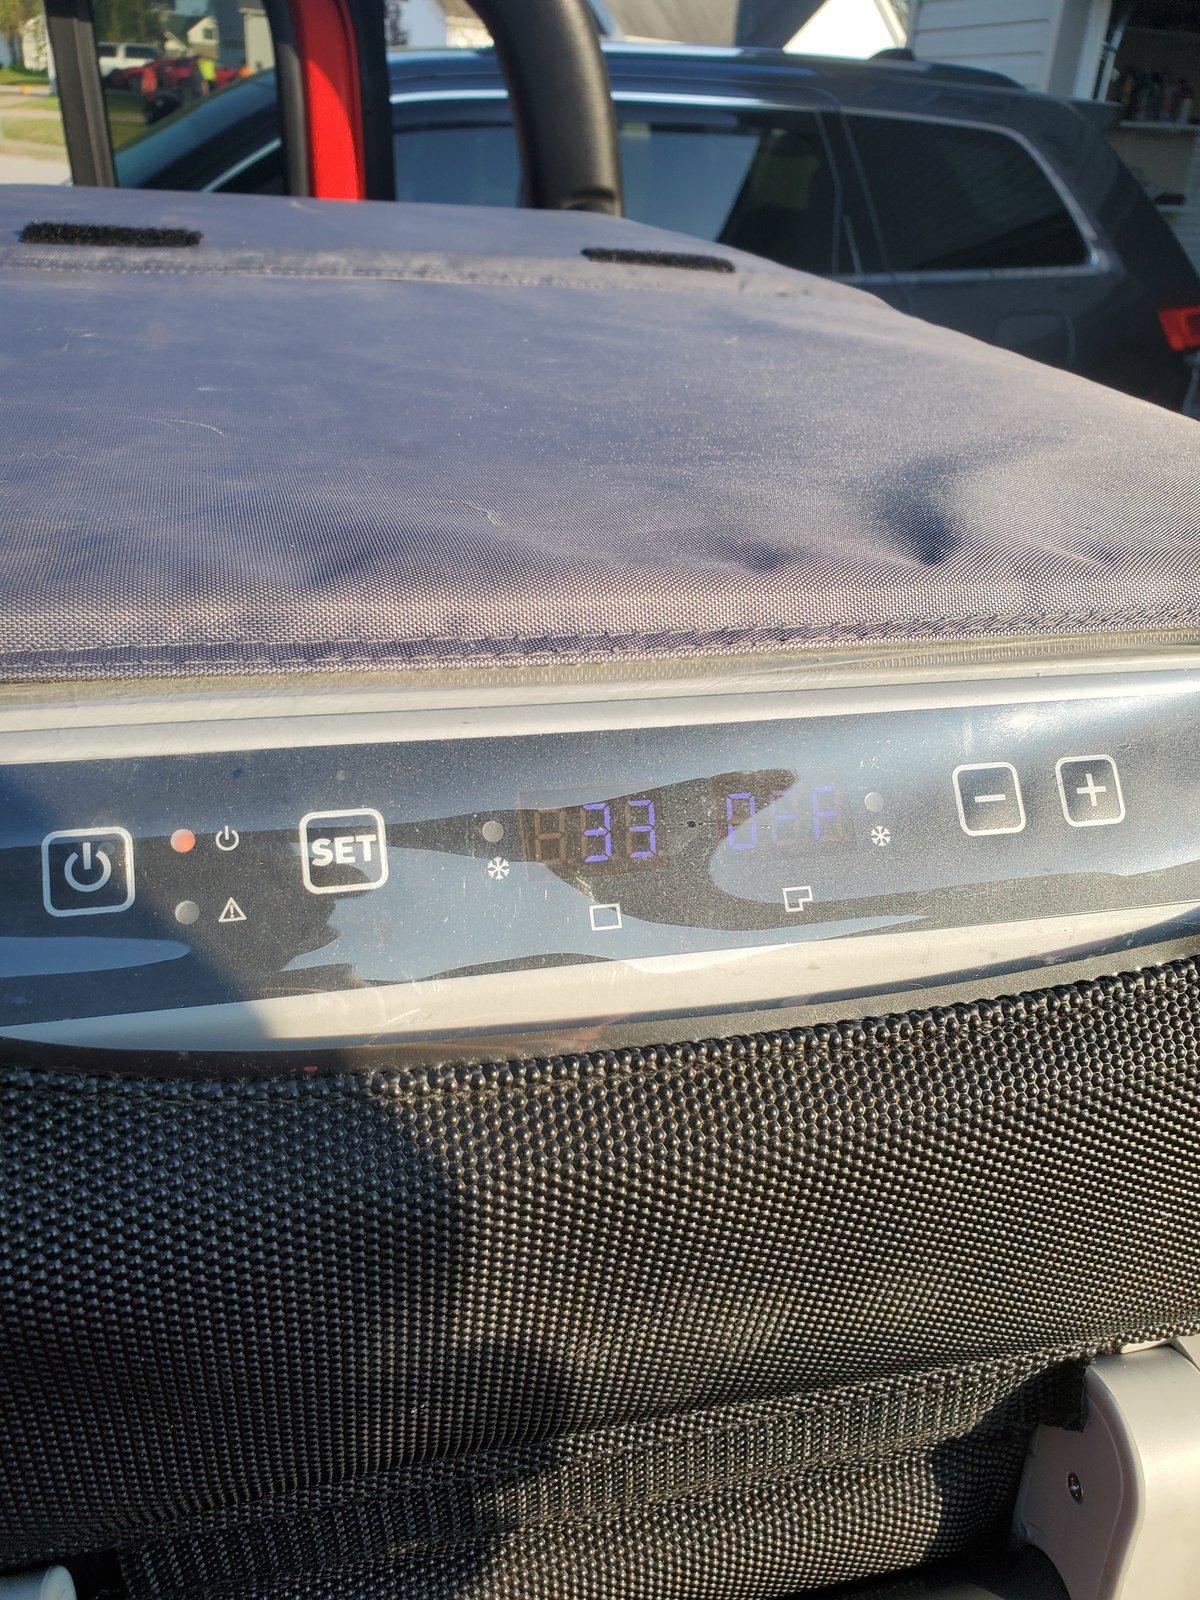
I installed an old inverter that I had in a previous rig that I used to run small electronics in the cab. It's a 600W pure sine wave inverter. I'll be using it to constantly power my massive Dometic fridge, as well as to charge my laptop and camera/drone equipment while off grid.

Jeep Gladiator Ares - Build Thread 20200403_150054


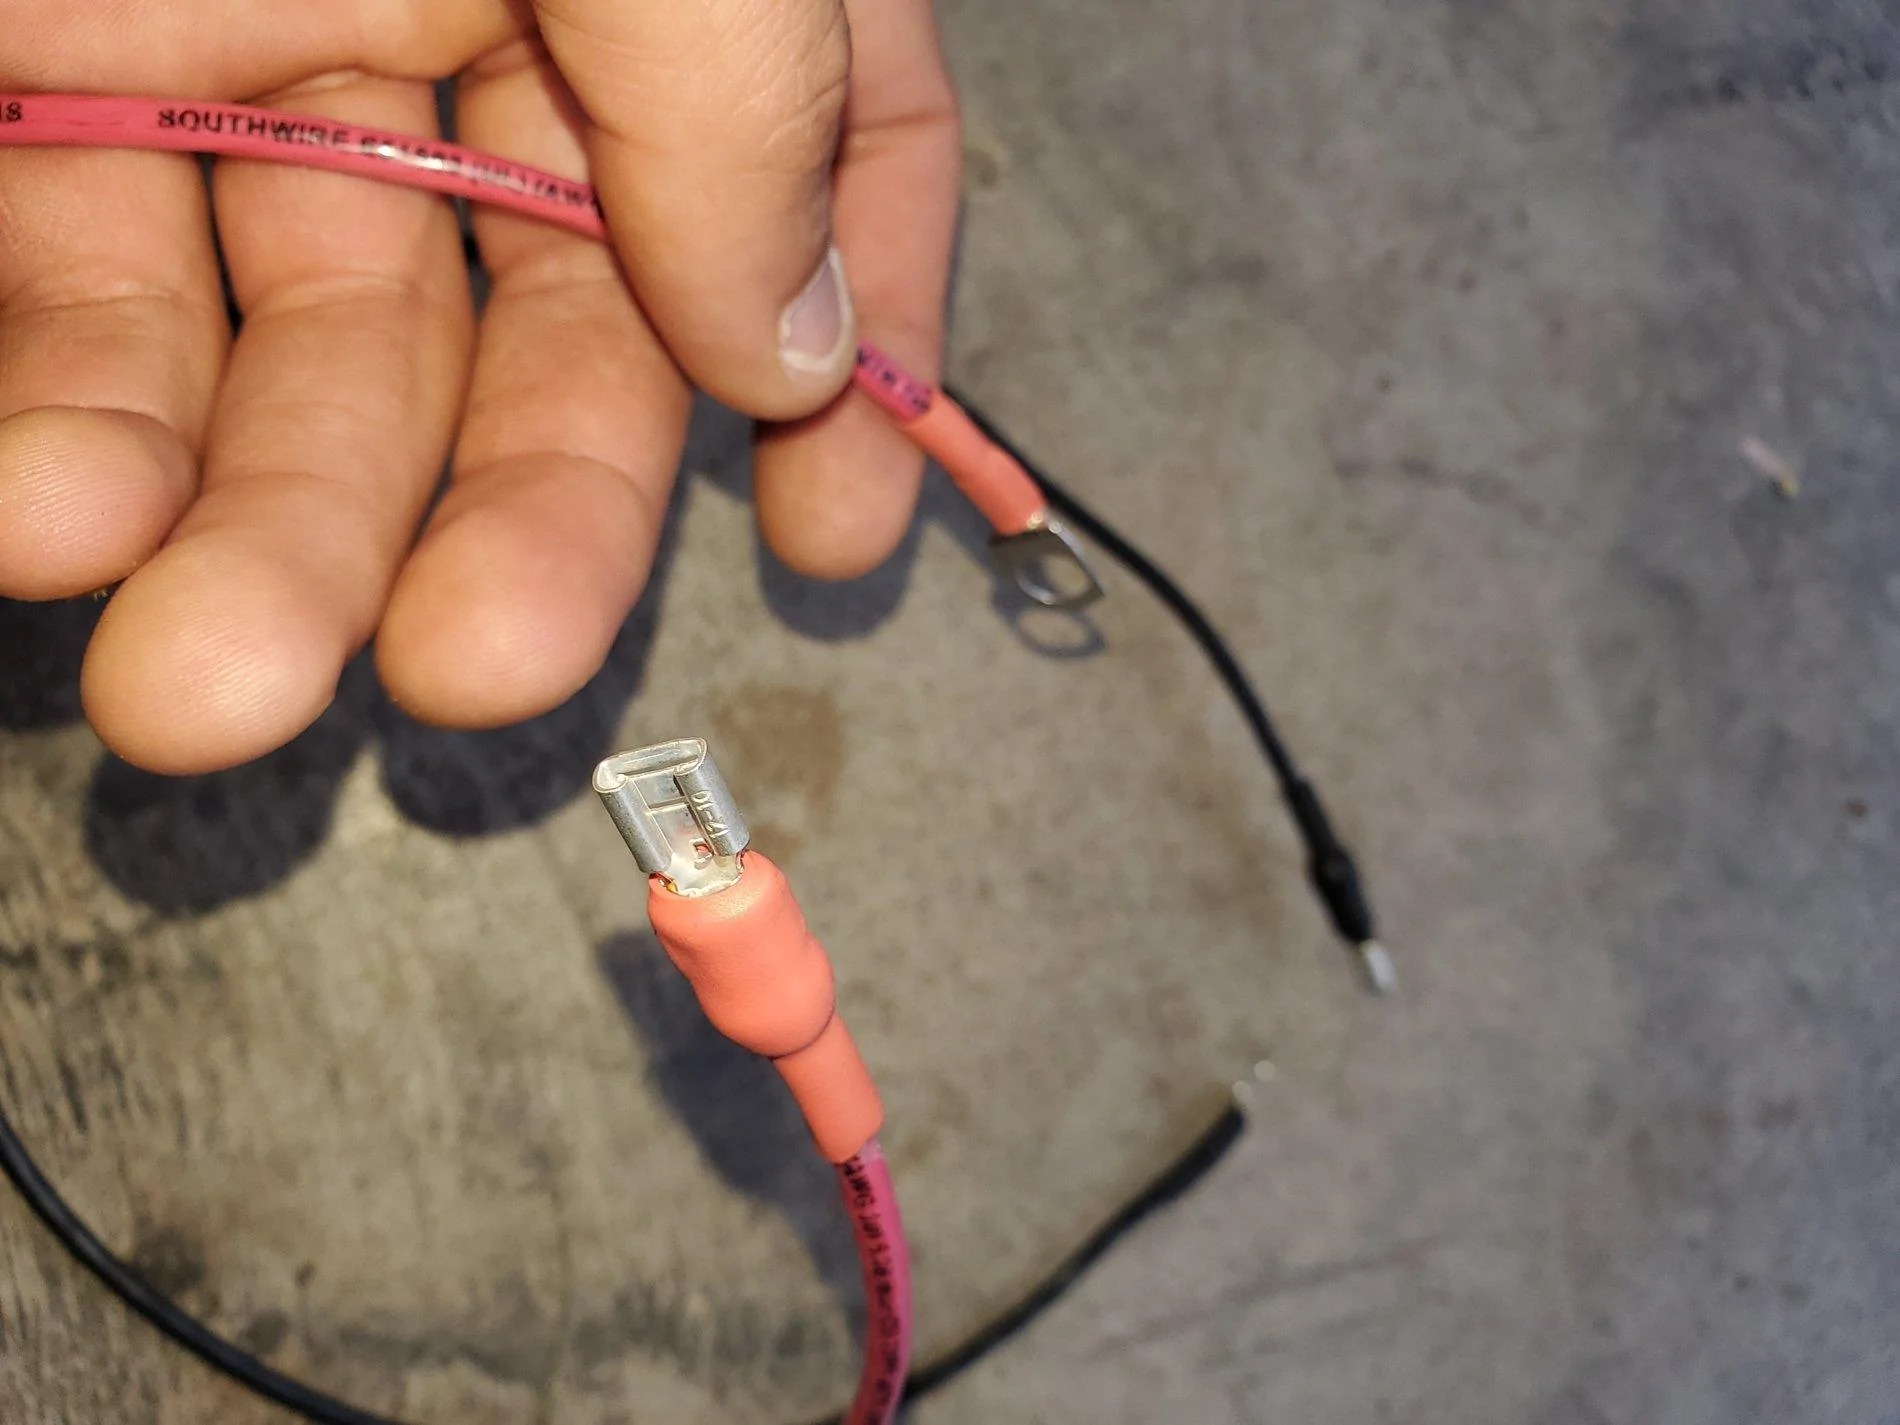
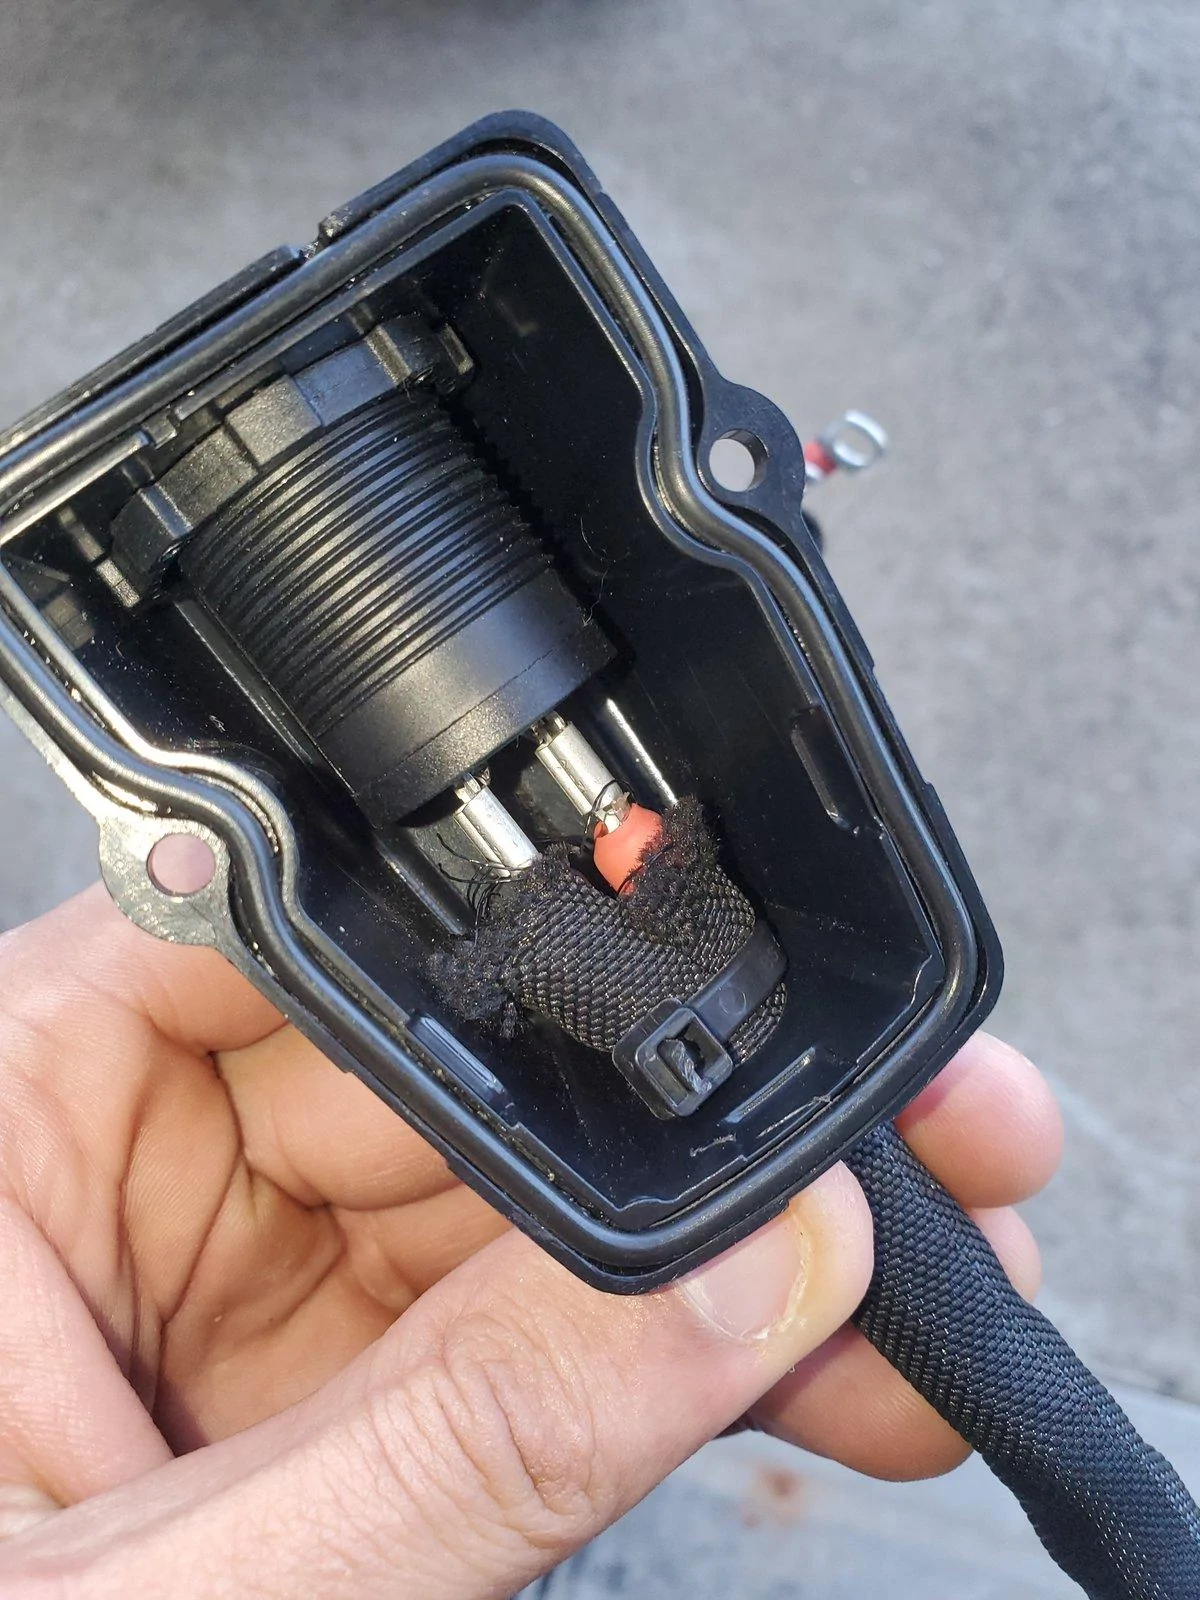
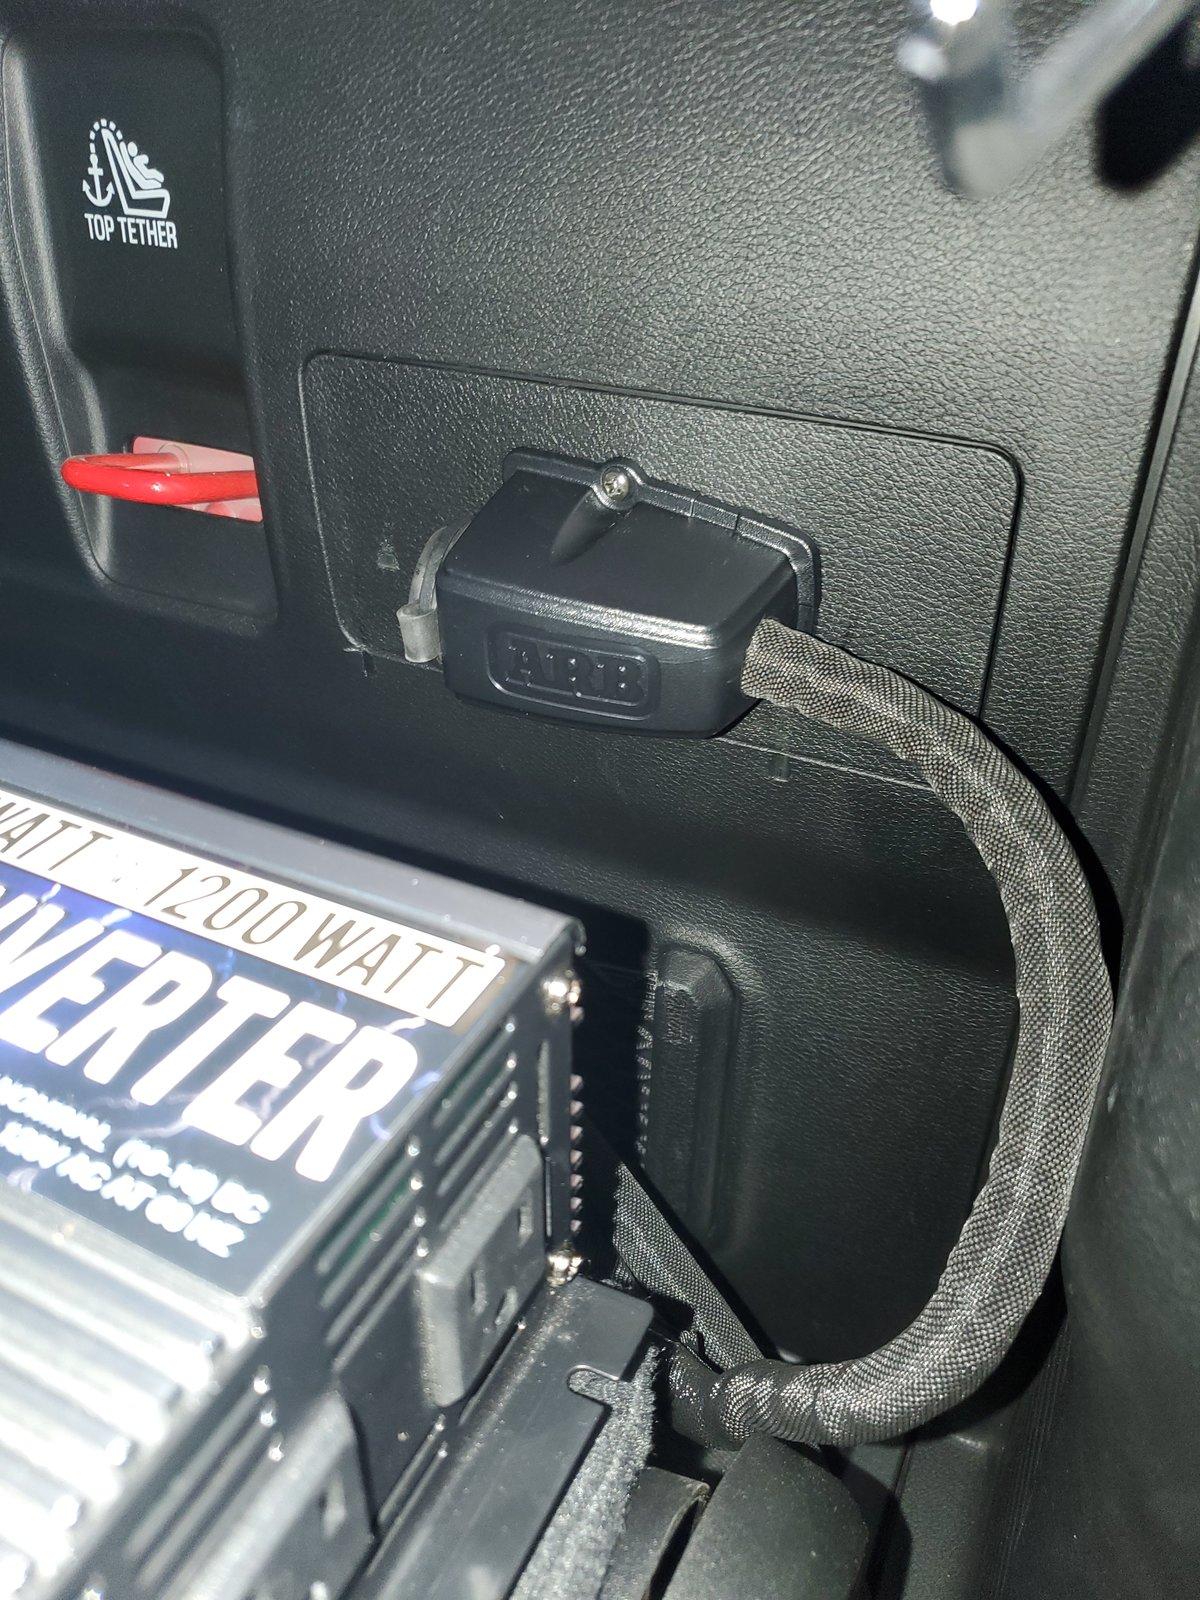
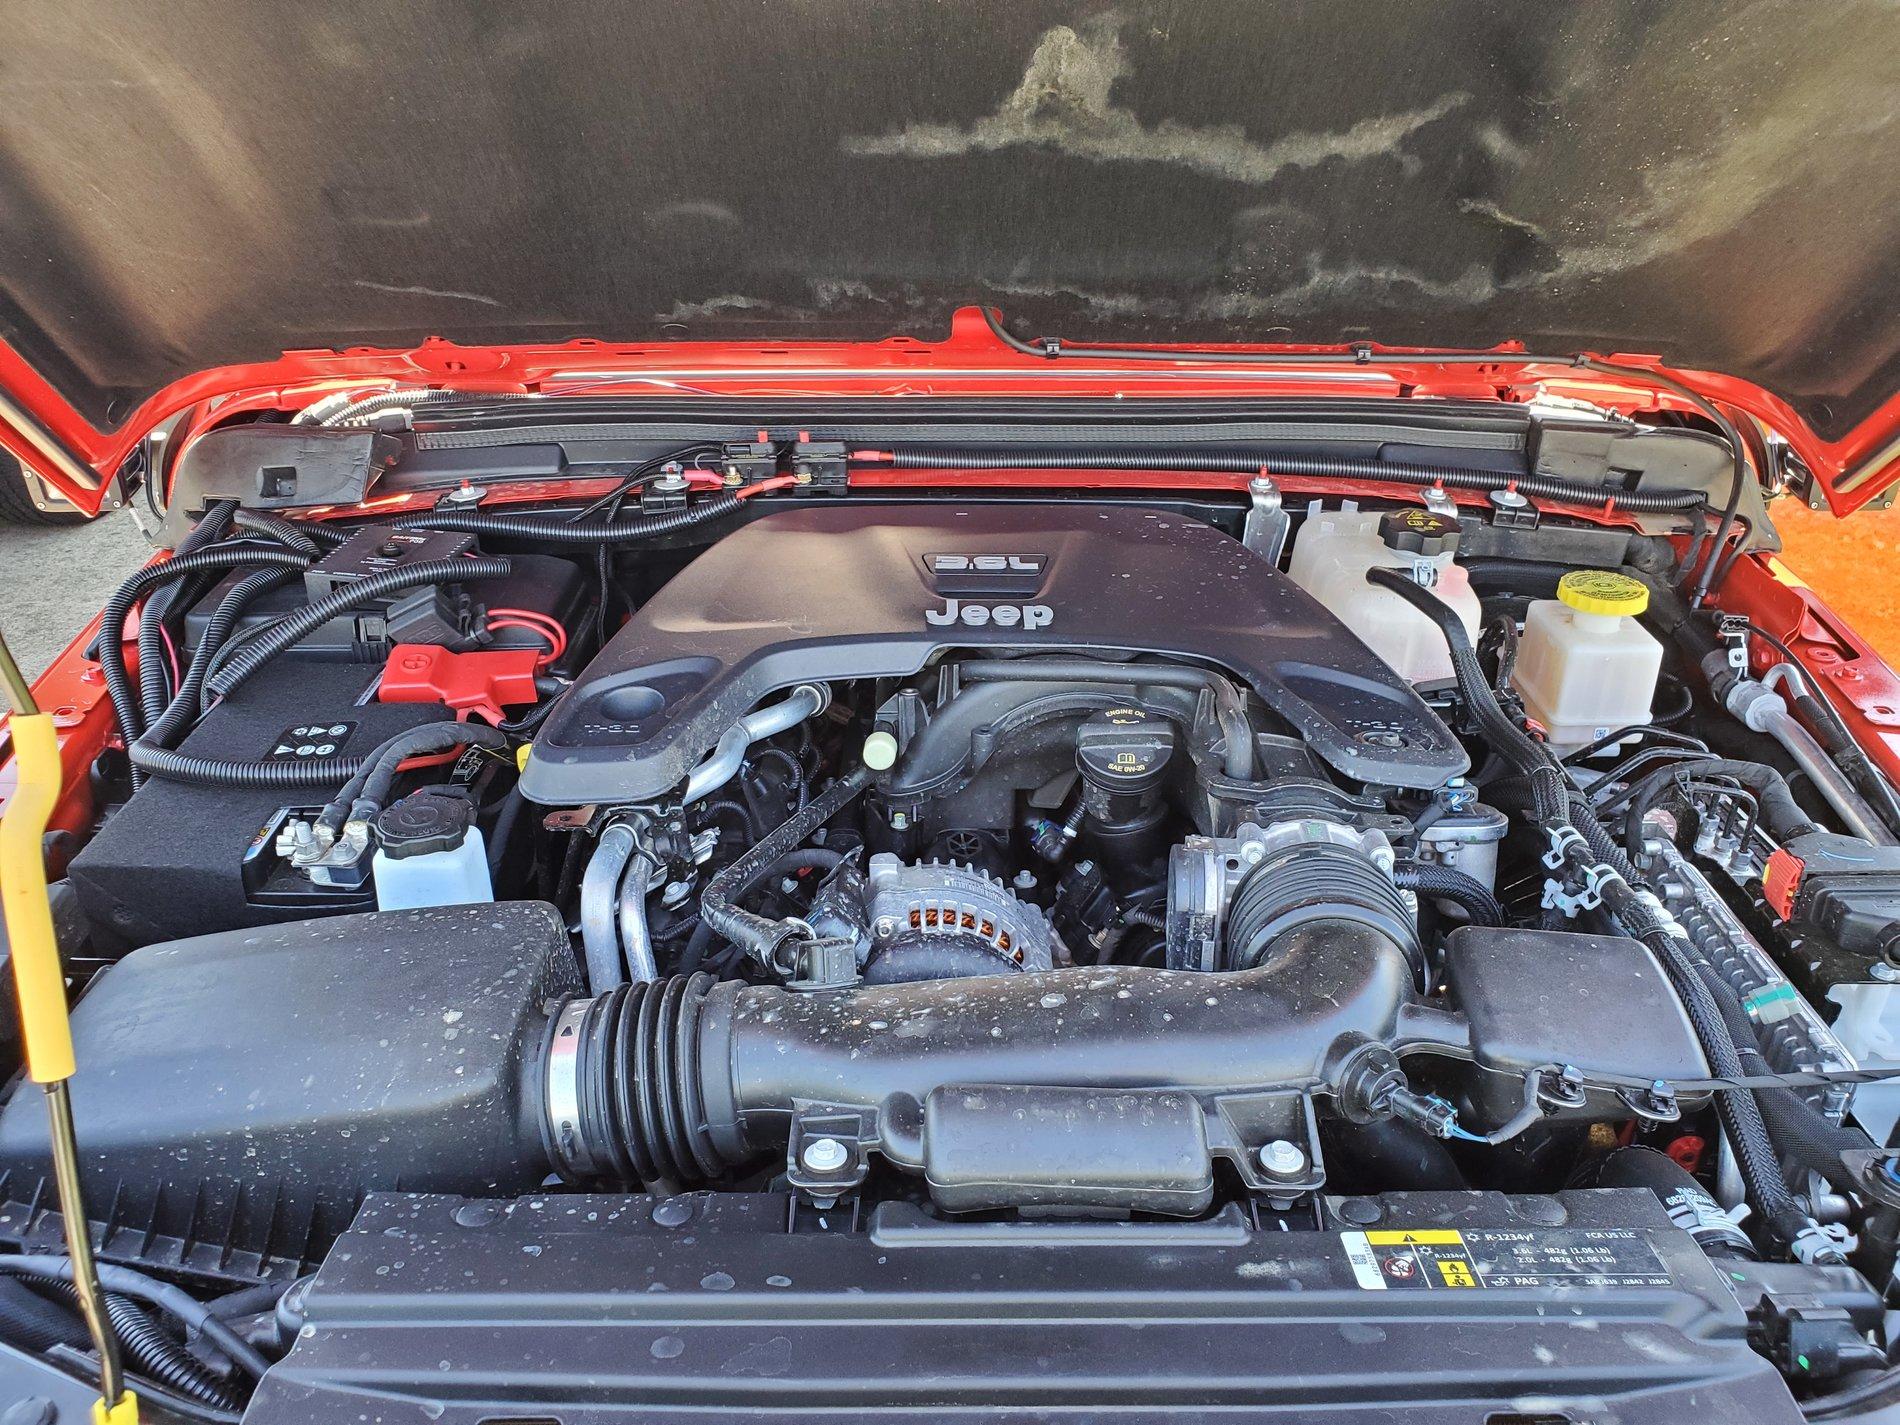
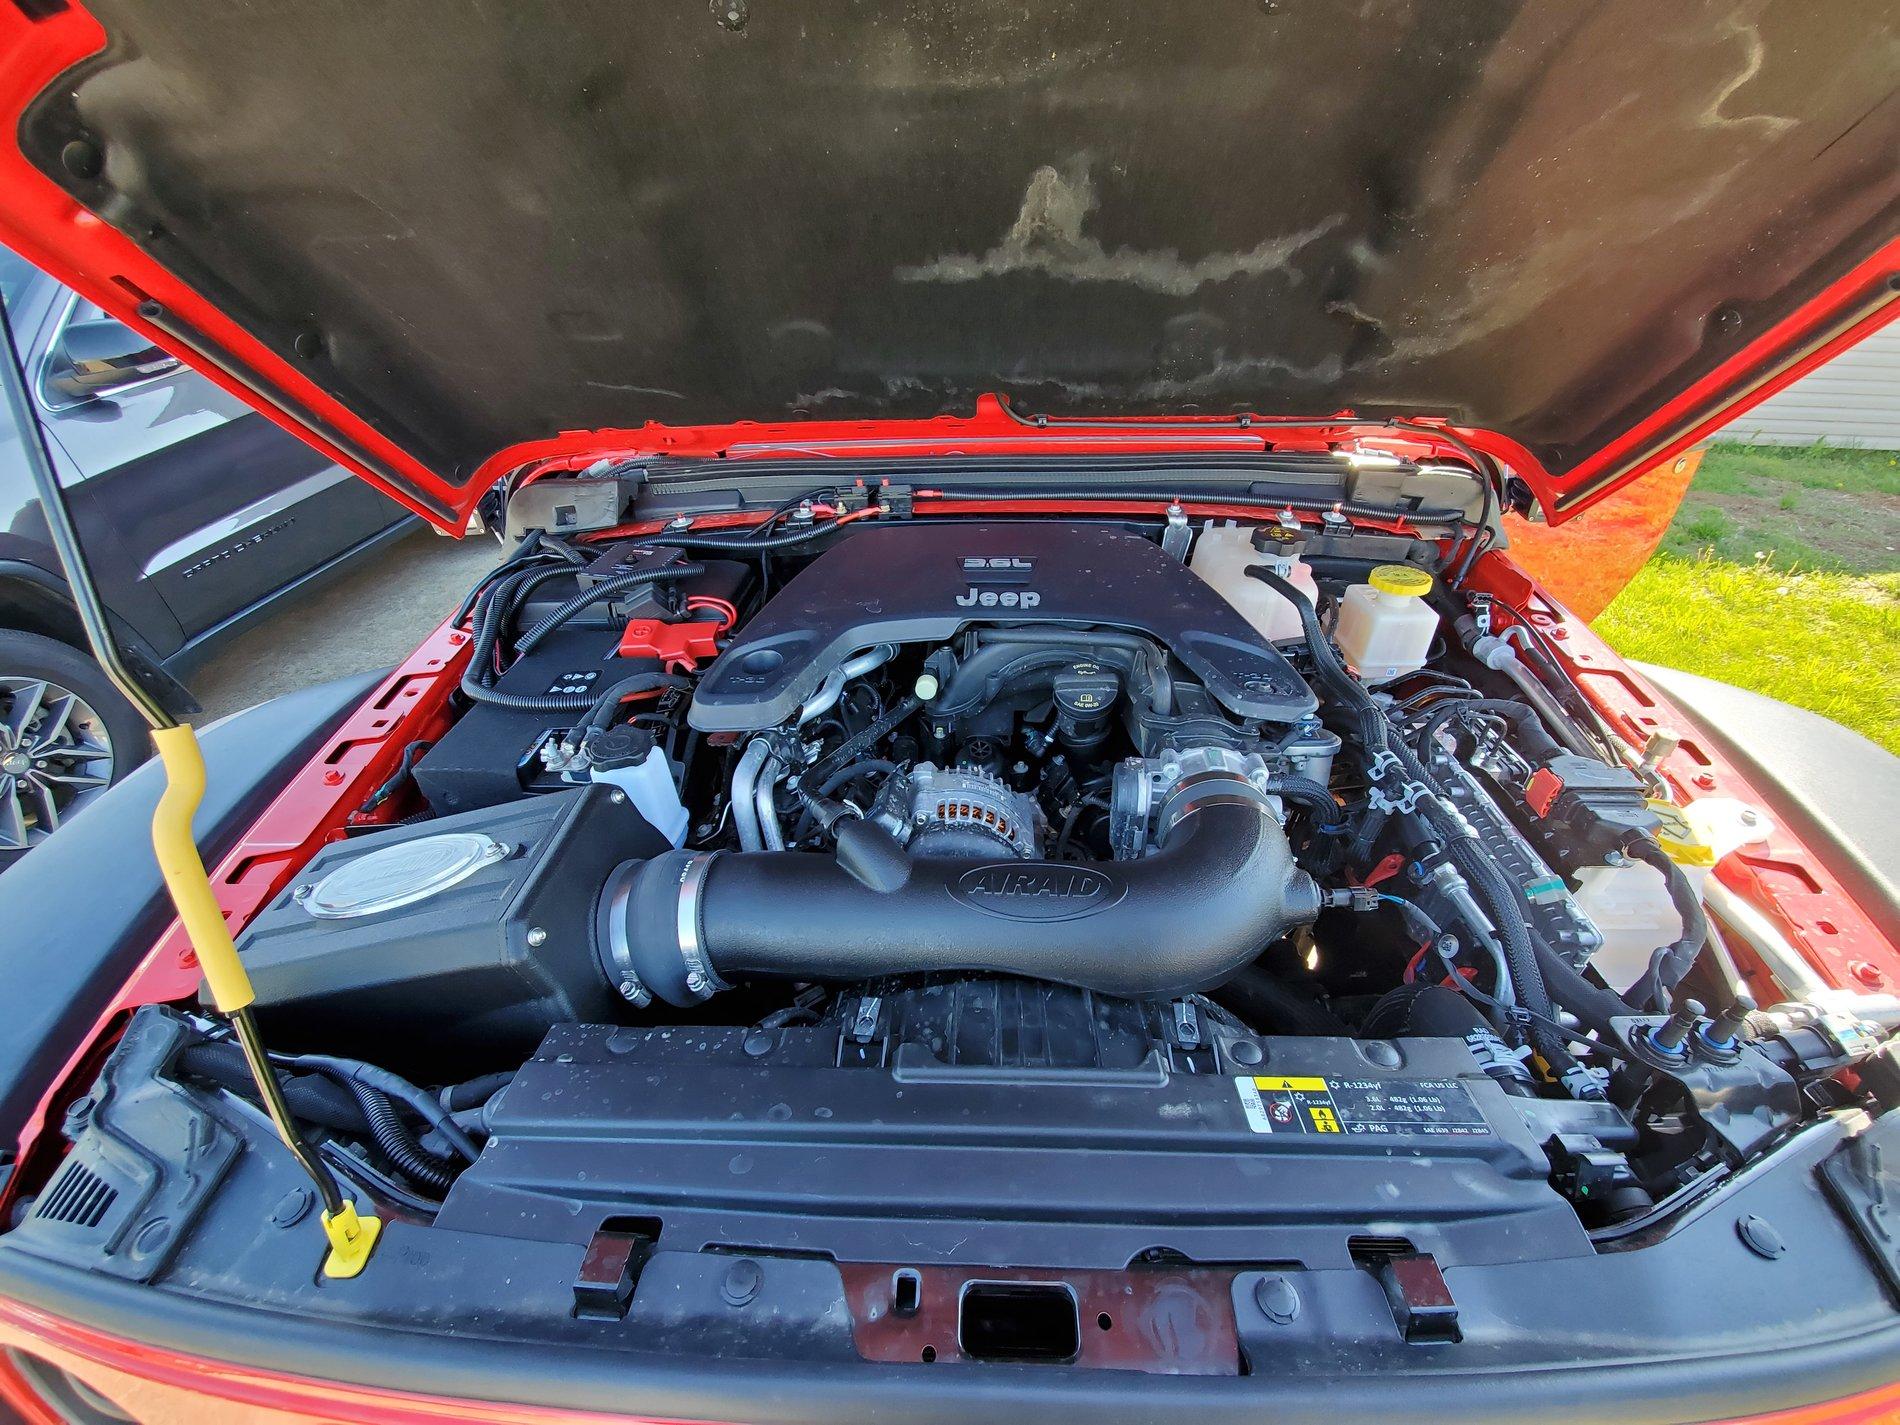
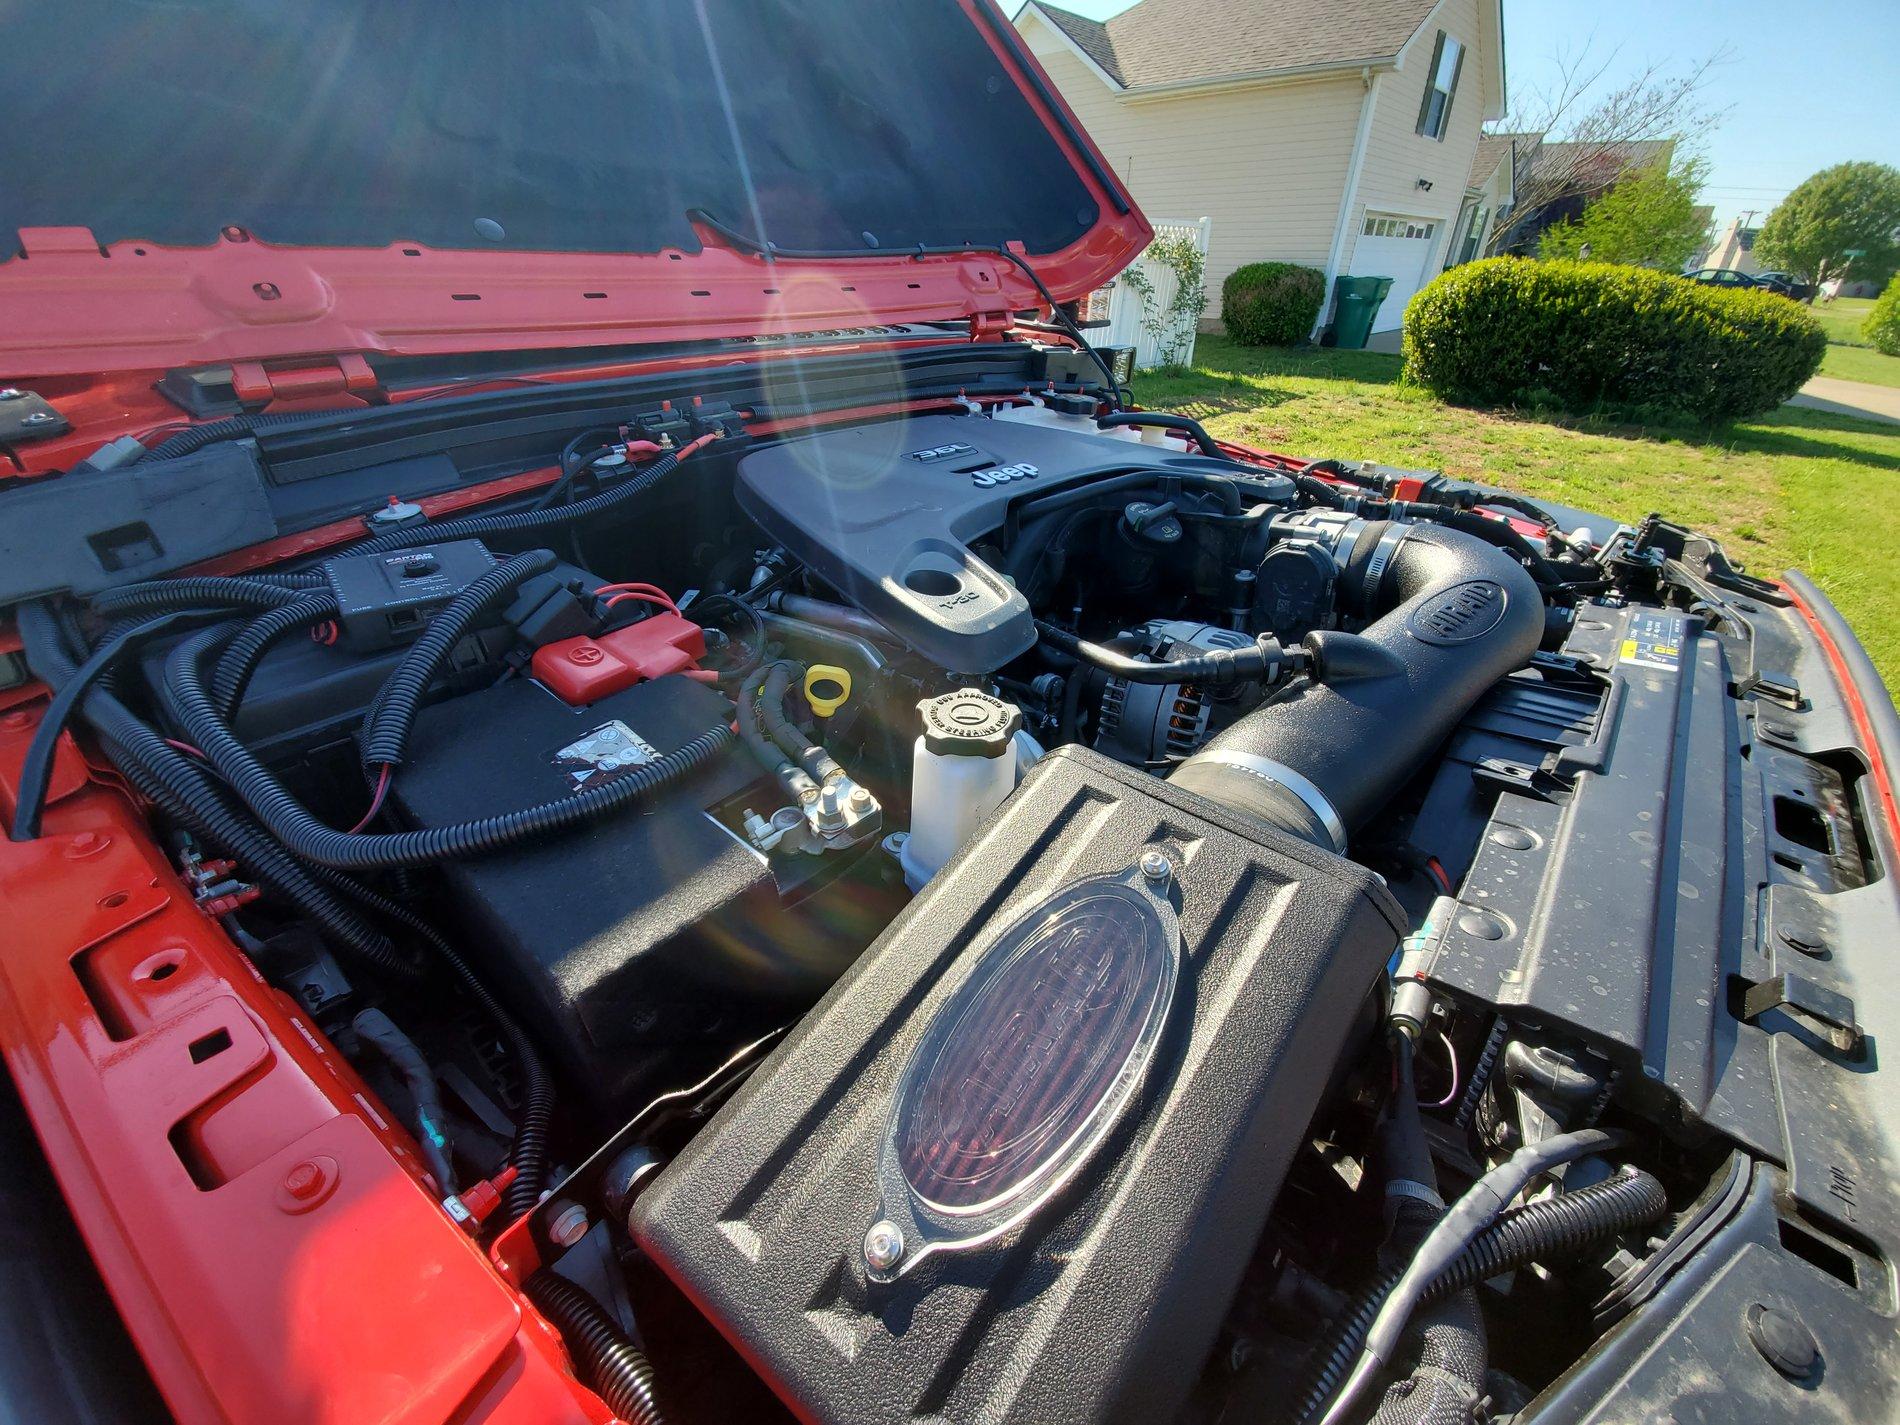
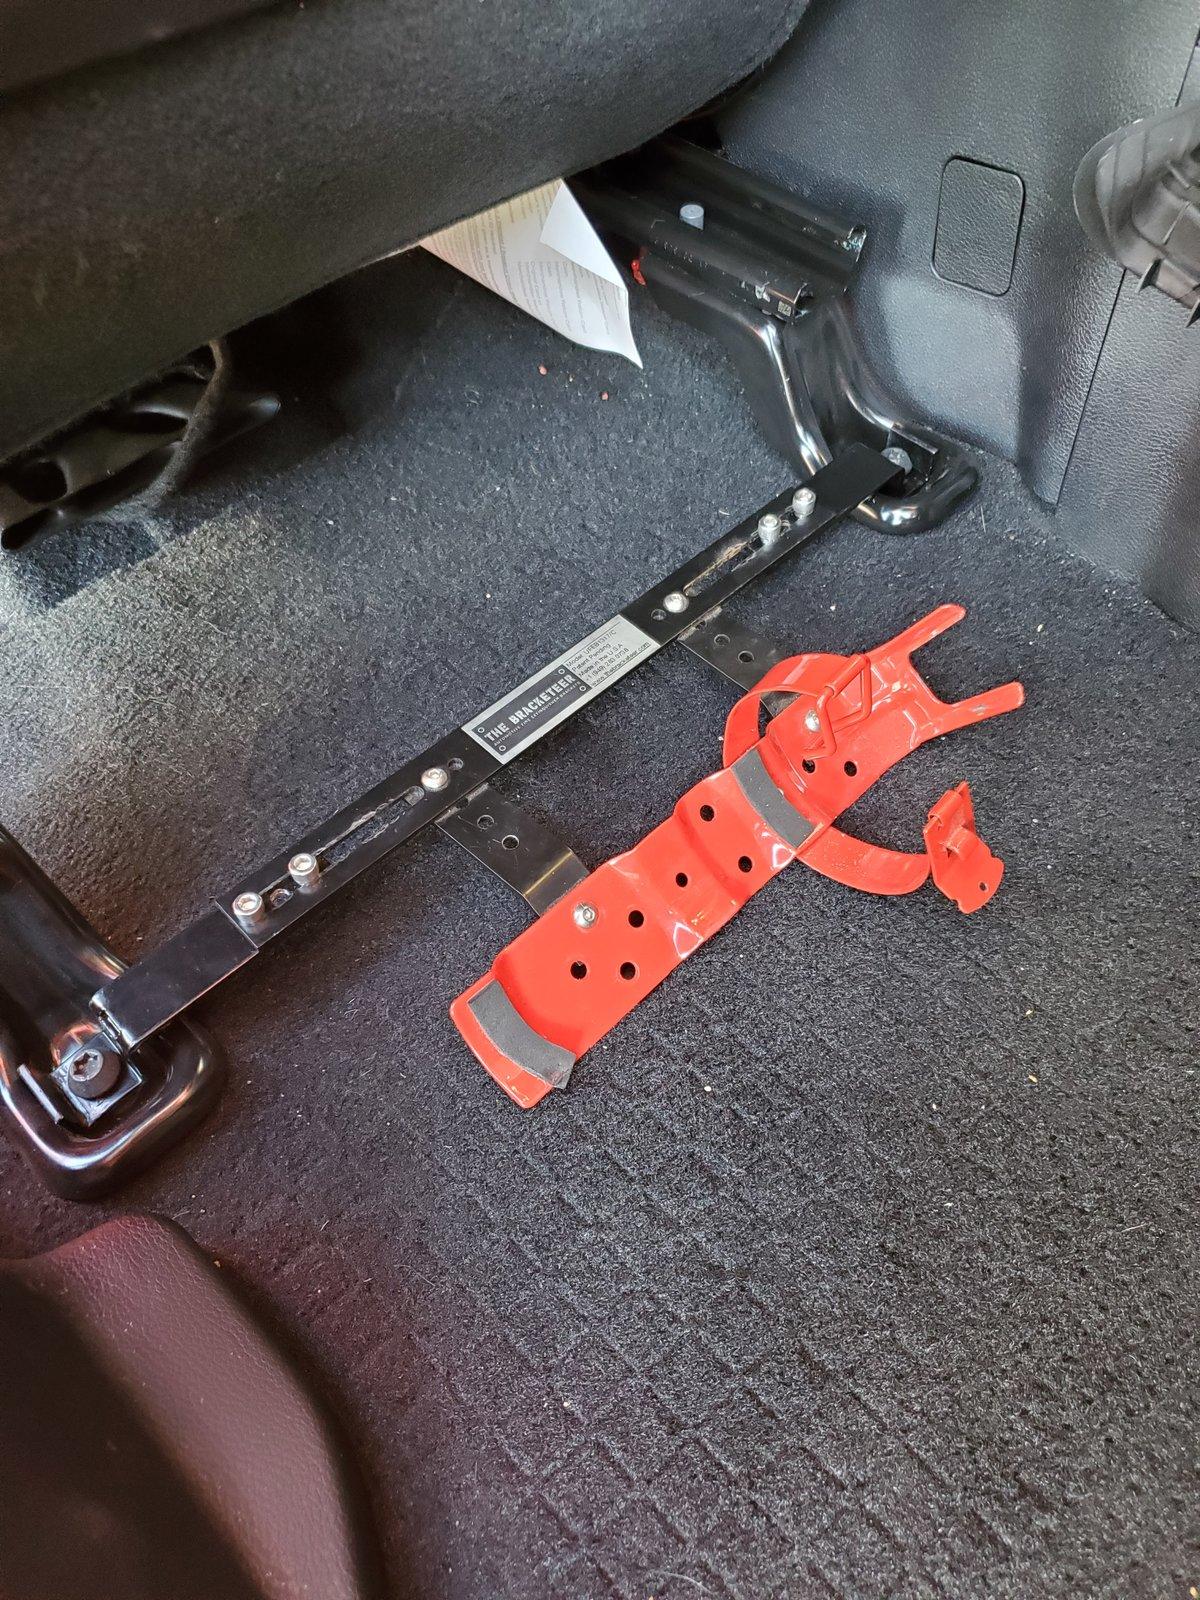
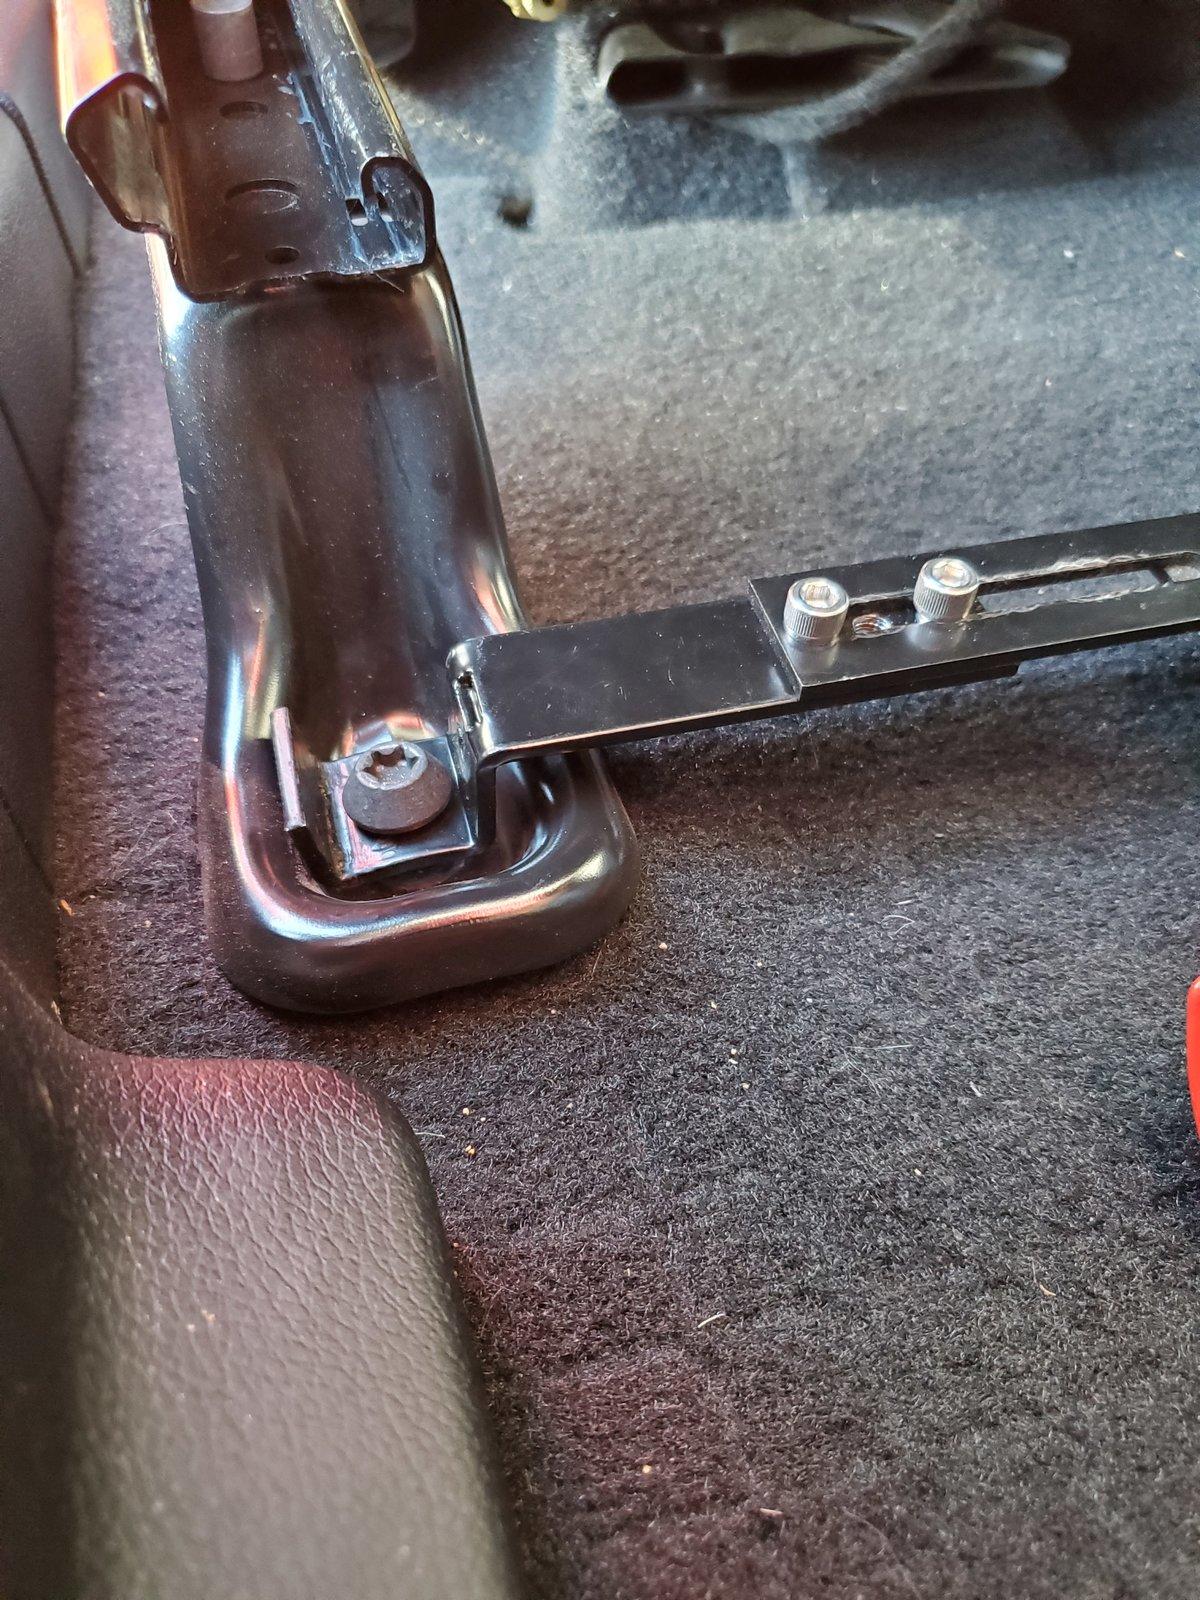
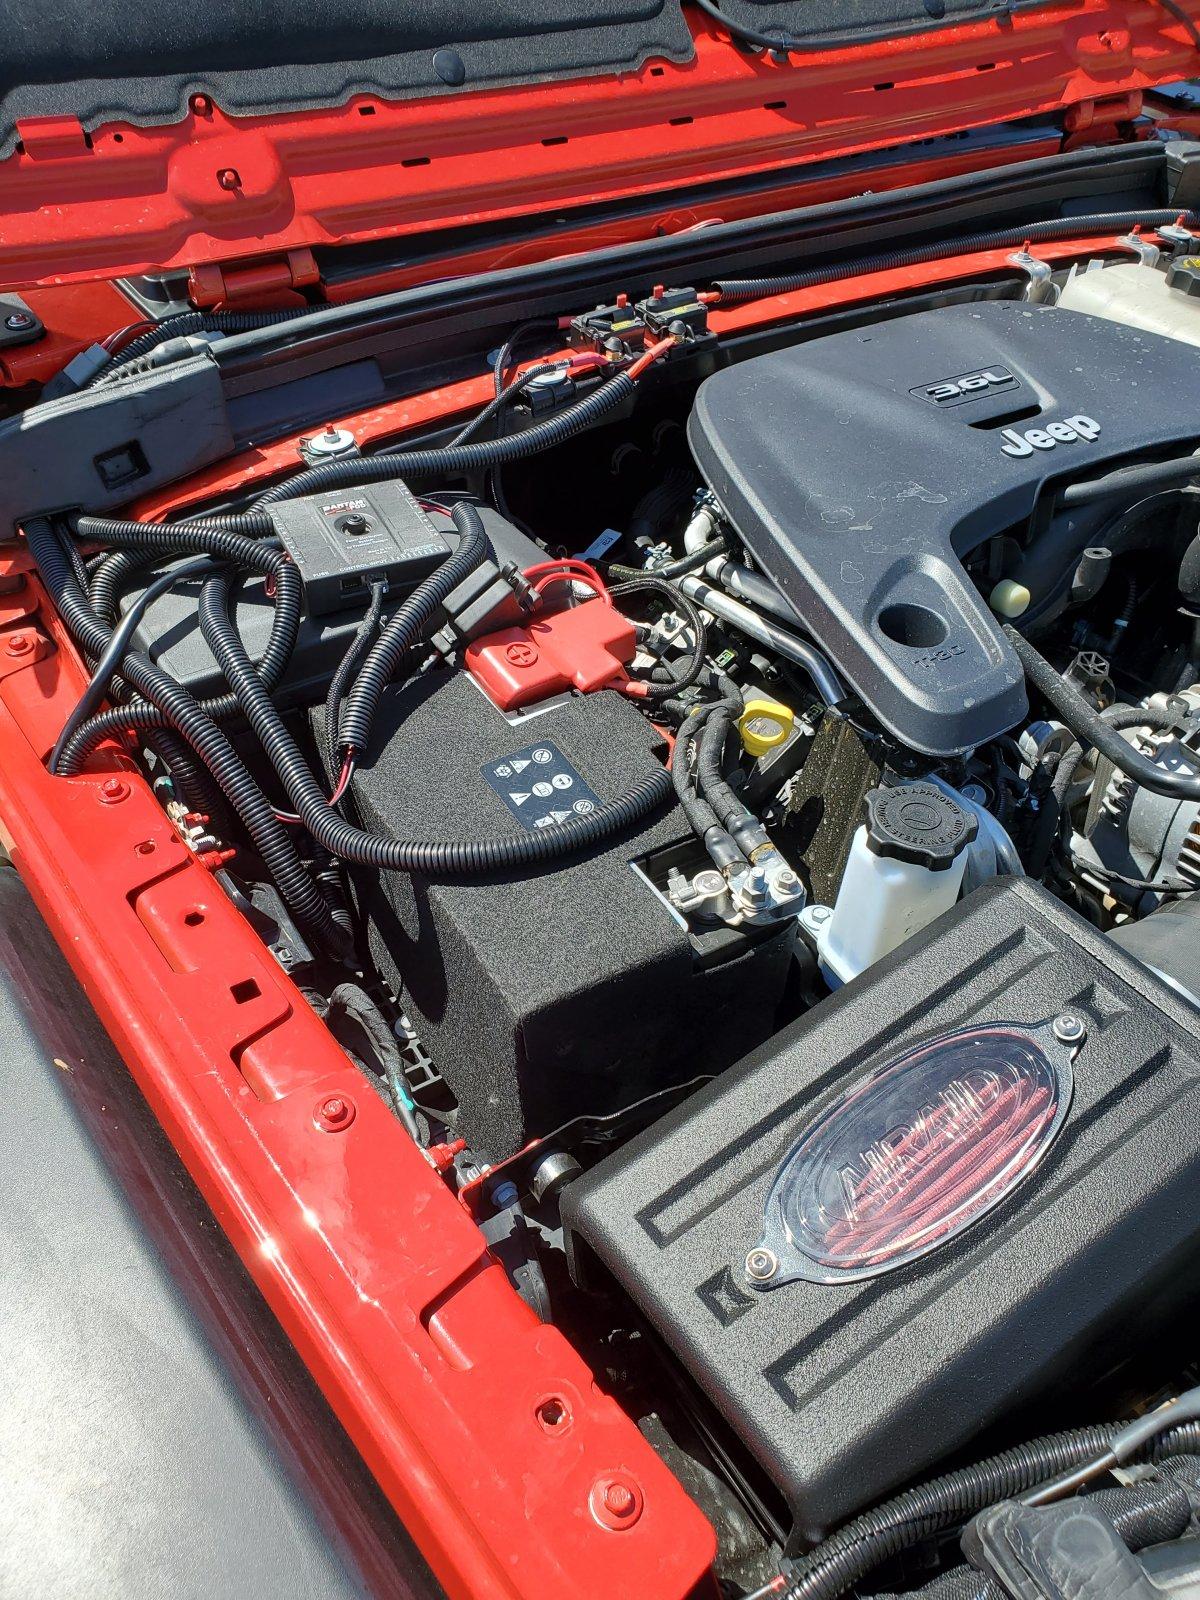
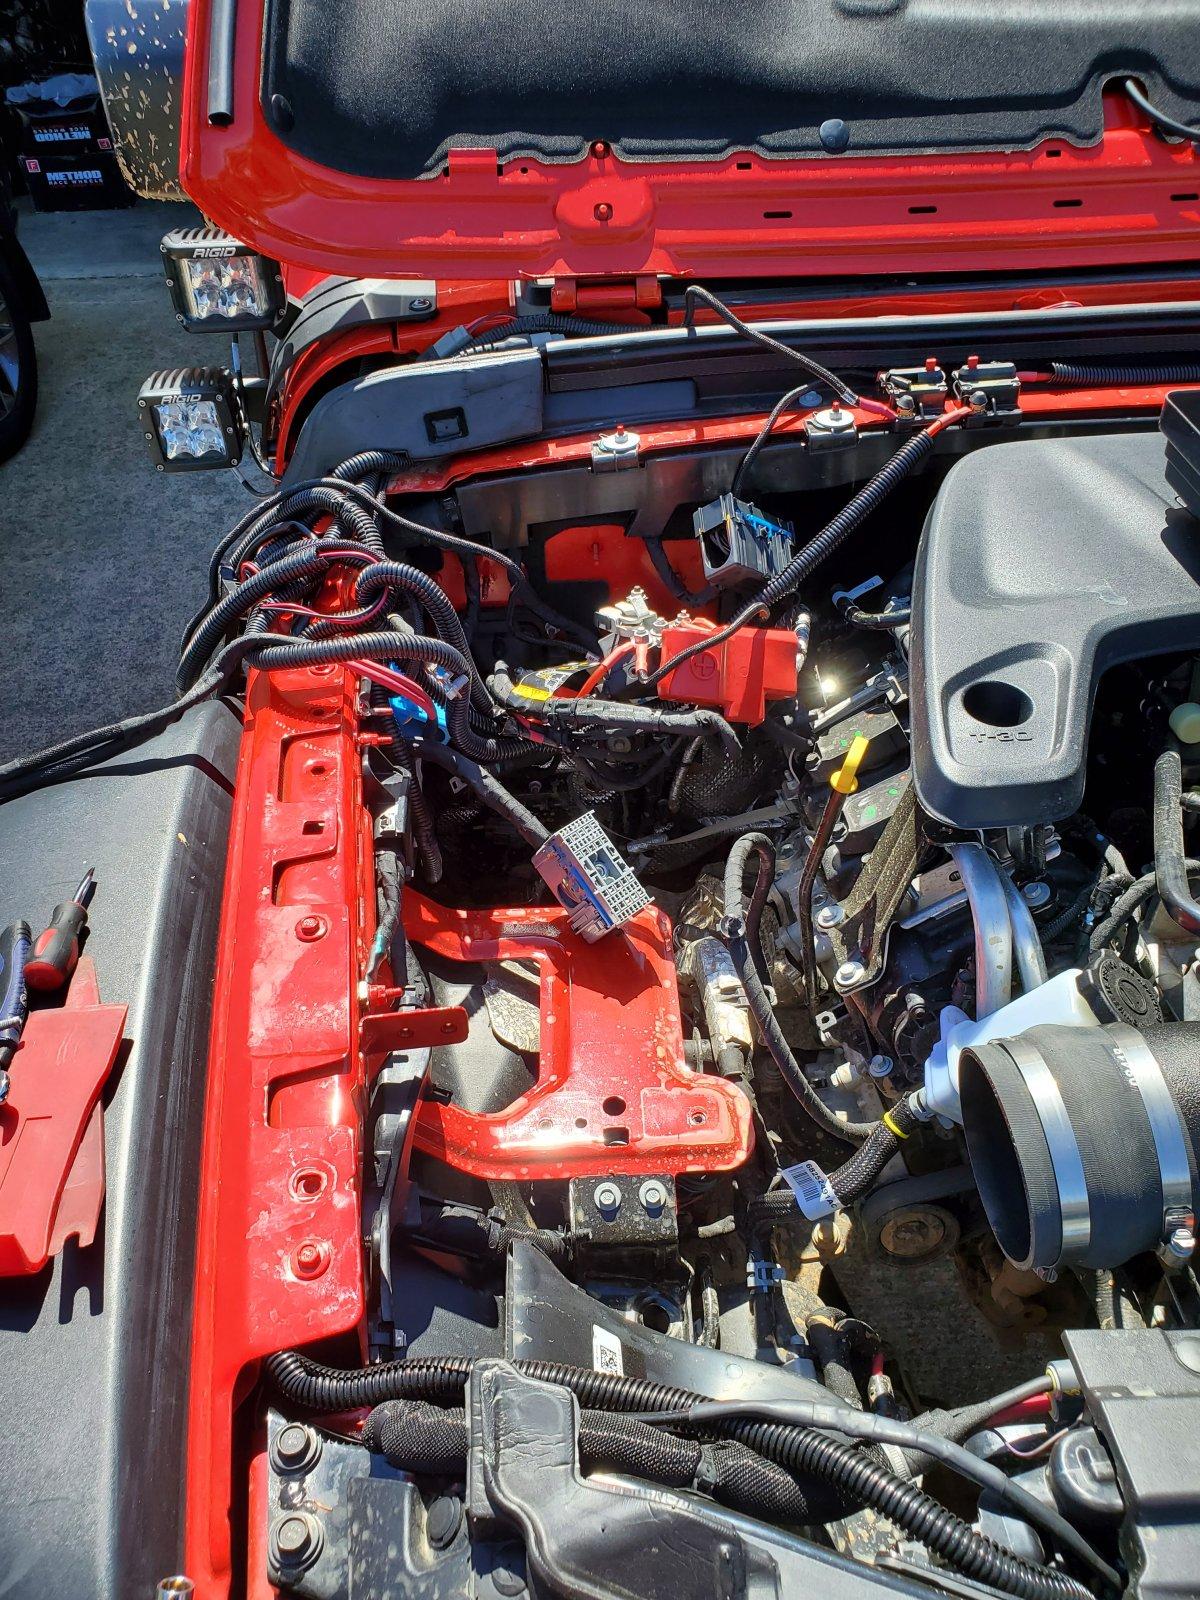
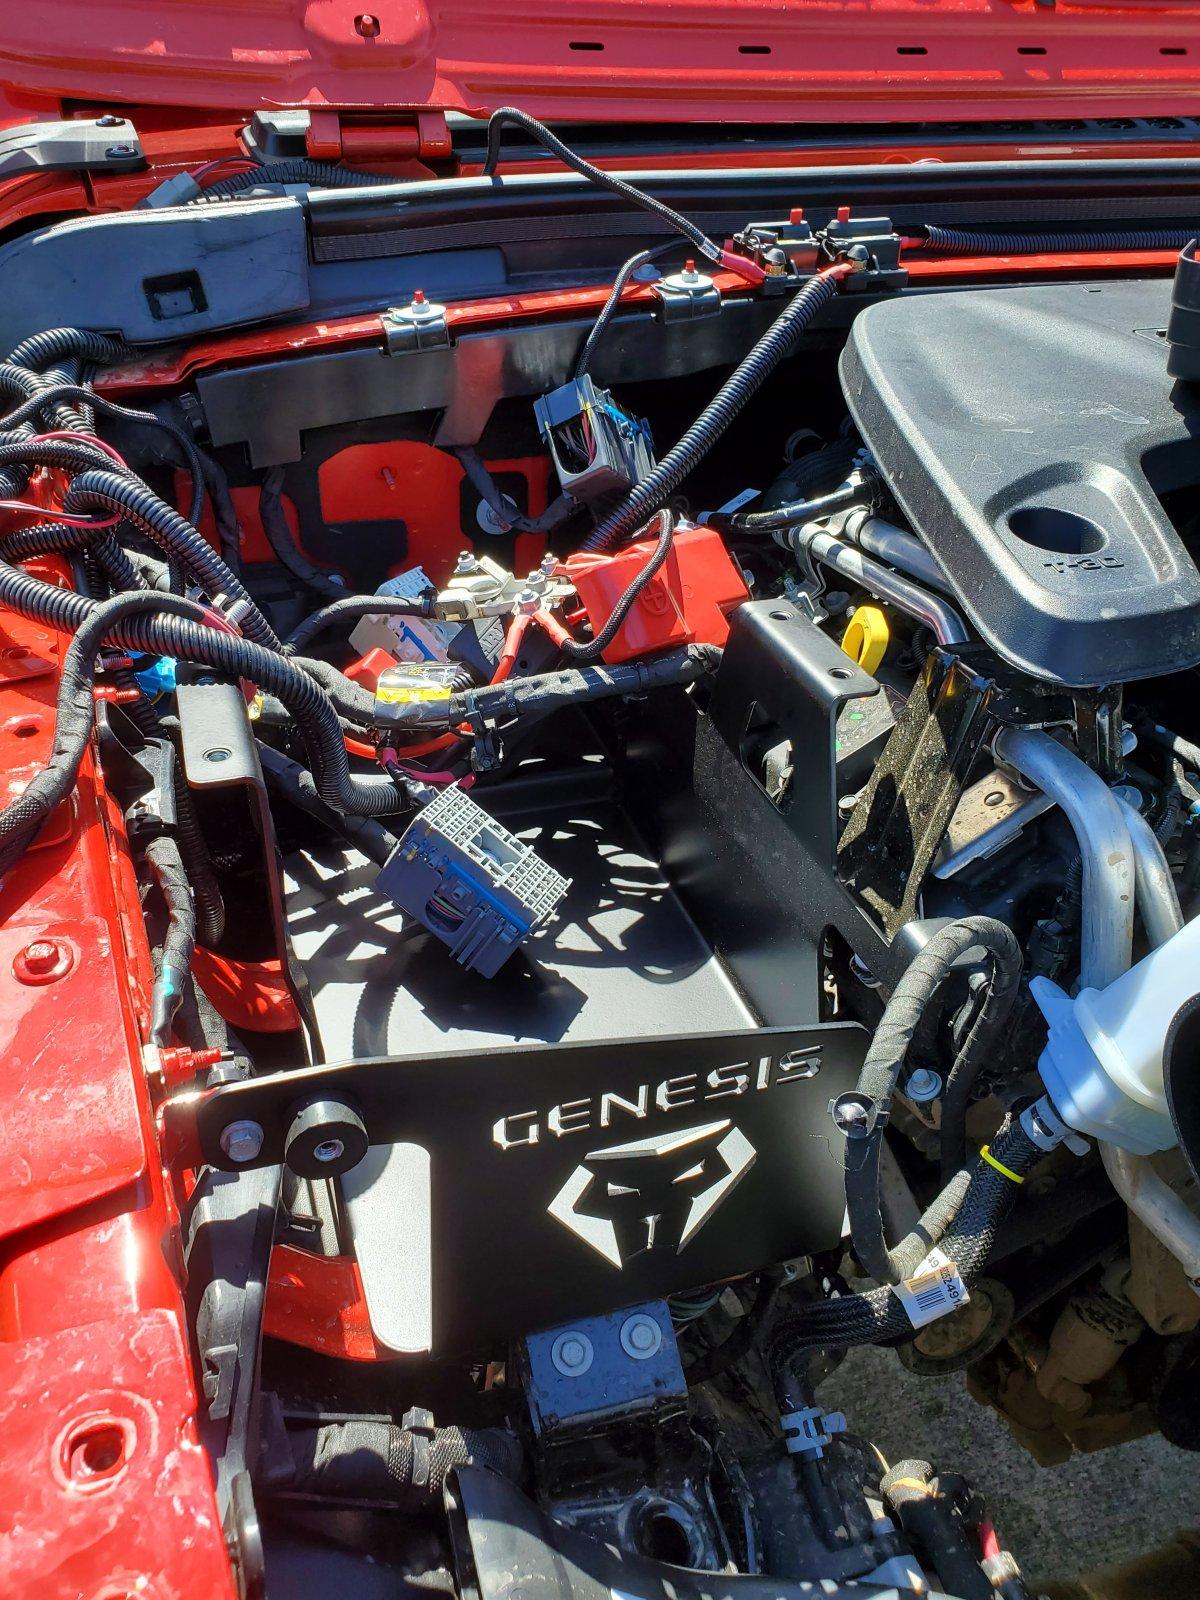
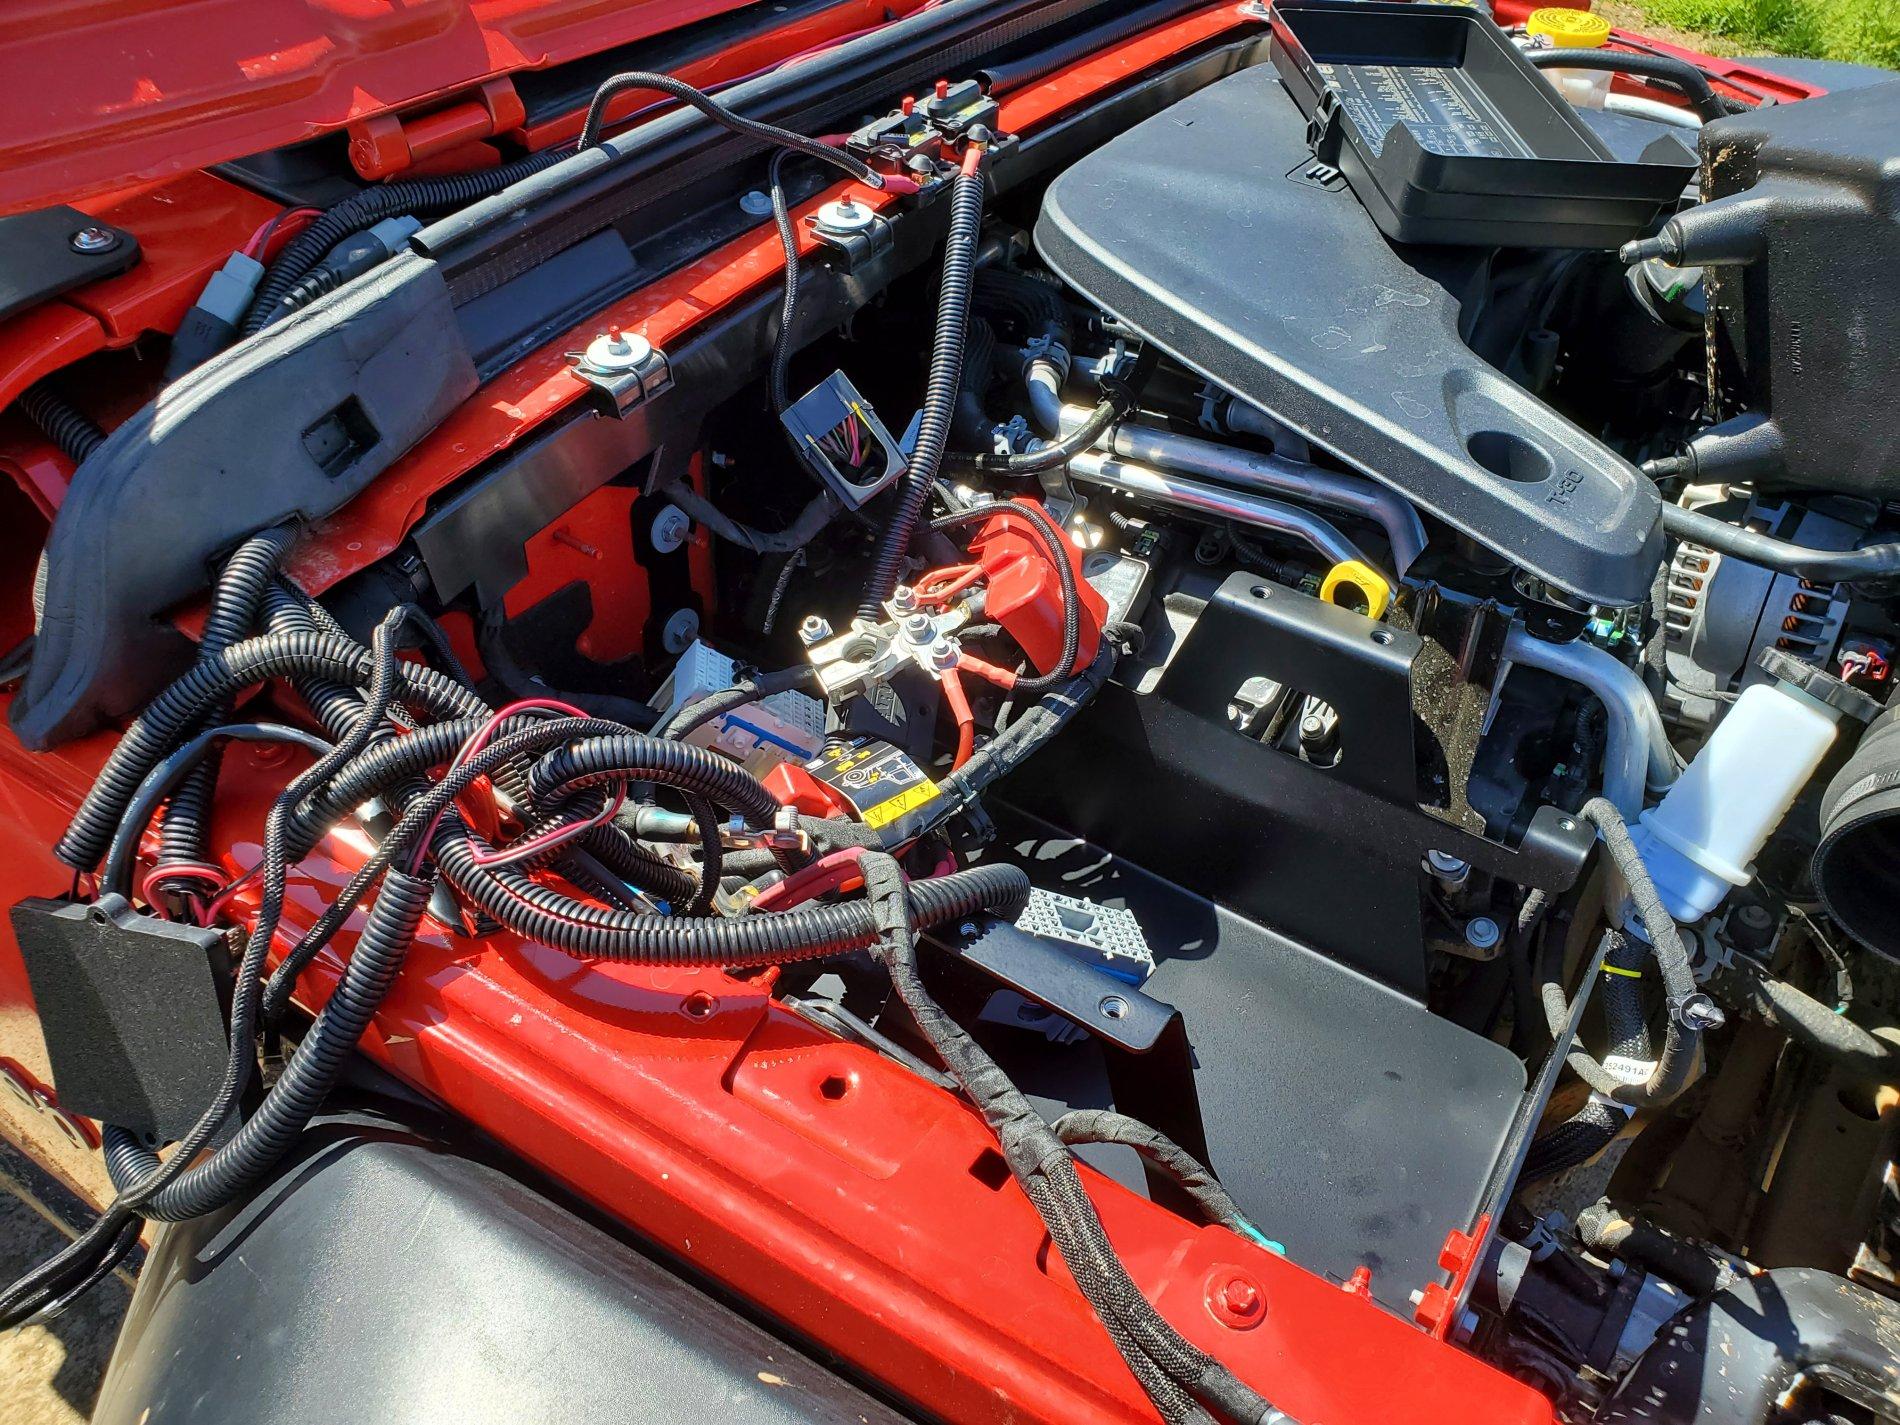
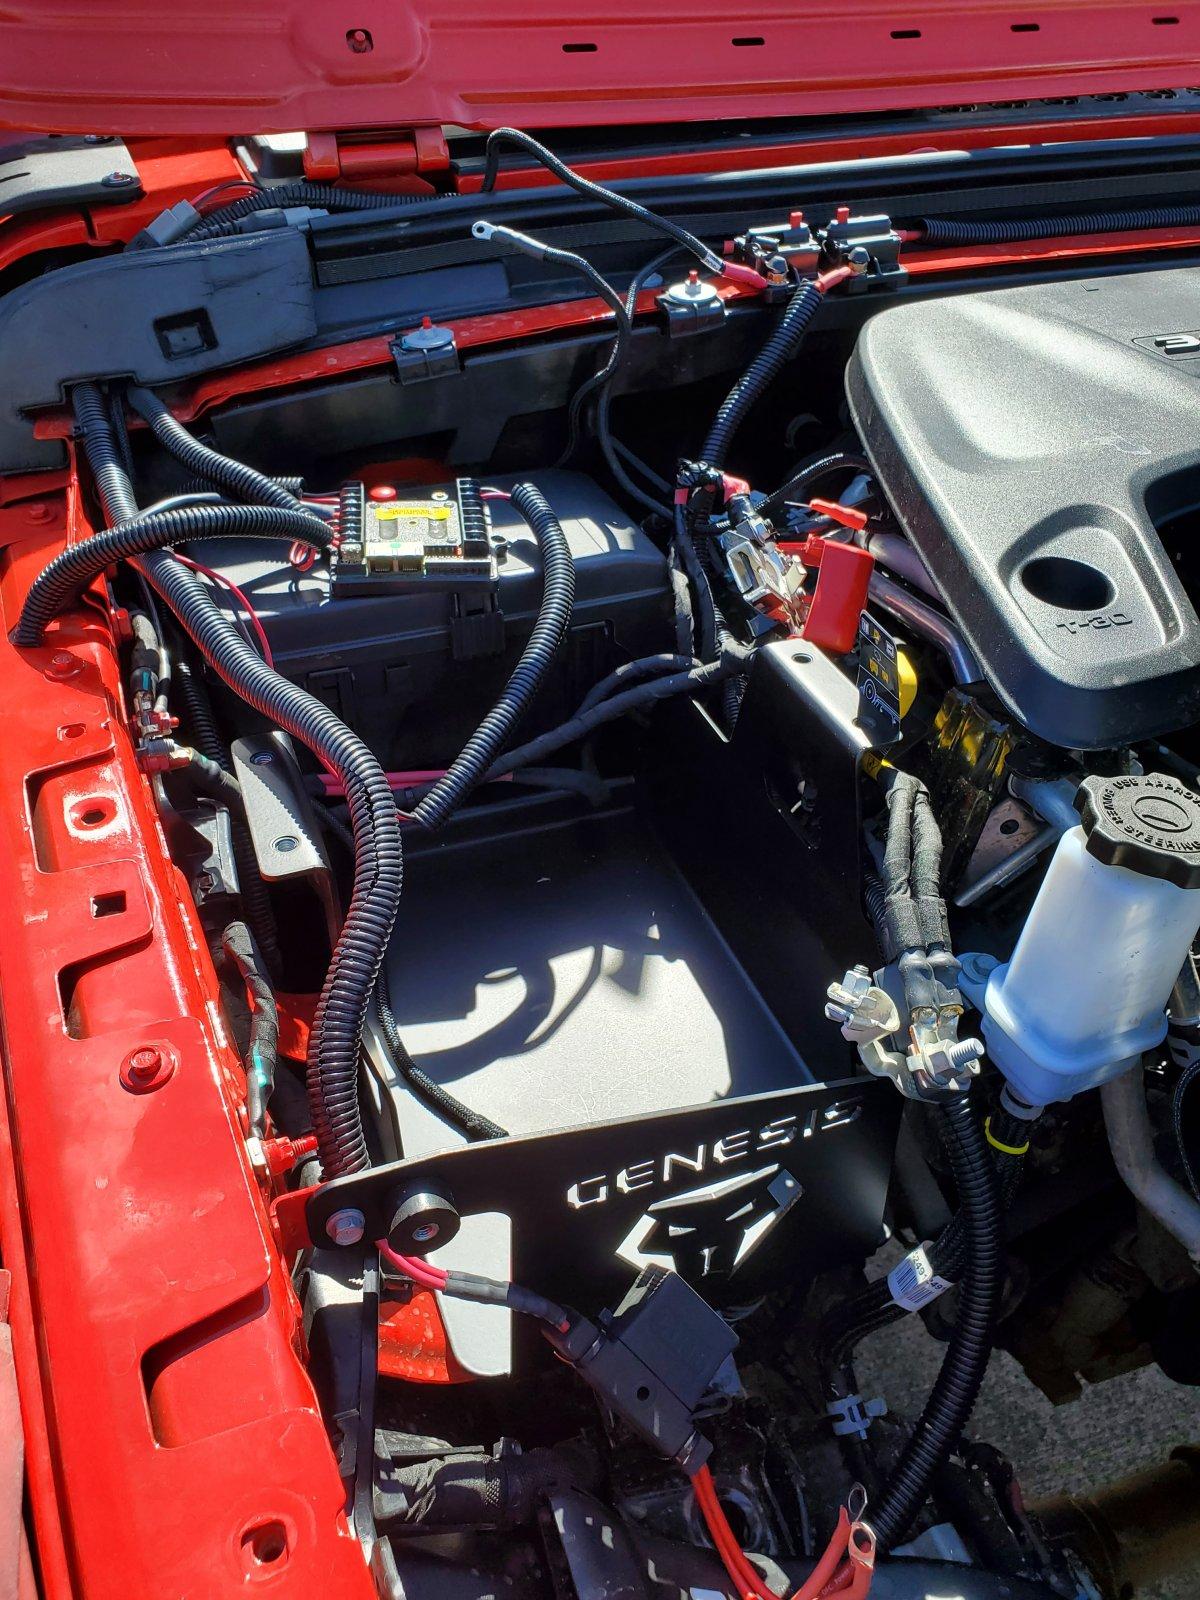
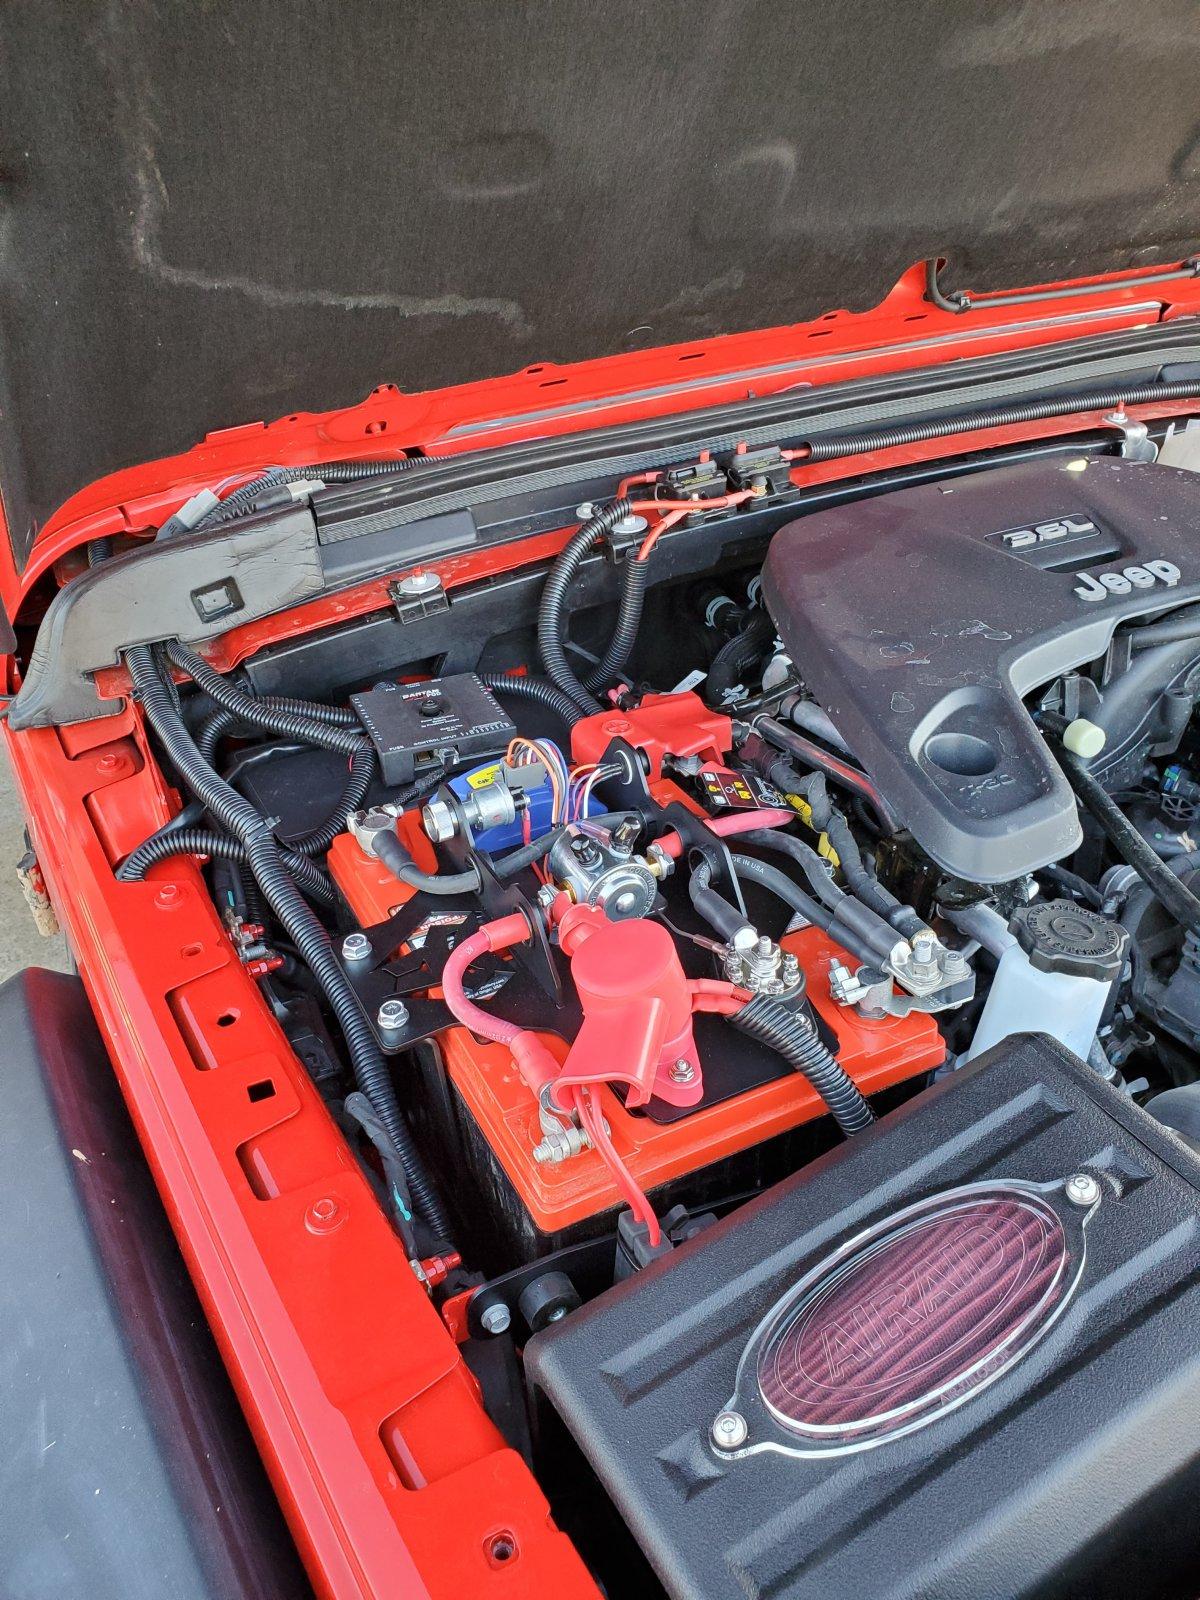
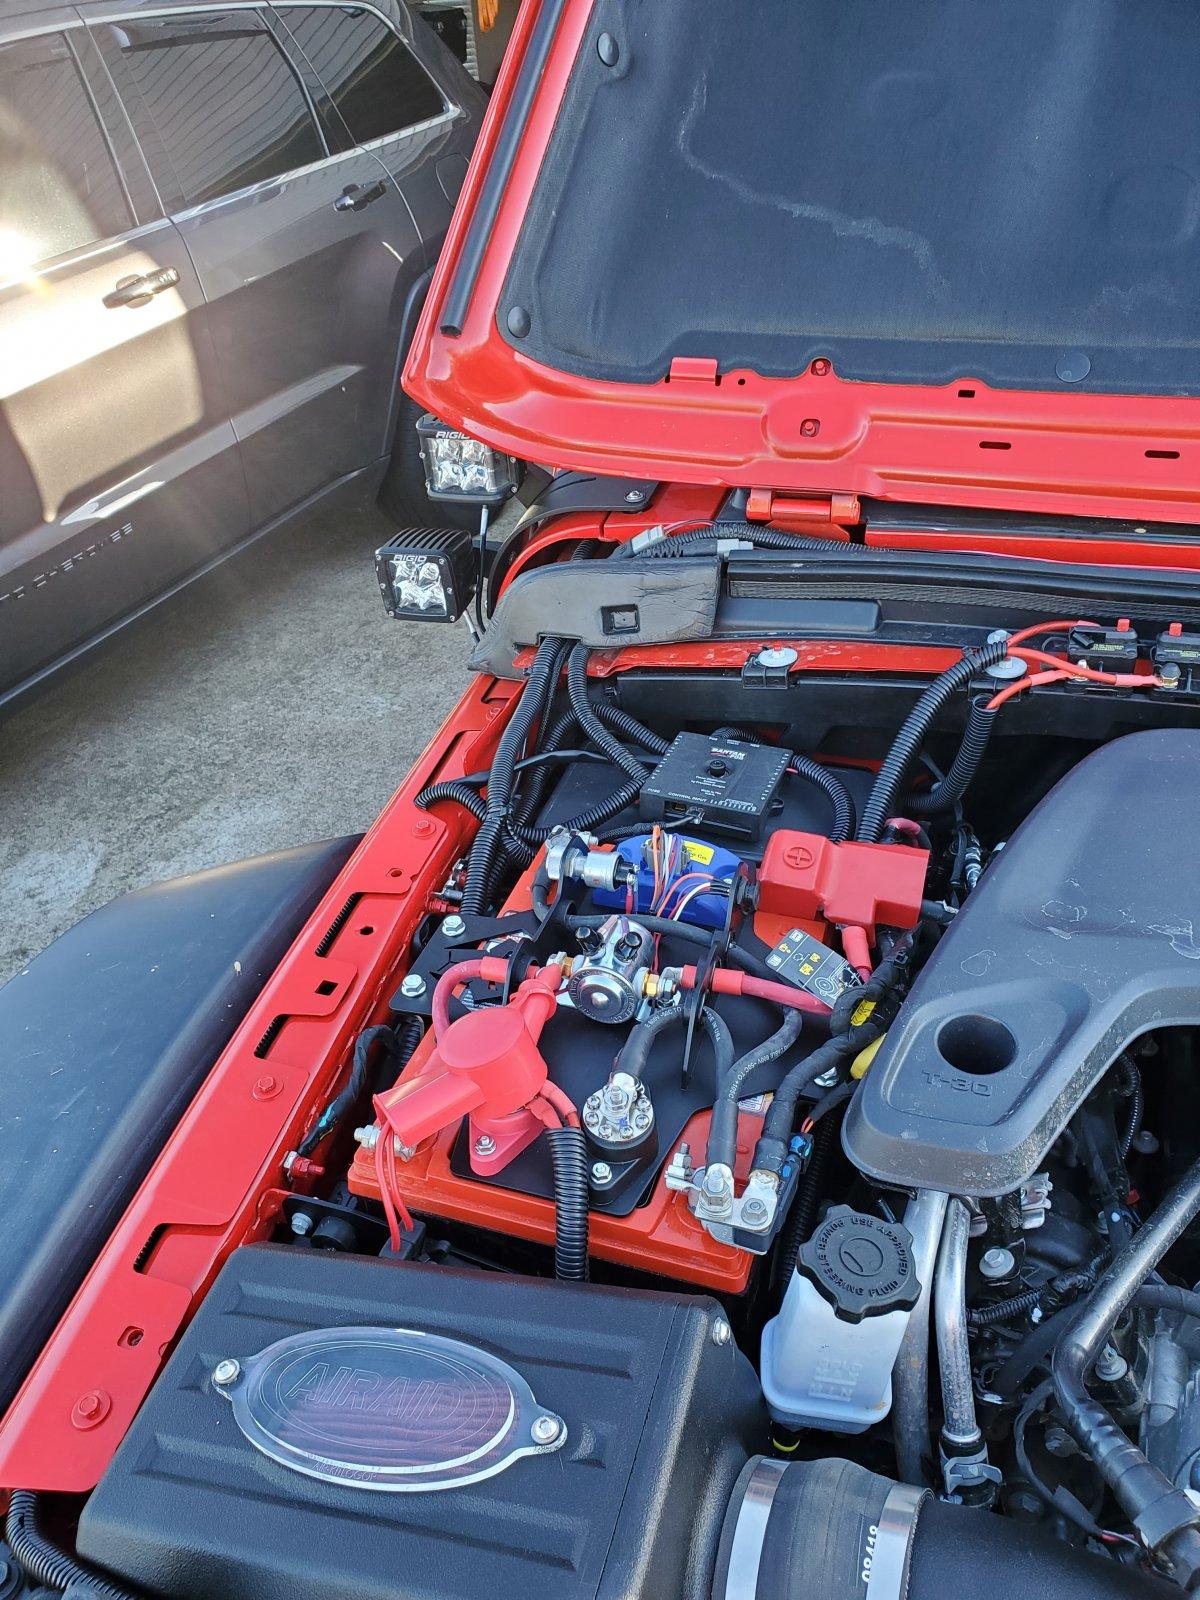
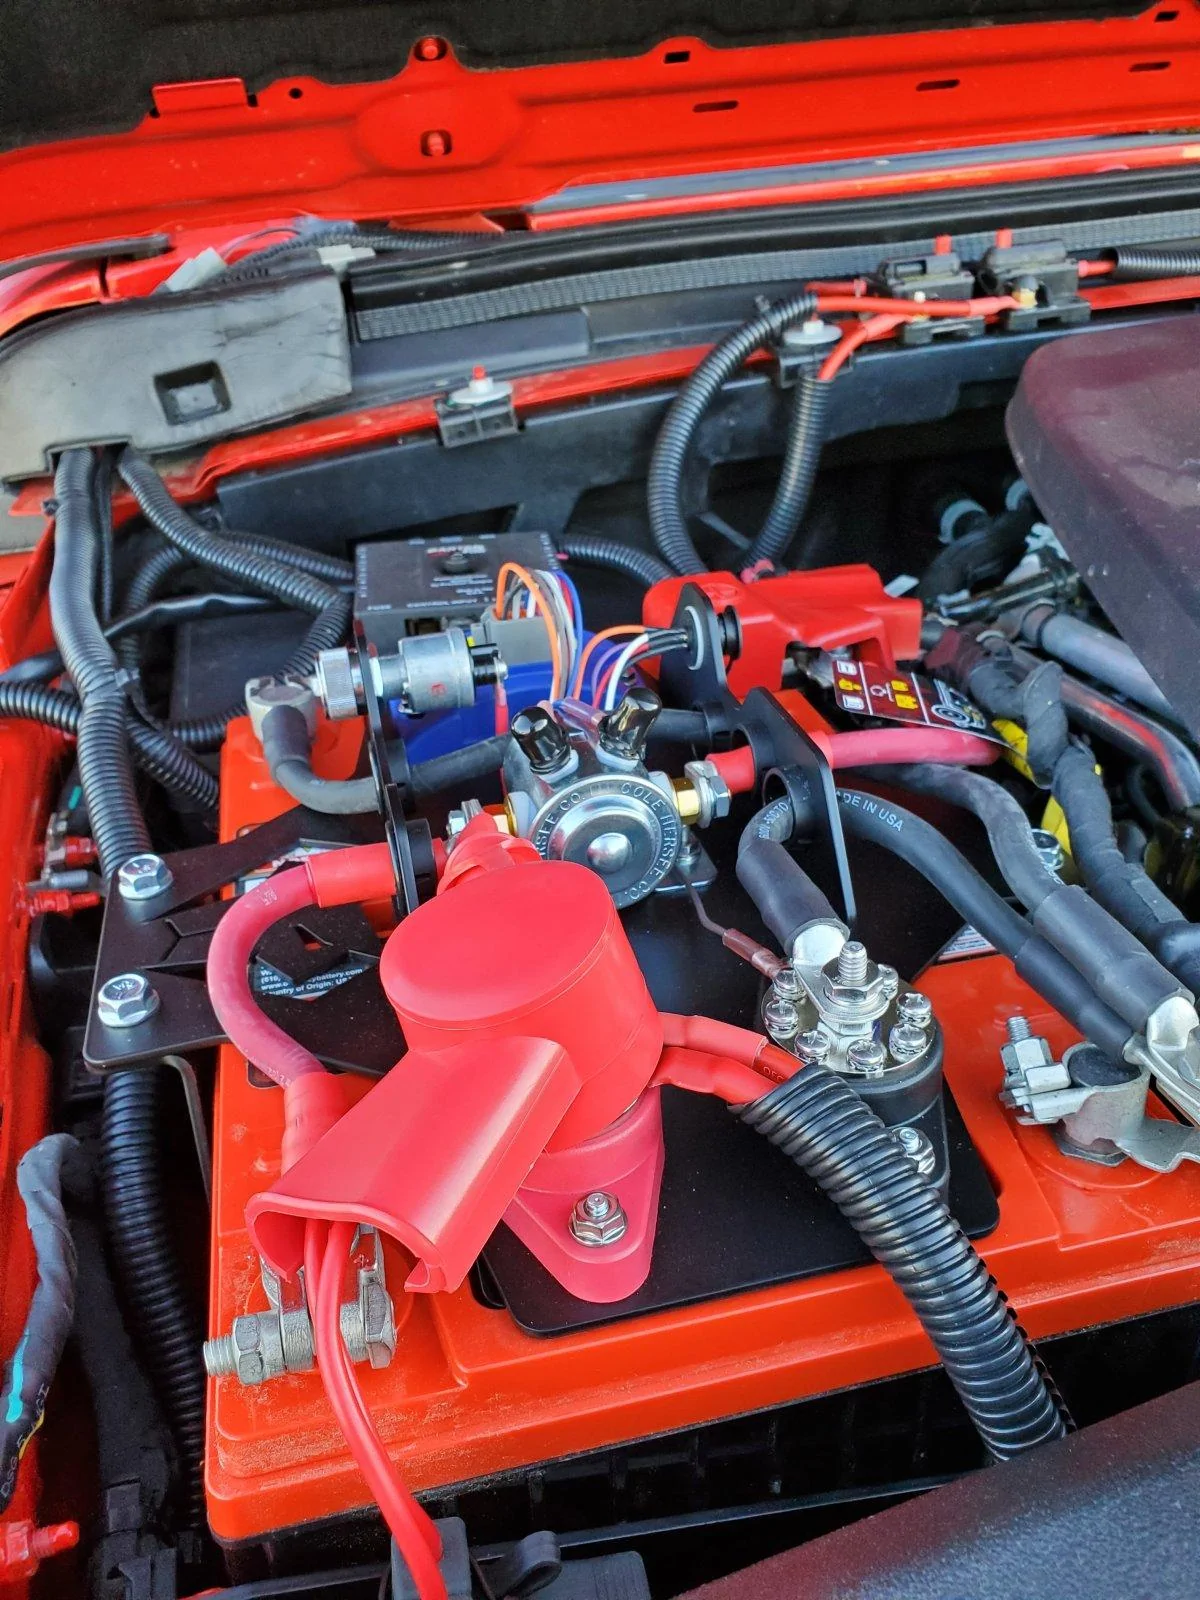
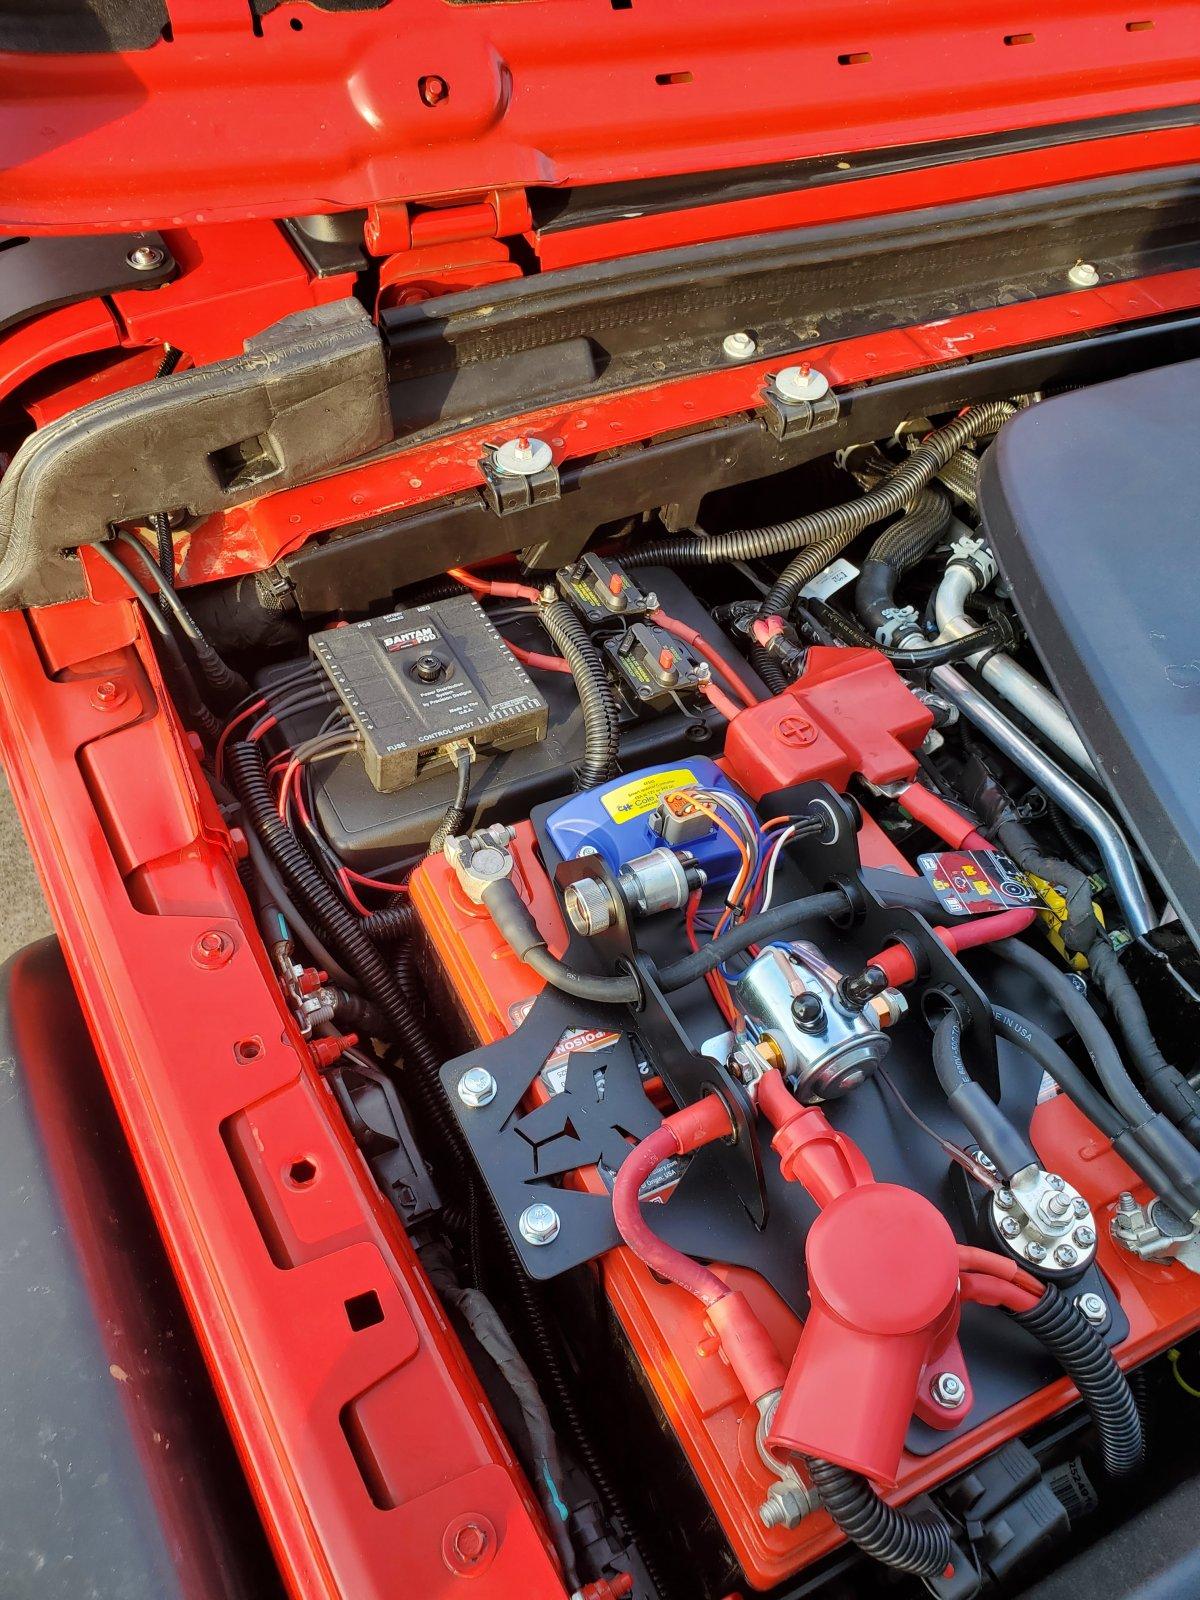
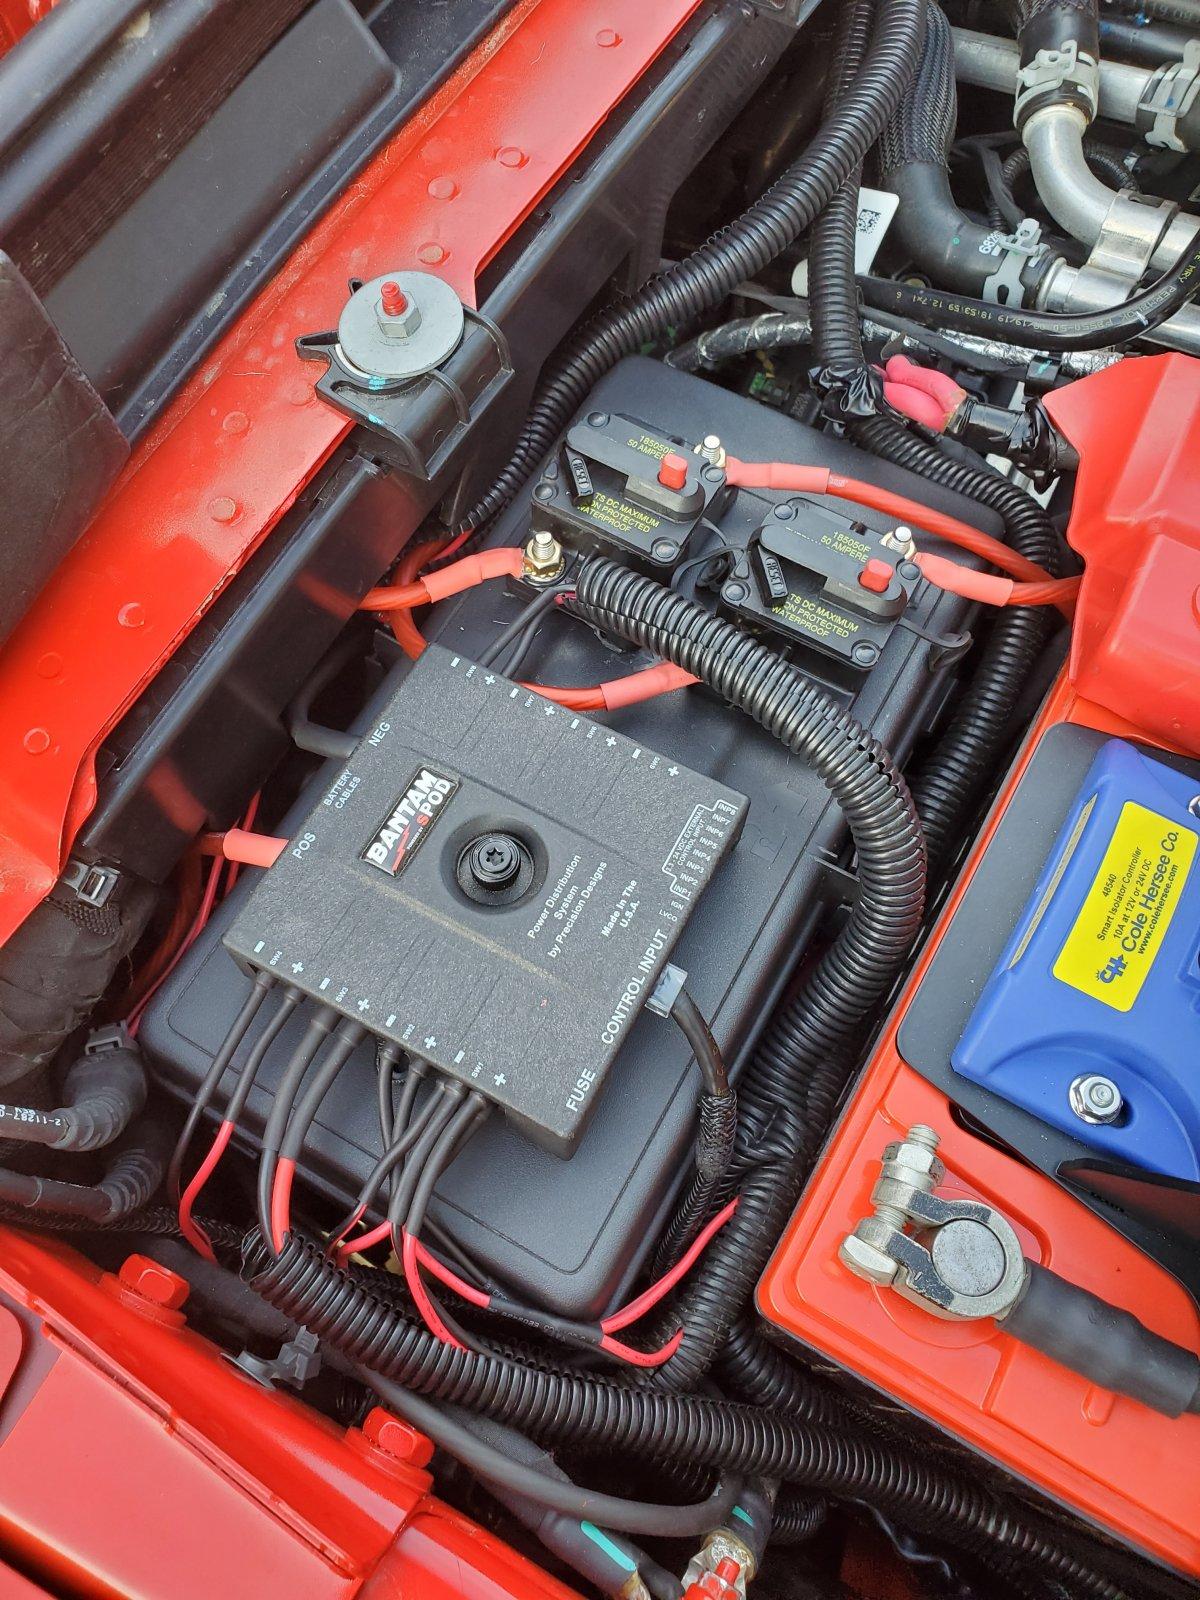
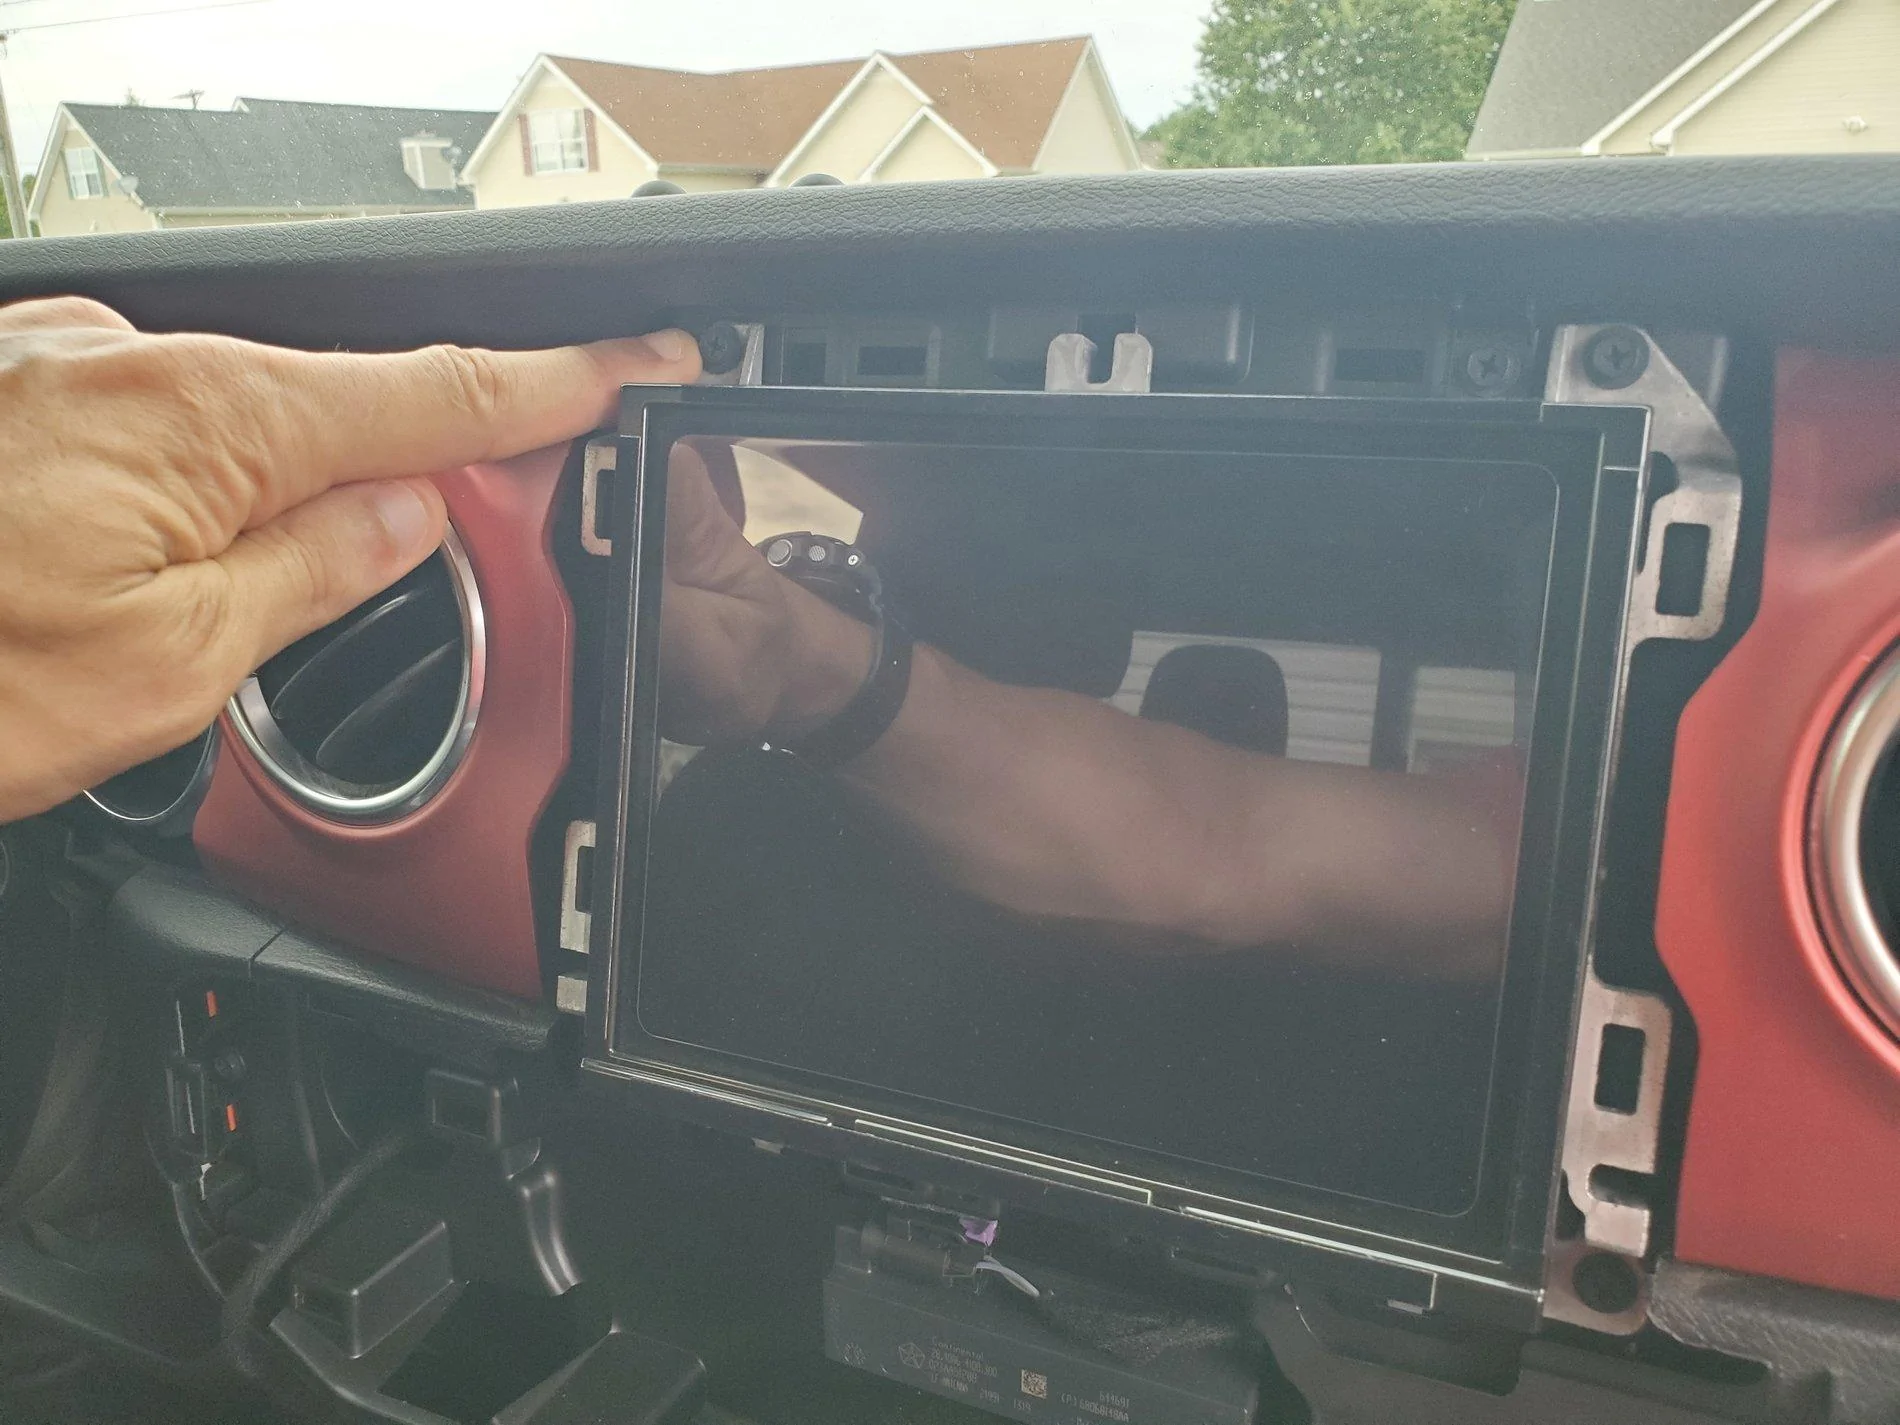
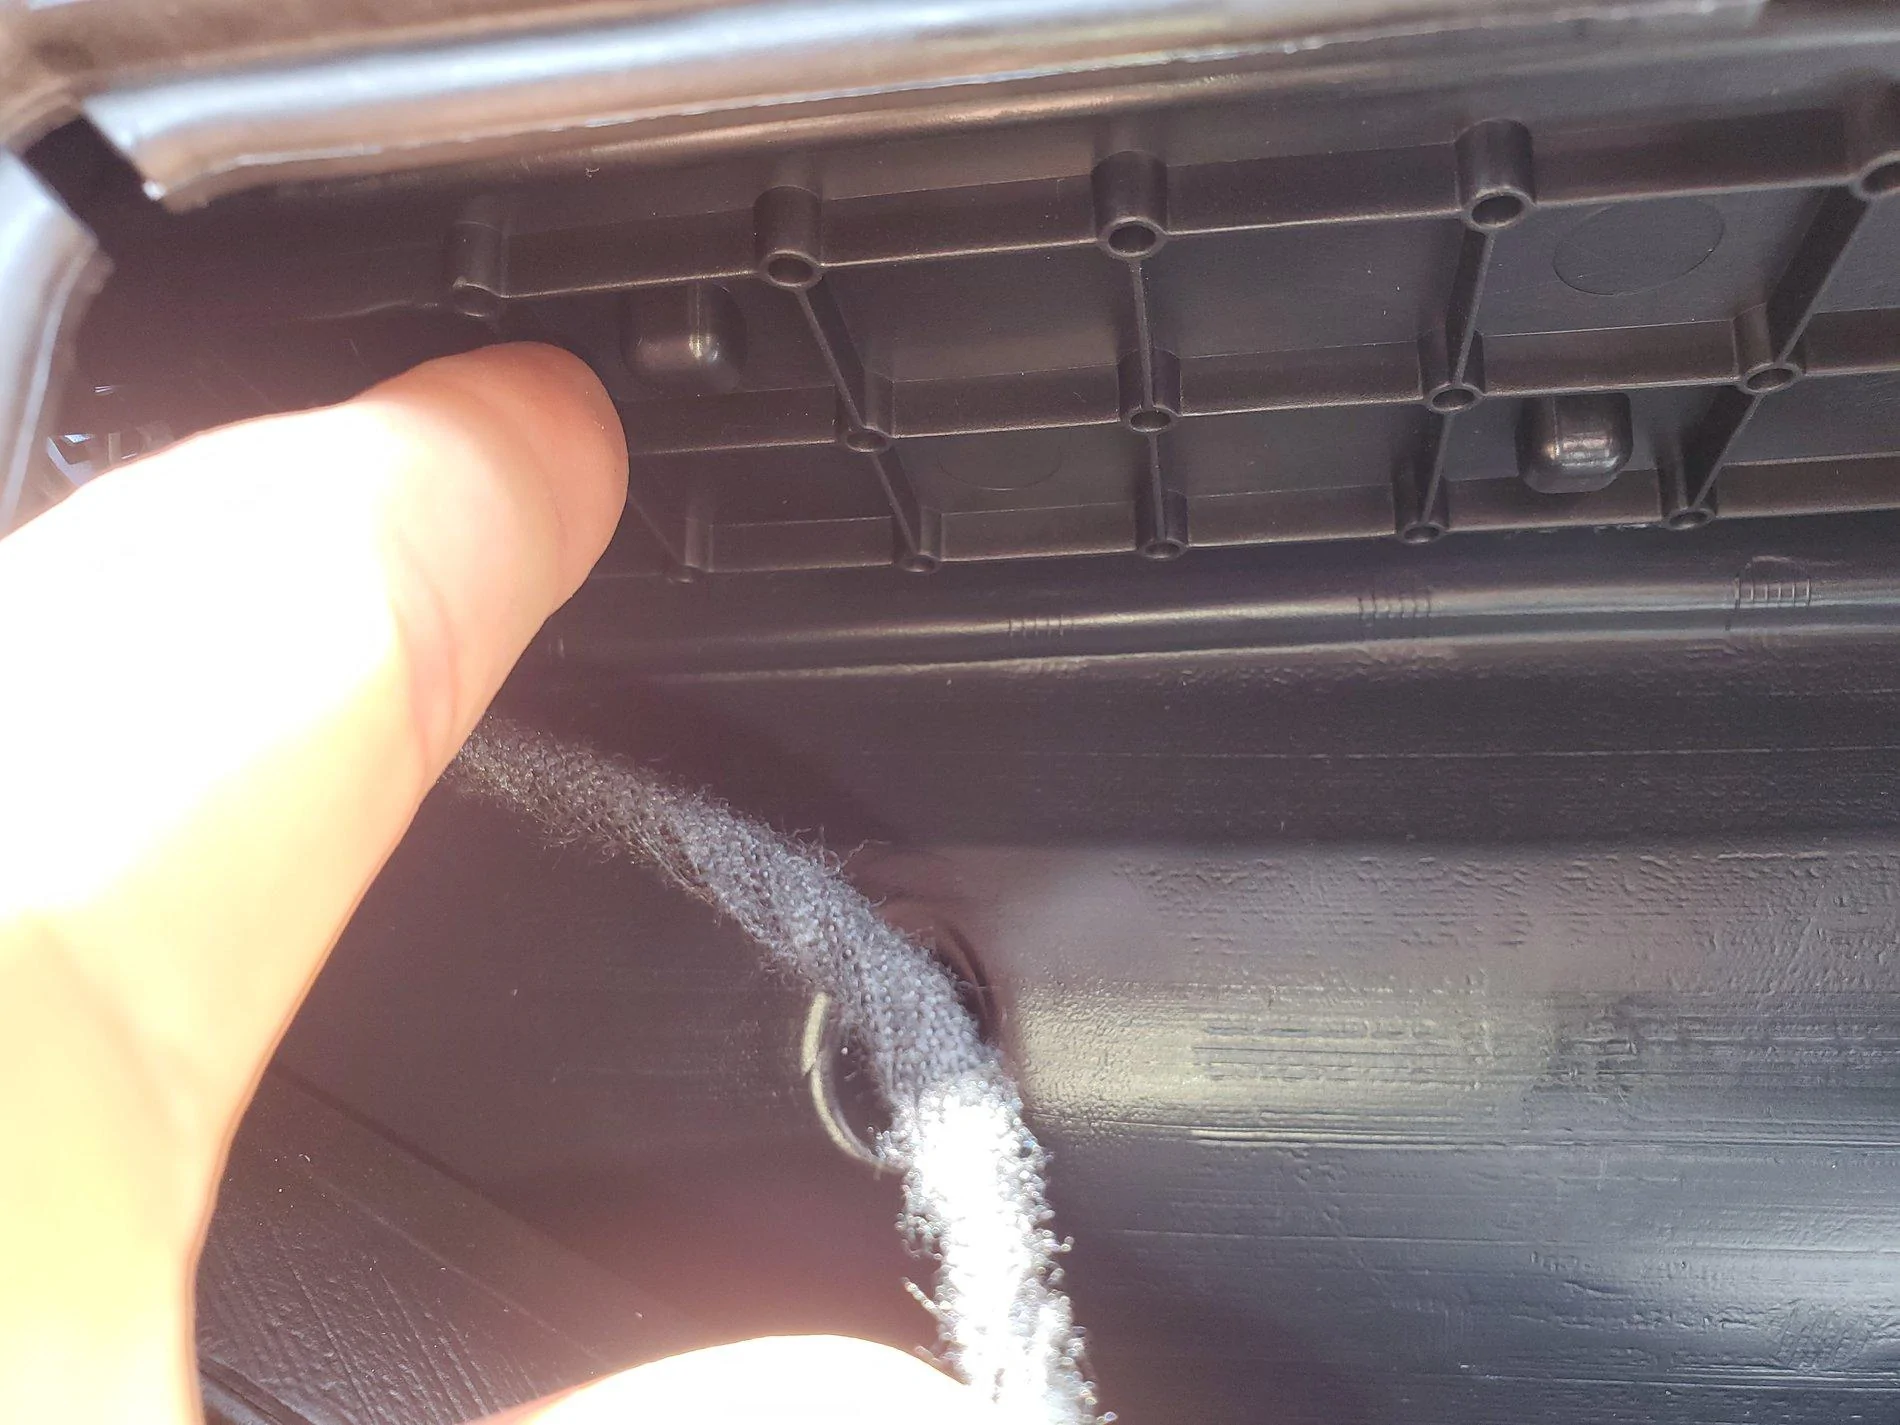
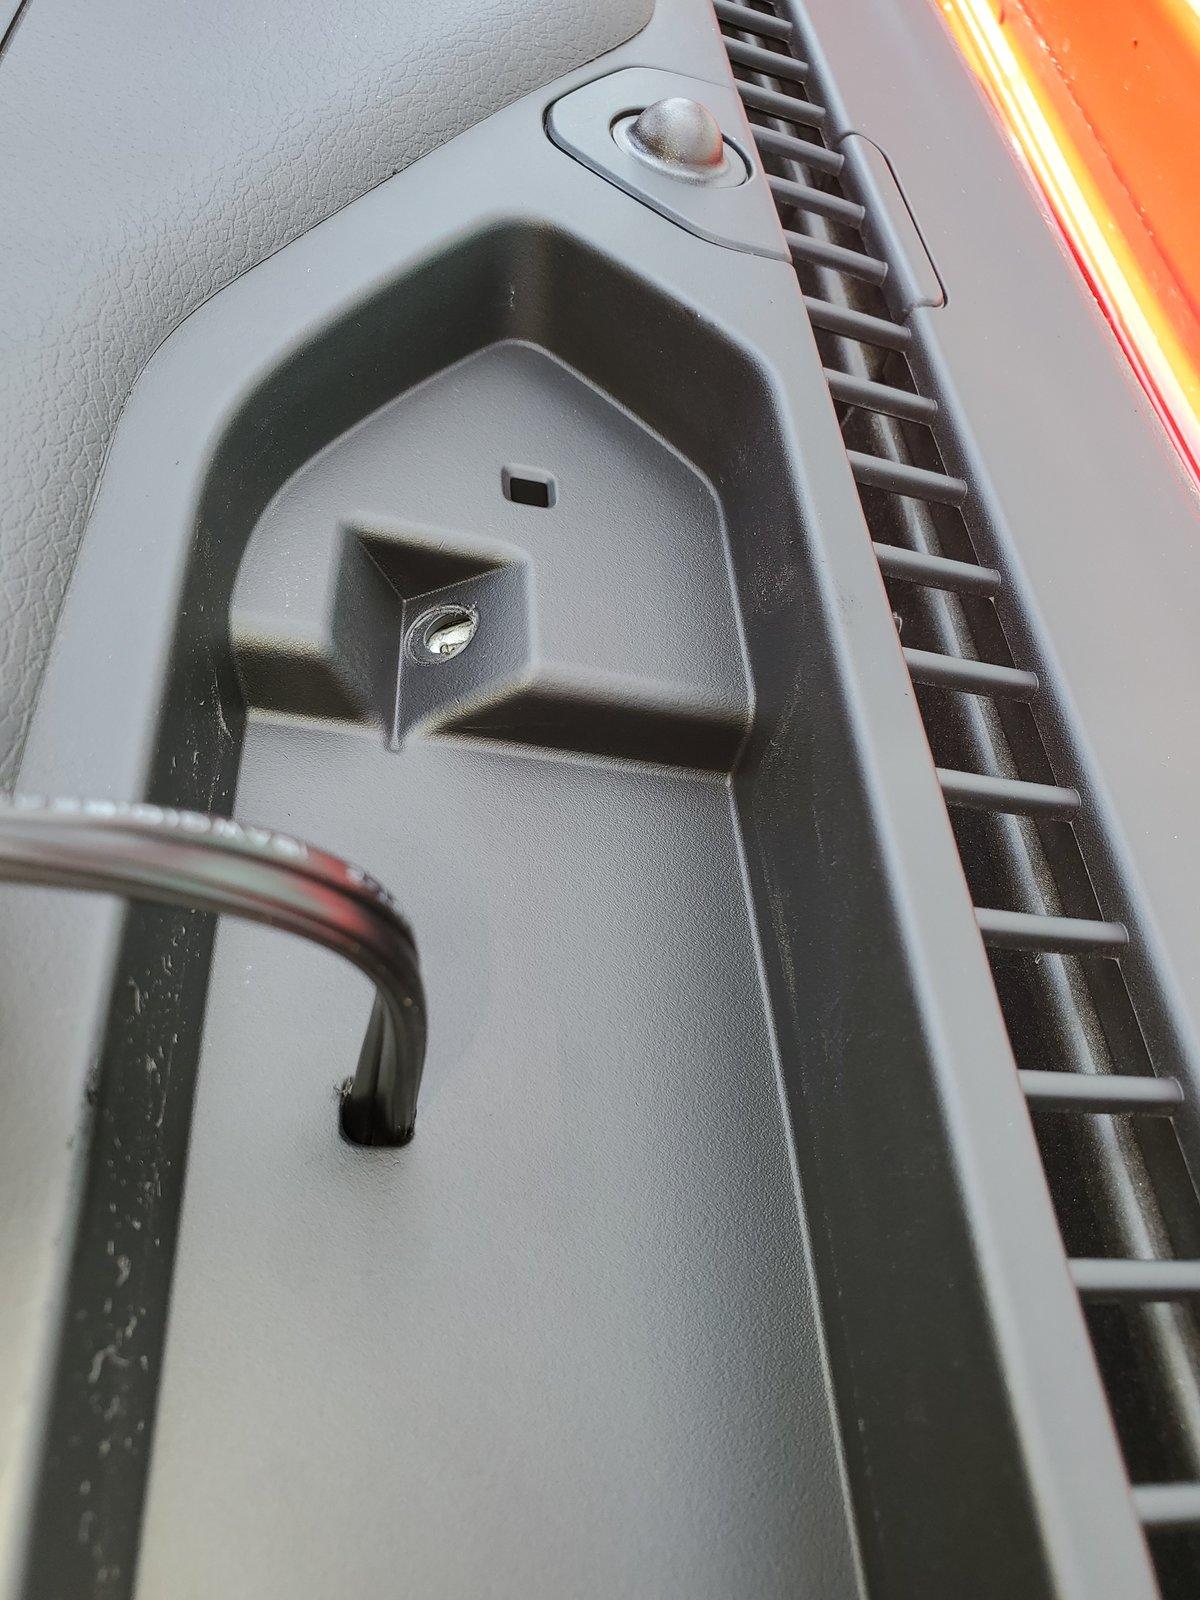
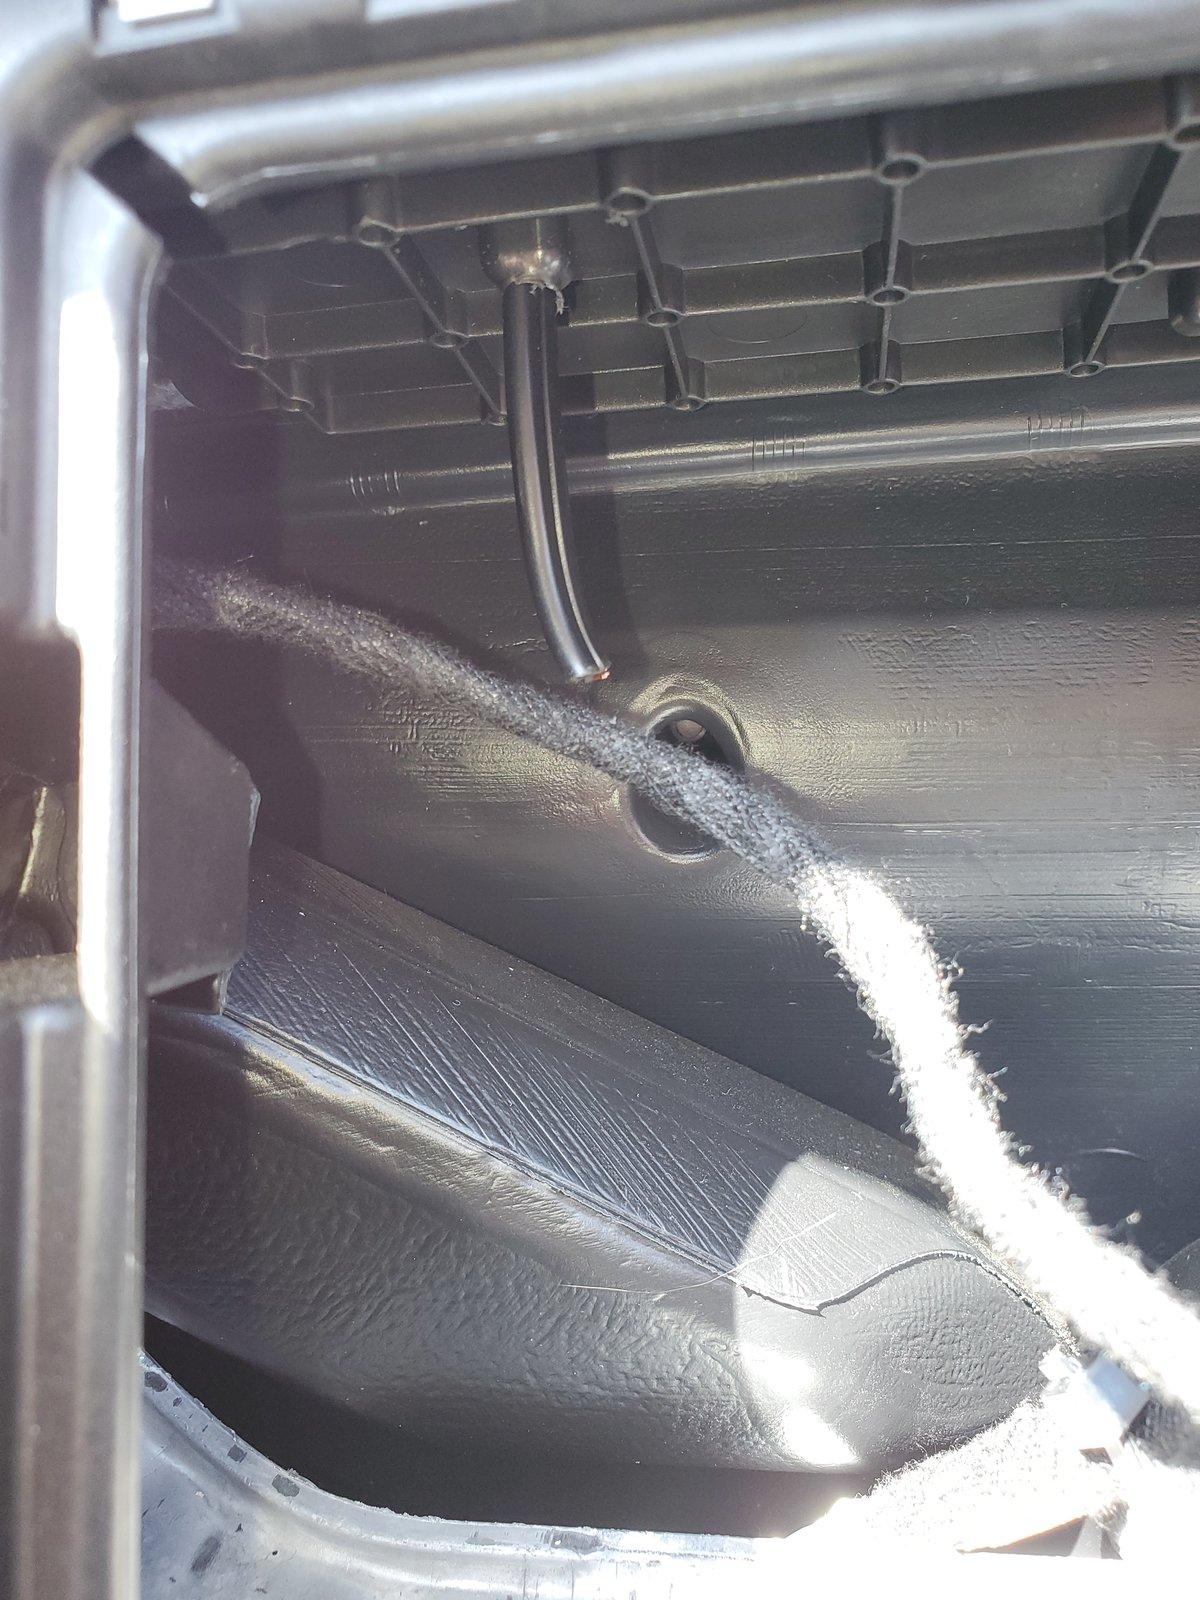
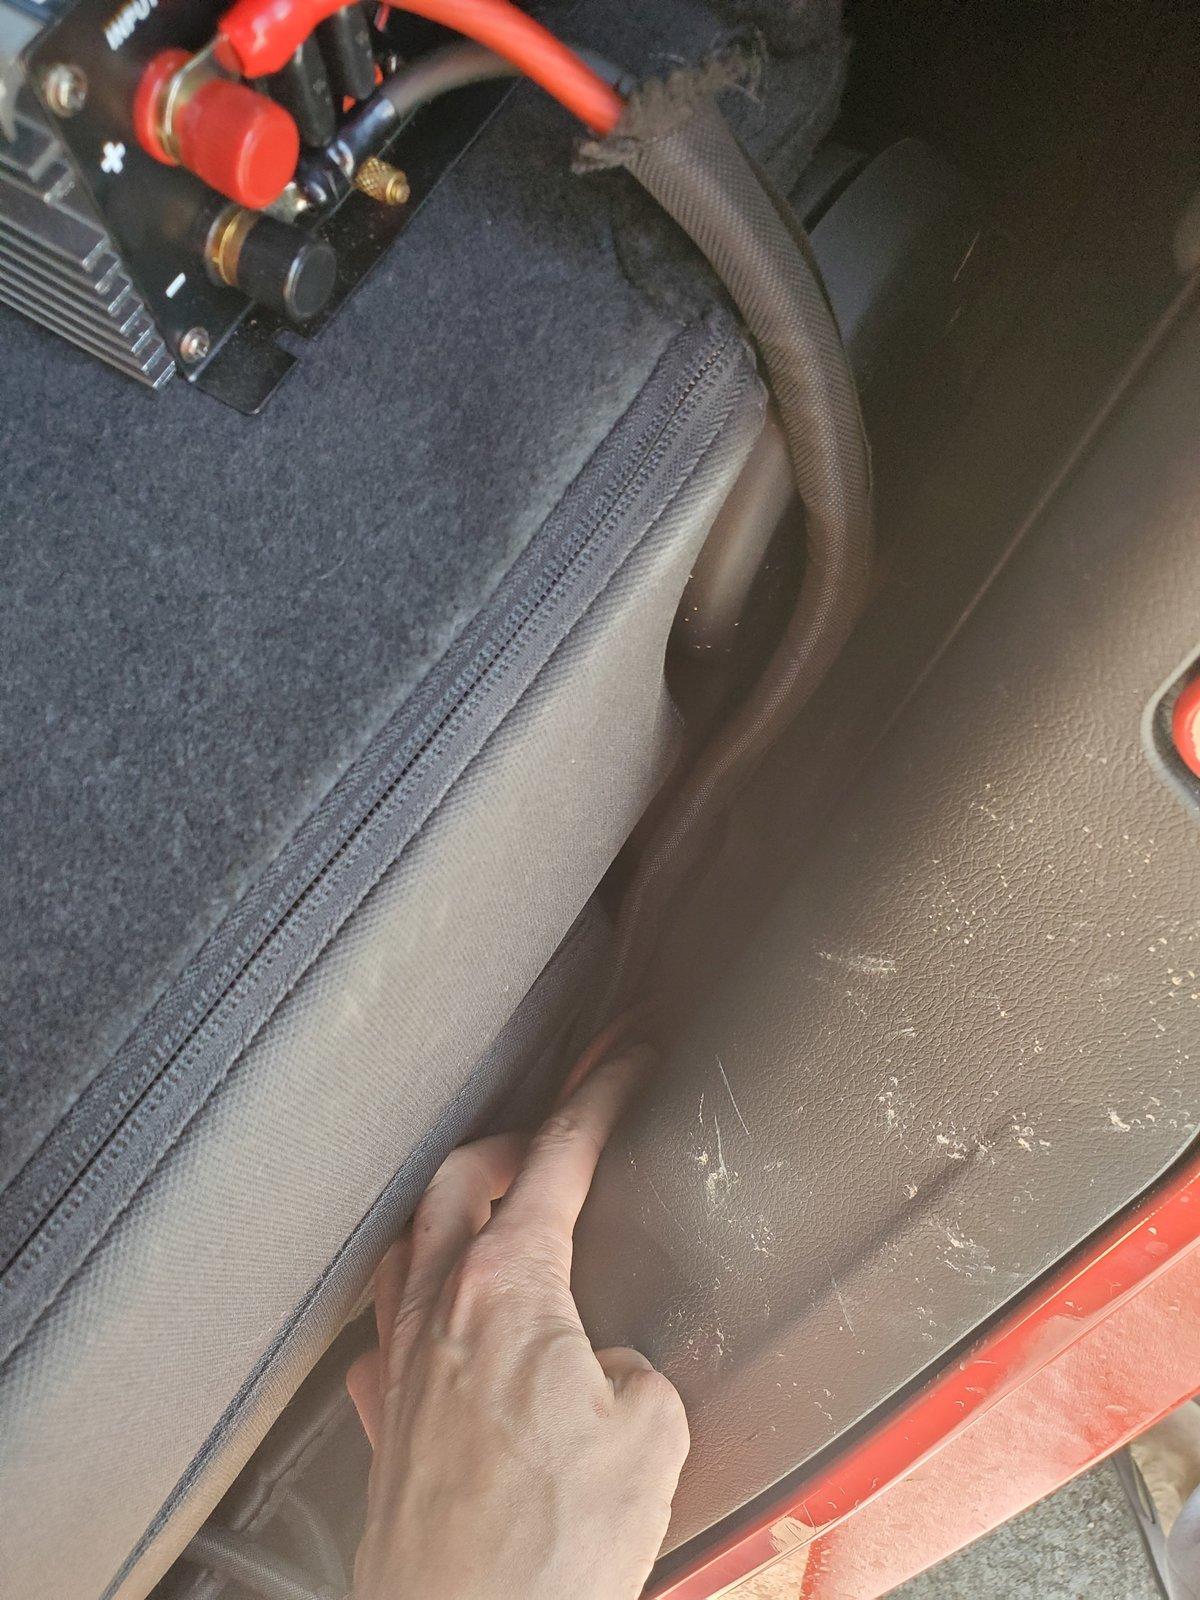
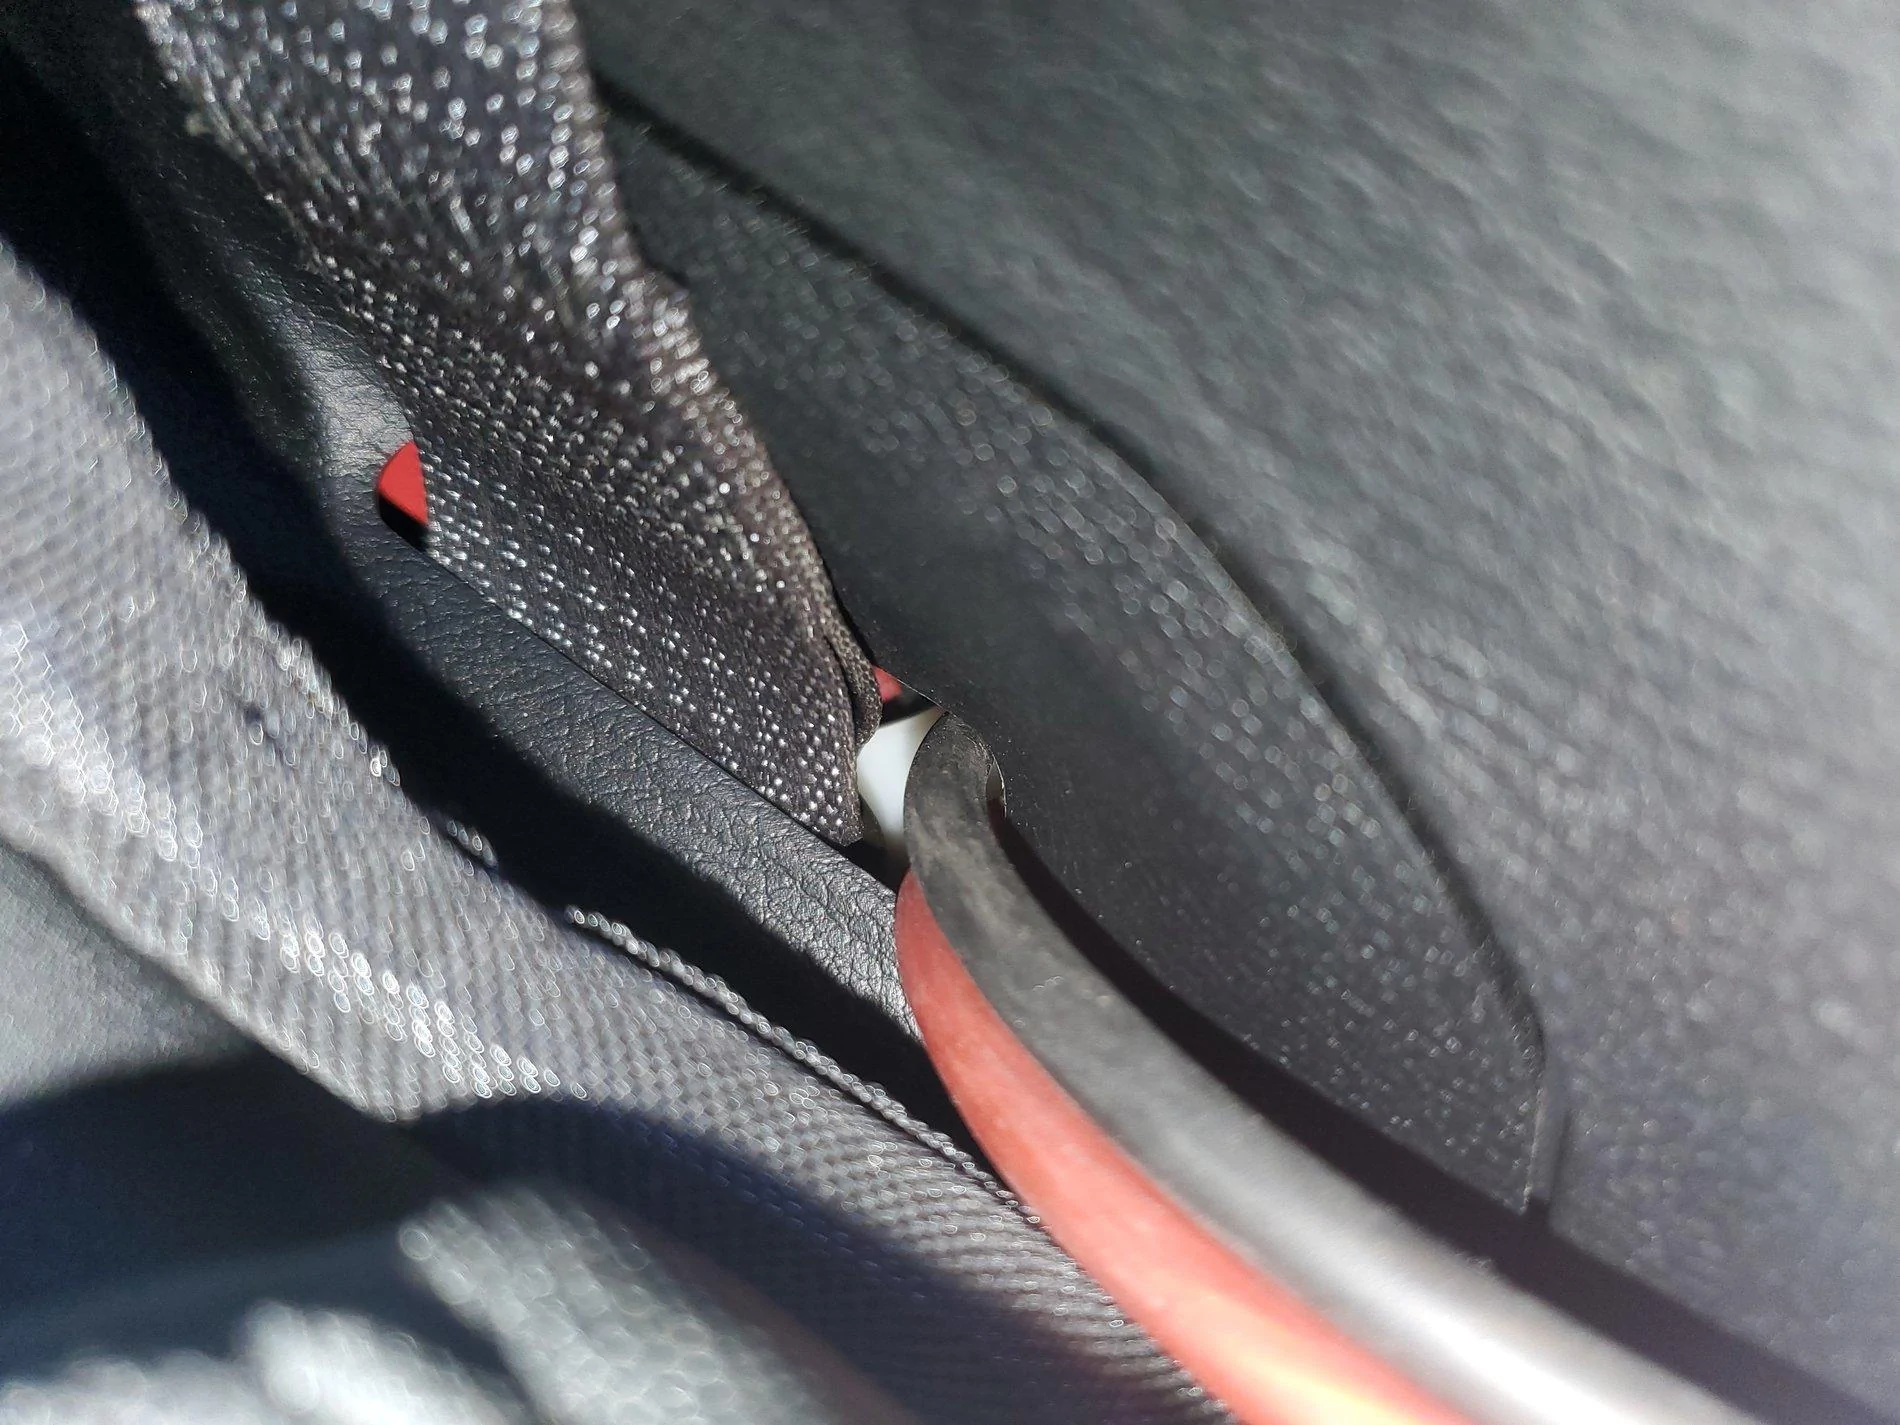
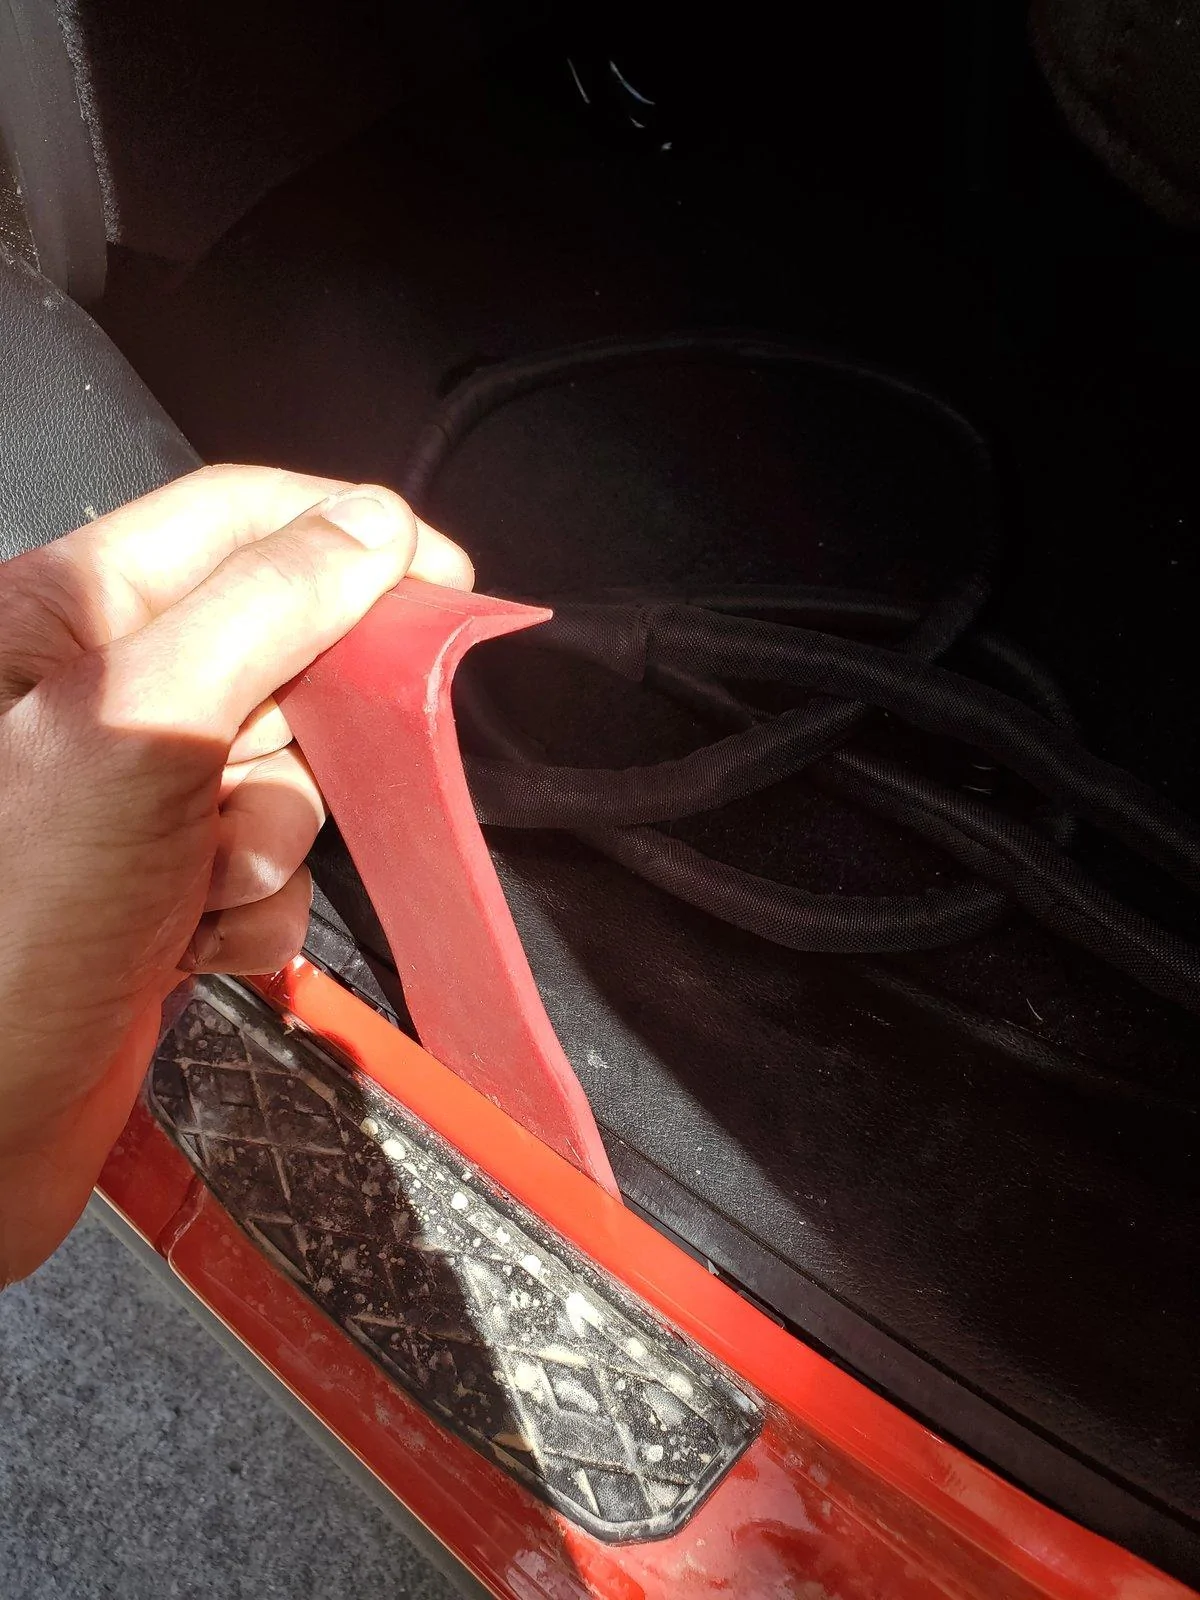
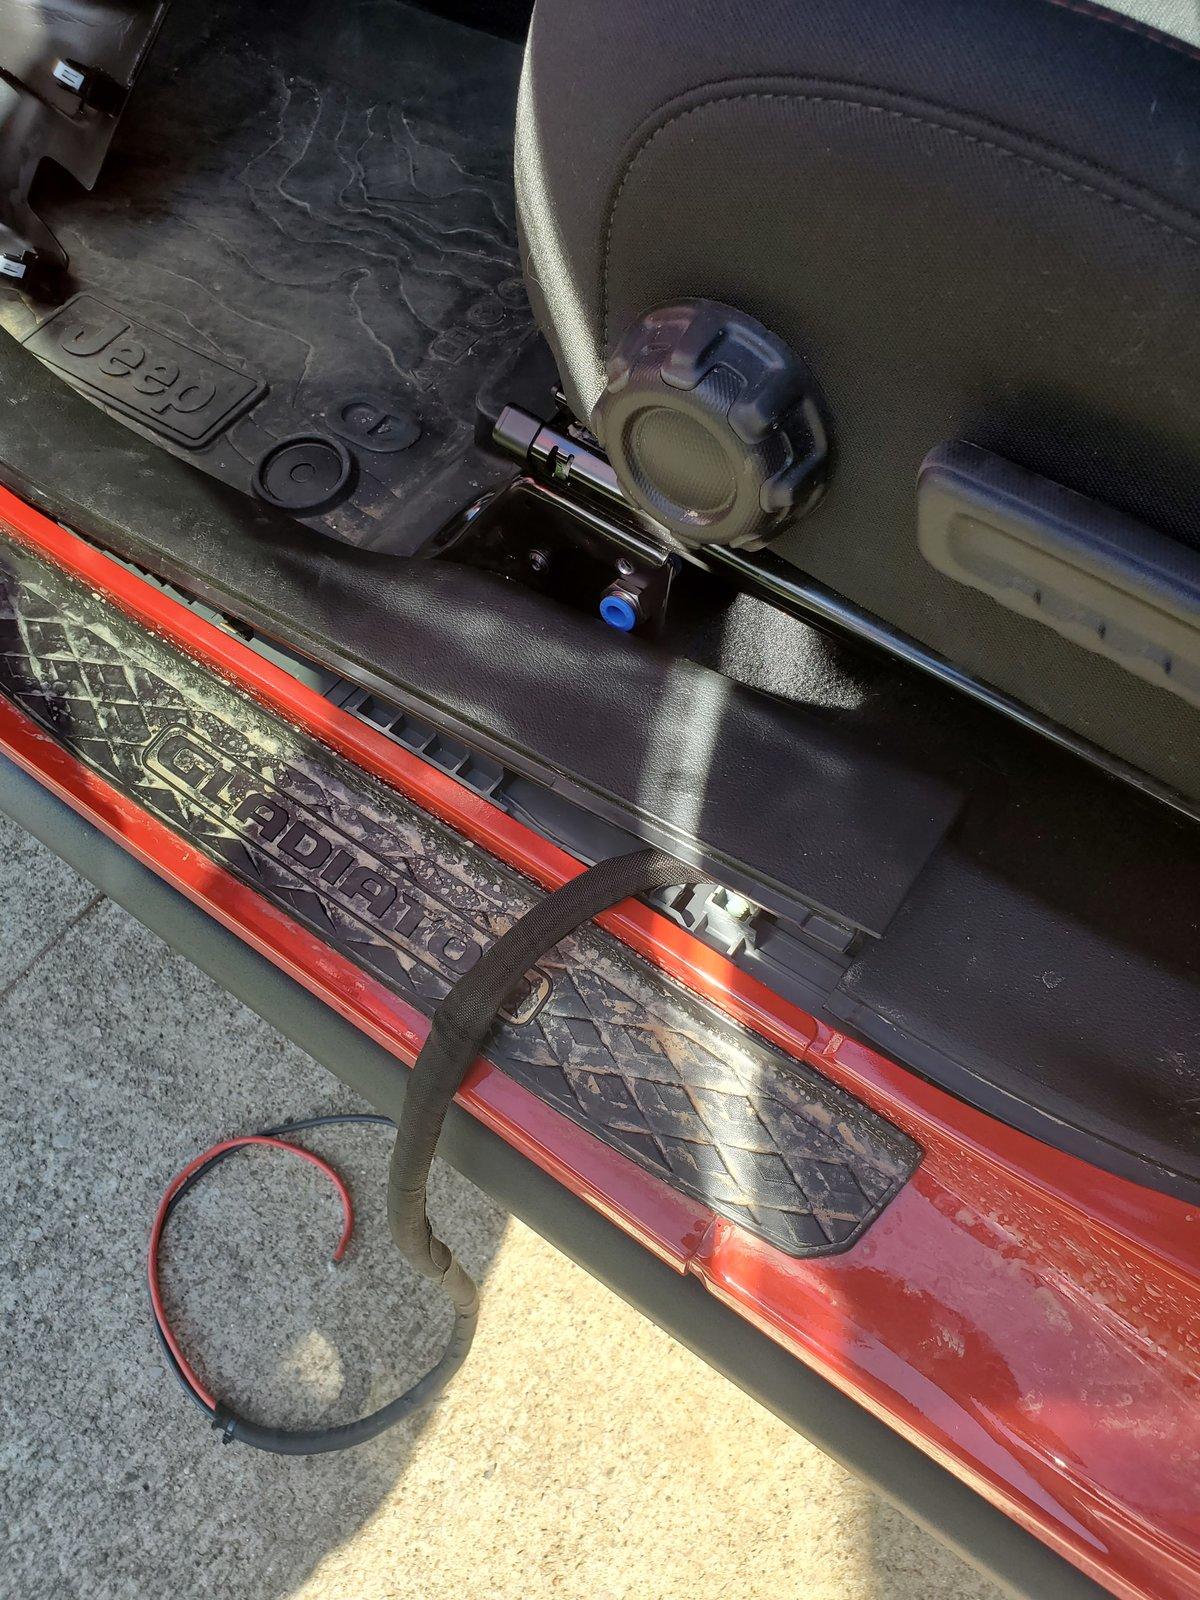
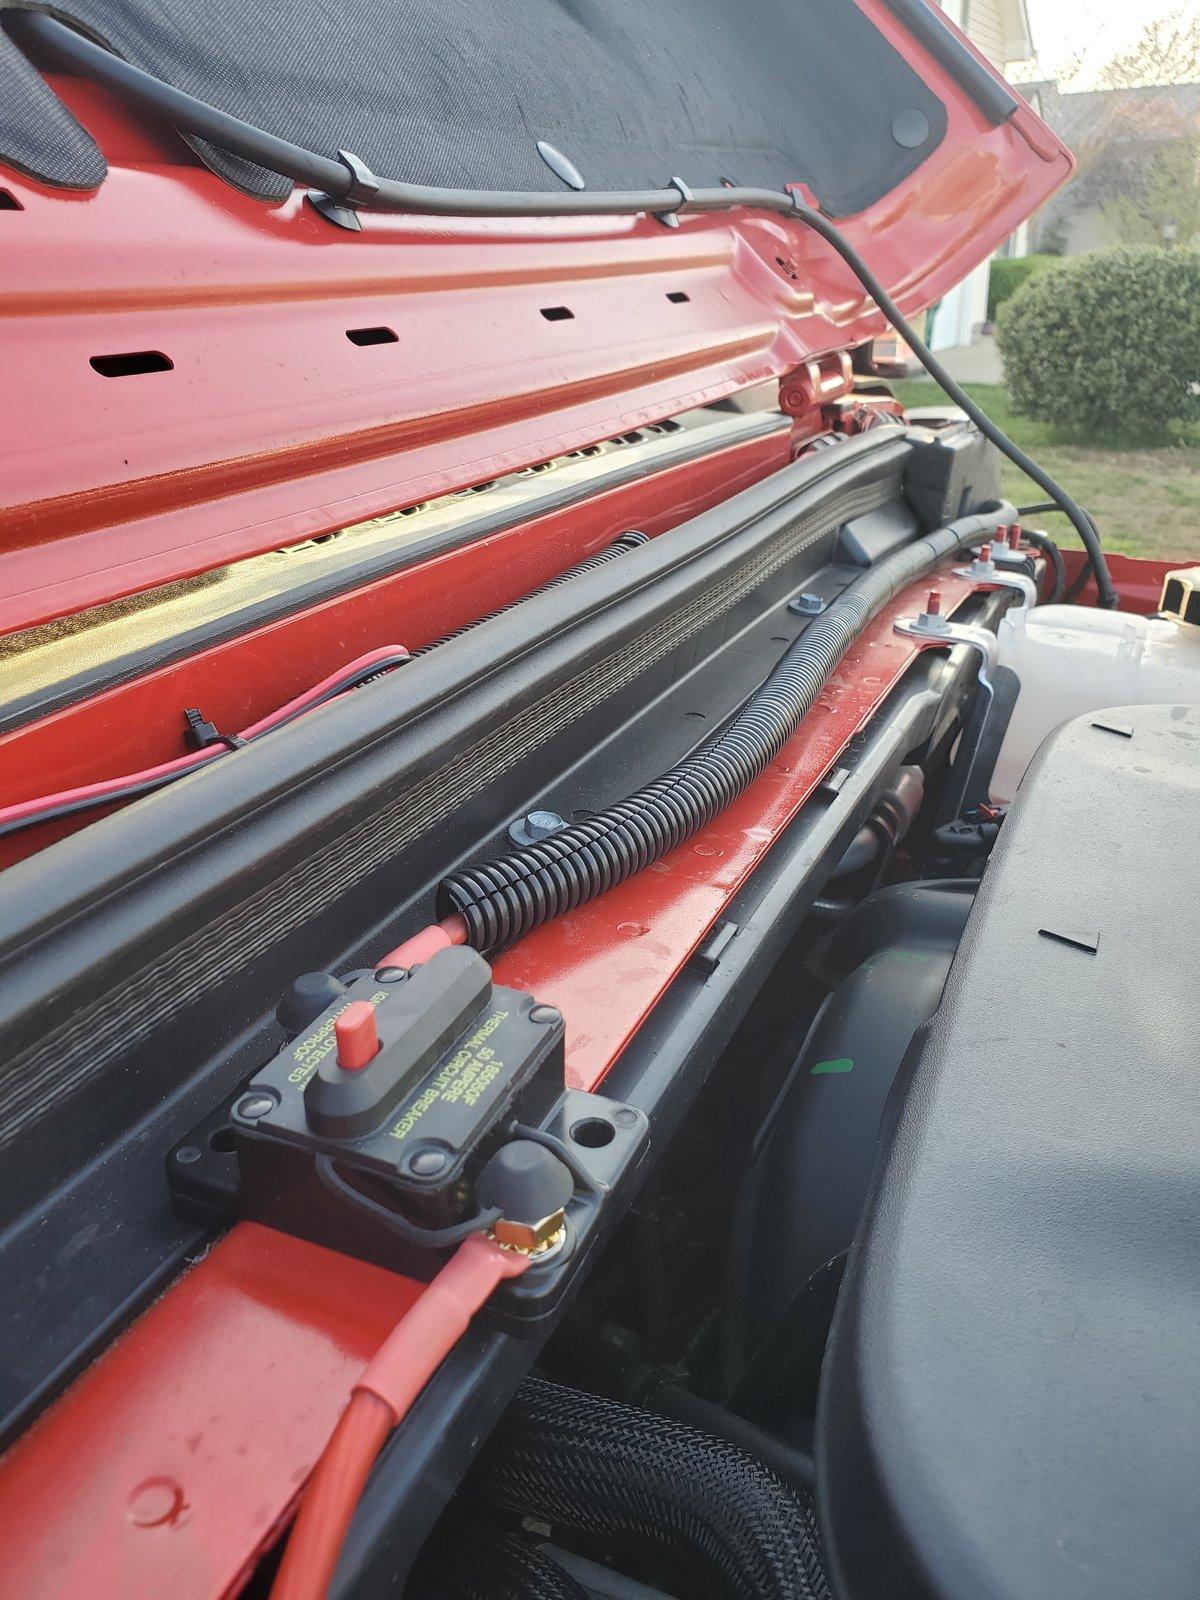
I took pretty much the same route as with my air compressor wiring, just mirrored to the driver's side. I installed it behind the rear driver's side seat using heavy duty velcro, and ran 8 gauge wire the whole way. Running the wires down to the opening at the base of the seatbelt, I took them through the driver side floor trim towards the driver floor well, and up and out in to the engine bay through the door jamb and cowl. There, it's attached to a 50a circuit breaker that is secured in the engine bay with double sided tape above the firewall

Jeep Gladiator Ares - Build Thread 20200403_150103
Jeep Gladiator Ares - Build Thread 20200403_150122
Jeep Gladiator Ares - Build Thread 20200403_150524
Jeep Gladiator Ares - Build Thread 20200403_151825
Jeep Gladiator Ares - Build Thread 20200405_175211


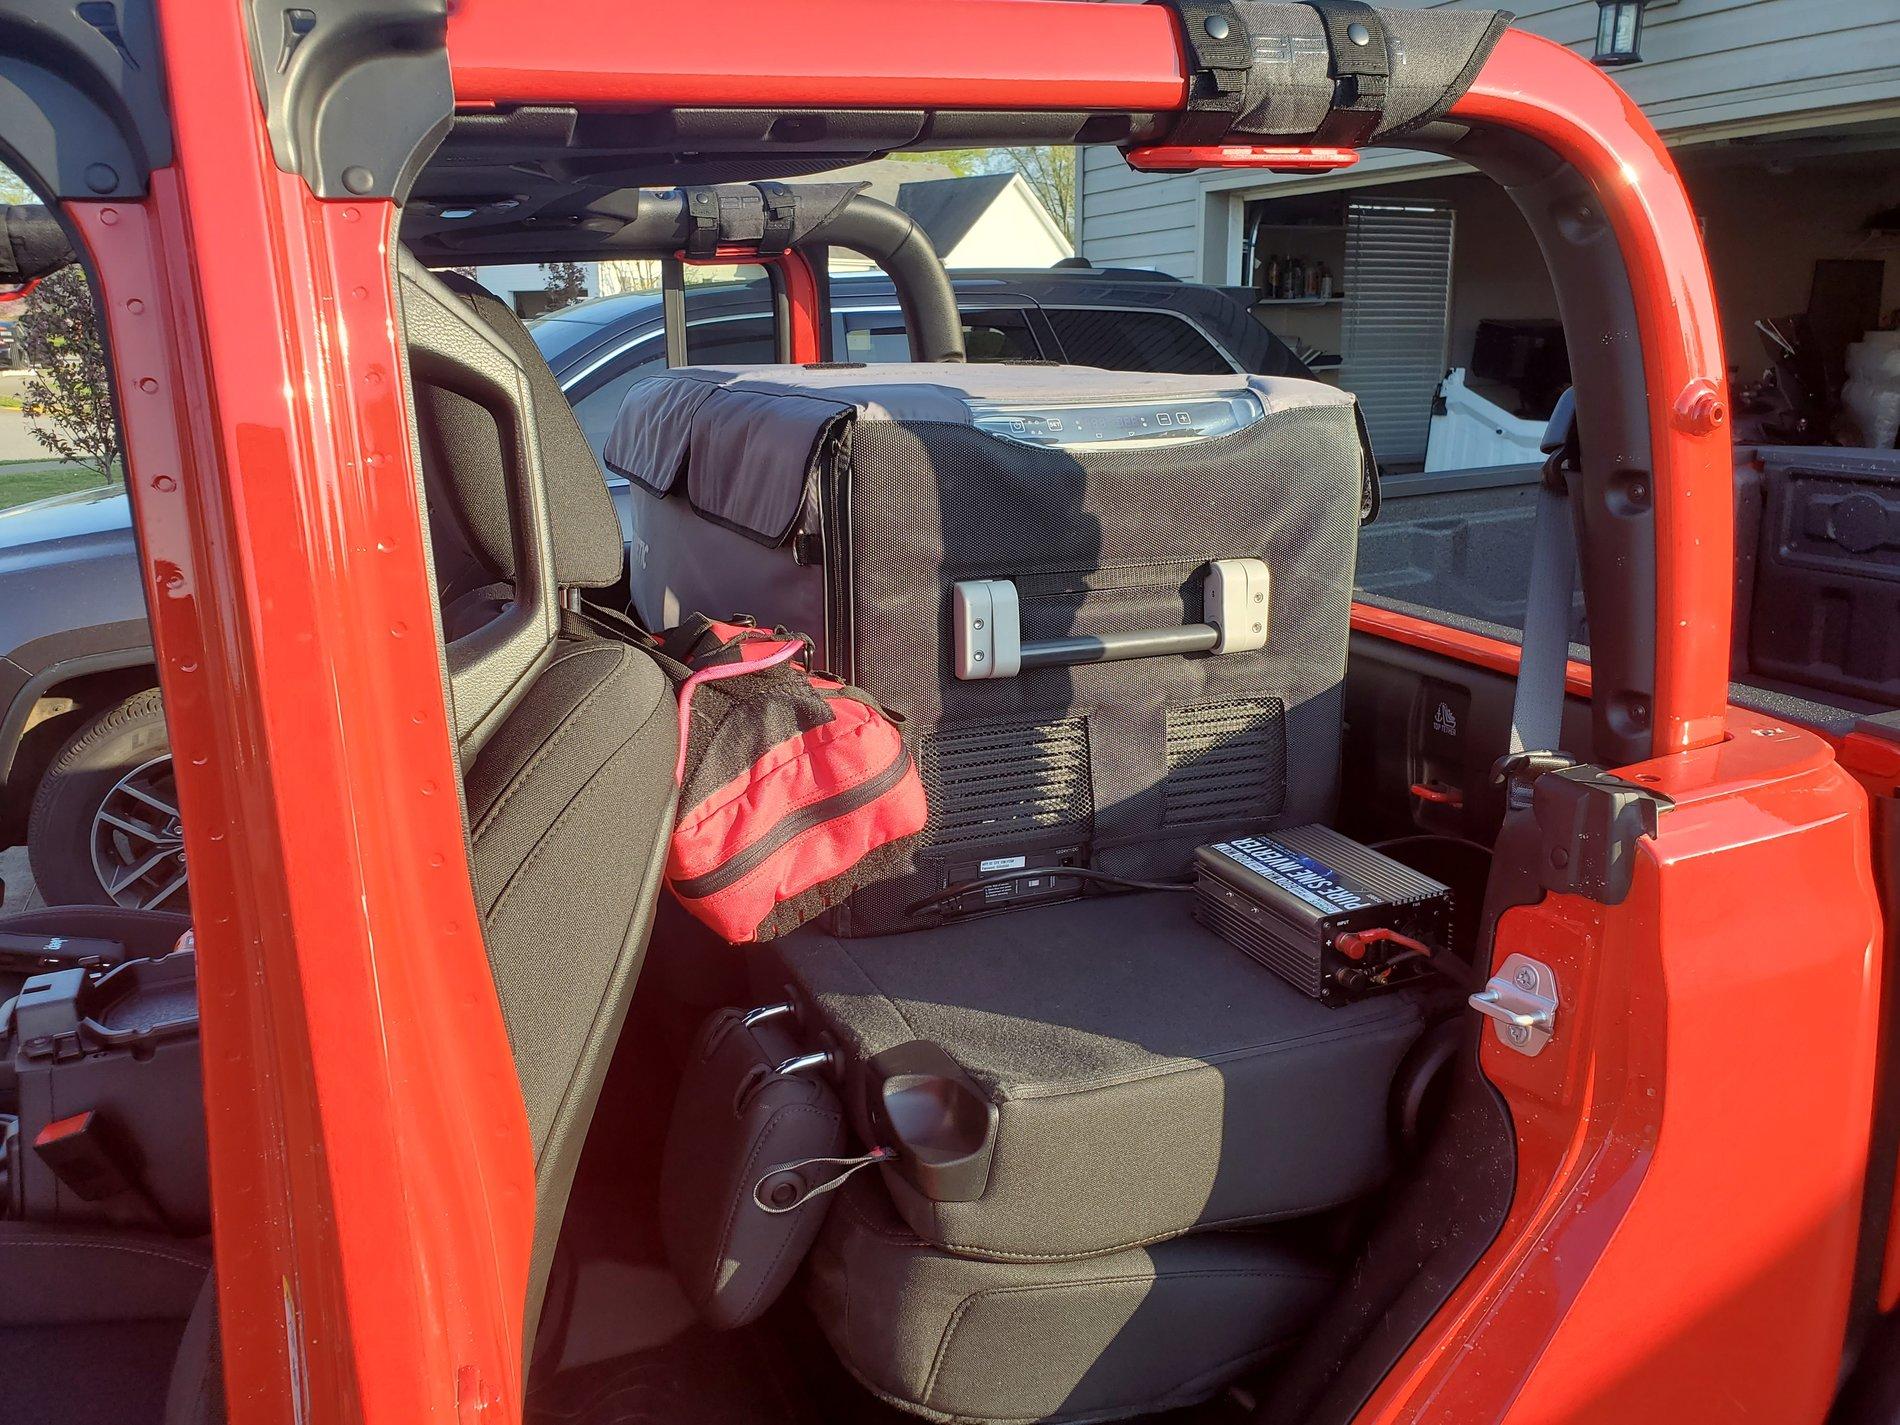
This was a fairly low priority mod for me, but I had all of the parts laying around (except for the circuit breaker that I ordered) and I had the time, so I figured why not? I did a test fit with my fridge and made sure the inverter was functioning properly. I even popped the rear passenger door back on to make sure I had clearance. No issues whatsoever.

Jeep Gladiator Ares - Build Thread 20200405_175111
Jeep Gladiator Ares - Build Thread 20200405_175136
Jeep Gladiator Ares - Build Thread 20200405_175124


All in all, it was a pretty quick, easy and useful mod, and it gave me something to do while debating what my next big project will be.
Sponsored

 
Last edited:

KX L

Well-Known Member
First Name
KX
Joined
May 1, 2019
Threads
16
Messages
419
Reaction score
488
Location
Lake St Louis MO
Vehicle(s)
2017 CVO Street Glide; 2022 JT Mojave with 6MT
Occupation
Retired
As usual, more coming soon![/QUOTE]

Really enjoy following your build.
 
OP
OP
TheHops

TheHops

Well-Known Member
Joined
Dec 23, 2019
Threads
33
Messages
559
Reaction score
823
Location
Nashville
Vehicle(s)
2020 Jeep Gladiator Rubicon
Build Thread
Link
Vehicle Showcase
1
Thanks! I appreciate it.
 
OP
OP
TheHops

TheHops

Well-Known Member
Joined
Dec 23, 2019
Threads
33
Messages
559
Reaction score
823
Location
Nashville
Vehicle(s)
2020 Jeep Gladiator Rubicon
Build Thread
Link
Vehicle Showcase
1
Another small project knocked out.

Today I installed a dedicated 12v port for my camp fridge, behind the rear drivers side seat to complement the inverter that I recently installed. That inverter will now be freed up for the sole purpose of powering small electronics and camera gear while off grid.

The project itself was very easy, since I already had power run from the battery behind the seat for my inverter (see previous posts for that). I found an ARB surface mounted threaded socket for about $15 to use for the install. This allows me to screw in my fridge power, so there's no worry of it shaking loose while on rough roads. I did slightly modify the housing, drilling out an inlet to 5/8" to comfortably run the wires and loom in.

20200409_164328.jpg
20200409_164333.jpg
20200409_164338.jpg
20200409_164910.jpg


I decided to use the small removable panel behind the seat for mounting, so that I could easily replace the panel with no evidence of drilling at a later time if need be. I simply lined up the ARB housing, centered it, marked and punched out two small holes with my dremel.

20200409_175823.jpg


After that, I cut two feet of positive and negative 10 gauge wire, and crimped on one ring terminal to piggyback off of the studs on my inverter, and one blade receptacle to attach to the ARB housing on each end of each wire. I sheathed the wires in loom, stuffed them in to the ARB housing, and secured it all with a thick zip tie so they could not back out of the hole or off of the blades.

20200409_183655.jpg
20200409_185550.jpg


I then bolted the housing on to the panel with two sets of 3/4" long bolts, flat washers, lock washers and nuts, snapped it back in to place, and that was that!

20200409_190033.jpg
20200409_190042.jpg


Again, a very easy, cheap project, but one that will be very useful once I get off grid and start camping. Shout out to @capercrew02 for schooling me on why running my fridge off of the inverter wasn't the best idea. Never stop learning!

My next major mod planned is the vehicle winch setup. After that, I'll be diving in to a dual battery setup, and will be laying the framework for a solar system to support all of these electronics while I'm off grid. As always though, the order of my big mods tends to be dictated by current sales.

More to come!
 

Sponsored

Gatorized

Well-Known Member
Joined
Sep 13, 2019
Threads
6
Messages
1,663
Reaction score
1,535
Location
ME/NH
Vehicle(s)
‘06 CRV, ‘14 Mazda3, ‘20 JTR (Gator)
Well done on your mods so far! A helpful addition to your thread would be links to the various items you have added. You could edit your first post with links to the items you add so they would be easily accessible. Have you had any issues with leaking or chafing on the weatherstripping with the routing of wires out the door into the cowling?
 
OP
OP
TheHops

TheHops

Well-Known Member
Joined
Dec 23, 2019
Threads
33
Messages
559
Reaction score
823
Location
Nashville
Vehicle(s)
2020 Jeep Gladiator Rubicon
Build Thread
Link
Vehicle Showcase
1
Well done on your mods so far! A helpful addition to your thread would be links to the various items you have added. You could edit your first post with links to the items you add so they would be easily accessible. Have you had any issues with leaking or chafing on the weatherstripping with the routing of wires out the door into the cowling?
Thanks! I appreciate that. And, I'll look in to doing that. That would be a nice addition for sure.

I've had zero issues with it. The weather stripping is substantial enough that it stops water under any conditions that I've observed so far. I washed it the other day with a power washer as well, and had no water in the cab after the fact. No evidence of chasing or wire breakage either. Fingers crossed!
 
OP
OP
TheHops

TheHops

Well-Known Member
Joined
Dec 23, 2019
Threads
33
Messages
559
Reaction score
823
Location
Nashville
Vehicle(s)
2020 Jeep Gladiator Rubicon
Build Thread
Link
Vehicle Showcase
1
More additions today. I decided to take advantage of the cool weather and sunshine.

I picked up an Airaid intake on a decent discount a little while back and it arrived this morning. Truth be told, I'm kind of disappointed in the build quality. I had the same intake on another vehicle and it was great. On this one, various mounting points didn't match up well, and I had to drill out holes on panels in order to get the hardware to line up with their threads properly. Those issues aside, installation was pretty straightforward.

That aside, it sounds great under load with a distinct intake howl, and the engine seems to rev a bit more freely.

20200410_142747.jpg
20200410_161915.jpg
20200410_161852.jpg


First impressions: I wouldn't buy it again (at full price). I have no plans to add a snorkel though, and I got a great deal on this, so overall no regrets. We'll see how the long term opinion is as far as economy and power. Airaid claims +12hp, but we all know how that goes.

After that, I was bored and stared at the Jeep for a while, trying to come up with something else to do, and managed to come up with a way to make my old Bracketeer work for my 2.5lb extinguisher. I noticed that I could strip some of the hardware from the bracket, invert the mounting feet, and they'd slip right in under the seat bolts!

20200410_171716.jpg
20200410_171712.jpg

20200410_172329.jpg


It ended up being rock solid. I've used this bracket on my past two vehicles, but this improvised fitment is the best use of it yet. Due to it being behind the seat now, I may get an Element to mount in reach on the roll bar for in-cab/immediate emergencies (trapped in a rollover with fire spreading to my body, etc...I'd rather have it and not need it, than need it and not have it).

Aside from that, I repositioned and inventoried my medical bags. They're no longer quick release, but they're now tucked up much higher on the seat back and they won't flop around or fall off of the velcro backing every time I hit a large bump. I have a red trauma bag for life/limb/eyesight, and a black first aid bag for your typical ouchies, pills, bandages, etc.

20200410_181846.jpg


That's all for now!
 
OP
OP
TheHops

TheHops

Well-Known Member
Joined
Dec 23, 2019
Threads
33
Messages
559
Reaction score
823
Location
Nashville
Vehicle(s)
2020 Jeep Gladiator Rubicon
Build Thread
Link
Vehicle Showcase
1
Today was a big day. I completed a huge priority mod towards my build...

Jeep Gladiator Ares - Build Thread 20200417_165319


That's right! It's the Genesis Offroad dual battery kit. The two Odyssey 25 series batteries I used are rated at 850 CCA and 65 ah each. I've been wanting to install a dual battery system in my last two vehicles, but there were no kits readily available for what I drove, and I never got around to drawing up my own plans. This will go a long way towards making sure that my food stays fresh, my devices stay charged, and that I don't get stranded due to a dead battery while off grid. With the solar setup that I'm piecing together as well, I should never be left needing more power.

Install was surprisingly easy, though a bit time consuming. It's hard to say exactly how long the process should be, as I was purposely killing time installing the kit while waiting for the FedEx guy to show up with my batteries, but all in I'd estimate it would have taken me 2.5 to 3 hours straight through. I do however have a lot of wires in my engine bay that I took the opportunity to reroute/clean up to optimize space, so YMMV.

I didn't really take detailed pictures or notes on the install, as the Genesis Offroad JL how-to video is more than sufficient for the JT install. Their instructions are very well done. I did take some pictures at key points though just to show what I was working with. This was my starting point:

Jeep Gladiator Ares - Build Thread 20200421_130002


After yanking the tray, stock battery, auto stop/start battery, fuse box and air box:

Jeep Gladiator Ares - Build Thread 20200421_135514


Cables everywhere there. I'm not going to lie, it was kind of nerve-wracking. I genuinely hate messing with vehicle electrical systems, as it's pretty easy to jack things up, but the detailed and easy to follow instructions from Genesis Offroad gave me a lot of confidence throughout the process.

Here's the new battery tray bolted in:

Jeep Gladiator Ares - Build Thread 20200421_140407


Great built quality, and the powder coating was flawless. This thing is rock solid, and supported 100 pounds of battery without complaint.

A few pictures of me slowly getting things back together; routing wires and replacing the fuse box and sPOD:

Jeep Gladiator Ares - Build Thread 20200421_140421

Jeep Gladiator Ares - Build Thread 20200421_143603
Jeep Gladiator Ares - Build Thread 20200421_151551


Once the batteries showed up, it was just a matter of dropping them in and tightening things down. I did spend a fair bit of extra time rerouting wires, crimping new terminals, adding extra wire loom and just generally trying to clean things up. It certainly doesn't look flawless, but everything is manageable and most importantly, done safely. I will however continue to play with the setup in order to improve the overall look as time goes on.

Pictured at lower left under the red rubber boot is the positive bus bar. I ran both of my positive leads for the air compressor here, with their 40a online fuses tucked between the air box and battery box. Also, I ran the sPOD positive wire here, and the positive wire for my inverter/12v port combo, from their circuit breakers mounted behind the engine on the right side of the picture. Here's the final few pictures before taking it for a test drive:

Jeep Gladiator Ares - Build Thread 20200421_180907
Jeep Gladiator Ares - Build Thread 20200421_181303
Jeep Gladiator Ares - Build Thread 20200421_181314


No dash lights, no issues, and no fire! All in all, I'm incredibly pleased with the product. I spent about 5 hours under the hood by the time all was said and done. This definitely wasn't the cheapest mod, but I have no doubt it'll keep on benefiting me for years to come.

So what's next? Who knows. I've stopped trying to predict it at this point. But one thing is for sure...there will be more. Stay tuned!
 

Sponsored

OP
OP
TheHops

TheHops

Well-Known Member
Joined
Dec 23, 2019
Threads
33
Messages
559
Reaction score
823
Location
Nashville
Vehicle(s)
2020 Jeep Gladiator Rubicon
Build Thread
Link
Vehicle Showcase
1
It sounded like today was going to be the nicest day for us here this weekend, so I took the time to do some pretty extensive rewiring and engine bay organization.

All of my wires that were ran in to the cab through the door jambs have been pulled, and rerouted through the floor drain holes. Unfortunately, I discovered some nasty leaks associated with that wire routing. The water was not getting through the seals, rather it was using my own wire loom essentially as a waterslide, riding it down through my door, in to my trim, and settling in the carpet. Luckily there was no water intrusion anywhere other than at floor level, but I knew I had to fix that. Truthfully, the drain holes seem to be a much easier route to run. I can't have the plugs in place though, so we'll see how watertight this option is. If it becomes and issue, I may end up drilling paths in the plugs and sealing around the wires with silicone sealant.

Along with rerouting, I reorganized the electronics. I thought it was alright before, but it's much better now.

Before:

Jeep Gladiator Ares - Build Thread 20200421_180907
Jeep Gladiator Ares - Build Thread 20200421_181303
Jeep Gladiator Ares - Build Thread 20200421_181314


After:

Jeep Gladiator Ares - Build Thread 20200424_180845

Jeep Gladiator Ares - Build Thread 20200424_180853


More improvements coming!
 
Last edited:
OP
OP
TheHops

TheHops

Well-Known Member
Joined
Dec 23, 2019
Threads
33
Messages
559
Reaction score
823
Location
Nashville
Vehicle(s)
2020 Jeep Gladiator Rubicon
Build Thread
Link
Vehicle Showcase
1
Installed Rock Hard 4x4 Patriot sliders today. Blown away by the quality of them. Removing the rubi rails and installing these was very straightforward. I did lose two captive nuts though for the body bolts somewhere up in there. I was able to pull down one with a telescoping magnet and a long flathead, but the rear driver side one is currently MIA. Hopefully with enough bouncing around in day to say driving it'll shake loose from wherever it's hiding and I'll be able to get a magnet on it to pull it back in to place.

Also, I did have to drill out some of the holes in the pinch seam to ensure good fitment (due to slight misalignment from the factory; the slider instructions warned about this) but it was nothing major.

Jeep Gladiator Ares - Build Thread 20200427_151232
Jeep Gladiator Ares - Build Thread 20200428_132132
Jeep Gladiator Ares - Build Thread 20200428_160820
Jeep Gladiator Ares - Build Thread 20200428_160827
Jeep Gladiator Ares - Build Thread 20200428_160835


All in all, I'm very happy with them. They're exactly what I wanted, and I know they'll serve me well against both rocks and door dings.
 
OP
OP
TheHops

TheHops

Well-Known Member
Joined
Dec 23, 2019
Threads
33
Messages
559
Reaction score
823
Location
Nashville
Vehicle(s)
2020 Jeep Gladiator Rubicon
Build Thread
Link
Vehicle Showcase
1
I've been out of town for a little while so I haven't had much in the way of updates, but I knocked out a couple of projects this past week.

First on the agenda: I added a set of Rokblokz. They're XL/Original size, black with red emblem. I was on the fence about what size to go with, but they provide perfect coverage for my 35x12.50s. I hit a gravel road at high speed the next day with the doors off, and the dust/dirt/rock fling was significantly reduced. And personally, I think they look great. Happy customer here. Install was pretty straightforward.

Jeep Gladiator Ares - Build Thread 20200722_123216


Up next, I finally added a WARN VR EVO 10S on the front bumper. I have plans to drop a matching one in the rear bumper down the road. I took the lazy route, and didn't disassemble my front bumper at all, and I kind of regret it. Getting this thing installed was an absolute pain in the ass. Also, there is *barely* enough clearance between the rear of the winch and the grille on my Road Armor Stealth bumper. All is well that ends well though, and it's on, secure, and fully functional, wired direct to the aux battery on my Genesis kit. I would like to add a power interrupt in the near future for peace of mind, but it is fine for the time being. I added a WARN Epic 1.5" thick hawse fairlead, a Factor 55 Prolink, and wrapped the winch in a WARN cover to protect the synthetic rope from the elements. I have no doubt that this system will come in handy out on the trail if I find myself or someone else in a sticky situation.

Jeep Gladiator Ares - Build Thread 20200722_123258
Jeep Gladiator Ares - Build Thread 20200722_123308
Jeep Gladiator Ares - Build Thread 20200722_123342


The list of remaining mods is really starting to wind down. As of right now, the final "primary" mod, as far as I'm concerned, is the bed and roof setup. Currently I'm leaning towards the RSI SmartCap. I'm considering pre-ordering this week. I'm also looking at the maximus 3 roof rack setup for the cab and a matching rhino rack for the rear.

There are still quite a few secondary projects to knock out, and I'll be tackling those as they become convenient. Up next is likely finalizing my cockpit setup.

More to come.
 
OP
OP
TheHops

TheHops

Well-Known Member
Joined
Dec 23, 2019
Threads
33
Messages
559
Reaction score
823
Location
Nashville
Vehicle(s)
2020 Jeep Gladiator Rubicon
Build Thread
Link
Vehicle Showcase
1
Warning: Picture heavy post.

As indicated by my last post, I expected my cockpit to be next in the pipeline. Well, all of the remaining parts arrived today, so I got straight to work.

Jeep Gladiator Ares - Build Thread 20200730_150805


My vision was to have a customizable, centralized yet low profile "command center" that would incorporate my phone, an *actual" GPS (with off road maps), and my personal SOS beacon (which also has trail and topo maps). I also wanted a mounting solution for my GoPro to film trail runs. With all of these devices, I didn't want a spaghetti monster of cords, so having a hidden USB hub in the vicinity of the devices was also a must. That is the main reason why I opted to go with the mounts that I did, being that they retain a portion of the recessed top cubby. After months of planning, I put together the following:

Devices (I've owned most of these for some time now):
-Phone
-Garmin Overlander
-Garmin inReach Explorer+
-GoPro Hero 7 Black
-USB charging hub (Disclaimer: I goofed and ordered an AC input/DC output hub instead of a DC input/DC output hub. I already have a compatible replacement on the way, but I will go ahead with the how-to as proof of concept)

Also, a previously installed sPOD HD panel, which is pictured in the final wide angle shot, rounds out my "command center" devices. Install is not covered in this post. Also, I purchased a pre-made harness that allows for a 10a fused circuit piggybacked off of the 12v port.

Hardware:
-CMM grab bar 20mm ball
-67d small arms x2
-67d nano arm
-67d diamond plate
-67d amps plate
-67d GoPro mount
-67d universal phone clamp
-Bulletproof driver side dual 20mm ball mount
-Bulletproof passenger side single 20mm ball mount

Another CMM mount (A pillar 20mm ball mount) and another 67d nano arm support the sPOD HD panel.

Jeep Gladiator Ares - Build Thread 20200730_151520


To get started, I installed a locking case on my Garmin Overlander that adds stability and offers a bit of protection, and allows me to hard mount it to the 67d diamond plate. I also swapped out the backing on the charging cradle for my inReach.

Jeep Gladiator Ares - Build Thread 20200730_162906
Jeep Gladiator Ares - Build Thread 20200730_152348


With that bit of prep work out of the way, I placed the Bulletproof mounts to determine how much space I had to work with. I determined that I was going to use the small left side indent as an ingress point for the USB hub wiring.

Jeep Gladiator Ares - Build Thread 20200730_153542
Jeep Gladiator Ares - Build Thread 20200730_153546


Before drilling, I wanted to make sure things were clear behind the dash, so I started popping panels. This was much easier than I expected. If you are unsure, Google the how-to for the JL for a step-by-step in real time. The down and dirty though, is to start with the panel with the AC controls. It is completely held in place by clips. I started with a plastic trim tool nearest to the passenger grab bar, and worked my way across the top to the push start button. Once you have that out of place, you can work on the radio. I have the upgraded radio, but I imagine it is similar for the 7" system. There are two screws at the base of the radio to remove, that will allow you to peel off the radio surround trim, which is also held on by clips.

Jeep Gladiator Ares - Build Thread 20200730_161823


Once those are undone and the trim is removed, you will see four screws at the corners of the radio. Undo these, and the radio will pop loose.

Jeep Gladiator Ares - Build Thread 20200729_175609


Once behind the radio, I was able to see my ingress point. It appeared to be safely away from all obstructions, and was not blocked by the radio when in place.

Jeep Gladiator Ares - Build Thread 20200730_153731


At this point, I decided to remove the freedom panels and drop the windshield in order to give myself more room to work, and so that I could drill straight downward. I used a dremel and a small bit to drill out and gradually widen the hole until the clipped USB hub wires fit snugly through. I used a small cardboard box that one of my 67d parts came in to catch all of the plastic shavings, then I hit the top side with a shop vac. The result is fairly clean, and would be easily covered by the Mopar insert if taken back to stock.

Jeep Gladiator Ares - Build Thread 20200730_154444
Jeep Gladiator Ares - Build Thread 20200730_154456
Jeep Gladiator Ares - Build Thread 20200730_154510
Jeep Gladiator Ares - Build Thread 20200730_162658


Having completed that, it was time to work on the lower part of the dash and get my piggyback harness up behind the radio. The lower dash (with the window controls) is held in place by a single screw, and numerous clips. Once this screw is undone, gently pry on the upper corners with your fingers and it will pop out of place.

Jeep Gladiator Ares - Build Thread 20200730_161653
Jeep Gladiator Ares - Build Thread 20200729_174815


Once that is out of the way, look directly behind the 12v port and identify the plug. Pinch against the blue clip, and remove the OEM harness.

Jeep Gladiator Ares - Build Thread 20200729_174819
Jeep Gladiator Ares - Build Thread 20200729_174829


With the purchased harness (I found them on both Amazon/Quadratec for $30, plus or minus a few bucks) plug in the appropriate piece to the OEM 12v from where you just removed the stock plug, and plug the stock piece in to the splitter on the purchased harness. In the picture below, the left piece (OEM harness) plugs in to the right piece (splitter on the purchased harness).

Jeep Gladiator Ares - Build Thread 20200729_174921


After that take the free end, and route it up behind the radio, and pull through. It was a bit tight for my ham hands, but not too bad once you find the route. After that, I turned on the ignition and I hit it with my multimeter to make sure everything was good.

Jeep Gladiator Ares - Build Thread 20200729_175427

Jeep Gladiator Ares - Build Thread 20200729_175202


At this point, you would strip the positive and negative wires on the USB hub, insert it in to the corresponding opening on the purchased harness, and tighten down the clamps for a solid connection. I did not do this, because it was at this point that I realized that I did not have the appropriate hub. I will fix this next week when my new hub comes in. Once that is complete, make sure all wires are tucked safely away from pinch points, and you are good to reinstall all of the trim. Don't forget to reinstall all of the screws (again: one for the lower dash piece, four for the radio, two for the radio trim)! At this point you may have two extra screws if you undid the ones in the top dash cubby. They are all identical, so don't worry about mixing them up (can't speak for the 7" radio screws, but I assume they are also the same).

The rest is just setting up your devices how you like. The following is my personal setup.

I started off by installing my inReach on the passenger grab bar, on the CMM 20mm ball and a 67d nano arm with a 67d amps plate backing on the Garmin charging cradle. Before I finally buttoned up my trim, I routed my charging cradle wires partially behind the trim. It was snug, but did not interfere with the form or function of anything.

Jeep Gladiator Ares - Build Thread 20200730_151717
Jeep Gladiator Ares - Build Thread 20200730_164723


After that, I began attaching arms and mounts to the Bulletproof bases up top. For the ball mounts, from left to right, I have a 67d small arm with the universal phone mount, a 67d small arm attached to a 67d diamond plate attached directly to my Garmin Overlander case, and a 67d GoPro mount that mounts directly to a 20mm ball. This is the final result with everything installed (minus the phone that I was taking pictures with, but you get the idea).

Jeep Gladiator Ares - Build Thread 20200730_170339
Jeep Gladiator Ares - Build Thread 20200730_170351
Jeep Gladiator Ares - Build Thread 20200730_170358

Jeep Gladiator Ares - Build Thread 20200730_170405
Jeep Gladiator Ares - Build Thread 20200730_170417
Jeep Gladiator Ares - Build Thread 20200730_170953


And here's a bonus picture of the field of view from the GoPro. I expect it'll create some awesome hyperlapses of my adventures.

Jeep Gladiator Ares - Build Thread GOPR2376_1596153480453.JPG


I'm very happy with the end result. The final picture was taken a bit low to highlight the devices. At my height, line of sight is minimally impacted. This may not be the case for a shorter driver. The GPS blocks my right side hood vent when in a relaxed driving position, but the entirety of the road is still visible. Along with that, all wires are clean and out of sight, and all devices (will be, once I install the new hub) are wired to charge off of the ignition, and sleep when not powered by the vehicle.

This was sort of both an update, and a how-to for a solution that I've seen minimal posts on. I may try to cross post it to the how-to section. Feel free to reach out with any questions if any of you have something similar in mind.

P.S. / In other news, I pre-ordered the RSI Smart Cap, so come October/November, as of right now, that will be the direction my build is going in as far as supporting my sleep and storage setup.
 
Last edited:

WhiteJT8541

Well-Known Member
First Name
Rob
Joined
Aug 6, 2019
Threads
4
Messages
310
Reaction score
373
Location
Ohio
Vehicle(s)
2020 Gladiator Sport
Occupation
LEO
Warning: Picture heavy post.

As indicated by my last post, I expected my cockpit to be next in the pipeline. Well, all of the remaining parts arrived today, so I got straight to work.

Jeep Gladiator Ares - Build Thread GOPR2376_1596153480453.JPG


My vision was to have a customizable, centralized yet low profile "command center" that would incorporate my phone, an *actual" GPS (with off road maps), and my personal SOS beacon (which also has trail and topo maps). I also wanted a mounting solution for my GoPro to film trail runs. With all of these devices, I didn't want a spaghetti monster of cords, so having a hidden USB hub in the vicinity of the devices was also a must. That is the main reason why I opted to go with the mounts that I did, being that they retain a portion of the recessed top cubby. After months of planning, I put together the following:

Devices (I've owned most of these for some time now):
-Phone
-Garmin Overlander
-Garmin inReach Explorer+
-GoPro Hero 7 Black
-USB charging hub (Disclaimer: I goofed and ordered an AC input/DC output hub instead of a DC input/DC output hub. I already have a compatible replacement on the way, but I will go ahead with the how-to as proof of concept)

Also, a previously installed sPOD HD panel, which is pictured in the final wide angle shot, rounds out my "command center" devices. Install is not covered in this post. Also, I purchased a pre-made harness that allows for a 10a fused circuit piggybacked off of the 12v port.

Hardware:
-CMM grab bar 20mm ball
-67d small arms x2
-67d nano arm
-67d diamond plate
-67d amps plate
-67d GoPro mount
-67d universal phone clamp
-Bulletproof driver side dual 20mm ball mount
-Bulletproof passenger side single 20mm ball mount

Another CMM mount (A pillar 20mm ball mount) and another 67d nano arm support the sPOD HD panel.

Jeep Gladiator Ares - Build Thread GOPR2376_1596153480453.JPG


To get started, I installed a locking case on my Garmin Overlander that adds stability and offers a bit of protection, and allows me to hard mount it to the 67d diamond plate. I also swapped out the backing on the charging cradle for my inReach.

Jeep Gladiator Ares - Build Thread GOPR2376_1596153480453.JPG


With that bit of prep work out of the way, I placed the Bulletproof mounts to determine how much space I had to work with. I determined that I was going to use the small left side indent as an ingress point for the USB hub wiring.

Jeep Gladiator Ares - Build Thread GOPR2376_1596153480453.JPG


Before drilling, I wanted to make sure things were clear behind the dash, so I started popping panels. This was much easier than I expected. If you are unsure, Google the how-to for the JL for a step-by-step in real time. The down and dirty though, is to start with the panel with the AC controls. It is completely held in place by clips. I started with a plastic trim tool nearest to the passenger grab bar, and worked my way across the top to the push start button. Once you have that out of place, you can work on the radio. I have the upgraded radio, but I imagine it is similar for the 7" system. There are two screws at the base of the radio to remove, that will allow you to peel off the radio surround trim, which is also held on by clips.

Jeep Gladiator Ares - Build Thread GOPR2376_1596153480453.JPG


Once those are undone and the trim is removed, you will see four screws at the corners of the radio. Undo these, and the radio will pop loose.

Jeep Gladiator Ares - Build Thread GOPR2376_1596153480453.JPG


Once behind the radio, I was able to see my ingress point. It appeared to be safely away from all obstructions, and was not blocked by the radio when in place.

Jeep Gladiator Ares - Build Thread GOPR2376_1596153480453.JPG


At this point, I decided to remove the freedom panels and drop the windshield in order to give myself more room to work, and so that I could drill straight downward. I used a dremel and a small bit to drill out and gradually widen the hole until the clipped USB hub wires fit snugly through. I used a small cardboard box that one of my 67d parts came in to catch all of the plastic shavings, then I hit the top side with a shop vac. The result is fairly clean, and would be easily covered by the Mopar insert if taken back to stock.

Jeep Gladiator Ares - Build Thread GOPR2376_1596153480453.JPG


Having completed that, it was time to work on the lower part of the dash and get my piggyback harness up behind the radio. The lower dash (with the window controls) is held in place by a single screw, and numerous clips. Once this screw is undone, gently pry on the upper corners with your fingers and it will pop out of place.

Jeep Gladiator Ares - Build Thread GOPR2376_1596153480453.JPG


Once that is out of the way, look directly behind the 12v port and identify the plug. Pinch against the blue clip, and remove the OEM harness.

Jeep Gladiator Ares - Build Thread GOPR2376_1596153480453.JPG


With the purchased harness (I found them on both Amazon/Quadratec for $30, plus or minus a few bucks) plug in the appropriate piece to the OEM 12v from where you just removed the stock plug, and plug the stock piece in to the splitter on the purchased harness. In the picture below, the left piece (OEM harness) plugs in to the right piece (splitter on the purchased harness).

Jeep Gladiator Ares - Build Thread GOPR2376_1596153480453.JPG


After that take the free end, and route it up behind the radio, and pull through. It was a bit tight for my ham hands, but not too bad once you find the route. After that, I turned on the ignition and I hit it with my multimeter to make sure everything was good.

Jeep Gladiator Ares - Build Thread GOPR2376_1596153480453.JPG

Jeep Gladiator Ares - Build Thread GOPR2376_1596153480453.JPG


At this point, you would strip the positive and negative wires on the USB hub, insert it in to the corresponding opening on the purchased harness, and tighten down the clamps for a solid connection. I did not do this, because it was at this point that I realized that I did not have the appropriate hub. I will fix this next week when my new hub comes in. Once that is complete, make sure all wires are tucked safely away from pinch points, and you are good to reinstall all of the trim. Don't forget to reinstall all of the screws (again: one for the lower dash piece, four for the radio, two for the radio trim)! At this point you may have two extra screws if you undid the ones in the top dash cubby. They are all identical, so don't worry about mixing them up (can't speak for the 7" radio screws, but I assume they are also the same).

The rest is just setting up your devices how you like. The following is my personal setup.

I started off by installing my inReach on the passenger grab bar, on the CMM 20mm ball and a 67d nano arm with a 67d amps plate backing on the Garmin charging cradle. Before I finally buttoned up my trim, I routed my charging cradle wires partially behind the trim. It was snug, but did not interfere with the form or function of anything.

Jeep Gladiator Ares - Build Thread GOPR2376_1596153480453.JPG


After that, I began attaching arms and mounts to the Bulletproof bases up top. For the ball mounts, from left to right, I have a 67d small arm with the universal phone mount, a 67d small arm attached to a 67d diamond plate attached directly to my Garmin Overlander case, and a 67d GoPro mount that mounts directly to a 20mm ball. This is the final result with everything installed (minus the phone that I was taking pictures with, but you get the idea).

Jeep Gladiator Ares - Build Thread GOPR2376_1596153480453.JPG

Jeep Gladiator Ares - Build Thread GOPR2376_1596153480453.JPG


And here's a bonus picture of the field of view from the GoPro. I expect it'll create some awesome hyperlapses of my adventures.

Jeep Gladiator Ares - Build Thread GOPR2376_1596153480453.JPG


I'm very happy with the end result. The final picture was taken a bit low to highlight the devices. At my height, line of sight is minimally impacted. This may not be the case for a shorter driver. The GPS blocks my right side hood vent when in a relaxed driving position, but the entirety of the road is still visible. Along with that, all wires are clean and out of sight, and all devices (will be, once I install the new hub) are wired to charge off of the ignition, and sleep when not powered by the vehicle.

This was sort of both an update, and a how-to for a solution that I've seen minimal posts on. I may try to cross post it to the how-to section. Feel free to reach out with any questions if any of you have something similar in mind.

P.S. / In other news, I pre-ordered the RSI Smart Cap, so come October/November, as of right now, that will be the direction my build is going in as far as supporting my sleep and storage setup.
One of the cleanest installs that I have seen. I've been trying to figure out how to run a USB charger to that center portion of the dash and you, my good sir, just showed me the way. I know someone else here on the forum actually tapped into the media hub behind the dash so they would still have car play which is my preferred method but I have not seen them explain how they did it and I have not monkeyed around with it yet. Good work.
Sponsored


Top