JAY
Staff member
- Joined
- Jan 13, 2015
- Threads
- 563
- Messages
- 1,223
- Reaction score
- 3,288
- Location
- Jeep Gladiator Forum
- Vehicle(s)
- JT
- Build Thread
- Link
- Occupation
- Admin
- Thread starter
- #1
Copied from JLWF, DIY by rubi-zero:
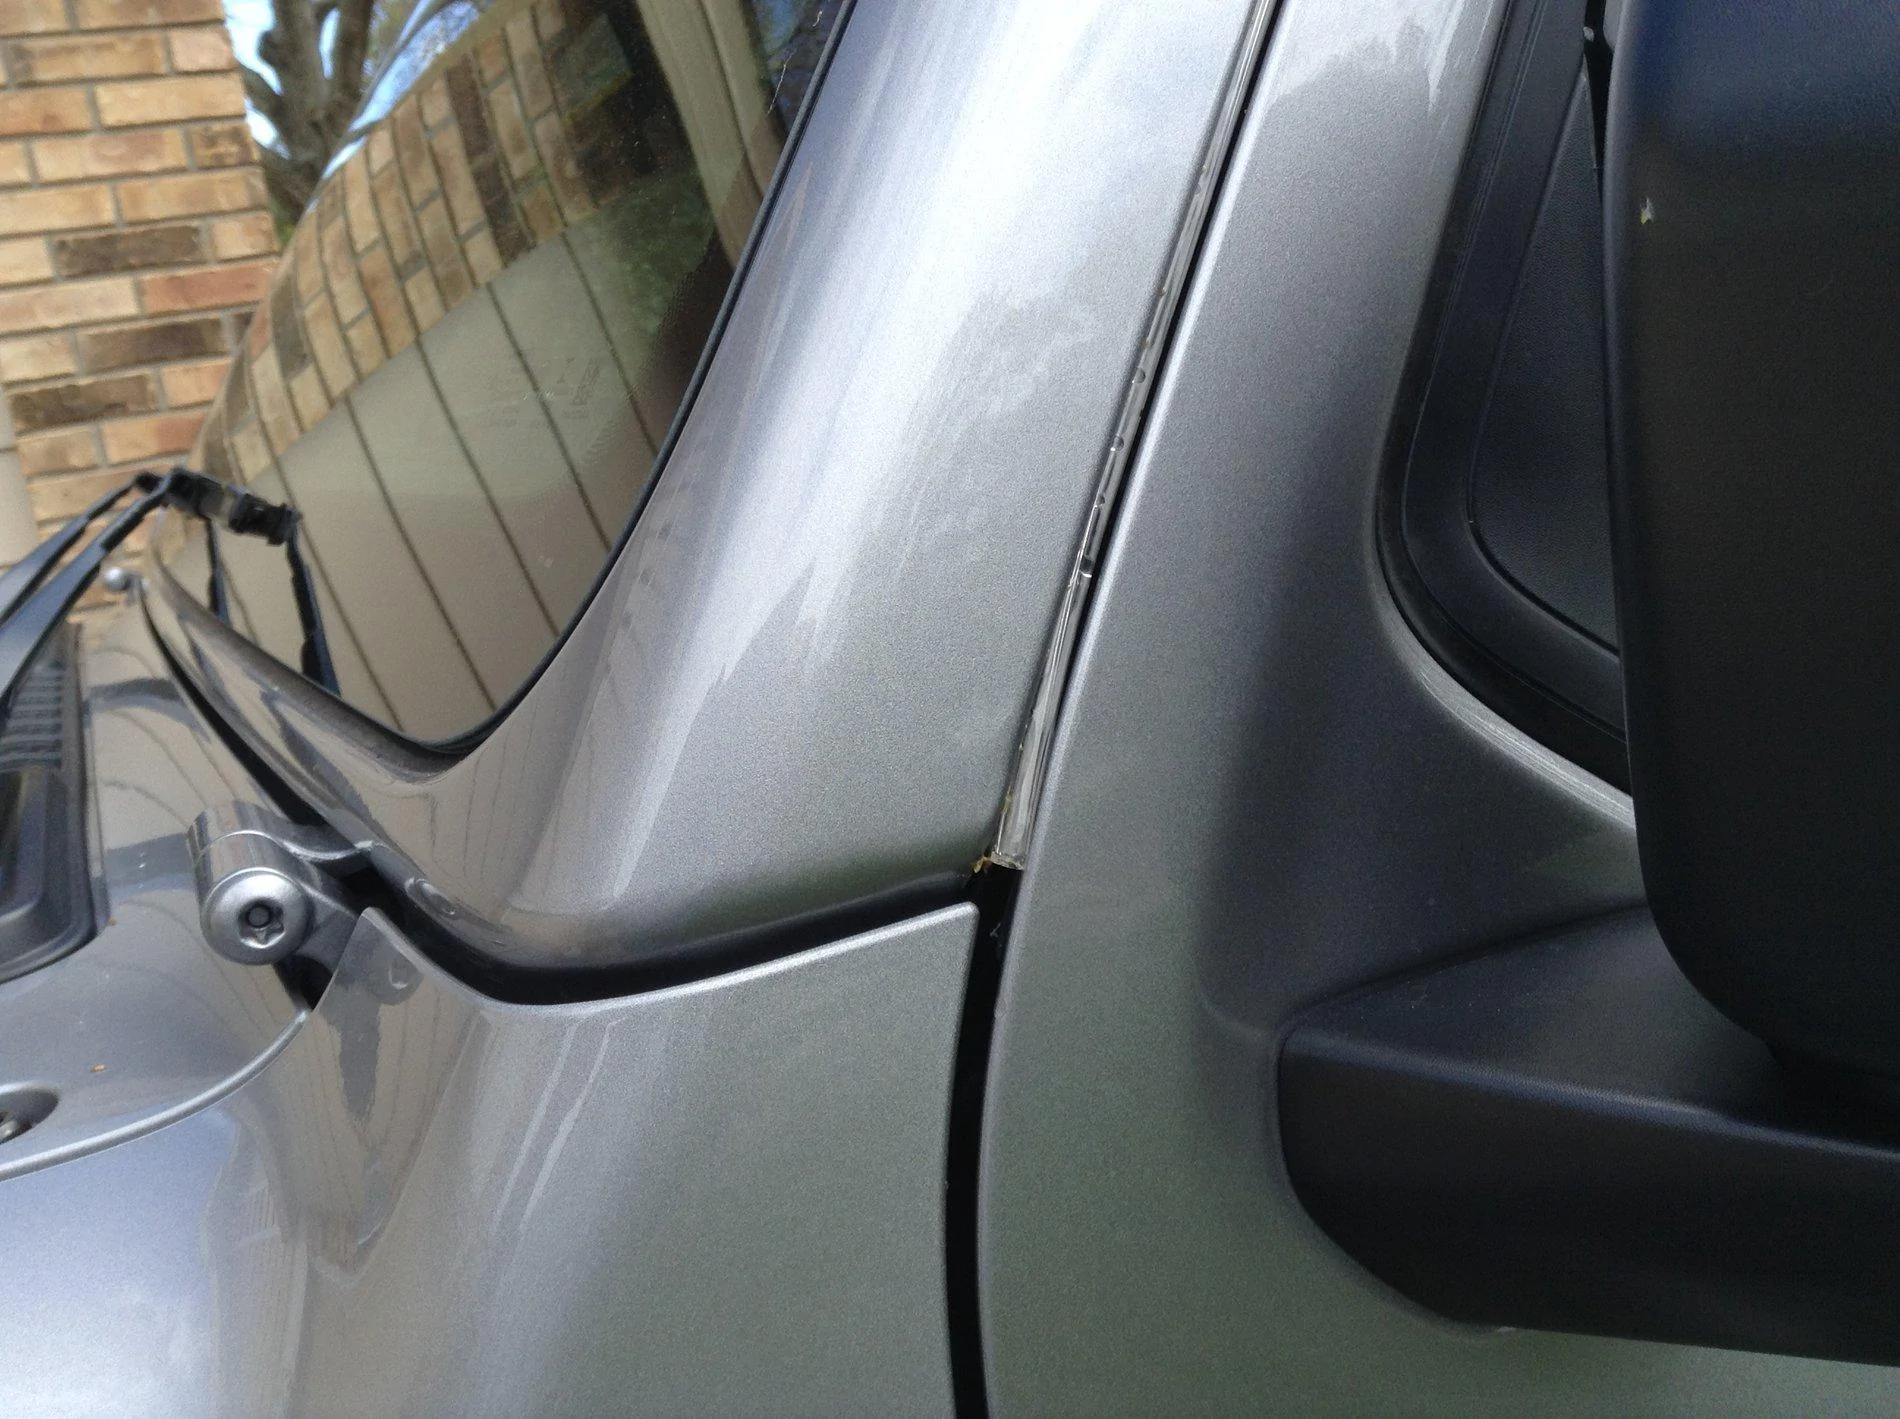
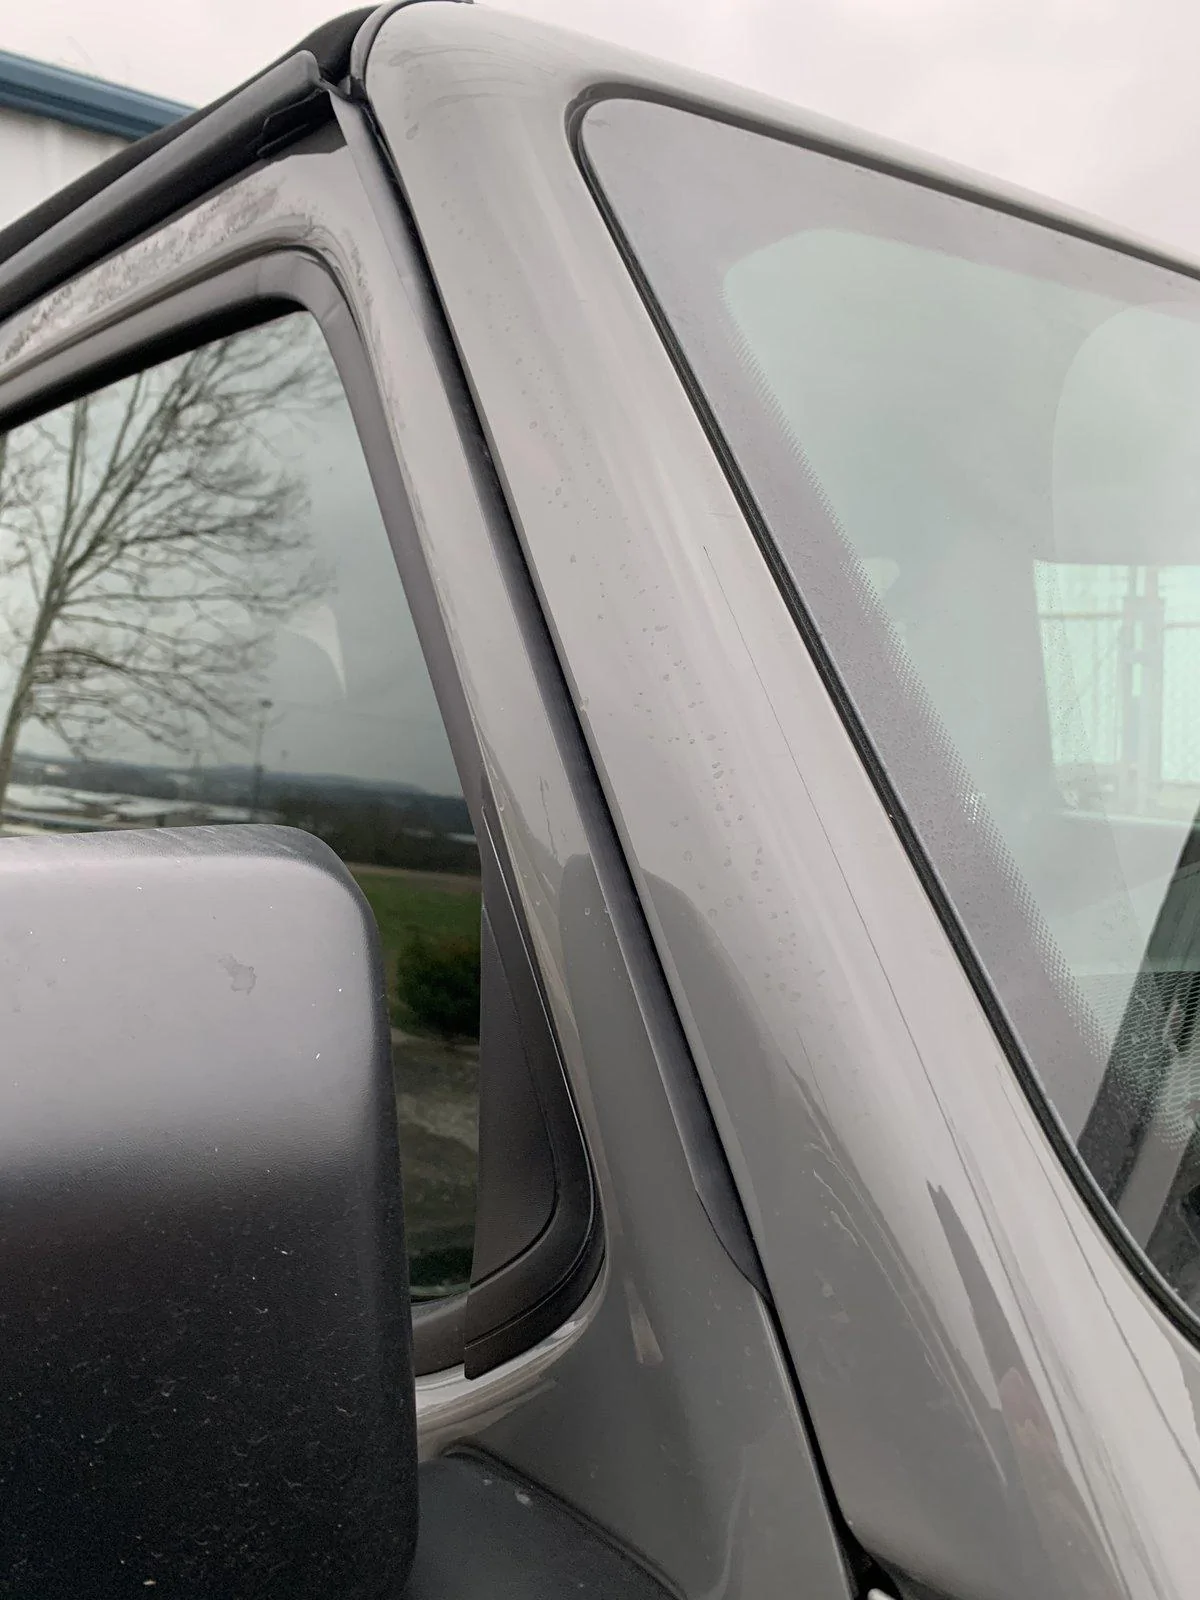
Ok so I been a long time Jeep owner since the 90’s so I have seen the wrangler come along way, as many of you have, from what it use to be to what it is now with the JLUR. With all the tech and creature comforts that are packed into these Jeeps at this time today I am a little surprised we have water streaming into the cabin when we open the door and it has been raining outside. Those that are familiar with this issue know it’s not a drip or two but can be a pretty steady stream if it’s been raining alot. This has been pretty annoying to me since the night I picked up my first JL in the rain.
Since that night in 2018 I have tested several solutions to try and solve this problem, some worked better then others.
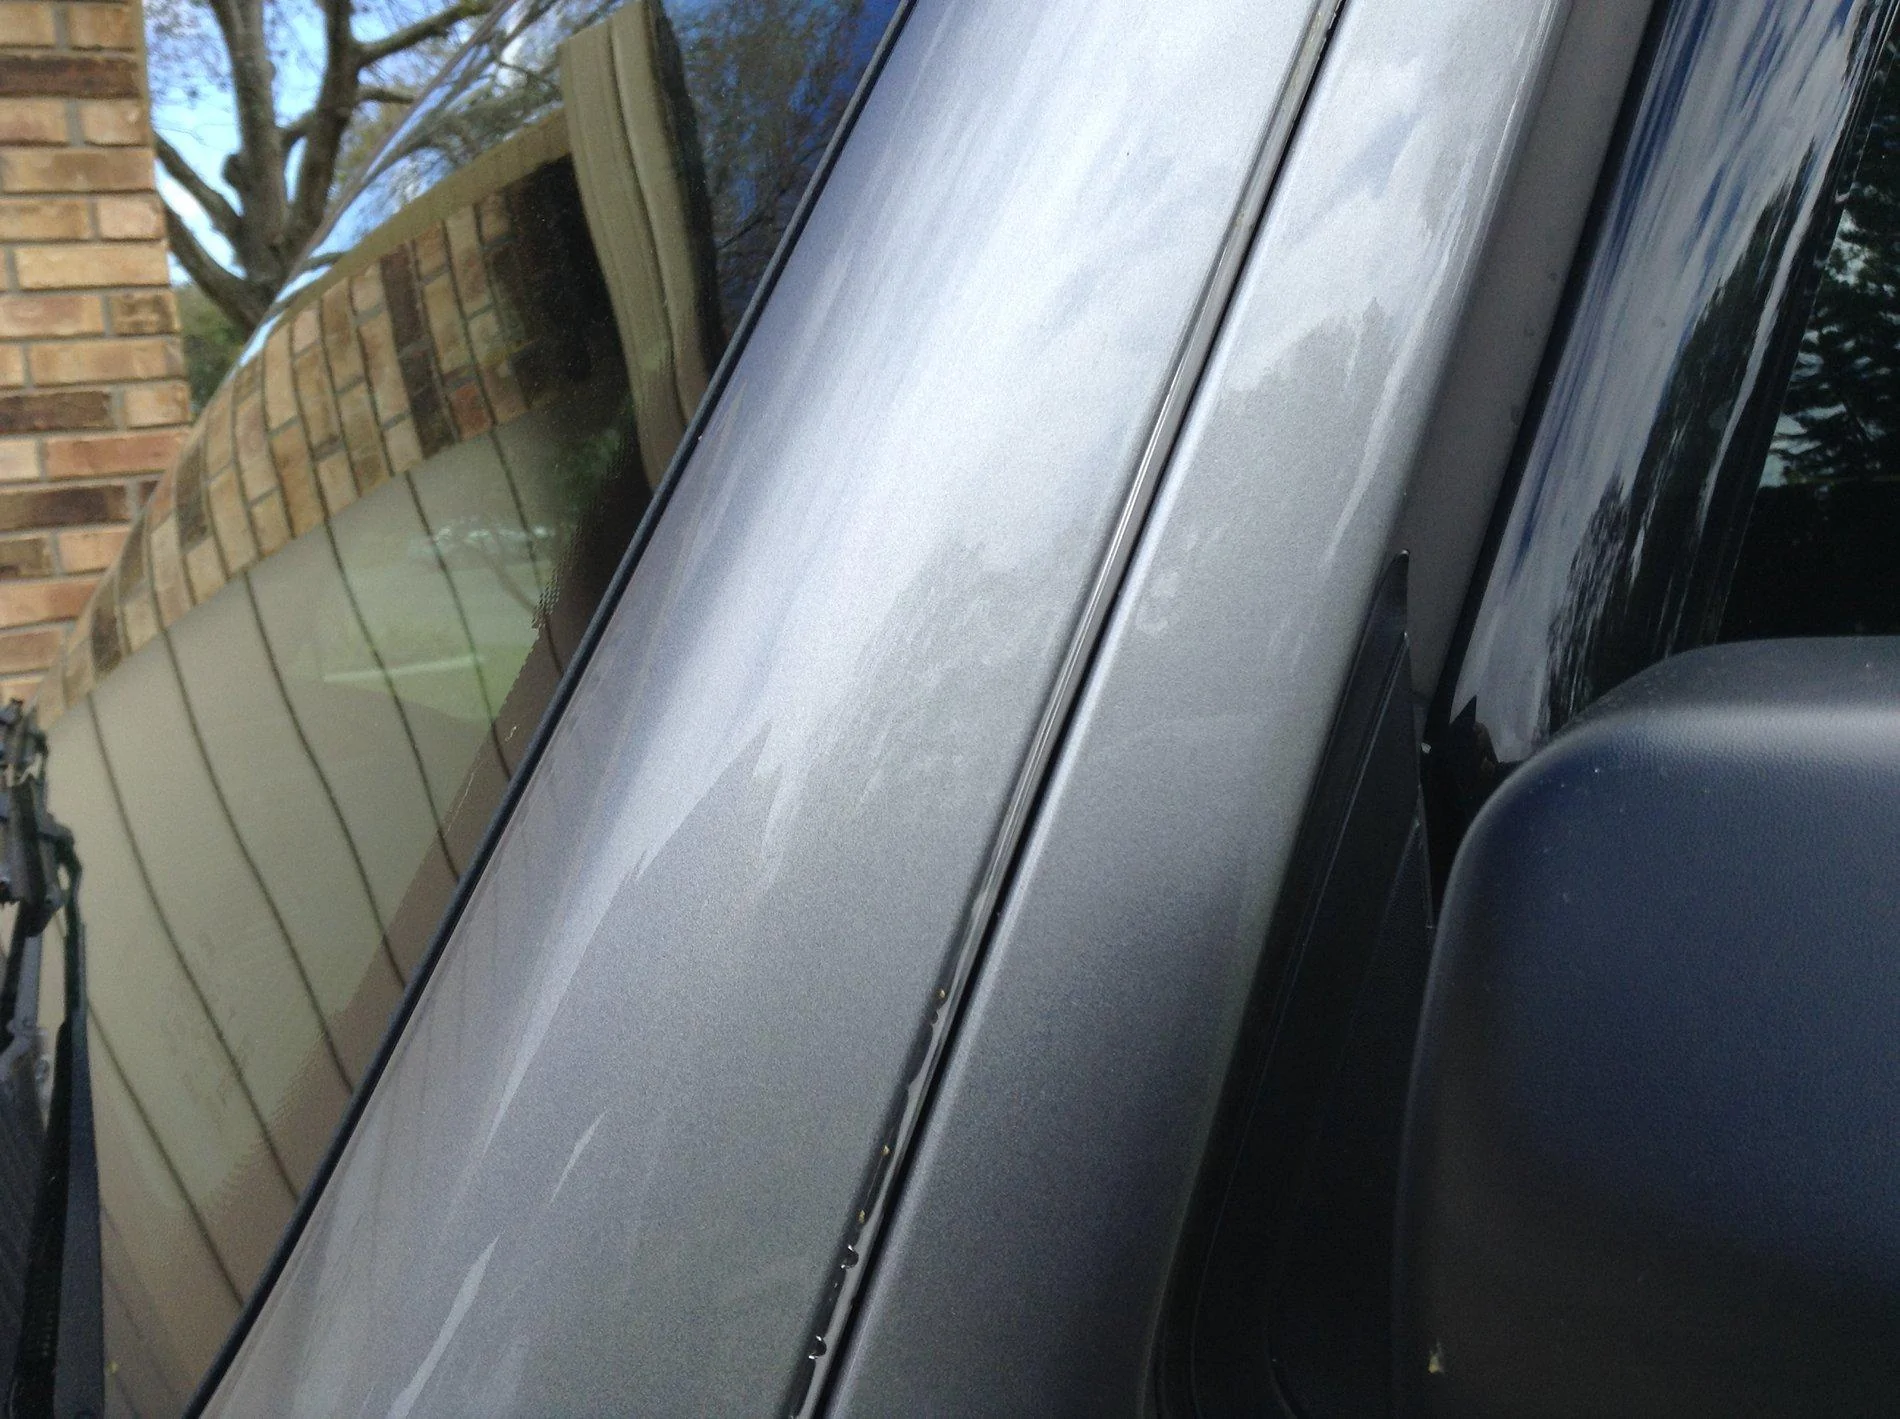
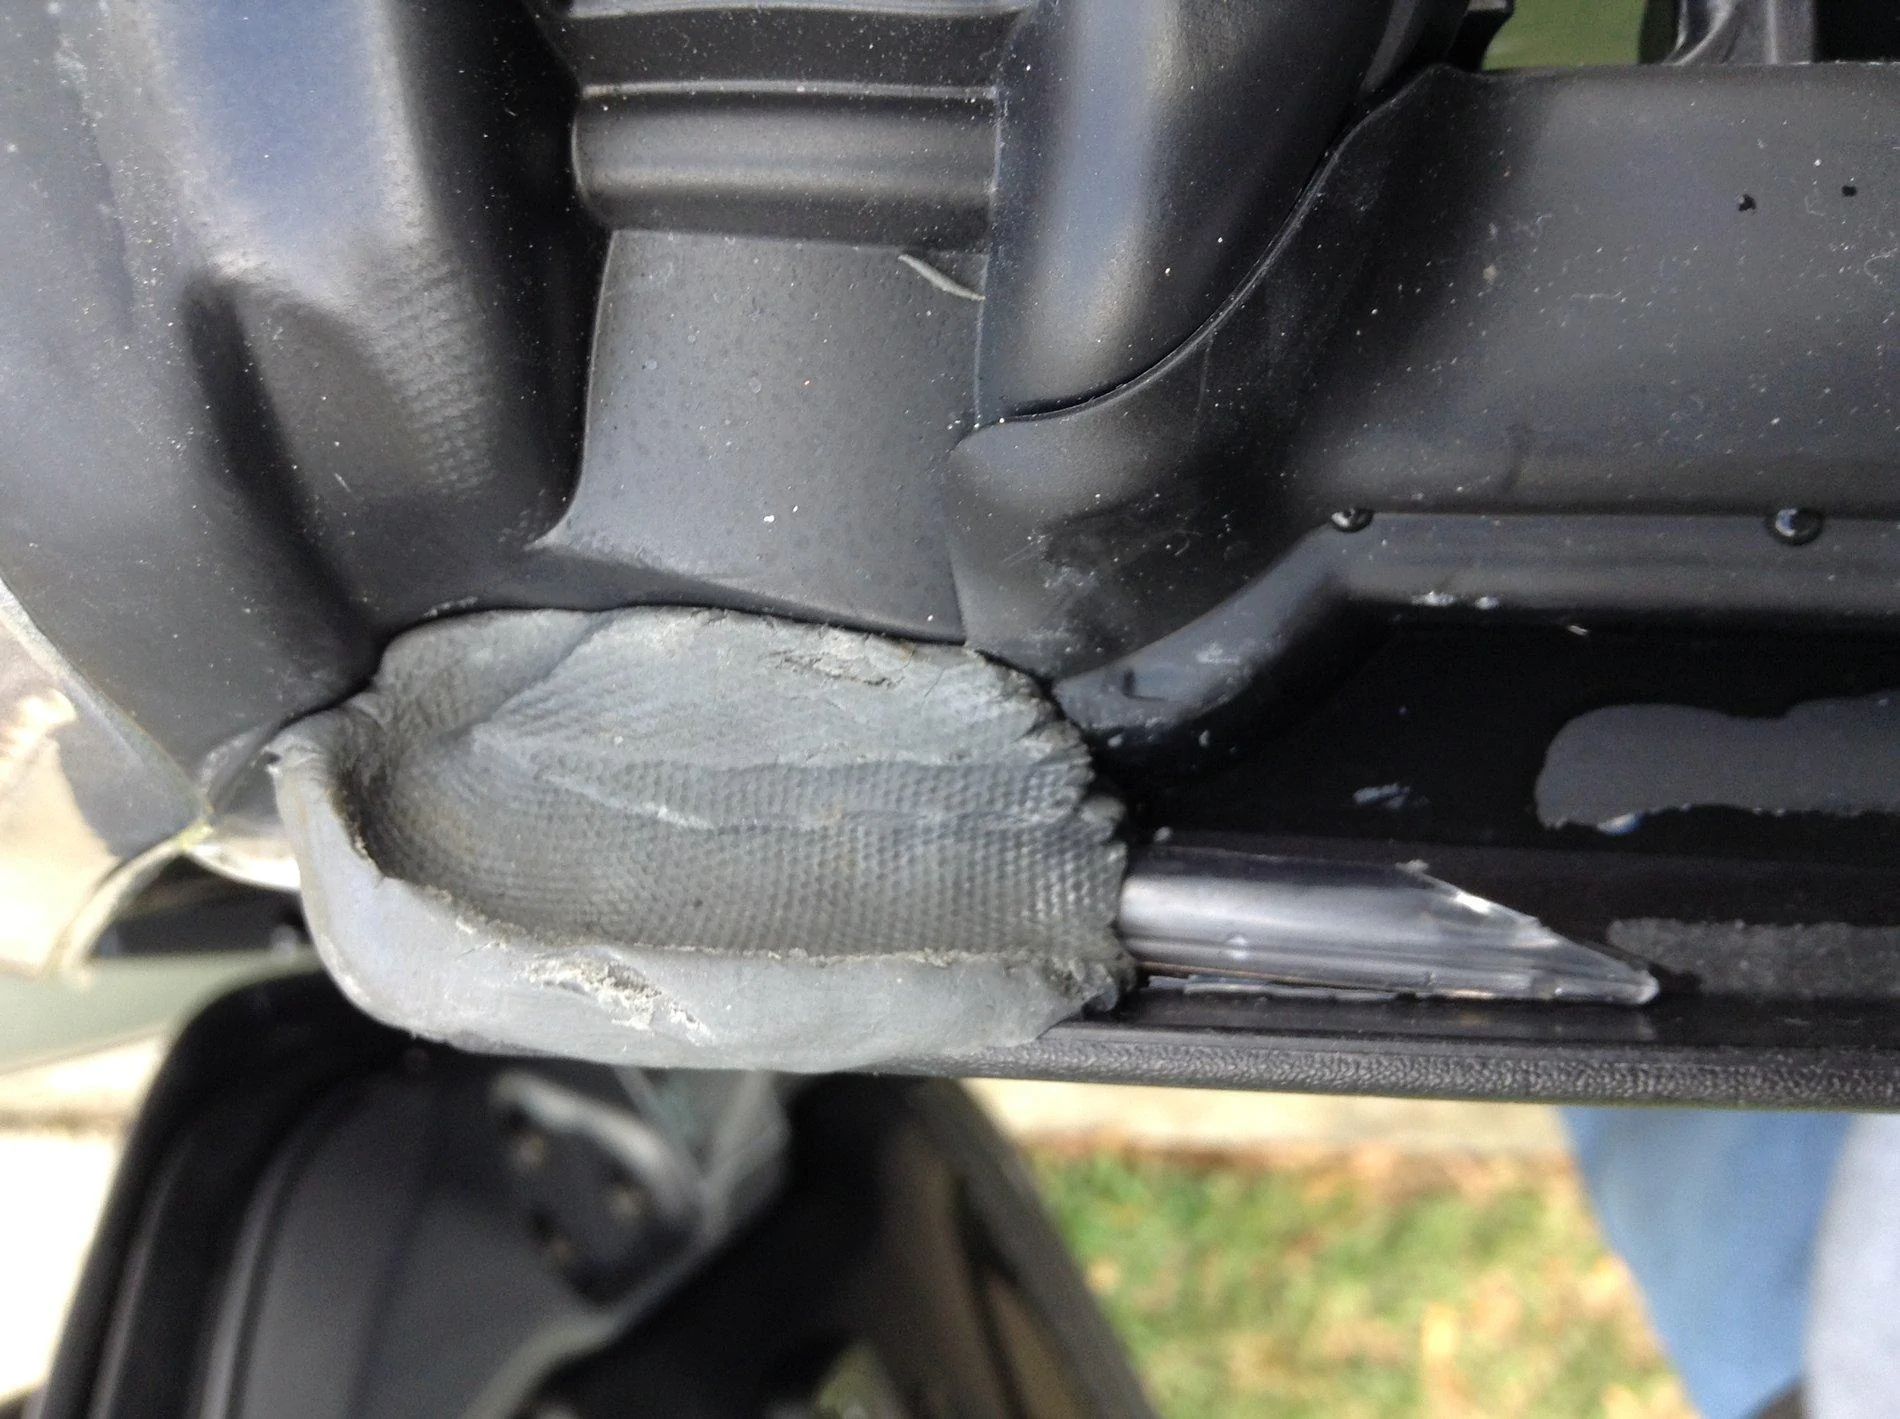
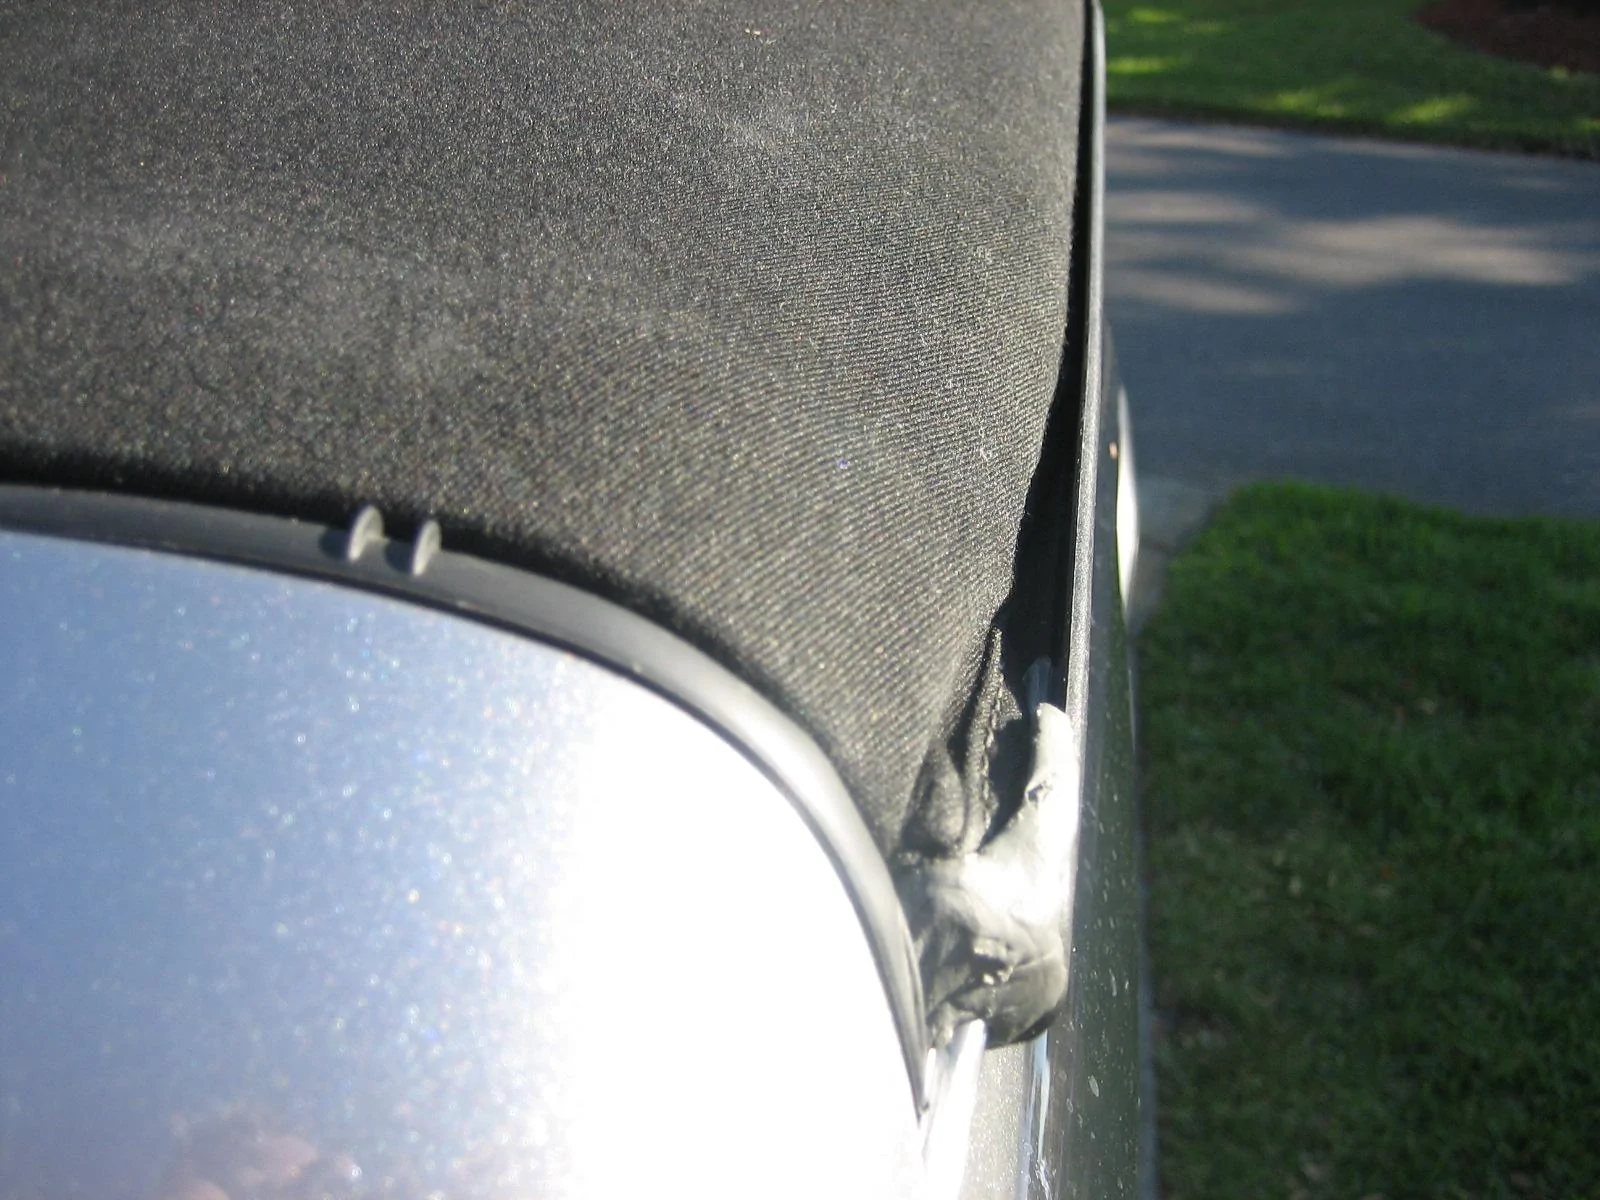
First I tried to block the end of the drip rail with stacked 3m tape like a dam, but that only slowed the stream down. This was really just testing the theory of blocking the end. I believe I had some very small gaps on the sides of the tape so kind of my fault with poor execution. I thought I could improve this solution by using a dab of silicon at the end of the rail as well, and for the most part that worked pretty good, unless it has been raining really hard and overflows or I parked on a decline and it over flowed the end. I also tried to use heat shrink to cap the end of the rail. I thought if I capped the end it would help it from over flowing or would hold the water in on a decline. Again this didn’t really work to my satisfaction. After this attempt I tried to extend the rail with rubber further towards the windshield frame, but I hated the look of the end result and couldn’t live with this very long.
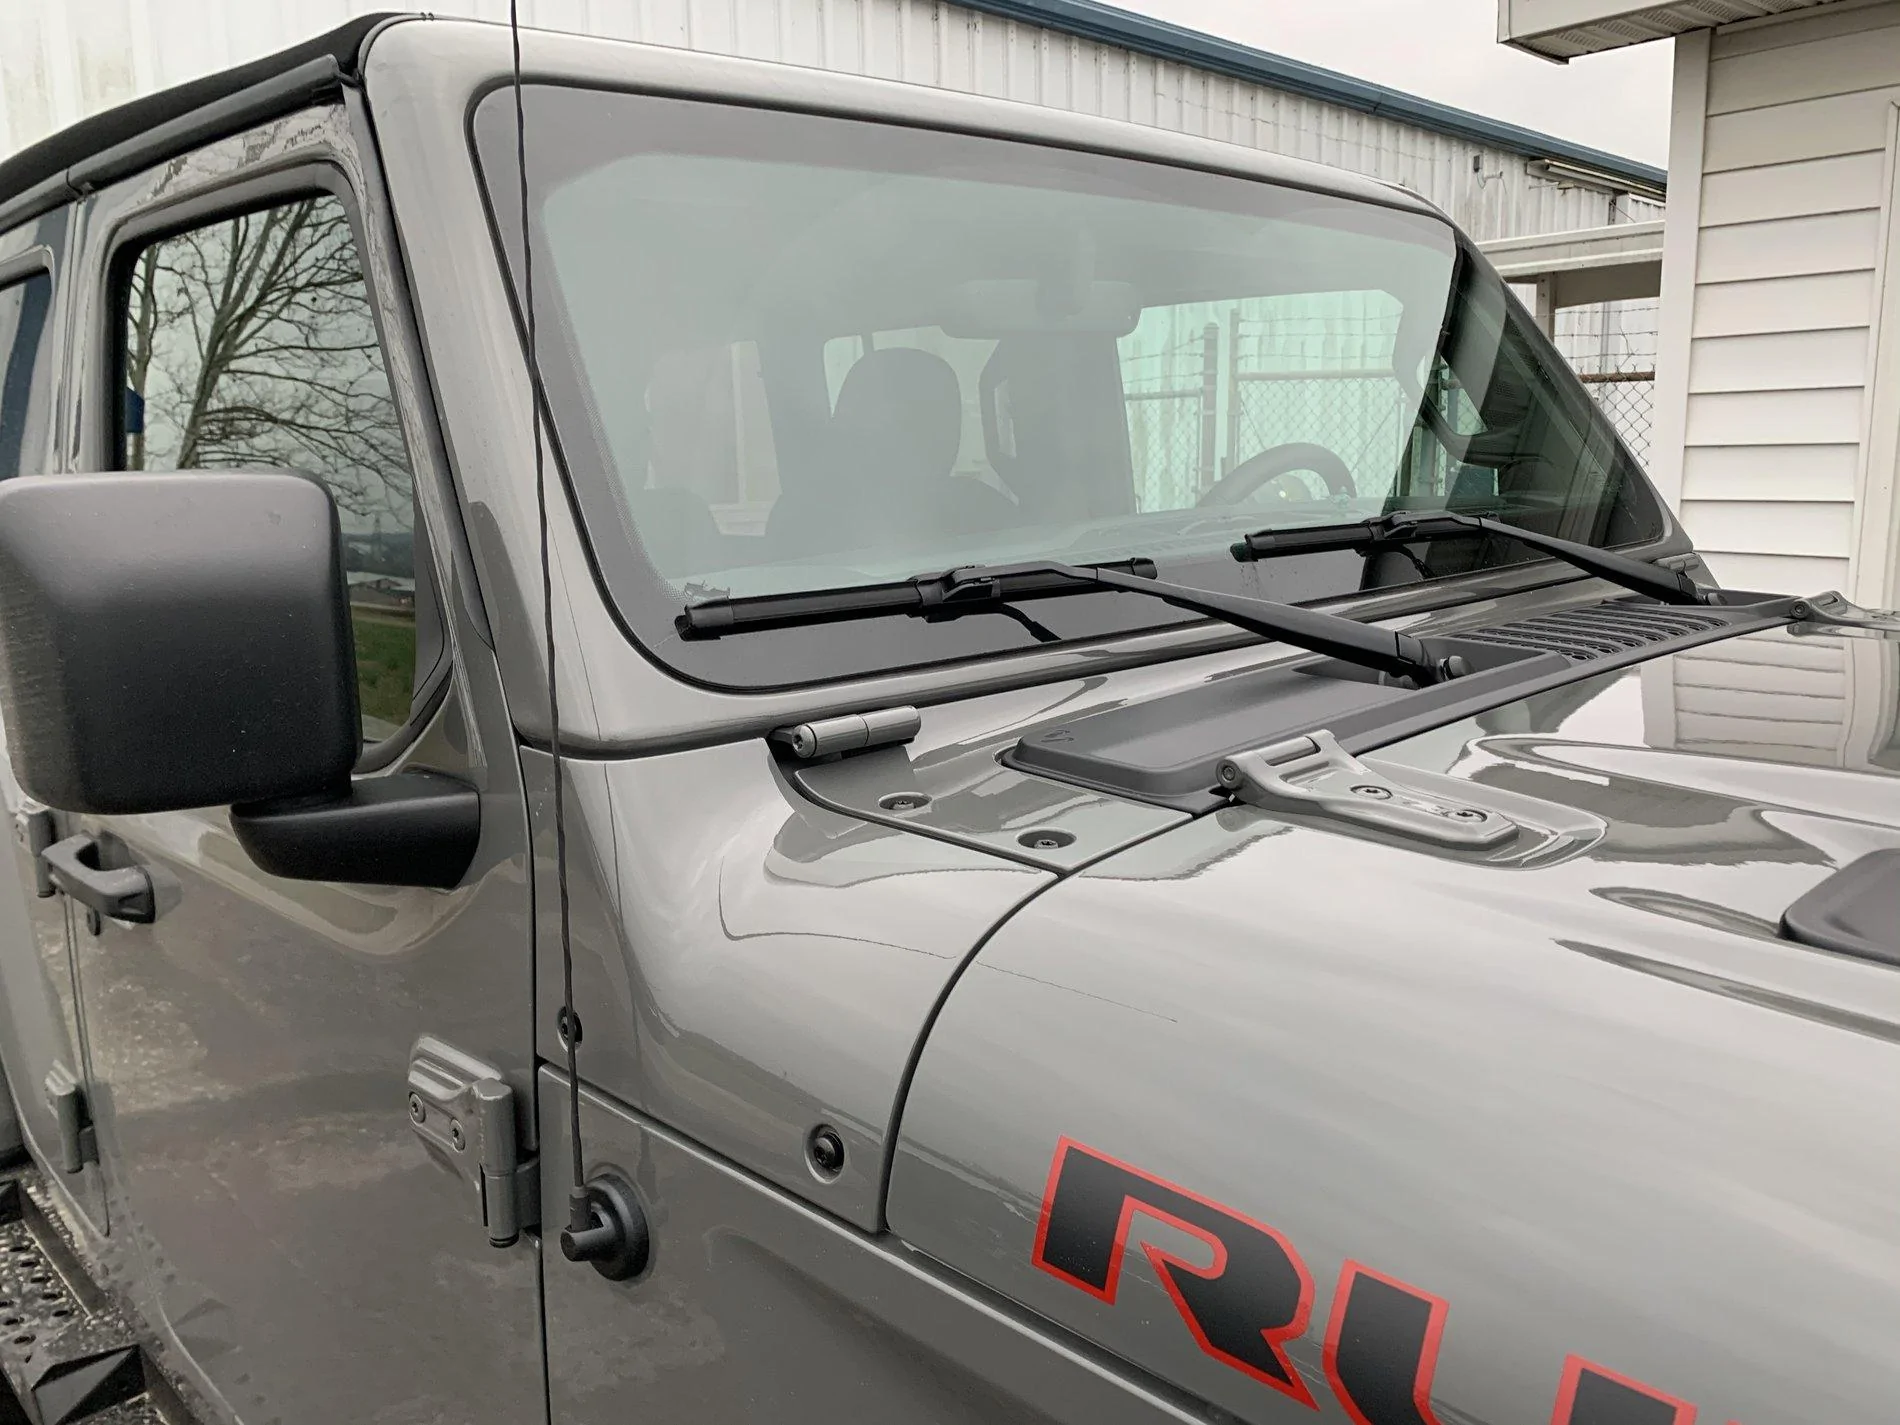
When I picked up my 2020 JLUR in Nov. I had a different approach to this issue and I believe I have finally created a solution that works.
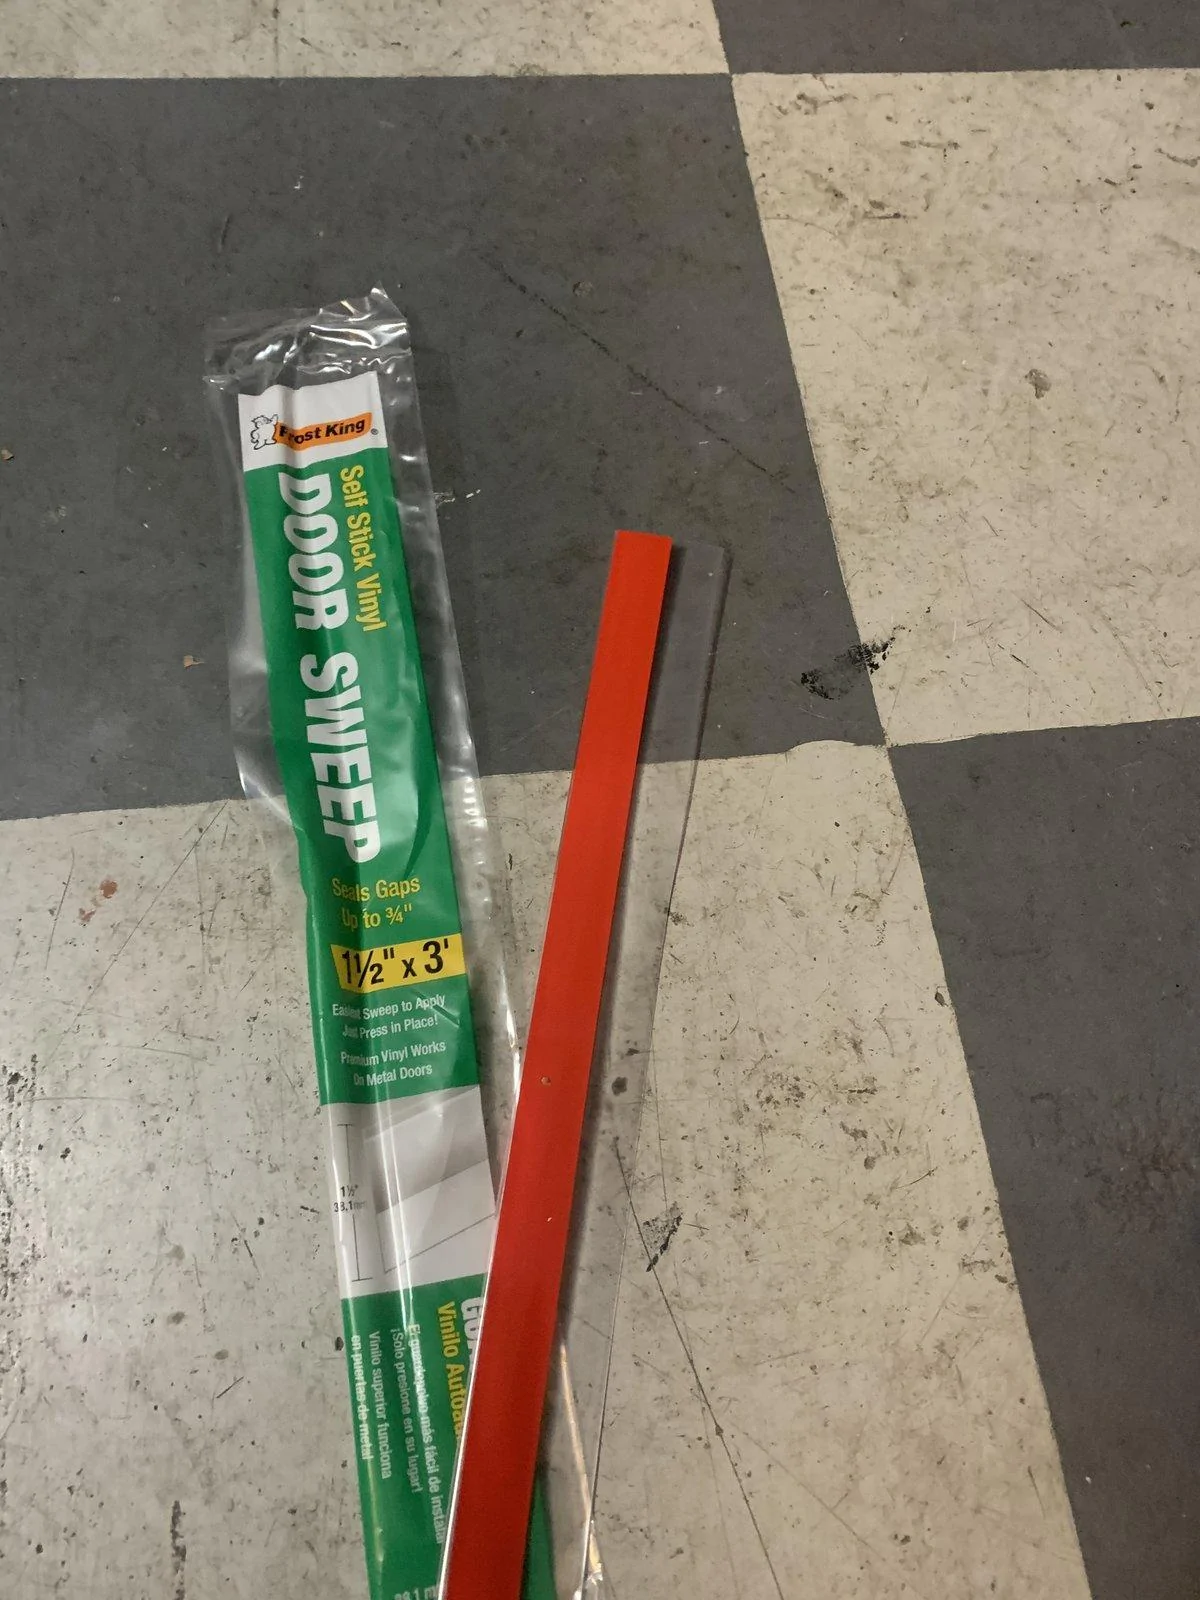
I went to Lowe’s and was on the hunt for something I could execute extending the rail better. I picked up two vinyl self stick door sweeps and some velcro that had adhesive tape so you can apply it to different surfaces. The vinyl door sweeps that I purchased did not come in black like I wanted, so I had to make the choice between dark brown, white, gray or clear. I purchased the clear knowing I was going to paint them black.
This is 1of the two door sweeps I purchased from Lowe’s, they were about $3 each. The door sweeps can be found in the weatherstripping isle. It comes with self adhesive ready to be applied.

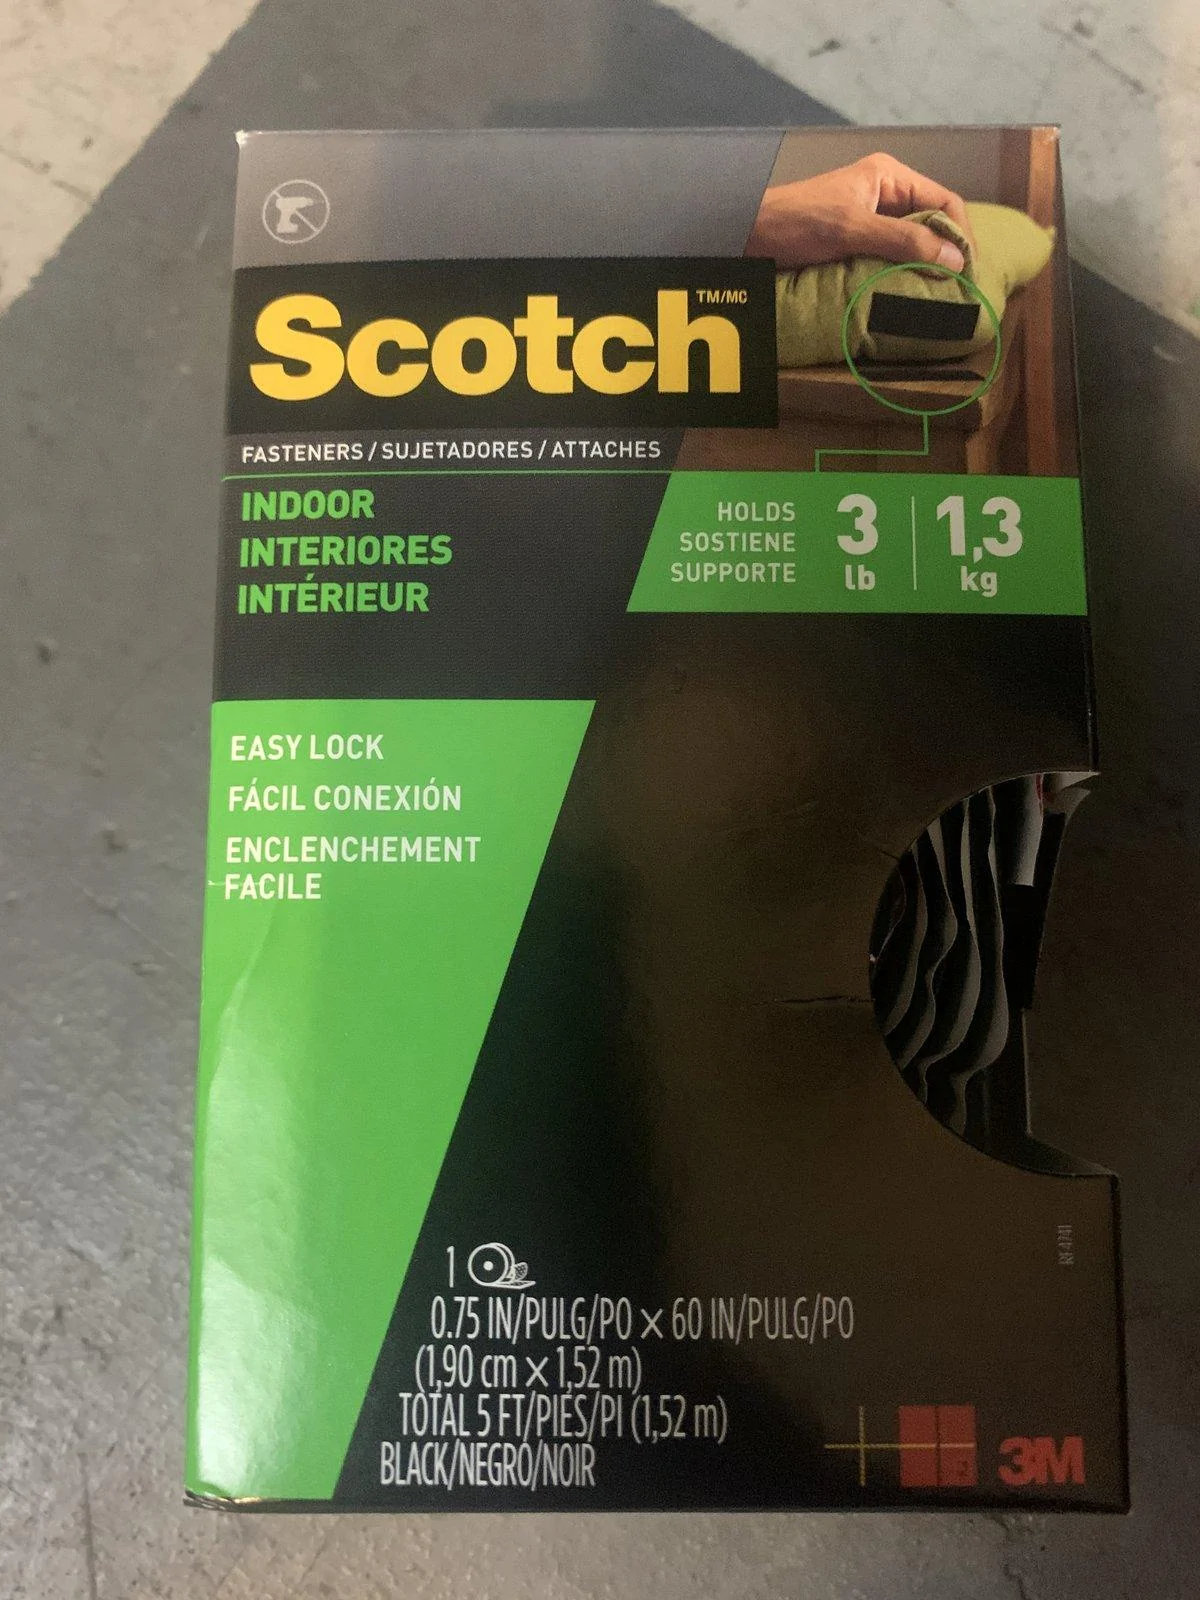
This is the velcro that has adhesive on each backside.
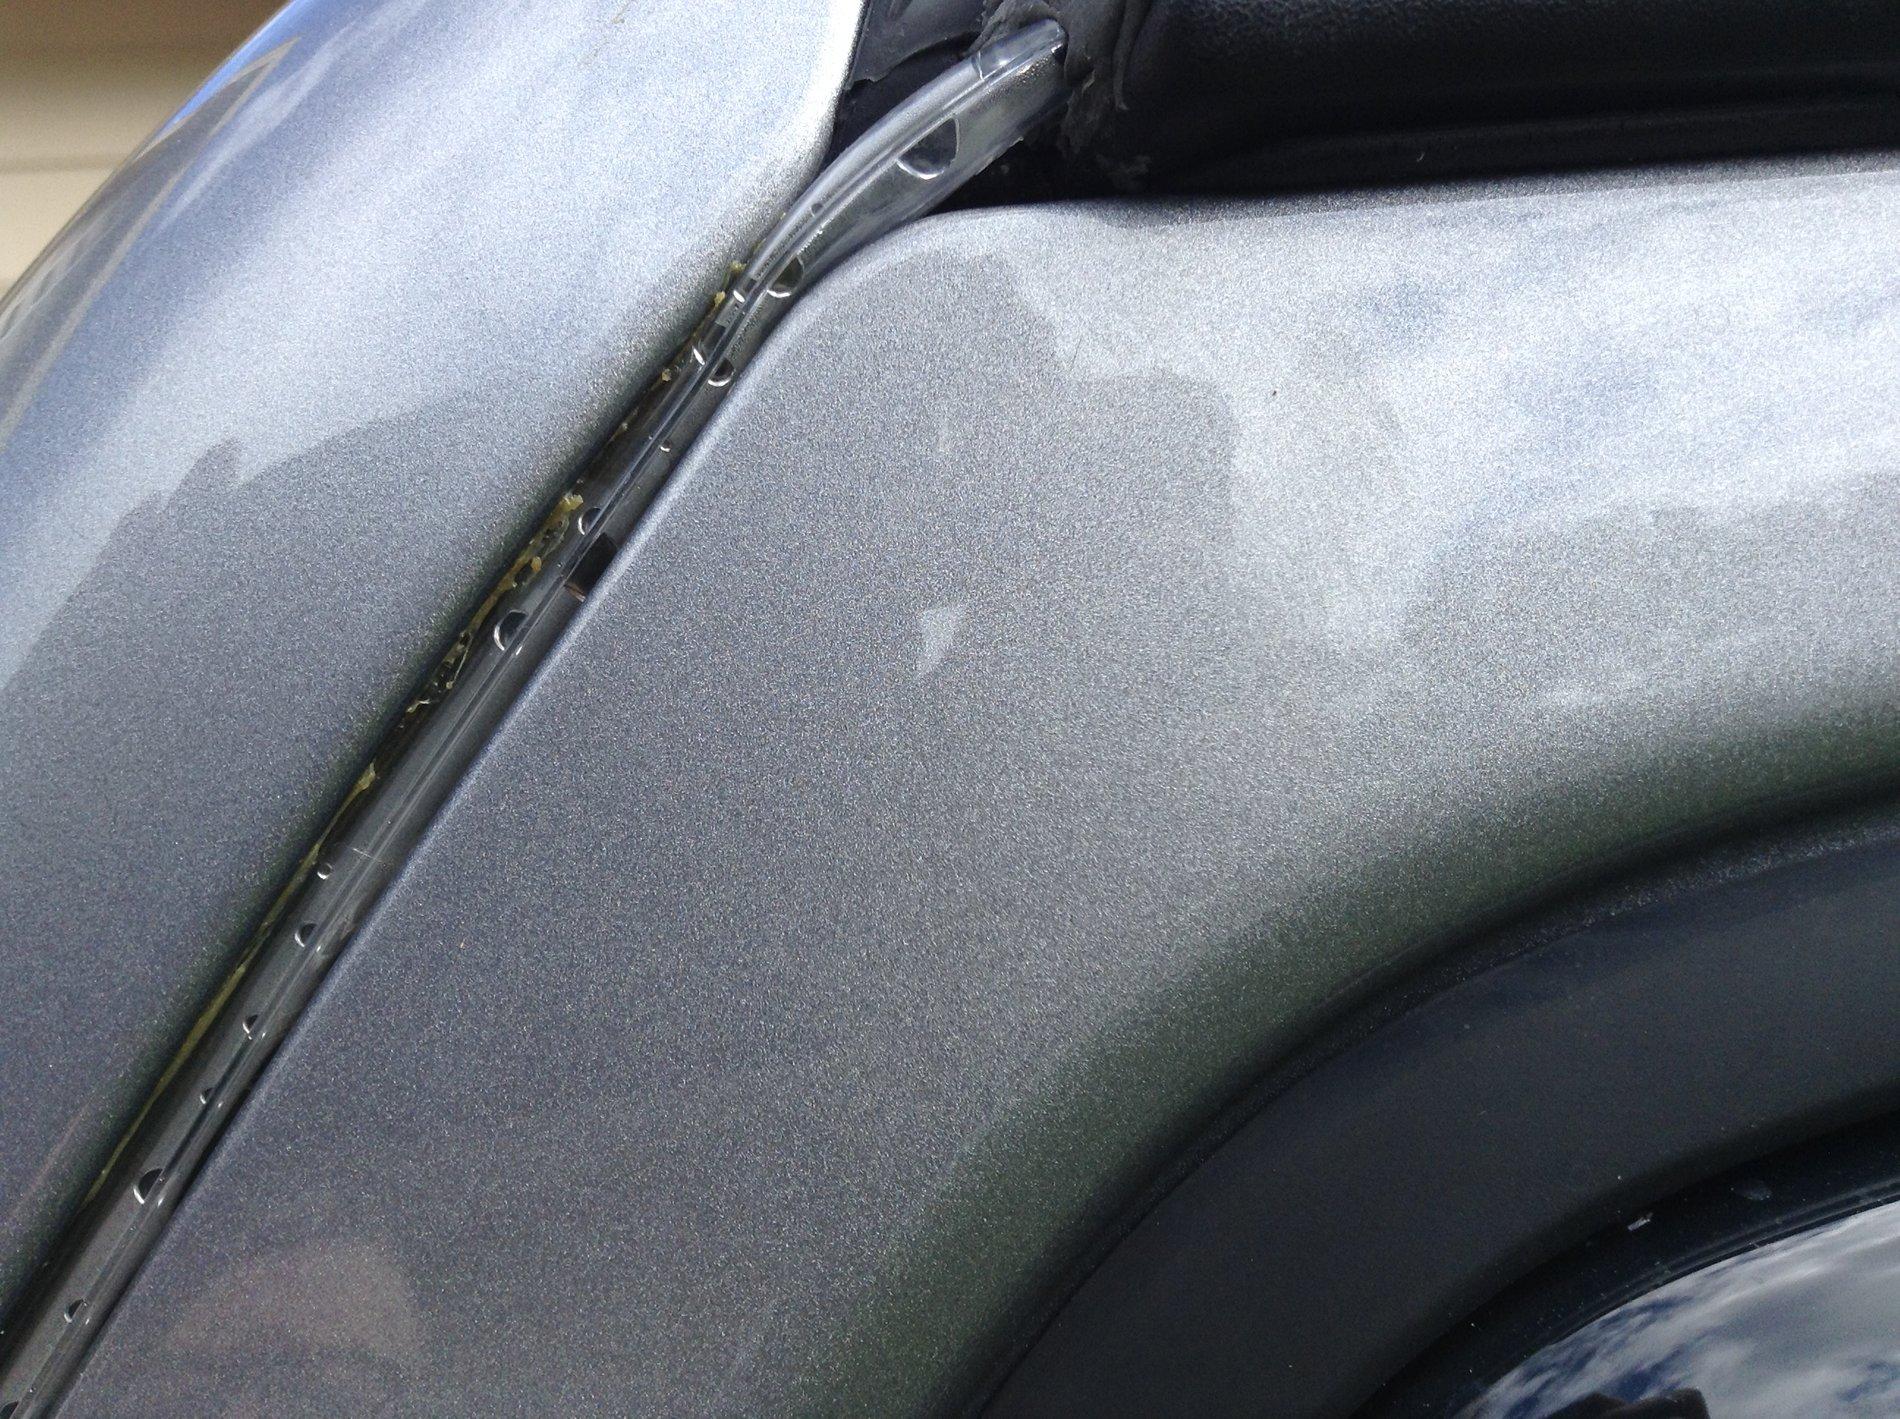
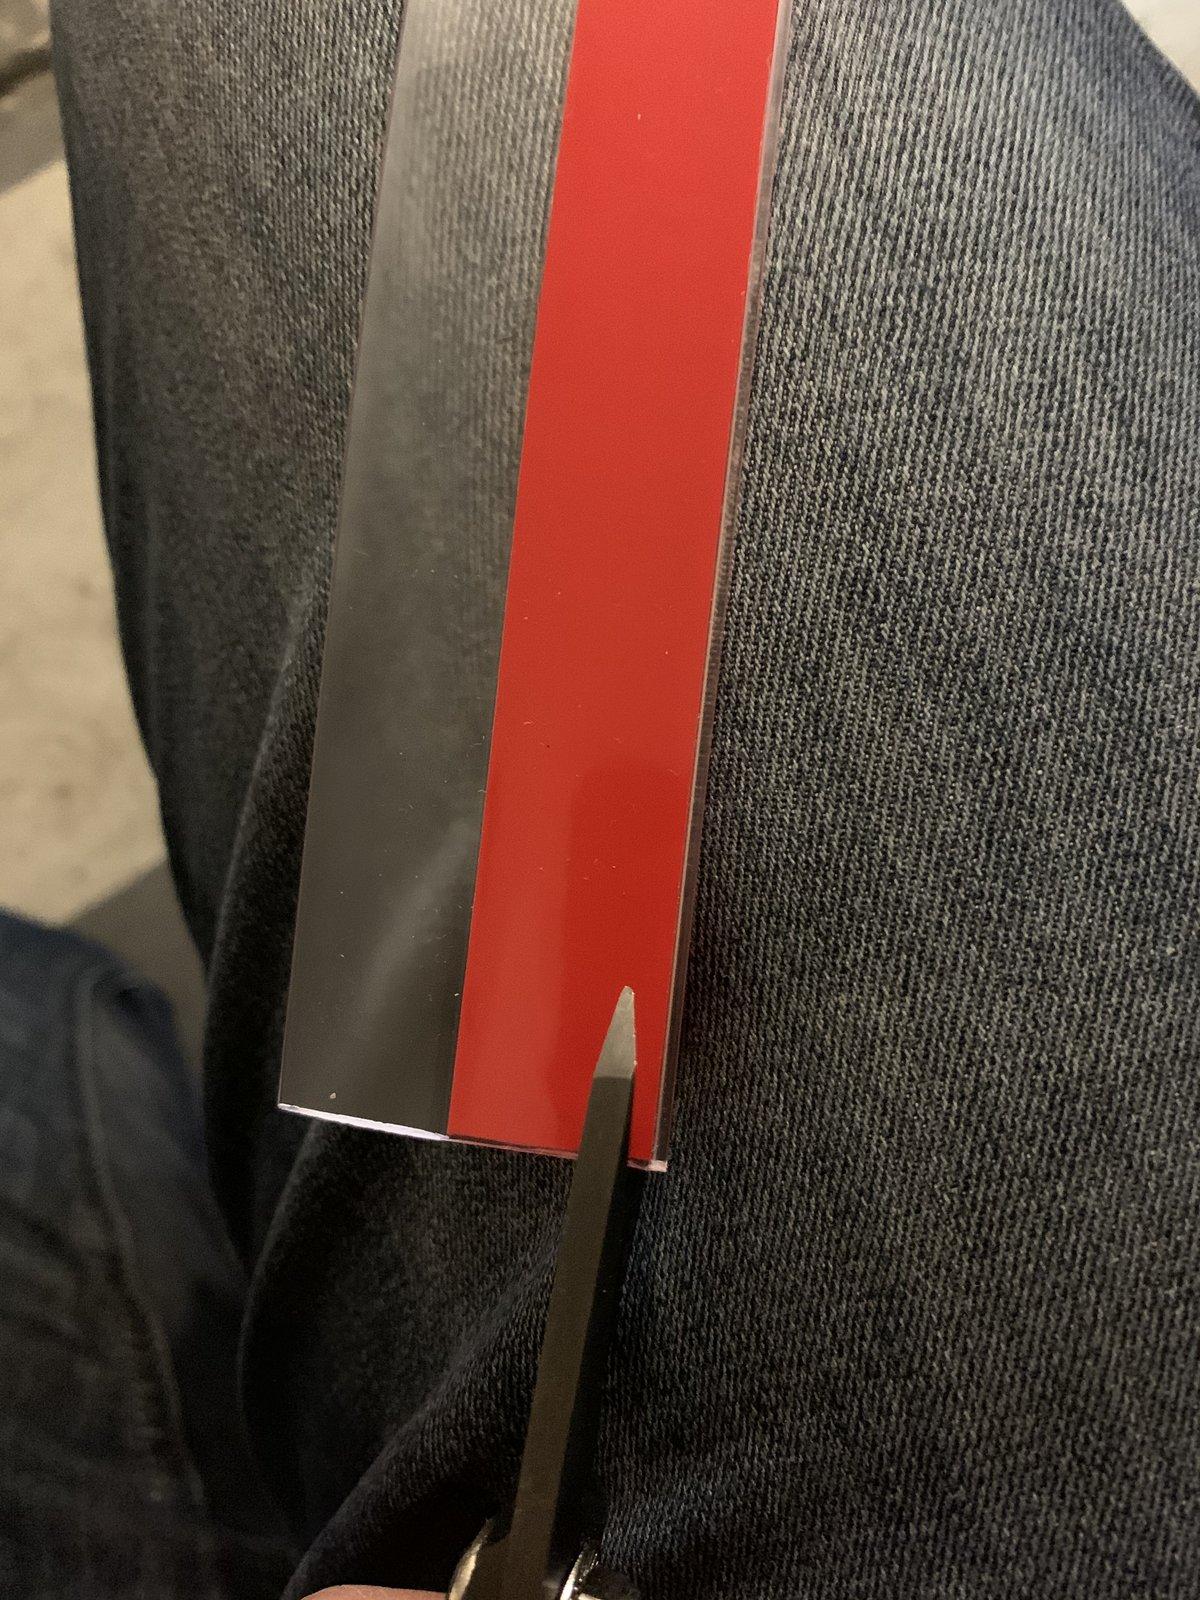
Once I got home I measured out how much of the door sweep I would need to extend the rails. I decided on 21”. After I trimmed it to 21inches, I decided to trim 1/8 inch off from the edge of the adhesive taped.
After all the cutting was finished, I wanted to paint them black. I used a scotch-brite pad to knock the shine off of the door sweep and then wiped them down with an alcohol pad. I used fusion satin black paint to paint the side without the adhesive. Since it was clear, I only had to paint one side. after letting the paint dry it was time to test if this was all going to work like I thought.

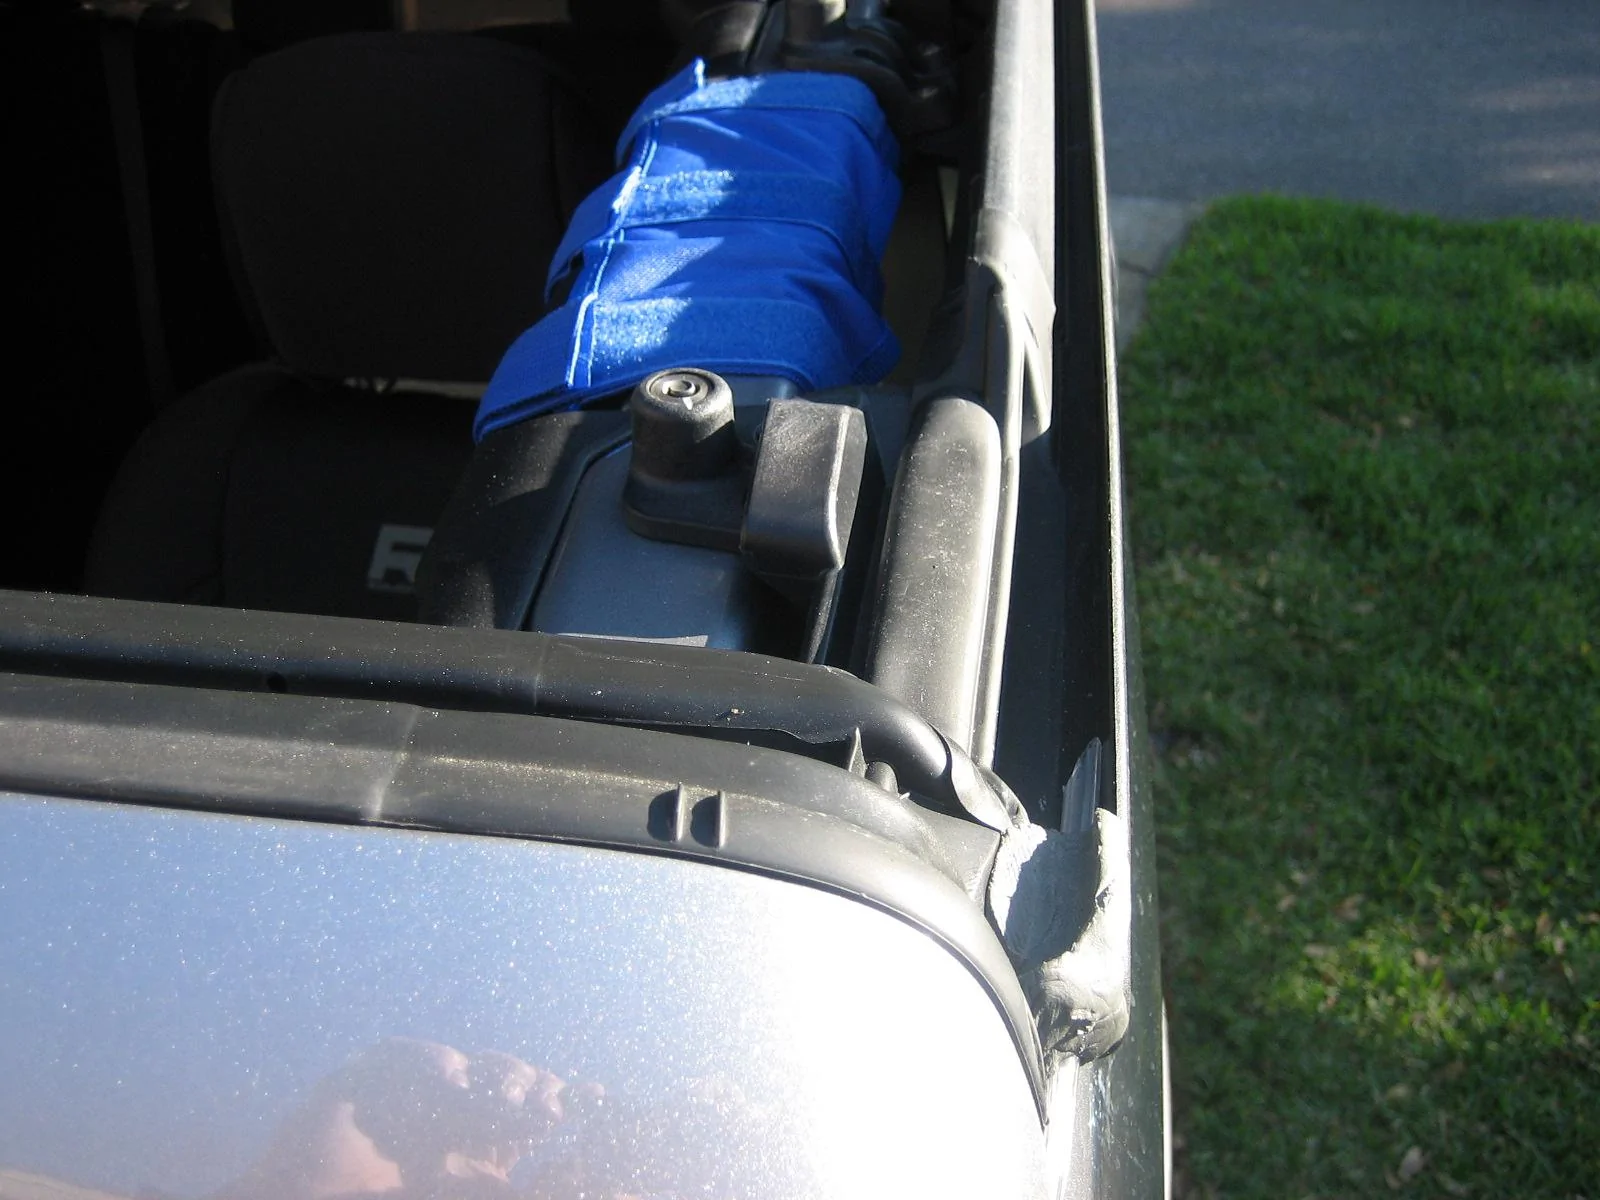
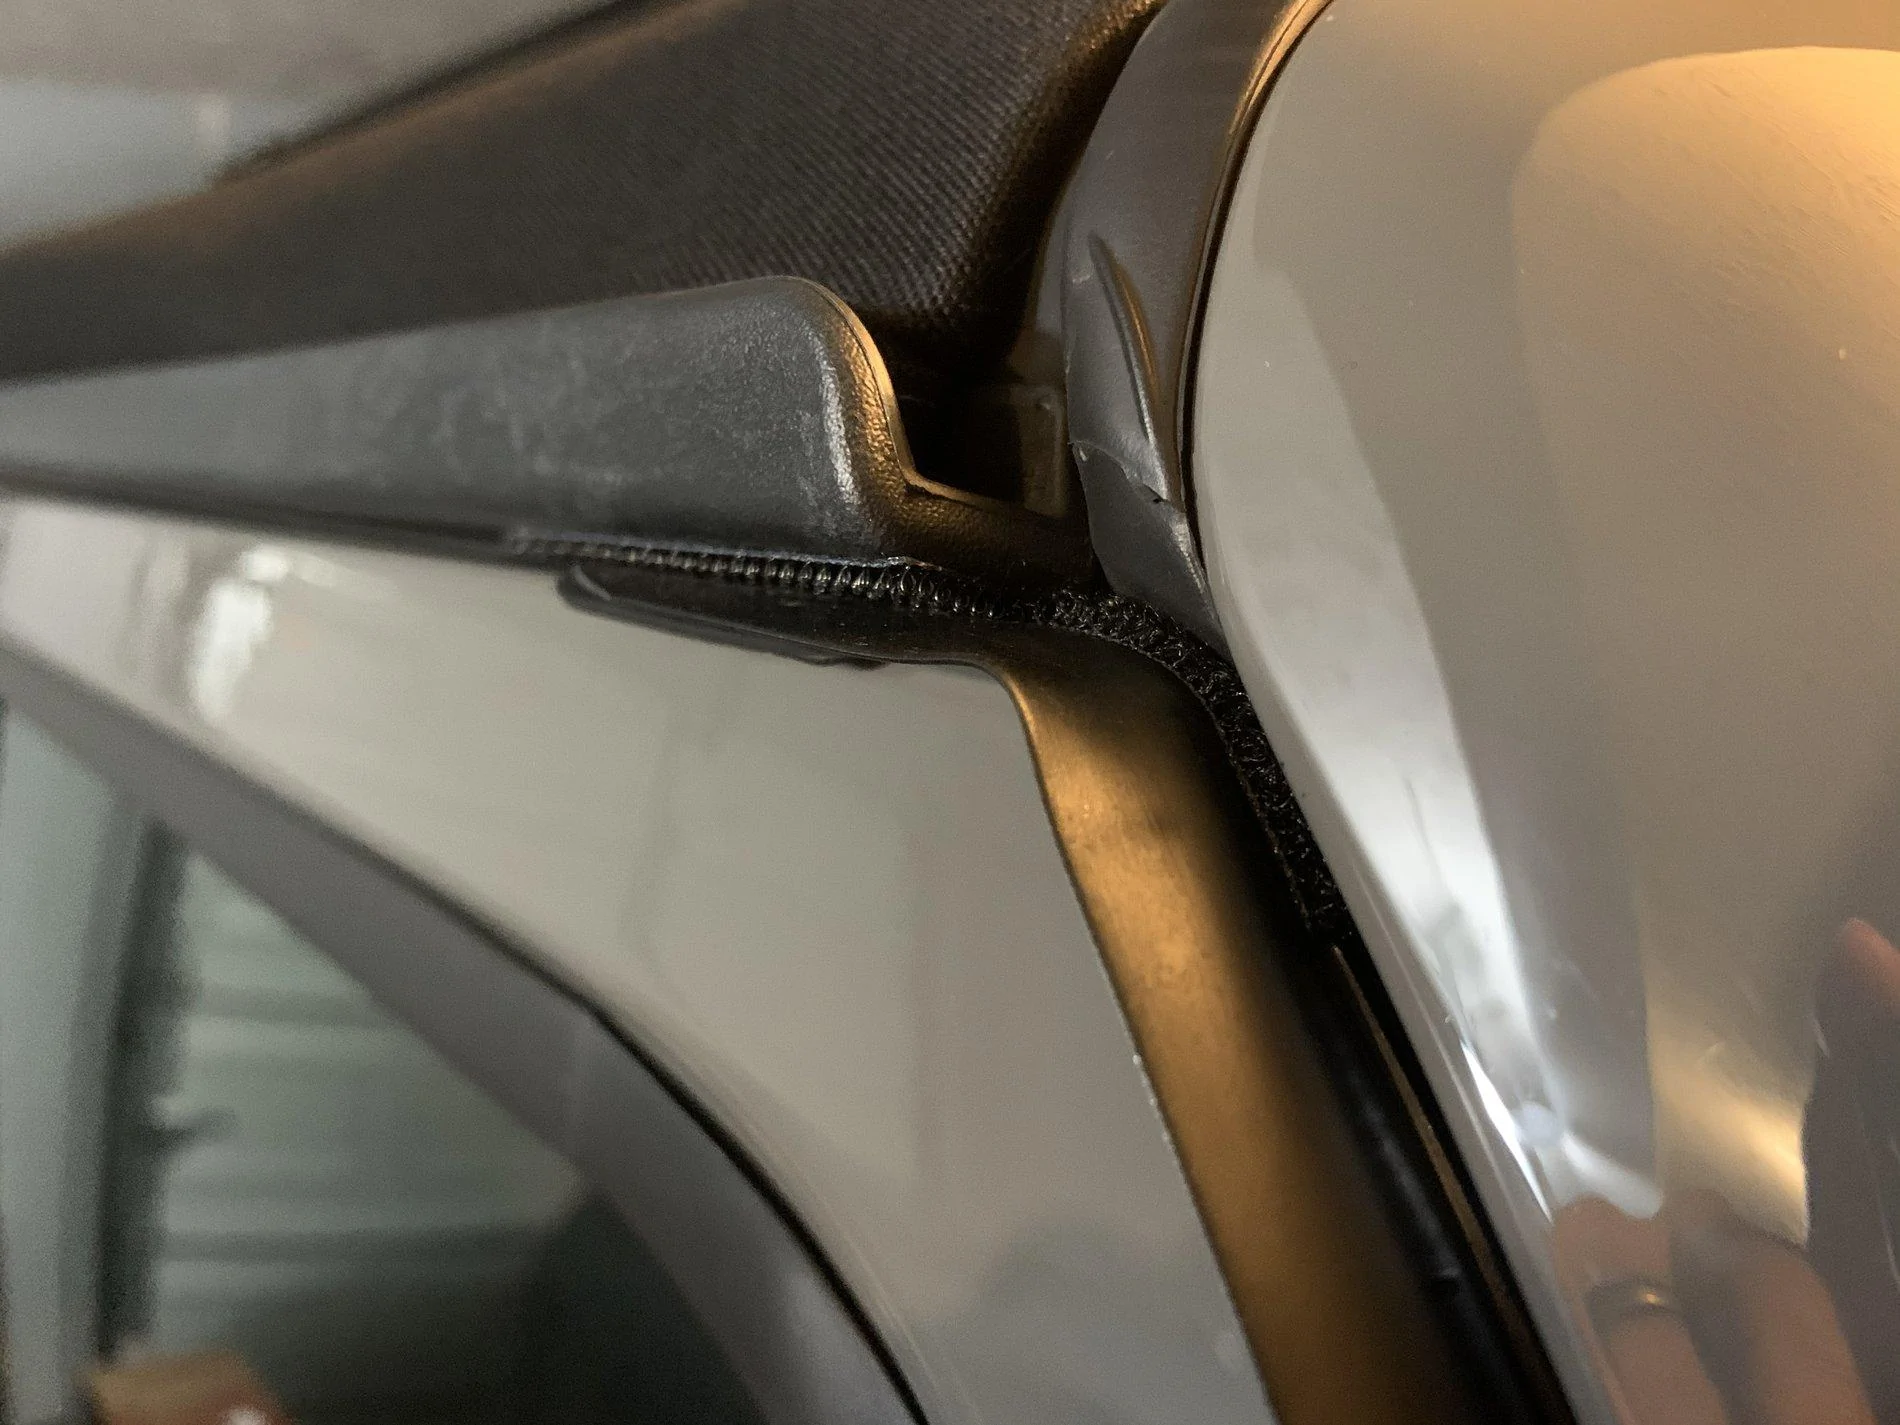
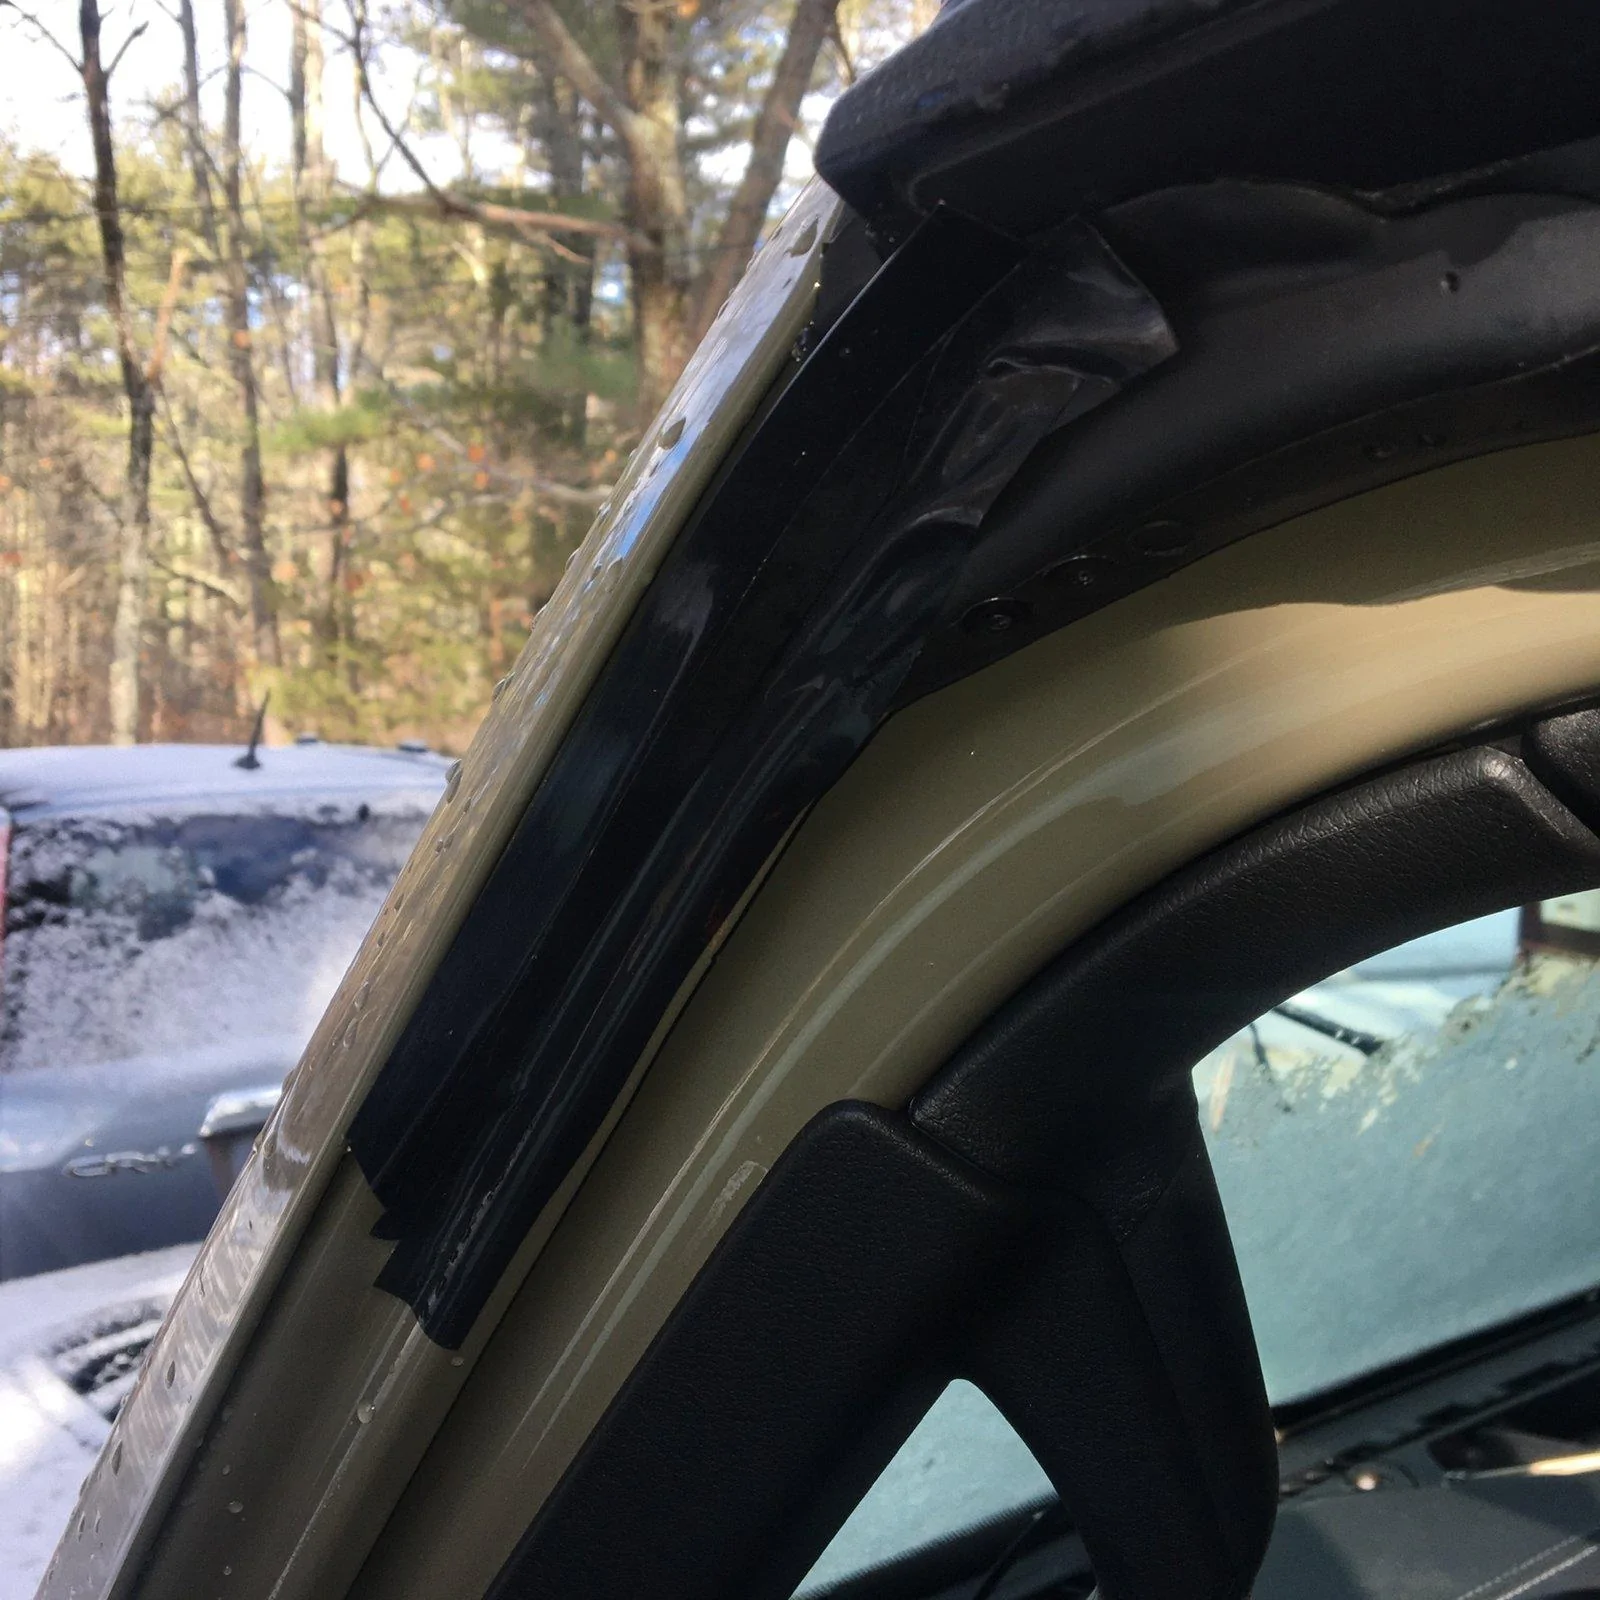
I ended up trimming the ends to not be so squared off. I don’t think it really matters, for me it was more pleasing to the eye. Once I peeled the red adhesive back, I did leave about 5 inches of red tape cover from the top portion. The adhesive tape will only be on the front part of your windshield frame starting right past the rubber seal all the way up until you reach that 5 inch piece you didn’t peel off yet. like the picture below.
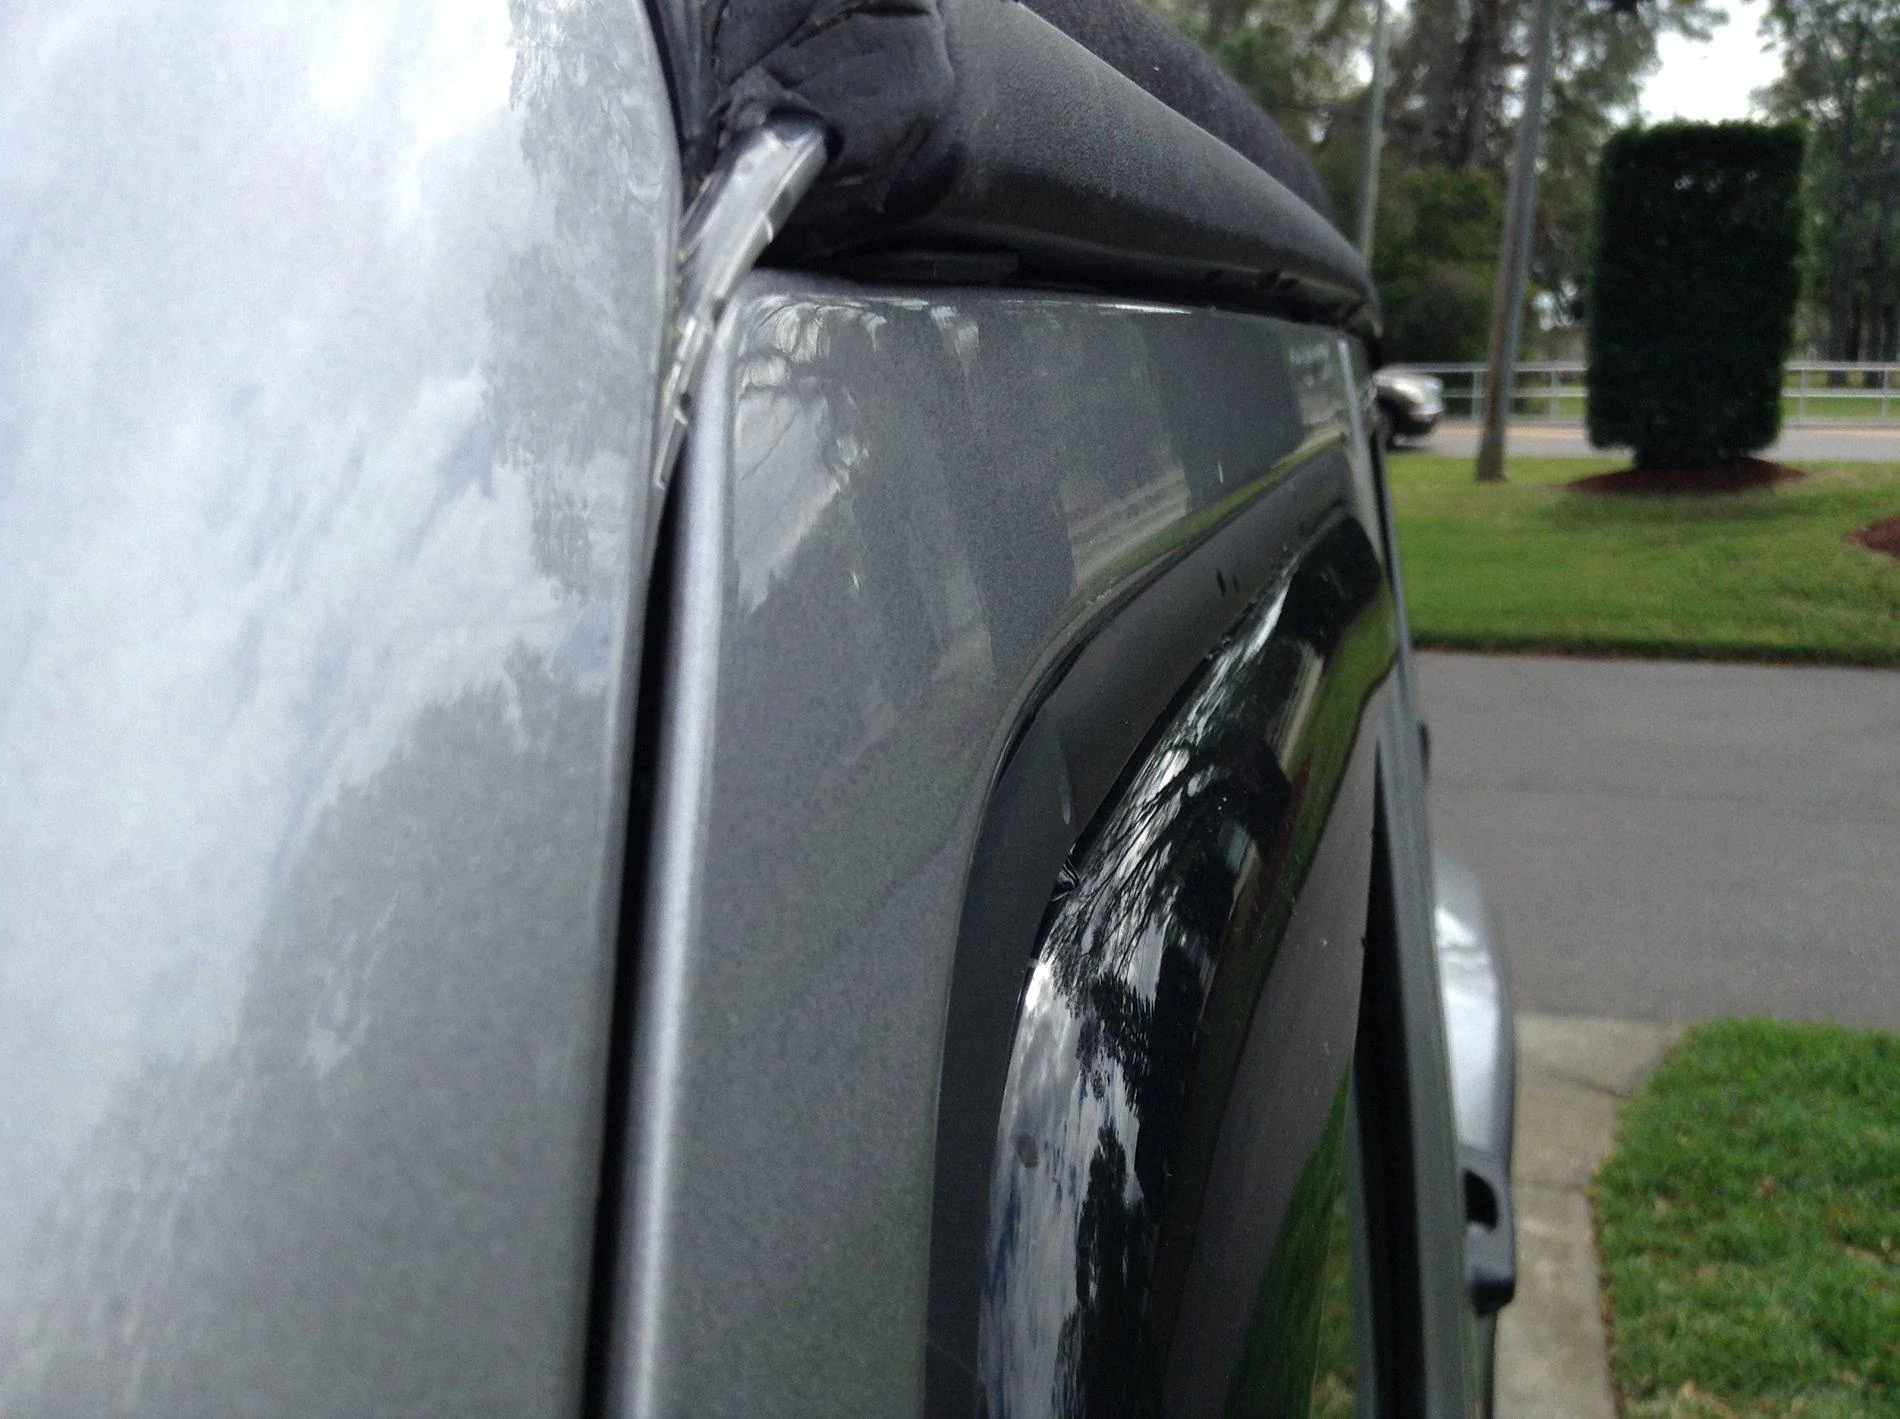
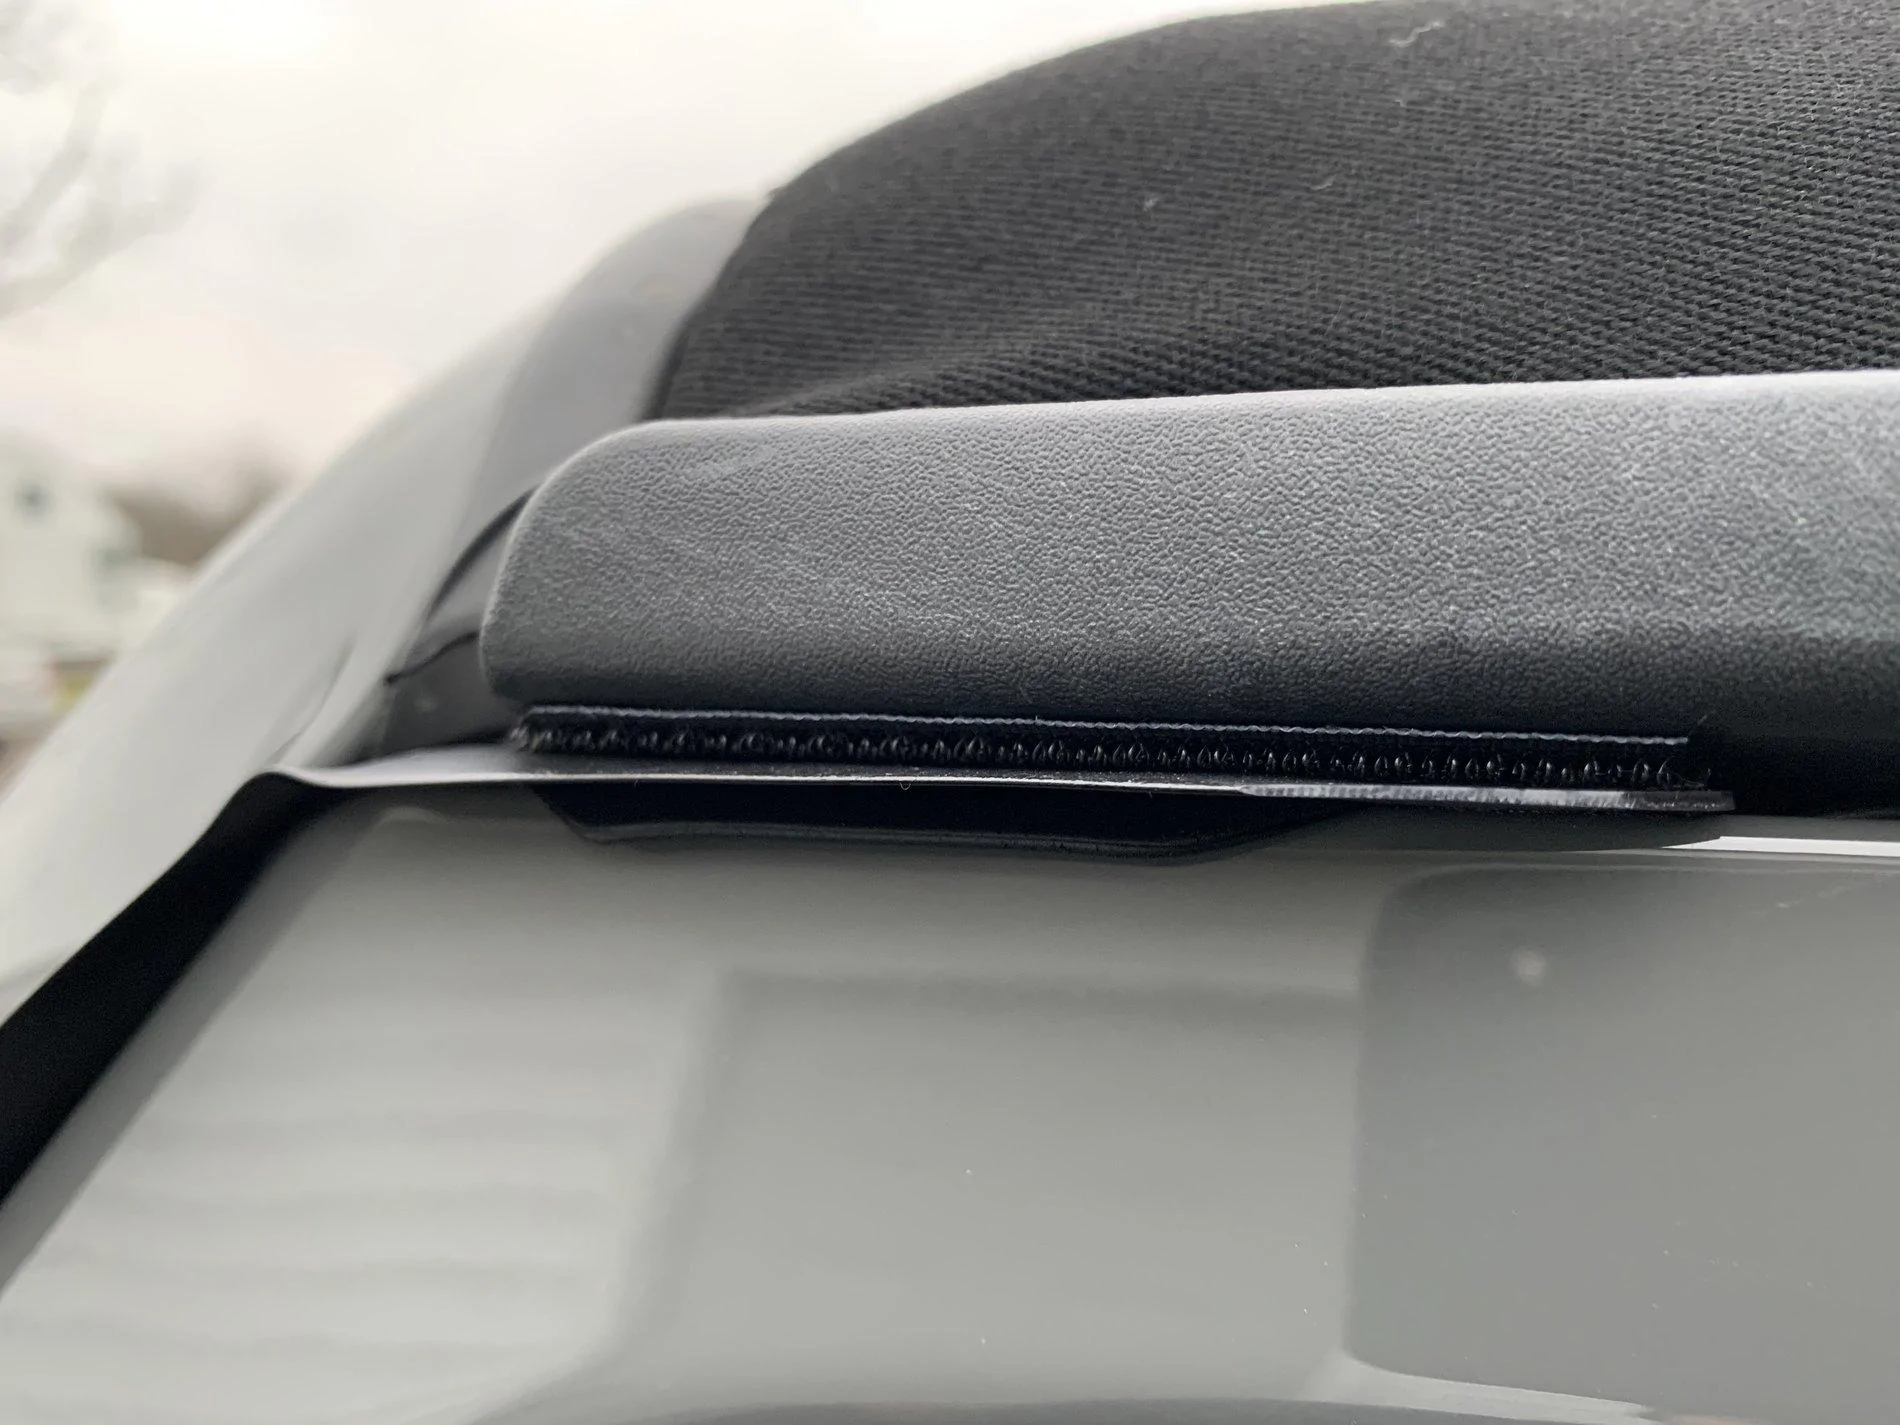
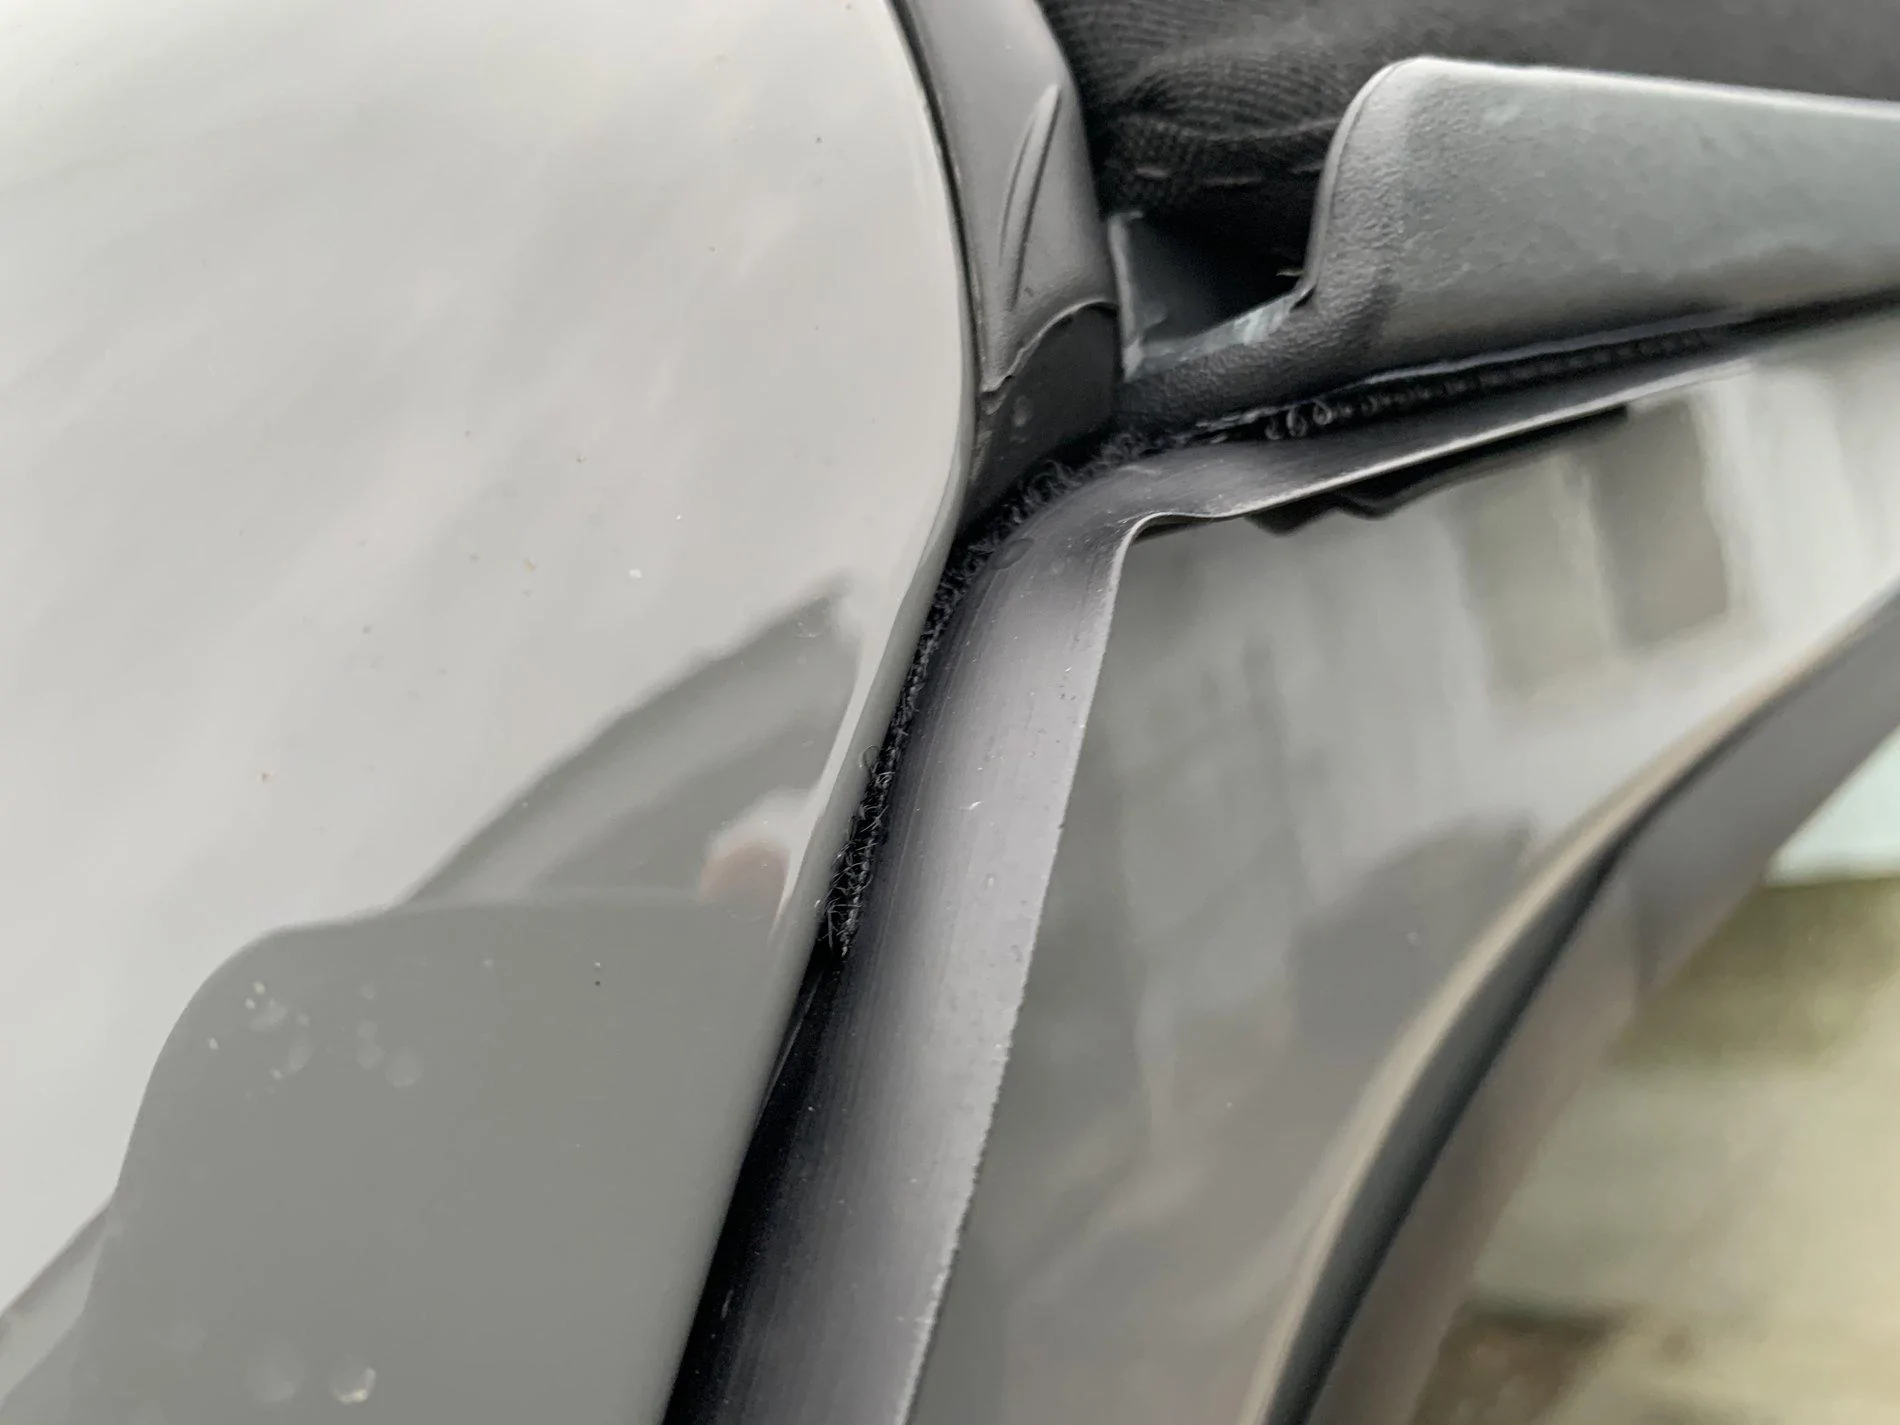
Once you get the door sweep set in place, cut a piece of soft sided velcro. it should match the length of the rest of the door sweep. Now you will pull the rest of the red adhesive back and the adhesive back to the soft sided velcro and attach them together.
Once this is completed. Now you just have to get the hard side of the velcro and cut that to match from the end of factory drip rail to the end of the door sweep that you just installed the soft velcro to. It should be about 3 inches.
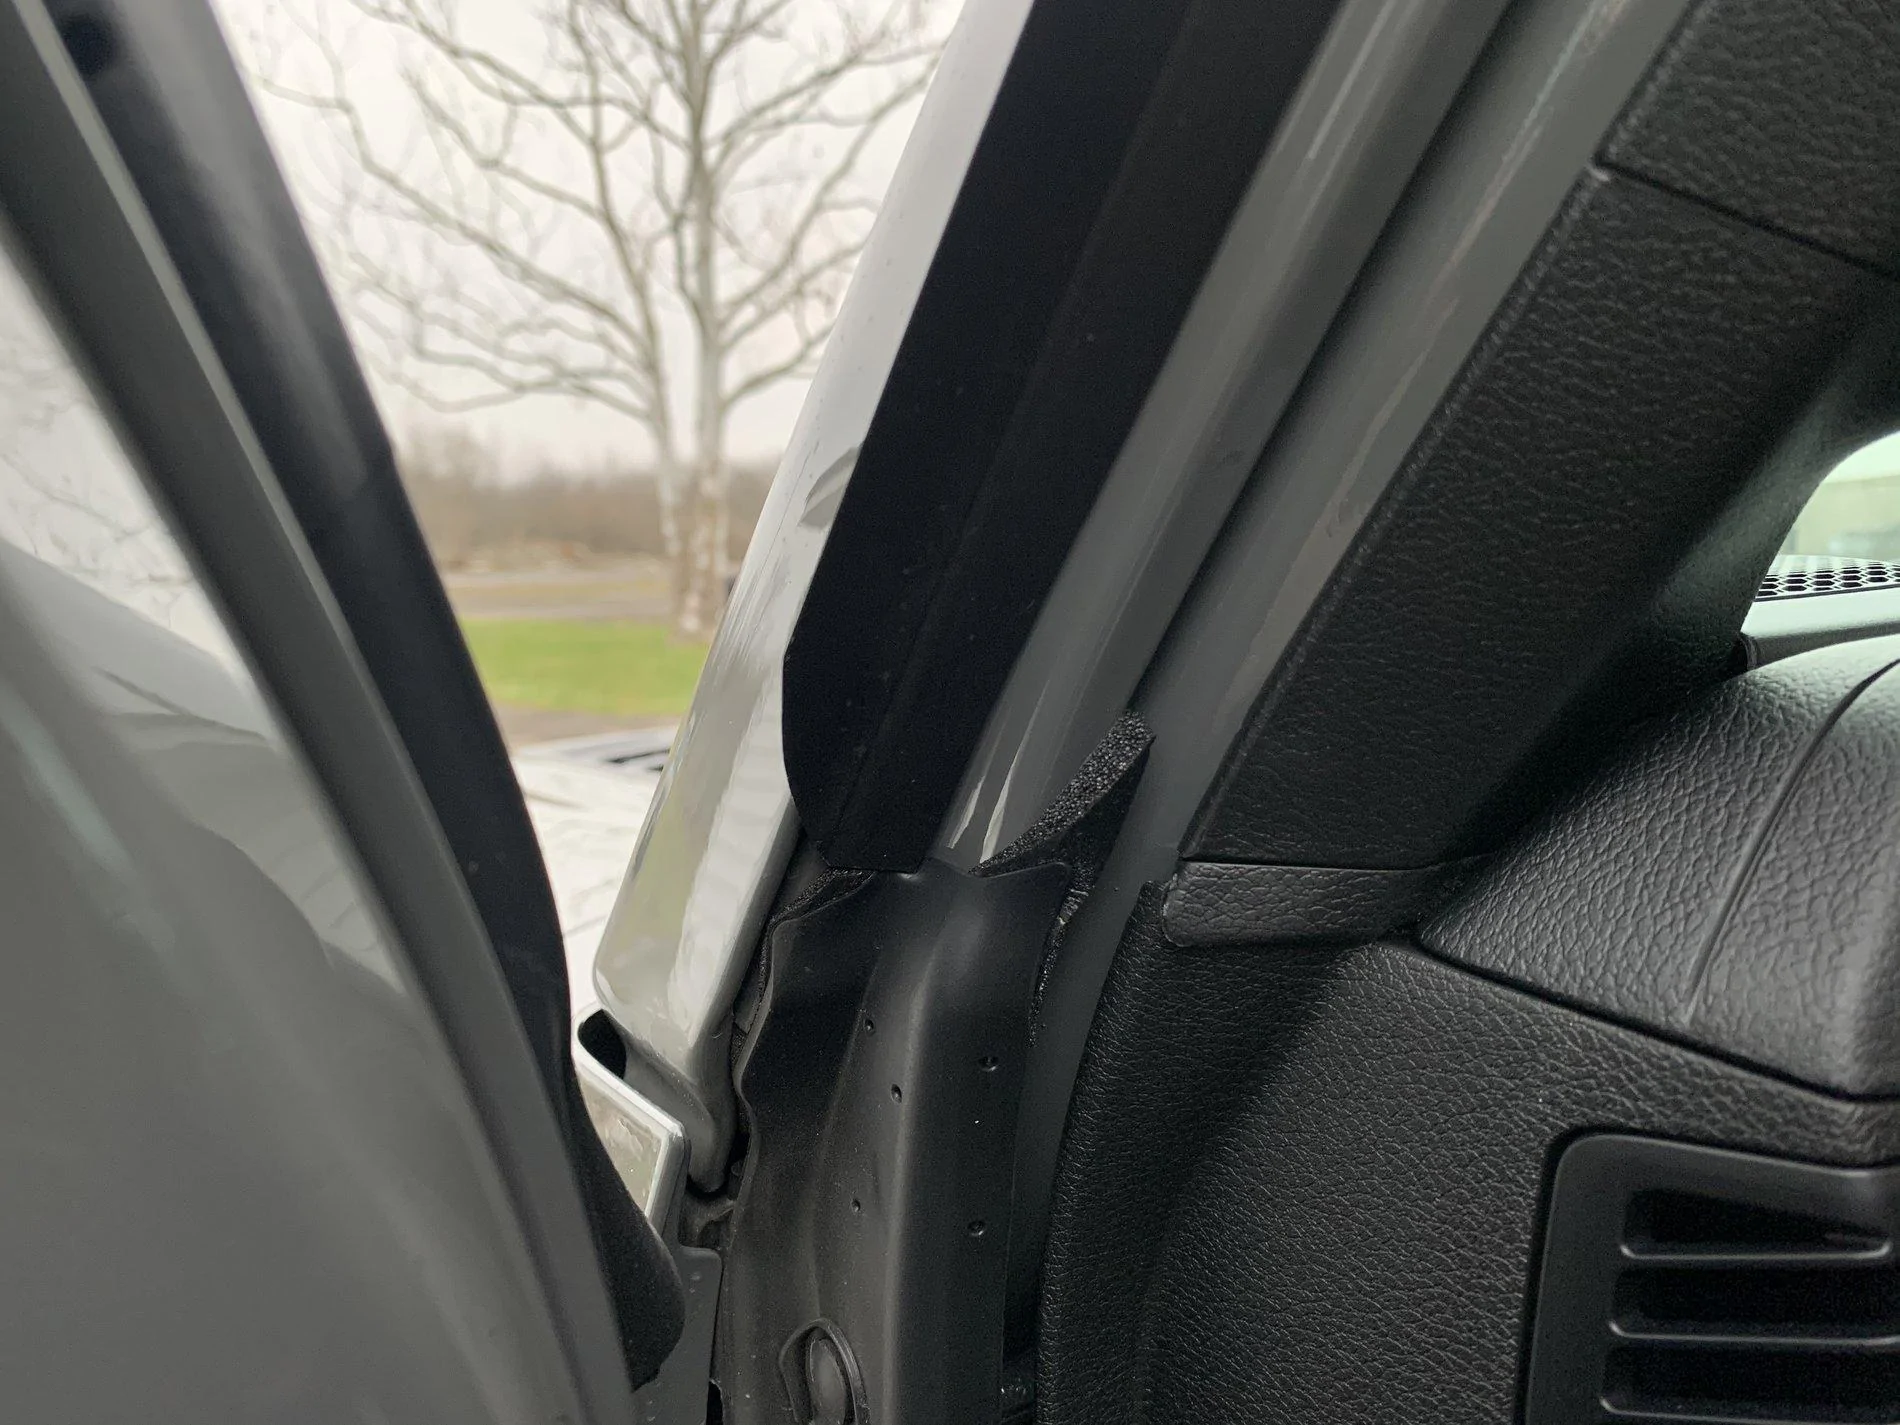
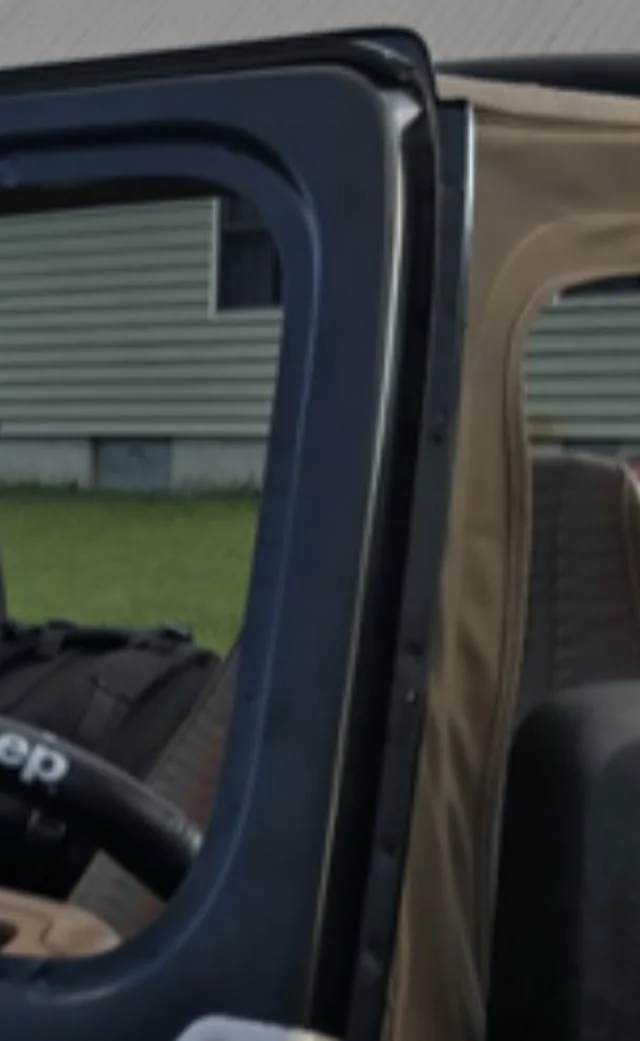
Once that is done, its complete
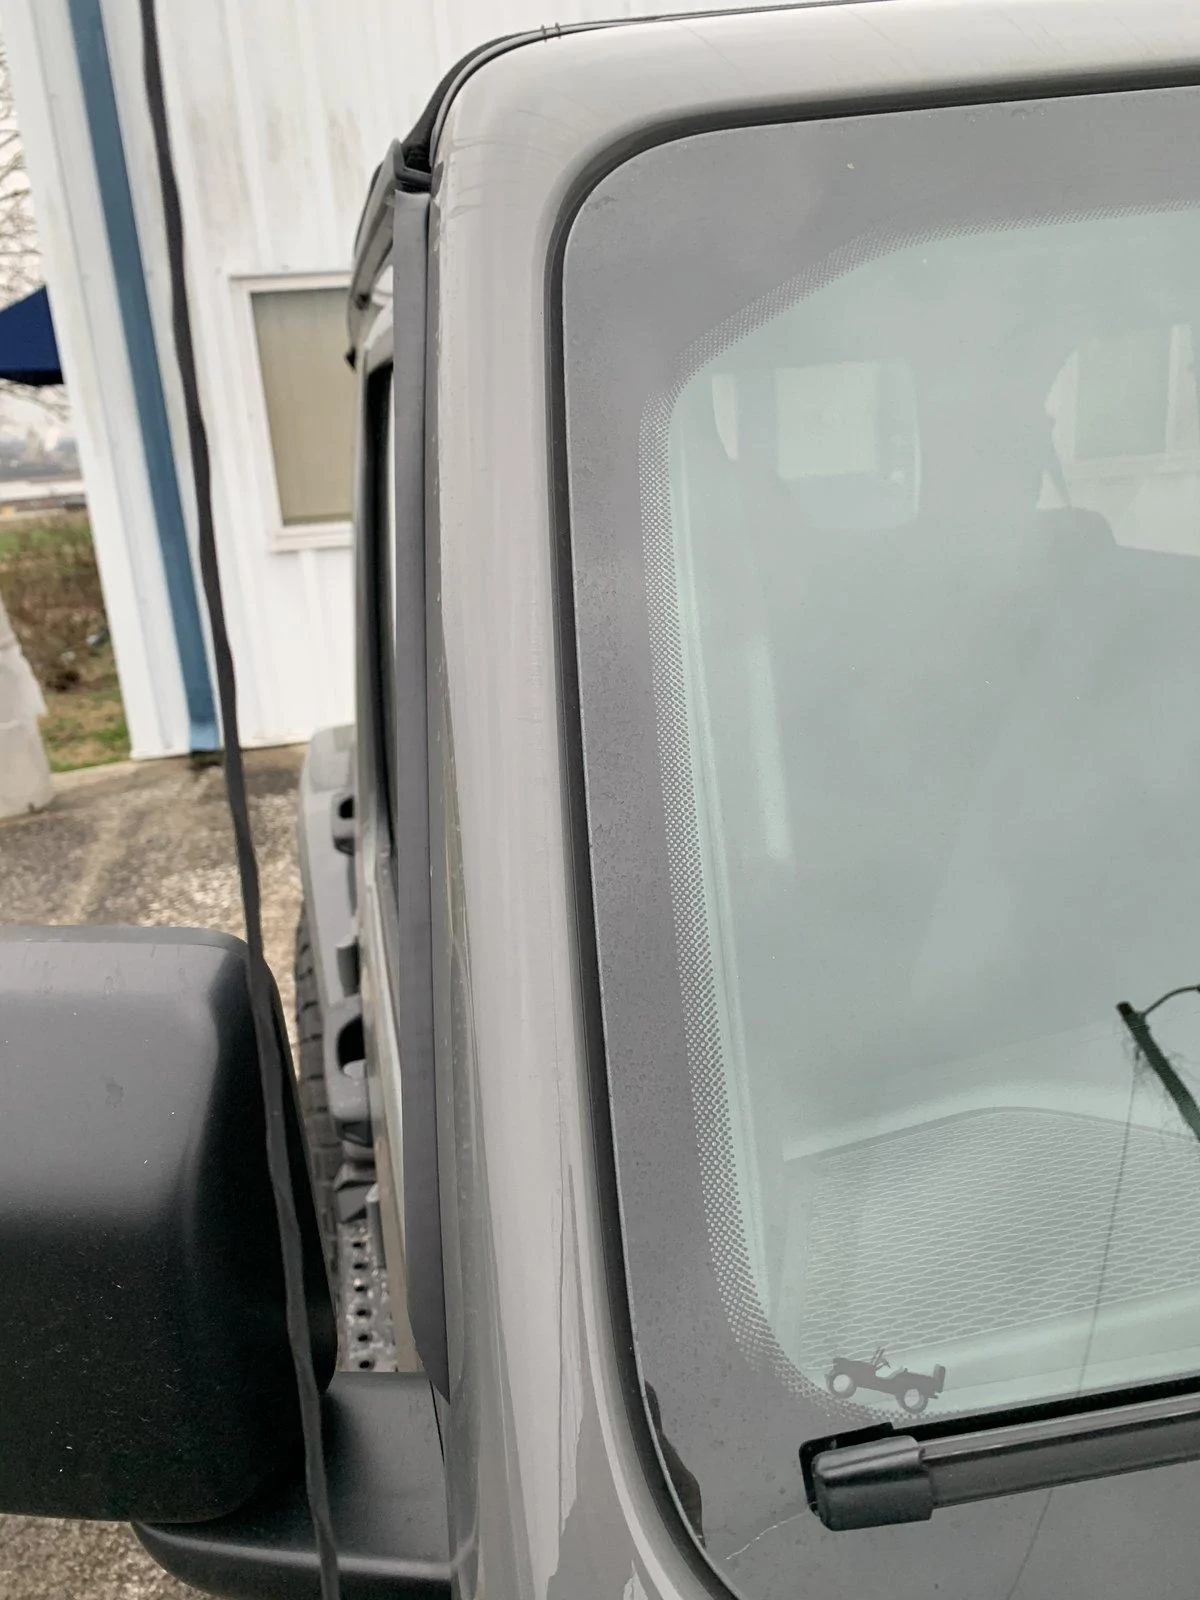
now you have drip rails that are extended and you will still be able to remove the top whether you have a soft top or a hard top. I have a premium soft top, but I don’t see any reason why this shouldn’t work for the hard top freedom panel.
So far this is the best solution I have come up with that has been working so far very well. As a licensed aircraft mechanic, This was only going to test the theory to see if it would actually function well, because I was going to fabricate them out of aluminum, but over time I actually have grown to really like them how they are. I like how simple they are and its very easy for anyone to replicate. Also they are very inexpensive. Anyway I just wanted to share this, and hope it helps someone. Sorry for the long post, there are probably some mistakes in here, as I did this all from my iPhone. If there needs to be any clarification please ask.
-John
Ok so I been a long time Jeep owner since the 90’s so I have seen the wrangler come along way, as many of you have, from what it use to be to what it is now with the JLUR. With all the tech and creature comforts that are packed into these Jeeps at this time today I am a little surprised we have water streaming into the cabin when we open the door and it has been raining outside. Those that are familiar with this issue know it’s not a drip or two but can be a pretty steady stream if it’s been raining alot. This has been pretty annoying to me since the night I picked up my first JL in the rain.
Since that night in 2018 I have tested several solutions to try and solve this problem, some worked better then others.
First I tried to block the end of the drip rail with stacked 3m tape like a dam, but that only slowed the stream down. This was really just testing the theory of blocking the end. I believe I had some very small gaps on the sides of the tape so kind of my fault with poor execution. I thought I could improve this solution by using a dab of silicon at the end of the rail as well, and for the most part that worked pretty good, unless it has been raining really hard and overflows or I parked on a decline and it over flowed the end. I also tried to use heat shrink to cap the end of the rail. I thought if I capped the end it would help it from over flowing or would hold the water in on a decline. Again this didn’t really work to my satisfaction. After this attempt I tried to extend the rail with rubber further towards the windshield frame, but I hated the look of the end result and couldn’t live with this very long.
When I picked up my 2020 JLUR in Nov. I had a different approach to this issue and I believe I have finally created a solution that works.
I went to Lowe’s and was on the hunt for something I could execute extending the rail better. I picked up two vinyl self stick door sweeps and some velcro that had adhesive tape so you can apply it to different surfaces. The vinyl door sweeps that I purchased did not come in black like I wanted, so I had to make the choice between dark brown, white, gray or clear. I purchased the clear knowing I was going to paint them black.
This is 1of the two door sweeps I purchased from Lowe’s, they were about $3 each. The door sweeps can be found in the weatherstripping isle. It comes with self adhesive ready to be applied.

This is the velcro that has adhesive on each backside.
Once I got home I measured out how much of the door sweep I would need to extend the rails. I decided on 21”. After I trimmed it to 21inches, I decided to trim 1/8 inch off from the edge of the adhesive taped.

After all the cutting was finished, I wanted to paint them black. I used a scotch-brite pad to knock the shine off of the door sweep and then wiped them down with an alcohol pad. I used fusion satin black paint to paint the side without the adhesive. Since it was clear, I only had to paint one side. after letting the paint dry it was time to test if this was all going to work like I thought.

I ended up trimming the ends to not be so squared off. I don’t think it really matters, for me it was more pleasing to the eye. Once I peeled the red adhesive back, I did leave about 5 inches of red tape cover from the top portion. The adhesive tape will only be on the front part of your windshield frame starting right past the rubber seal all the way up until you reach that 5 inch piece you didn’t peel off yet. like the picture below.
Once you get the door sweep set in place, cut a piece of soft sided velcro. it should match the length of the rest of the door sweep. Now you will pull the rest of the red adhesive back and the adhesive back to the soft sided velcro and attach them together.
Once this is completed. Now you just have to get the hard side of the velcro and cut that to match from the end of factory drip rail to the end of the door sweep that you just installed the soft velcro to. It should be about 3 inches.
Once that is done, its complete


now you have drip rails that are extended and you will still be able to remove the top whether you have a soft top or a hard top. I have a premium soft top, but I don’t see any reason why this shouldn’t work for the hard top freedom panel.
So far this is the best solution I have come up with that has been working so far very well. As a licensed aircraft mechanic, This was only going to test the theory to see if it would actually function well, because I was going to fabricate them out of aluminum, but over time I actually have grown to really like them how they are. I like how simple they are and its very easy for anyone to replicate. Also they are very inexpensive. Anyway I just wanted to share this, and hope it helps someone. Sorry for the long post, there are probably some mistakes in here, as I did this all from my iPhone. If there needs to be any clarification please ask.
-John


Sponsored
") !
!