Sponsored

FL Robert

Well-Known Member
First Name
Robert
Joined
Feb 4, 2024
Threads
5
Messages
256
Reaction score
357
Location
South Florida
Vehicle(s)
2024 Gladiator Mojave X
Build Thread
Link
$800 does not bother me, the flexing of the tailgate skin does....a lot. They need to include the proper size stiffening bracket on the back of the case to replace the one that gets removed. Once they do that, the can have my $800. I love the idea of it!
Sponsored
 

MSgt4246

Member
First Name
Fredd
Joined
Sep 8, 2023
Threads
0
Messages
24
Reaction score
37
Location
Rio Rancho, NM
Vehicle(s)
2022 Jeep Gladiator Rubicon - Snazberry
Occupation
Retired
I can't say for sure, there wasn't a listing on the website, so I'll give you a rough number.

Given that it's "Aircraft grade Aluminum", I'm going to say it's Alloy 2024, the most common variant. It's usually 0.032 thick, with a density of 0.1 lbm/in^3. Now this box is roughly 47" *10.75" *3.25" in volume. Taking the volume * thickness of 6 sheets of AL2024 * density.

(1642 in^3) * (0.192 in) * (0.1 lbm/in^3) = 31.5 lbs.

Which feels about right, I was able to move it around very easily. Napkin math checks out.

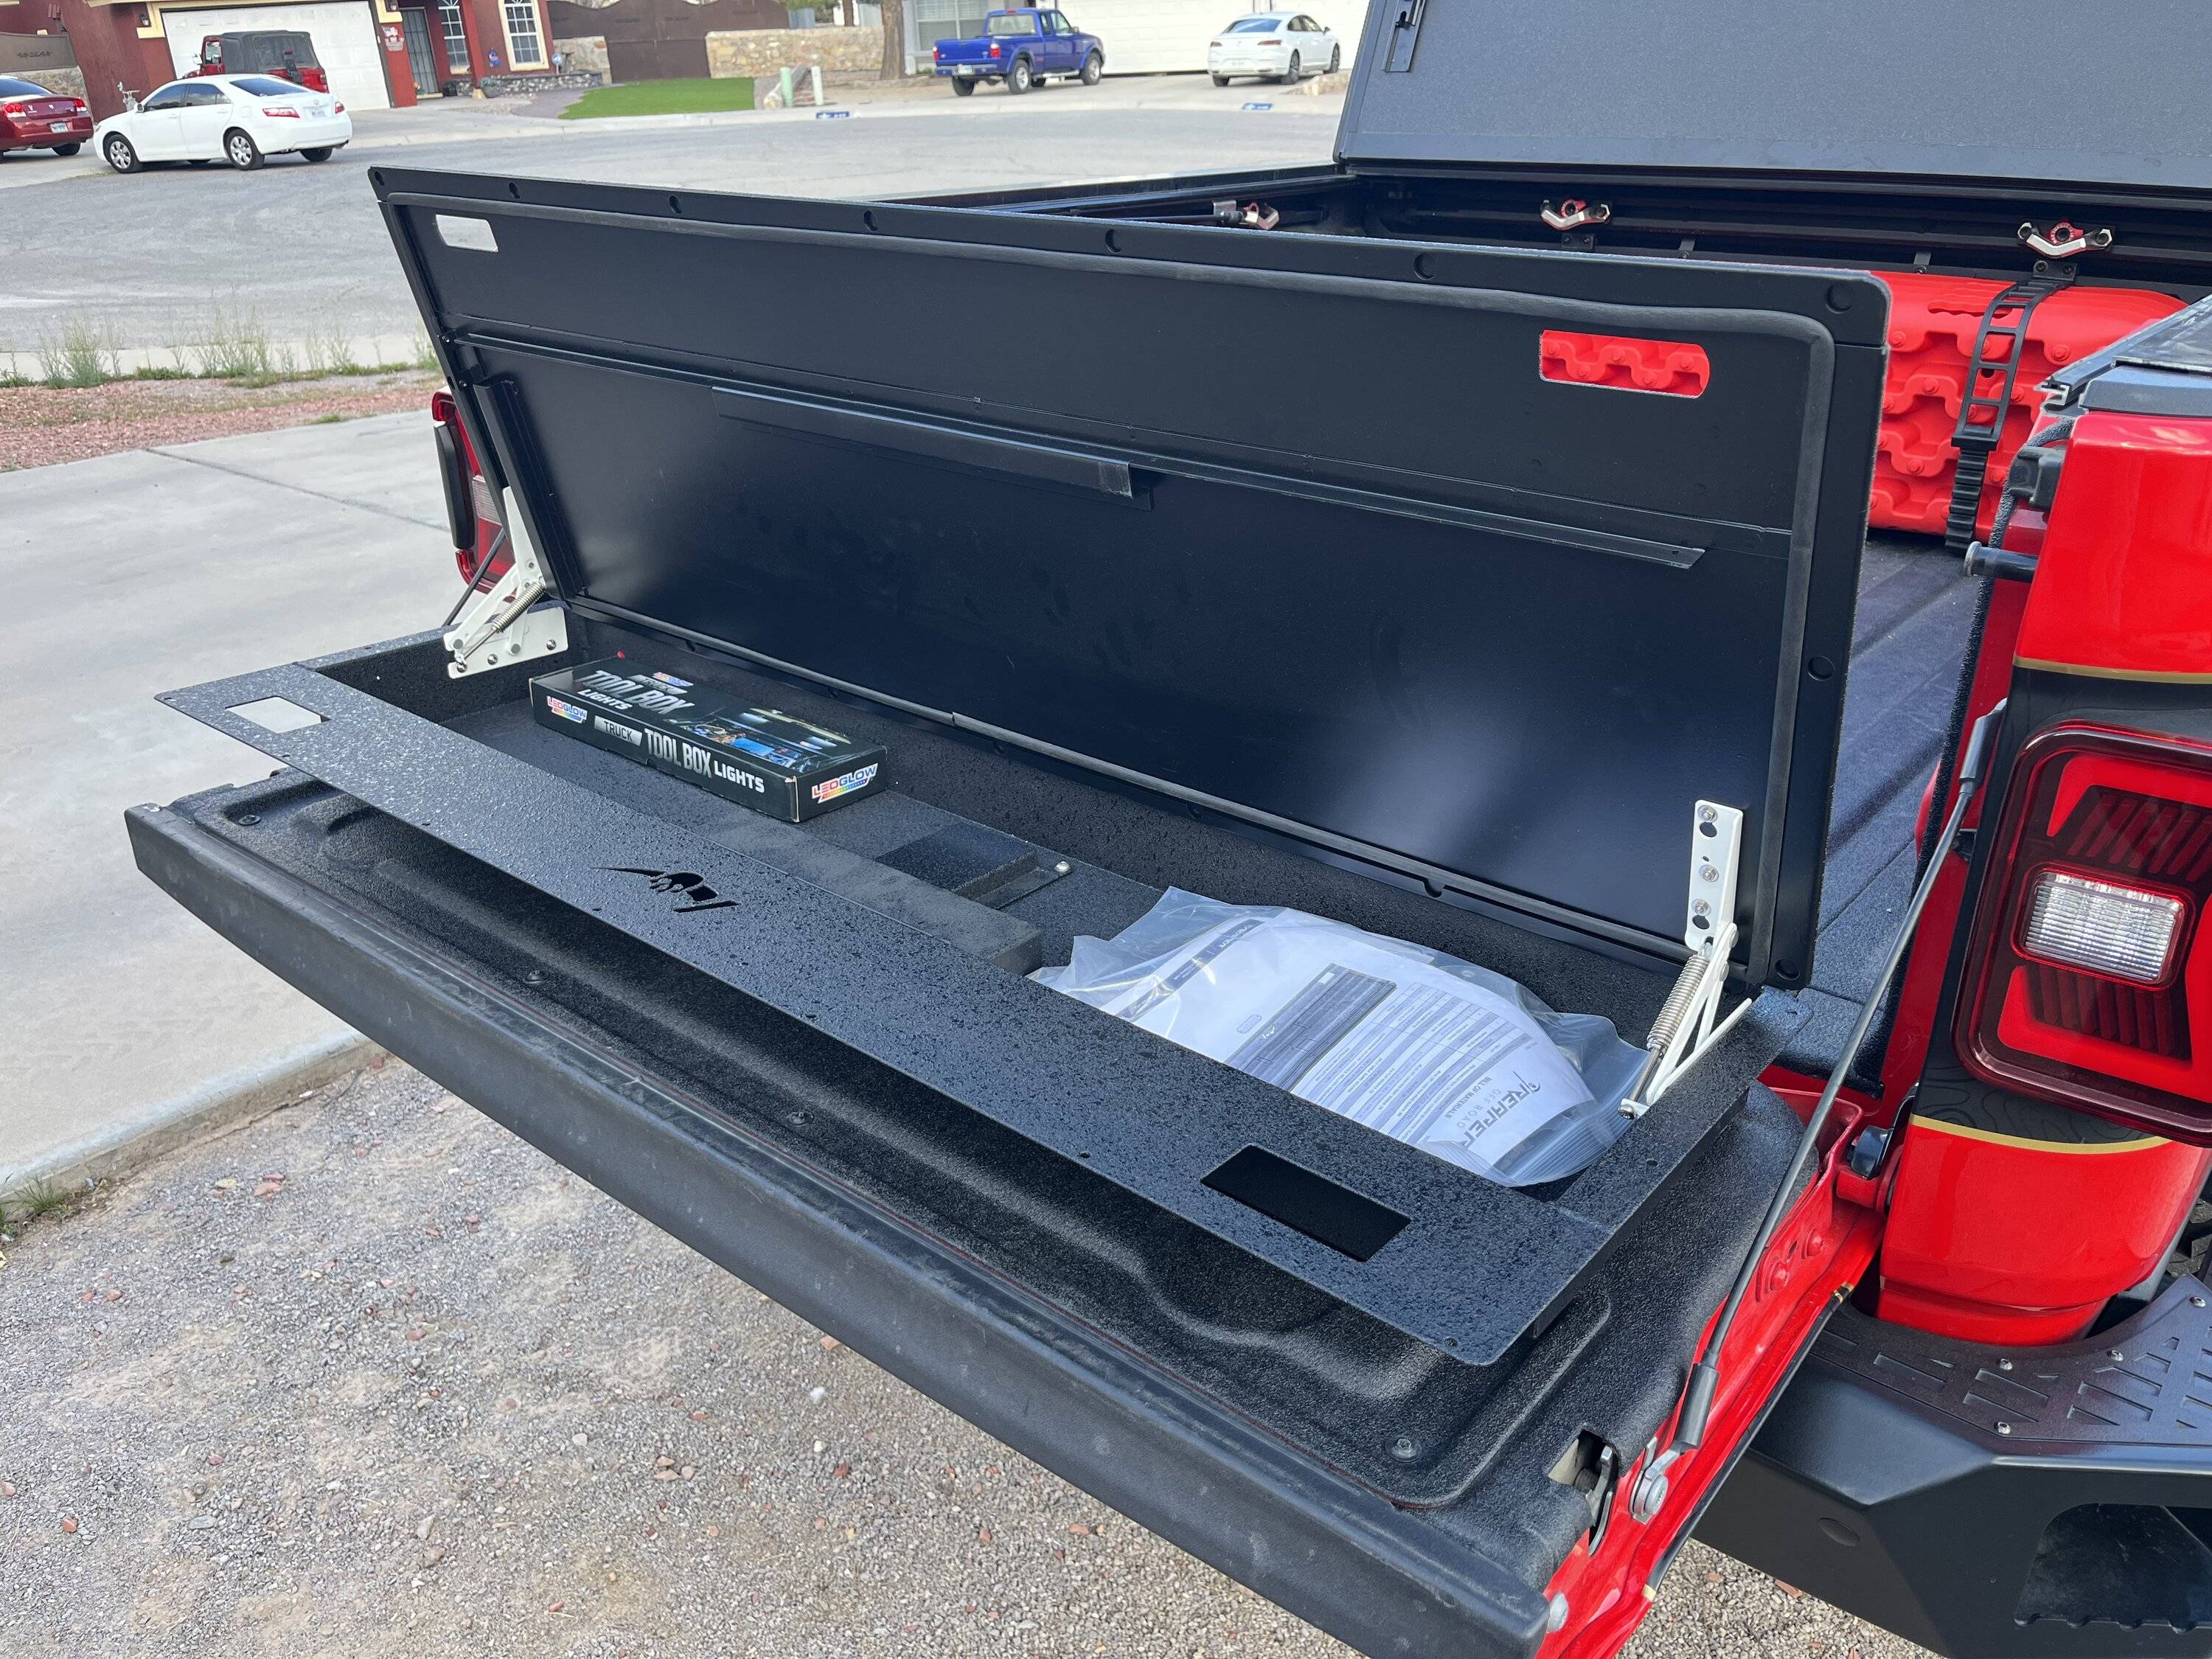
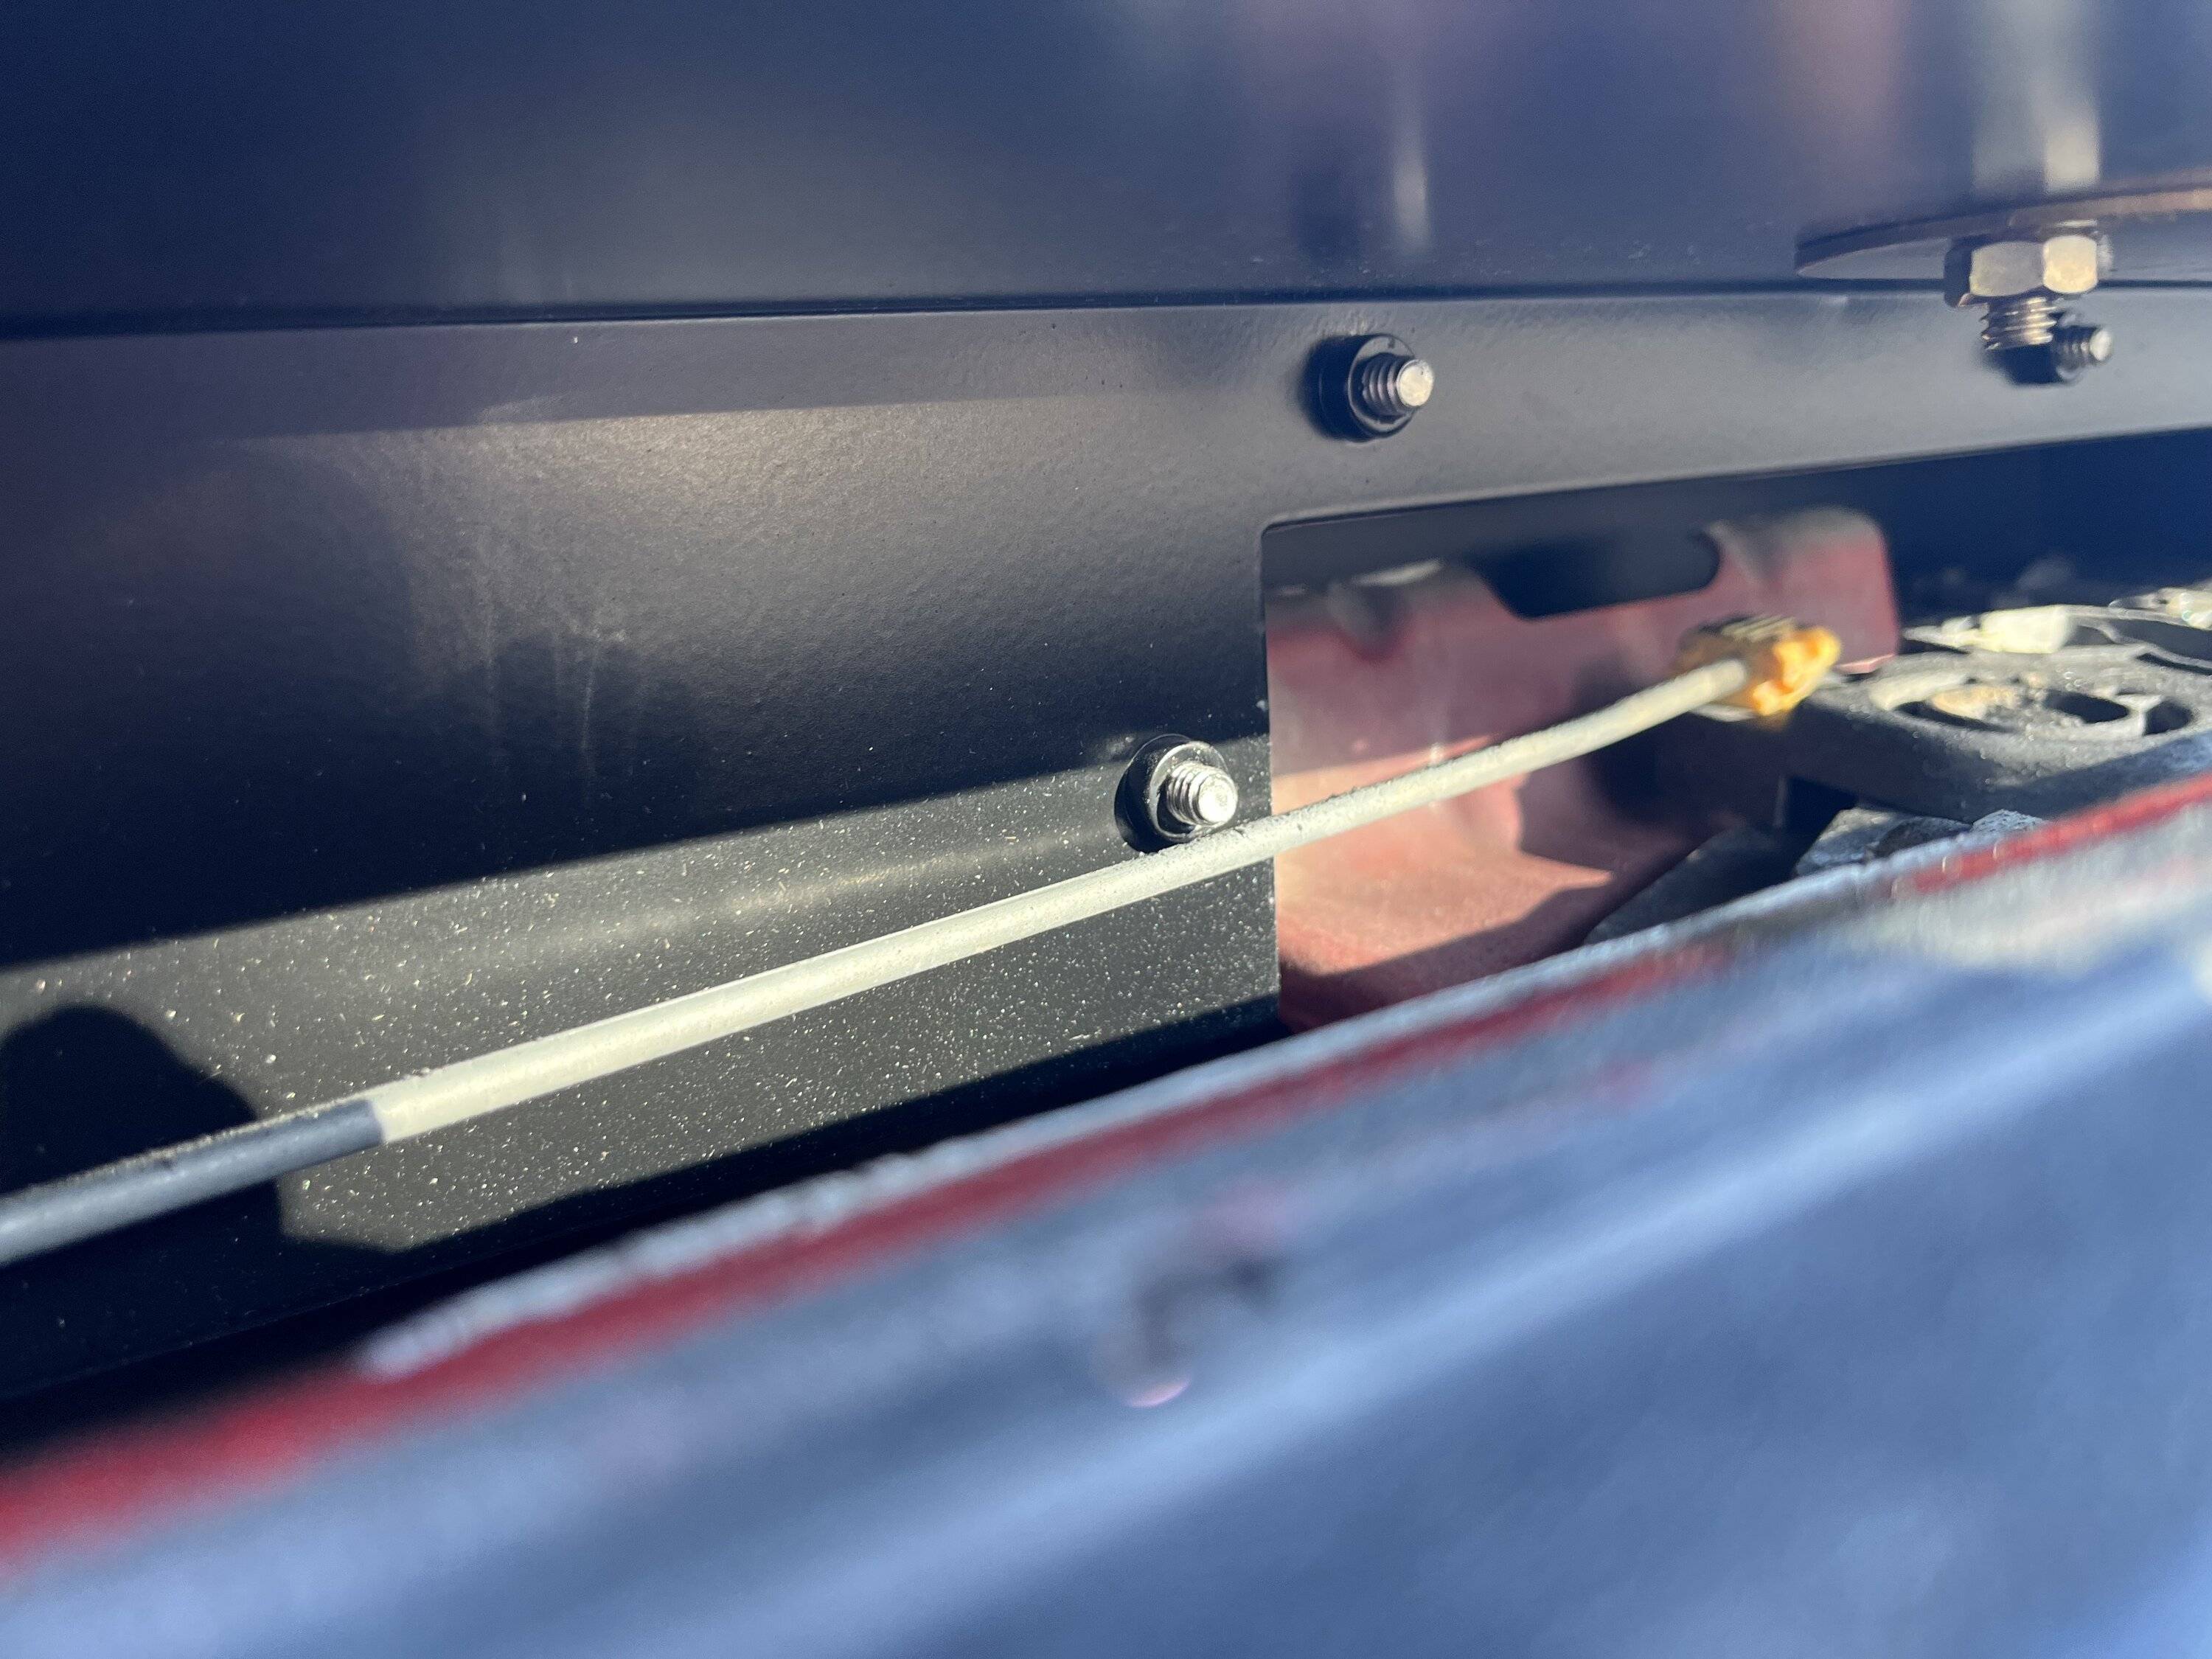
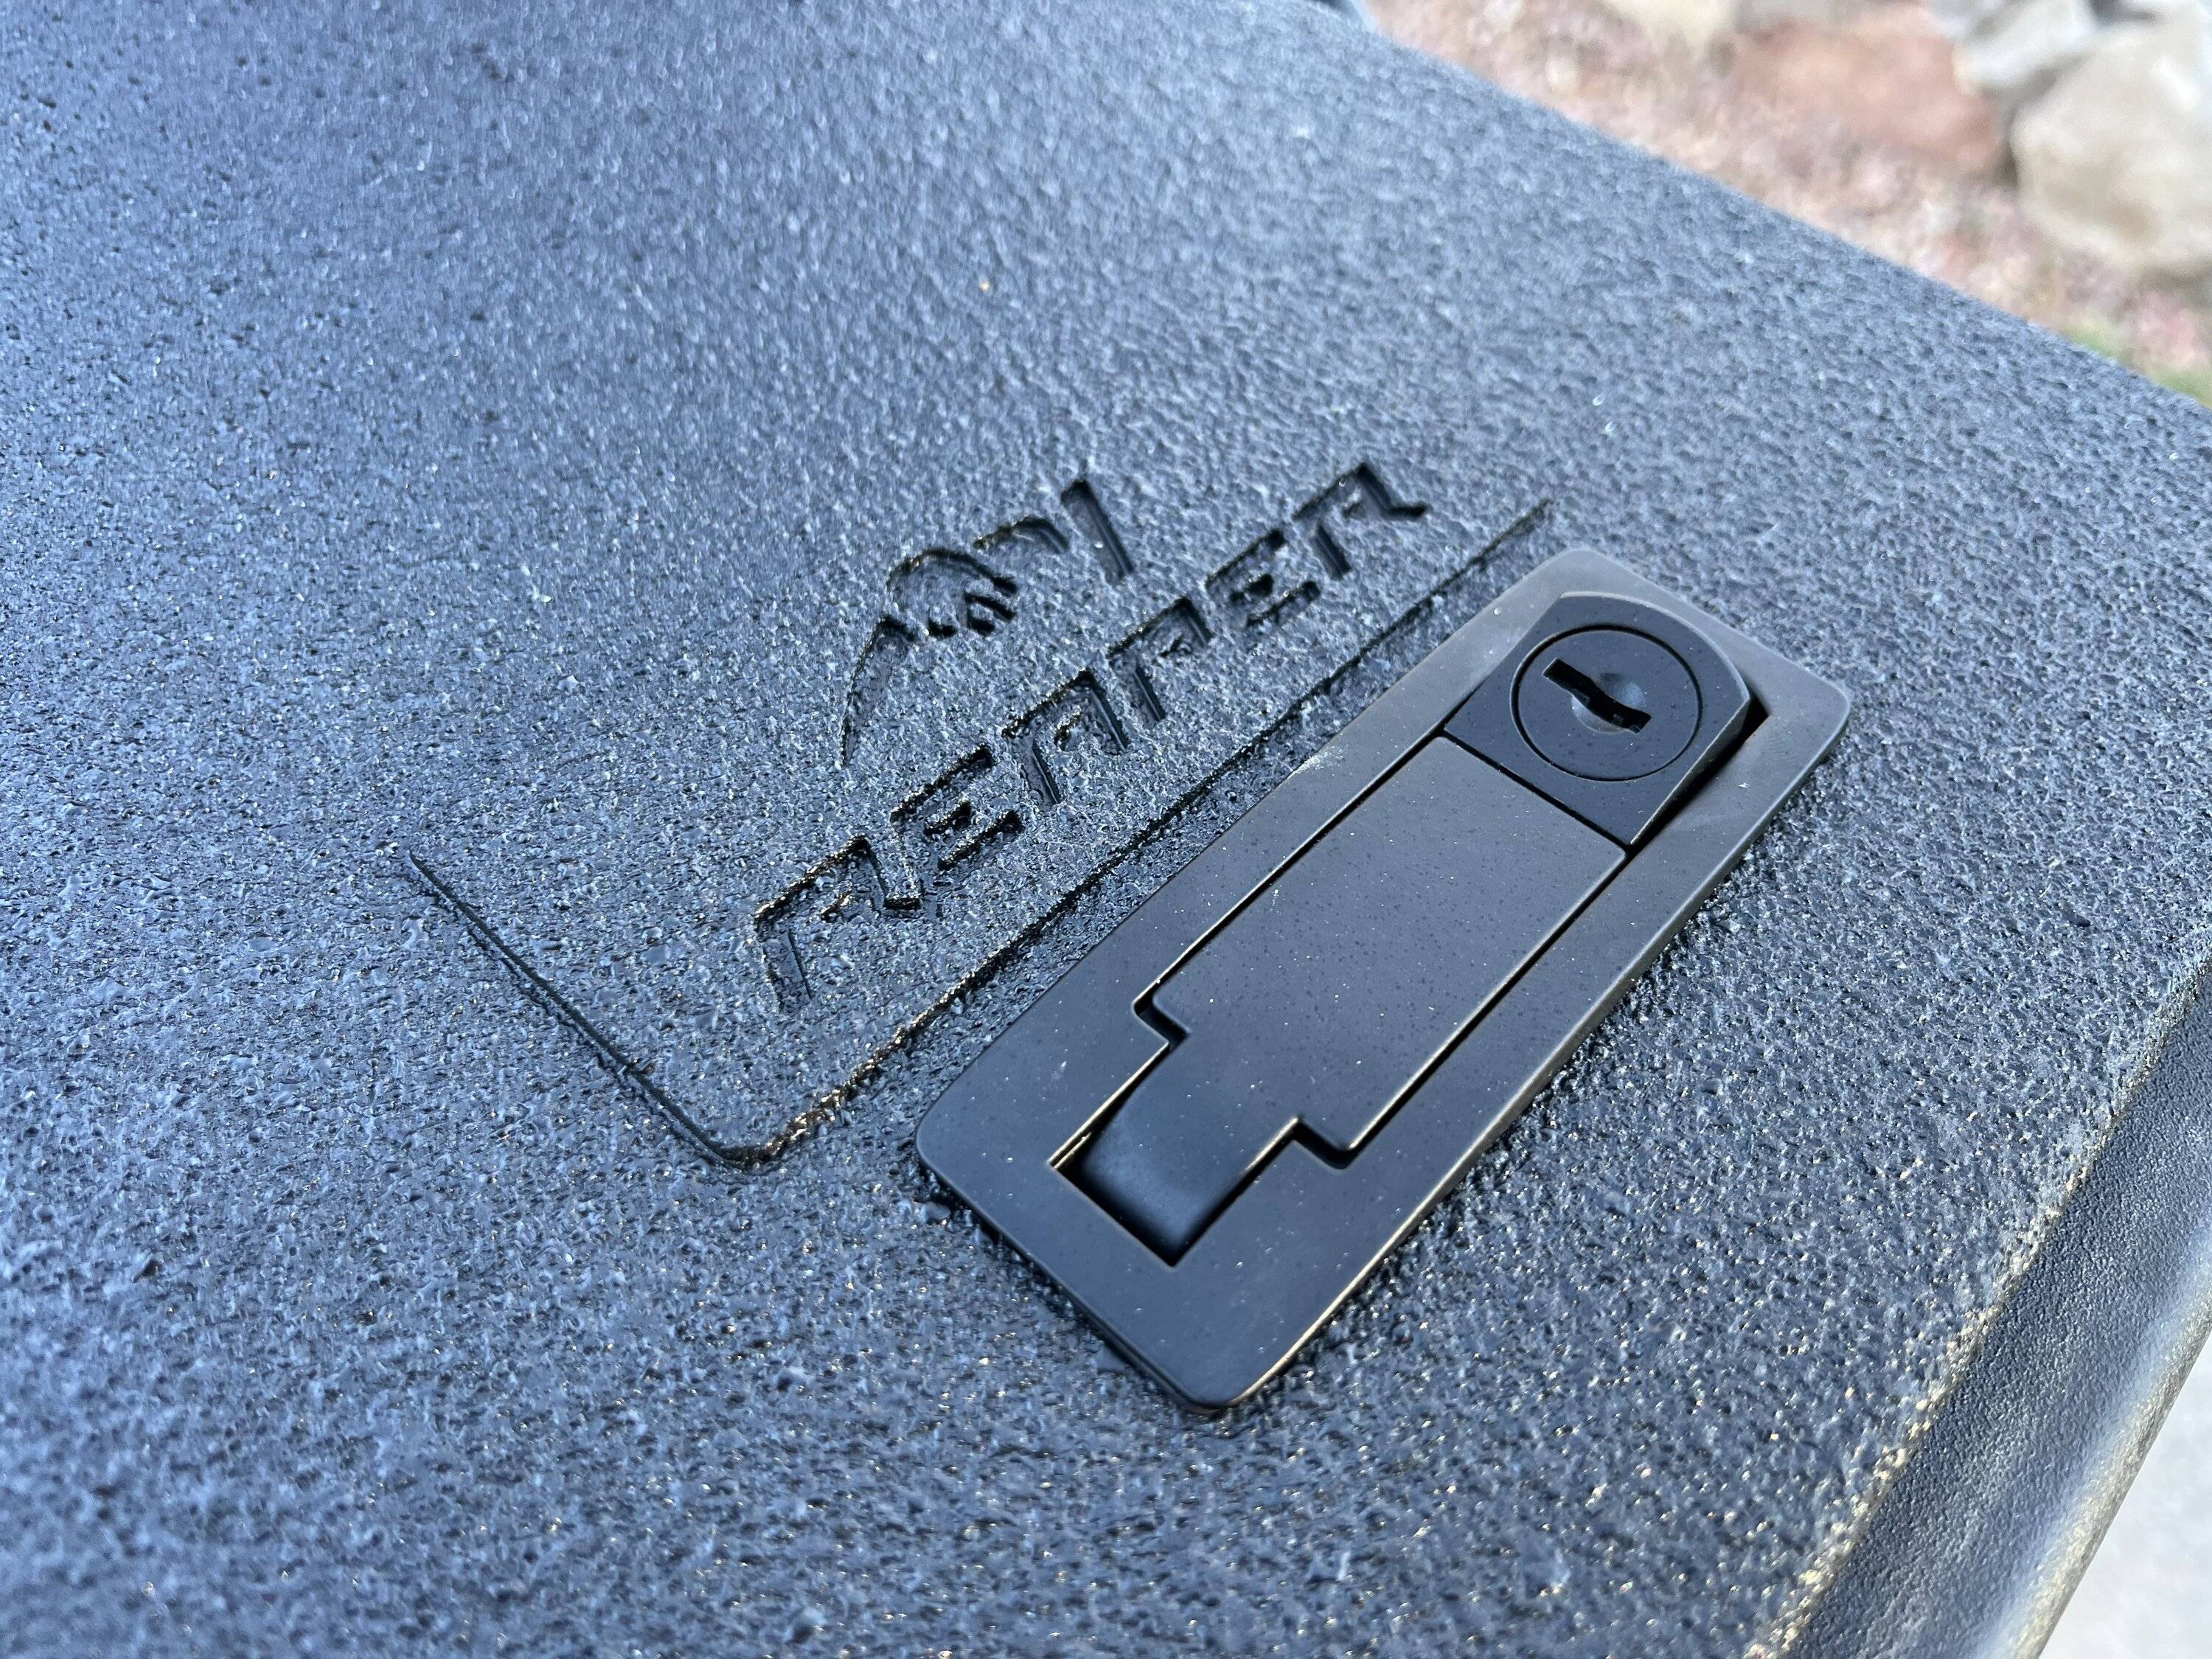
As for water tightness, there's a gasket around the lid, if you adjust the clamps correctly, I don't think water intrusion will be an issue. It's that grey looking piece above latches.

IMG_9349.JPG
(Summary at the bottom: Overall rating: 8/10: Feel free to ask any questions!)

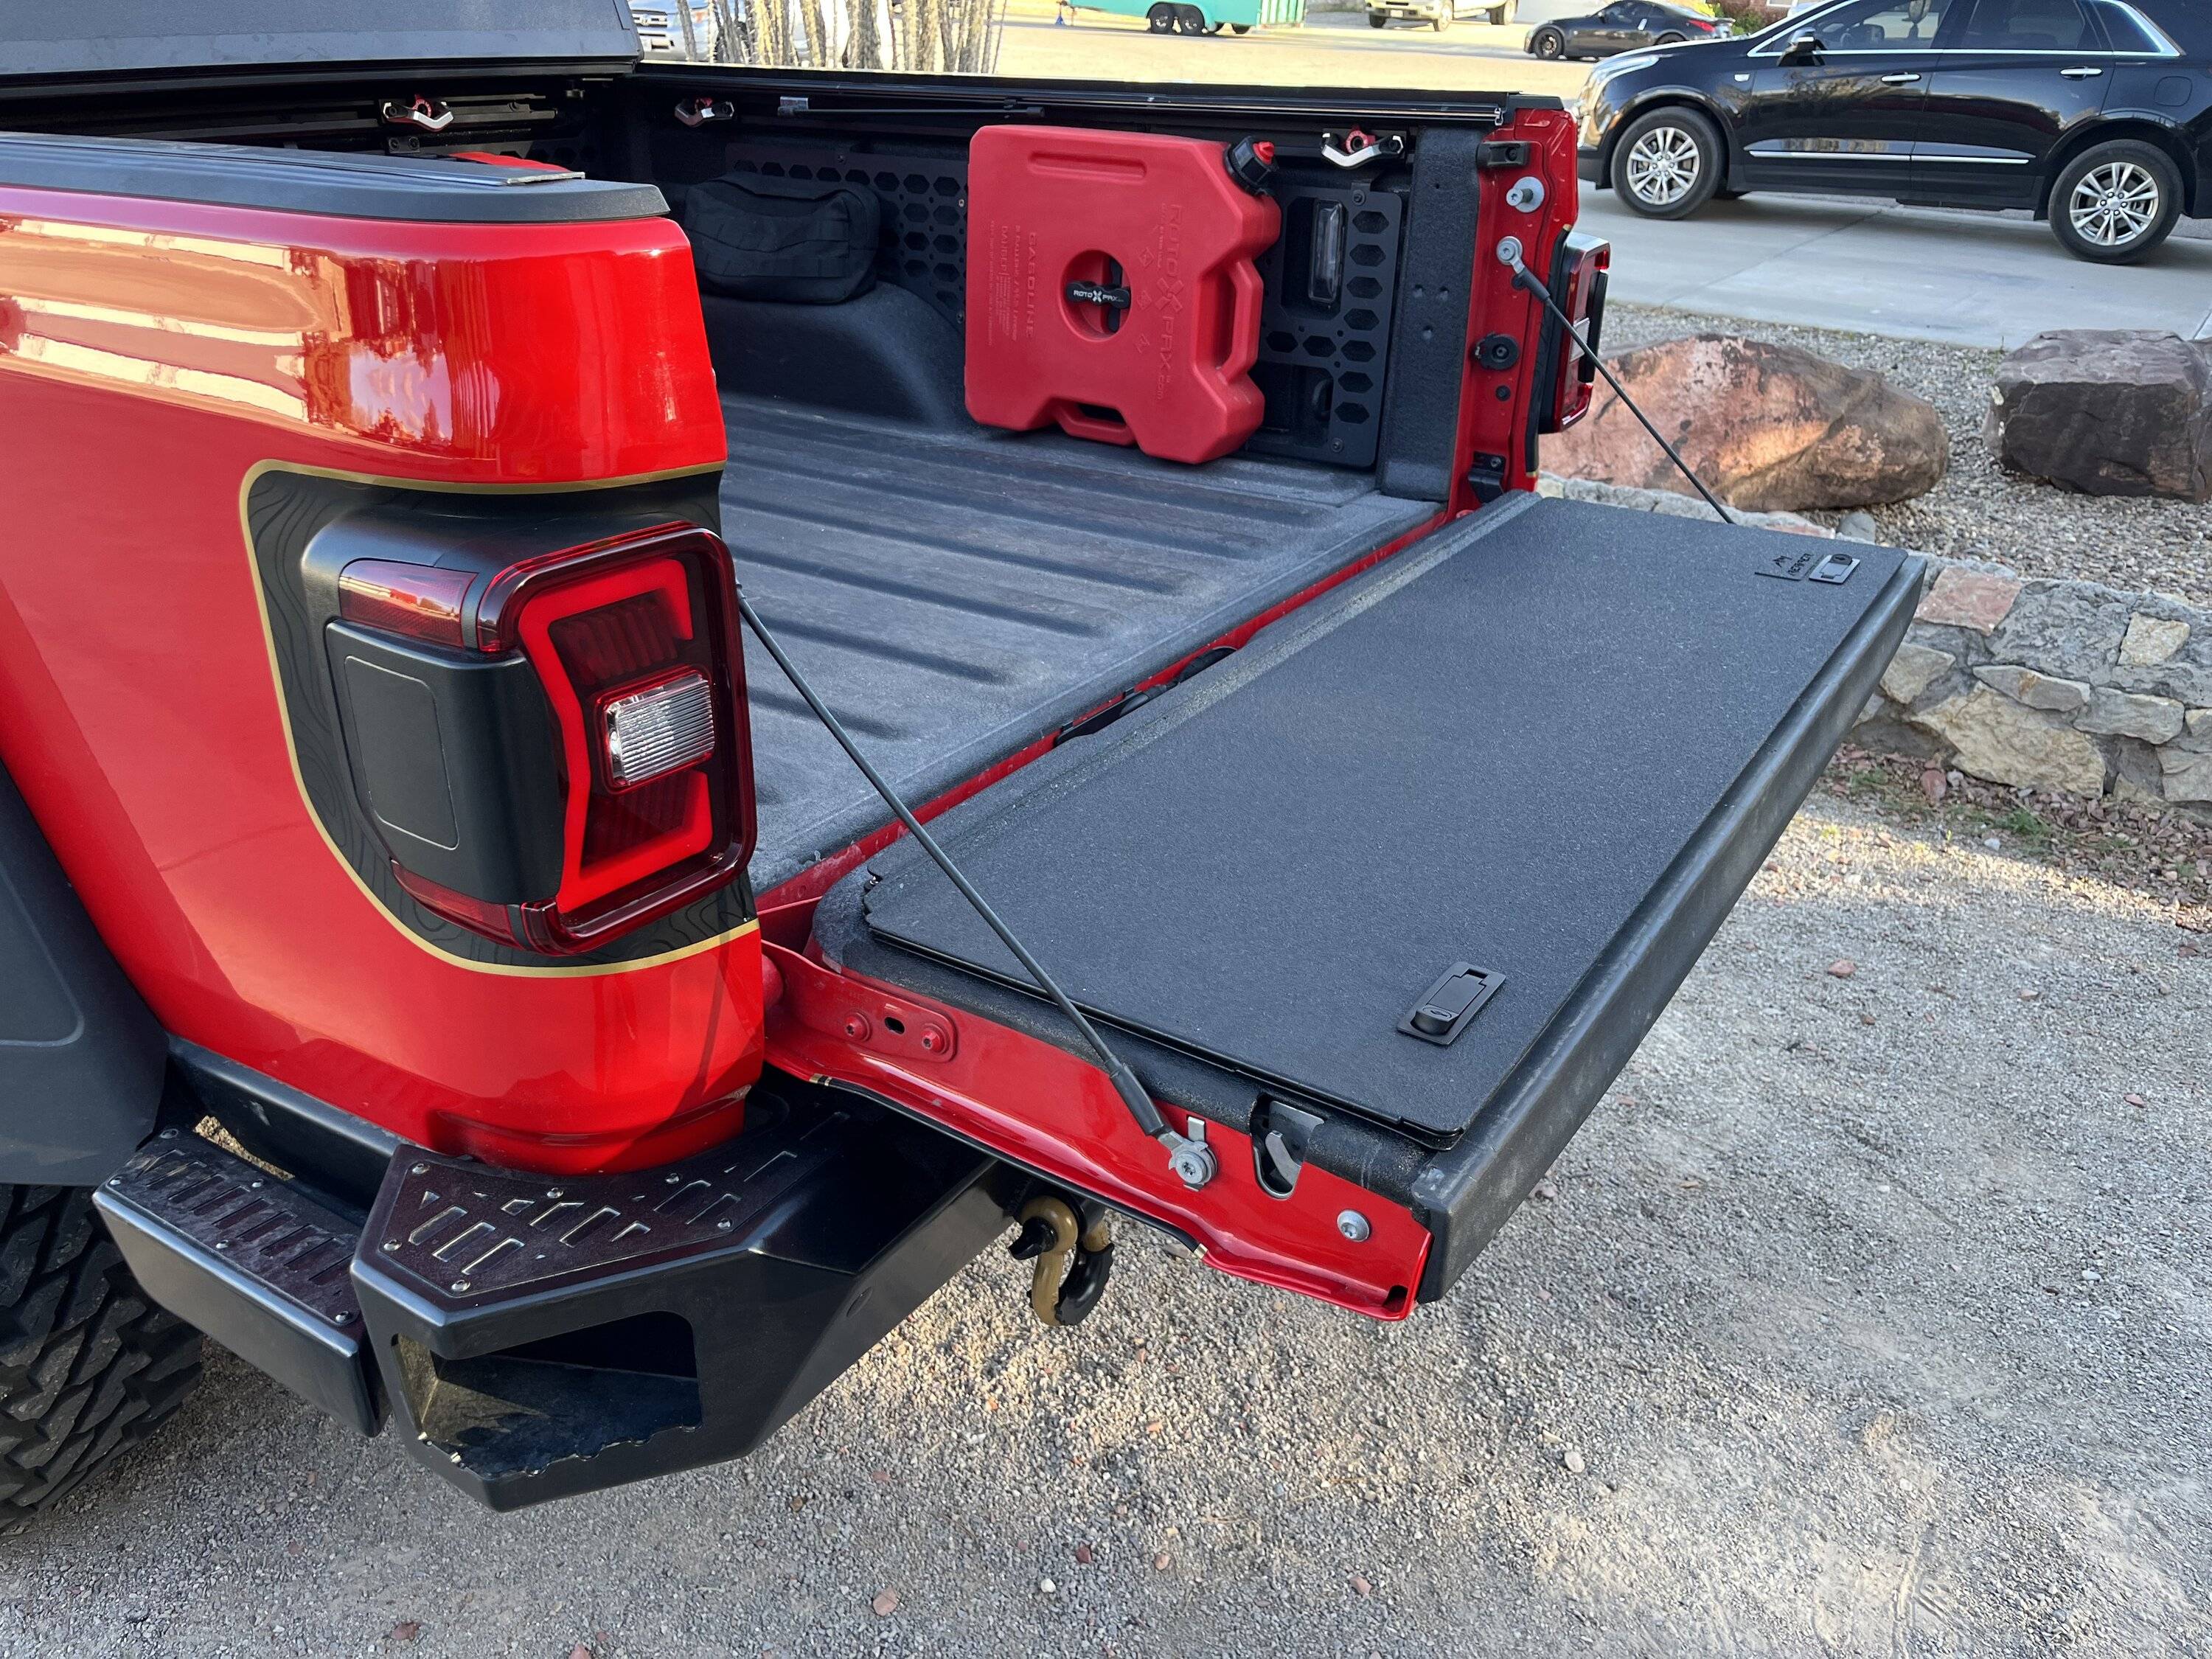
The day has arrived, I've lost my marbles and cut open my truck with an angle grinder!

IMG_9324.JPG


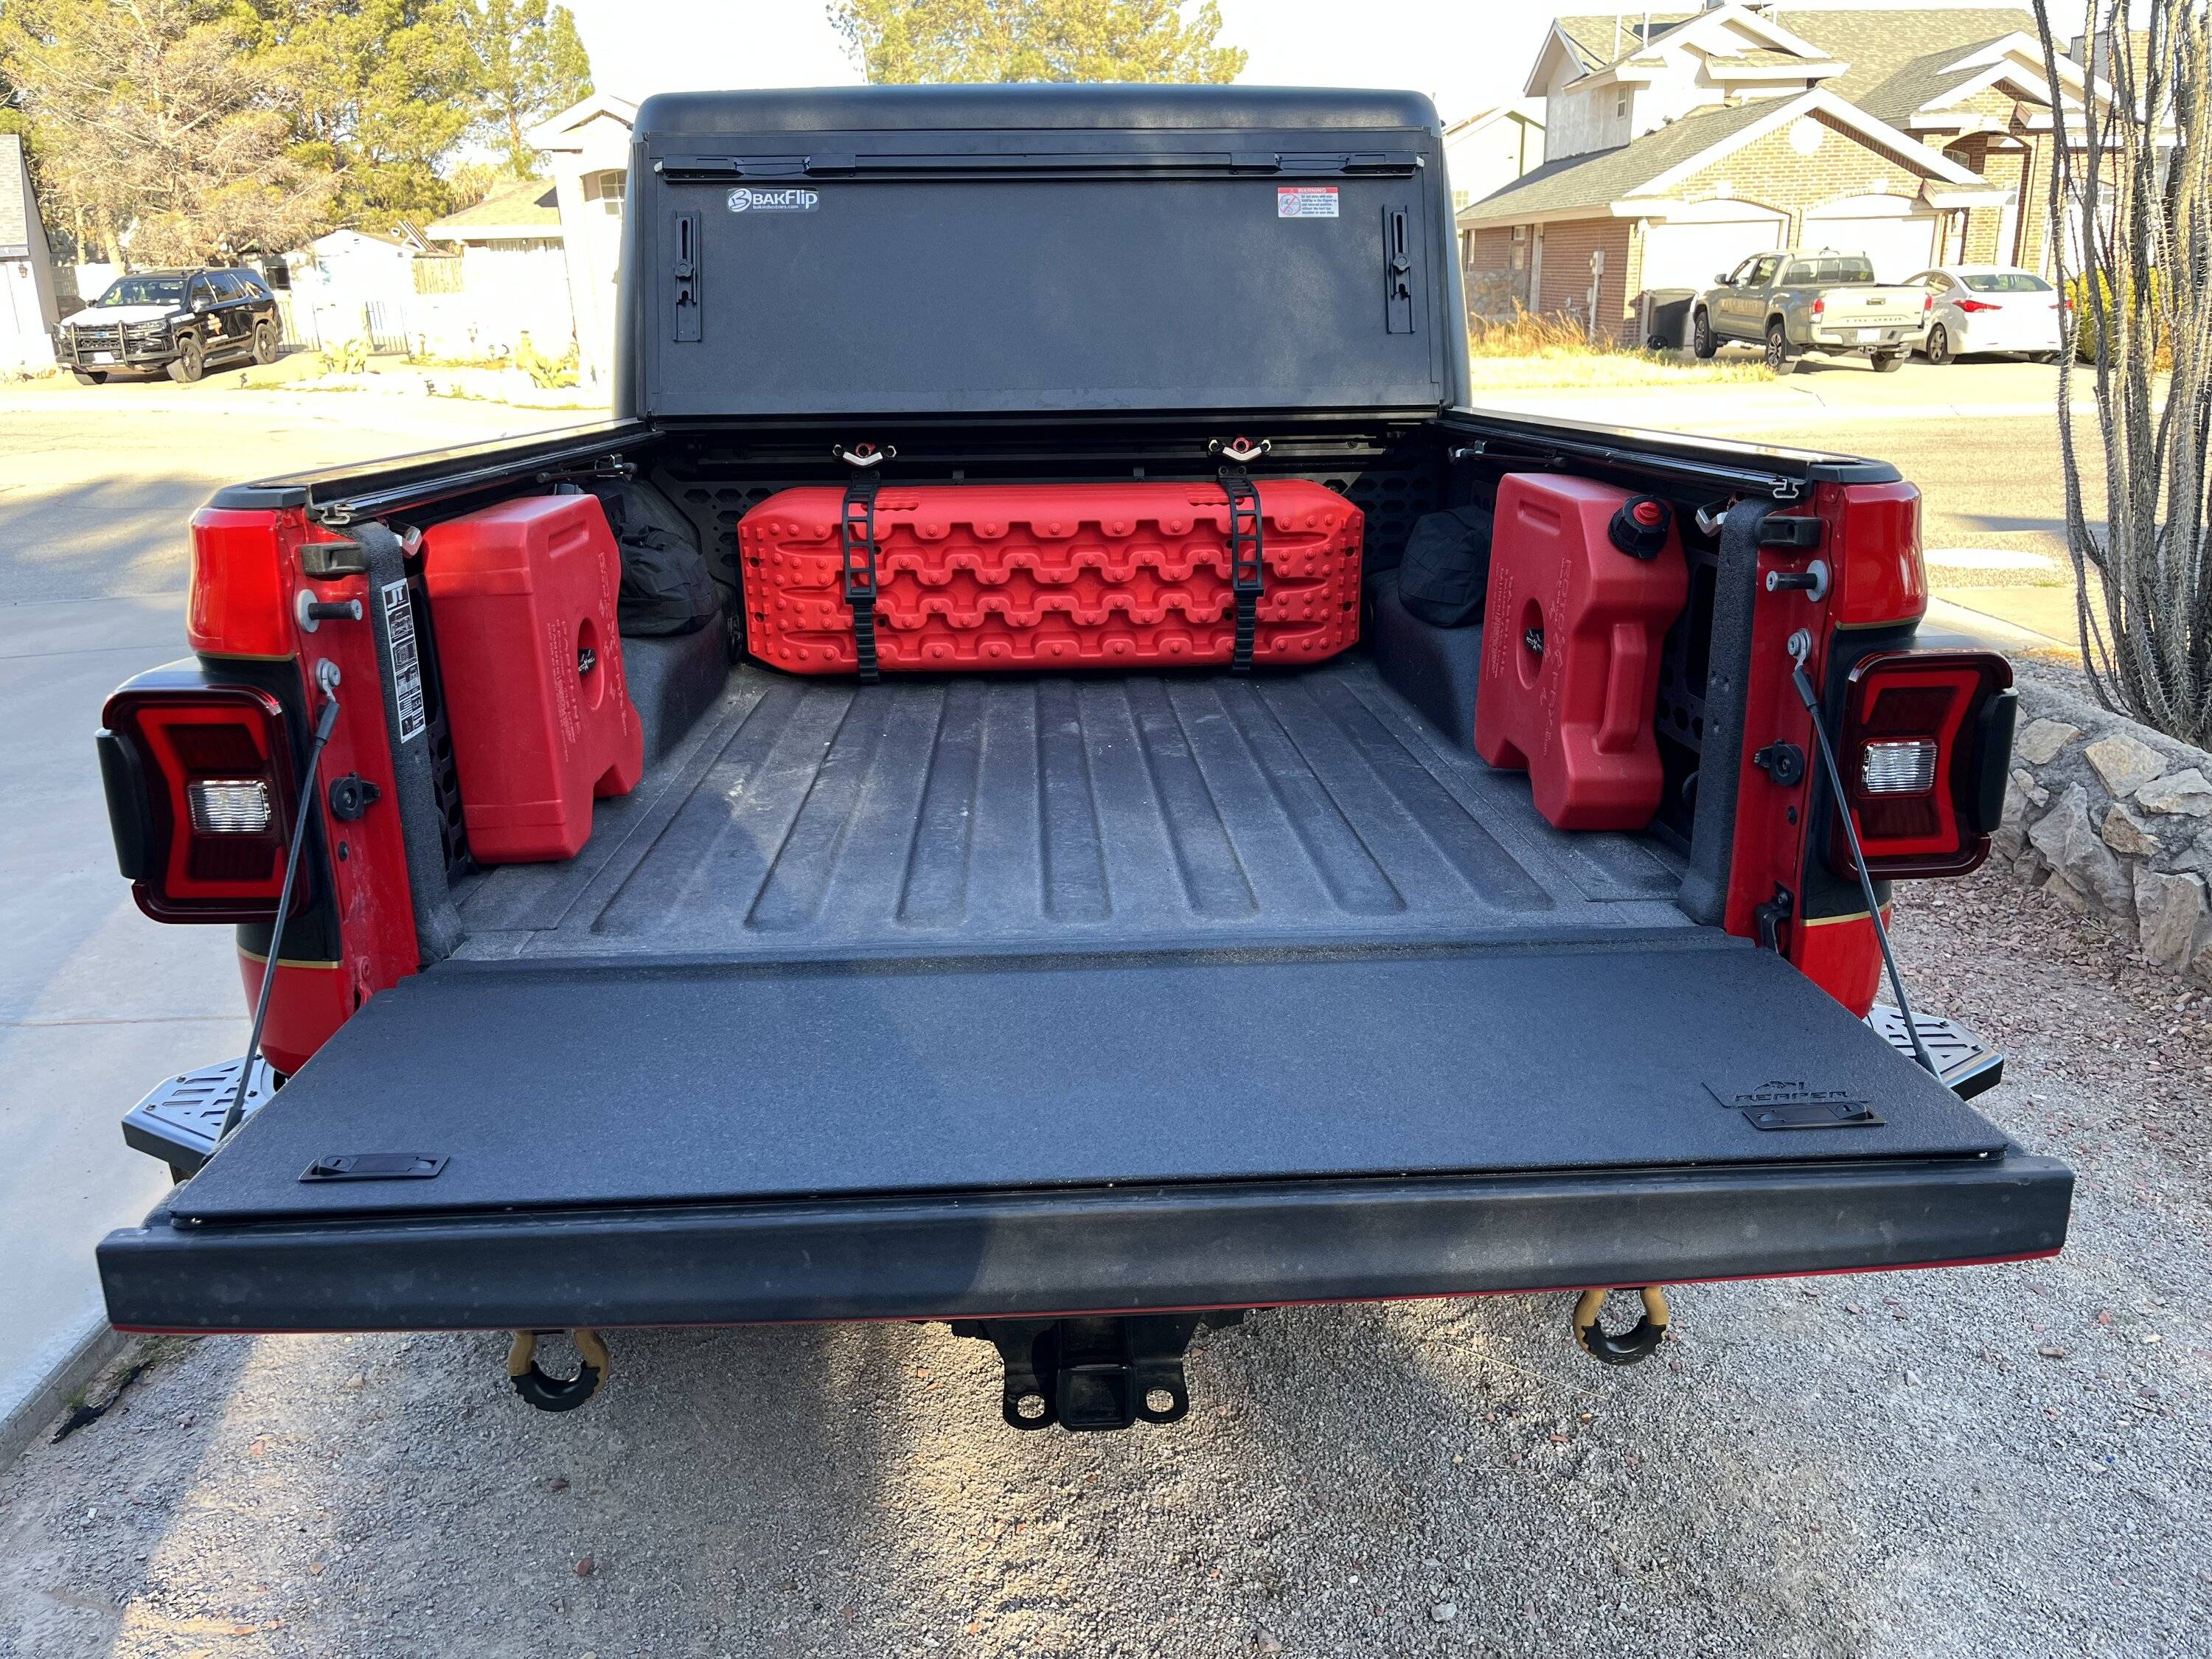
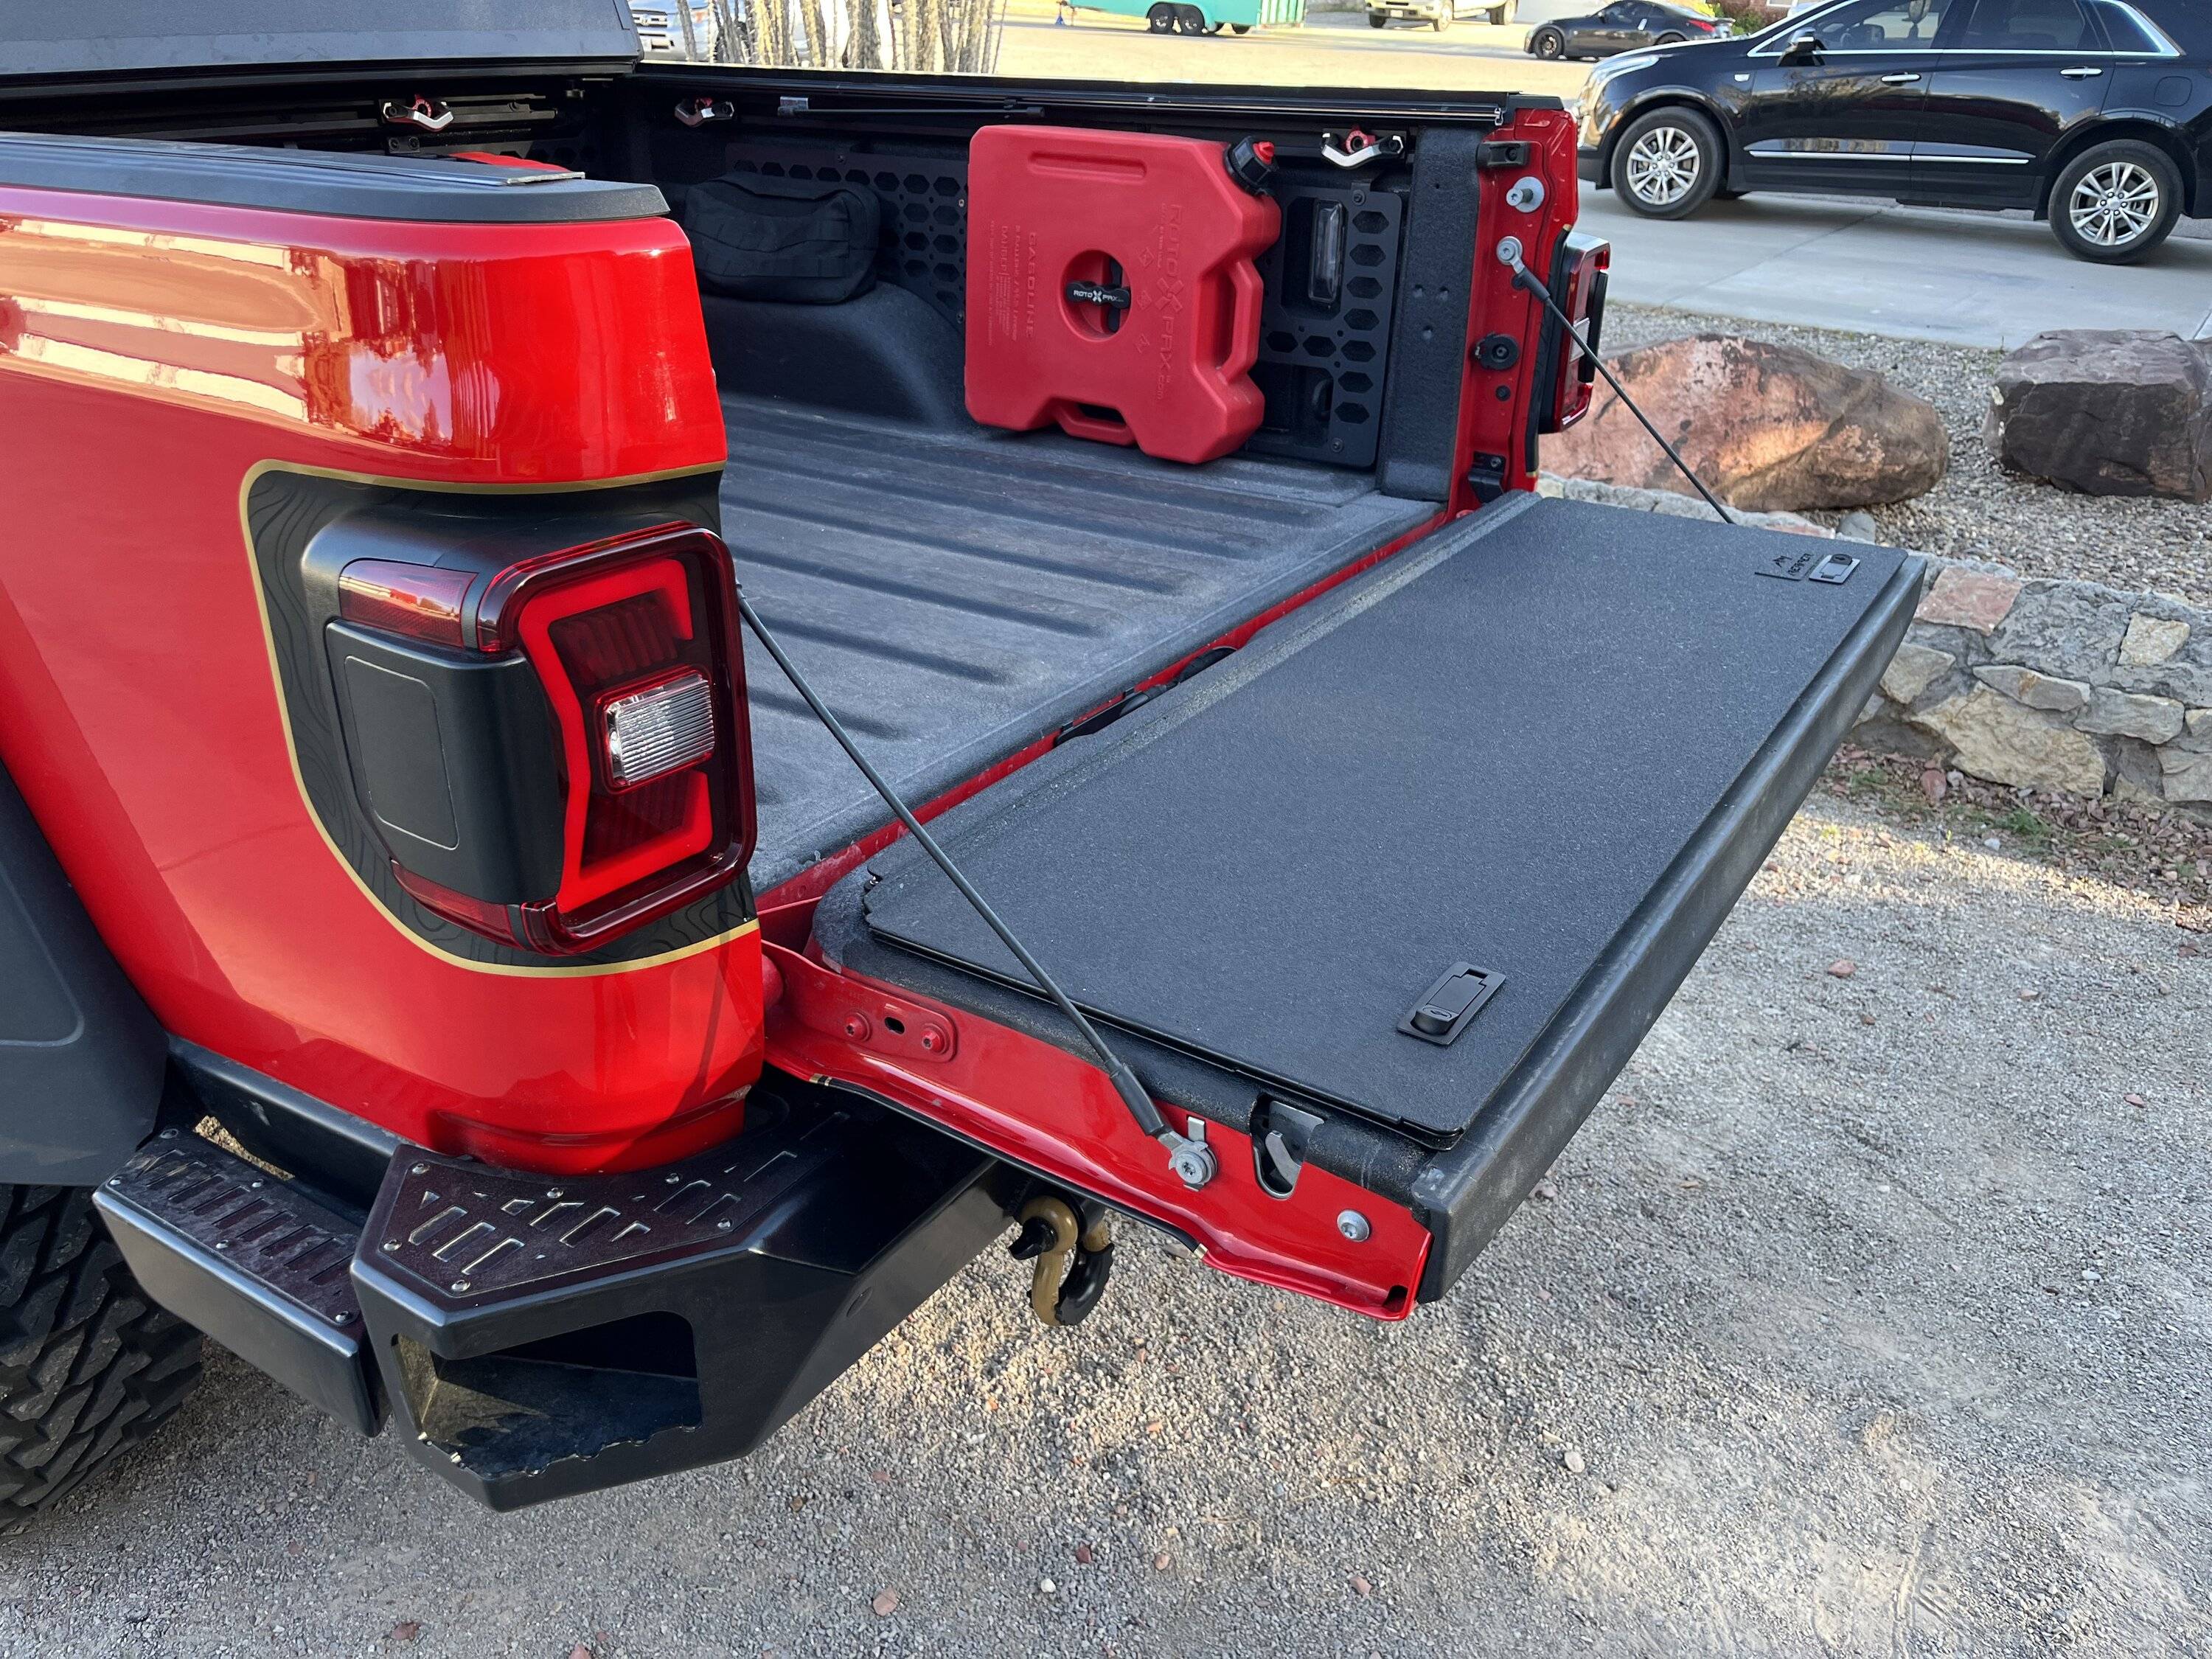
Now I have my reasons for this, as I'll explain bellow. It was so I could do this!

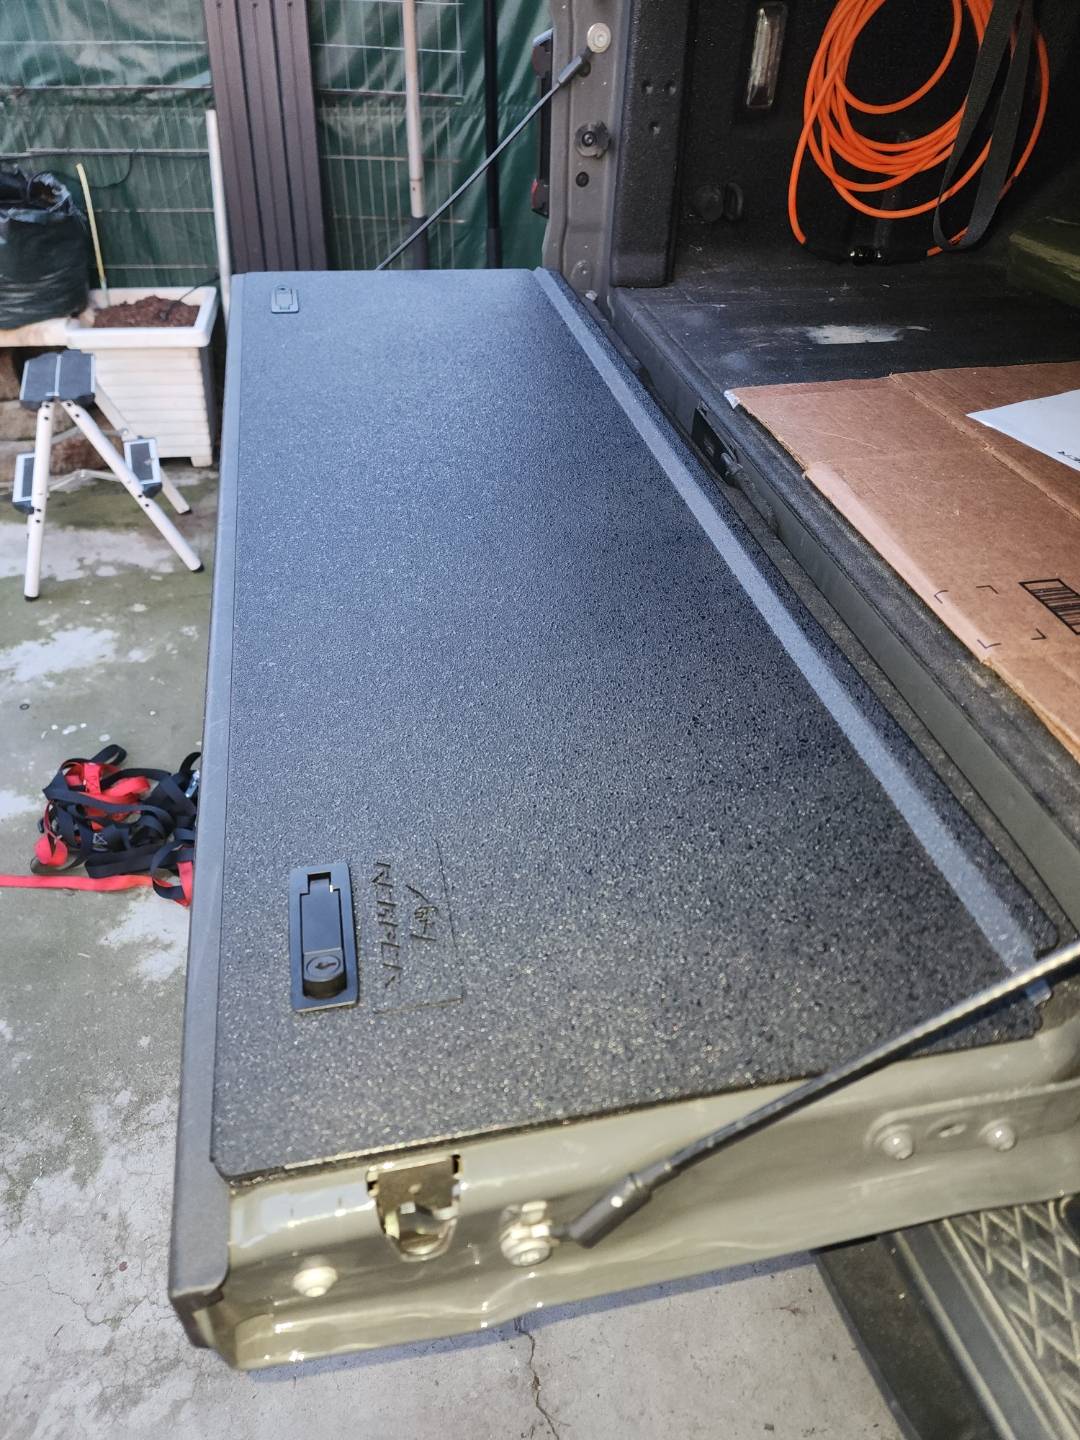
IMG_9345.JPG


------------------------------------------------------------------------------------

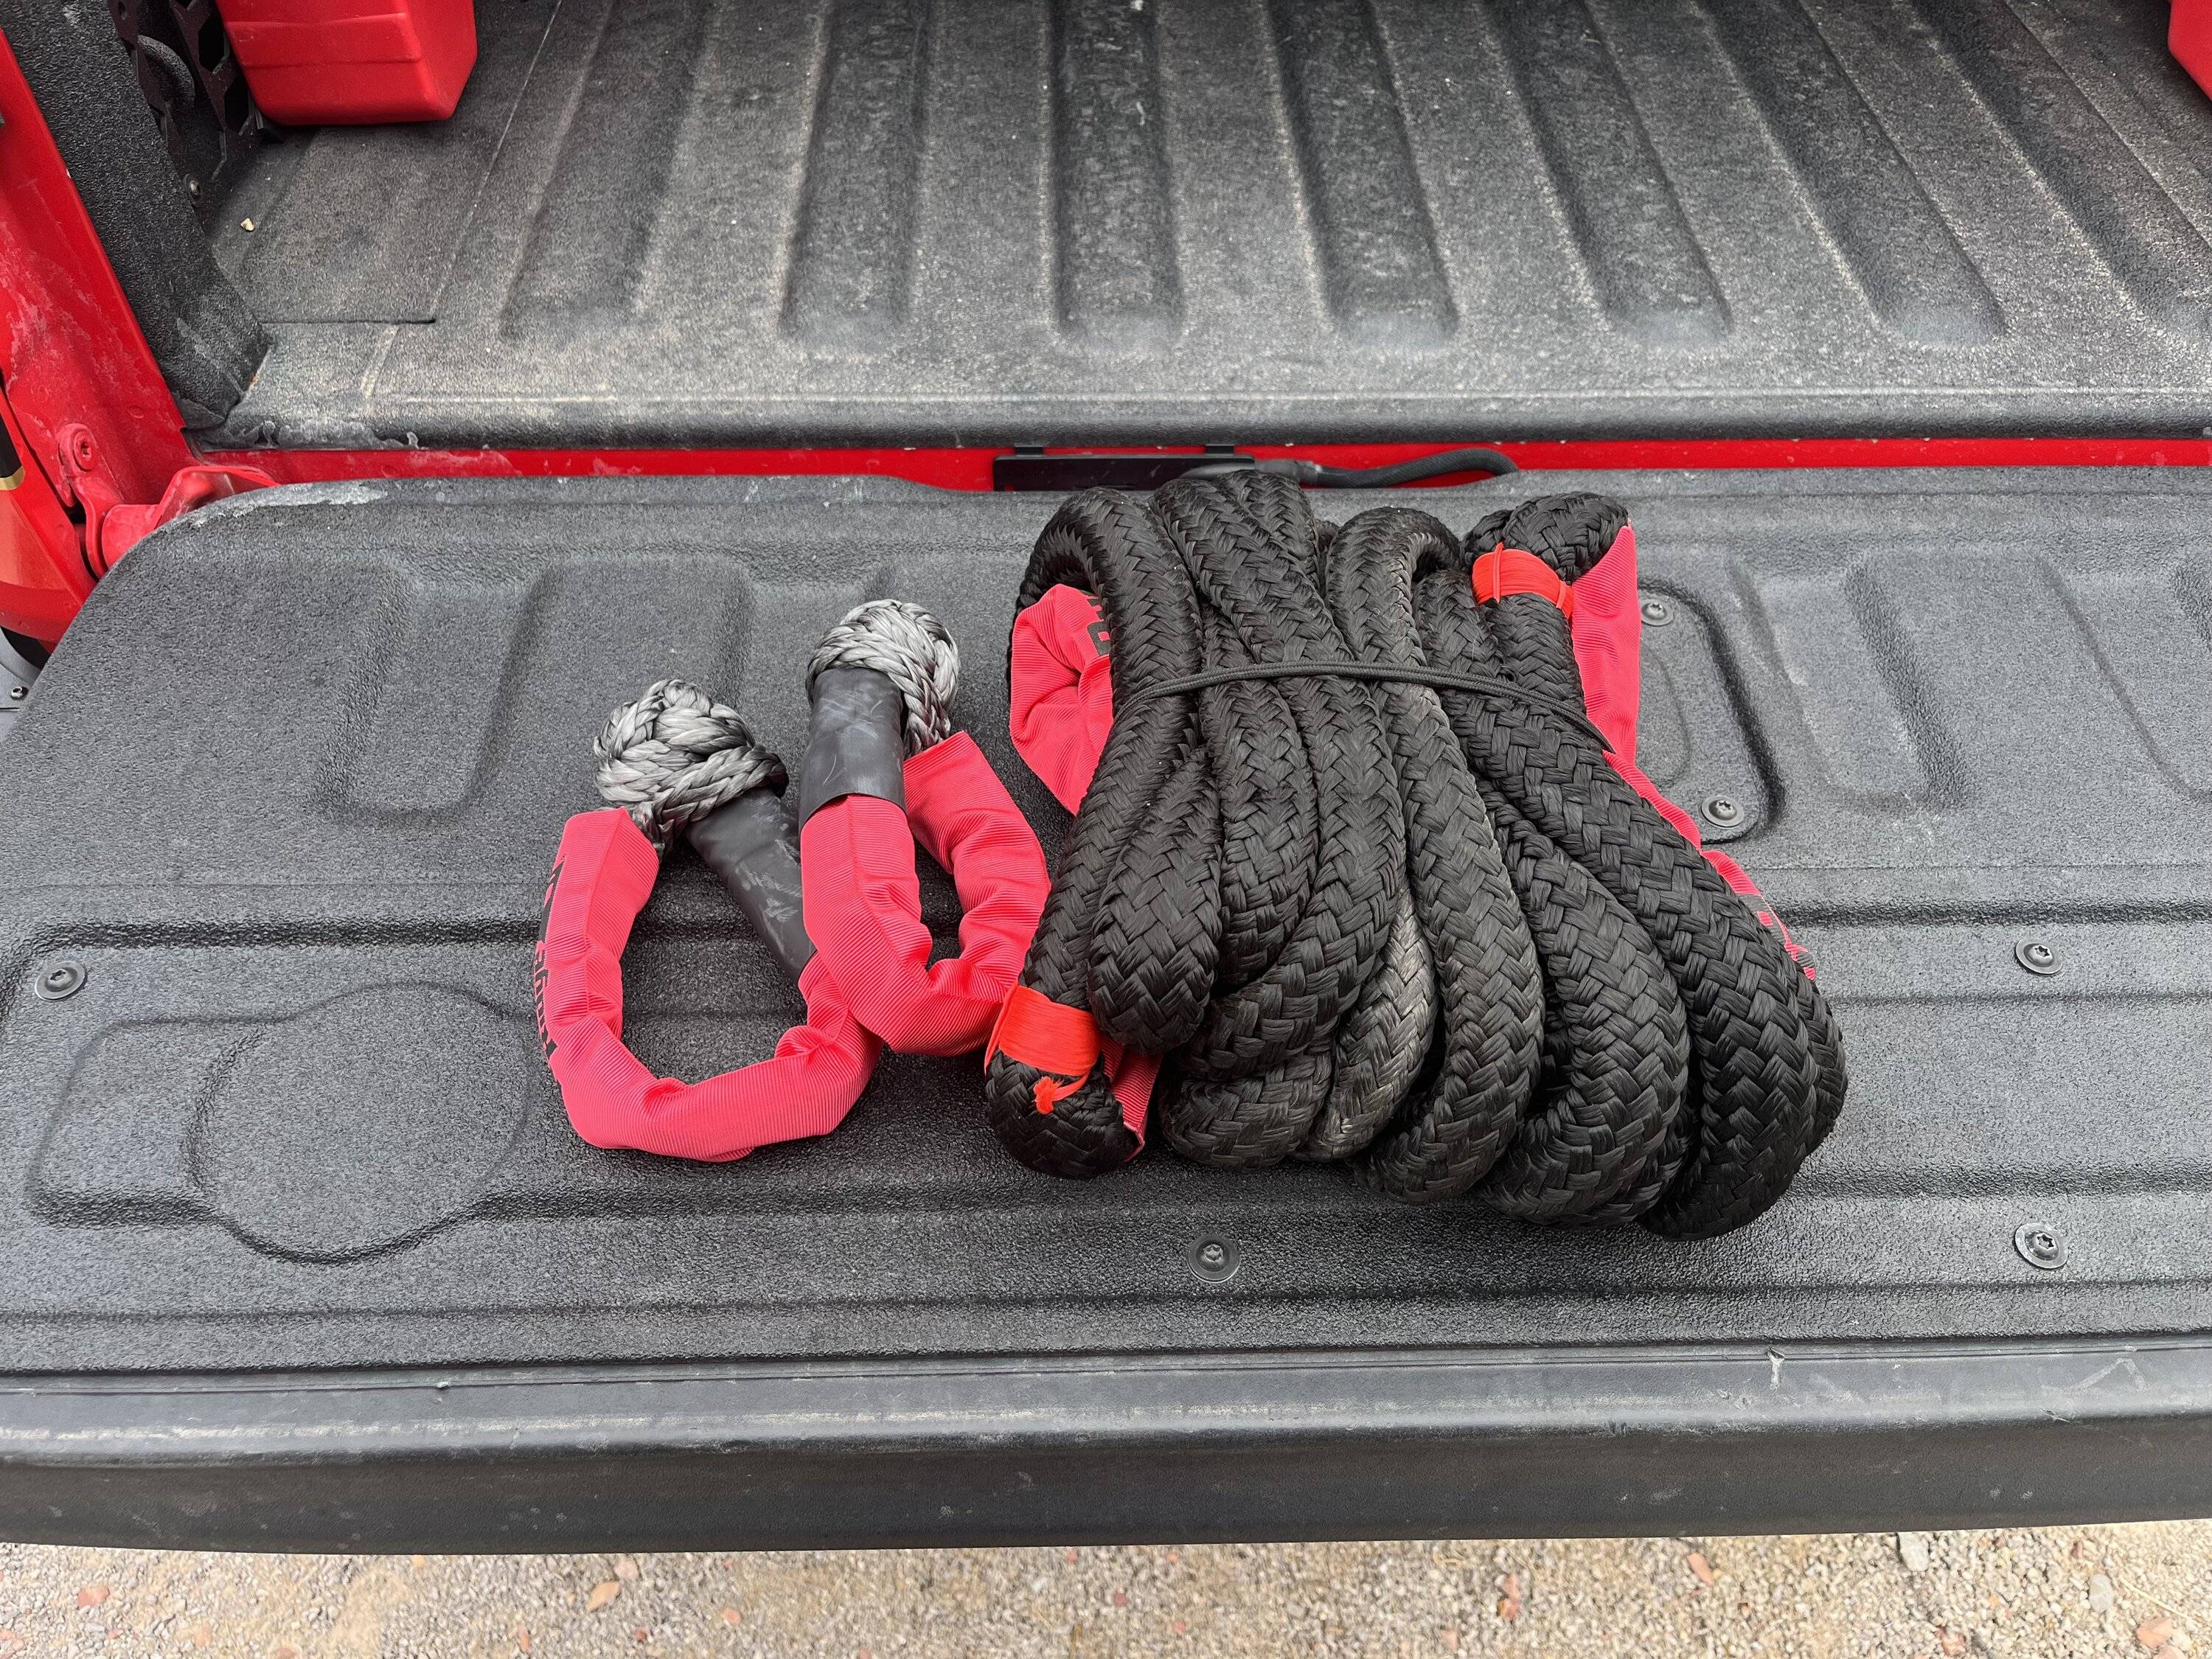
I have a small collection of recovery gear that I use semi-regularly, especially when the weather gets bad. 90% of the time, it's locals who take their street car/truck through the desert as a "shortcut" and get stuck in the soft sand. Because of this, my most used item is my kinetic rope. It's real easy to throw it on a soft shackle, and gently remove most stuck vehicles.

IMG_9239.JPG


BUT, since it's typically used during bad weather, it tends to get muddy. This was a problem as water soaks into it, and stinks up the cab/gets the back of the seat dirty when it would get stored in the interior storage bins. I wanted to move it to the bed for these reasons, BUT, without having to unbutton it from the typical "molle panel" mount storage.

Enter the Reaper Off-Road tailgate box.

IMG_9272.JPG


I liked this idea because it would give me storage space that wouldn't compromise interior comfort/space (overhead molle mounts), and it would leave me room on my bedside molle panels for "less used" gear, but gear that I want to carry off-road. Plus, this option leaves my recovery gear more accessible than both options, and will allow me to store gear right after it's been used without worrying about getting other items dirty with mud/bog water.

Biggest downside: You have to cut open your tailgate.

Lets begin.

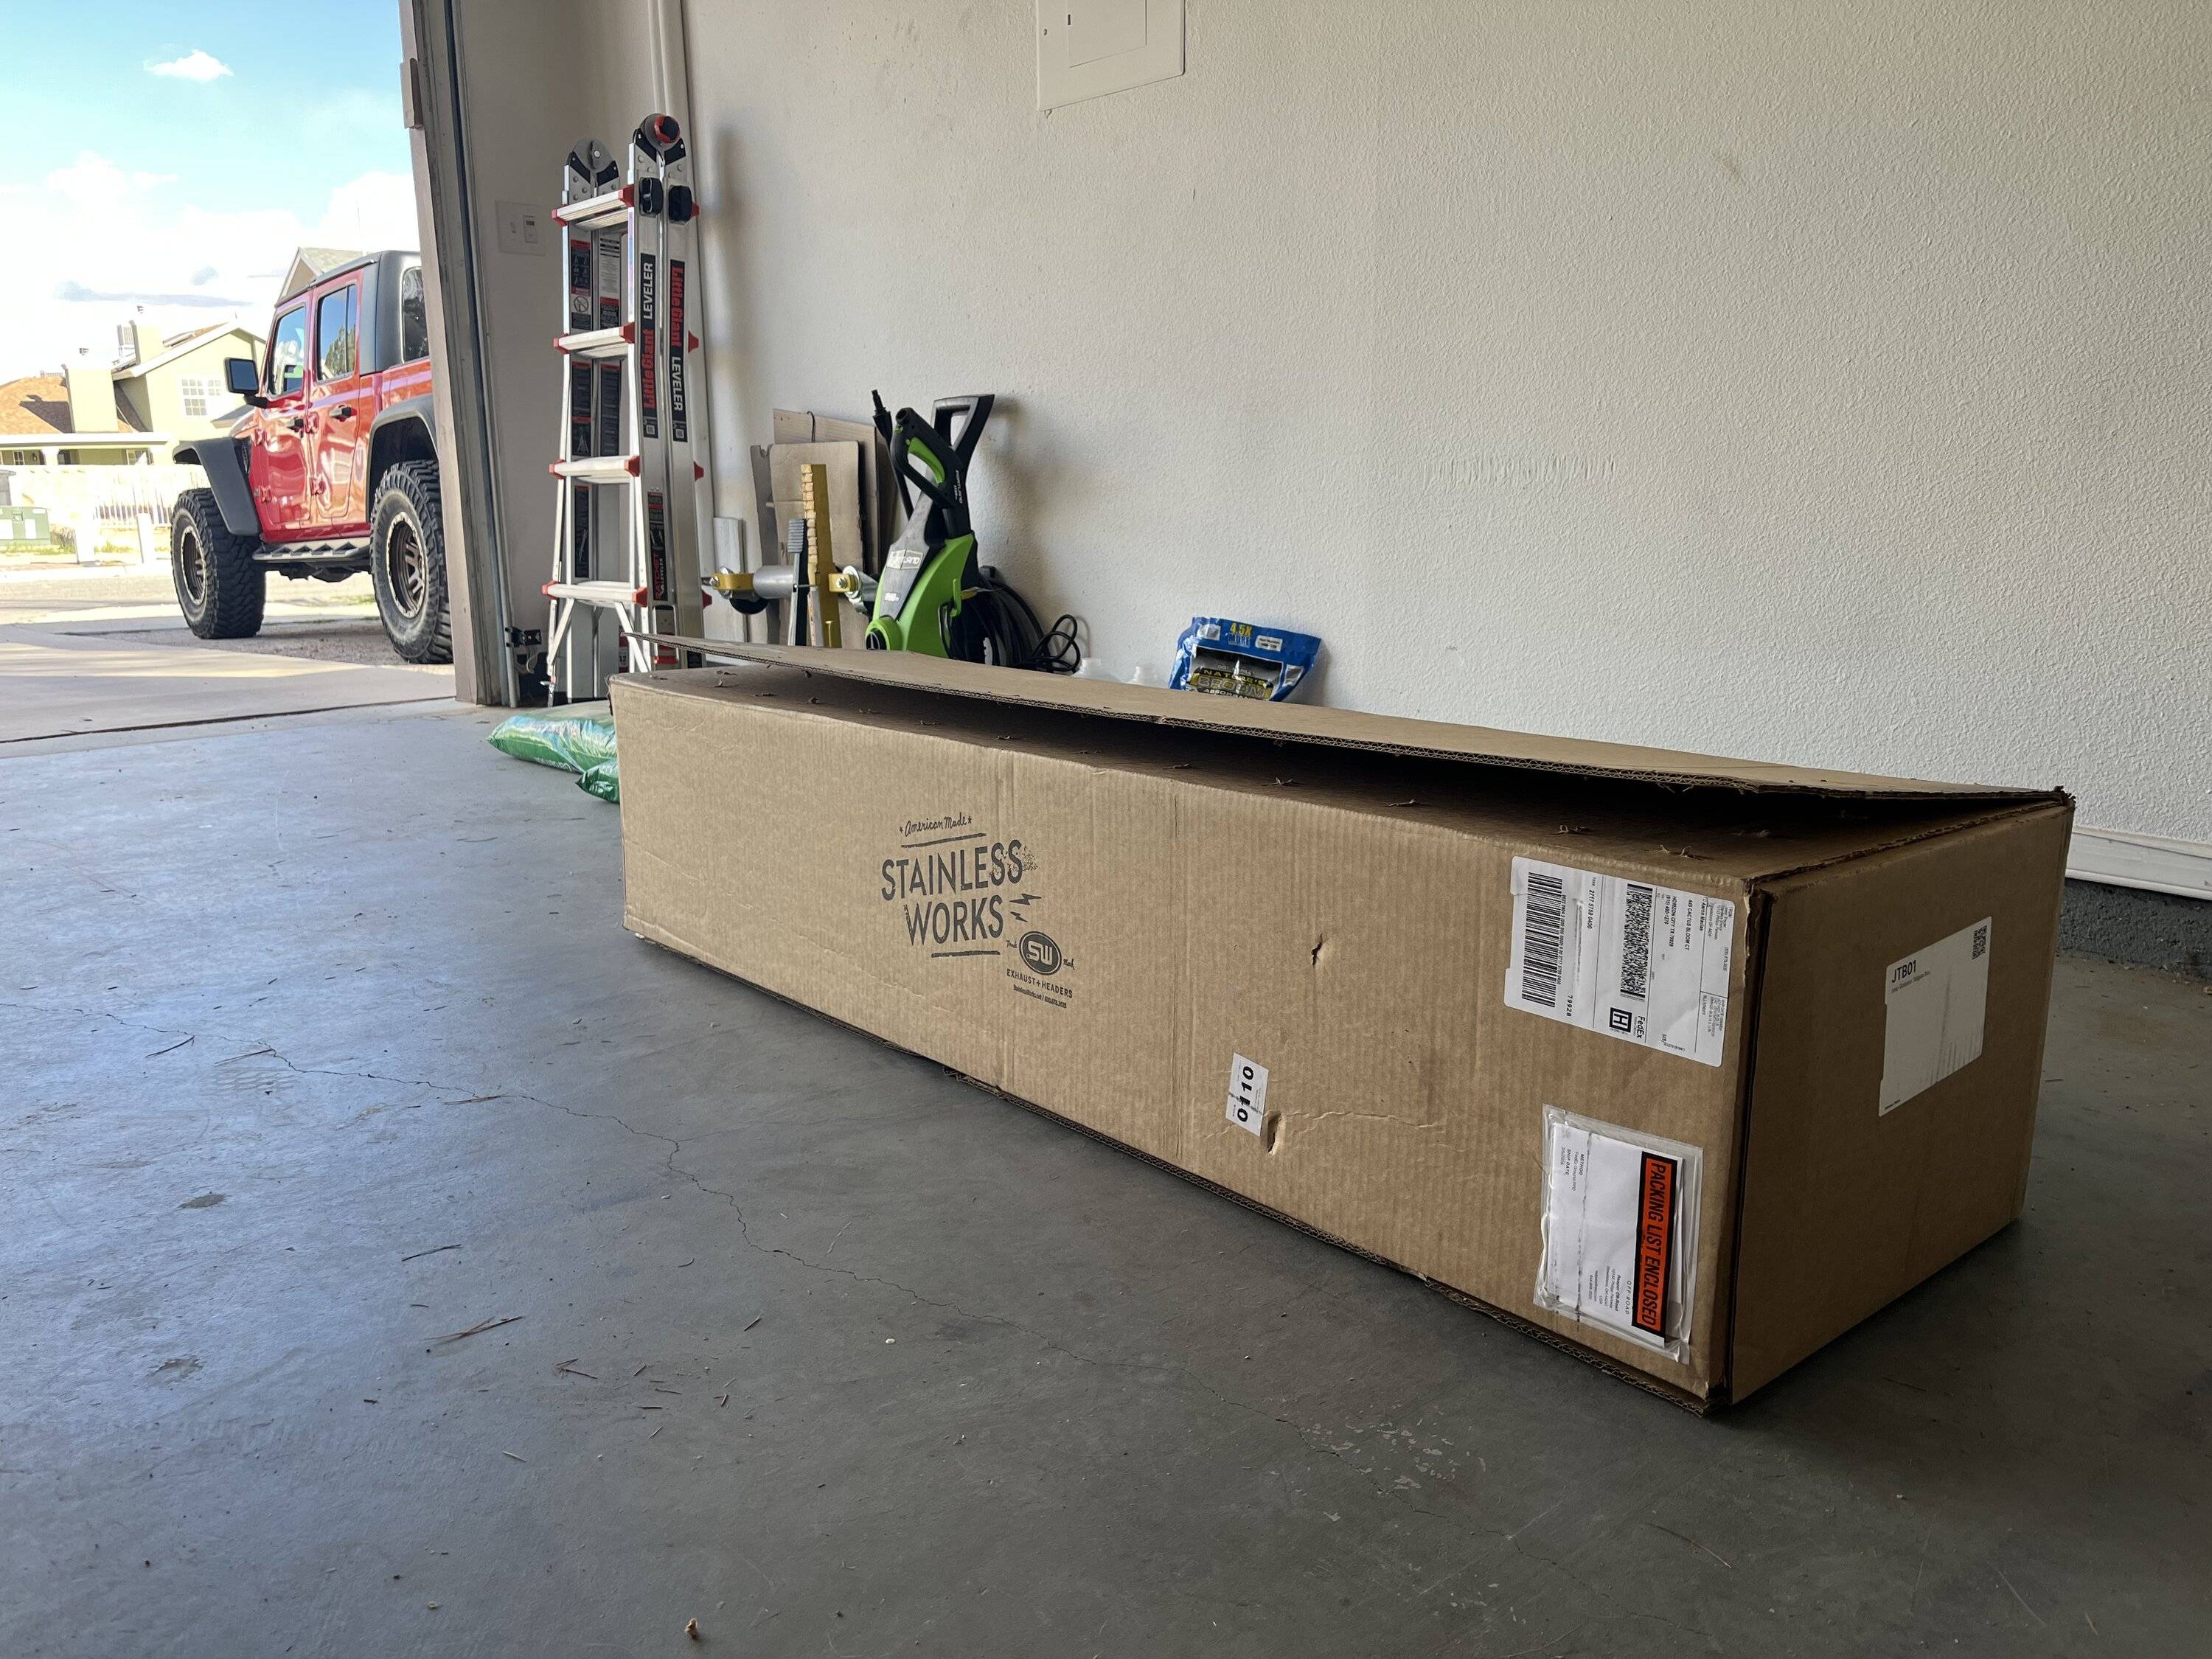
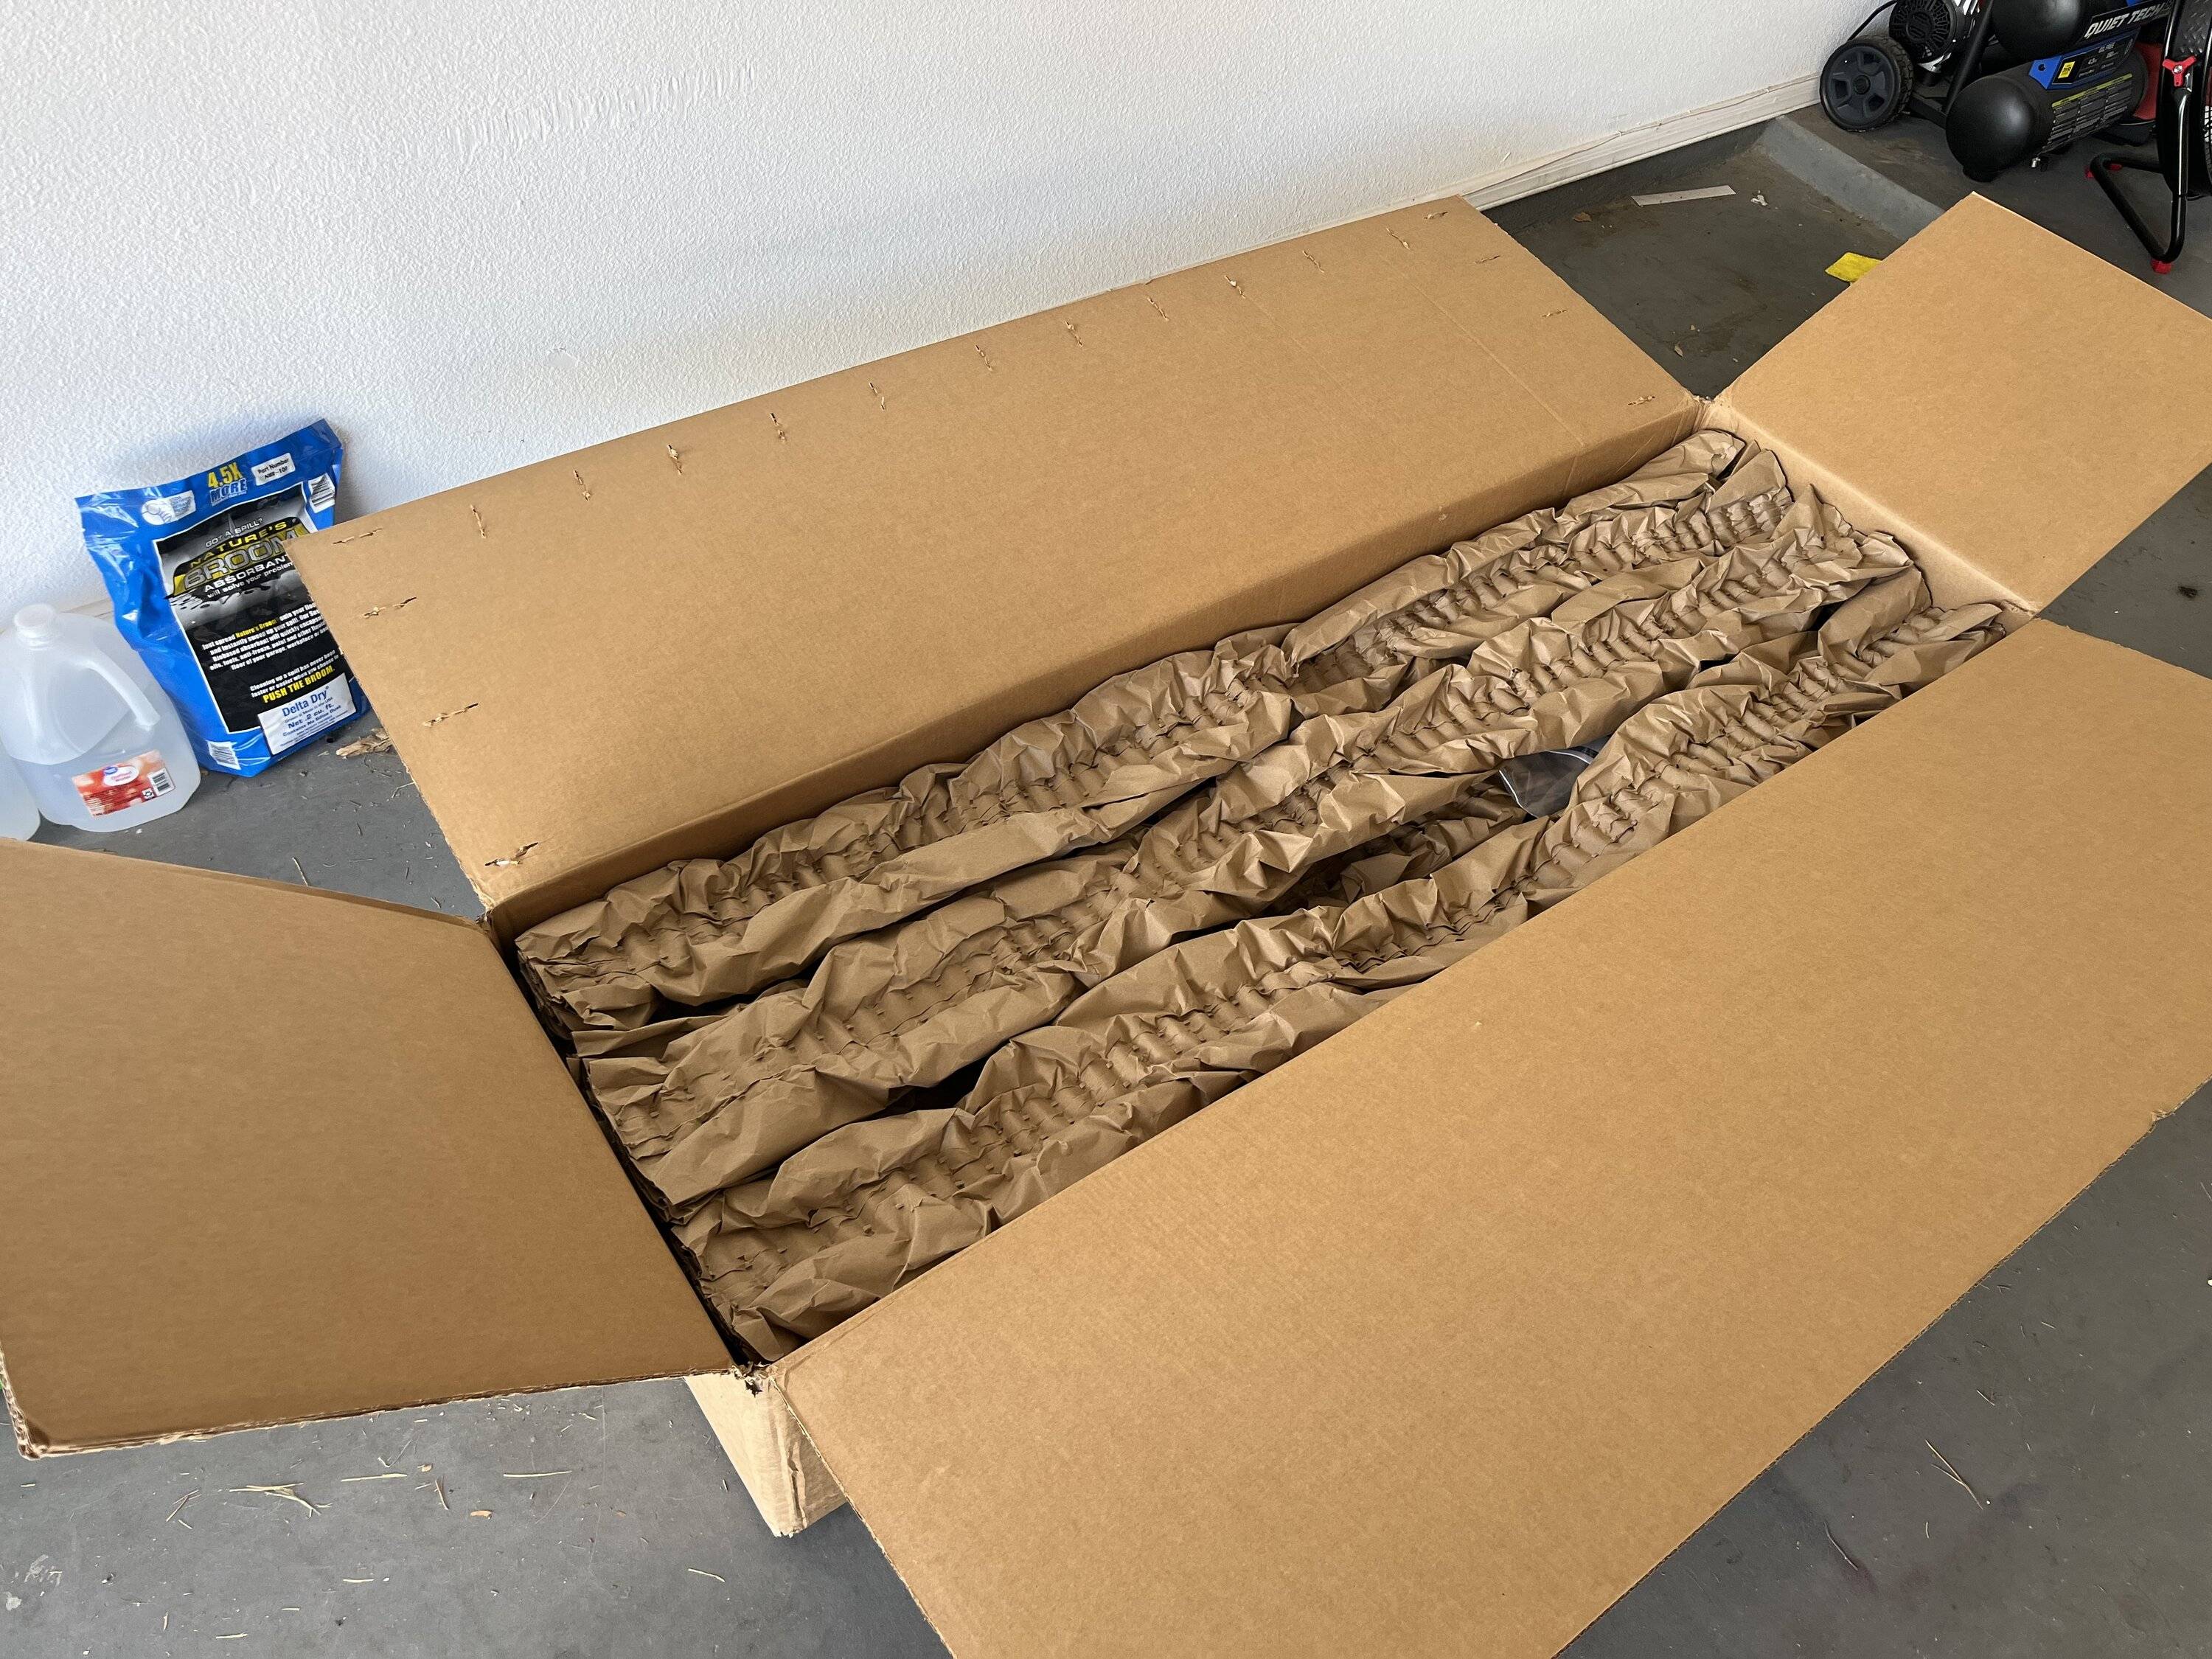
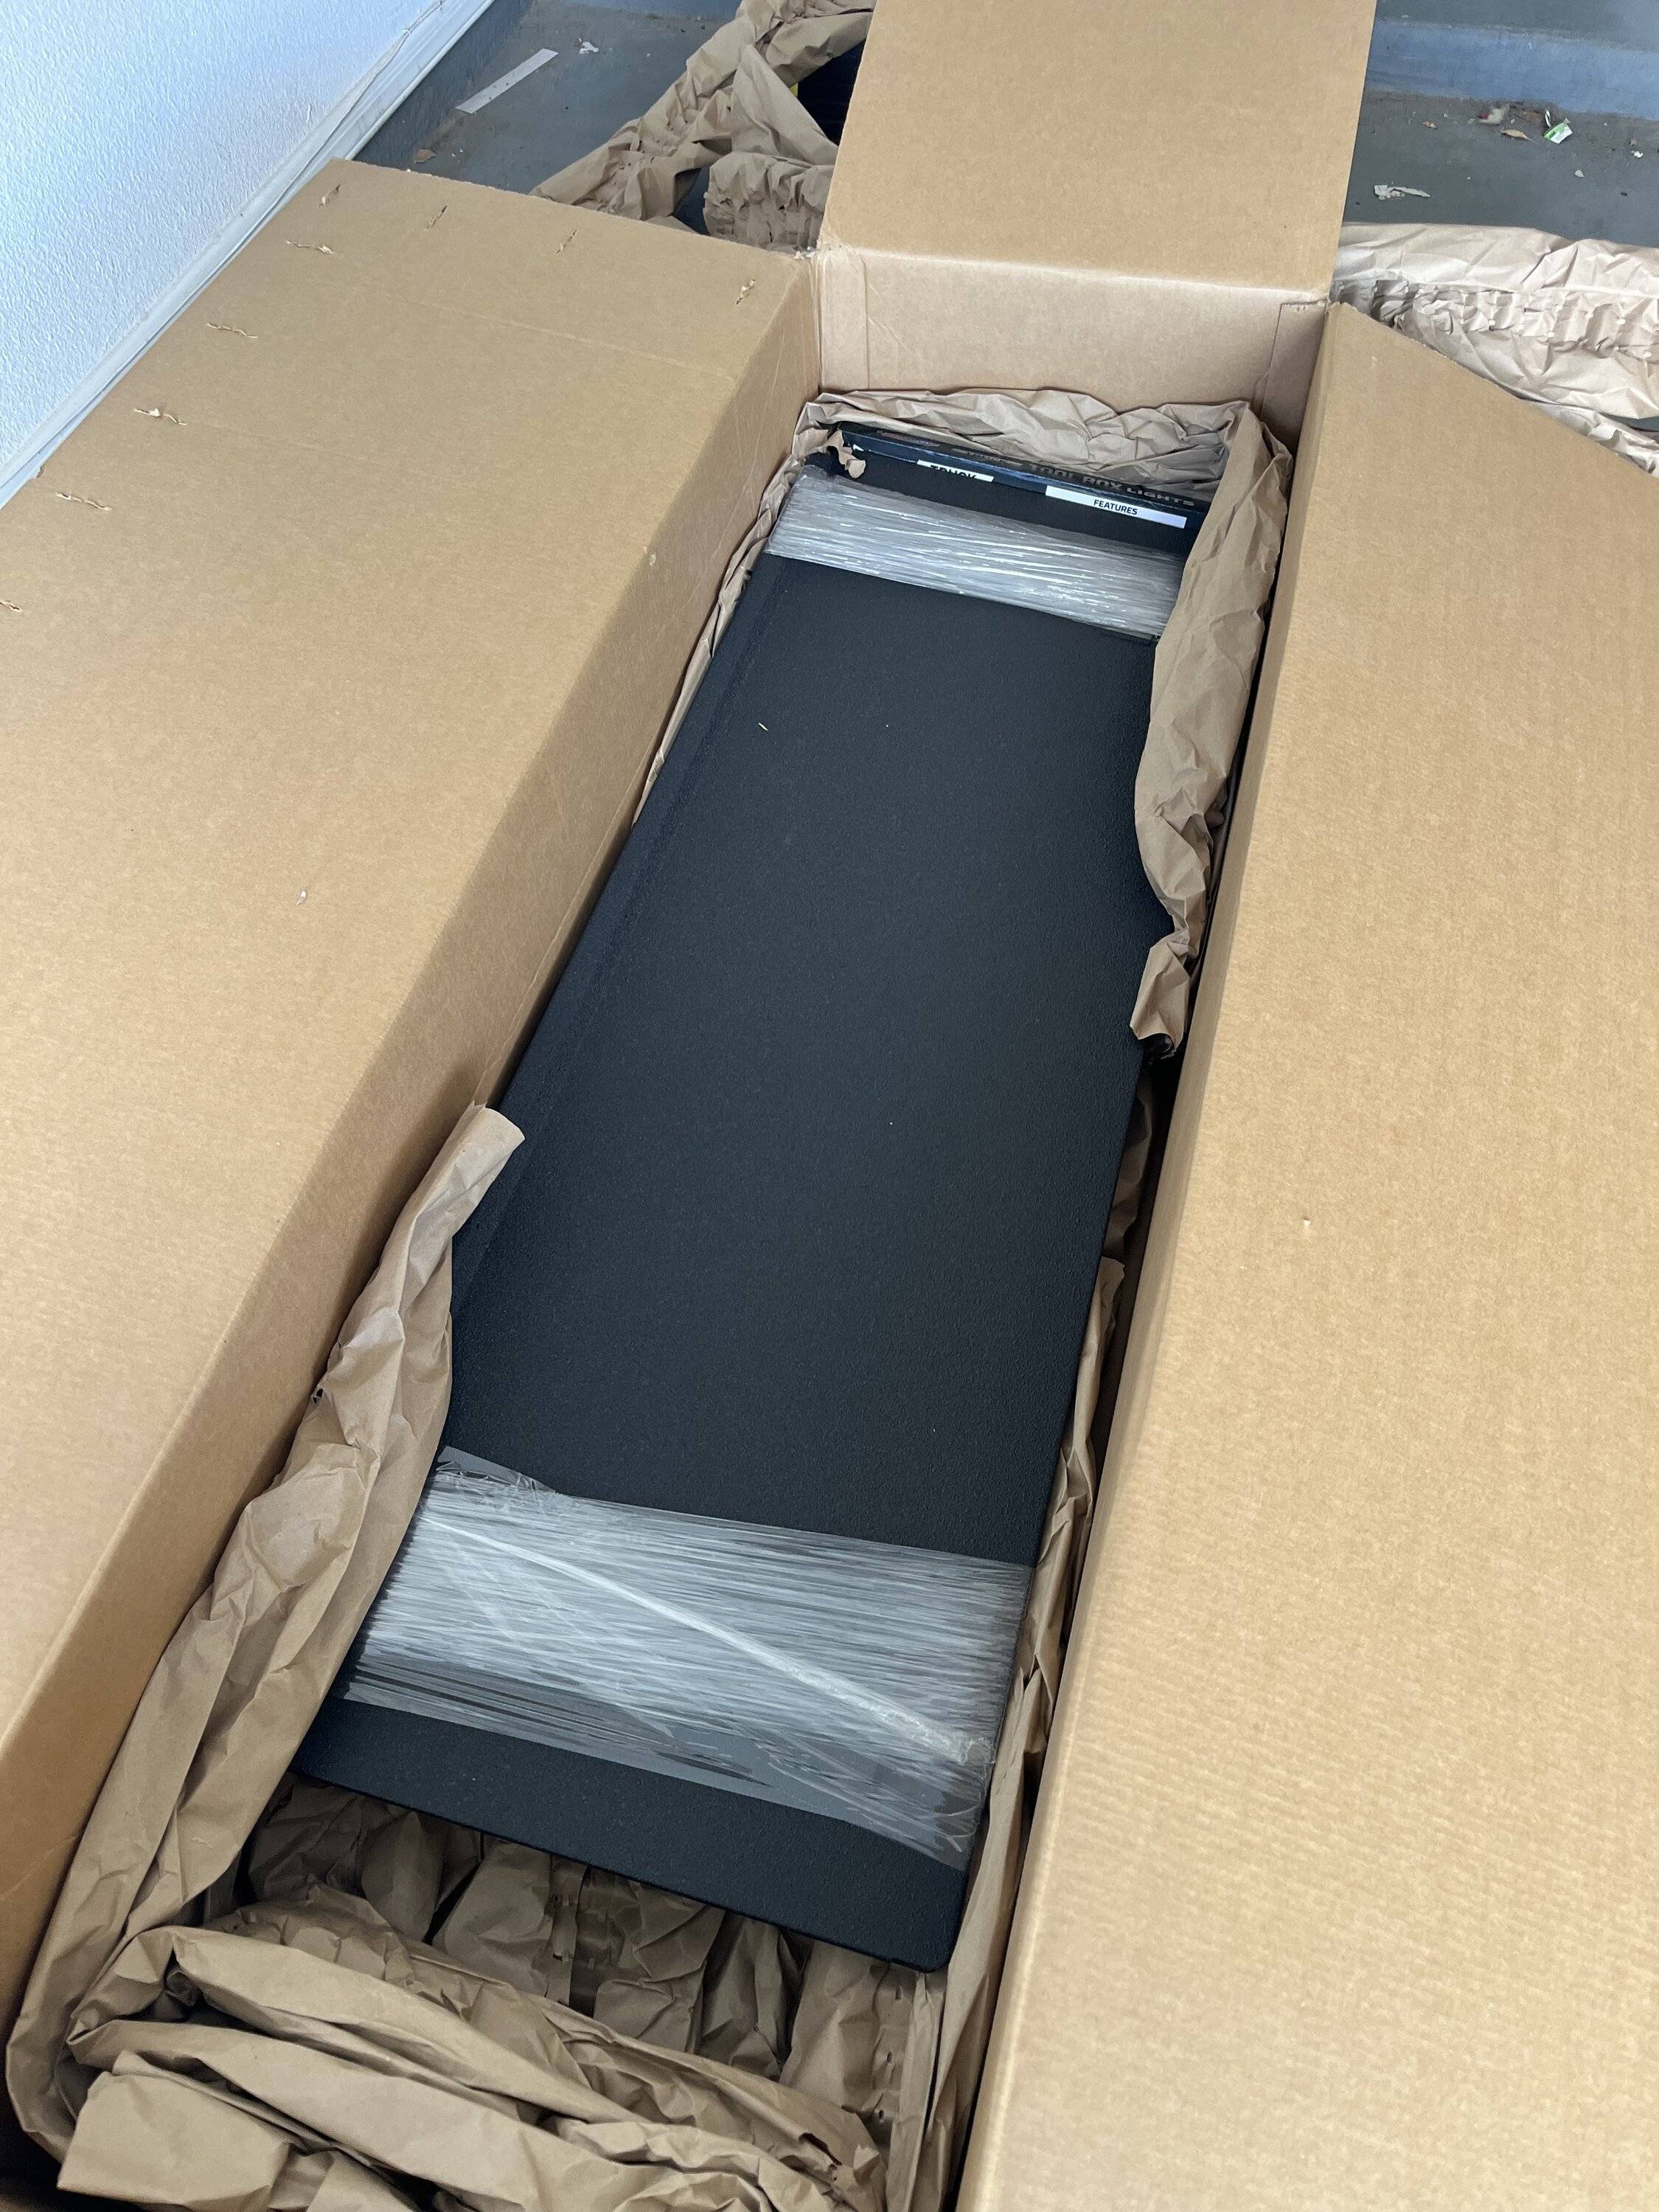
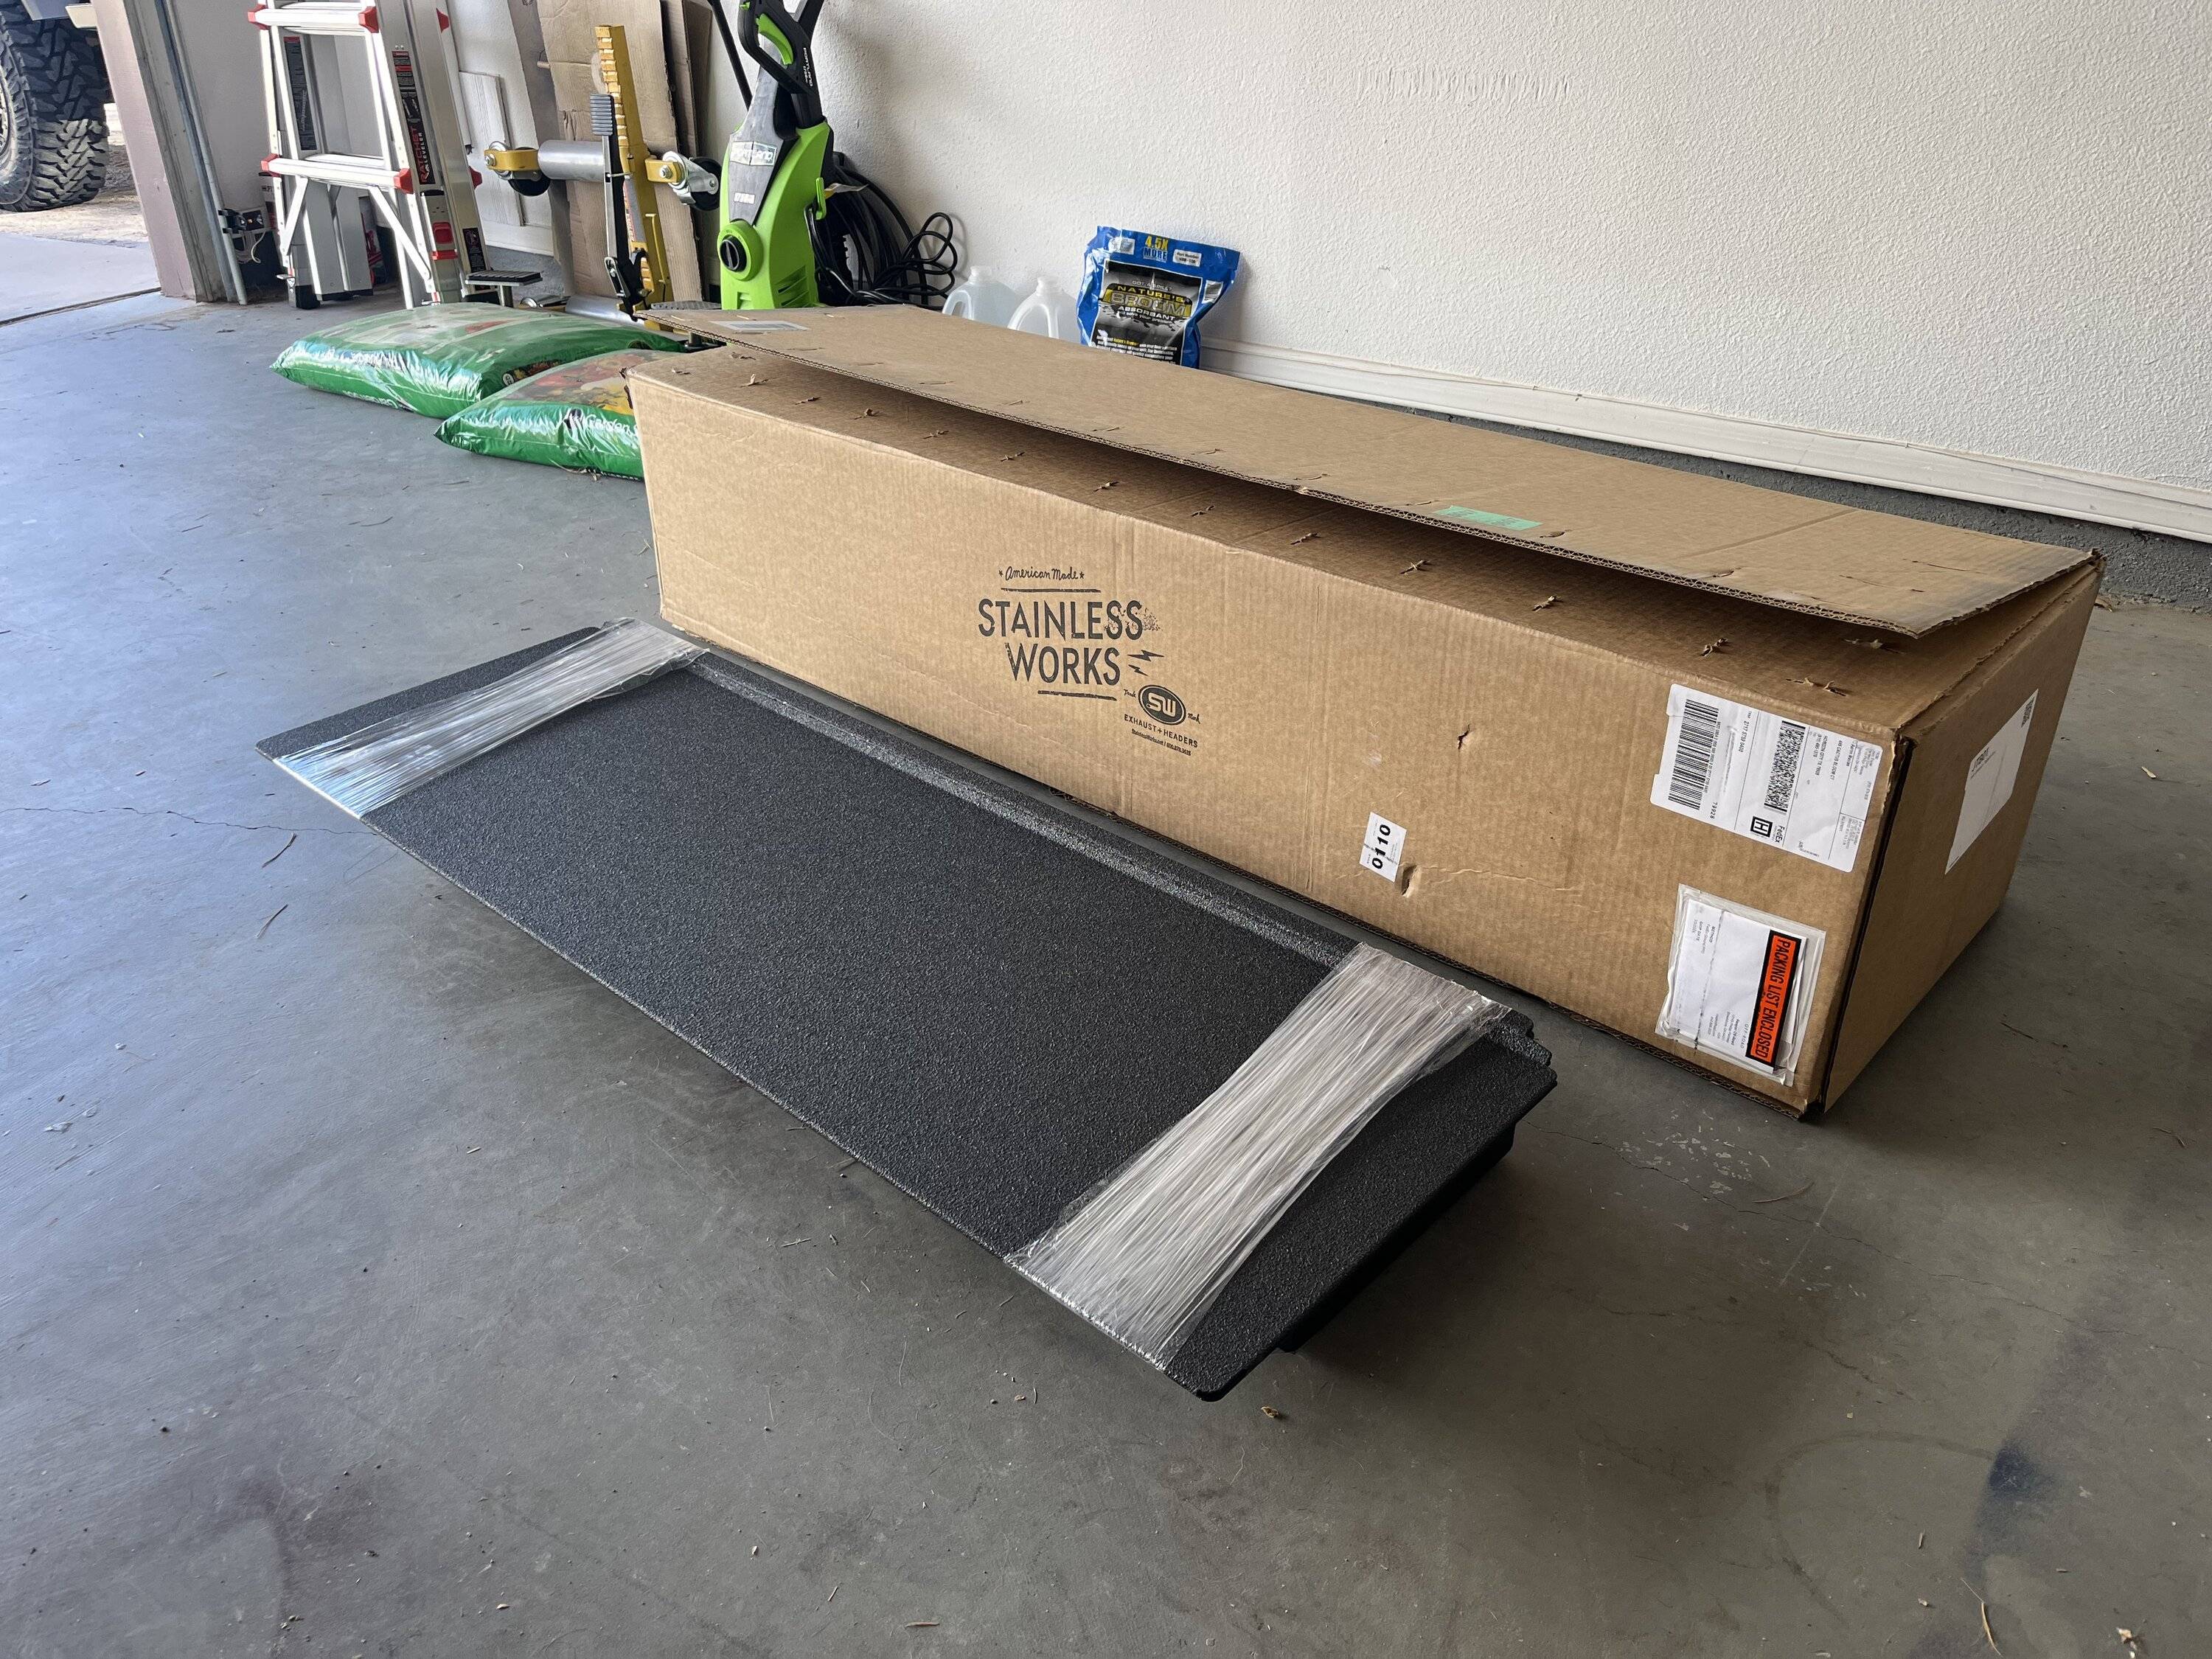
Between ordering the box and it's arrival, it took exactly 7 days. Very happy with how quickly that went, and the condition the box arrived in. It was well packed, with no missing parts or damage of any kind.

IMG_9259.JPG


IMG_9260.JPG


IMG_9264.JPG


IMG_9265.JPG


IMG_9268.JPG


Next part was sizing up the box to the truck. I wanted to get a rough idea in my head on how much I had to work with in regards to the cut profile. The reasons for this is this box uses self taping screws to secure it in place. I personally dislike self tapping screws, and opted to order my own hardware, stainless M5 button head bolts, that would be secured via RivetNuts. Thanks to the overhang on the box, I was sure that RivetNuts would work.

IMG_9277.JPG


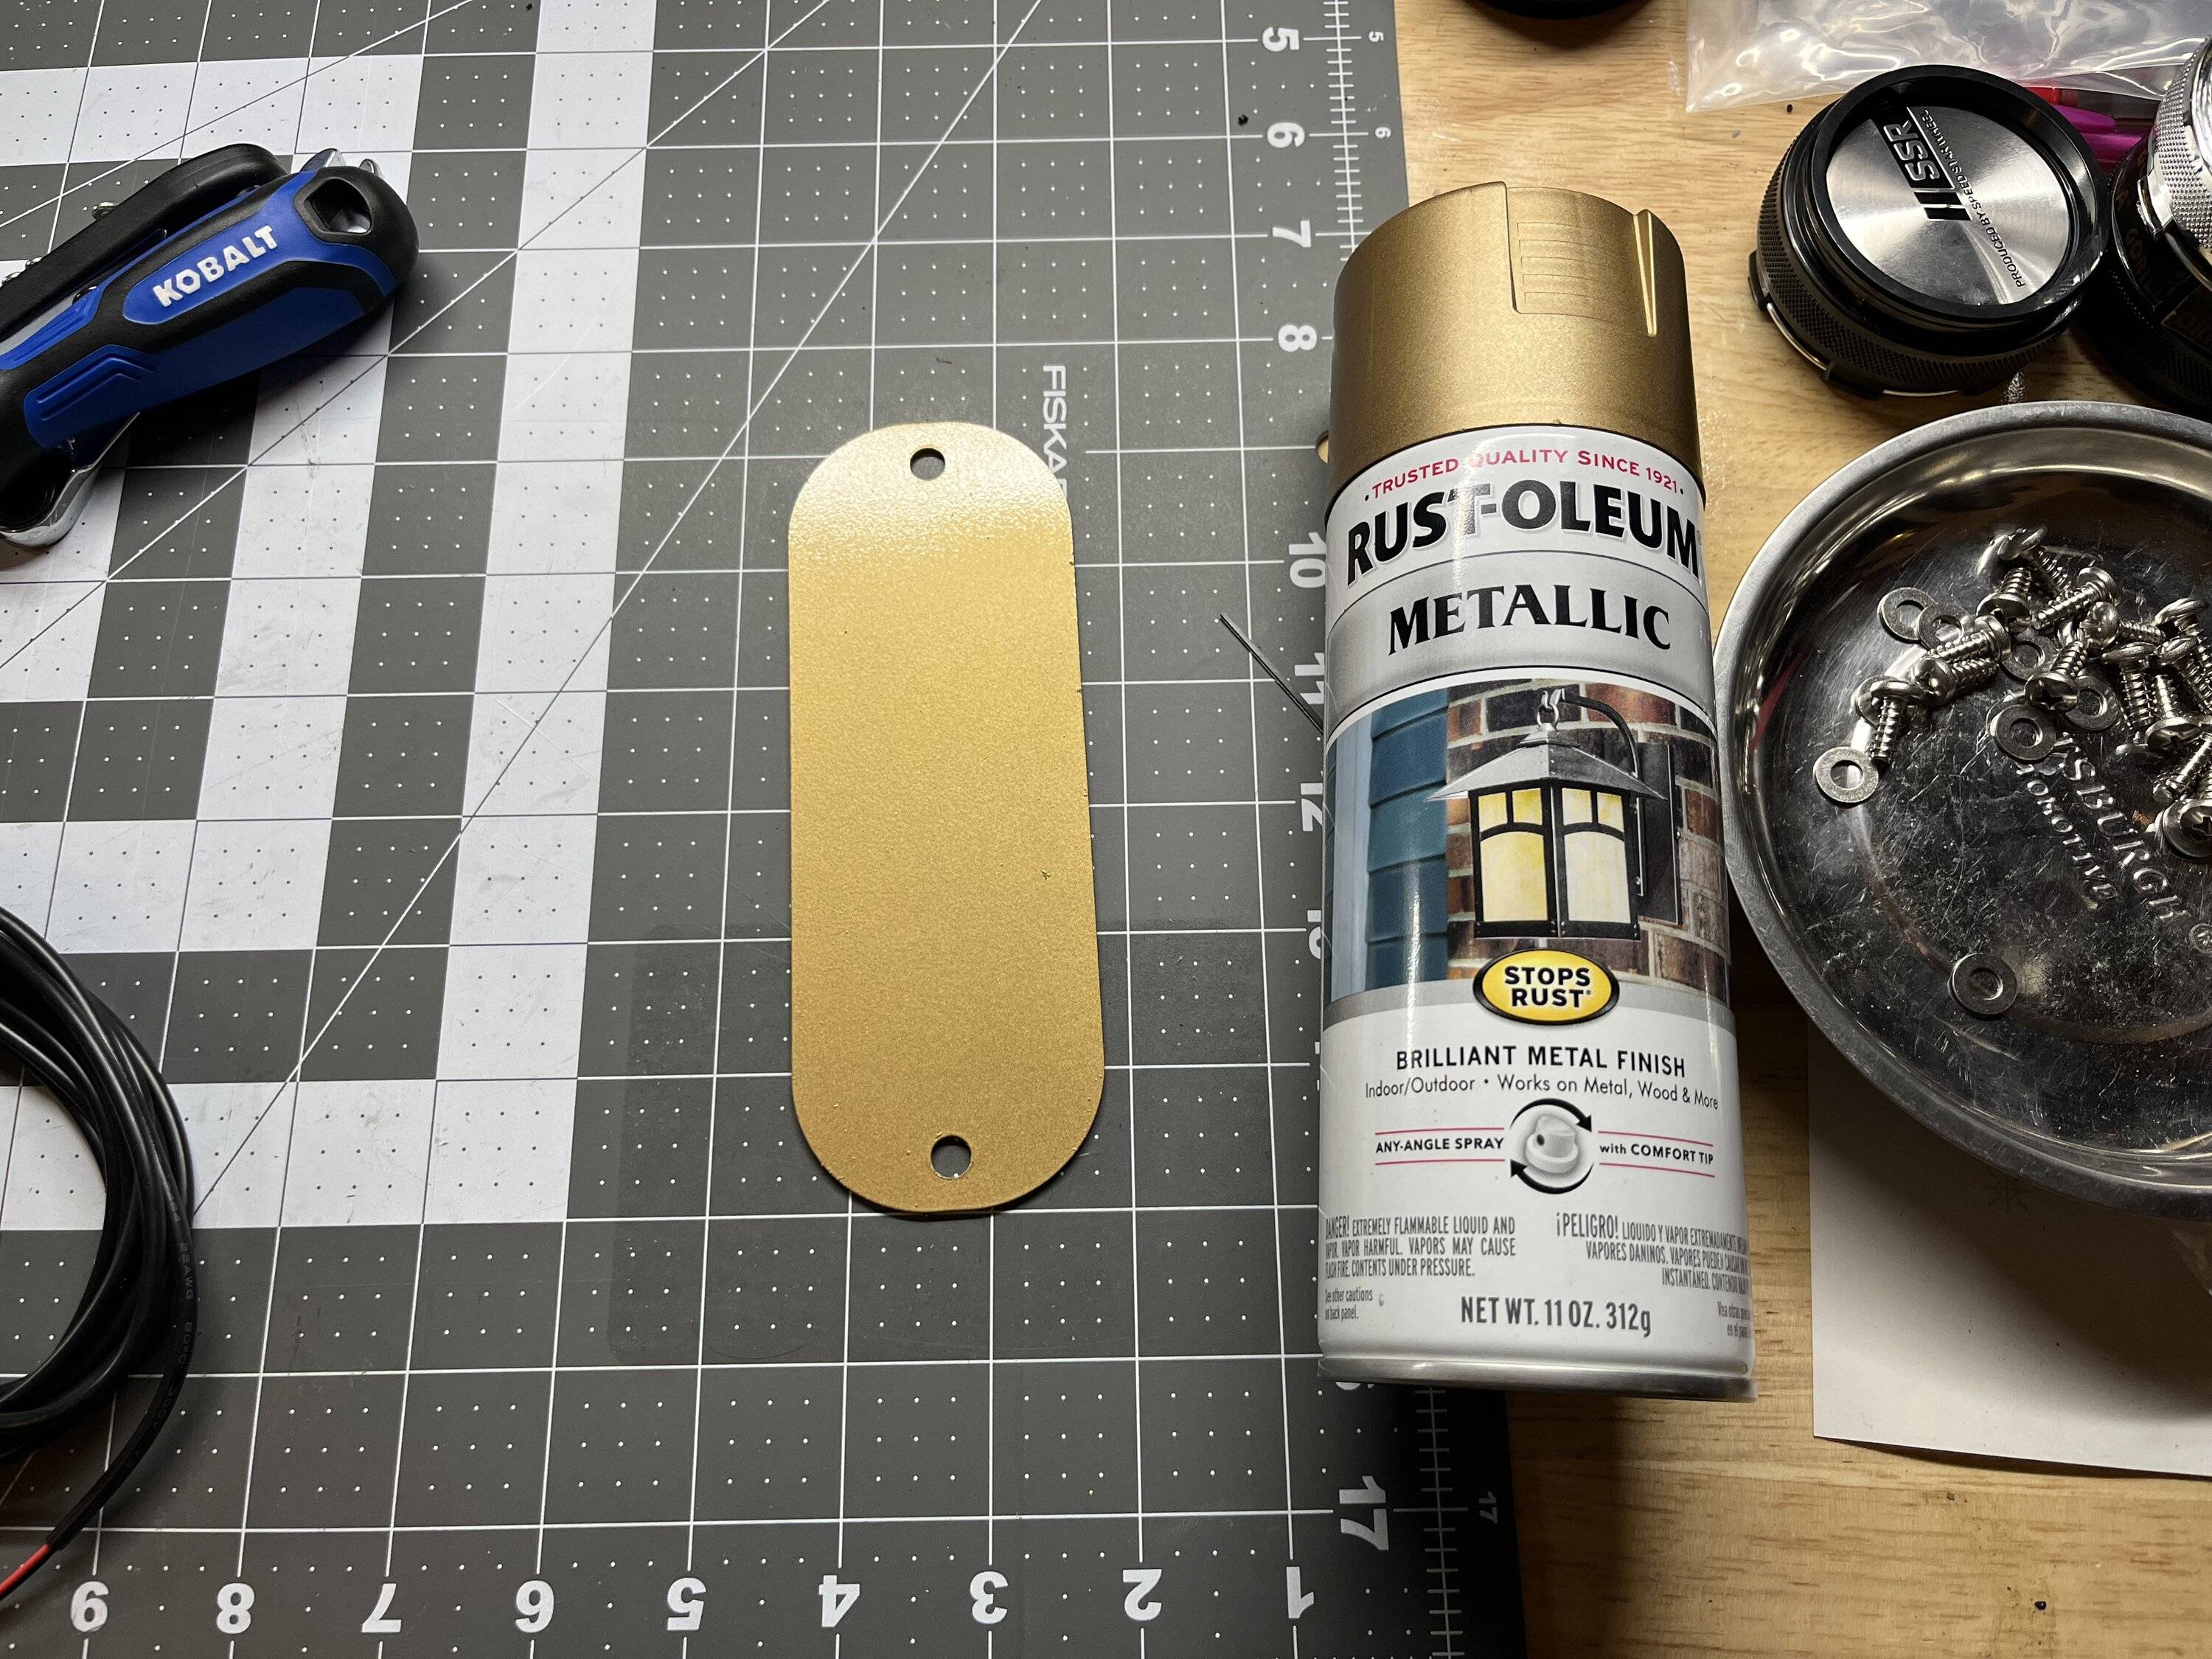
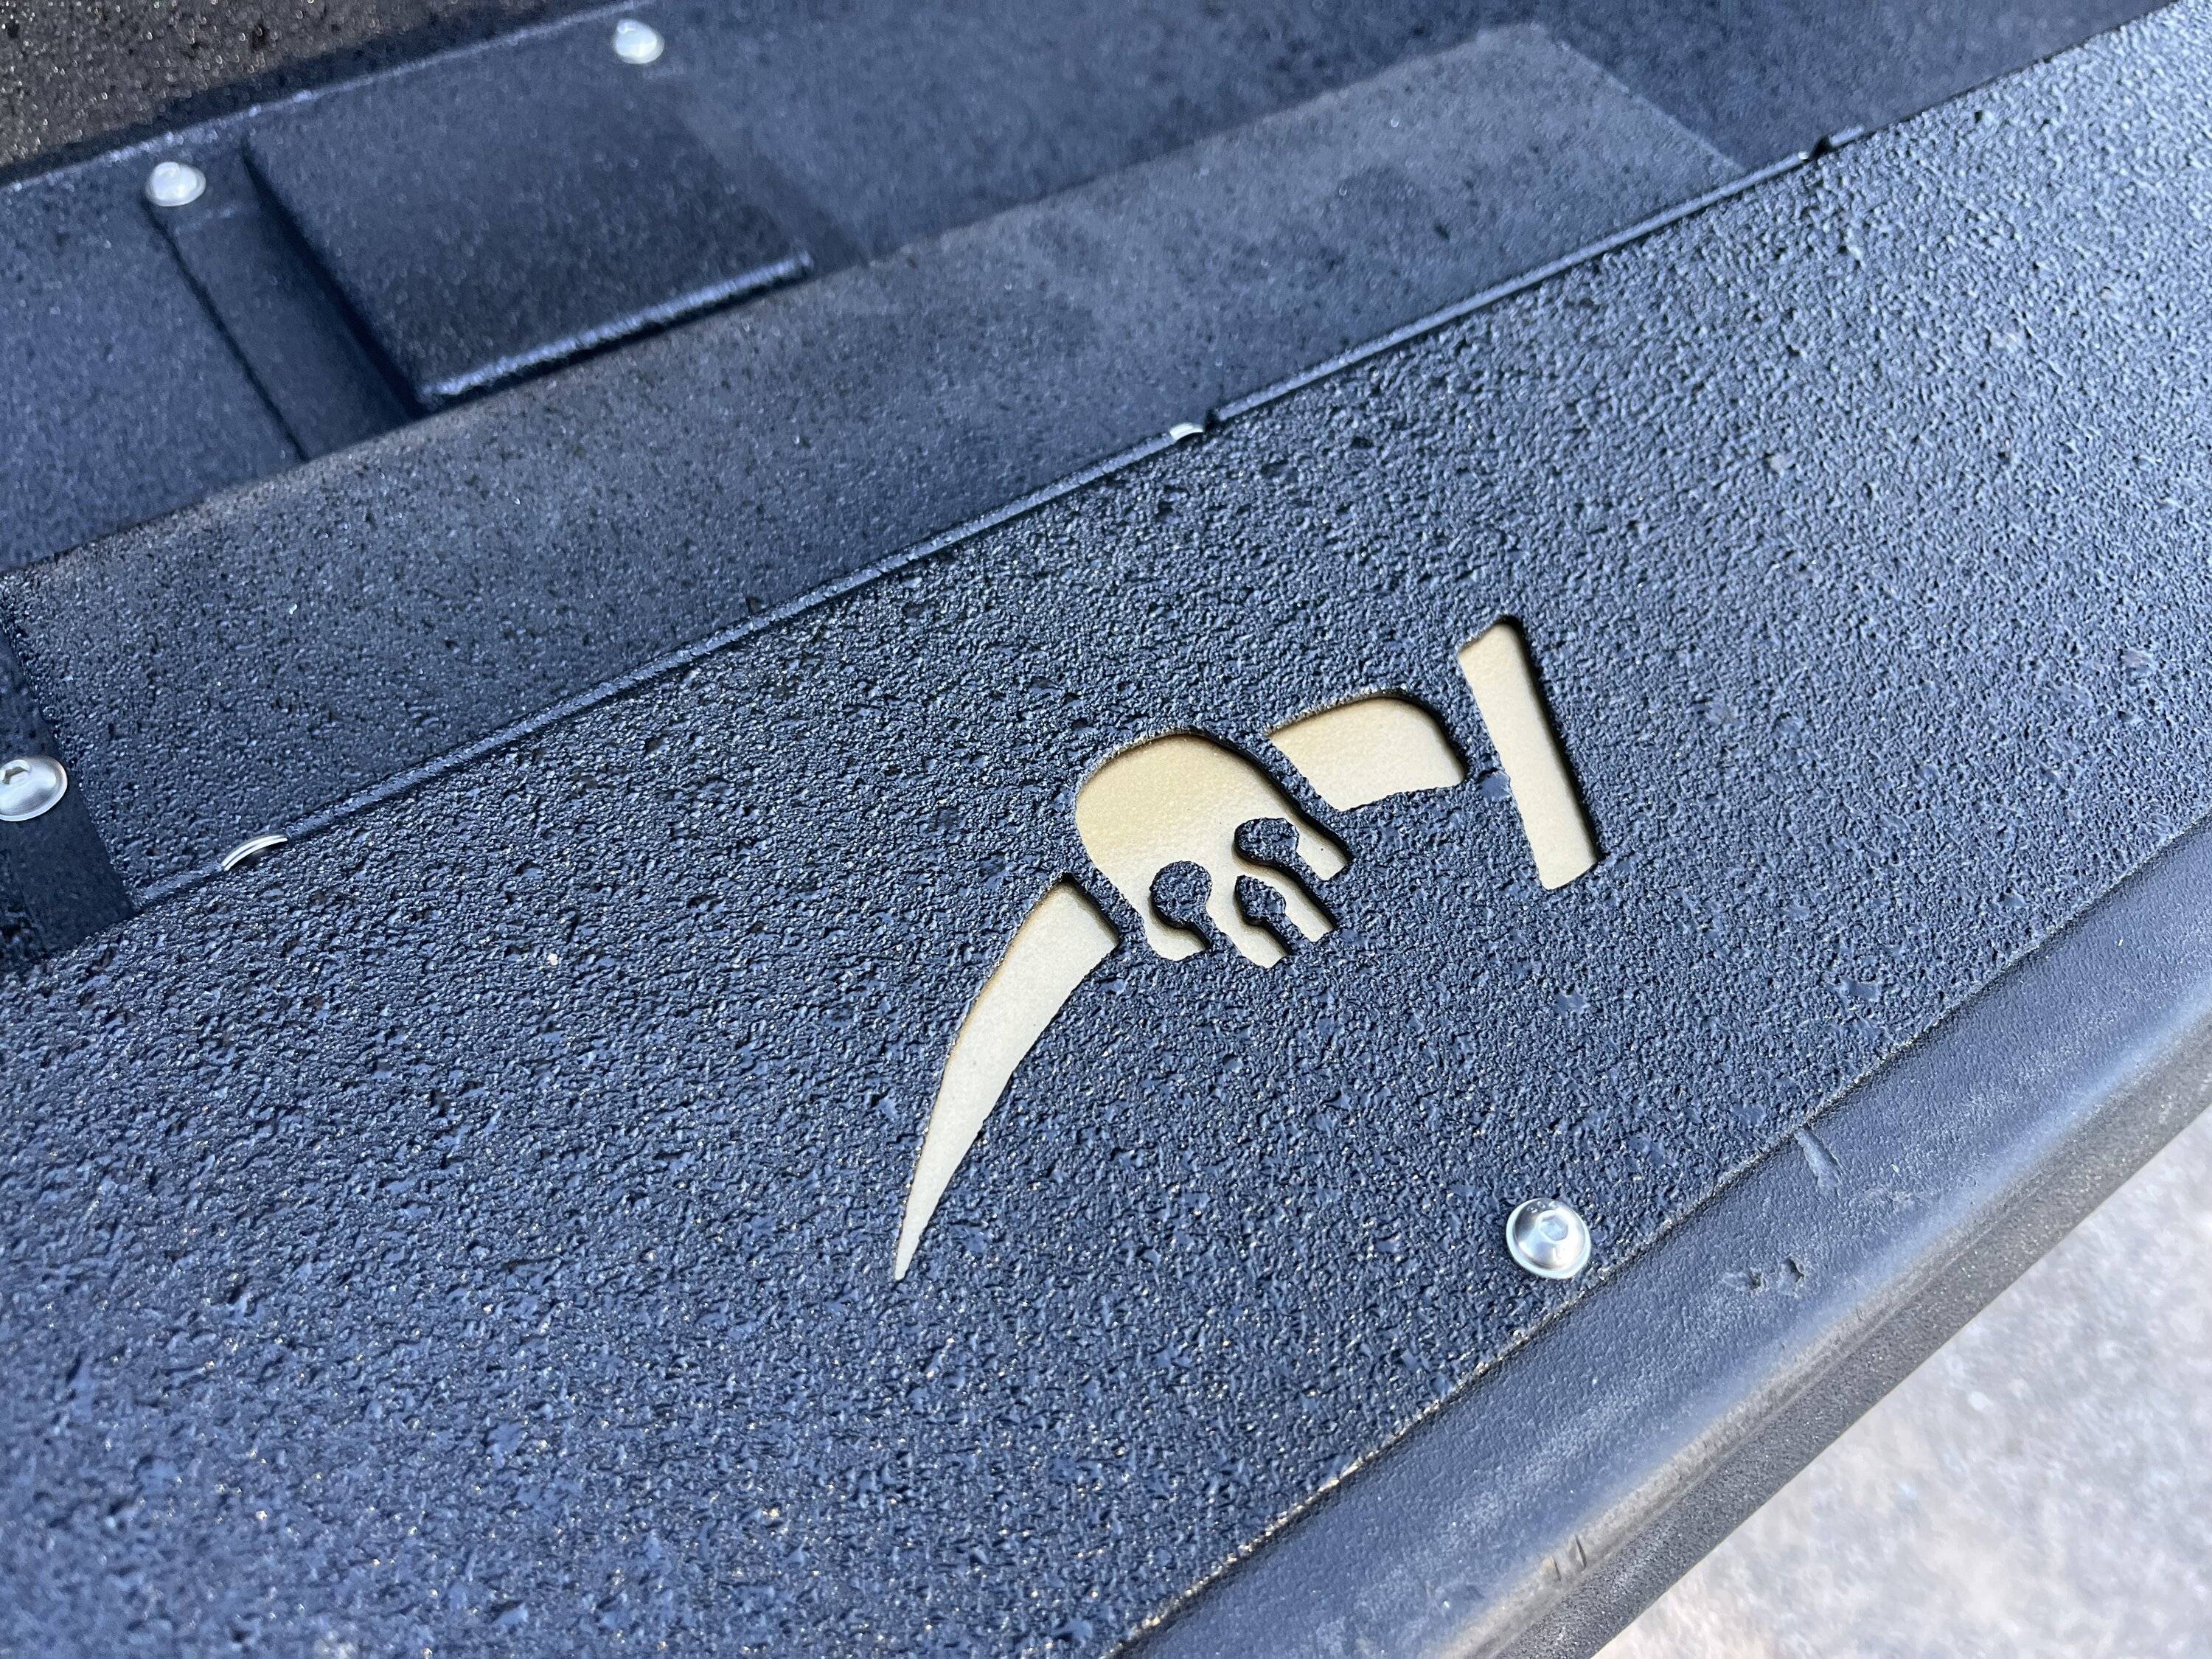
I went ahead and put the box away, as it was delivered later in the day, so I would have to save the actual install for the next day. I took the opportunity to paint the "Accent color" plate for the logo. Painted "392 Bronze", to match my other accents for the truck.

IMG_9291.JPG


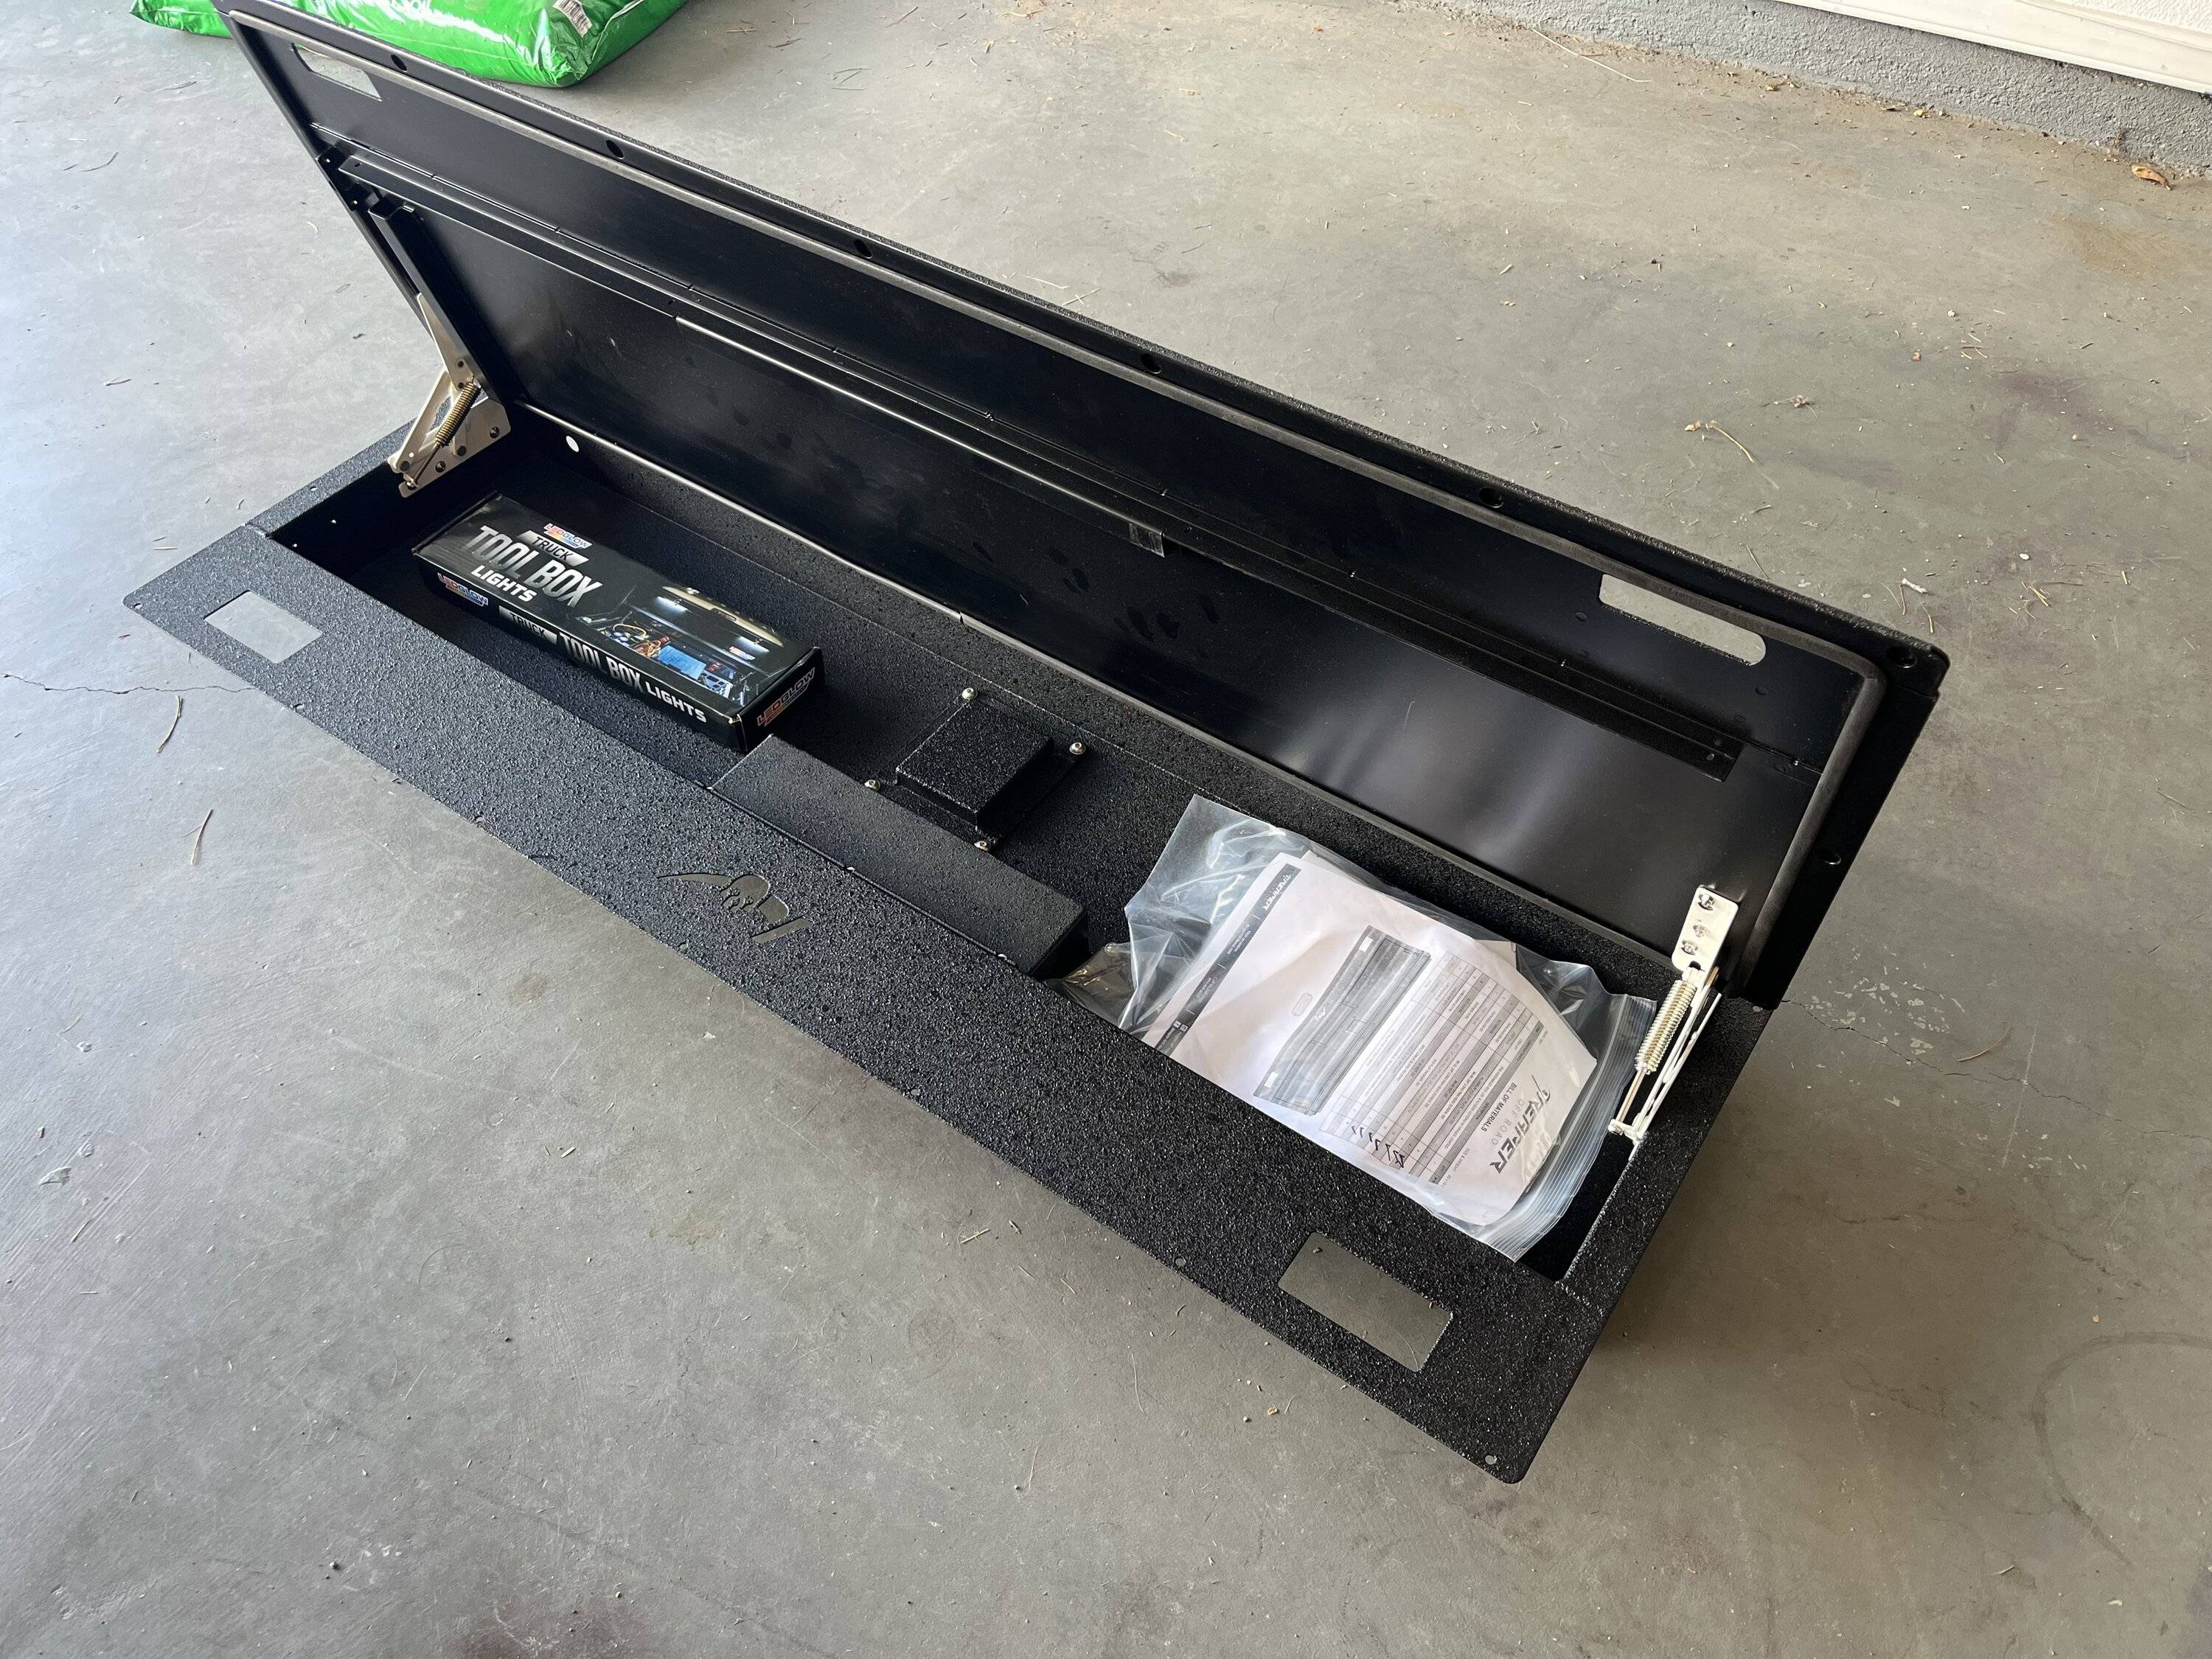
Decided to do early prep by assembling the latches and other parts beforehand. Had to use my track tires as a workbench because my actual workbench was too small for the box. I also pre-assembled the lights for the box.

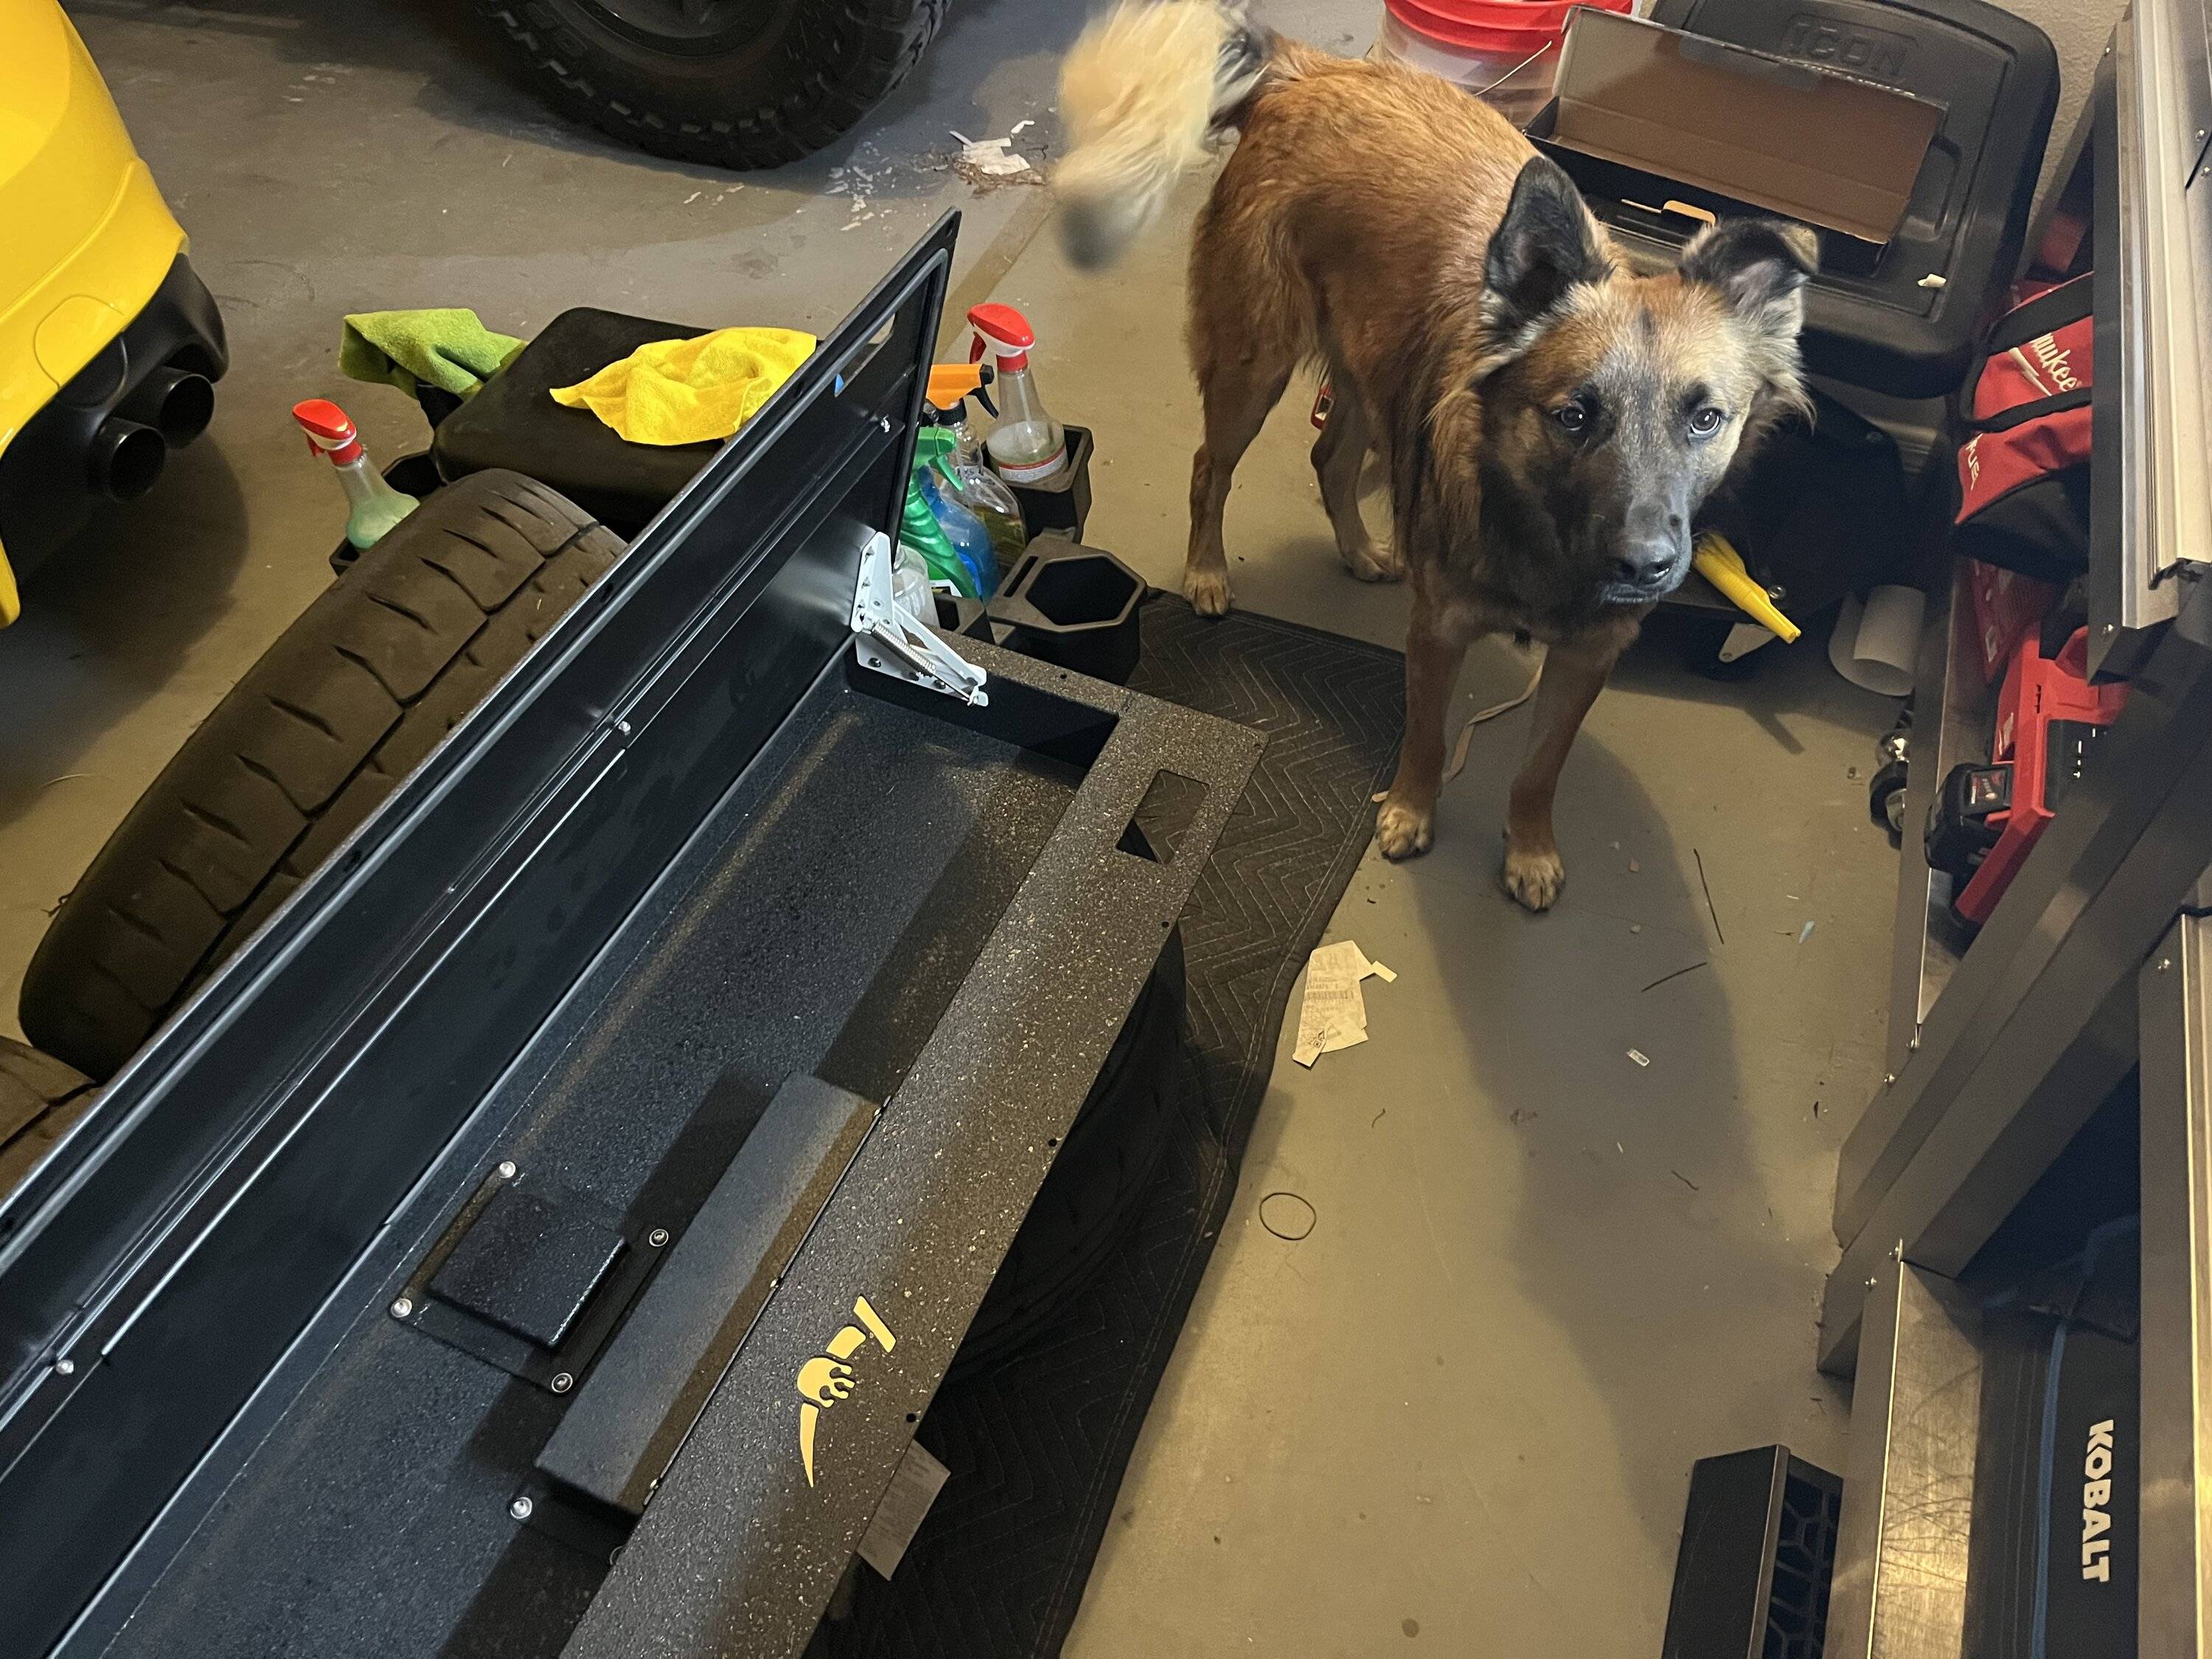
Bandit, the shop supervisor, did an inspection, and approved.

IMG_9294.JPG


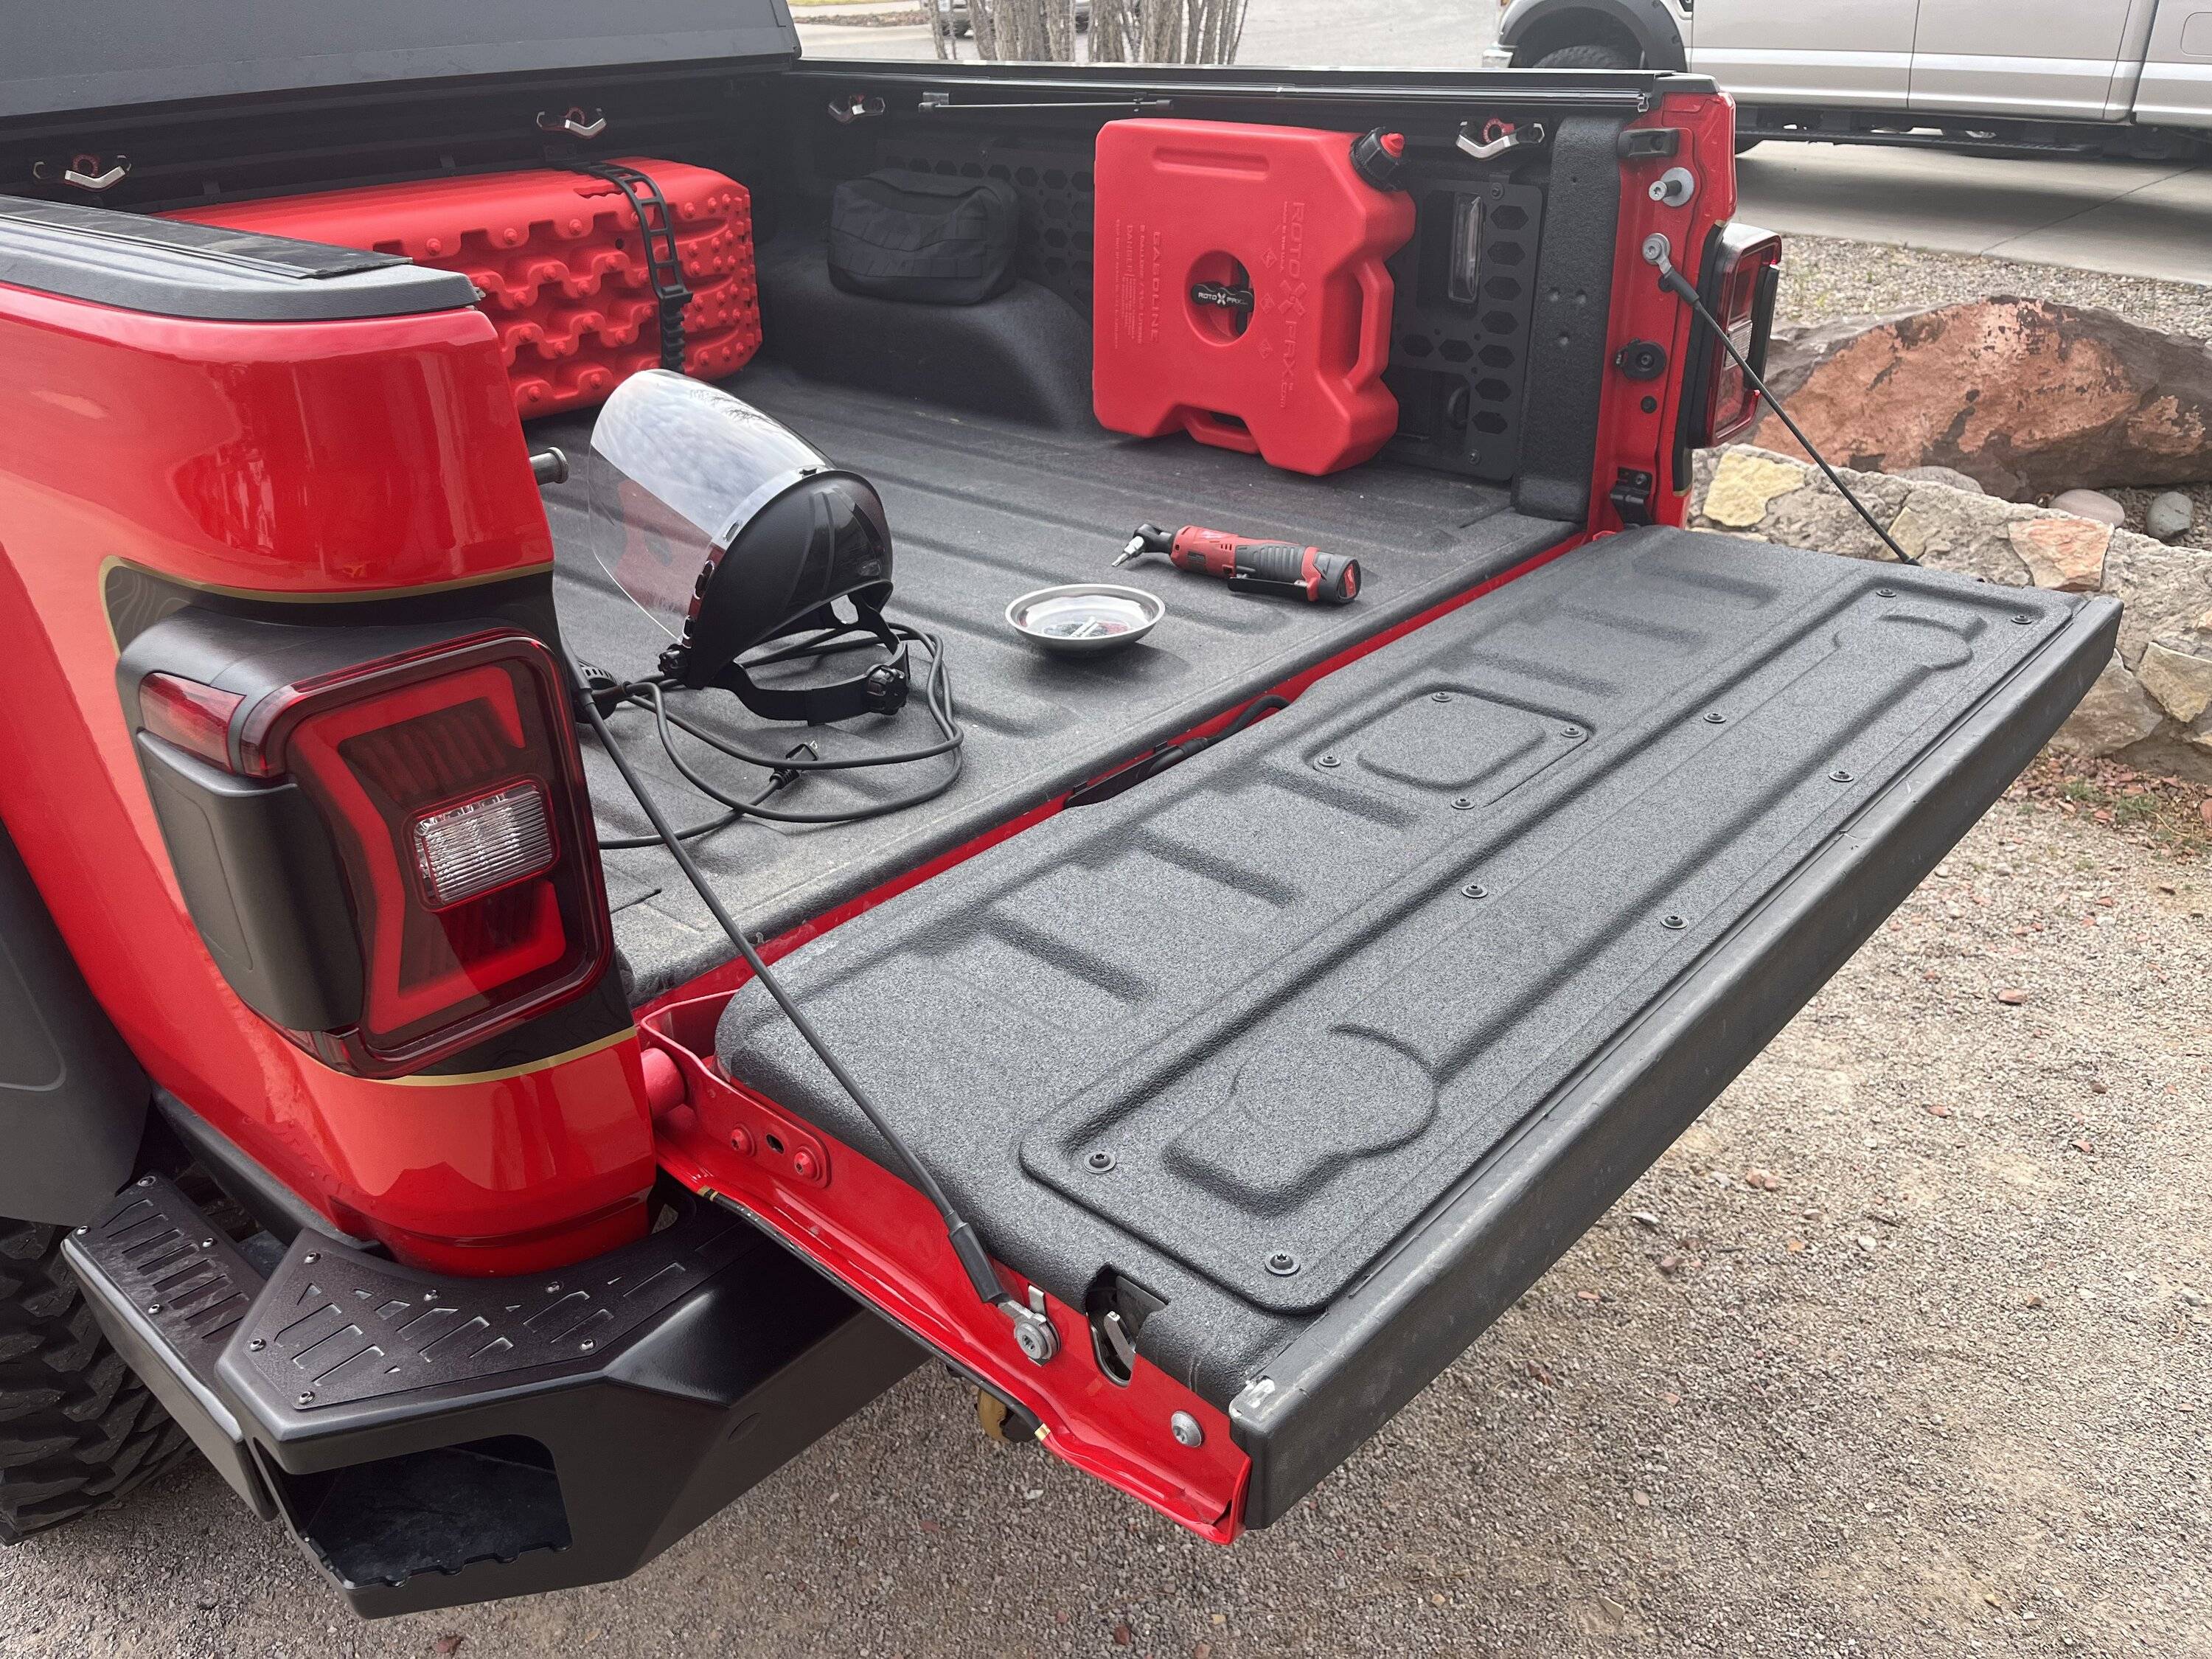
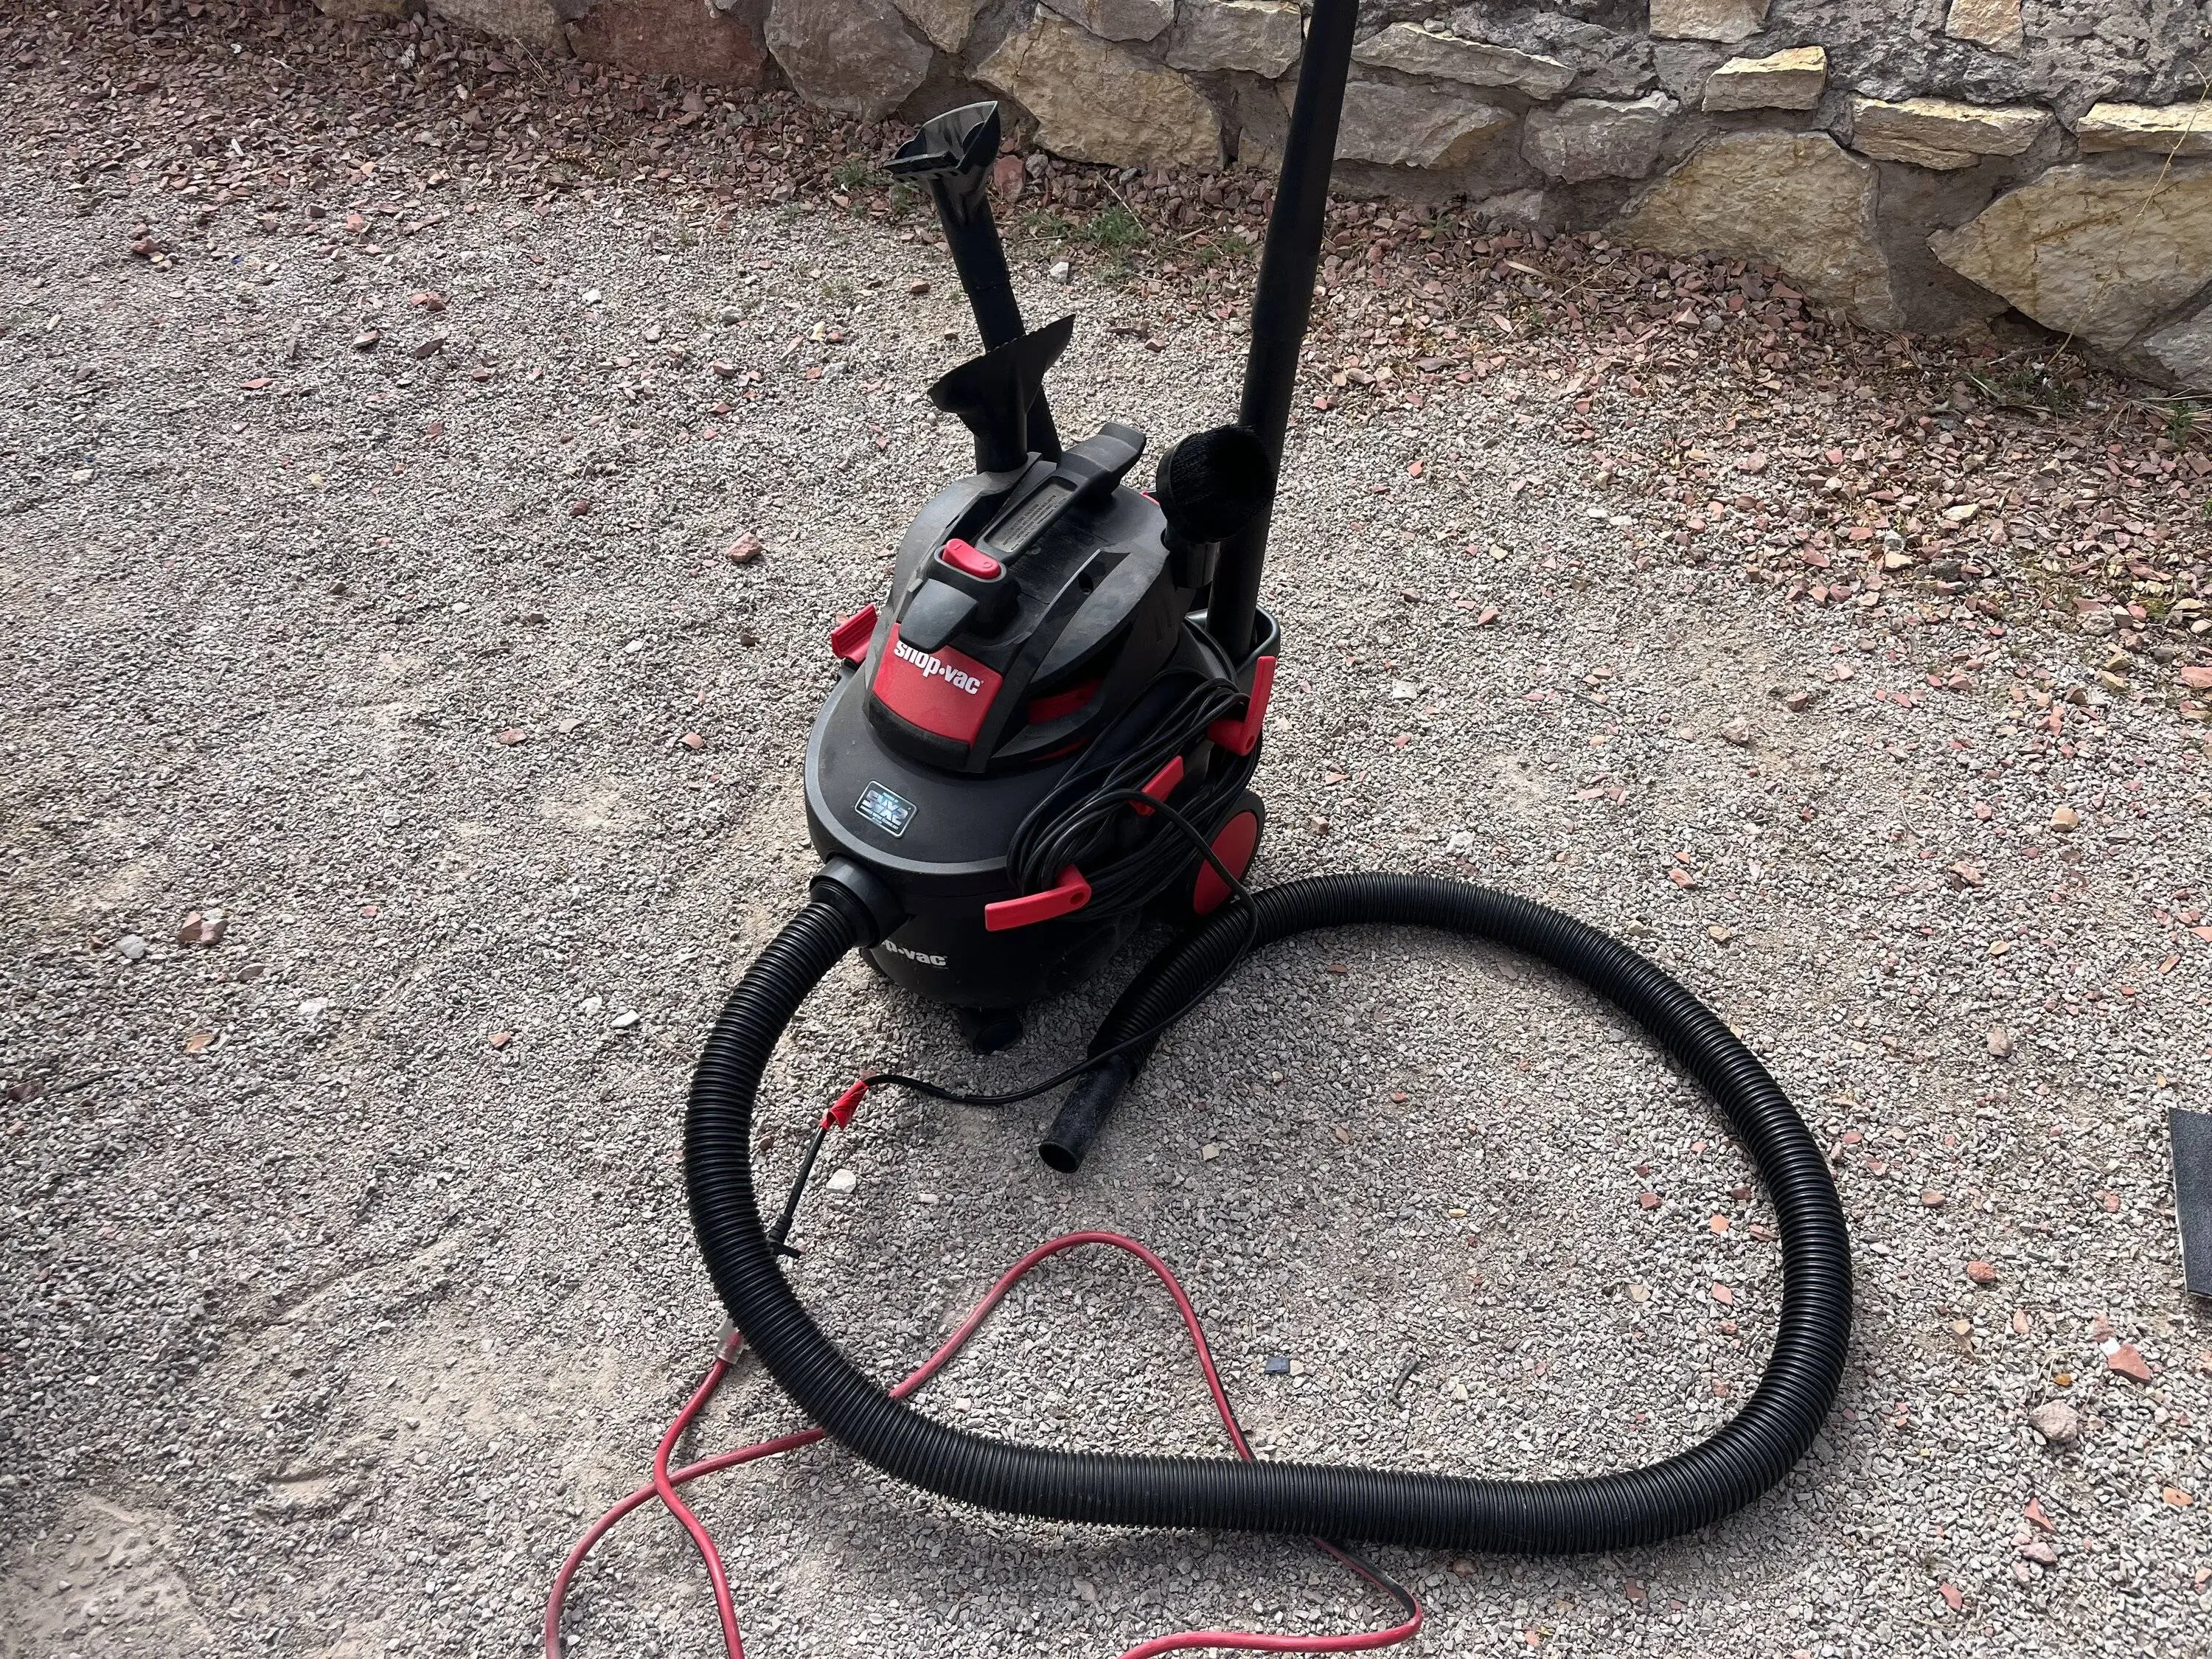
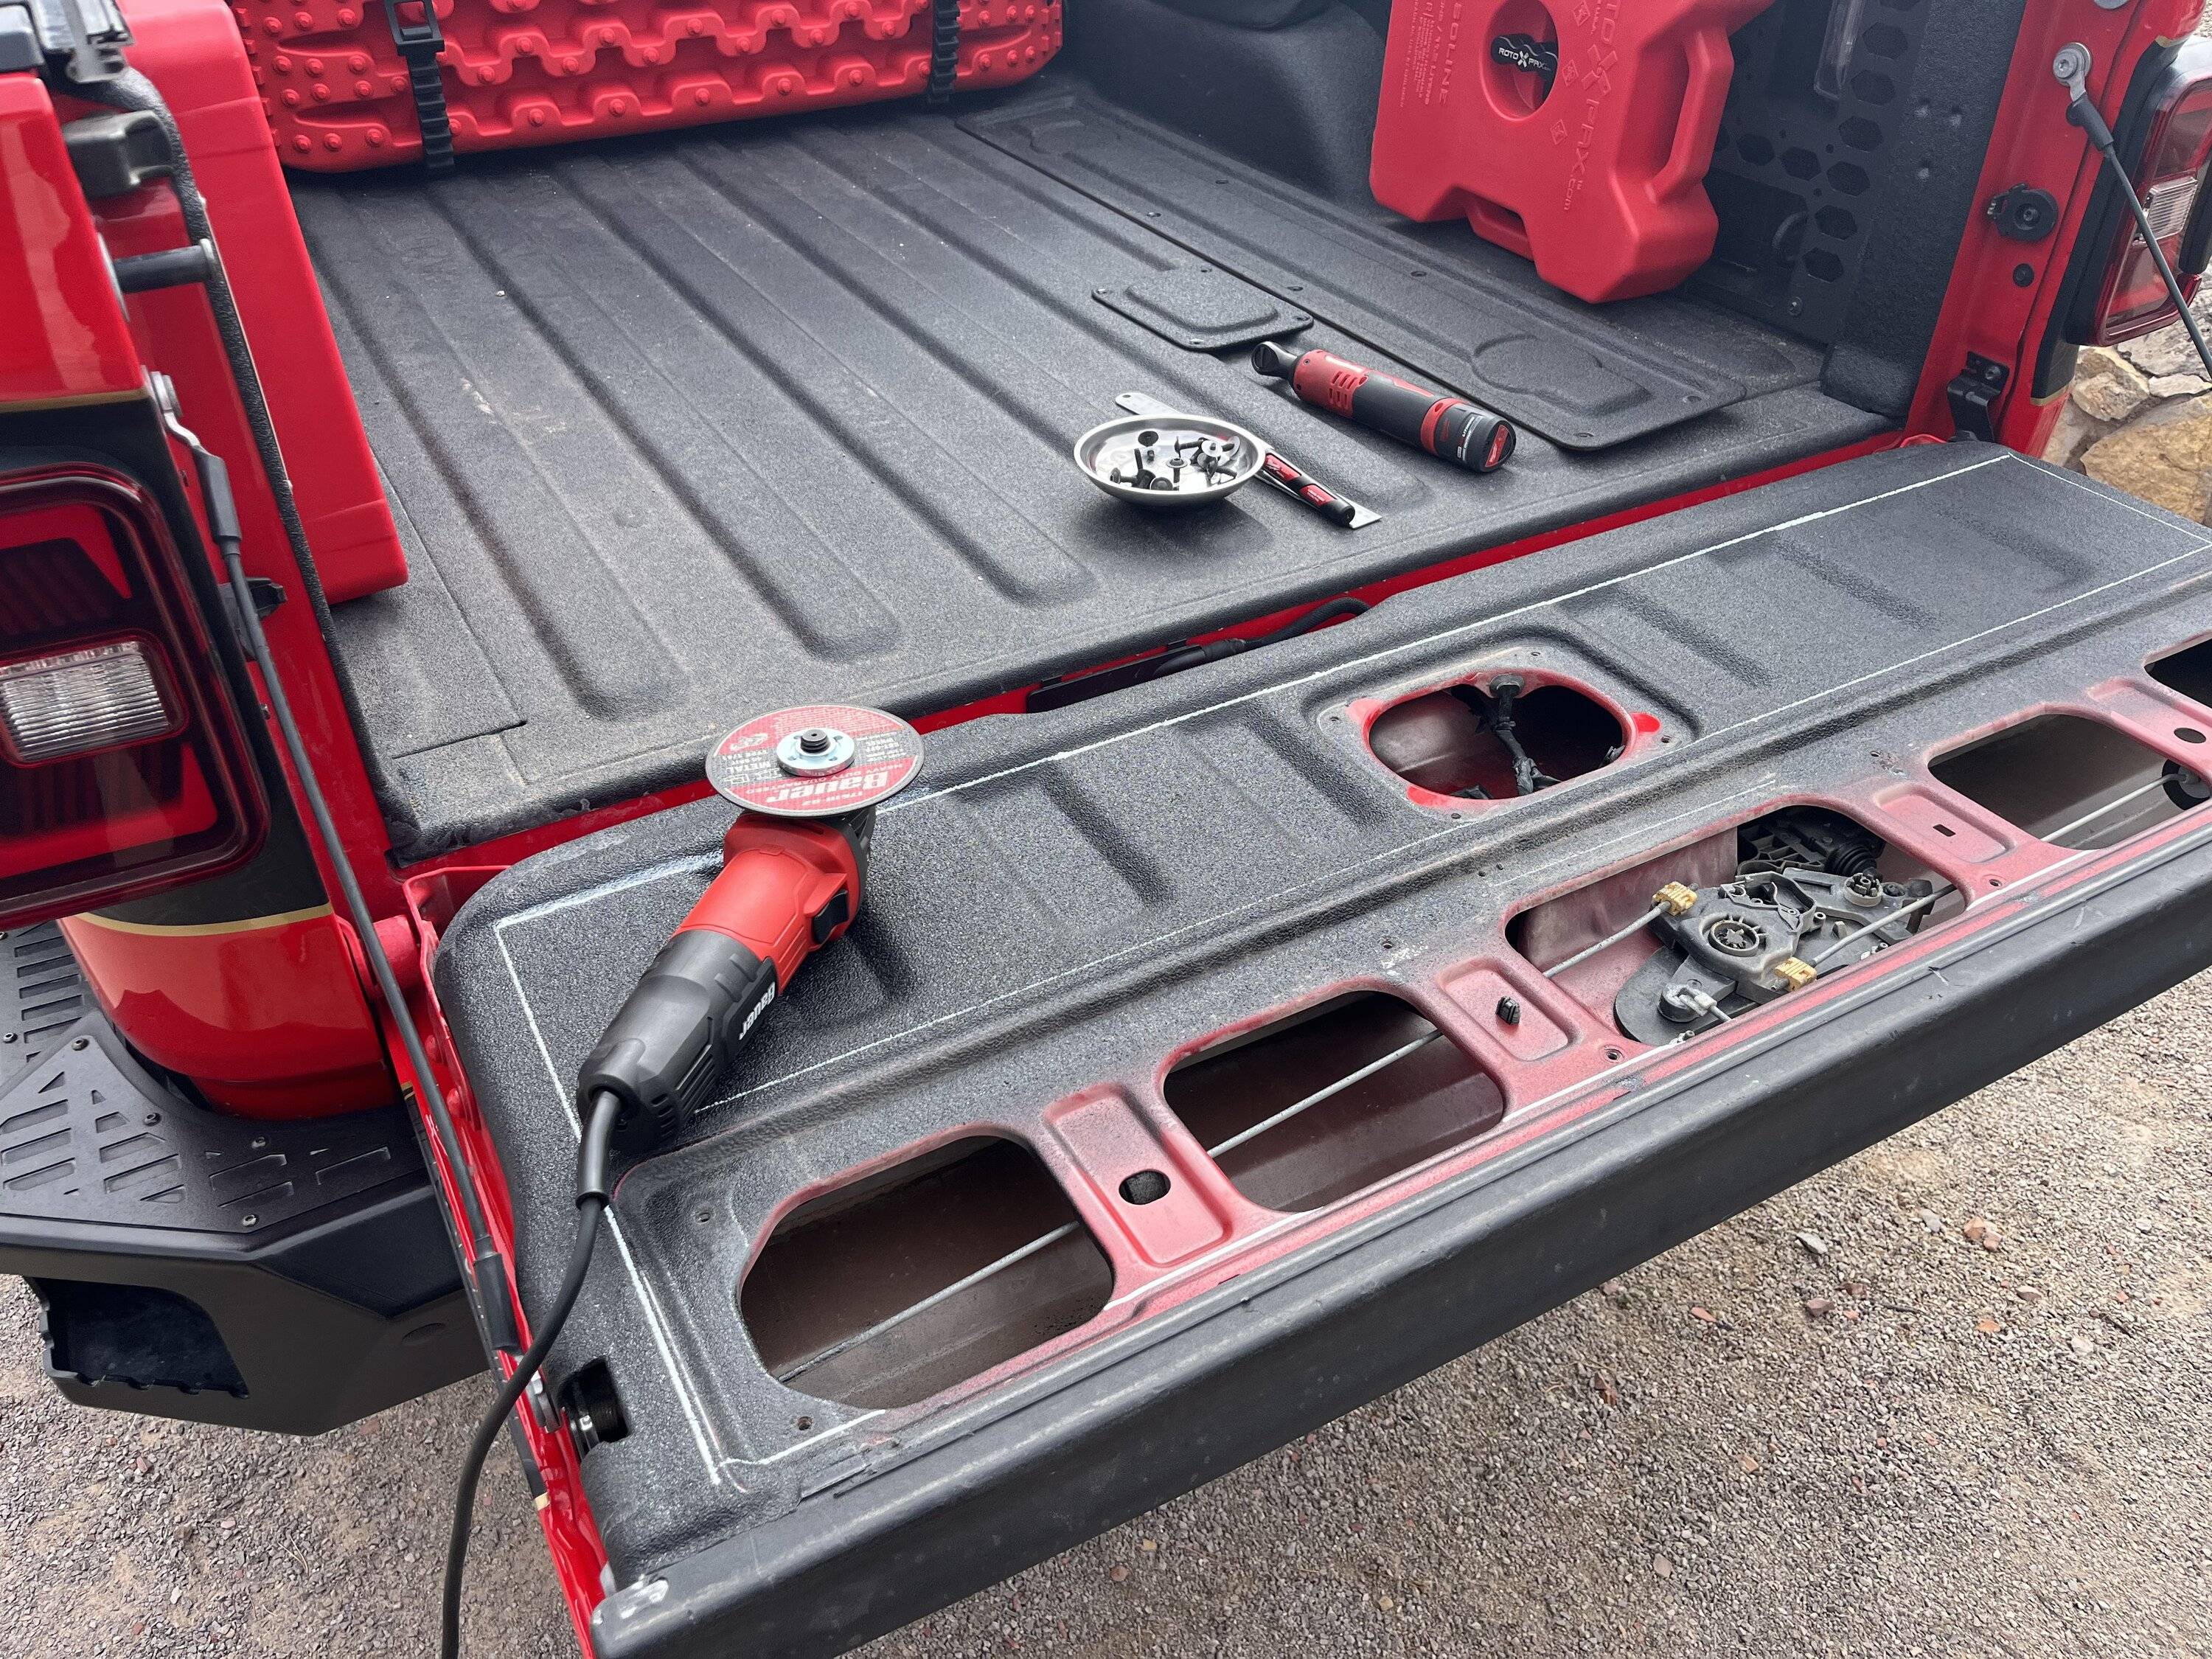
Next day was cutting day. I gathered my tools. A face shield and mask for the aluminum dust and bedliner. The cutoff wheel and ratchet for the box panels. A shop vac. And a paint marker for drawing the outline for the cut profile.

IMG_9296.JPG


IMG_9309.webp


My Milwaukee electric ratchet took off my panels in a snap.

IMG_9297.JPG


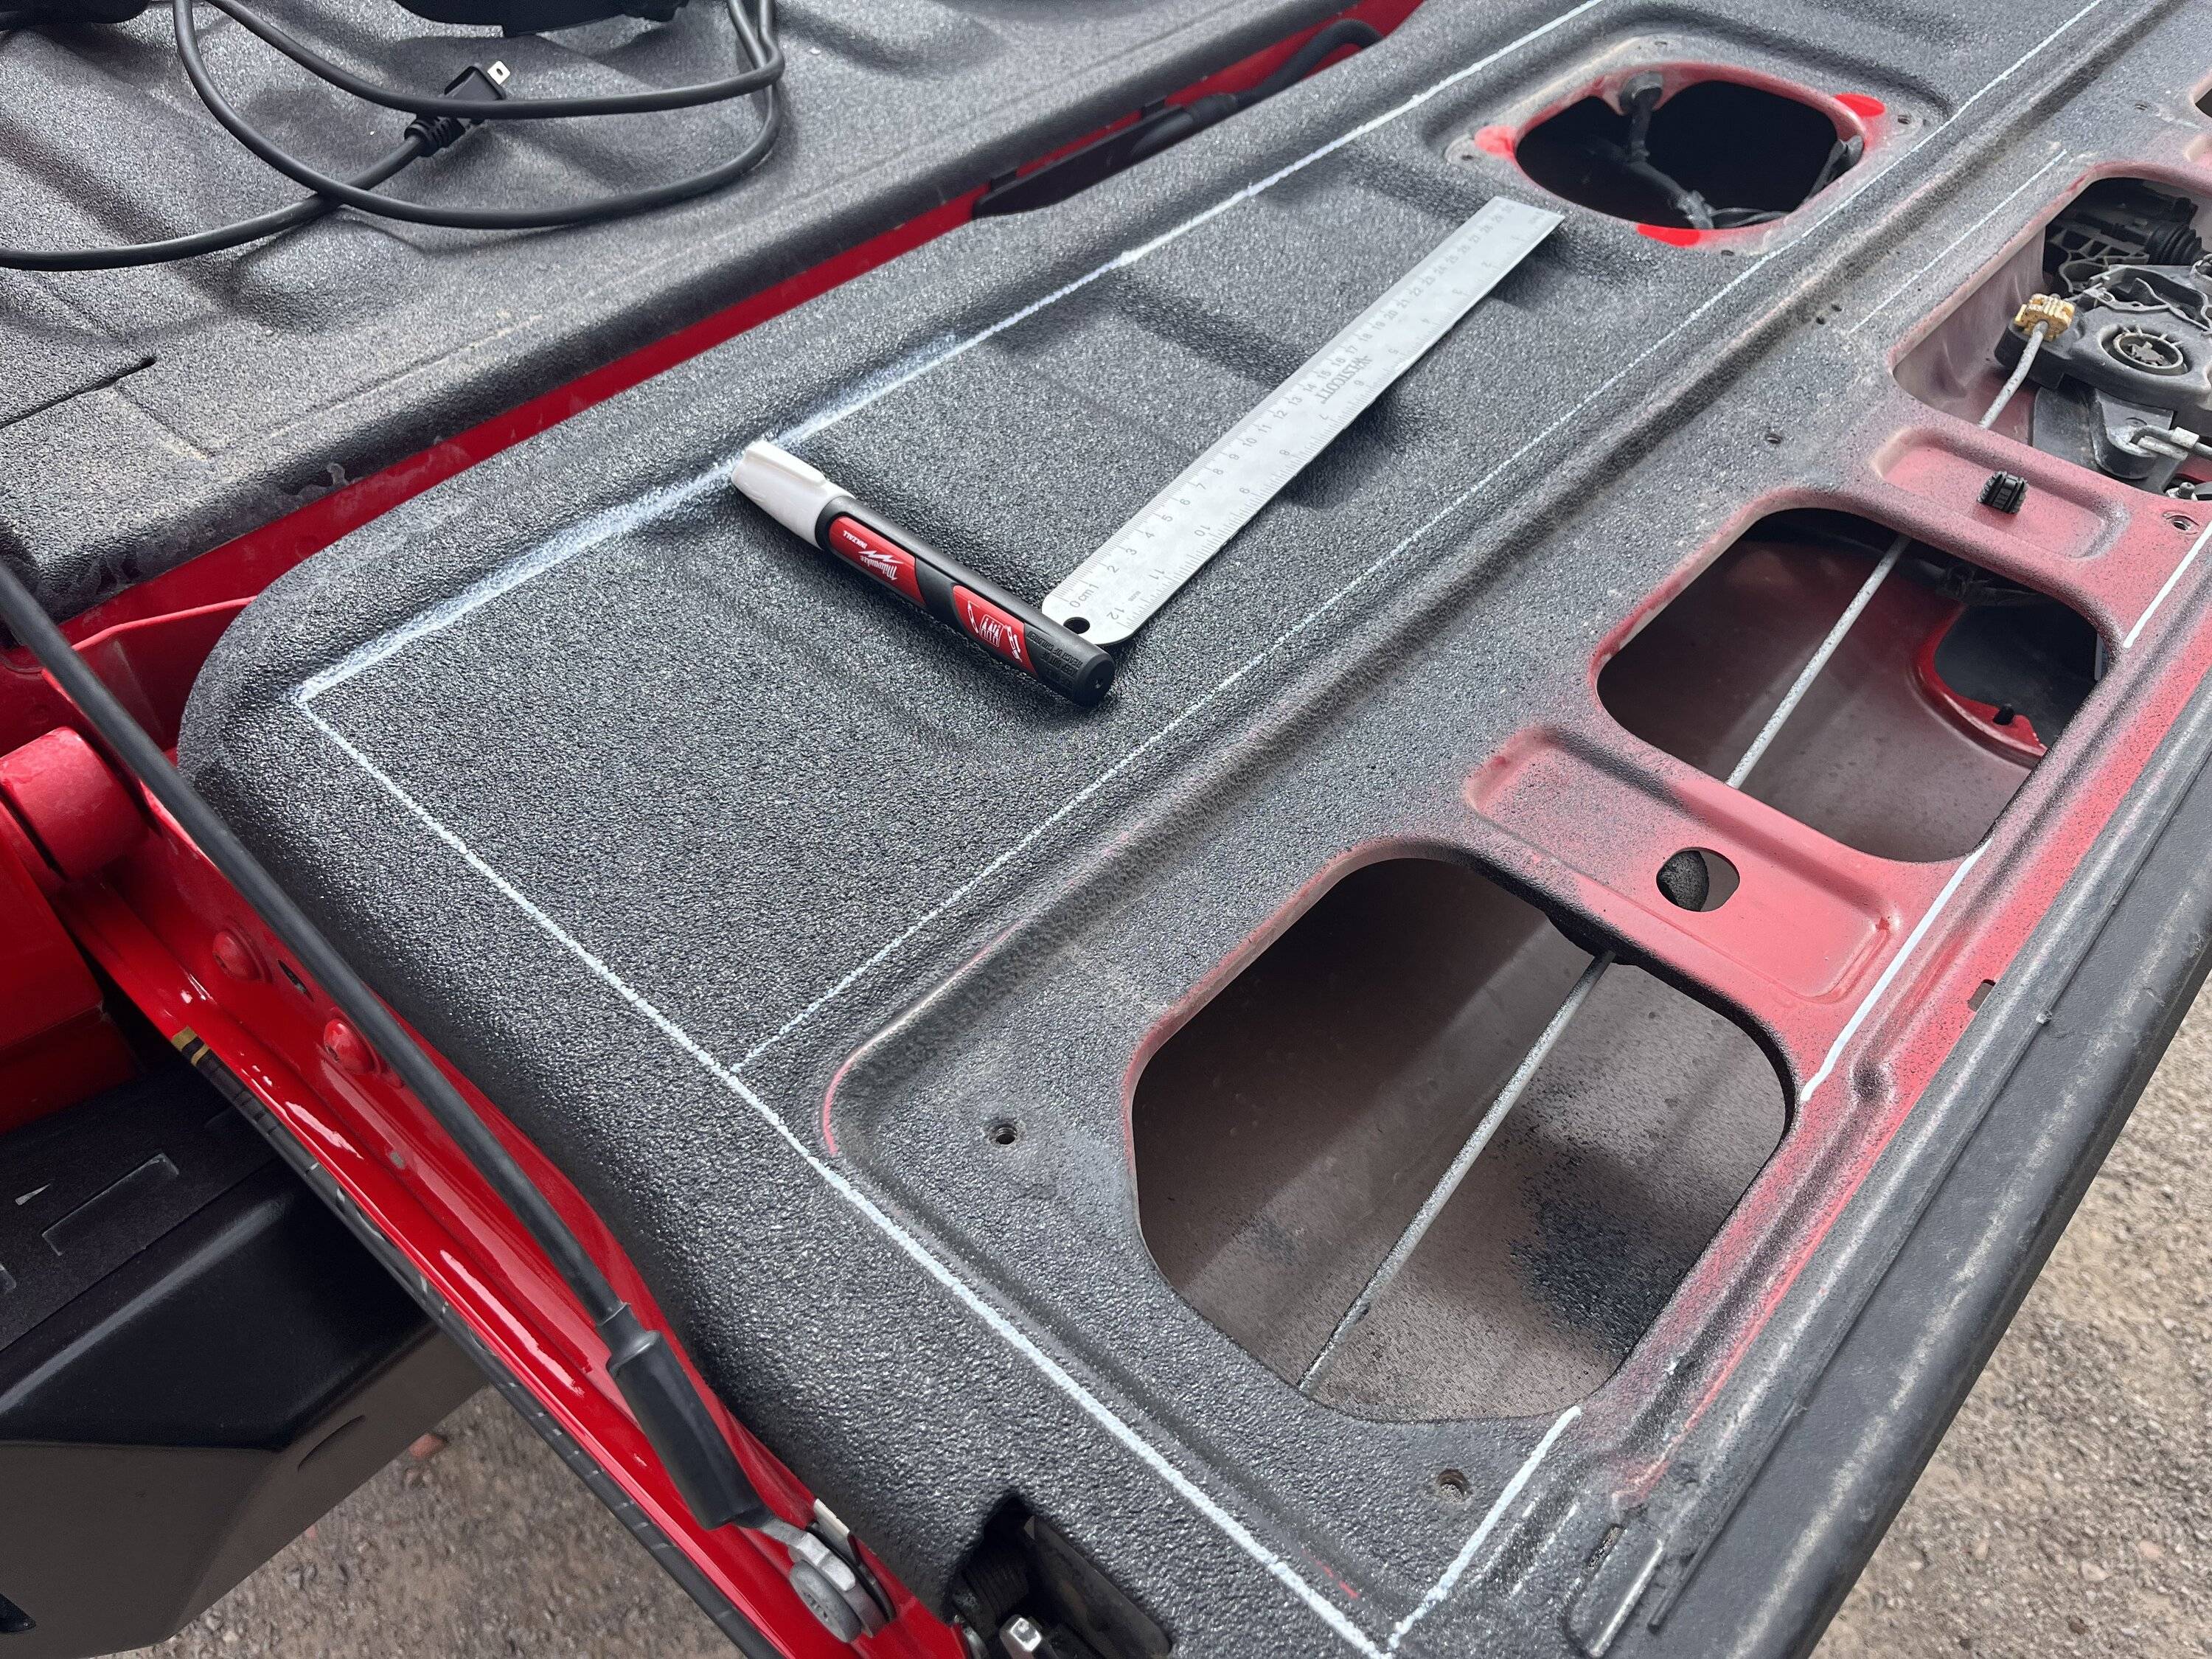
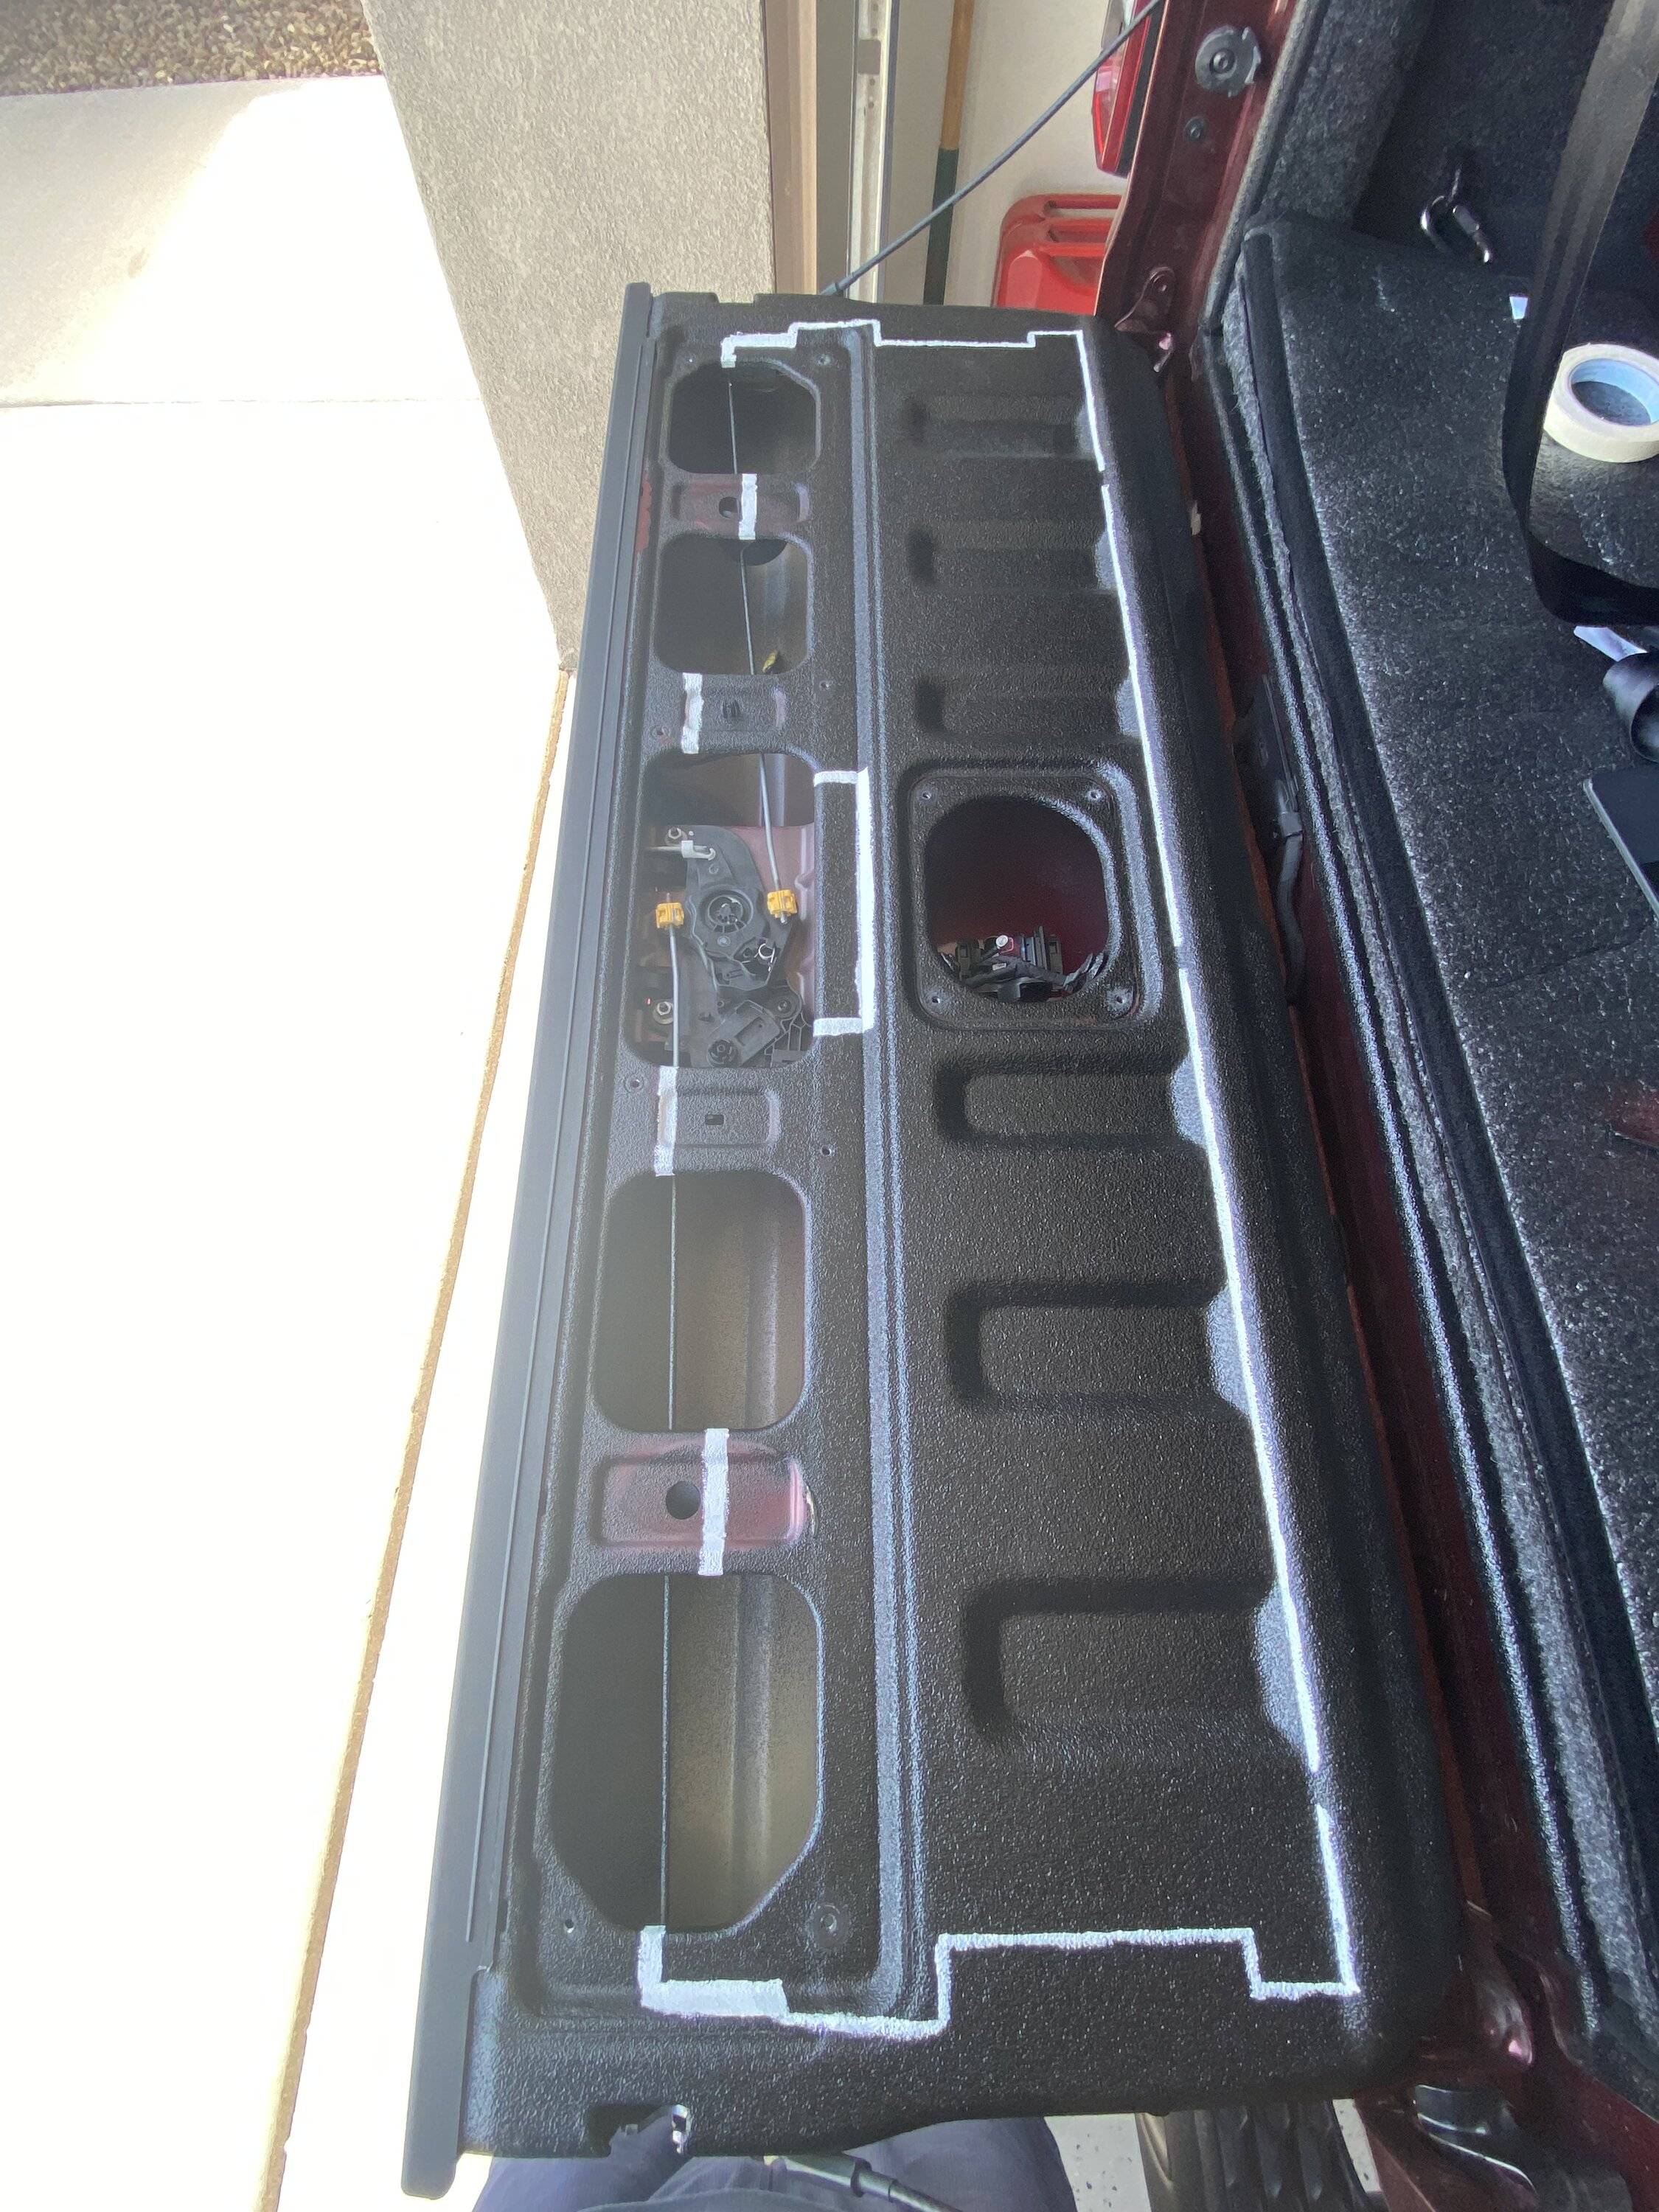
Now I just needed to outline my cut profile. I used a "Liquid Paint" pen, and a ruler as a straight edge. Outlined it per Reapers instructions, minus a few small changes. I opted to only mark the supports at the top of the tailgate vs the straight line Reaper wanted.

IMG_9302.JPG


No turning back here!

IMG_9306.JPG


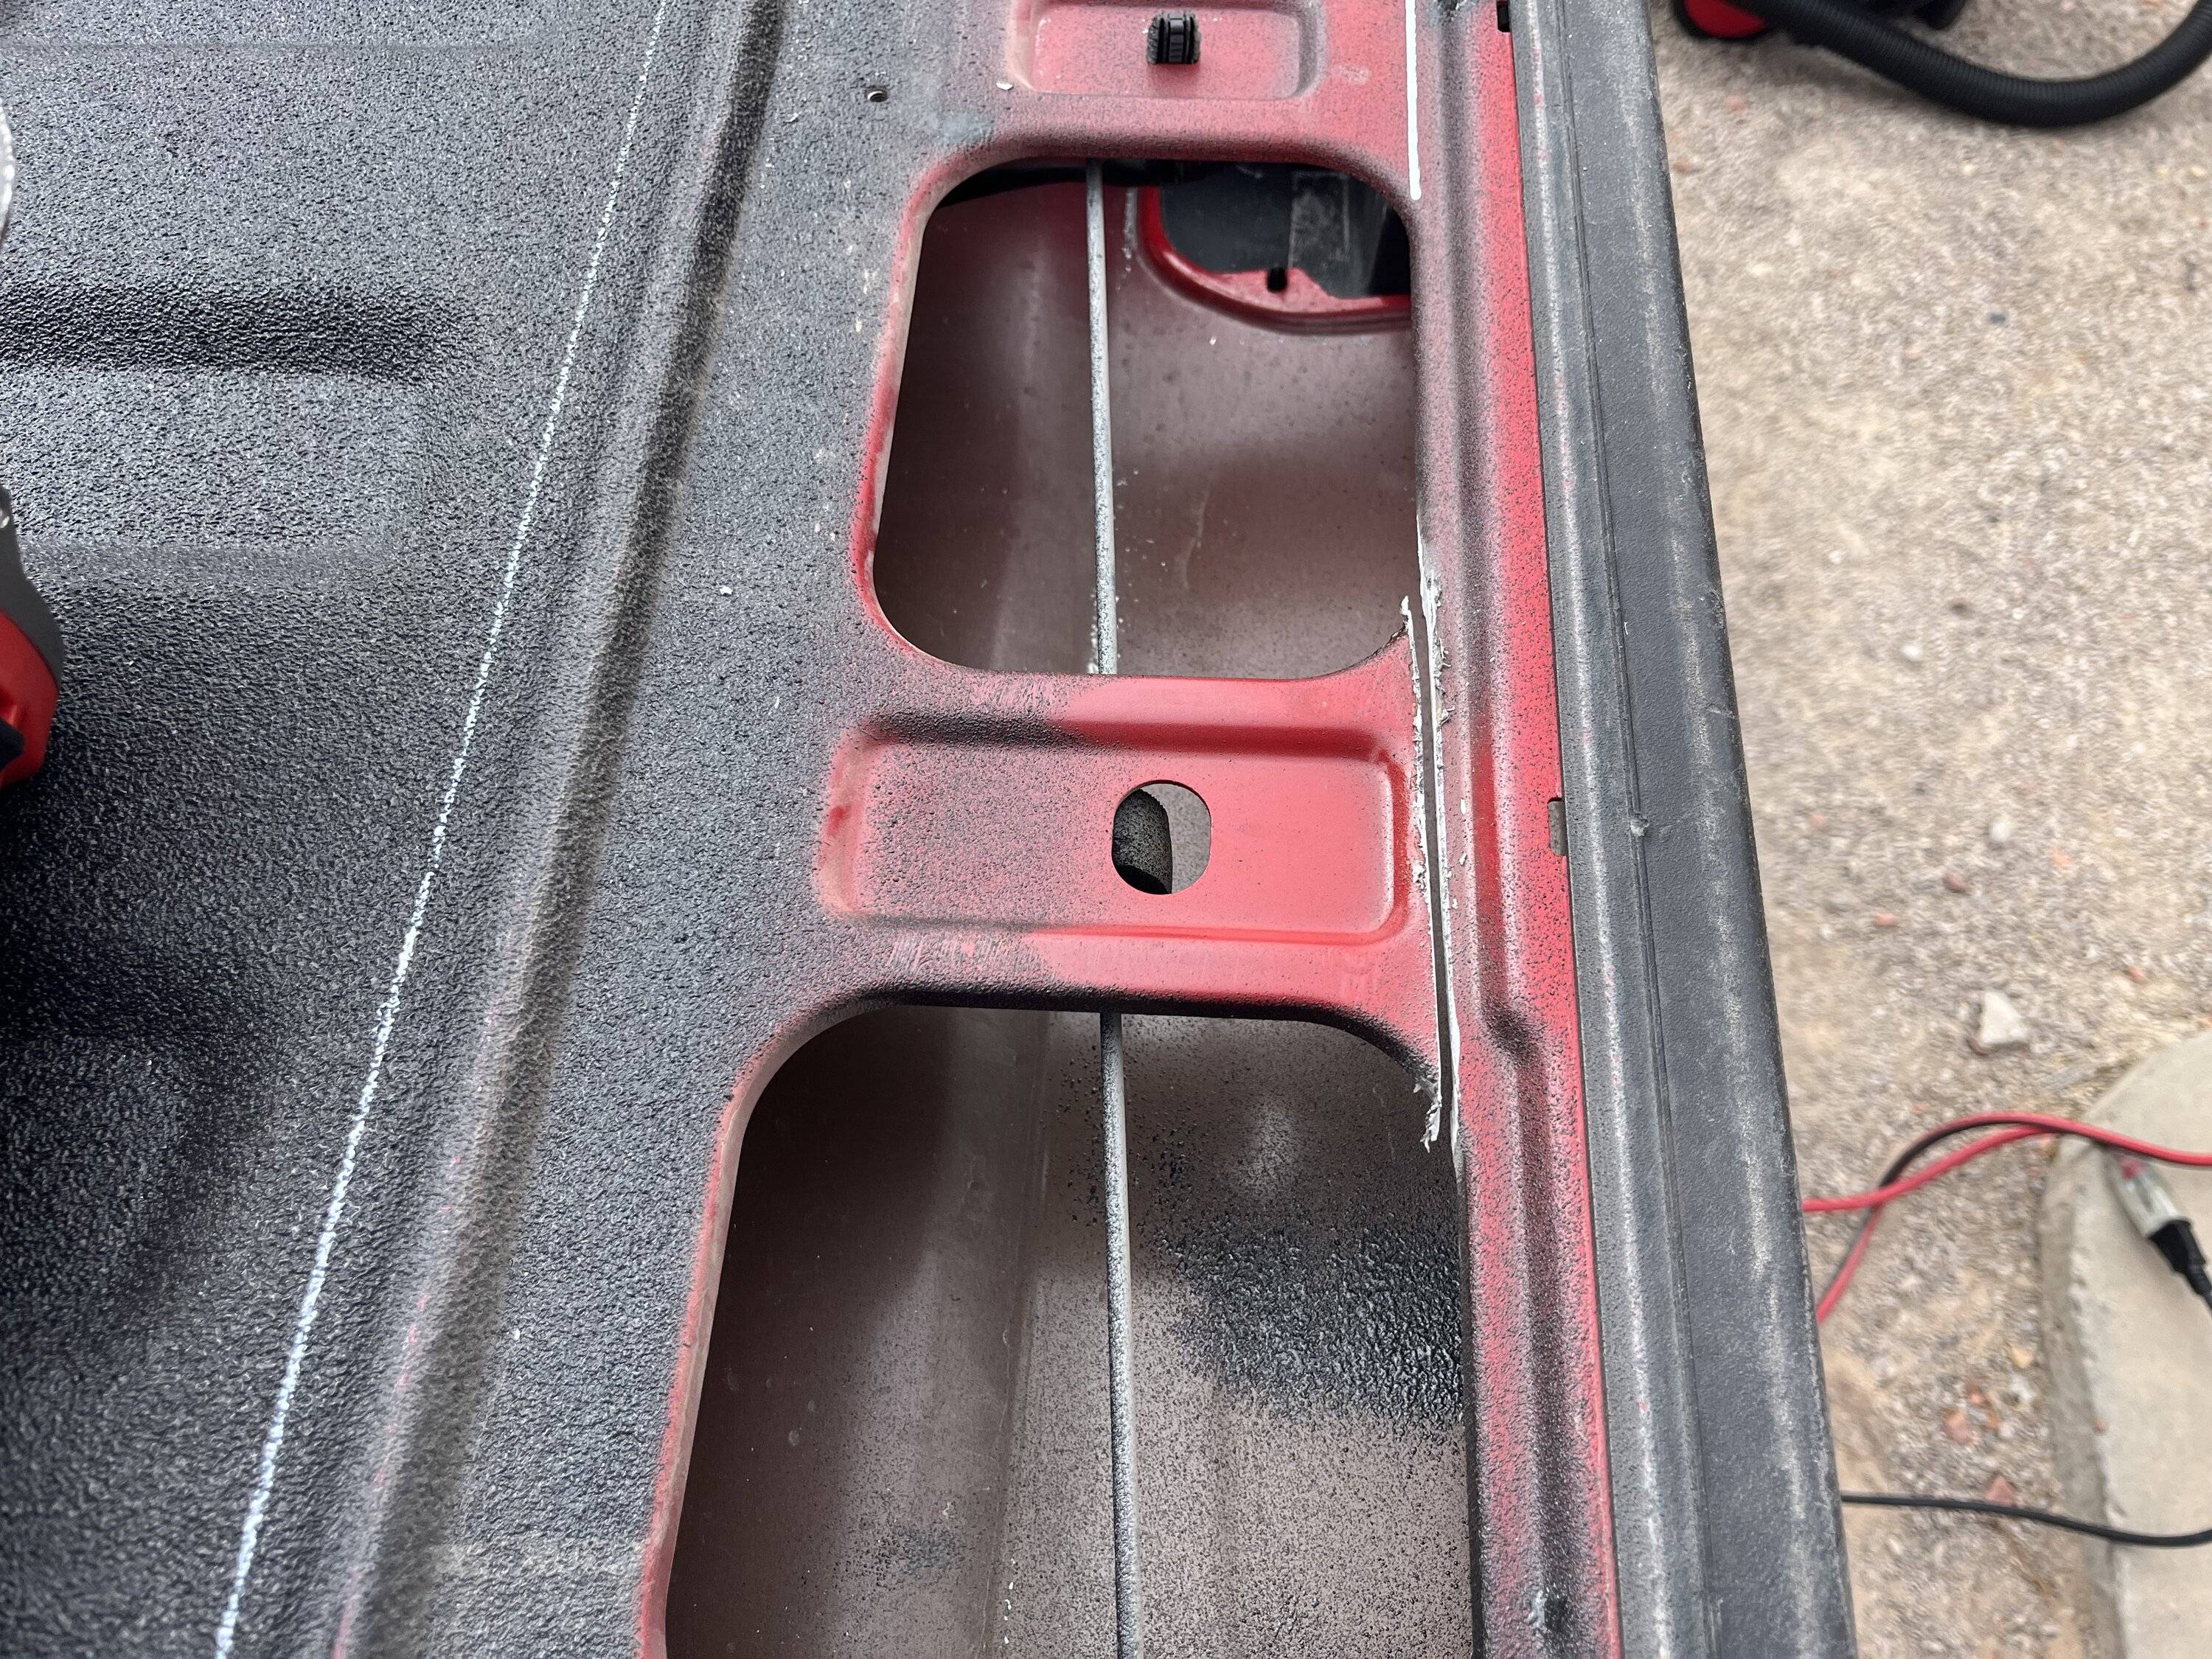
Time for the first cut! The aluminum was no match for 30,000 rpm, and cut smooth. It was very easy to maintain control of the cutoff tool and to not cut too deep. I opted to do all my cuts at once, and I even managed to keep my lines straight!

IMG_9307.JPG


IMG_9308.JPG


Pulled the top panel and used my shop vac to pull up all the aluminum shavings for the next step. I also grinded the edges smooth with a flap disk in between steps as necessary whenever I needed to reach into the tailgate in that area.

IMG_9311.JPG


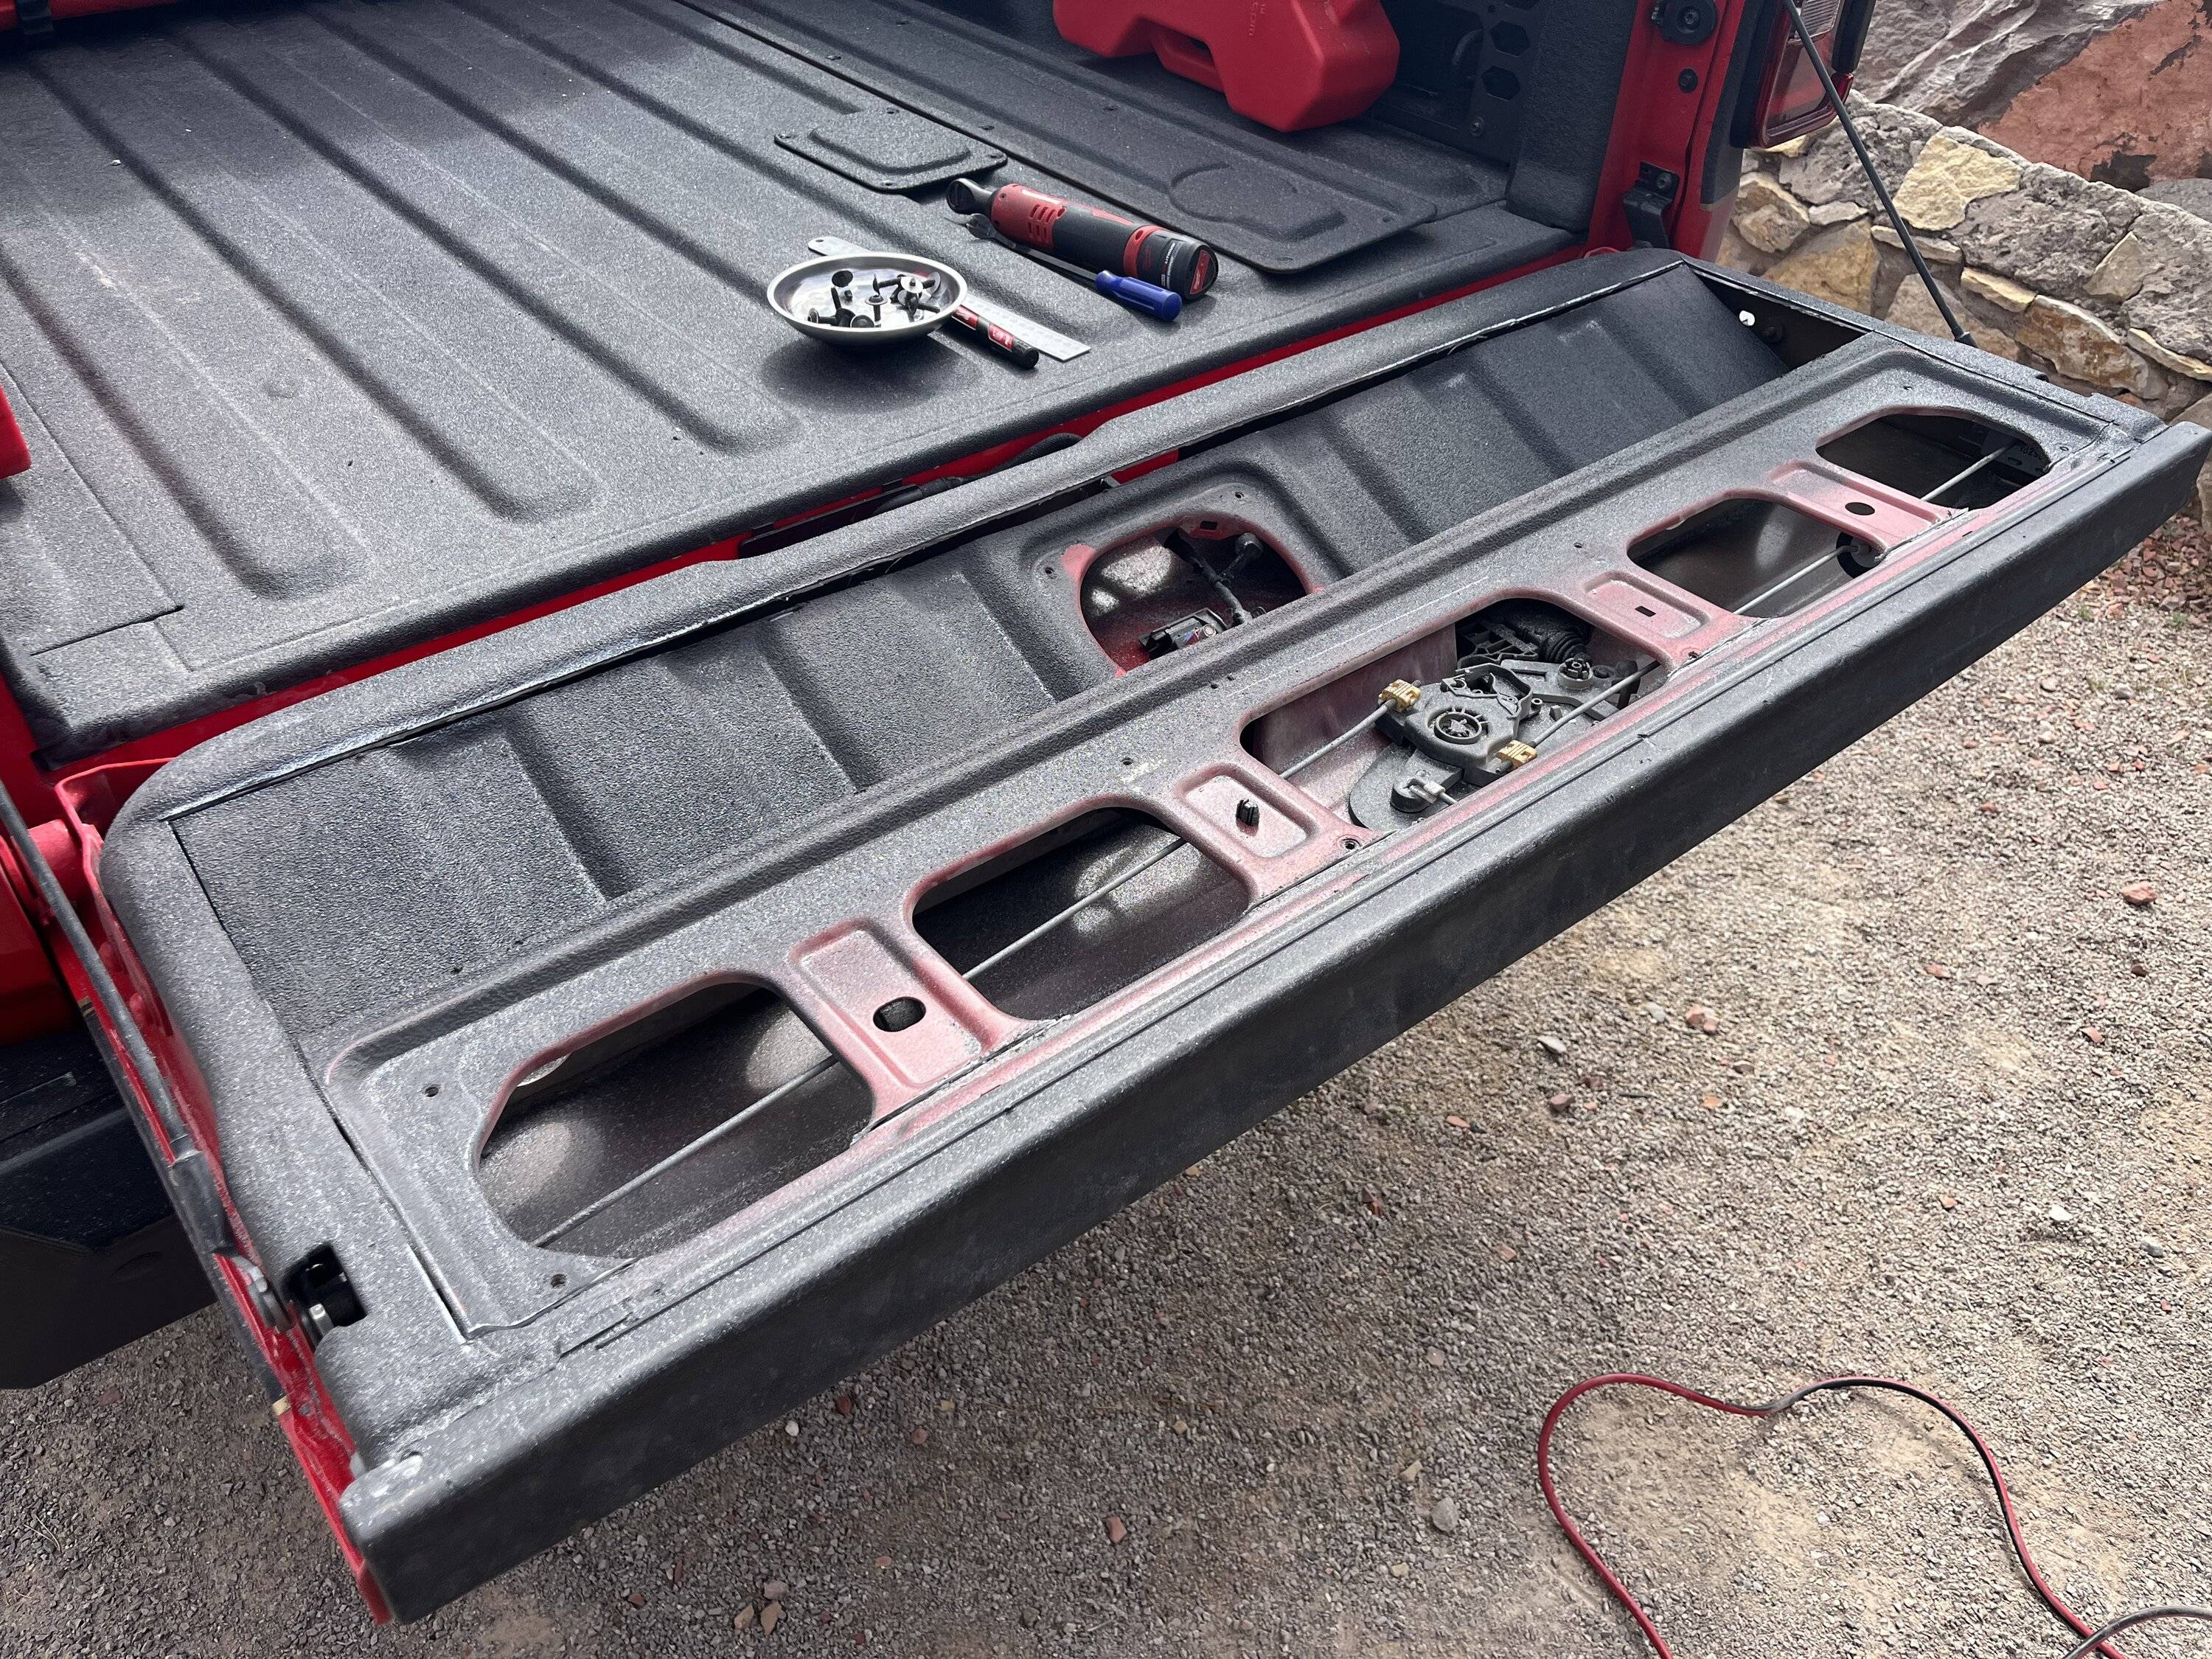
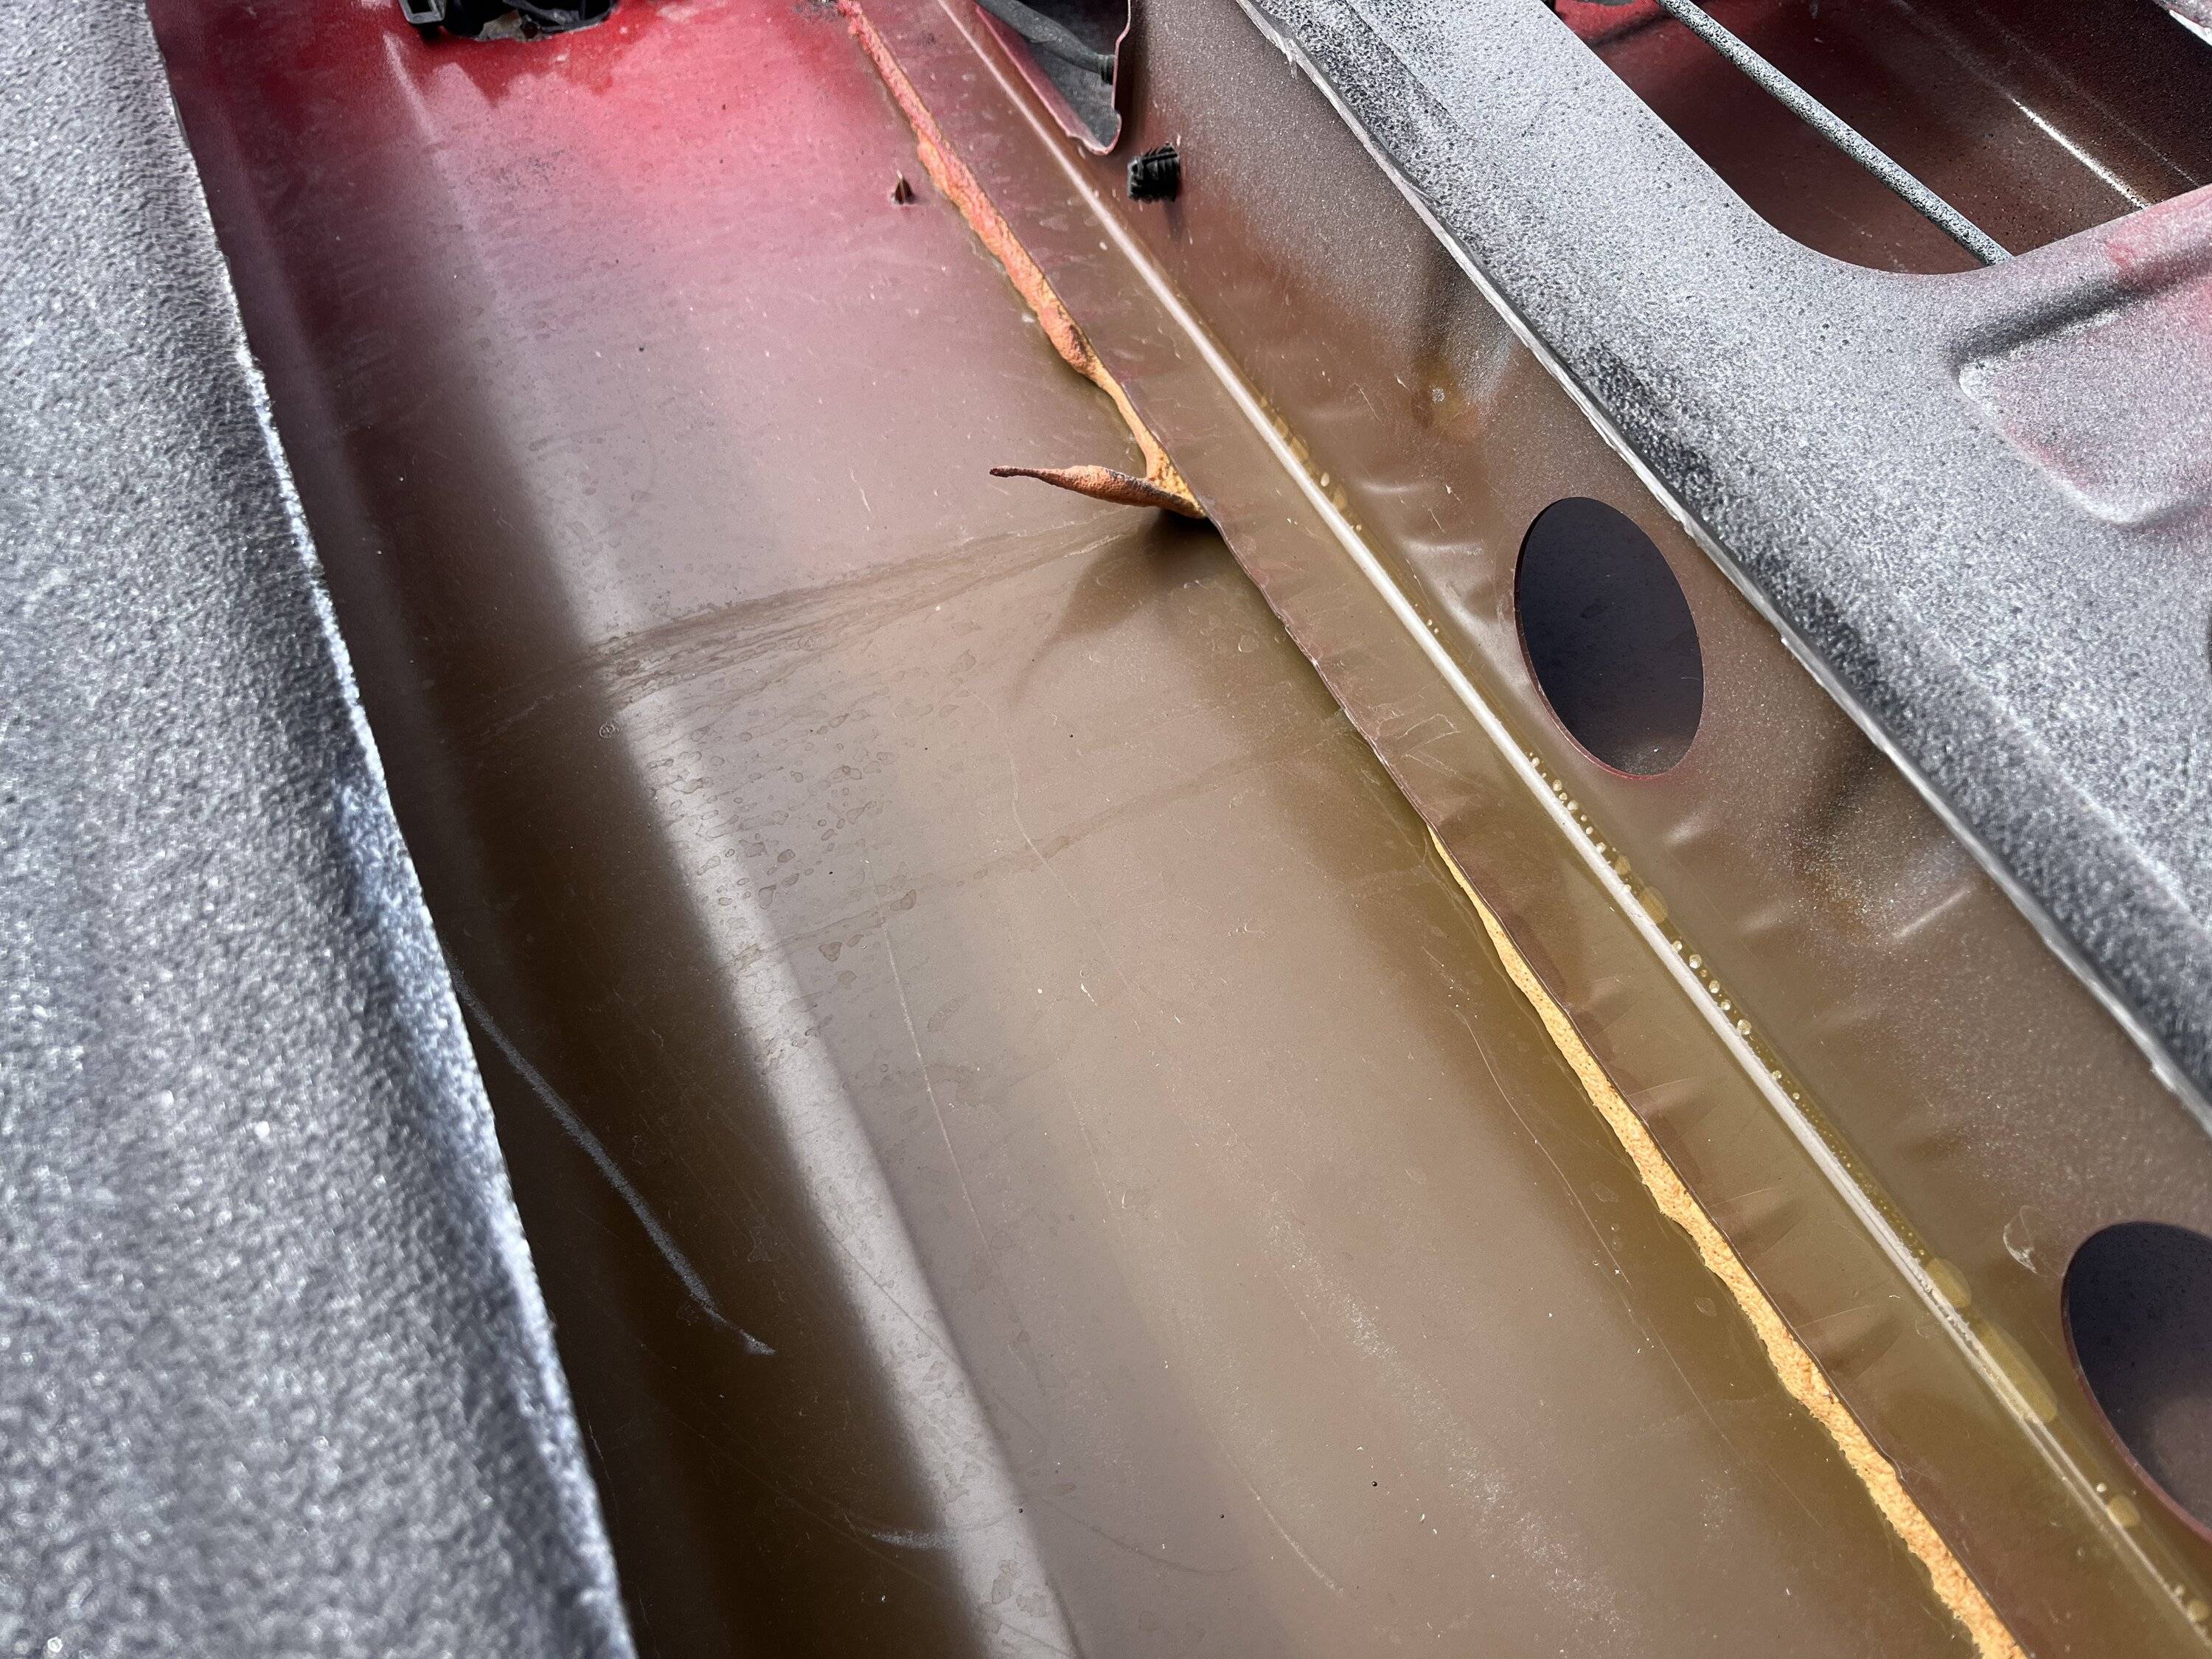
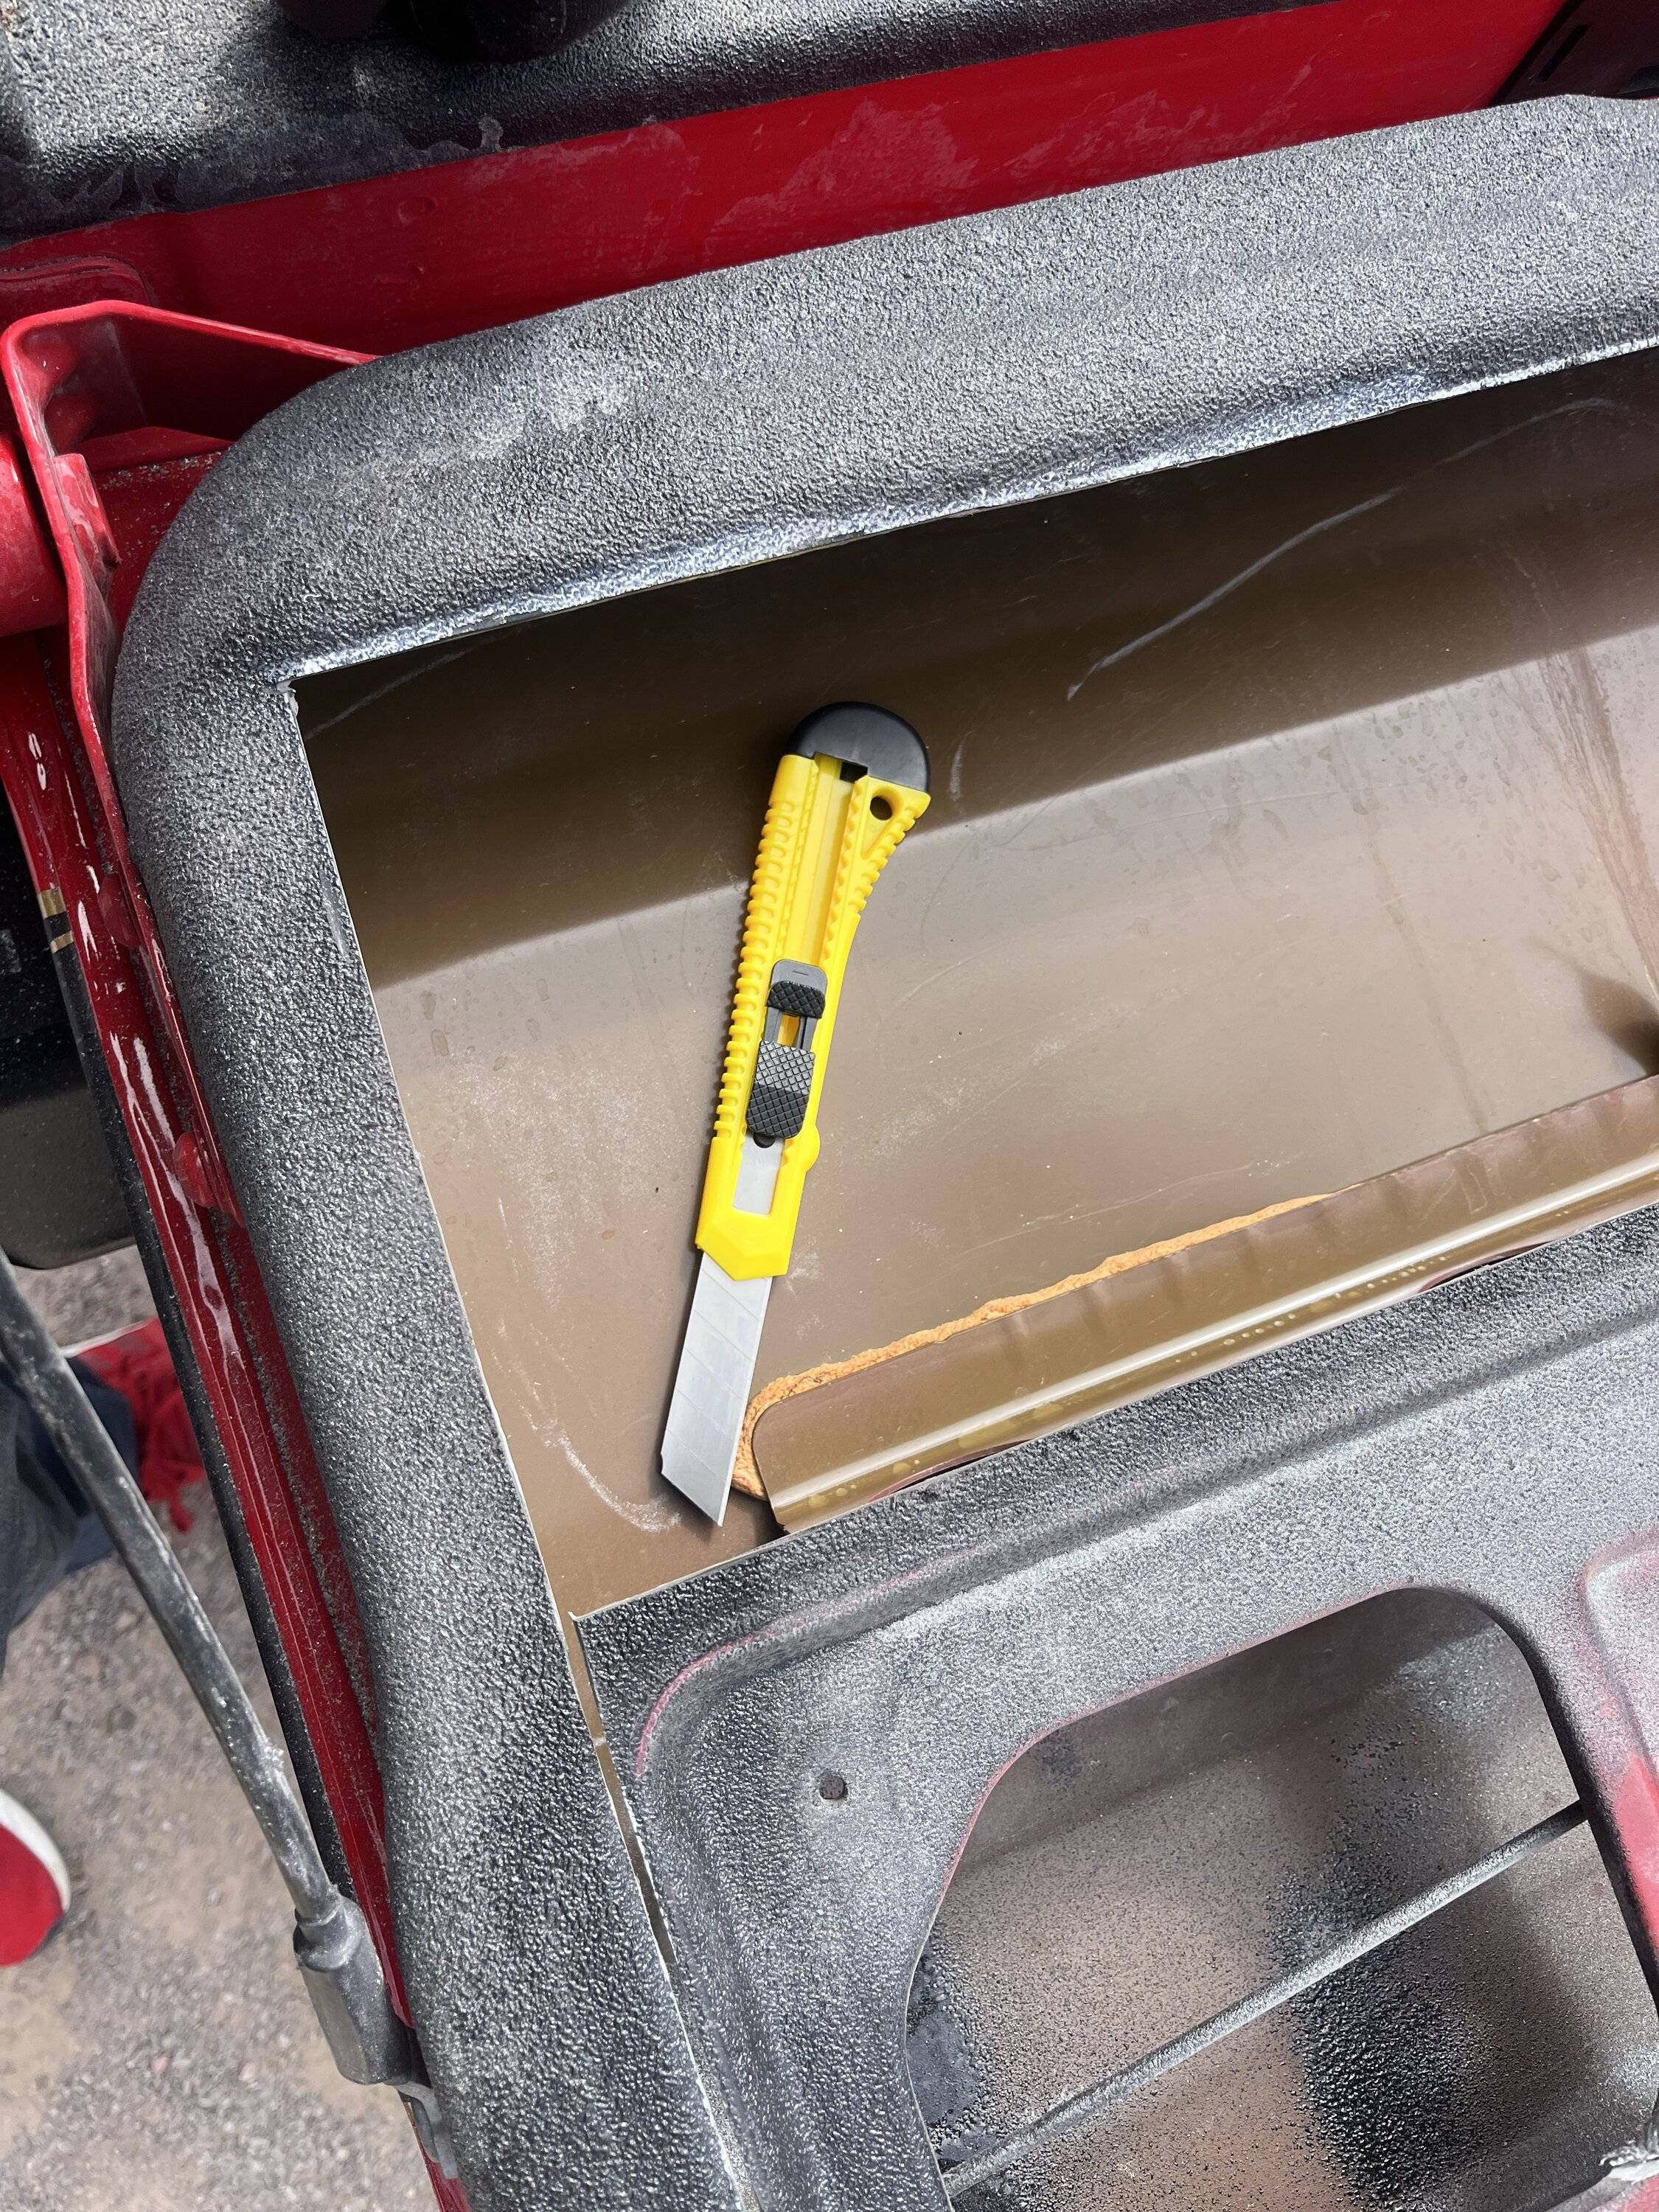
Next was to remove the foam sealant holding what was left of the tailgate skin. A flat blade knife made this easy.

IMG_9312.JPG


IMG_9313.JPG


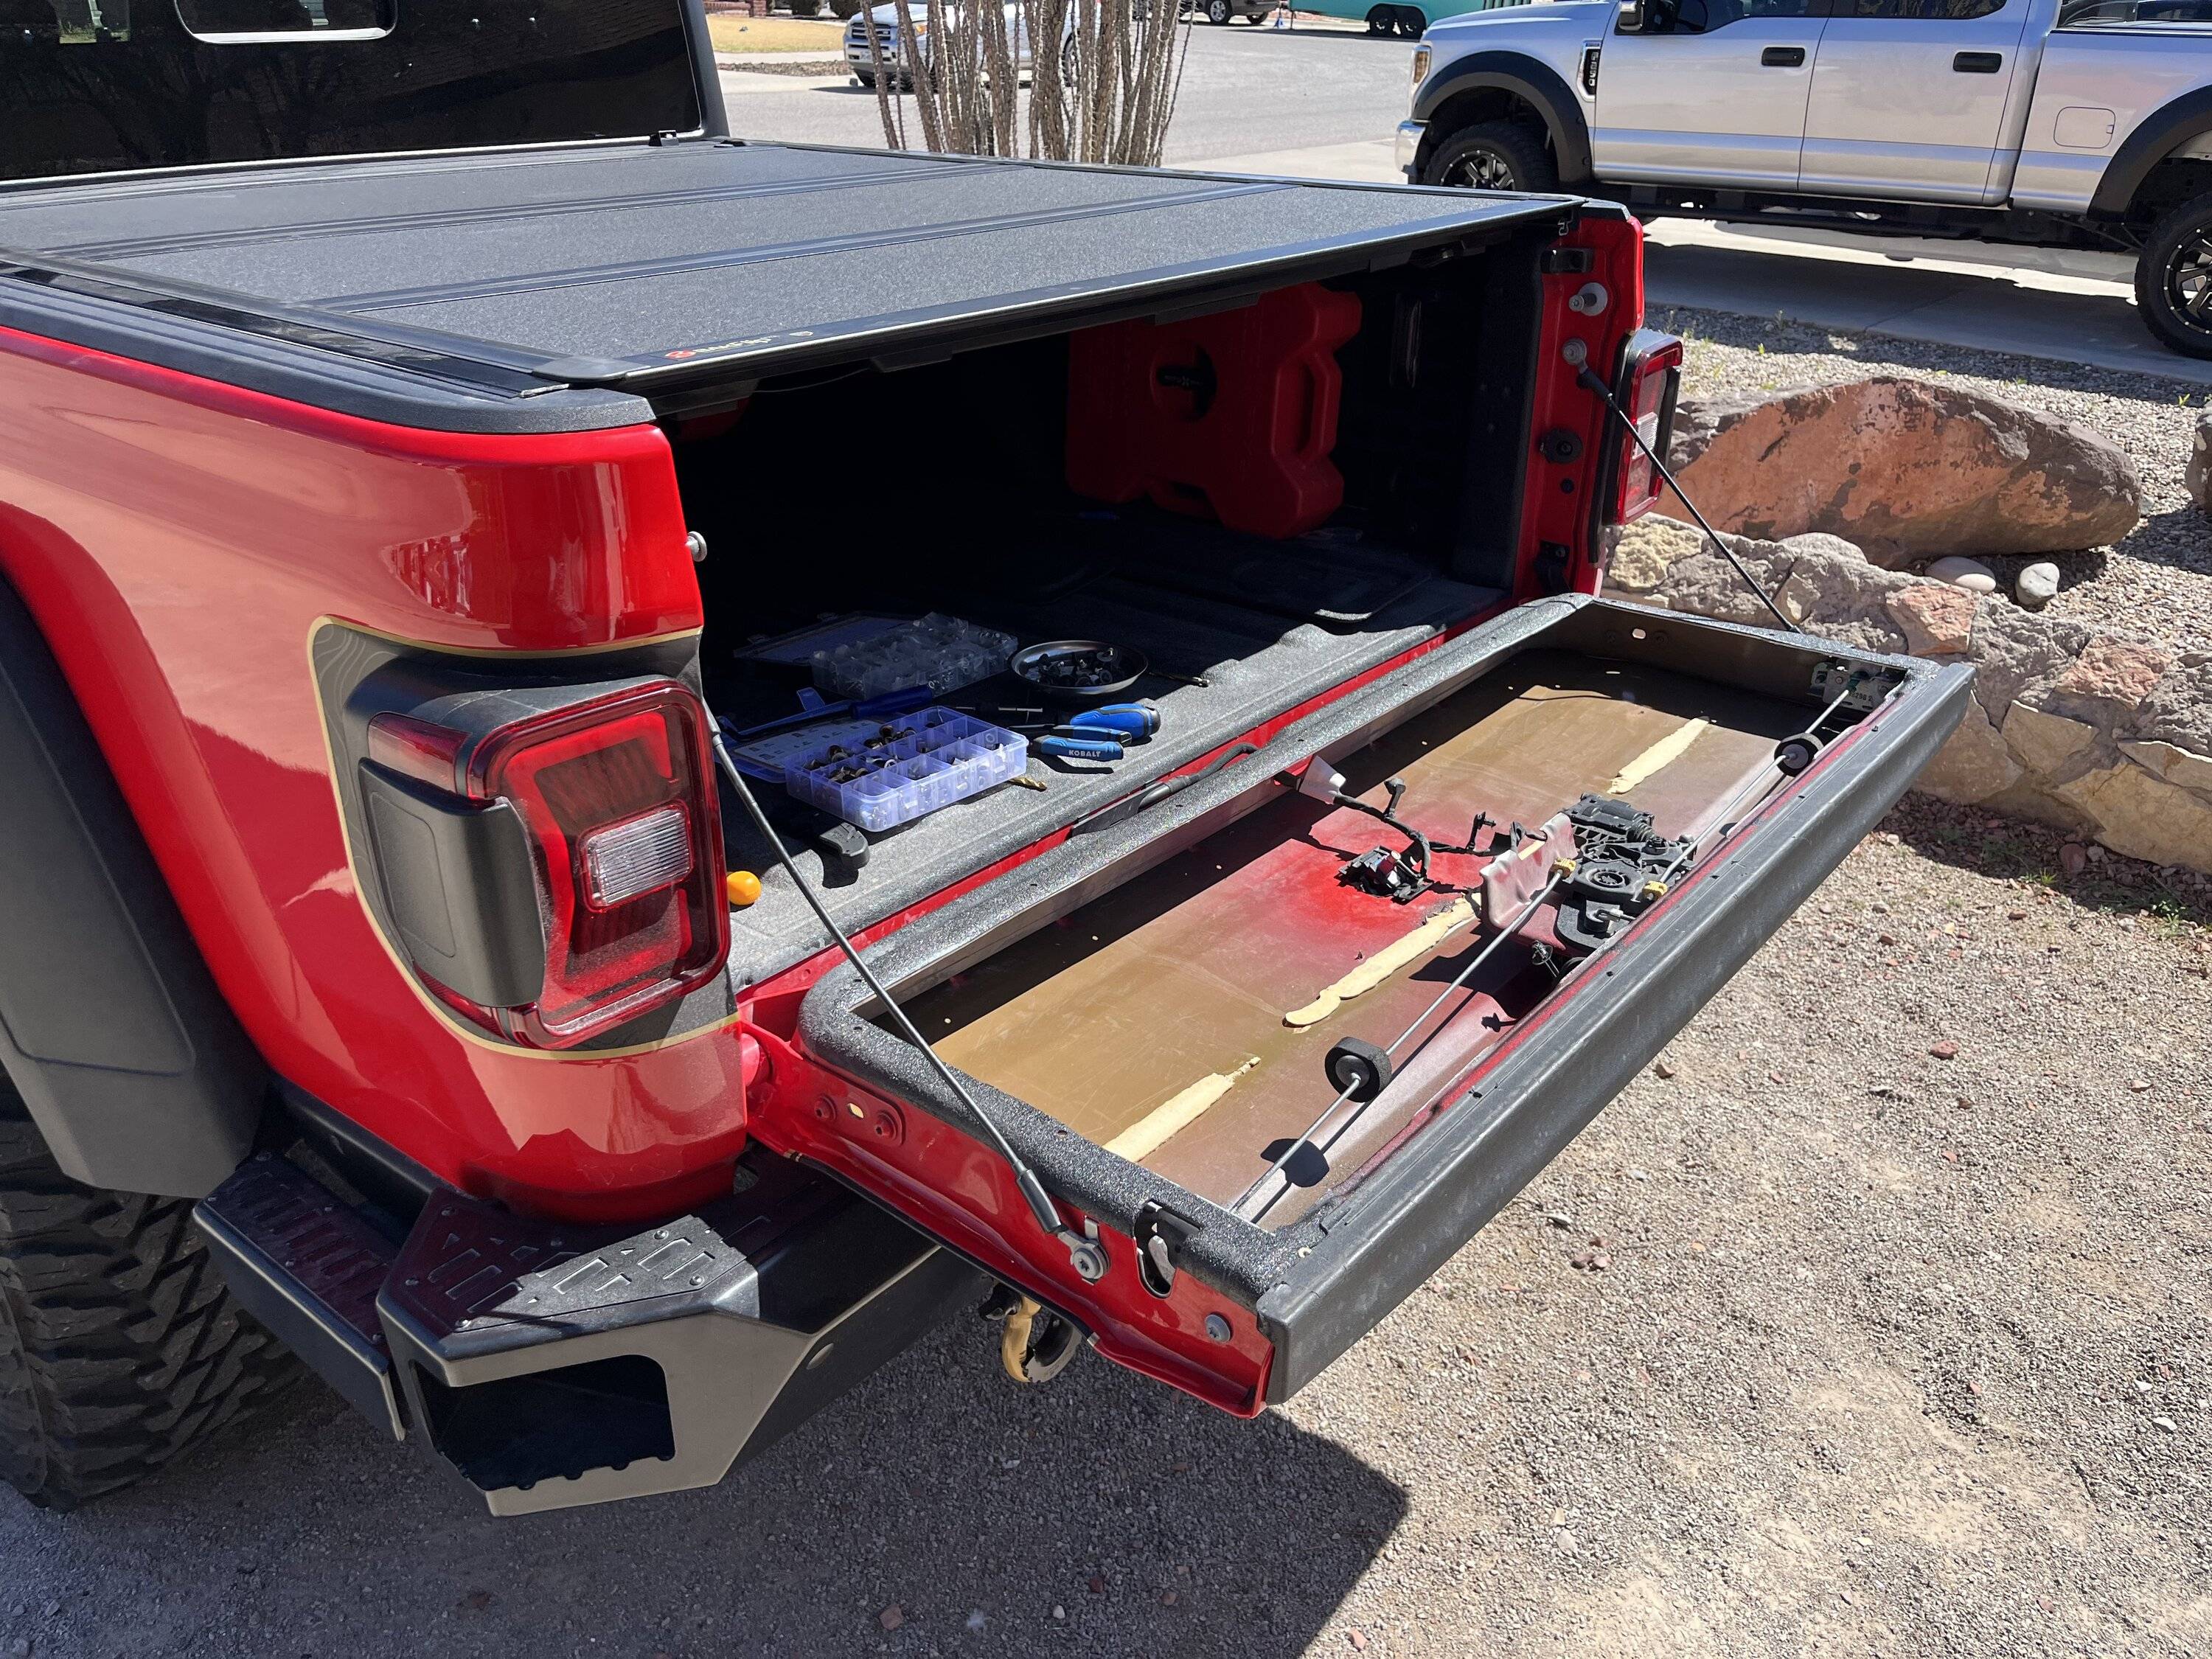
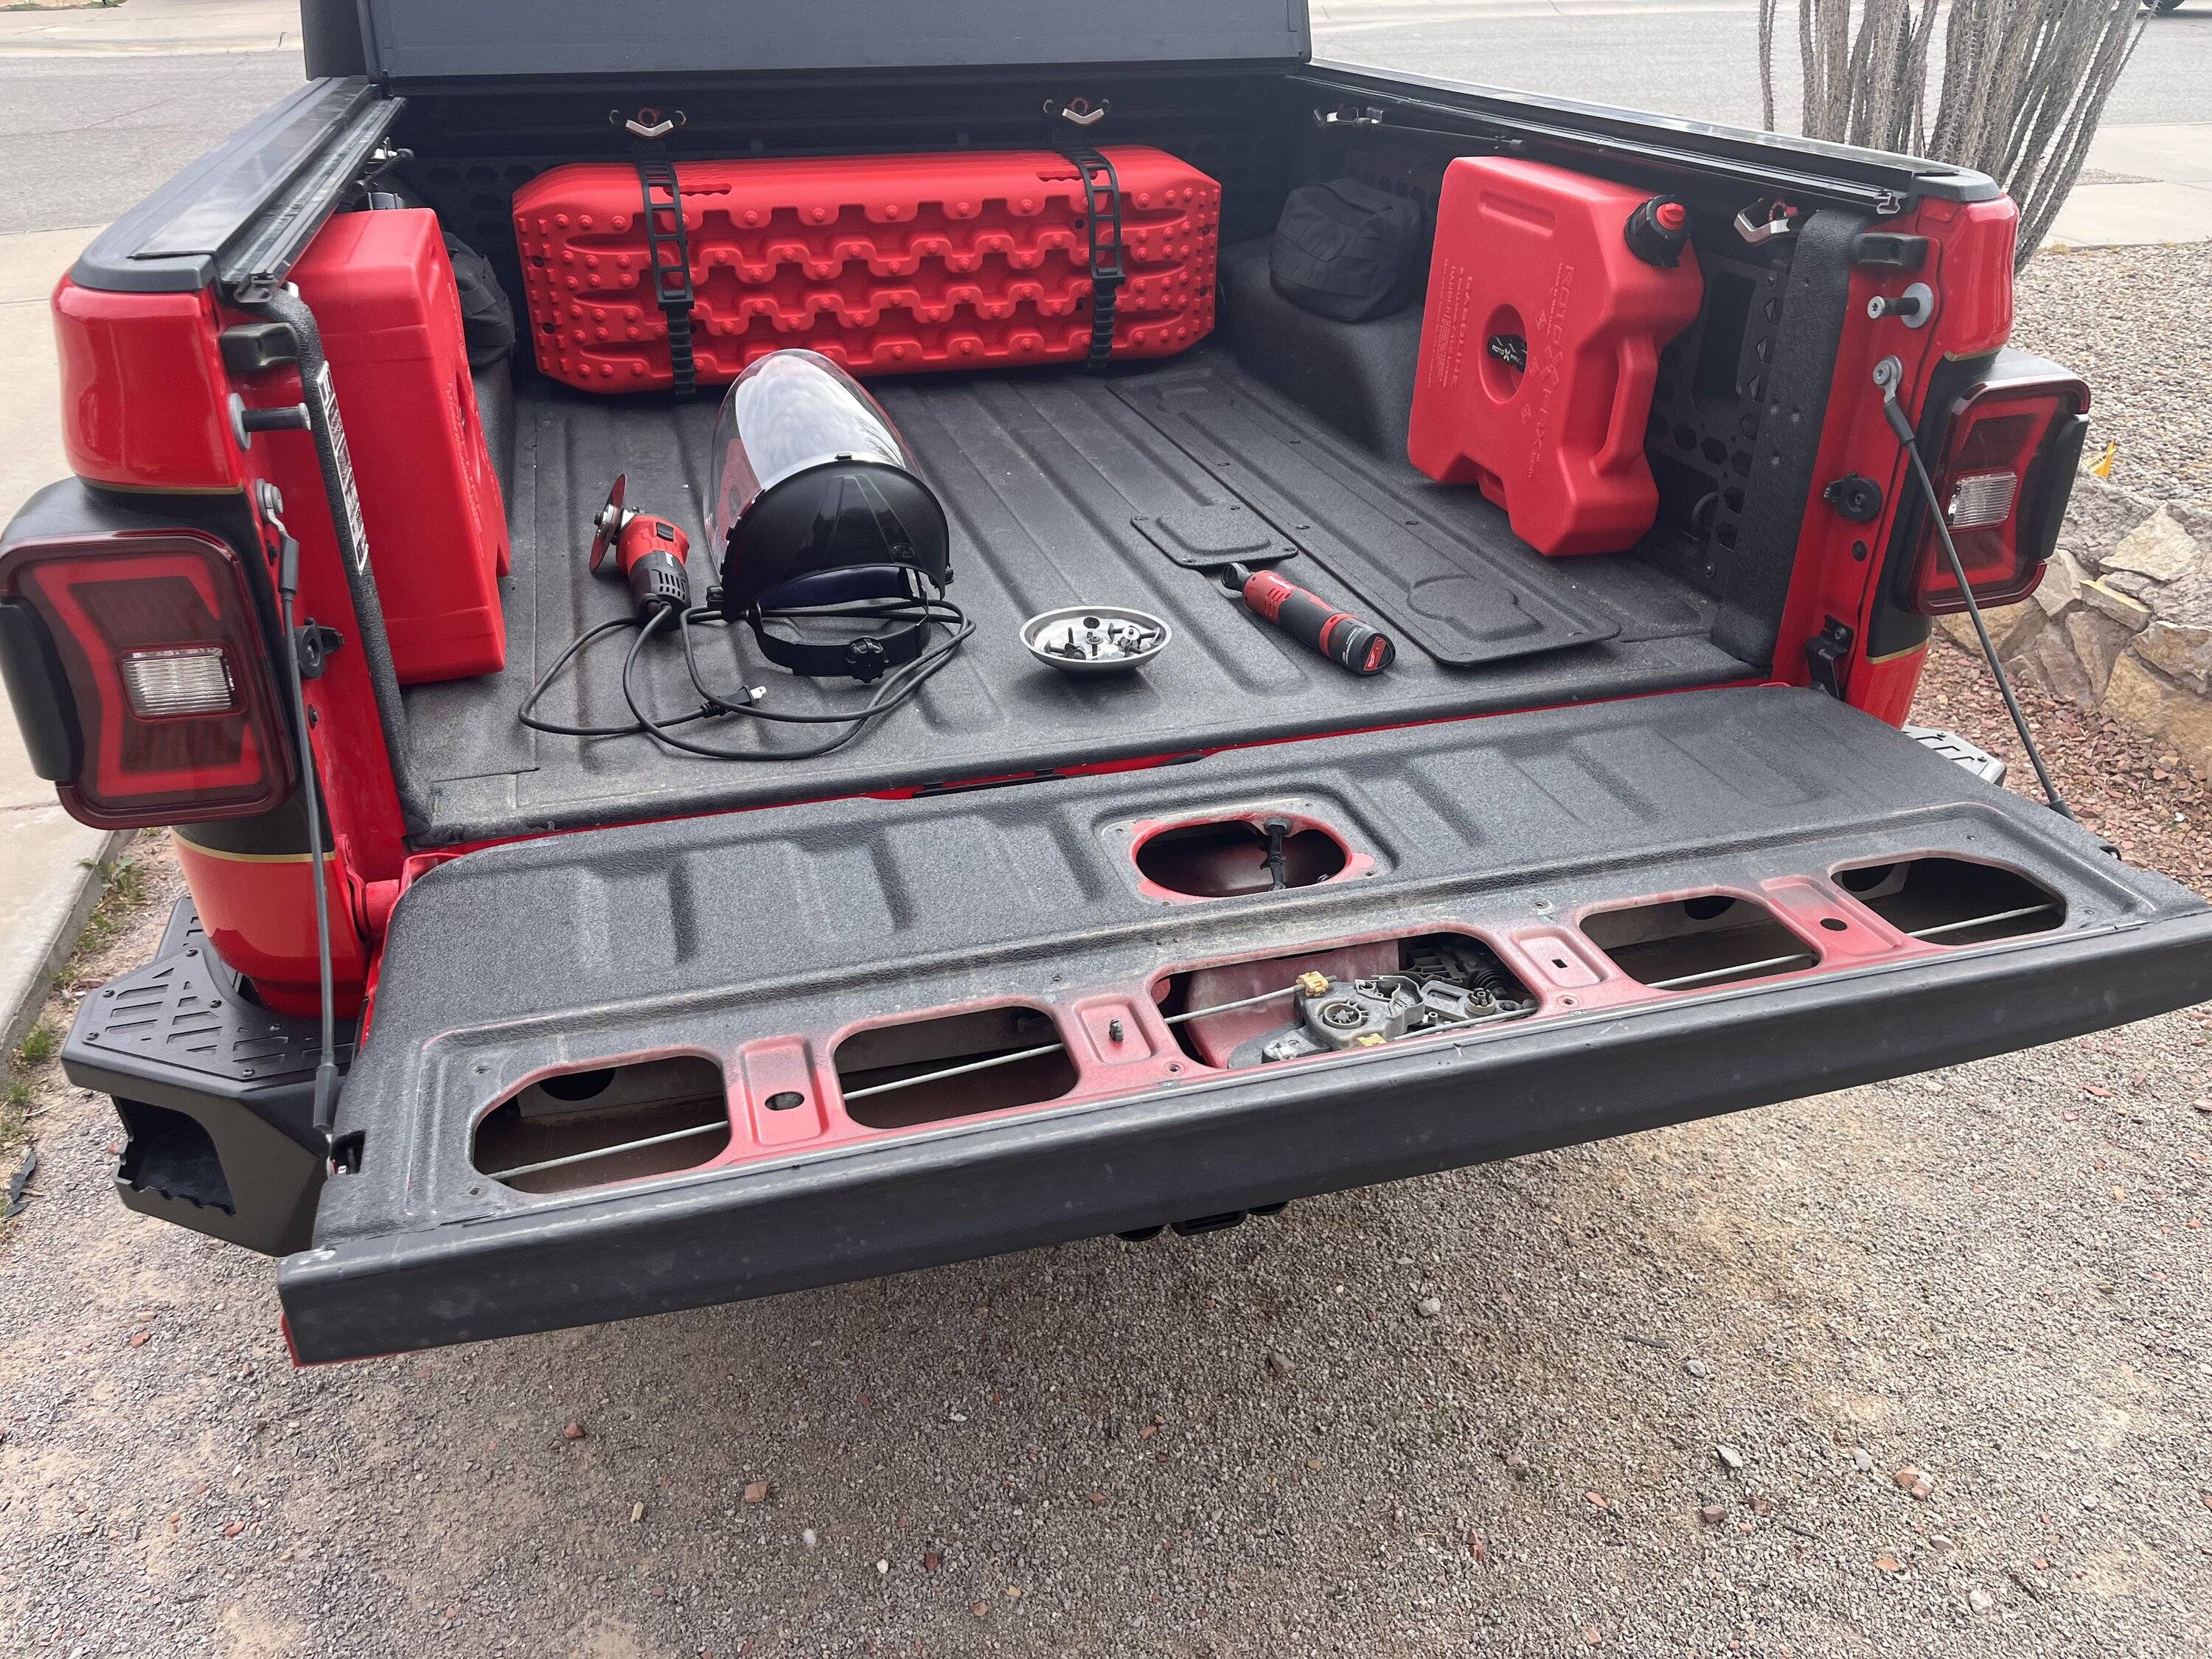
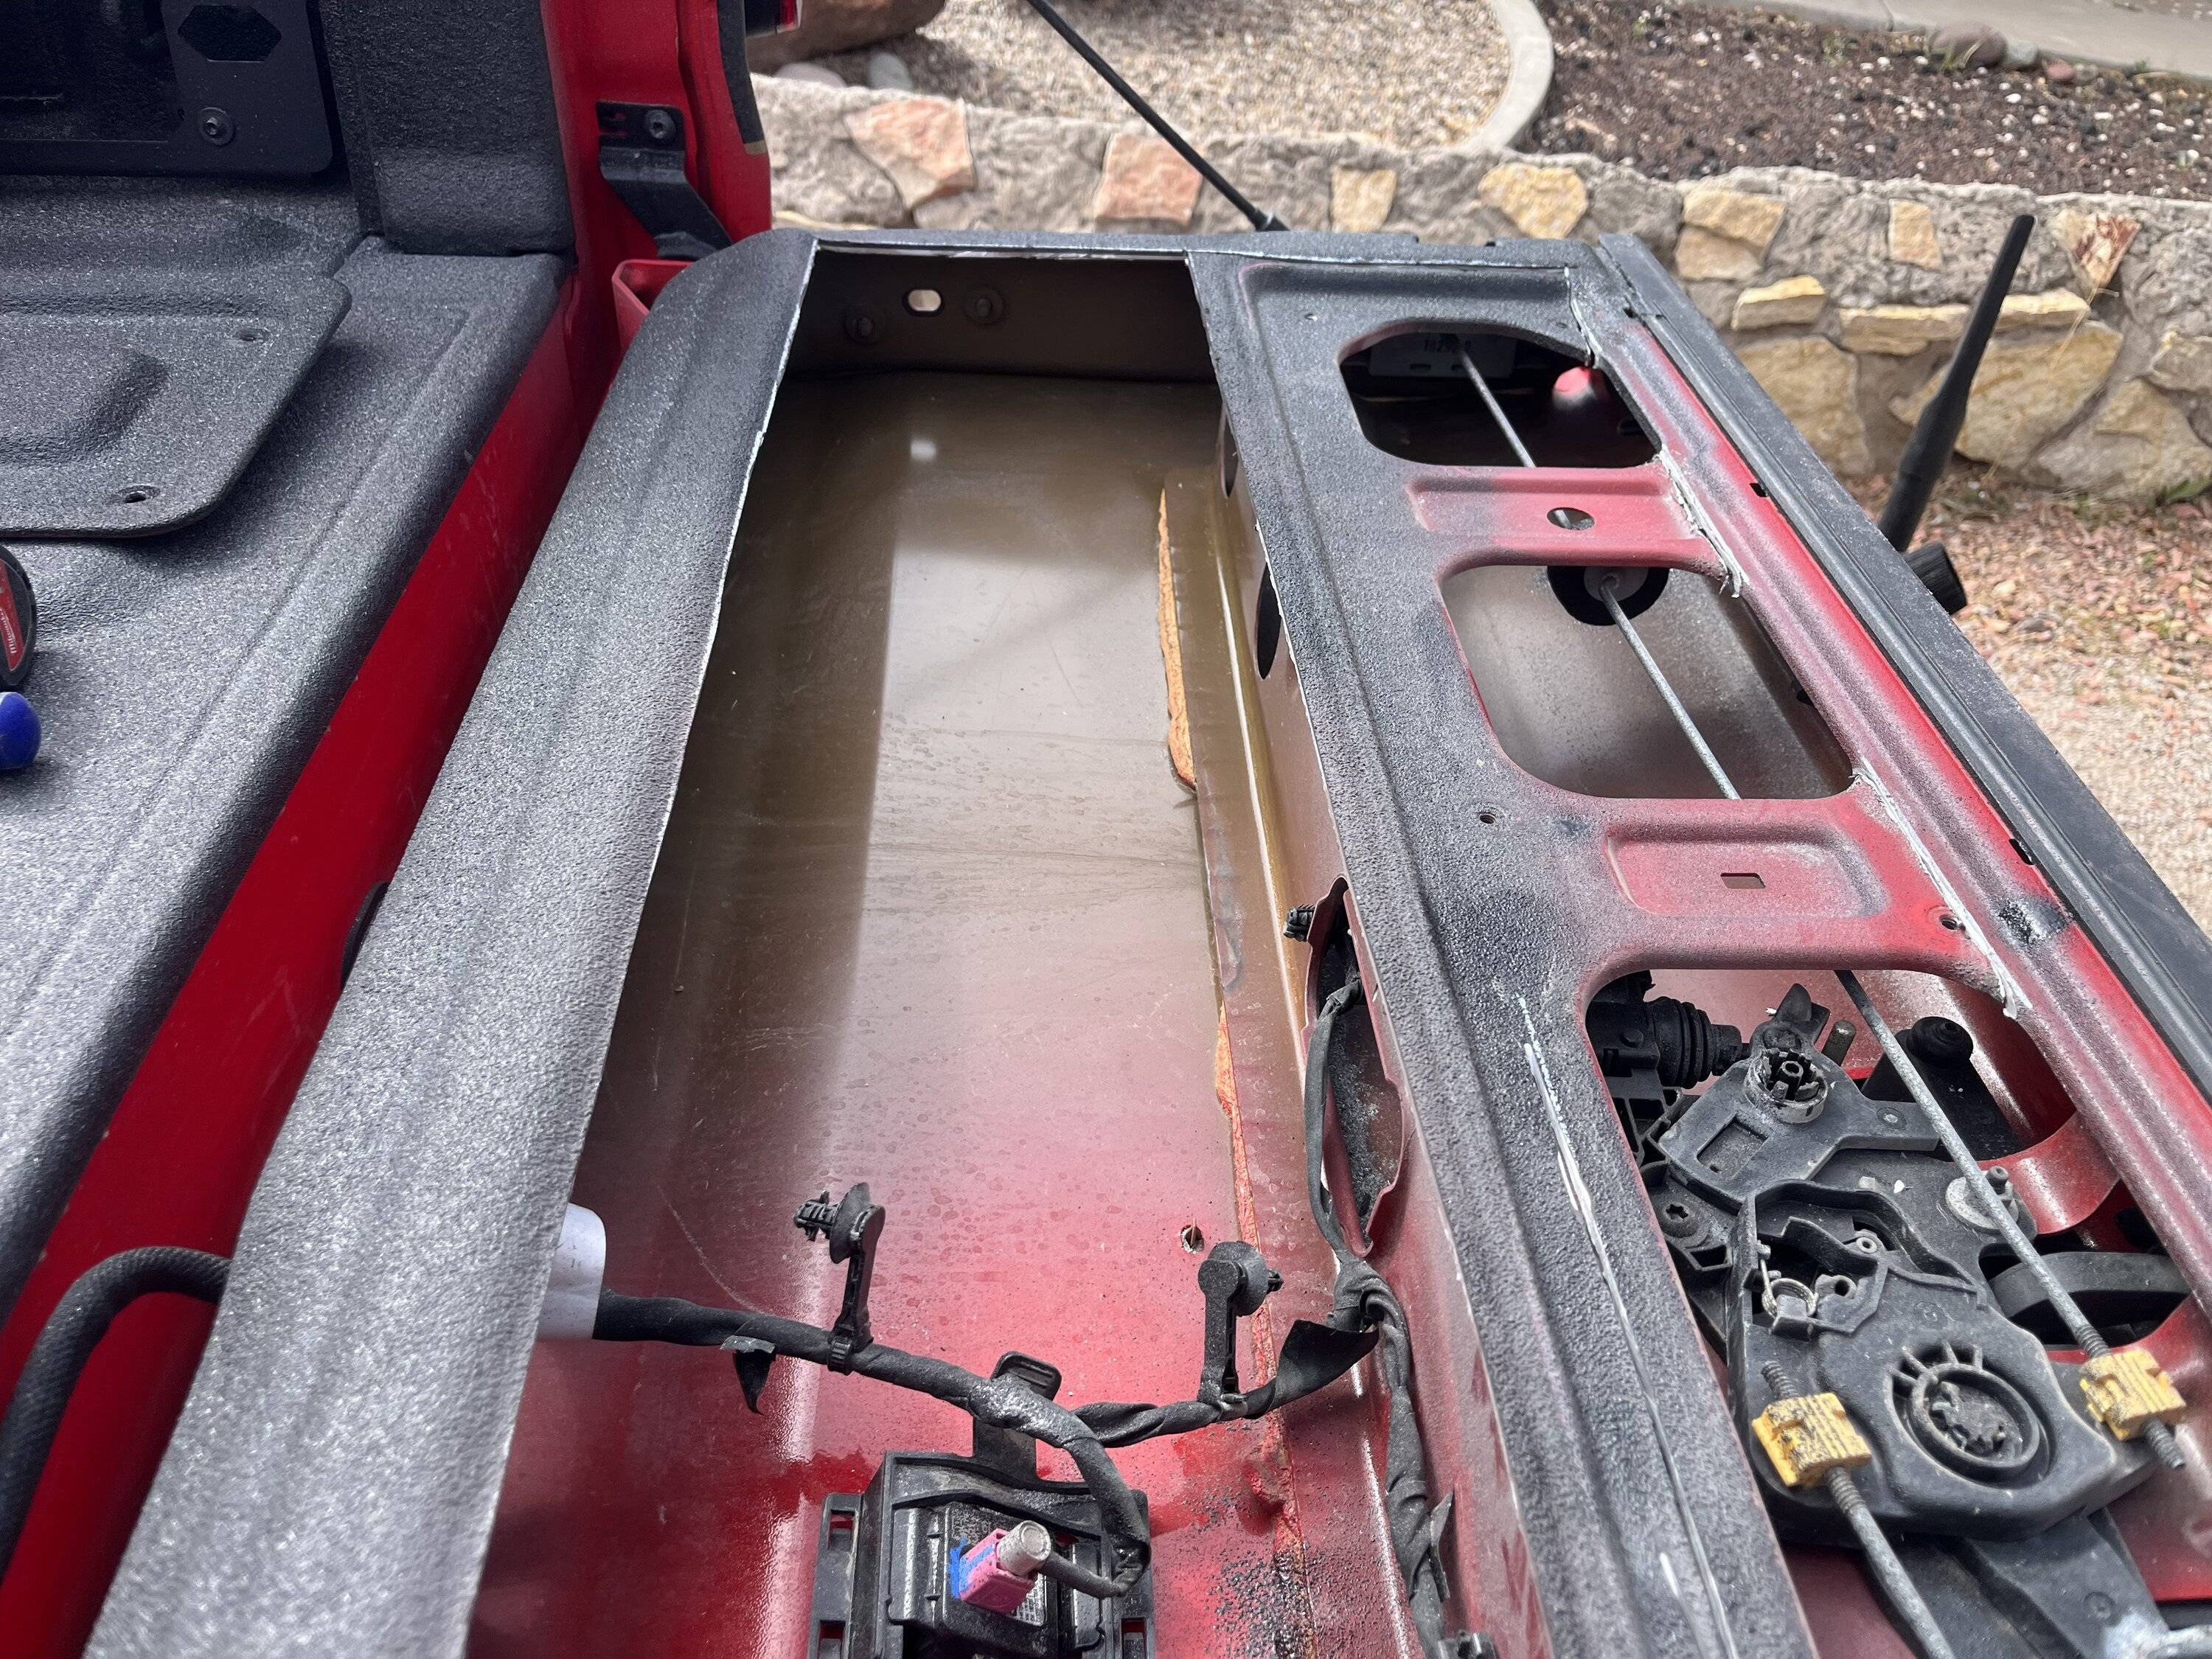
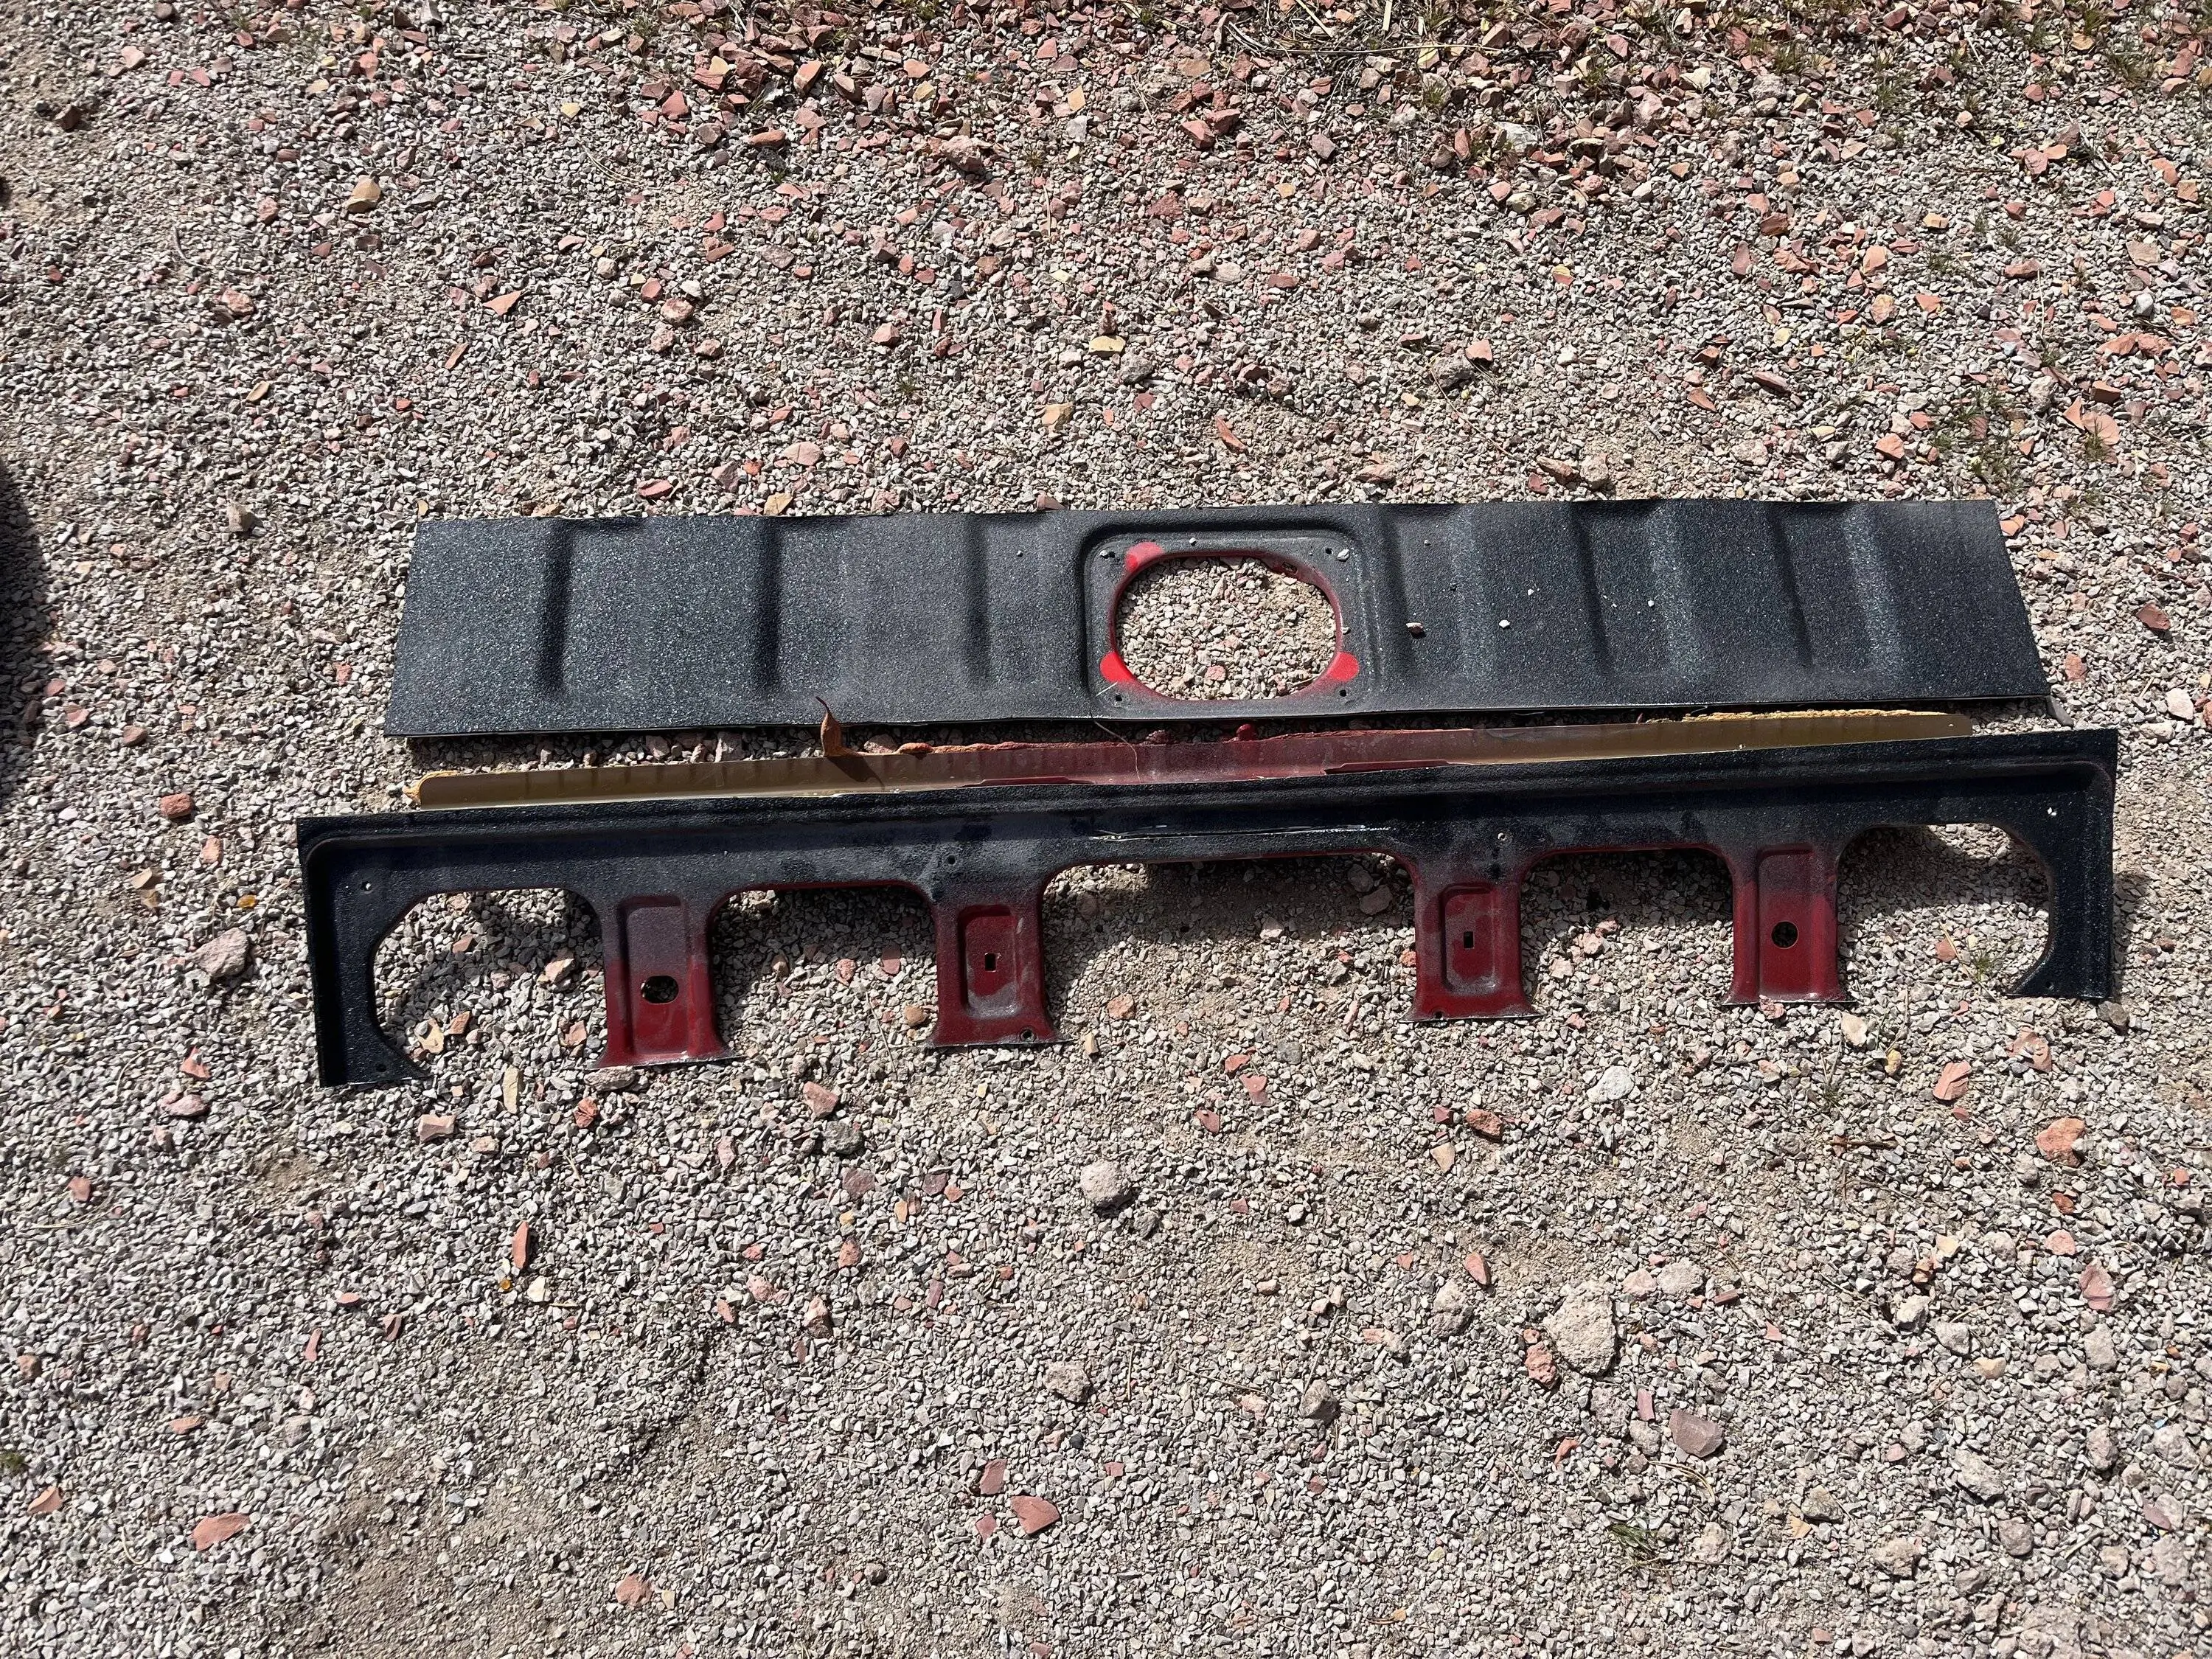
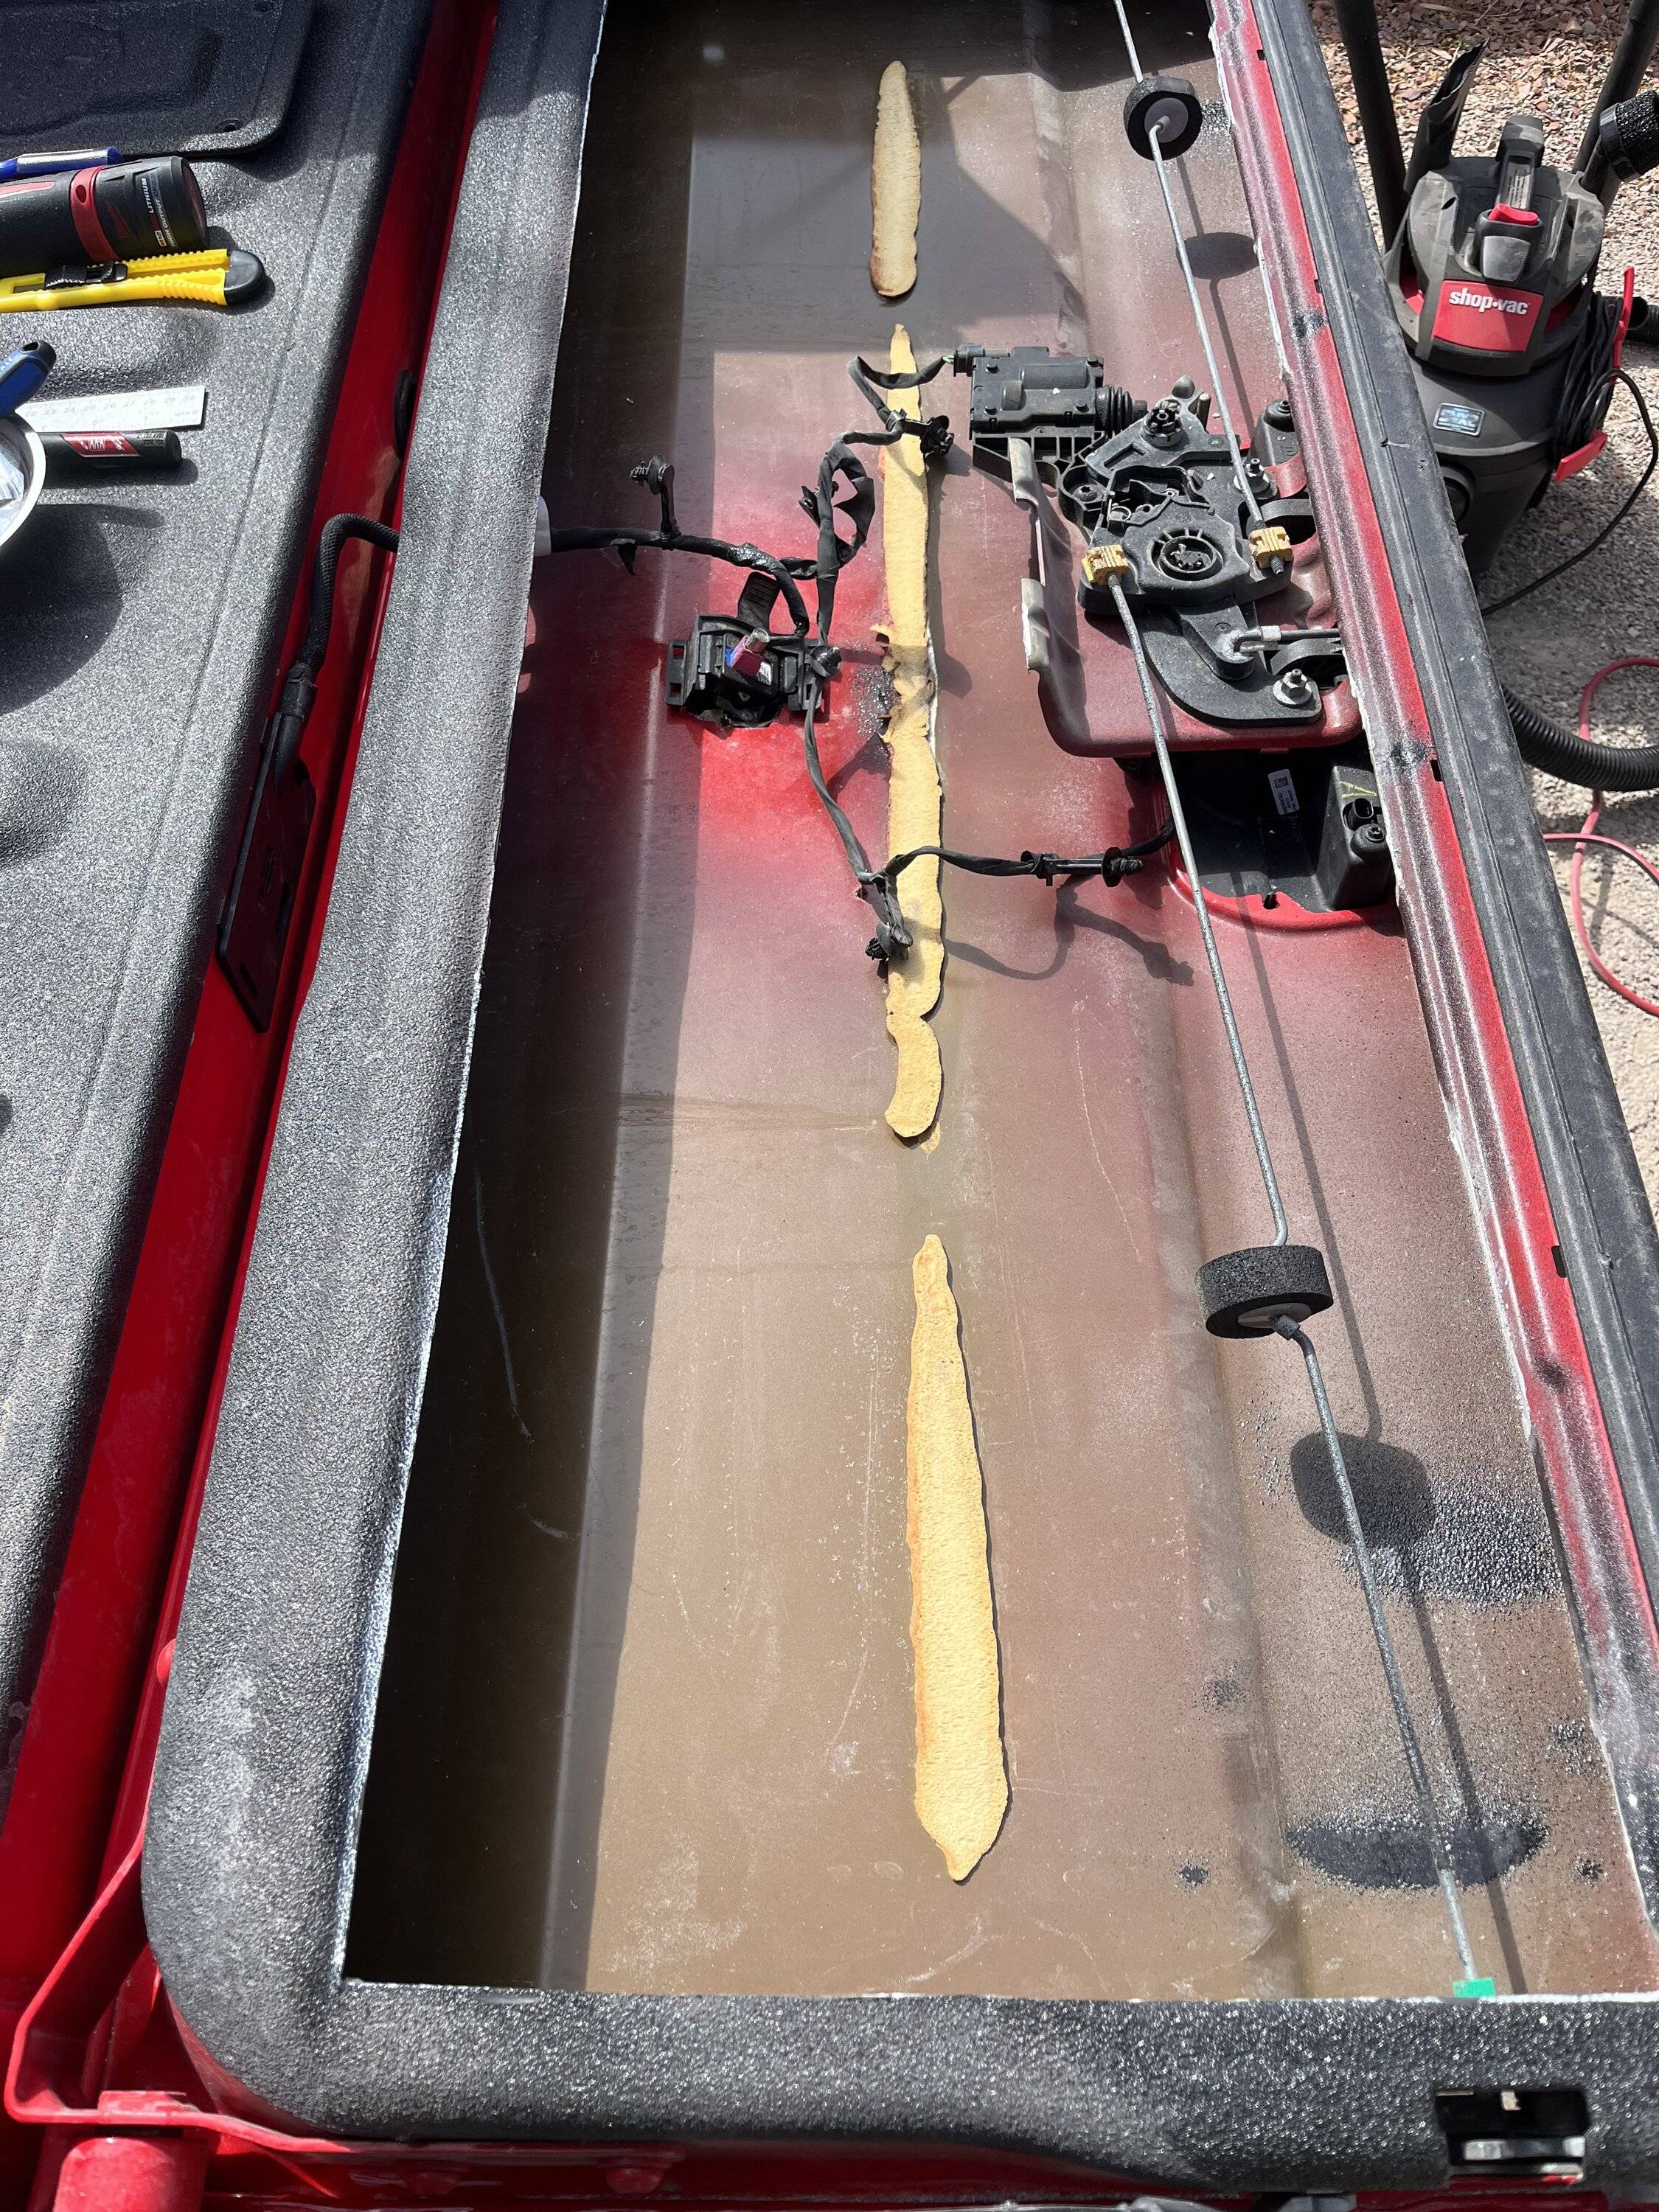
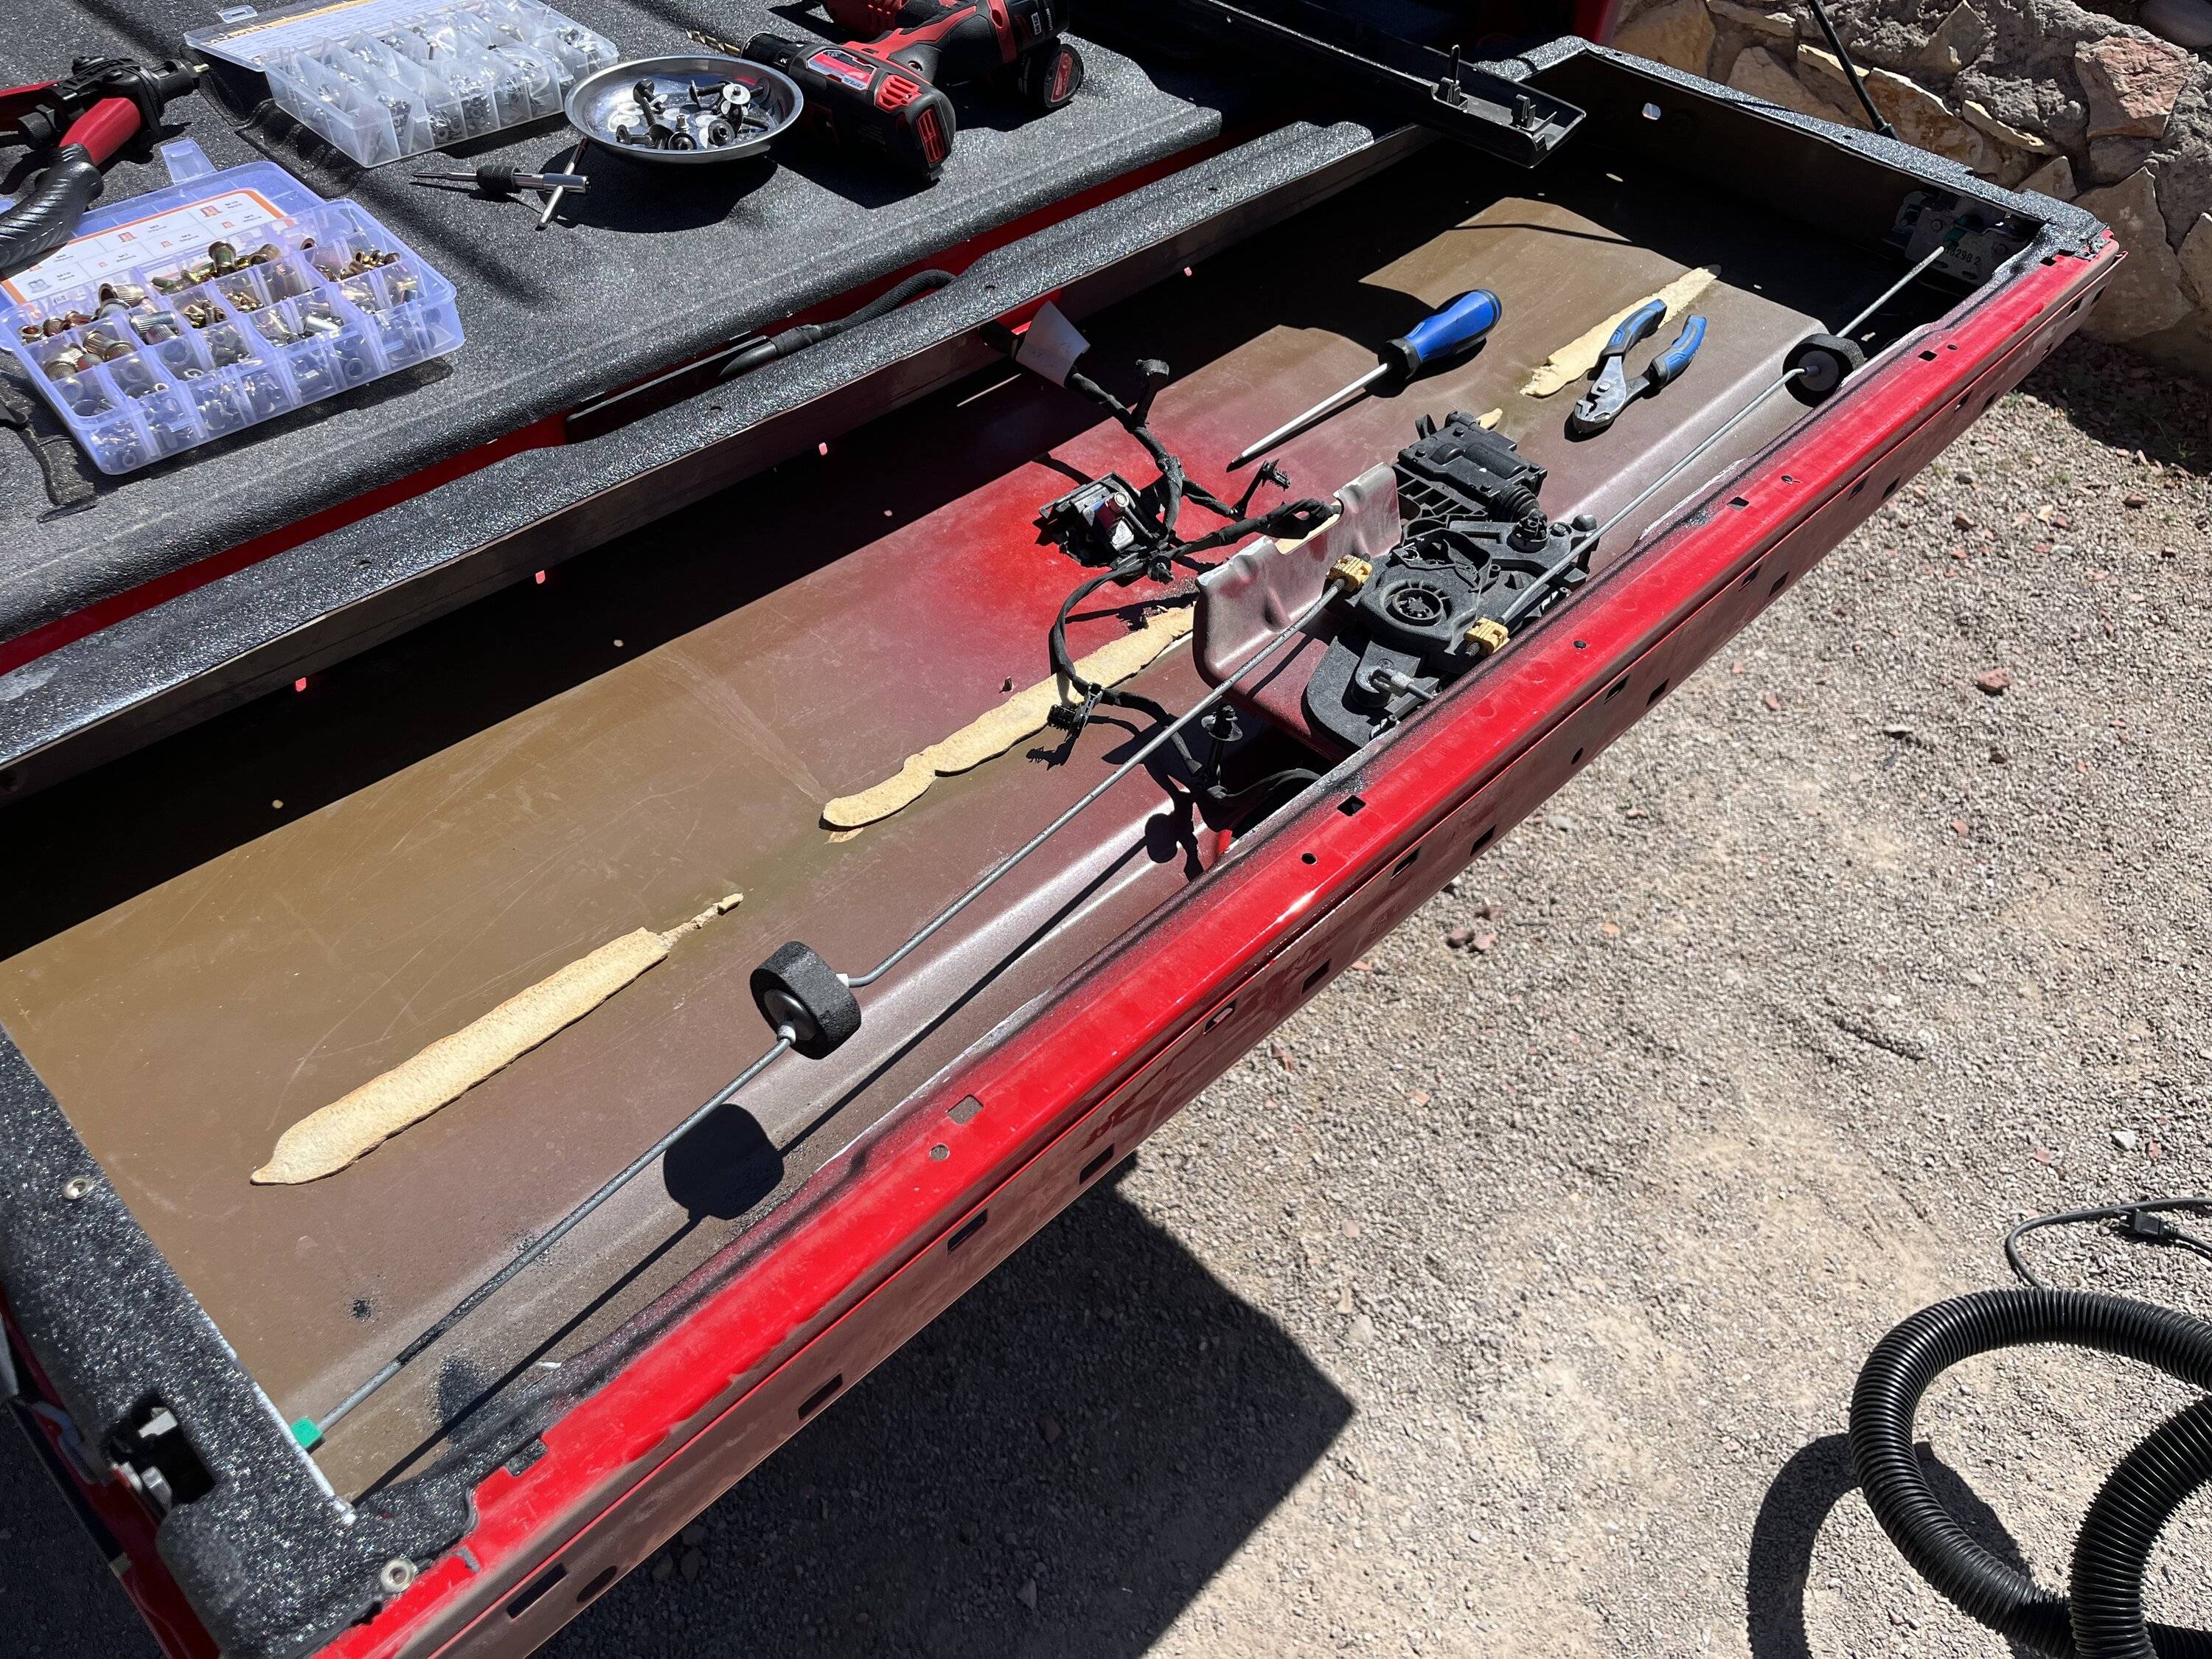
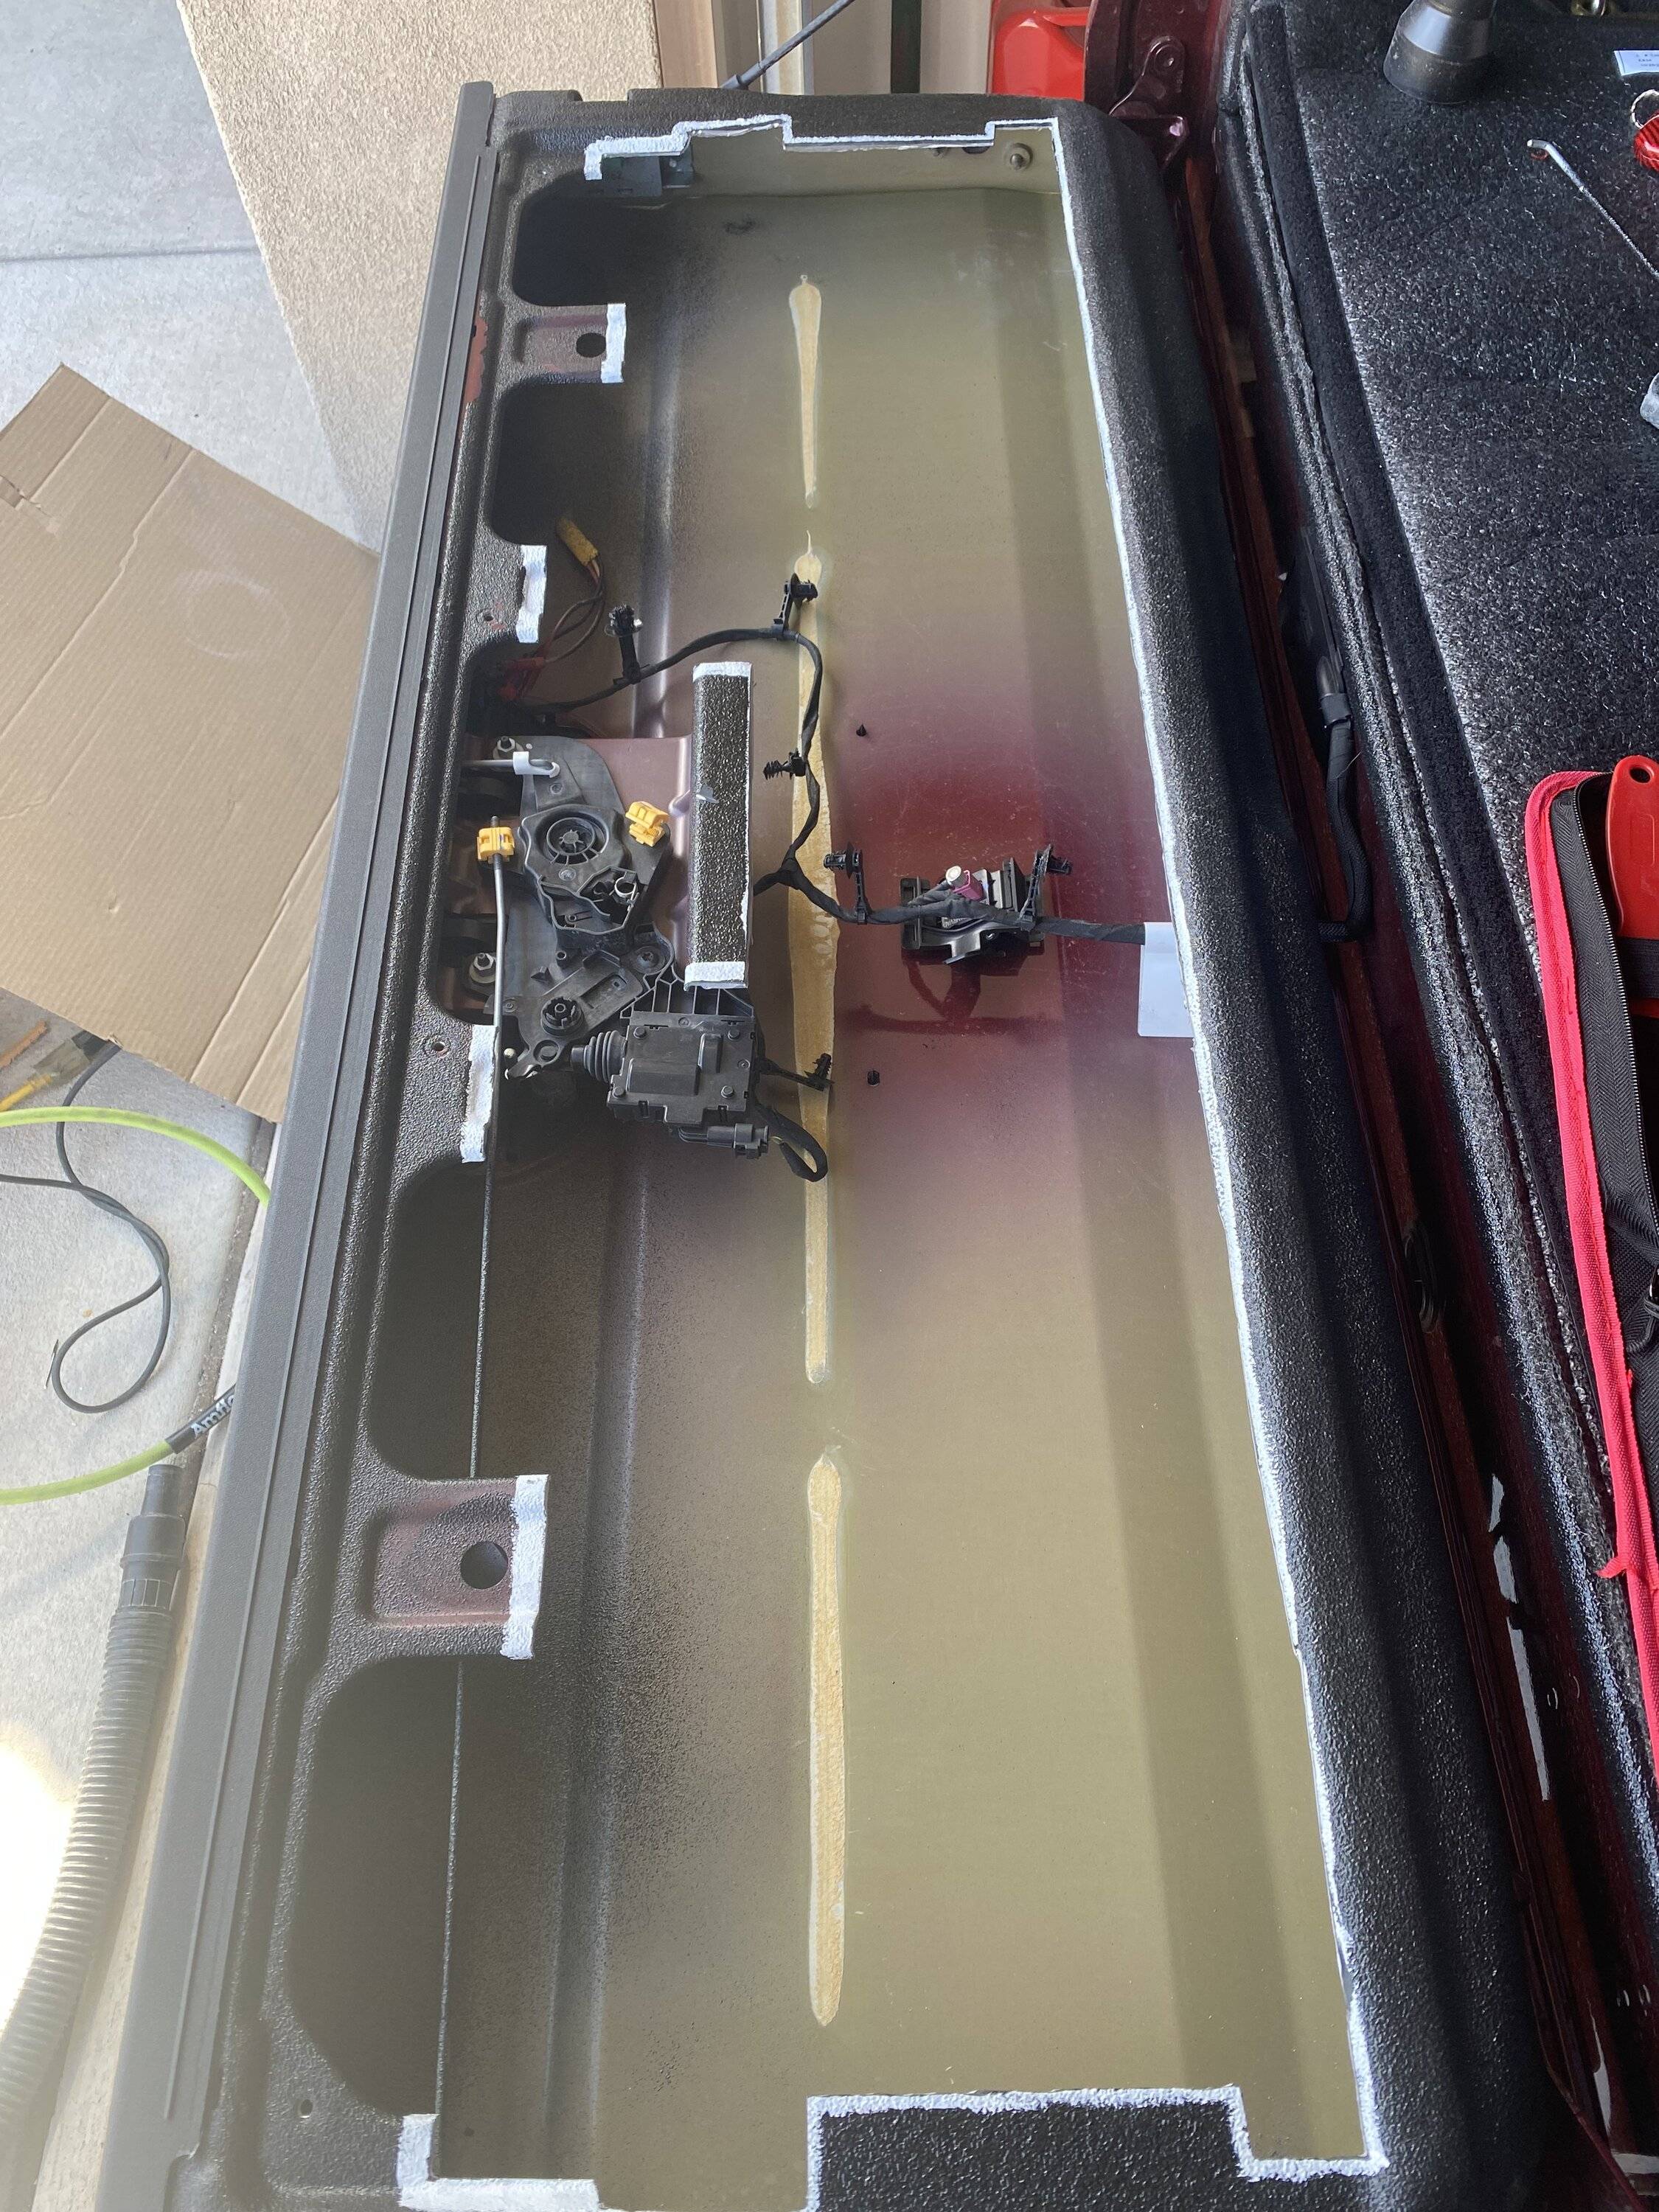
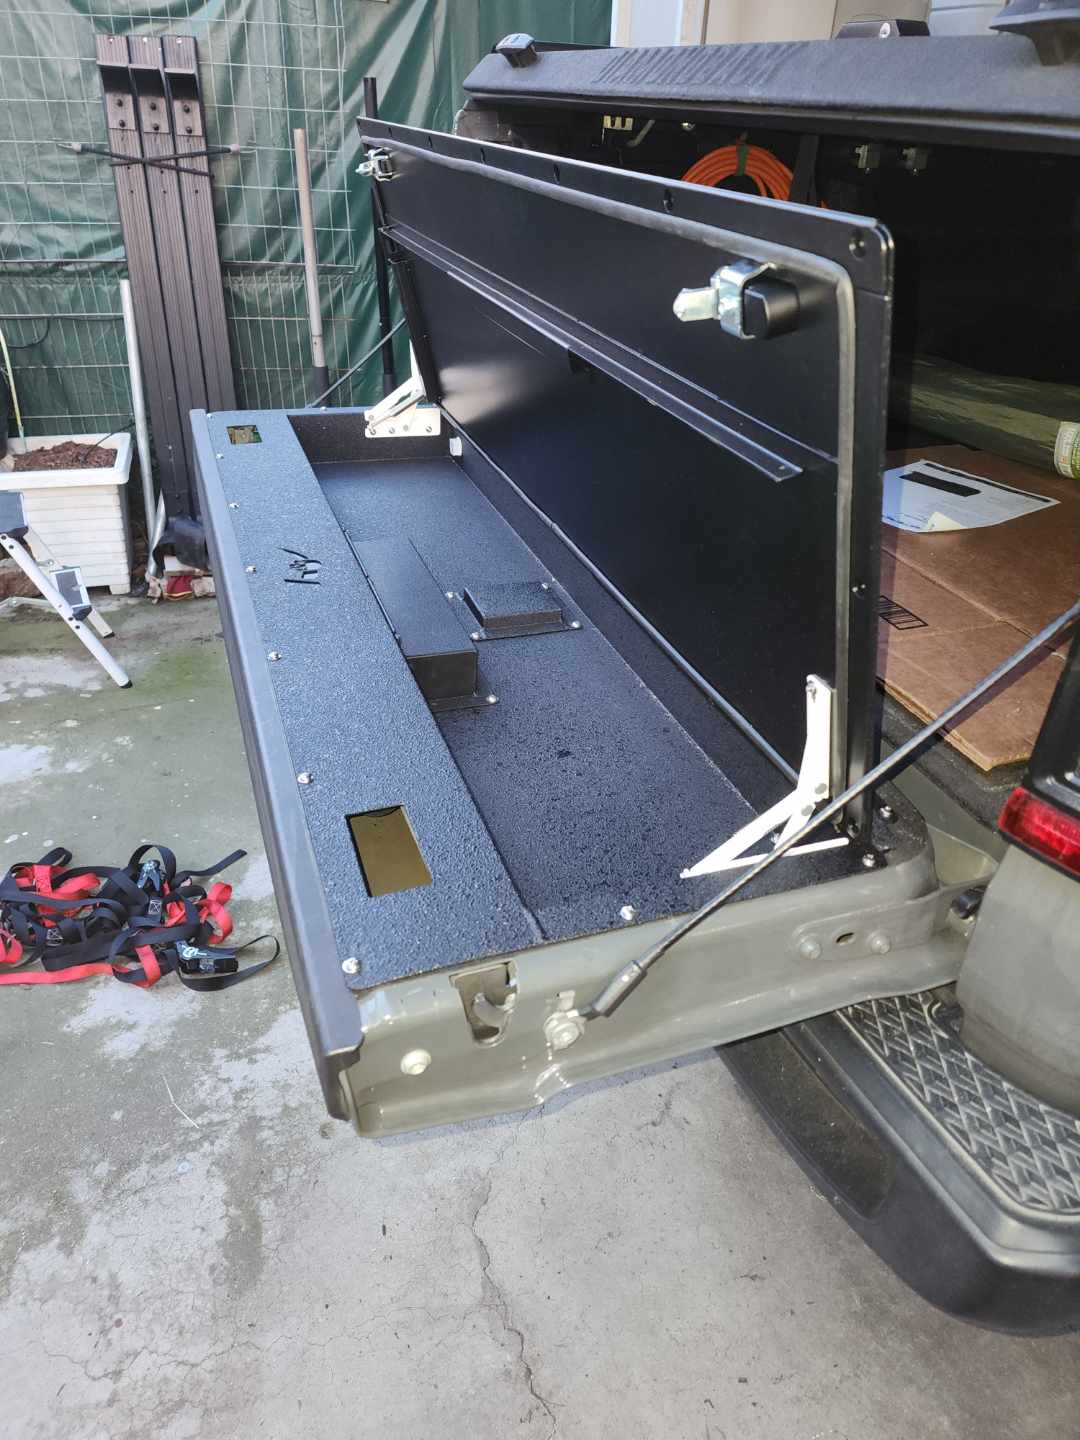
With the adhesive detached, I was finally able to skin the tailgate, behold the remains and my open tailgate box. I took this opportunity to grind my edges smooth. I also tucked the wires for the camera, lock mechanism, and taillight underneath the latch handle support.

IMG_9316.webp


IMG_9317.JPG


It was at this point I test fit the Reaper box. More or less dropped right in, minus some small interference with the prop rod, which was solved by dropping the front of the tailgate box in first , so I started marking and drilling my holes, using the box as a template.

IMG_9332.JPG


IMG_9337.JPG


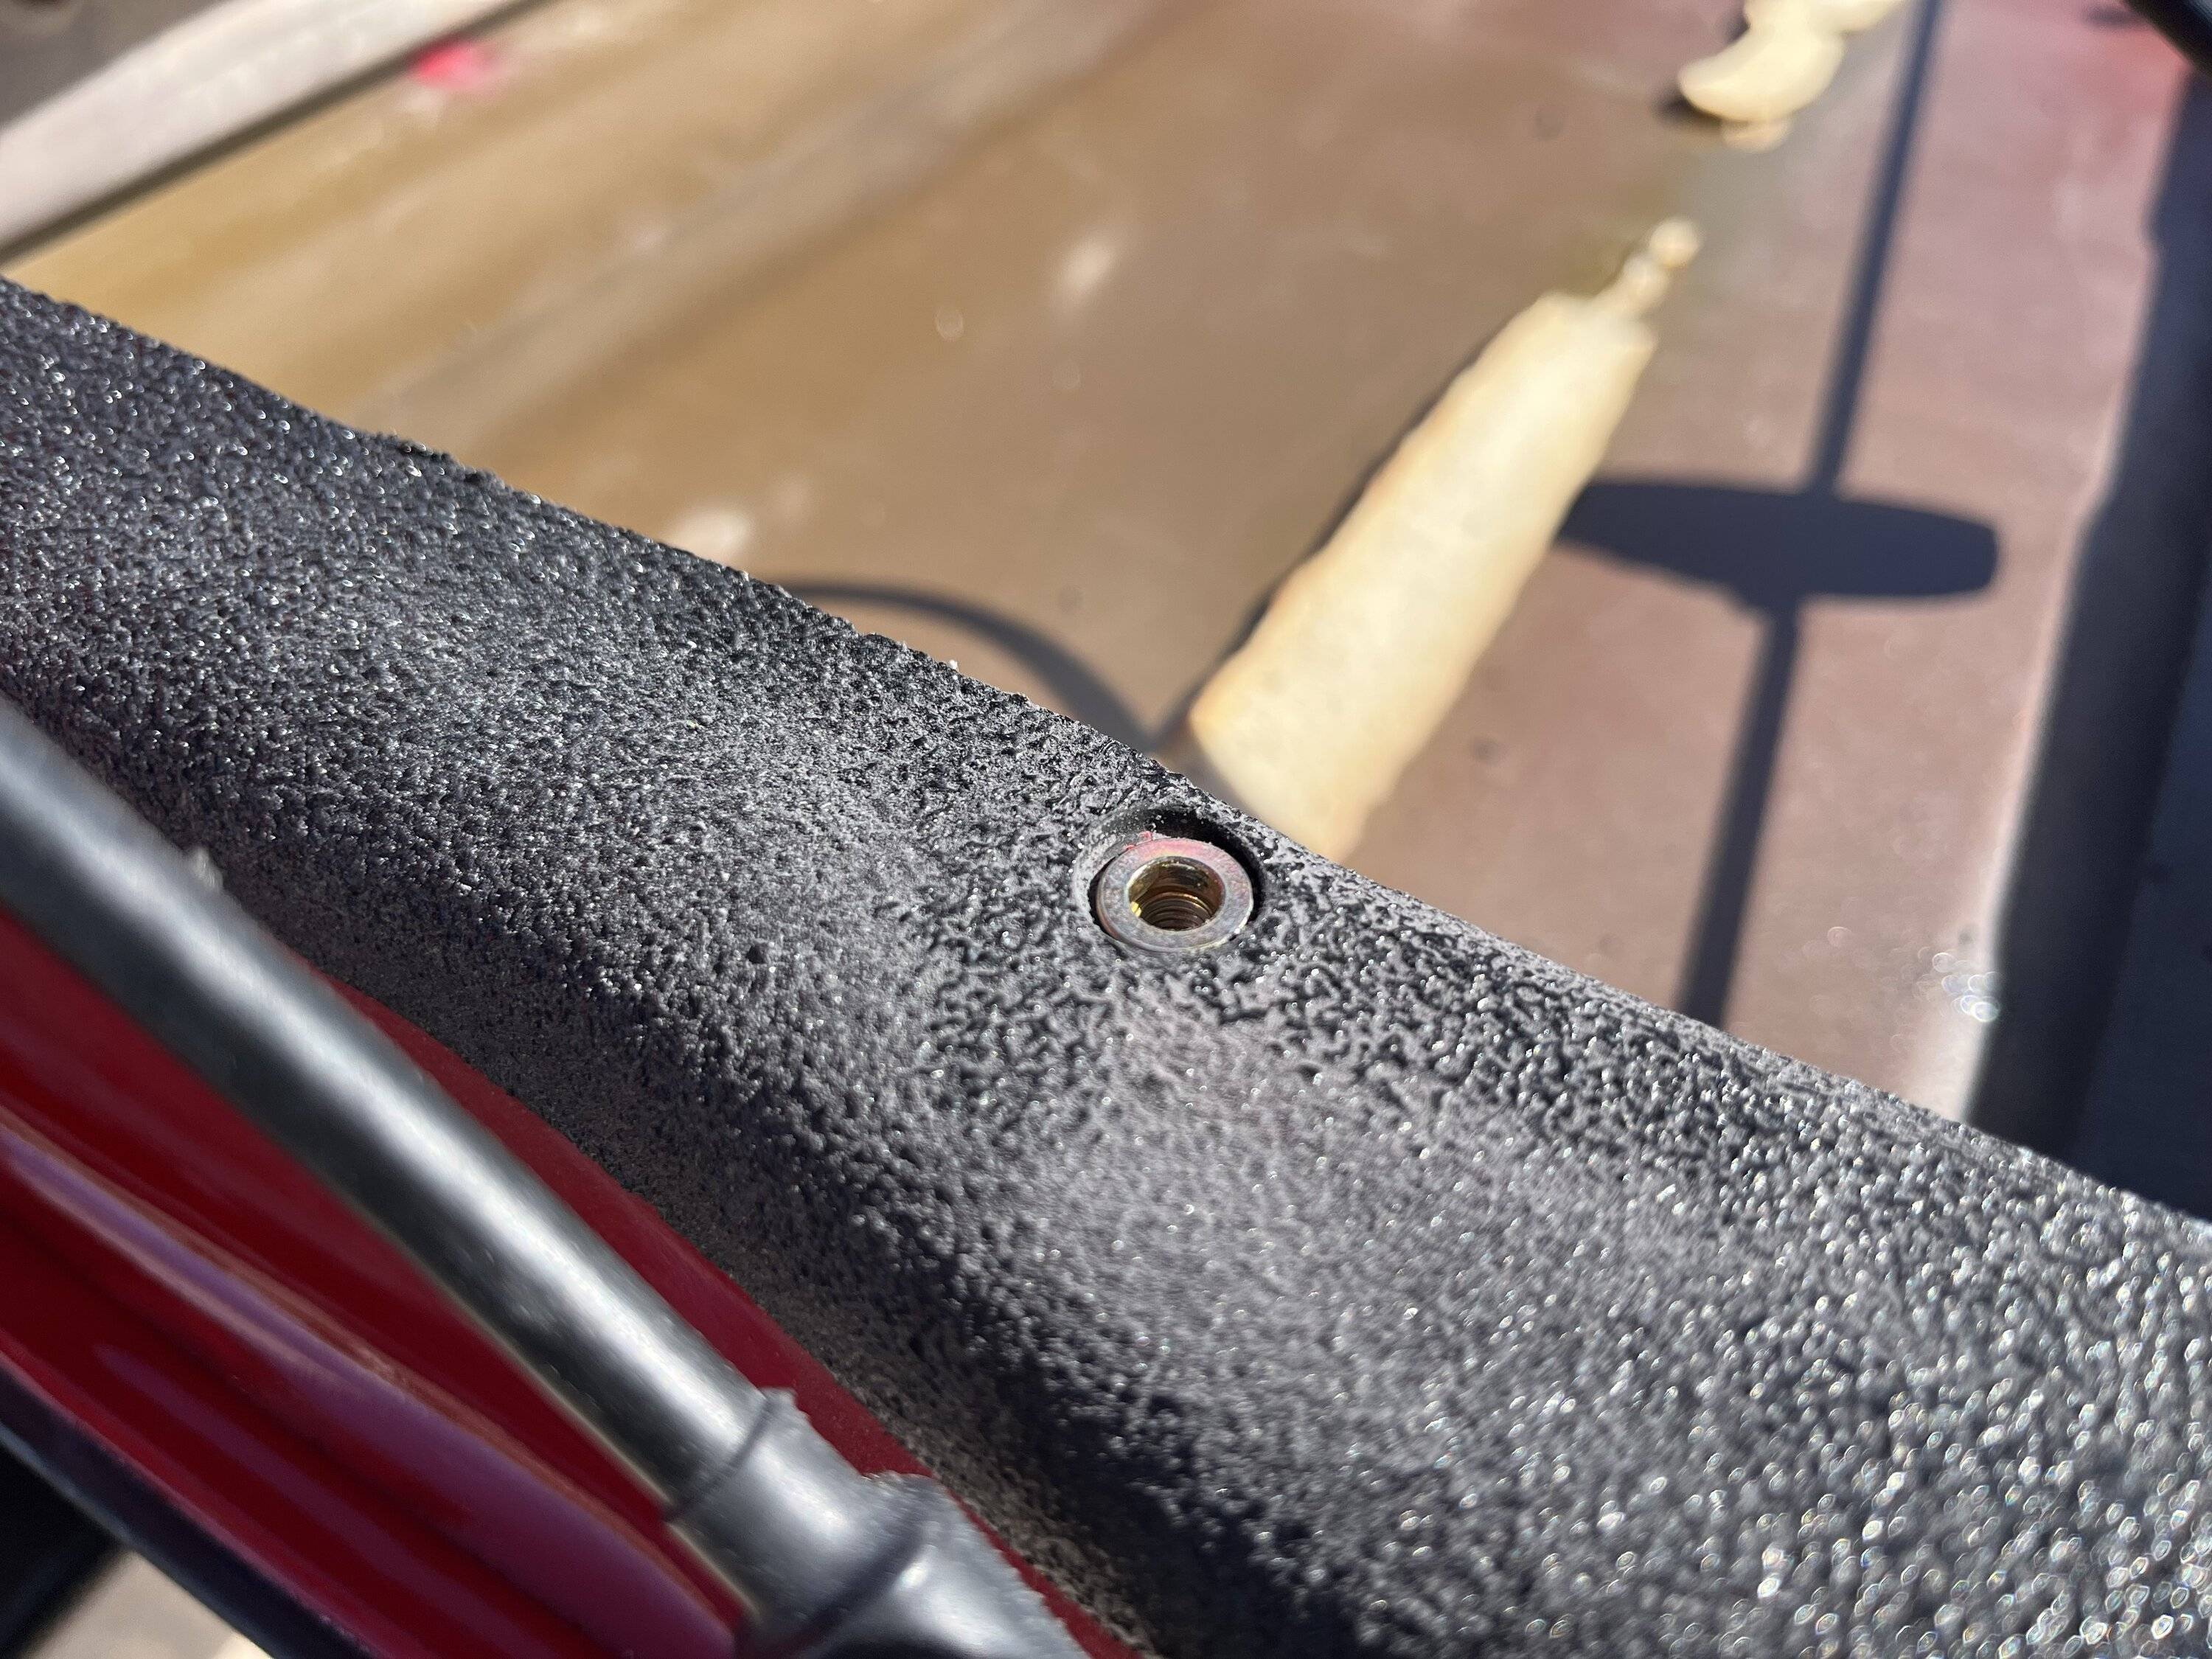
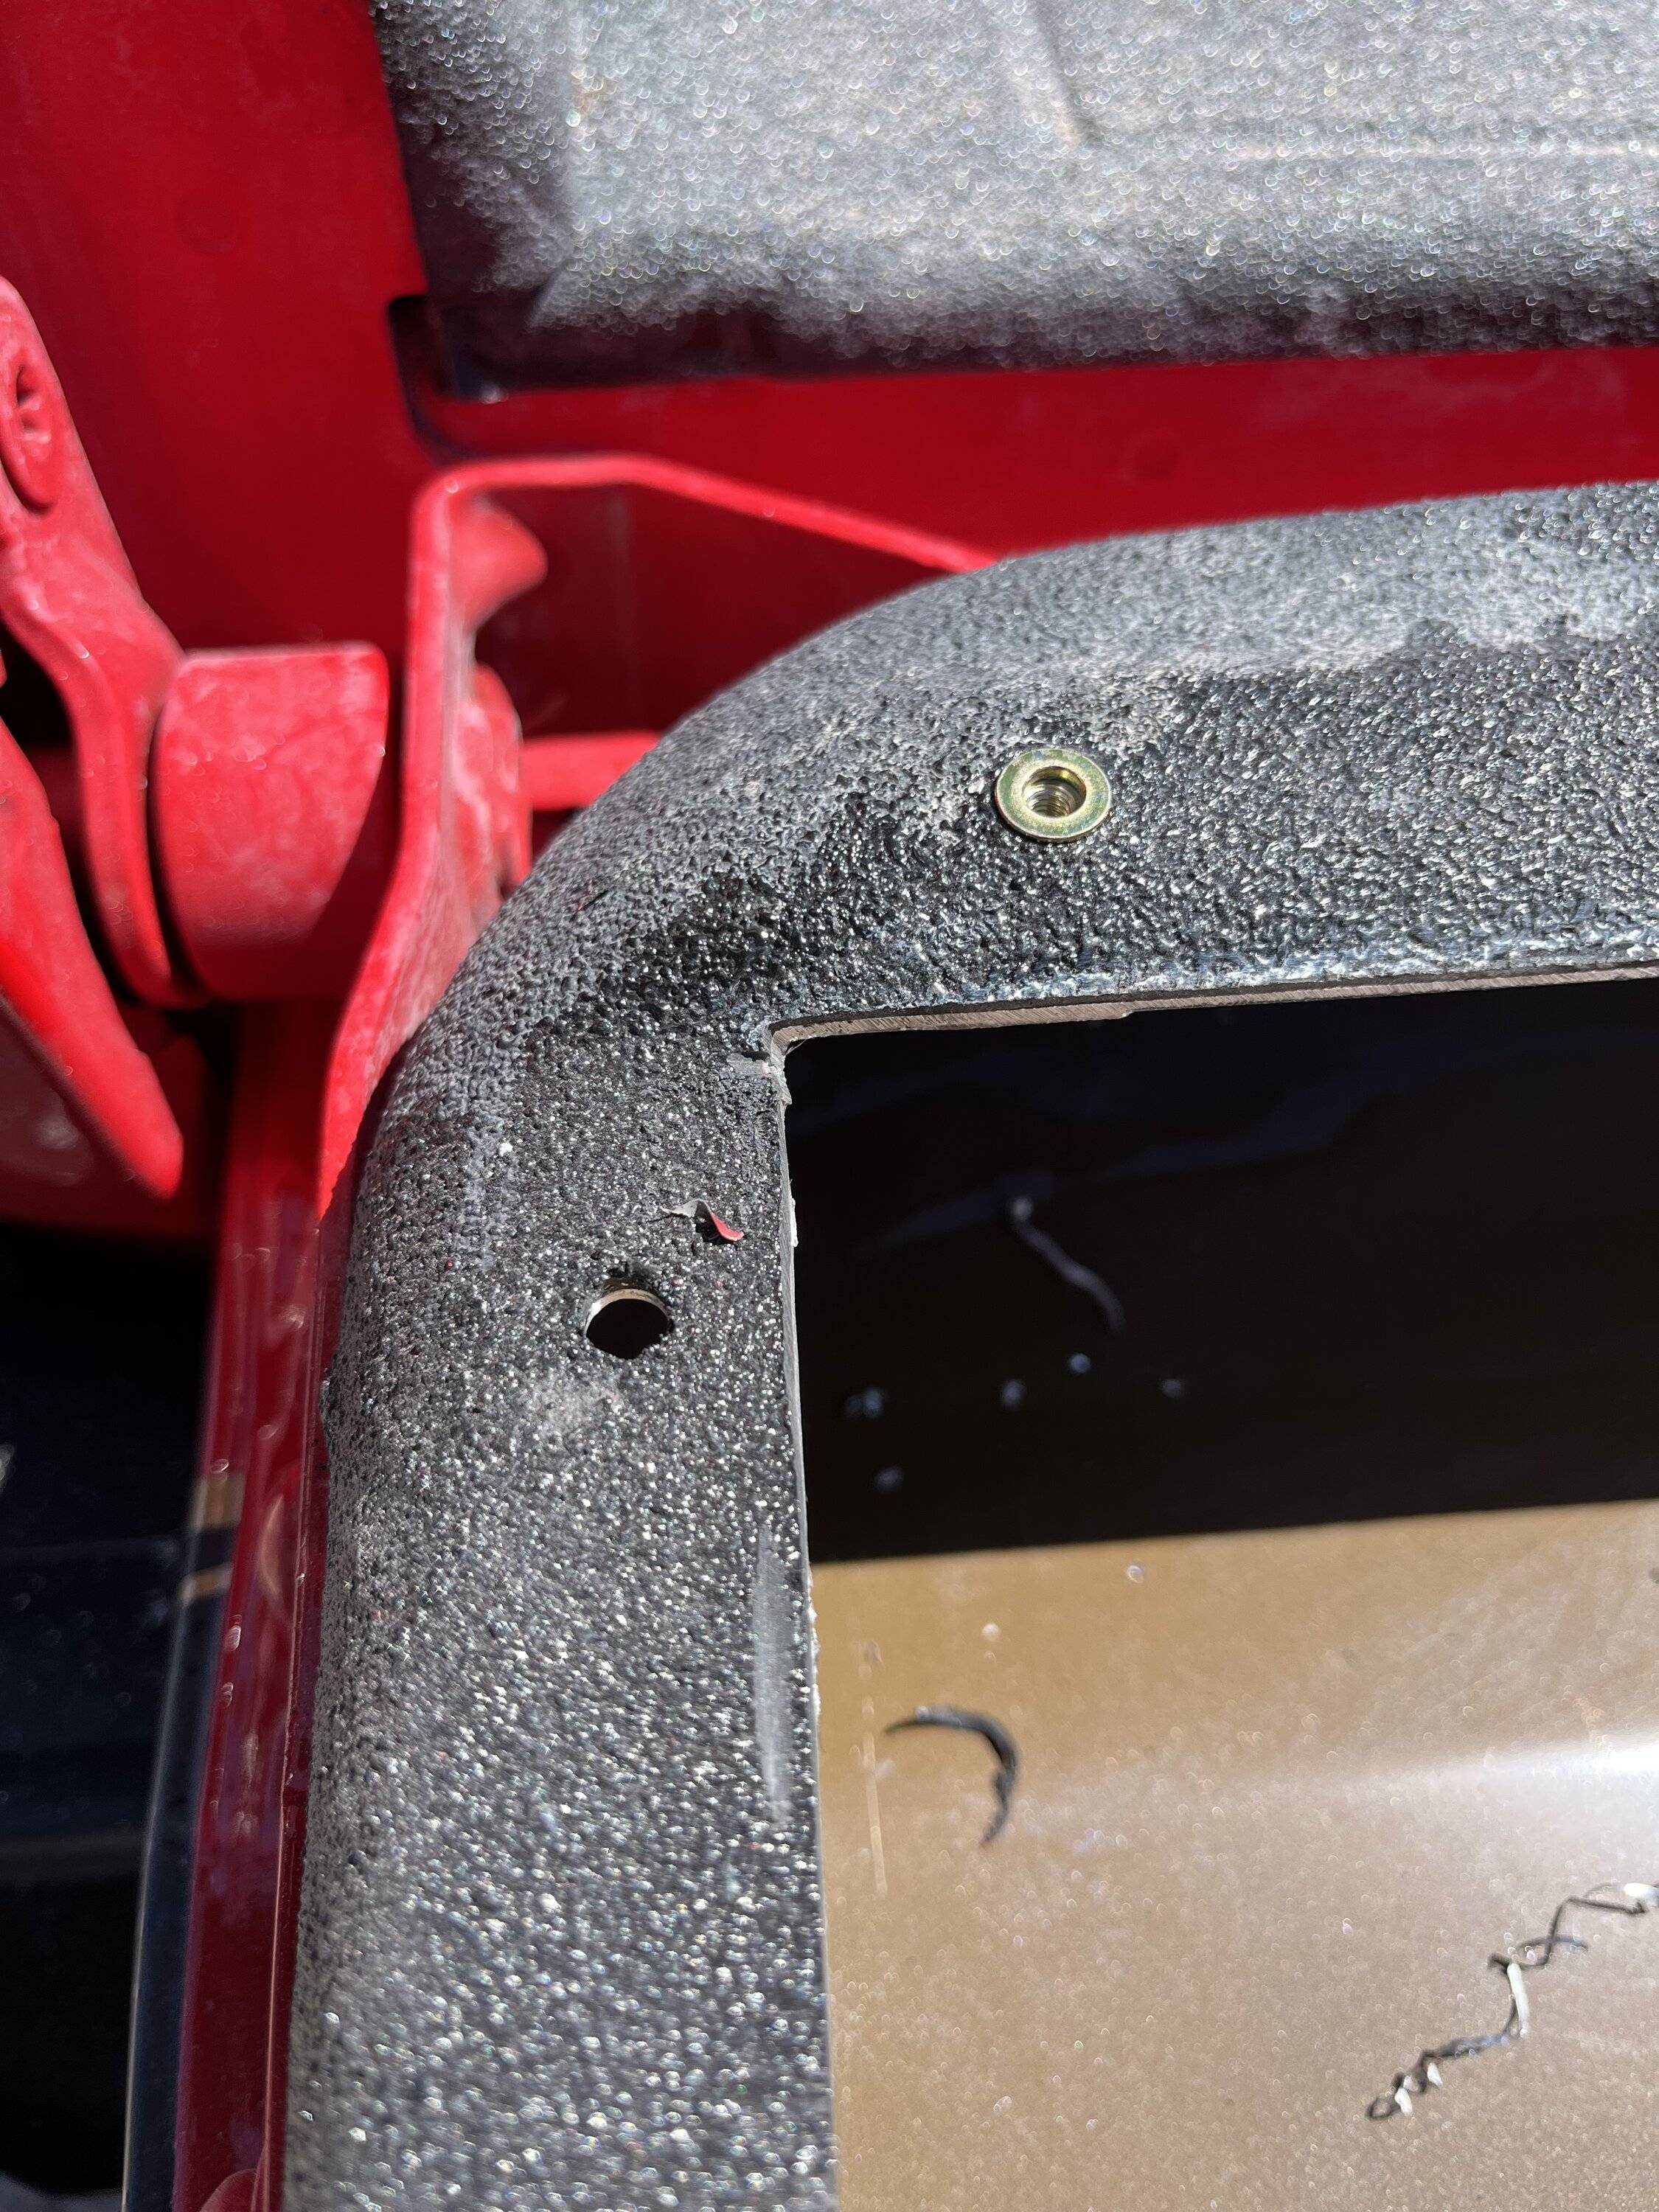
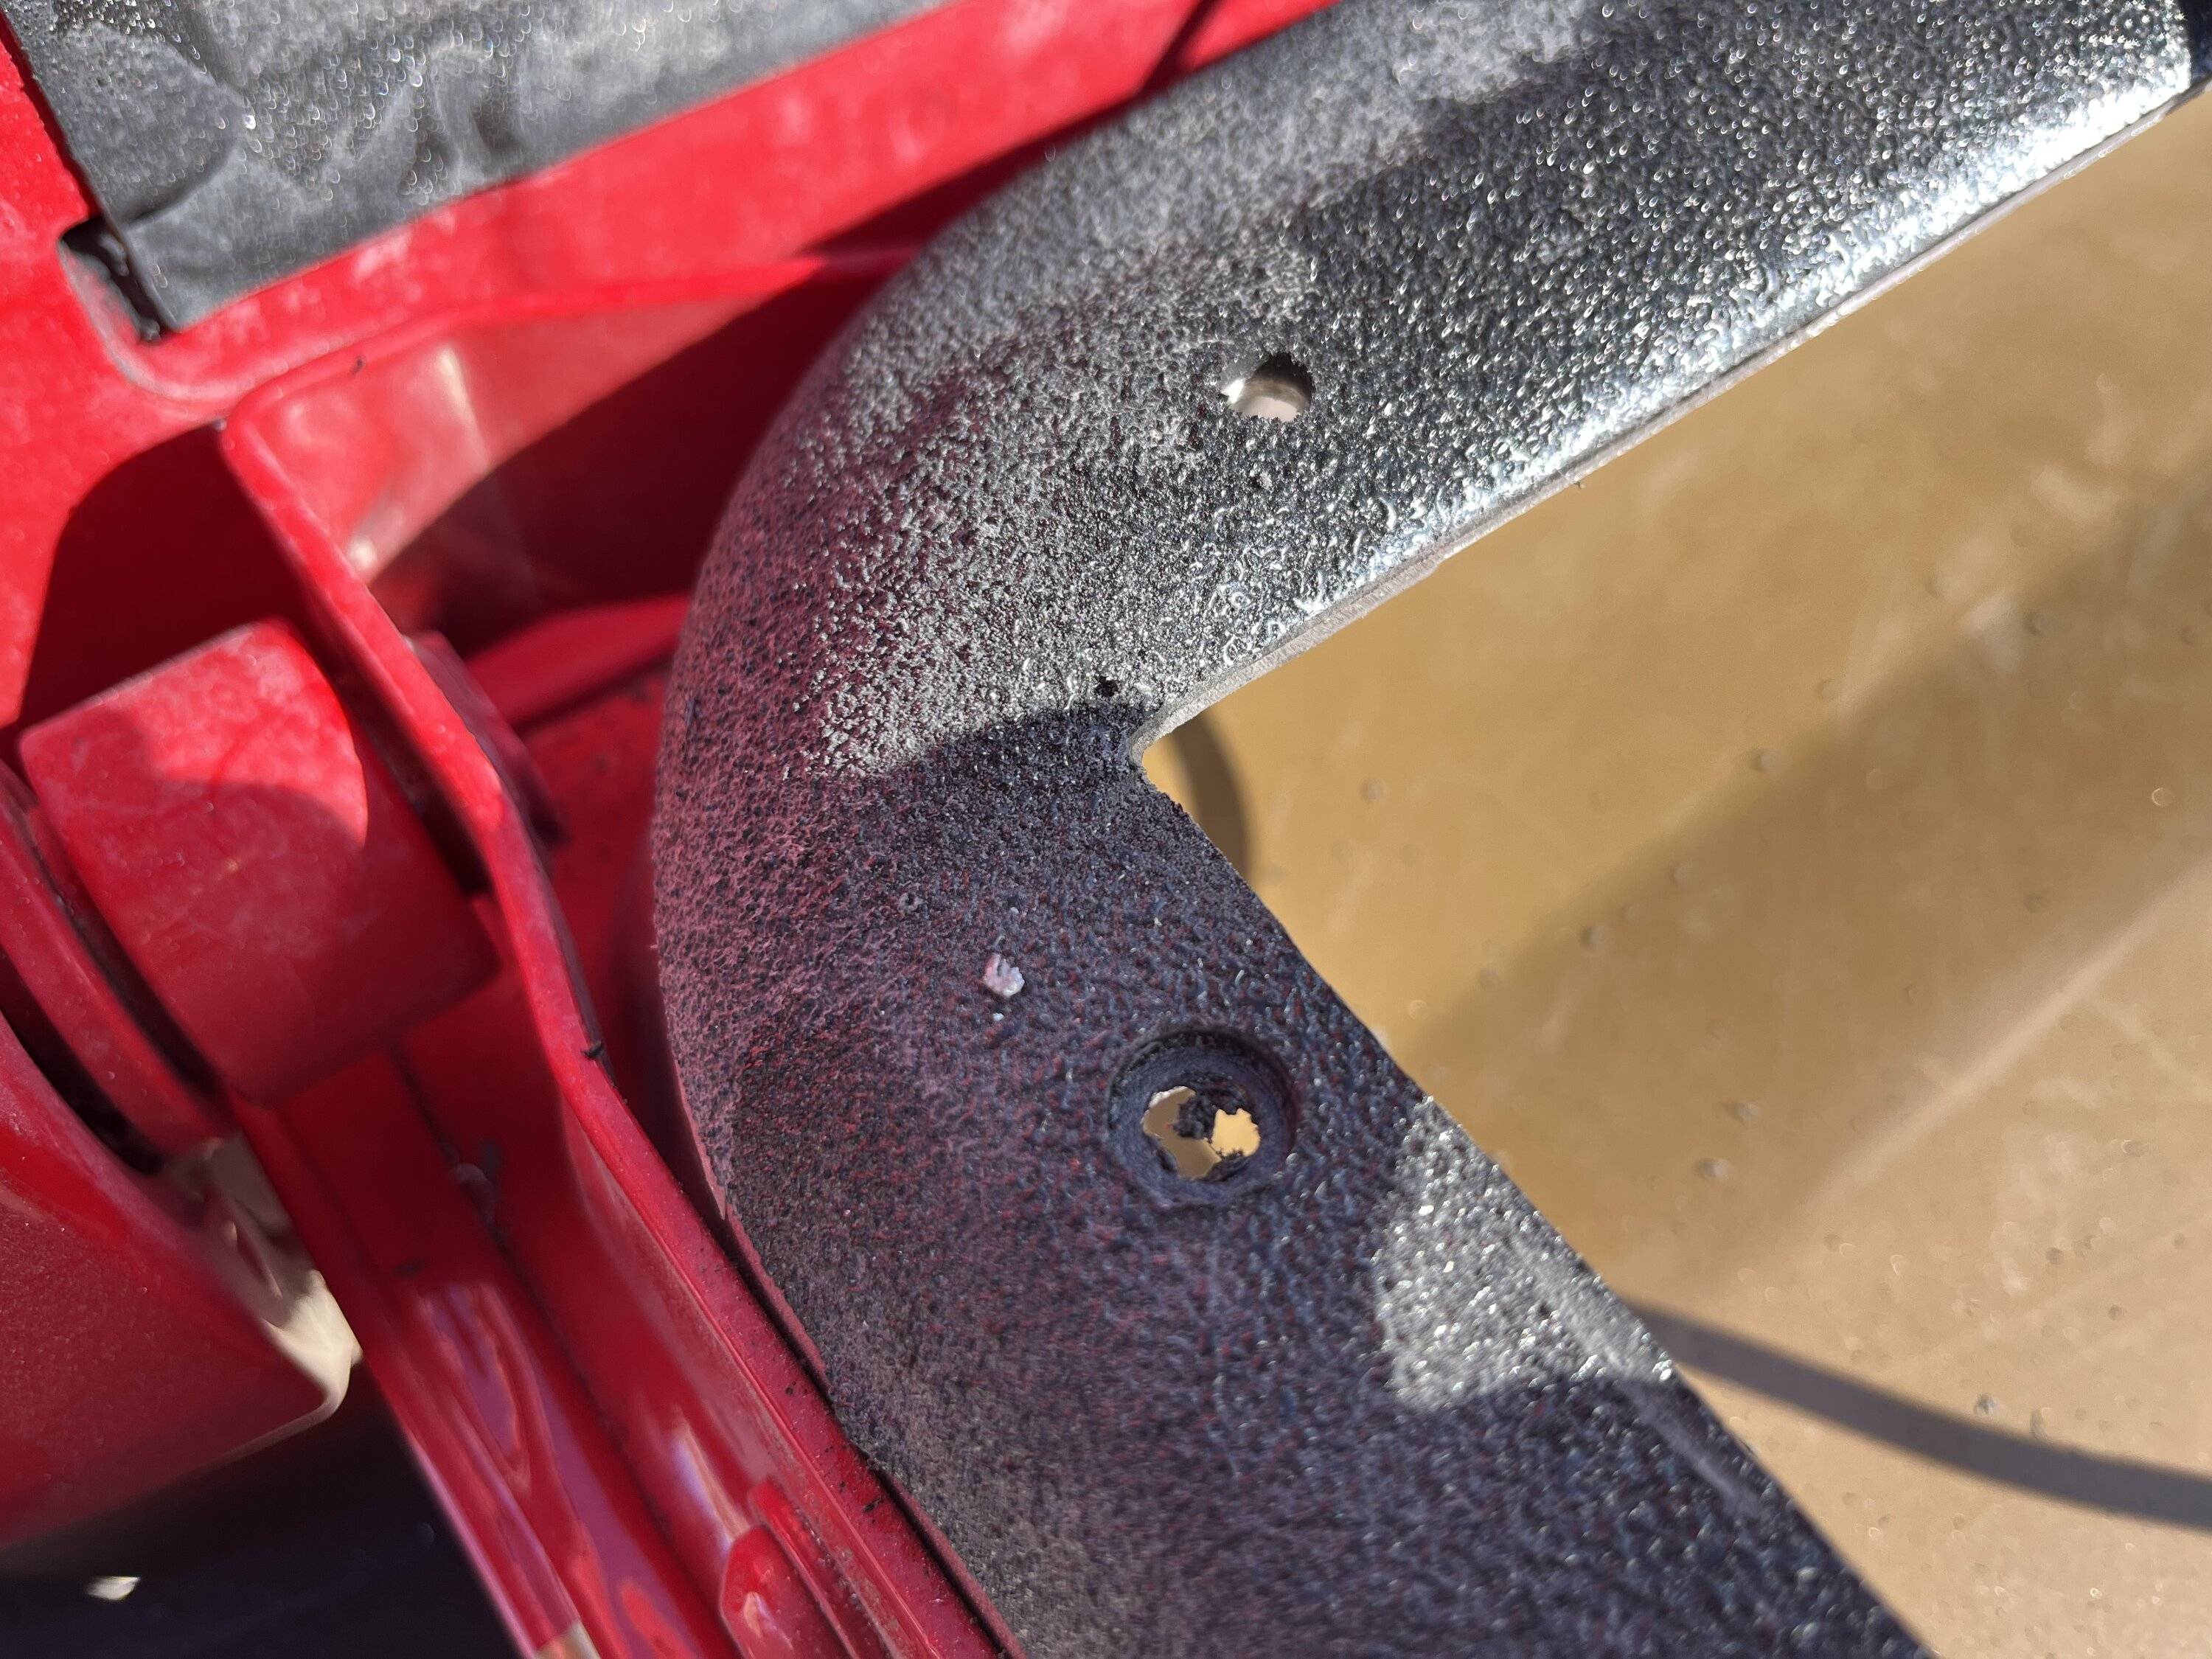
Here's where I had my only issue. Since I wanted to use RivNuts instead of self tapers, I had to remove the box one more time to install them. I thought it was going smoothly, but realized I had a problem. The RivNuts I had weren't able to seat properly due to the bedliner! It was too thick, and the RivNuts were not crushing on the back side of the sheetmetal! You could pop them out by hand. :swear:

IMG_9321.JPG


Luckily I was able to think of a solution. I went into my toolbox and found my Dremel set. I attached a cylinder shapped sanding stone that was approximately the same size as my RivNuts. With the Dremel, I was able to sand down the bedliner until I hit the aluminum surface. With some washers on my RivNut tool, I was able to seat the RivNuts on the sheetmetal through the now counterbored holes, and able to get them to bite properly. I was able to continue with my install. Only took 1 hour to figure that out. ?

IMG_9327.JPG


IMG_9326.JPG


Removed the plastic tailgate trim to install the rivets at the top of the bed.

IMG_9323.JPG


Counter bored and riveted all 20 something holes, and dropped the box in. Fit perfectly!

IMG_9336.JPG


IMG_9337.JPG


Some detail pics!

IMG_9339.JPG


IMG_9340.JPG


IMG_9341.JPG


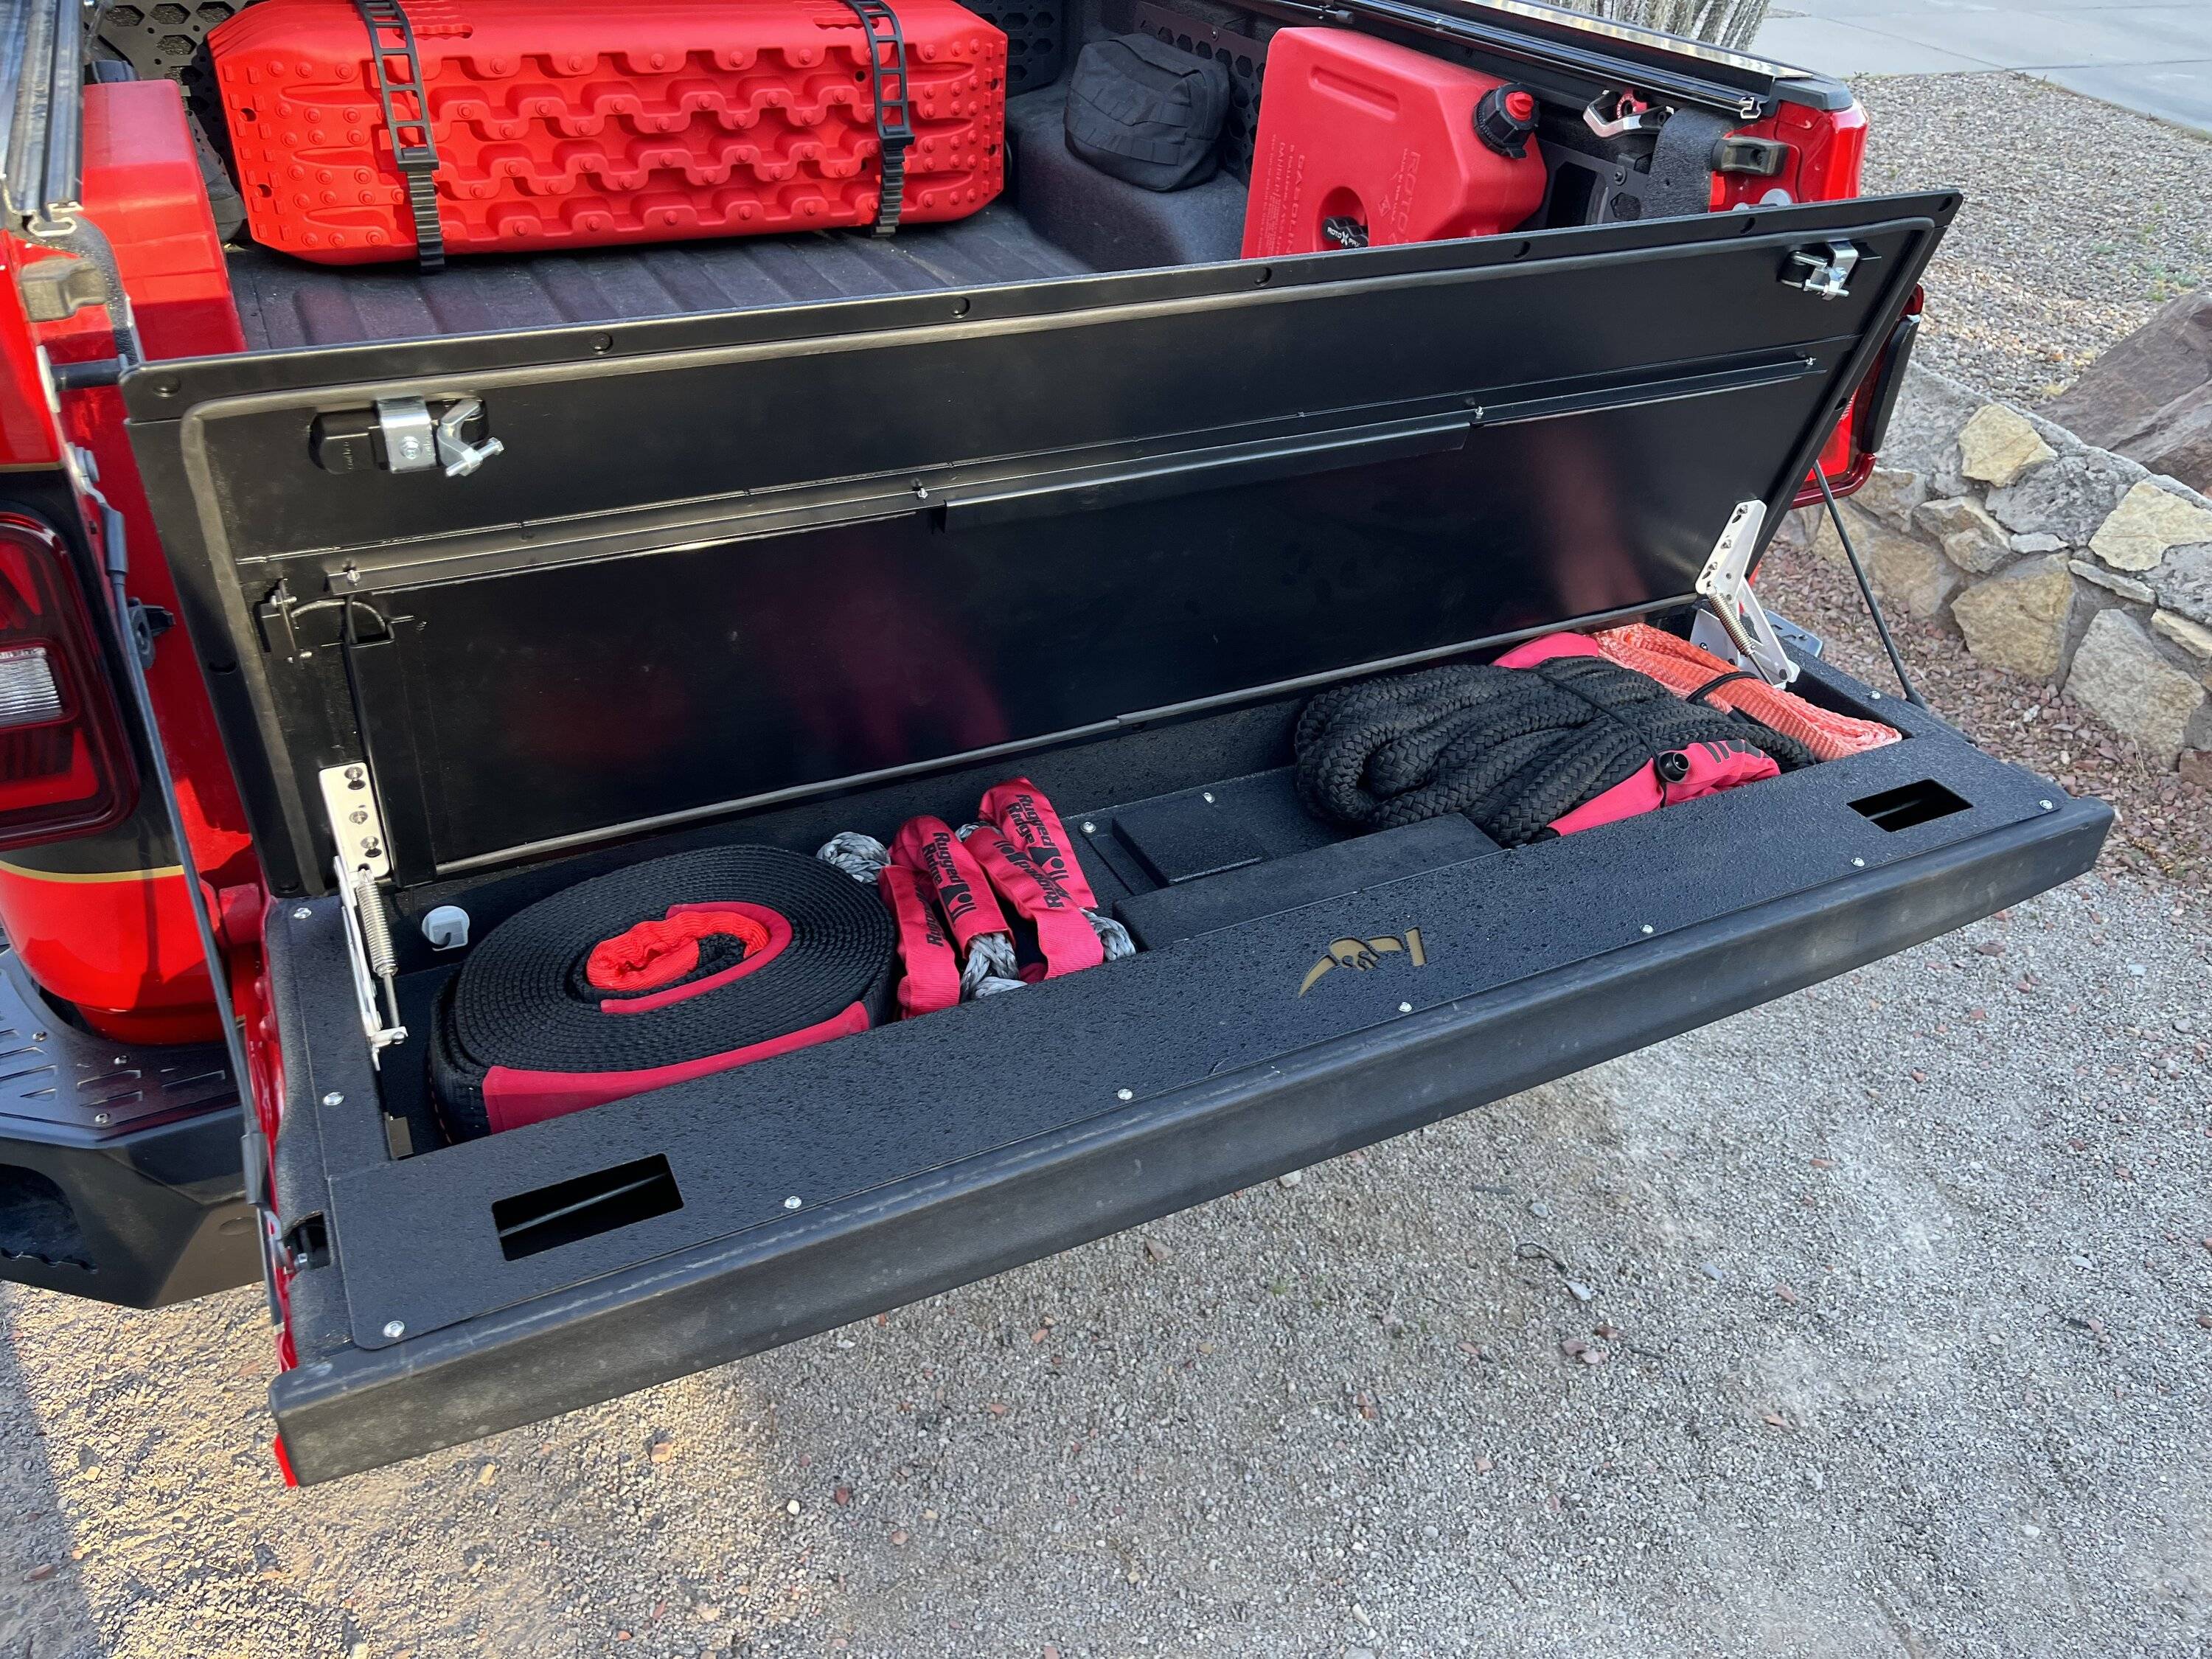
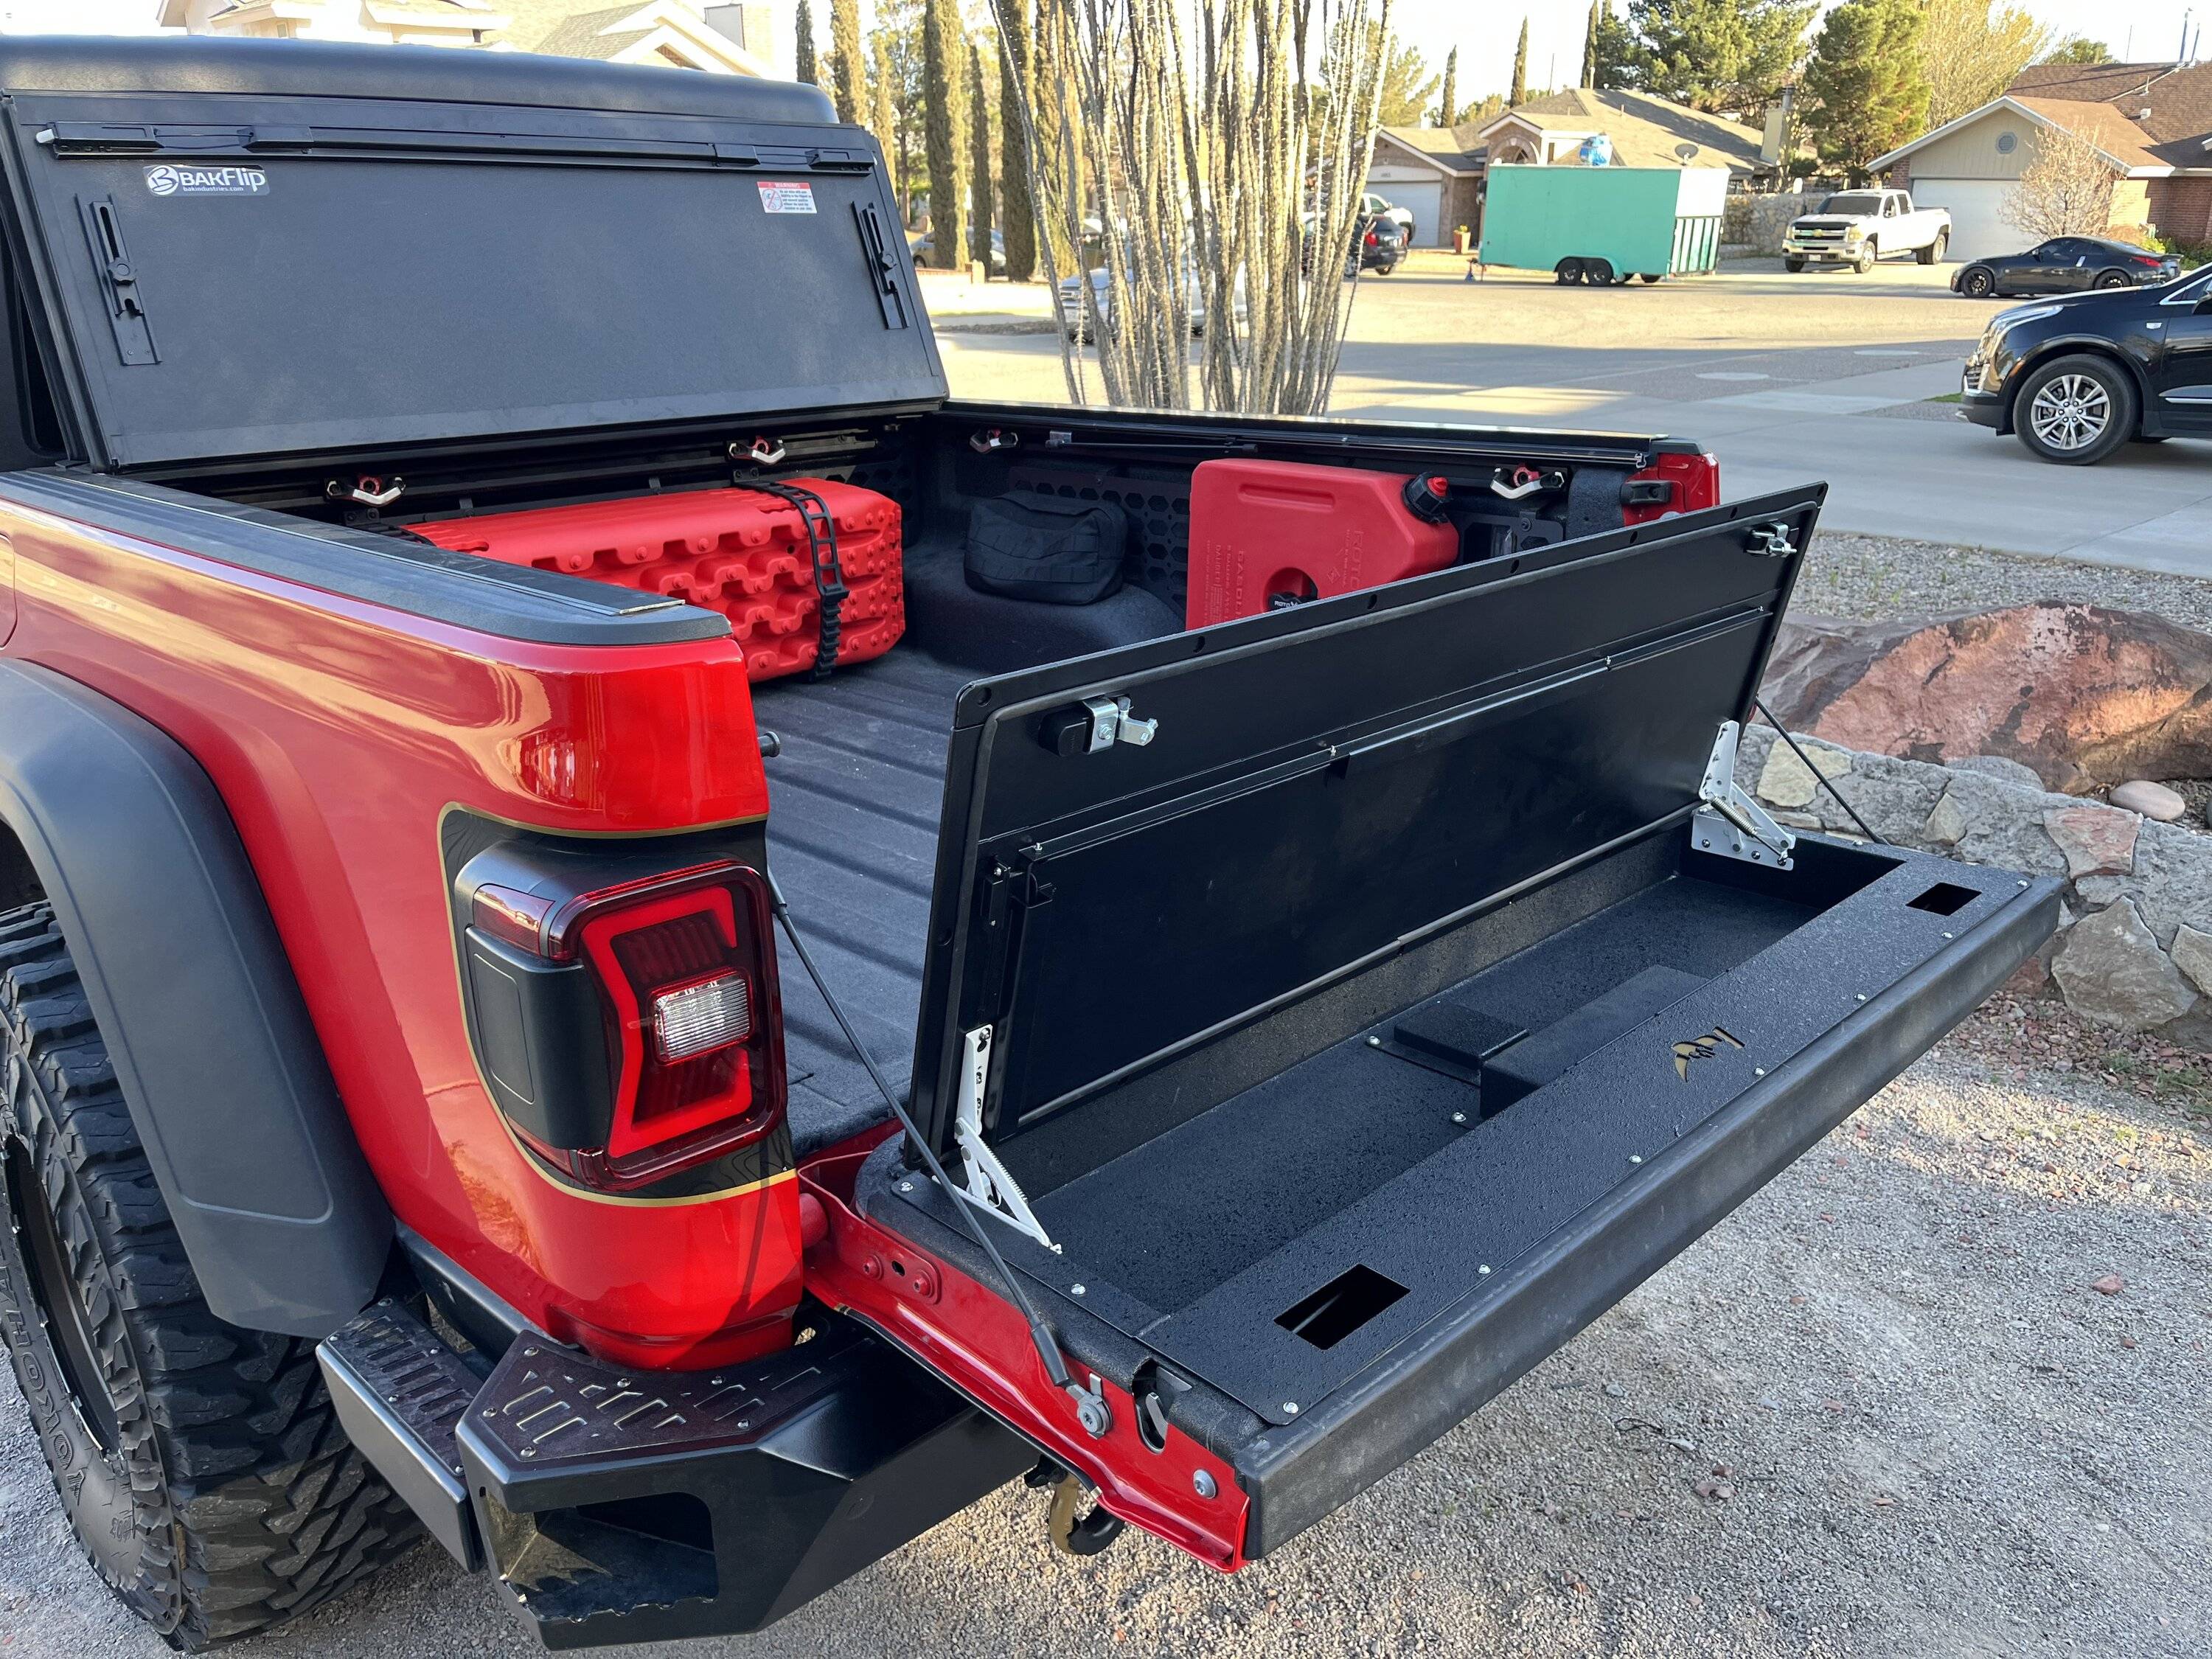
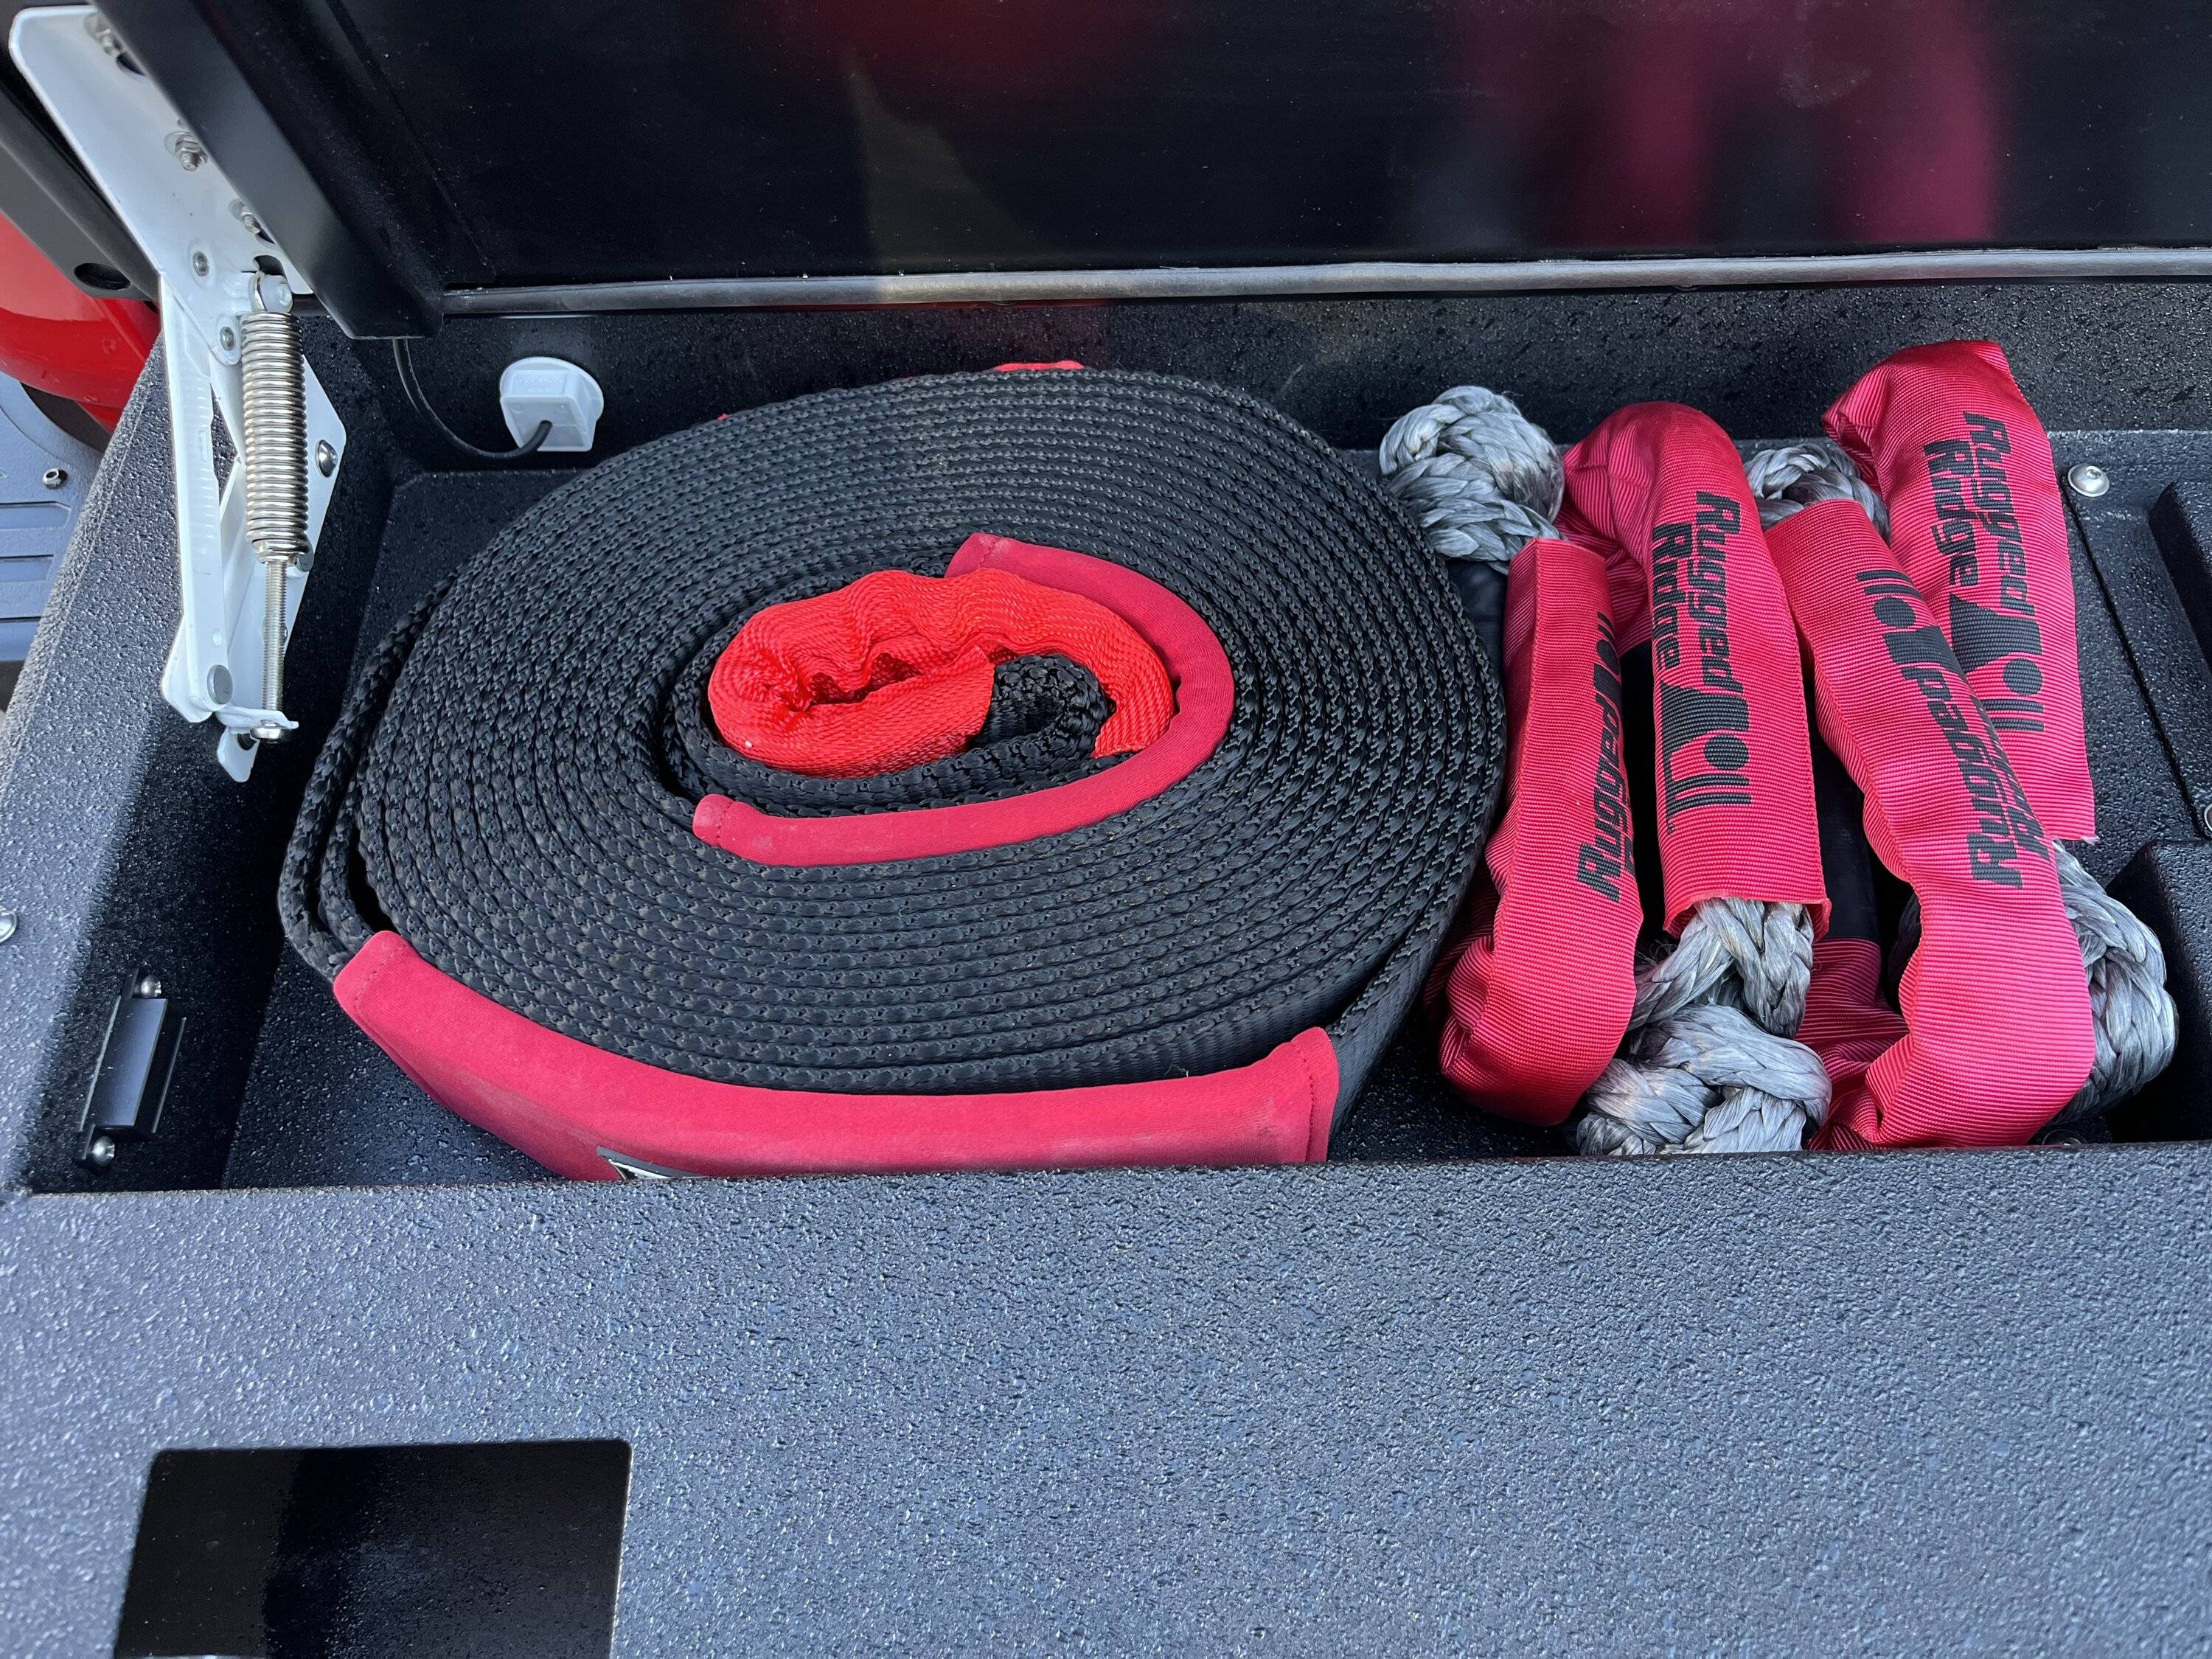
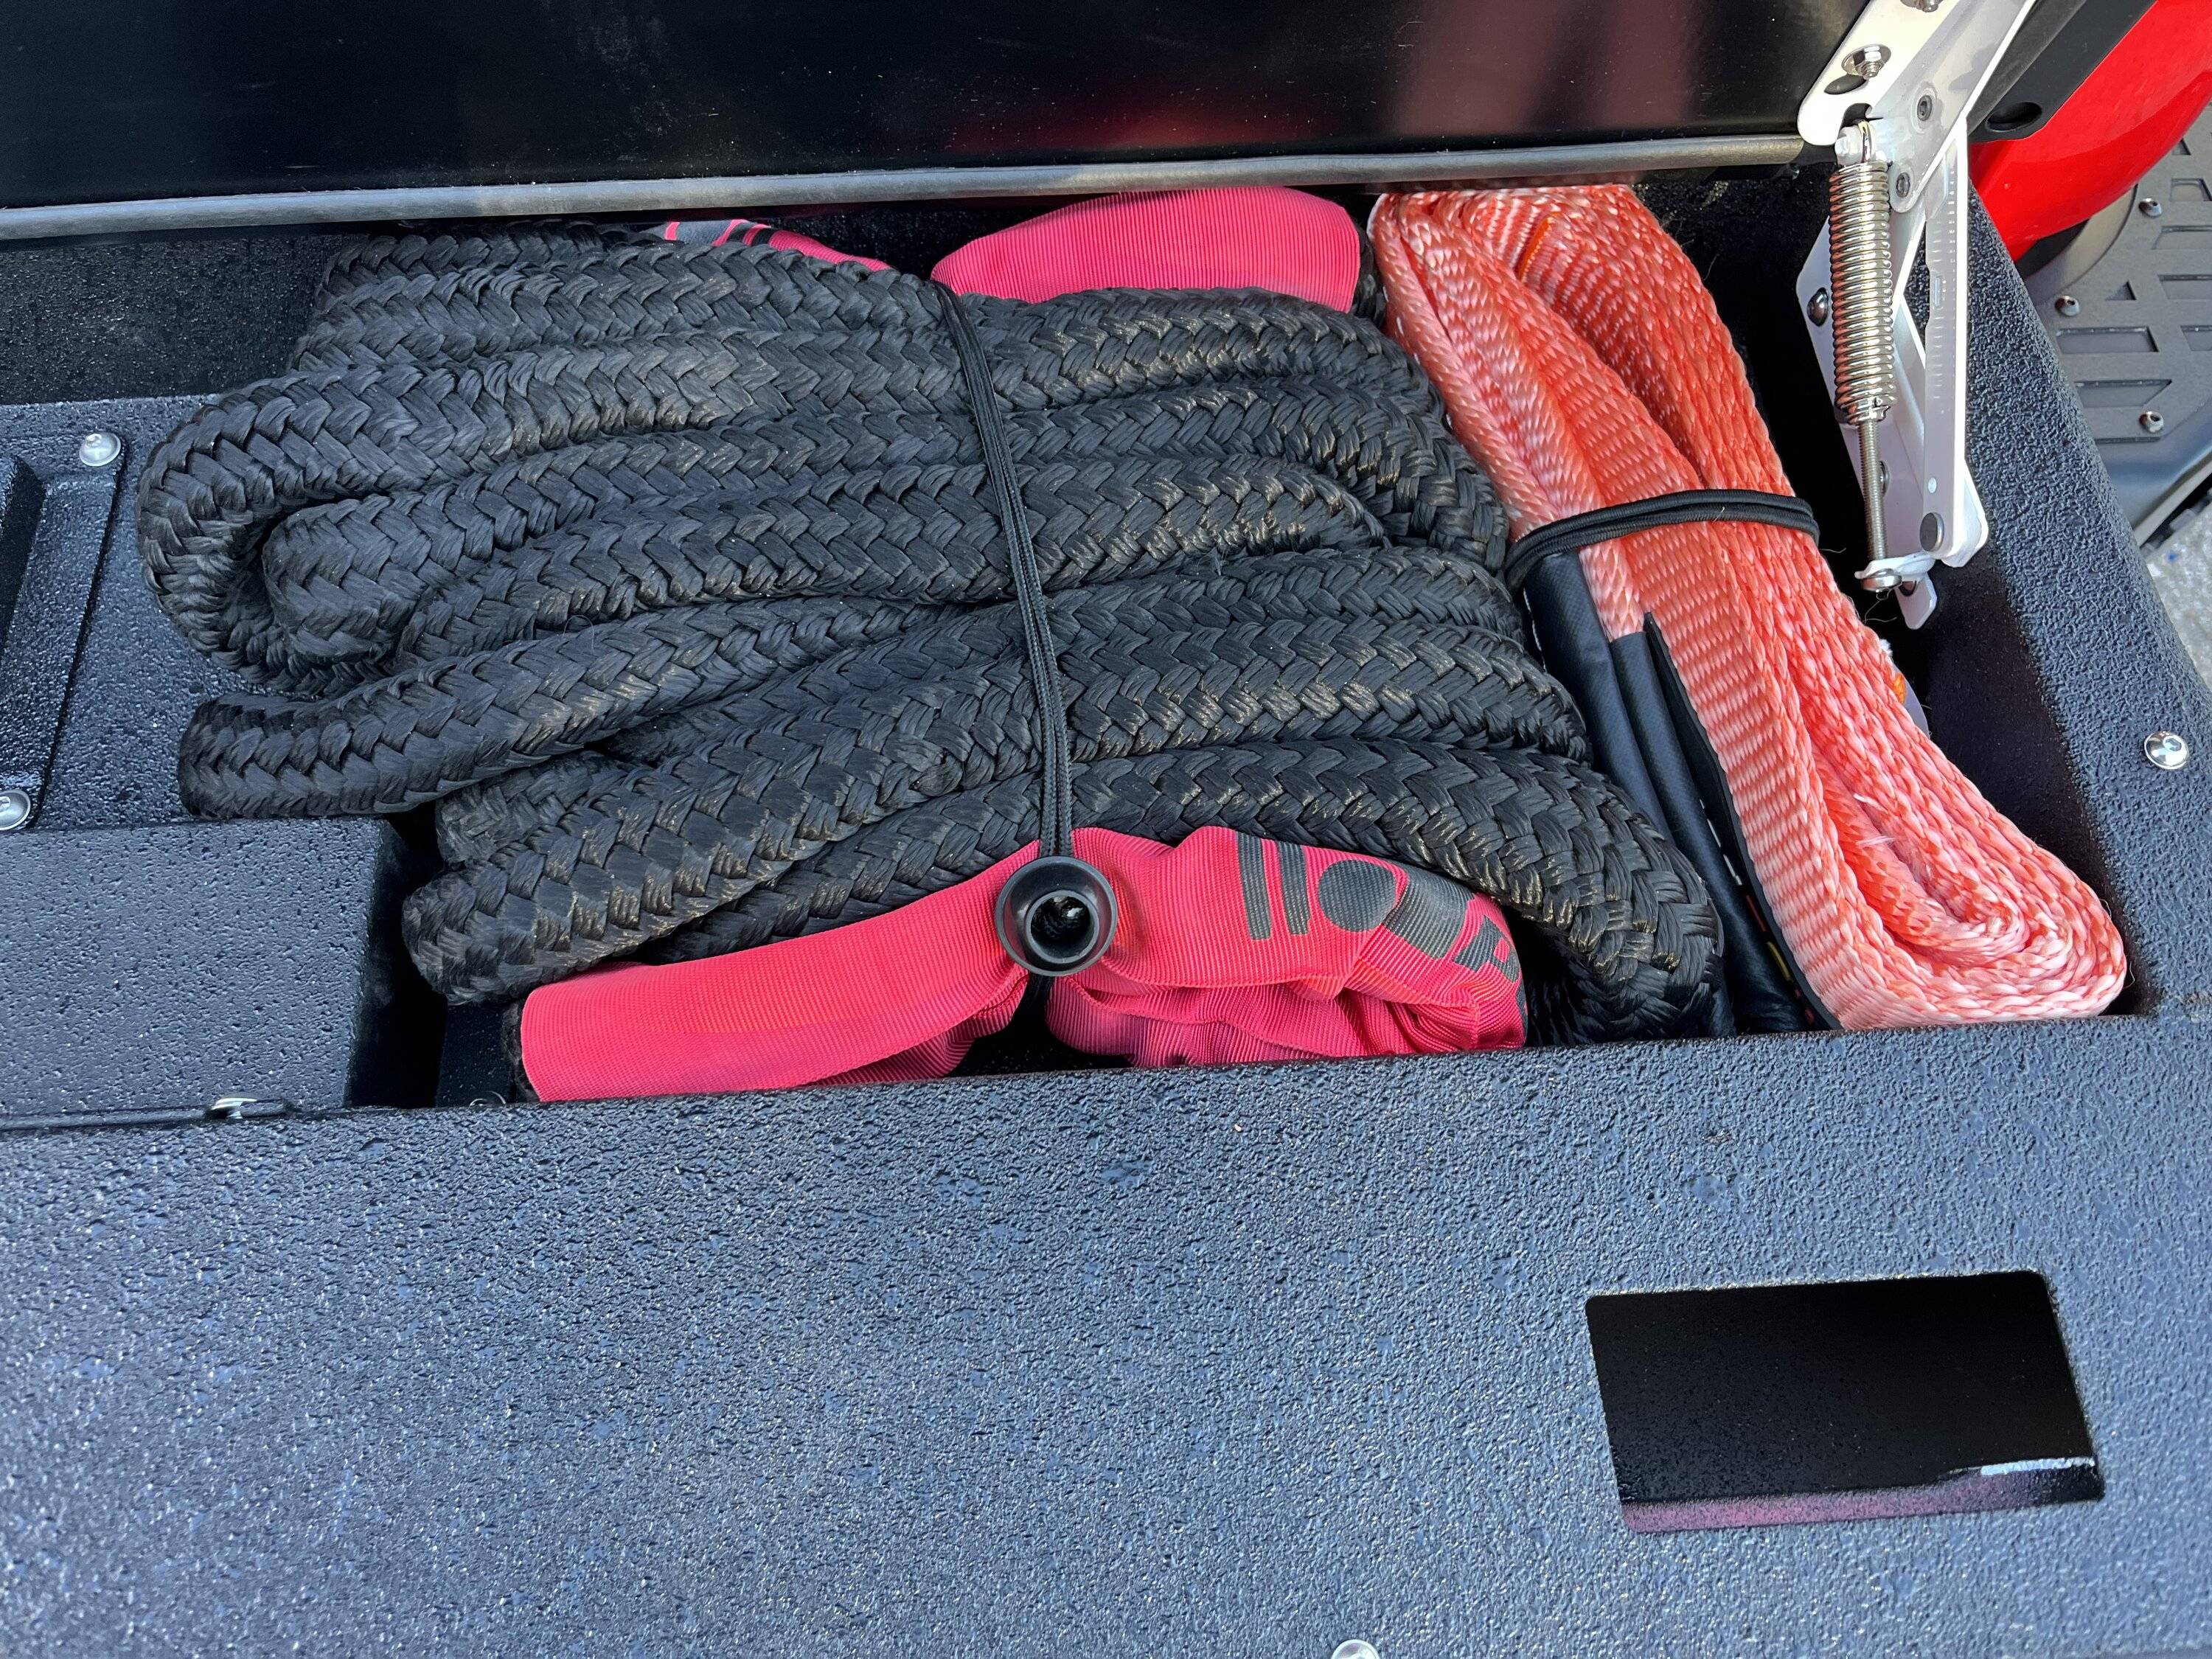
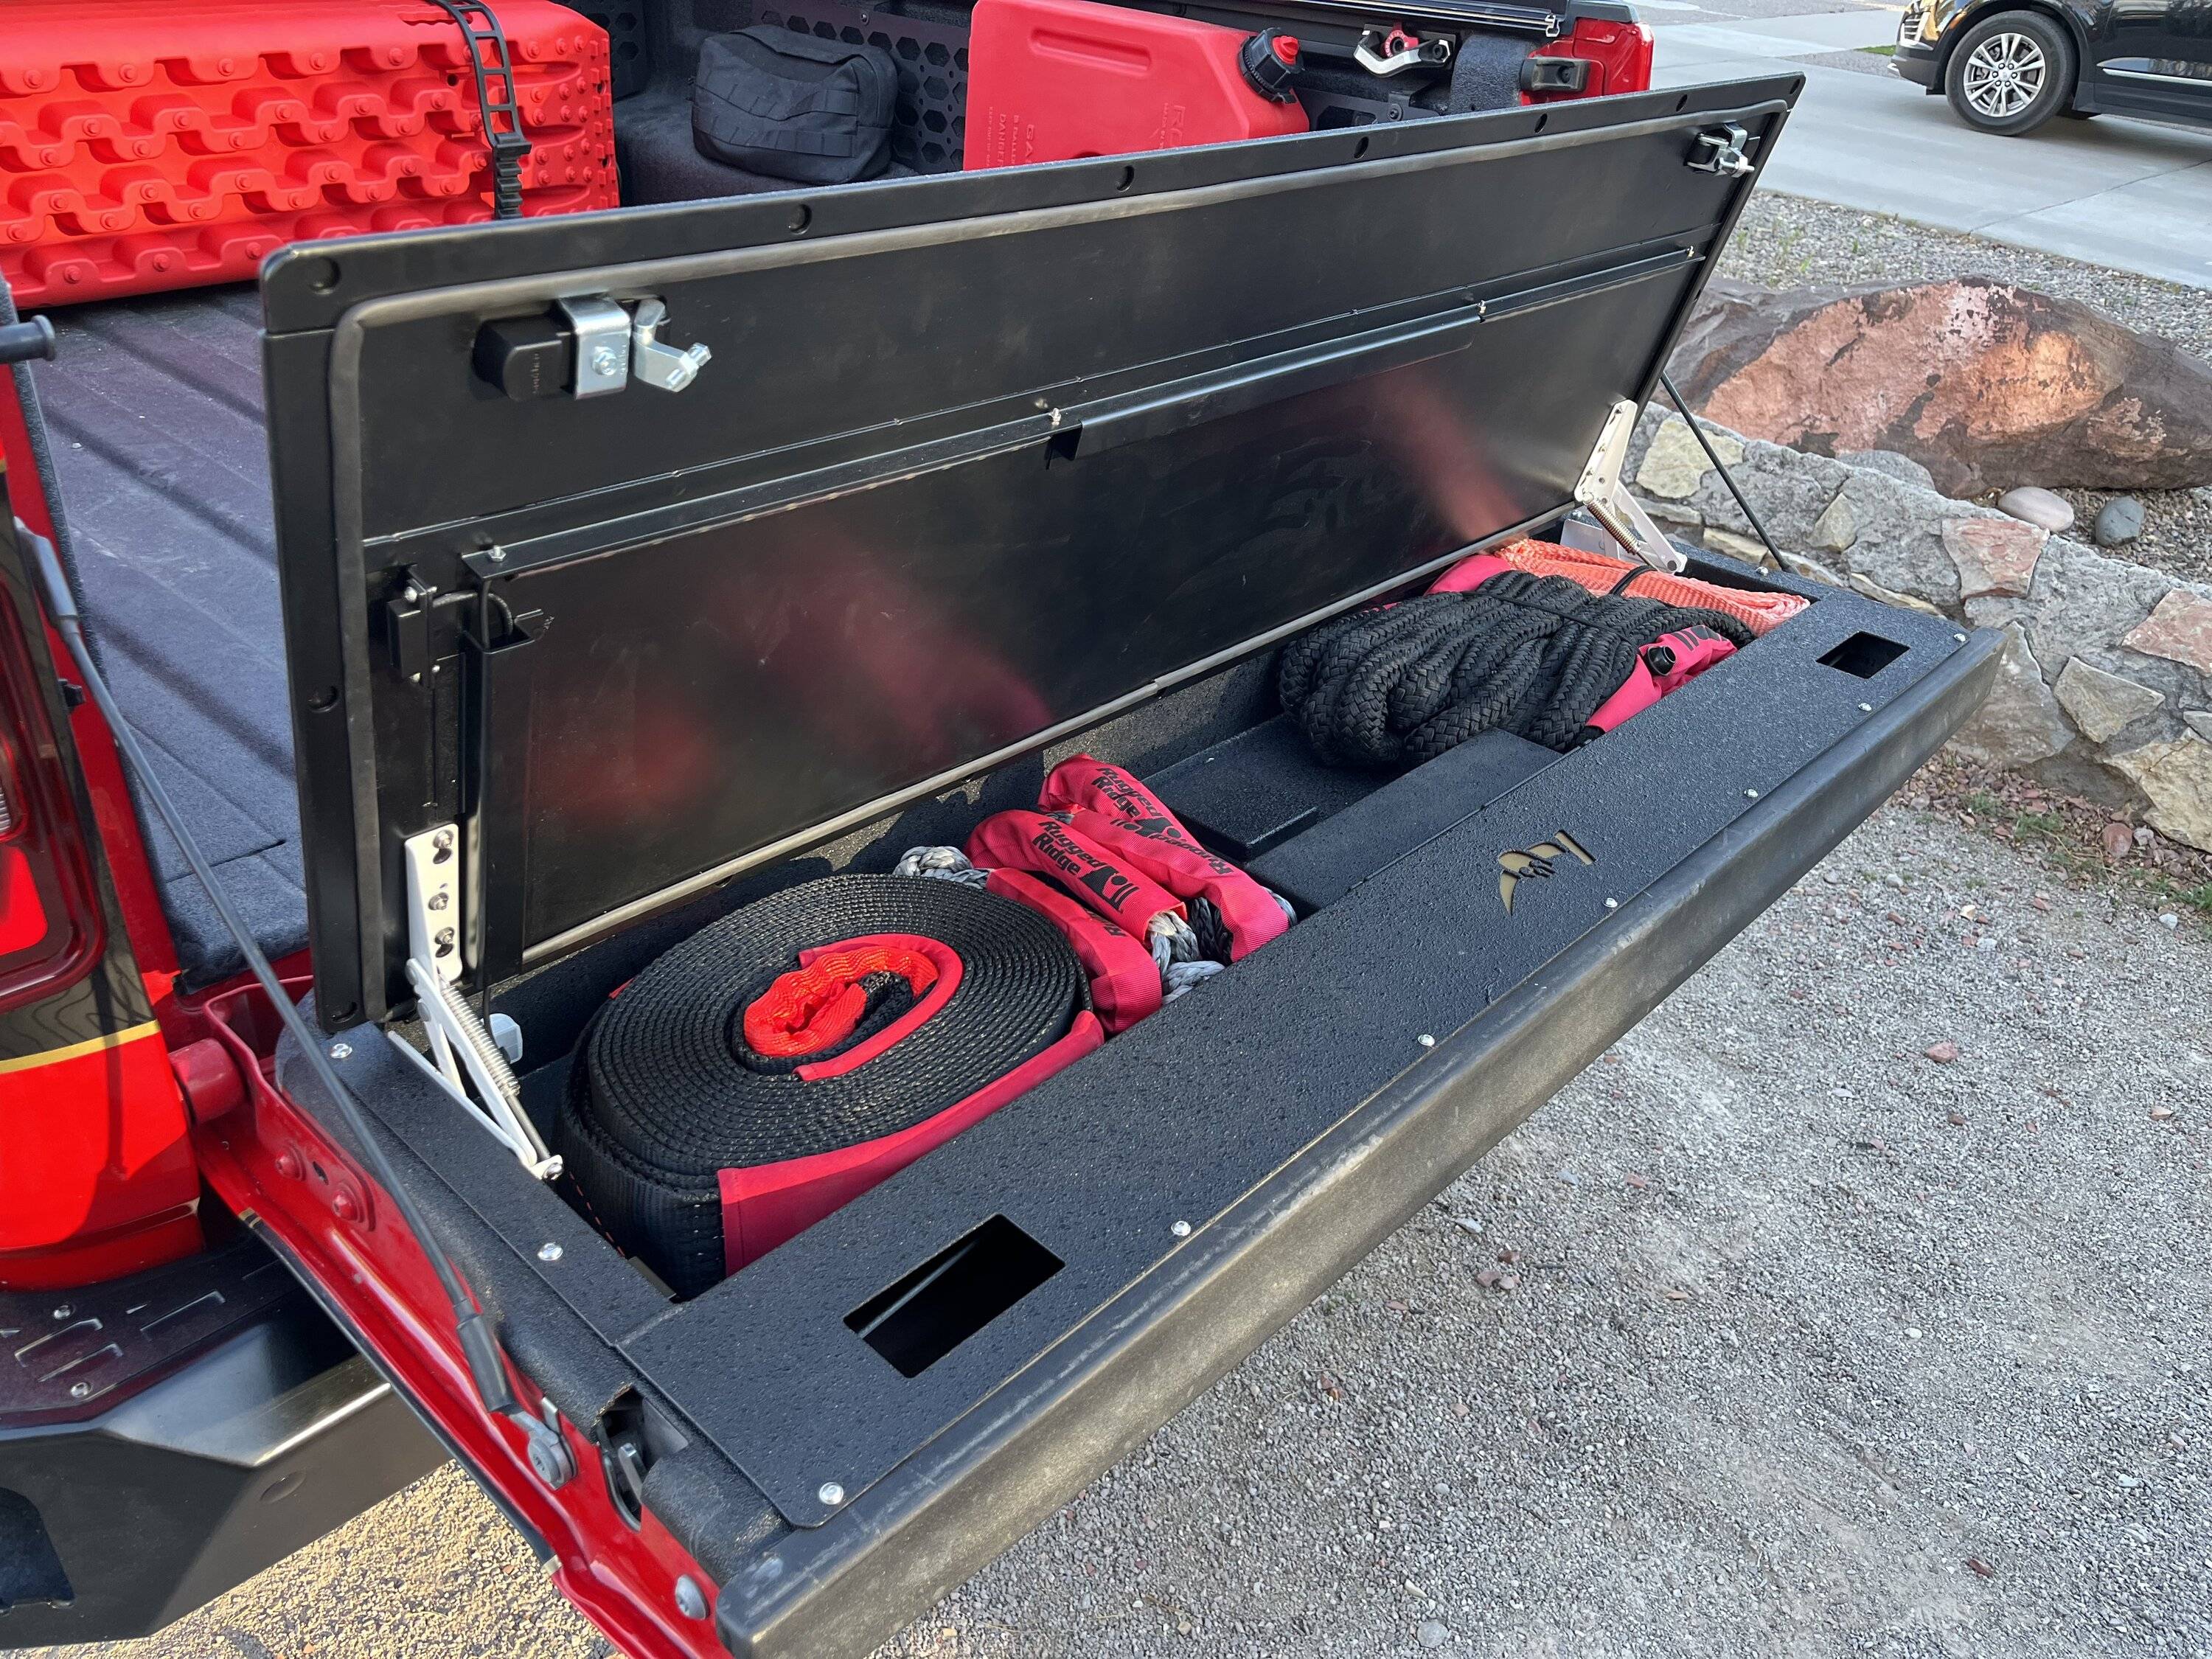
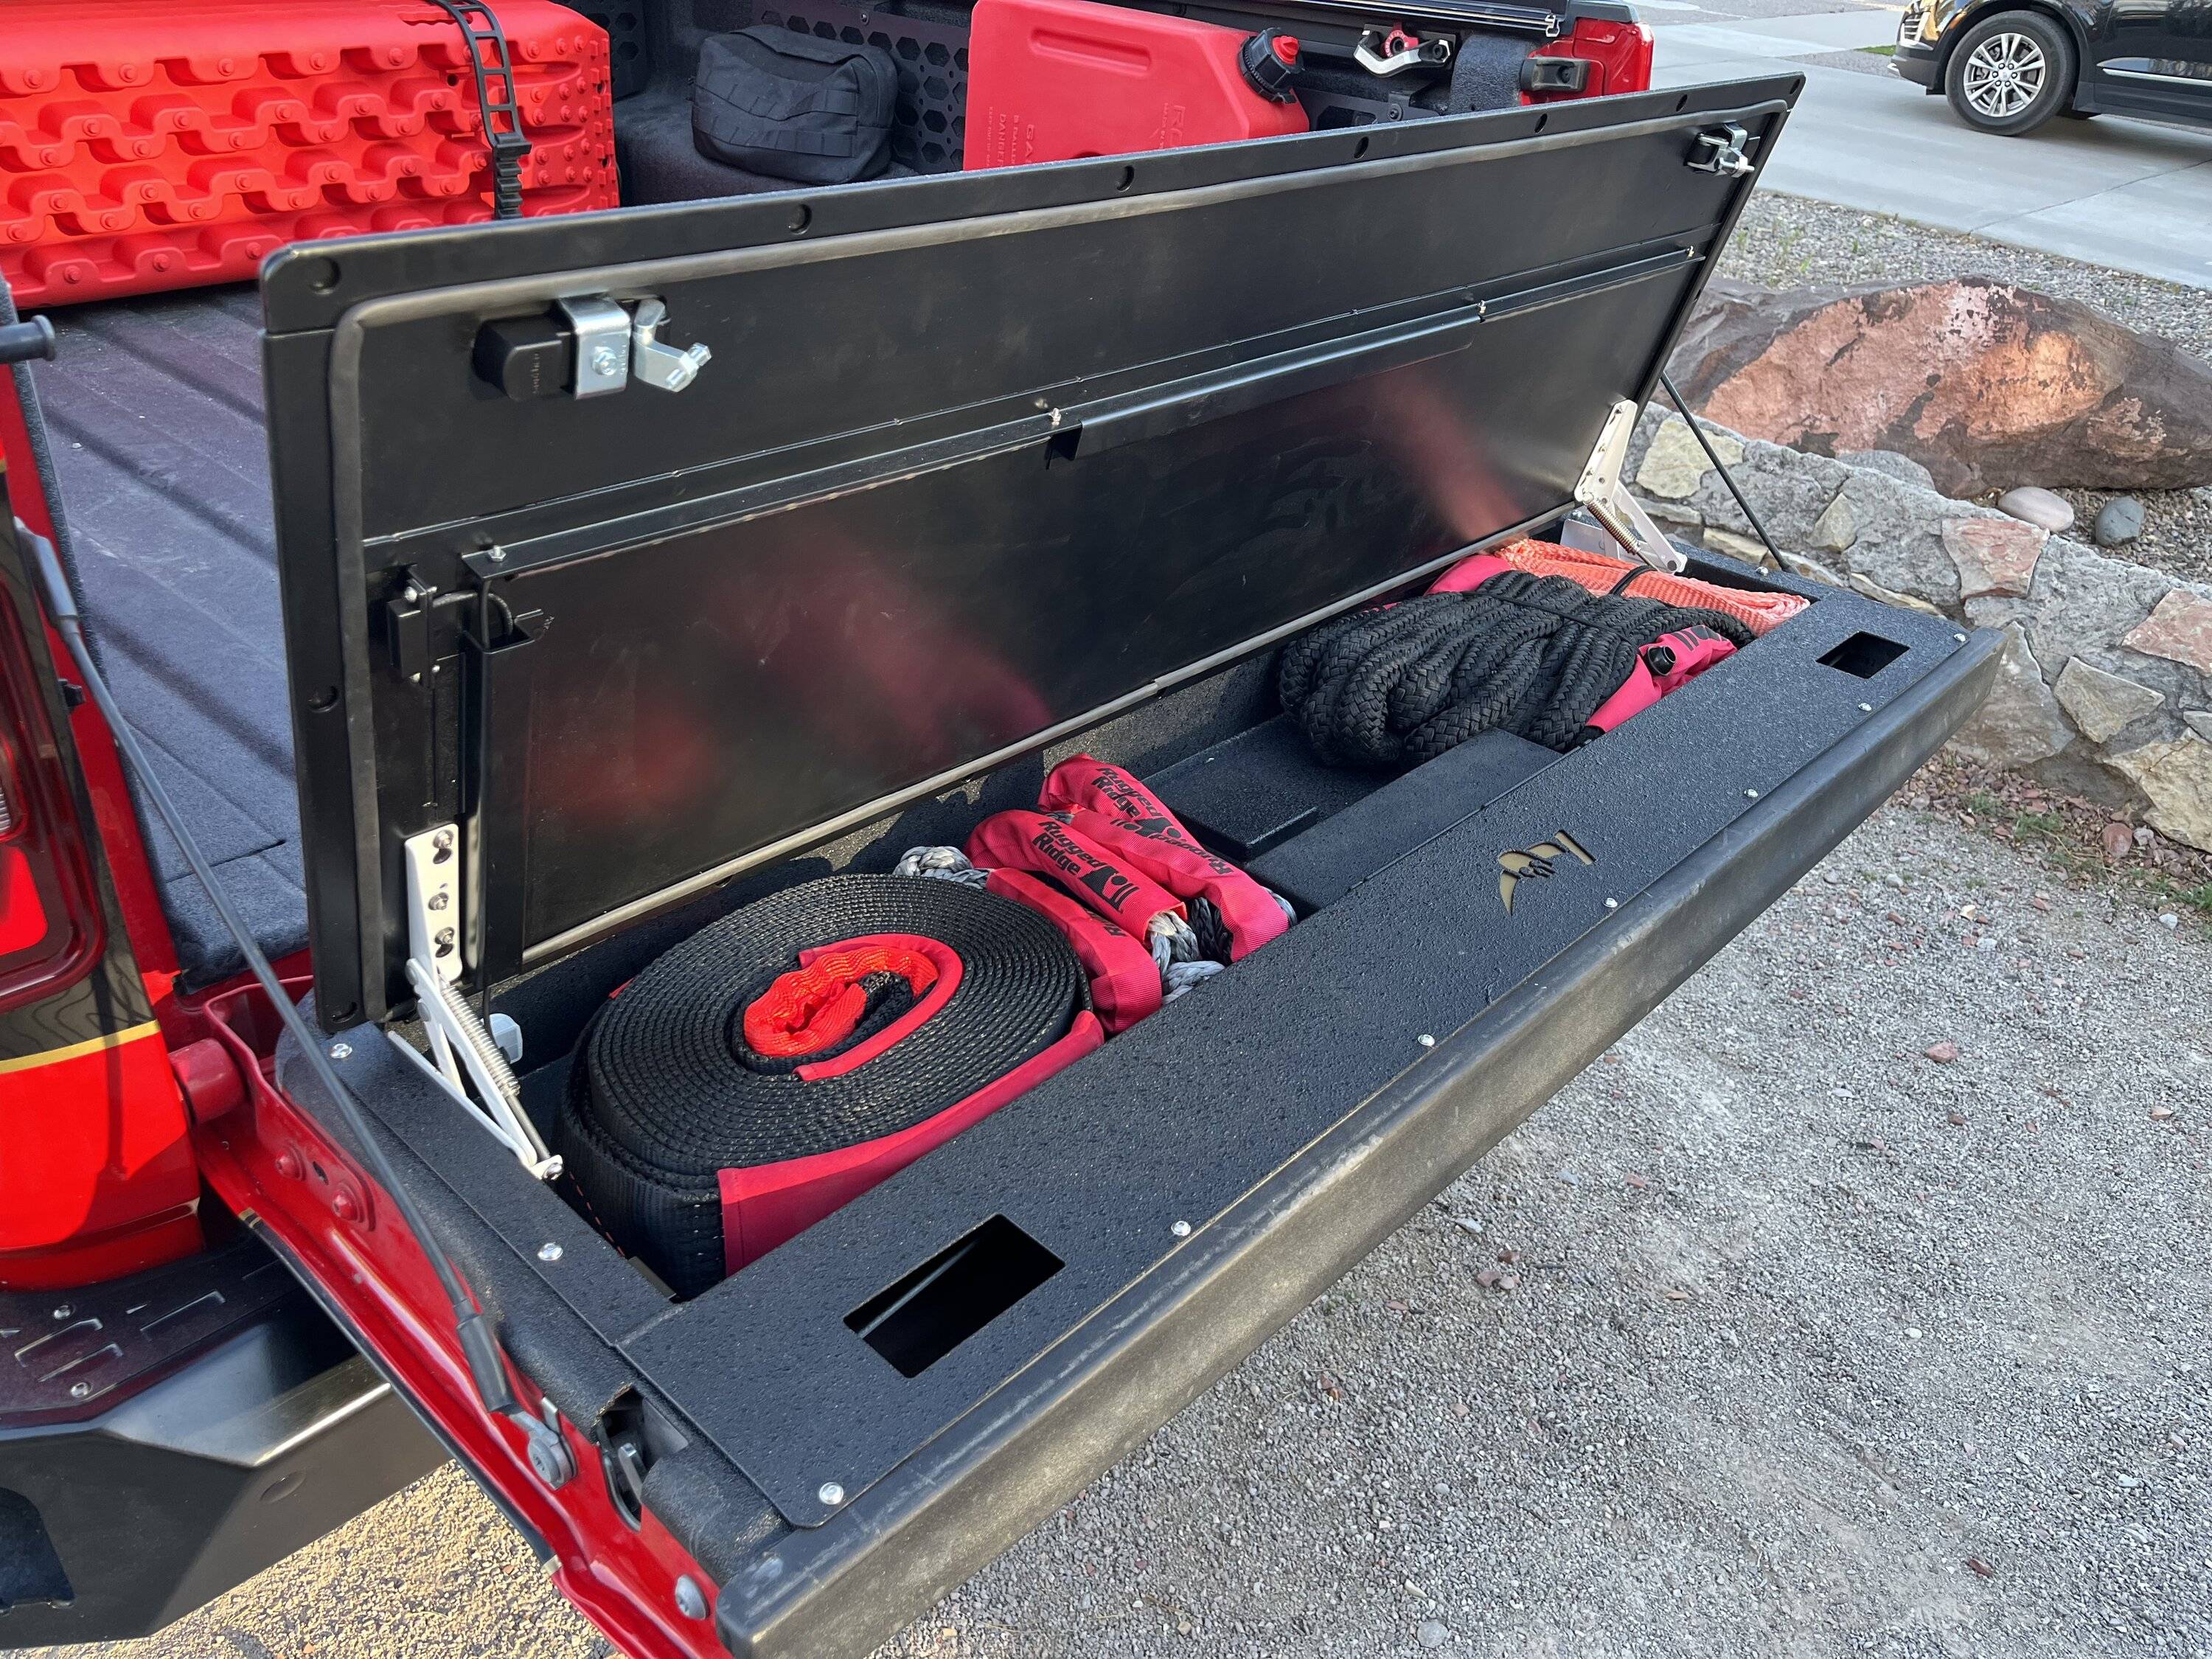
Took all my (soft) recovery gear from the back seat, and placed it in the box. Pretty much filled it up instantly, but it's such a perfect place for these things.

IMG_9346.JPG


IMG_9347.JPG


IMG_9349.JPG


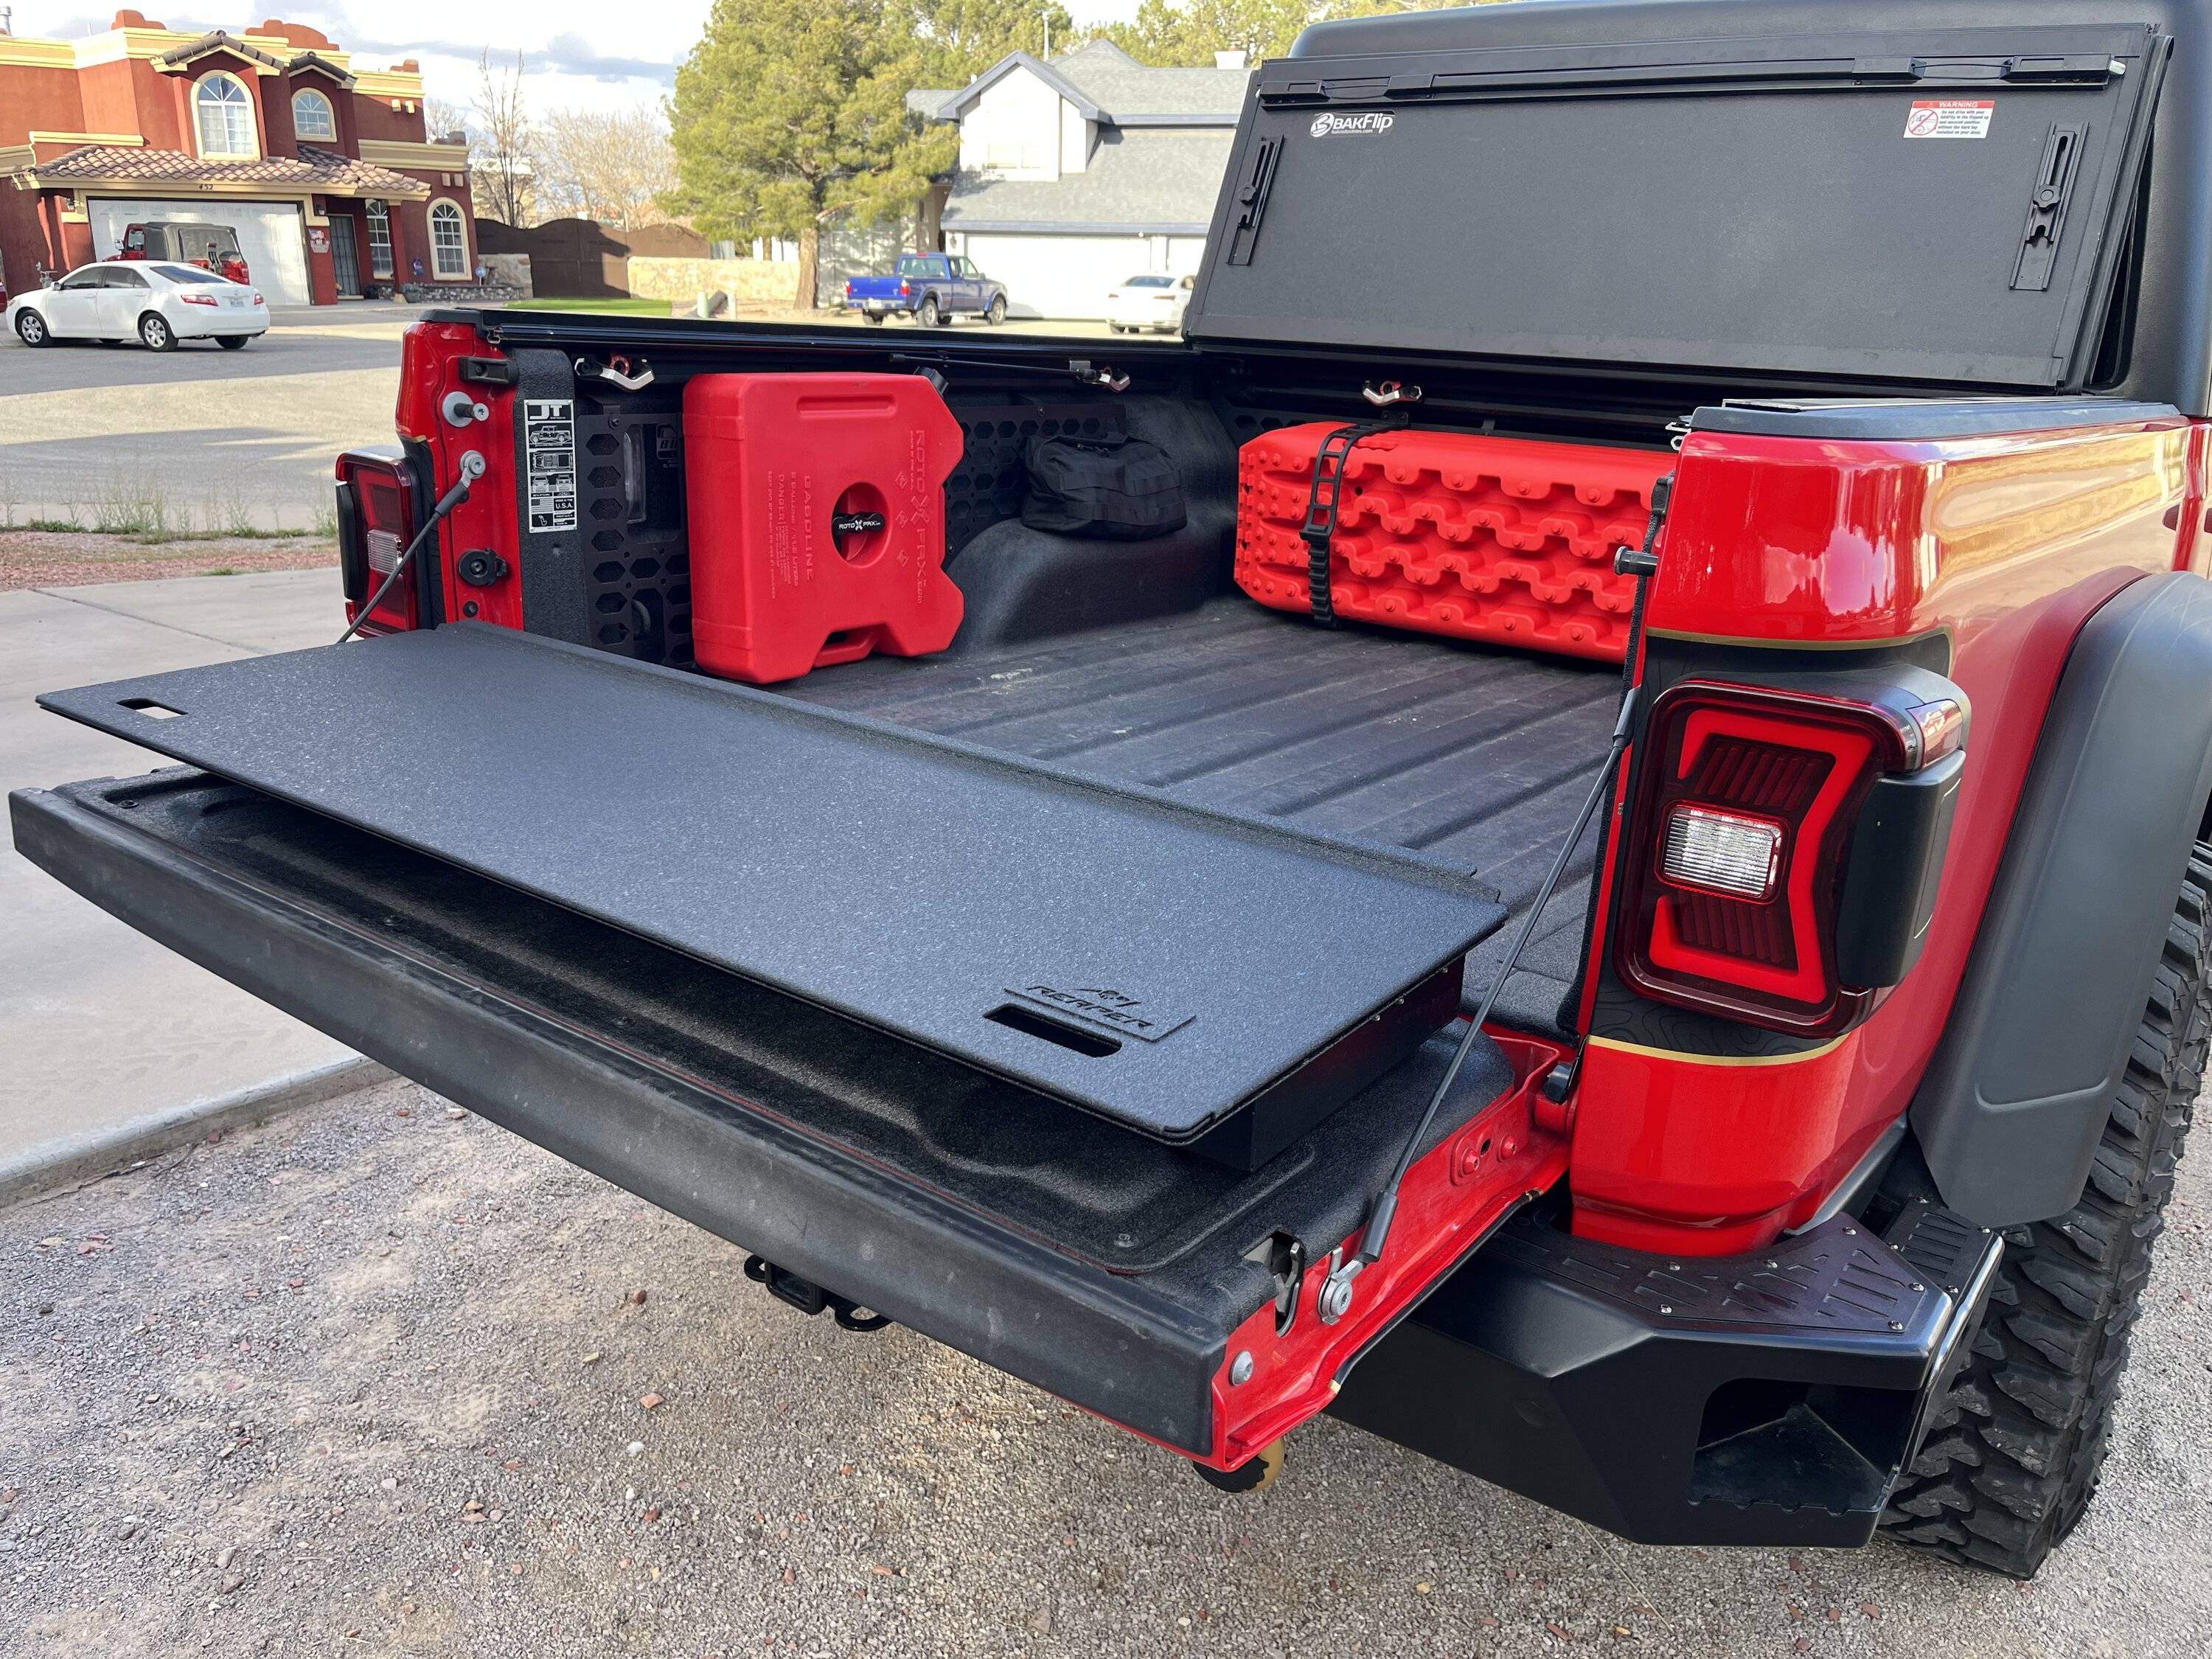
And the overall situation with the tailgate. It's VERY tight, but it does close nicely. I love how well the bedliner matches and blends into everything else.

IMG_9363.JPG


IMG_9362.webp


Notes:

The tailgate with gear, is much heavier, and the stock strut can't handle the weight, so I'll need to look into a stronger replacement.

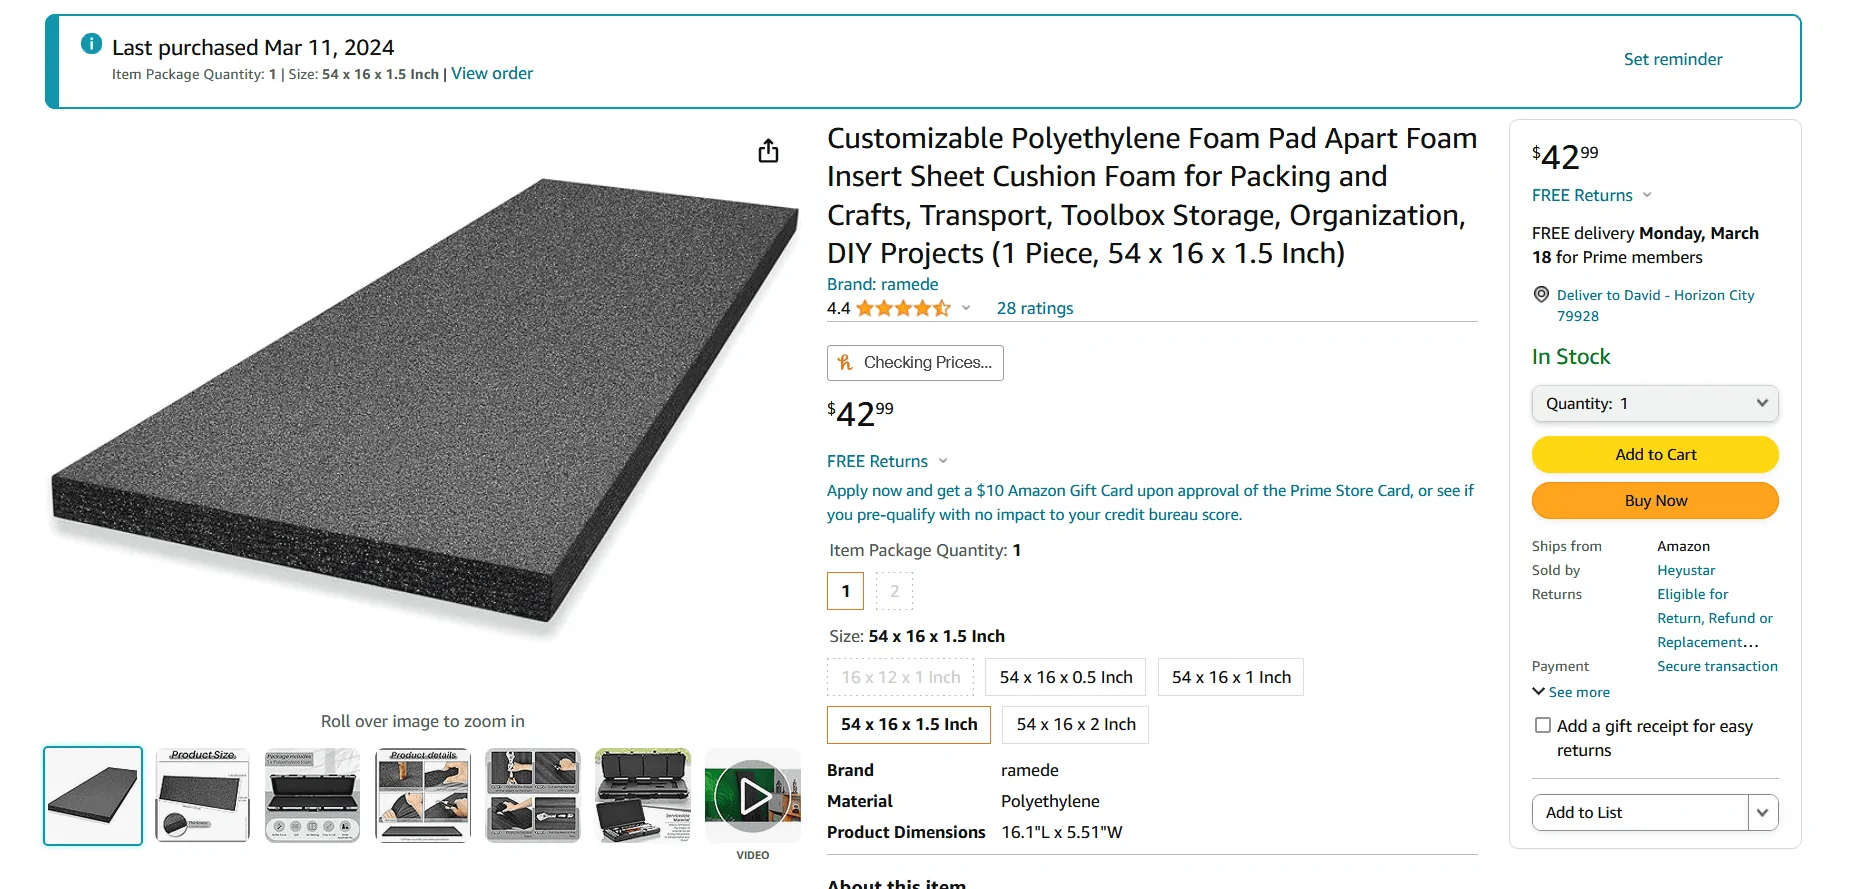
Lost the structure behind the "Jeep" emblem. It is very easy to flex. I'm not sure if it will be a problem, but as long as you don't lean on it, it should be okay. I'm looking into polyethylene foam to fit on the inside of the box and the outer skin to provide more structure. There's a noisy "rattle" as the tailgate rod is free to shake when closing, will also add foam to the foam bumper on the passenger side to remedy that.

Personally, I don't need it to be keyed, so I took note of the company that makes the latches, SouthCo, and I might just order the non-key version of these latches, that also lay flat as well. Just personal preference.

OVERALL:

Rating: 8/10


I'm very happy with the way it turned out! There's some quirks that I need to sort, but I love the additional space! The cutting itself wasn't bad at all, it's just getting over the fact that I was cutting up my truck was the hardest part. Between the molle panels and this tailgate box, I have the under-seat storage available again, which I will most likely fill up with tools.

Would I do it again: Most likely, if I can sort out those quirks that I mentioned above. If I had to do it again, I would leave it for last on the storage mod list, for the following reason:

It's quite a bit of work and money for what is a small increase of storage. It's also semi-permanent, you'll need to replace the entire tailgate if you have any regrets or have any major issues.

-----------------------------------------------------------------------------

TLDR:


(3/10/2024)
While I'm happy with end result, this mod isn't for everyone. It's quite a bit of work and money for what is a small increase of storage. It's also semi-permanent, you'll need to replace the entire tailgate if you have any regrets or have any major issues.

Rating:

Part quality: 9/10, Install: 7/10, Cool factor: Freaking dig it!
(Summary at the bottom: Overall rating: 8/10: Feel free to ask any questions!)

The day has arrived, I've lost my marbles and cut open my truck with an angle grinder!

Jeep Gladiator I cut a giant hole in my tailgate! Reaper Off-Road Tailgate Box install and write-up. IMG_9324.JPG


Now I have my reasons for this, as I'll explain bellow. It was so I could do this!

Jeep Gladiator I cut a giant hole in my tailgate! Reaper Off-Road Tailgate Box install and write-up. IMG_9345.JPG


------------------------------------------------------------------------------------

I have a small collection of recovery gear that I use semi-regularly, especially when the weather gets bad. 90% of the time, it's locals who take their street car/truck through the desert as a "shortcut" and get stuck in the soft sand. Because of this, my most used item is my kinetic rope. It's real easy to throw it on a soft shackle, and gently remove most stuck vehicles.

Jeep Gladiator I cut a giant hole in my tailgate! Reaper Off-Road Tailgate Box install and write-up. IMG_9239.JPG


BUT, since it's typically used during bad weather, it tends to get muddy. This was a problem as water soaks into it, and stinks up the cab/gets the back of the seat dirty when it would get stored in the interior storage bins. I wanted to move it to the bed for these reasons, BUT, without having to unbutton it from the typical "molle panel" mount storage.

Enter the Reaper Off-Road tailgate box.

Jeep Gladiator I cut a giant hole in my tailgate! Reaper Off-Road Tailgate Box install and write-up. IMG_9272.JPG


I liked this idea because it would give me storage space that wouldn't compromise interior comfort/space (overhead molle mounts), and it would leave me room on my bedside molle panels for "less used" gear, but gear that I want to carry off-road. Plus, this option leaves my recovery gear more accessible than both options, and will allow me to store gear right after it's been used without worrying about getting other items dirty with mud/bog water.

Biggest downside: You have to cut open your tailgate.

Lets begin.

Between ordering the box and it's arrival, it took exactly 7 days. Very happy with how quickly that went, and the condition the box arrived in. It was well packed, with no missing parts or damage of any kind.

Jeep Gladiator I cut a giant hole in my tailgate! Reaper Off-Road Tailgate Box install and write-up. IMG_9259.JPG


Jeep Gladiator I cut a giant hole in my tailgate! Reaper Off-Road Tailgate Box install and write-up. IMG_9260.JPG


Jeep Gladiator I cut a giant hole in my tailgate! Reaper Off-Road Tailgate Box install and write-up. IMG_9264.JPG


Jeep Gladiator I cut a giant hole in my tailgate! Reaper Off-Road Tailgate Box install and write-up. IMG_9265.JPG


Jeep Gladiator I cut a giant hole in my tailgate! Reaper Off-Road Tailgate Box install and write-up. IMG_9268.JPG


Next part was sizing up the box to the truck. I wanted to get a rough idea in my head on how much I had to work with in regards to the cut profile. The reasons for this is this box uses self taping screws to secure it in place. I personally dislike self tapping screws, and opted to order my own hardware, stainless M5 button head bolts, that would be secured via RivetNuts. Thanks to the overhang on the box, I was sure that RivetNuts would work.

Jeep Gladiator I cut a giant hole in my tailgate! Reaper Off-Road Tailgate Box install and write-up. IMG_9277.JPG


I went ahead and put the box away, as it was delivered later in the day, so I would have to save the actual install for the next day. I took the opportunity to paint the "Accent color" plate for the logo. Painted "392 Bronze", to match my other accents for the truck.

Jeep Gladiator I cut a giant hole in my tailgate! Reaper Off-Road Tailgate Box install and write-up. IMG_9291.JPG


Decided to do early prep by assembling the latches and other parts beforehand. Had to use my track tires as a workbench because my actual workbench was too small for the box. I also pre-assembled the lights for the box.

Bandit, the shop supervisor, did an inspection, and approved.

Jeep Gladiator I cut a giant hole in my tailgate! Reaper Off-Road Tailgate Box install and write-up. IMG_9294.JPG


Next day was cutting day. I gathered my tools. A face shield and mask for the aluminum dust and bedliner. The cutoff wheel and ratchet for the box panels. A shop vac. And a paint marker for drawing the outline for the cut profile.

Jeep Gladiator I cut a giant hole in my tailgate! Reaper Off-Road Tailgate Box install and write-up. IMG_9296.JPG


Jeep Gladiator I cut a giant hole in my tailgate! Reaper Off-Road Tailgate Box install and write-up. IMG_9309


My Milwaukee electric ratchet took off my panels in a snap.

Jeep Gladiator I cut a giant hole in my tailgate! Reaper Off-Road Tailgate Box install and write-up. IMG_9297.JPG


Now I just needed to outline my cut profile. I used a "Liquid Paint" pen, and a ruler as a straight edge. Outlined it per Reapers instructions, minus a few small changes. I opted to only mark the supports at the top of the tailgate vs the straight line Reaper wanted.

Jeep Gladiator I cut a giant hole in my tailgate! Reaper Off-Road Tailgate Box install and write-up. IMG_9302.JPG


No turning back here!

Jeep Gladiator I cut a giant hole in my tailgate! Reaper Off-Road Tailgate Box install and write-up. IMG_9306.JPG


Time for the first cut! The aluminum was no match for 30,000 rpm, and cut smooth. It was very easy to maintain control of the cutoff tool and to not cut too deep. I opted to do all my cuts at once, and I even managed to keep my lines straight!

Jeep Gladiator I cut a giant hole in my tailgate! Reaper Off-Road Tailgate Box install and write-up. IMG_9307.JPG


Jeep Gladiator I cut a giant hole in my tailgate! Reaper Off-Road Tailgate Box install and write-up. IMG_9308.JPG


Pulled the top panel and used my shop vac to pull up all the aluminum shavings for the next step. I also grinded the edges smooth with a flap disk in between steps as necessary whenever I needed to reach into the tailgate in that area.

Jeep Gladiator I cut a giant hole in my tailgate! Reaper Off-Road Tailgate Box install and write-up. IMG_9311.JPG


Next was to remove the foam sealant holding what was left of the tailgate skin. A flat blade knife made this easy.

Jeep Gladiator I cut a giant hole in my tailgate! Reaper Off-Road Tailgate Box install and write-up. IMG_9312.JPG


Jeep Gladiator I cut a giant hole in my tailgate! Reaper Off-Road Tailgate Box install and write-up. IMG_9313.JPG


With the adhesive detached, I was finally able to skin the tailgate, behold the remains and my open tailgate box. I took this opportunity to grind my edges smooth. I also tucked the wires for the camera, lock mechanism, and taillight underneath the latch handle support.

Jeep Gladiator I cut a giant hole in my tailgate! Reaper Off-Road Tailgate Box install and write-up. IMG_9316


Jeep Gladiator I cut a giant hole in my tailgate! Reaper Off-Road Tailgate Box install and write-up. IMG_9317.JPG


It was at this point I test fit the Reaper box. More or less dropped right in, minus some small interference with the prop rod, which was solved by dropping the front of the tailgate box in first , so I started marking and drilling my holes, using the box as a template.

Jeep Gladiator I cut a giant hole in my tailgate! Reaper Off-Road Tailgate Box install and write-up. IMG_9332.JPG


Jeep Gladiator I cut a giant hole in my tailgate! Reaper Off-Road Tailgate Box install and write-up. IMG_9337.JPG


Here's where I had my only issue. Since I wanted to use RivNuts instead of self tapers, I had to remove the box one more time to install them. I thought it was going smoothly, but realized I had a problem. The RivNuts I had weren't able to seat properly due to the bedliner! It was too thick, and the RivNuts were not crushing on the back side of the sheetmetal! You could pop them out by hand. :swear:

Jeep Gladiator I cut a giant hole in my tailgate! Reaper Off-Road Tailgate Box install and write-up. IMG_9321.JPG


Luckily I was able to think of a solution. I went into my toolbox and found my Dremel set. I attached a cylinder shapped sanding stone that was approximately the same size as my RivNuts. With the Dremel, I was able to sand down the bedliner until I hit the aluminum surface. With some washers on my RivNut tool, I was able to seat the RivNuts on the sheetmetal through the now counterbored holes, and able to get them to bite properly. I was able to continue with my install. Only took 1 hour to figure that out. ?

Jeep Gladiator I cut a giant hole in my tailgate! Reaper Off-Road Tailgate Box install and write-up. IMG_9327.JPG


Jeep Gladiator I cut a giant hole in my tailgate! Reaper Off-Road Tailgate Box install and write-up. IMG_9326.JPG


Removed the plastic tailgate trim to install the rivets at the top of the bed.

Jeep Gladiator I cut a giant hole in my tailgate! Reaper Off-Road Tailgate Box install and write-up. IMG_9323.JPG


Counter bored and riveted all 20 something holes, and dropped the box in. Fit perfectly!

Jeep Gladiator I cut a giant hole in my tailgate! Reaper Off-Road Tailgate Box install and write-up. IMG_9336.JPG


Jeep Gladiator I cut a giant hole in my tailgate! Reaper Off-Road Tailgate Box install and write-up. IMG_9337.JPG


Some detail pics!

Jeep Gladiator I cut a giant hole in my tailgate! Reaper Off-Road Tailgate Box install and write-up. IMG_9339.JPG


Jeep Gladiator I cut a giant hole in my tailgate! Reaper Off-Road Tailgate Box install and write-up. IMG_9340.JPG


Jeep Gladiator I cut a giant hole in my tailgate! Reaper Off-Road Tailgate Box install and write-up. IMG_9341.JPG


Took all my (soft) recovery gear from the back seat, and placed it in the box. Pretty much filled it up instantly, but it's such a perfect place for these things.

Jeep Gladiator I cut a giant hole in my tailgate! Reaper Off-Road Tailgate Box install and write-up. IMG_9346.JPG


Jeep Gladiator I cut a giant hole in my tailgate! Reaper Off-Road Tailgate Box install and write-up. IMG_9347.JPG


Jeep Gladiator I cut a giant hole in my tailgate! Reaper Off-Road Tailgate Box install and write-up. IMG_9349.JPG


And the overall situation with the tailgate. It's VERY tight, but it does close nicely. I love how well the bedliner matches and blends into everything else.

Jeep Gladiator I cut a giant hole in my tailgate! Reaper Off-Road Tailgate Box install and write-up. IMG_9363.JPG


Jeep Gladiator I cut a giant hole in my tailgate! Reaper Off-Road Tailgate Box install and write-up. IMG_9362


Notes:

The tailgate with gear, is much heavier, and the stock strut can't handle the weight, so I'll need to look into a stronger replacement.

Lost the structure behind the "Jeep" emblem. It is very easy to flex. I'm not sure if it will be a problem, but as long as you don't lean on it, it should be okay. I'm looking into polyethylene foam to fit on the inside of the box and the outer skin to provide more structure. There's a noisy "rattle" as the tailgate rod is free to shake when closing, will also add foam to the foam bumper on the passenger side to remedy that.

Personally, I don't need it to be keyed, so I took note of the company that makes the latches, SouthCo, and I might just order the non-key version of these latches, that also lay flat as well. Just personal preference.

OVERALL:

Rating: 8/10


I'm very happy with the way it turned out! There's some quirks that I need to sort, but I love the additional space! The cutting itself wasn't bad at all, it's just getting over the fact that I was cutting up my truck was the hardest part. Between the molle panels and this tailgate box, I have the under-seat storage available again, which I will most likely fill up with tools.

Would I do it again: Most likely, if I can sort out those quirks that I mentioned above. If I had to do it again, I would leave it for last on the storage mod list, for the following reason:

It's quite a bit of work and money for what is a small increase of storage. It's also semi-permanent, you'll need to replace the entire tailgate if you have any regrets or have any major issues.

-----------------------------------------------------------------------------

TLDR:


(3/10/2024)
While I'm happy with end result, this mod isn't for everyone. It's quite a bit of work and money for what is a small increase of storage. It's also semi-permanent, you'll need to replace the entire tailgate if you have any regrets or have any major issues.

Rating:

Part quality: 9/10, Install: 7/10, Cool factor: Freaking dig it!
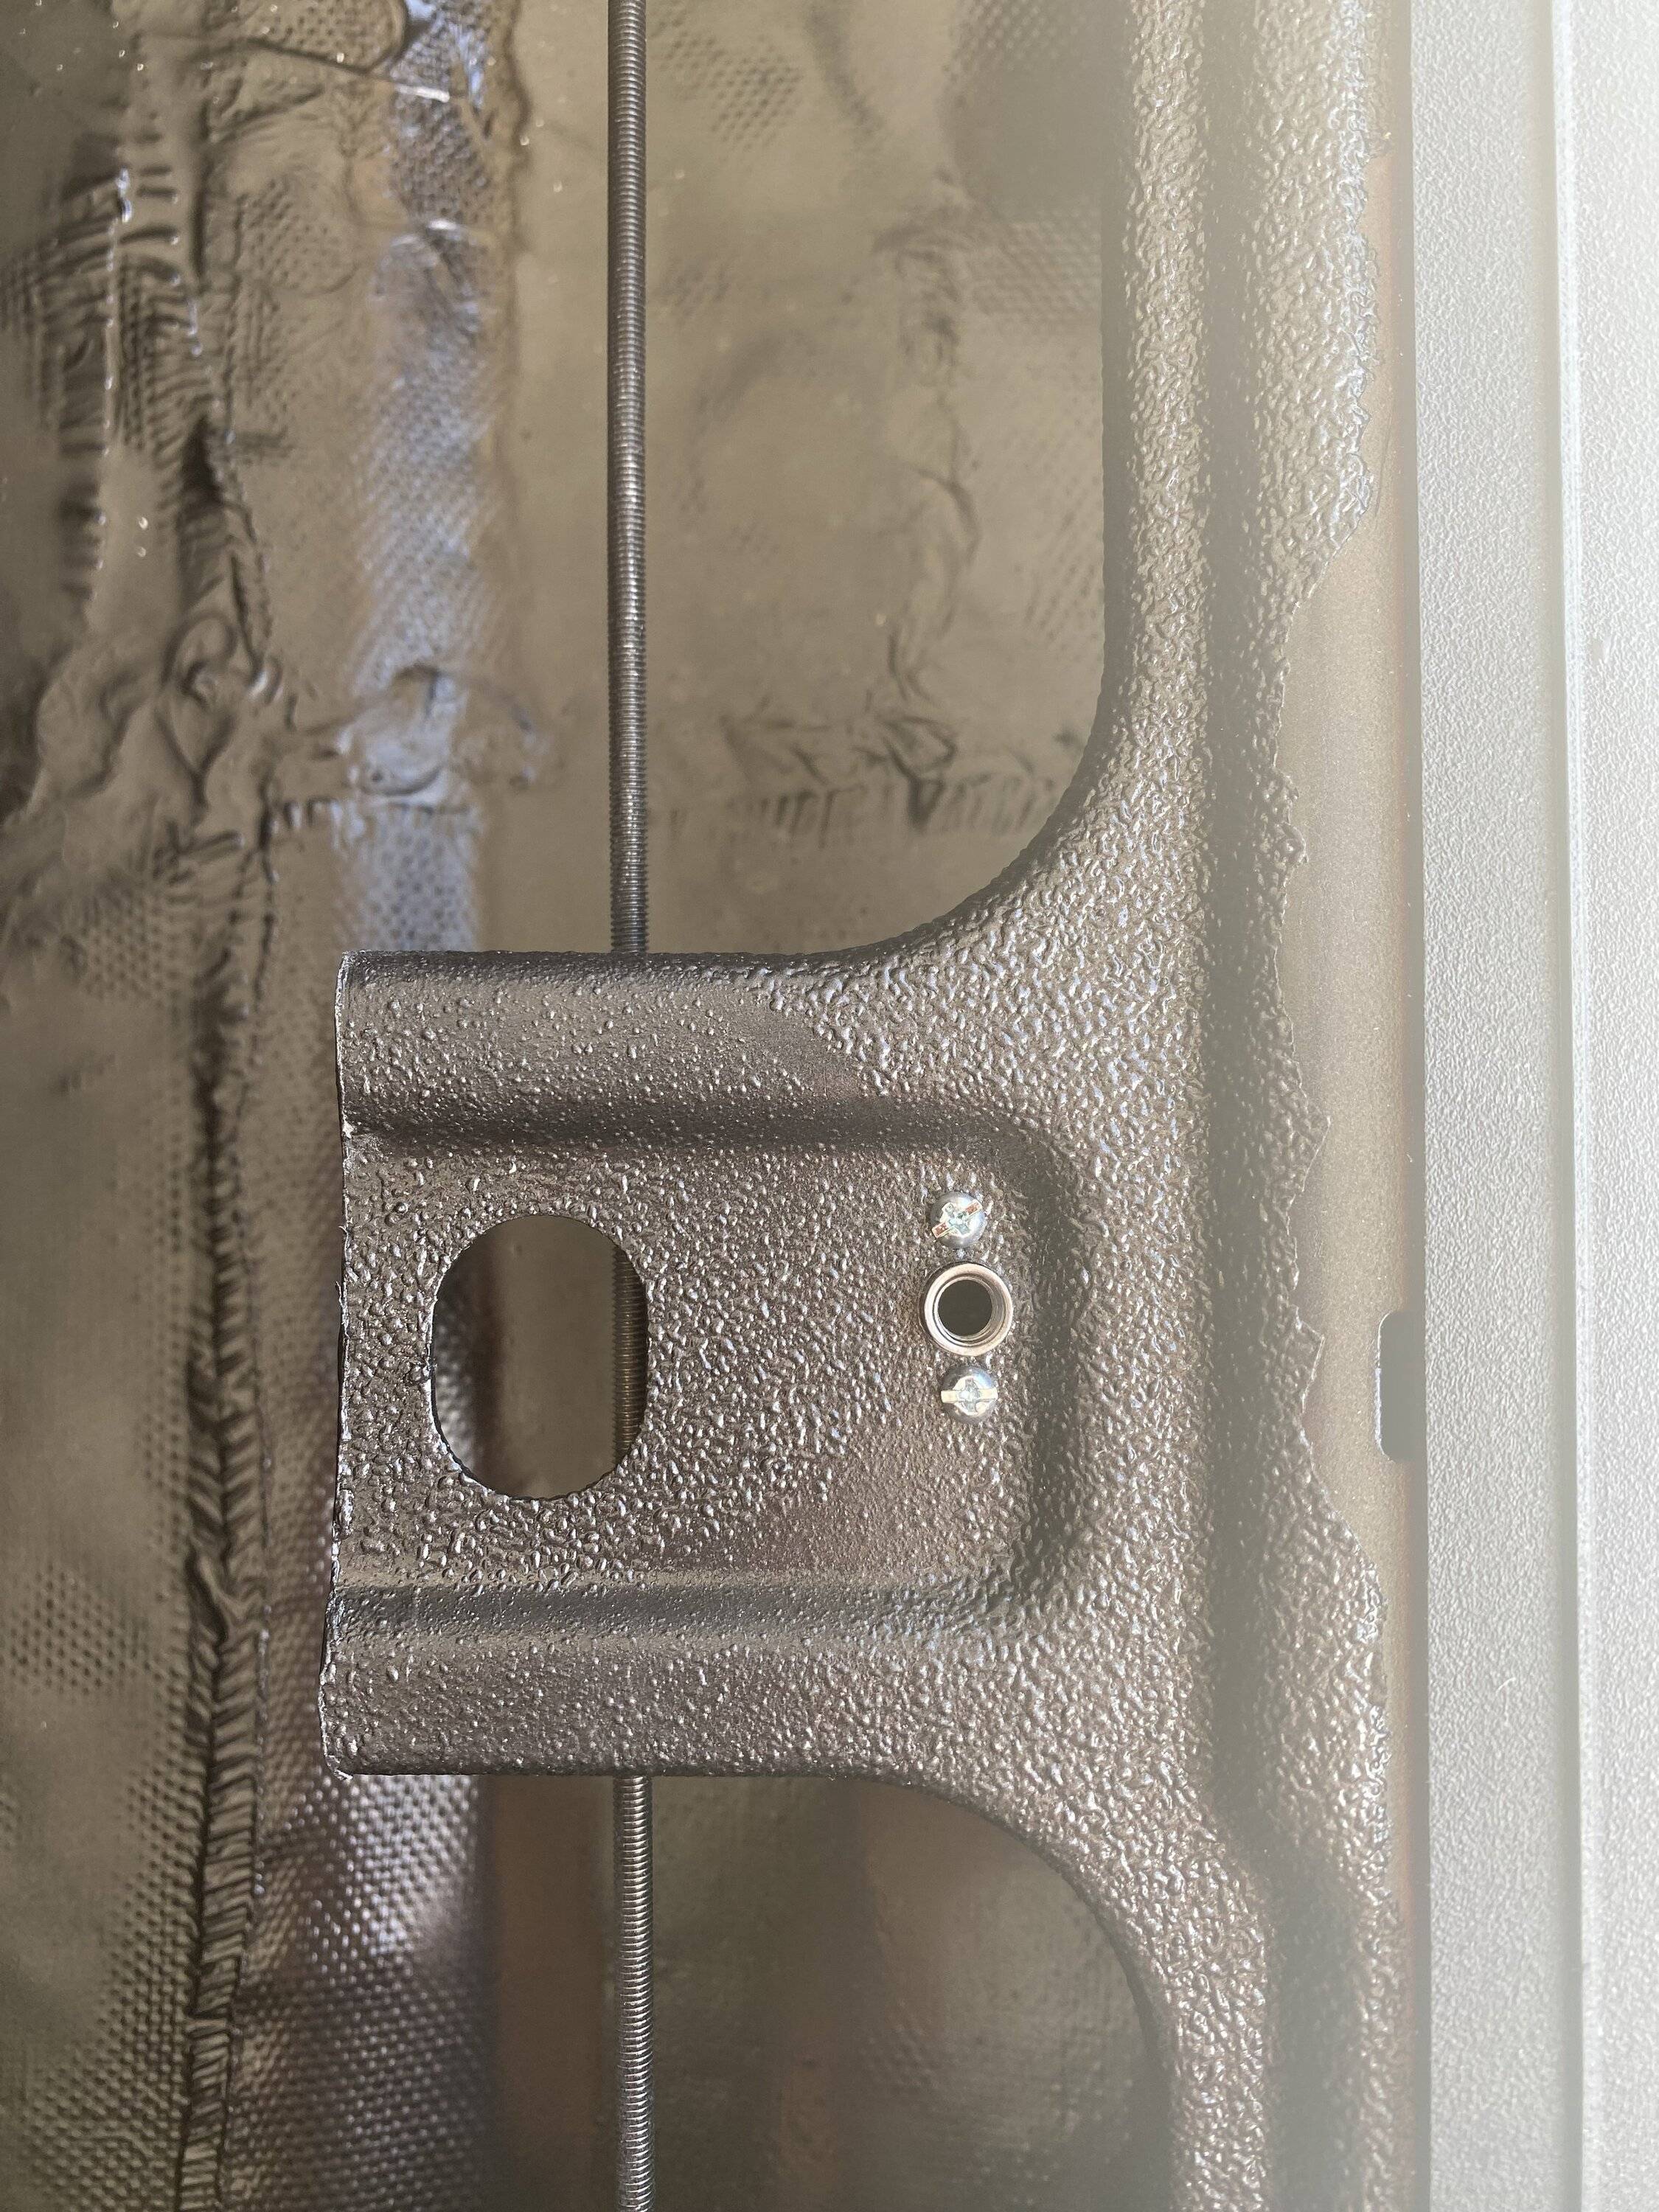
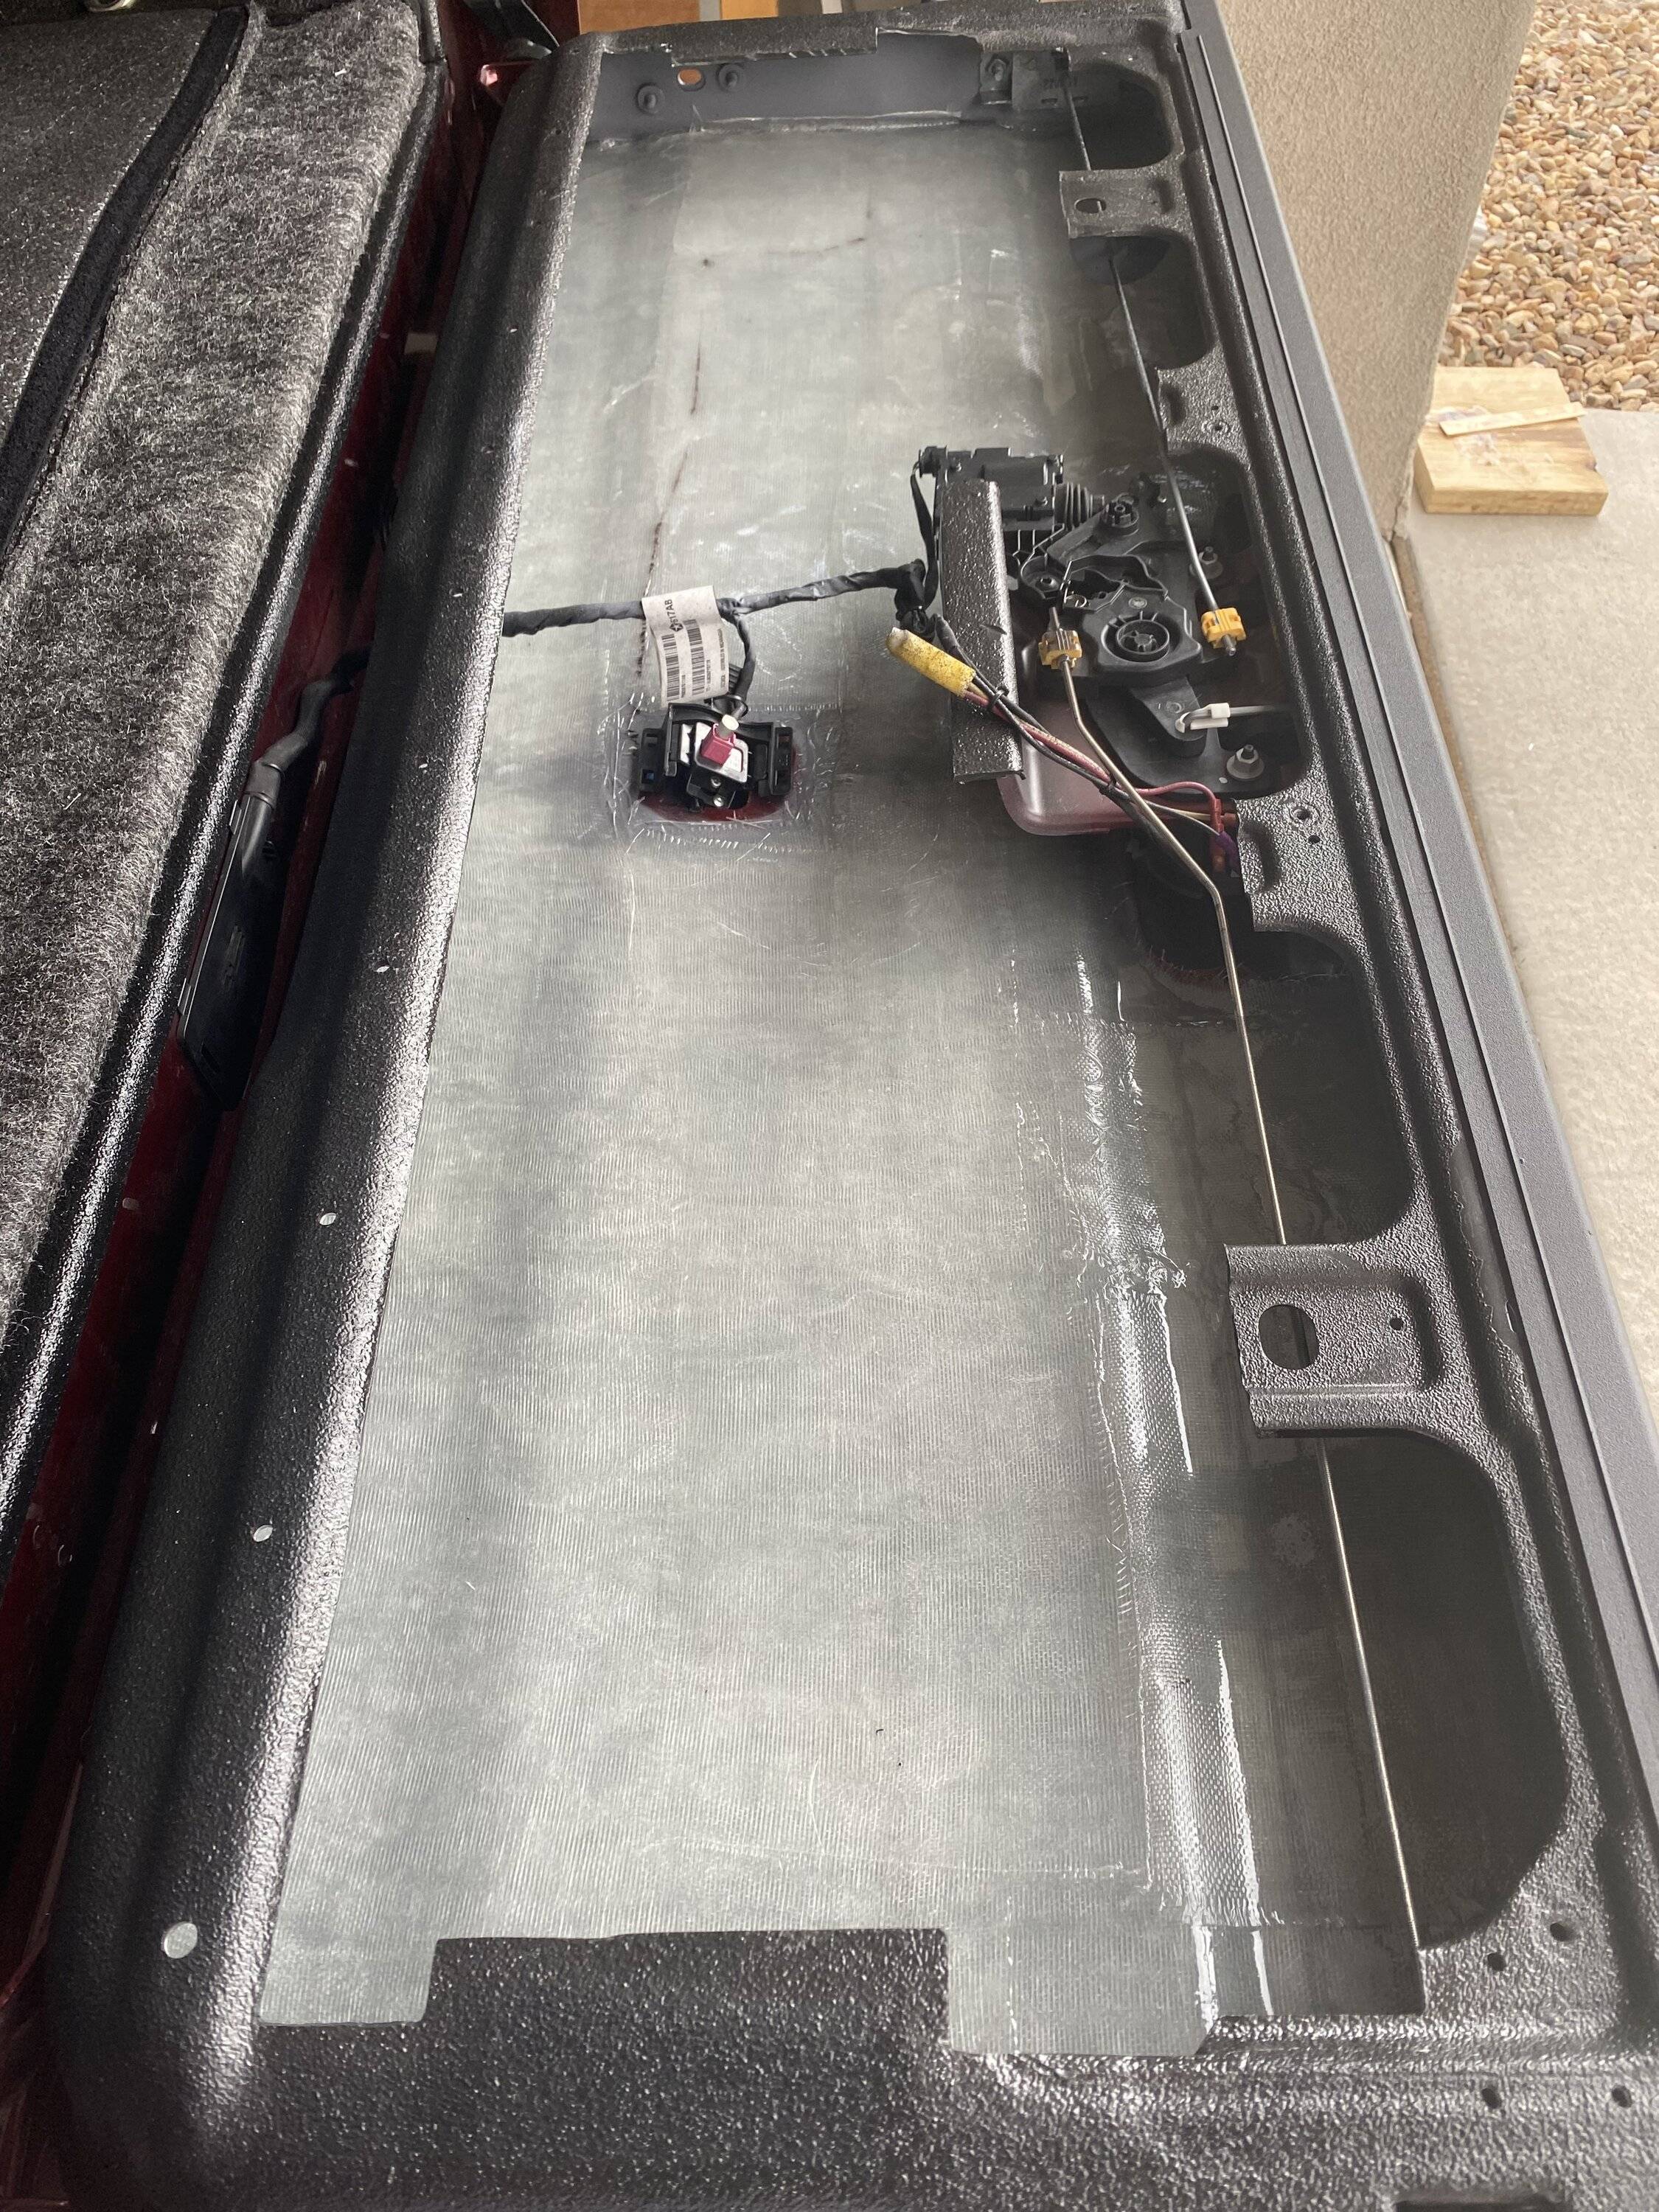
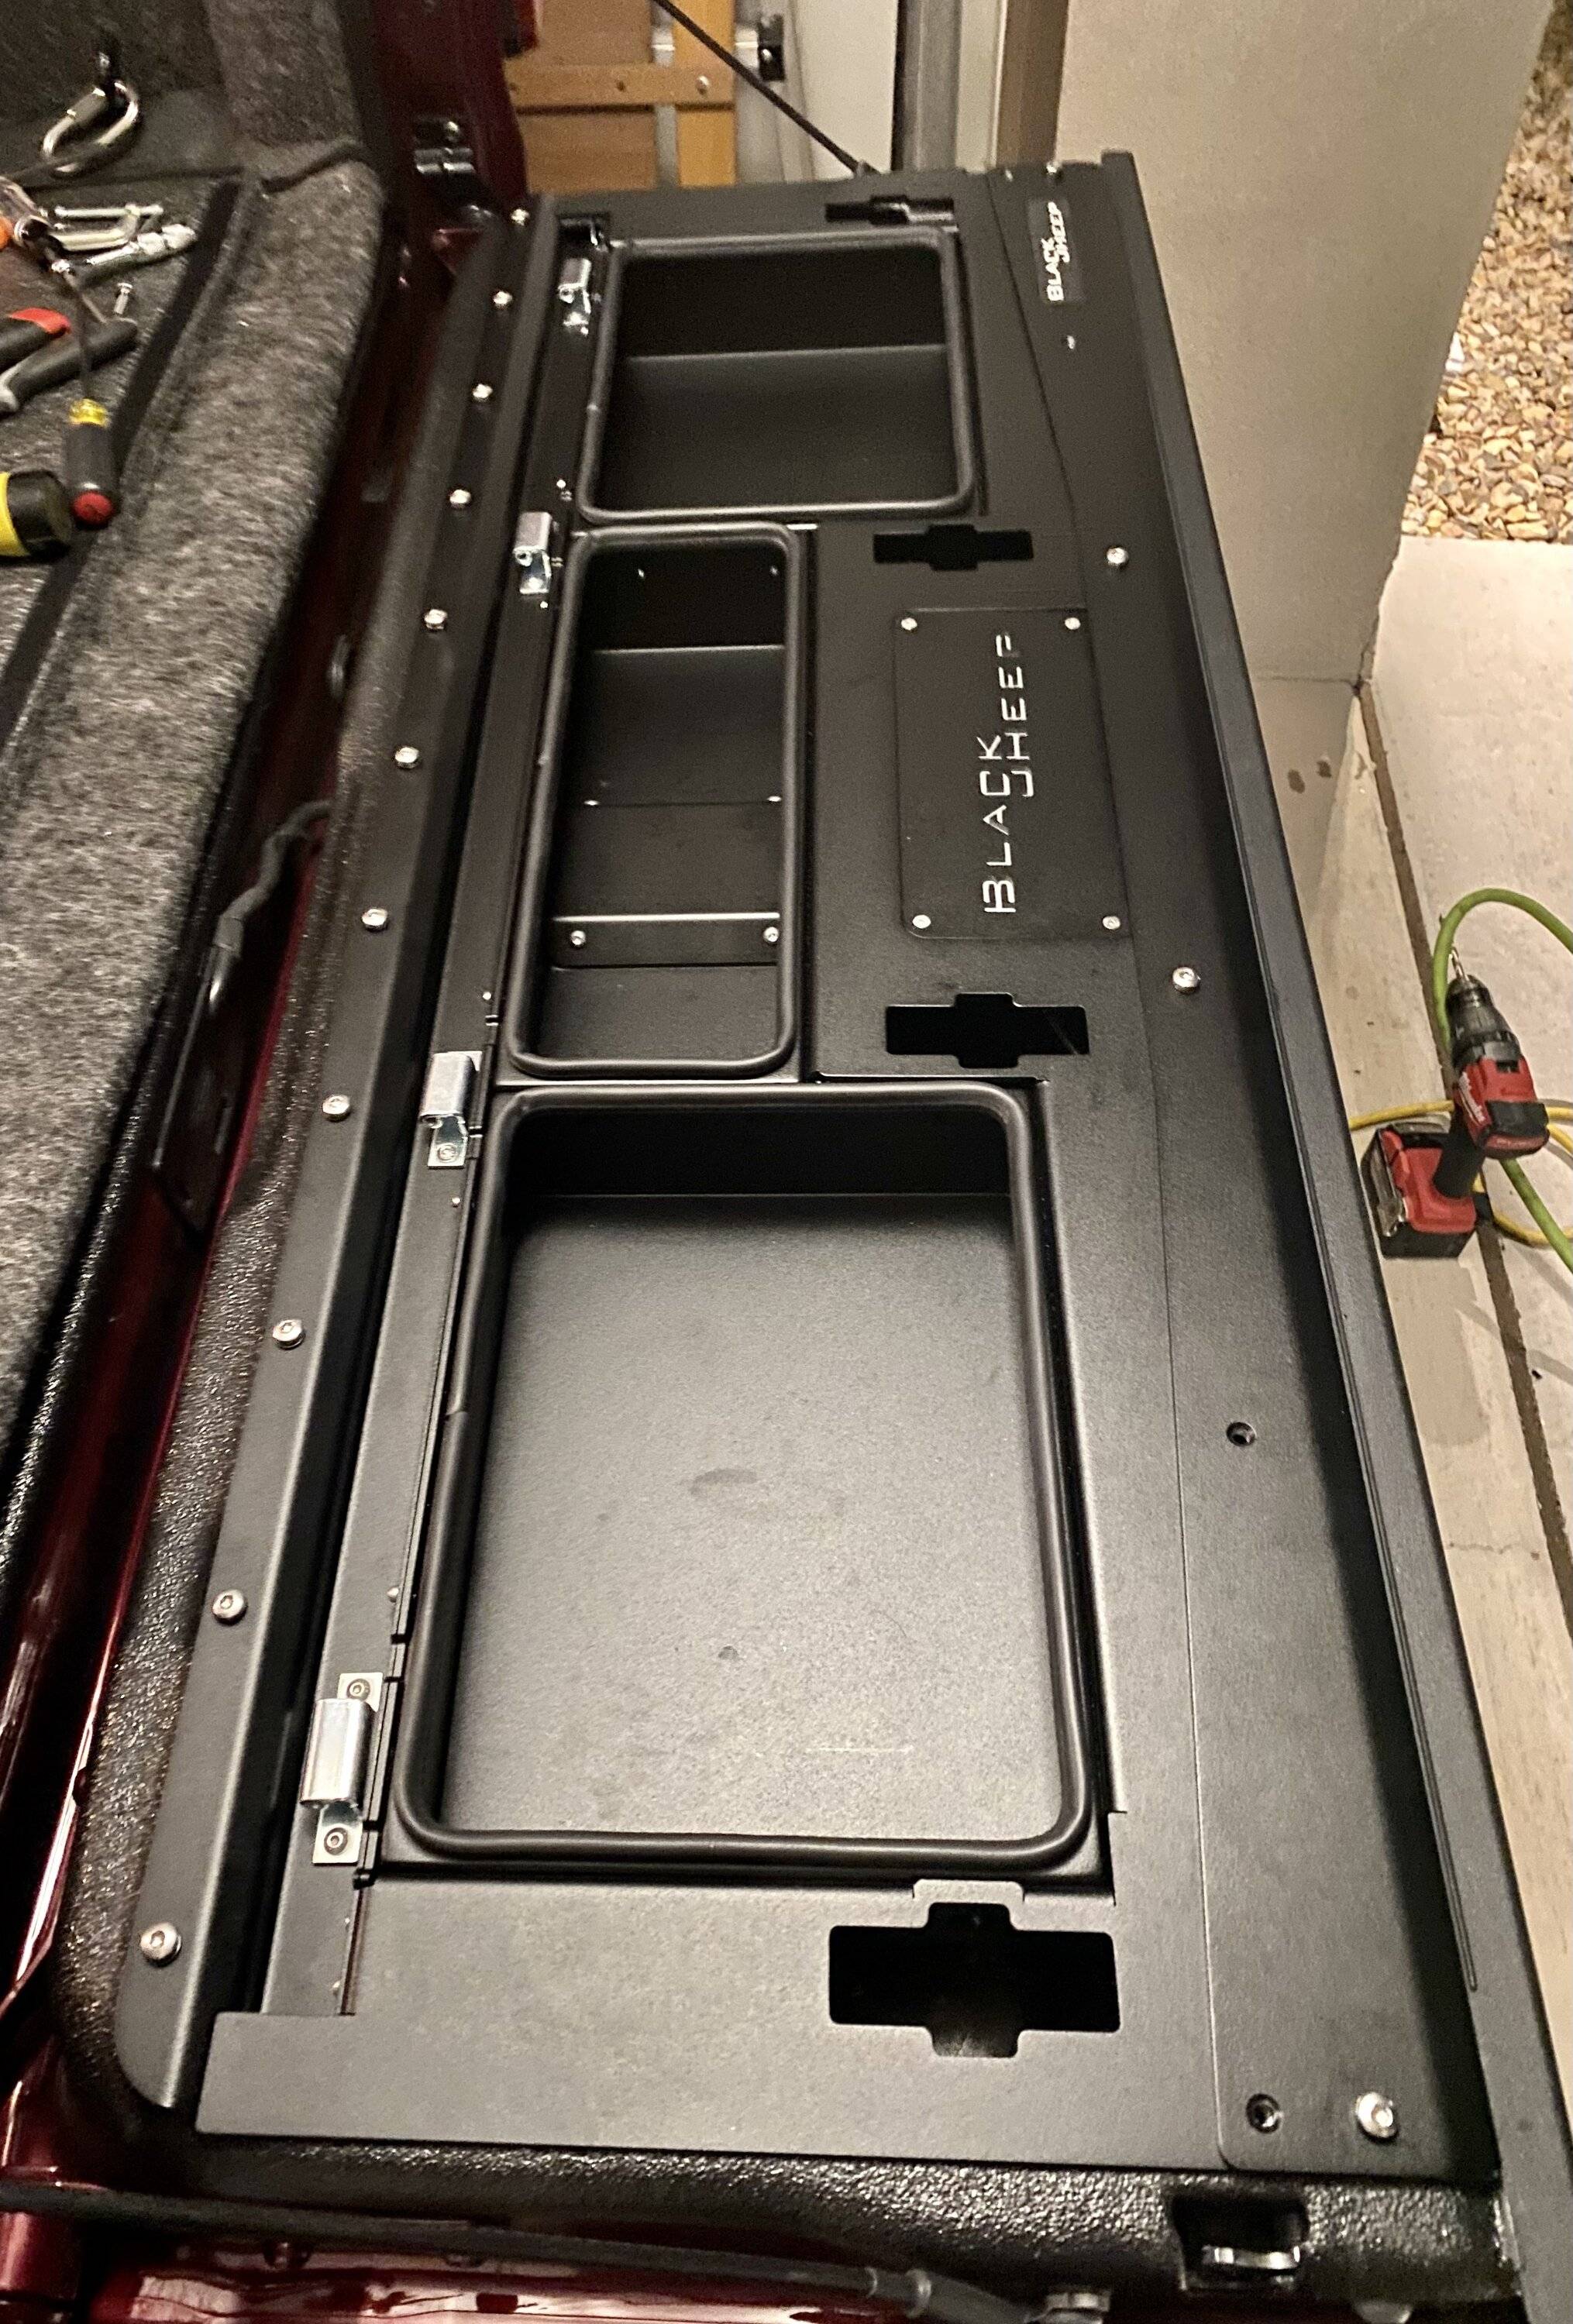
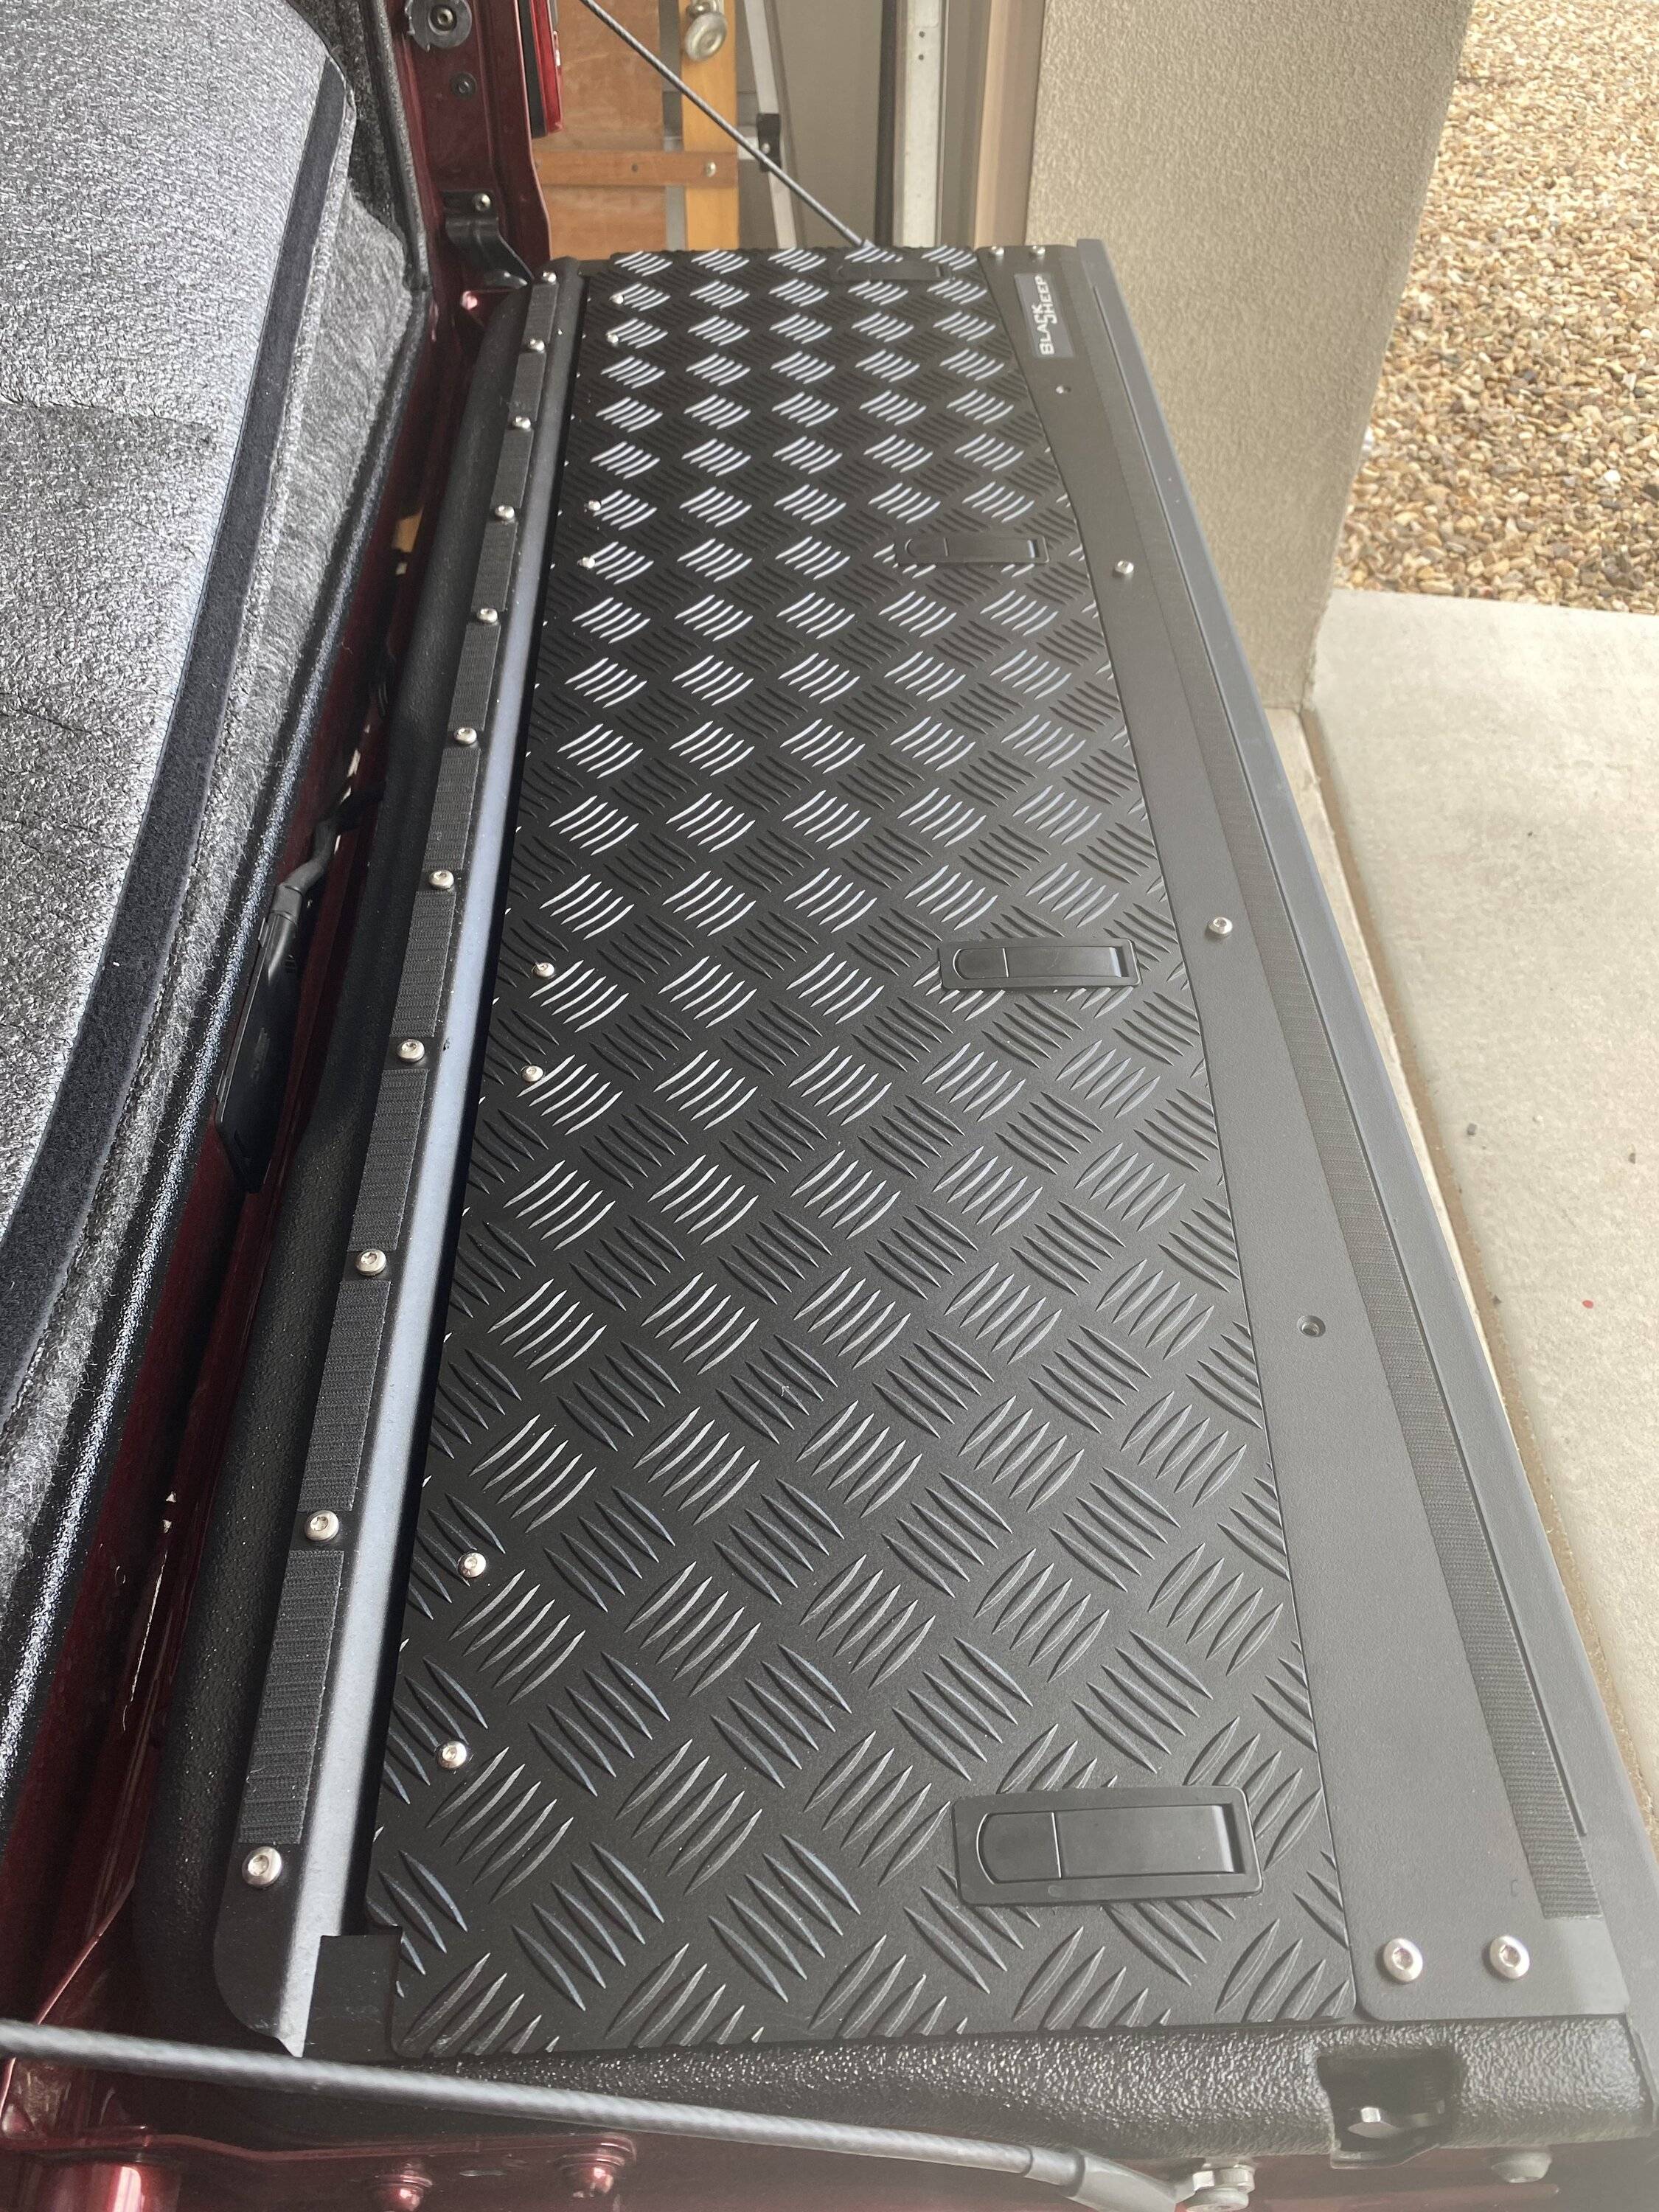
First of all congratulations on a phenomenal job on that mod. I did a similar thing with a unit from Black Sheep Innovations though had to have it shipped from Europe. I ended up bypassing the rivnuts and went with threaded t-nuts. Was a little trickier but provided a more stable outcome in my opinion. To say that chopping up your tailgate on a new rig is super scary is a major understatement but like you said if you plan it out and take your time it's doable. I ultimately ended up laying down some fiberglass on the bottom of the tailgate to strengthen up that flimsy outer layer of aluminum once the bracing sections were removed. Definitely added some support to prevent buckling or denting. The tailgate is definitely heavier once completed but with storage being at a premium every little bit helps. Thanks for sharing.
Jeep Gladiator I cut a giant hole in my tailgate! Reaper Off-Road Tailgate Box install and write-up. IMG_7230


Jeep Gladiator I cut a giant hole in my tailgate! Reaper Off-Road Tailgate Box install and write-up. IMG_7237


Jeep Gladiator I cut a giant hole in my tailgate! Reaper Off-Road Tailgate Box install and write-up. IMG_7257


Jeep Gladiator I cut a giant hole in my tailgate! Reaper Off-Road Tailgate Box install and write-up. IMG_7254


Jeep Gladiator I cut a giant hole in my tailgate! Reaper Off-Road Tailgate Box install and write-up. IMG_7270


Jeep Gladiator I cut a giant hole in my tailgate! Reaper Off-Road Tailgate Box install and write-up. IMG_7279
 

Minty JL

Well-Known Member
First Name
Jeremy
Joined
May 15, 2019
Threads
25
Messages
4,803
Reaction score
7,634
Location
Ft Meade, MD - AOR
Vehicle(s)
23 JTM - 19 JLUR - 22 Compass LTD - 04 355 ZQ8
Occupation
USA(R), DoD - Dirty Contractor
Bang for the buck, not sure it meets my threshold.... BUT i appreciate your attention to detail with the install aka Rivnuts and SS hardware!

Well done
 

Benbean66

Well-Known Member
First Name
Ben
Joined
Apr 29, 2019
Threads
15
Messages
1,238
Reaction score
1,853
Location
PA
Vehicle(s)
2020 JT Sport Base, 2004 Honda Goldwing
Occupation
Railroad Equipment Operator
Vehicle Showcase
1
$800... ? I think I just found my next DIY project, lol!
 

Sponsored

Minty JL

Well-Known Member
First Name
Jeremy
Joined
May 15, 2019
Threads
25
Messages
4,803
Reaction score
7,634
Location
Ft Meade, MD - AOR
Vehicle(s)
23 JTM - 19 JLUR - 22 Compass LTD - 04 355 ZQ8
Occupation
USA(R), DoD - Dirty Contractor
OP
OP
Zero_Accel

Zero_Accel

Well-Known Member
First Name
Aaron
Joined
Oct 27, 2021
Threads
32
Messages
526
Reaction score
1,284
Location
El Paso, Texas
Vehicle(s)
2020 Jeep Gladiator Sport
Build Thread
Link
Occupation
Systems Engineer
$800... ? I think I just found my next DIY project, lol!
They have 20% off sales pretty often, that's when I bought mine. Taxes and shipping included FYI.

Paid $650 for mine.
 
OP
OP
Zero_Accel

Zero_Accel

Well-Known Member
First Name
Aaron
Joined
Oct 27, 2021
Threads
32
Messages
526
Reaction score
1,284
Location
El Paso, Texas
Vehicle(s)
2020 Jeep Gladiator Sport
Build Thread
Link
Occupation
Systems Engineer
I saw the Black-Sheep model! It's very nice, but man it's expensive! I thought my Reaper box was a bit expensive at $650, but the Black-Sheep is $1400!

Reaper box made more sense for me because I wanted as much space as possible, and it was already bedlined.

Although I do wish I had removable bins, makes things easy to clean.
 

MSgt4246

Member
First Name
Fredd
Joined
Sep 8, 2023
Threads
0
Messages
24
Reaction score
37
Location
Rio Rancho, NM
Vehicle(s)
2022 Jeep Gladiator Rubicon - Snazberry
Occupation
Retired
I'll be honest the Black Sheep kit is nice but when I bought it was kind of the new kid on the block. Then of course Reaper came out with theirs at half the price. Trust me you done good. Looks great and was happy to know I wasn't the only one with some heightened anxiety over taking my Milwaukee cutting wheel to my new tailgate.
 
OP
OP
Zero_Accel

Zero_Accel

Well-Known Member
First Name
Aaron
Joined
Oct 27, 2021
Threads
32
Messages
526
Reaction score
1,284
Location
El Paso, Texas
Vehicle(s)
2020 Jeep Gladiator Sport
Build Thread
Link
Occupation
Systems Engineer
Bang for the buck, not sure it meets my threshold.... BUT i appreciate your attention to detail with the install aka Rivnuts and SS hardware!

Well done
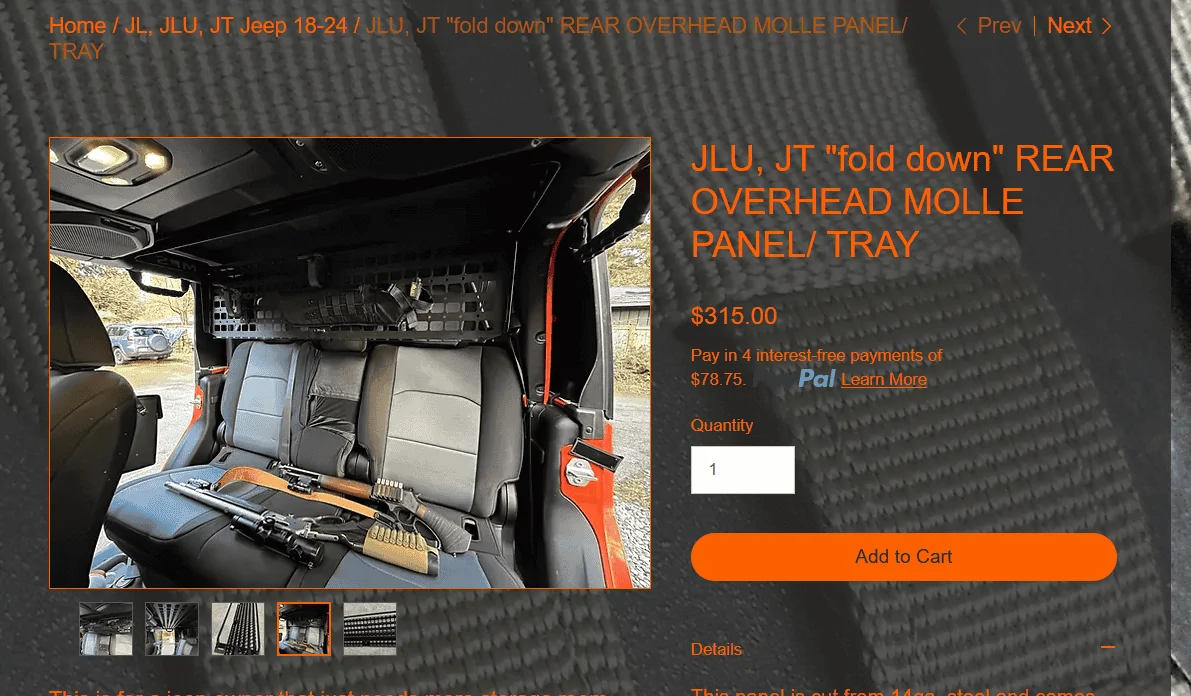
I will admit, it's an expensive way to add not that much storage. Barely fit my existing recovery gear. For the $650 for the box alone, I could have bought an overhead molle panel for the cab for less than half the price, stored my recovery gear there, and avoided cutting up my truck.

Jeep Gladiator I cut a giant hole in my tailgate! Reaper Off-Road Tailgate Box install and write-up. Captur


Jeep Gladiator I cut a giant hole in my tailgate! Reaper Off-Road Tailgate Box install and write-up. Captur


But, it does keep things slim, and one of my goals is to keep the bed as usable as possible. Also keeps prying eyes away from my gear with the tonneau cover in place.
 

Sponsored
OP
OP
Zero_Accel

Zero_Accel

Well-Known Member
First Name
Aaron
Joined
Oct 27, 2021
Threads
32
Messages
526
Reaction score
1,284
Location
El Paso, Texas
Vehicle(s)
2020 Jeep Gladiator Sport
Build Thread
Link
Occupation
Systems Engineer
I did the same mod this past weekend. So far I like it, didn't feel the need to install the lights. Kit was on sale at extreme terrain, only took a week and half to get.

Resized_20240309_175500_1710035715233.jpeg


Resized_20240309_175517_1710035722590.jpeg
Oh don't worry, my lights aren't wired up yet lol. I have the harness bundled up and zip tied in place to the tow bar support.

I can't decide if I want to run it to my battery or just tap into the existing bed light. Biggest issue is how quick the stupid stock bed light turns off. And I don't want the magnetic latch doing something stupid and failing to shut off, draining my battery.

Might just end up running it to my Voswitch.
 
OP
OP
Zero_Accel

Zero_Accel

Well-Known Member
First Name
Aaron
Joined
Oct 27, 2021
Threads
32
Messages
526
Reaction score
1,284
Location
El Paso, Texas
Vehicle(s)
2020 Jeep Gladiator Sport
Build Thread
Link
Occupation
Systems Engineer
Looks great and was happy to know I wasn't the only one with some heightened anxiety over taking my Milwaukee cutting wheel to my new tailgate.
Yup, my biggest concern was having the damn cutting wheel "jump" and hitting something I didn't want it to, or cutting too deep.

But those cutting disks ran through the aluminum like butter. Pretty easy job, I think drilling for the RivNuts on mine was harder.
 
OP
OP
Zero_Accel

Zero_Accel

Well-Known Member
First Name
Aaron
Joined
Oct 27, 2021
Threads
32
Messages
526
Reaction score
1,284
Location
El Paso, Texas
Vehicle(s)
2020 Jeep Gladiator Sport
Build Thread
Link
Occupation
Systems Engineer
$800 does not bother me, the flexing of the tailgate skin does....a lot. They need to include the proper size stiffening bracket on the back of the case to replace the one that gets removed. Once they do that, the can have my $800. I love the idea of it!
Oh don't worry, I'm already working on that, gonna cut this to shape, and stuff it in between the box and tailgate skin.

Jeep Gladiator I cut a giant hole in my tailgate! Reaper Off-Road Tailgate Box install and write-up. Captur


Should have a bit of give so that I'm not putting pressure on the outer skin, but will give structure so that it's not pressed in as easily.

I'll post pics of the end result.
 
OP
OP
Zero_Accel

Zero_Accel

Well-Known Member
First Name
Aaron
Joined
Oct 27, 2021
Threads
32
Messages
526
Reaction score
1,284
Location
El Paso, Texas
Vehicle(s)
2020 Jeep Gladiator Sport
Build Thread
Link
Occupation
Systems Engineer
$800

Some of these companies are out of their mind.
Eh, it's not the worst I've seen, and Reaper includes taxes and shipping in that price, plus they have 20% sales every three months or so.

Got mine for $650 that way, and with how I look at it, I think the price was absolutely fair, I felt like I was getting my monies worth at that point.

I don't need to design the box. I don't have to purchase the aluminum sheet. I don't need to cut it myself. I don't need to weld the aluminum (plus I don't have that skill set!). It's already bedlined. And has all the hardware I need. And the little extras like the lights and weather seal gasket.

It's also a fairly niche product, the fact that you have to cut up your tailgate will scare away a fair portion of potential buyers. So the price is a bit higher to compensate for that.

Plus it's built in the U.S, so more of the money I'm spending is going towards regular people, instead of the countless sweatshops overseas to make some multimillionaire/billionaire that much richer.
Sponsored


Top