Once I folded the rear seats down and saw just how much space they took I knew I needed to remove them. So I did.
It was a project worth doing. Big thanks to Rokon for his info as he removed his Gladiator's rear seat to install his ARB fridge - you can see his install here. This is a great DIY mod - the seats come out rather easily (except for wrestling with the 8 Torx nuts - 4 per seat) and you'll have significantly more useful space behind the rear seats.
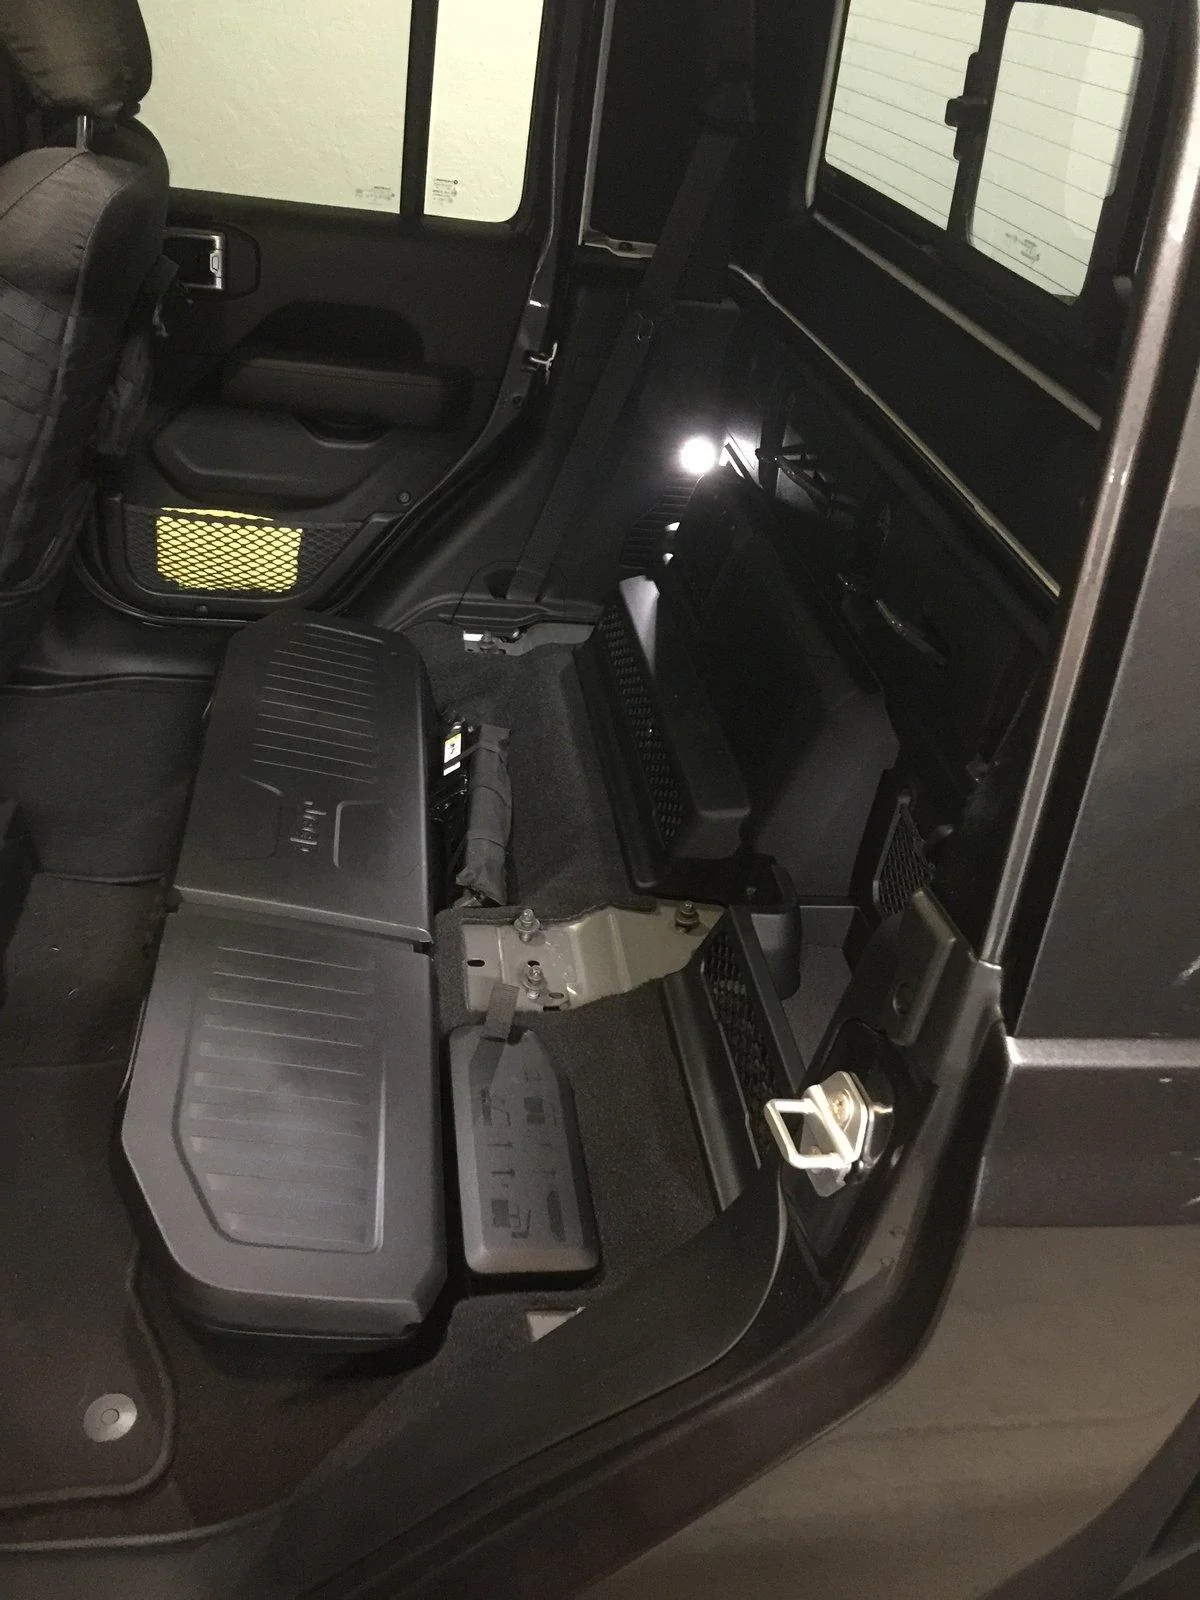
Here's a pic of the end result with the rear seats removed:
Here's how to do it and what you'll need...
Tools:
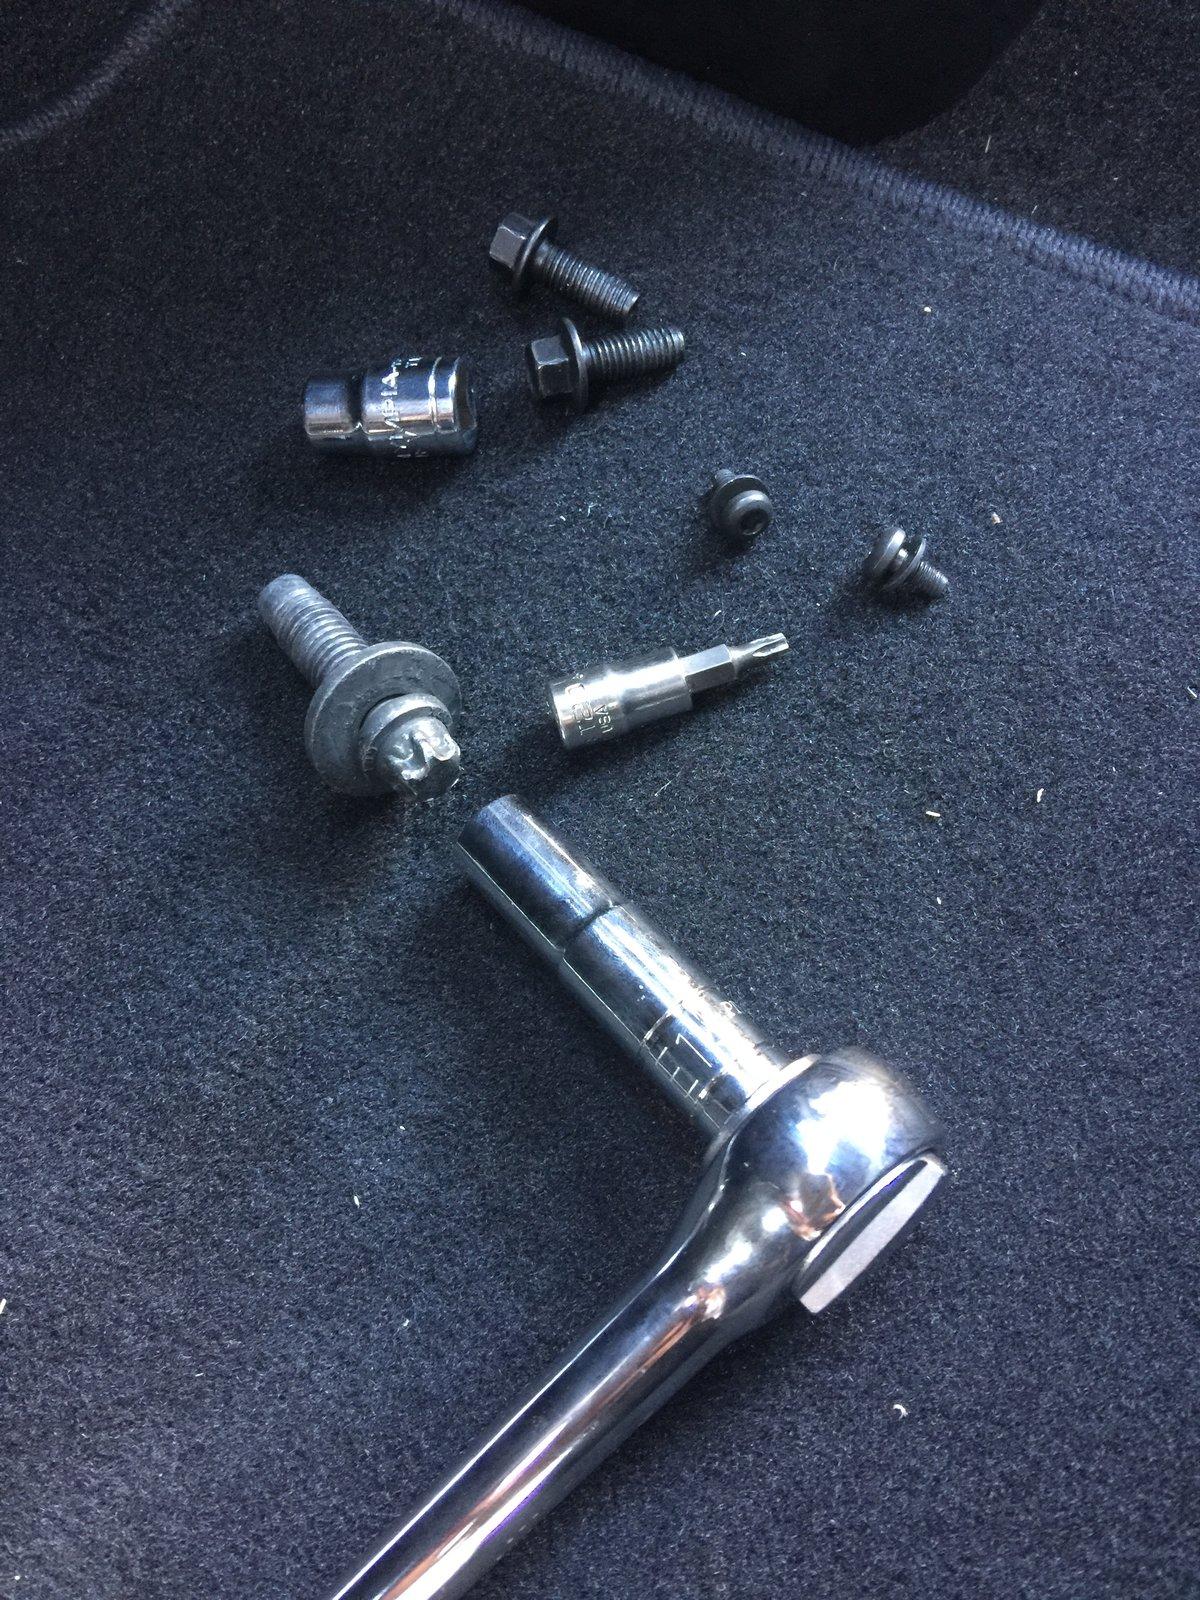
* E14 Torx socket (female) - I got a set at Harbor Freight for about $9.99 before the 20% discount coupon. Suggestion: don't get the deep socket as they'll come off the Torx nuts too easily as it takes a good-to-great amount of force to break them loose.
* Breaker bar - ⅜" Breaker Bar at Harbor Freight - it's not necessary but it was a huge help in breaking loose two of the rear Torx nuts - it's $9.99 before any discount coupon
* 10mm socket - to remove the 2 bolts that hold the rear seats together
* T20 Torx (male) screwdriver or socket version - to remove the 2 screws holding the plastic seat base shroud
You can see the 2 sockets and the Torx screw (socket version) and the hardware here:
Gladiator Rear Seats Removal Process:
1. Fold both seats up
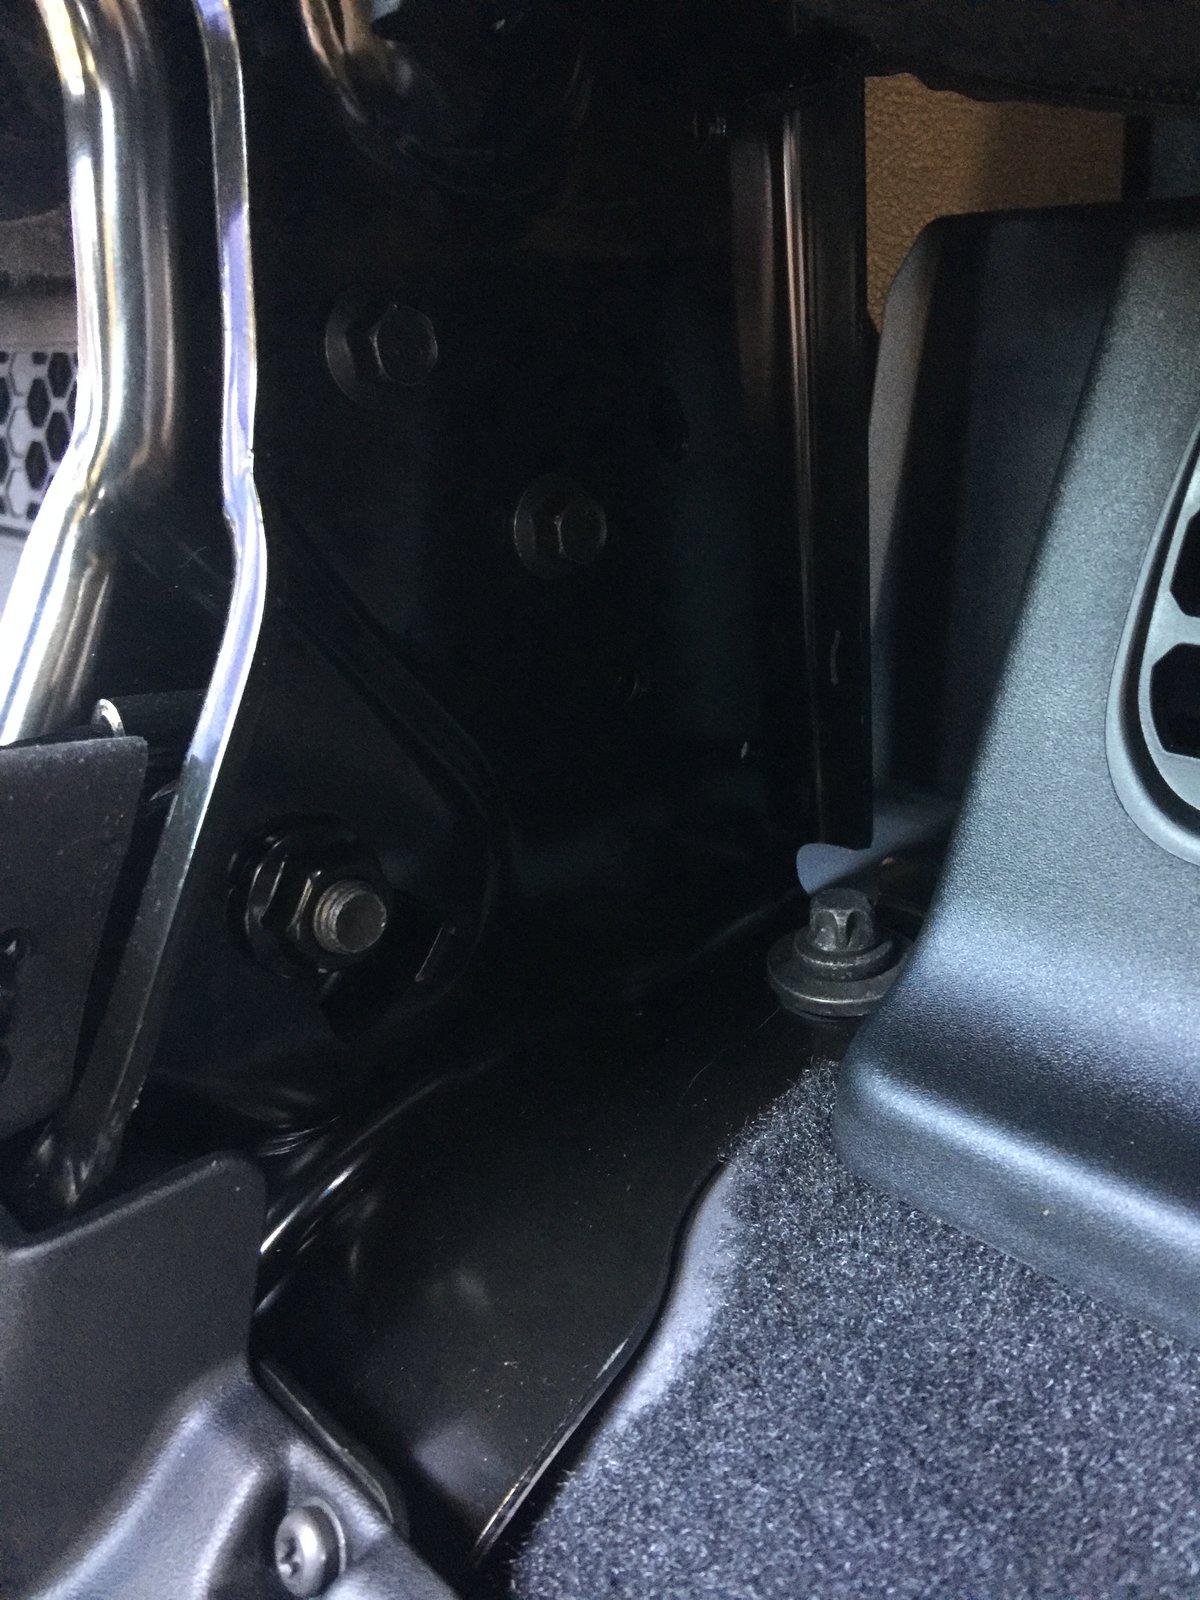
2. Using the 10mm socket, remove the 2 bolts holding the rear seats together. You'll want to be on the driver's side as the 2 bolts' heads are on that side. You can see the 2 bolts in the following pic - one is below and behind the other.
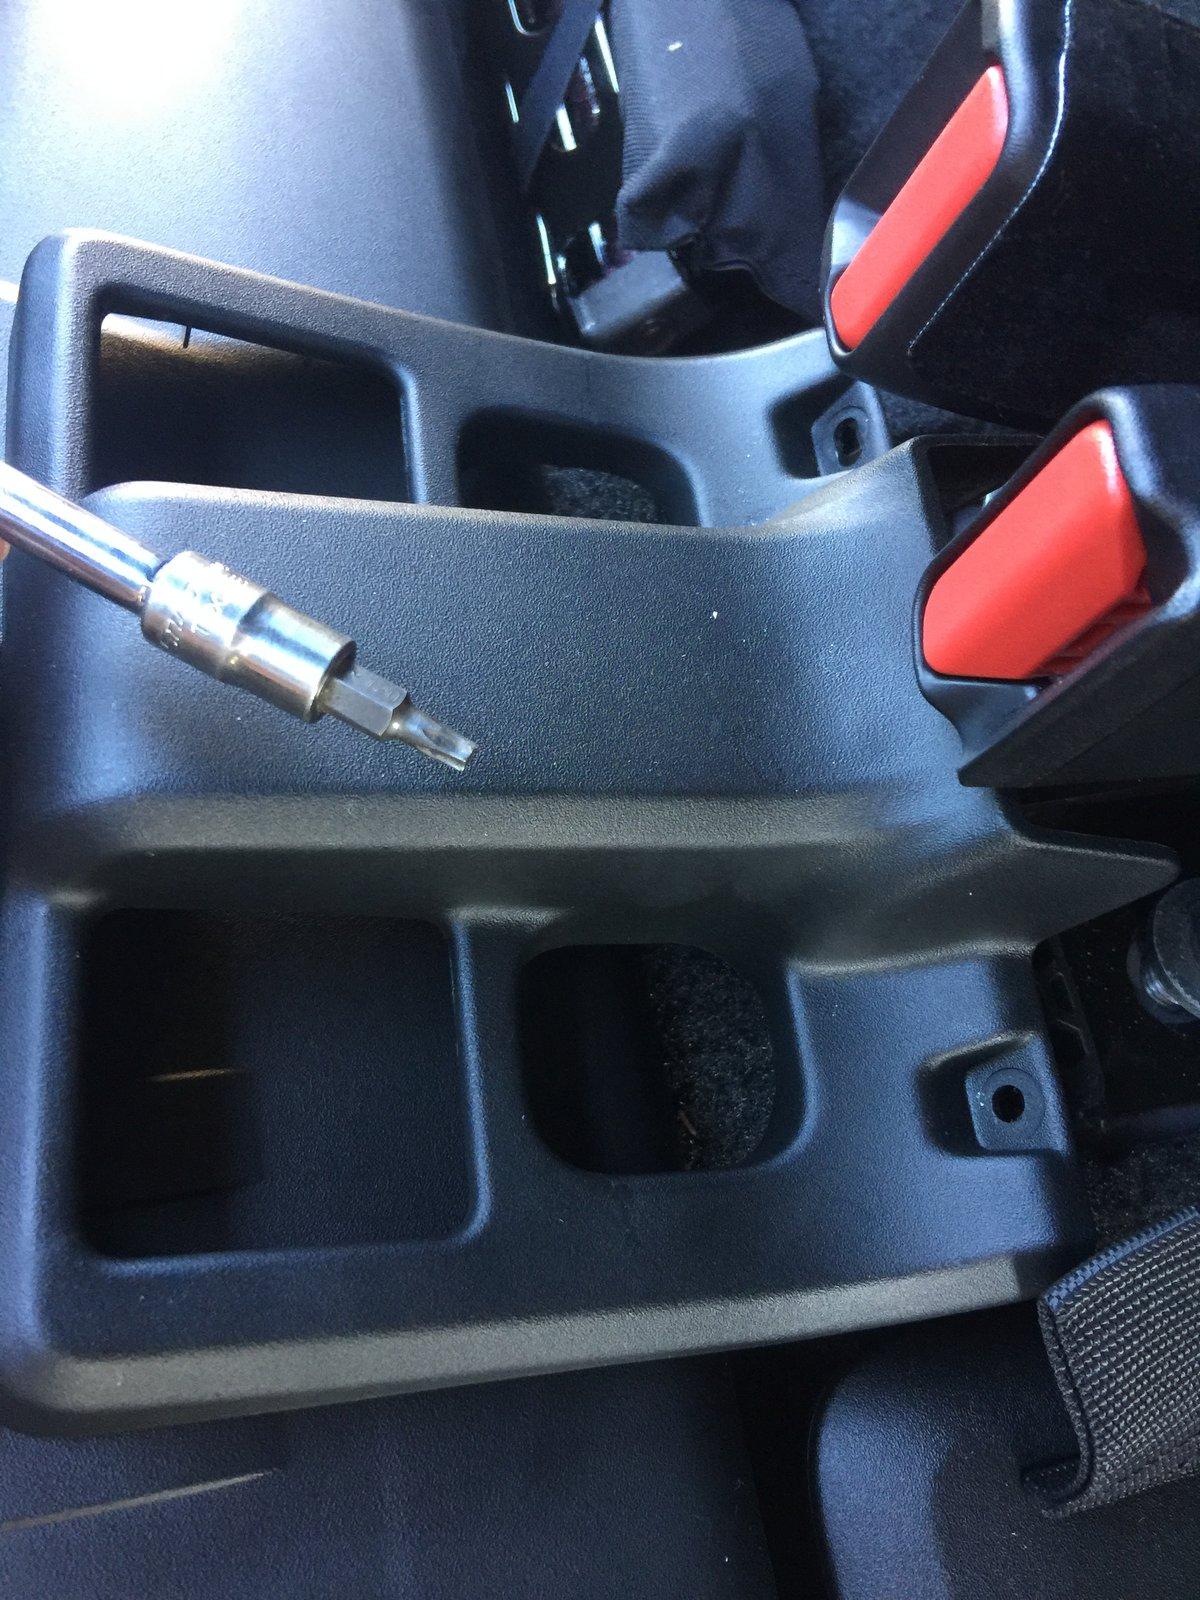
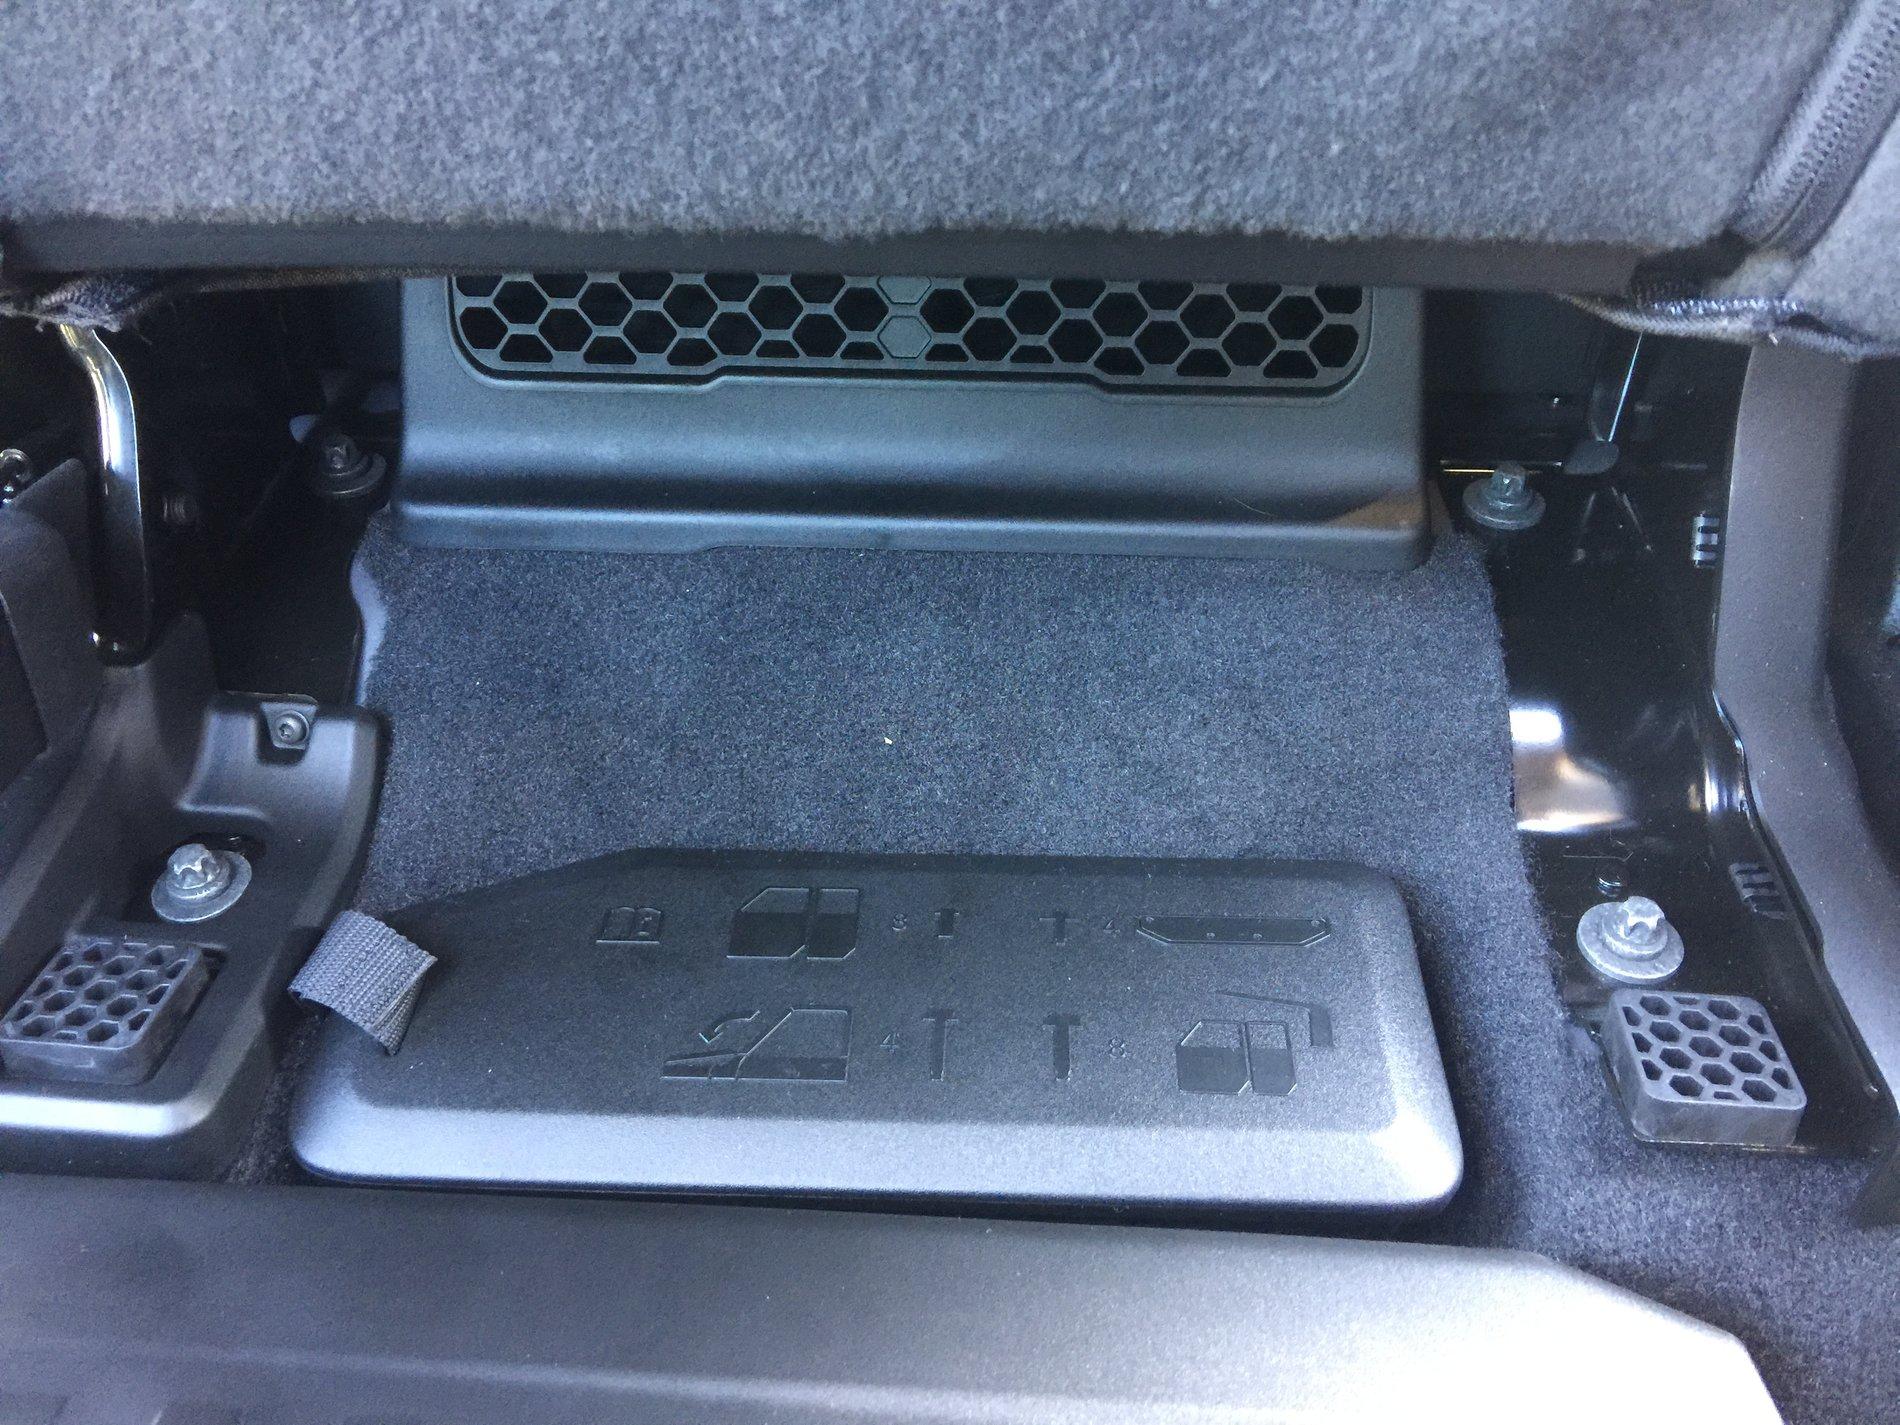
3. Use the T20 Torx screwdriver (or socket version as shown in the above pic) to unscrew and remove the 2 Torx screws holding the plastic Seat Base Shroud - it's the plastic "surround panel" that is on the floor where the two seats' bases attach to the floor. Here's a pic of the Seat Base Shroud removed...
4. Use the breaker bar with the E14 Torx Female Socket to break all 8 of the seat base nuts loose. There are 4 nuts per seat - 2 in the back and 2 in the front. The 2 nuts in the back were a bit more challenging than the front ones and the breaker bar made life much easier as once they were broken loose I switched over to the ratchet to finish loosening the nuts and removing them by hand.
5. Remove the 2 rear seats - Now that the bolts are all out, use the strap Seat Back Releases to free the seats from their locked (to the back wall) position. I suggest taking out the smaller driver's side seat first but either one can be removed first.
Lift them out carefully so you don't scratch anything and...enjoy all that extra space!
My next project will be fabricating a platform with some features that should make it quite useful for daily as well as camping/overlanding use. I'll post that stuff up once I have more to report on that mod.
A few more pics...
Photo showing the driver's side seat base bolts. You' can also see a portion of the Seat Base Shroud - the plastic panel (note the Torx screw facing you behind the seat base bolt in the lower left):
4. Use the breaker bar with the E14 Torx Female Socket to break all 8 of the seat base nuts loose. There are 4 nuts per seat - 2 in the back and 2 in the front. The 2 nuts in the back were a bit more challenging than the front ones and the breaker bar made life much easier as once they were broken loose I switched over to the ratchet to finish loosening the nuts and removing them by hand.
Appreciate the time and detail of the post. I had watched a video on YT where the two guys removed the whole seat. I found this process more useful and easier for me to remove the two sections separately. Now on to the threads on building a platform.
Went by your directions and worked perfectly! I have a flexible head, long handled 3/8” ratchet that broke all the bolts loose easily. Used my Dewalt cordless impact to re-install seat bolts.
Thank you for the instructions!