
Sponsored

AirLift rear bag system - info you need to know

Gren71

Well-Known Member
First Name
Matt
Joined
Jul 9, 2019
Threads
143
Messages
4,004
Reaction score
6,392
Location
Delaware
Vehicle(s)
Jeep JT sports S Max Tow (Sold) '23 Ram 1500
Occupation
Magician
Vehicle Showcase
1
I have friends that put the schrader valves into the 2 hole on the bottom of the license plate. I did the same thing on my Power Wagon too.

Question. With no load on the rear. How much will the air bags lift the rear? And what is the max air pressure? On the PW, I had Carli long travel air bags. Min was 5psi and max was 100 psi. At 100 psi, they would lift the rear 6".
With only the min 5 or 7 psi (if I remember correctly) they shouldn’t provide any lift or support. My understanding is that the min psi is just to make sure the bag retains its shape and position when not in use.

im also fairly sure the airlift bags max at maybe 35-40psi.

can’t speak to their lift potential but i run them at 10psi and they take almost all of the bounce out when i pull my new 5,600lbs travel trailer.

I usually leave mine at 5psi when not in use.
Sponsored

 

ShadowsPapa

Well-Known Member
First Name
Bill
Joined
Oct 12, 2019
Threads
247
Messages
40,510
Reaction score
54,033
Location
Runnells, Iowa
Vehicle(s)
'25 JTMX, '23 JLU 4xe, '82 SX4, '73 Javelin
Occupation
Retired auto mechanic, frmr gov't ntwrk security admin
Vehicle Showcase
3
Bill: a thought as small as that unit is you could put it under the bed easily. If not under corner of bed with a connection for hookup easy to reach. Not a fast air up for a tire maybe but how fast are you going on a flat tire. ;) I figure your probably going to run some 12v power to back of your truck too?? If not a Anderson connector? Handy for a portable winch in receiver hitch or winch on car hauler. :like:
The plate to mount a winch on an aluma tilt bed is over $200 - but I've considered it..........

The compressor in the rear is an idea.
I found the schematic for the compressor and the troubleshooting guide in one of my AMC technical service manuals. I pulled the head and hooked up the leads for a direct run and it runs.

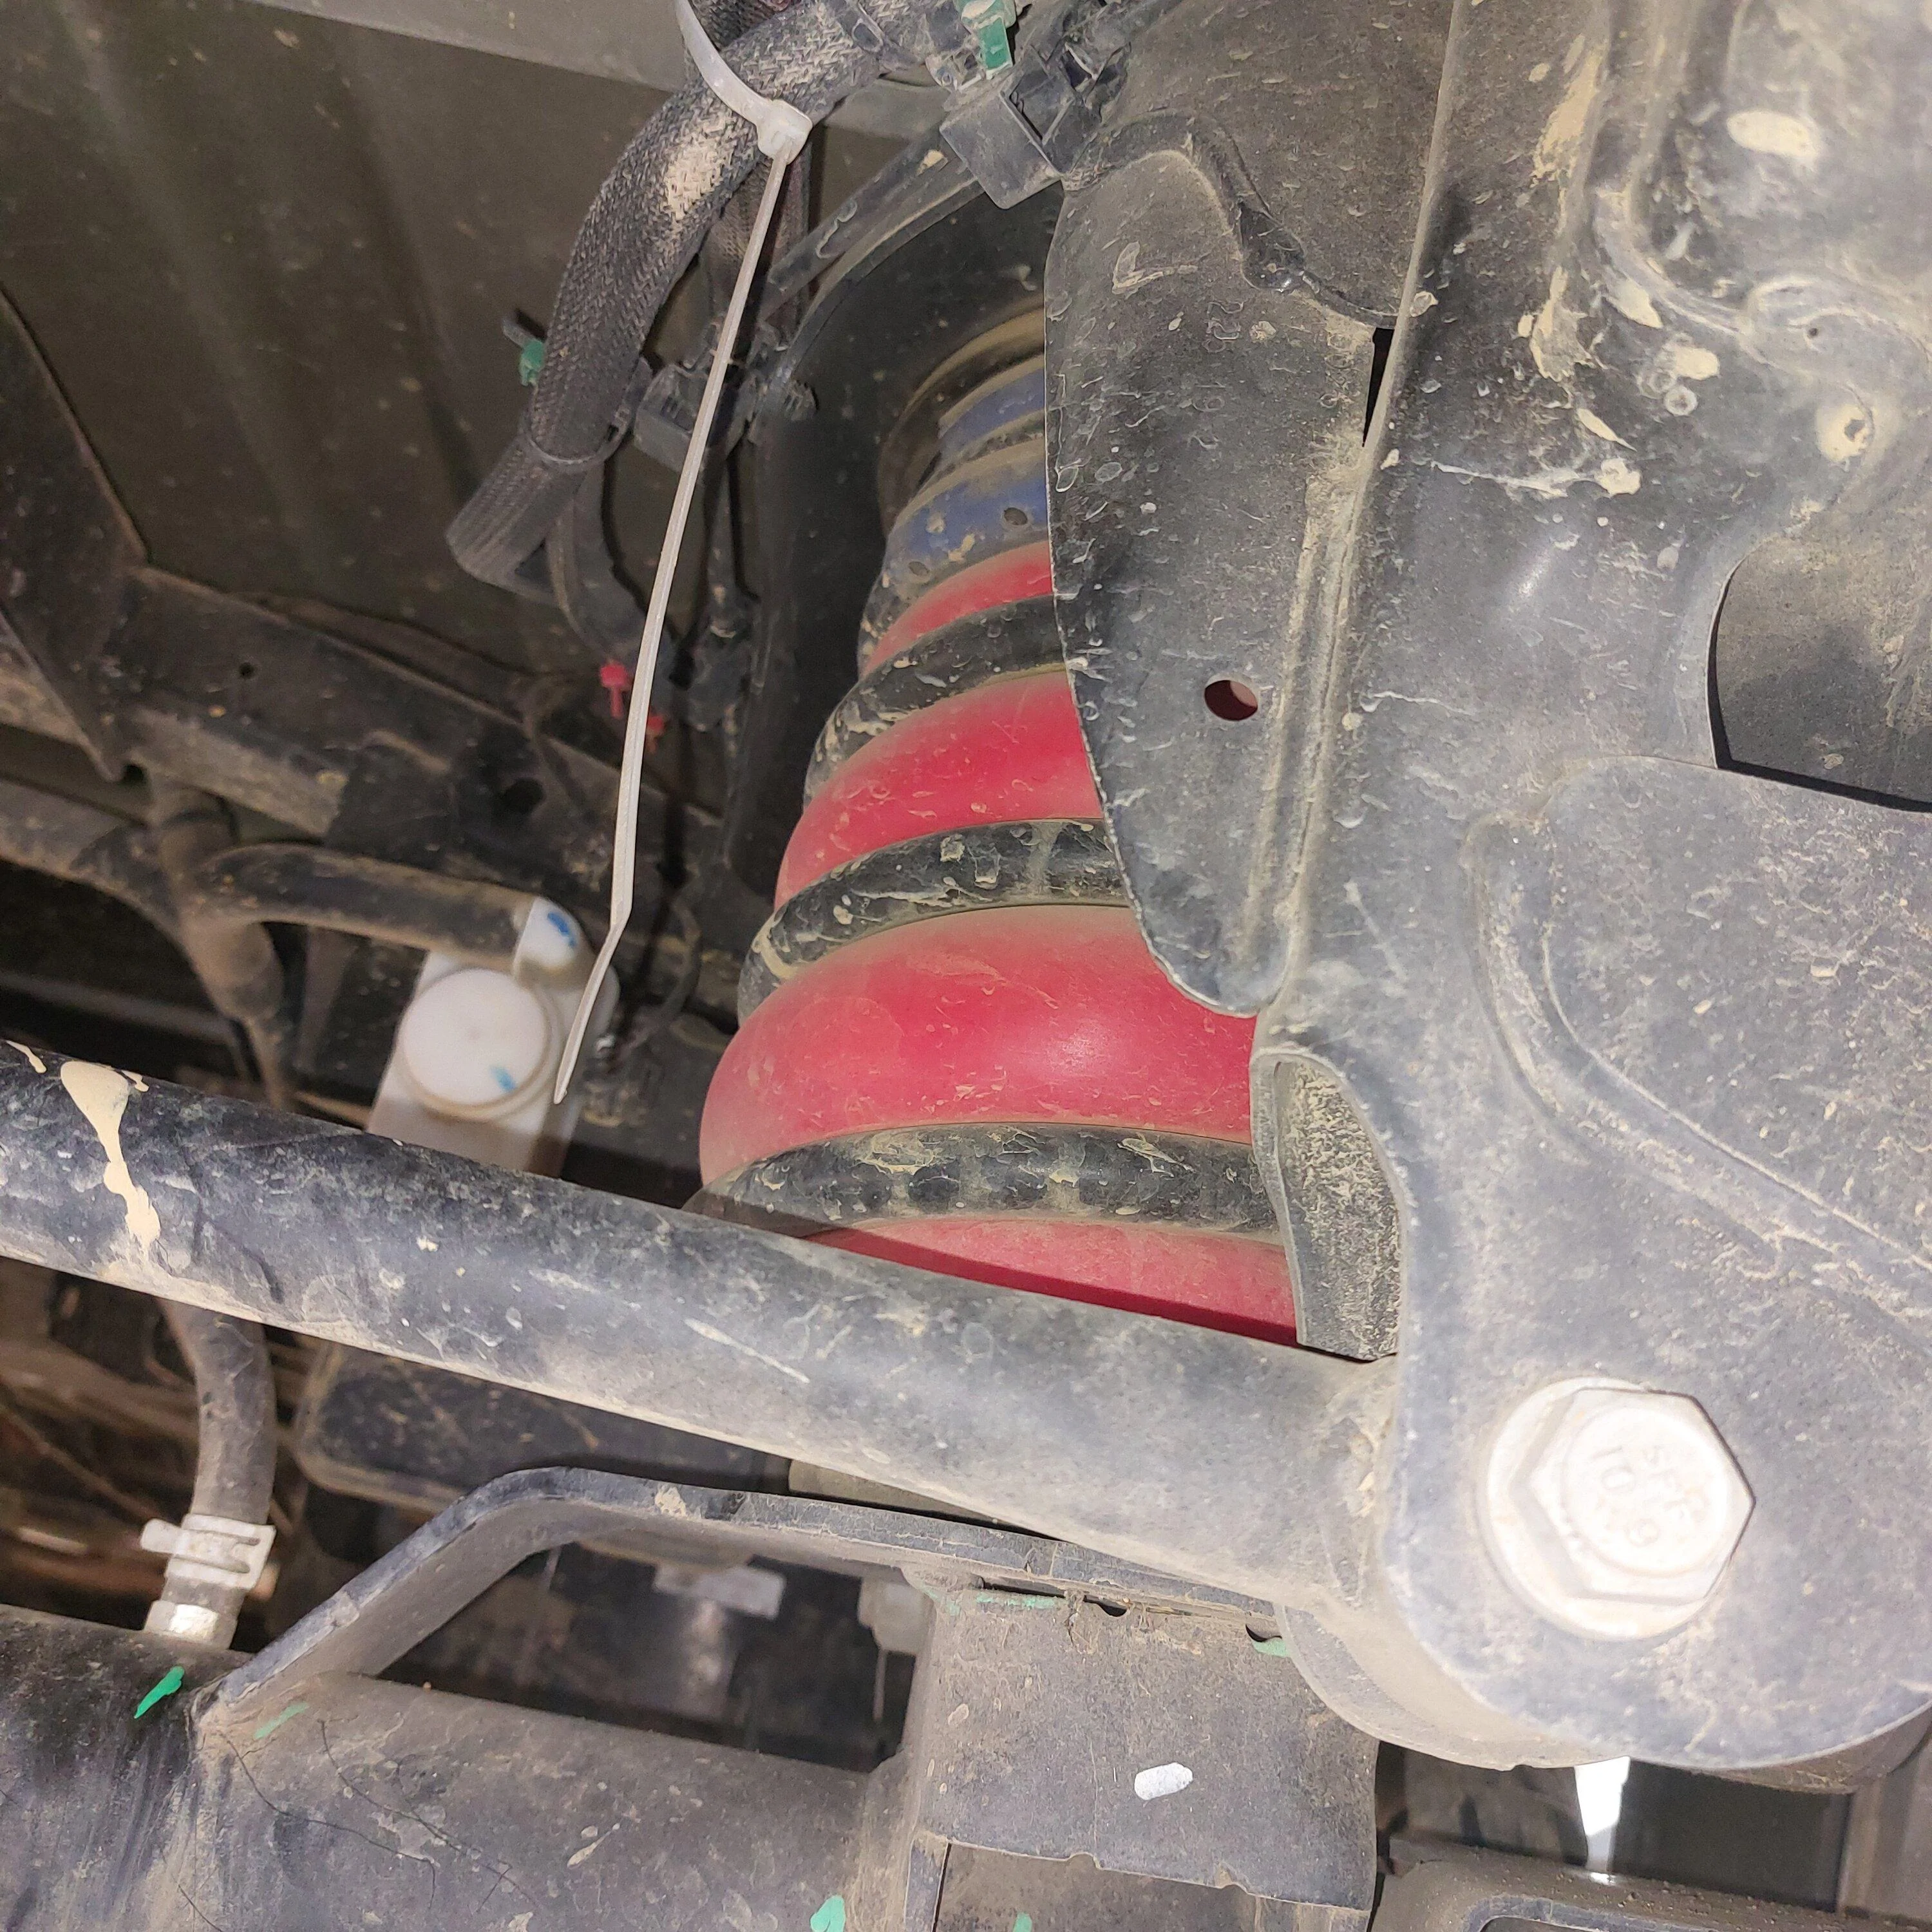
Max tow coils are a lot closer together than the widely spaced coils in the taller Overland springs. So it's likely to be easier to install the bags in Overland springs.

With only the min 5 or 7 psi (if I remember correctly) they shouldn’t provide any lift or support. My understanding is that the min psi is just to make sure the bag retains its shape and position when not in use.

im also fairly sure the airlift bags max at maybe 35-40psi.

can’t speak to their lift potential but i run them at 10psi and they take almost all of the bounce out when i pull my new 5,600lbs travel trailer.

I usually leave mine at 5psi when not in use.
Spot-on. 5 psi minimum, 35 max unless you buy the HD versions.
6psi gave me 0 lift so I can run 5 to 6 normally like they want.

And I had thought about next to the license plate - or off to the side by the license plate lights, something like that. Will get that finished up tomorrow.

Lots of good info and advice and examples here!!!!!!!!!!!!!!!!!!!!!!!!!!!!
 

Muddzy

Well-Known Member
First Name
Keith
Joined
Feb 19, 2021
Threads
0
Messages
65
Reaction score
62
Location
NJ
Vehicle(s)
2020 JTR, 2013 JKUR, 2008 JKU Sahara (sold)
Max tow coils are a lot closer together than the widely spaced coils in the taller Overland springs. So it's likely to be easier to install the bags in Overland springs.
Wow. Your springs stretched open a lot farther apart than mine. I've got EVO springs/Rubicon and no way my airbags were sliding in as easy without folding and using a zip tie. Good for others to know some springs are easier.
 

PJZ

Well-Known Member
First Name
Patrick
Joined
Dec 16, 2021
Threads
13
Messages
333
Reaction score
478
Location
SoCal - The Valley
Vehicle(s)
2022 JTRD AEV370
Build Thread
Link
Nicely done Bill the springs on yours must be a lot more flex than on mine, being a Max-Tow. I know I "unloaded" the weight off the axle to install them and it was a P.T.A. still.


I will have to remember that, and need to look into some different springs possibly. :like: the bags in mine currently are acting like a typical late night Walmart customer in spandex. ?
20220809_103752.jpg

Trying to spill over. ?

I put the valves next to license plate.
Haha, for sure. That is how mine looked. It was ok when the bags were newer since they were soft. Once the heat took its tool it wasn't letting the spring work correctly. They were on there for 6+ years so you have lots of time
 

ShadowsPapa

Well-Known Member
First Name
Bill
Joined
Oct 12, 2019
Threads
247
Messages
40,510
Reaction score
54,033
Location
Runnells, Iowa
Vehicle(s)
'25 JTMX, '23 JLU 4xe, '82 SX4, '73 Javelin
Occupation
Retired auto mechanic, frmr gov't ntwrk security admin
Vehicle Showcase
3
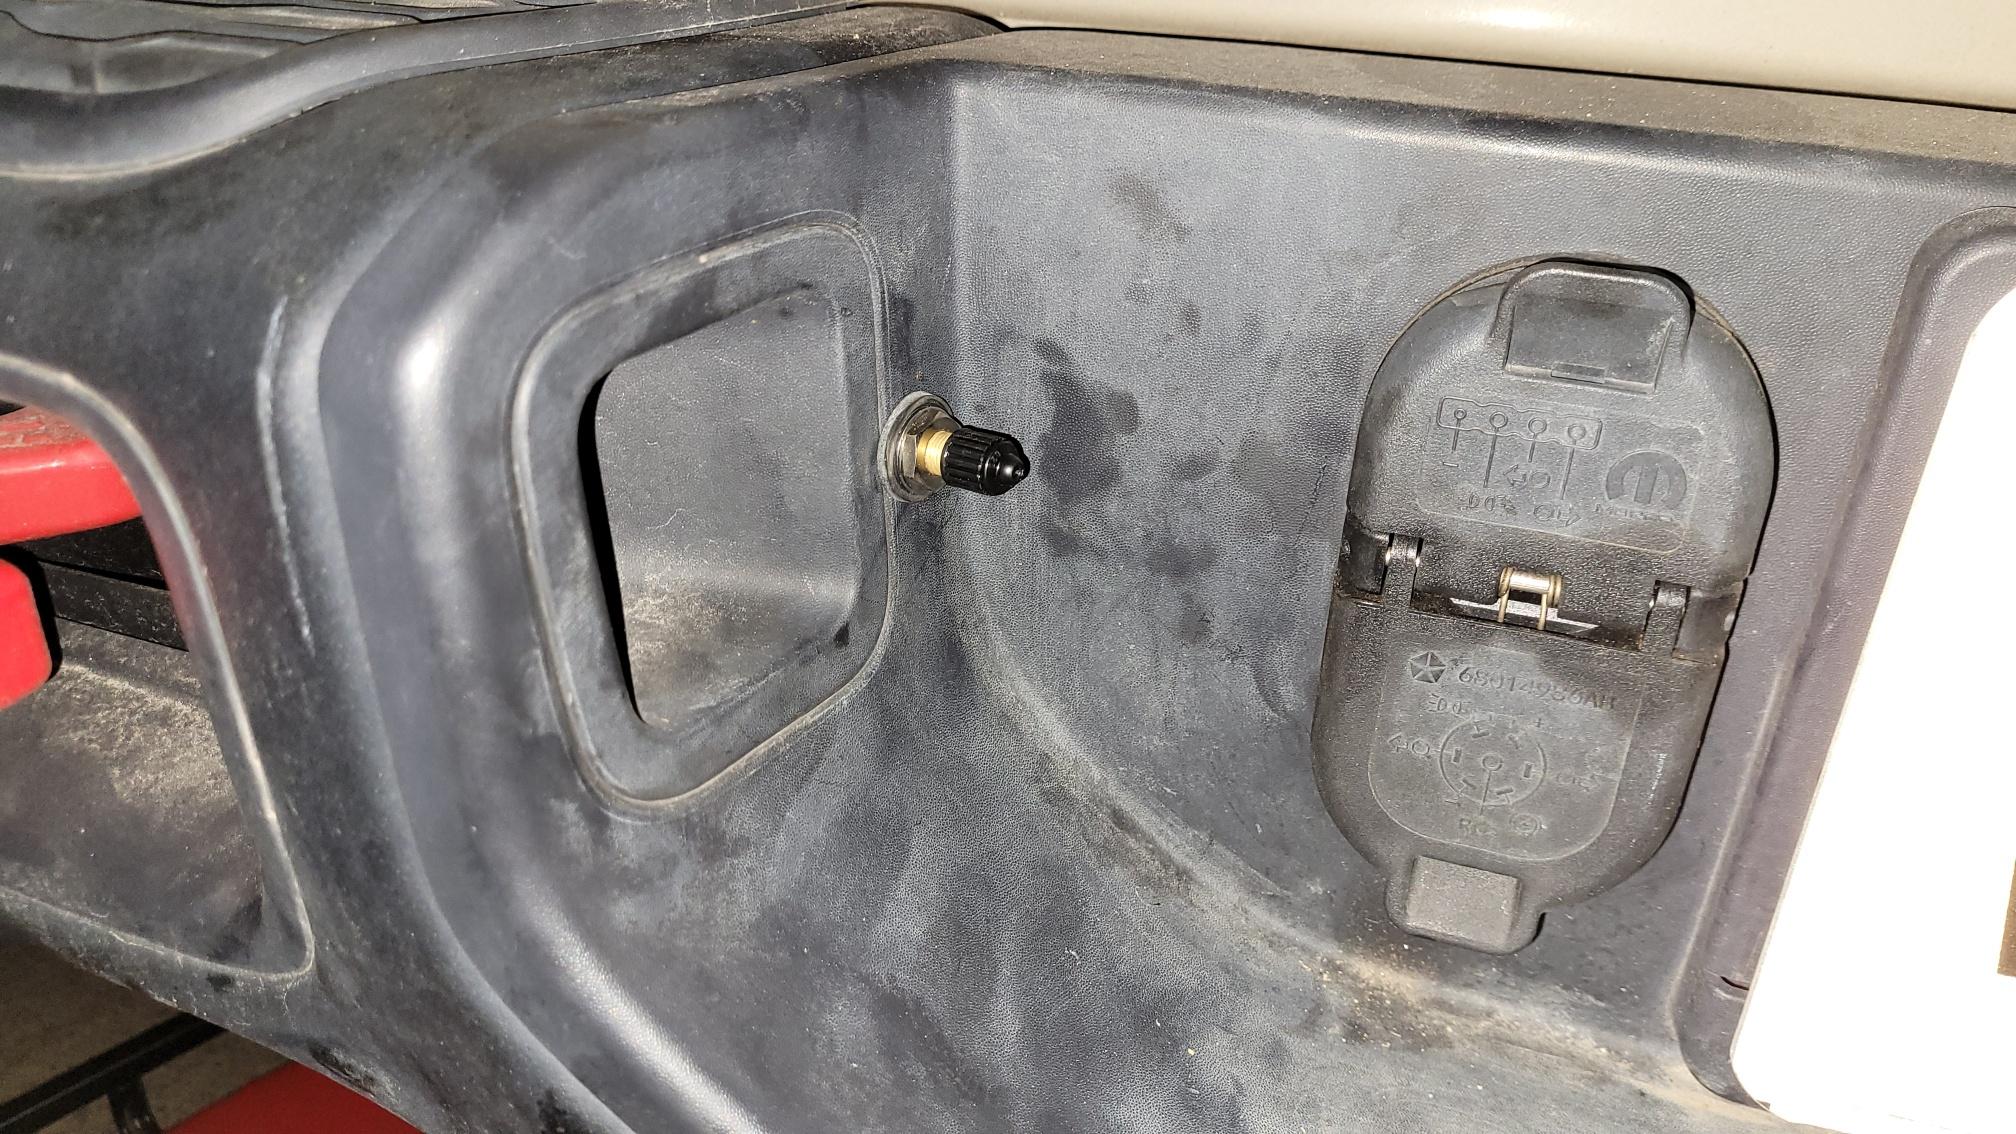
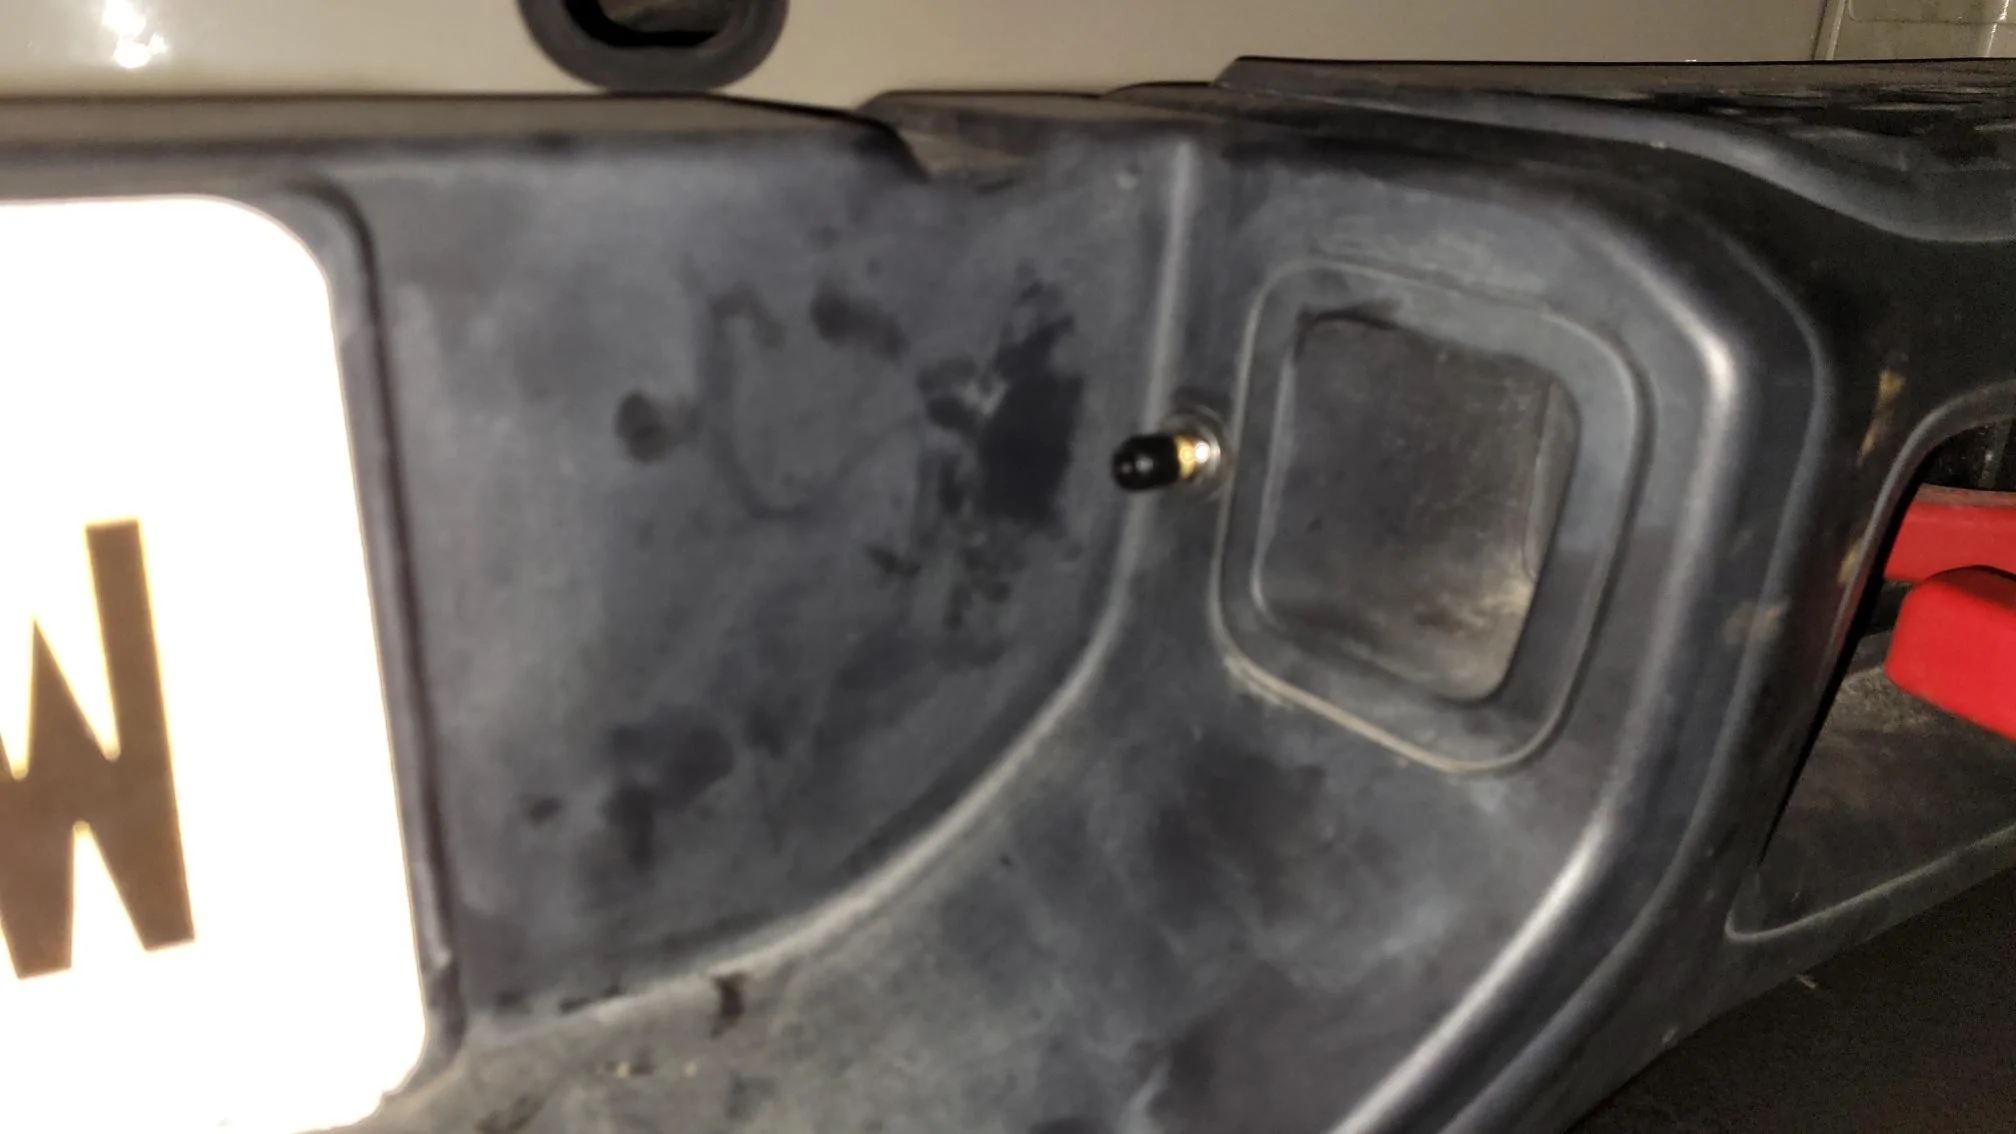
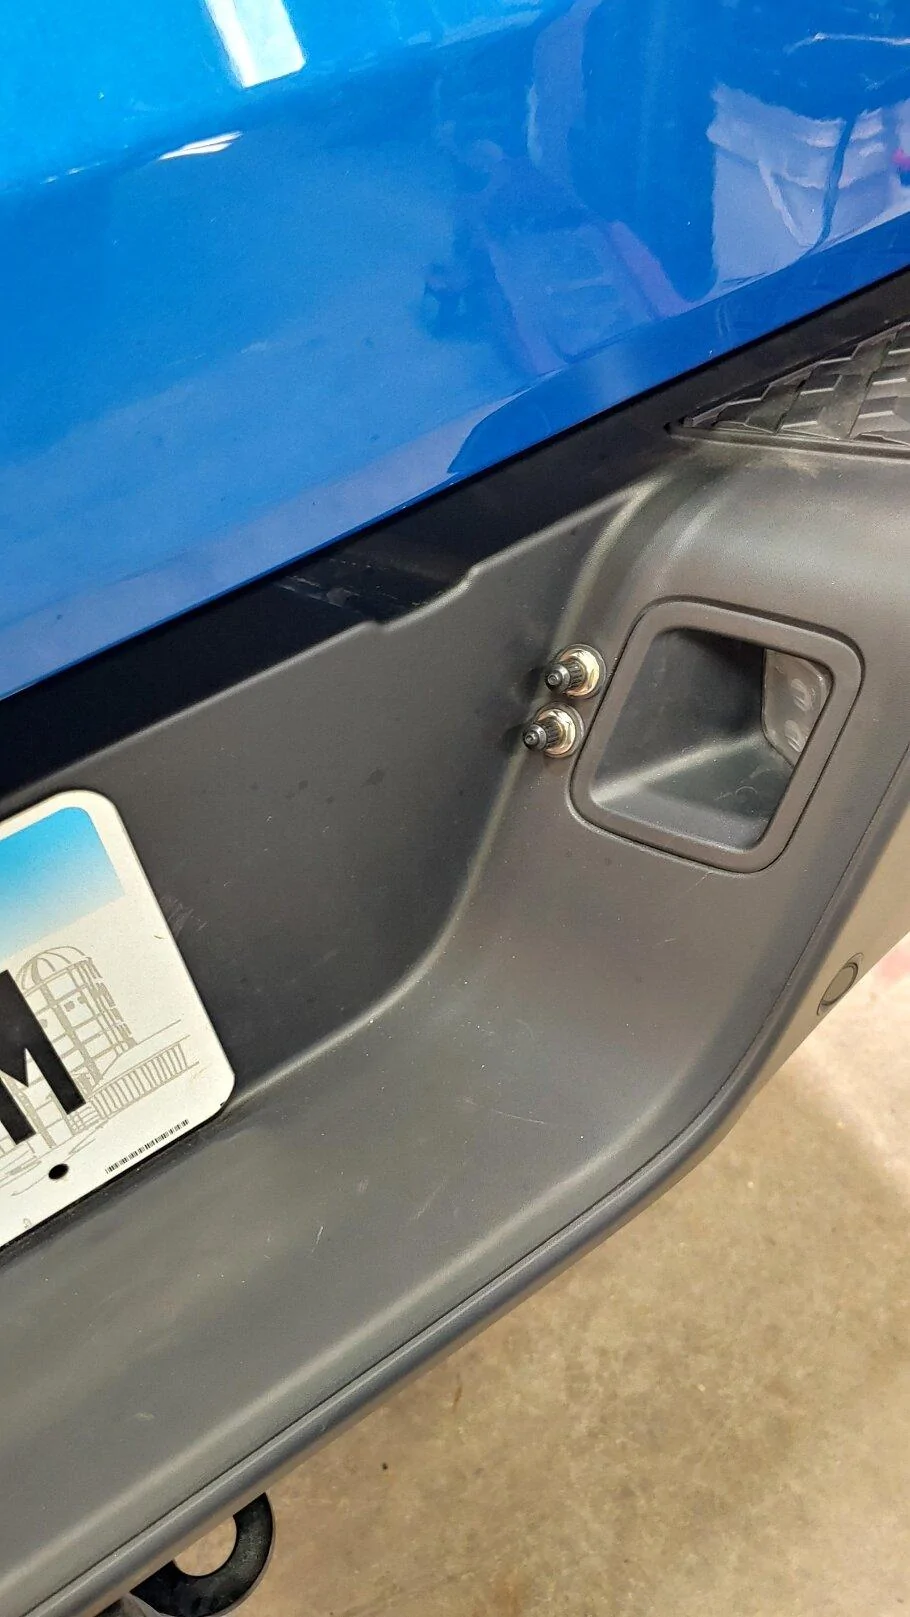
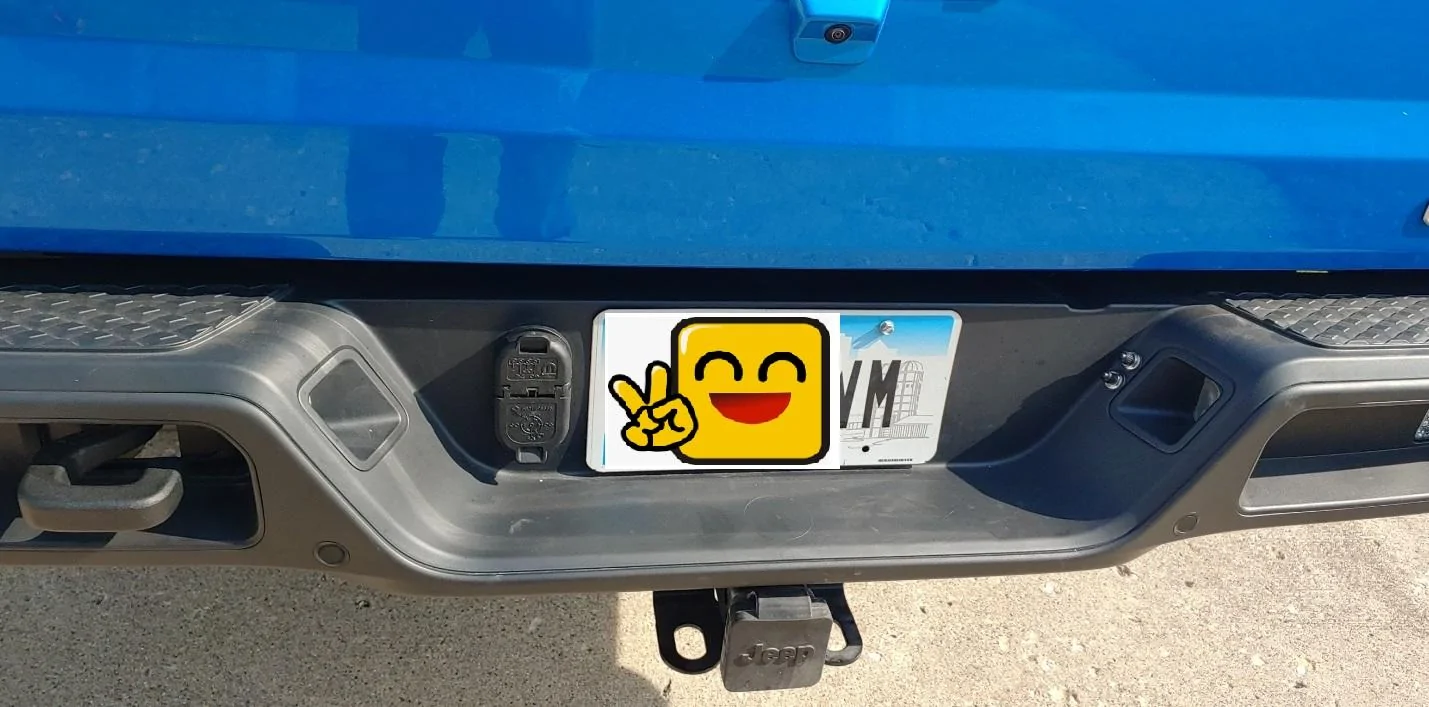
My bumper is a little different than yours but I put each of them beside the license plate lights. There was easy access behind and all I had to do was drill though the plastic. No steel or aluminum. Bad pics but you get the idea. I thought about putting them next to the license plate (facing out) like the concept above. But my spare was in the way and there's a thin sheet metal plate. It wouldn't have been hard but this was quicker and they're off to the side so I don't need to worry as much about stepping on them. I will probably still step on them ?.

20220810_220217_resized.jpg


20220810_220210_resized.jpg
I have the plastic Overland bumper - you'd have the heavier steel Rubicon rear bumper.

--------
Keep in mine, my suspension was also at full droop.
Shocks were disconnected at bottom end, sway bar links disconnected at frame bracket.
I leaned on the rotor hubs to get a tiny bit more droop than what just letting the axle settle on its own might do. The coils opened up just a little bit more that way.

Yes, these springs are different than max tow for sure - I had max tow springs under my 2020 Overland and the springs were shorter than the Overland rears, coils a bit closer.
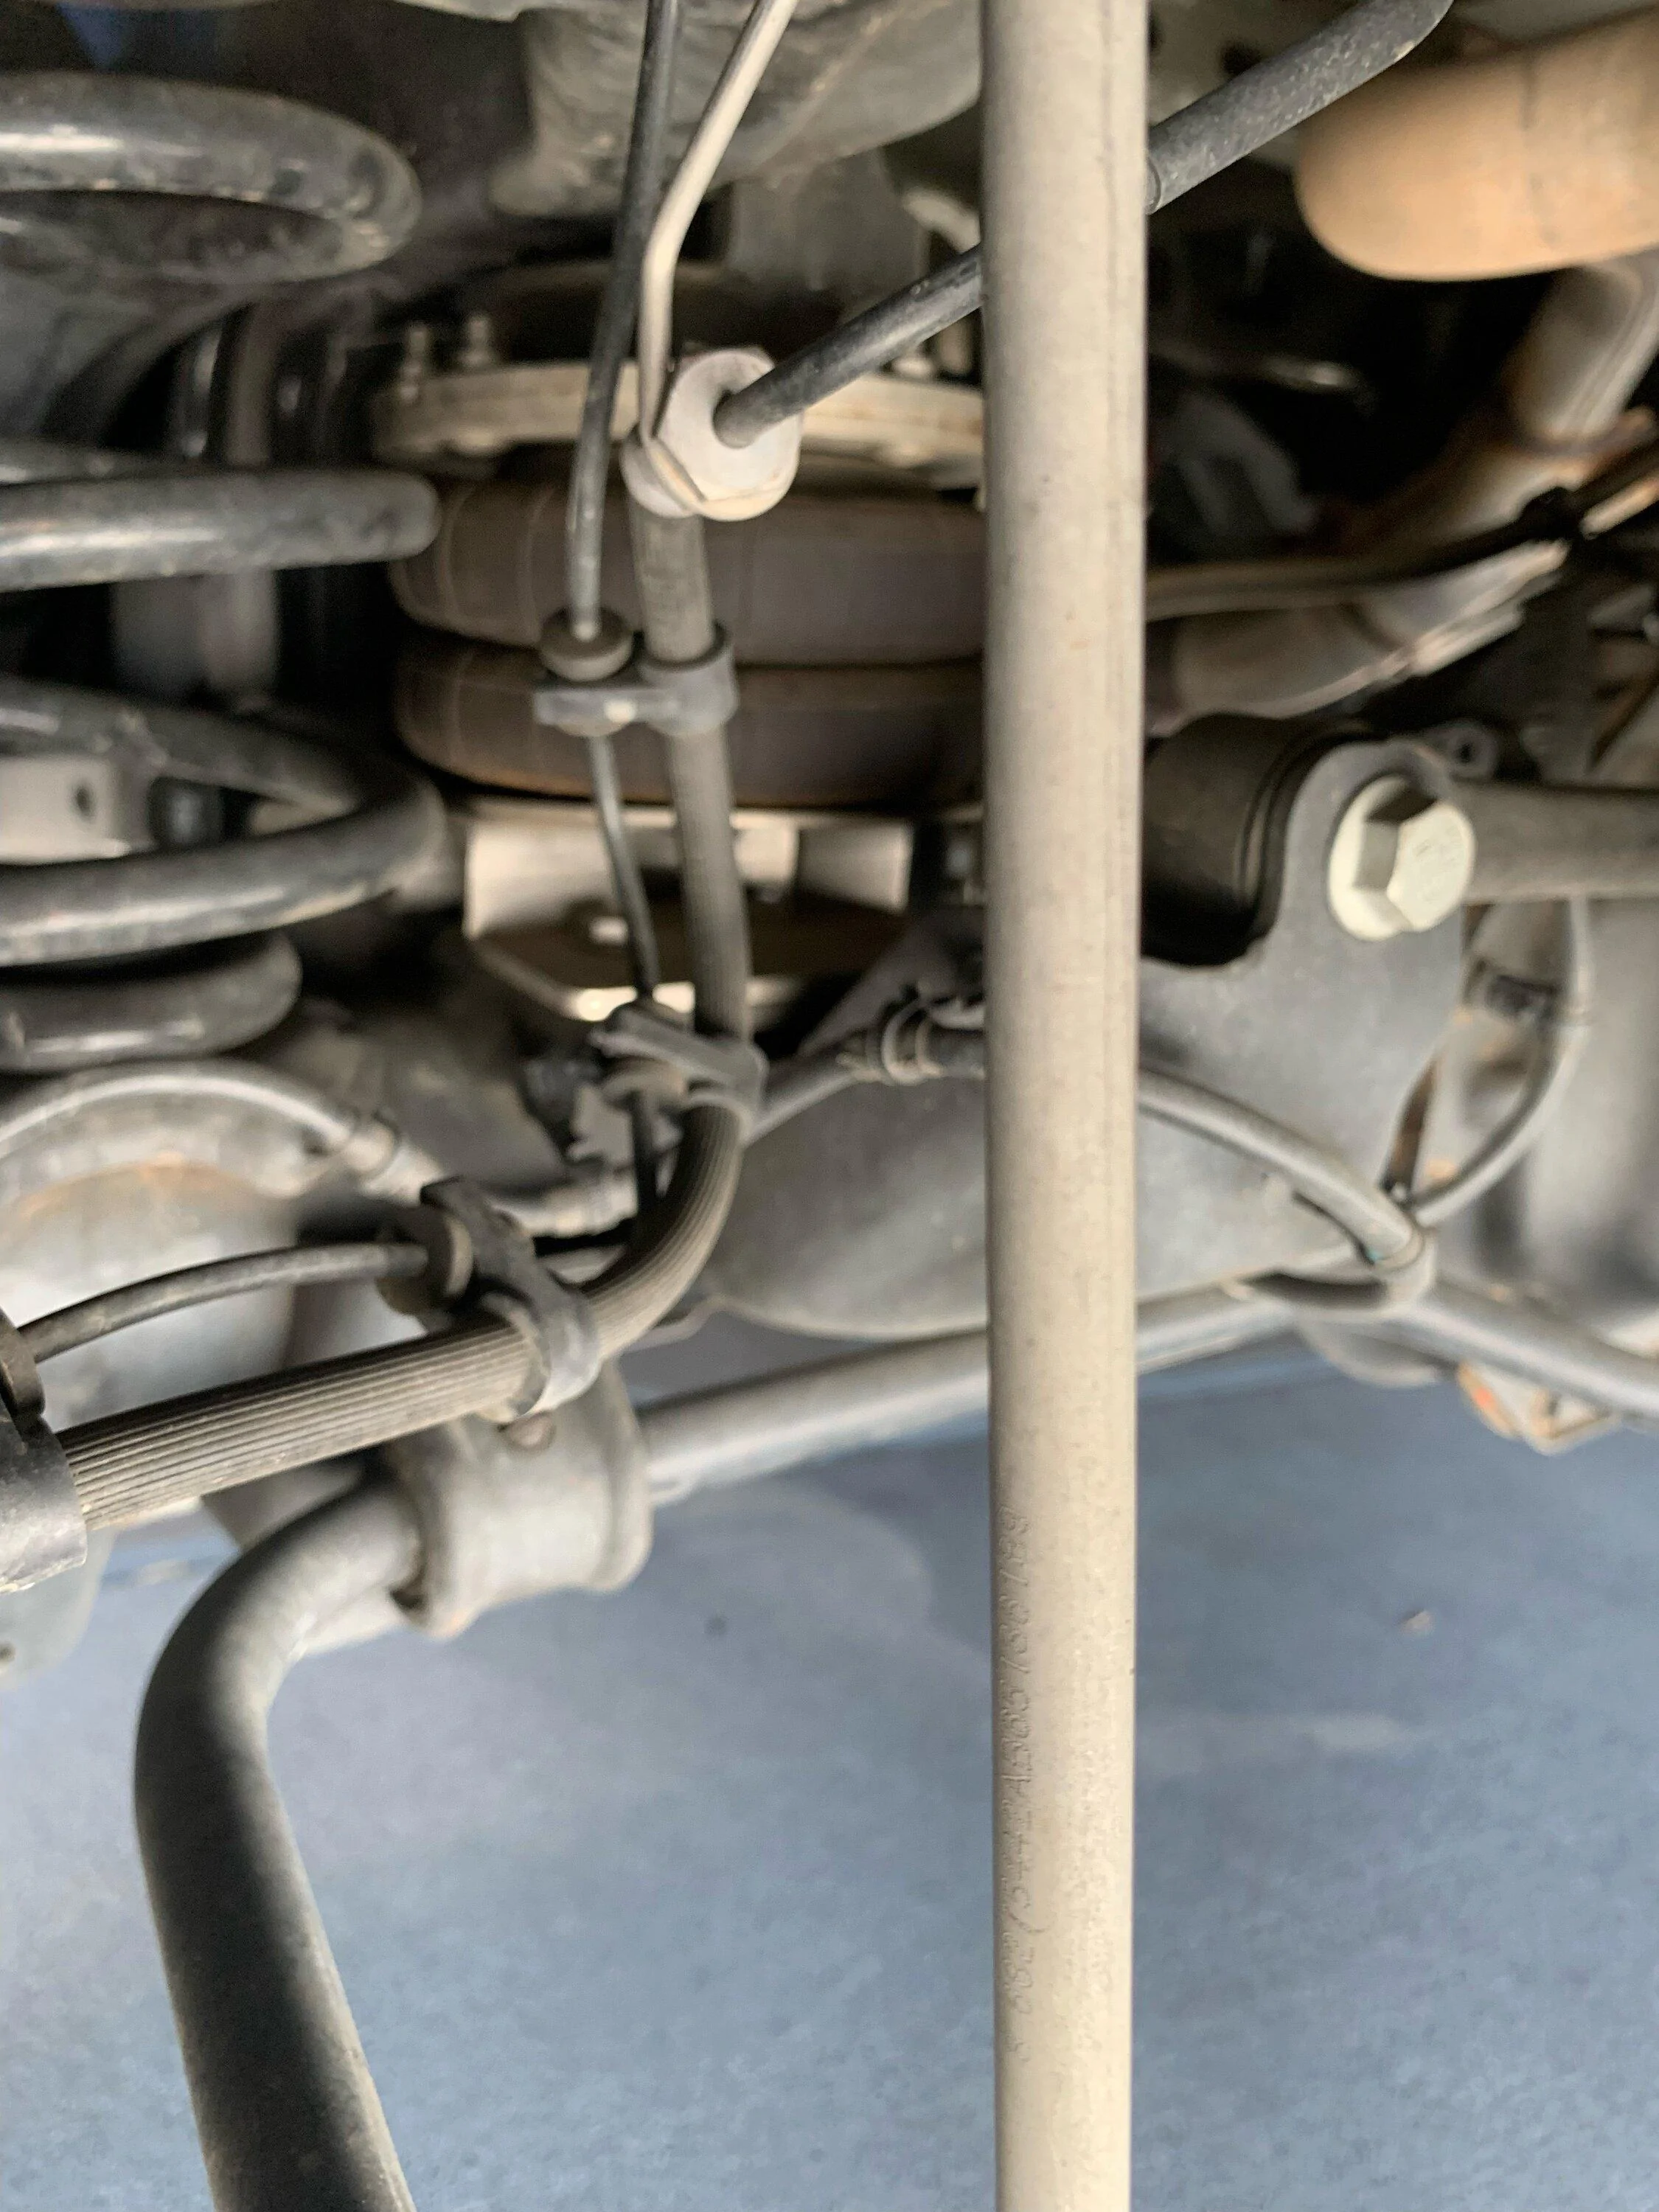
So - YMMV getting the bags in - I thought what the heck, worth a try and wow, it worked!
Otherwise, I had my bag of zip ties ready just in case and I knew my 200+ pounds of force could make those bags look like road kill that's been on the road after a couple of days if necessary to REALLY make 'em flat.

Now before it gets to 100 degrees in my garage, time to secure the air fittings at the rear.
 

Sponsored

Gren71

Well-Known Member
First Name
Matt
Joined
Jul 9, 2019
Threads
143
Messages
4,004
Reaction score
6,392
Location
Delaware
Vehicle(s)
Jeep JT sports S Max Tow (Sold) '23 Ram 1500
Occupation
Magician
Vehicle Showcase
1
Haha, for sure. That is how mine looked. It was ok when the bags were newer since they were soft. Once the heat took its tool it wasn't letting the spring work correctly. They were on there for 6+ years so you have lots of time
This makes me wonder what the projected life span for the bags are. Im sure it different with different climates, but since i live close to the ocean id bet mine will harden up pretty quick. I think im two years with them in now.

Anyone have an insight into their life span?
 
  • Like
Reactions: PJZ

montechie

Well-Known Member
First Name
Wes
Joined
Nov 26, 2021
Threads
4
Messages
304
Reaction score
574
Location
Bozeman, MT, USA
Vehicle(s)
2005 LJ Rubicon, 2022 JT Rubicon
Occupation
Writer of code, designer of things
I'm loving the AirLift bags, I put some on a month ago before a big road trip (~2500 miles) and certainly helped body roll on the highway. I have a heavy topper ~320lbs + recovery gear daily on the soft rubi coils and am running my bags at 15lbs. Some notes on my install:
  • Soaking the bags in hot water with a little dish soap beforehand both softened them up nicely and made them slide in easier.
  • A good portable bike pump is enough to air these up, I have a Lezyn hand pump that screws onto schrader/presta stems and is way more convenient than my compressor.
  • Not a huge stat, but a couple in my friend group are at around 100K with AirLifts in their HD setups without failure. (in the Rocky Mountain states CO, WY, MT) Between that and the low price I figured it was worth it. Granted those are probably heavier duty bags, but they were also hauling big slide-in campers and 5th wheels on them.
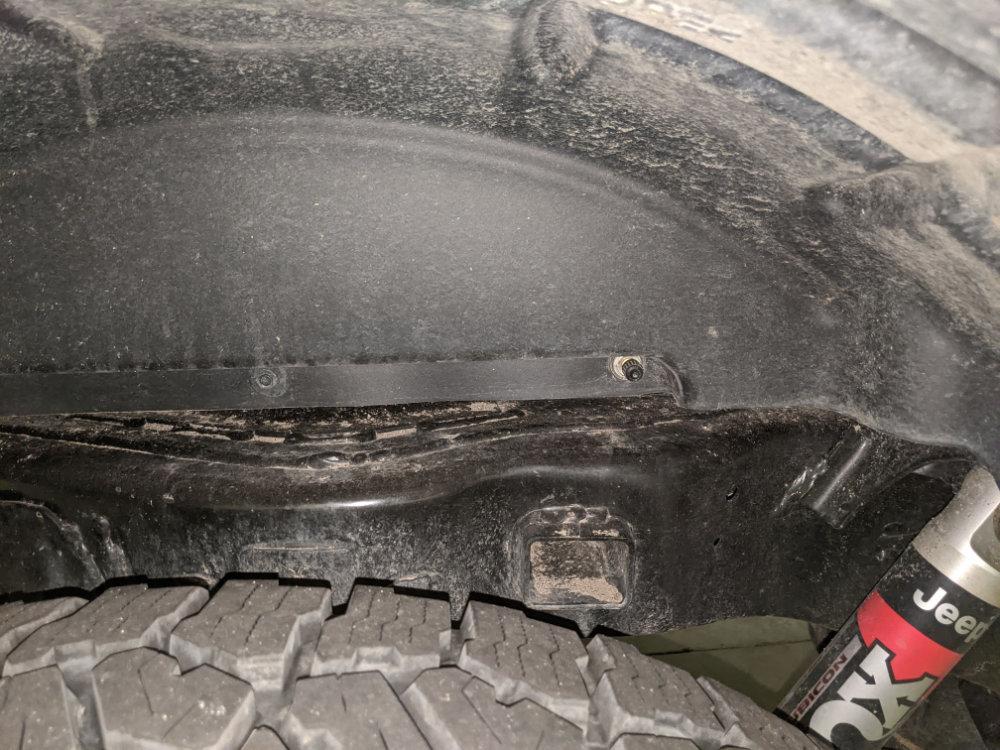
  • I have the stock steel bumper and didn't feel like drilling it, I instead opted to just run a nozzle through each wheel well liner (see photo), no fuss or muss. There are 3 screws that keep the liner secured, the nozzle fit through the hole perfectly. Super easy location and convenient since I often am messing with tire pressures at the same time. I also wanted to keep each side independent so needed 2 locations.
Jeep Gladiator AirLift rear bag system - info you need to know airspring-nozzle
 

ShadowsPapa

Well-Known Member
First Name
Bill
Joined
Oct 12, 2019
Threads
247
Messages
40,510
Reaction score
54,033
Location
Runnells, Iowa
Vehicle(s)
'25 JTMX, '23 JLU 4xe, '82 SX4, '73 Javelin
Occupation
Retired auto mechanic, frmr gov't ntwrk security admin
Vehicle Showcase
3
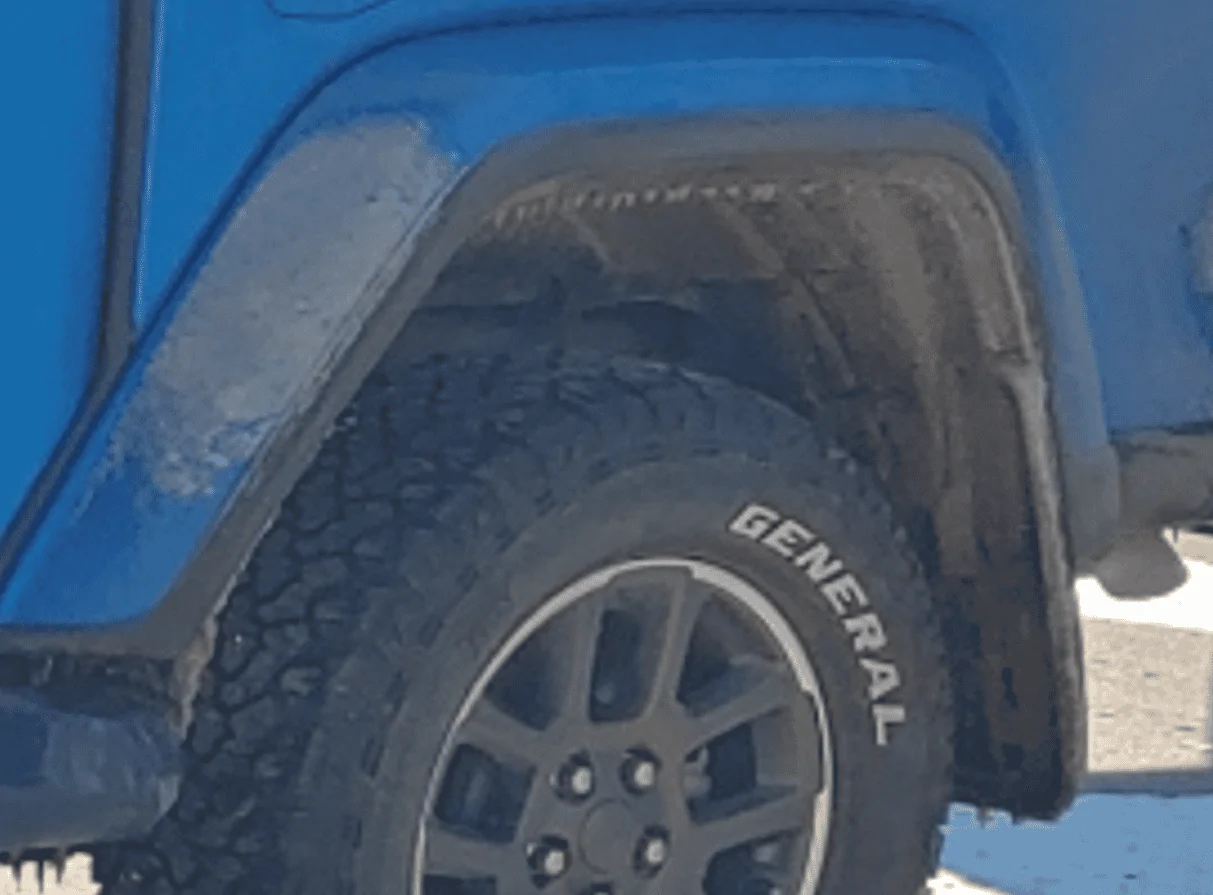
This is one reason I opted to stay clear of the wheels or anything directly in their paths - salt, sand and water (and this is the next day after much of it dropped off) -

Jeep Gladiator AirLift rear bag system - info you need to know 1660239806714


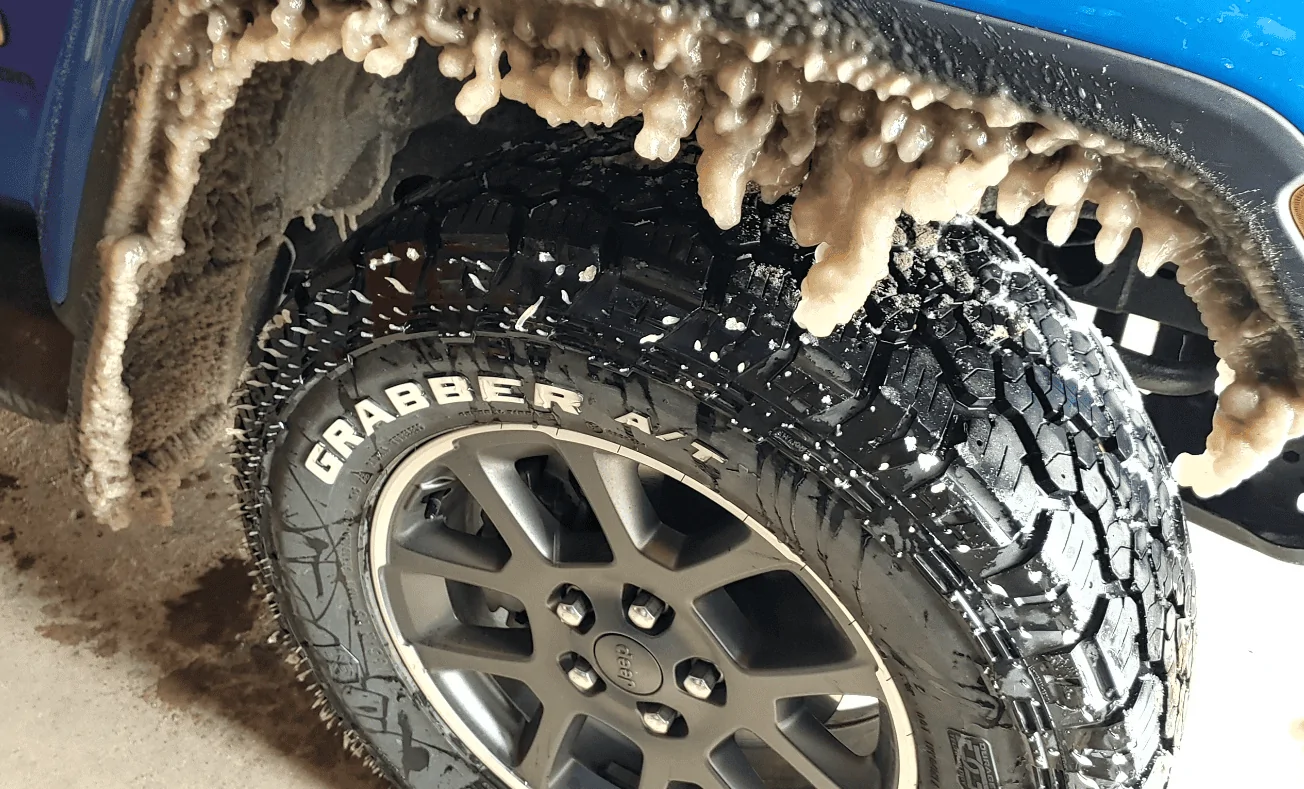
It was more like this originally -

Jeep Gladiator AirLift rear bag system - info you need to know 1660239896993


I've had air shock fittings that corroded so badly they had to be replaced - no way to air them up or let them down. So I tried to find a safe spot away from Iowa stuff...........

.................but the Overland plastic rear bumper limits your options bigly.
Can't use the license plate screw area - the plastic is thick and deep with webbing. Deeper than the length of the fittings. I measured it at 1 3/8" by using a very fine bit into one of the screw holes, using a wire and measuring the wire. Nope, can't do that without removing the bumper and cutting out a bunch of that plastic webbing and such.
I thought about the area where the lower plate holes are - nope, there's steel back there. What about next to the plate? Well............ too much stuff -webbing, steel and more.
Every time I thought hey, this would be a great spot and look good, I got back under the truck - nope, too thick, or steel or whatever. The receiver bolts to the back of the bumper messing up that area and then I remembered - I sometimes stand on that drop area of the bumper where the plate is, and it accumulates ice and snow in the winter. Rats.
So I went this route. Not my first choice, but it was open back there (as long as I stayed where they are to miss the other stuff back there.
I might love the look of the hardware on some other vehicle, but on this truck, it's going to get painted satin black................ I want it painted black LOL

Jeep Gladiator AirLift rear bag system - info you need to know 20220811_115833_HDR


Jeep Gladiator AirLift rear bag system - info you need to know 20220811_095200
 

Muddzy

Well-Known Member
First Name
Keith
Joined
Feb 19, 2021
Threads
0
Messages
65
Reaction score
62
Location
NJ
Vehicle(s)
2020 JTR, 2013 JKUR, 2008 JKU Sahara (sold)
This is one reason I opted to stay clear of the wheels or anything directly in their paths - salt, sand and water (and this is the next day after much of it dropped off) -

1660239806714.png


It was more like this originally -

1660239896993.png


I've had air shock fittings that corroded so badly they had to be replaced - no way to air them up or let them down. So I tried to find a safe spot away from Iowa stuff...........

.................but the Overland plastic rear bumper limits your options bigly.
Can't use the license plate screw area - the plastic is thick and deep with webbing. Deeper than the length of the fittings. I measured it at 1 3/8" by using a very fine bit into one of the screw holes, using a wire and measuring the wire. Nope, can't do that without removing the bumper and cutting out a bunch of that plastic webbing and such.
I thought about the area where the lower plate holes are - nope, there's steel back there. What about next to the plate? Well............ too much stuff -webbing, steel and more.
Every time I thought hey, this would be a great spot and look good, I got back under the truck - nope, too thick, or steel or whatever. The receiver bolts to the back of the bumper messing up that area and then I remembered - I sometimes stand on that drop area of the bumper where the plate is, and it accumulates ice and snow in the winter. Rats.
So I went this route. Not my first choice, but it was open back there (as long as I stayed where they are to miss the other stuff back there.
I might love the look of the hardware on some other vehicle, but on this truck, it's going to get painted satin black................ I want it painted black LOL

20220811_115833_HDR.jpg


20220811_095200.jpg
At first when I saw your bumper I thought they would look odd in that location since it was sloped more than mine. But it doesn't look bad to me. And painting them will definitely make them disappear a lot more like you want. Funny how locating 2 little nozzles can take a lot more time than one would think. And I had no idea the bumpers were that different.
 
  • Like
Reactions: PJZ

Alaska-HWY JK

Well-Known Member
Joined
Jun 26, 2019
Threads
4
Messages
207
Reaction score
194
Location
BC
Vehicle(s)
2005 Rubicon LJ 2007 JKU 2020 Rubicon Gladiator
This makes me wonder what the projected life span for the bags are. Im sure it different with different climates, but since i live close to the ocean id bet mine will harden up pretty quick. I think im two years with them in now.

Anyone have an insight into their life span?
Mine lasted one winter. Installed last summer, went to air up this spring and found them split. They were replaced under warranty but it’s getting late this year so I won’t install the new bags. We had a cold January/February. Down to -40 some days. They don’t like that.
 
  • Like
Reactions: PJZ

Sponsored

PJZ

Well-Known Member
First Name
Patrick
Joined
Dec 16, 2021
Threads
13
Messages
333
Reaction score
478
Location
SoCal - The Valley
Vehicle(s)
2022 JTRD AEV370
Build Thread
Link
Mine lasted one winter. Installed last summer, went to air up this spring and found them split. They were replaced under warranty but it’s getting late this year so I won’t install the new bags. We had a cold January/February. Down to -40 some days. They don’t like that.
Take a look at Timber Grove bags if you need something for more extreme weather. Put these on our 5th gen Ram and they are apples to oranges different than the airlift bags. Have not put anything on the JT yet.
https://timbergroveenterprises.com/shop/19-up-jeep-gladiator-stainless-rear-asam-sq6466157
 

Muddzy

Well-Known Member
First Name
Keith
Joined
Feb 19, 2021
Threads
0
Messages
65
Reaction score
62
Location
NJ
Vehicle(s)
2020 JTR, 2013 JKUR, 2008 JKU Sahara (sold)
  • Haha
Reactions: PJZ

PJZ

Well-Known Member
First Name
Patrick
Joined
Dec 16, 2021
Threads
13
Messages
333
Reaction score
478
Location
SoCal - The Valley
Vehicle(s)
2022 JTRD AEV370
Build Thread
Link
How the hell do you zip tie those and slide them in between the springs? Obviously just kidding but you ain't joking apples to oranges.
They are an easy install replacing the bumpstops - all bolt on. On the Ram the bags are inboard to the spring. on our JTs it would be outboard and even easier to install. They say to give them a call if you have a lift for the correct spacer.

If you want to go down the rabbit hole you could install these with an ARB Linx + controller and independently control each bag on the fly. Just in case you hadn't spent enough money yet on your truck :)

Jeep Gladiator AirLift rear bag system - info you need to know IMG_5783
 

PhantomChameleon

Well-Known Member
Joined
Nov 6, 2019
Threads
7
Messages
397
Reaction score
702
Location
Colorado
Vehicle(s)
Gator Gladiator Rubicon
So I've read this thread through twice and am still unsure of which option is the better one for those of us with the Mopar 2in lift.

It seems like there's three different paths people are taking with these airlift bags:

1) Order the RAM 1500 bags and use them together with the spacers from the Gladiator kit.

2) Get the Gladiator kit and figure out some way to get thicker spacers to take up the space created by the lift.

3) Get the Gladiator kit and run it by itself as-is.


Can anyone clarify which seems to be working the best, or at least which option worked for them?

And for those running the Gladiator kit with a thicker spacer (option #2), what are you using as the thicker spacer?

Thanks!
Sponsored


Top