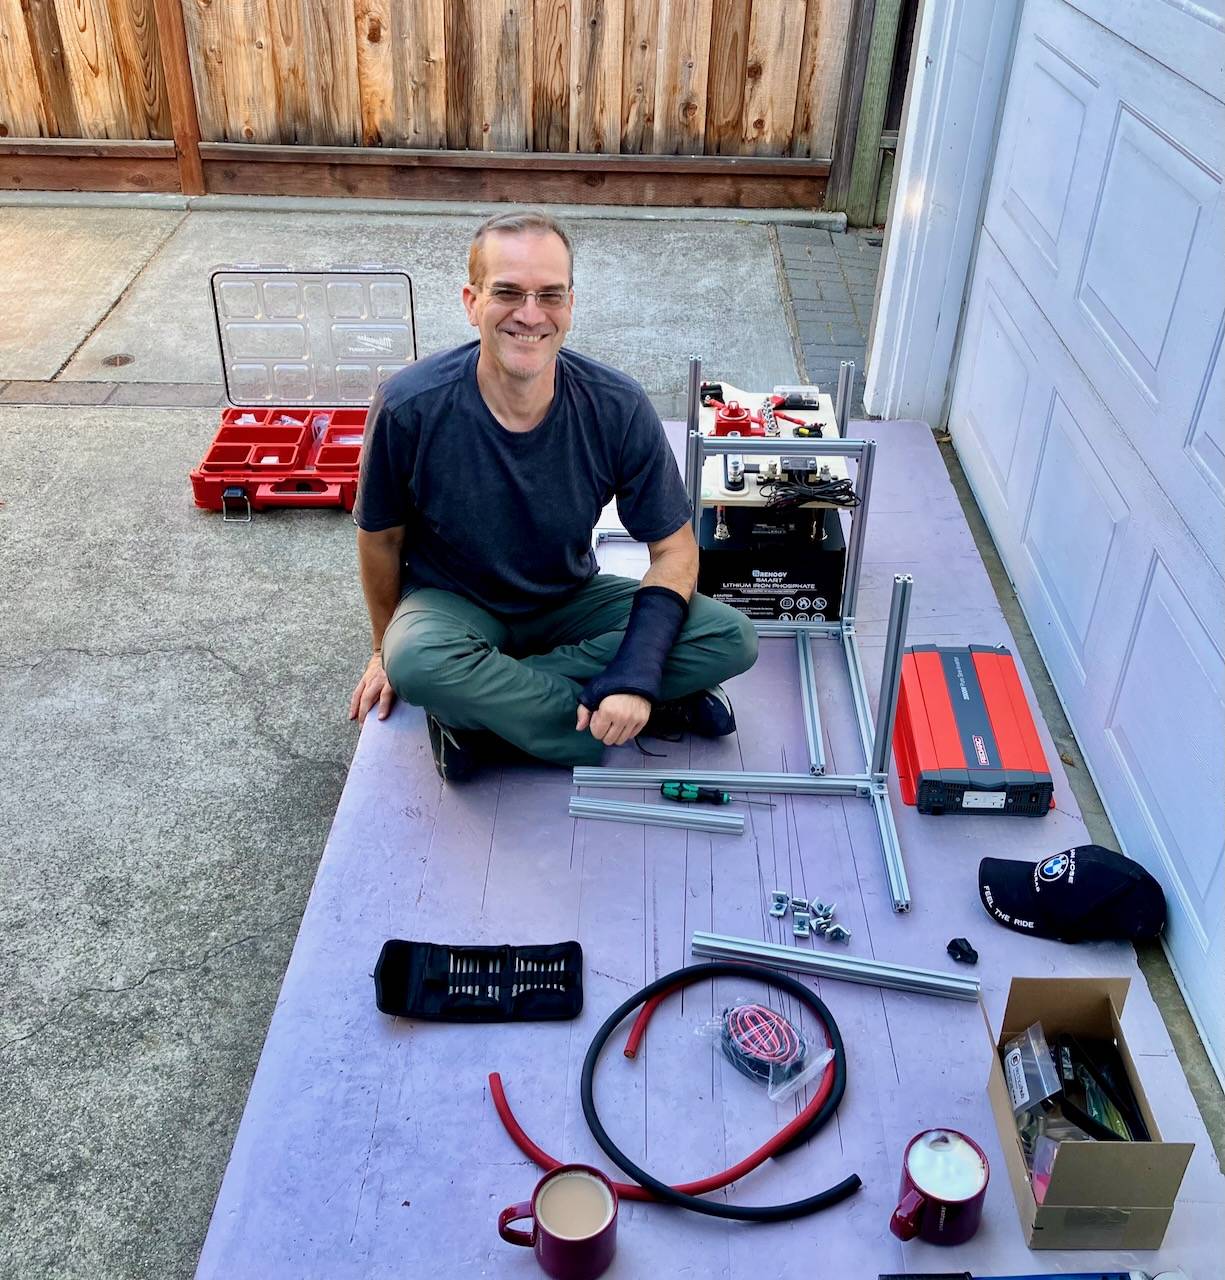
Sponsored

A new hope ... (build journal and component reviews)

OP
OP
cug

cug

Well-Known Member
First Name
Guido
Joined
Apr 1, 2023
Threads
13
Messages
602
Reaction score
664
Location
Christchurch, New Zealand
Vehicle(s)
JTR EcoDiesel, Land Cruiser 79, BMW R1250GS
Build Thread
Link
Occupation
Just keeping busy
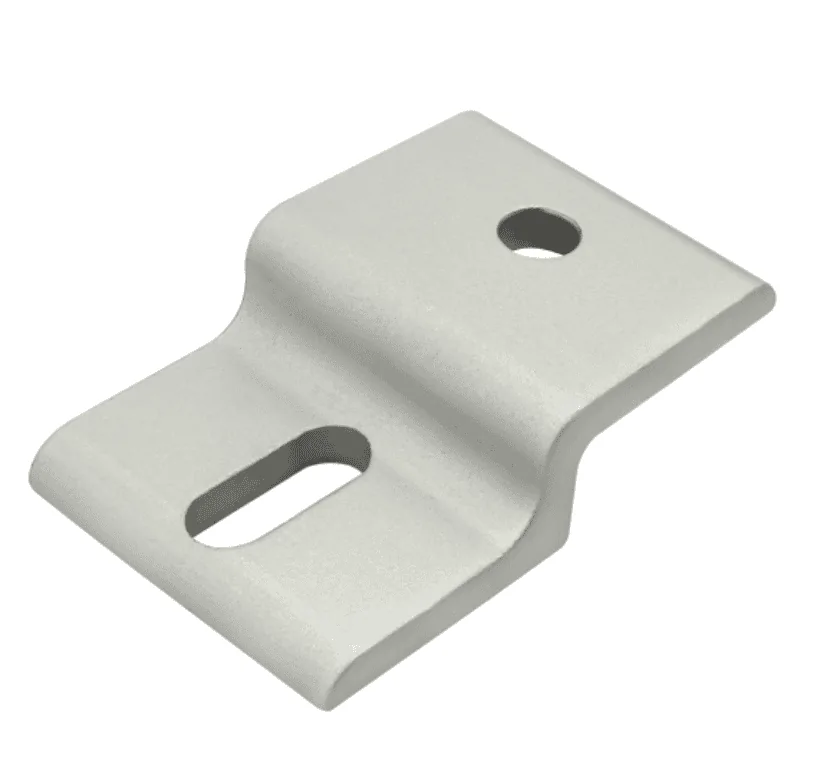
Mule Expedition Outfitters Rear Camera Relocation Bracket

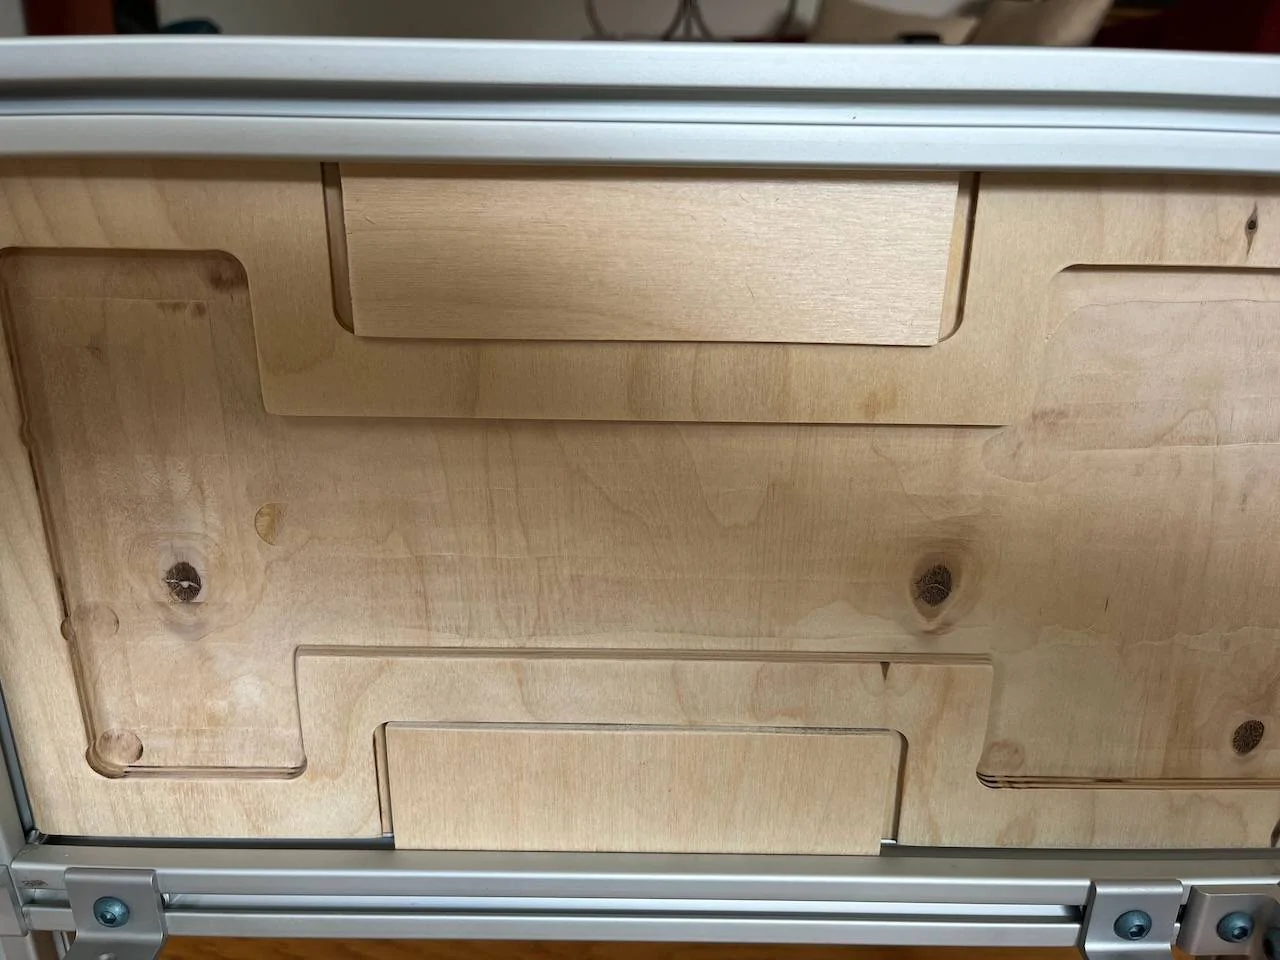
When I received the bracket, I was surprised that the camera just didn't fit. Here's the continuation of that.

So, I don't know how different they can be given that. Especially when I see how far the bracket is off:

Jeep Gladiator A new hope ... (build journal and component reviews) img_5790-jpeg


That notch the OEM cutout has is so that the plastic doesn't "ride" on a small plastic ridge when the camera is mounted. Their bracket not only has too big a hole, it als has the wrong shape, at least for the camera that is in my truck, which Mopar claims isn't something very special.
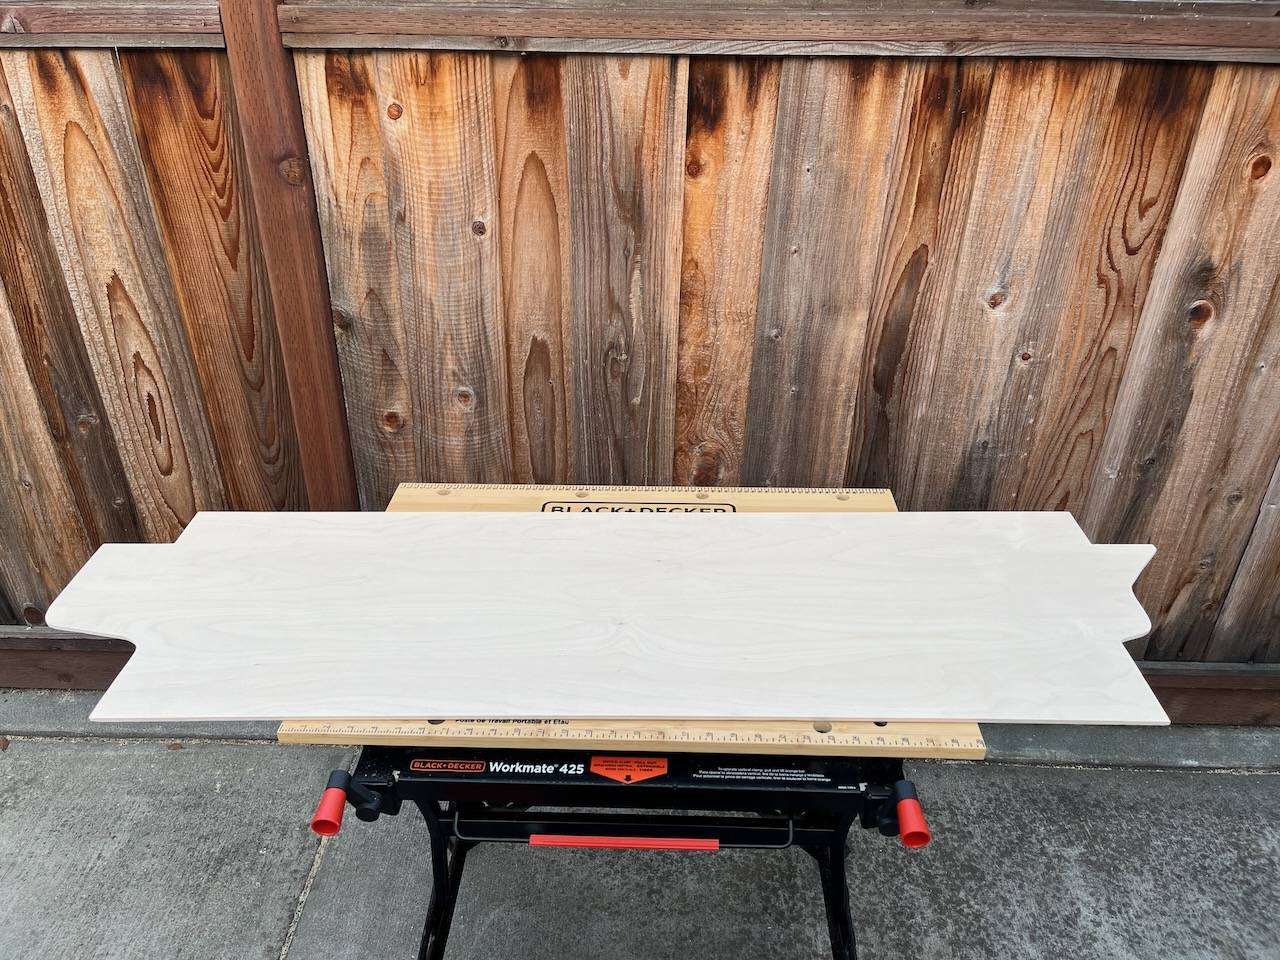
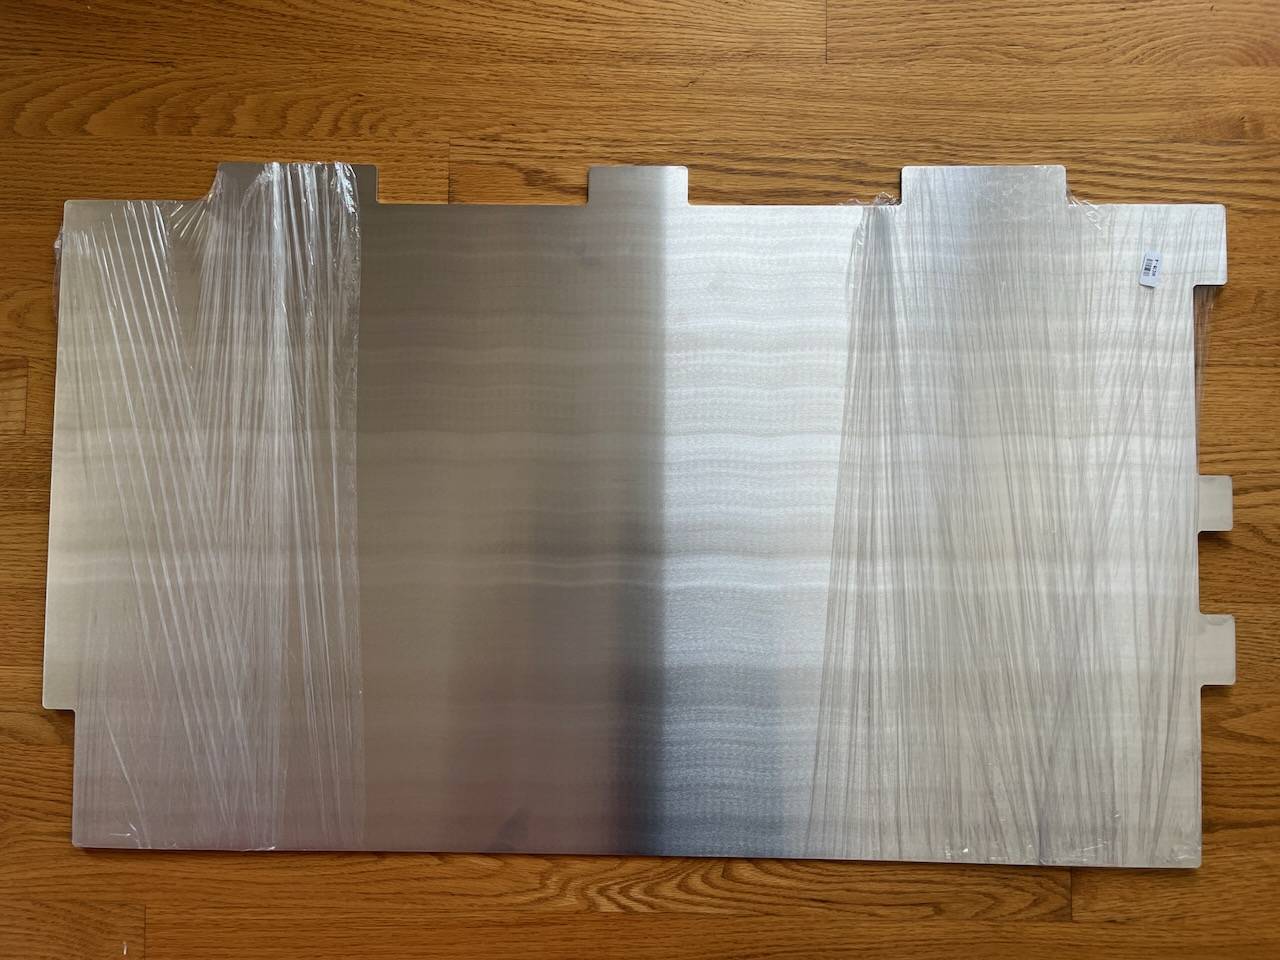
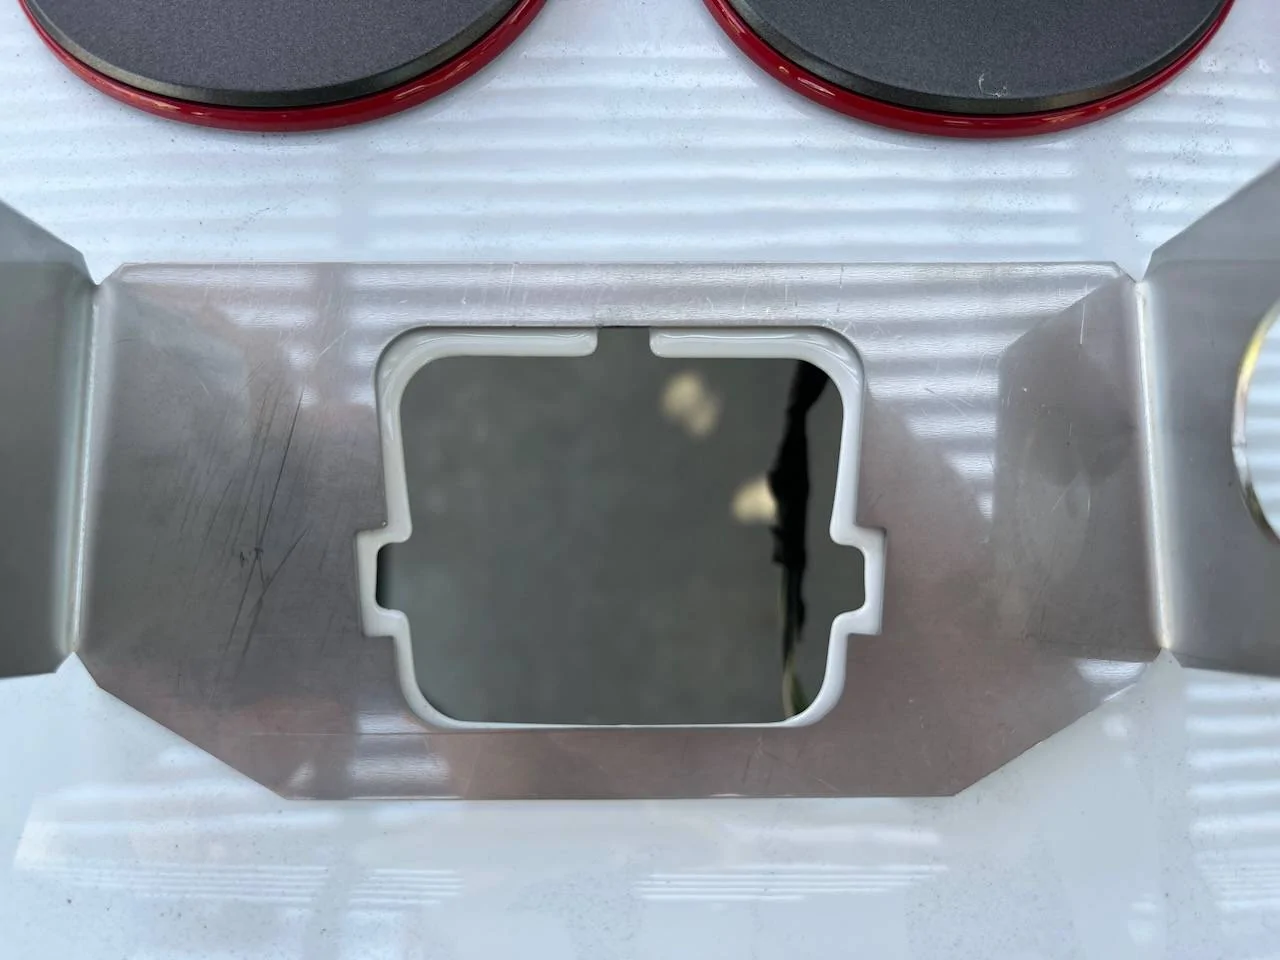
Okay, had to call Mule again to find out what the problem is: they claim that they changed vendors to produce the bracket and that they got a bad batch with sloppy cutout.

Be that as it may, I'm returning it and will look for other options. No review, since I don't know what a "good one" would look and work like.

The one comment I can make is that I find it annoying when I call a manufacturer or vendor with an issue and the only way to keep things moving or to get information is to call again and again even when they tell you "email info here and we'll get back to you" or "we'll call you back". It shows disrepect to customers.
Sponsored

 
OP
OP
cug

cug

Well-Known Member
First Name
Guido
Joined
Apr 1, 2023
Threads
13
Messages
602
Reaction score
664
Location
Christchurch, New Zealand
Vehicle(s)
JTR EcoDiesel, Land Cruiser 79, BMW R1250GS
Build Thread
Link
Occupation
Just keeping busy
Progress Report

Haven't made much actual progress in terms of things going into the truck or camper.

Rear Seat Delete

The "rear seat delete platform" is in testing and has been awesome so far (some improvements to come though, I just can't leave it alone ...).

Electrics

For the camper, we have re-installed the GP Factor Full Redarc System after it arrived back from a warranty service and have been testing it briefly. I'll have a full write-up of that up in the two weeks or so when the rest of the electrical system is getting usable.

Furniture and Camper Build-out

We've also worked on the interior layout and how to build it. Today we started on the first piece:

Jeep Gladiator A new hope ... (build journal and component reviews) IMG_5855


This is the panel for the bed wall under the water tank. We'll put thinsulate behind and carpet on the front to help with any condensation since the electrical components are sitting right in front of this.

The rest of the build-out will move forward slowly now. We designed the first "furniture piece" that will hold the batteries, shunt, busbars, fuses and breakers, as well as the inverter. We've gone back and forth on the best layout for this and decided to leave a little bit "breathing room", so that we can adjust to changing requirements. When I have something to share there, I'll post more pictures.

Rear Door Table

Designed a back-plate for a custom built rear table using some well known components and some DIY work. The template is out for laser-cutting in aluminum. I hope to be able to share more once the part arrives here. Can't wait to see whether my first foray into the world of SVG templates for metal cutting will go as hoped.

Other Storage

The Frontrunner boxes have turned out excellent. They are easy to secure on the platform (we've put some automotive carpet underneath for the time being) and hold a good amount of stuff. The space under the platform is a little cramped but will hopefully only be used for rarely used items, so that should be okay.

Rear Door Outside Storage

Since we have so many other things going on, we decided to post-pone any work on this until we know that we actually need it.

Backup Camera

Sent back the Mule Expedition bracket since it didn't work with our camera, actual solution for this problem should materialize at some point ... hopefully.

So, all in all, it's moving, but it's moving slowly. More slowly than my wife hoped for, about the pace I expected as the worst case. But again, it's moving forward, and whenever we work on something we have done before, at least similar things, it goes much faster than the first time, so that's encouraging.
 
OP
OP
cug

cug

Well-Known Member
First Name
Guido
Joined
Apr 1, 2023
Threads
13
Messages
602
Reaction score
664
Location
Christchurch, New Zealand
Vehicle(s)
JTR EcoDiesel, Land Cruiser 79, BMW R1250GS
Build Thread
Link
Occupation
Just keeping busy
Started the build for electrics compartment:

Jeep Gladiator A new hope ... (build journal and component reviews) IMG_5860


And received the backing plate for the table build:

Jeep Gladiator A new hope ... (build journal and component reviews) IMG_5861


And it actually fits and it looks totally amazing. We'll have to obviously drill all the mounting holes, but that should be straightforward.

Unfortuntaly, clumsy self has prevented further progress for a while:

Jeep Gladiator A new hope ... (build journal and component reviews) IMG_5862


Managed to fall over and got myself a suspected metacarpal fracture, basically a crack in one of the bones of the left thumb. Basically can't use my left hand for a while.

On the other hand (pun intended), my wife is leaving for a few days of rockclimbing, so I can sit alone at home in self-pity. Hmpf.
 
OP
OP
cug

cug

Well-Known Member
First Name
Guido
Joined
Apr 1, 2023
Threads
13
Messages
602
Reaction score
664
Location
Christchurch, New Zealand
Vehicle(s)
JTR EcoDiesel, Land Cruiser 79, BMW R1250GS
Build Thread
Link
Occupation
Just keeping busy
hope your hand get well ! accidents happen ...
Thank you. I had it checked by a hand surgeon now and unfortunately, the suspicion of a small crack was correct. Which now means that my hand is in a cast for the next four weeks and then in the brace for another two or so. I'm ticked off beyond belief since this will set me back quite a bit. I will have to be very careful not to get any wood or aluminum shavings into the cast ... My wife will take on some of the work, but still, it will set us back a few weeks at least.
 

Sponsored

OP
OP
cug

cug

Well-Known Member
First Name
Guido
Joined
Apr 1, 2023
Threads
13
Messages
602
Reaction score
664
Location
Christchurch, New Zealand
Vehicle(s)
JTR EcoDiesel, Land Cruiser 79, BMW R1250GS
Build Thread
Link
Occupation
Just keeping busy
While I'm partly out of commission, progress is slow, but since my wife is back from her climbing trip, at least we are making some progress.

She's doing all the hard work with tools and everything that throws "stuff" (wood splinters, saw dust, aluminum shavings, etc.) around. Be that a track saw, edge router, miter saw, drill, ... she's handling it like a champ. I've been relegated to planning, directing, and otherwise helping.

Here's what we were working on today:

Jeep Gladiator A new hope ... (build journal and component reviews) IMG_5854


Setting up the final electrics installation before installing everything in the truck. The extrusions for the electrics module are nearly all cut, we ran out of 80/20 but will get more on Tuesday.

Status today:
  • Nearly all wiring cut, connectors crimped and properly routed
  • Components placed on the board, not yet screwed down yet
  • Batteries have their place
  • Battery connectors shortened since we changed our initial installation plan
  • Inverter has a proper place
Missing:
  • Inverter connection cables
  • Secondary Redarc charger
  • Final connection to the GP Factor Redarc unit
I'm confident that we'll find time to finish the rest of this over the coming week and then we have a working electrical installation in the camper. There will be some more tweaks after that, like drilling a hole into the camper for a shore power connection and setting up solar, but all the heavy lifting is done and we are seeing real progress now.

The photo above also shows a lot of the 80/20 90 degree connectors – these are EXPENSIVE and are adding quite some weight. Once the unit is all figured out, and we know for sure, where everything sits, we'll switch to some ligher weight and much less expensive connectors and keep re-using the hardware we have in places where it makes sense. This has worked well on other projects, so we are repeating this here. I like having the freedom of moving things around easily until I know how the whole thing looks and works, then make it permanent.
 

smlobx

Well-Known Member
First Name
Eddie
Joined
Jun 28, 2018
Threads
86
Messages
2,647
Reaction score
4,522
Location
Mid Atlantic
Vehicle(s)
JTR, F-350 diesel, Porsche Spyder, Model Y
Occupation
Semi retired consultant
Finally the remaining L-track arrived and I bolted it in – the holes and teenuts were already in the platform.

IMG_5836.jpeg


And with that, the final piece of the 3D-puzzle also fell into place. It fits:

IMG_5780.jpeg


Something that came together exactly as planned. A rare occurrence on this project ...

This reminds me:


Thanks for the hint with the FrontRunner boxes, they fit really well. So far, they are empty, but will provide a very handy storage space.

You’re welcome! I was talking to another Overlander about the Frontrunner boxes and he said that he took a piece of aluminum tread sheeting and cut it to fit on the top of the box and bolted it to the top. He can now use the box for a table while at camp or to put his feet on. I did this and it’s a great addition for just a few ounces of weight.
 
  • Like
Reactions: cug
OP
OP
cug

cug

Well-Known Member
First Name
Guido
Joined
Apr 1, 2023
Threads
13
Messages
602
Reaction score
664
Location
Christchurch, New Zealand
Vehicle(s)
JTR EcoDiesel, Land Cruiser 79, BMW R1250GS
Build Thread
Link
Occupation
Just keeping busy
@smlobx – Thanks for the tip. We normally have a tiny aluminum table stashed somewhere. Might not put our legs up on that, but it works great as a small sidetable. Still haven't found a good way to stash a larger table, but also haven't really invested all that much thought into it yet.
 
OP
OP
cug

cug

Well-Known Member
First Name
Guido
Joined
Apr 1, 2023
Threads
13
Messages
602
Reaction score
664
Location
Christchurch, New Zealand
Vehicle(s)
JTR EcoDiesel, Land Cruiser 79, BMW R1250GS
Build Thread
Link
Occupation
Just keeping busy
Making of ... inverter wiring ...

Jeep Gladiator A new hope ... (build journal and component reviews) IMG_5861 (1)
 
OP
OP
cug

cug

Well-Known Member
First Name
Guido
Joined
Apr 1, 2023
Threads
13
Messages
602
Reaction score
664
Location
Christchurch, New Zealand
Vehicle(s)
JTR EcoDiesel, Land Cruiser 79, BMW R1250GS
Build Thread
Link
Occupation
Just keeping busy
Partly installed, 3x front vertical legs and the front connectors to the sides missing.

Jeep Gladiator A new hope ... (build journal and component reviews) IMG_5908


Hours of cutting, drilling access holes, hand-cutting (after our tap bit broke) 6mm thread into ends, etc.

Jeep Gladiator A new hope ... (build journal and component reviews) IMG_5907


The finished frame (minus the long cross-member that is fixed in the truck):

Jeep Gladiator A new hope ... (build journal and component reviews) IMG_5909


For anyone interested in building something like this in 80/20:

Do not underestimate the work that goes into this!

If you have a nicely set up shop and don't need to plan and measure anymore, just build, it's not hard and won't take all too long. But since this was our first time building this, there is a lot of thinking, planning, measuring, swearing, correcting (sometimes by half millimeters), re-thinking, re-calculating, re-planning etc. in there.

There is also a lot of material and "invislbe work" in there:
  • Just under 12m (yes, 12 meters) of extrusion (11.8m to be precise) (about $170); that's 8.7kg just in aluminium extrusion
  • 34 (yes, 34!) 6mm end taps and 17 access holes drilled
  • $260 in "hidden connectors" as well as $70 in "visible nice corners" (another 500g)
There is $500 and 9.2kg just in material in this thing! Unbelievable.

But okay, this part is done now, we are moving forward with:
  1. installing it securely in the truck;
  2. building the bottom frames for the "front furniture" to have an accurate layout;
  3. with the layout, measure and mark where the frame will get connected to the bedplate;
  4. drill the holes into the bed plate and install teenuts;
  5. build side walls, lids, hatches, etc. from plywood.
A lot is still to do, but it IS moving (I have to tell myself that, everything takes for frigging ever).

My honest recommendation:

If you can live with the layout, buy Goose Gear. It's a metric shit-ton of work to do a reasonable job at home.
 
Last edited:

Sponsored

OP
OP
cug

cug

Well-Known Member
First Name
Guido
Joined
Apr 1, 2023
Threads
13
Messages
602
Reaction score
664
Location
Christchurch, New Zealand
Vehicle(s)
JTR EcoDiesel, Land Cruiser 79, BMW R1250GS
Build Thread
Link
Occupation
Just keeping busy
It's been quiet here, but we are making slow progress.

From this:

Jeep Gladiator A new hope ... (build journal and component reviews) IMG_5637


To this:

Jeep Gladiator A new hope ... (build journal and component reviews) IMG_5896


We are closing in.

The compartment towards the truck cabin 80/20 portion is 99% done. The driver's side bench 80/20 portion is 99% done. The 1% missing is just for things we forgot, a fastener here, a mount point there. Nothing big.

There was also again a lot of small detail work done that doesn't quite show up yet but will the make the continuation of the build much easier and quicker since we already figured out what to build and don't have start thinking and re-thinking again and again. That includes access doors, panels, dividers, shelfs, hatches and latches, cable routing, etc.

Optimistically, if the ordered wood panels show up this week, we should be able to finally finish quite a few parts of this build.
 
OP
OP
cug

cug

Well-Known Member
First Name
Guido
Joined
Apr 1, 2023
Threads
13
Messages
602
Reaction score
664
Location
Christchurch, New Zealand
Vehicle(s)
JTR EcoDiesel, Land Cruiser 79, BMW R1250GS
Build Thread
Link
Occupation
Just keeping busy
Here's a close-up of the bench:

Jeep Gladiator A new hope ... (build journal and component reviews) IMG_5921


This is from the rear, you can just see the wheelhouse cutout showing on the left corner, it's supported from above and connects to the rear strut and the middle shelf support. Most of the panels that will close up the box will be 6mm Baltic Birch, so super lightweight, but very strong. Have to offset the weight of the aluminum somewhat. The seat will be a hinged lid, dividing it into a 3/4 opening and 1/4 fixed top.

The front part towards the "aisle" will have two small doors and one bigger fixed panel. We'll end up with two large(ish) compartments, one accessed from the lid on top, one from the two smaller doors at the bottom. We made two doors so we can still put a middle divider in if that makes sense.

This bench connects to the battery/utility piece, which sits under the watertank and houses the batteries, electrics, toilet, water pump and filter, and some storage cubbies. It'll get a shared sidewall (on the utility box).

Today we'll finish the interior shelf and probably start with the tops. We have very little 6mm BB left, so need to wait for new panels to arrive to build all the sidewalls and dividers. But we should be able for finish the tops with the 9mm BB we still have.
 
OP
OP
cug

cug

Well-Known Member
First Name
Guido
Joined
Apr 1, 2023
Threads
13
Messages
602
Reaction score
664
Location
Christchurch, New Zealand
Vehicle(s)
JTR EcoDiesel, Land Cruiser 79, BMW R1250GS
Build Thread
Link
Occupation
Just keeping busy
Bench in the truck:

Jeep Gladiator A new hope ... (build journal and component reviews) IMG_5923


With interior "shelf":

Jeep Gladiator A new hope ... (build journal and component reviews) IMG_5922


As said, upper part will be accessible through a big lid from the top, lower part through two smaller doors. Upper front will be a fixed panel.
 
OP
OP
cug

cug

Well-Known Member
First Name
Guido
Joined
Apr 1, 2023
Threads
13
Messages
602
Reaction score
664
Location
Christchurch, New Zealand
Vehicle(s)
JTR EcoDiesel, Land Cruiser 79, BMW R1250GS
Build Thread
Link
Occupation
Just keeping busy
For those interested in working with 80/20, here are some tricks and lessons learned from various projects I have done with it:
  • It will be expensive. Don't kid yourself.
  • Precision is everything – getting lengths and cuts just right means you get things square. We use a miter saw for our cuts, with a laser guide it's reasonably easy to get cuts exact to about half a millimeter.
  • Use precise tools for measuring – our Milwaukee tape measure is a piece of shit, but as long as I measure the same way all the time, I get reproducible results. But I try not to use it. We have 150mm, 300mm, and 600mm high precision metal rulers that are WAY better for this.
  • The extrusions are reasonably cheap, the hardware is crazy expensive, especially brackets and connectors – so, if you plan a complex build, either plan ahead really well or start with the "easy" hardware (angle brackets, etc.) and then convert piece by piece to cheaper fastening methods. Especially if you also want to install panels within the extrusions, hidden fasteners are important. As an example: you could use two brackets, four t-nuts, four screws to build a single 90 degree connection for about $12. Or you could spend $2.24 for an internal end fastener.
  • Visible corners with 80/20 are either ugly or expensive. We have overall 14 at least somewhat visilbe corners, each will take hardware for nearly $15. It's the price you pay for building with 80/20.
  • If you want to save money, put panels outside of the extrusion frame.
  • If you like the technical look of panels inside the frame and the frame itself exposed, plan for some improvising (see below).
  • Hardware is heavy – avoid unneccessary connectors and brackets, all the parts add up. 80/20 extrusion is very stable, but does have some light flex. You can control that flex with well placed wood panels much more effectively than with additional aluminum and steel hardware.
  • Use lightweight wood – there is absolutely no reason at all to use anything thicker than 9mm (just under 3/8") high quality plywood (marine grade or baltic birch, we use baltic birch). A 9mm panel on top of something like the bench in the post above is easily capable of holding even the biggest adult (anecdote below if you're interested), yes, it will flex a bit, but it won't be damaged. We use 12mm baltic birch for the bed plate, 9mm for the top surfaces, seating areas, and doors/hatches, and 6mm for all sidewalls, backpanels, and covers.
  • You can't have enough 4mm hex tools ...
  • If you're not working off a pre-made plan with all sizes, connectors, etc. listed, plan on taking each piece apart often until it's really done. There is always some connector, t-nut, etc. missing and you have to pull a bunch of things off to get to that one section of extrusion.
  • Since starting with a relatively heavy material, make sure to save weight wherever possible:
    • Reduce the number of external connectors,
    • use lighter wood,
    • remove wood thickness where you don't need it,
    • don't overbuild for "what-if-cases", they never happen anyways.
  • It takes forever to do all the cutting, drilling, tapping, etc. if you don't have a pre-made kit.
There are probably a lot of points I missed, but I was just typing these up from memory.

Regarding improvisation:

For one of the cover panels, we had a nearly perfectly fitting piece of plywood that even had the grain running in the right direction. The only downside was, that it was 12mm thick. Not the 6mm I wanted to use for panels like this. So, what to do? This is what we did:

Jeep Gladiator A new hope ... (build journal and component reviews) Screenshot 2023-10-19 at 23.51.09


With this being the result:

Jeep Gladiator A new hope ... (build journal and component reviews) IMG_5927


A 12mm baltic birch panel, with about 40% of its material removed from the back and some 6mm pieces glued in place to go into the extrusion channel. It saved about 35% of the weight of the original 12mm material. Just slightly over the original plan.

We wanted the front of the panel to sit flush with the profile, so I was planning on using 9mm material, also with parts removed, and some added 6mm pieces to attach to the inner channels. Since we started with 12mm, we removed 3mm on the four parts where the small additional pieces sit, that got it to fit nicely into the extrusion channel and since the piece was too frigging heavy for a simple panel, we removed about 8mm from the back in the shape you see above.

Results to be shown tomorrow or so, the glue for the 4 small pieces is drying overnight and it'll get its first coat of Osmo finish tomorrow.

There is also improvisation needed if you want specific doors and hatches mounted in a way that 80/20 does not provide parts for. We are using Southco latches and doors that sit flush inside the profile. This means we can use 80/20 hinges but need to build our own interior stops and parts to attach the latch retainer to. Photos upcoming.

And the anecdote ...

Back when I was just out of school and living in Germany, I owned my own company. We rented out light and sound equipment for events, parties, etc. I was even DJing at the time. We used to have large lights (PAR64, 1000W halogen), six pieces on an aluminum bar. Two of these light bars were transported in massive cases about 7 feet long, two feet wide, three feet high. They were build from 6 or 7mm multiplex (plywood, similar to baltic birch). On one party, two sturdy guys got on top of one of these cases and started dancing – we were just looking at the flexing and wobbling and were thinking about a) our insurance, and b) "these guys can be transported out right inside the case if they break through" ... Long story short, nothing happened. These cases, if build right, and with really good plywood are INSANELY strong. No, make that twice that. I would have NEVER thought they'd survice, but they are still in service, 30 years later. That should give anyone a pause who's claiming you'd need "thicker and more solid plywood" for a build like this.
 
Last edited:
OP
OP
cug

cug

Well-Known Member
First Name
Guido
Joined
Apr 1, 2023
Threads
13
Messages
602
Reaction score
664
Location
Christchurch, New Zealand
Vehicle(s)
JTR EcoDiesel, Land Cruiser 79, BMW R1250GS
Build Thread
Link
Occupation
Just keeping busy
Test install (in the living room):

Jeep Gladiator A new hope ... (build journal and component reviews) IMG_5930


From the back to show the mounting:

Jeep Gladiator A new hope ... (build journal and component reviews) IMG_5929


The glued on 6mm pieces slot into the extrusion and the panel sits nicely.

To make it "non-rattle" (the slot is a bit more than 6mm) there are two options: a strip of Gaffer's tape or a panel mount:

Jeep Gladiator A new hope ... (build journal and component reviews) Screenshot 2023-10-20 at 10.36.29


The panel mounts are expensive for such a light duty (> $5 for one) so we generally try to get away with a strip of tape. But two of these will do the job nicely as well.
Sponsored


Top