Sponsored

starrskream

Well-Known Member
First Name
E
Joined
Oct 2, 2023
Threads
84
Messages
670
Reaction score
834
Location
New york
Vehicle(s)
2023 Rubicon
Build Thread
Link
Occupation
Manager
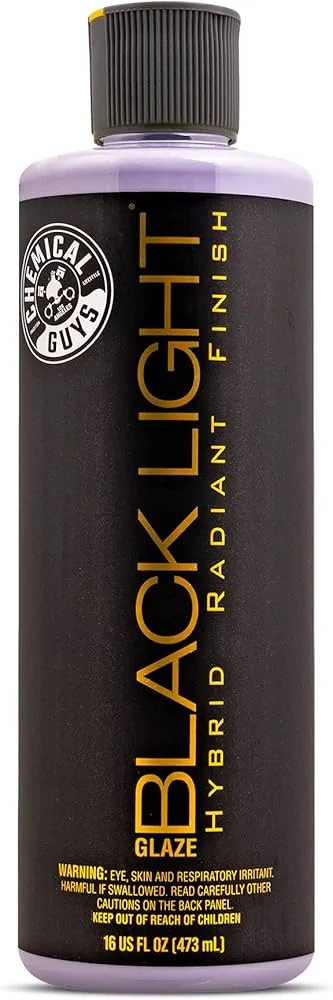
I have been using carnauba waxes for 25 years. Today I made the shift to ceramic waxes. HOLY CRAP THIS WAS EASY! Buffing on cars removing swirls etc. In fact I still have(though not often used) my 7" right angle that i bought at sears in 1998! Though today and for the last 5-6 years i use the TORQ right angle from Chemical Guys lol. its been amazing.

Given the automatic car wash swirls and the fact my paint was still relatively new I decided to do my truck.

This was after swirl removal, and before wax. I used Meguiars M105, and the hand sponge from chemical guys(orange one) if you copy this make sure you use a quick detailer on the sponge. one spritz is plenty.

DO NOT USE A CERAMIC QD.

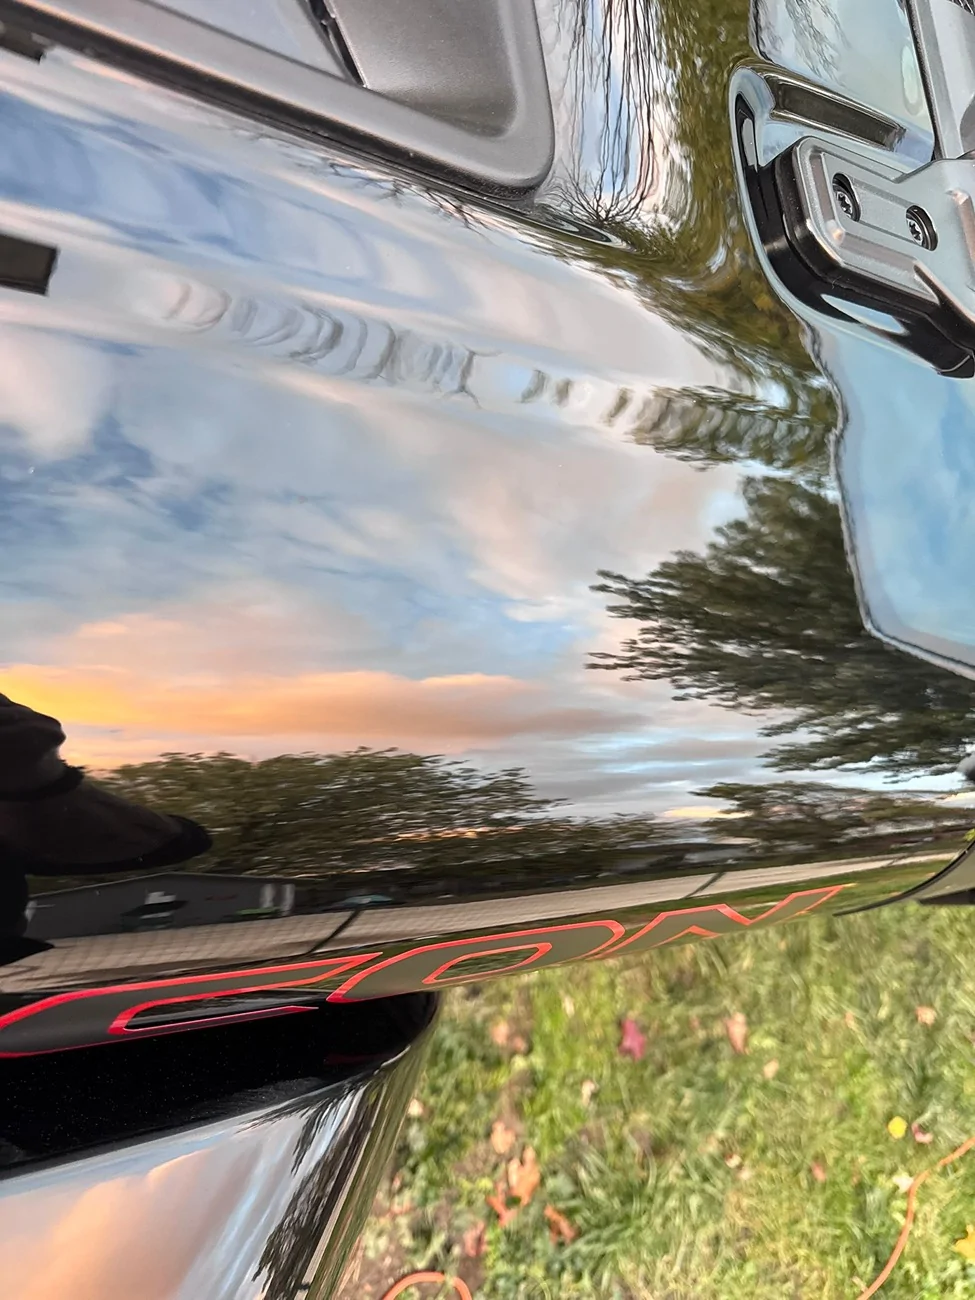
These two pics are after polishing and before any wax was applied.

Jeep Gladiator You'll like this.  Paint correction and polishing results with ceramic wax! IMG_6707
Jeep Gladiator You'll like this.  Paint correction and polishing results with ceramic wax! IMG_6706


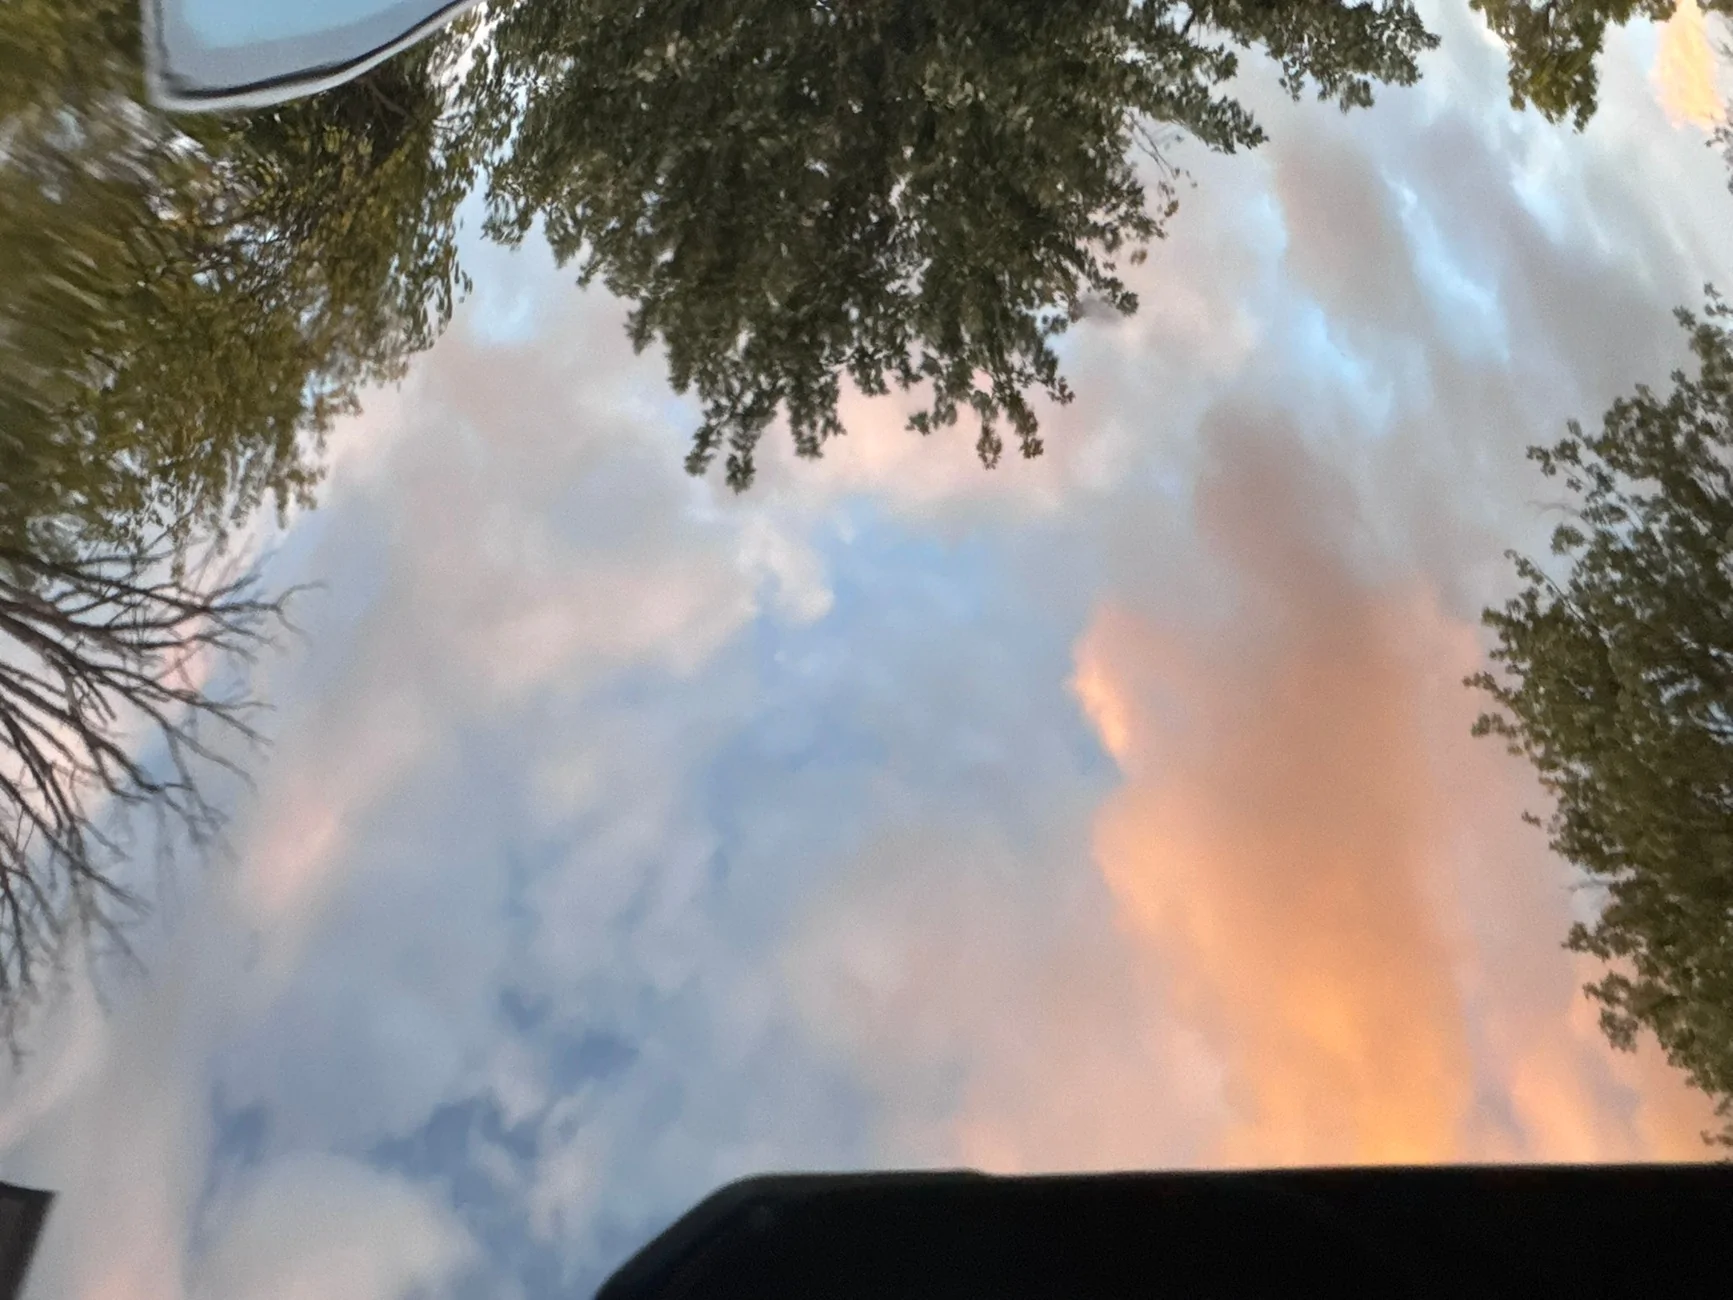
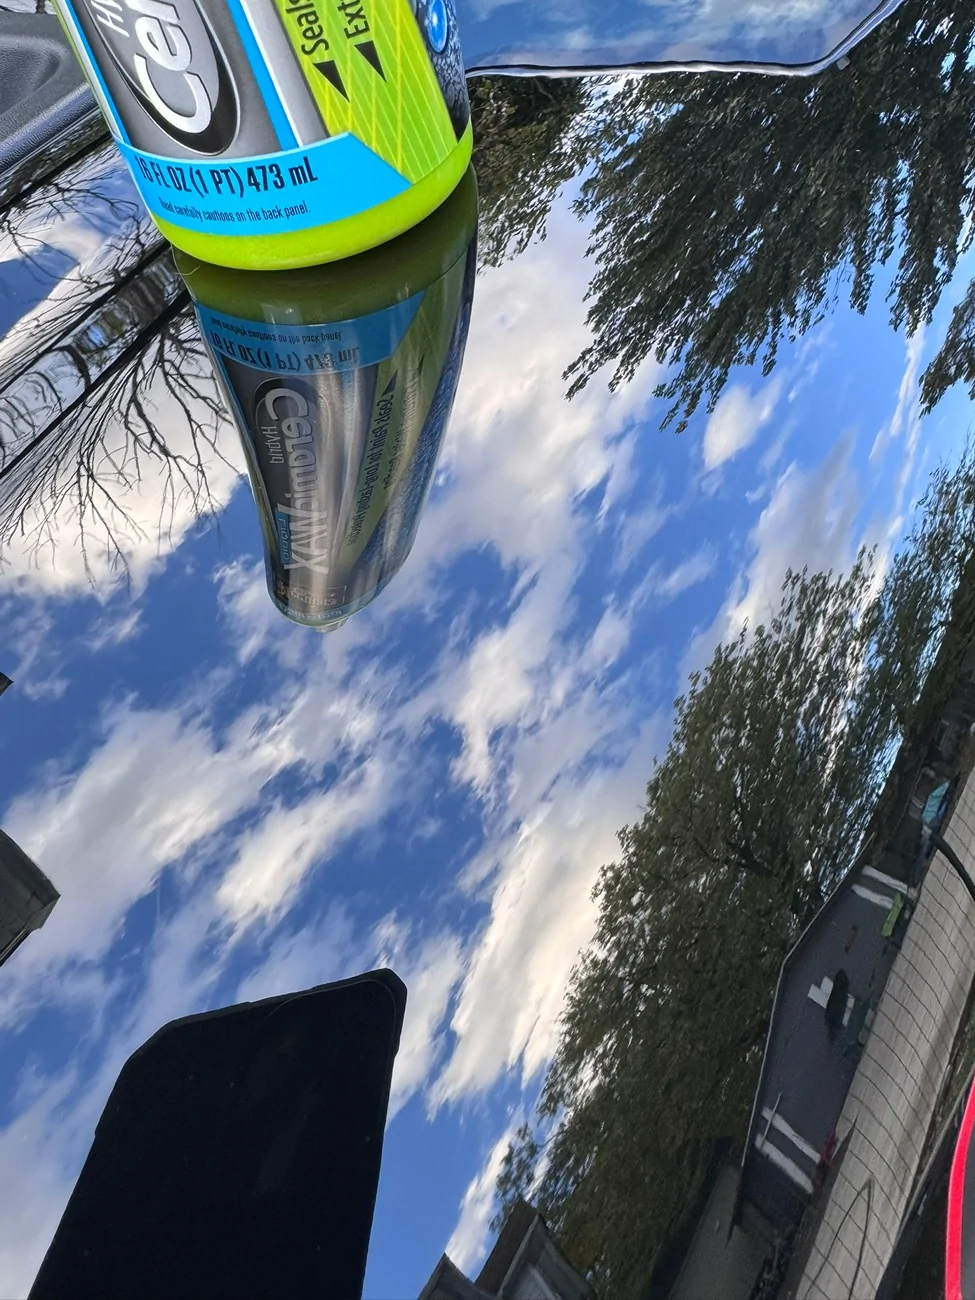
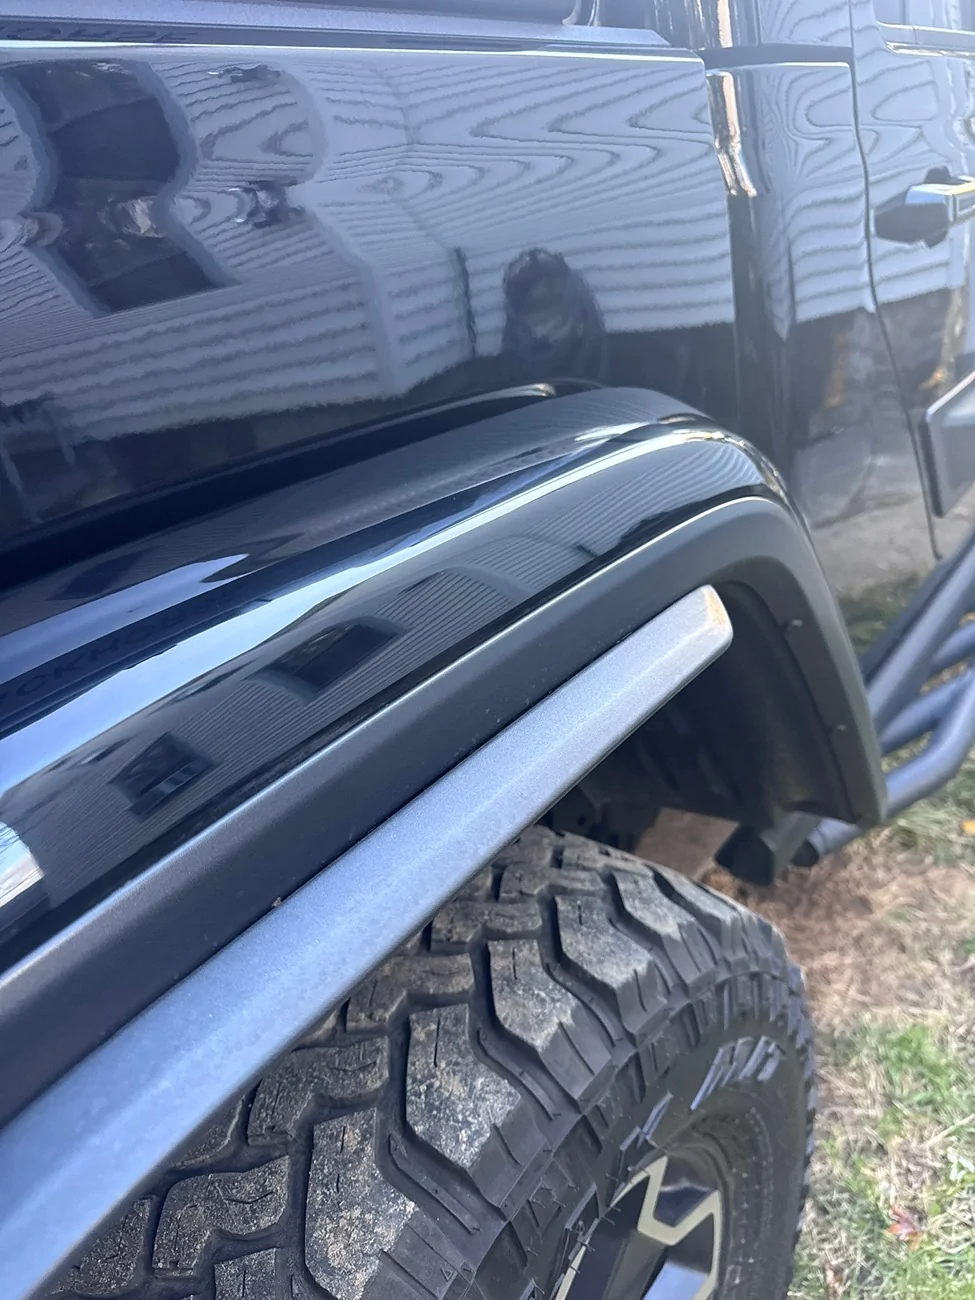
and now here is after waxing.
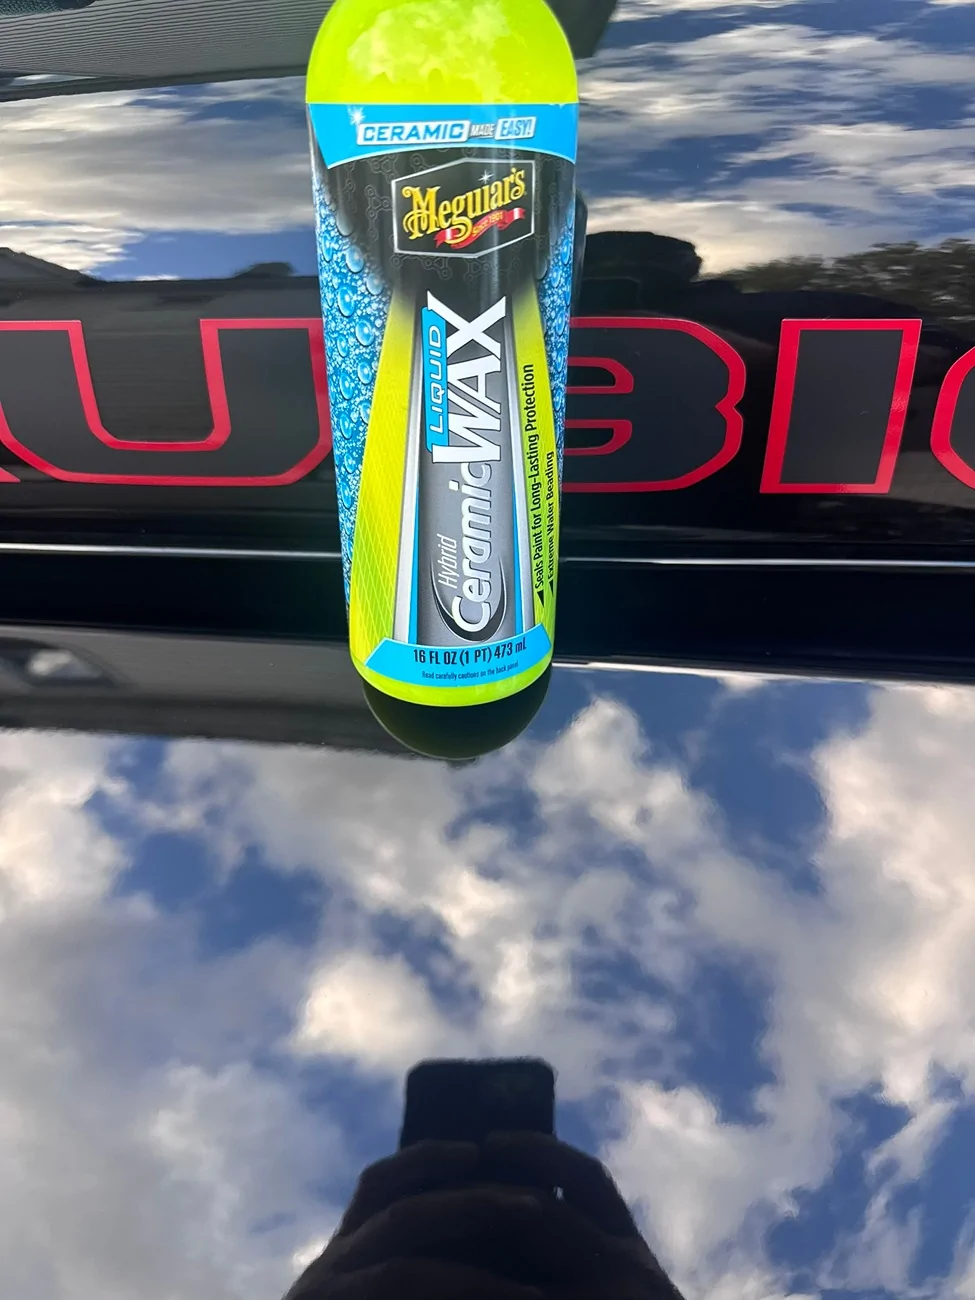
IDK how well it will hold up, but i will be using the meguiars Ceramic QD spray between washes.
most of what is in the pics is the reflection of my paint. Look closely.
Jeep Gladiator You'll like this.  Paint correction and polishing results with ceramic wax! IMG_6718
Jeep Gladiator You'll like this.  Paint correction and polishing results with ceramic wax! IMG_6719


this is a reflection, look at the bottom right to see
Jeep Gladiator You'll like this.  Paint correction and polishing results with ceramic wax! IMG_6721
Jeep Gladiator You'll like this.  Paint correction and polishing results with ceramic wax! IMG_6720


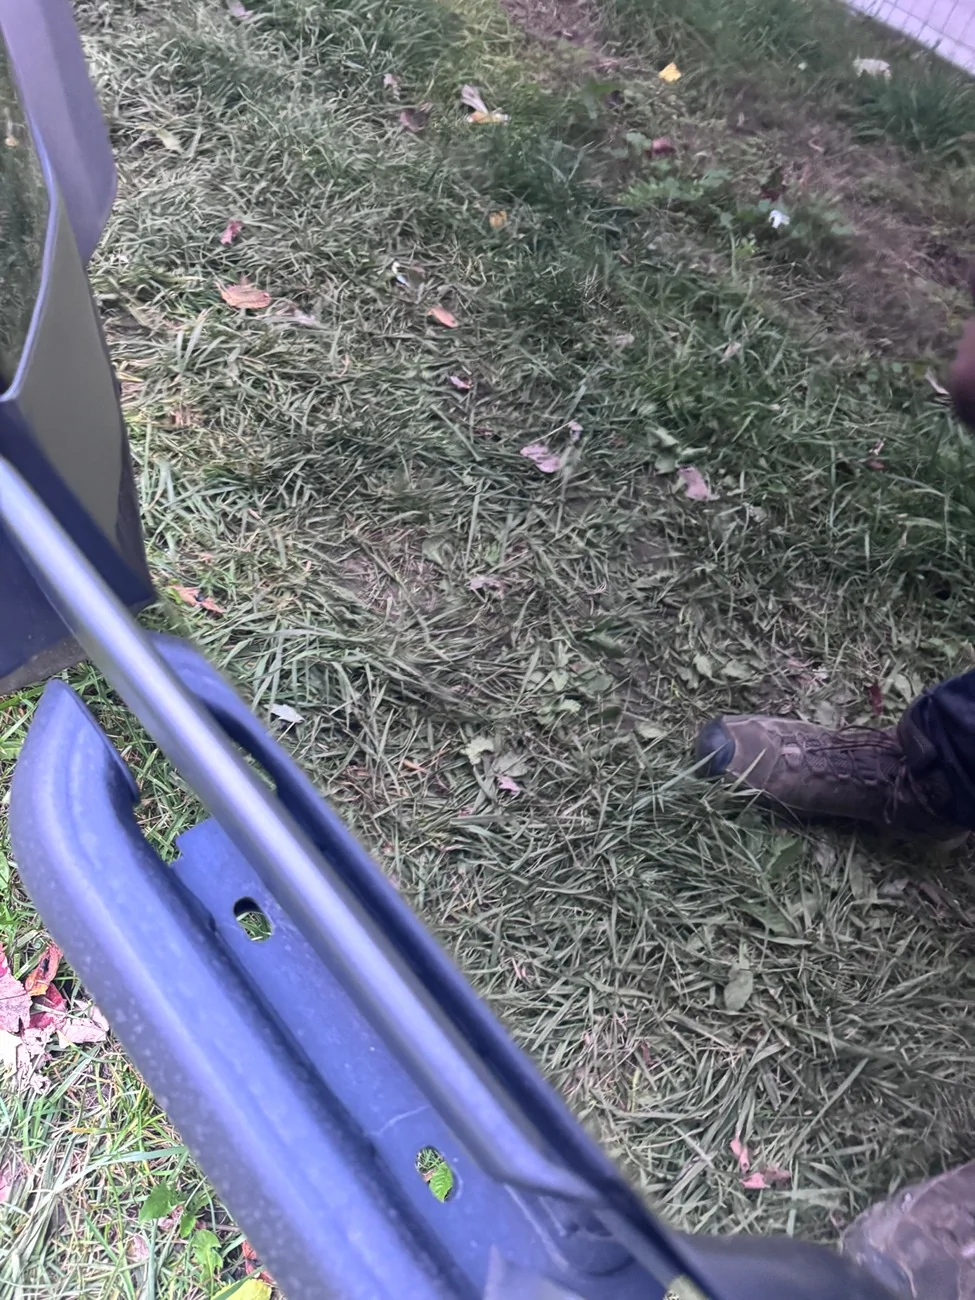
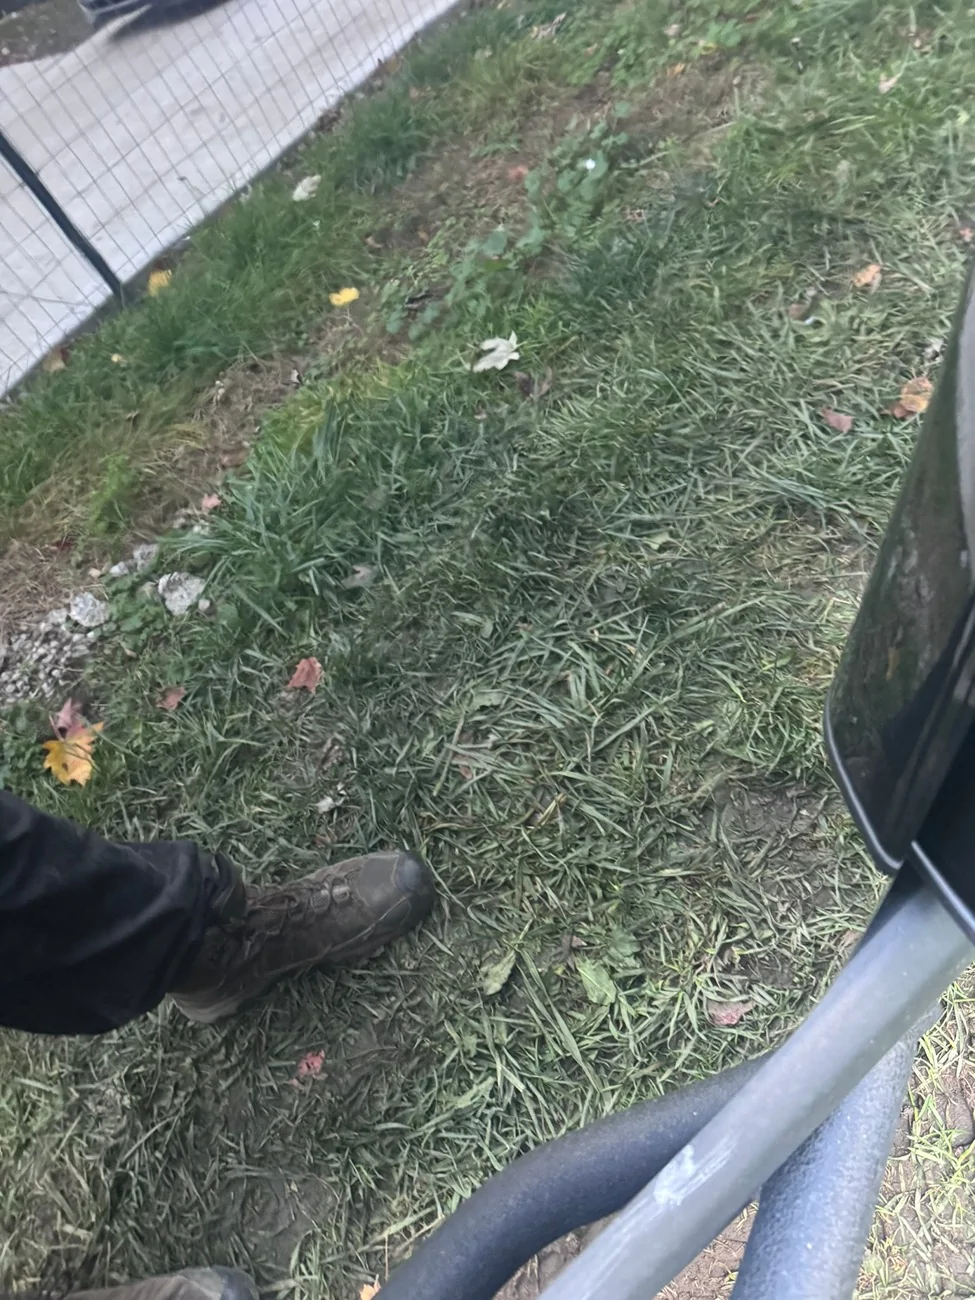
another reflection, look bottom left.
Jeep Gladiator You'll like this.  Paint correction and polishing results with ceramic wax! IMG_6722


again, a reflection. in case you thought it was just a shiny panel lol.
Jeep Gladiator You'll like this.  Paint correction and polishing results with ceramic wax! IMG_6723
Sponsored

 
Last edited:

Jteakus

Well-Known Member
First Name
Teakus
Joined
Feb 19, 2022
Threads
19
Messages
1,810
Reaction score
3,269
Location
Oil City, LA
Vehicle(s)
2020 JLURD, 2022 JTRD, 2017 JKU, 1998 TJ, 1983 CJ-7
Build Thread
Link
Vehicle Showcase
1
I'm sold. Will be hitting the black JLURD soon!
 
OP
OP
starrskream

starrskream

Well-Known Member
First Name
E
Joined
Oct 2, 2023
Threads
84
Messages
670
Reaction score
834
Location
New york
Vehicle(s)
2023 Rubicon
Build Thread
Link
Occupation
Manager
SOLD! My Black JTR will be introduced to this same process very soon! Thank you @starrskream for the beautiful pics.
I'm sold. Will be hitting the black JLURD soon!

You will need the following:
M105 cut compound
cutting pad (orange for cutting black for polishing)
the polish
the buffer i used
the wax i used

mist and wipe, needed for cutting phase (any brand will do as long as it is not ceramic. I've used this same stuff for over 20 years. its quality. but after using the wax you will need a ceramic detailer between waxing)
CERAMIC quick detailer use in-between washes to reapply some ceramic coat and keep things looking clean. This stuff will go a relatively long way. follow instructions on bottle.
This is the polish i used.
here is the process.
(if you are unfamiliar with the torq buffer please watch some videos. being uneducated here can damage your vehicles paint)
so first off wash your vehicle. Dawn dish soap is very good for removing wax/ grime. If you want to get serious you can wipe down the entire vehicle with 90% alcohol after you wash and dry the vehicle.
next, use your NON CERAMIC quick detailer on the orange hand pad. one spray is plenty.
in a small area, one side of the hood or even one 2x2' section of it.
apply 5 dots of cutting compound (think the number 5 on dice). work your area for about a minute. Mr. Myagi, wax on wax off. for real. NO BUFFER ON CUTTING PHASE(you could, but its unnecessary the orange hand pad works very well and doing it by hand keeps slop off the plastic trim pieces, saving you cleaning later)
DO NOT USE THE M 105 ON ANY VINYL GRAPHICS OR PLASTIC TRIM!!!

once you have gone over the area twice, stop. wait about 30 seconds and buff out with a microfiber towel until the surface is shiny and you no longer see material on the paint.
repeat that step until you have covered all the painted surfaces on your vehicle.

now. walk around your vehicle, making sure you have not missed any material from the cutting phase.

I once again wiped my entire vehicle's painted surface again with alcohol.

now on to the polish.
if you used the buffer i have, it came with a yellow disc for holding pads. take a sharpie and make a vertical line between each "cutout in the dis along the outside of the disc. (so you have a visual of it spinning as you use it)

you will be using the BLACK pads that came with the buffer, or you can just order some for your buffer. it works the same. I used setting 35 or 40 on MY Buffer. Im guessing that is close to 3500-4000 rpm check your buffers settings to be sure.

three very important things about this buffer.
- DO NOT KEEP IT IN ONE SPOT FOR TOO LONG, you will damage your paint. despite it being a random orbital.
- DO NOT LET THOSE LINES YOU DREW STAND STILL. to keep them spinning apply pressure or release pressure as needed for it to be spinning and not stopped. you will quickly get the hang of it.
-DO NOT LET THE PAD DRY OUT. use a qd(the non ceramic one from earlier if you need to. one light mist is more than plenty. just to get the pad lightly wet) VERY LIGHTLY

as before work one small area at a time. 5 drops of polish same as with the hand pad. (you can use more the first timpe you apply it to the pad. before you start buffing "tap" the pad in a few different spots on your area to spread it out so it will not sling when you turn the buffer on.

you need to make sure the pad DOES NOT GET DRY, it could damage paint and or break the pad apart. which is bad if that velcro attached to the base is spinning and a piece breaks off and the velcro hits your paint at 4000rpm)
work the area until the polish has covered the entire area. cover the entire area in each direction. (first side to side then up and down. or however you end up doing it)

let that area dry a few moments and start on an area next to the one you just did. (you can increase area as big as you feel comfortable with so long as the product does not set for more than 2-3 mins)
once done with the second area, go back to the first.
wipe the first area with a FRESH AND CLEAN (dont even have random lint on it) microfiber towel. You are not buffing, just removing any particles until it shines.
continue this until you finish the entire truck.
go over the vehicle and make sure you did not leave any polish. wipe door jam cracks, around Windows etc.... you do not want material setting up it will get hard. use alcohol to wipe polish off of plastic trim.

now the wax , the instructions are on the bottle. As before small areas and return to wipe clean after 2-3 mins in this case. THIS WAX WILL NOT HAZE UP.
do the rest of the truck.
crack a beer and enjoy the shine. id bet this took you many hours, you earned it lol.
 
Last edited:

Deleted member 57233

You will need the following:
M105 cut compound
cutting pad (orange for cutting black for polishing)
the polish
the buffer i used
the wax i used

mist and wipe, needed for cutting phase (any brand will do as long as it is not ceramic. I've used this same stuff for over 20 years. its quality. but after using the wax you will need a ceramic detailer between waxing)
CERAMIC quick detailer use in-between washes to reapply some ceramic coat and keep things looking clean. This stuff will go a relatively long way. follow instructions on bottle.

here is the process.
(if you are unfamiliar with the torq buffer please watch some videos. being uneducated here can damage your vehicles paint)
so first off wash your vehicle. Dawn dish soap is very good for removing wax/ grime. If you want to get serious you can wipe down the entire vehicle with 90% alcohol after you wash and dry the vehicle.
next, use your NON CERAMIC quick detailer on the orange hand pad. one spray is plenty.
in a small area, one side of the hood or even one 2x2' section of it.
apply 5 dots of cutting compound (think the number 5 on dice). work your area for about a minute. Mr. Myagi, wax on wax off. for real. NO BUFFER ON CUTTING PHASE(you could, but its unnecessary the orange hand pad works very well and doing it by hand keeps slop off the plastic trim pieces, saving you cleaning later)
DO NOT USE THE M 105 ON ANY VINYL GRAPHICS OR PLASTIC TRIM!!!

once you have gone over the area twice, stop. wait about 30 seconds and buff out with a microfiber towel until the surface is shiny and you no longer see material on the paint.
repeat that step until you have covered all the painted surfaces on your vehicle.

now. walk around your vehicle, making sure you have not missed any material from the cutting phase.

I once again wiped my entire vehicle's painted surface again with alcohol.

now on to the polish.
if you used the buffer i have, it came with a yellow disc for holding pads. take a sharpie and make a vertical line between each "cutout in the dis along the outside of the disc. (so you have a visual of it spinning as you use it)

you will be using the BLACK pads that came with the buffer, or you can just order some for your buffer. it works the same. I used setting 35 or 40 on MY Buffer. Im guessing that is close to 3500-4000 rpm check your buffers settings to be sure.

three very important things about this buffer.
- DO NOT KEEP IT IN ONE SPOT FOR TOO LONG, you will damage your paint. despite it being a random orbital.
- DO NOT LET THOSE LINES YOU DREW STAND STILL. to keep them spinning apply pressure or release pressure as needed for it to be spinning and not stopped. you will quickly get the hang of it.
-DO NOT LET THE PAD DRY OUT. use a qd(the non ceramic one from earlier if you need to. one light mist is more than plenty. just to get the pad lightly wet) VERY LIGHTLY

as before work one small area at a time. 5 drops of polish same as with the hand pad. (you can use more the first timpe you apply it to the pad. before you start buffing "tap" the pad in a few different spots on your area to spread it out so it will not sling when you turn the buffer on.

you need to make sure the pad DOES NOT GET DRY, it could damage paint and or break the pad apart. which is bad if that velcro attached to the base is spinning and a piece breaks off and the velcro hits your paint at 4000rpm)
work the area until the polish has covered the entire area. cover the entire area in each direction. (first side to side then up and down. or however you end up doing it)

let that area dry a few moments and start on an area next to the one you just did. (you can increase area as big as you feel comfortable with so long as the product does not set for more than 2-3 mins)
once done with the second area, go back to the first.
wipe the first area with a FRESH AND CLEAN (dont even have random lint on it) microfiber towel. You are not buffing, just removing any particles until it shines.
continue this until you finish the entire truck.
go over the vehicle and make sure you did not leave any polish. wipe door jam cracks, around Windows etc.... you do not want material setting up it will get hard. use alcohol to wipe polish off of plastic trim.

now the wax , the instructions are on the bottle. As before small areas and return to wipe clean after 2-3 mins in this case. THIS WAX WILL NOT HAZE UP.
do the rest of the truck.
crack a beer and enjoy the shine. id bet this took you many hours, you earned it lol.
This is why I pay my detailer $300 lol
 

Sponsored

OP
OP
starrskream

starrskream

Well-Known Member
First Name
E
Joined
Oct 2, 2023
Threads
84
Messages
670
Reaction score
834
Location
New york
Vehicle(s)
2023 Rubicon
Build Thread
Link
Occupation
Manager
This is why I pay my detailer $300 lol
it cost me 20$ and around 5 hours of my day. bonus i got some exercise. Ive had the buffer appx 5 years. the other tools used as long or longer. they have paid for themselves many times over. Last vehicle i traded in the dealer gave me an extra 1000$ because the paint was so perfect and the vehicle was detailed they did not need to do any of that themselves.
 

ChrisNLA

Well-Known Member
First Name
Chris
Joined
Jun 7, 2022
Threads
16
Messages
2,025
Reaction score
3,690
Location
Louisiana
Vehicle(s)
2022 JT Sport Max Tow
Build Thread
Link
Looks good! I buffed my hood here recently. Pretty easy to do with a little patience, even if inexperienced.

I just use the Mequiars Ultimate Compound and Polish.

I also used their paste Ultimate paste wax as I had a bit that needed to be used up.

I do want to try that hybrid wax next, though.

Between washes I touch up my vehicles with this: https://a.co/d/528xYEC Works really well to keep the surface slick longer. Use it on both my John Deere's too 😄

I buy it and wheel cleaner by the gallon.
 
OP
OP
starrskream

starrskream

Well-Known Member
First Name
E
Joined
Oct 2, 2023
Threads
84
Messages
670
Reaction score
834
Location
New york
Vehicle(s)
2023 Rubicon
Build Thread
Link
Occupation
Manager
Looks good! I buffed my hood here recently. Pretty easy to do with a little patience, even if inexperienced.

I just use the Mequiars Ultimate Compound and Polish.

I also used their paste Ultimate paste wax as I had a bit that needed to be used up.

I do want to try that hybrid wax next, though.

Between washes I touch up my vehicles with this: https://a.co/d/528xYEC Works really well to keep the surface slick longer. Use it on both my John Deere's too 😄

I buy it and wheel cleaner by the gallon.
if you do switch to hybrid, or a ceramic wax you need to make sure you wash, and strip all wax off your vehicle. That's why i suggested dawn and an alcohol wipe.
I did my truck and ofc it rained today...looking online and on the bottle, you can apply a second coat after 24 hours. I guess when it stops raining lol .
 

Deleted member 57233

it cost me 20$ and around 5 hours of my day. bonus i got some exercise. Ive had the buffer appx 5 years. the other tools used as long or longer. they have paid for themselves many times over. Last vehicle i traded in the dealer gave me an extra 1000$ because the paint was so perfect and the vehicle was detailed they did not need to do any of that themselves.
I have the tools as well, and have done it enough times to know paying a detailer frees up a whole day for me to get other things done. For me it all comes down to what my time is worth, and what others are charging for their time.
 

ChrisNLA

Well-Known Member
First Name
Chris
Joined
Jun 7, 2022
Threads
16
Messages
2,025
Reaction score
3,690
Location
Louisiana
Vehicle(s)
2022 JT Sport Max Tow
Build Thread
Link
I have the tools as well, and have done it enough times to know paying a detailer frees up a whole day for me to get other things done. For me it all comes down to what my time is worth, and what others are charging for their time.
Sometimes a long detailing session is something I personally enjoy, but my truck only gets an in depth treatment like that twice a year at best.

But I feel ya on paying someone else to do stuff. We just paid a contractor to rebuild half a bedroom for us. I could do it - just wanted to use my time elsewhere 😂
 

Sponsored

KevinM60

Well-Known Member
First Name
Kevin
Joined
Jun 7, 2023
Threads
9
Messages
1,079
Reaction score
1,882
Location
Southern Cal
Vehicle(s)
2023 Gladiator Mojave
Occupation
CAD/CAM
Good information. I have a few pinstripes that I need to cleanup
 

MCGladJT

Active Member
Joined
Apr 3, 2024
Threads
1
Messages
39
Reaction score
35
Location
WA
Vehicle(s)
2023 Jeep Gladiator
Great job and write up, thanks for taking the time to post the detailed info on paint maintenance.
 
OP
OP
starrskream

starrskream

Well-Known Member
First Name
E
Joined
Oct 2, 2023
Threads
84
Messages
670
Reaction score
834
Location
New york
Vehicle(s)
2023 Rubicon
Build Thread
Link
Occupation
Manager
I have the tools as well, and have done it enough times to know paying a detailer frees up a whole day for me to get other things done. For me it all comes down to what my time is worth, and what others are charging for their time.
Absolutely.
I enjoy doing it. And now it’s a simple apply wax ever couple months.
I only plan to do this once a year or every two years this intensely.
 

JohnWick

Well-Known Member
First Name
Bill
Joined
Jul 30, 2023
Threads
8
Messages
146
Reaction score
254
Location
Waunakee, WI
Vehicle(s)
2023 Sport S Max Tow
I do not recommend 105 if you're not going to follow it up with a polish like 205 or 210.

Under proper sunlight there's almost certainly micromarring that you've installed using 105 and any pad. Especially on a black vehicle. And while it does degrade while you're working it.. It's still technically a non-diminishing cutting compound. It isn't going to finish down like a polish will.

I would instead recommend using a finish polish only if you're going to just do a single step.

M210, Koch Chemie Micro Cut, Oberk Polish, CarPro Reflect, etc.

While hand-applied sealants work fine.. The new generation of spray on/rinse off sealants work really well. I've used the Meguiar's Ceramic Wax which works ok.... My preference is CarPro Hydro 2 Lite or Aenso Aquila.
 
OP
OP
starrskream

starrskream

Well-Known Member
First Name
E
Joined
Oct 2, 2023
Threads
84
Messages
670
Reaction score
834
Location
New york
Vehicle(s)
2023 Rubicon
Build Thread
Link
Occupation
Manager
I do not recommend 105 if you're not going to follow it up with a polish like 205 or 210.

Under proper sunlight there's almost certainly micromarring that you've installed using 105 and any pad. Especially on a black vehicle. And while it does degrade while you're working it.. It's still technically a non-diminishing cutting compound. It isn't going to finish down like a polish will.

I would instead recommend using a finish polish only if you're going to just do a single step.

M210, Koch Chemie Micro Cut, Oberk Polish, CarPro Reflect, etc.

While hand-applied sealants work fine.. The new generation of spray on/rinse off sealants work really well. I've used the Meguiar's Ceramic Wax which works ok.... My preference is CarPro Hydro 2 Lite or Aenso Aquila.
i use this after the 105. been using it for years.

.
Jeep Gladiator You'll like this.  Paint correction and polishing results with ceramic wax! 1761539221365-mk


I'll take some pics of the paint in sunlight for you tomorrow. Its just like you see in the pics. smooth and mirrored.
Sponsored


Top