Sponsored

A new hope ... (build journal and component reviews)

OP
OP
cug

cug

Well-Known Member
First Name
Guido
Joined
Apr 1, 2023
Threads
13
Messages
602
Reaction score
664
Location
Christchurch, New Zealand
Vehicle(s)
JTR EcoDiesel, Land Cruiser 79, BMW R1250GS
Build Thread
Link
Occupation
Just keeping busy
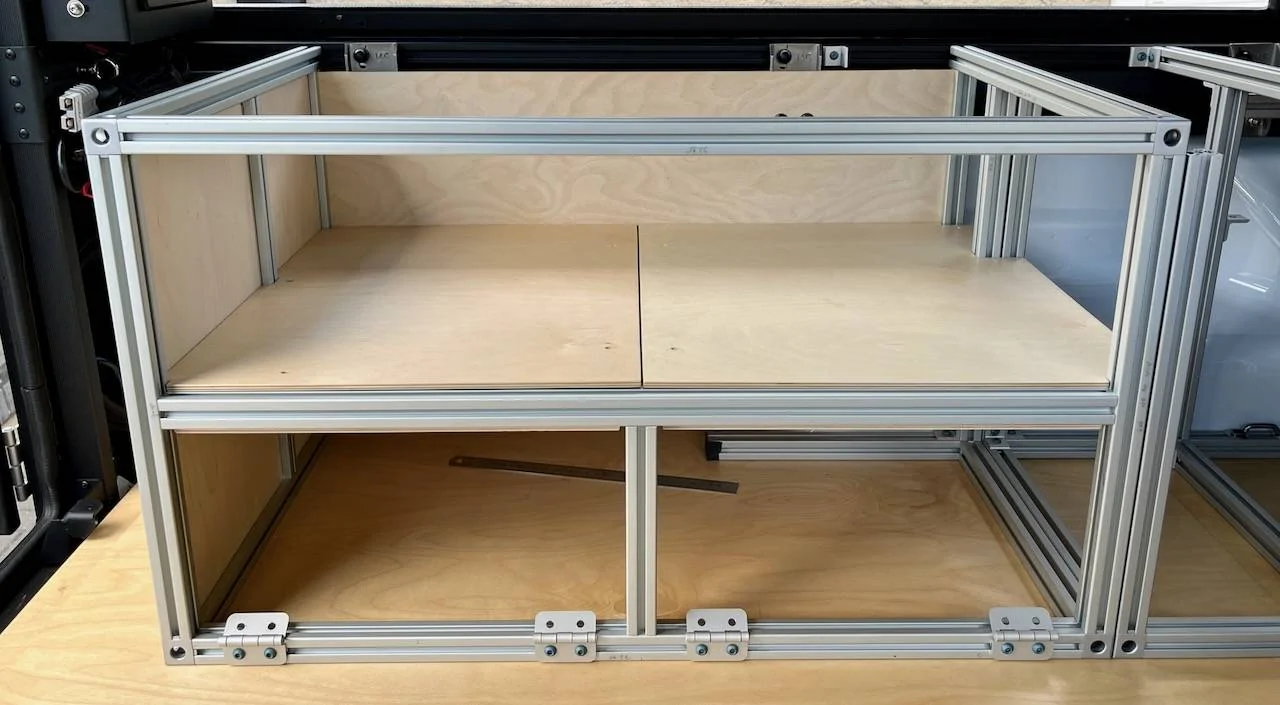
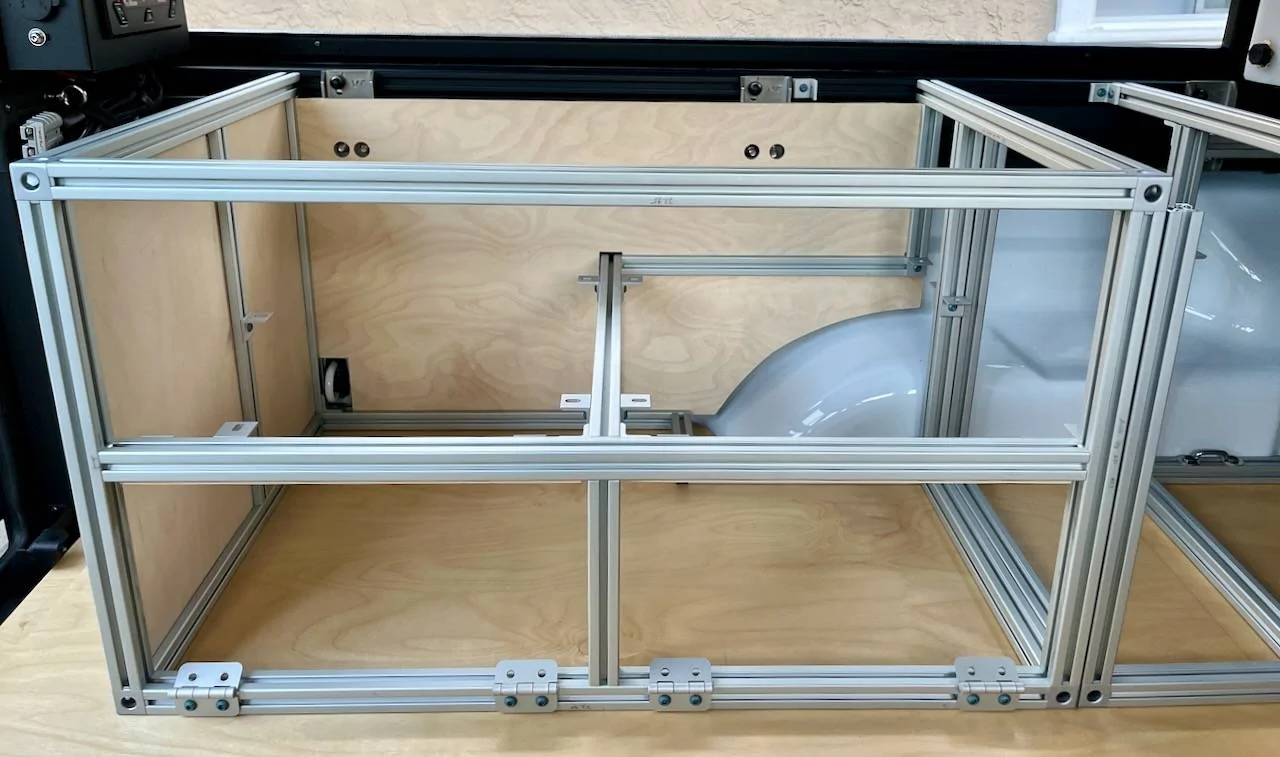
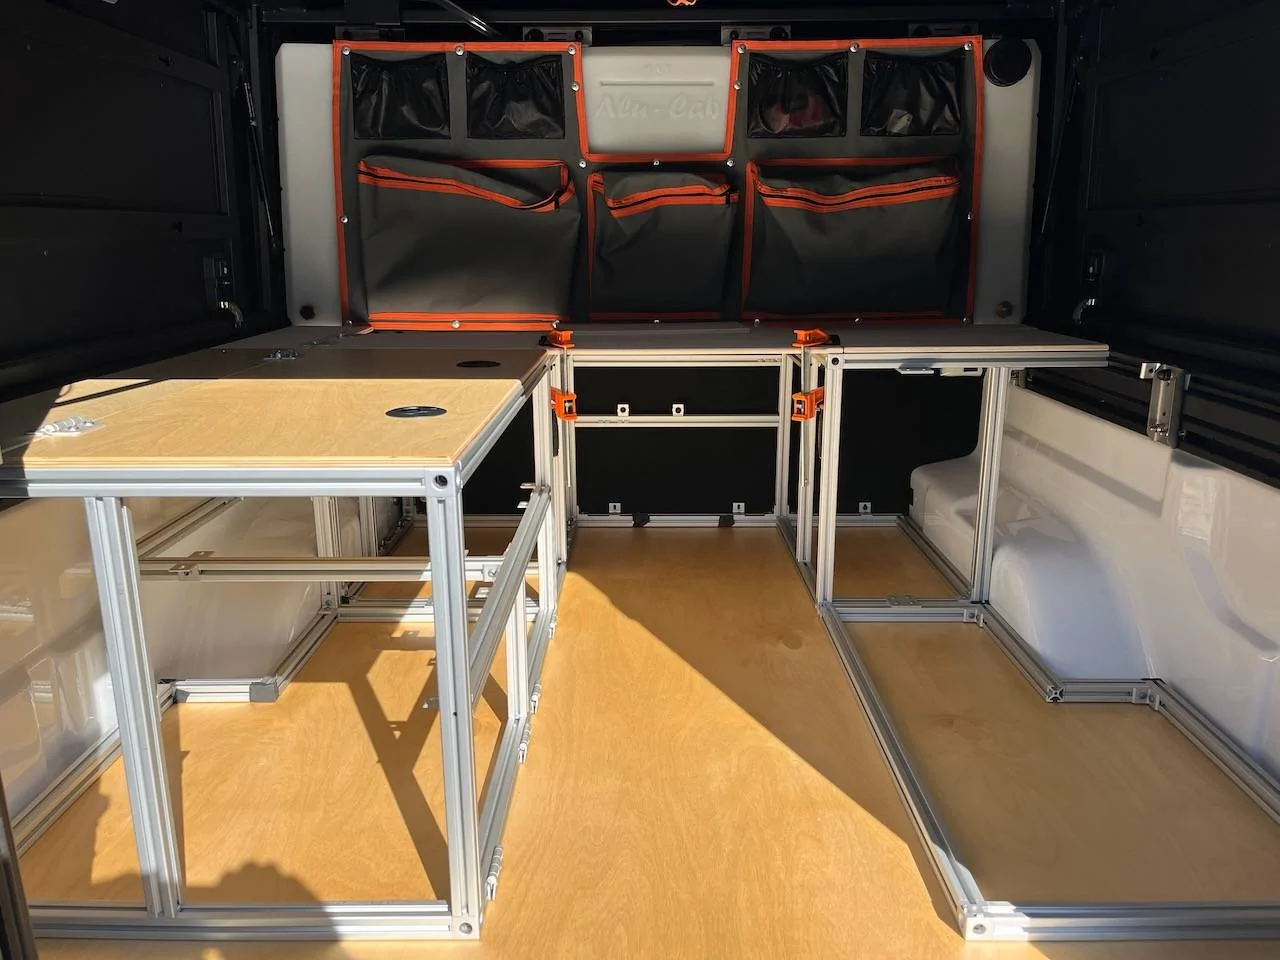
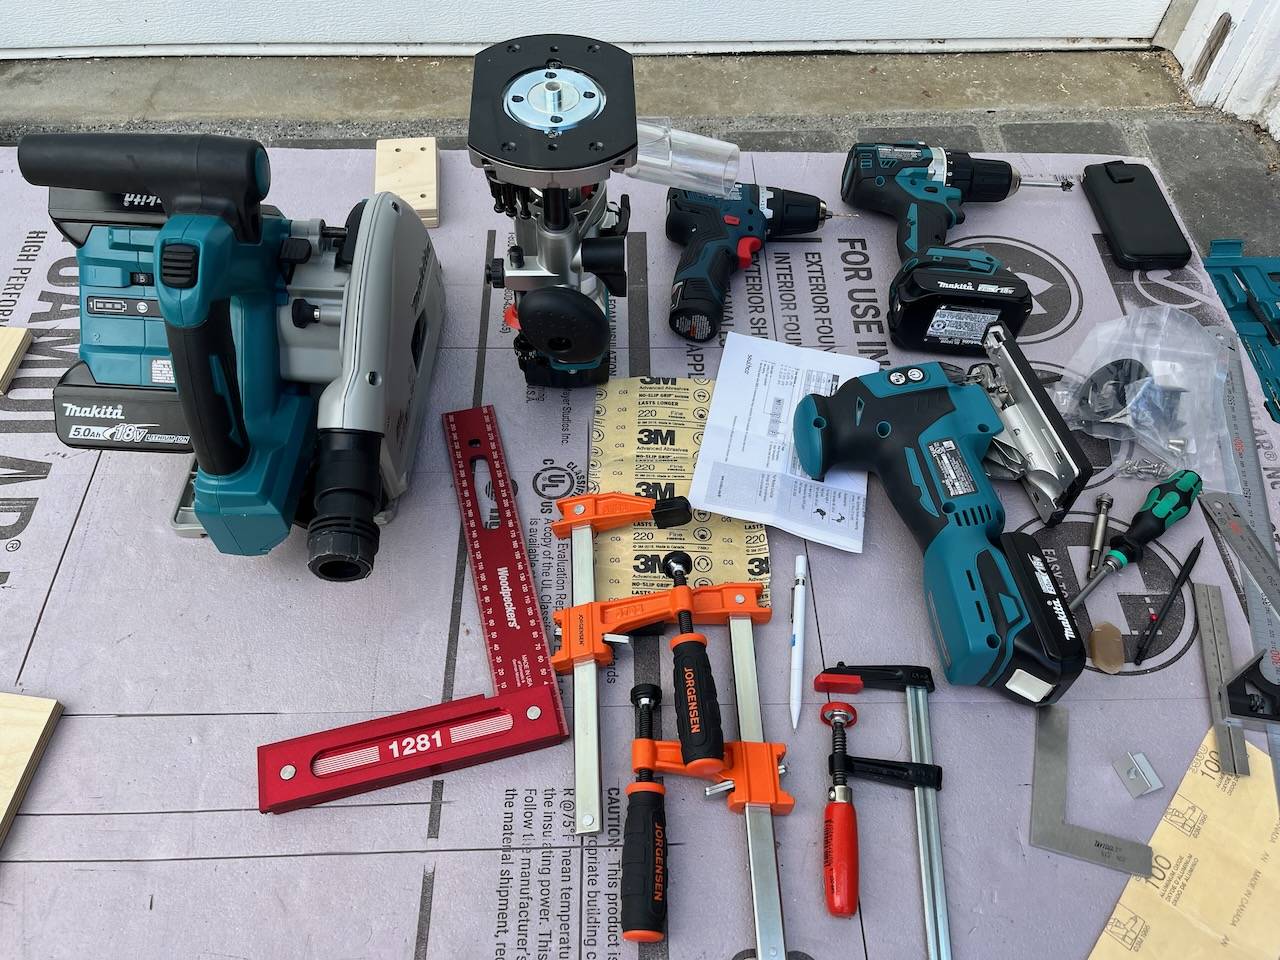
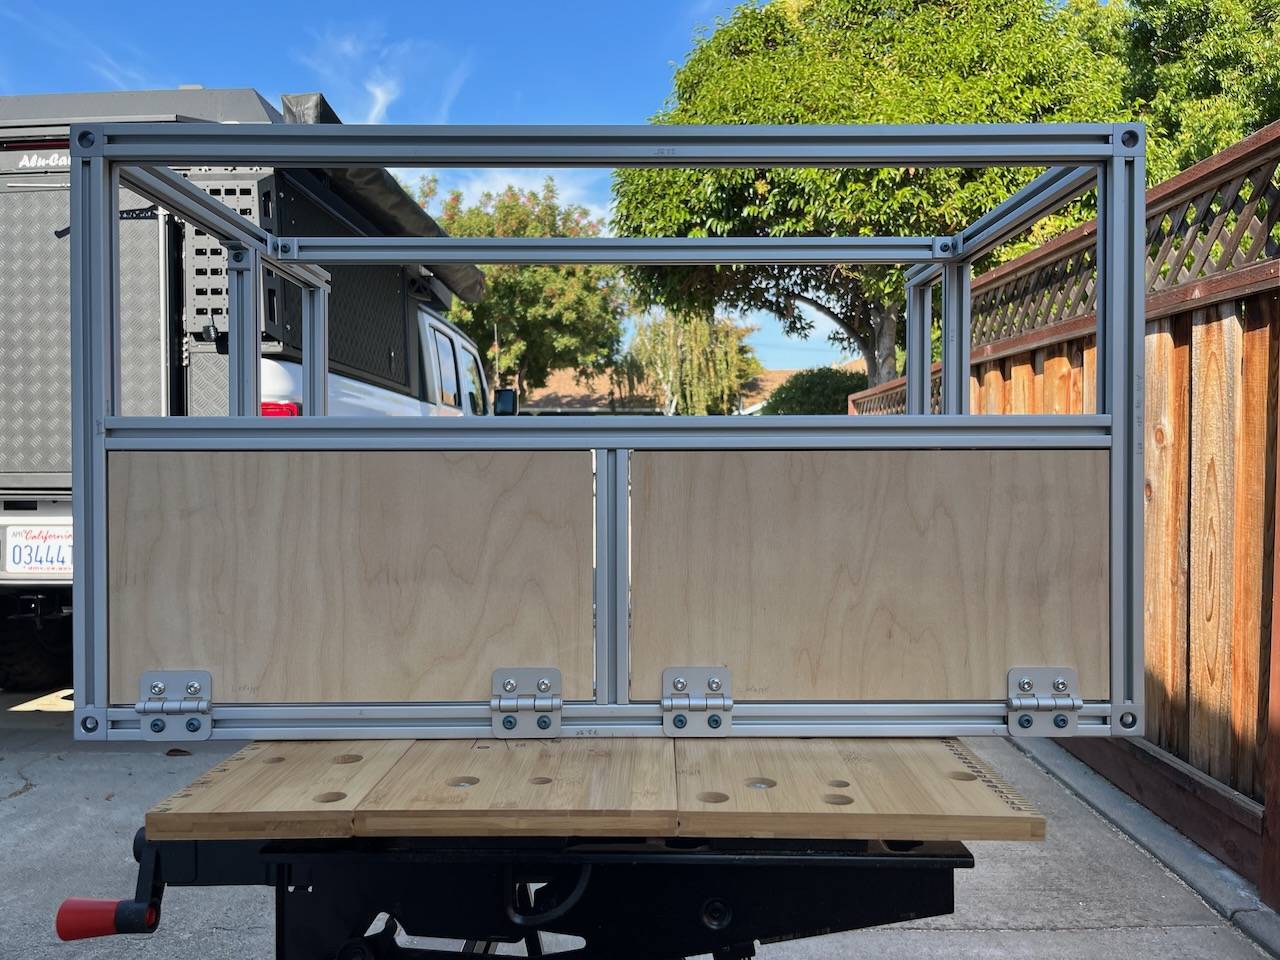
Got the woodworking and the attachments for the "doors" done today:

doors that sit flush inside the profile
Test fit of the door panels:

Jeep Gladiator A new hope ... (build journal and component reviews) IMG_5931


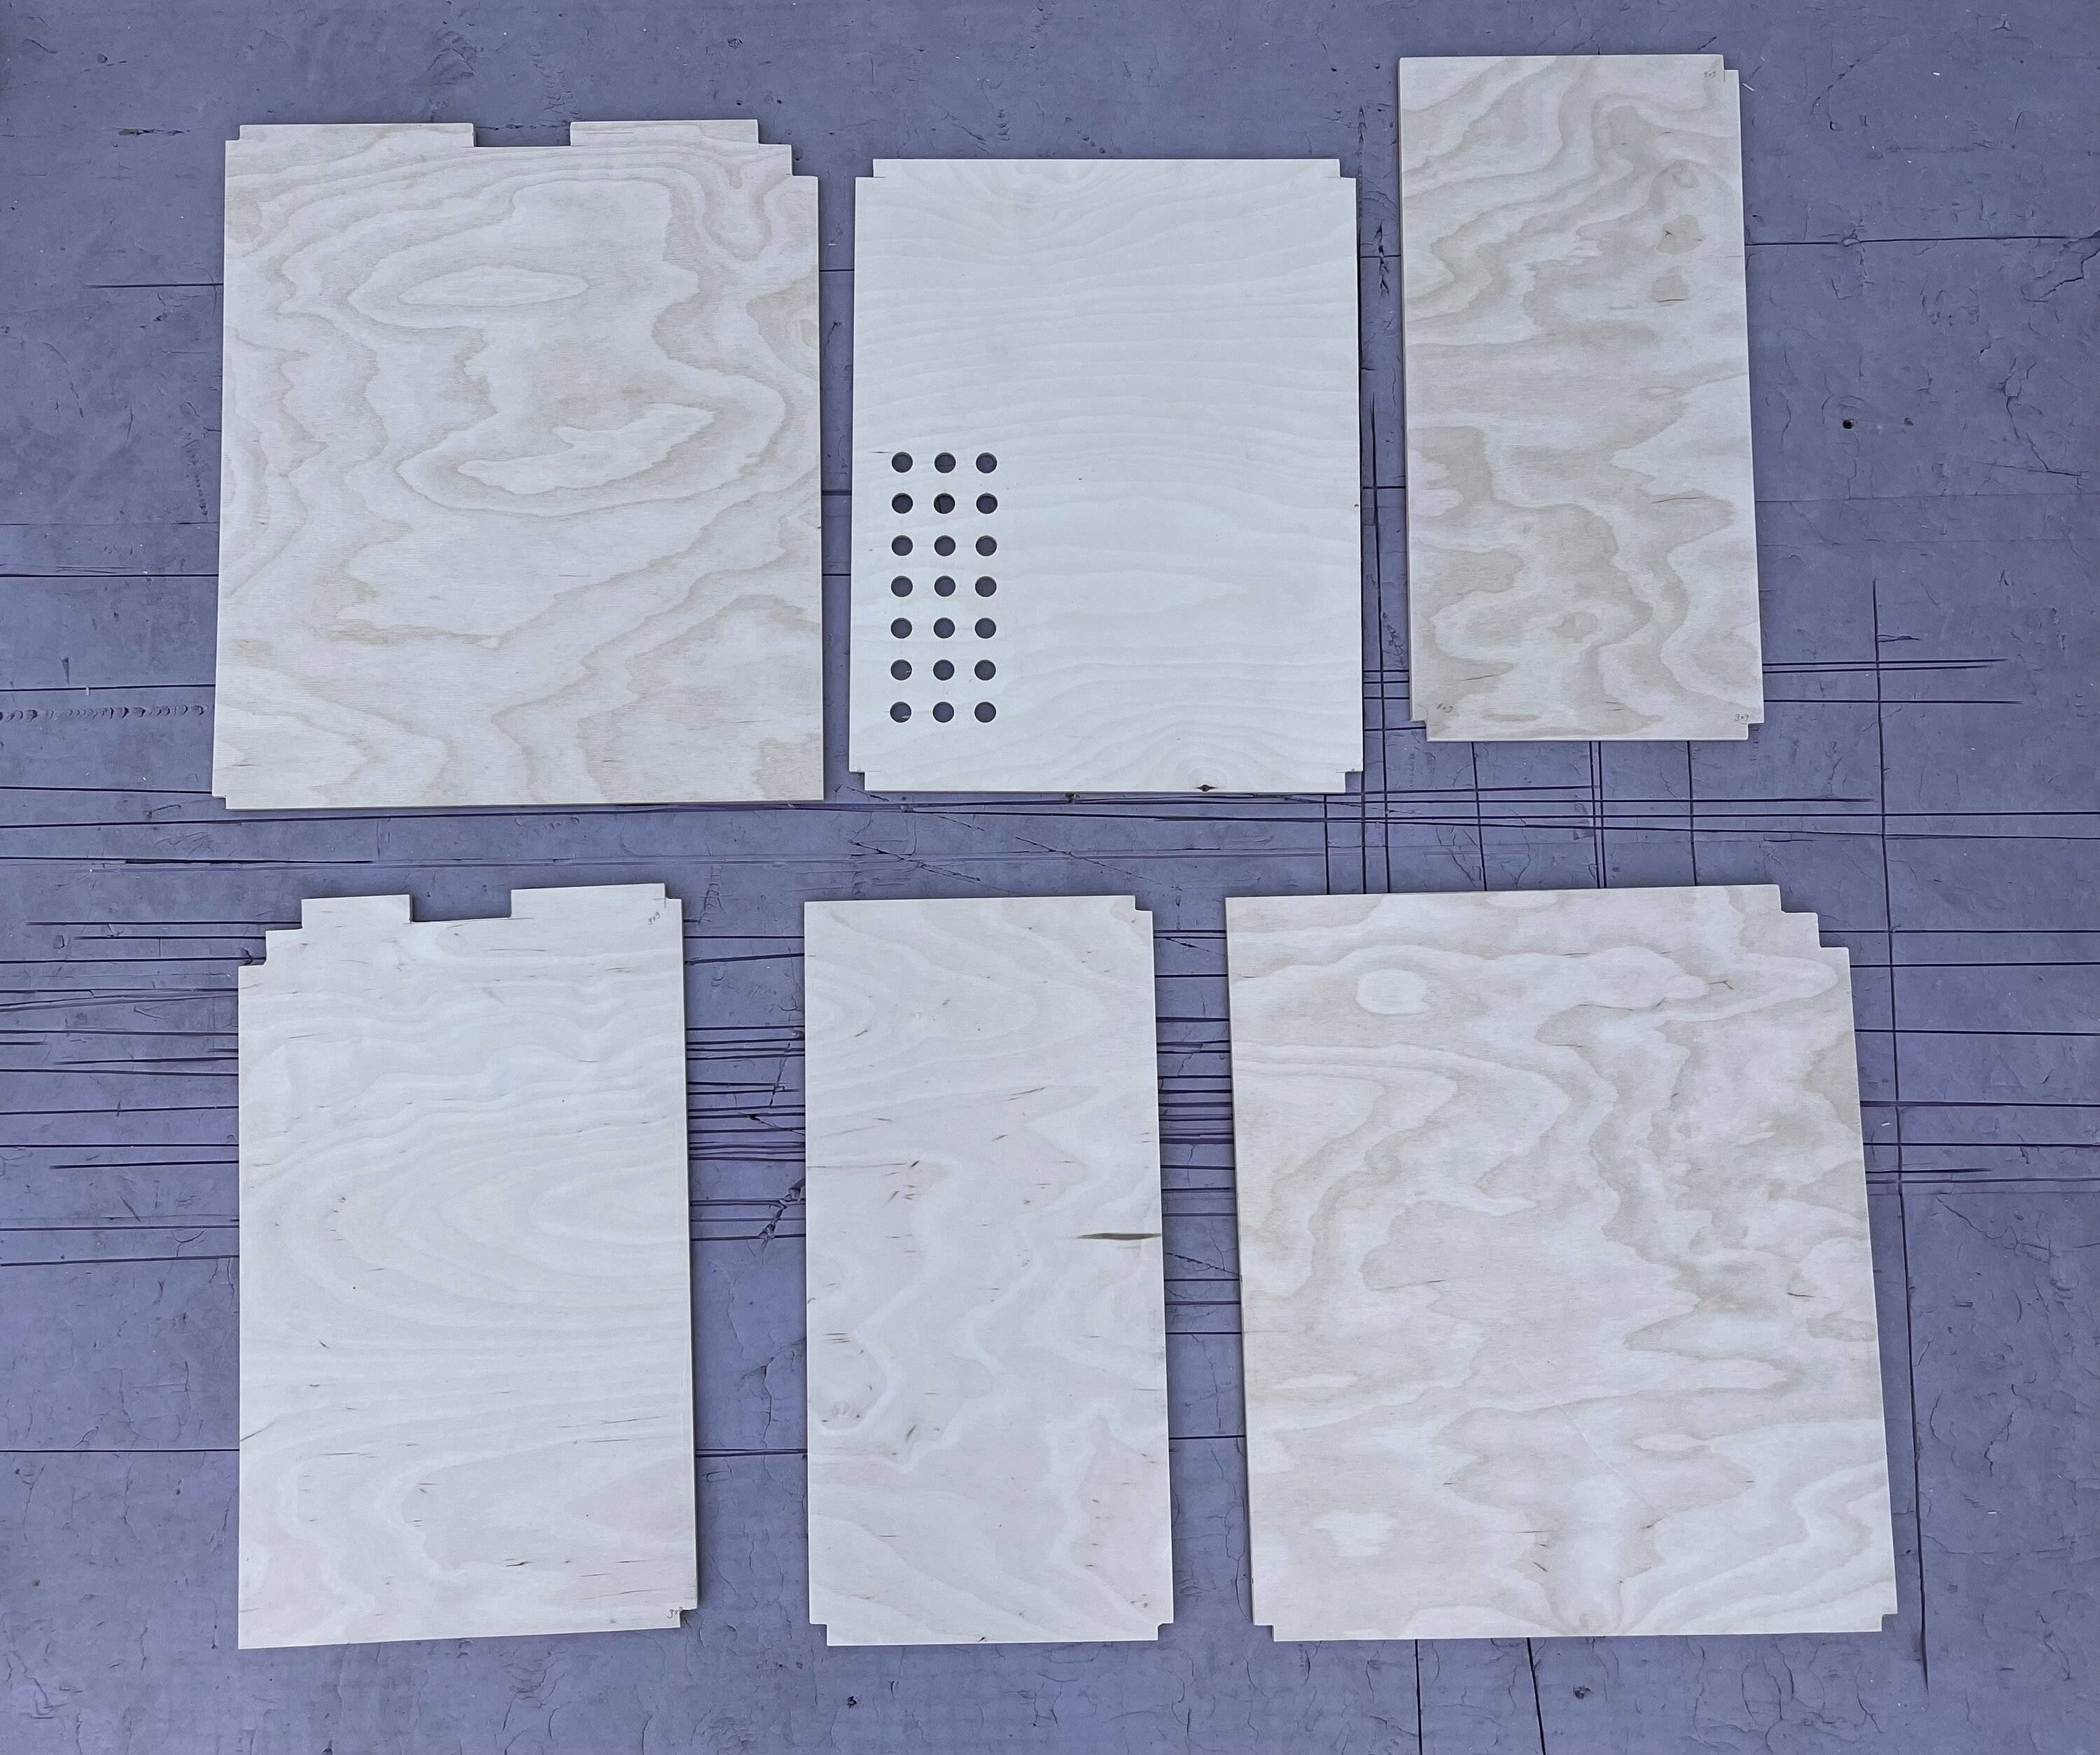
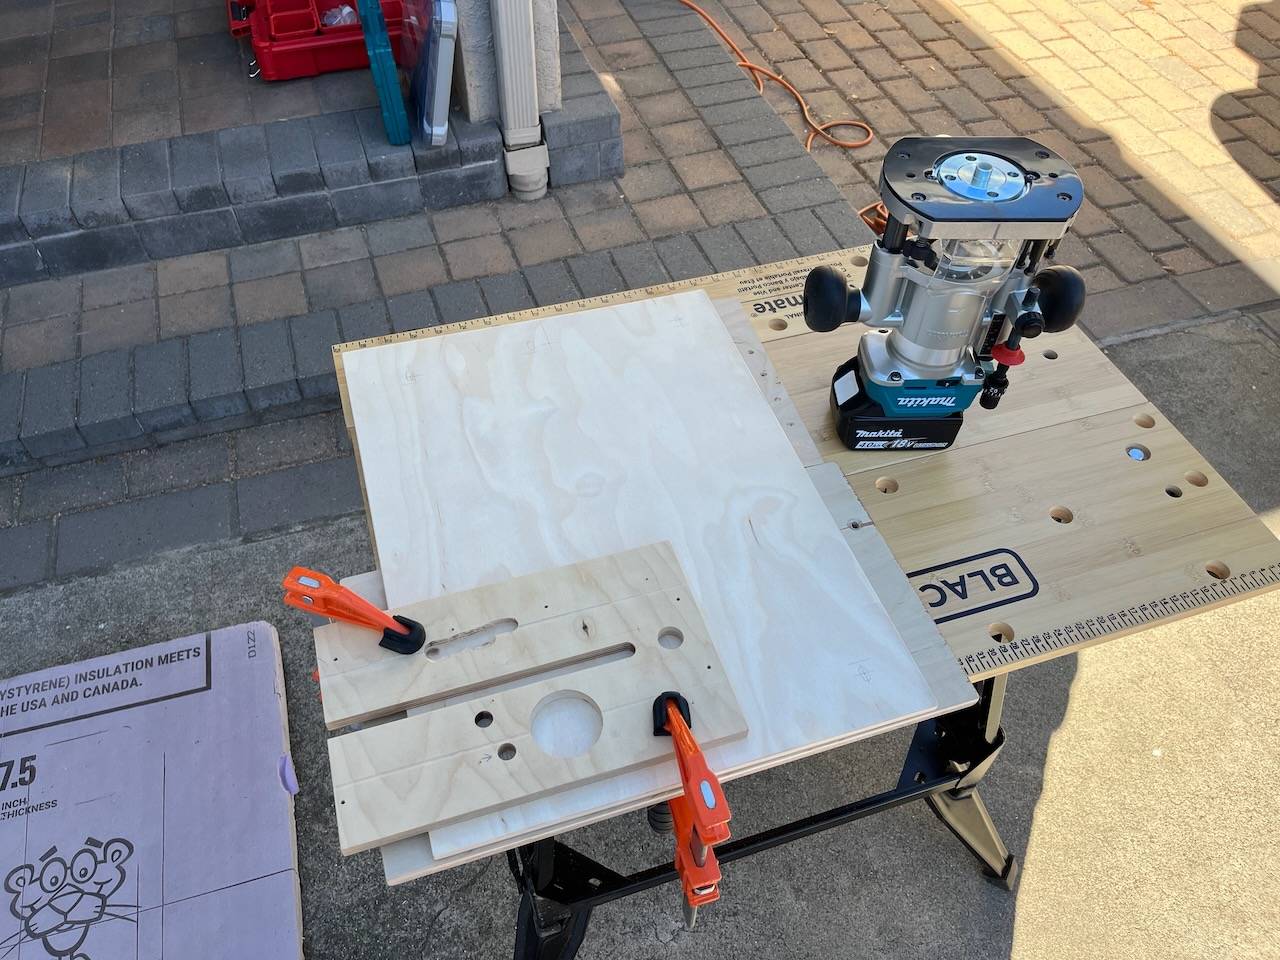
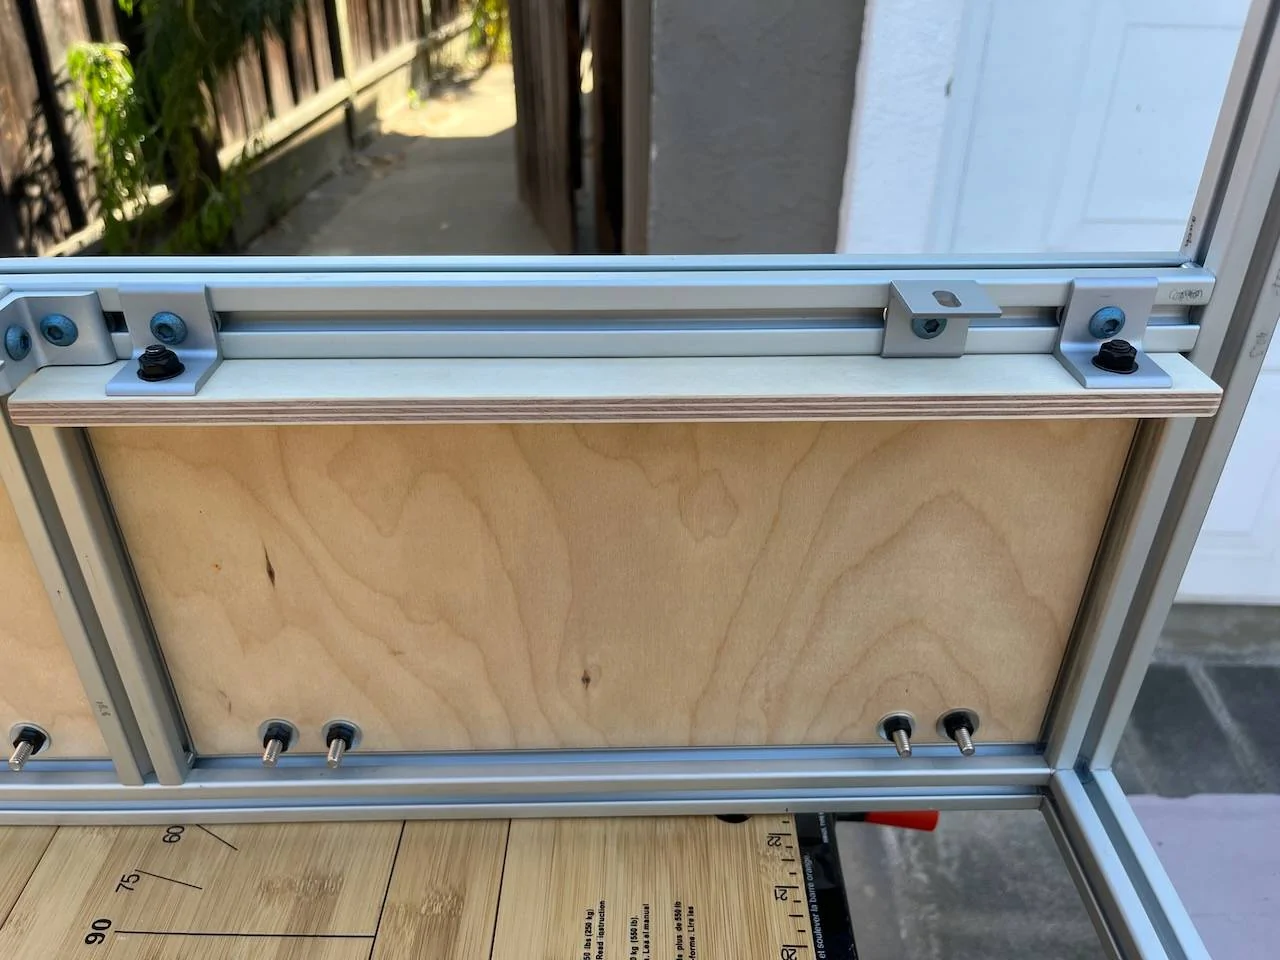
Inside, the small panel prevents the door from falling through and is the attachment point for the latch keeper (temporary hardware, the final one will be used when it gets here):

Jeep Gladiator A new hope ... (build journal and component reviews) IMG_5932


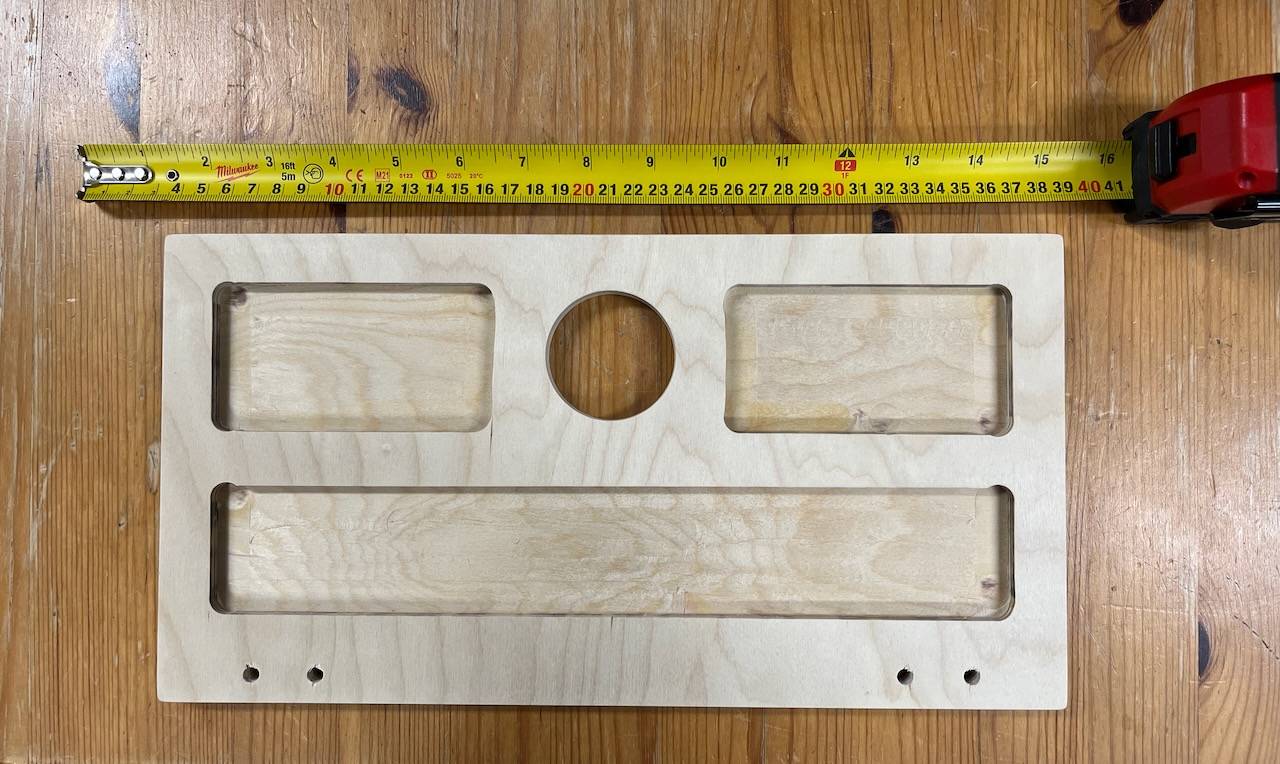
Gave the doors the same treatment as the upper panel:

Jeep Gladiator A new hope ... (build journal and component reviews) IMG_5935


Weight savings on doors and upper panel: two cans of beer ... have to get priorities right ... ;-)
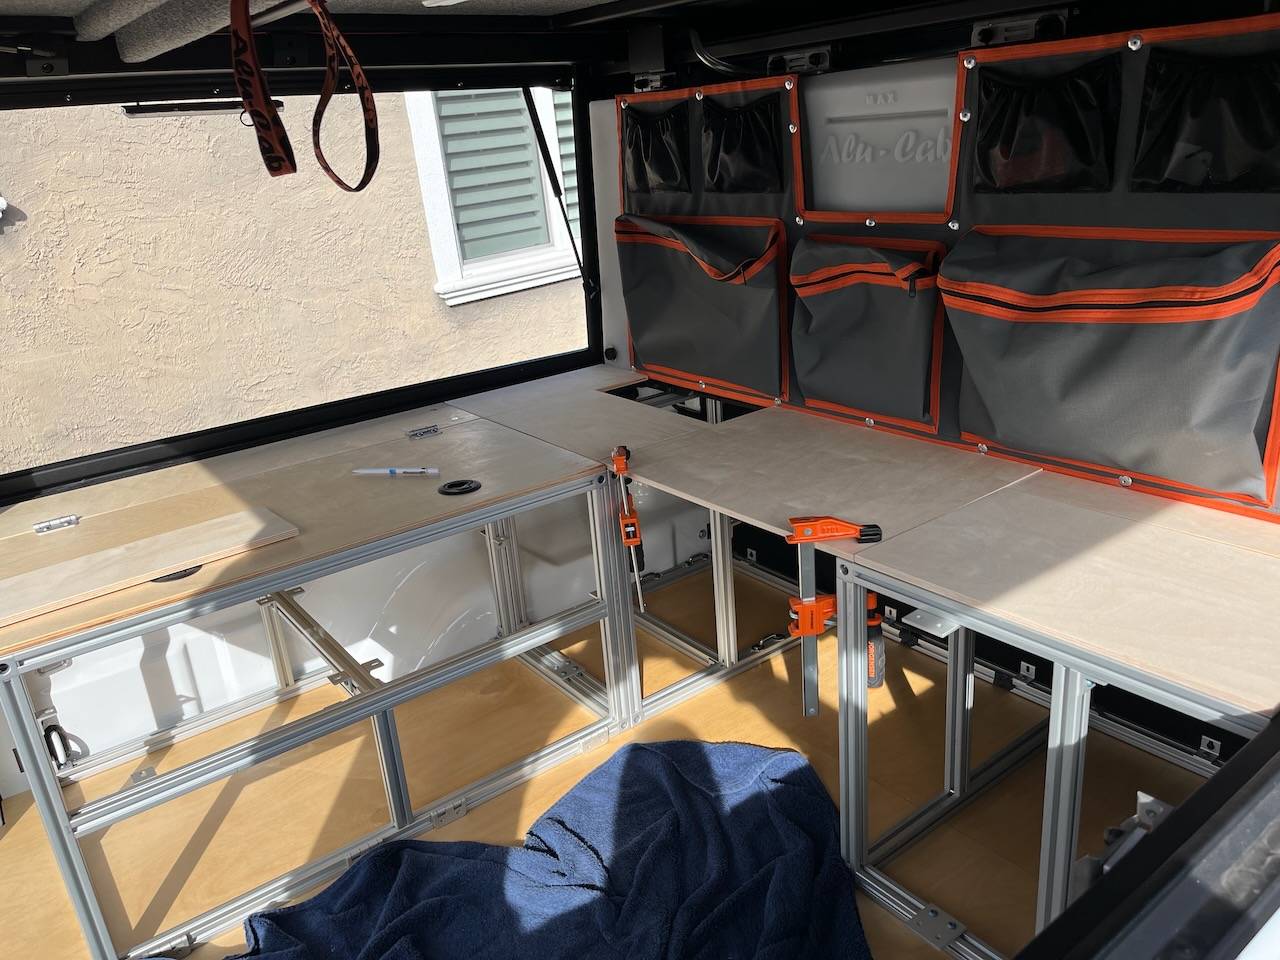
Sponsored

 
OP
OP
cug

cug

Well-Known Member
First Name
Guido
Joined
Apr 1, 2023
Threads
13
Messages
602
Reaction score
664
Location
Christchurch, New Zealand
Vehicle(s)
JTR EcoDiesel, Land Cruiser 79, BMW R1250GS
Build Thread
Link
Occupation
Just keeping busy
Made quite some progress in the last few days, but no new photos, I'll post more photos when the "bench" is done and ready, it won't be long:
  • Installed Southco slam latches in the lid, figured out a way to mount the strike plate in this case as well, not optimal, but it works: a strip of 12mm plywood mounted behind the upper front strut of the 80/20 part and then mount the strike plate on that. It takes away 12mm opening size, but we can live with that.
  • Installed the lid on the bench, made a fixed panel that closes the gap towards the side window. Mid-term we are going to build a back for the bench which will also create an enclosed space accessible from the side window where we plan to store our camp chairs and table. The fixed part of the seat is the bottom of that space.
  • Closed some gaps and fixed small issues with the 80/20 construction.
  • Started with the final wiring loom between the GP Factor Redarc unit and the rest of the system.
  • Added a Bluesea switch panel on the passenger side, so we have to run only one cable from left to right and can still switch individual appliances and gadgets.
  • Re-programmed the Redarc system so that the water system will be turned off as soon as an ignition signal from the truck is available (with manual override if necessary).
  • Took all the 80/20 constructions apart and then back together a few times to feed more t-nuts into the channel for: battery straps, connection to bedplate, connection to rear wall towards truck cabin, and to connect the various furniture pieces together.
One more tip for 80/20: always have a bunch of "roll-in t-nuts" for your system at hand. You can keep building and adding stuff where needed without pulling the whole unit apart. When you have it apart the next time, replace them with standard t-nuts. This way you can get away with having a relatively small number of these and can keep working without constant annoyance.

And one bonus tip for drilling straight holes in wood:

If you have a palm router, use that one with a plunge base to get perfectly perpendicular holes through panels. They are cleaner, less tear-out and the process reasonably fast if you create a template jig for it. And it's much more precise than drilling with a hand drill.

If you don't have a palm router for a project like this, get one! It's worth the expense, since it makes so many things easier or even possible. Learn to use it with jigs and fences and you'll be amazed how useful it is.
 
OP
OP
cug

cug

Well-Known Member
First Name
Guido
Joined
Apr 1, 2023
Threads
13
Messages
602
Reaction score
664
Location
Christchurch, New Zealand
Vehicle(s)
JTR EcoDiesel, Land Cruiser 79, BMW R1250GS
Build Thread
Link
Occupation
Just keeping busy
Not much to show just yet, just a bunch of internal dividers …

Jeep Gladiator A new hope ... (build journal and component reviews) IMG_5954


Again, it’s moving …
 
OP
OP
cug

cug

Well-Known Member
First Name
Guido
Joined
Apr 1, 2023
Threads
13
Messages
602
Reaction score
664
Location
Christchurch, New Zealand
Vehicle(s)
JTR EcoDiesel, Land Cruiser 79, BMW R1250GS
Build Thread
Link
Occupation
Just keeping busy
Ugh. Posted the above from the phone ... what a shitty white balance. But okay, it looks better in real life.

We'll finish the dividers and the various covers and hatches for the "utility module" (the one under the tank) and then we'll put it all together and in the truck. THEN I'll get some real photos.
 

Sponsored

OP
OP
cug

cug

Well-Known Member
First Name
Guido
Joined
Apr 1, 2023
Threads
13
Messages
602
Reaction score
664
Location
Christchurch, New Zealand
Vehicle(s)
JTR EcoDiesel, Land Cruiser 79, BMW R1250GS
Build Thread
Link
Occupation
Just keeping busy
And while there doesn't seem to be much progress – a lot of things are moving into the final stages before they come together.

Today we did a "track saw puzzle" to waste as little of our stock of baltic birch panels as possible while still getting the panels with the wood grain in the same direction. Unfortunately, had some run-out with the router on one piece (of course the largest) because I missed that the locking mechanism in the router base had losened a bit over time and the bit dropped ... damn. That panel will have to become a smaller door somewhere. Couldn't live with the screwed up edge.

Jeep Gladiator A new hope ... (build journal and component reviews) IMG_5959


Plan for the rest of the week (updated 11/05):
  • Build the bottom frame for the right side furniture piece so we can mark all teenuts in the bedplate. [DONE]
  • Remove the bedplate, install all the teenuts, get bedplate installed again with final insulation glued on and mounting points ready. [DONE]
  • Put the finishing touches on the "utility module", install it as well as the bench. [other than install into camper – DONE]
  • Re-install the electrical components (sh**, need to finish the wiring loom ...)
  • Go on one or two test trips and decide on exactly how to build the right side piece.
Go from there. If all goes well, the truck should be ready for some test trips by the end of the coming weekend. We'll see, if the weather holds we can keep working in the driveway ....
 
Last edited:
OP
OP
cug

cug

Well-Known Member
First Name
Guido
Joined
Apr 1, 2023
Threads
13
Messages
602
Reaction score
664
Location
Christchurch, New Zealand
Vehicle(s)
JTR EcoDiesel, Land Cruiser 79, BMW R1250GS
Build Thread
Link
Occupation
Just keeping busy
It seems I can't edit older posts (other than the first one) anymore. If that stays, I'm going to stop this build thread and move it to a site where I can. Bummer.

Update: this seems to work again.
 
Last edited:

redline61

Well-Known Member
Joined
Jul 23, 2022
Threads
3
Messages
95
Reaction score
156
Location
Idaho
Vehicle(s)
2020 Gladiator
Build is looking great! I appreciate the detailed breakdown and time on this build. Keep it going!
 
  • Like
Reactions: cug
OP
OP
cug

cug

Well-Known Member
First Name
Guido
Joined
Apr 1, 2023
Threads
13
Messages
602
Reaction score
664
Location
Christchurch, New Zealand
Vehicle(s)
JTR EcoDiesel, Land Cruiser 79, BMW R1250GS
Build Thread
Link
Occupation
Just keeping busy
@redline61 – I'll see how this edit/delete thing works out. If I can't edit older posts for corrections or revisions, I'm not going to update all that much here anymore and will have to find a different place. Pain in the butt, since I'd have to copy a lot of stuff, but if that's what it takes to get ownership of my own posts back, that's what I'm going to do.
 

Sponsored

OP
OP
cug

cug

Well-Known Member
First Name
Guido
Joined
Apr 1, 2023
Threads
13
Messages
602
Reaction score
664
Location
Christchurch, New Zealand
Vehicle(s)
JTR EcoDiesel, Land Cruiser 79, BMW R1250GS
Build Thread
Link
Occupation
Just keeping busy
Build the bottom frame for the right side furniture piece so we can mark all teenuts in the bedplate.
Done. Took about 90 minutes today to get exact measurements, cutting, tapping, and assembly for the "footprint" done. Getting better ...

Jeep Gladiator A new hope ... (build journal and component reviews) IMG_5960


Working on:
  • Put the finishing touches on the "utility module", install it as well as the bench.
now since we already have all the parts in the camper. Will do the final work on the bedplate, once we remove these parts for final assembly, fixes, and additions.
 
OP
OP
cug

cug

Well-Known Member
First Name
Guido
Joined
Apr 1, 2023
Threads
13
Messages
602
Reaction score
664
Location
Christchurch, New Zealand
Vehicle(s)
JTR EcoDiesel, Land Cruiser 79, BMW R1250GS
Build Thread
Link
Occupation
Just keeping busy
So, again, everything is taking forever. If we had a proper workshop (we just don't have the space even for a small workbench in the garage or so, tiny houses in CA), it would go about twice as fast or for some things even faster.

Tools I'm really missing, to cut down the time very significantly:
  • A drill press – drilling straight holes (really perpendicular through the workpiece) is difficult with a handheld drill. Getting reliable results takes a long time. Especially for stuff that just has to fit right so that the gaps don't get horrendous. Same for countersunk screws ... they have to sit right or look like crap. A photo of our "straight hole in the right place jig" is below.
  • A table saw – this would basically just speed things up quite a bit, since measuring, setting up the track for track saw, making the cut, etc. just takes so much longer. If it comes with a cross-cut sled, even better, that would eliminate the "kind of sort of straight" cuts we sometimes do with the jig saw.
  • A router table (or at least a board that acts like one): that would make all the edge trimming about three times faster.
Oh, and a REAL workshop table to work on. We are doing most things on the floor, on a piece of foam board. My back and my knees are absolutely killing me today.

Here's a photo of our jig for absolutely straight drilling without any tear-out even in plywood:

Jeep Gladiator A new hope ... (build journal and component reviews) IMG_5963


The small holes next to the larger one have markings inside so can be setup perfectly with a crossmarker underneath. The router with the template guide fits tight into the hole, push down through the plunge base, perfect hole is cut.

Part of our "workshop":

Jeep Gladiator A new hope ... (build journal and component reviews) IMG_5964


I bought most of these tools for this conversion and will enjoy using them in the future.

We pulled the "utility unit" out of the car today to test final assembly, check panel gaps, adjust latch strike plates, etc. Fitment looks decent.

Jeep Gladiator A new hope ... (build journal and component reviews) IMG_5967


The different color mostly comes from artificial light and the fact that some of the panels haven't gotten any wood finishing yet. TBD tomorrow. The bench will attach to the left front of this, another furniture piece to the right front. Batteries/electrics under the left rear panel (with the two latches), water pump and utility storage under the right side, toilet will go under the seat in the middle.

To be continued ...
 
OP
OP
cug

cug

Well-Known Member
First Name
Guido
Joined
Apr 1, 2023
Threads
13
Messages
602
Reaction score
664
Location
Christchurch, New Zealand
Vehicle(s)
JTR EcoDiesel, Land Cruiser 79, BMW R1250GS
Build Thread
Link
Occupation
Just keeping busy
Build is looking great! I appreciate the detailed breakdown and time on this build. Keep it going!
Thanks for the kind words!

There are some comments on this from my side though:
  • Personally, I would do the build again (although different). My wife would probably not. It's just taking too long. Part of the problem is that we try to match a professional quality build in a hobbyist (at best) setup.
  • If we had a small "home workshop", e.g. the size of a single garage for building this, it would go about two to three times faster. Yes, two to three times. Doing this in a driveway setup is a nightmare.
  • Building with a combination of 80/20 and wood is at least doubling the complexity. I would NOT do this again, if I were to do another build, I'd build purely with wood. I would have to learn quite a bit more regarding proper woodworking, but the result would likely be ligher and just as nice, but maybe not quite as solid, although, I'm not even certain about this. 80/20 or any other extrusion system adds a lot of potential failure points with the various connections and hundreds of small bolts that can work themselves loose. We are going to counter this with threadlocker (medium, blue) once we are confident that the build is right.
  • We are doing all this together, which sometimes isn't easy, patience and drive can vary over time and there are times when it's hard to keep going and not throw everything against the wall. There are also times that are incredibly rewarding. E.g. when we had the furniture all set up in the living room and it all looked and felt great. The gaps and tolerances are tight and don't vary much, it's solid and, at first glance, very functional.
  • There is a lot to learn if you have not done this kind of work before. I have a bit of experience with road case building, 80/20, some woodworking, some metal working, reasonable knowledge of electrics, no experience with RV water systems, no experience designing furniture or so, never owned an RV to copy ideas from etc. – long story short, there is a lot of knowledge and experience needed to do a build like this and you have to LEARN FAST.
  • Nobody around you will understand how much work even small things are. It can take days to work out a nice looking and functional solution for something that should be utterly simple and done within an hour or two. This can be incredibly frustrating.
I don't want to discourage anybody reading this, but if you think about building something yourself and you have not done something similar before, think twice. If you can live with an existing solution, it's probably better to get that. If you, like us, can't or don't want to live with existing solutions, then may the force be with you! Still, the simpler you can keep it, the quicker you get the reward of using it. And it likely won't be limiting you compared to a more complex one. It'll just be done quicker ...
 
Last edited:
OP
OP
cug

cug

Well-Known Member
First Name
Guido
Joined
Apr 1, 2023
Threads
13
Messages
602
Reaction score
664
Location
Christchurch, New Zealand
Vehicle(s)
JTR EcoDiesel, Land Cruiser 79, BMW R1250GS
Build Thread
Link
Occupation
Just keeping busy
I think I might have to clean this up just a little bit ... ;-)

Jeep Gladiator A new hope ... (build journal and component reviews) IMG_5908


Just making sure we have all the bits and pieces in place to finish the final wiring setup.

Been asking myself why the heck these components can't standardize just a little bit. The terminals are all on different heights (copper washers to the rescue. and in one case even a wood spacer underneath), on different bolt sizes (WTF, I must have 10 different crimp on ring terminals here and still missing one or two sizes to put it all together), some of the pieces claim to be "M10", but actually aren't metric and instead 3/8 ... alll have different mouning holes and are sometimes tiny (e.g. on the bus bar or the 250A fuse).

This will likely look okay once everything is wrapped up nicely in wiring protectors, and ziptied into the correct spots. Tomorrow will be "crimp day" ... ;-)
 

antwon412

Well-Known Member
First Name
Tony
Joined
Sep 25, 2021
Threads
42
Messages
1,086
Reaction score
2,222
Location
Northern Ca - Yuba City
Vehicle(s)
TJ, JT Mojave
I really want to build a driver side storage unit in the gladiator. The height of the bed and the full length of it. Maybe 12 inches wide or so. Originally debating doing 8020 but I think honestly just for simplicity I’m going to build a frame out of 1x2 or 1x3 and then just figure out what I want to use for panels. Cover it in carpet that matches the bed rug. And then maybe just do some aluminum angle along the edges to give it a finished look.


Yours looks amazing. And it’s going to better than anything I make. But the common content is from many people who do these that really is just so much work and not always worth it in their opinion.


I would consider goose gear, but it is so damn expensive
Sponsored

 
  • Like
Reactions: cug


Top