Sponsored

A new hope ... (build journal and component reviews)

OP
OP
cug

cug

Well-Known Member
First Name
Guido
Joined
Apr 1, 2023
Threads
13
Messages
602
Reaction score
664
Location
Christchurch, New Zealand
Vehicle(s)
JTR EcoDiesel, Land Cruiser 79, BMW R1250GS
Build Thread
Link
Occupation
Just keeping busy
Curious if you are using a specific vendor for some of this stuff.
Background

To get to these parts, I learned the bare minimum usage of Autodesk Fusion 360, it's free to use if you only have less than 10 active designs, which is easy for me. The ones that were done, were marked as "Read only" and I moved on.

Then, to get get them cut and bent, I used either OSHCut or Send Cut Send. These services have validaton tools looking at the uploaded designs and I went back and forth between my design and new uploads to address errors and warnings. At some point I ran out of patience when my design wasn't accepted for something their specification said was okay. Emailed OSHCut and they found a software error in their validation software and fixed it over a weekend - very impressive customer service.

So, in short, I learned the absolute basics of sheet metal design by reading, watching some tutorials, back and forth with online validation tools, and a little bit of knowledge about metal working I learned as part of an apprenticeship 35 years ago. Then had an online provider cut and bend the pieces.

I didn't go with powder coating directly from these vendors, because they were very expensive for this. It all started with the heater outside box and lid, that was the first thing I designed. Having it cut and bent and shipped was around $200. Powder coating would have brought it up to $360, since it would have included de-burring and cleaning the edges. The other reason was, that I knew there were some more holes to be drilled or things to be cut, as I didn't know the exact placement of all components just yet and could place some mounting holes due to restrictiions in the bending process (inadequate flange distance).

That's when I started looking for a local shop to do the powder coating once we had all the holes drills and other mistakes corrected. Found JIP Finishing here in Santa Clara, talked to them and they were super helpful.

I also talked to a local metal shop about cutting and bending some of the stuff based on my already existing design, and they ended up at more than double the price of the online vendor AND weren't particularly interested in some one-off stuff from a hobbyist.

Reasion for DIY

For the heater box, there just wasn't anything out there to use. And paying someone to develop it for me would have been prohibitively expensive. These are all small order fabrication, there is very little business to be made by doing it once and then being able to mass fabricate, since there basically isn't any demand for "mass production".

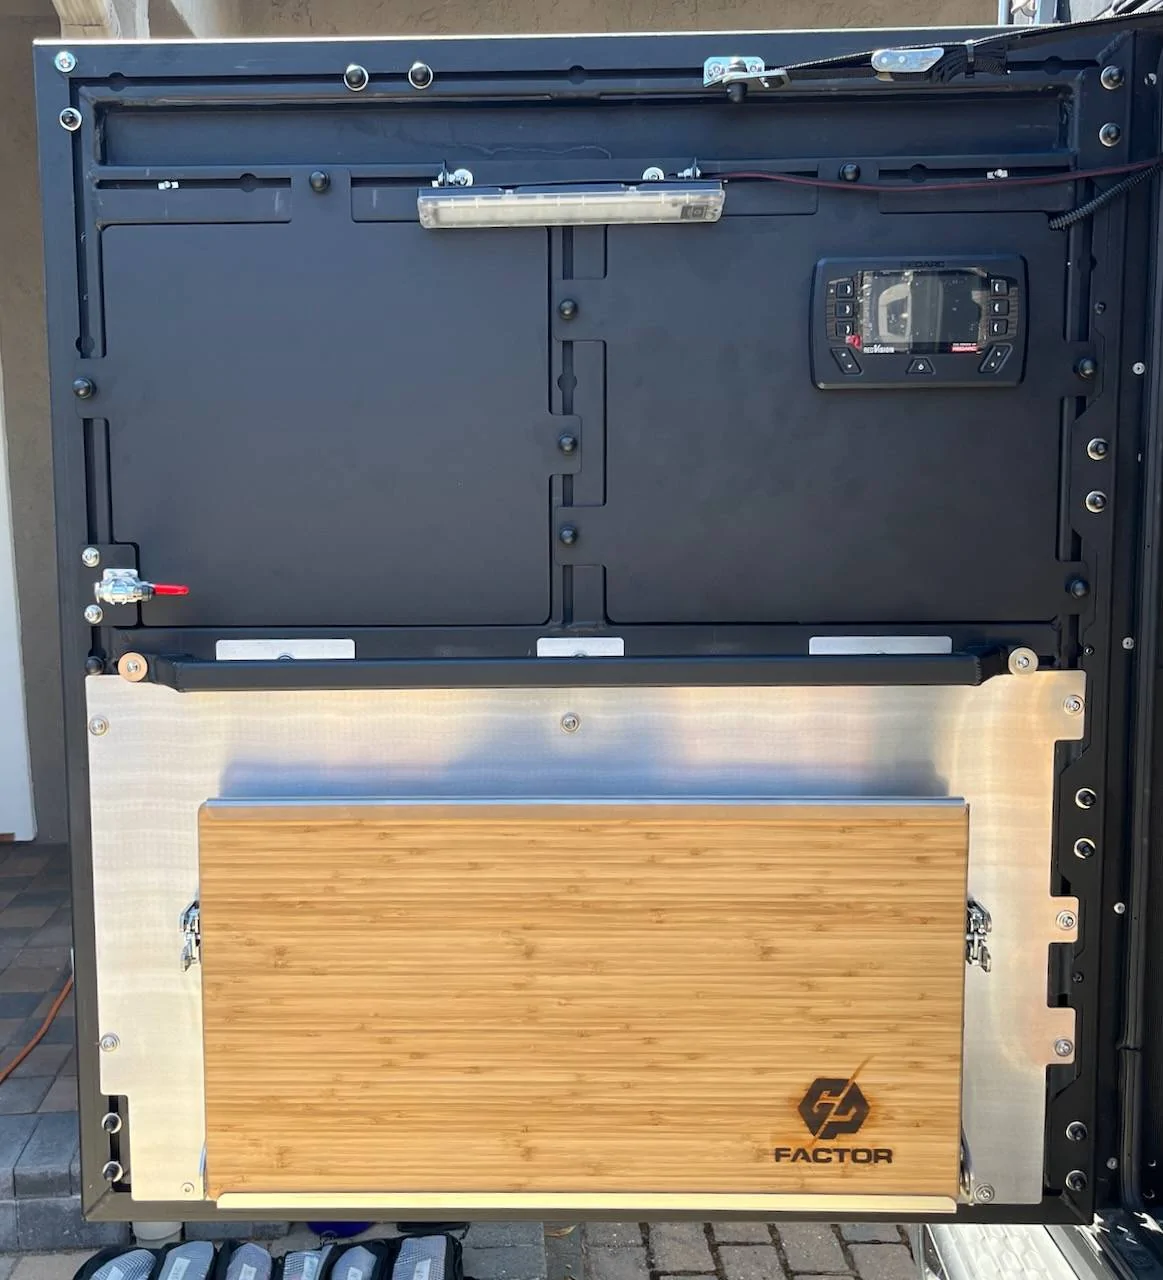
The door components were a different story:

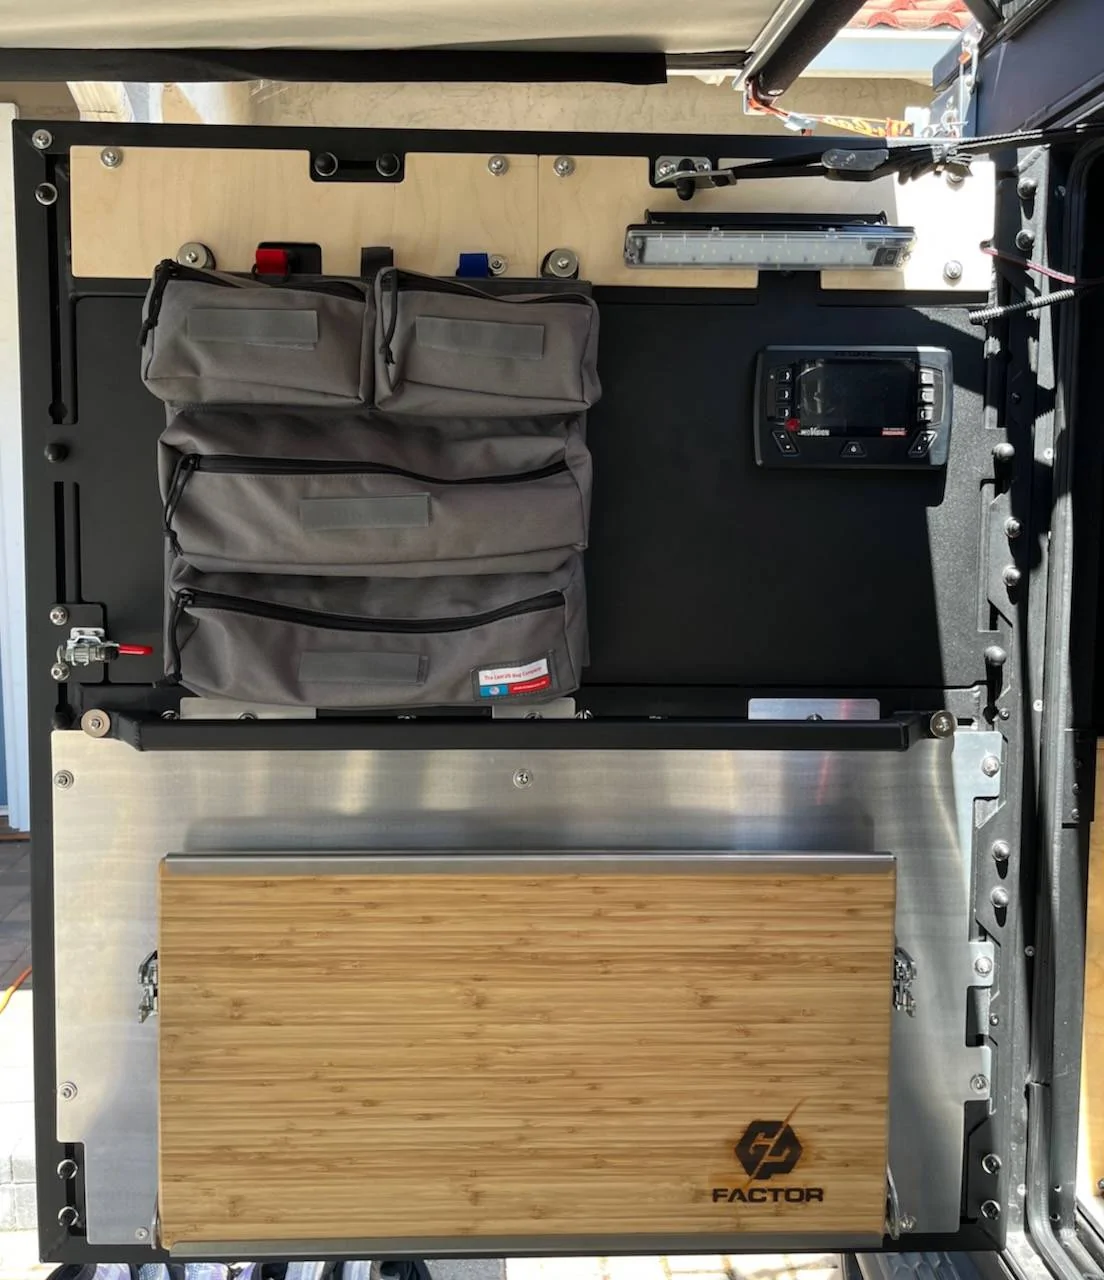
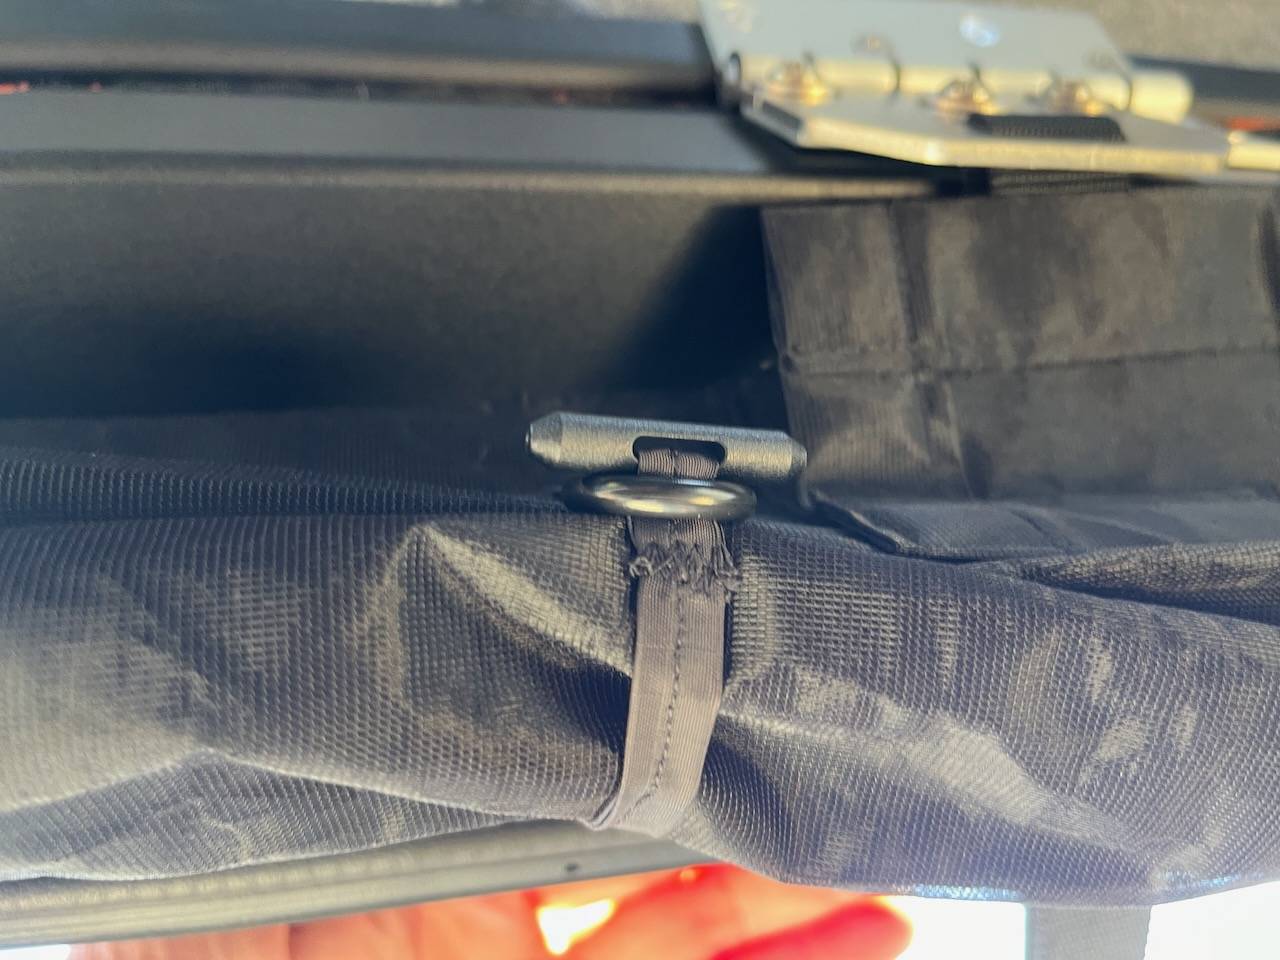
We screwed ourselves by having the door flipped 180 degrees so that it opens to the other side. Jeremy (@813 Fabrication & Design) had offered to help with some components he already had, but they wouldn't have fit our flipped door. We have the new style door with extrusions and the extrusions are offset form the center as can be seen here:

Jeep Gladiator A new hope ... (build journal and component reviews) IMG_6345


This means that everything that is designed for these extrusions would have fit our door, but upside down. Of course that doesn't help much if you're talking, for example, about a fold down table (GP Factor) or mounting for a Redvision display ... they just wouldn't be very useful this way ... :)

That's why all the door components we made were custom for our use case. We plain had to if we wanted these things.

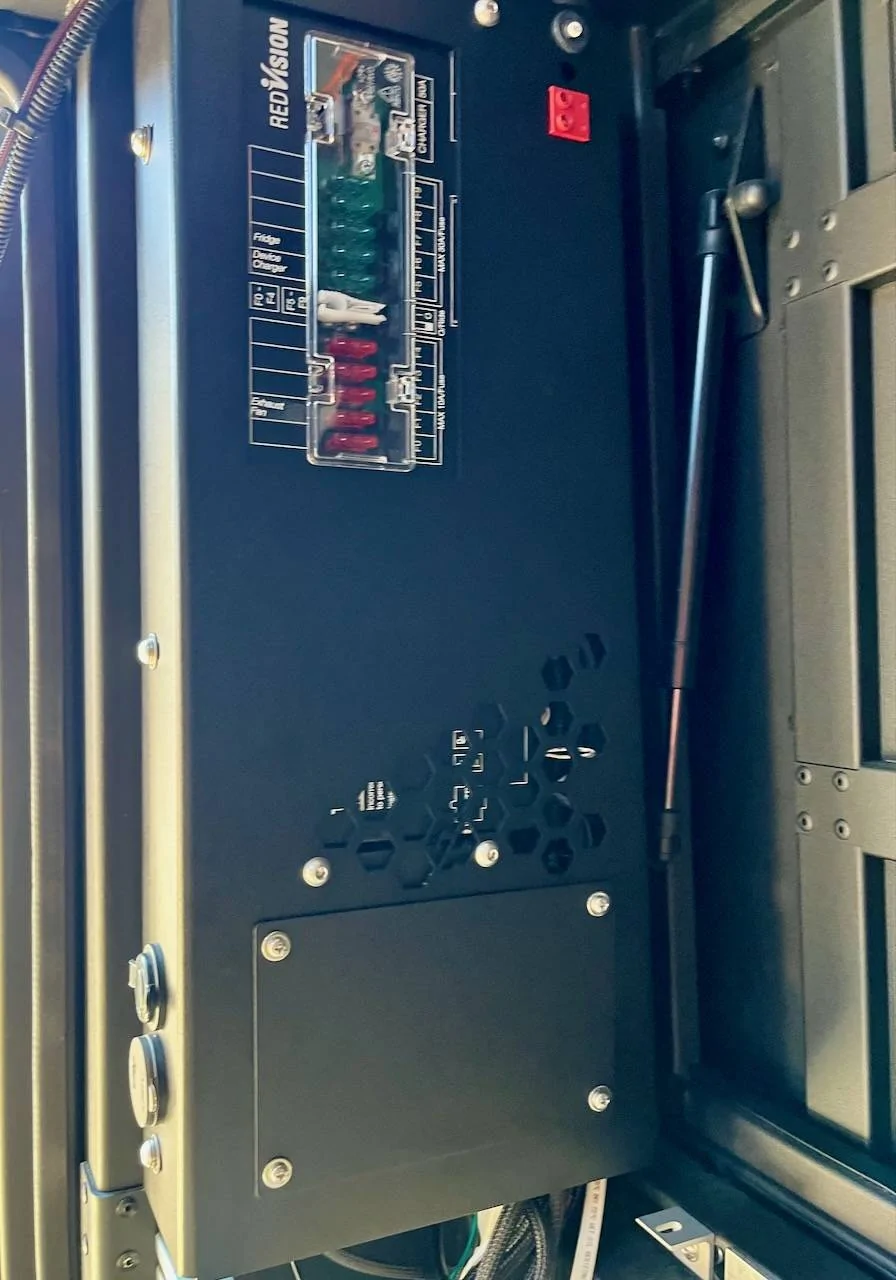
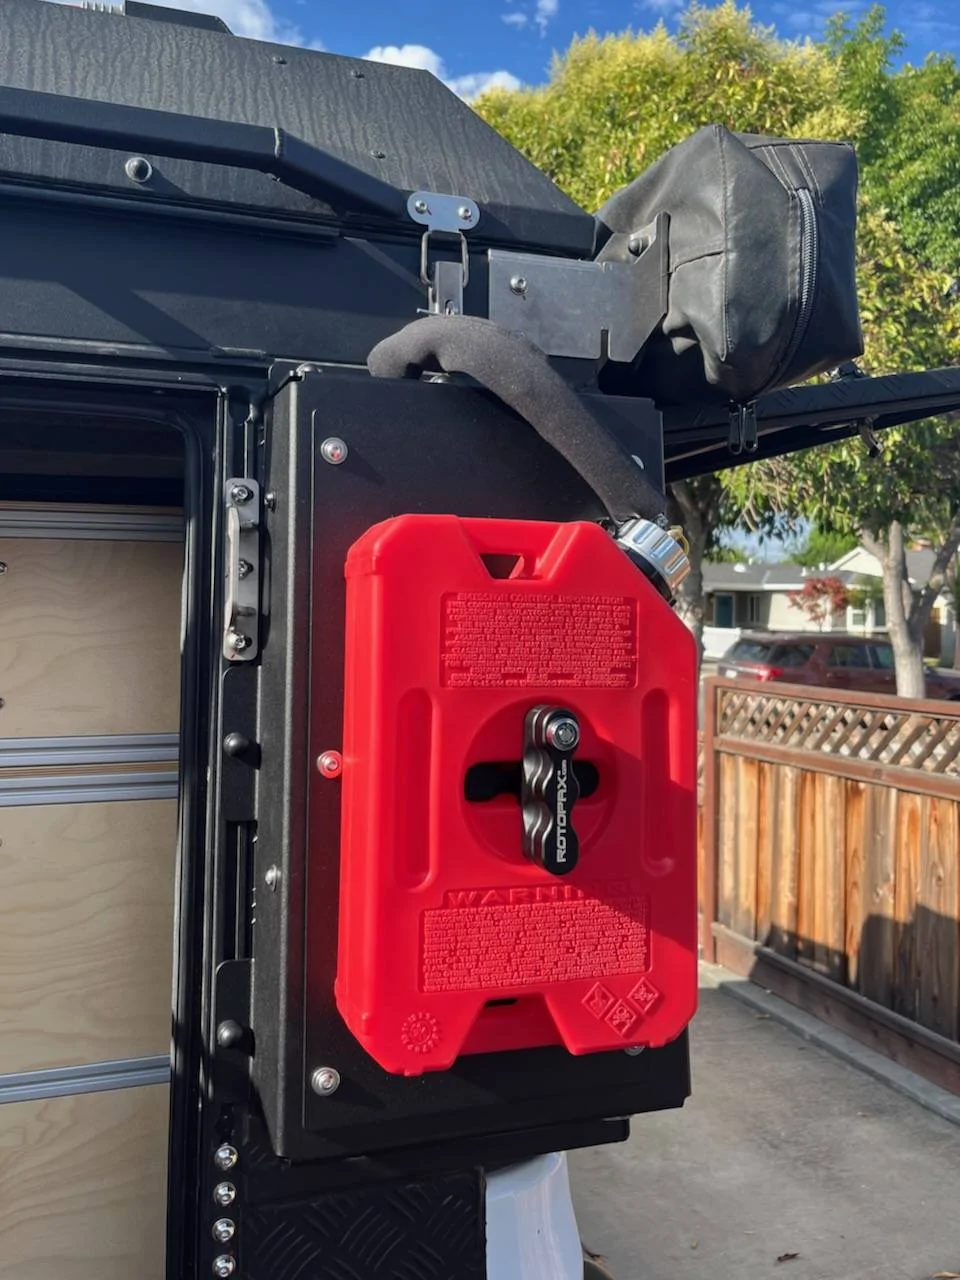
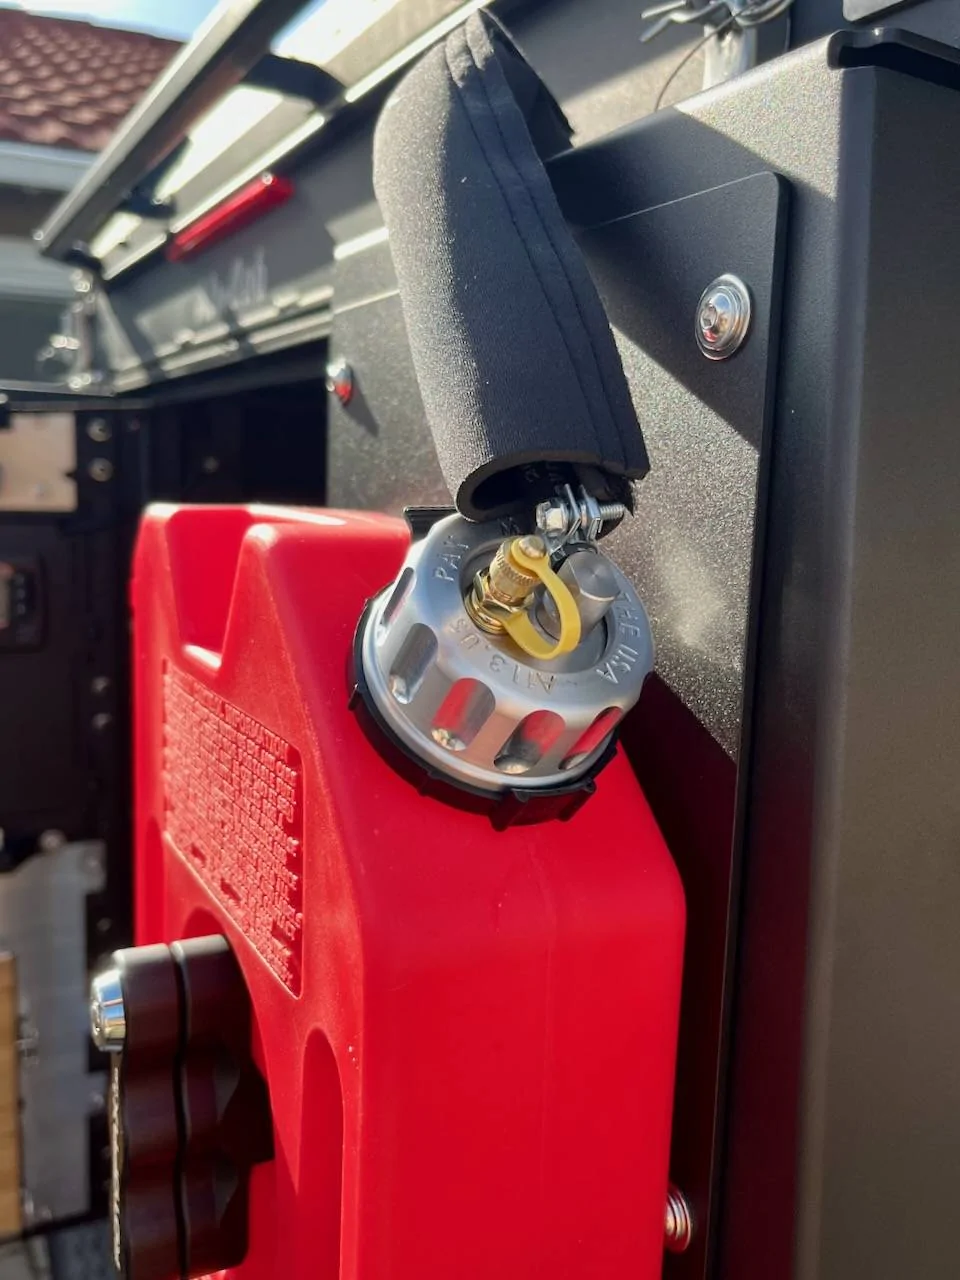
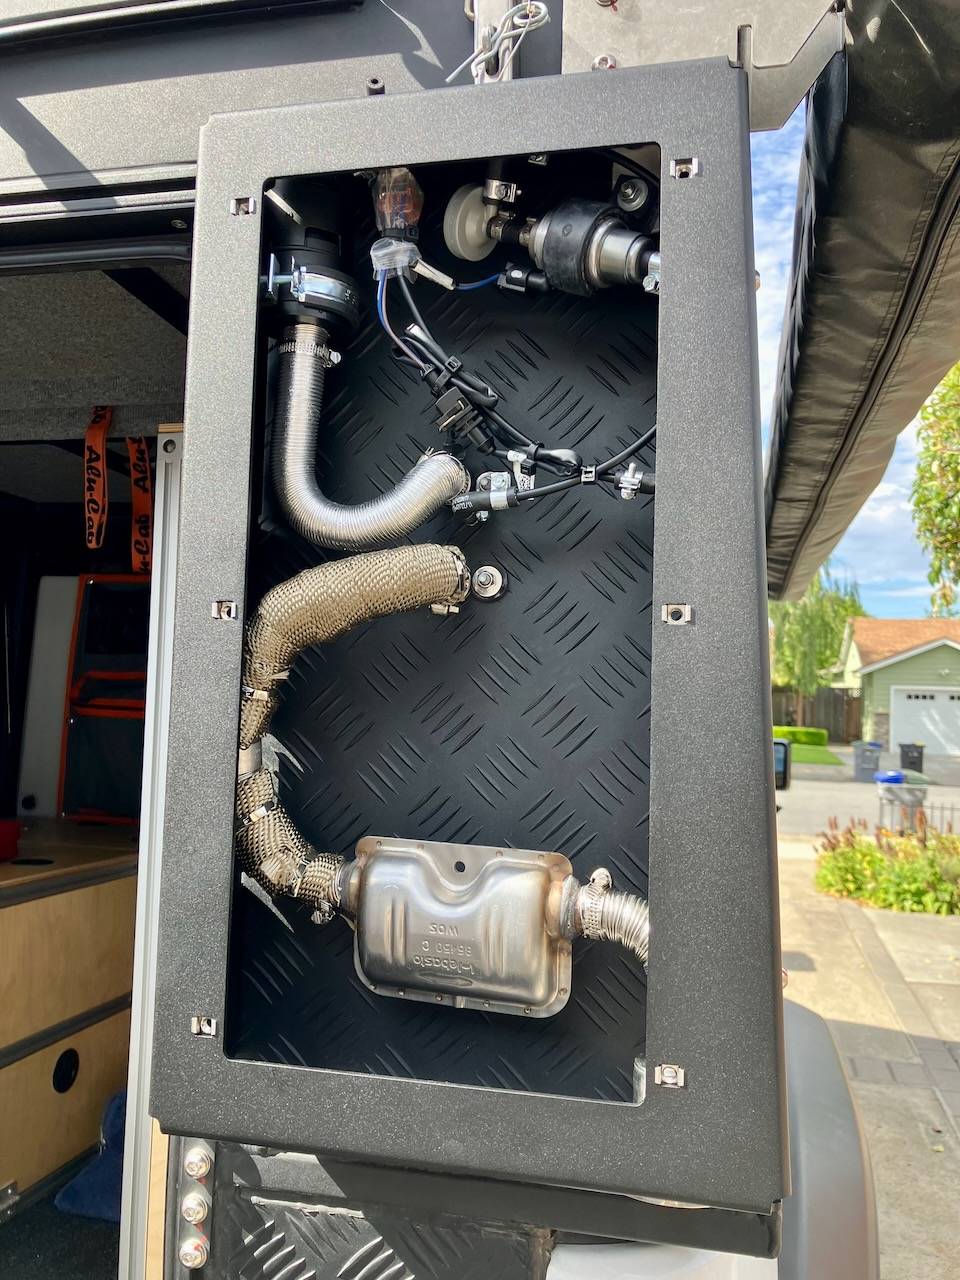
Webasto Heater Bracket

For the heater inside stuff: that's just an artifact of how we mounted the heater. While we thought about how thin the metal in that area is, we still went ahead mounting it there and THEN came up with a solution to stabilize it. So, one DIY "mistake" leading to the neccessity of solving a problem, which we did with the easiest DIY solution we could come up with.

Conclusion and TLDR

If you start with a complete DIY solution, forget about easily incorporating existing solutions - either they won't fit the idea, or the implementation. We were able to use a few things, but in the end, this turned out to be suboptimal as well and it would have been not only cheaper, but also much better if we had also done it ourselves.

If you want to use existing solutions, just pick one, stick to it, use stuff that is designed for it or known to work with it and don't think about customization. They only lead down a rabbit hole.
Sponsored

 
OP
OP
cug

cug

Well-Known Member
First Name
Guido
Joined
Apr 1, 2023
Threads
13
Messages
602
Reaction score
664
Location
Christchurch, New Zealand
Vehicle(s)
JTR EcoDiesel, Land Cruiser 79, BMW R1250GS
Build Thread
Link
Occupation
Just keeping busy
And the reason we didn’t get much done today was that we had to take the GP Factor Redarc unit out and apart to get a longer Ethernet cable in there. What an ordeal …

Jeep Gladiator A new hope ... (build journal and component reviews) IMG_6434
 
OP
OP
cug

cug

Well-Known Member
First Name
Guido
Joined
Apr 1, 2023
Threads
13
Messages
602
Reaction score
664
Location
Christchurch, New Zealand
Vehicle(s)
JTR EcoDiesel, Land Cruiser 79, BMW R1250GS
Build Thread
Link
Occupation
Just keeping busy
So, door interior more or less sorted:

Jeep Gladiator A new hope ... (build journal and component reviews) IMG_6491


Only things missing:
  • Osmo treatment for the upper wood panels – we did this with wood for now, since we really didn't know enough to design an aluminium panel. Maybe in the future.
  • Simple fire extinguisher mount for an Element Fire 50. Just two clips mounted above the grey bag.
A little annoying: either AluCab or TiinyRig bent the hell out of the lamp mount. so it sits crooked and I can't correct this without drilling out the rivets. Ticks me off a bit, but okay. It is what it is.
 
OP
OP
cug

cug

Well-Known Member
First Name
Guido
Joined
Apr 1, 2023
Threads
13
Messages
602
Reaction score
664
Location
Christchurch, New Zealand
Vehicle(s)
JTR EcoDiesel, Land Cruiser 79, BMW R1250GS
Build Thread
Link
Occupation
Just keeping busy
Things are coming together.

Heater is all hooked up and working:

Jeep Gladiator A new hope ... (build journal and component reviews) IMG_6492


The box turned out pretty nice. As did the new "connector lids" for the Rotopax:

Jeep Gladiator A new hope ... (build journal and component reviews) IMG_6495


These arrived earlier today and worked out great. Overall, I'm pretty happy with the install.
 

Sponsored

OP
OP
cug

cug

Well-Known Member
First Name
Guido
Joined
Apr 1, 2023
Threads
13
Messages
602
Reaction score
664
Location
Christchurch, New Zealand
Vehicle(s)
JTR EcoDiesel, Land Cruiser 79, BMW R1250GS
Build Thread
Link
Occupation
Just keeping busy
We've had this deadline for a while now, but since I'm back from Europe, I've really been tracking our task list more closely. We'll be leaving on a trip with this truck and we at:

67 tasks remaining, about 350 have been completed
 
OP
OP
cug

cug

Well-Known Member
First Name
Guido
Joined
Apr 1, 2023
Threads
13
Messages
602
Reaction score
664
Location
Christchurch, New Zealand
Vehicle(s)
JTR EcoDiesel, Land Cruiser 79, BMW R1250GS
Build Thread
Link
Occupation
Just keeping busy
Some more notes on the Webasto heater install:
  • We got the one with the SmartTemp 3 Bluetooth controller. That thing is expensive and feels like the cheapest piece of plastic I've seen in a while. What a disappointment.
  • The wiring harness for the SmartTemp 3 tries to beat the controller in what part of the system feels cheaper. It's absolute garbage quality cabling. Disgusting. We do have another Webasto in a different truck, there it's the European version and the controller feels much better, not sure about the harness, I didn't install that one. The SmartTemp 3 seems to be a US only thing and believe me: it's utter crap!
  • The harness is not only cheap as f*** it's also stupid. It's super long and either you hide it somewhere if you have space (we don't), or you have to cut it. We are in the 21st century, high quality connectors have been around for decades!
Here's what we cut out from the wiring harness:

Jeep Gladiator A new hope ... (build journal and component reviews) IMG_6499


And here is what's left, it'll be shortened even more before being installed, this is the maximum we need. Sure, this is specific to our usecase, but how hard is it really to make this more flexible? They sell just this harness for more than $100 - a high estimate for the parts would be around $3 worth of China sourced marterials in there. Oh, I forgot the connector to the heater - that's probably triple the price of the rest of the compents. So, let's say $12 worth of components and very little thought in assembly.

It'll get hooked up to a BlueSea fuse panel since I can't stand inline fuses.

Jeep Gladiator A new hope ... (build journal and component reviews) IMG_6500


We also found a few disturbing pieces in the wiring, multiple areas like this:

Jeep Gladiator A new hope ... (build journal and component reviews) IMG_6497


Already twisted and the insulation nearly broken. This is not a good sign.

The heater itself and the other components were fine and feel like good quality.

I was incredibly tempted to throw away that piece of shit wire loom and build my own. I just don't have the time right now, but it's something I'll keep in mind for the future, because this part of the heater is such disgustingly low quality, I'm not sure how long I'll keep it around.
 
OP
OP
cug

cug

Well-Known Member
First Name
Guido
Joined
Apr 1, 2023
Threads
13
Messages
602
Reaction score
664
Location
Christchurch, New Zealand
Vehicle(s)
JTR EcoDiesel, Land Cruiser 79, BMW R1250GS
Build Thread
Link
Occupation
Just keeping busy
Today we finally installed the rear door mosquito netting, we held back since we didn't want to damage anything will all the back and forth we've been doing, but we needed this to be done, to know that nothing needs fixing.

Jeep Gladiator A new hope ... (build journal and component reviews) IMG_6508


It's a copy of the AluCab mozzie net, just without the canvas layer and slightly different attachment. We put the loop side of velcro tape with adhesive backing in the door frame and above the door, this is also riveted in, so it really won't move.

The netting is super light, and surprisingly durable.

Details:

Jeep Gladiator A new hope ... (build journal and component reviews) IMG_6502


To keep it open, we used some hiking tent hardware:

Jeep Gladiator A new hope ... (build journal and component reviews) IMG_6506


Works great to hold up the inner part:

Jeep Gladiator A new hope ... (build journal and component reviews) IMG_6504


Again, so far so good.
 
OP
OP
cug

cug

Well-Known Member
First Name
Guido
Joined
Apr 1, 2023
Threads
13
Messages
602
Reaction score
664
Location
Christchurch, New Zealand
Vehicle(s)
JTR EcoDiesel, Land Cruiser 79, BMW R1250GS
Build Thread
Link
Occupation
Just keeping busy
Again, super slow progress over the last few days. My wife has been busy with sewing things, like small bags for easy access of common items, like an Element Fire extinguisher, small water spray bottle for toilet use, small trash bag, mosquito netting for the passenger side window and so on.

I've been handicapped by RSI and back issues. So, not much done from my side other than small improvements, like mounting a fuse block for the Webasto, etc.

Planned out the water system and got all my ducks in a row. The biggest issue I ran into, was getting stuff that was actually food safe. Can't believe how hard it is to get these things togehter in this country. I'm not used to this, in Germany I was able to get to the local home improvement store and get everything I needed, with the exception of a faucet and pump and, if needed, very elaborate filter systems. But still, all that stuff follows standards, hoses and connectors were available etc. Here – not so much. Maybe I haven't found a good plumbing store just yet ... the last that I knew was good closed a few years ago.

But, after a lot of searching I got all the parts I wanted:
  • Shut-off valve for directly going on the tank
  • Food safe hose
  • Water pump
  • Filter system
  • Adaptors for everything (the filter is set up for push-to-connect fittings, the rest is 3/8", other than the tank and faucet, which are 1/2 NPT
Just a word of warning: most of the Amazon sourced stuff is garbage, nearly nothing is in any way declared (or certified) food safe, most things are low quality and only in the ballpark of the size advertised, but nearly no fitting is the ACTUAL advertized size. I've returned to specialized retailers and found that their stuff actually meets the specifications.

Also, due to my bad back I haven't done all that much work inside the camper, but I was able to measure out the fitment for our toilet exhaust line and connection to the toilet.

Again, custom parts are ordered ... hopefully they'll fit:

Jeep Gladiator A new hope ... (build journal and component reviews) Screenshot 2024-07-01 at 10.29.09


The oval hole will hold a hose connector which will press against the toilet body with some soft foam to get a relatively tight seal.

Then we can just move the toilet in and out from it's holding space without having to sort the vent hose every time. Similar concept to the original "docking station" from BioToi:

https://www.biotoi.de/Docking-Station/PC0016.00

This one is for a Ford Nugget Camper and while we have the parts, we knew it wouldn't fit our truck. But it gave us the ideas on how to build one.
 

Sponsored

OP
OP
cug

cug

Well-Known Member
First Name
Guido
Joined
Apr 1, 2023
Threads
13
Messages
602
Reaction score
664
Location
Christchurch, New Zealand
Vehicle(s)
JTR EcoDiesel, Land Cruiser 79, BMW R1250GS
Build Thread
Link
Occupation
Just keeping busy
So, the sprint to the finish line has officially started today. We've started taking all the furniture back out of the truck.

Tasks to do while all furniture is out:
  • Set up the water system in the "galley module". This includes faucet, shower head, water filter, UV filtration.
  • Take out the tank, check for leaks, insulate behind, put back in.
  • Treat the new wood panels with Osmo.
  • Put insulation on the back panels.
  • Fix a few stupid mistakes we made while building the various furniture modules.
  • Finalize wiring loom and set up everything properly.
  • Put thread locker (blue) on all critical bolts of the 8020 structure.
  • Replace all roll-in t-nuts with normal ones.
  • Put everything back in.
After that, we are theoretically ready to roll. Optional items before our planned first long trip:
  • Build a "storage backrest" on the driver side to a) give us a backrest and b) store our camp chairs with access from the driver side window.
  • Install Baja Designs fog lights.
  • Wire up antenna for GMRS radio.
  • ...
There is more stuff, but I'm not going to list everything. So far so good.
 

chorky

Well-Known Member
First Name
Chad
Joined
Feb 26, 2022
Threads
175
Messages
3,466
Reaction score
3,801
Location
Montana
Website
www.youtube.com
Vehicle(s)
'22JTR, '06 LJ, '06 TJ GE
Build Thread
Link
Occupation
GIS Specialist
Planned out the water system and got all my ducks in a row. The biggest issue I ran into, was getting stuff that was actually food safe. Can't believe how hard it is to get these things togehter in this country. I'm not used to this, in Germany I was able to get to the local home improvement store and get everything I needed, with the exception of a faucet and pump and, if needed, very elaborate filter systems. But still, all that stuff follows standards, hoses and connectors were available etc. Here – not so much. Maybe I haven't found a good plumbing store just yet ... the last that I knew was good closed a few years ago.

But, after a lot of searching I got all the parts I wanted:
  • Shut-off valve for directly going on the tank
  • Food safe hose
  • Water pump
  • Filter system
  • Adaptors for everything (the filter is set up for push-to-connect fittings, the rest is 3/8", other than the tank and faucet, which are 1/2 NPT
Just a word of warning: most of the Amazon sourced stuff is garbage, nearly nothing is in any way declared (or certified) food safe, most things are low quality and only in the ballpark of the size advertised, but nearly no fitting is the ACTUAL advertized size. I've returned to specialized retailers and found that their stuff actually meets the specifications.

Hmm, thats interesting. Being in CA I would think it should be easy to find those things. In my super small town I can find all the fittings I need - led free. Even found the right under sink filter and hose. I think you have an Ace hardware in Ca? They should have all the fittings you need that are led free.
 
  • Like
Reactions: cug
OP
OP
cug

cug

Well-Known Member
First Name
Guido
Joined
Apr 1, 2023
Threads
13
Messages
602
Reaction score
664
Location
Christchurch, New Zealand
Vehicle(s)
JTR EcoDiesel, Land Cruiser 79, BMW R1250GS
Build Thread
Link
Occupation
Just keeping busy
Hmm, thats interesting. Being in CA I would think it should be easy to find those things. In my super small town I can find all the fittings I need - led free. Even found the right under sink filter and hose. I think you have an Ace hardware in Ca? They should have all the fittings you need that are led free.
I needed some specific stuff: nylon NPT to barbed 3/8, push to connect to barbed 3/8, food safe shutoff valve with barbed 3/8, etc. Also, I’d like to see not just lead free, but actually drinking water safe certified. Might just be me … as so often …

Oh, and if the pieces actually are the size they claim to be, that helps, too.
 

chorky

Well-Known Member
First Name
Chad
Joined
Feb 26, 2022
Threads
175
Messages
3,466
Reaction score
3,801
Location
Montana
Website
www.youtube.com
Vehicle(s)
'22JTR, '06 LJ, '06 TJ GE
Build Thread
Link
Occupation
GIS Specialist
I needed some specific stuff: nylon NPT to barbed 3/8, push to connect to barbed 3/8, food safe shutoff valve with barbed 3/8, etc. Also, I’d like to see not just lead free, but actually drinking water safe certified. Might just be me … as so often …
Yeah I get it I like to see that stuff as well but I dont think it is actually a requirement to have that. At least, if it is then theres a billion violations. all of those components you listed I can find in my local Ace which is in a tiny basement below a very small grocery store (town of less than 800). But I just looked at some fittings I do have the package of and it's funny. It specifies "led free' with the ansi rating. But then on the back is the typical California message of 'this may expose you to..... led'. hahahah hilarious.

What I have found is even the engineers of most of these products have no clue what they are even engineering or what the products they are designing are actually made of. Maybe that sounds 'hateful' but it's been my experience. Trying to find actual specifications of things, even commercial grade things, is basically impossible. I spent hours and days researching the intrecies of 'safe water' and heavy metals in relation to all the professional level water filtration systems when deciding what option to choose for my home whole house system. And even then I found zero actual data that would back up any claims. So either it is all lies, or nobody actually knows/cares, or it's in some secret lab somewhere for nobody to see....

That said, I figure there is less than a linear foot of 1/2" ID brass where water will have direct contact with. And all of these products I have acquired are 'led free' but still may (and probably do considering everything is made in China) contain led. But, for the 45 days or so I might actually drink out of it during a year's worth of camping, I don't think it's an issue, considering it took decades of people in houses with the entire plumbing being made of led to realize there was a problem. This is coming from a guy with a lot of medical problems too. But I fully understand your situation, and I wish I could find definitive answers on a lot of these things as well. But even if a company advertises 'led free' and is ansi certified - the only way to truly know is to do a destructive third party test. And I bet with that, not one single component of these 'led free' things will actually be led free.
 
OP
OP
cug

cug

Well-Known Member
First Name
Guido
Joined
Apr 1, 2023
Threads
13
Messages
602
Reaction score
664
Location
Christchurch, New Zealand
Vehicle(s)
JTR EcoDiesel, Land Cruiser 79, BMW R1250GS
Build Thread
Link
Occupation
Just keeping busy
But I just looked at some fittings I do have the package of and it's funny. It specifies "led free' with the ansi rating. But then on the back is the typical California message of 'this may expose you to..... led'. hahahah hilarious.
Yeah, prop 65 is a total joke. They should just put it on the "Welcome to California" signs and be done with it. "'Entering the State of Stu... hmm California may eventually kill you". Since the label is on everything these days it's utterly useless in warning about real danger.

I generally try to avoid "Made in China" for everything that comes into contact with my food. I prefer a certificate like NSF 61 and a at least somewhat trustworthy country of origin. Right now I'm using components from the US, Germany, Sweden, and Switzerland. I don't trust the Germans (since I am one ;-)), but otherwise it should be okay. Nearly all the components are also nylon, not brass. Only three exceptions:
  • The made in Sweden faucet has a brass fitting (not concerned since I know that the Skandinavians are pretty good with health stuff).
  • And a 316 stainless steel shutoff valve right at the tank.
  • The original brass fitting in the AluCab tank - that's probably the most problematic piece.
Inbetween is a GuzzleH2O filter system, so I'm not super concerned. I bet every second restaurant I go to has worse tap water.

There might be an ACE hardware store here, never checked. The ones I can easily get to on my bicyle are Home Depot and Lowe's. None of them has anything remotely useful. I know two good plumbing stores, but they are a decent drive away ...
Sponsored


Top