solfrost
Well-Known Member
- Thread starter
- #1
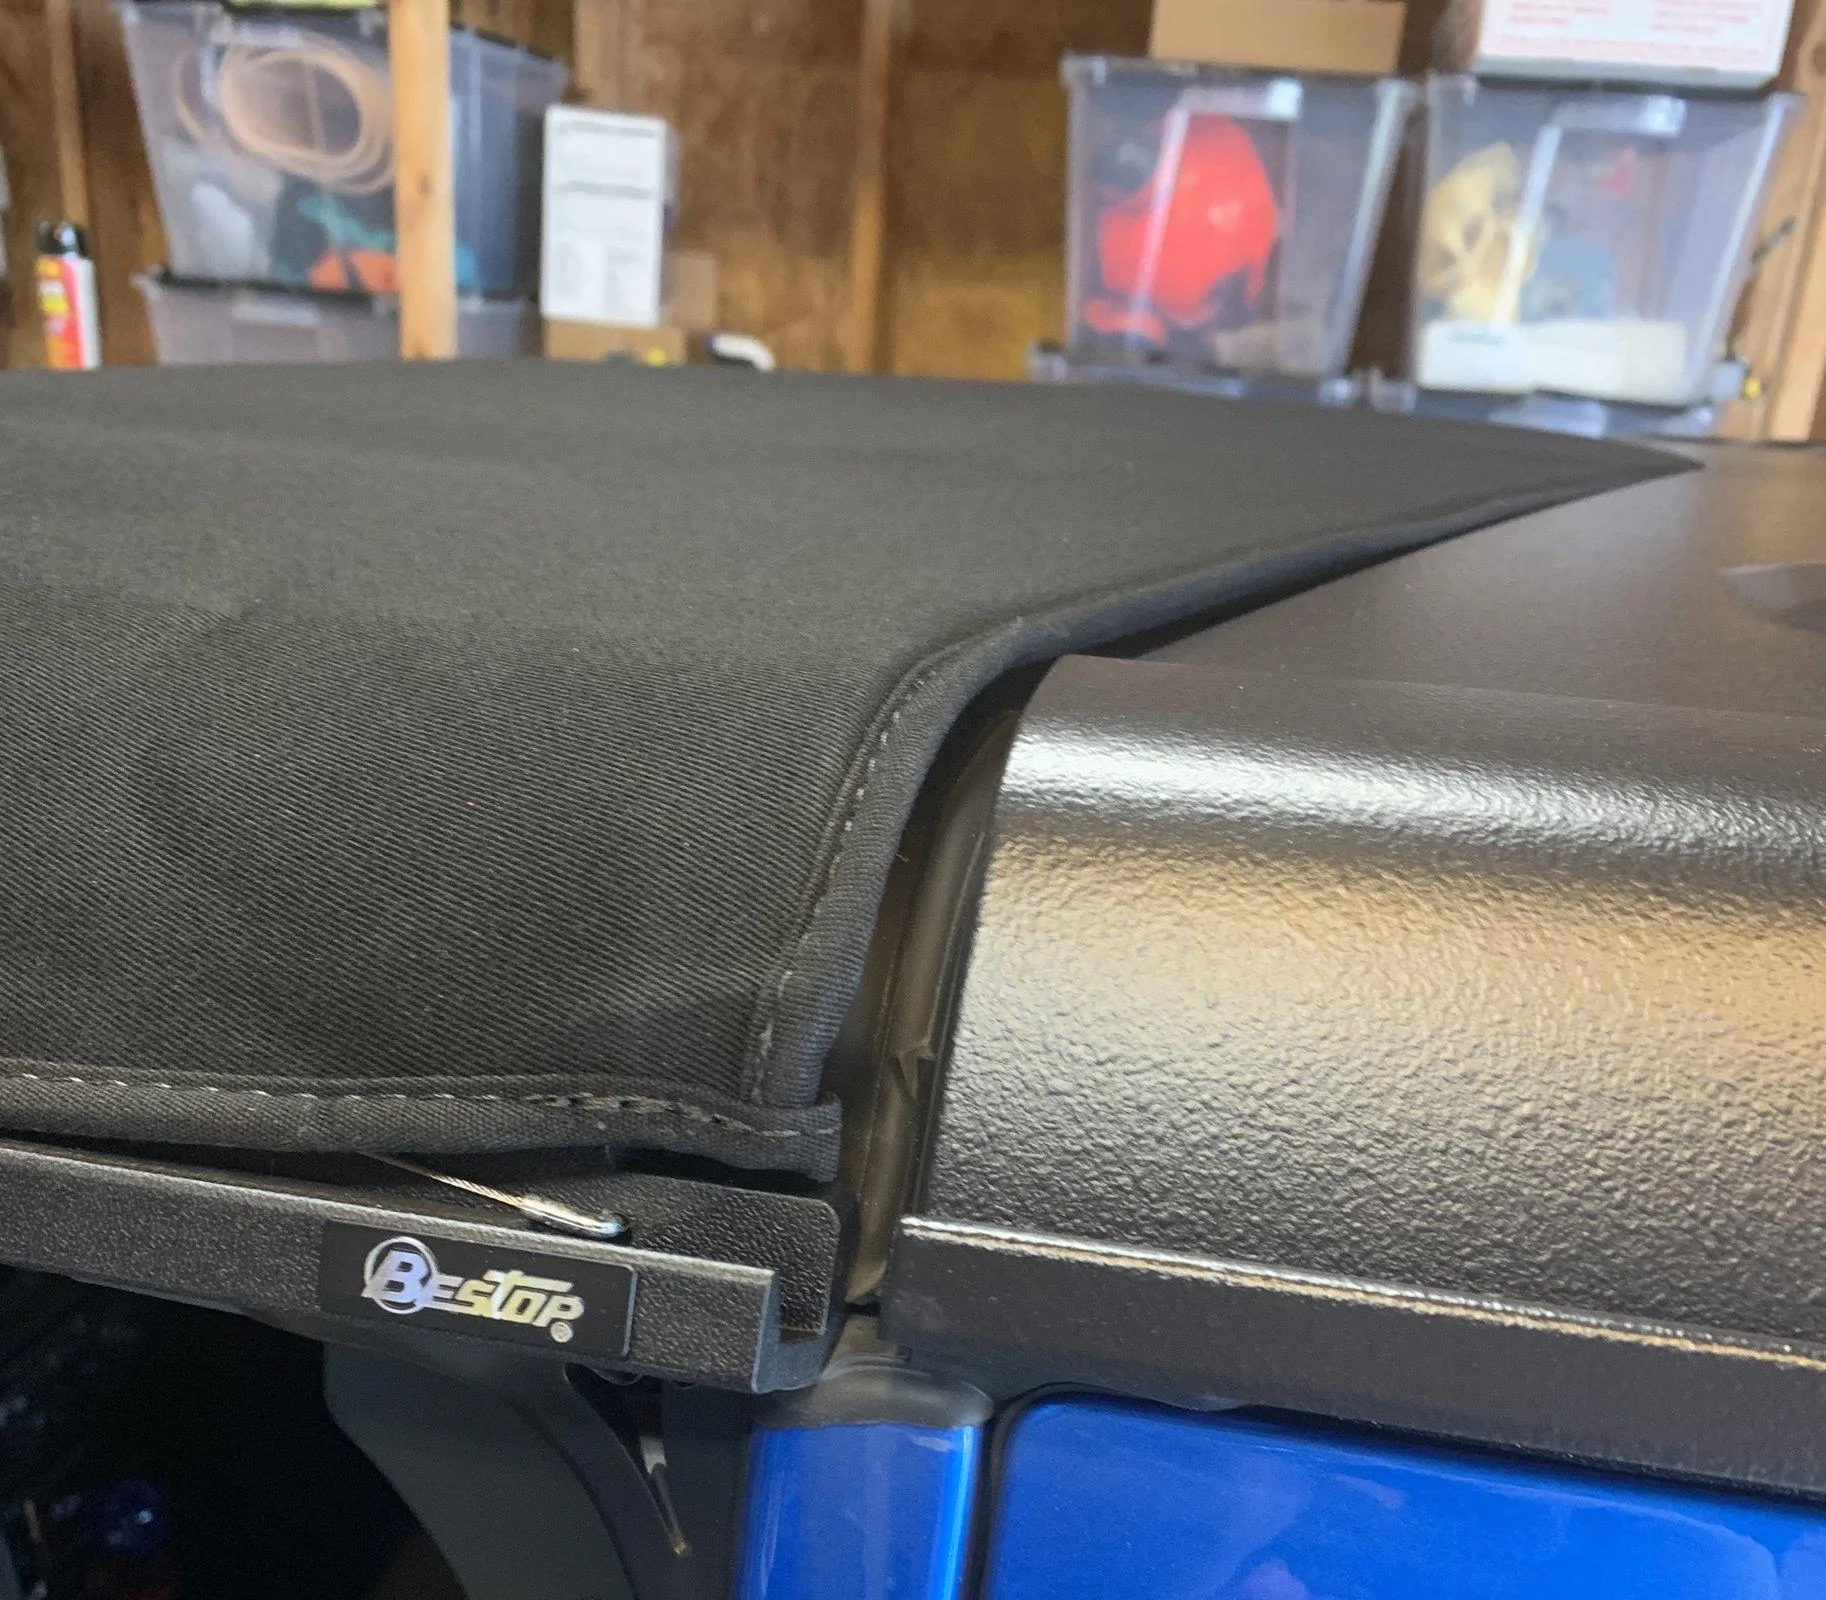
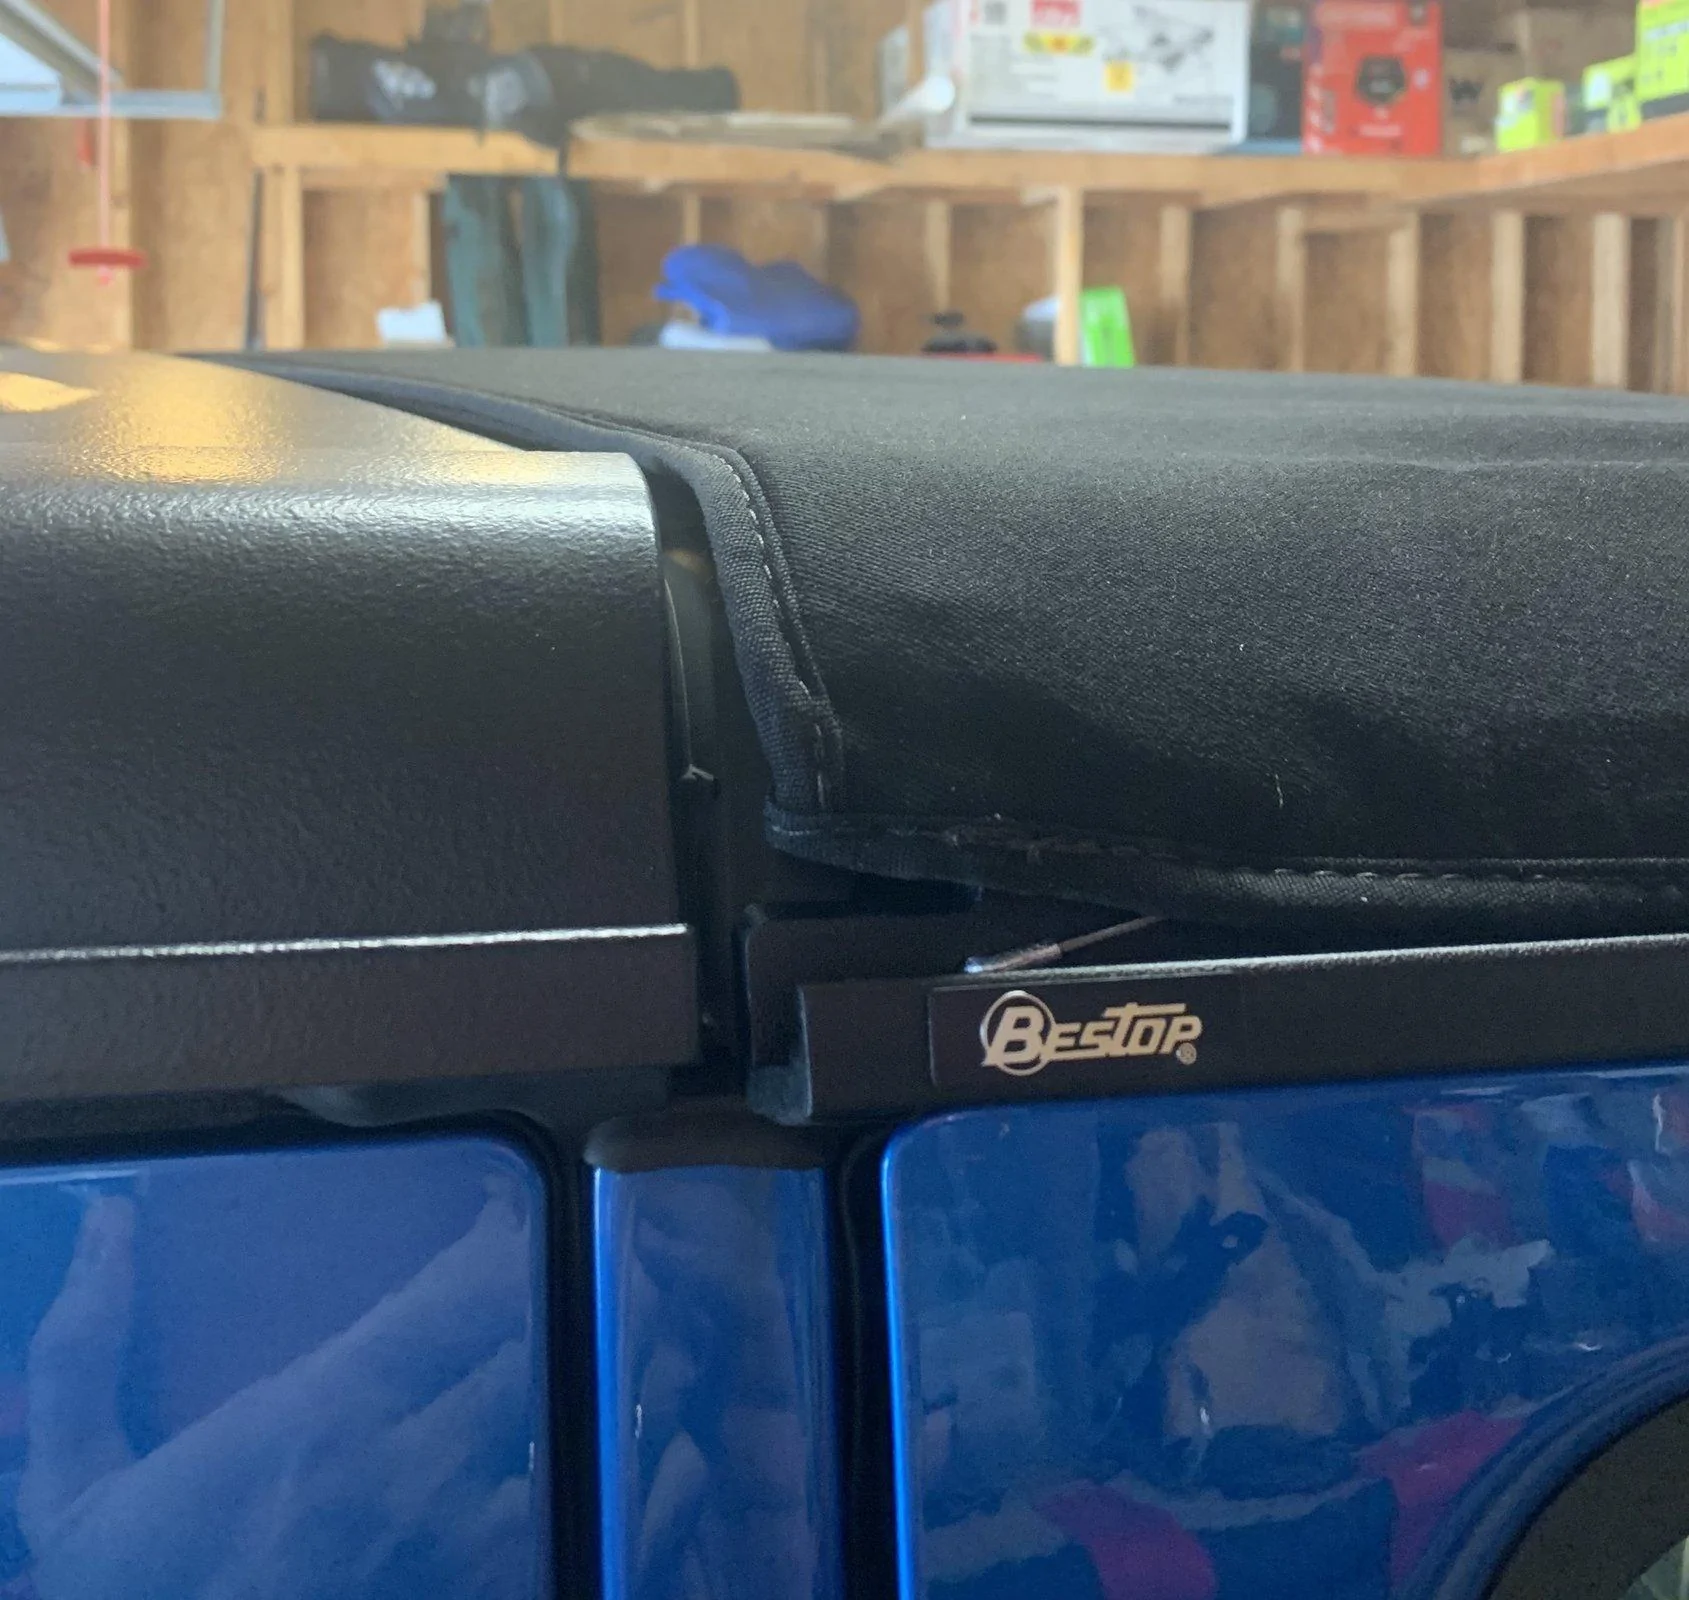
So I went ahead and ordered a Bestop Sunrider to take advantage of the rebate stuff and just installed it today — the fitment is pretty bad, I’m assuming I just did something wrong. The back is all bunched up, the fabric is pulling away from the drain rails a bit, the z-clip/wires are visible, and it doesn’t even come close to aligning with the drain rail on the back piece of the hard top. The doors also don’t close quite flush at the top/back corners anymore unless I am deliberate about it.
Any suggestions for ways to adjust the fitment here better or am I just going to have to live with it?
Sponsored