Chocolyle
Well-Known Member
- First Name
- Lyle
- Joined
- Sep 13, 2020
- Threads
- 21
- Messages
- 305
- Reaction score
- 304
- Location
- Manchester, CT
- Vehicle(s)
- 21 JTR Sarge Green MT
- Occupation
- Technical Sales / Security
- Thread starter
- #1
I figured I would post my install for others to pass along some things learned and ideas. There is not much out there for a sub behind the rear seat, this was important to me since I need the under seat storage. Yes there is a bed but I'm just not a fan of bed covers. I use my bed too much.
My insperation came from Texan here on the forms, link to his build: https://www.jeepgladiatorforum.com/...nstall-with-custom-sub-box-behind-seat.43076/
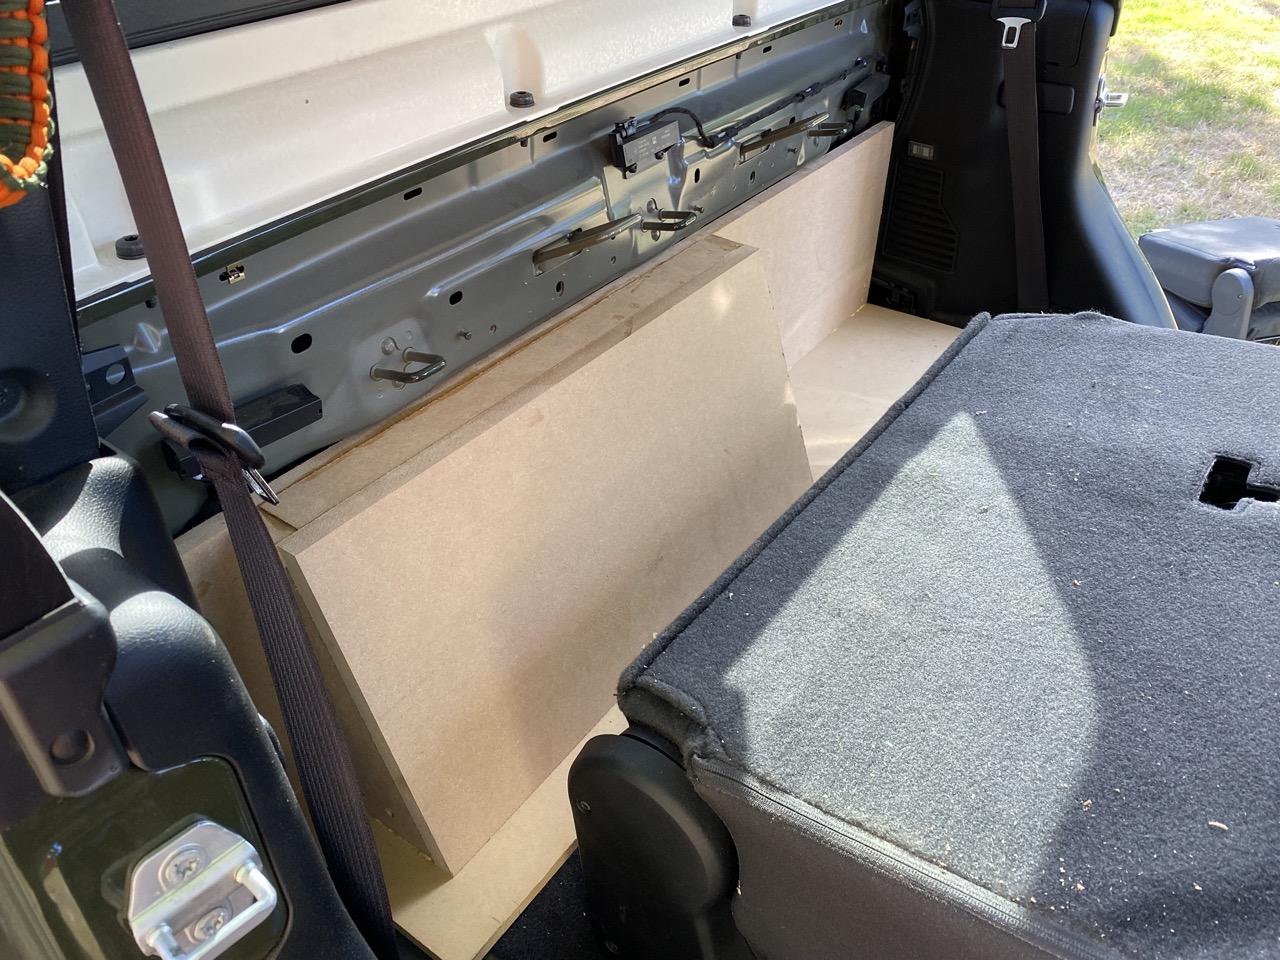
I started out trying to copy his using MDF, the original plan was to use my JL 10W3-D4 and old school Xtant A301/302 amps. After trying every which way, there was just no possibility to get them to fit. There is a reason no one or very few sell a drop in sub enclosure for behind the seats, difficult barely sums up what it will take. However all is not lost if you have LOTS of patience. I do not.

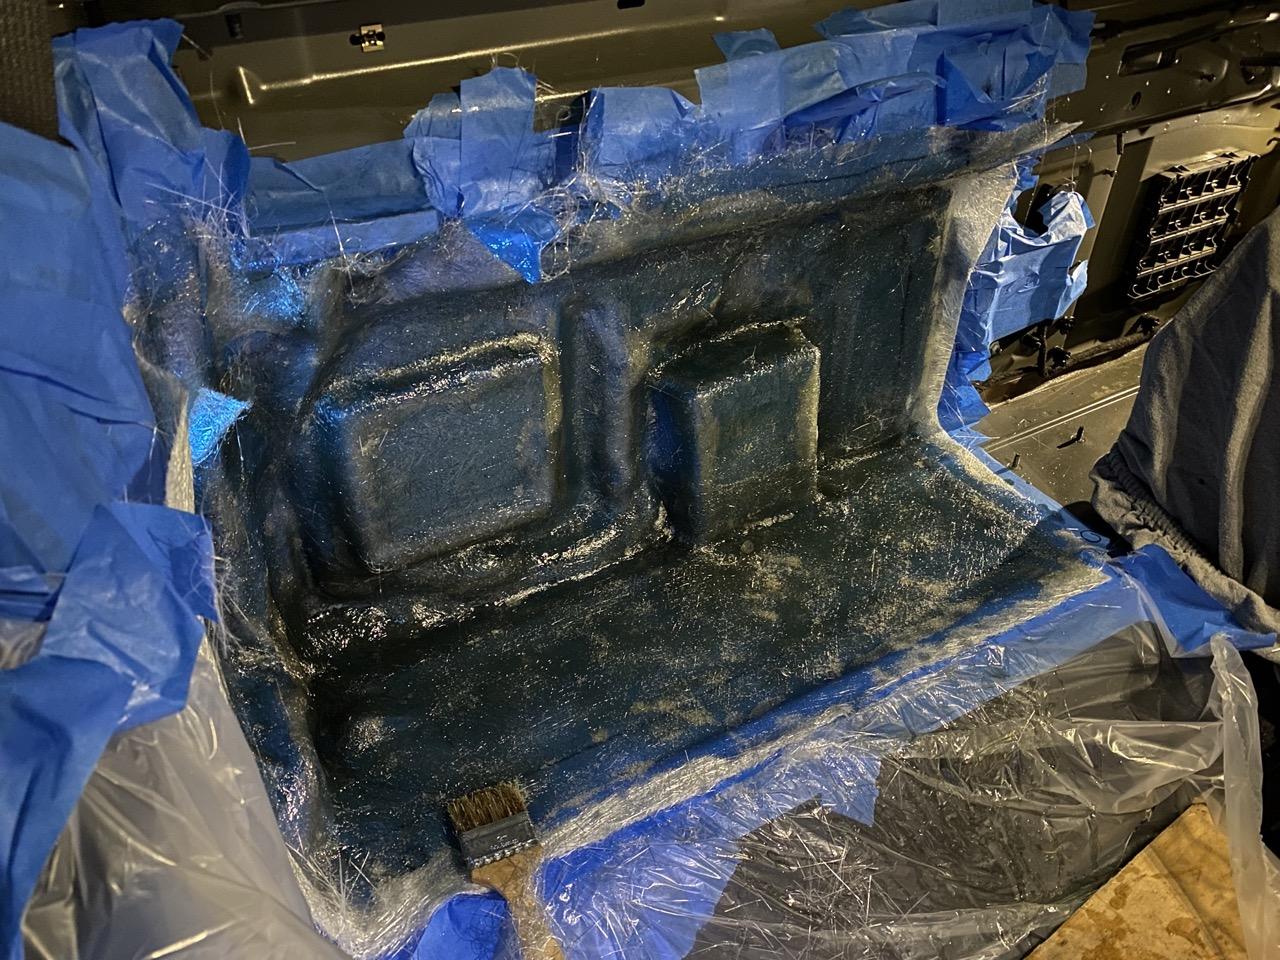
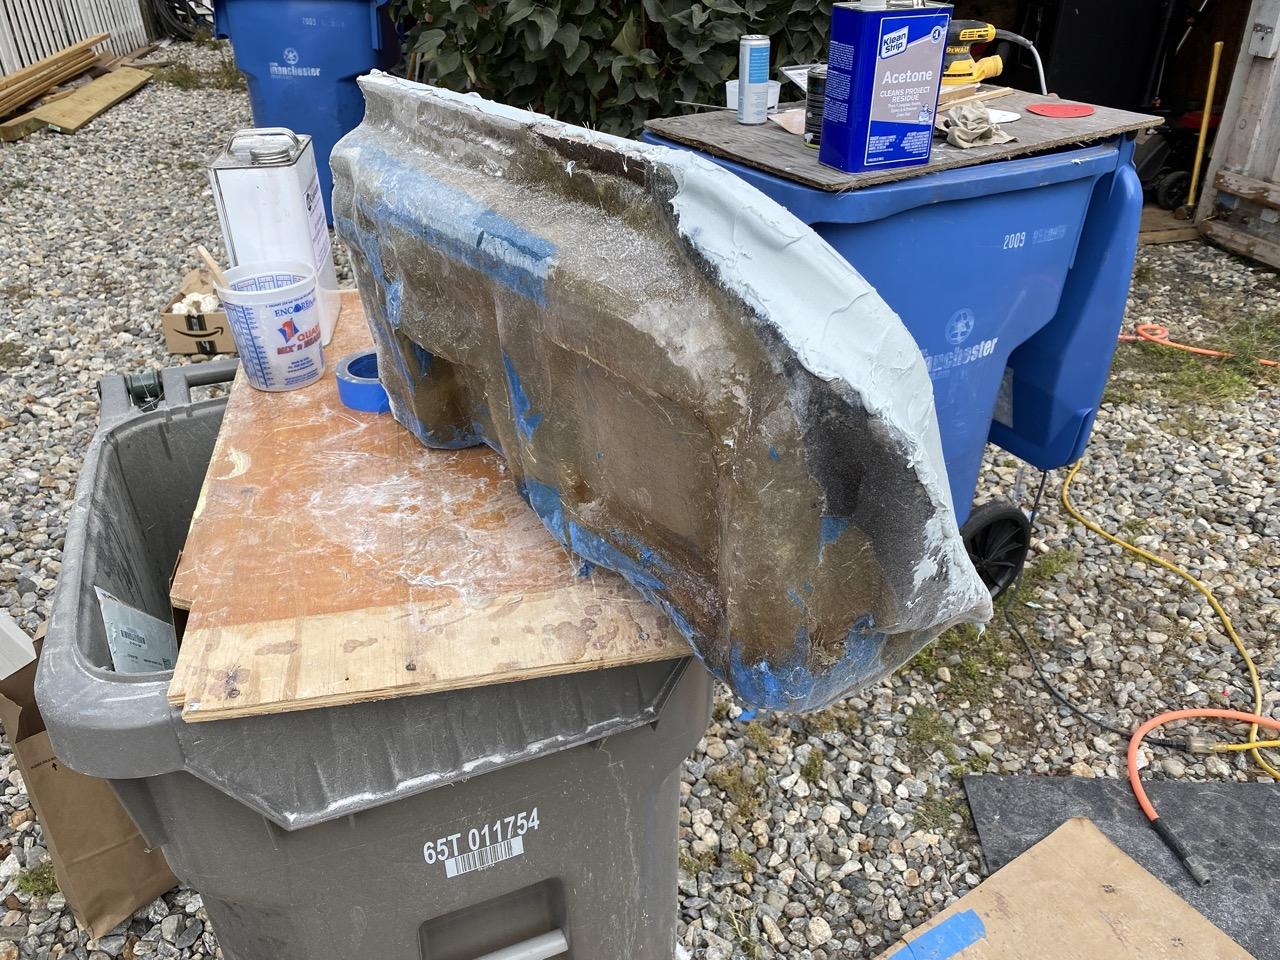
Above was the full MDF route, which I found out the the JL would not fit. My next attack was to use some of the cardboard templates and the MDF but make a fiberglass mold of the back wall. I have never done fiberglass before but Mark from Car Audio Fabrications on YouTube has some great fiberglass how-to videos. It was very straight forward to do. You defiantly want to do this outside!
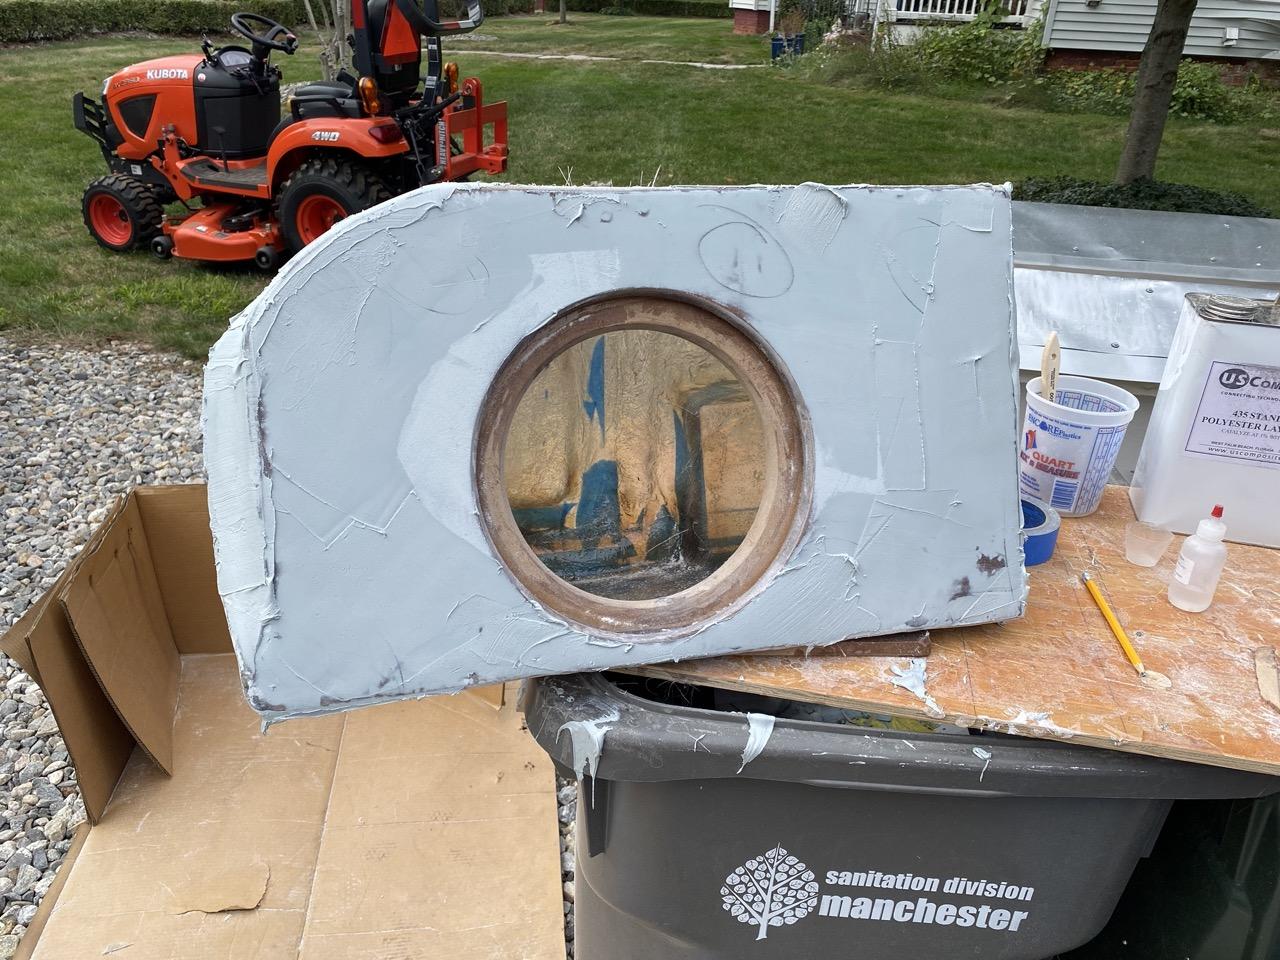
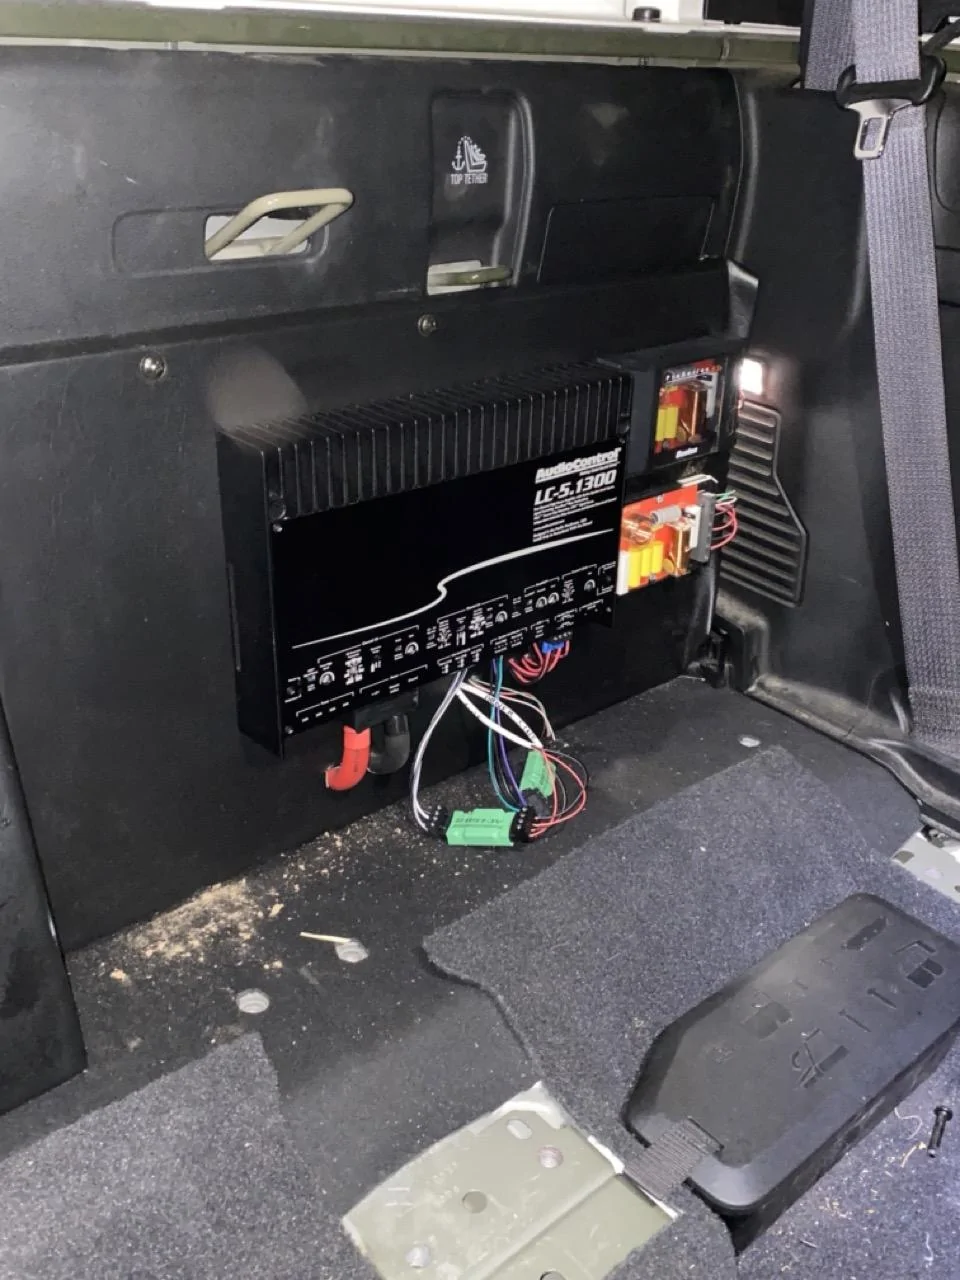
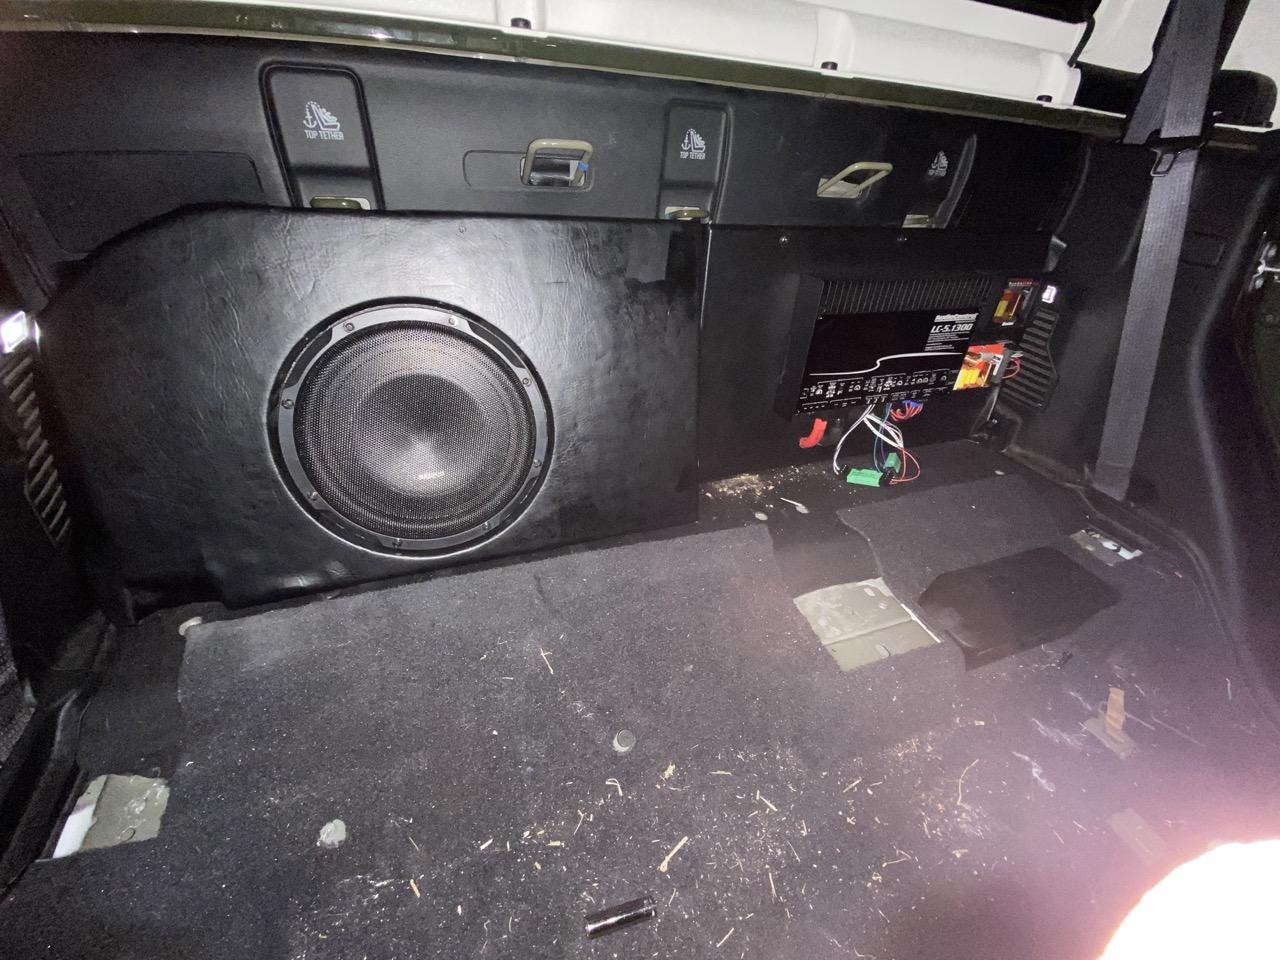
So for the components on the back wall of the JT I made cardboard covers for them and the wires. I decided the sub enclosure would be one piece and the amp rack would be another. I also decided to make the floor of the sub with FBG as well. The right side of the enclosure and face are all that is MDF. The next issue was: FBG gave me a little more room to fit the JL sub but I was still off by 1/2" to clear the seats. Any angle and it did not mater. This is where the new shallow mount sub came in. I wanted to go with a JL but at $450.00! I needed an alternative. Also the Audio Control LC5.1300, 2ohm out for the sub is 500W RMS, finding a shallow mount that handled the power was the next challenge. (Yes I know that exceeds the JL models but there is some wiggle room if you drive them clean.)
I did bondo the front since I was doing marine grade vinyl and wanted it smooth. Total inside volume is about .6CFT.
The sub I went with is an Audison APBX10DS, dual 4 ohm voice coil. I never hear of them but the local shop said they were part of the Hertz family but considered their higher end line of Hertz speakers. For the price compared to the JL I figured I would try it. It sounded good in the store.
Amp time, I have gone back and forth on head unit replacement, especially since the audio out of the 7" screen model I had was troublesome. Crackling, loss of track skips or just not connecting at all. The issue was not the head unit but the in dash USB. After trying multiple iPhones, cables and then trying the center consil USB, the problem pointed to the dash USB. (Still fighting with the dealer on that.) I wanted something I could do speaker level and maybe line level down the road if the I do change the head unit. There are a lot of test videos and reviews of the Audio Control products and their amps always seem to have about 20% more output than listed. So one amp, Speaker level, line level and 5 channels, it fit the bill. $899.00 is not cheap, yes there are some eBay units for sale but just too many knock-offs now.
Worth. Every. Penny!! Clean, stupid simple to setup and power! My front and rears are Boston Pro 6.5's. They are power hungry and the AC 5.1300 just wakes them up. It has been years since I have used them and man do they sound great!

Sorry, not the best pictures, it was late and raining that night, just needed to get my truck back together, still need time to clean everything up.
Lessons learned:
Last time I think I will do this. I did it professionally years ago but I still hurt from the install.
Time???: Jebus! Think it will take X amount of time, multiply it by 10!! I swear every-time I though I was in good shape with this part or another and it will only take X amount of time, where did the day go!
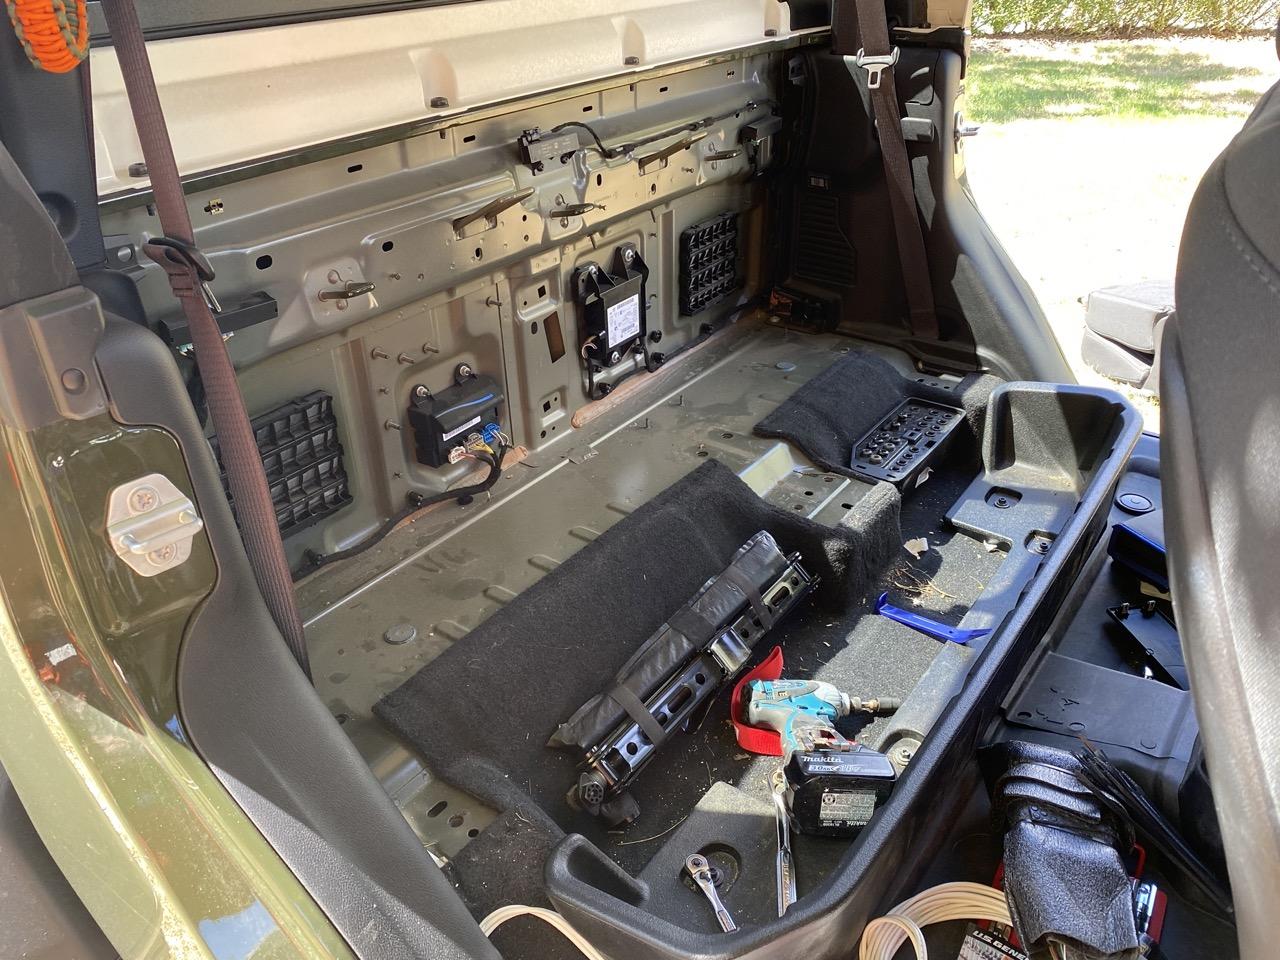
Space, it is tight back there and when the seats fold down, try take up about a 1/2" more of the little room there is. Plan accordingly. Shallow mount is the way to go, it will give you tons of room.
1/0 power cable through the firewall . . . . . . . . . My JTR is a manual and I have the Aux switch kit. You have to go through the passenger boot, it will fit but do tape well to your snake and use soap! I have seen along the frame and up in by the rear wall, I just wasn't comfortable with that route.
Worth it??? Now that it is done, absolutely! Was I going to quit? Absolutely! Not my best work but it works very well and at some point I will clean it up, AKA finish it.
Music is my thing and I only have so many more years of hearing, I'm going to enjoy it while I can, before the world goes silent.
Single 10. sealed enclosure and even this hits hard!

My insperation came from Texan here on the forms, link to his build: https://www.jeepgladiatorforum.com/...nstall-with-custom-sub-box-behind-seat.43076/
I started out trying to copy his using MDF, the original plan was to use my JL 10W3-D4 and old school Xtant A301/302 amps. After trying every which way, there was just no possibility to get them to fit. There is a reason no one or very few sell a drop in sub enclosure for behind the seats, difficult barely sums up what it will take. However all is not lost if you have LOTS of patience. I do not.
Above was the full MDF route, which I found out the the JL would not fit. My next attack was to use some of the cardboard templates and the MDF but make a fiberglass mold of the back wall. I have never done fiberglass before but Mark from Car Audio Fabrications on YouTube has some great fiberglass how-to videos. It was very straight forward to do. You defiantly want to do this outside!

So for the components on the back wall of the JT I made cardboard covers for them and the wires. I decided the sub enclosure would be one piece and the amp rack would be another. I also decided to make the floor of the sub with FBG as well. The right side of the enclosure and face are all that is MDF. The next issue was: FBG gave me a little more room to fit the JL sub but I was still off by 1/2" to clear the seats. Any angle and it did not mater. This is where the new shallow mount sub came in. I wanted to go with a JL but at $450.00! I needed an alternative. Also the Audio Control LC5.1300, 2ohm out for the sub is 500W RMS, finding a shallow mount that handled the power was the next challenge. (Yes I know that exceeds the JL models but there is some wiggle room if you drive them clean.)
I did bondo the front since I was doing marine grade vinyl and wanted it smooth. Total inside volume is about .6CFT.
The sub I went with is an Audison APBX10DS, dual 4 ohm voice coil. I never hear of them but the local shop said they were part of the Hertz family but considered their higher end line of Hertz speakers. For the price compared to the JL I figured I would try it. It sounded good in the store.
Amp time, I have gone back and forth on head unit replacement, especially since the audio out of the 7" screen model I had was troublesome. Crackling, loss of track skips or just not connecting at all. The issue was not the head unit but the in dash USB. After trying multiple iPhones, cables and then trying the center consil USB, the problem pointed to the dash USB. (Still fighting with the dealer on that.) I wanted something I could do speaker level and maybe line level down the road if the I do change the head unit. There are a lot of test videos and reviews of the Audio Control products and their amps always seem to have about 20% more output than listed. So one amp, Speaker level, line level and 5 channels, it fit the bill. $899.00 is not cheap, yes there are some eBay units for sale but just too many knock-offs now.
Worth. Every. Penny!! Clean, stupid simple to setup and power! My front and rears are Boston Pro 6.5's. They are power hungry and the AC 5.1300 just wakes them up. It has been years since I have used them and man do they sound great!
Sorry, not the best pictures, it was late and raining that night, just needed to get my truck back together, still need time to clean everything up.
Lessons learned:
Last time I think I will do this. I did it professionally years ago but I still hurt from the install.
Time???: Jebus! Think it will take X amount of time, multiply it by 10!! I swear every-time I though I was in good shape with this part or another and it will only take X amount of time, where did the day go!
Space, it is tight back there and when the seats fold down, try take up about a 1/2" more of the little room there is. Plan accordingly. Shallow mount is the way to go, it will give you tons of room.
1/0 power cable through the firewall . . . . . . . . . My JTR is a manual and I have the Aux switch kit. You have to go through the passenger boot, it will fit but do tape well to your snake and use soap! I have seen along the frame and up in by the rear wall, I just wasn't comfortable with that route.
Worth it??? Now that it is done, absolutely! Was I going to quit? Absolutely! Not my best work but it works very well and at some point I will clean it up, AKA finish it.
Music is my thing and I only have so many more years of hearing, I'm going to enjoy it while I can, before the world goes silent.
Single 10. sealed enclosure and even this hits hard!
Sponsored