ChrisNLA
Well-Known Member
- Thread starter
- #1
I've seen a few threads like this on JL Wrangler and here, but whatever I'm making one, too. A few years ago I ordered my truck without the Alpine setup. For two reasons....I was being cheap and didn't want to spend the extra $2K for the 8.4" screen and sound system, and I figured if I wanted a change it would give me a tinkering project later on.
So here we are, the 51HS10 was on sale at Crutchfield and I had been longing for some bass in my truck - so the time was right. They were also giving away some wired Kicker ear buds with a purchase over $150...and I mean who uses wired ear buds but me while I'm sitting here at my laptop typing this - but whatever. Free stuff.
If you dial any amount of base into the base system the speakers in the sound bar (and/or the bar itself) starts to rattle, so I've had bass set to 0 for the last three years. I didn't want to use up any space under my back seat, and I don't use a lot of space behind the seat, so...
Started by extending the trigger wire and ground wire to be the same length as the rest of the harness.

Loomed it up with some mesh loom - remembered why I hate this stuff and only use it on other peoples projects when they request it. It's harder to put wire in and sometimes the wire likes to puke back out easier. Looks cool though. Not that it matters considering nearly all of it is covered...
I split the harness here. One part will go up the B-pillar behind the front passenger seat and the other will continue on to other the end.
I pulled out the door sill covers and the lower half B-pillar covers. Everything snaps together so just use an interior pry tool and get at it. You could probably avoid this and just shove the wires under the covers. I did everything the overly difficult way. Learned a lot about the truck though.
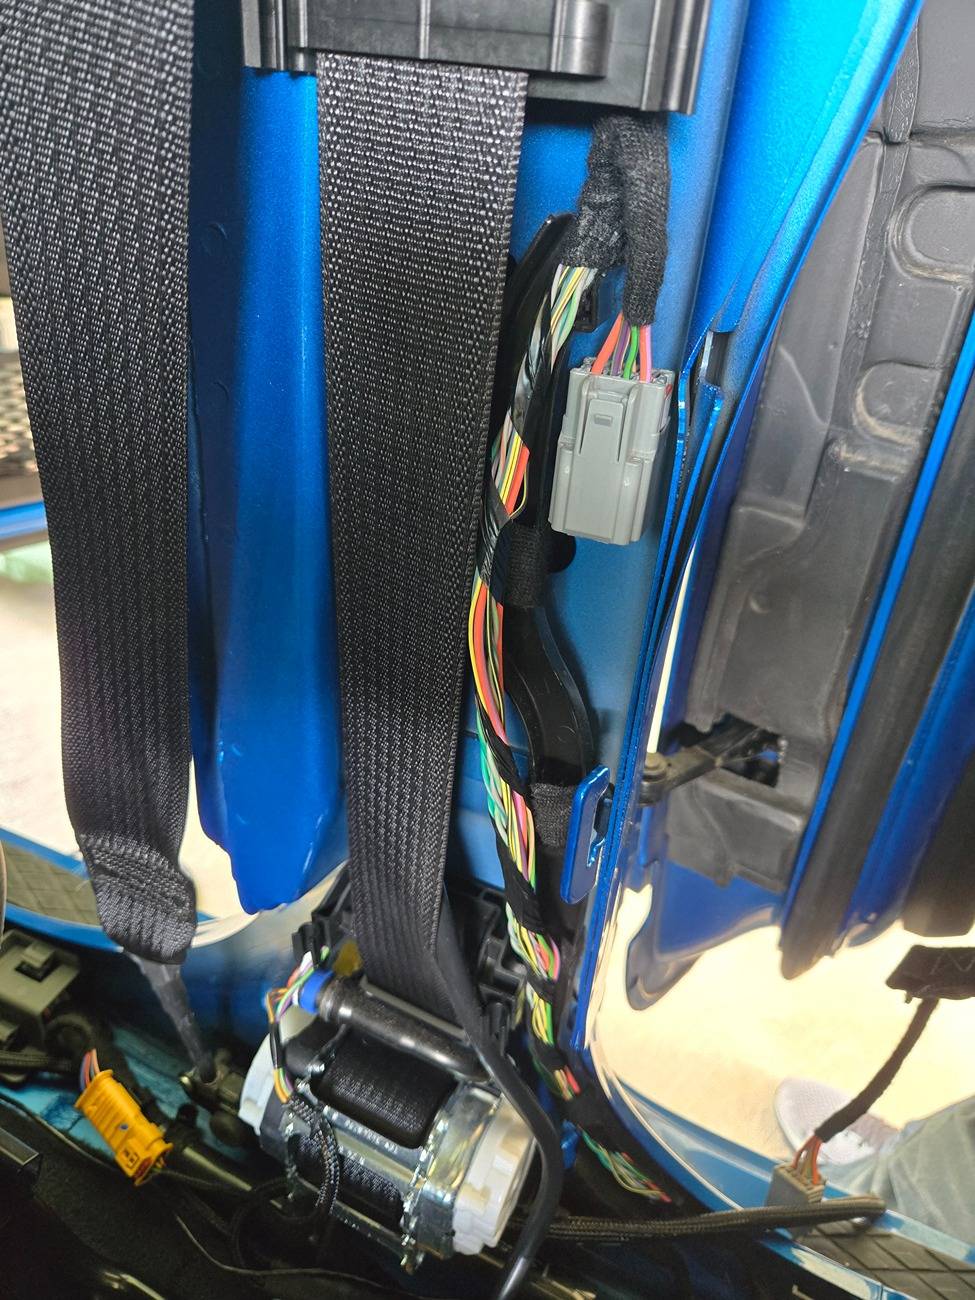
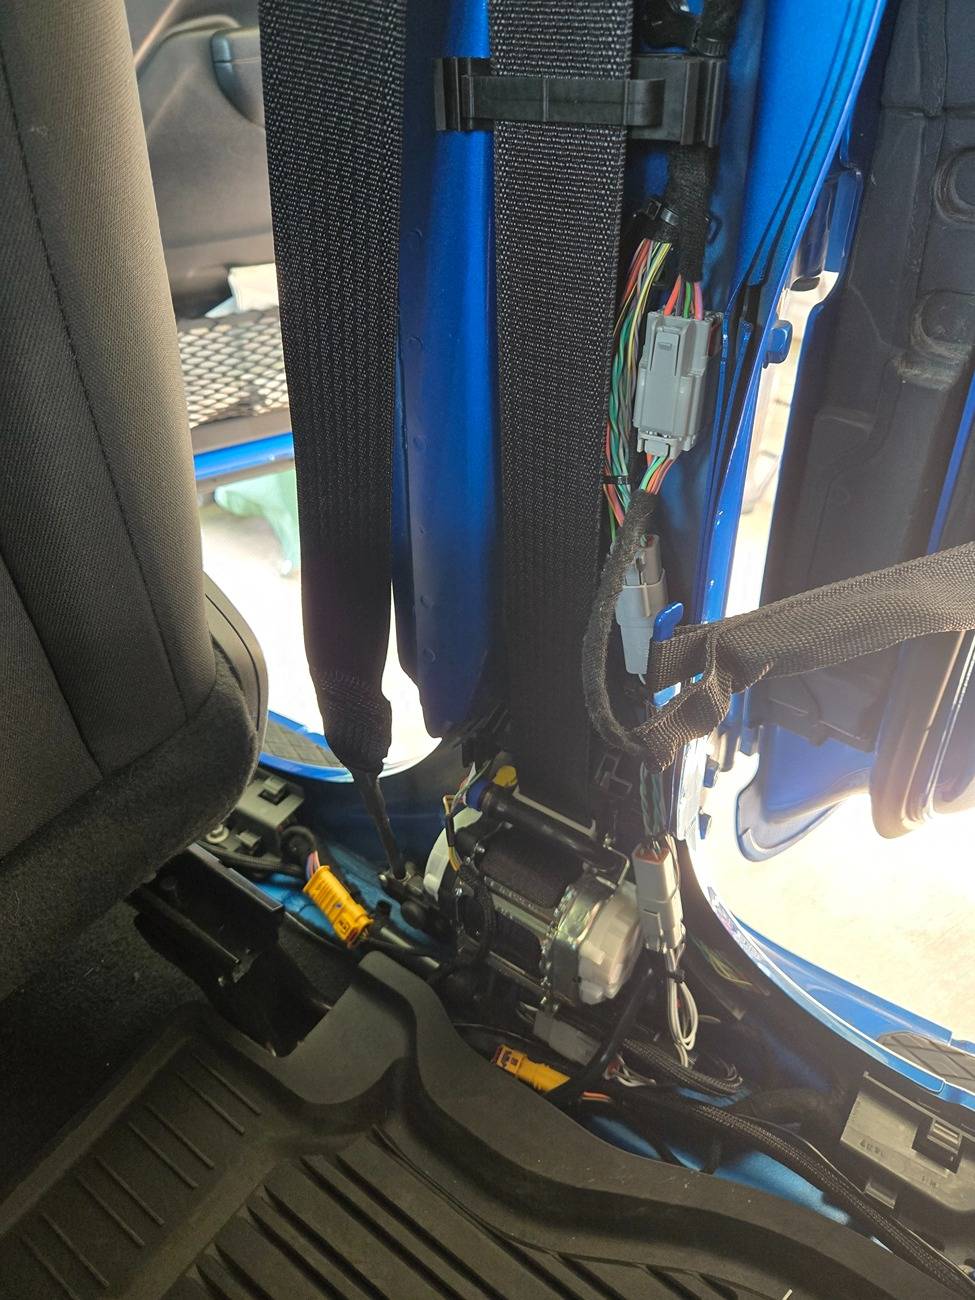
The wires to tie into are located here in the B-pillar. In this photo I already cut the fabric tape that was holding them into the plastic raceway and pulled them out some.
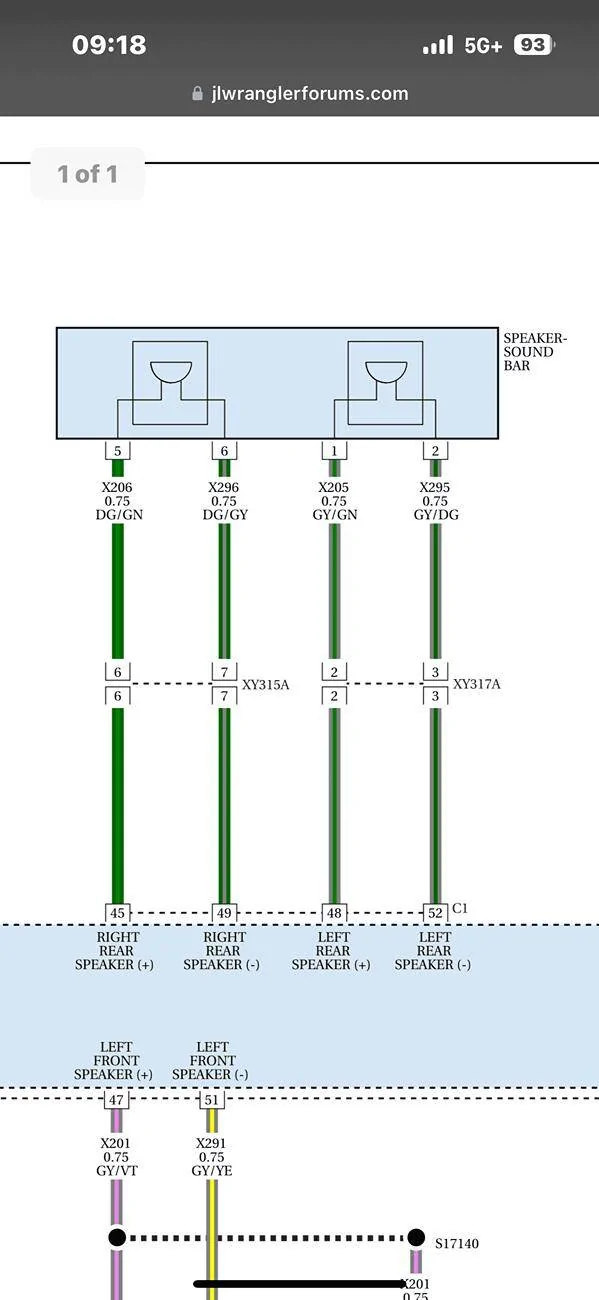
I borrowed this picture from another thread. It's the color code for the speaker wires.

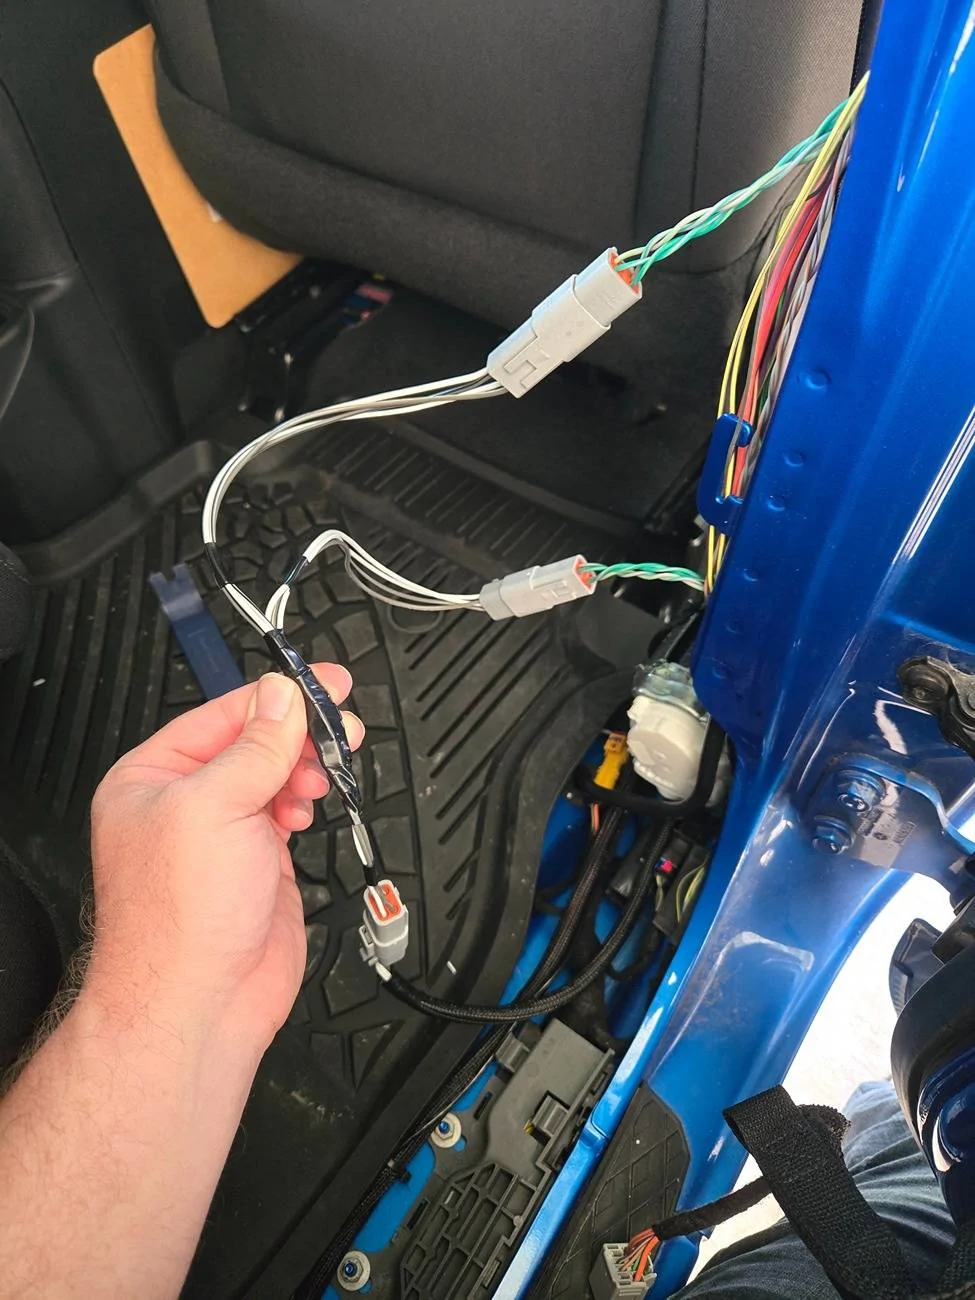
It seems most people use scotch locks or t-taps. I wired emergency vehicles for many years and those were a serious no-no to use. Use what you are comfortable with, but I went with Deutsch connectors and made this Y-harness. If at any point in time I want to remove my sub and harness, I can simply plug the factory wires back together and take my Y-harness, sub harness, and sub out and not leave any wire stubs, or other damage in the harness. Most folks won't have Deutsch connections around, but I keep a supply since I'm the 'hey come wire my hot rod or boat or (insert project here)' guy in my circle.
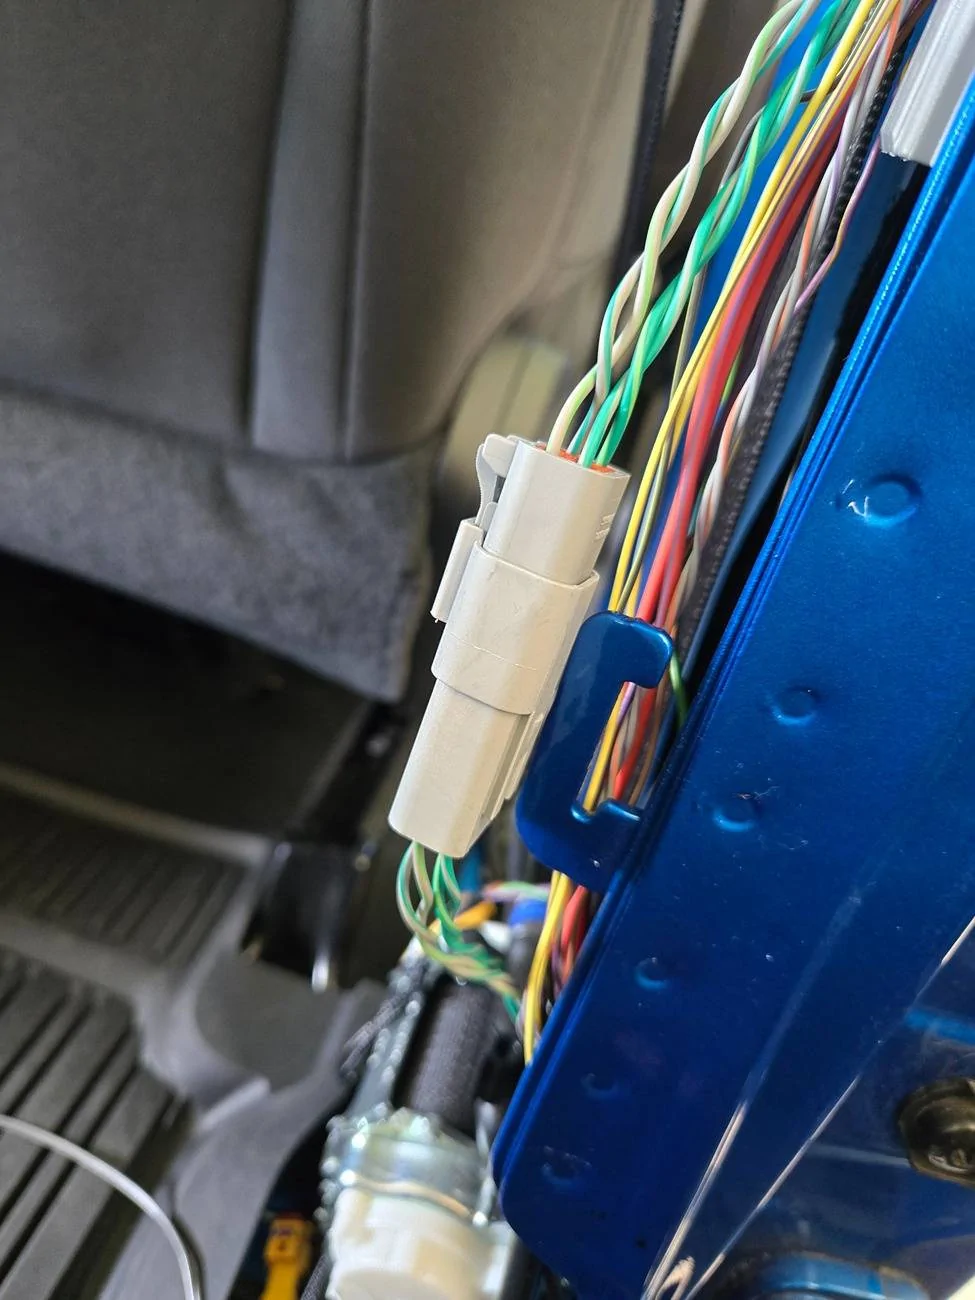
See, if I remove the sub and sub harness the factory wiring will just plug back together like this.
Everything tucked back in and tied back up.
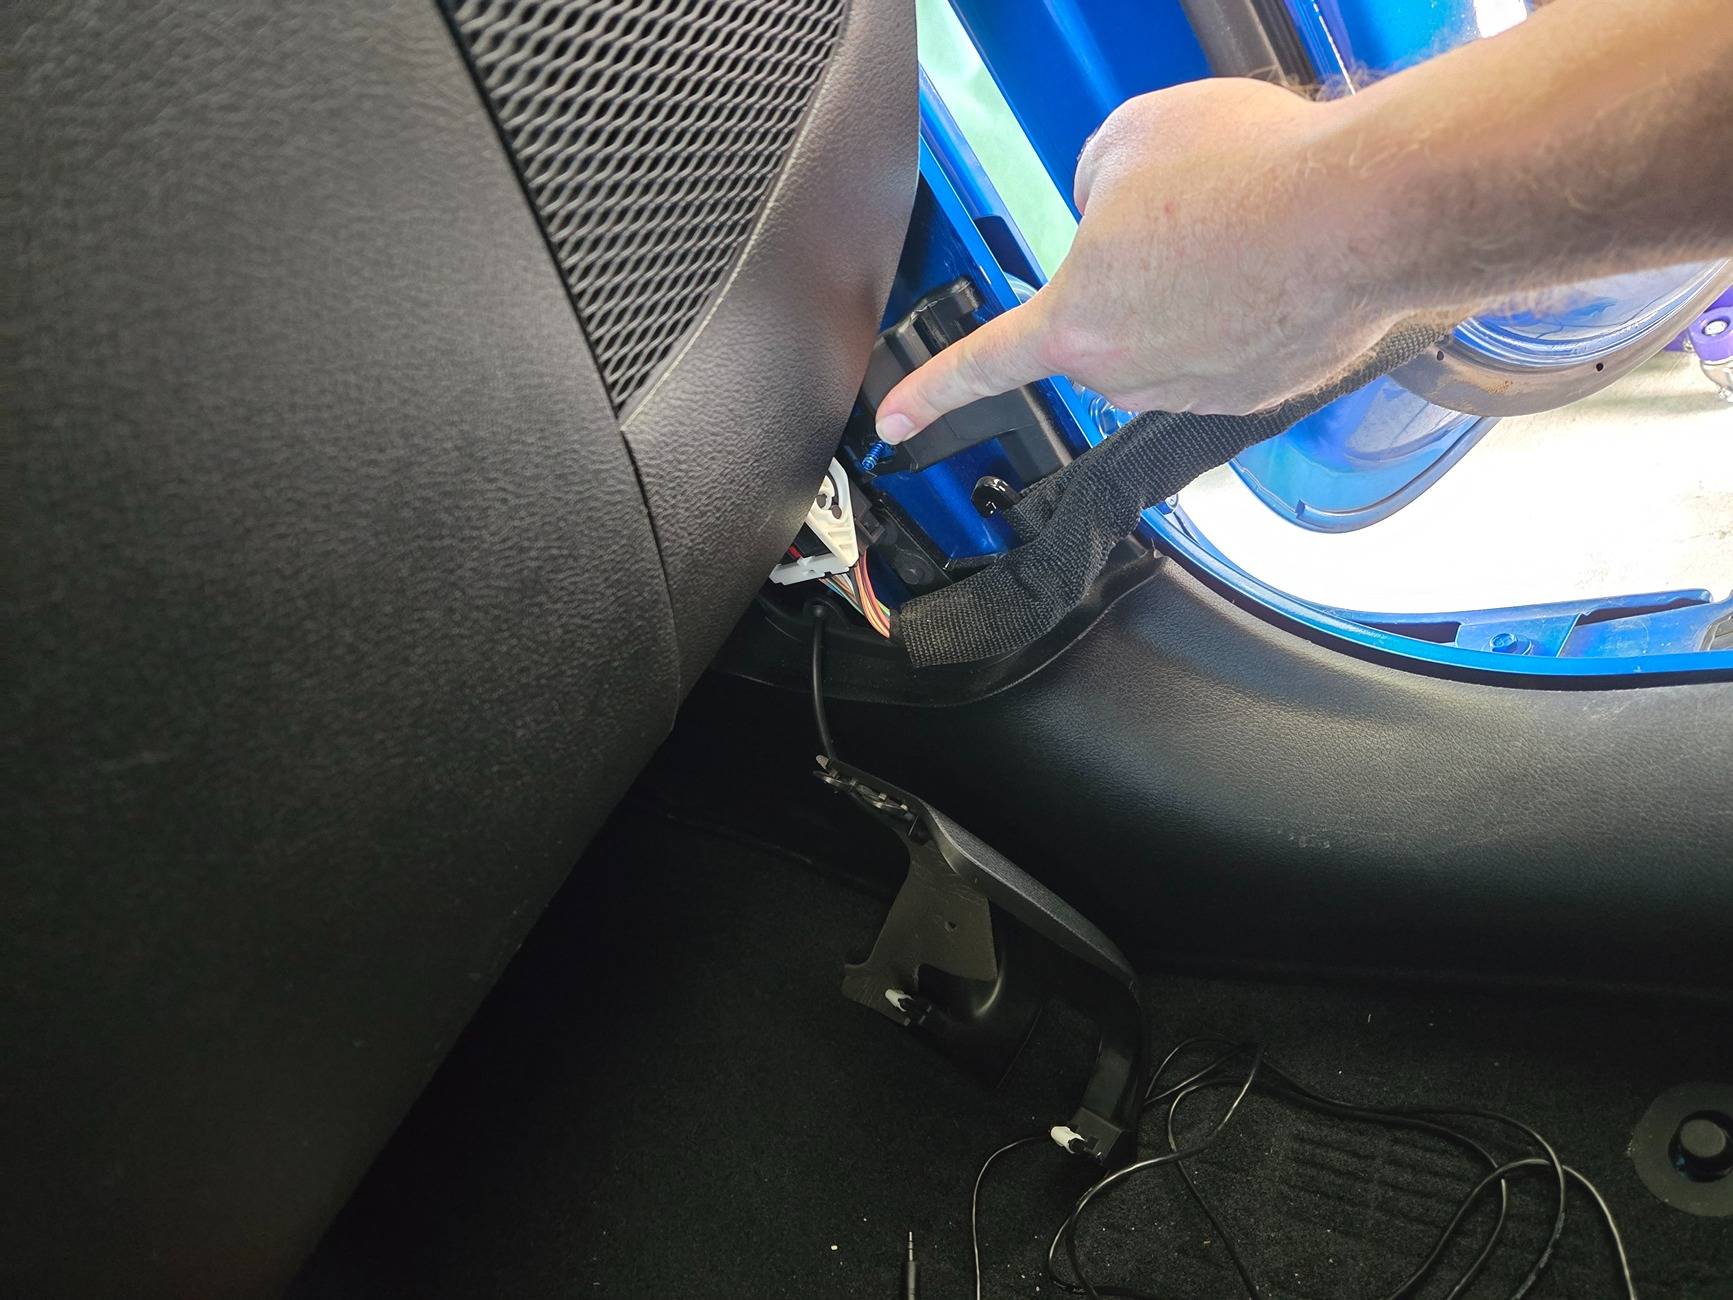
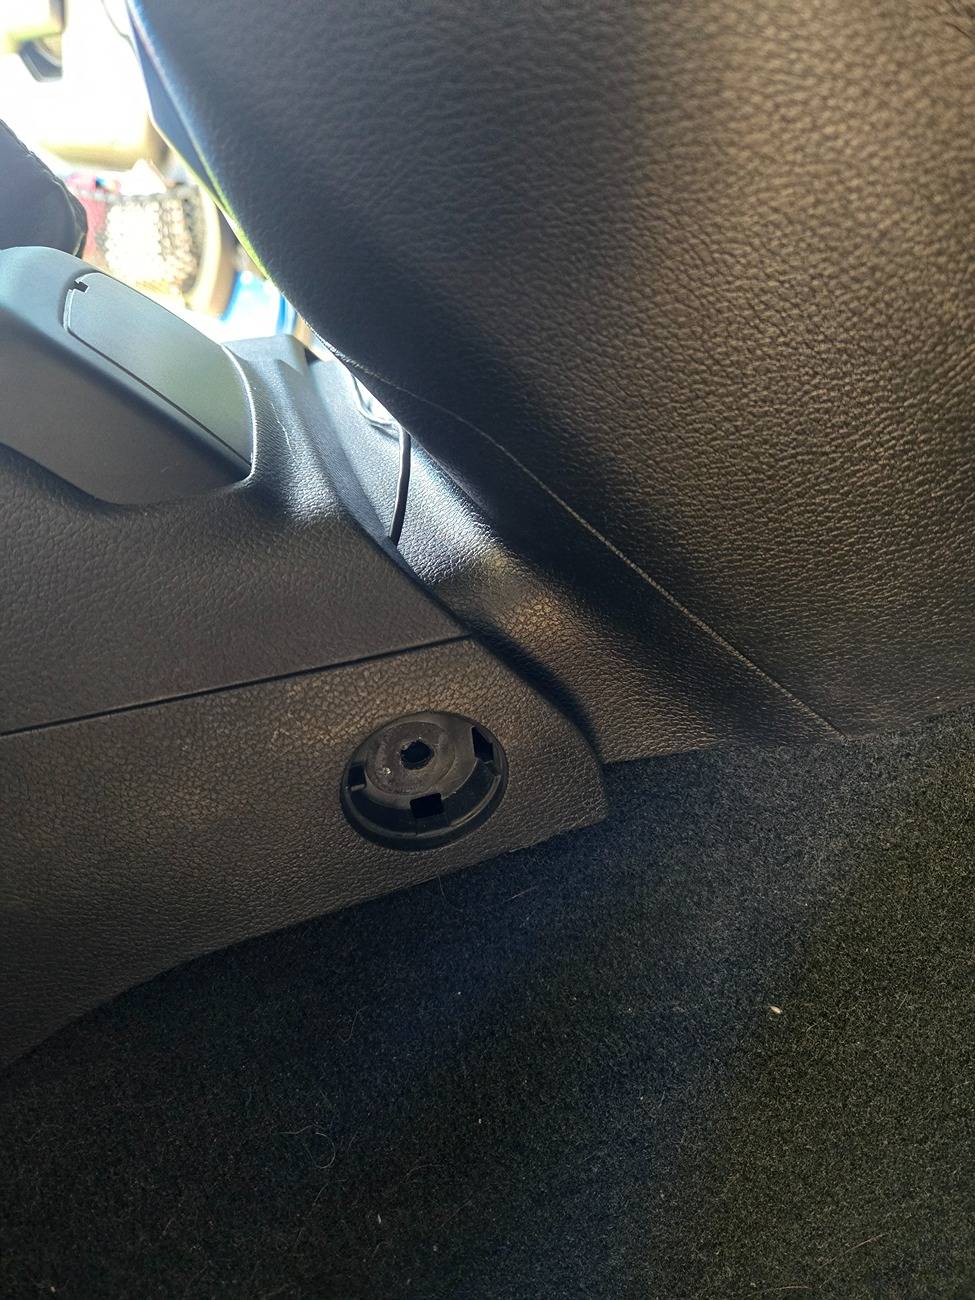
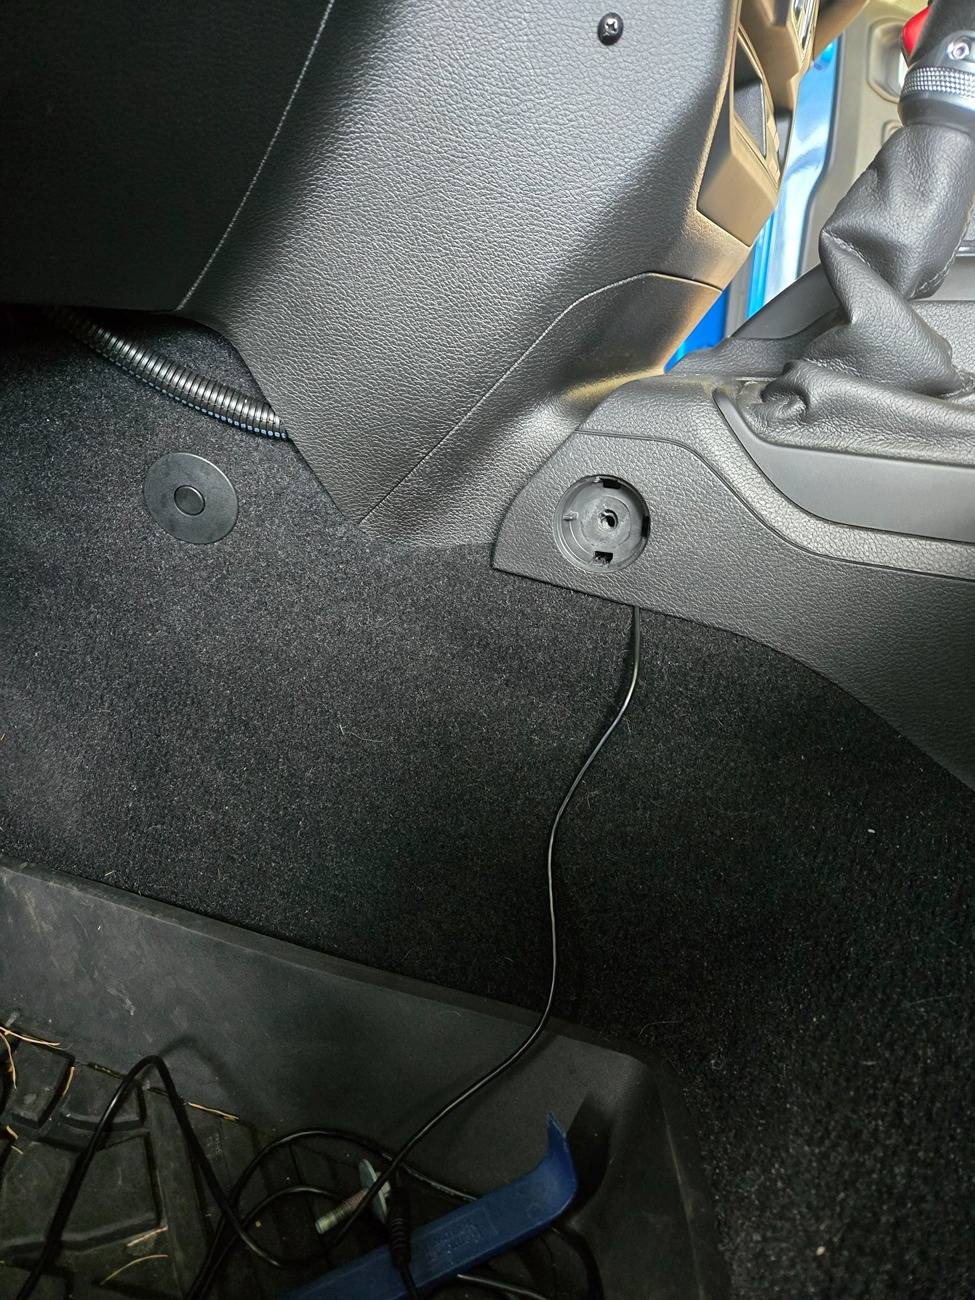
Up front I loosened the kick panel / door sill cover to keep running wires. There is a nut where my finger is pointing you need to remove if you want to move this cover around. The rest of it snaps in.

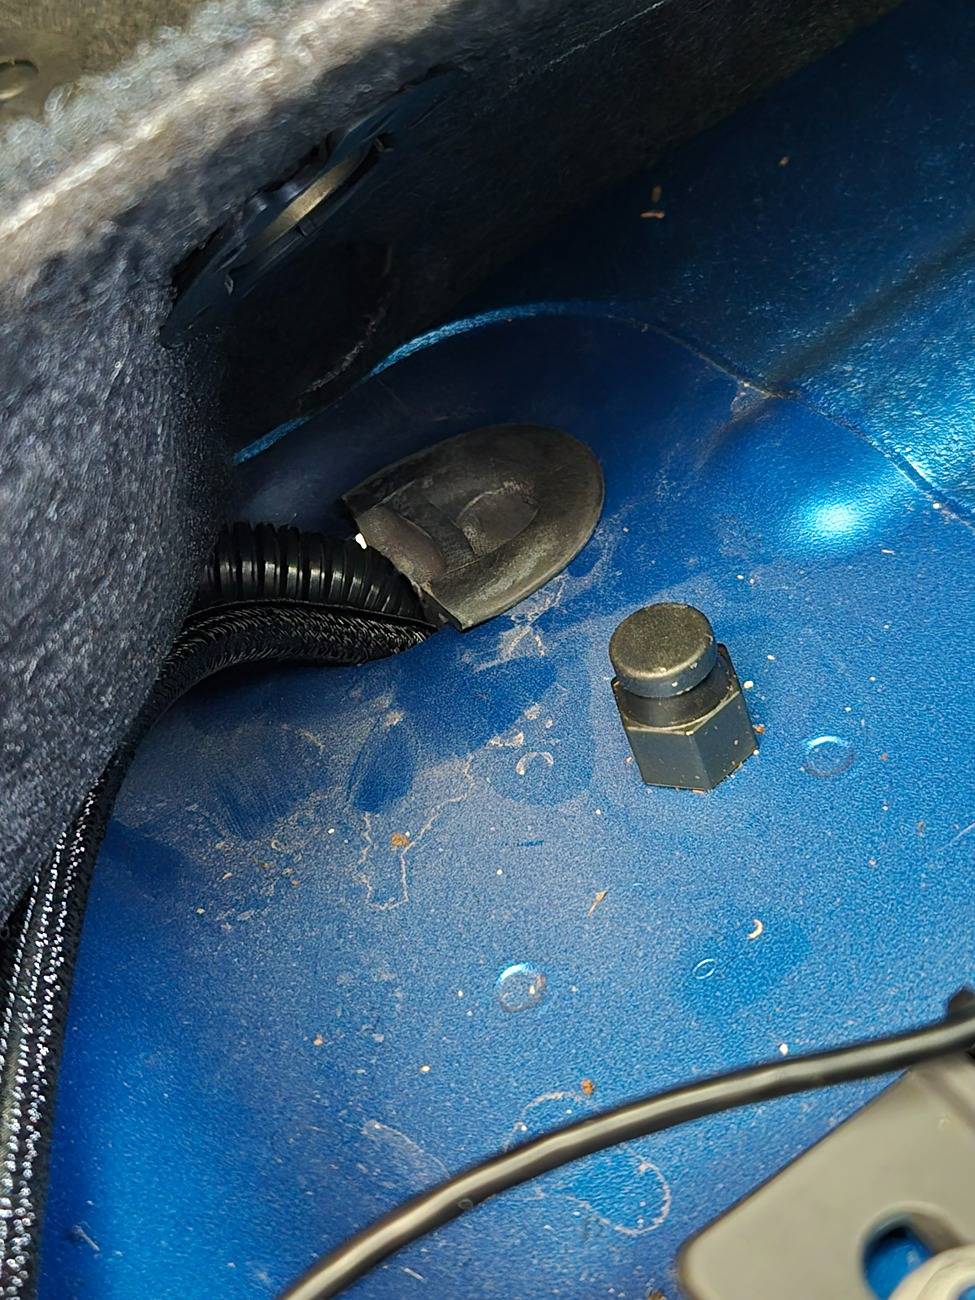
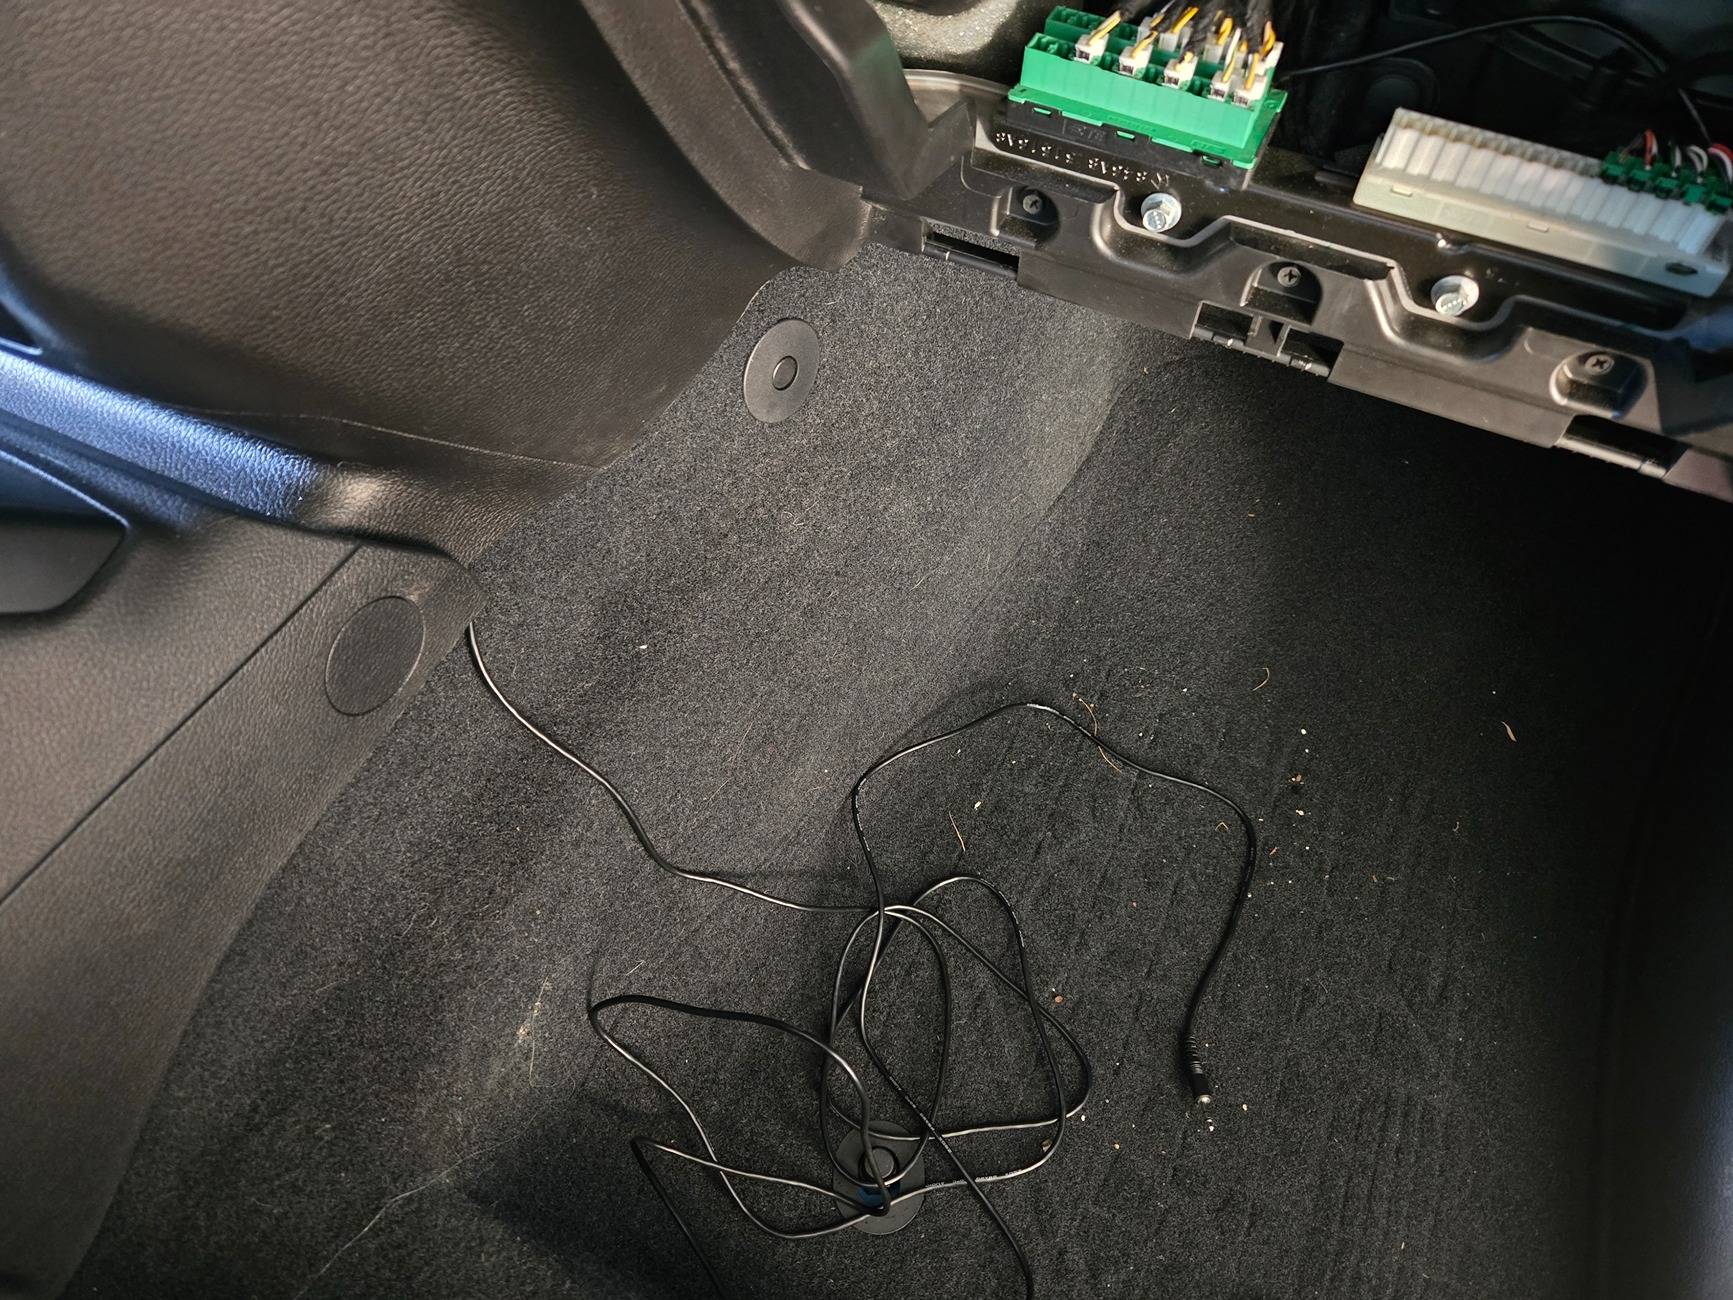
I do not use the drain holes in my truck for draining water, because I don't take the top or doors off and take my floor mats out to clean them. This is the drain hole under the passenger front floor mat.
So anyway I had already used this hole to run the wires for the power outlets I installed in the back of the console. I am now using it for the sub harness. I use the original plug, cut in half, to close up the rest of the hole. There are a variety of other ways to get under the hood including shoving it through the harness boot under the dash or under the windshield frame.
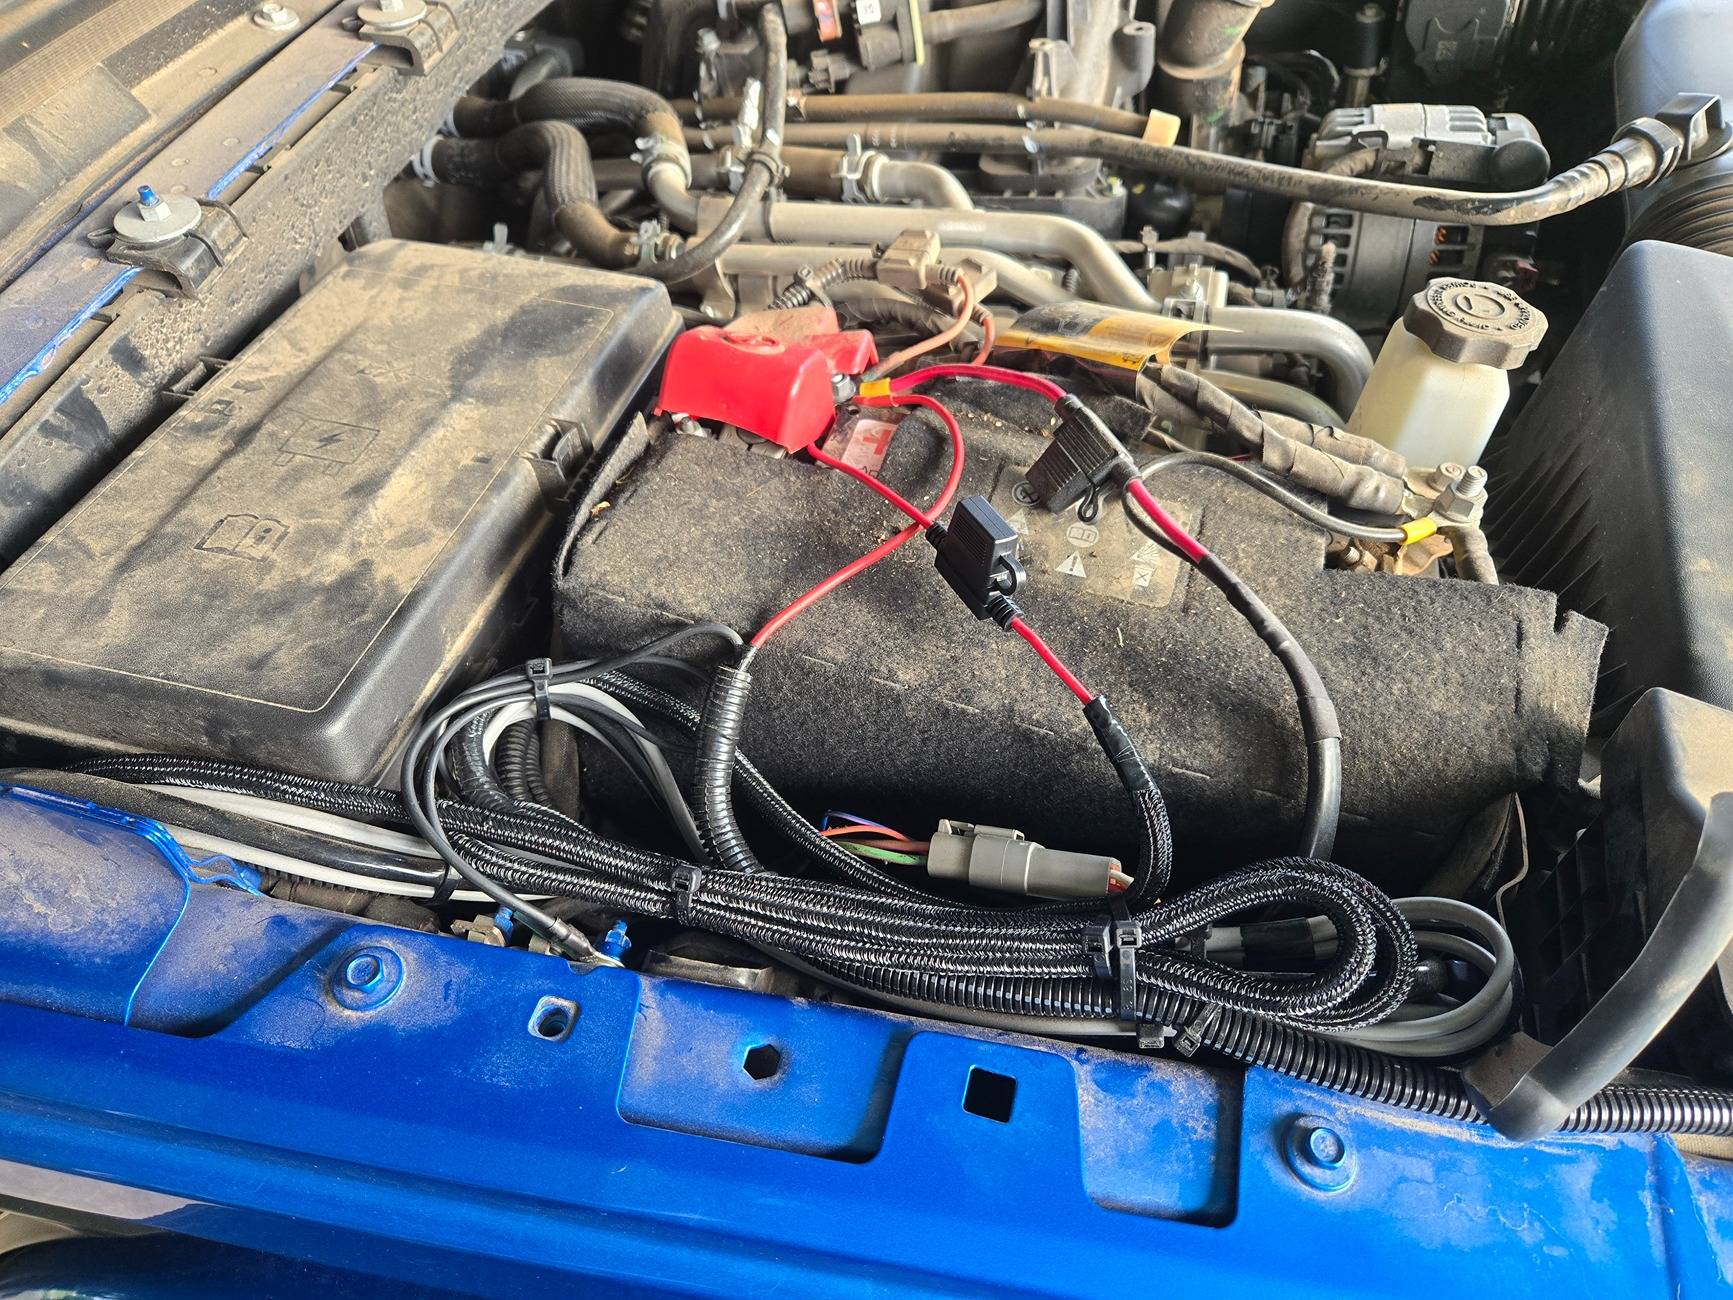
My wire goes under the truck and runs along the frame rail with a bundle of other wires I already have running everywhere then runs up the back of the passenger front fender liner, along the firewall, and up beside the fuse box to get beside the battery.
I use the factory ground stud on the fender frame for all my grounds I add except for the winch. I used the included fuse holder to connect to the battery and tied up all slack along the battery. I did not shorten the harness in case I want to use it somewhere else later, and I have plenty space here. I sealed off the blue trigger wire and taped it inside the loom. I am using the DC offset activation that turns the amp on when it senses speaker signal. Turns out, this makes the amp turn on when you open the door and it stays on until the dome light goes out and the truck 'goes to sleep'. If it becomes an issue I will use an add-a-fuse to get ignition from the fuse box. I may do that regardless, but I only have mini add a fuses and the Gladiator uses micro fuses and I wasn't paying $10 for one at Oreillys.
I want to add a Blue Sea fuse block and ground bus here on a bracket at some point as I am up to four or five fuse holders and I don't want this to look janky.
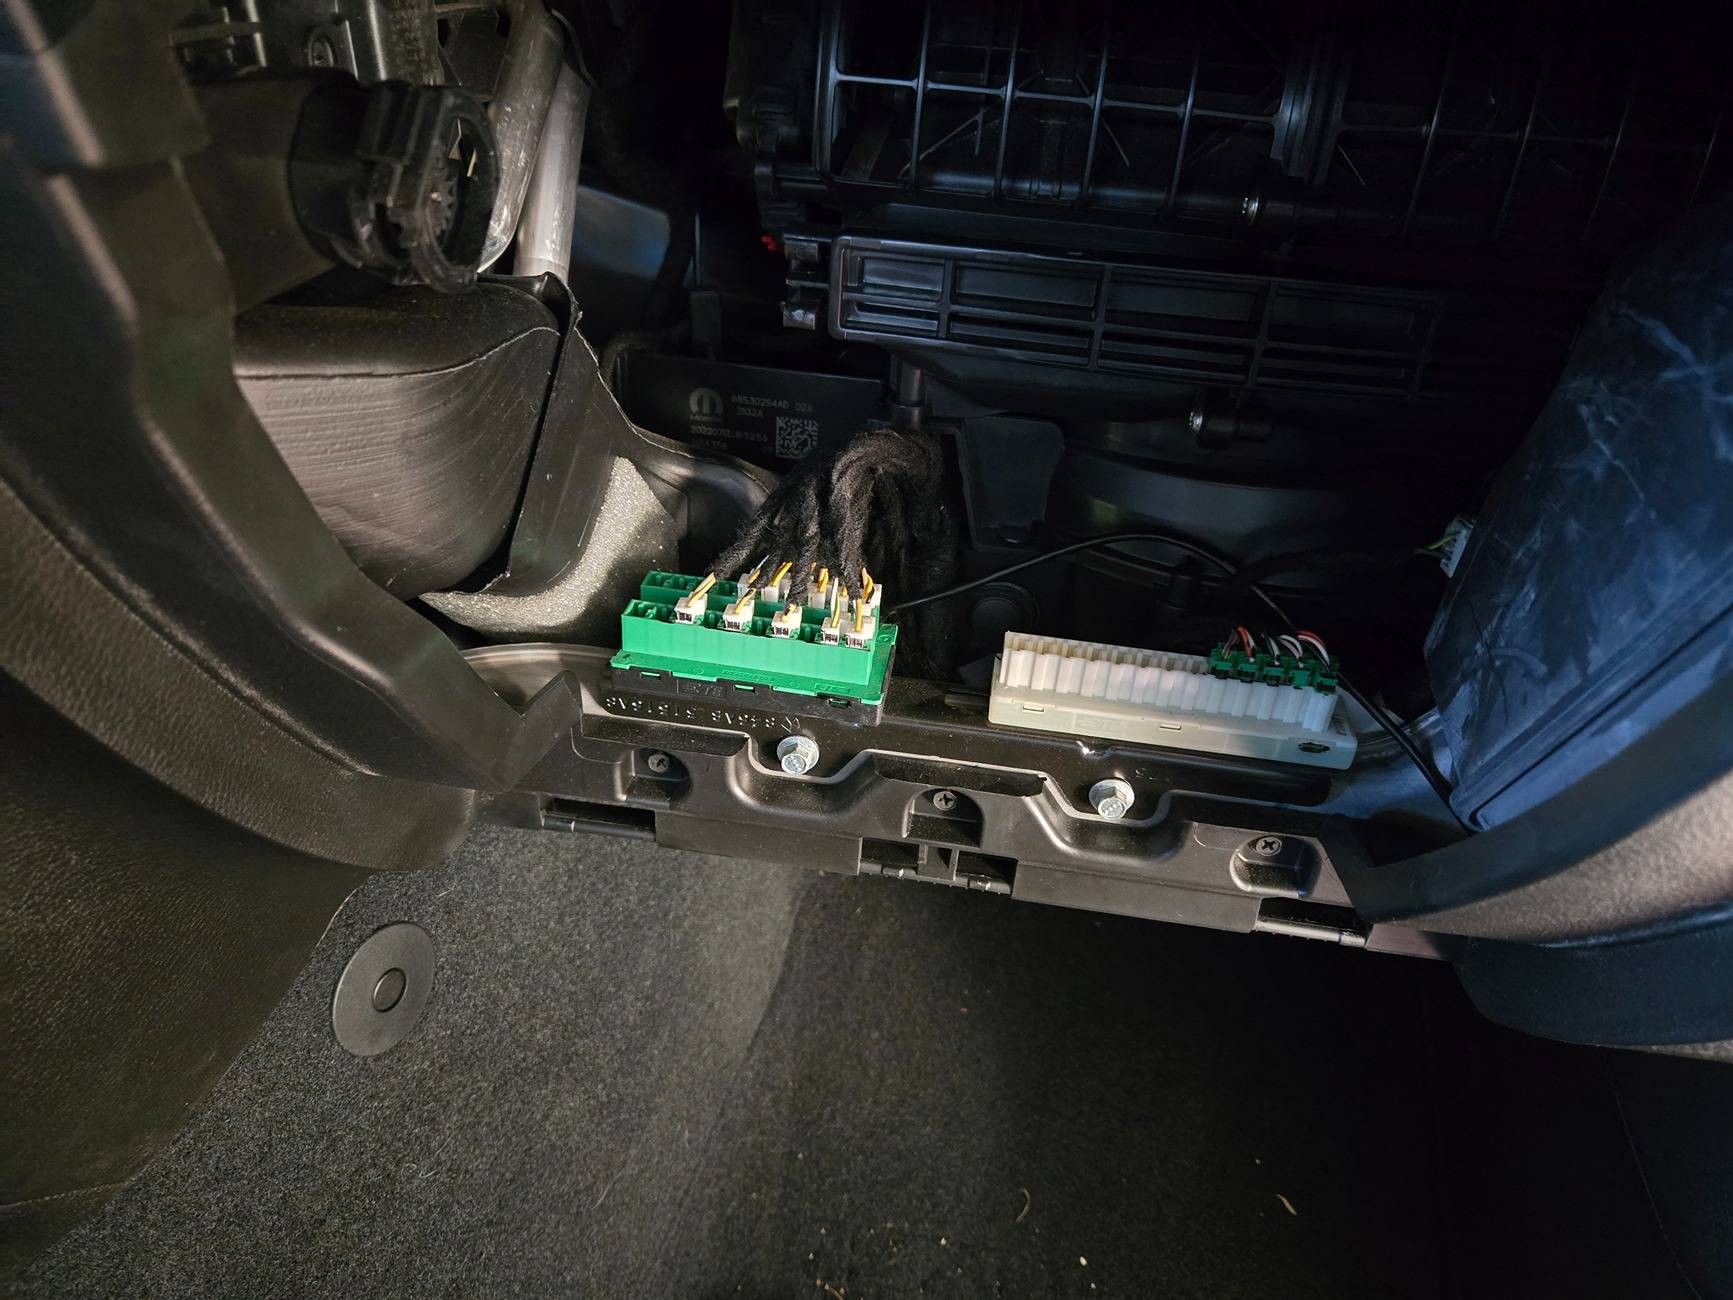
I took the glove box out and ran the bass knob cable through here, behind the CANBUS wires and blocks.
Tucked cable under the dash to this point.
Took out this console screw and ran the cable to the rear of the screw so that it would not fall out of the front of the console so easy. Put screw back in and pulled gently to confirm I didn't pinch the cable.
Same on this side - ran cable to the rear of the console screw and reinstalled the screw.
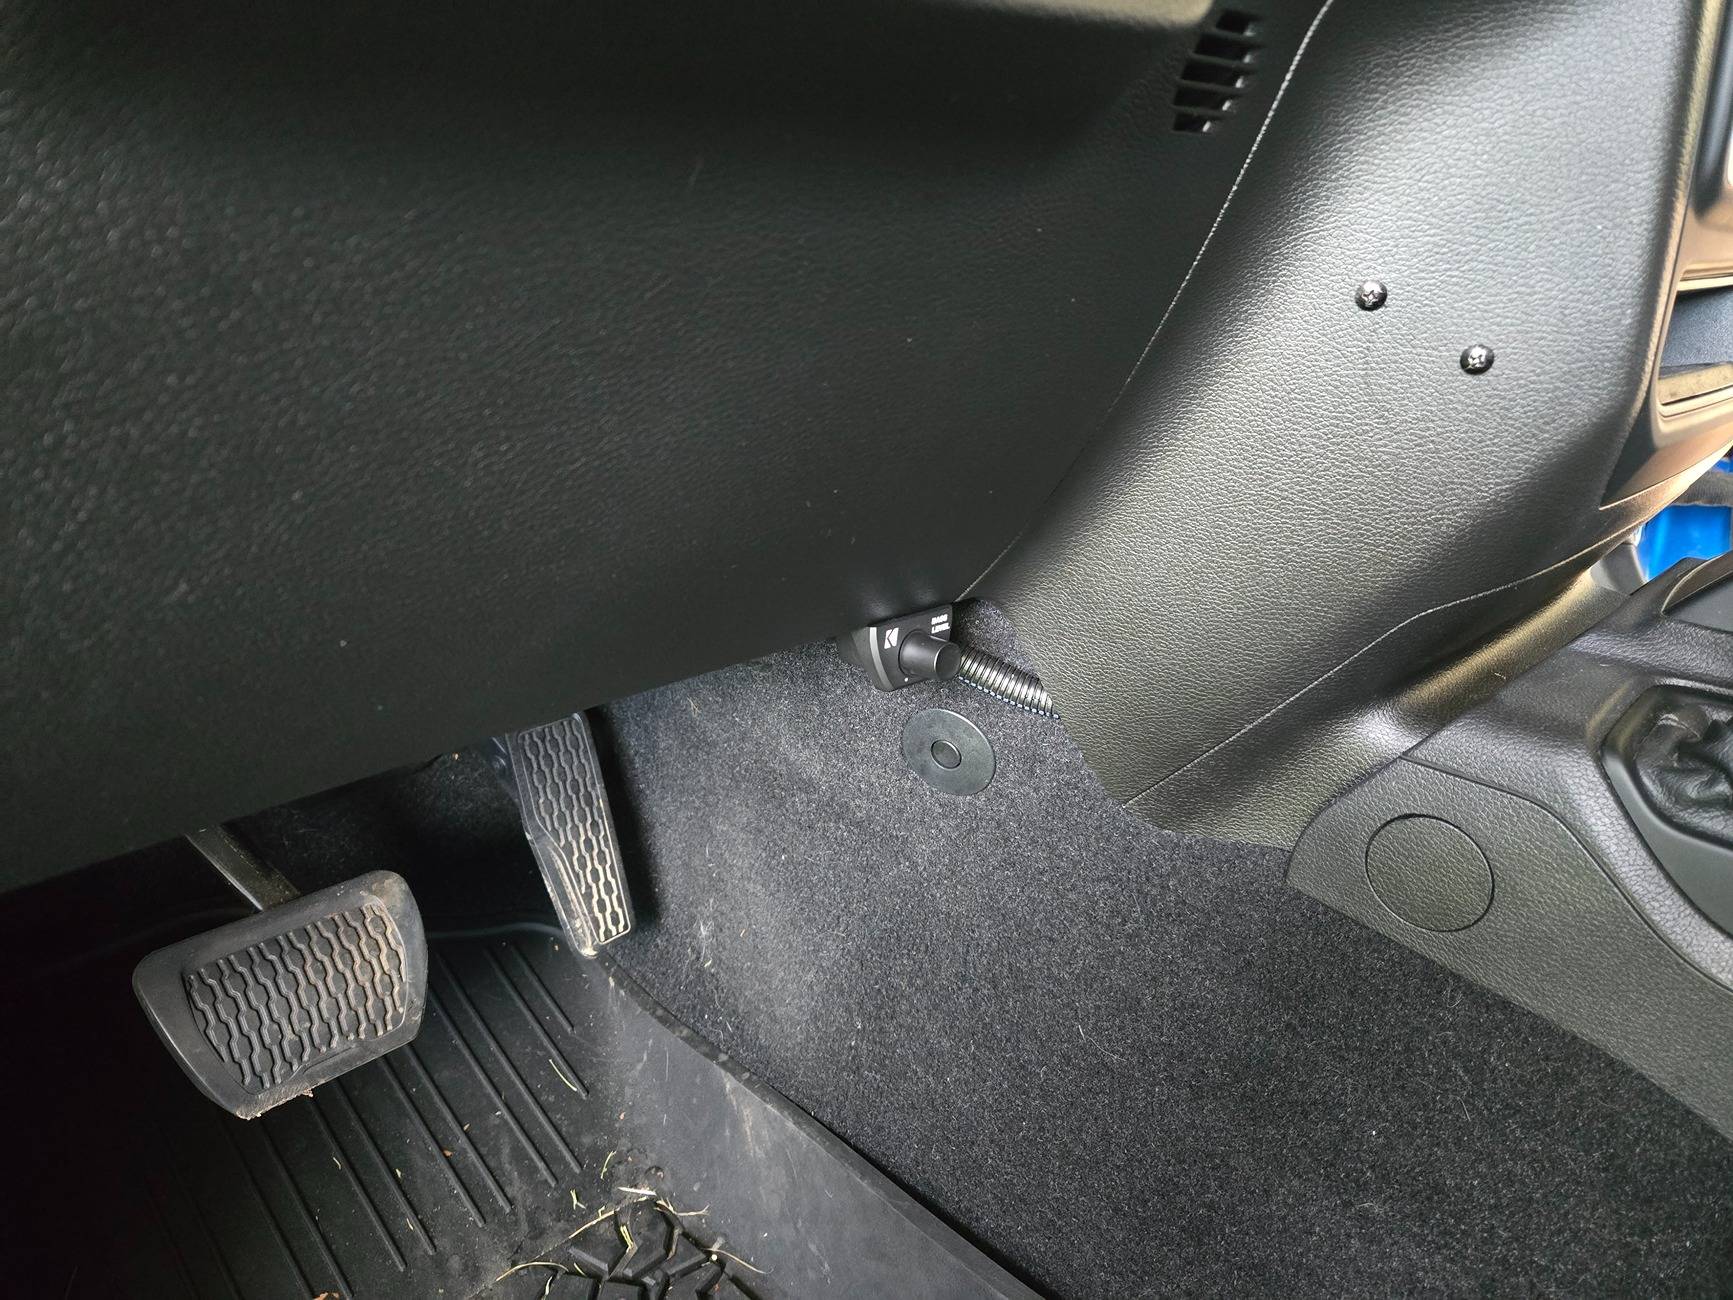
Bass knob mounted below my right knee. Extra cable bundled neatly and tucked in the void behind the carpet. This isn't my favorite position as I have to lean forward and reach down slightly, but it is fine for now. I may eventually move it to a more convenient location. It's not been a big deal so far.
If you are curious, the screws are where my trailer brake controller mounts and that loom you see behind the bass knob is the harness it plugs into, tucked away for now.
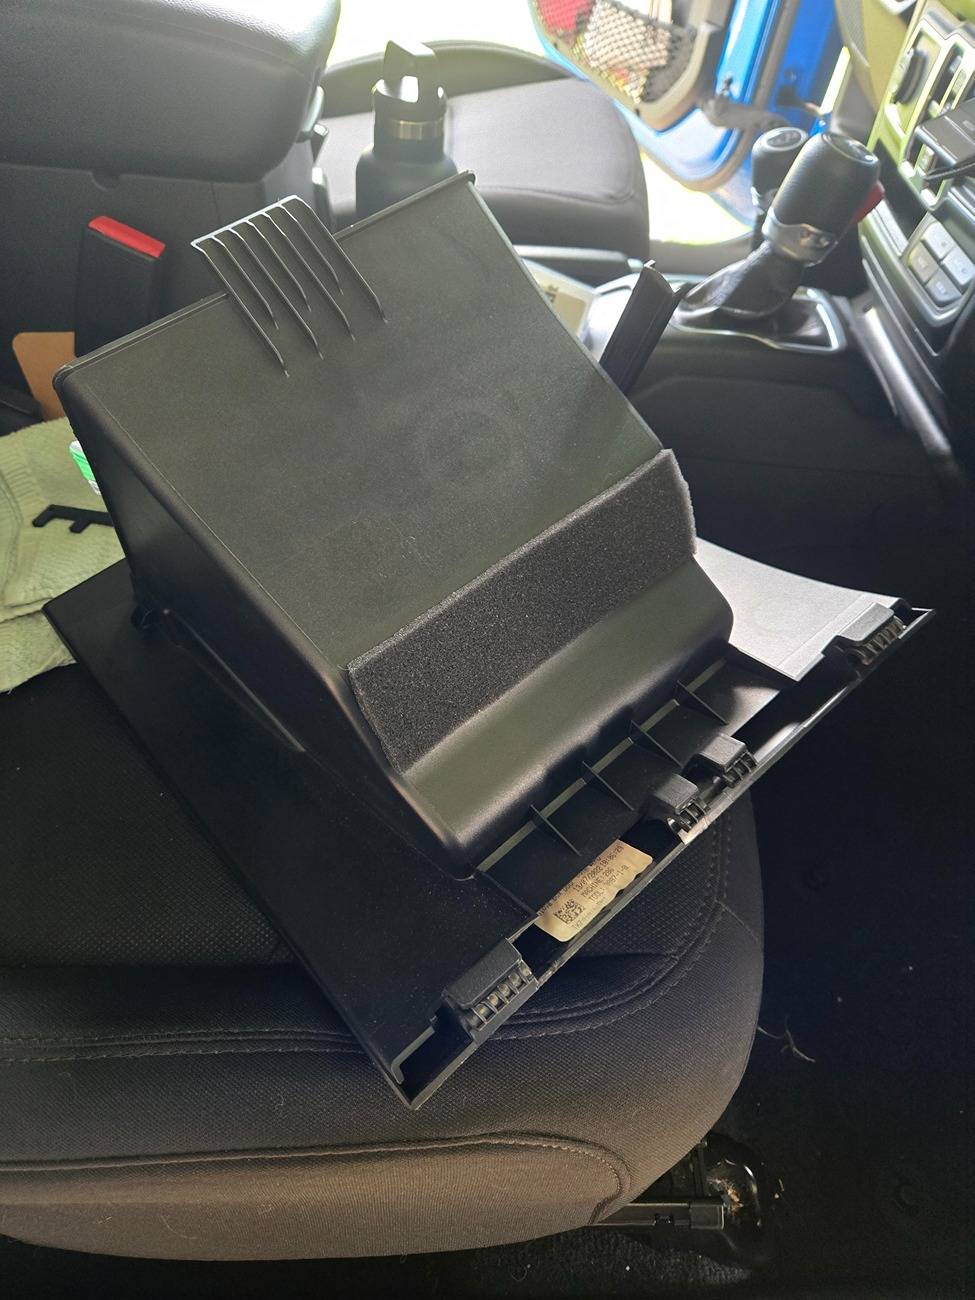
Oh, this foam that helps protect the CAN wires was falling off.
So new foam before I put it back in.
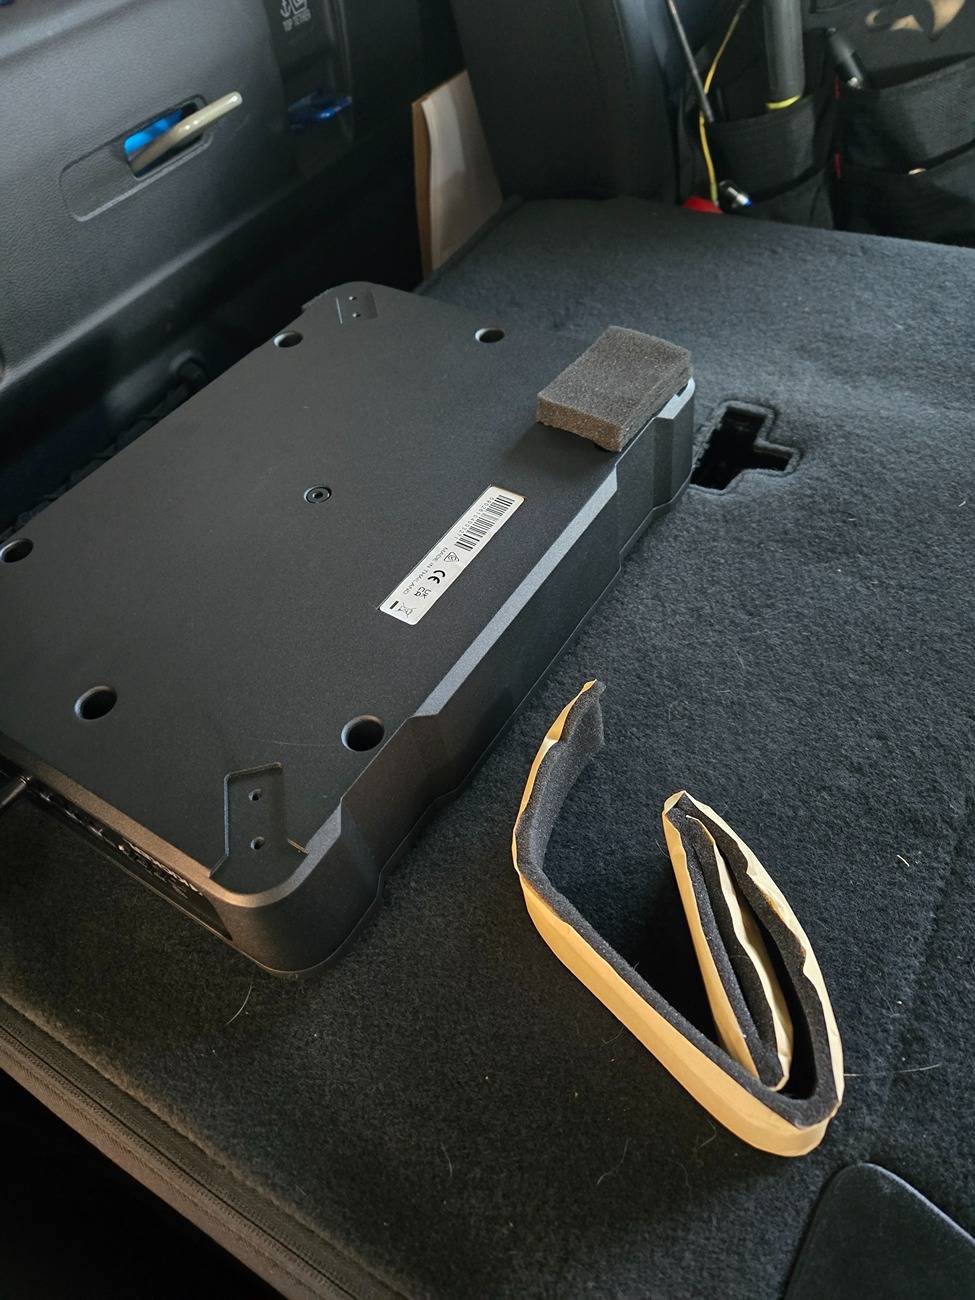
This foam came with a window unit AC but we didn't need it (was temporary while I was waiting for a blower motor for my central air) but I kept it in the 'house box' in case I ever needed it. Well - here it is. I put three pieces on the bottom of the sub to help dampen vibrations.
I also stacked two pieces on this corner where it leans against the net mount on the back wall.
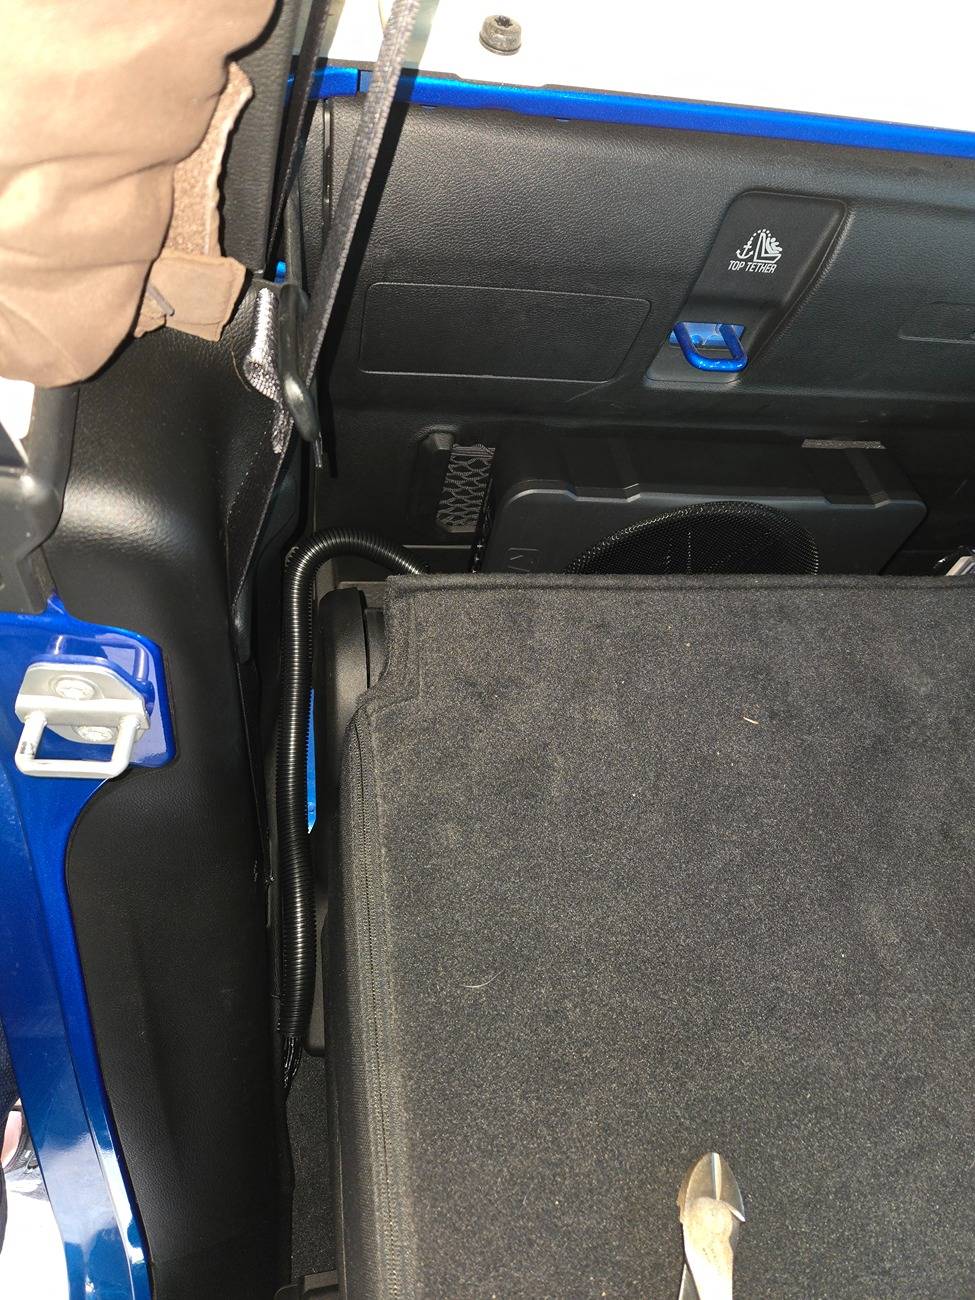
This is what the install looks like. I covered the harness and the separate bass cable with another piece of loom to protect / pretty it up. It runs down past the back seat a little until it goes under the sill cover. The sub is just sitting in the tray behind the seat, it's not affixed to anything.
How does it sound?
I went for a drive today running my typical errands around town and I have to say, I REALLY like it. I was listening at probably 40% of its max bass and it added all the depth back to the music I was missing. I didn't hear any rattles from the back wall or tray, and didn't appear to slide around after doing my errands. I think it responds really well when listening to all types of music for my tastes, and it has enough power that for typical listening I find myself turning it down a notch on some songs because I don't want the lows to overpower. It's not gonna shake a rear view mirror, it's not gonna work for you if you miss the two 10's you had as a teenager - but it really made the base system come to life. Keep in mind I don't drive door less or roof less and rarely with the windows down, so I don't need LOUD music, I just need it to have a little ummph.
Down the road I may still upgrade my sound bar speakers and dash speakers - but this has made a GREAT difference and now I sit in the driveway too long playing 90s country cause those fellas had some solid bass in those tunes The stock base non-Alpine speakers now have an extended life expectancy.
So here we are, the 51HS10 was on sale at Crutchfield and I had been longing for some bass in my truck - so the time was right. They were also giving away some wired Kicker ear buds with a purchase over $150...and I mean who uses wired ear buds but me while I'm sitting here at my laptop typing this - but whatever. Free stuff.
If you dial any amount of base into the base system the speakers in the sound bar (and/or the bar itself) starts to rattle, so I've had bass set to 0 for the last three years. I didn't want to use up any space under my back seat, and I don't use a lot of space behind the seat, so...
Started by extending the trigger wire and ground wire to be the same length as the rest of the harness.
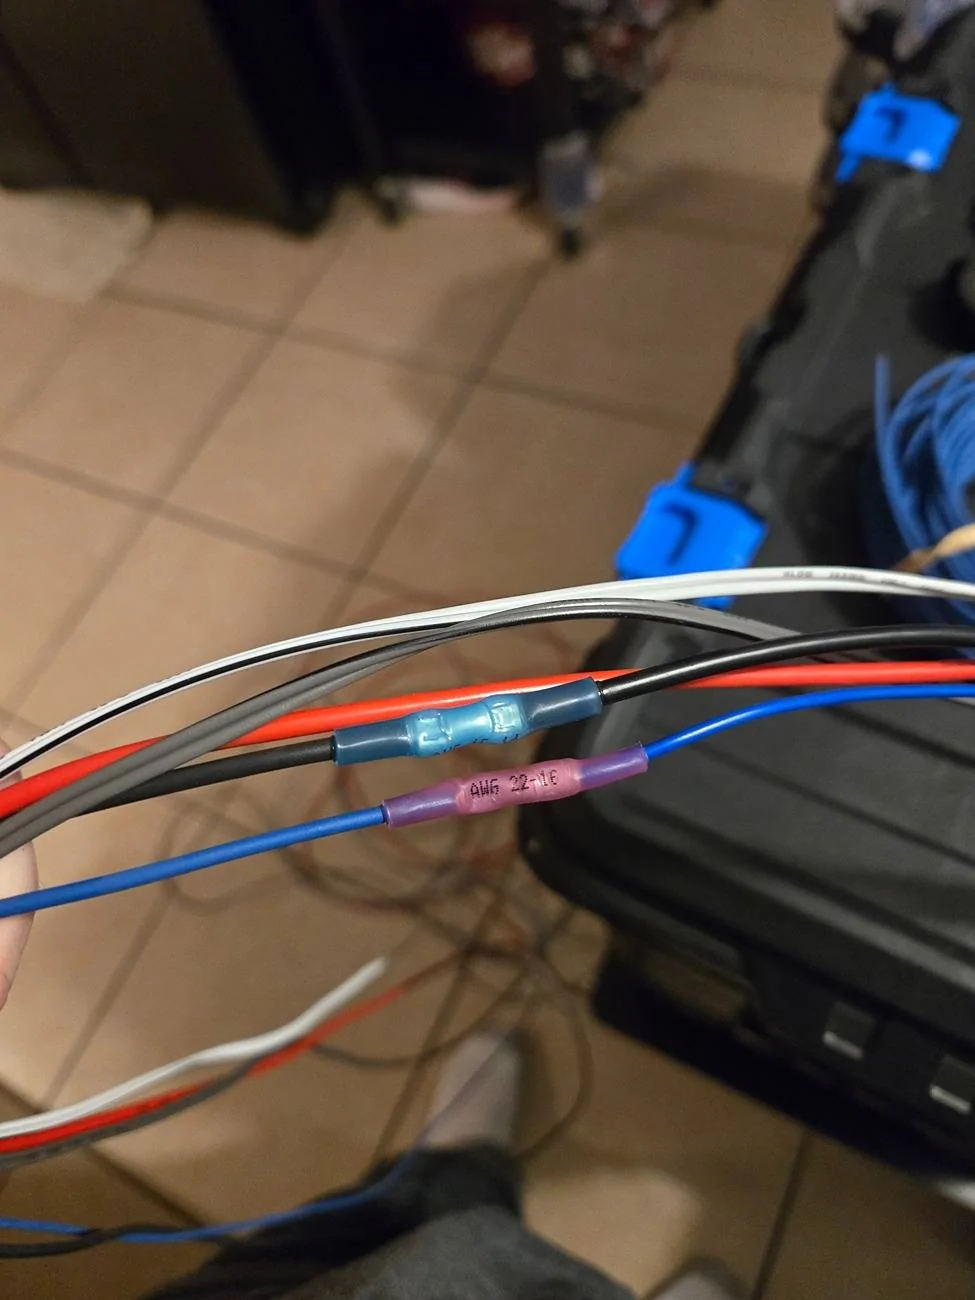
Loomed it up with some mesh loom - remembered why I hate this stuff and only use it on other peoples projects when they request it. It's harder to put wire in and sometimes the wire likes to puke back out easier. Looks cool though. Not that it matters considering nearly all of it is covered...
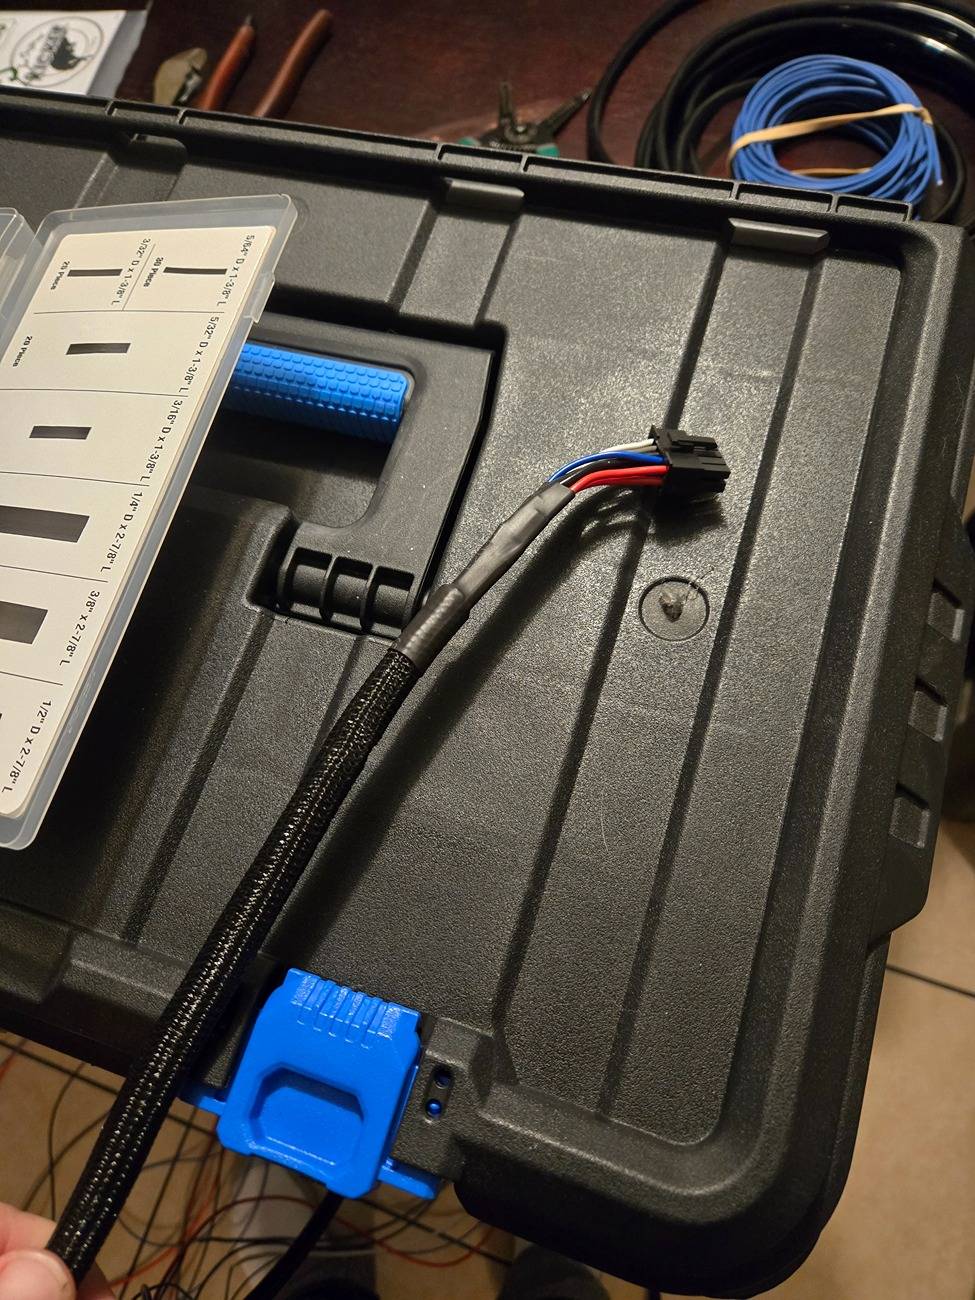
I split the harness here. One part will go up the B-pillar behind the front passenger seat and the other will continue on to other the end.
I pulled out the door sill covers and the lower half B-pillar covers. Everything snaps together so just use an interior pry tool and get at it. You could probably avoid this and just shove the wires under the covers. I did everything the overly difficult way. Learned a lot about the truck though.
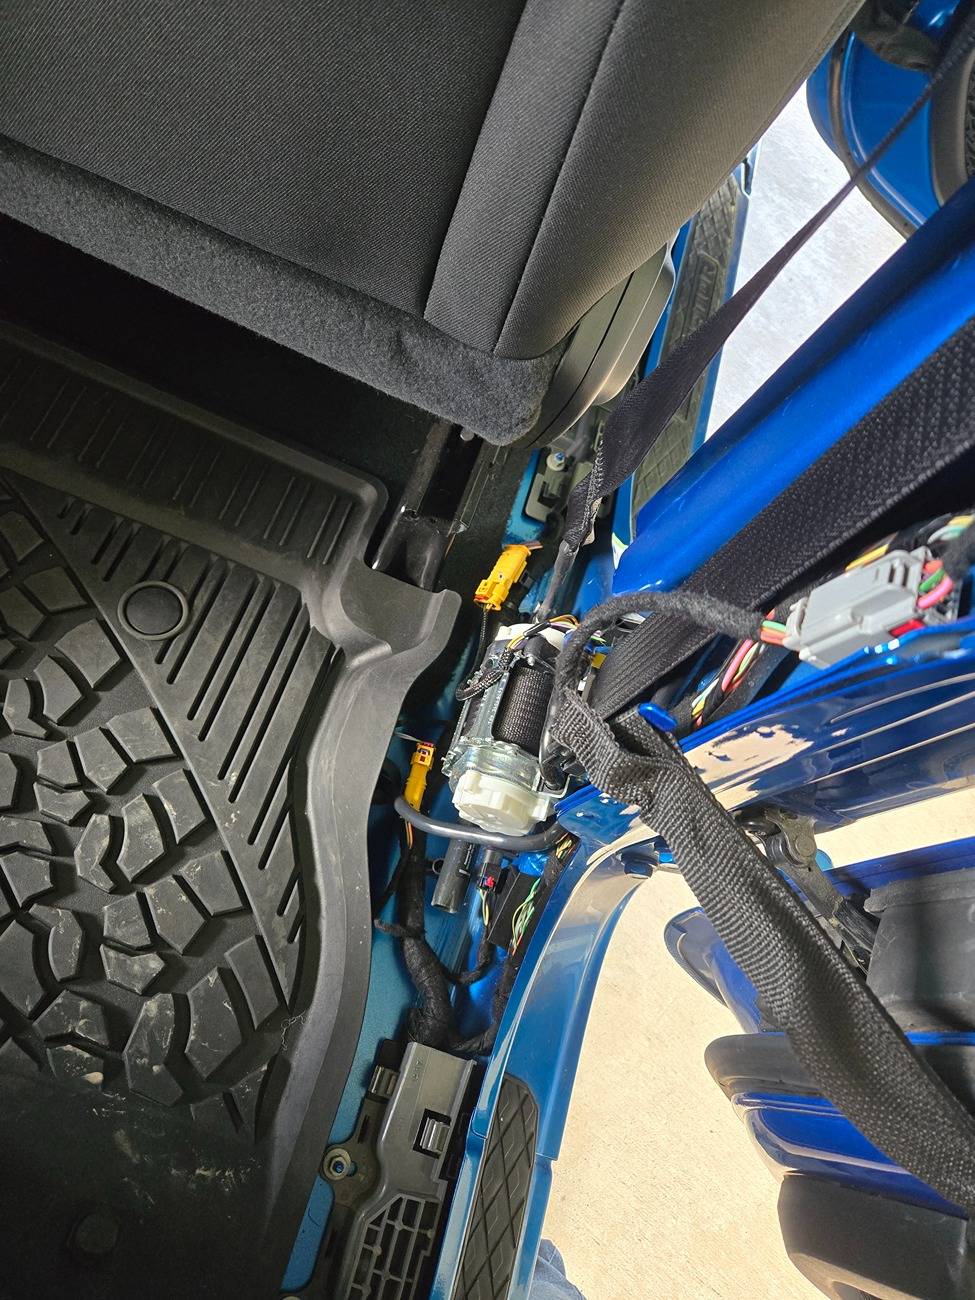
The wires to tie into are located here in the B-pillar. In this photo I already cut the fabric tape that was holding them into the plastic raceway and pulled them out some.
I borrowed this picture from another thread. It's the color code for the speaker wires.
It seems most people use scotch locks or t-taps. I wired emergency vehicles for many years and those were a serious no-no to use. Use what you are comfortable with, but I went with Deutsch connectors and made this Y-harness. If at any point in time I want to remove my sub and harness, I can simply plug the factory wires back together and take my Y-harness, sub harness, and sub out and not leave any wire stubs, or other damage in the harness. Most folks won't have Deutsch connections around, but I keep a supply since I'm the 'hey come wire my hot rod or boat or (insert project here)' guy in my circle.
See, if I remove the sub and sub harness the factory wiring will just plug back together like this.
Everything tucked back in and tied back up.
Up front I loosened the kick panel / door sill cover to keep running wires. There is a nut where my finger is pointing you need to remove if you want to move this cover around. The rest of it snaps in.
I do not use the drain holes in my truck for draining water, because I don't take the top or doors off and take my floor mats out to clean them. This is the drain hole under the passenger front floor mat.
So anyway I had already used this hole to run the wires for the power outlets I installed in the back of the console. I am now using it for the sub harness. I use the original plug, cut in half, to close up the rest of the hole. There are a variety of other ways to get under the hood including shoving it through the harness boot under the dash or under the windshield frame.
My wire goes under the truck and runs along the frame rail with a bundle of other wires I already have running everywhere then runs up the back of the passenger front fender liner, along the firewall, and up beside the fuse box to get beside the battery.
I use the factory ground stud on the fender frame for all my grounds I add except for the winch. I used the included fuse holder to connect to the battery and tied up all slack along the battery. I did not shorten the harness in case I want to use it somewhere else later, and I have plenty space here. I sealed off the blue trigger wire and taped it inside the loom. I am using the DC offset activation that turns the amp on when it senses speaker signal. Turns out, this makes the amp turn on when you open the door and it stays on until the dome light goes out and the truck 'goes to sleep'. If it becomes an issue I will use an add-a-fuse to get ignition from the fuse box. I may do that regardless, but I only have mini add a fuses and the Gladiator uses micro fuses and I wasn't paying $10 for one at Oreillys.
I want to add a Blue Sea fuse block and ground bus here on a bracket at some point as I am up to four or five fuse holders and I don't want this to look janky.
I took the glove box out and ran the bass knob cable through here, behind the CANBUS wires and blocks.
Tucked cable under the dash to this point.
Took out this console screw and ran the cable to the rear of the screw so that it would not fall out of the front of the console so easy. Put screw back in and pulled gently to confirm I didn't pinch the cable.
Same on this side - ran cable to the rear of the console screw and reinstalled the screw.
Bass knob mounted below my right knee. Extra cable bundled neatly and tucked in the void behind the carpet. This isn't my favorite position as I have to lean forward and reach down slightly, but it is fine for now. I may eventually move it to a more convenient location. It's not been a big deal so far.
If you are curious, the screws are where my trailer brake controller mounts and that loom you see behind the bass knob is the harness it plugs into, tucked away for now.
Oh, this foam that helps protect the CAN wires was falling off.
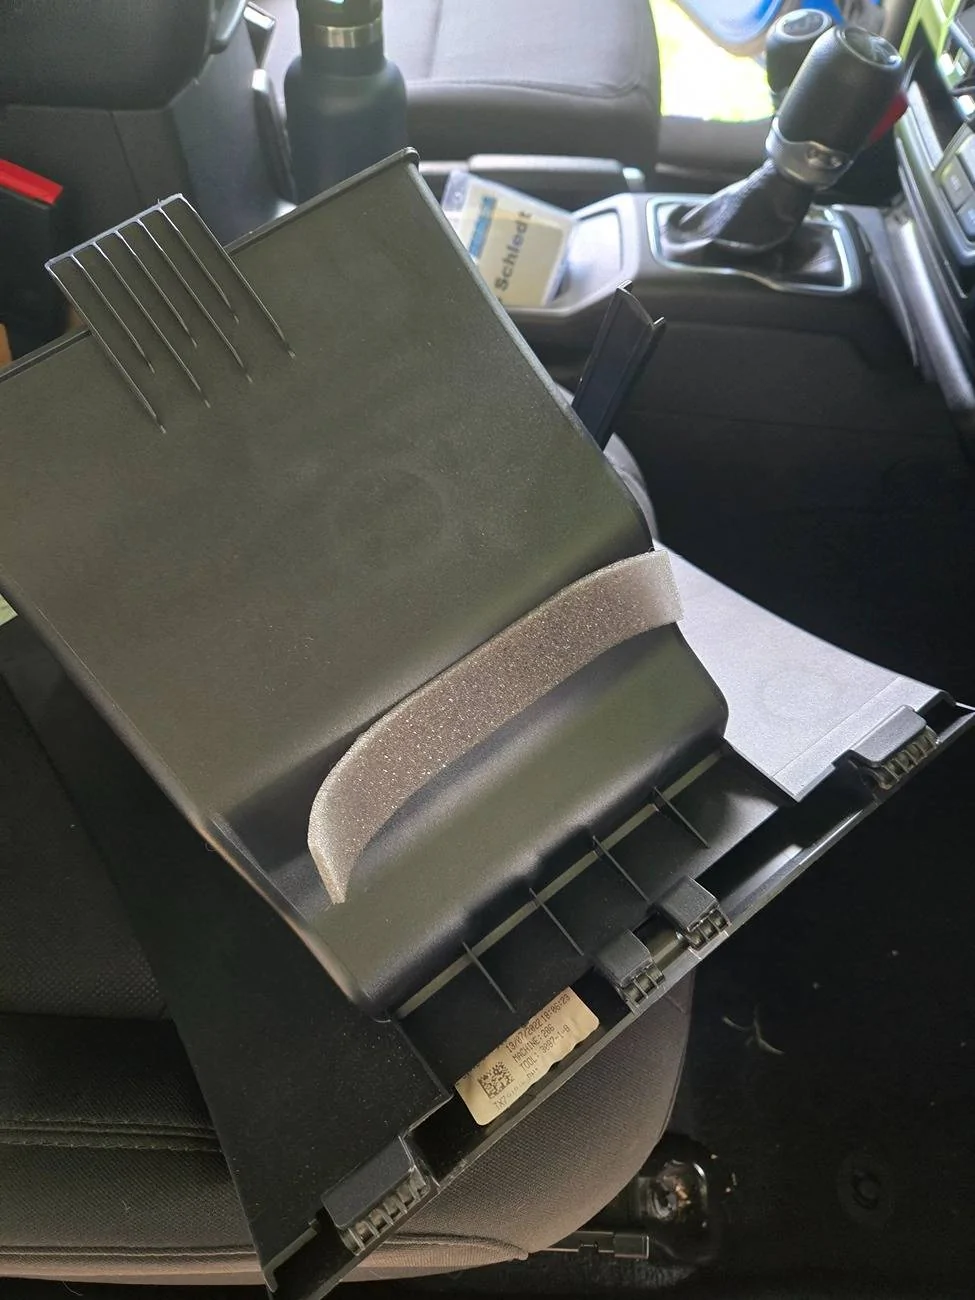
So new foam before I put it back in.
This foam came with a window unit AC but we didn't need it (was temporary while I was waiting for a blower motor for my central air) but I kept it in the 'house box' in case I ever needed it. Well - here it is. I put three pieces on the bottom of the sub to help dampen vibrations.
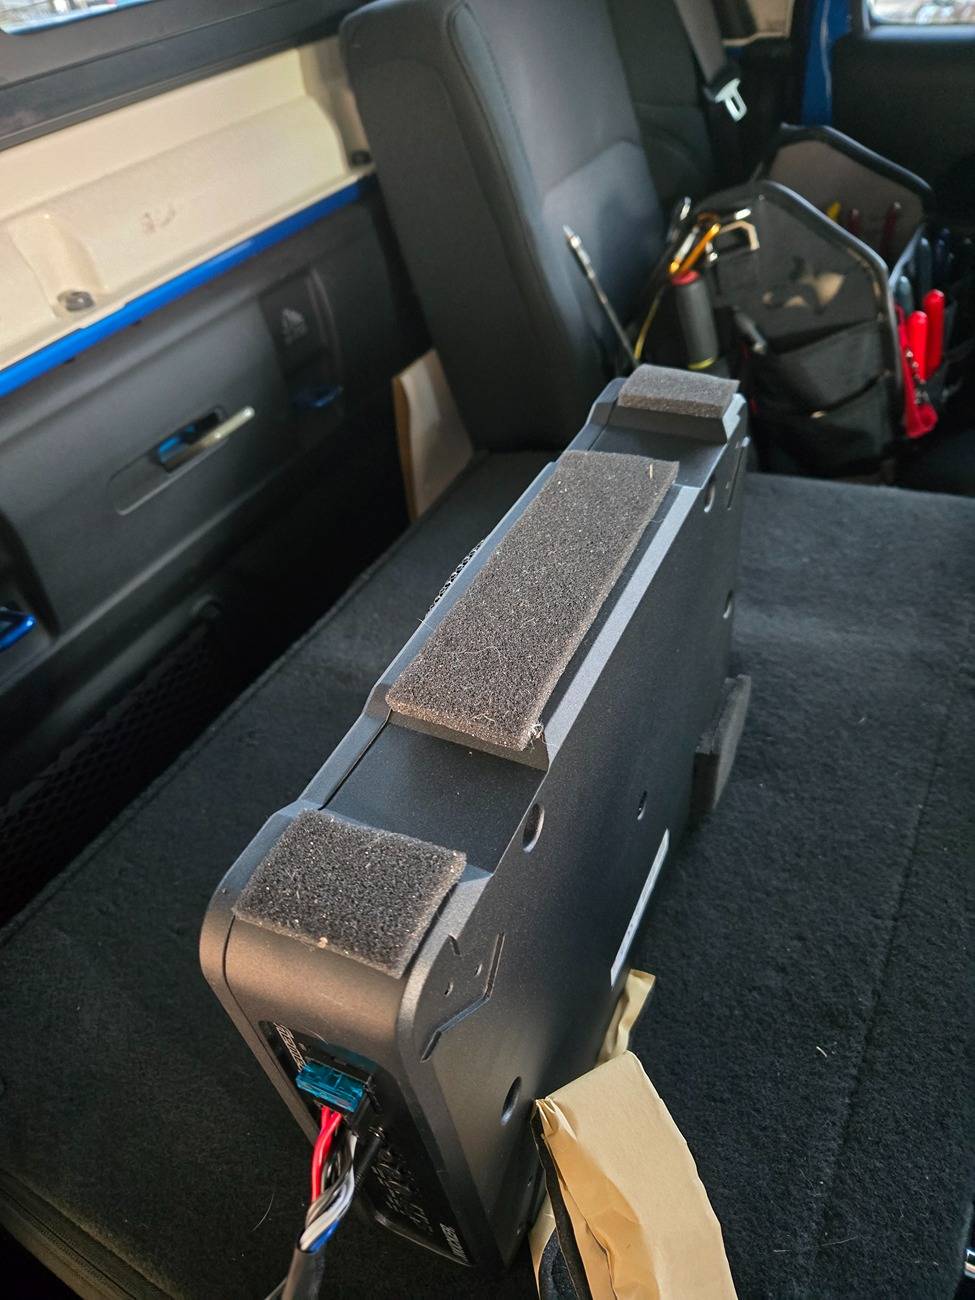
I also stacked two pieces on this corner where it leans against the net mount on the back wall.
This is what the install looks like. I covered the harness and the separate bass cable with another piece of loom to protect / pretty it up. It runs down past the back seat a little until it goes under the sill cover. The sub is just sitting in the tray behind the seat, it's not affixed to anything.
How does it sound?
I went for a drive today running my typical errands around town and I have to say, I REALLY like it. I was listening at probably 40% of its max bass and it added all the depth back to the music I was missing. I didn't hear any rattles from the back wall or tray, and didn't appear to slide around after doing my errands. I think it responds really well when listening to all types of music for my tastes, and it has enough power that for typical listening I find myself turning it down a notch on some songs because I don't want the lows to overpower. It's not gonna shake a rear view mirror, it's not gonna work for you if you miss the two 10's you had as a teenager - but it really made the base system come to life. Keep in mind I don't drive door less or roof less and rarely with the windows down, so I don't need LOUD music, I just need it to have a little ummph.
Down the road I may still upgrade my sound bar speakers and dash speakers - but this has made a GREAT difference and now I sit in the driveway too long playing 90s country cause those fellas had some solid bass in those tunes
The stock base non-Alpine speakers now have an extended life expectancy.Sponsored
 I double checked the wiring at my connectors and two were backwards. Re-pinned them and it was perfect.
")