Zero_Accel
Well-Known Member
- First Name
- Aaron
- Joined
- Oct 27, 2021
- Threads
- 32
- Messages
- 526
- Reaction score
- 1,283
- Location
- El Paso, Texas
- Vehicle(s)
- 2020 Jeep Gladiator Sport
- Build Thread
- Link
- Occupation
- Systems Engineer
- Thread starter
- #1
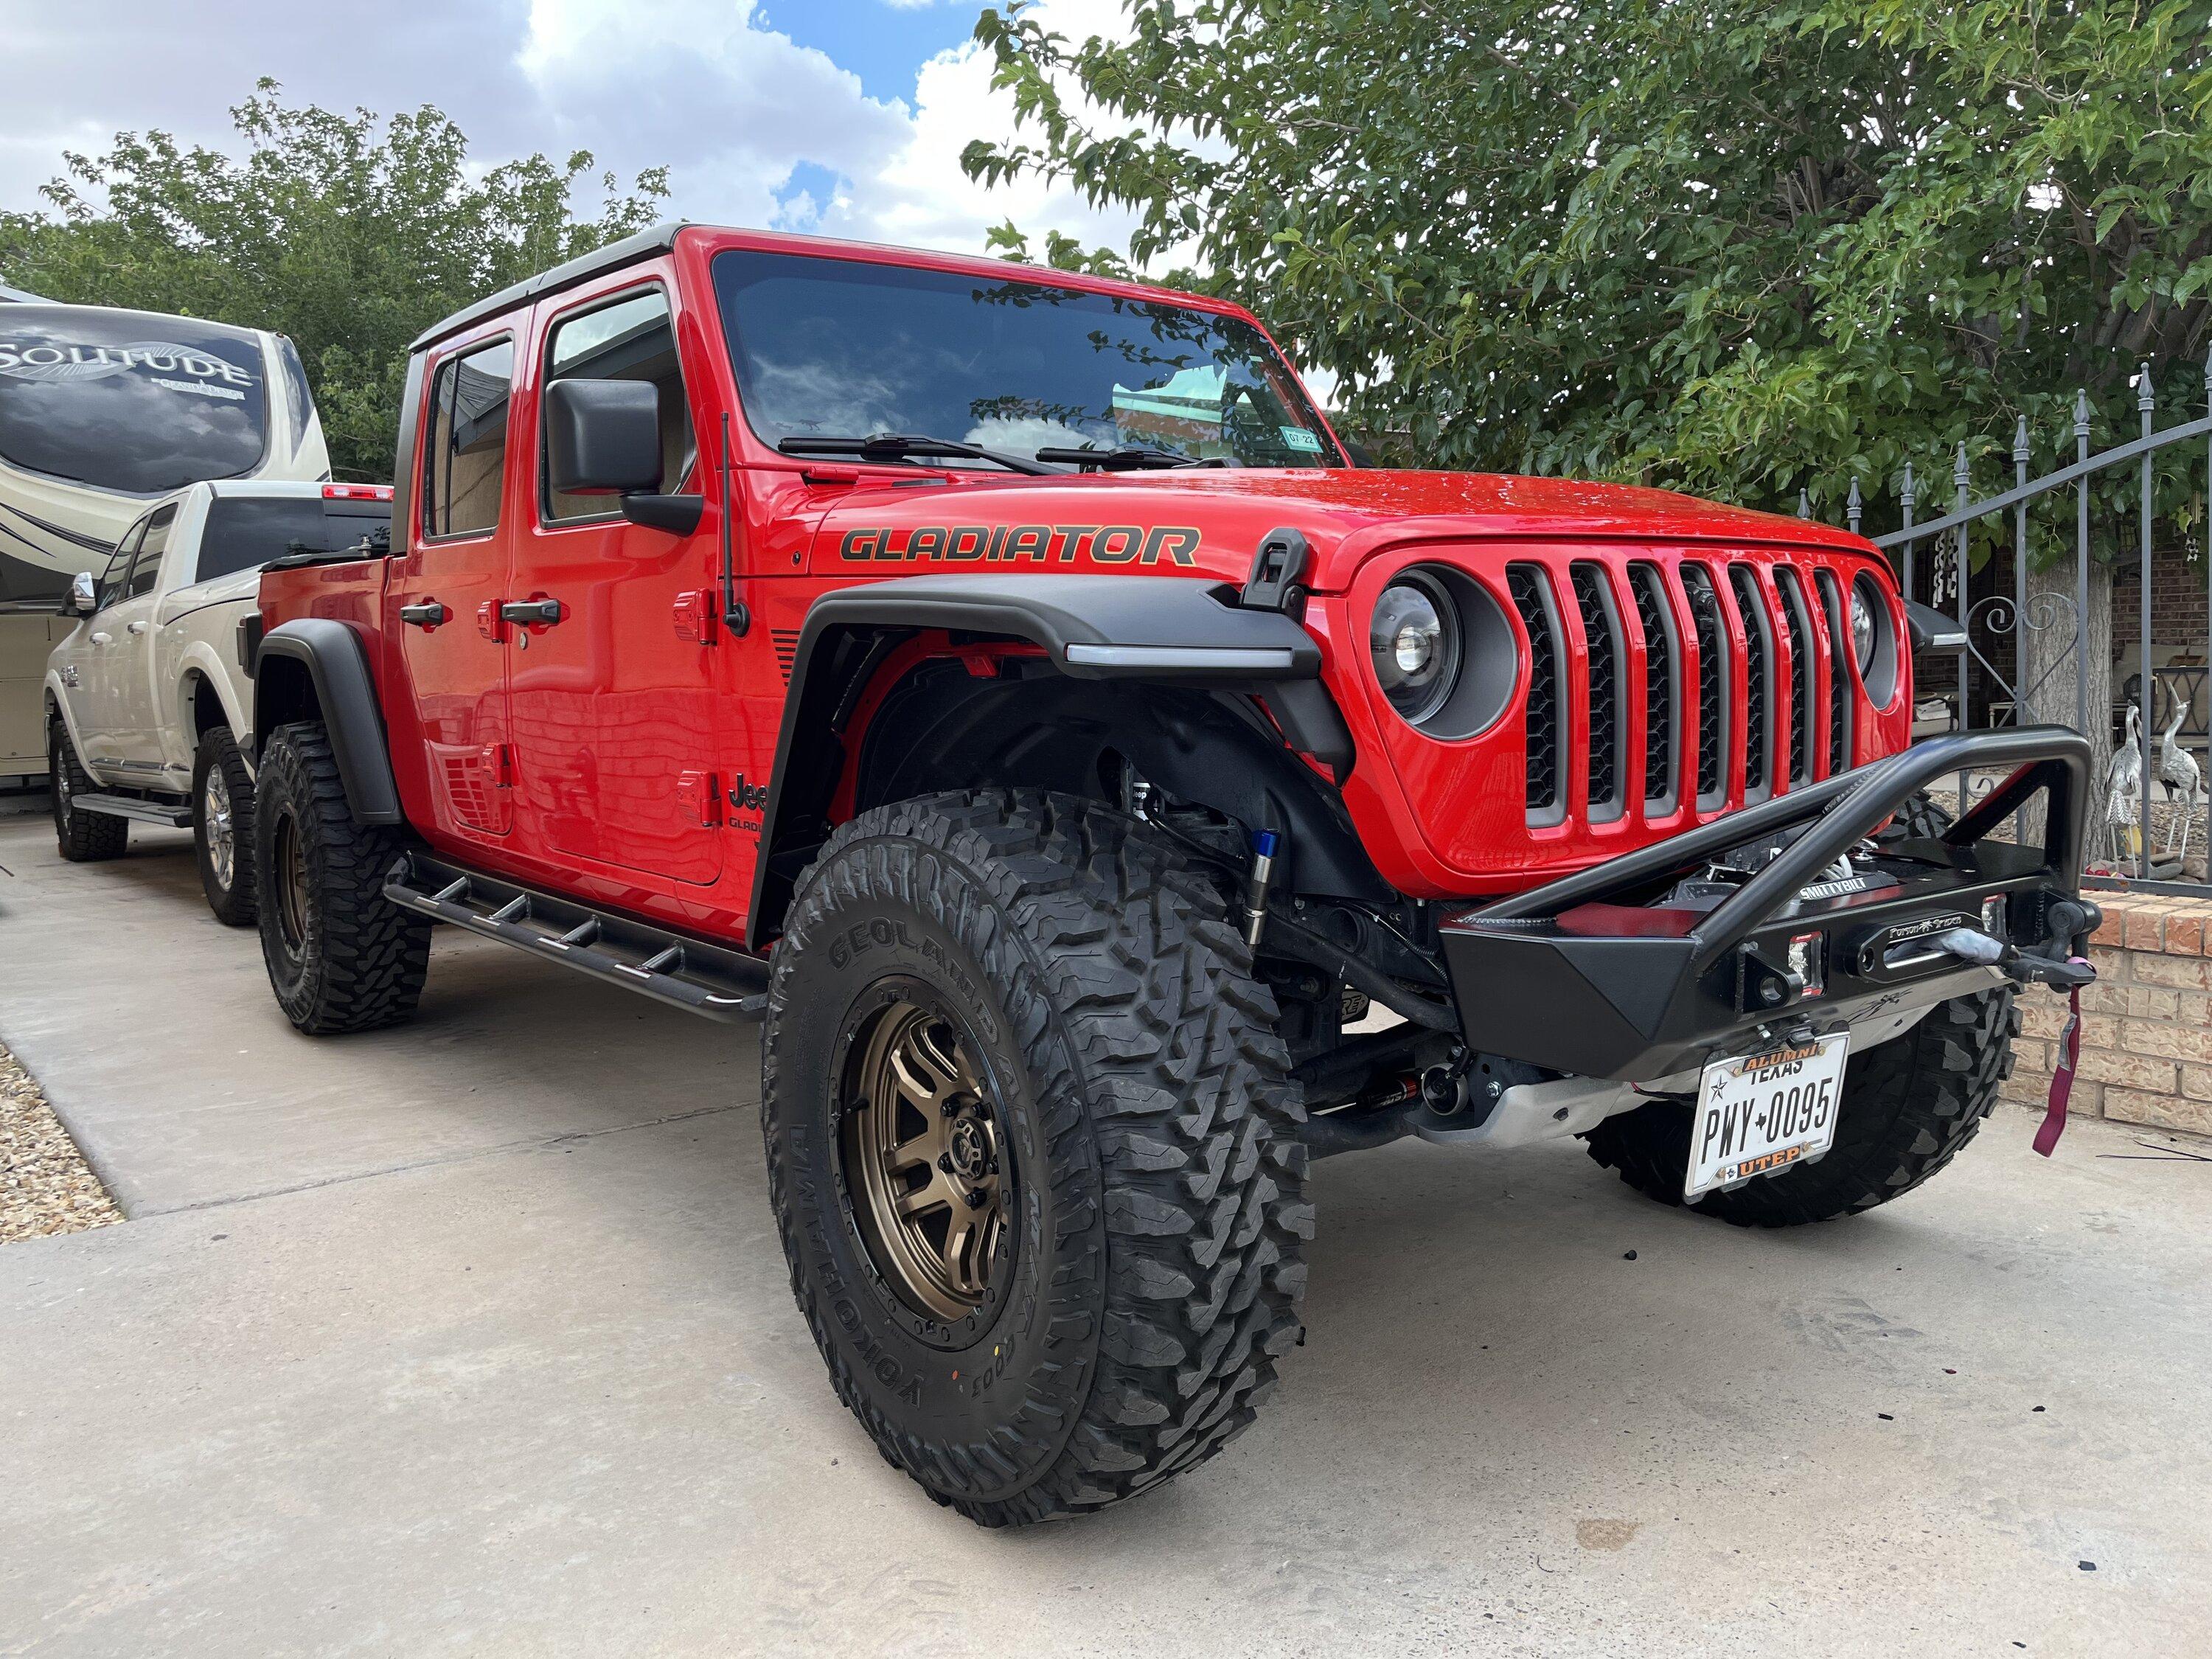
TLDR: Would recommend, rated 8.5/10. Some minor gripes about missing/non-preferred hardware, minor fit/ finish/assembly issues.
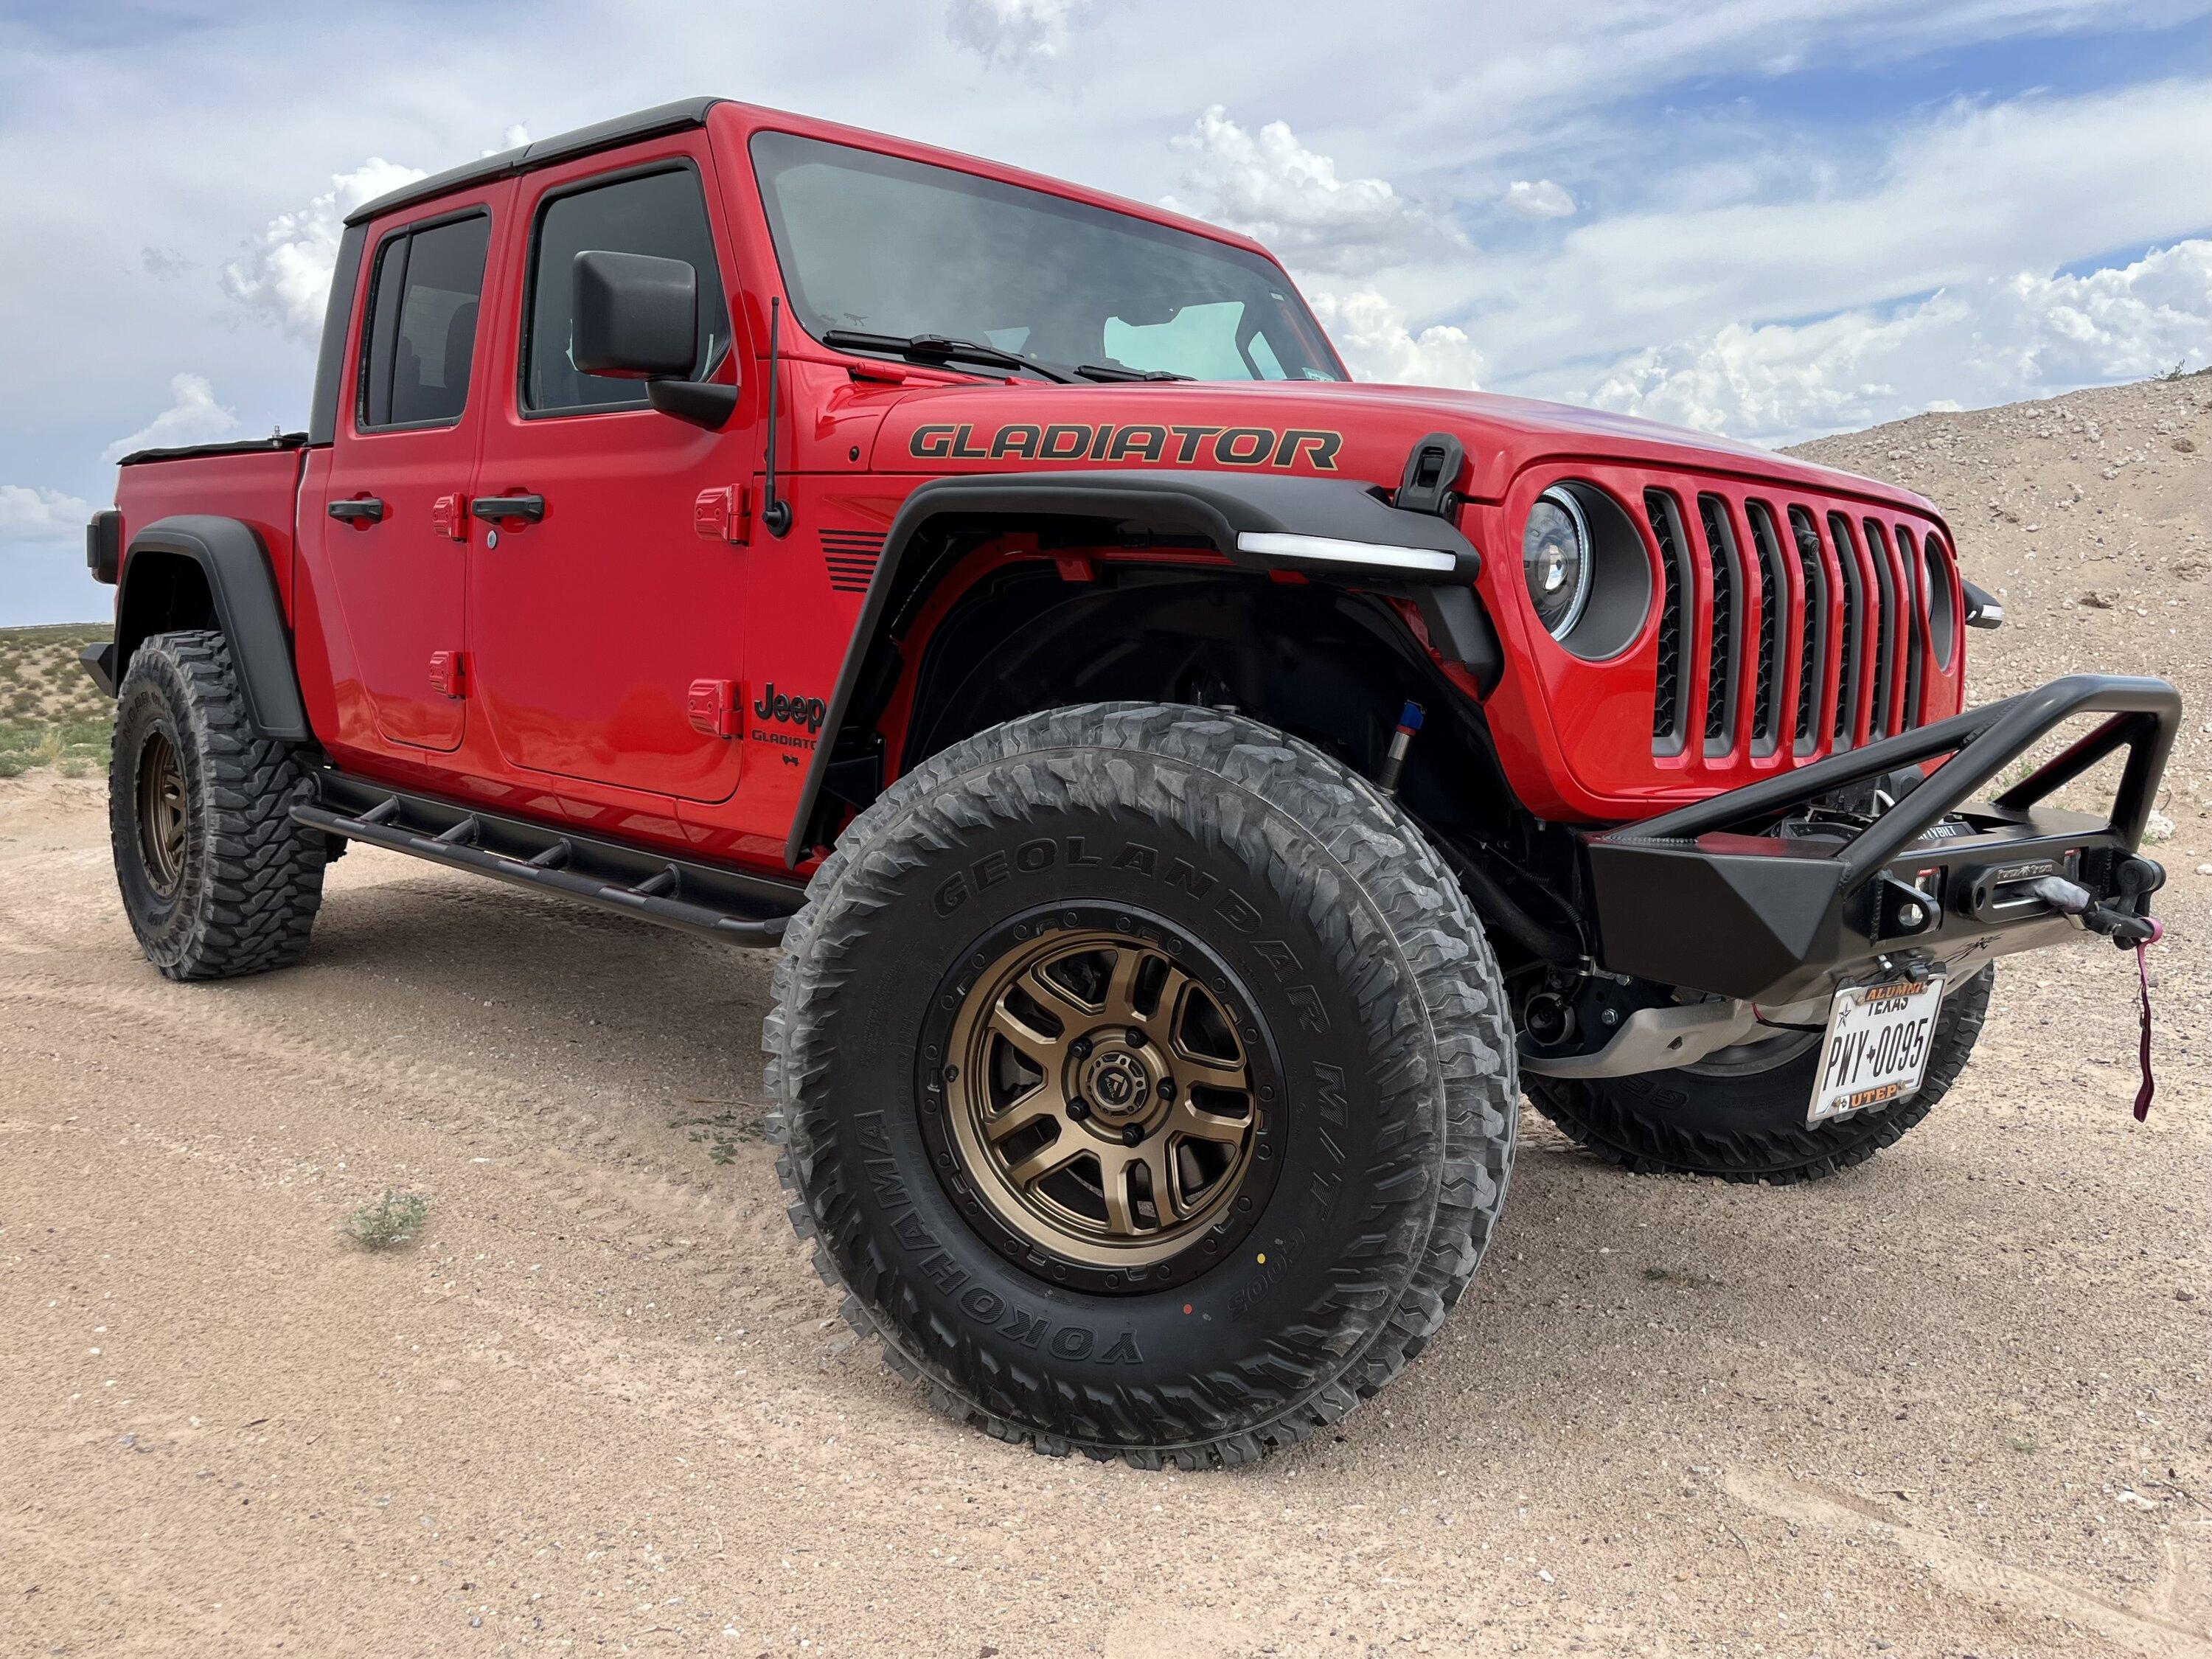
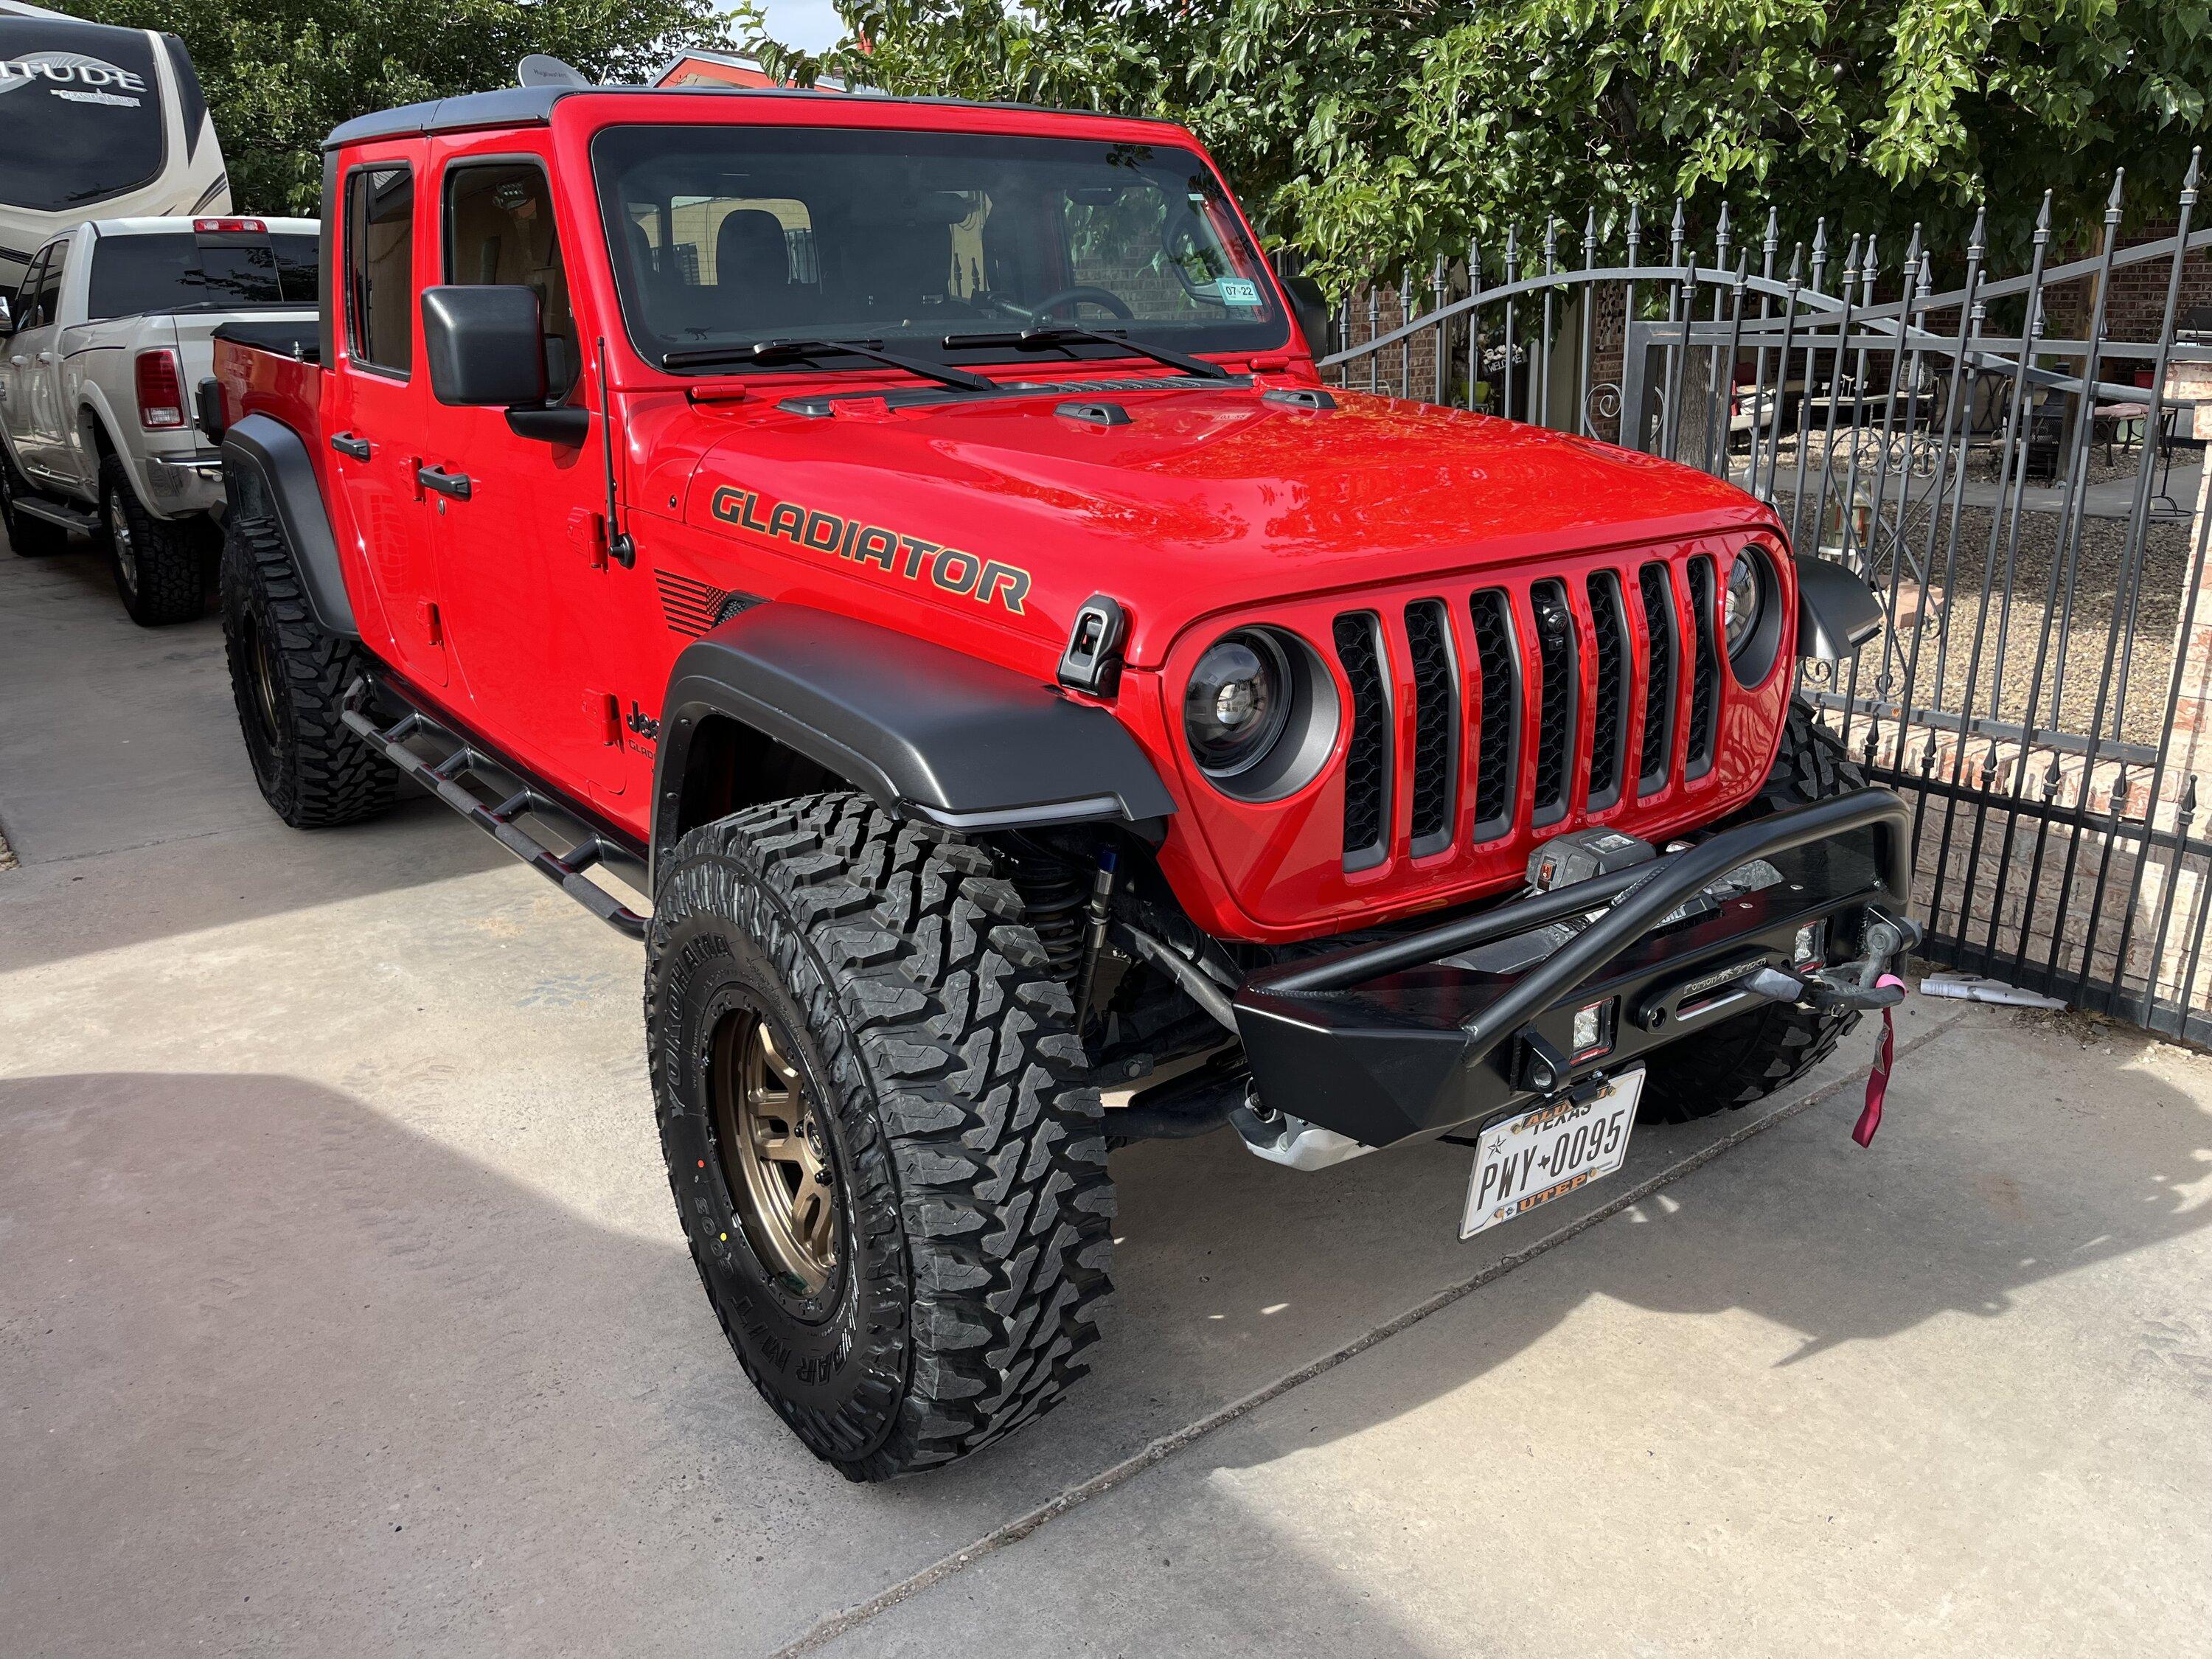
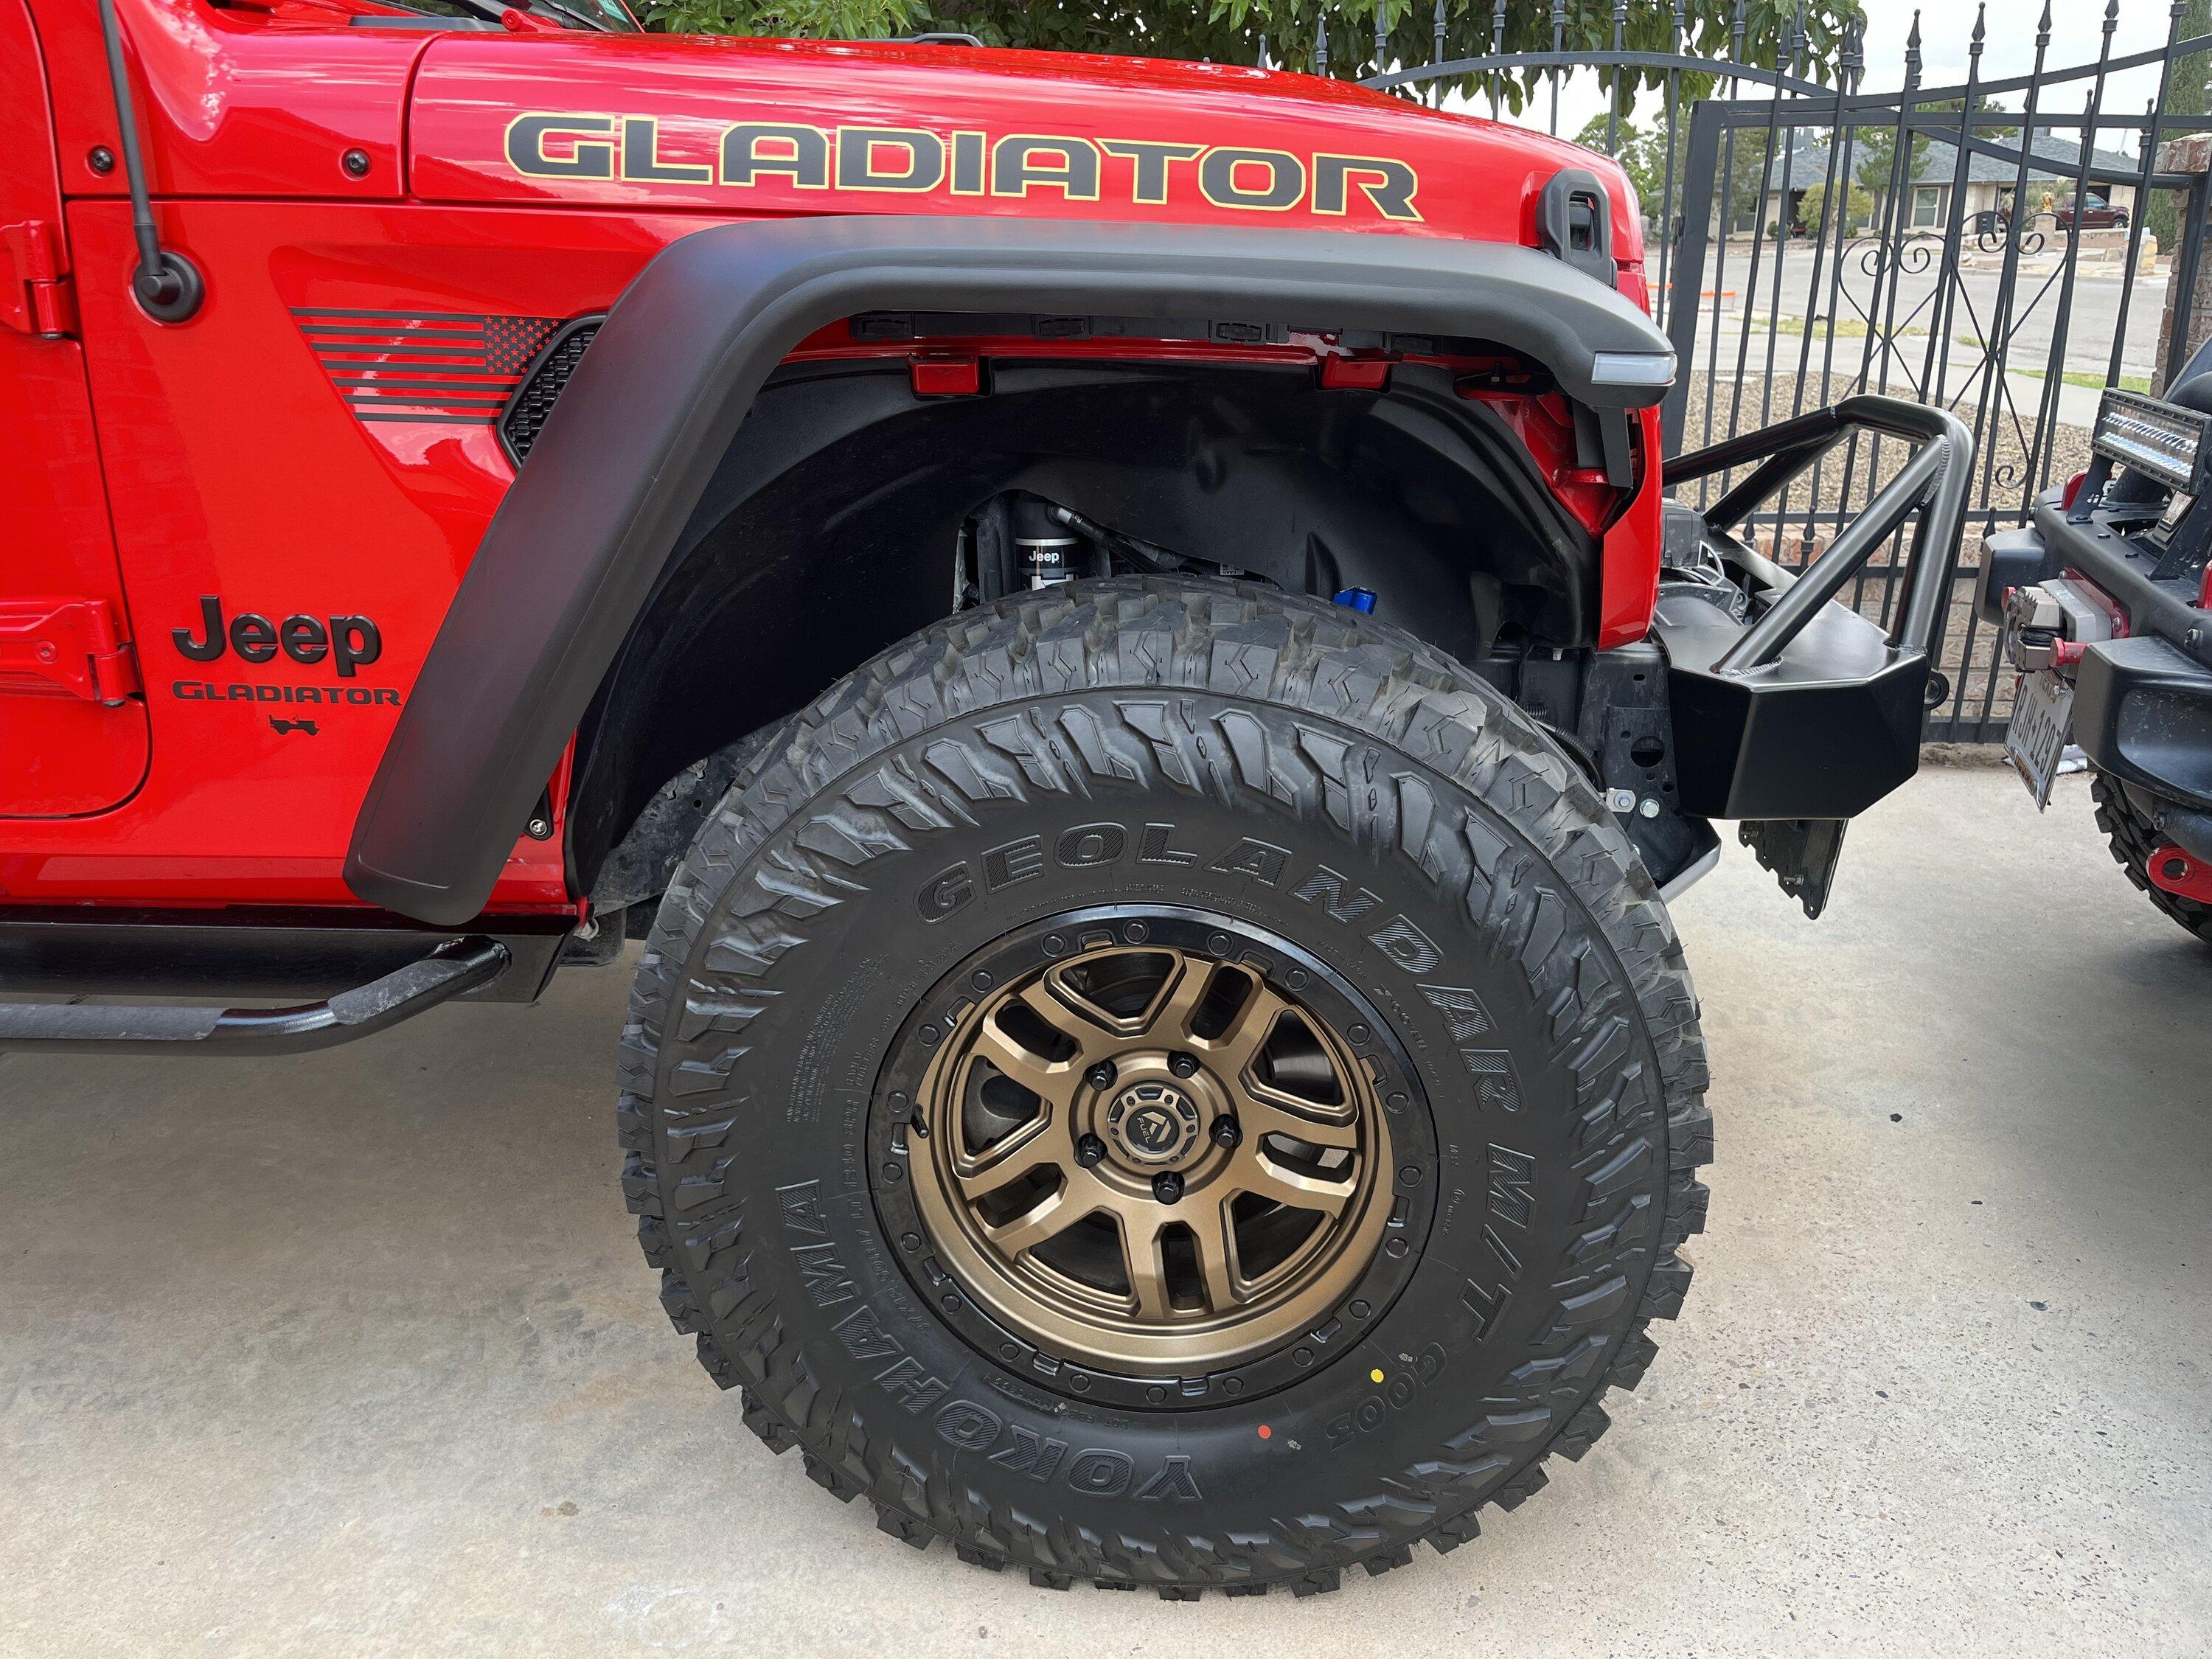
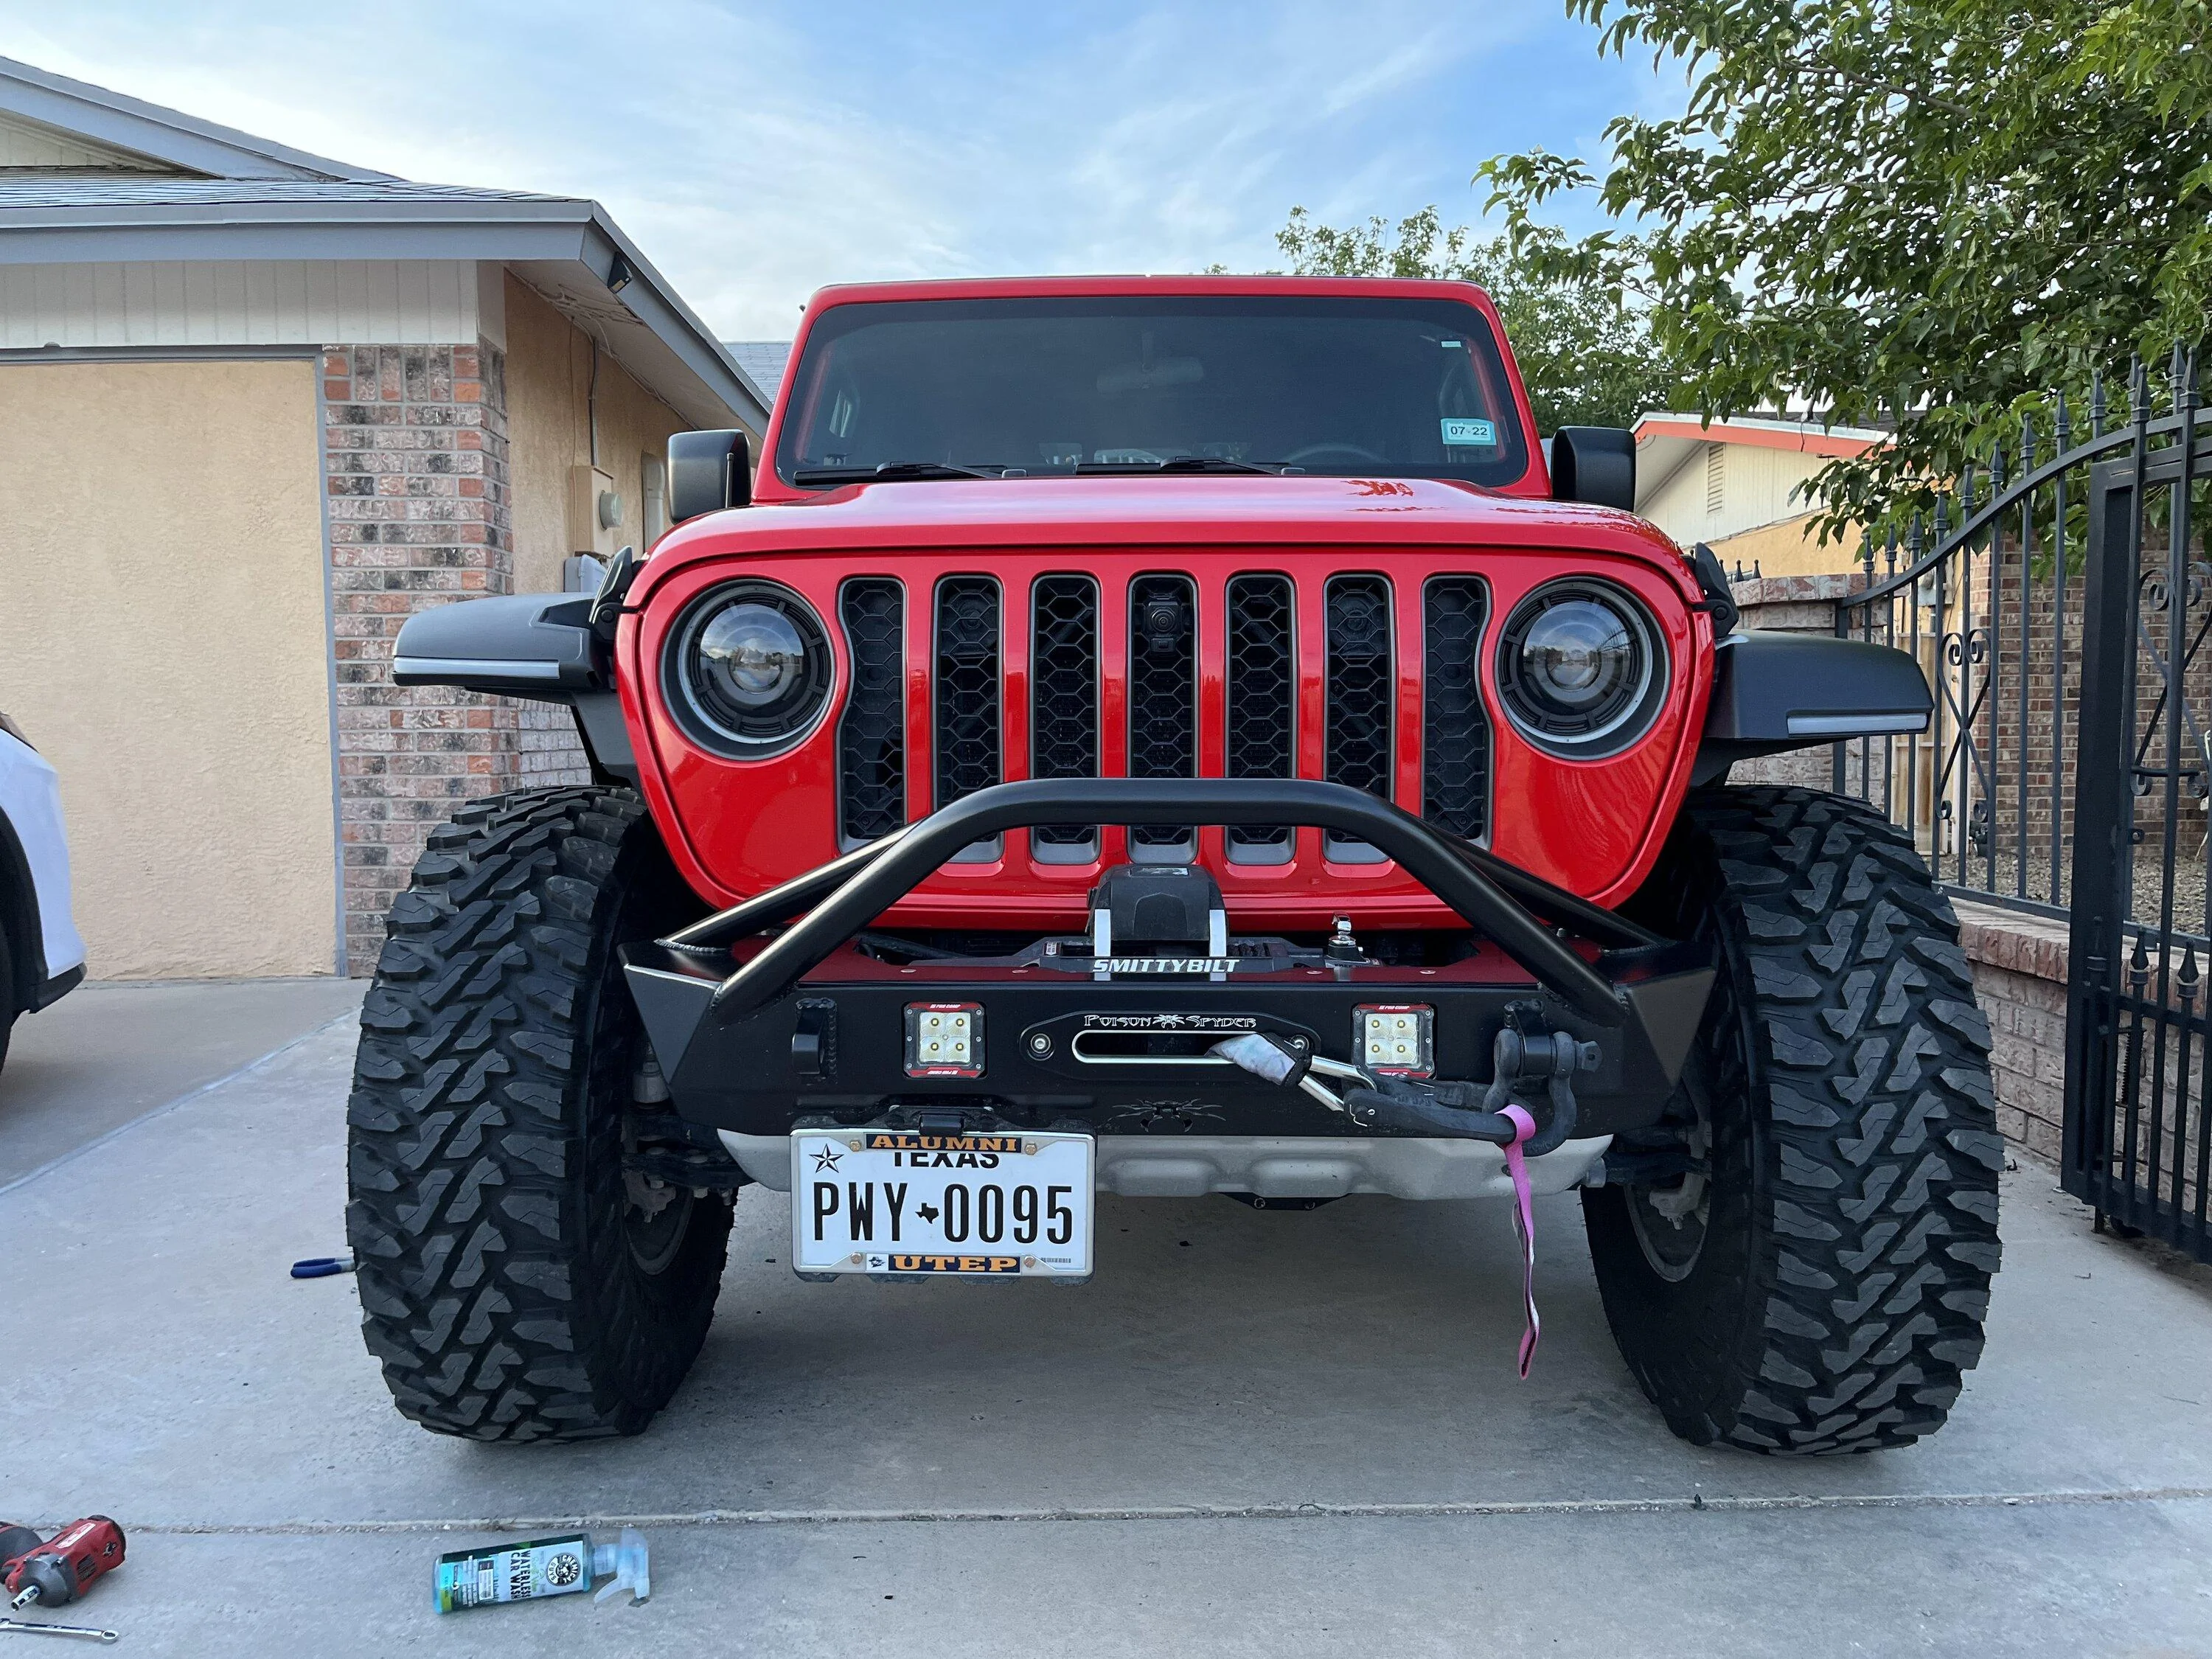
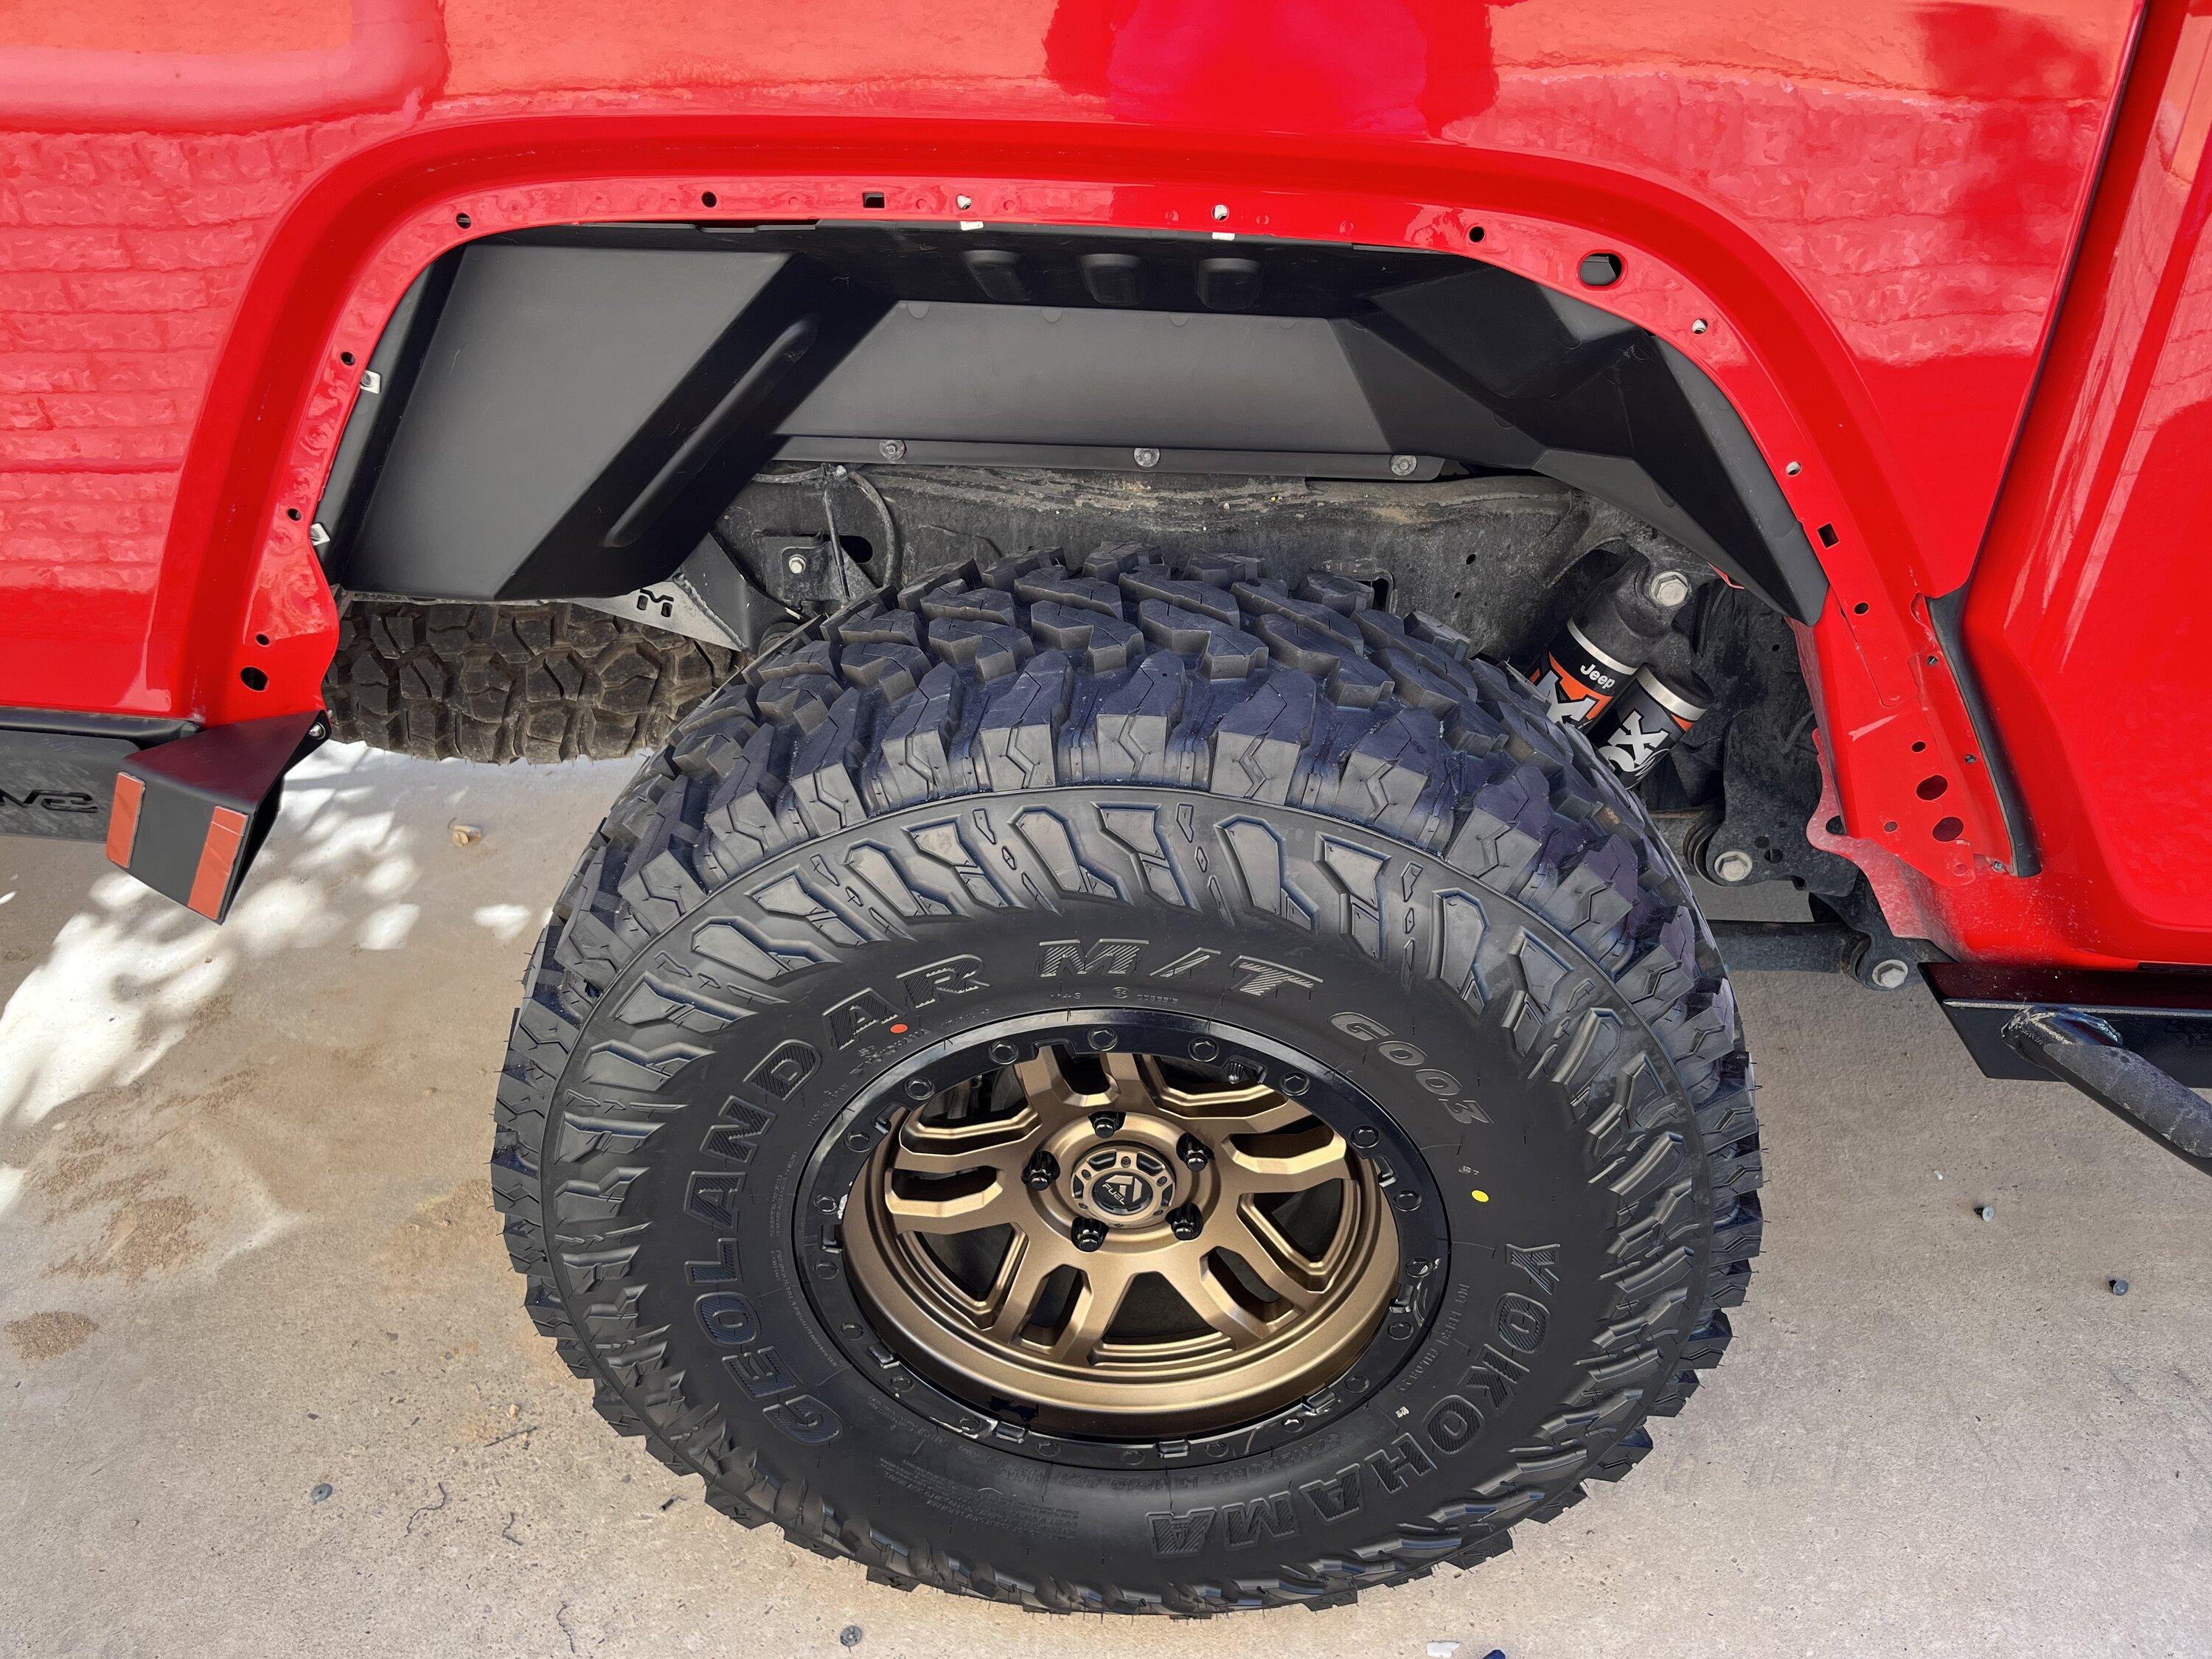
Doing a write up on the Max Terrain flares for the Gladiator as it looks like they've become available since I last checked in March. Just a general walk through/log and some of my thoughts. For the folks out there who just want an idea of what they look like, here's a shot with everything done, there will be more pic's in the write-up. Spec's: 2.5 inch Ready lift, 37x12.5x17 Yokohama Geolander M/T, Fuel Ammo wheels (+1 offset, 5.04 inch backspacing, 9 inch wheel), 2020 Gladiator Sport:

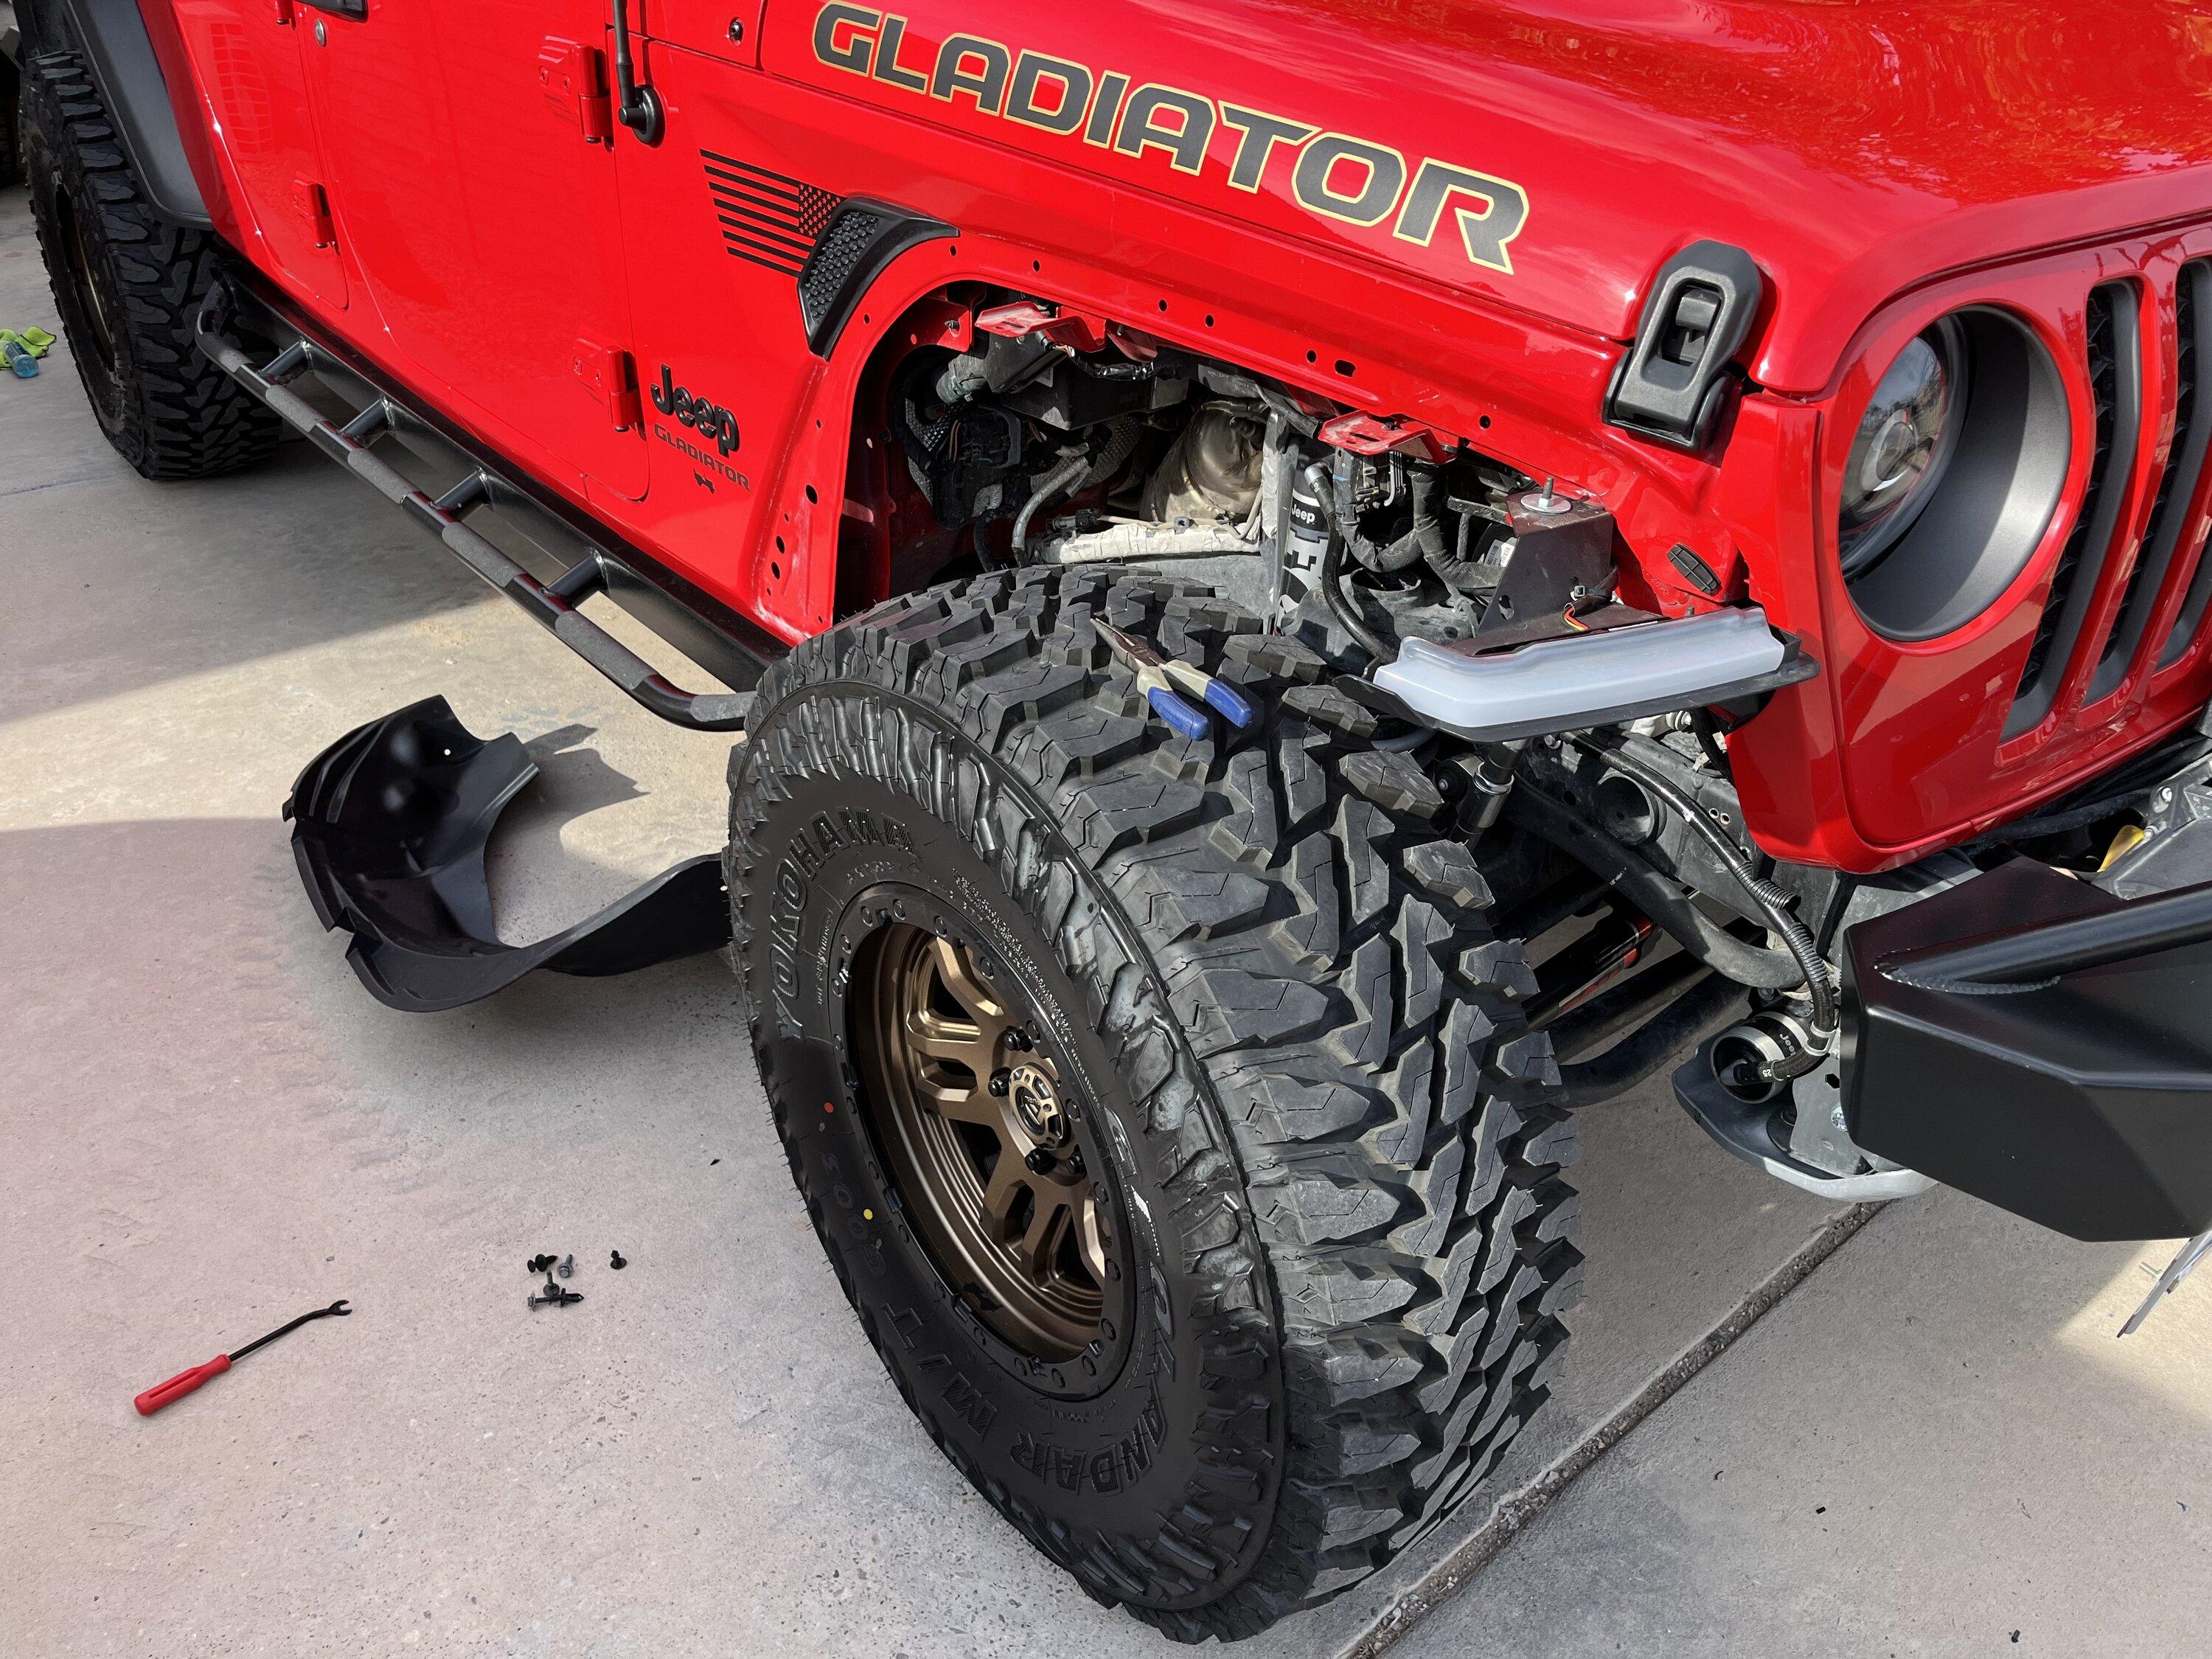
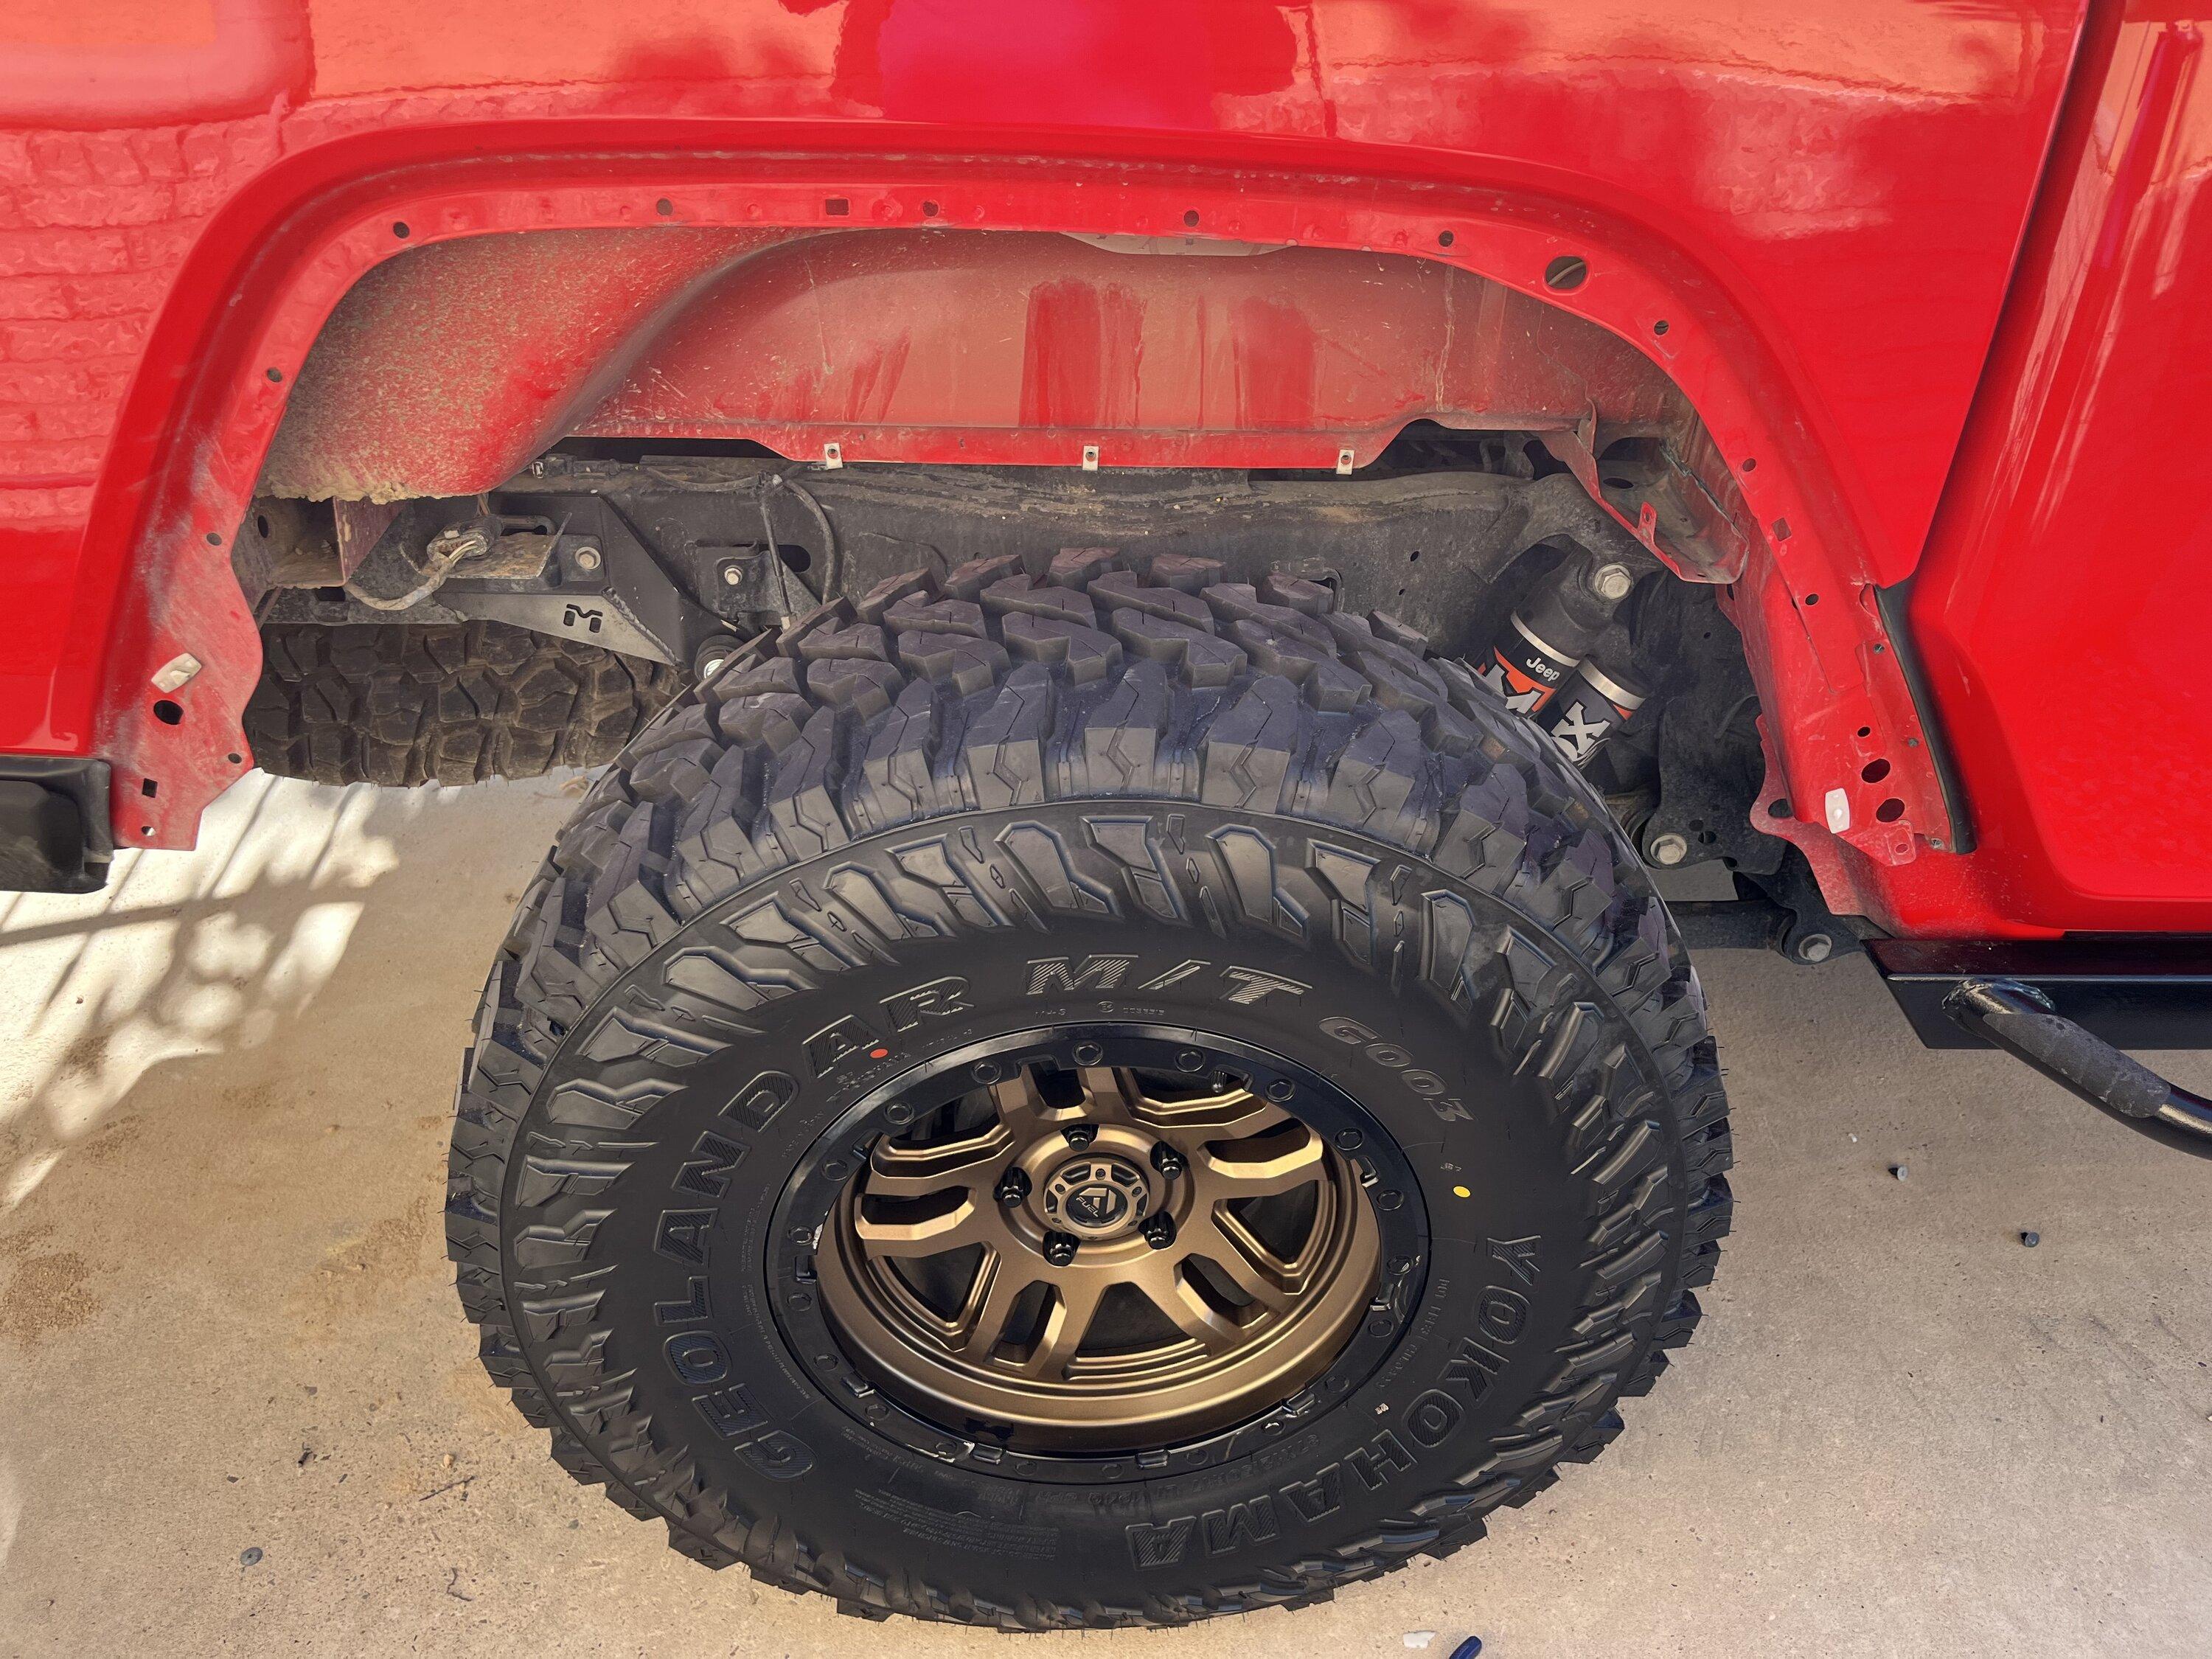
Back to the write up. So with my new set of 37' Geolanders, I quickly realized that no amount of cutting and bending with a heat gun was going to make my Sport flares work. Tires are too big, and my wheels have too much backspacing/offset, sitting way past the edge of the factory flares:
So I pulled the trigger, 600 bucks after the rebate and slight discount. Comes with a set of front and rear flares, rear fender liners, a set of LED switchback marker lights, and all the brackets and hardware to make it work. My set was missing the 12 M6 U-Nuts needed for the rear liners, however I was able to steal the ones on the factory fender flares with a flat head screwdriver. Not a fan of the provided button head Allen bolts, too easy to strip, would have preferred hex bolts.
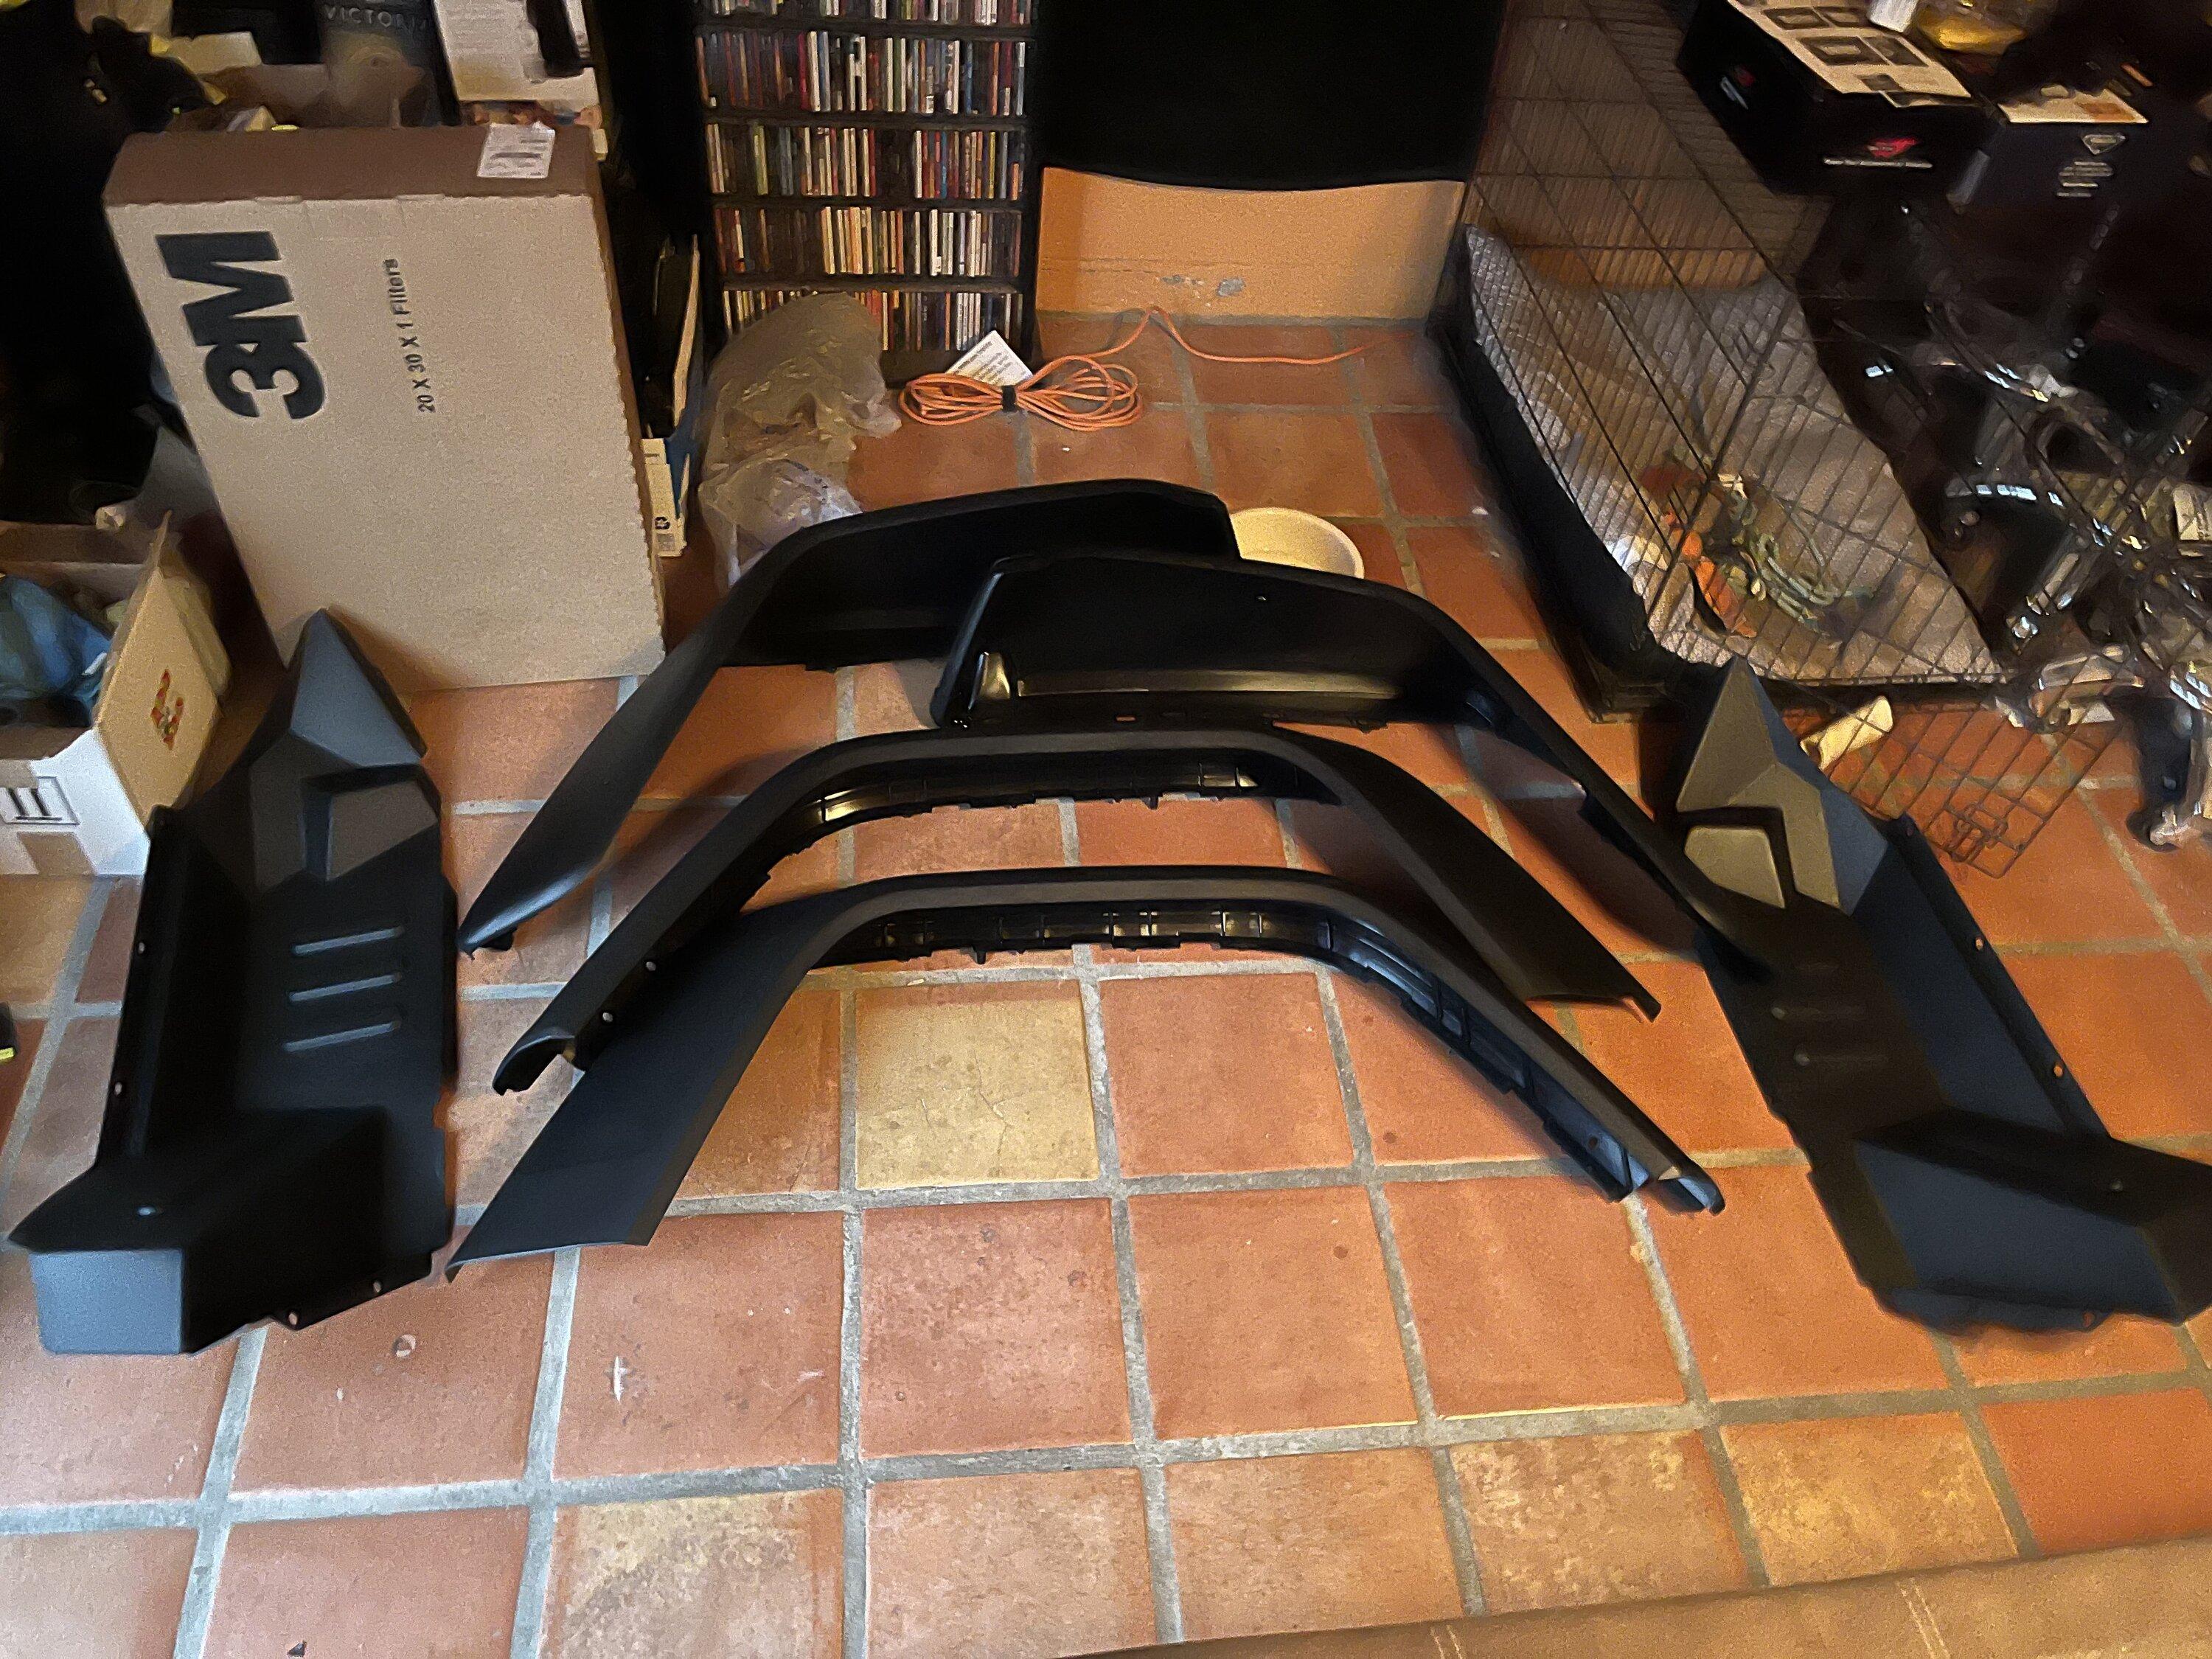
This install was surprisingly labor intensive, took me Friday afternoon after work, some prep work that night to get ready to finish the next day, and about 5 more hours Saturday morning. Also, they don't include a set of front inner liners, instead wanting you to trim the factory front liners, but in my opinion, this looks cheap and unfinished, so I kept the set of Paramount front liners I already had installed. Minus half a point for those two things. A photo of the flares in a slightly messy workspace:
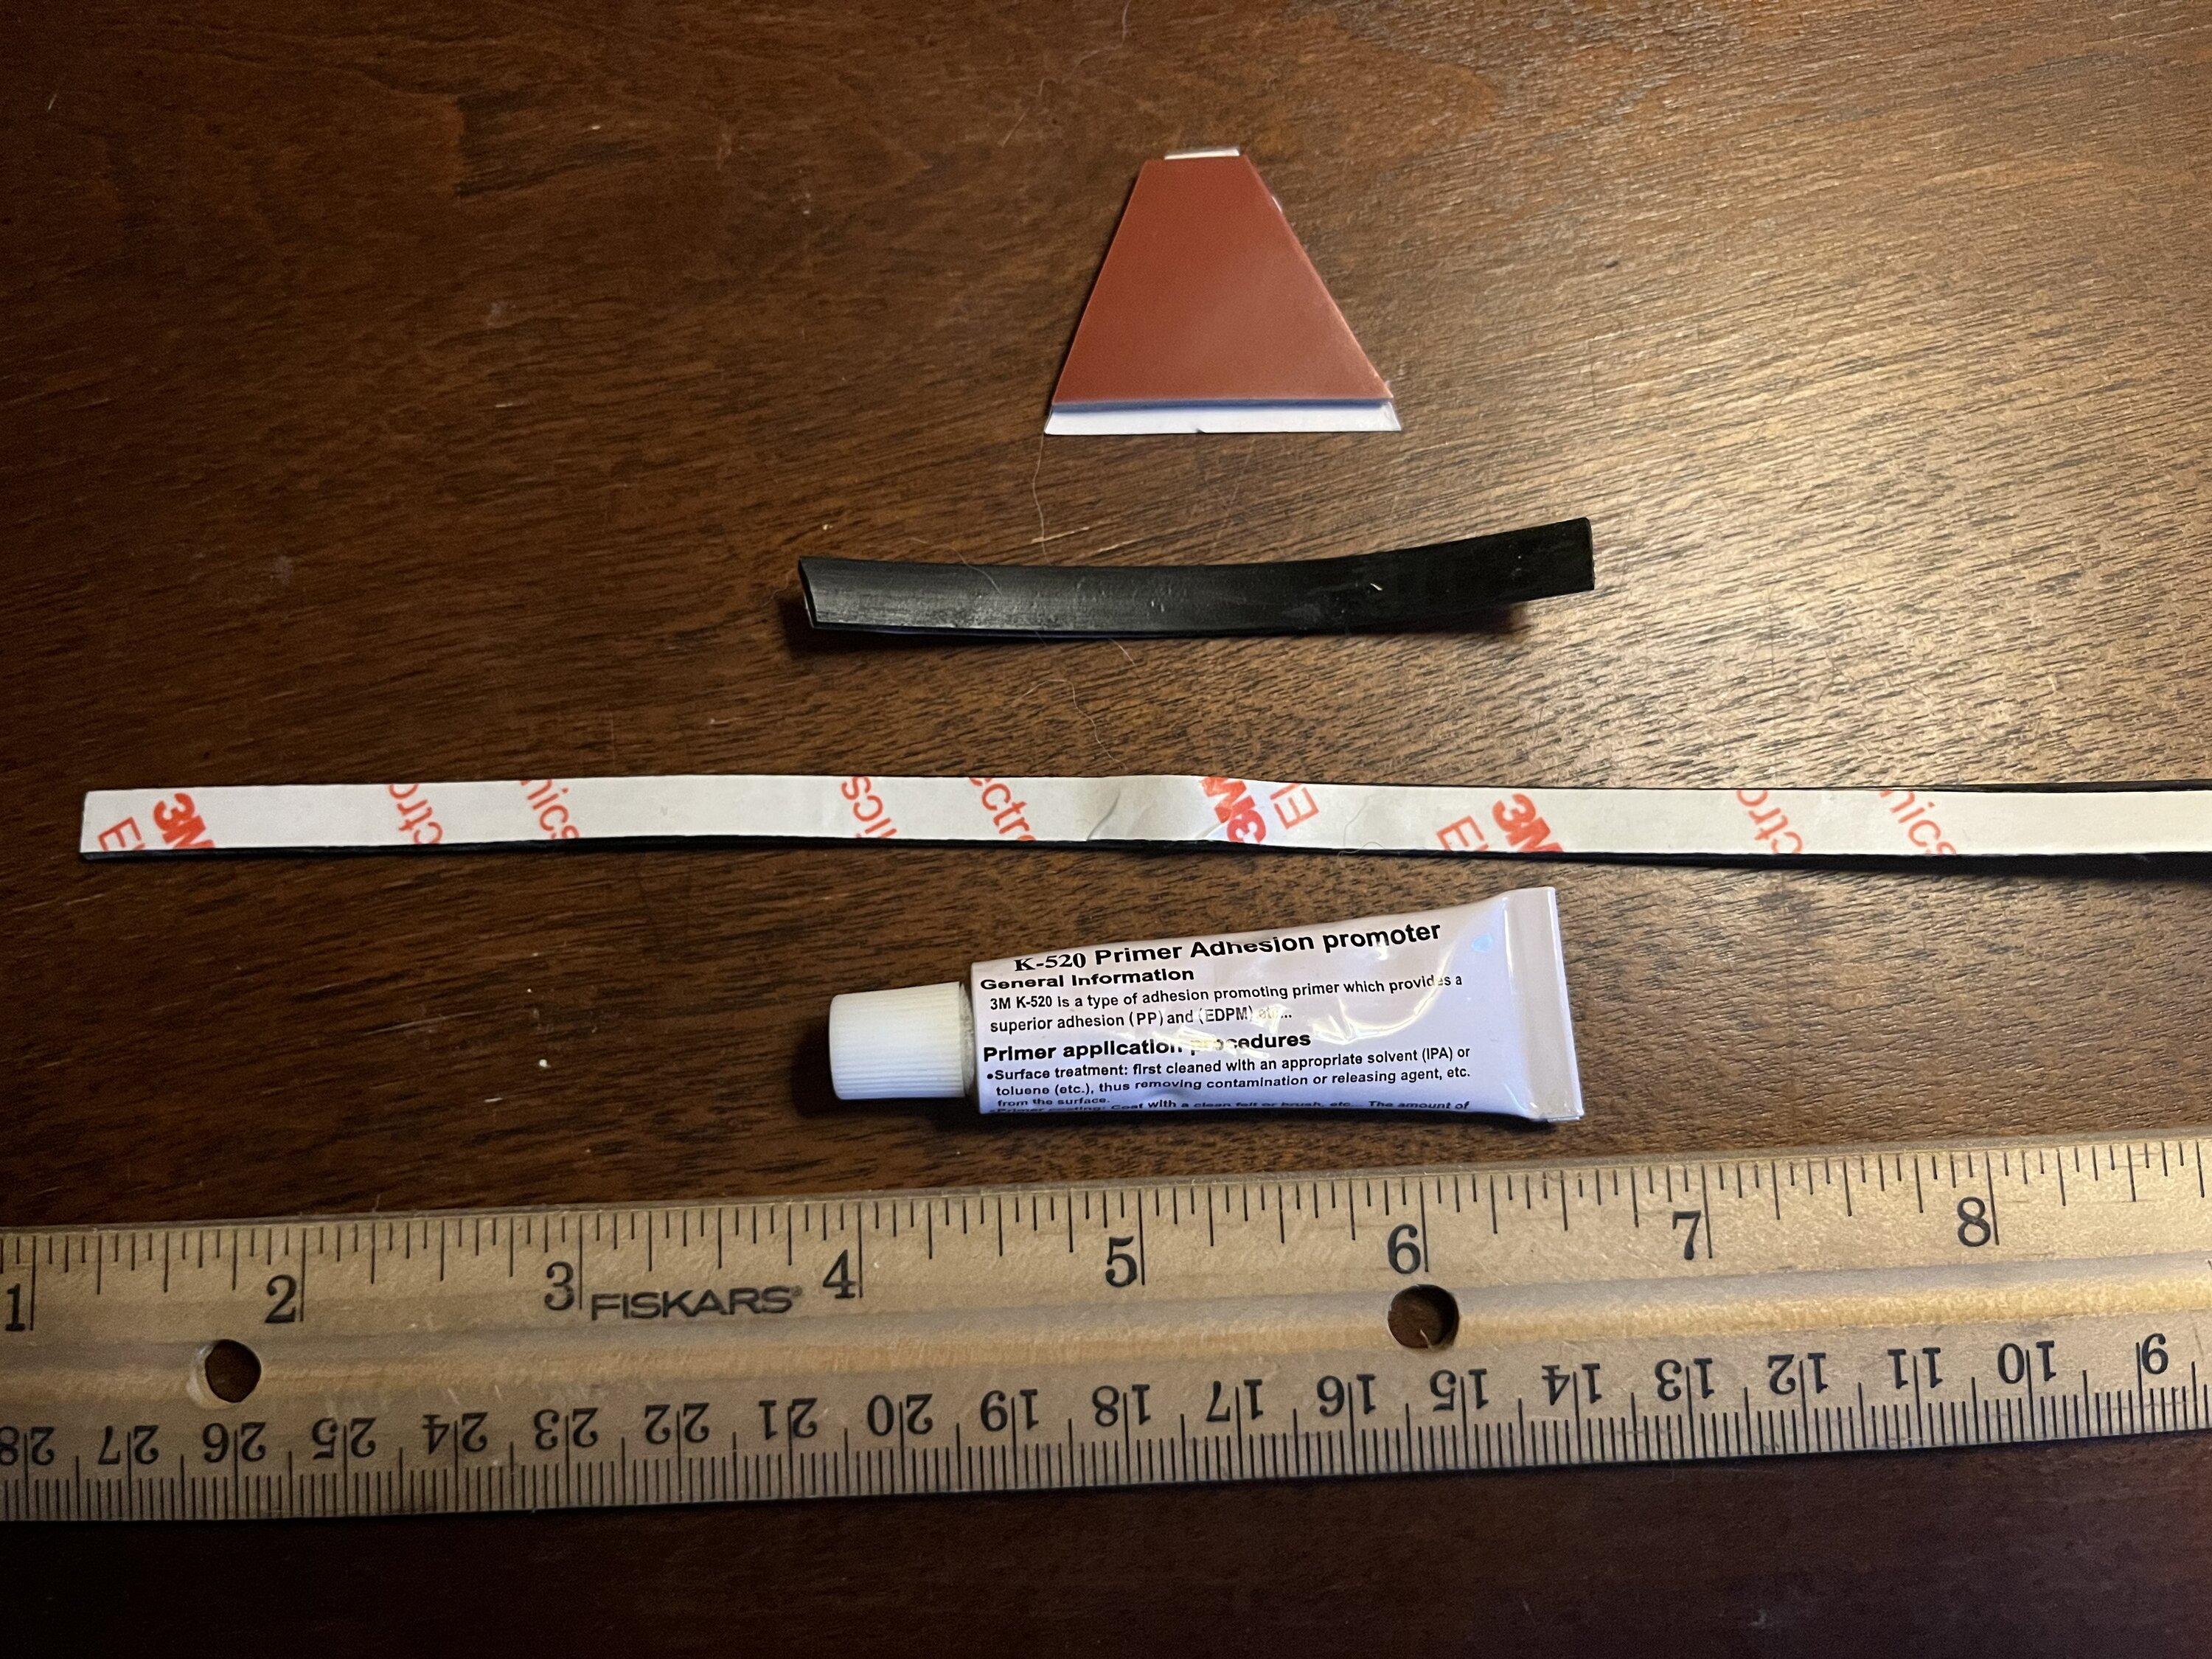
Next was prepping the fenders for install, these new finders sit higher on the body, in order to provide more clearance. In order to protect the paint, RR provides "Trim Foam". What I got was 3M rubber weather stripping (same thing right?). This needs to be hand applied to the contacting edge of each fender, with some provided adhesion promoter (be careful with this stuff, its pretty runny). This stuff is also used to hold the double sided tape used for some of the supporting brackets. This all took about an hour. Here's a photo of some of the left overs.
Now back to the truck, first things first, pulling the factory flares off, which I had cut to fit the RR chop light kit. There's a ton of reviews/videos on how to do this without hurting your paint, so I won't go into the details:
Next was attaching the front flare with the provided clips in the kit, although I would consider picking up spare clips, or upgrading to a set of retention hardware from American Adventure Lab. I have seen some people paint these flares, they require some prep work as they are textured, which can show through the paint. I personally prefer unpainted flares, although if these fade in a few years like most plastics do in the sun out here, I may either paint them body color, or most likely I'll bedliner them.
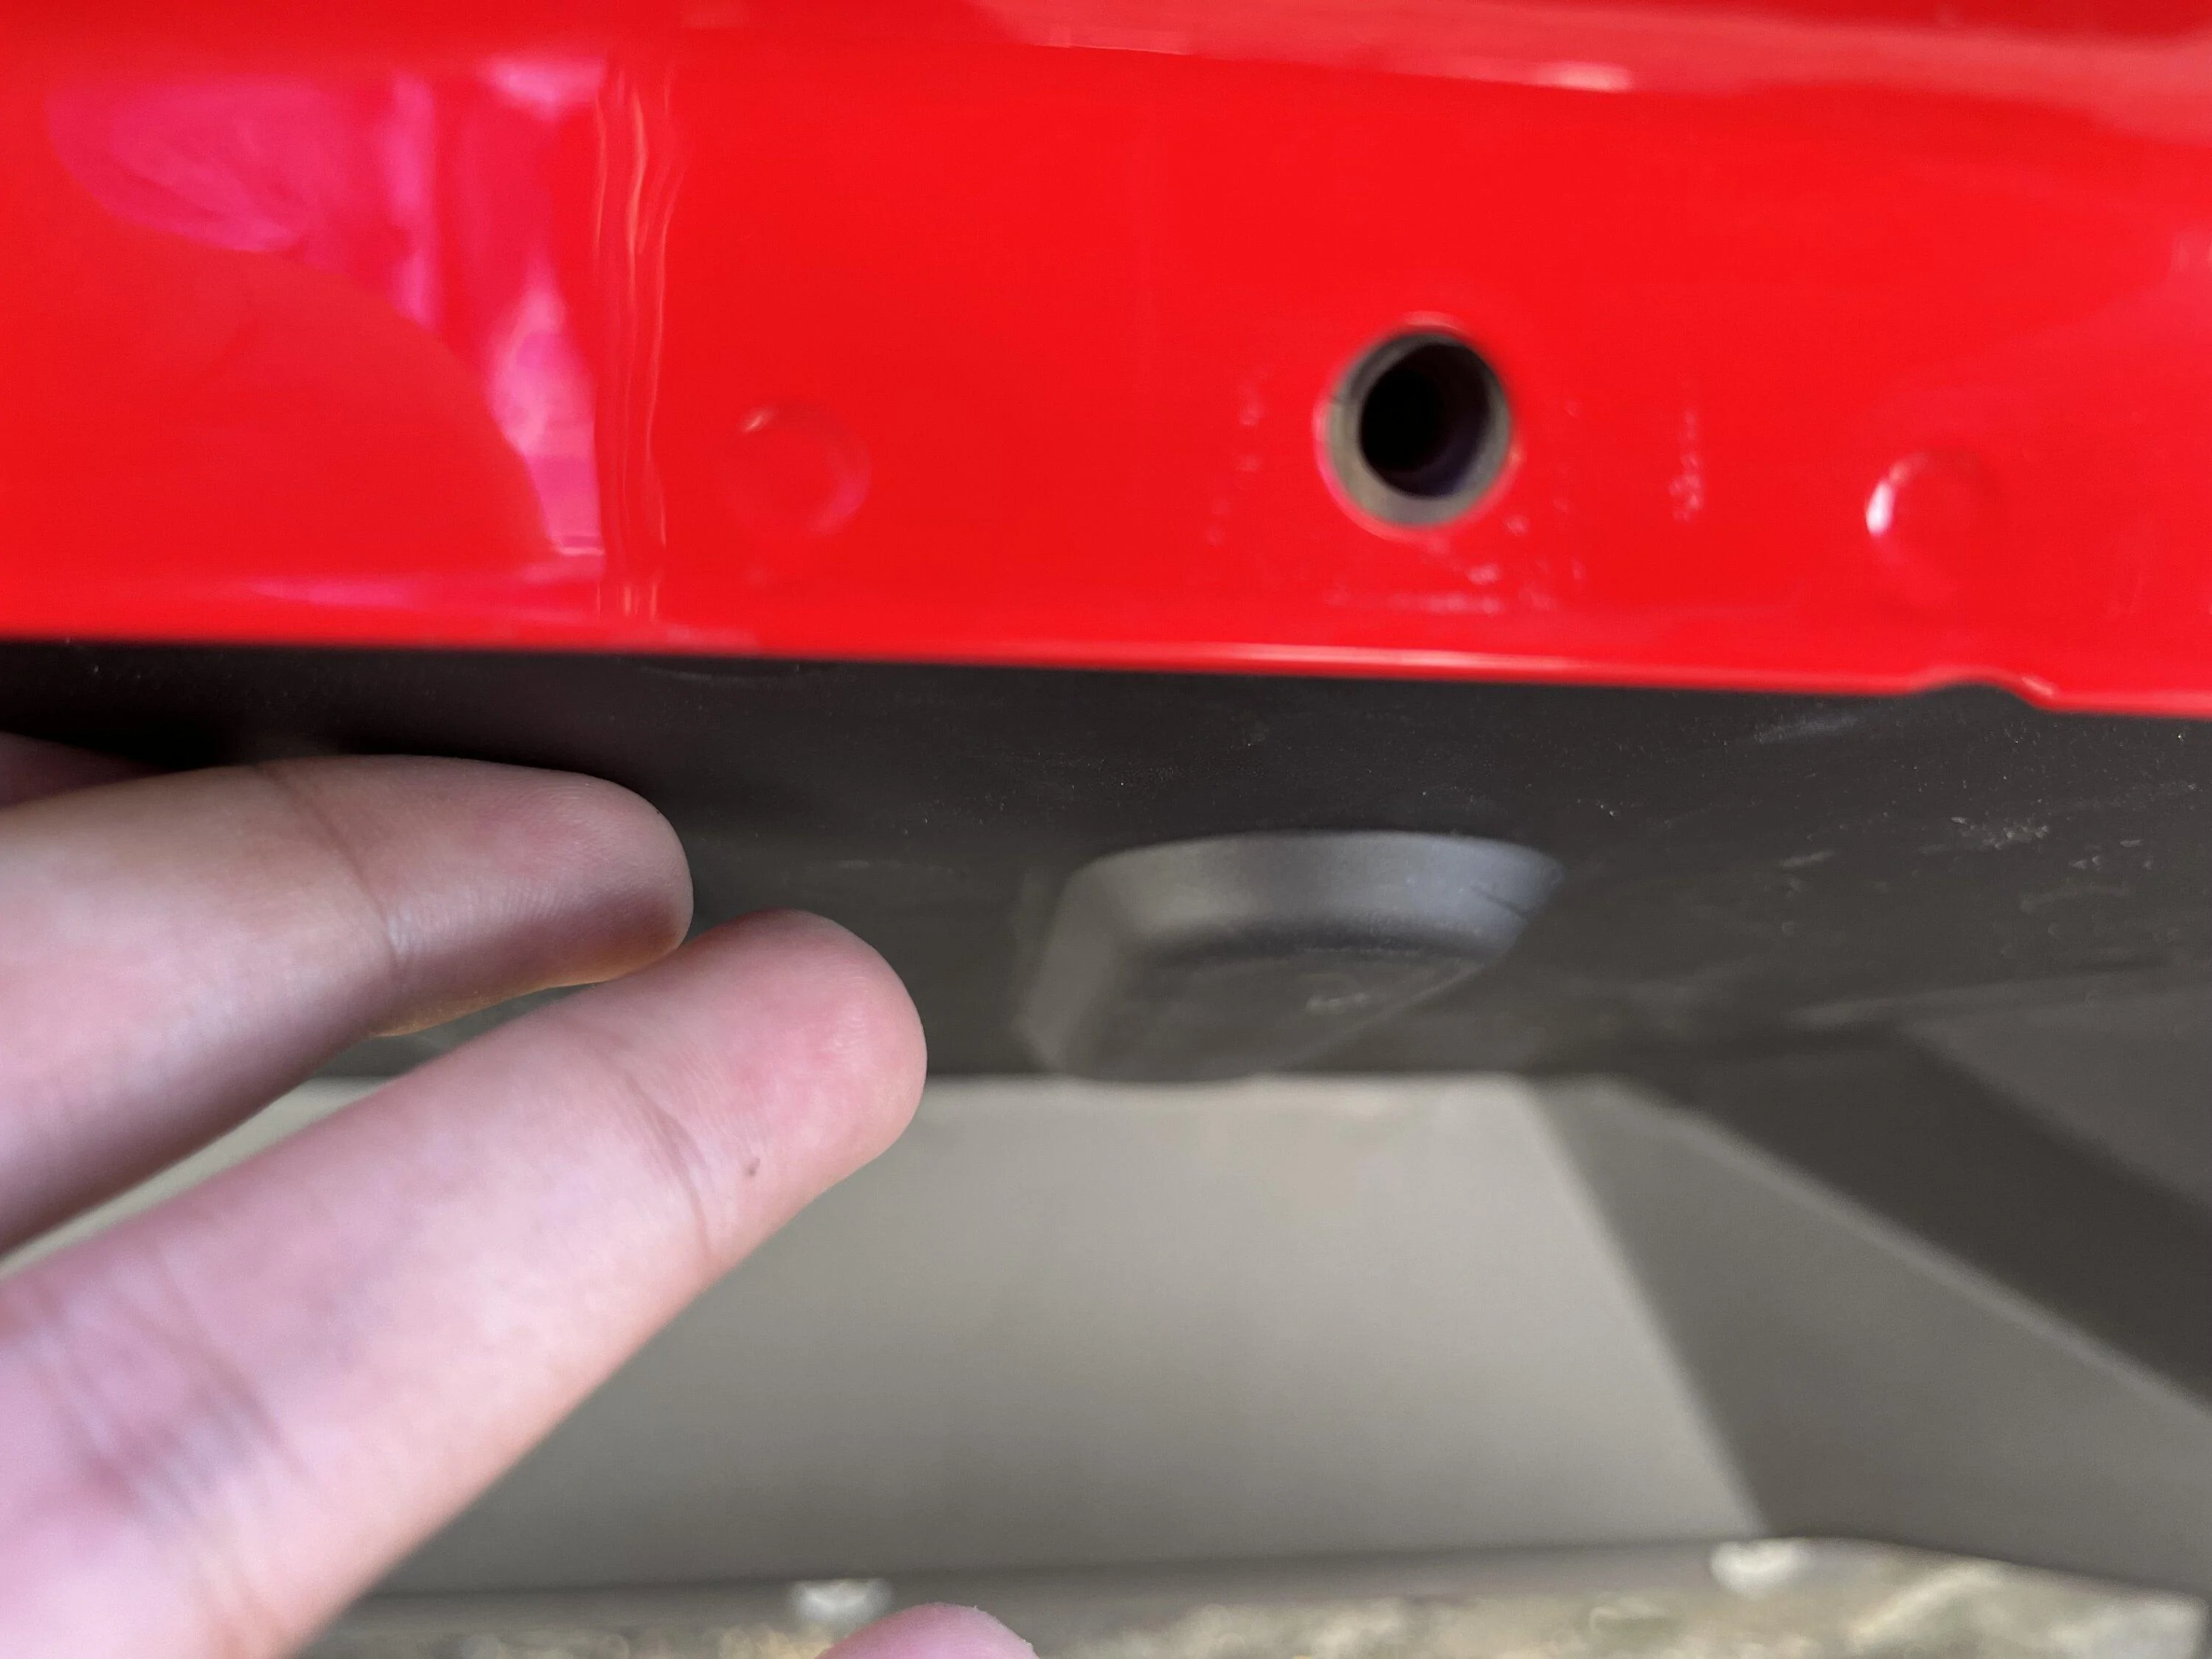
Here's my only major complaint about this product. For some strange reason, they omitted two clips on the front flare. This leaves this section unsupported even after all other supports have been added, and results in the flare not sitting flush to the body in this section. An additional support brace would fix this issue, I will have to make something in the 3D printer. For now some adjustments on both the front and rear bracing gets them close enough, although they're still wobbly if you press onto them on that side.
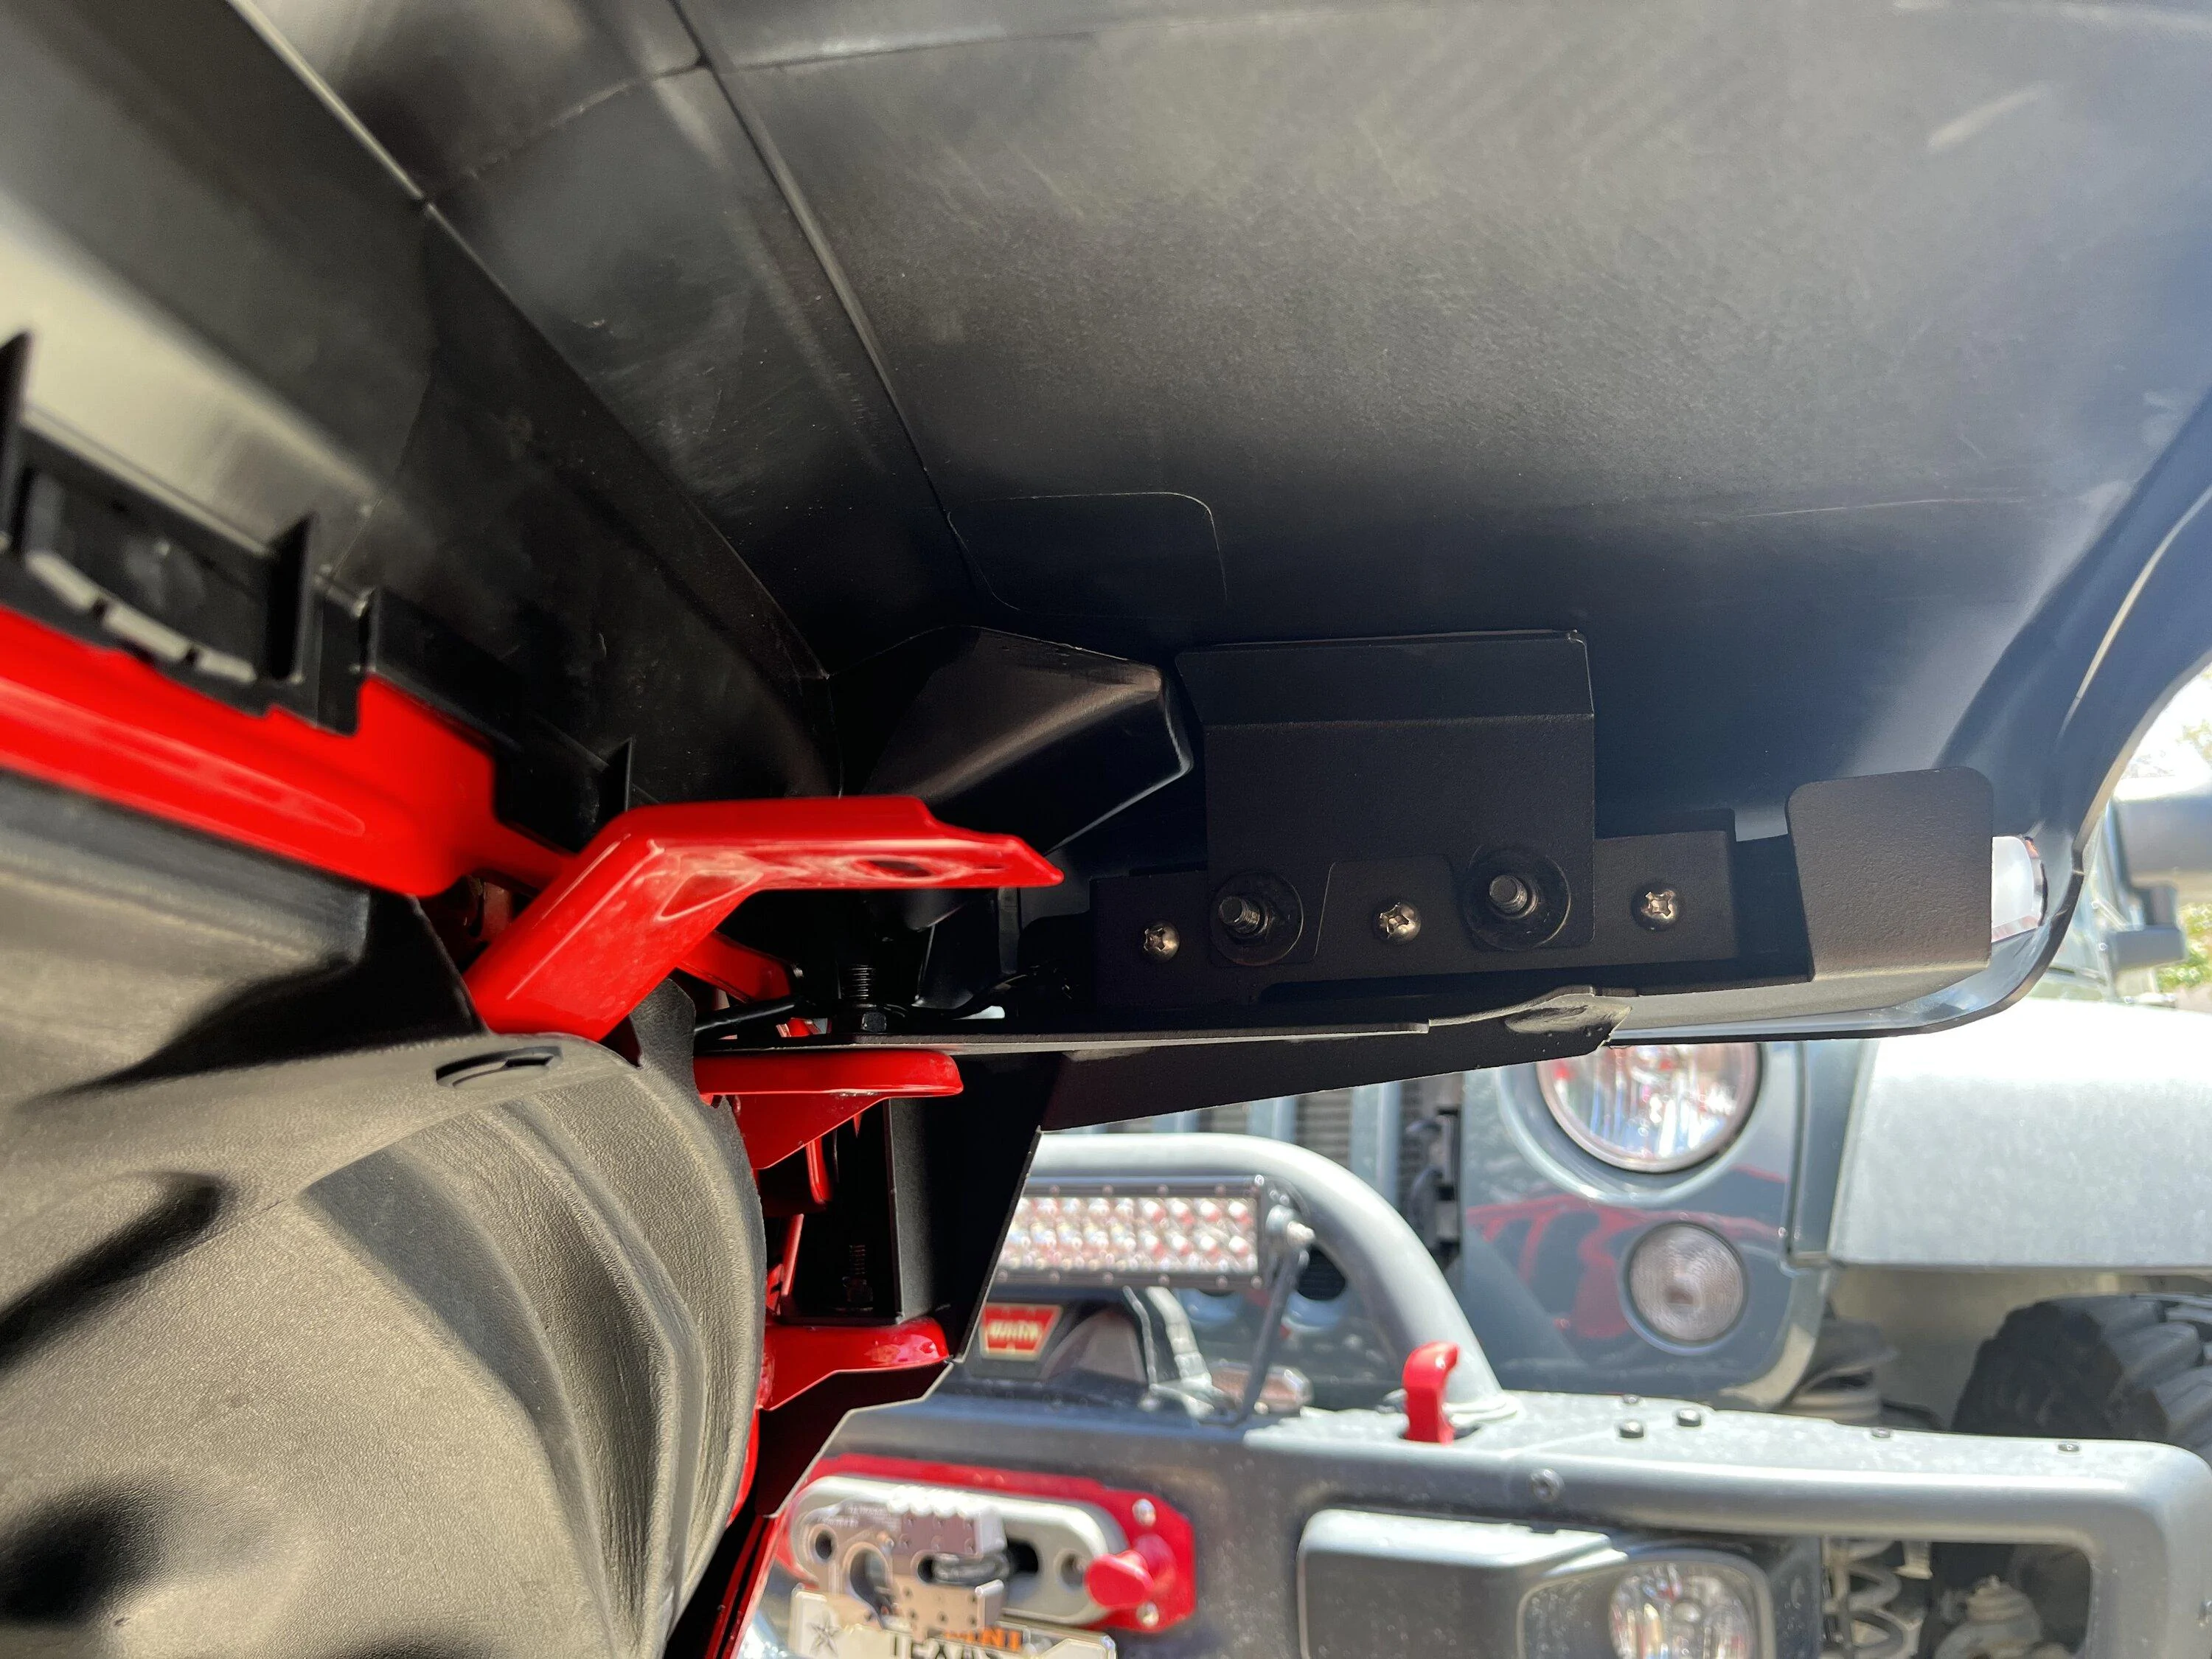
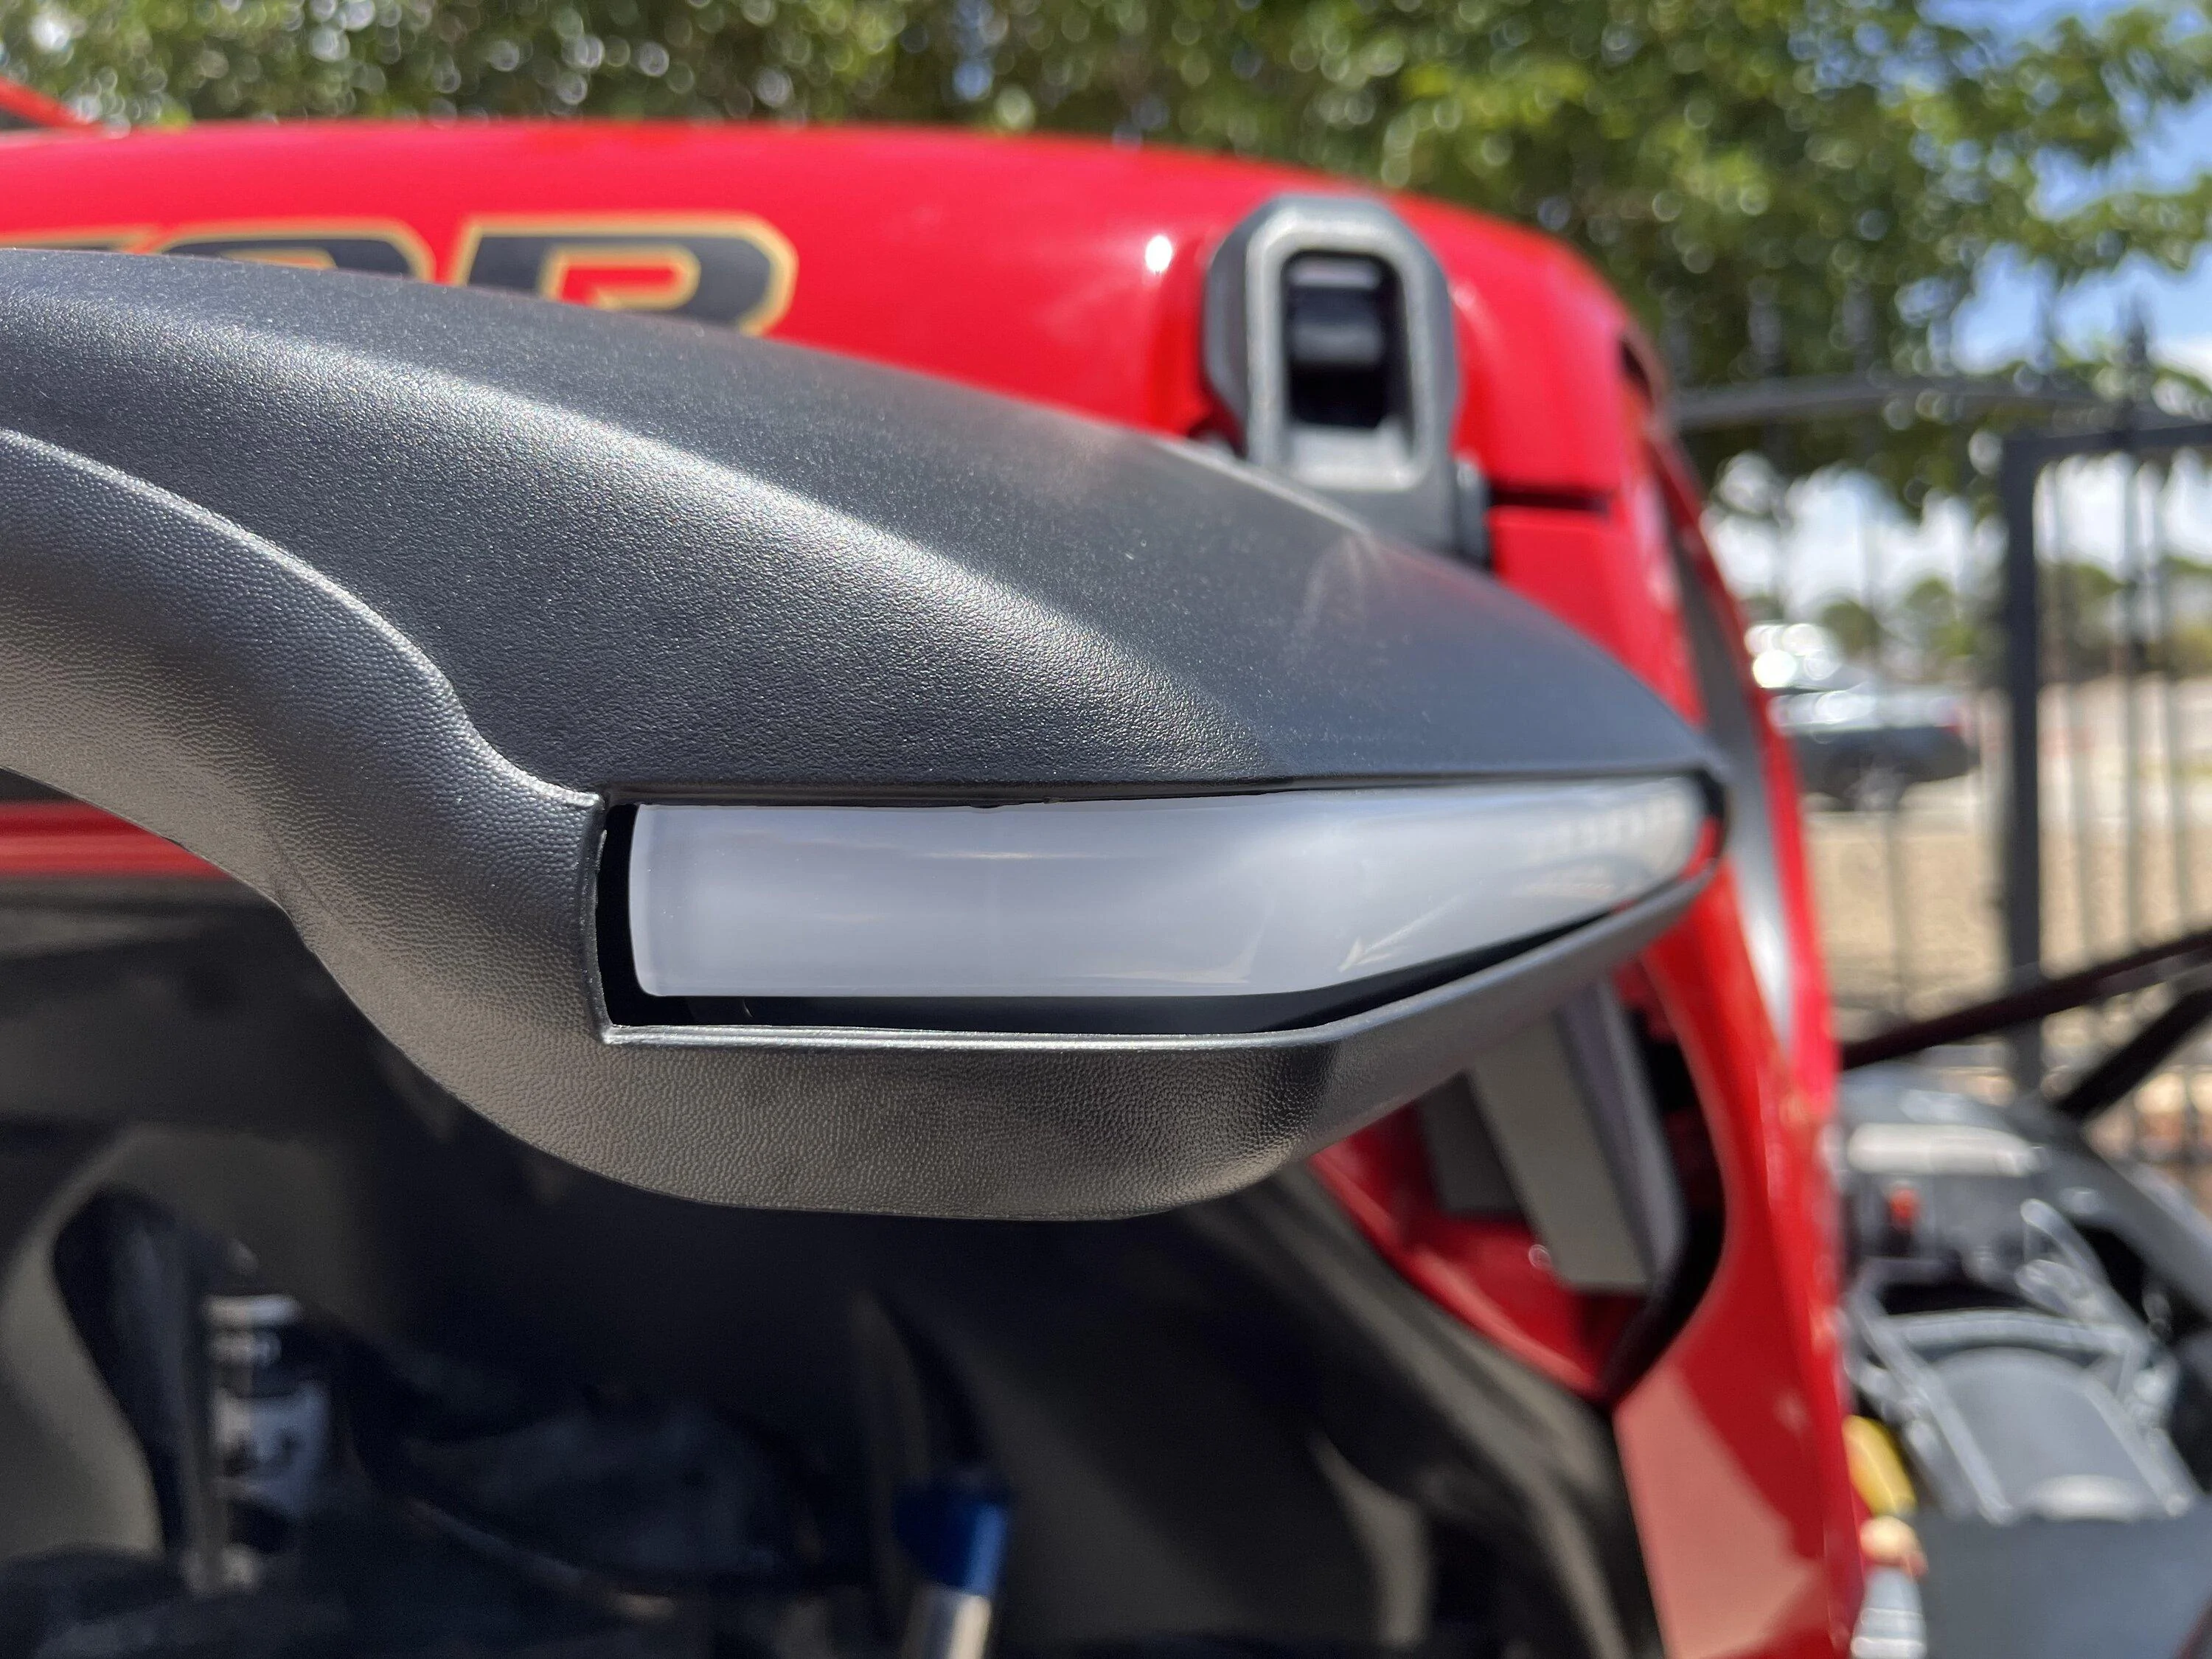
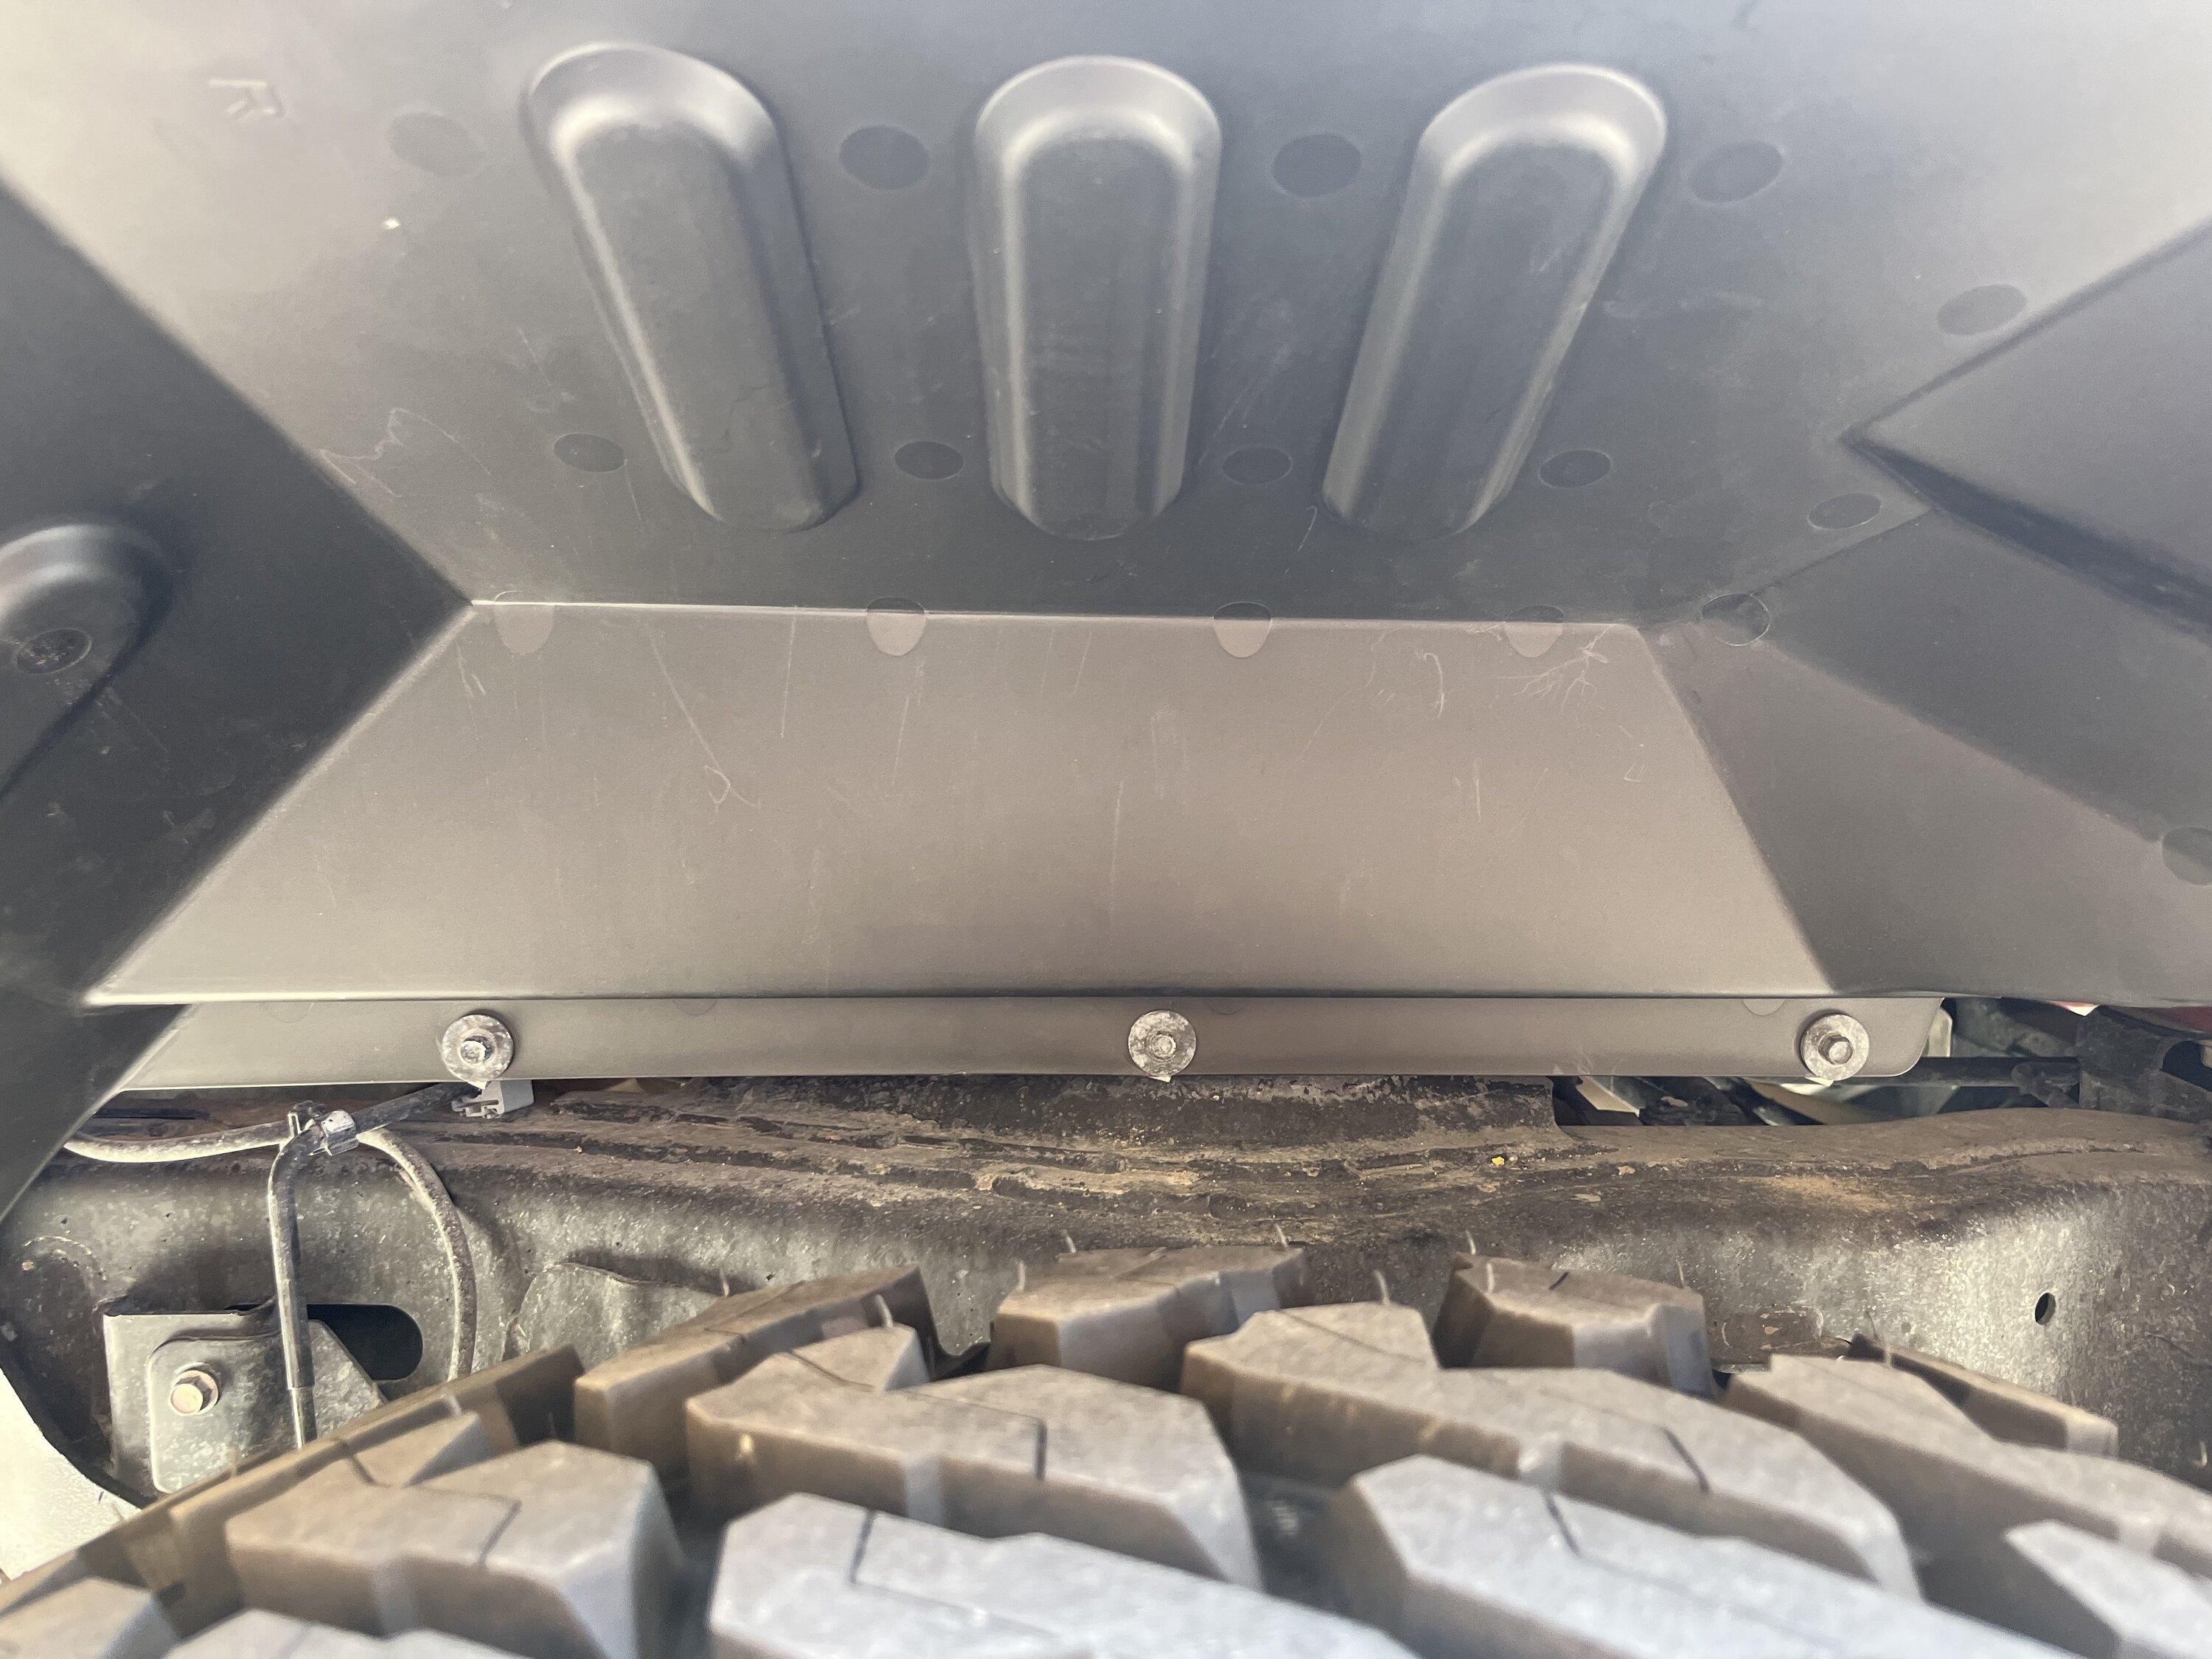
Now some details on the LED marker lights, it comes with a set of instructions on how to wire it based on your setup, I chose to wire it in the factory LED configuration as I have a Tazer and was able to reprogram my truck. The light bracket also provides support to the front of the flare, and required lots of adjustment, even then, it is still doesn't have as nice fitment as I would like. Note the bracket which uses some of the double sided tape to hold to the flare, which you then use the hardware to press against it to apply pressure so the tape sets. If this tape fails and my flare starts flapping in the wind, I'll probably attach it using some plastic bond. One more thing that I wanted to note, the metal tab of the bracket that reached out to the grill stuck out too far and was actually sitting on the paint. In addition, the notch to accommodate the plastic reinforcement from the grill was slightly off. A quick correction in a vice for the bracket, and a small notch on the back plastic for the grill fixed these issues.
*When tightening up the lights to the provided light support brackets, be VERY CAREFUL with how tight you put the mounting screws. The silver ones in the above photo.
Rugged Ridge, in their infinite wisdom, opted to have you use self tapping screws instead of having the light housing already tapped for a standard bolt/screw. Since these housings are plastic, and the self tapping screws are larger, they split as I ran them through. I repaired mine with some JB Plastic weld, but this is a lazy design decision that damages the product during normal installation. If you can find different hardware that will work, I HIGHLY suggest that route, or you can try to reinforce the plastic housing with something like hose clamps.
The rear support brace was then added, which uses more double sided tape to hold the flare in place (it was here I managed to strip one of the hex bolts, had to use the factory hardware I had taken off as a replacement). The front liners were reinstalled:
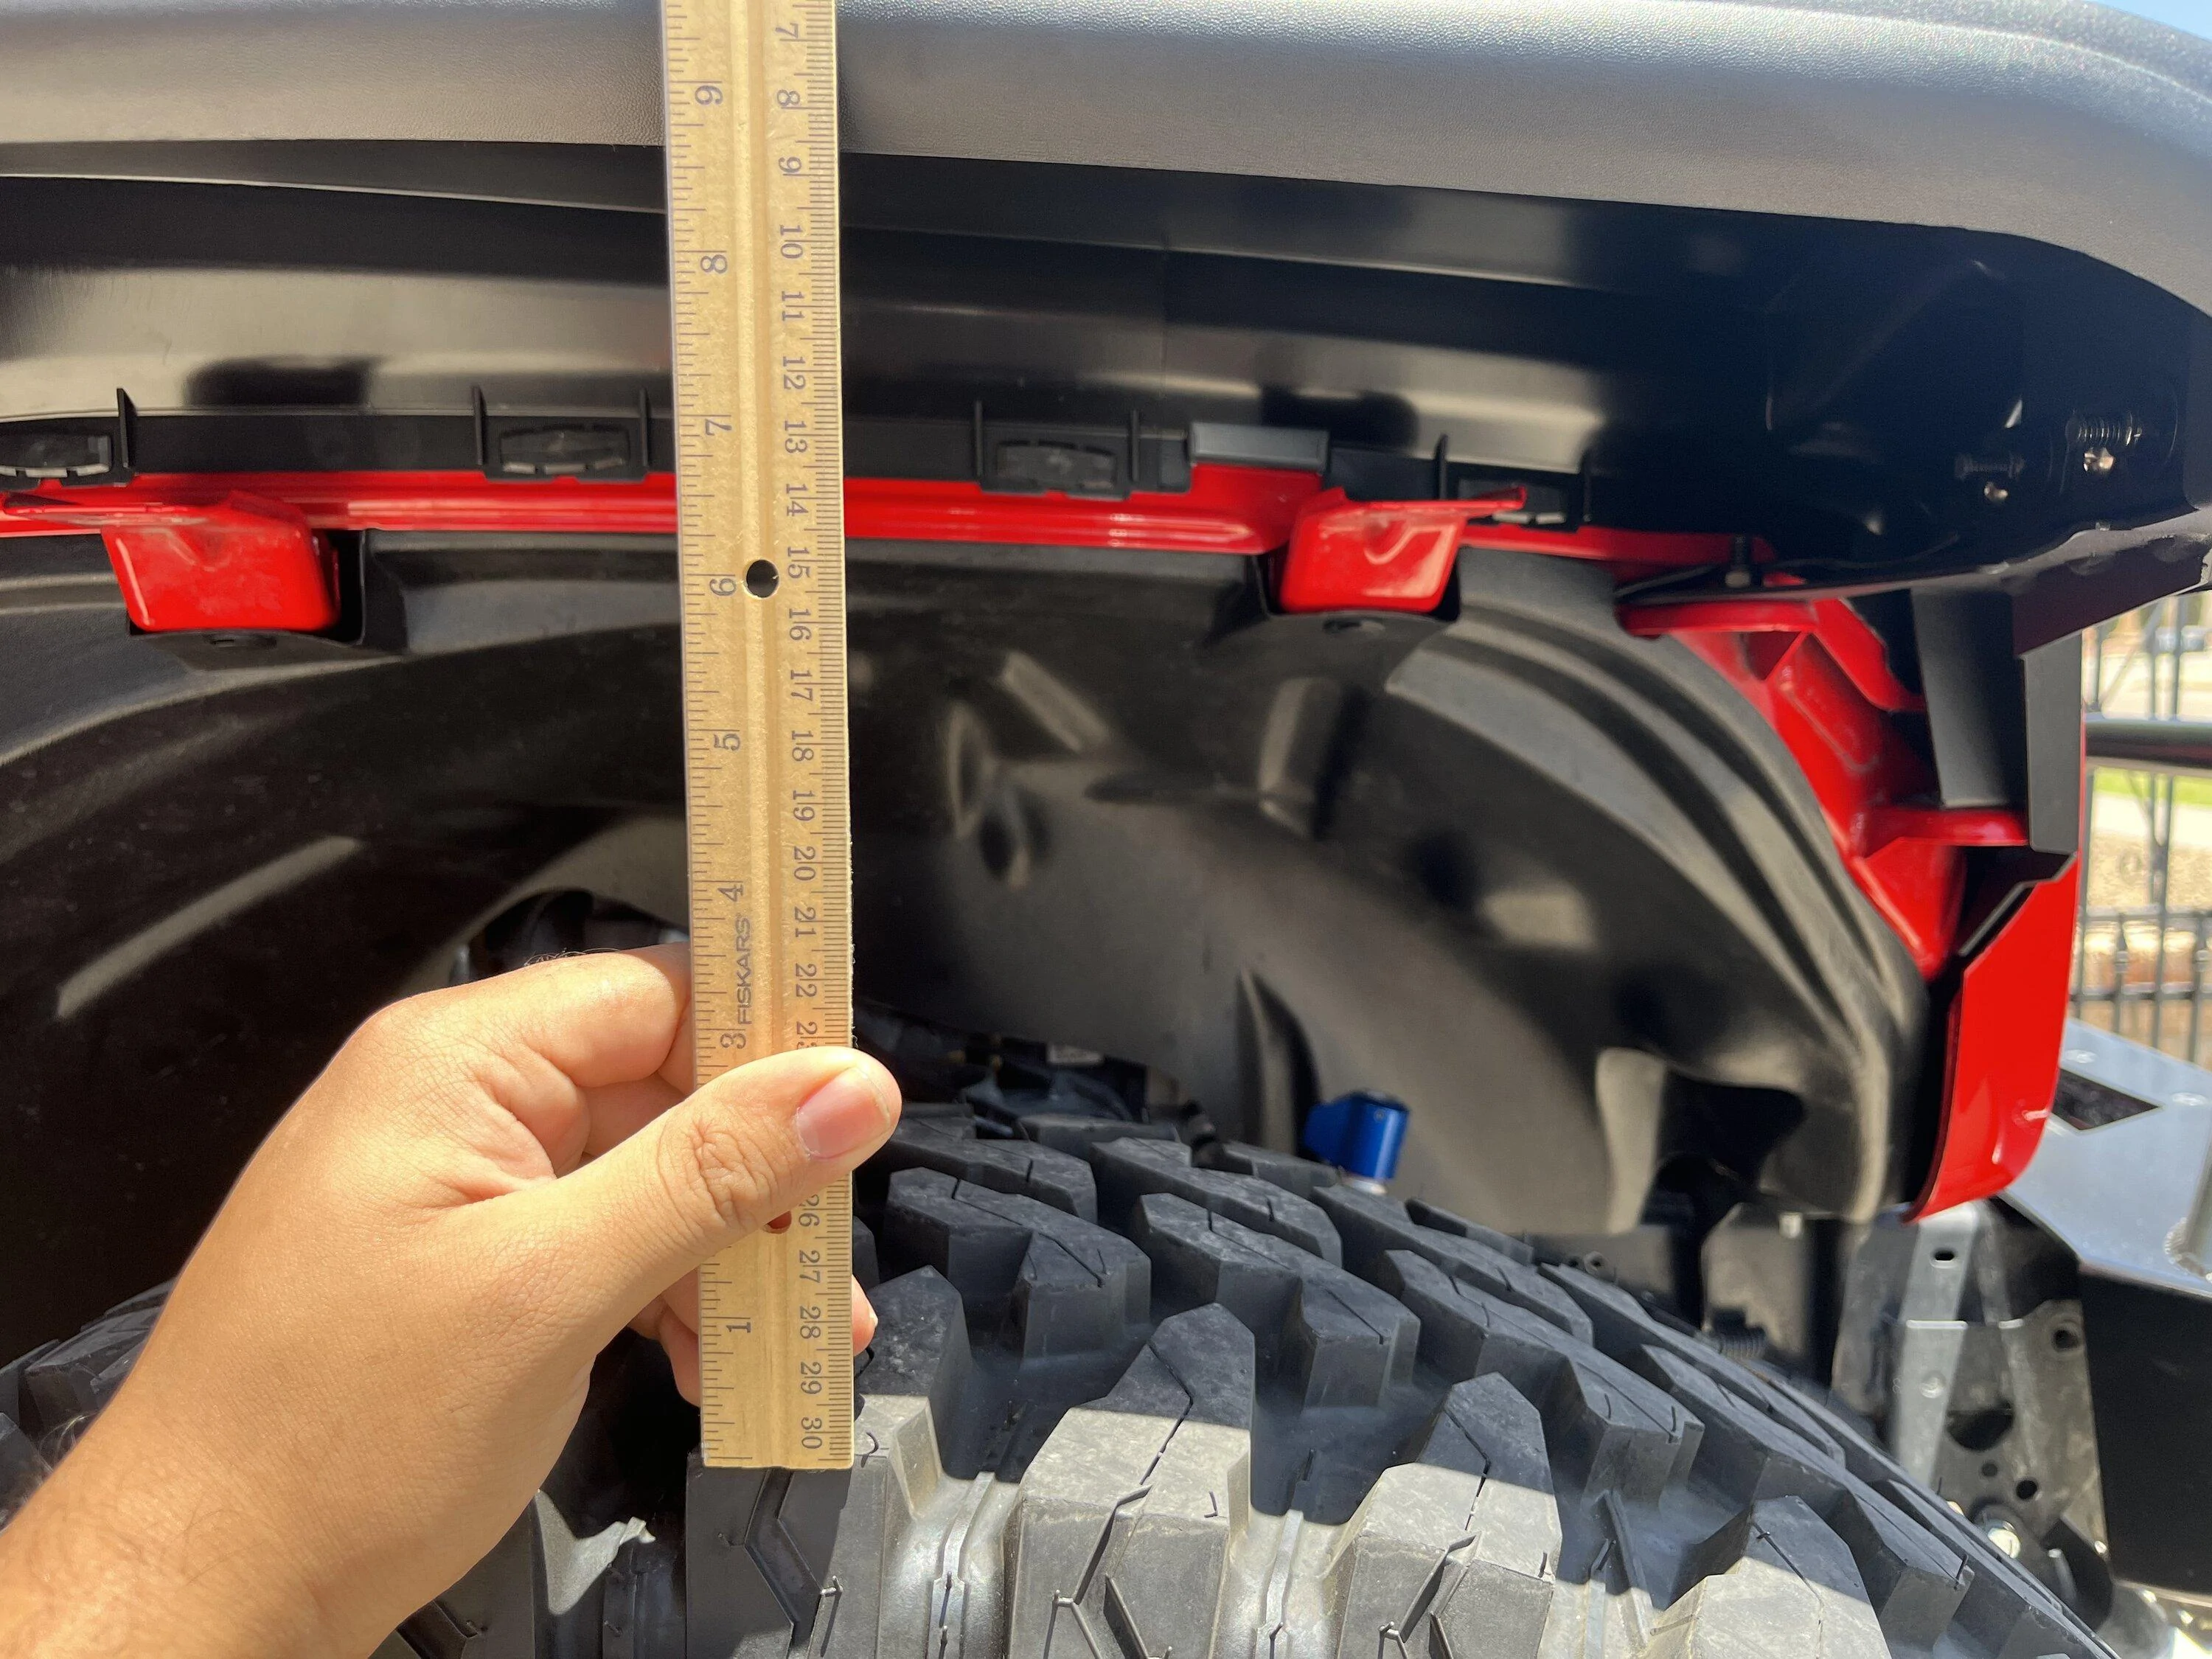
A side by side shot of the new flare and the old one, I gained about 4 inches of clearance!
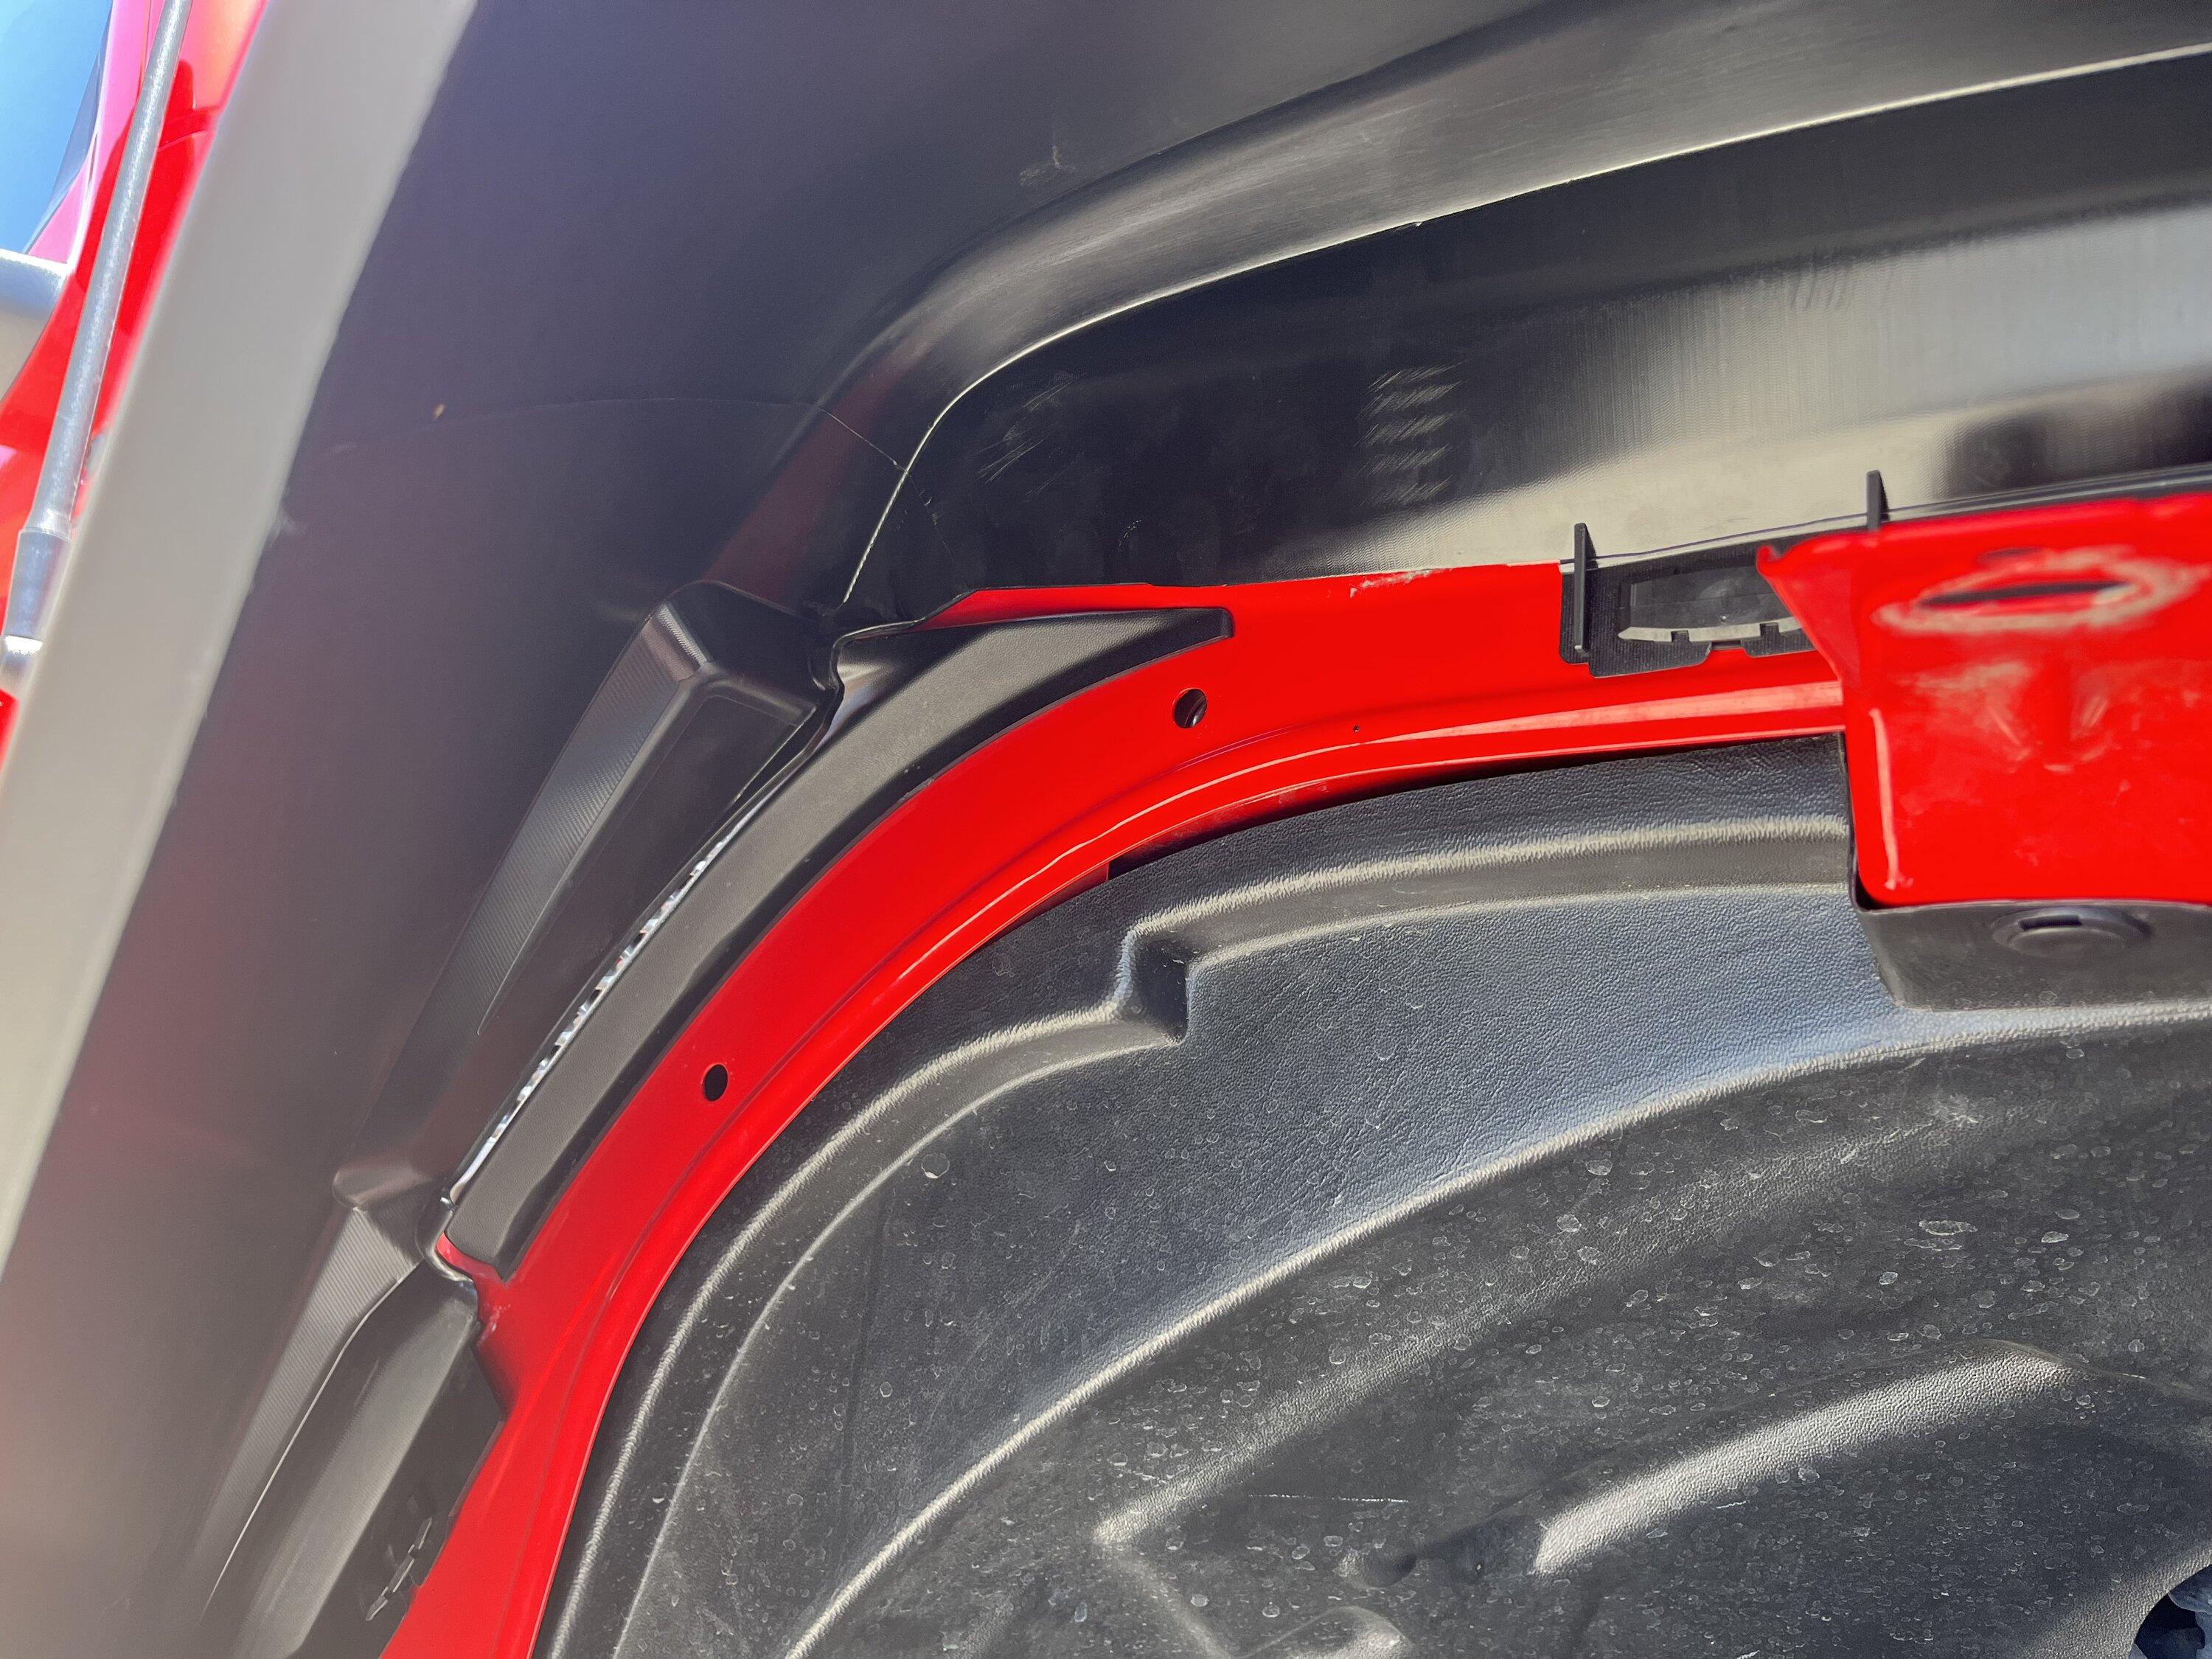
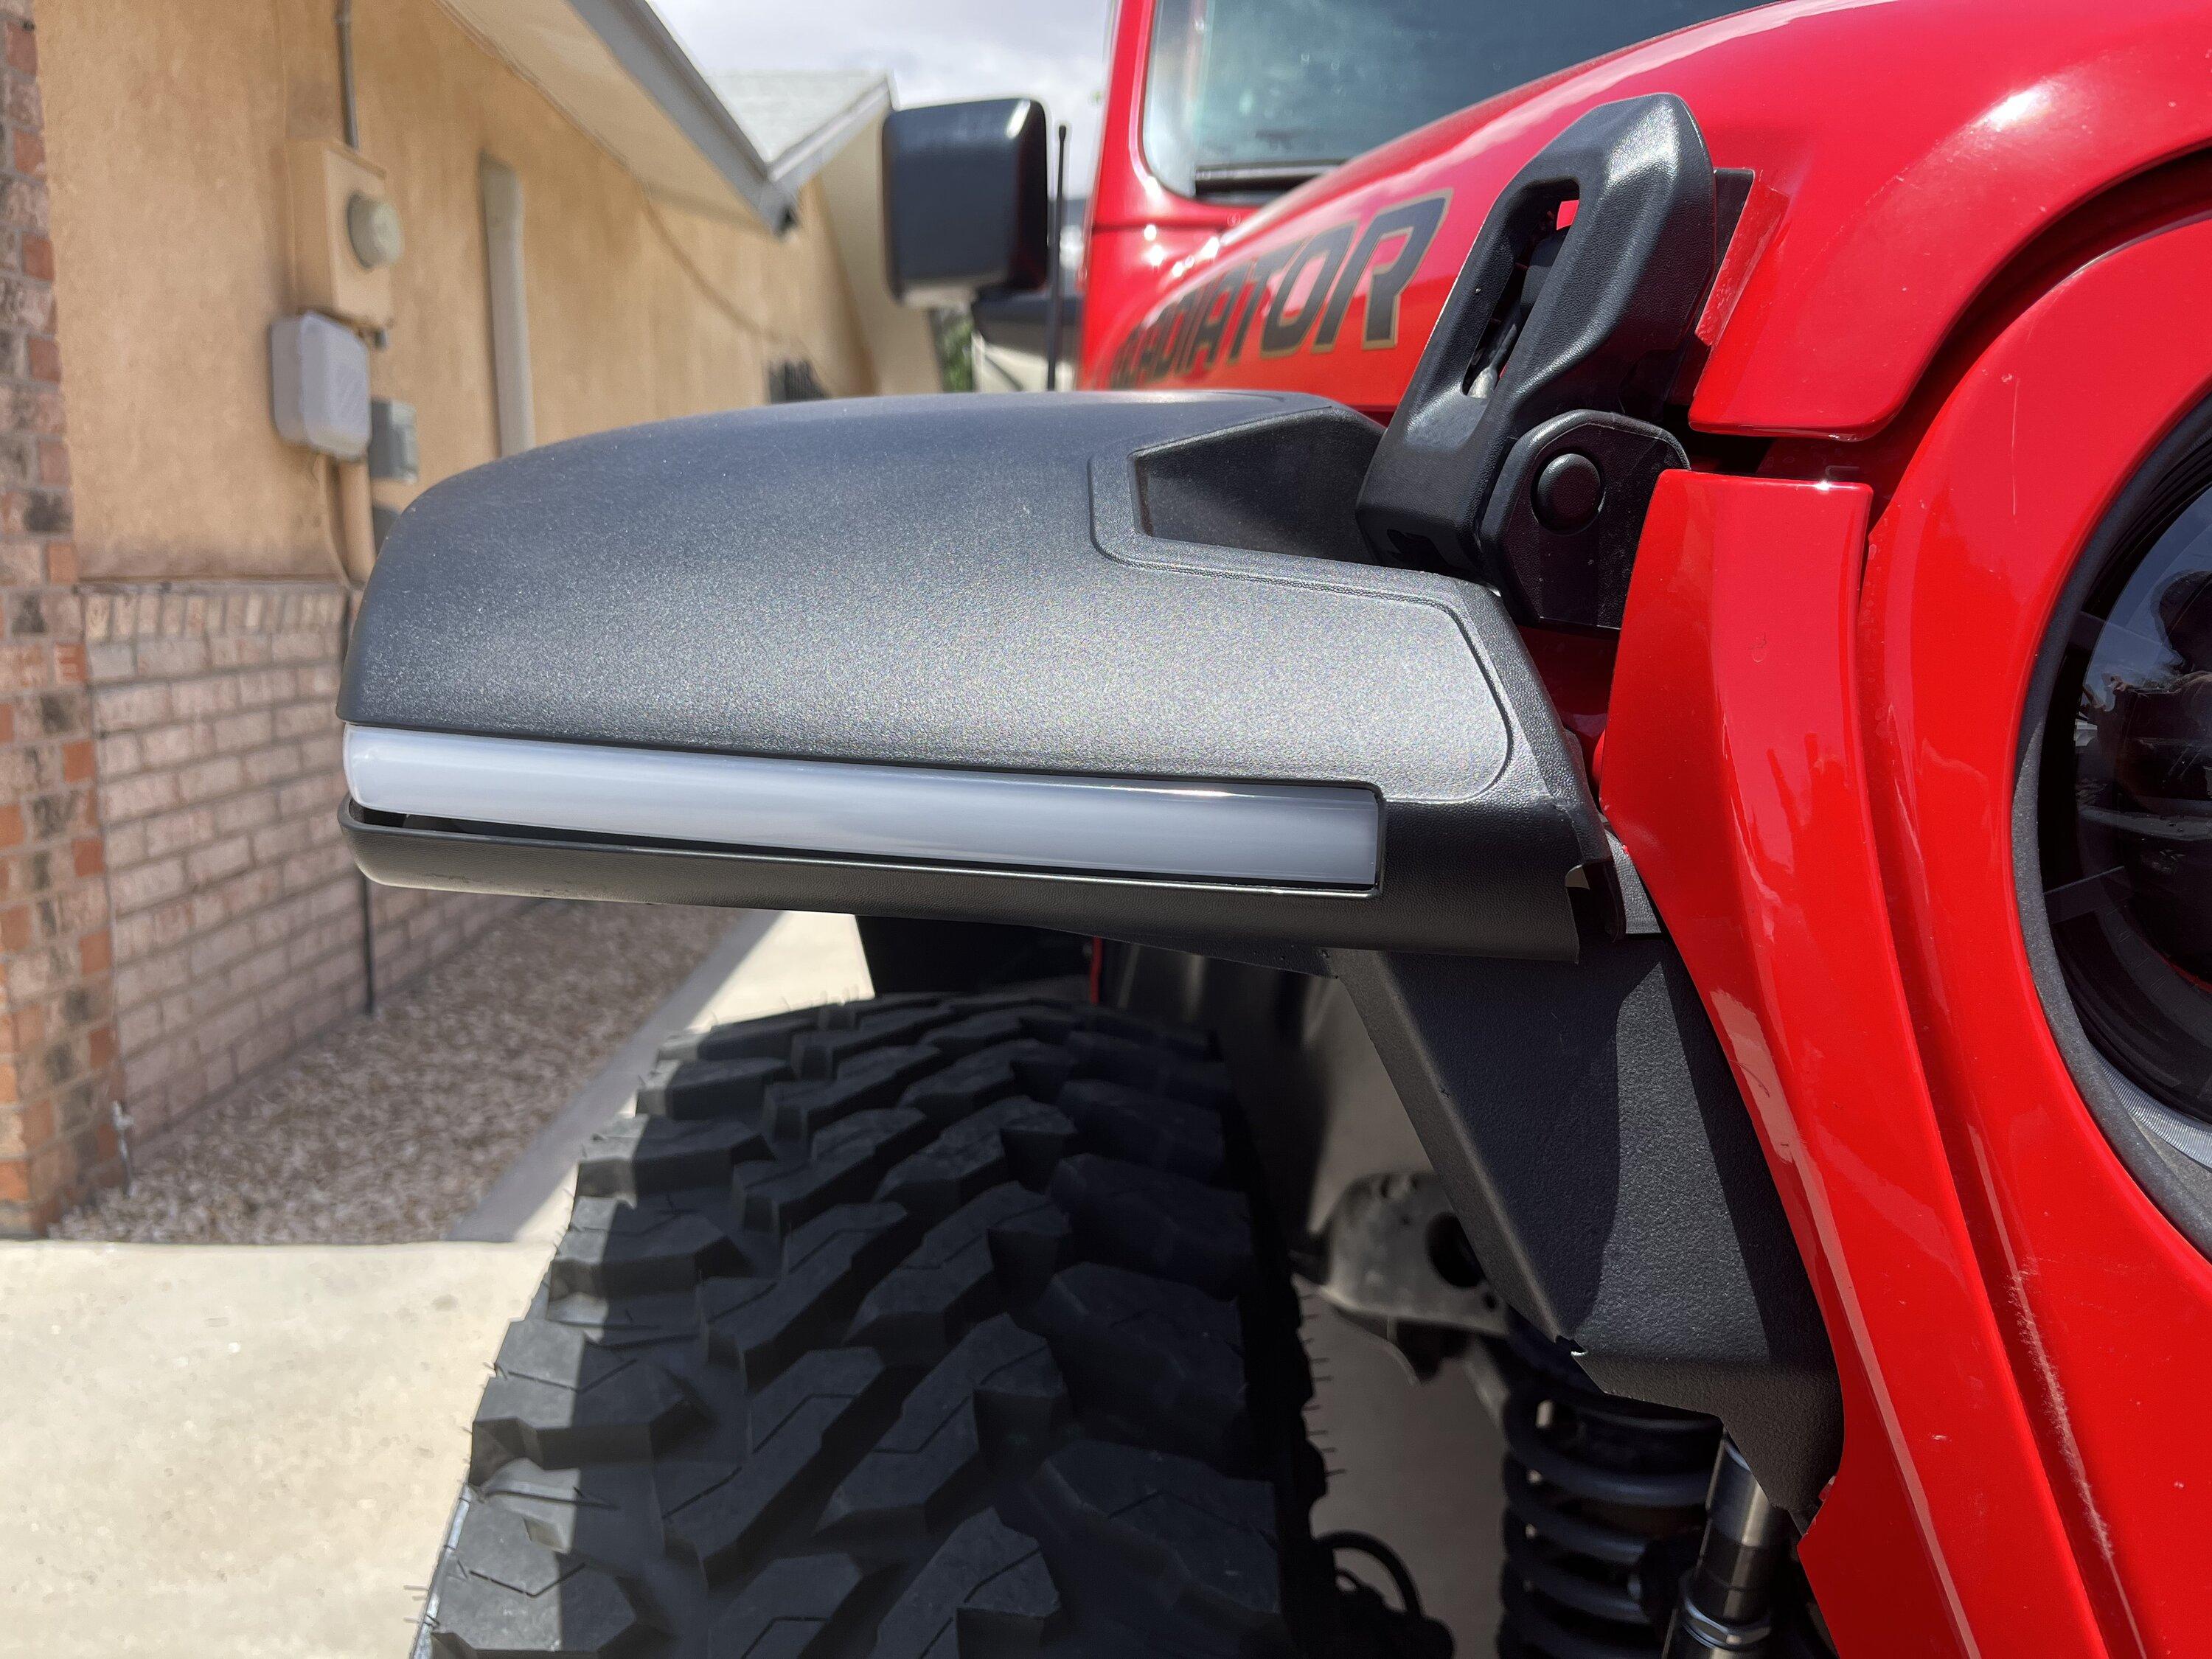
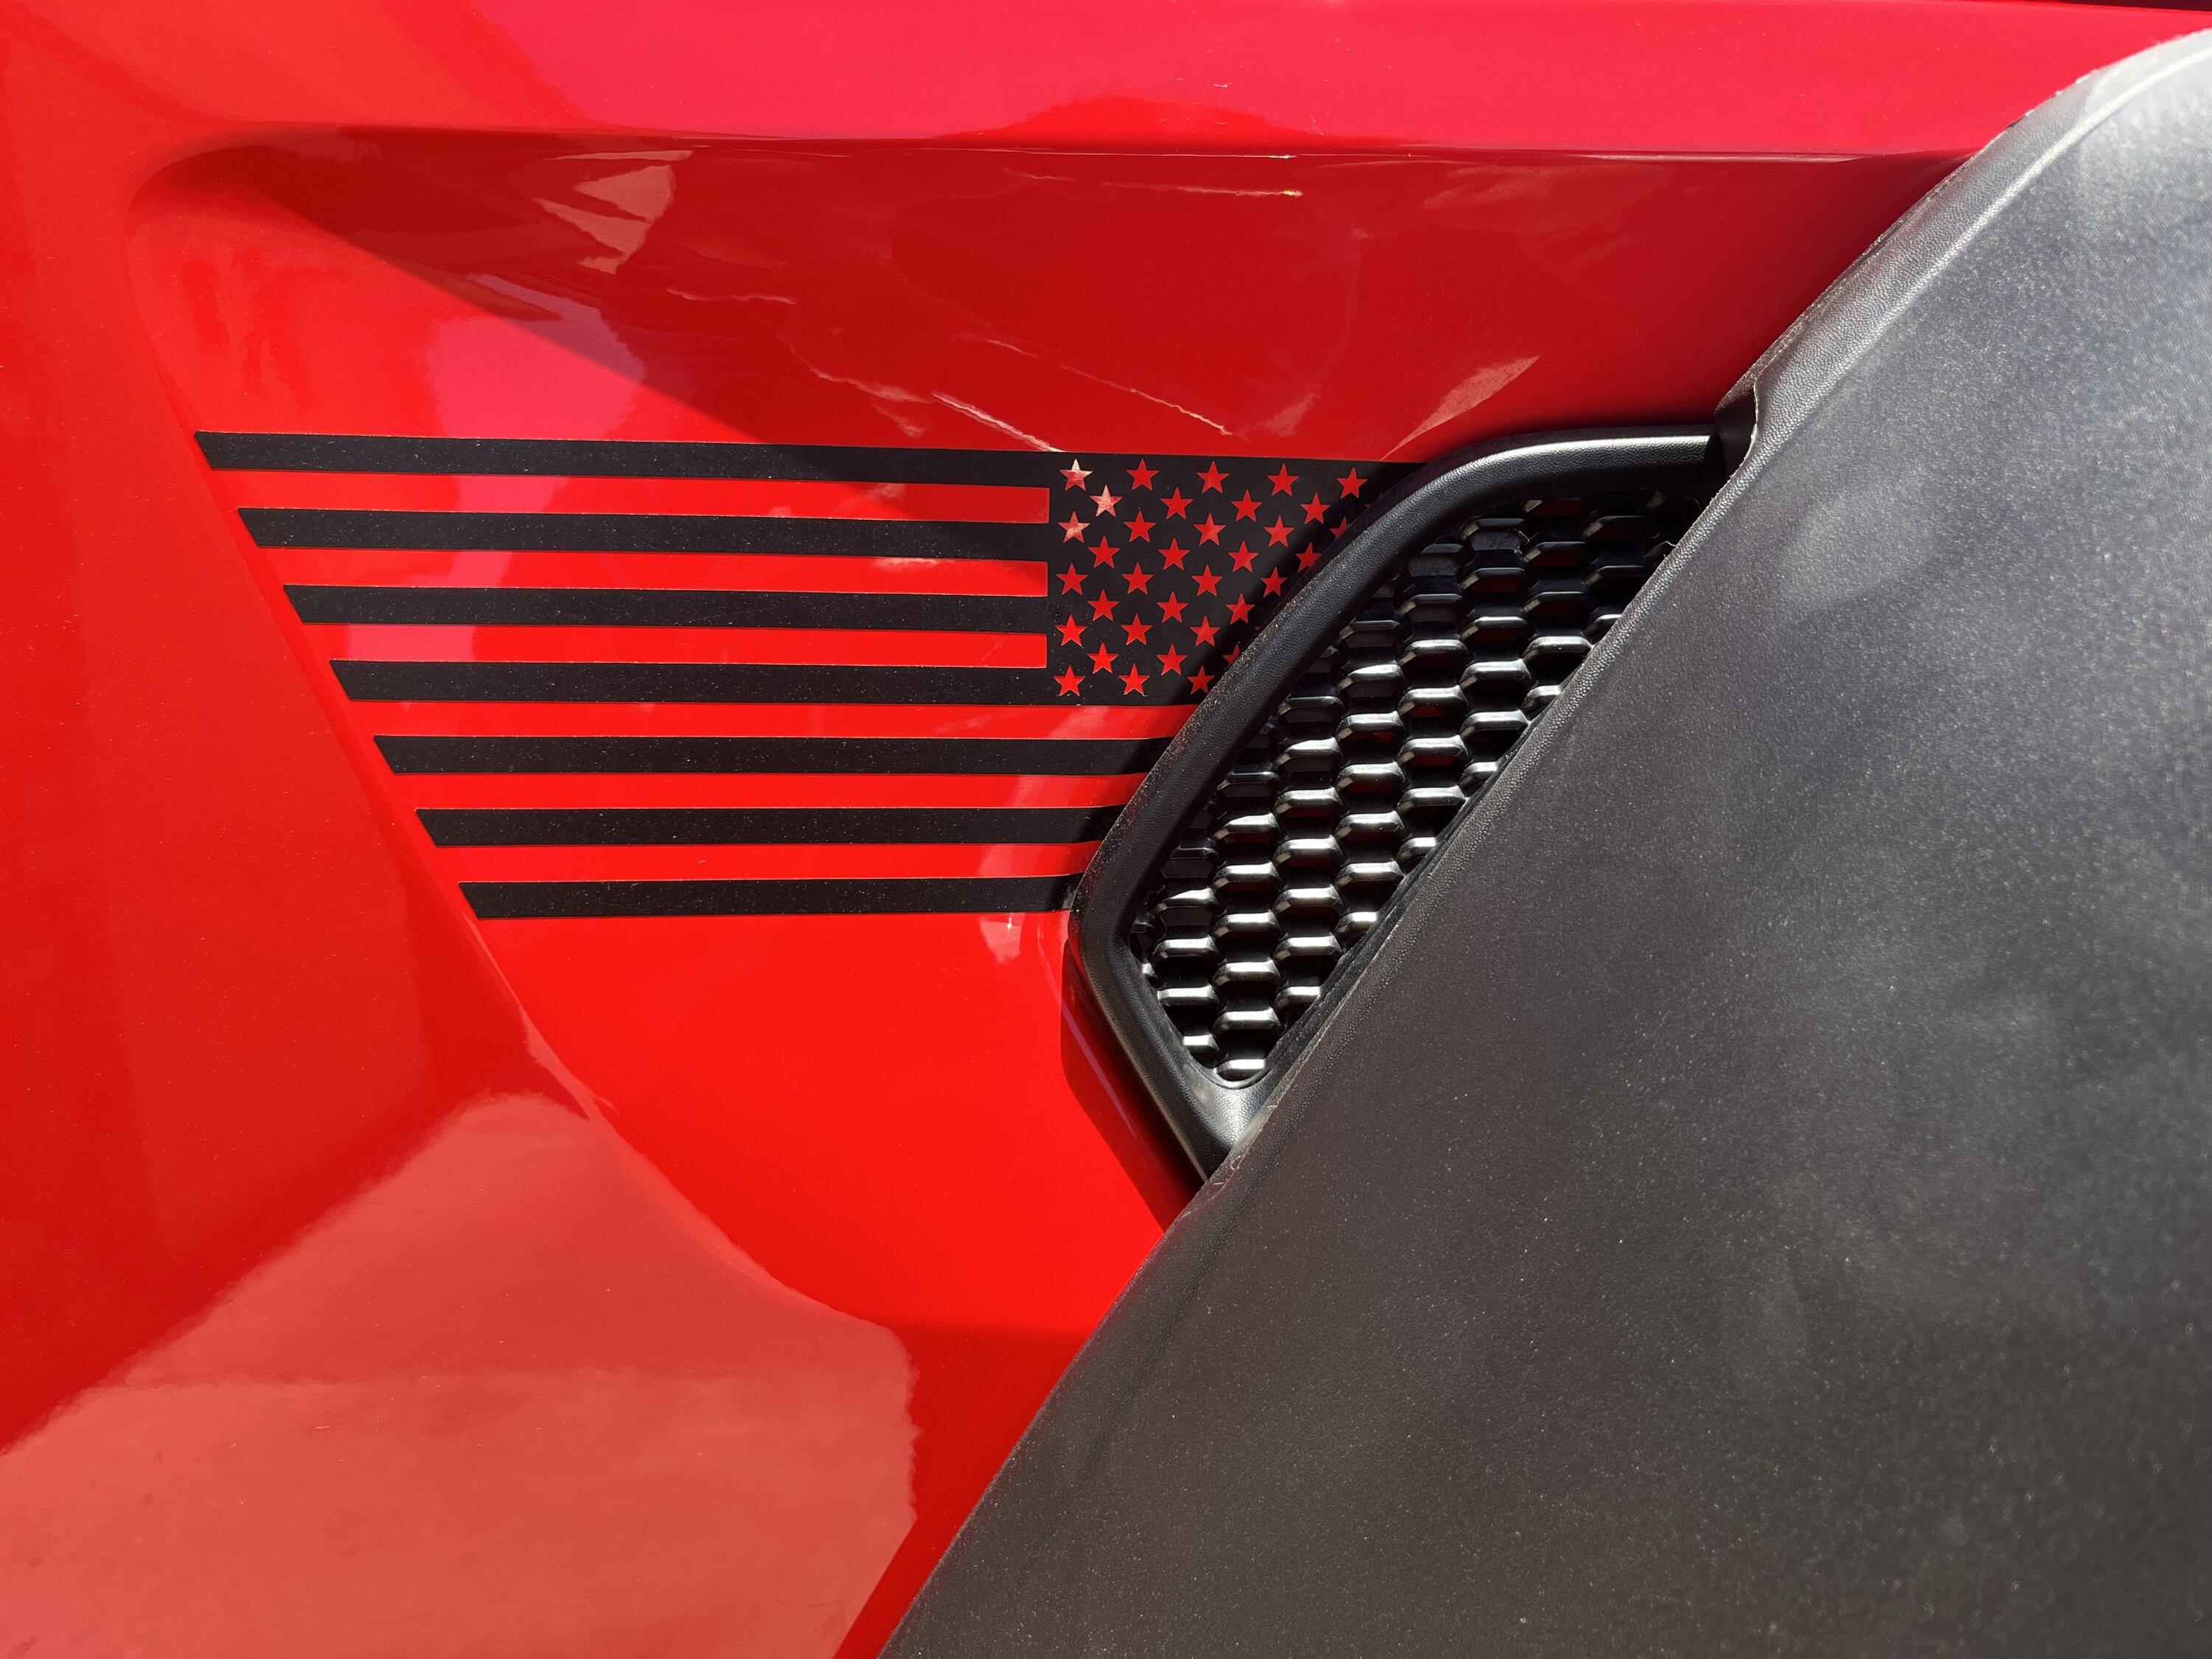
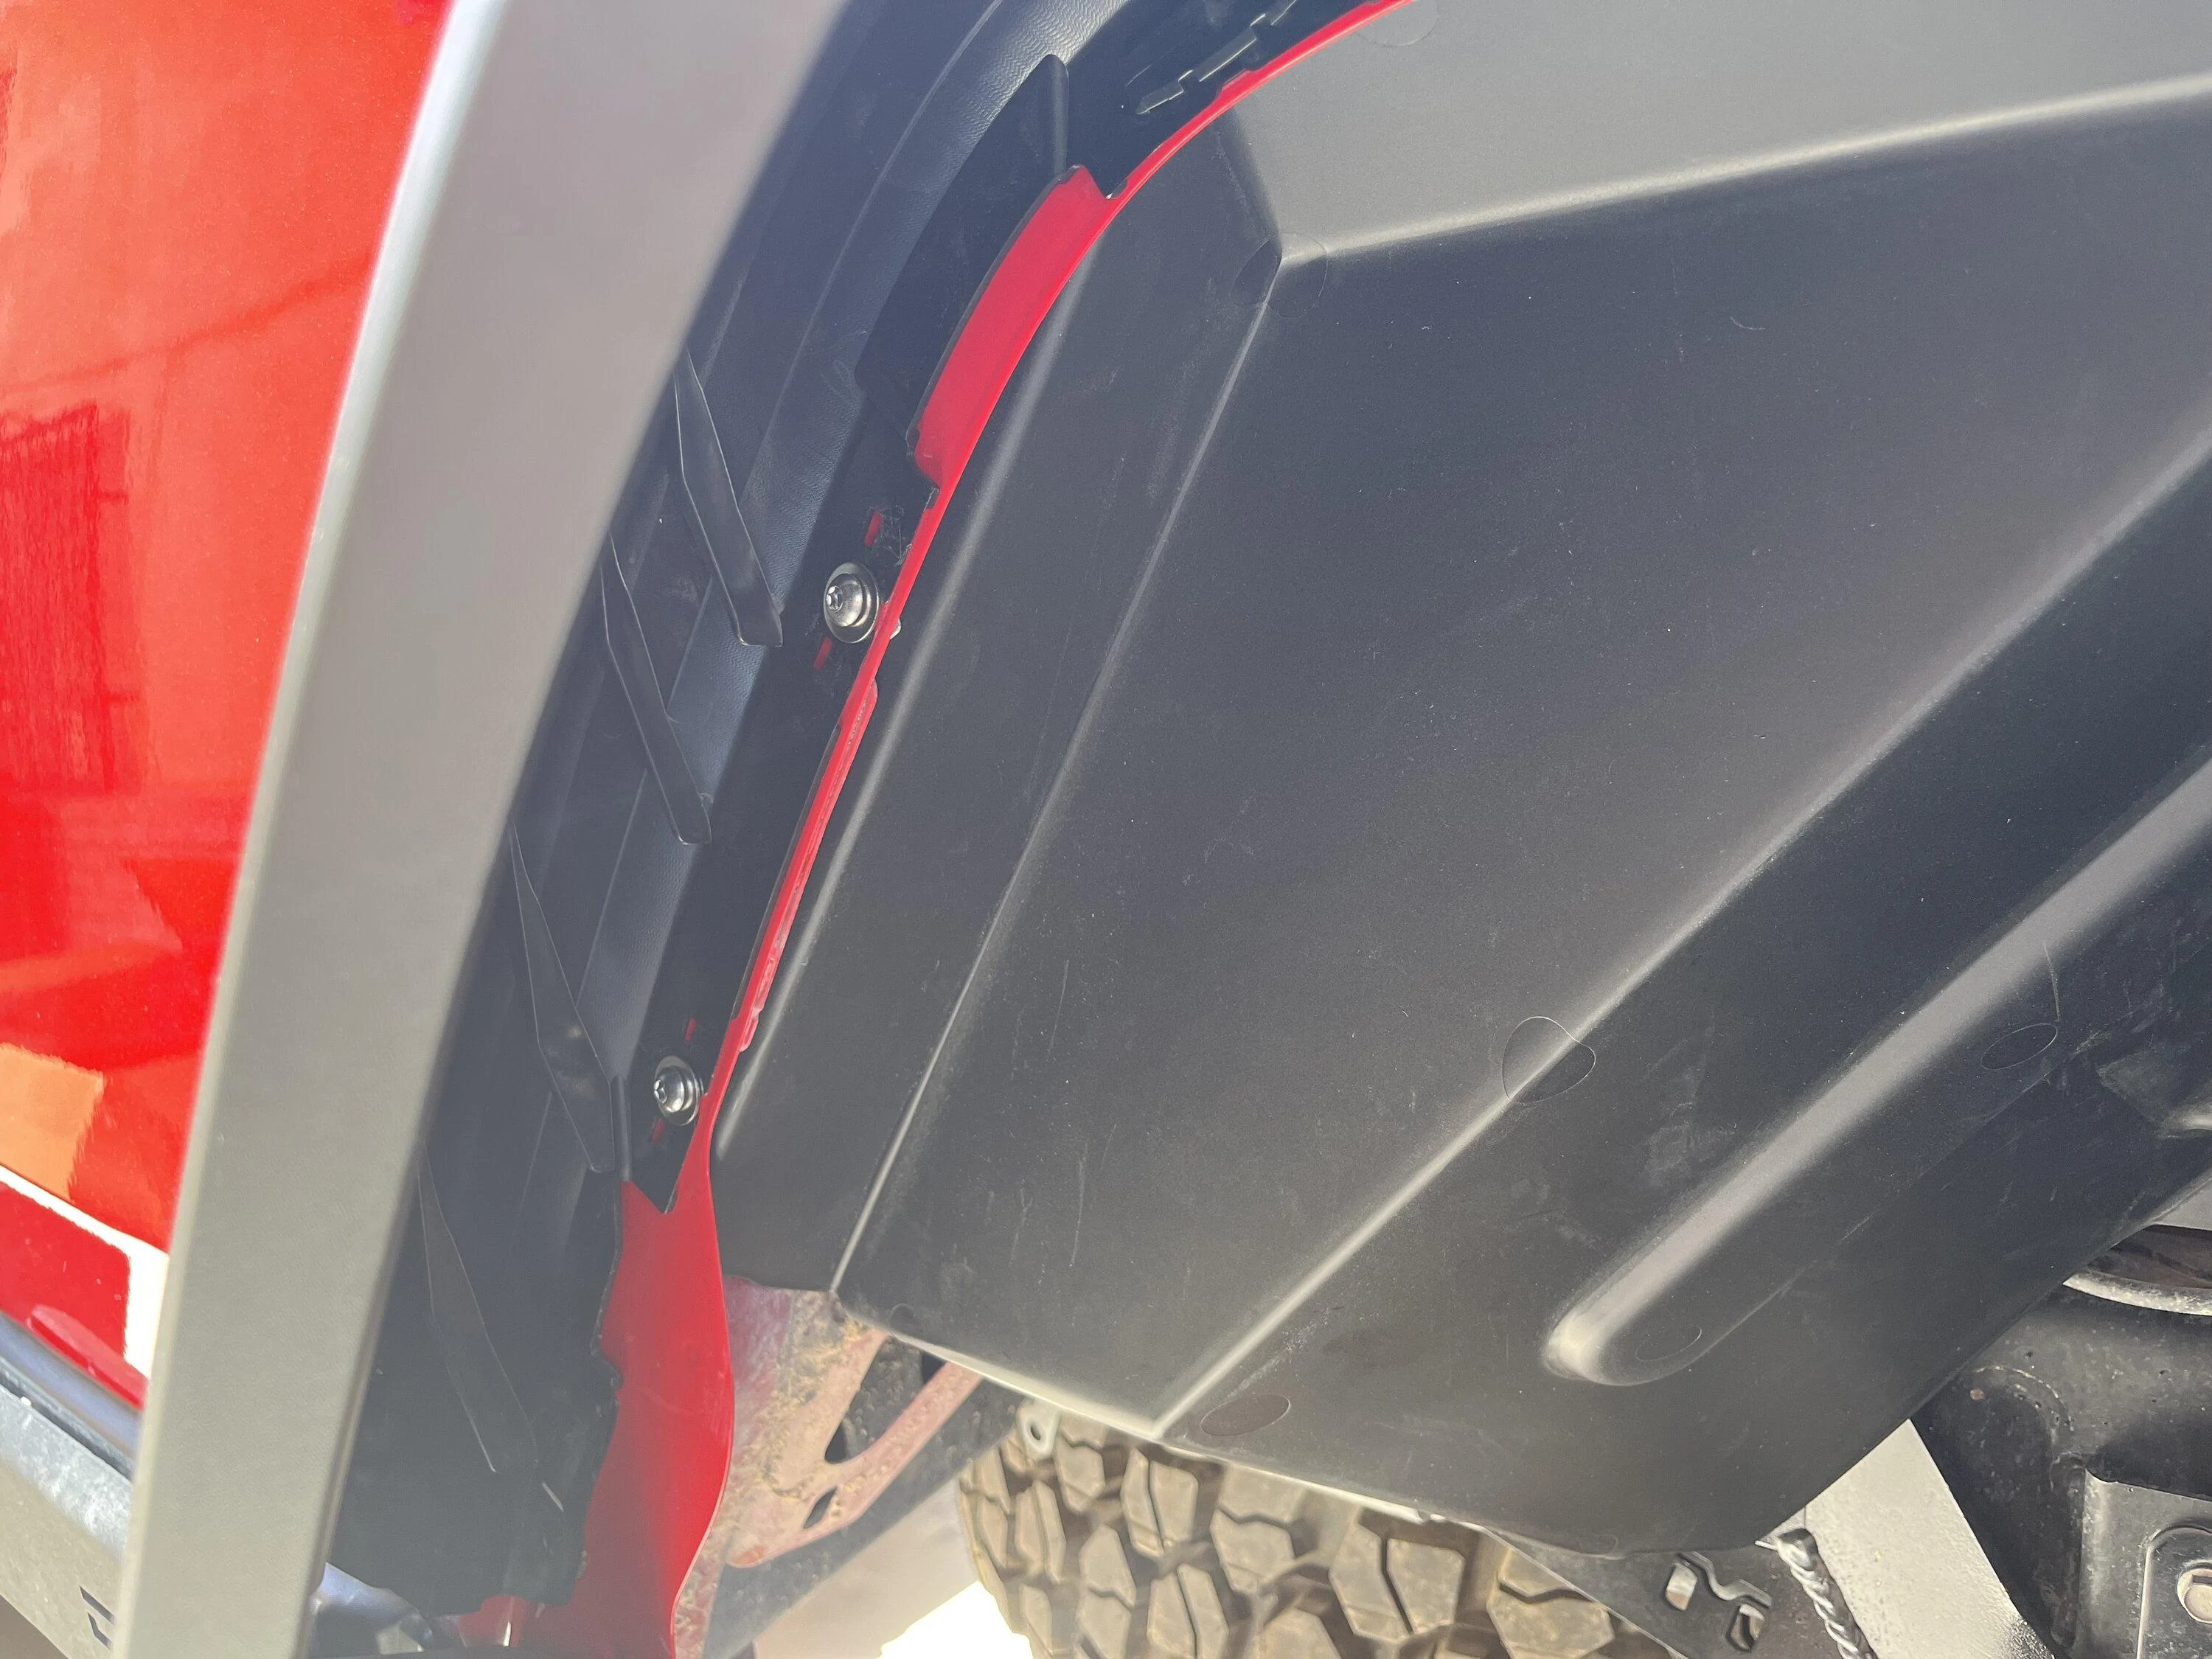
The flare conforms against the vent well, and looks like it would work with some of the aftermarket lights that some folk put there.
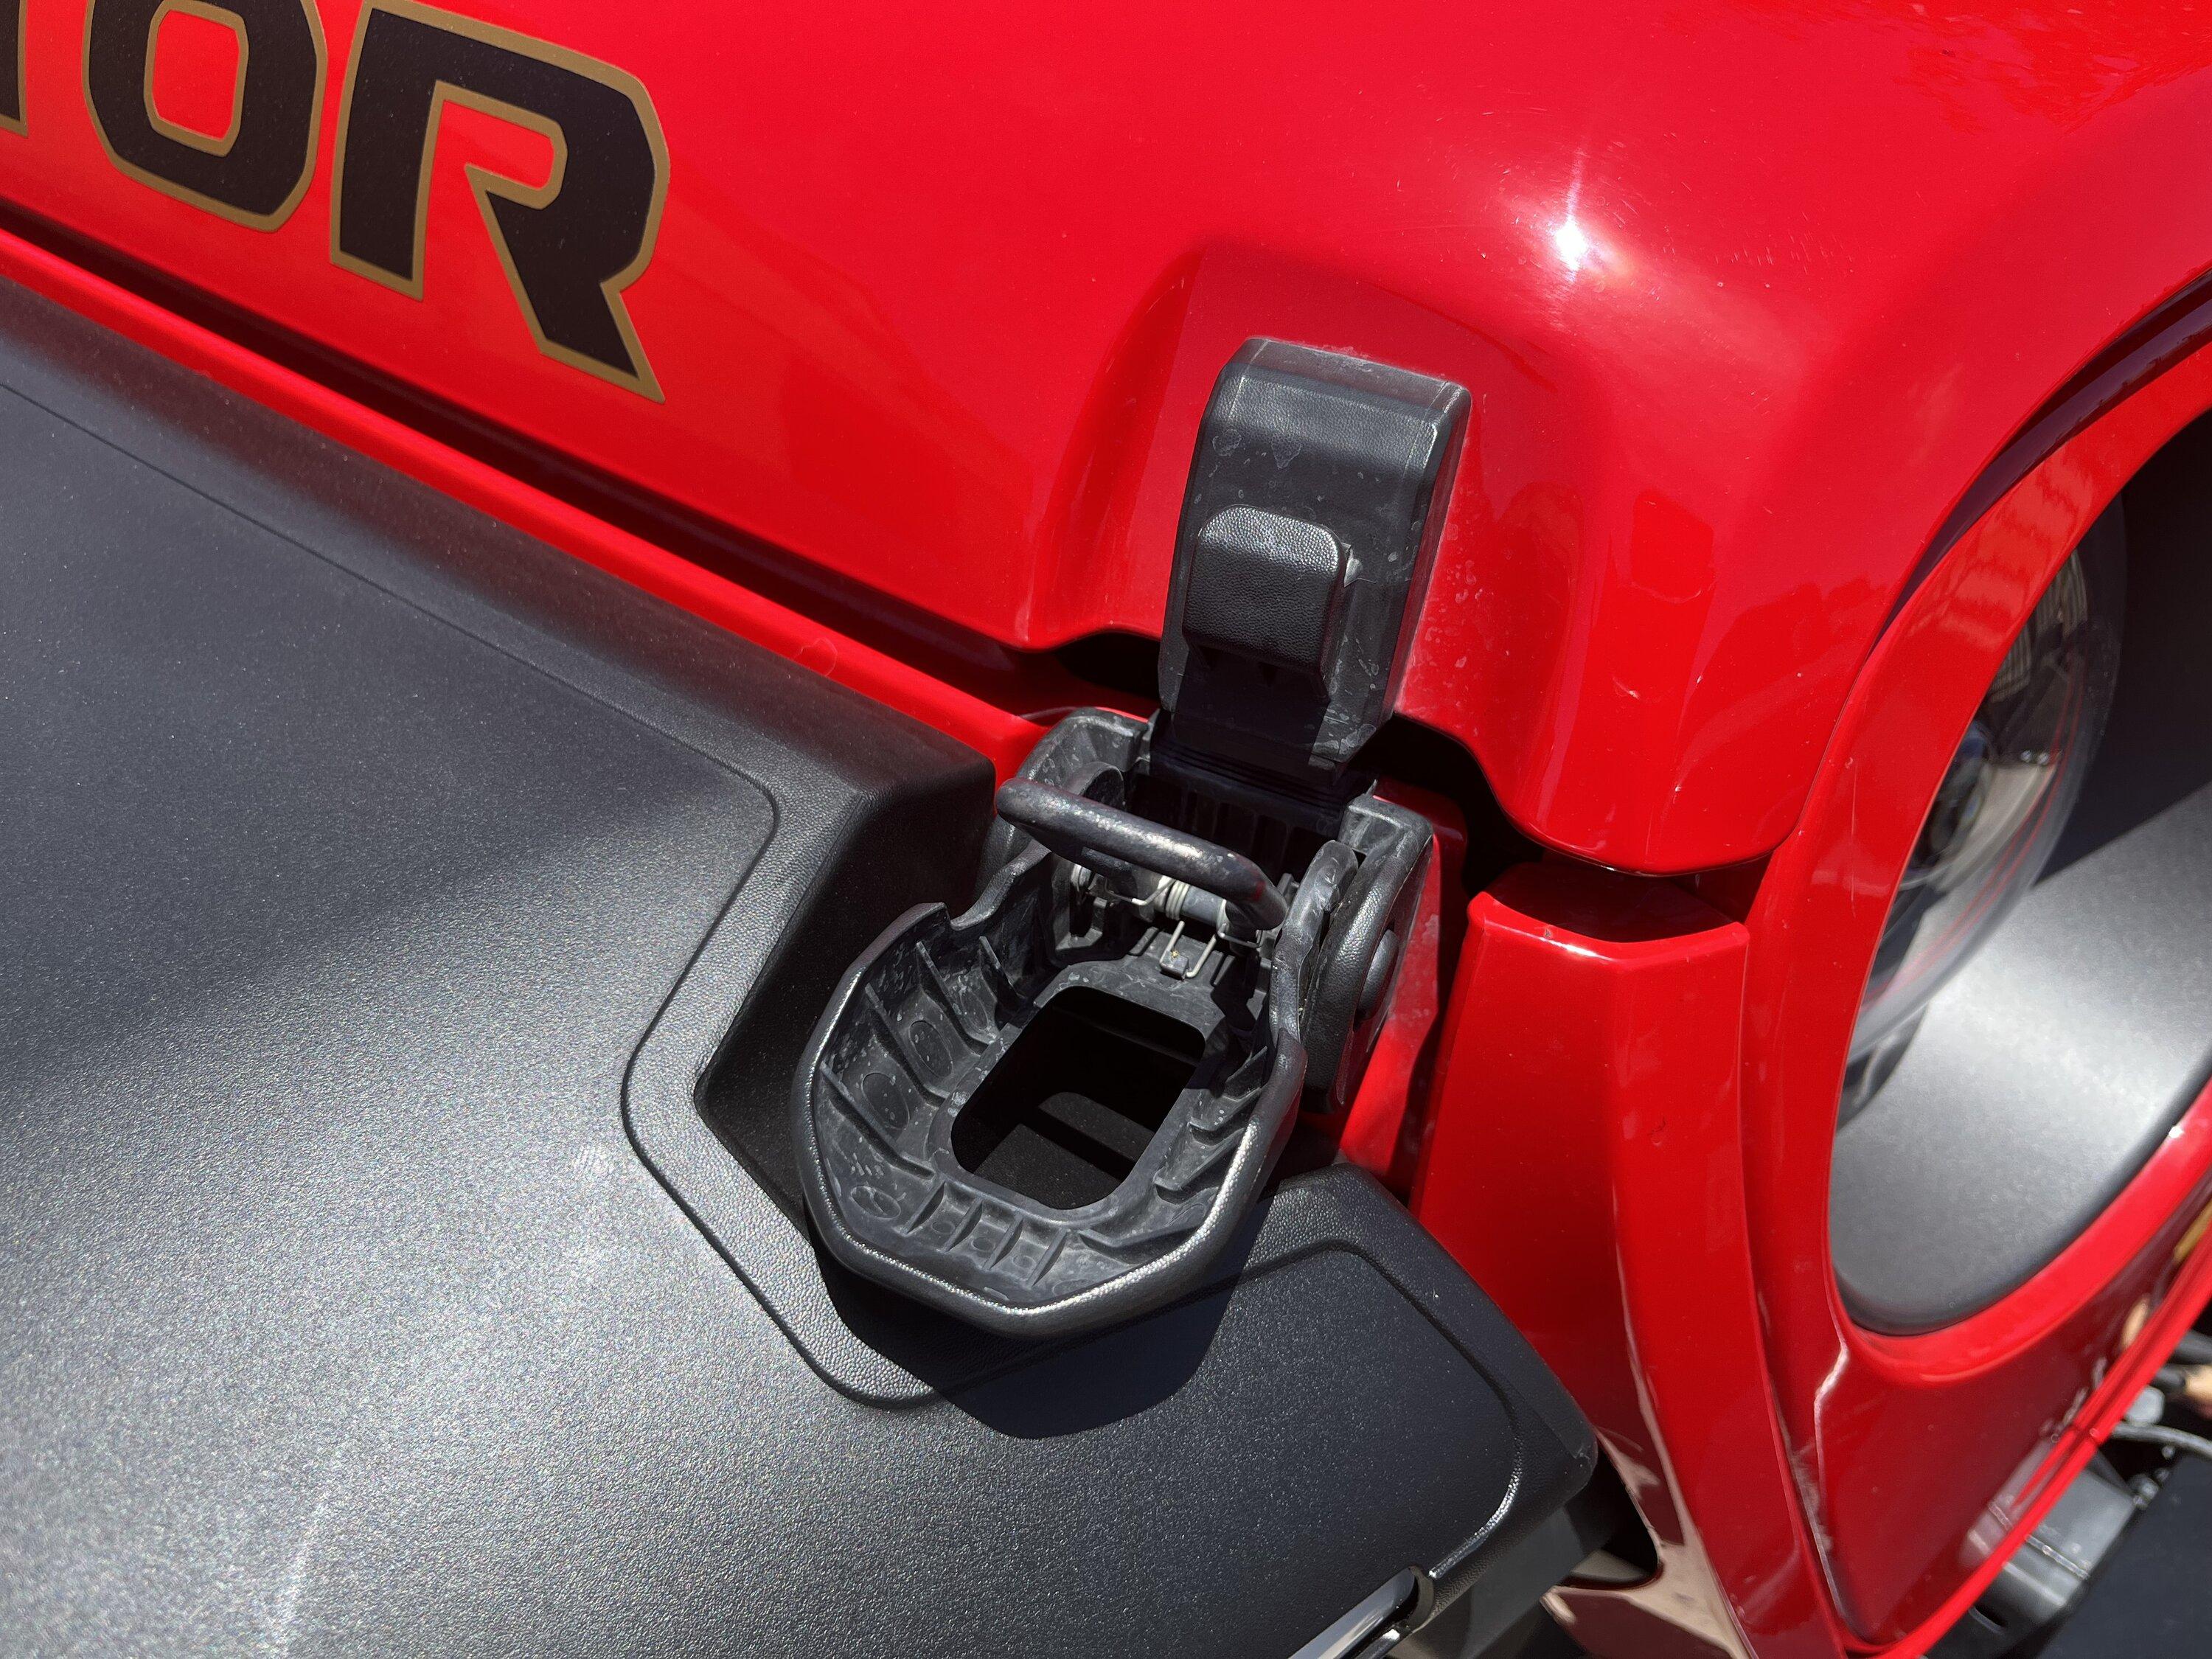
Front hood latches open no problem. No deep valley for rocks to catch in like the Rubi flares.
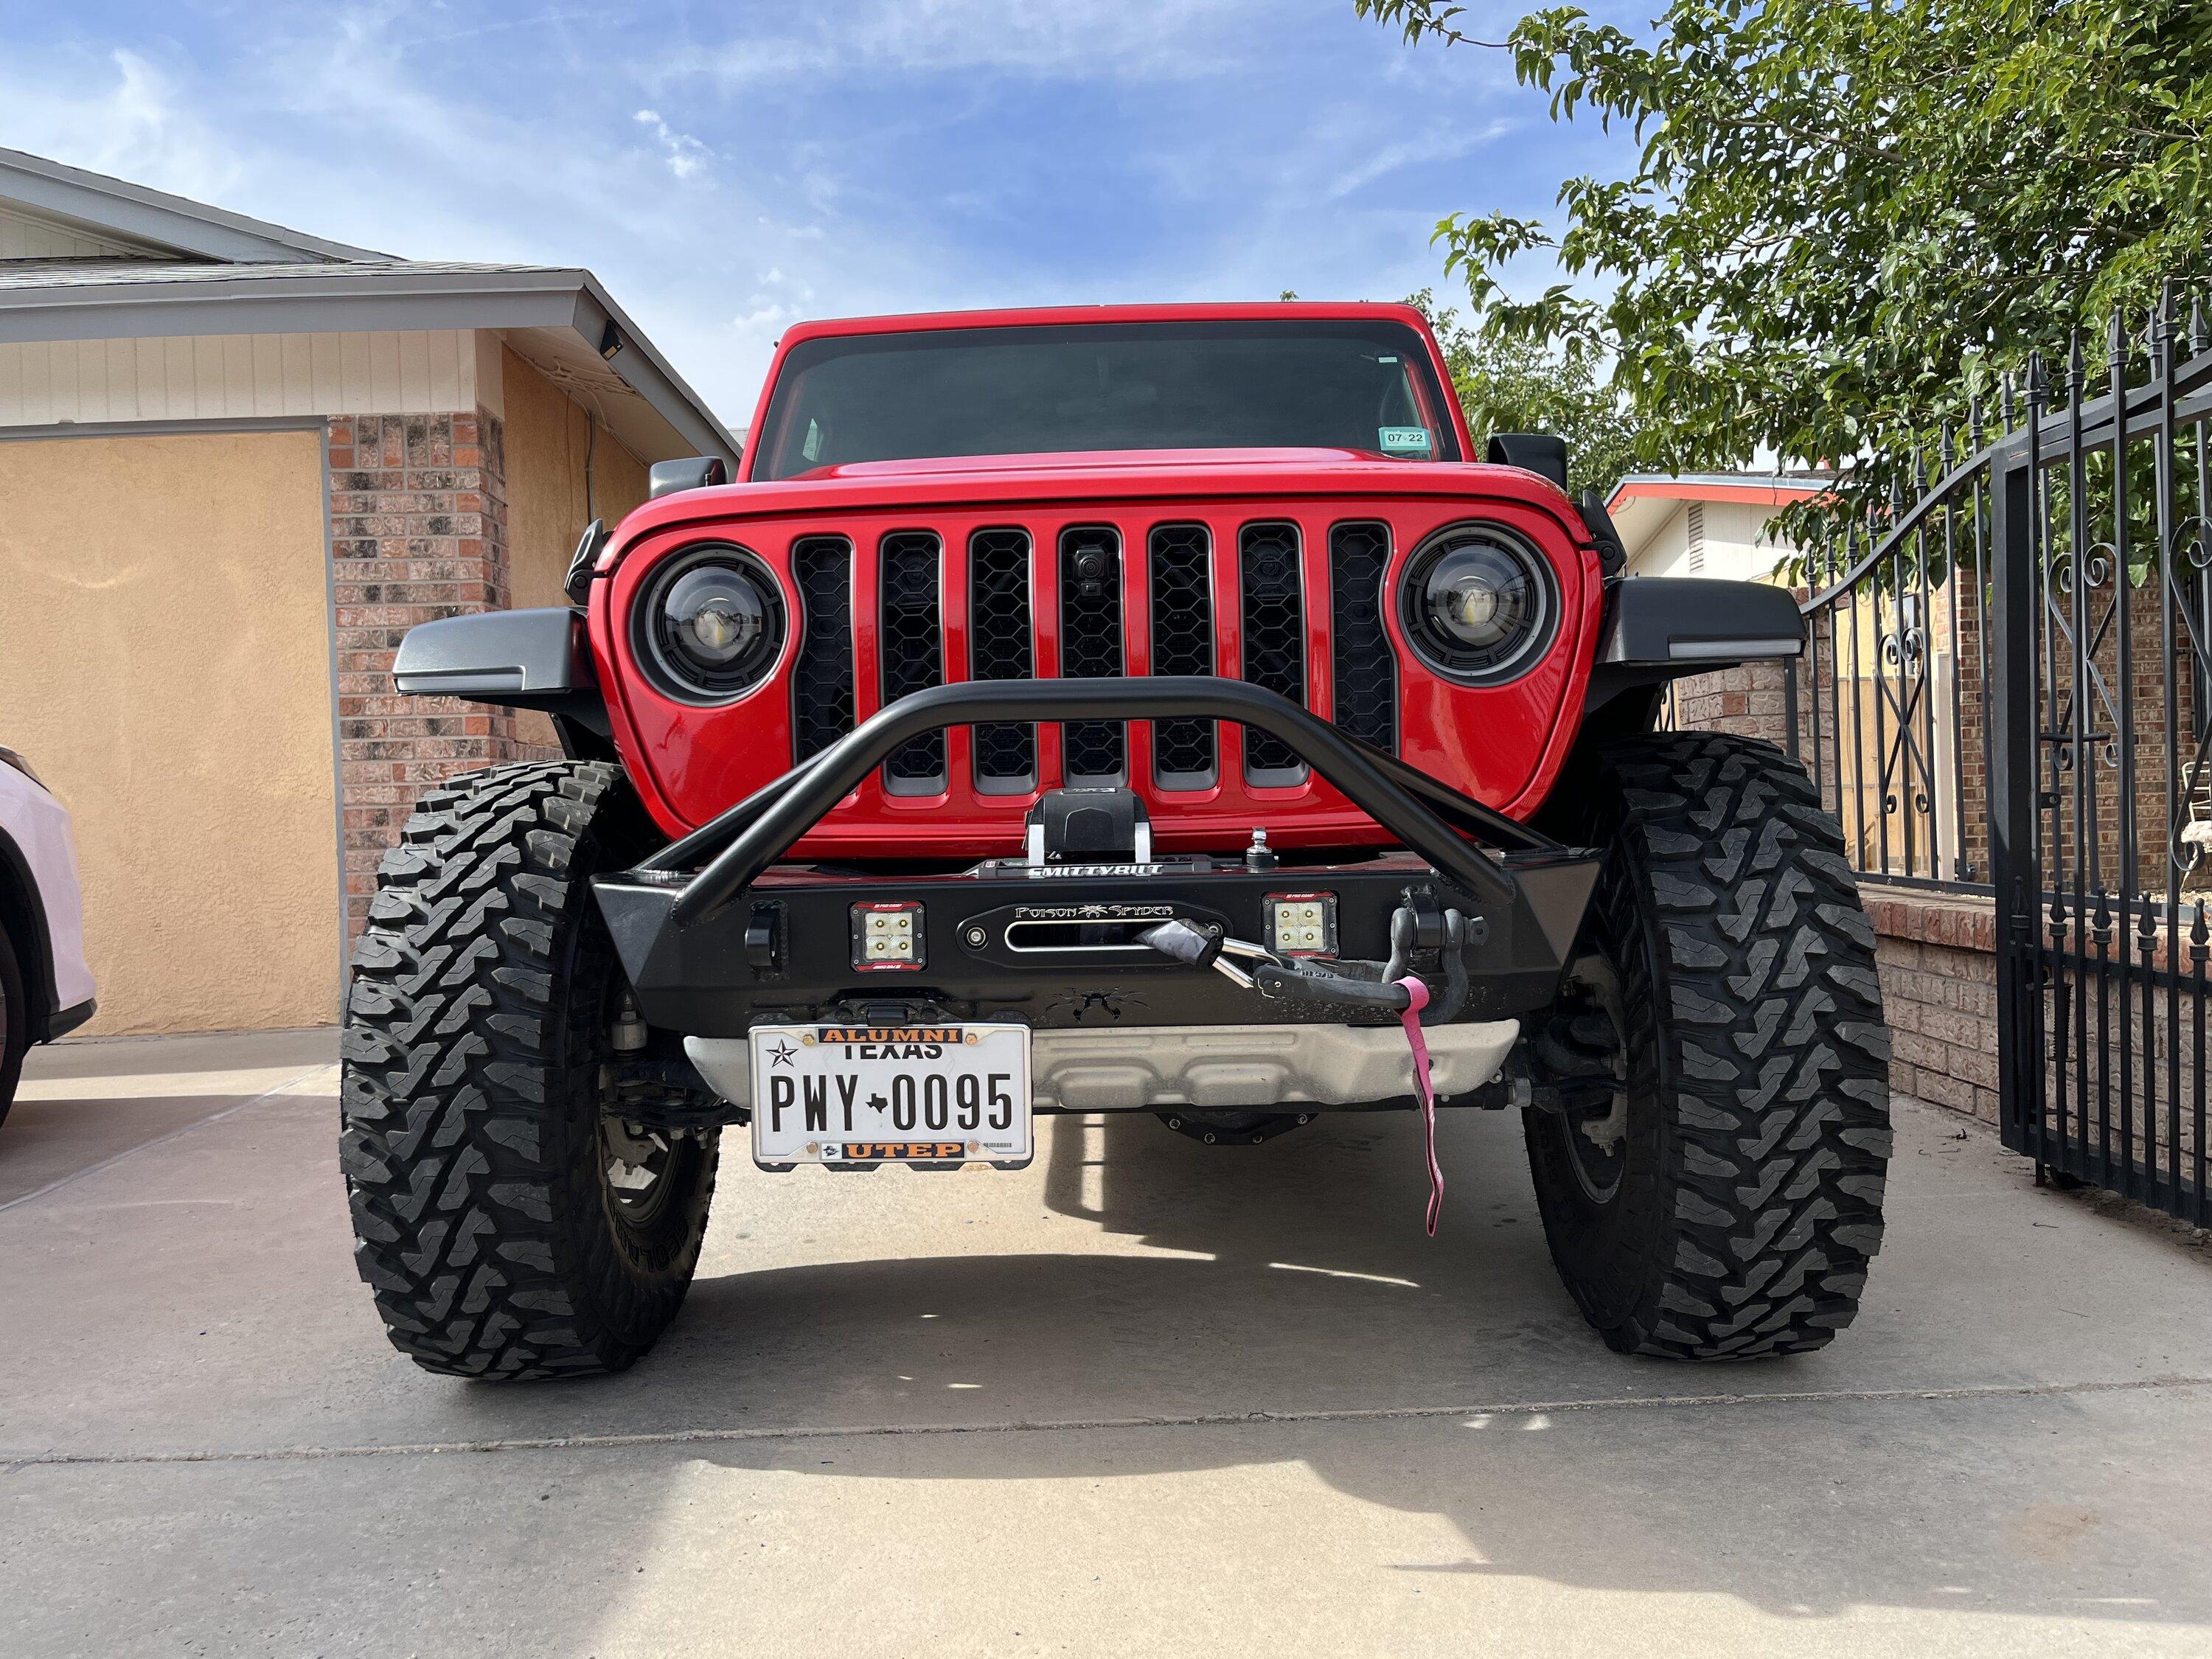
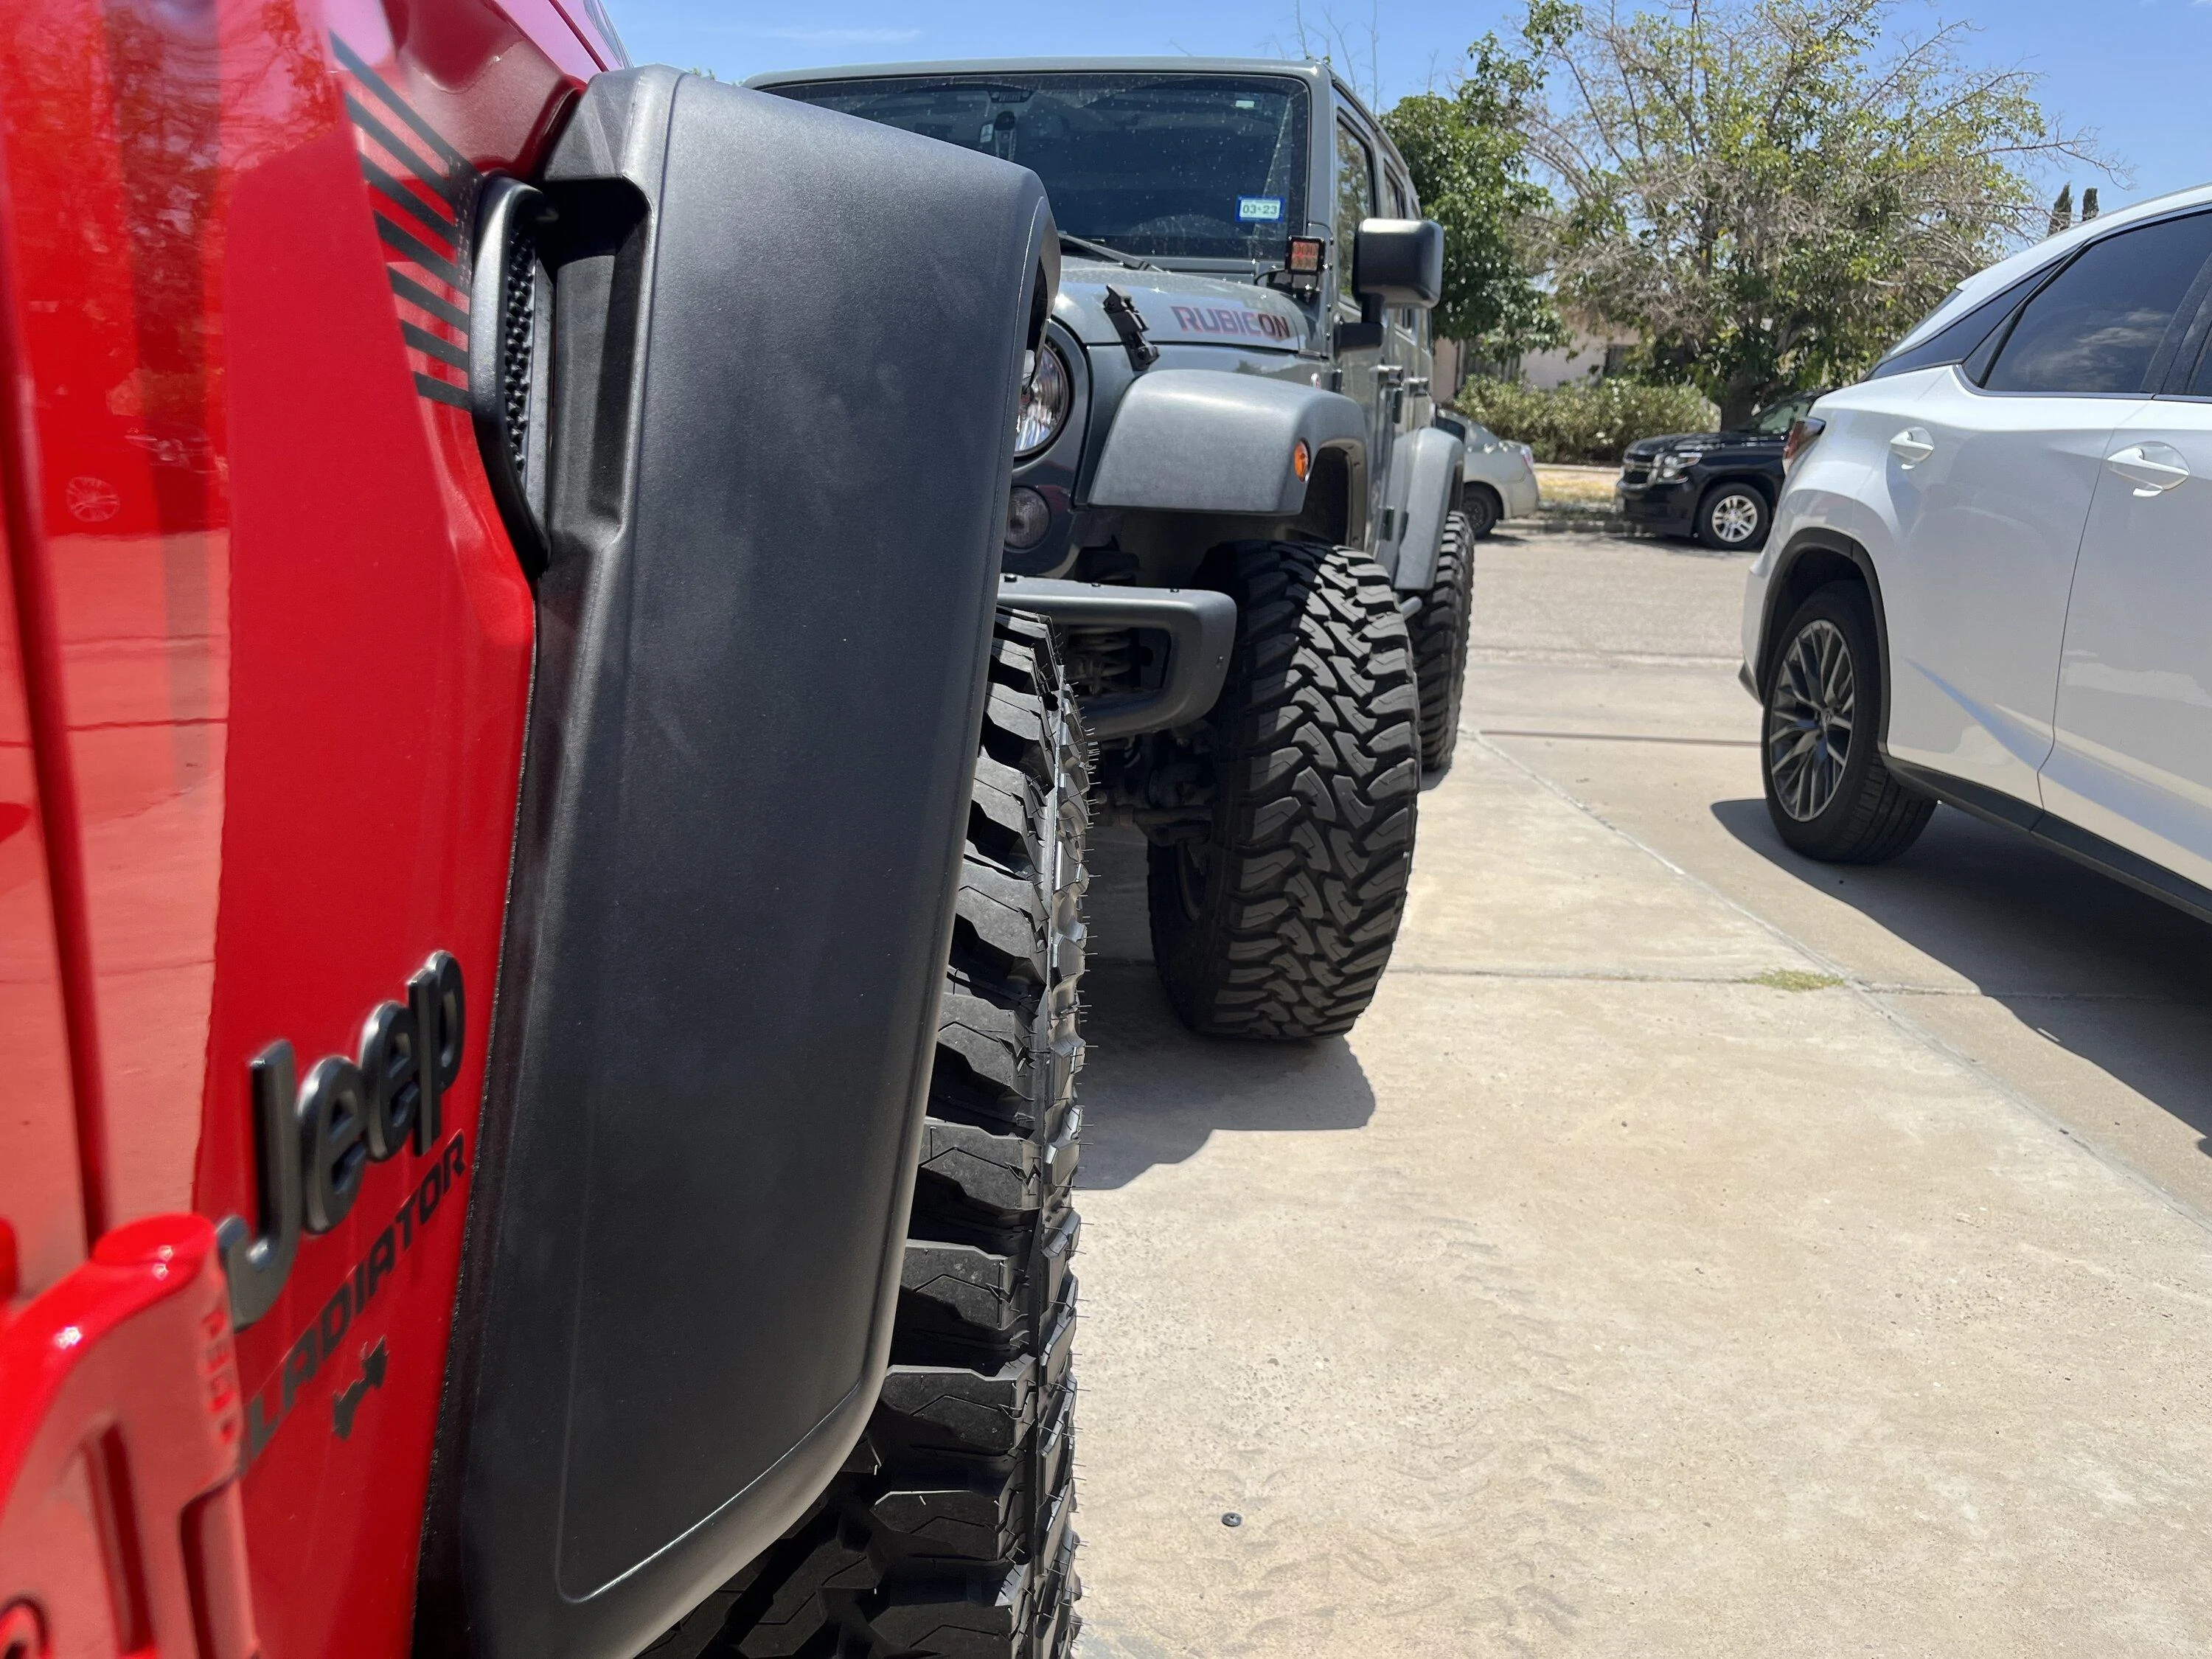
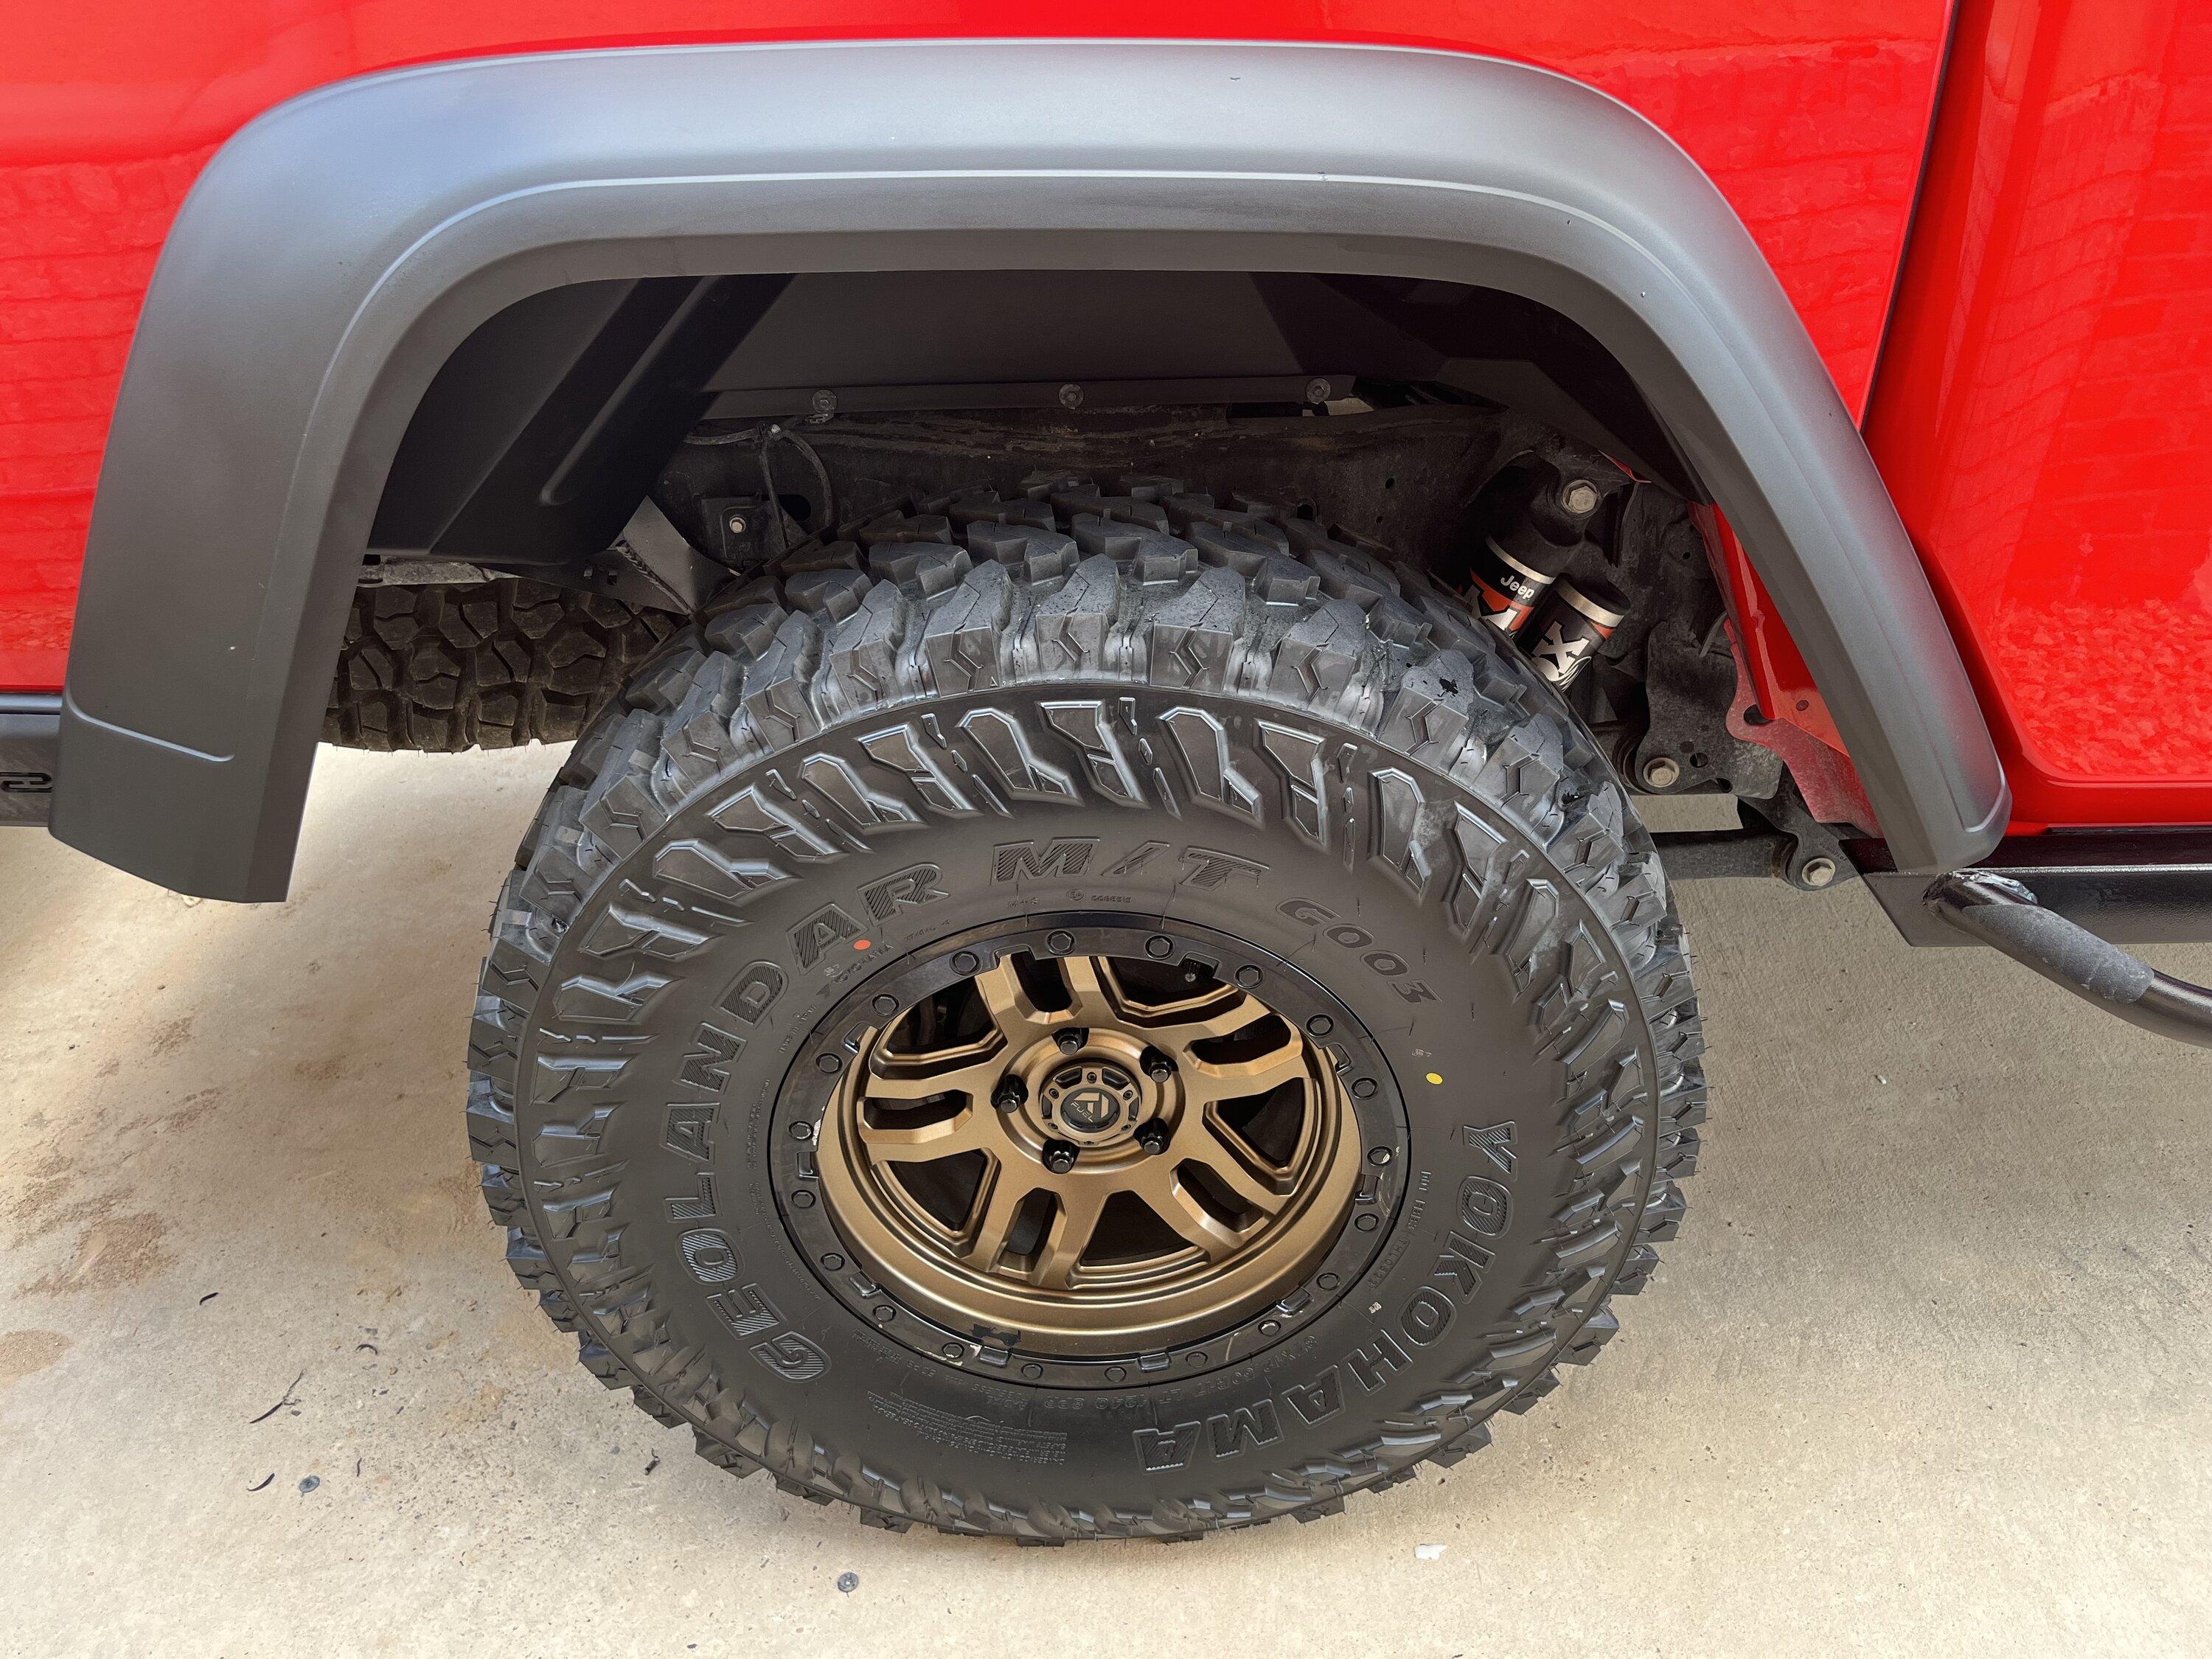
These flares are about 1 inch wider than stock, so now my tires fit much better than before, the tread lines up perfectly with the edge of the flare.
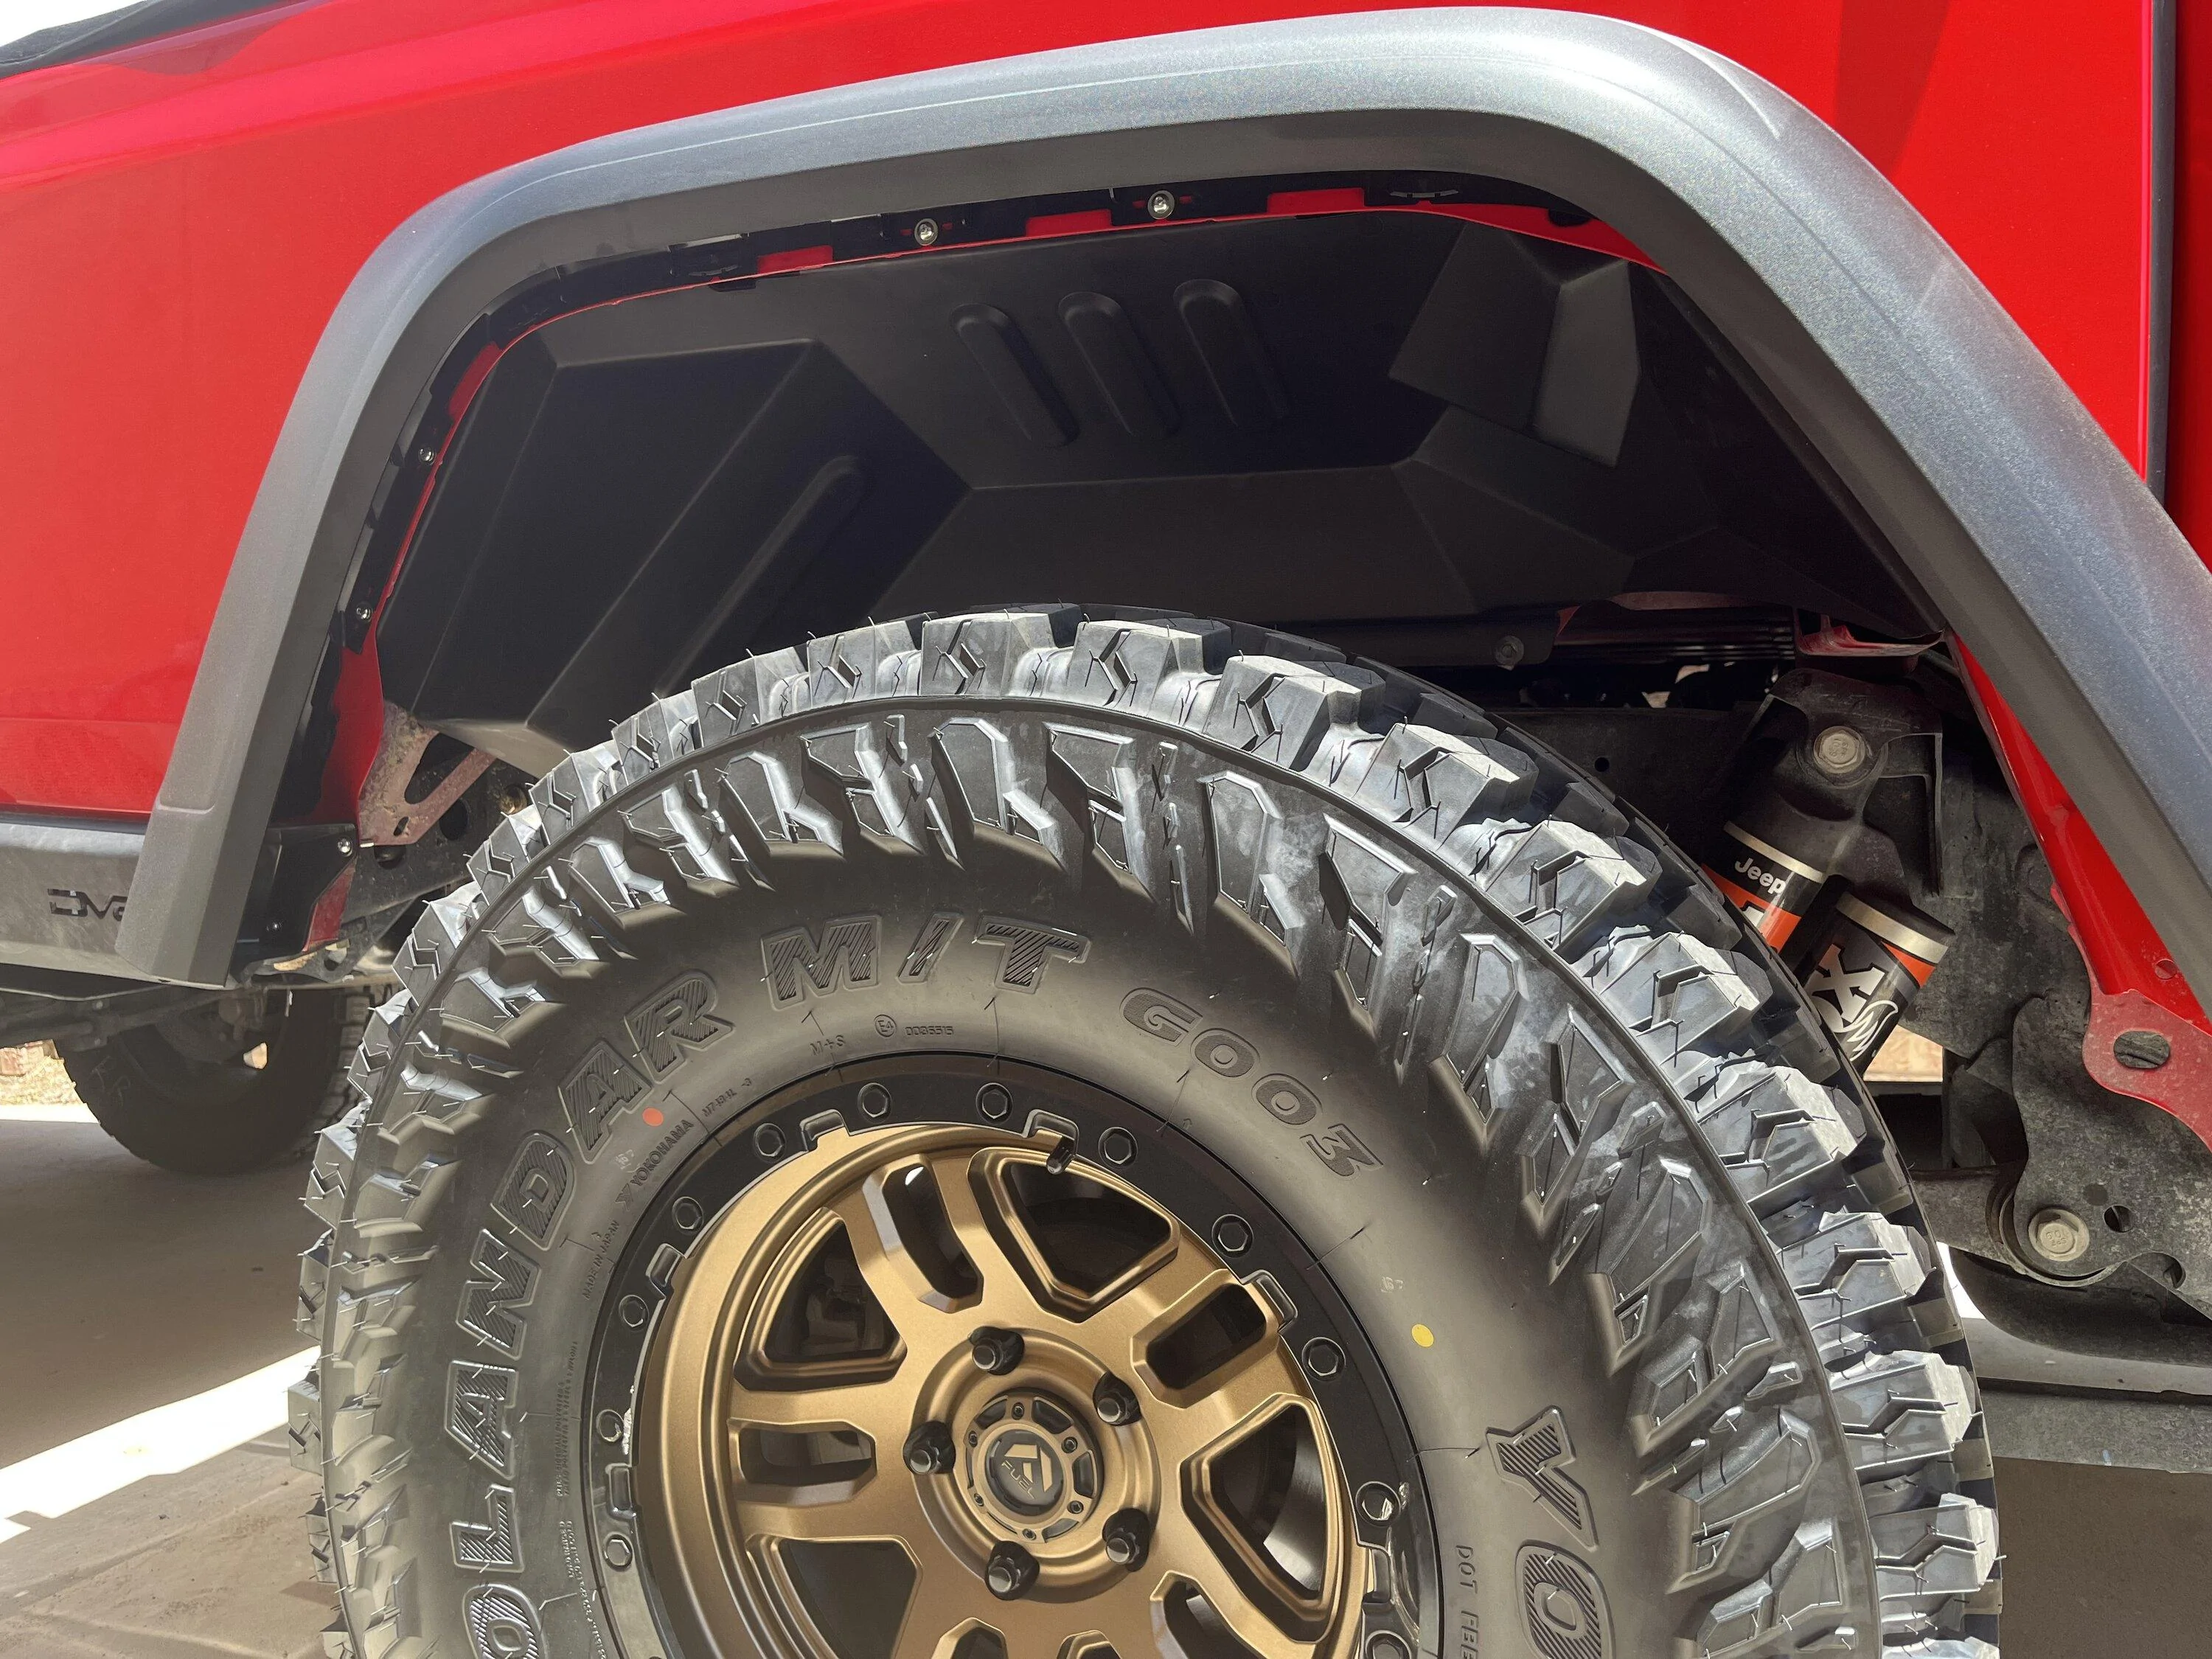
Next was staring the install on the rear liners. These liners required the use of the "provided" U-nuts, and some tree clips. I opted to just reuse the factory 8mm bolts. I also attached the rear support for the flare in advance.
Next was the rear flare, double check the placement of the clips on this flare as some of the clip cutouts are actually used by the bolts for the inner liner. Snap rear flare into place and bolt up the hardware to the liner. Pull the tape for the rear support after that. Done.
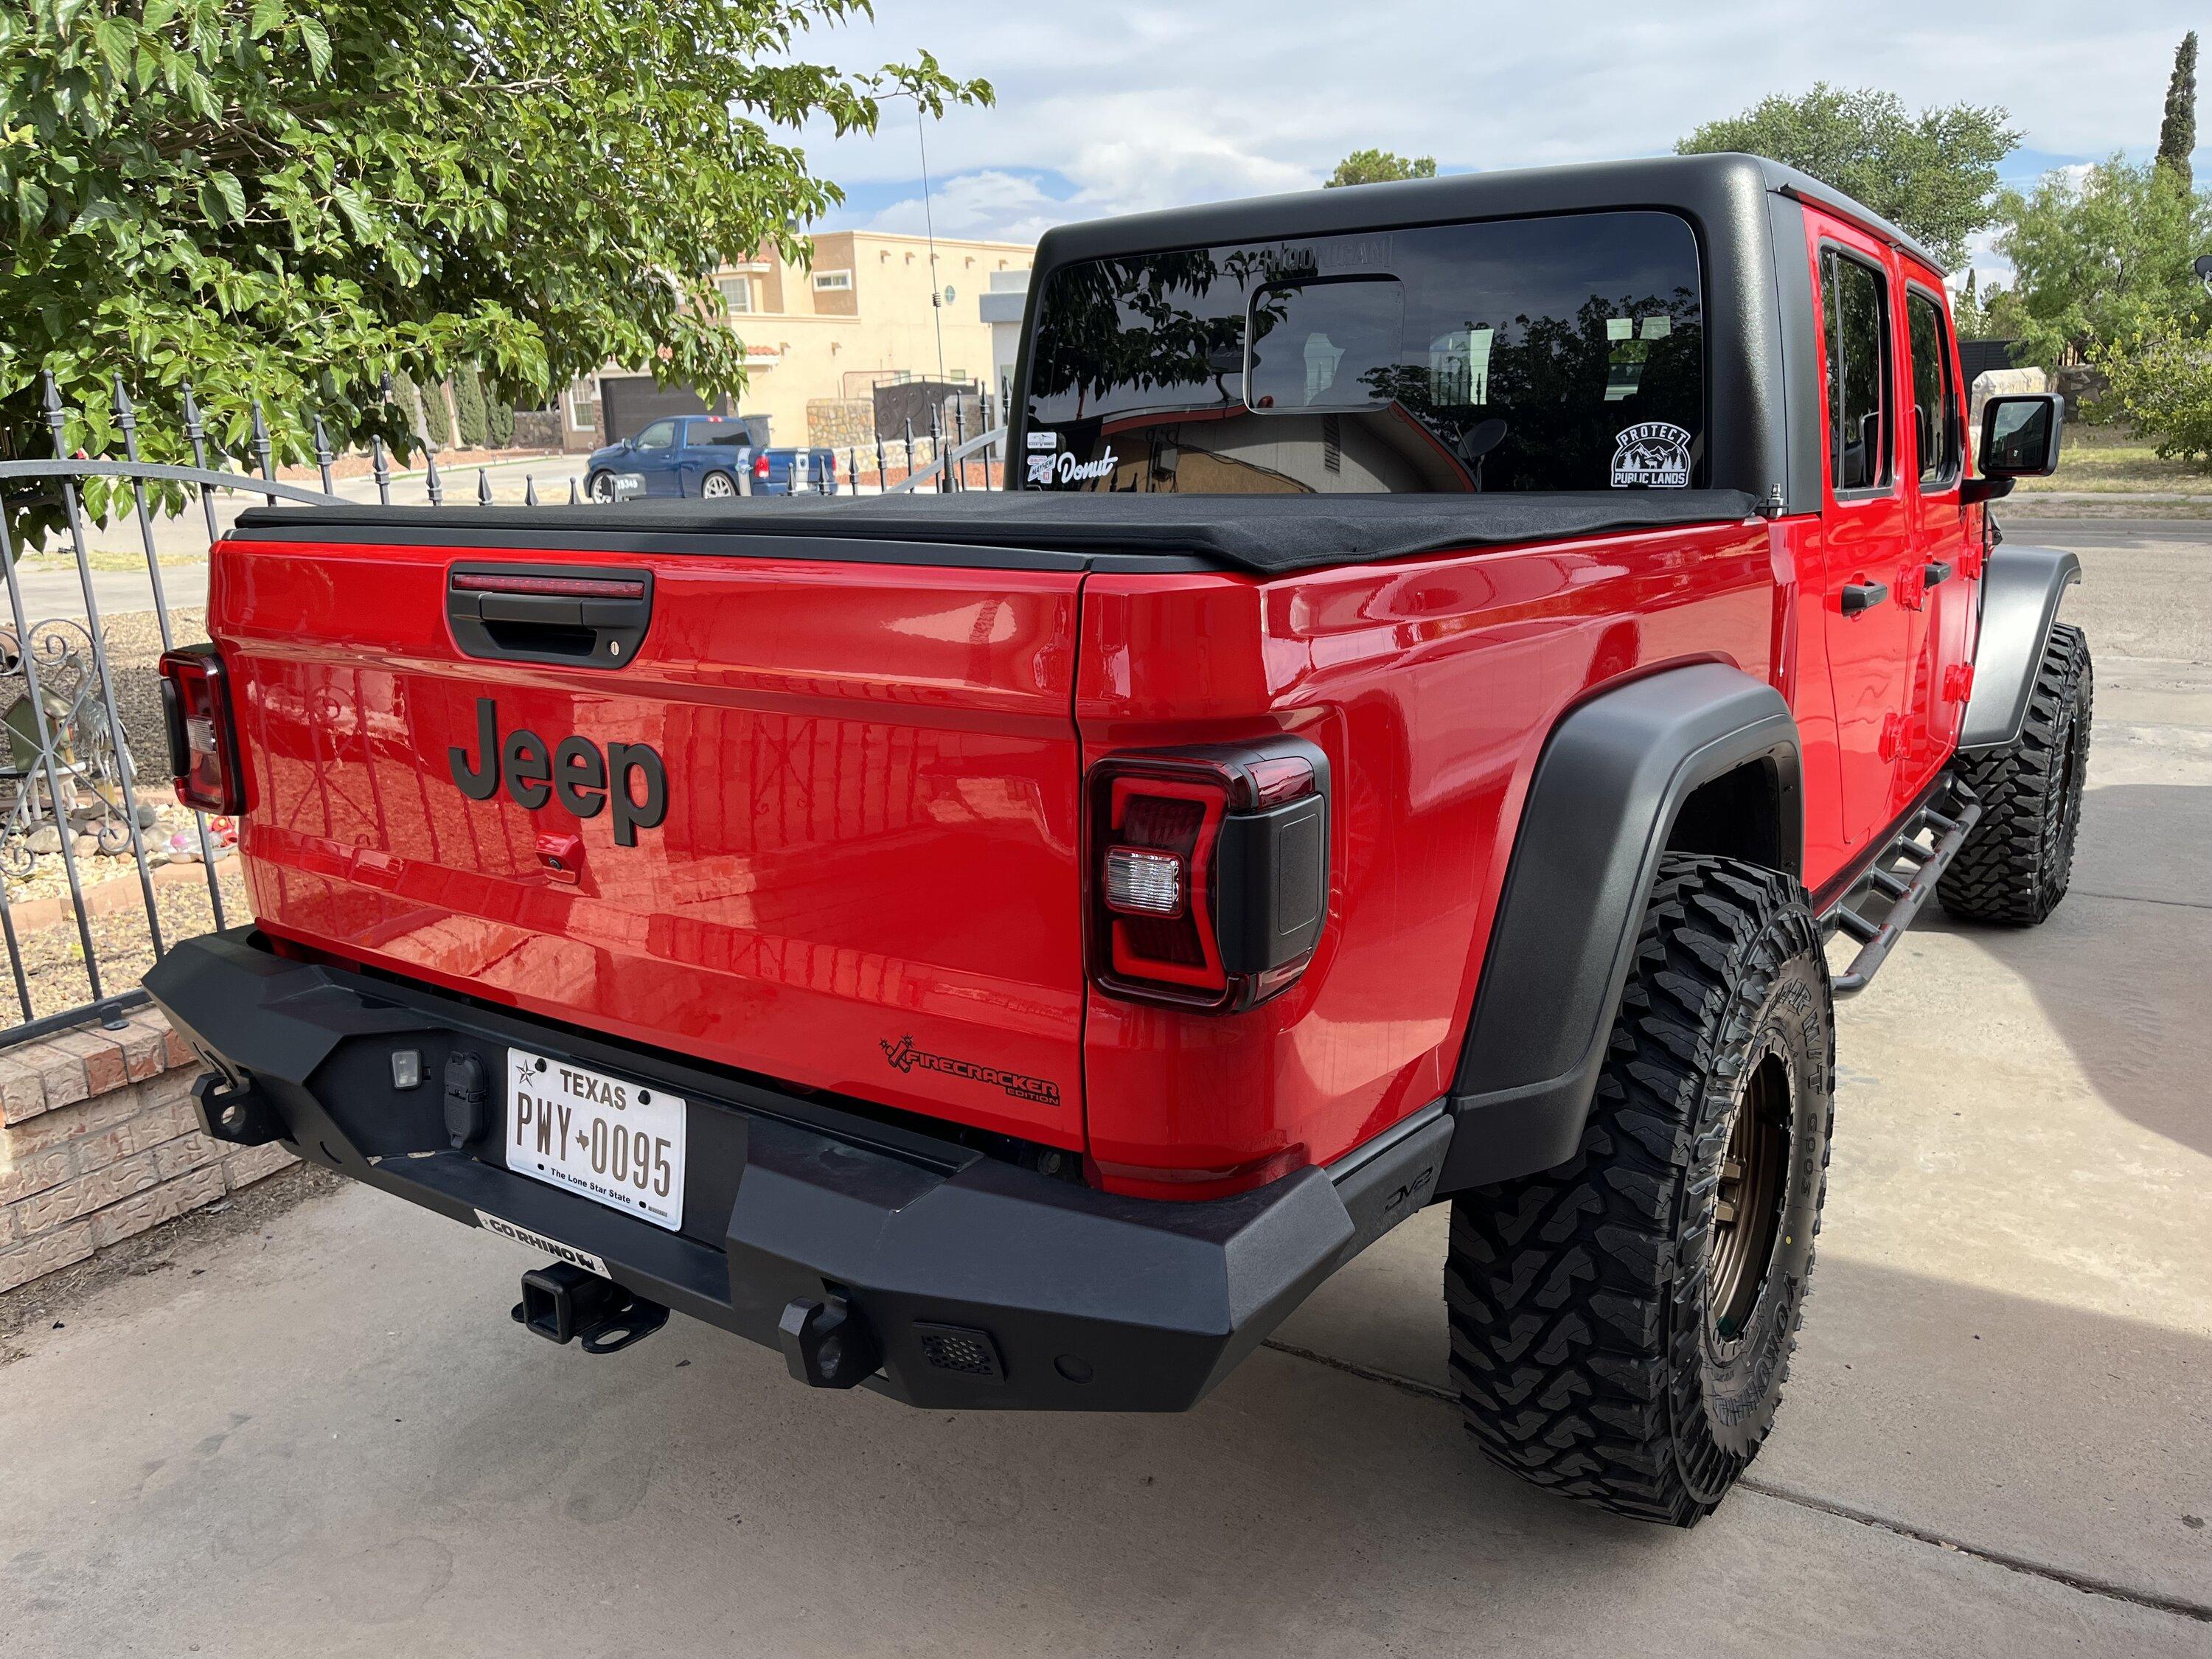
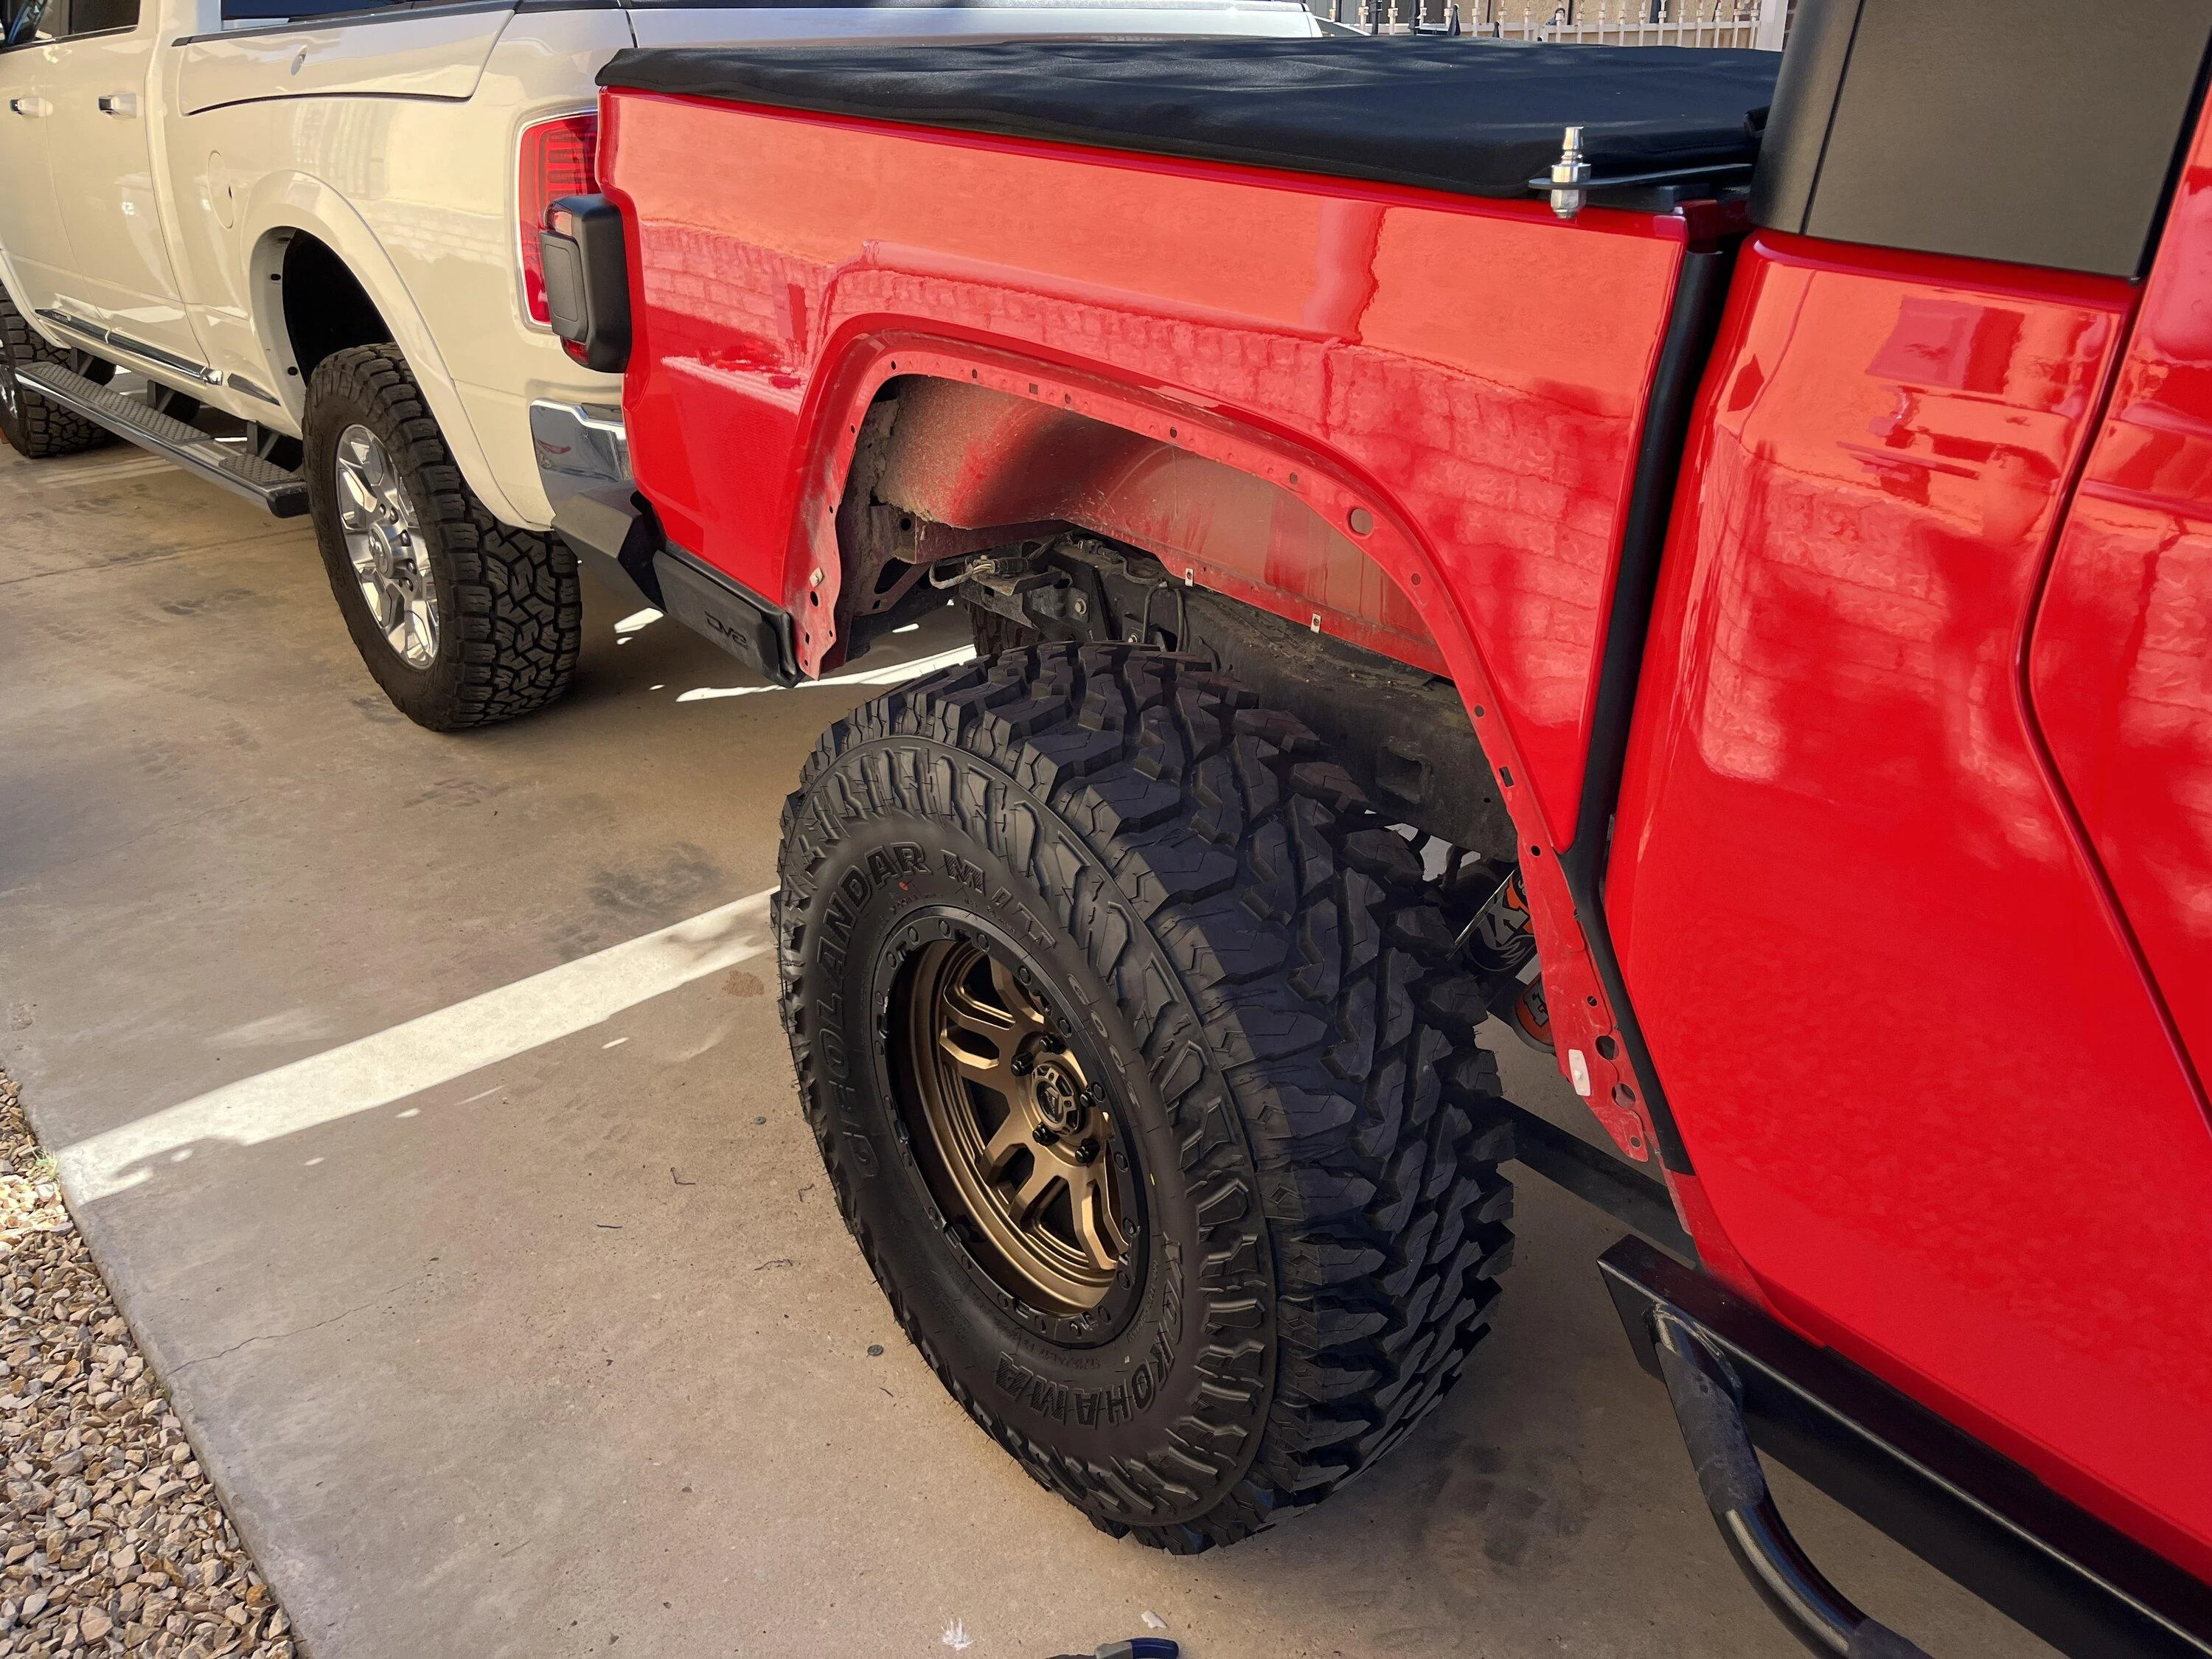
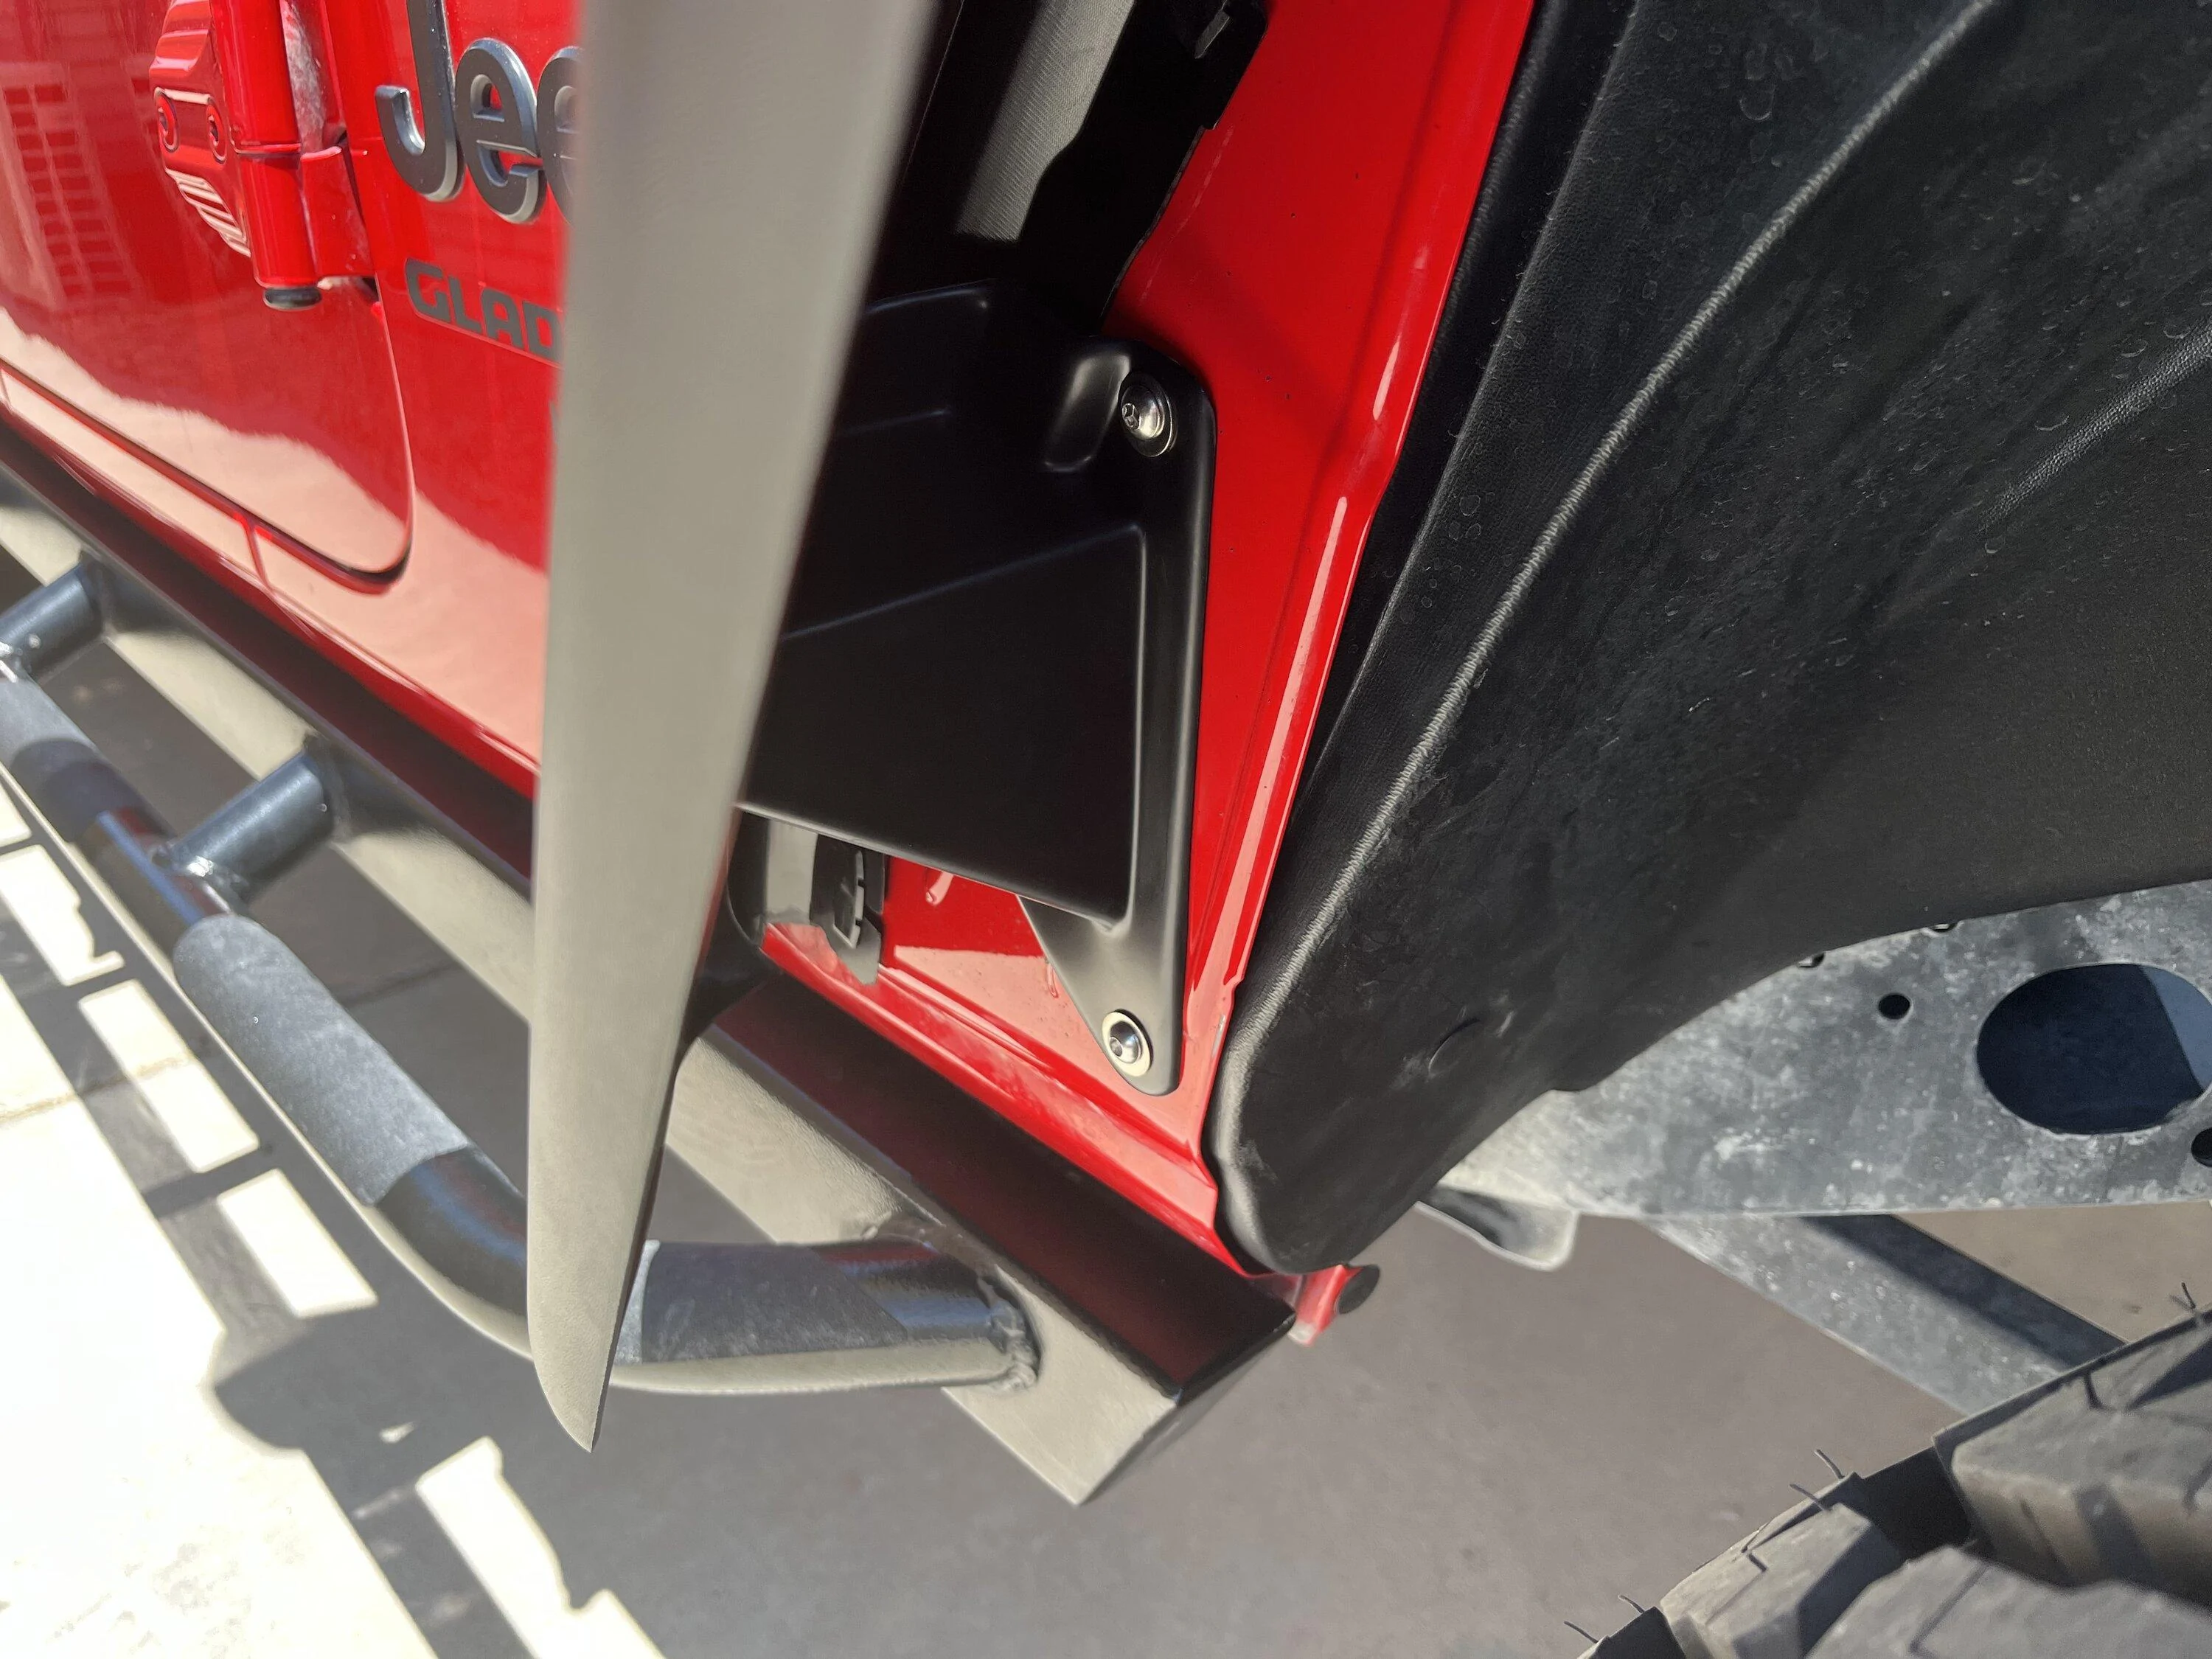
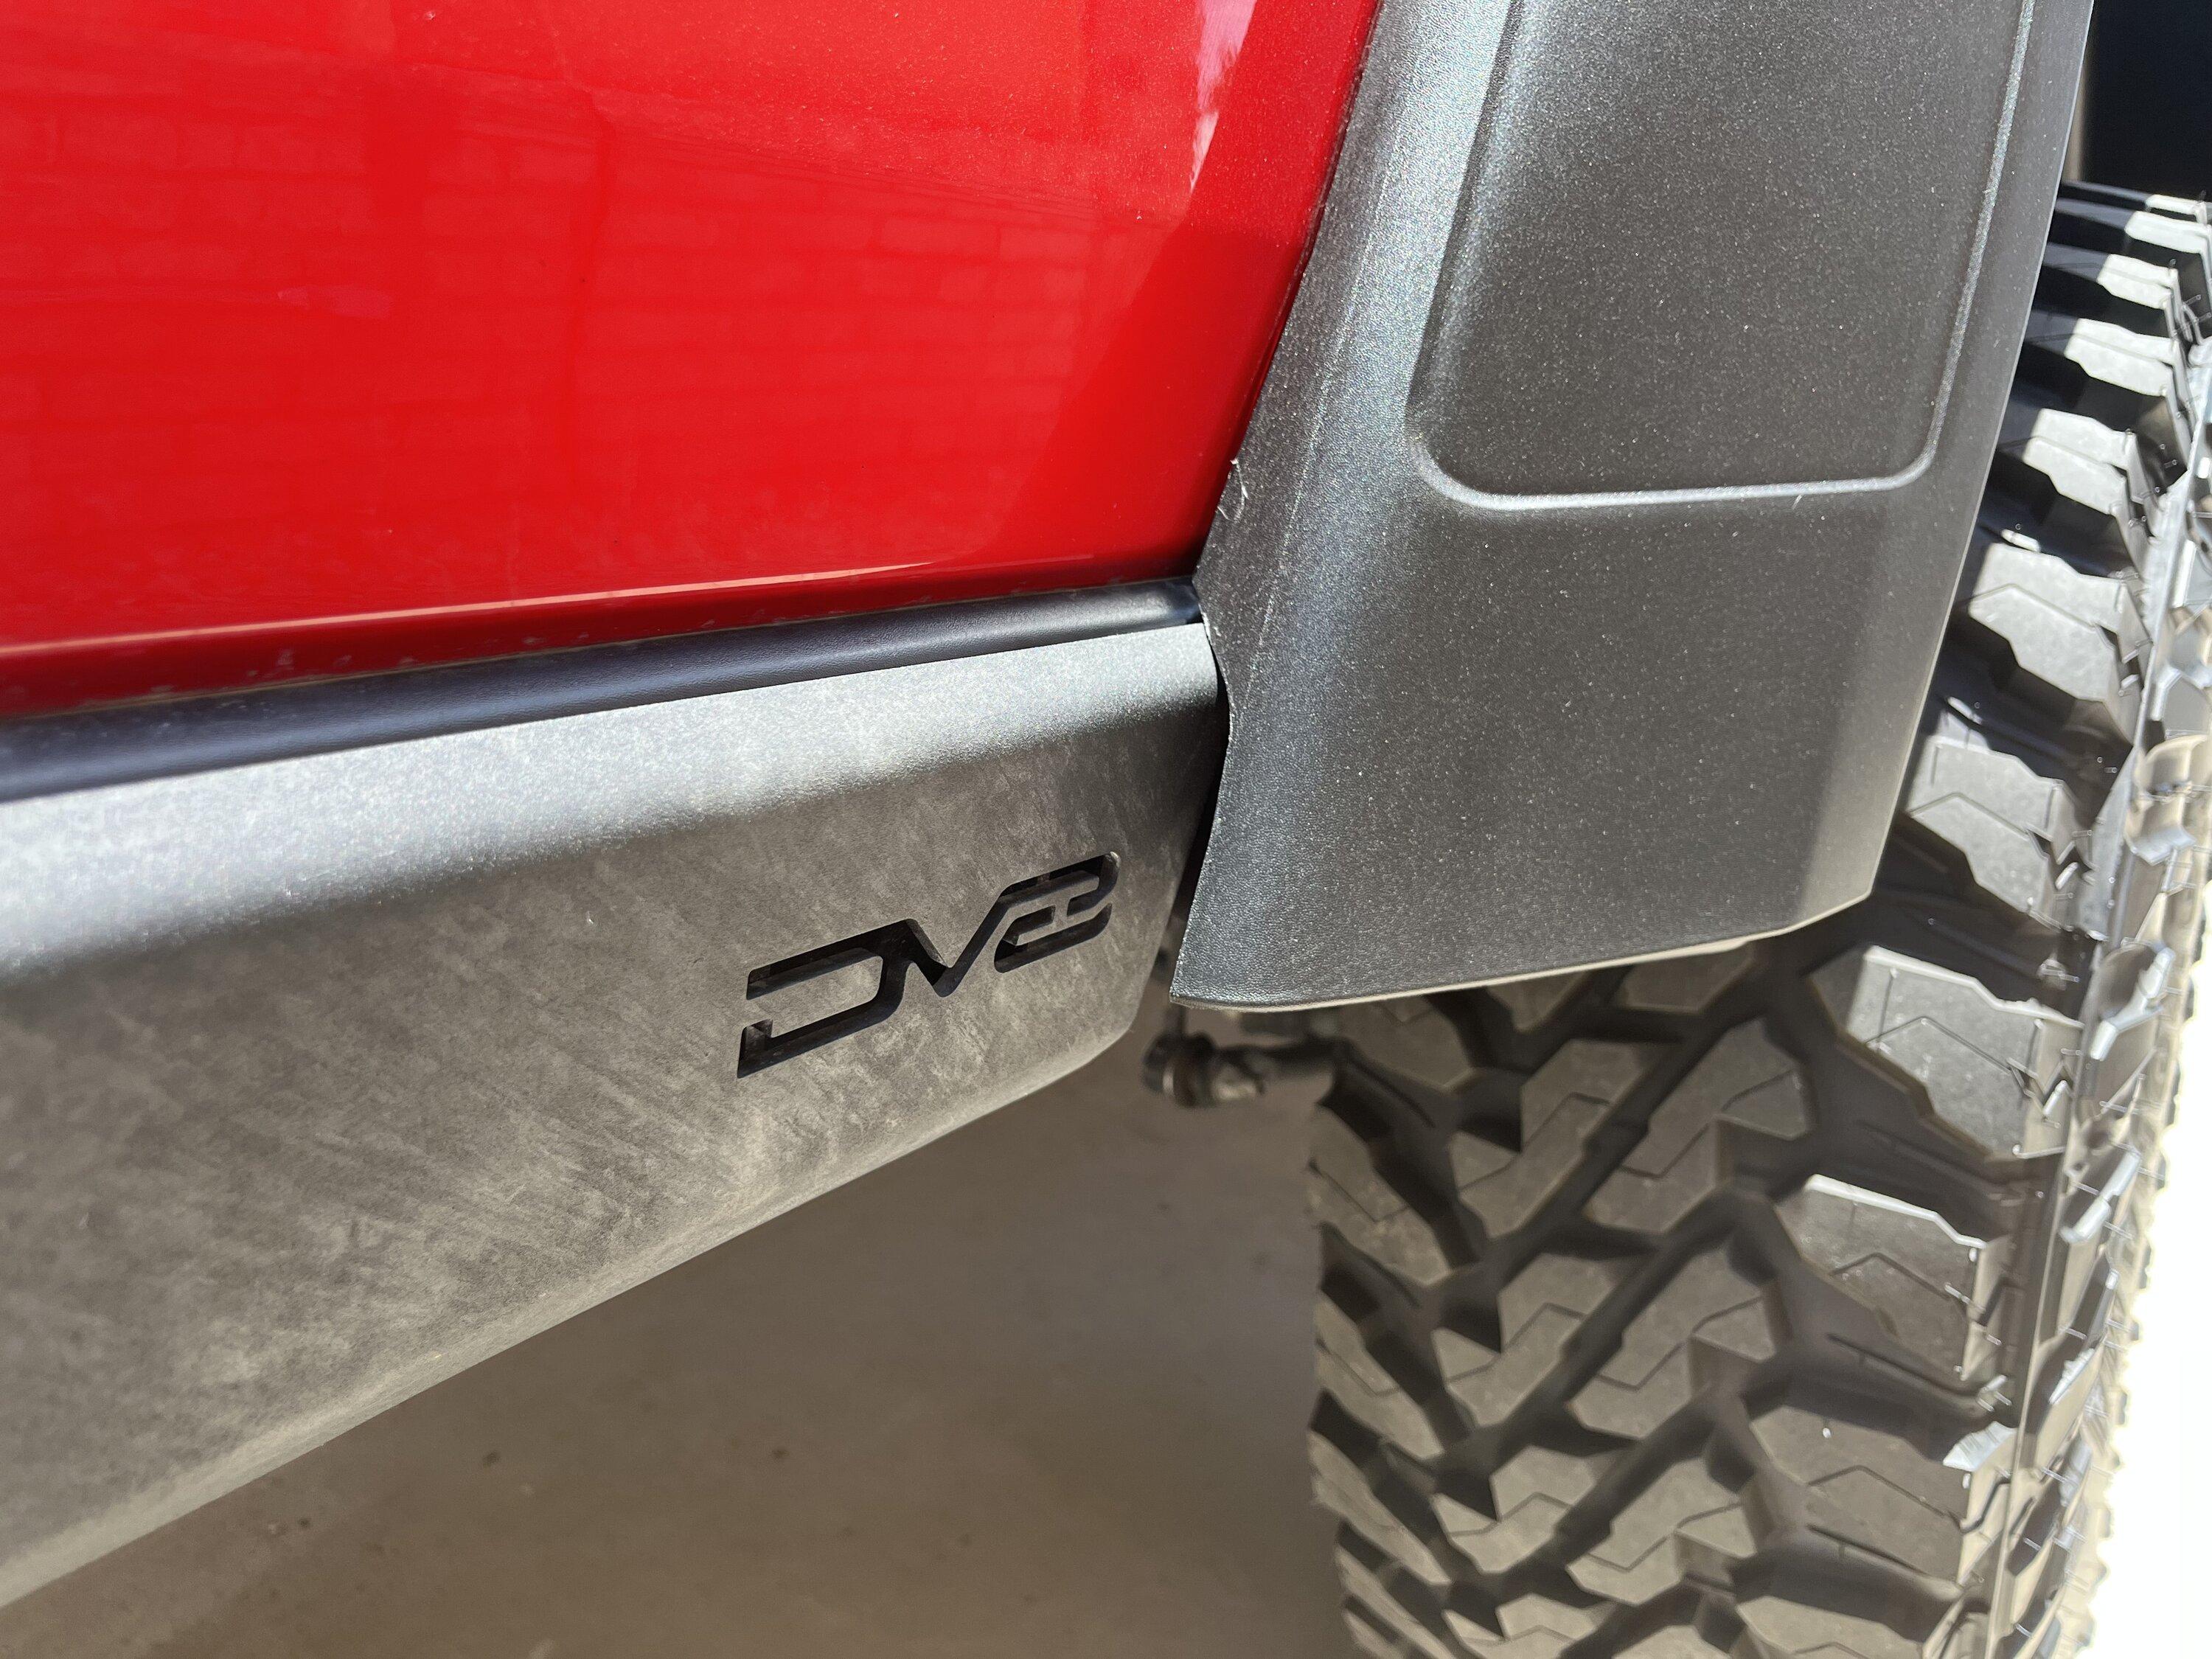
Here's the only modification I had to do, these flares are meant to sit flush with the plastic panel on the bedside. Since I have DV8 bed protectors, I had to trim it with a box cutter. Trimmed a little more than I needed, but the cut is clean at least.
And that's it, all the flares are installed, feel free to ask any questions and I will try my best to answer them! I would definitely say these are a nice product despite some of the quirks, and I would recommend them!
Doing a write up on the Max Terrain flares for the Gladiator as it looks like they've become available since I last checked in March. Just a general walk through/log and some of my thoughts. For the folks out there who just want an idea of what they look like, here's a shot with everything done, there will be more pic's in the write-up. Spec's: 2.5 inch Ready lift, 37x12.5x17 Yokohama Geolander M/T, Fuel Ammo wheels (+1 offset, 5.04 inch backspacing, 9 inch wheel), 2020 Gladiator Sport:
Back to the write up. So with my new set of 37' Geolanders, I quickly realized that no amount of cutting and bending with a heat gun was going to make my Sport flares work. Tires are too big, and my wheels have too much backspacing/offset, sitting way past the edge of the factory flares:
So I pulled the trigger, 600 bucks after the rebate and slight discount. Comes with a set of front and rear flares, rear fender liners, a set of LED switchback marker lights, and all the brackets and hardware to make it work. My set was missing the 12 M6 U-Nuts needed for the rear liners, however I was able to steal the ones on the factory fender flares with a flat head screwdriver. Not a fan of the provided button head Allen bolts, too easy to strip, would have preferred hex bolts.
This install was surprisingly labor intensive, took me Friday afternoon after work, some prep work that night to get ready to finish the next day, and about 5 more hours Saturday morning. Also, they don't include a set of front inner liners, instead wanting you to trim the factory front liners, but in my opinion, this looks cheap and unfinished, so I kept the set of Paramount front liners I already had installed. Minus half a point for those two things. A photo of the flares in a slightly messy workspace:
Next was prepping the fenders for install, these new finders sit higher on the body, in order to provide more clearance. In order to protect the paint, RR provides "Trim Foam". What I got was 3M rubber weather stripping (same thing right?). This needs to be hand applied to the contacting edge of each fender, with some provided adhesion promoter (be careful with this stuff, its pretty runny). This stuff is also used to hold the double sided tape used for some of the supporting brackets. This all took about an hour. Here's a photo of some of the left overs.
Now back to the truck, first things first, pulling the factory flares off, which I had cut to fit the RR chop light kit. There's a ton of reviews/videos on how to do this without hurting your paint, so I won't go into the details:
Next was attaching the front flare with the provided clips in the kit, although I would consider picking up spare clips, or upgrading to a set of retention hardware from American Adventure Lab. I have seen some people paint these flares, they require some prep work as they are textured, which can show through the paint. I personally prefer unpainted flares, although if these fade in a few years like most plastics do in the sun out here, I may either paint them body color, or most likely I'll bedliner them.
Here's my only major complaint about this product. For some strange reason, they omitted two clips on the front flare. This leaves this section unsupported even after all other supports have been added, and results in the flare not sitting flush to the body in this section. An additional support brace would fix this issue, I will have to make something in the 3D printer. For now some adjustments on both the front and rear bracing gets them close enough, although they're still wobbly if you press onto them on that side.
Now some details on the LED marker lights, it comes with a set of instructions on how to wire it based on your setup, I chose to wire it in the factory LED configuration as I have a Tazer and was able to reprogram my truck. The light bracket also provides support to the front of the flare, and required lots of adjustment, even then, it is still doesn't have as nice fitment as I would like. Note the bracket which uses some of the double sided tape to hold to the flare, which you then use the hardware to press against it to apply pressure so the tape sets. If this tape fails and my flare starts flapping in the wind, I'll probably attach it using some plastic bond. One more thing that I wanted to note, the metal tab of the bracket that reached out to the grill stuck out too far and was actually sitting on the paint. In addition, the notch to accommodate the plastic reinforcement from the grill was slightly off. A quick correction in a vice for the bracket, and a small notch on the back plastic for the grill fixed these issues.
*When tightening up the lights to the provided light support brackets, be VERY CAREFUL with how tight you put the mounting screws. The silver ones in the above photo.
Rugged Ridge, in their infinite wisdom, opted to have you use self tapping screws instead of having the light housing already tapped for a standard bolt/screw. Since these housings are plastic, and the self tapping screws are larger, they split as I ran them through. I repaired mine with some JB Plastic weld, but this is a lazy design decision that damages the product during normal installation. If you can find different hardware that will work, I HIGHLY suggest that route, or you can try to reinforce the plastic housing with something like hose clamps.
The rear support brace was then added, which uses more double sided tape to hold the flare in place (it was here I managed to strip one of the hex bolts, had to use the factory hardware I had taken off as a replacement). The front liners were reinstalled:
A side by side shot of the new flare and the old one, I gained about 4 inches of clearance!
The flare conforms against the vent well, and looks like it would work with some of the aftermarket lights that some folk put there.

Front hood latches open no problem. No deep valley for rocks to catch in like the Rubi flares.
These flares are about 1 inch wider than stock, so now my tires fit much better than before, the tread lines up perfectly with the edge of the flare.
Next was staring the install on the rear liners. These liners required the use of the "provided" U-nuts, and some tree clips. I opted to just reuse the factory 8mm bolts. I also attached the rear support for the flare in advance.
Next was the rear flare, double check the placement of the clips on this flare as some of the clip cutouts are actually used by the bolts for the inner liner. Snap rear flare into place and bolt up the hardware to the liner. Pull the tape for the rear support after that. Done.
Here's the only modification I had to do, these flares are meant to sit flush with the plastic panel on the bedside. Since I have DV8 bed protectors, I had to trim it with a box cutter. Trimmed a little more than I needed, but the cut is clean at least.
And that's it, all the flares are installed, feel free to ask any questions and I will try my best to answer them! I would definitely say these are a nice product despite some of the quirks, and I would recommend them!
Sponsored
Last edited:
