Sponsored

Daystar 2" Lift for Mojave

wpscheel

Active Member
First Name
Phillip
Joined
Jul 15, 2020
Threads
3
Messages
44
Reaction score
93
Location
Mico Texas
Vehicle(s)
2020 Gladiator Mojave
Occupation
Retired
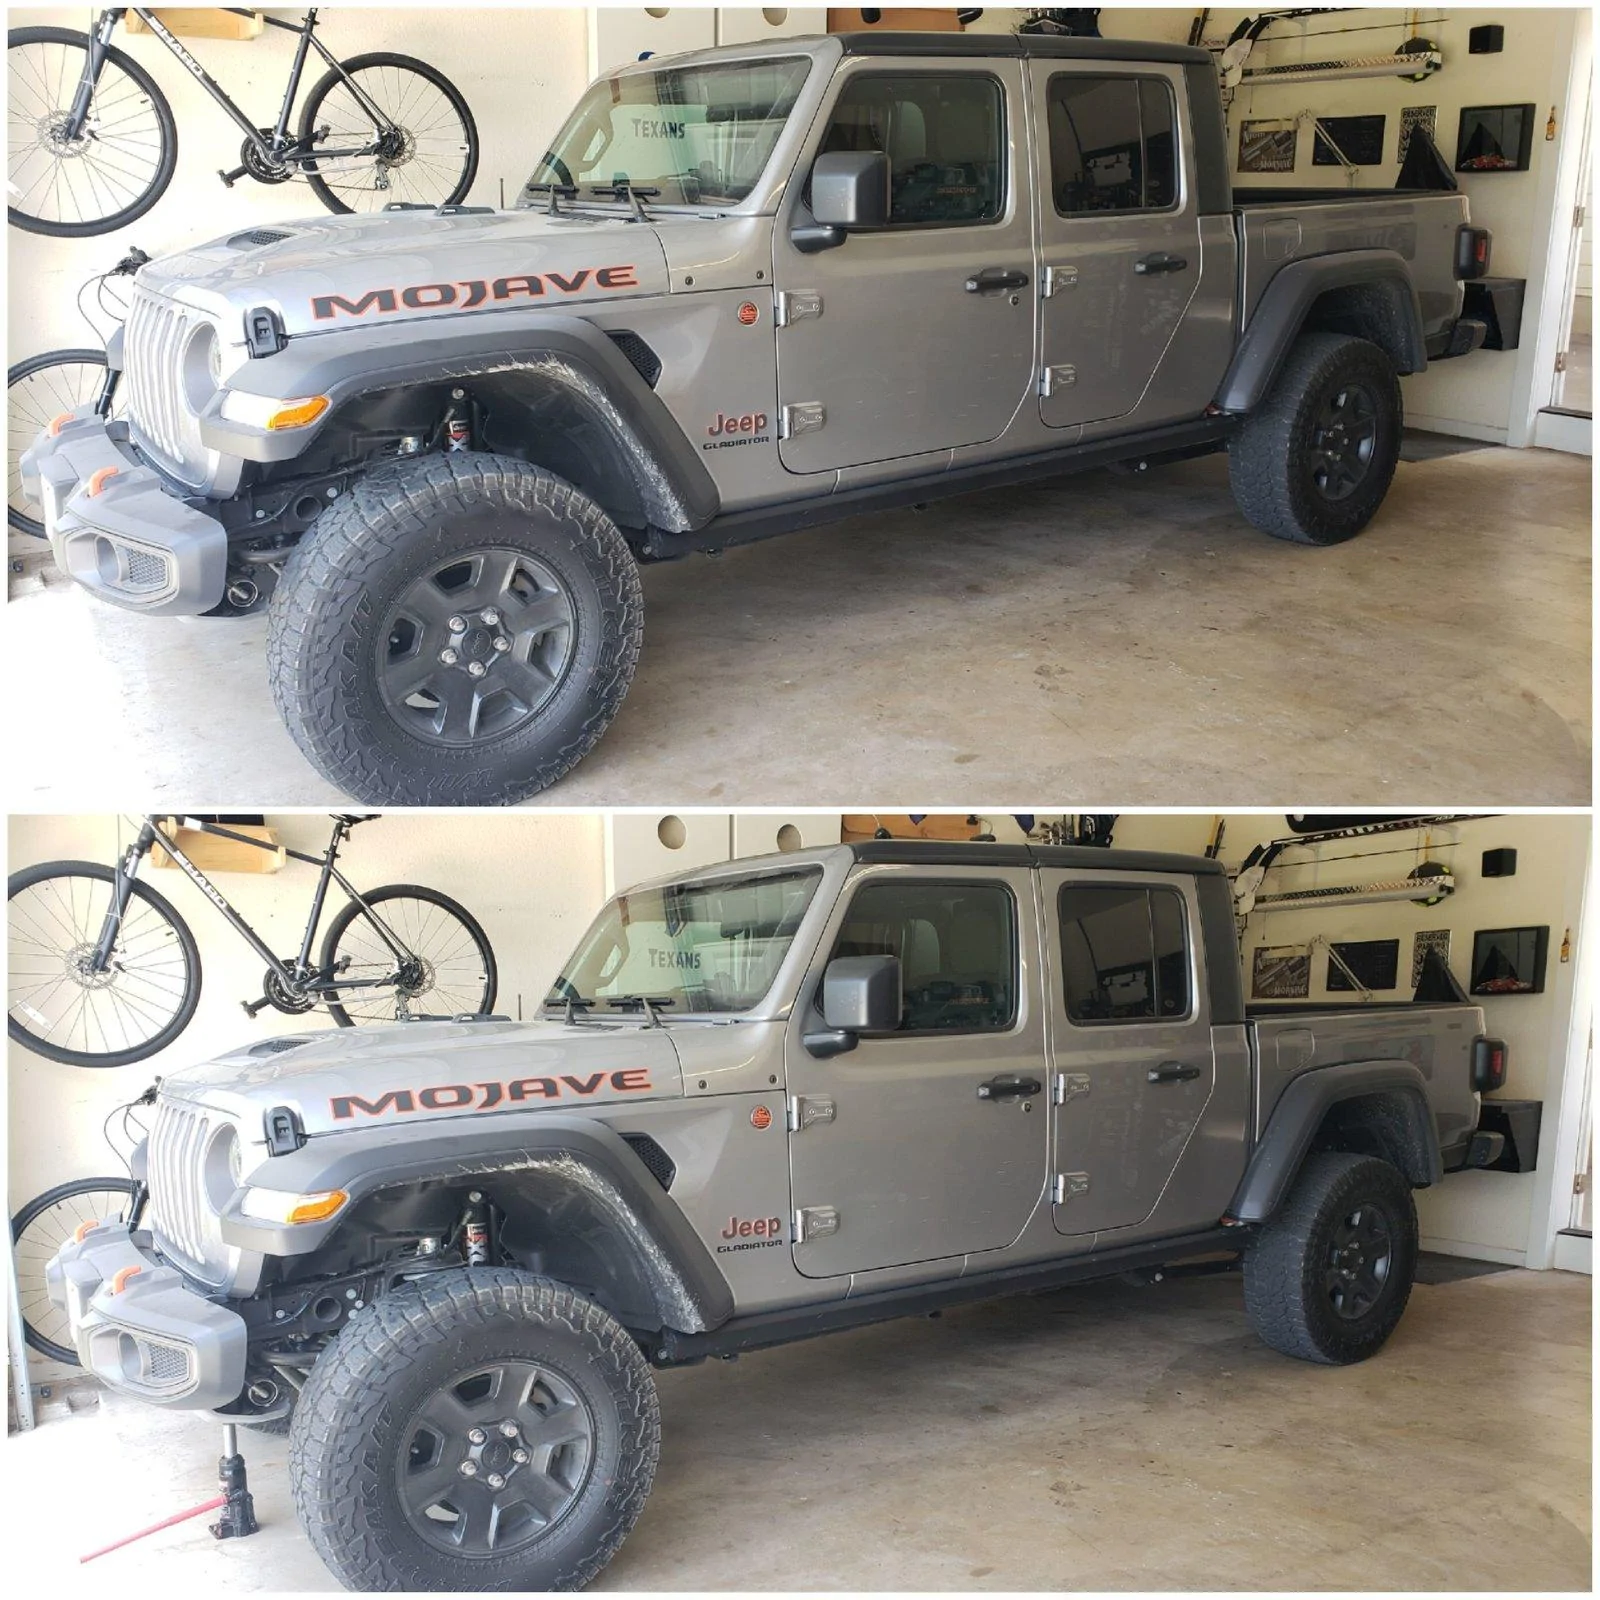
So here's my dilemma. My Mojave sits perfect right now, even just slightly nose up depending on weight transfer, and I dont want to change that, nor do I want to change the suspension parts or ride quality that i paid extra for, but i wanted a little more height.
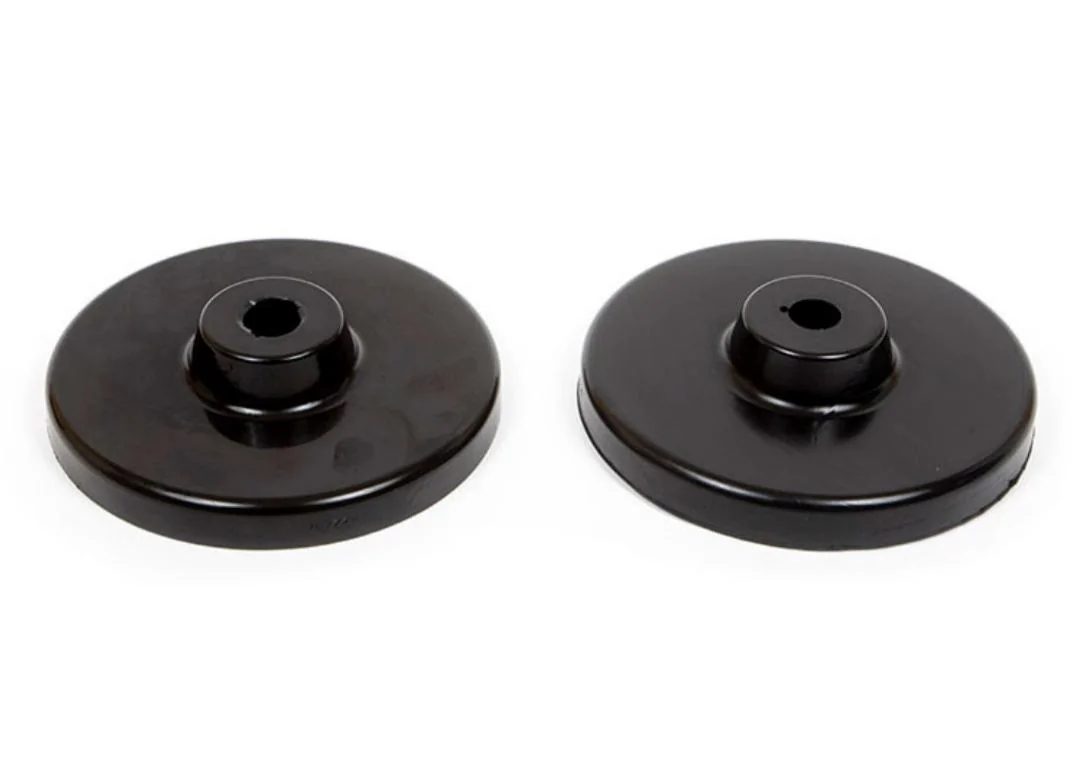
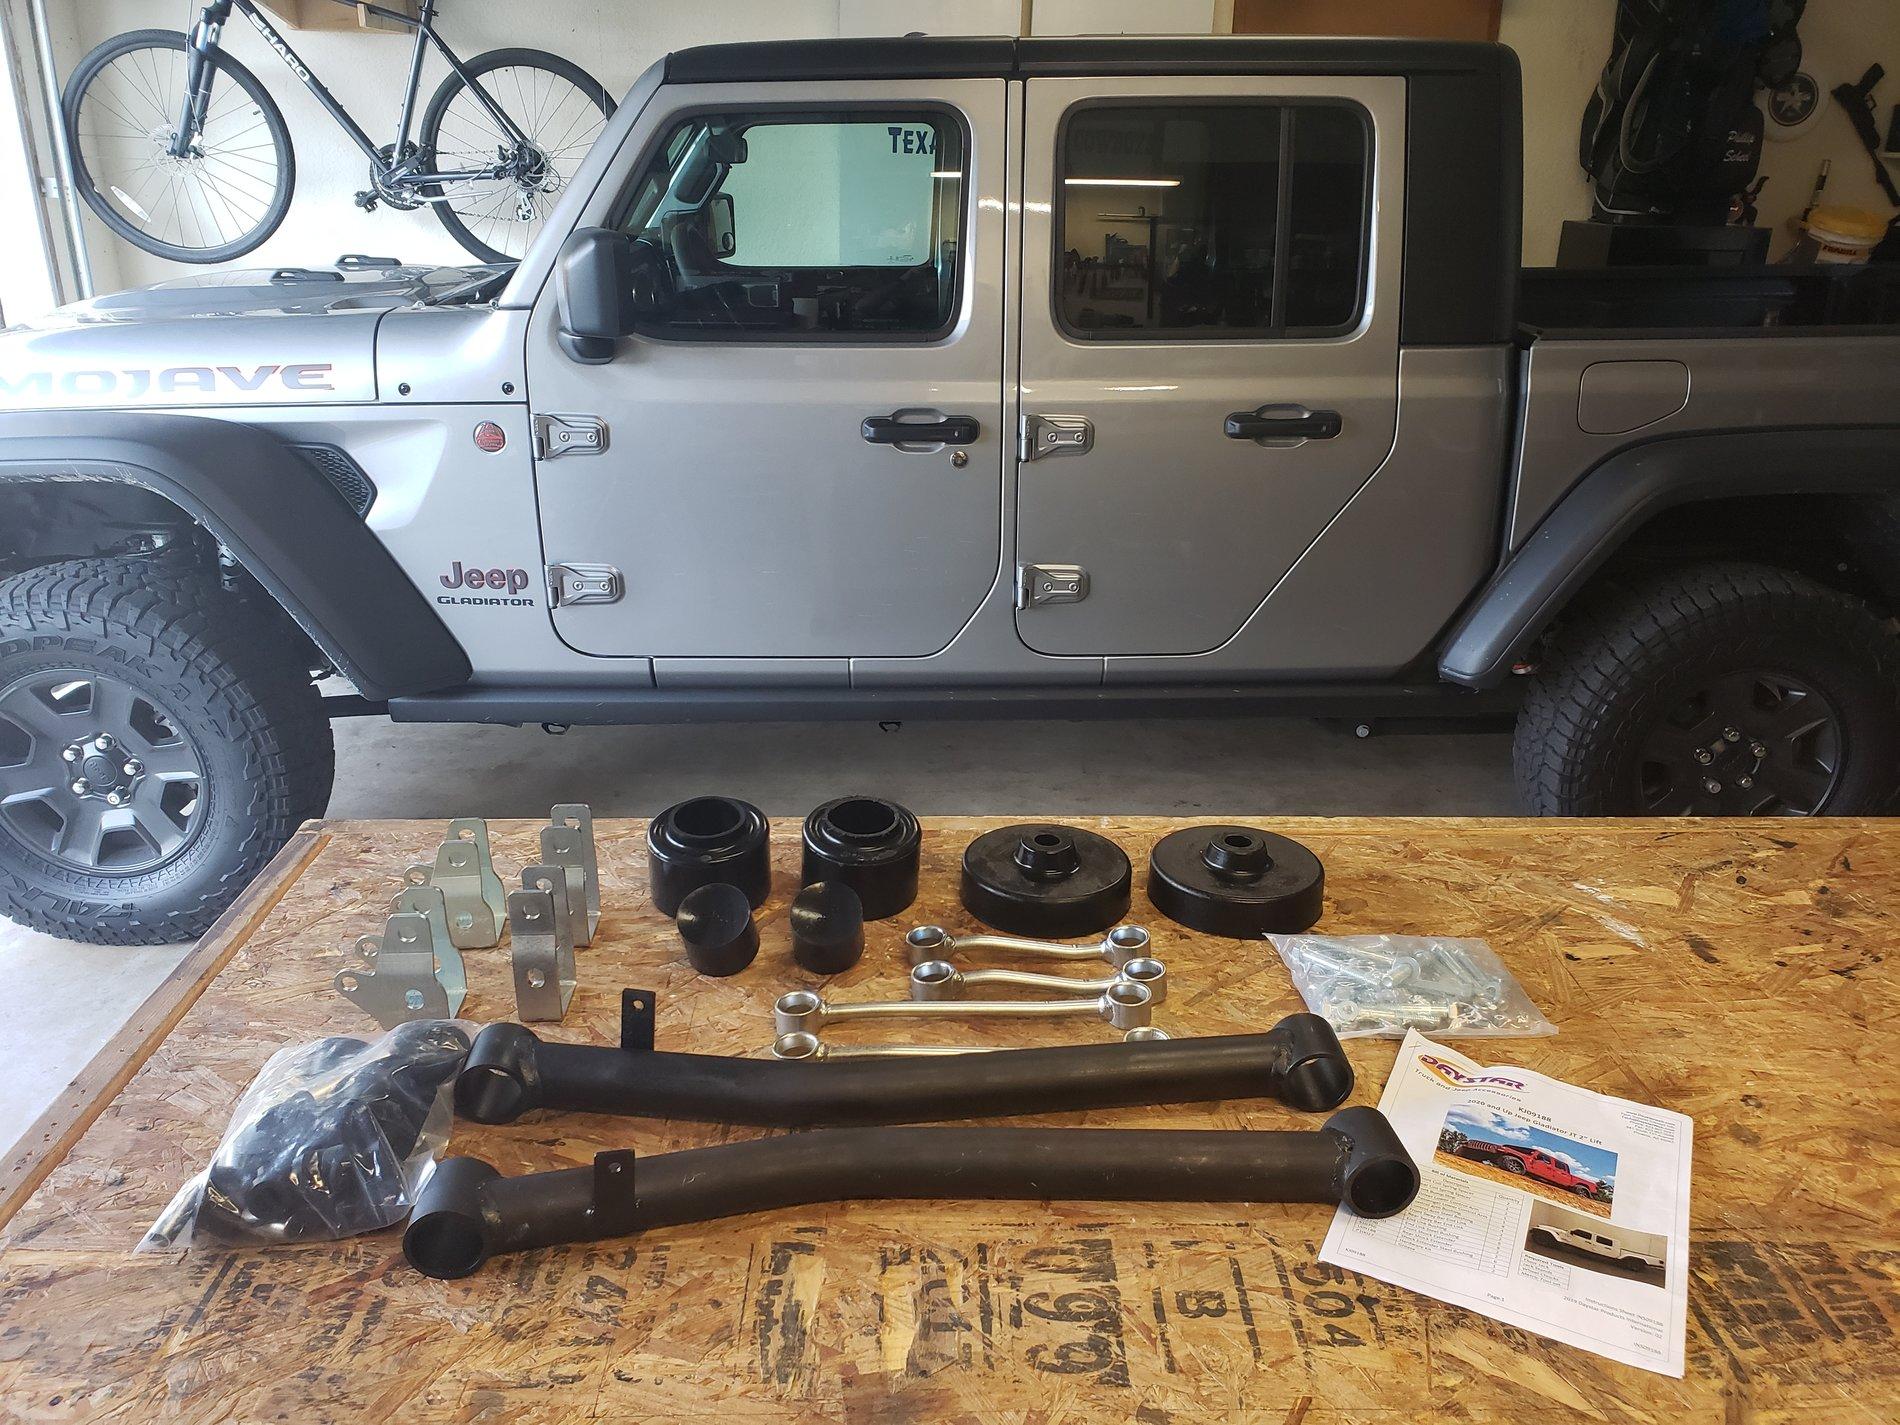
I went for a Daystar 2" spacer cause i was assured that it lifted 2" in the front as well as 2" in the rear.
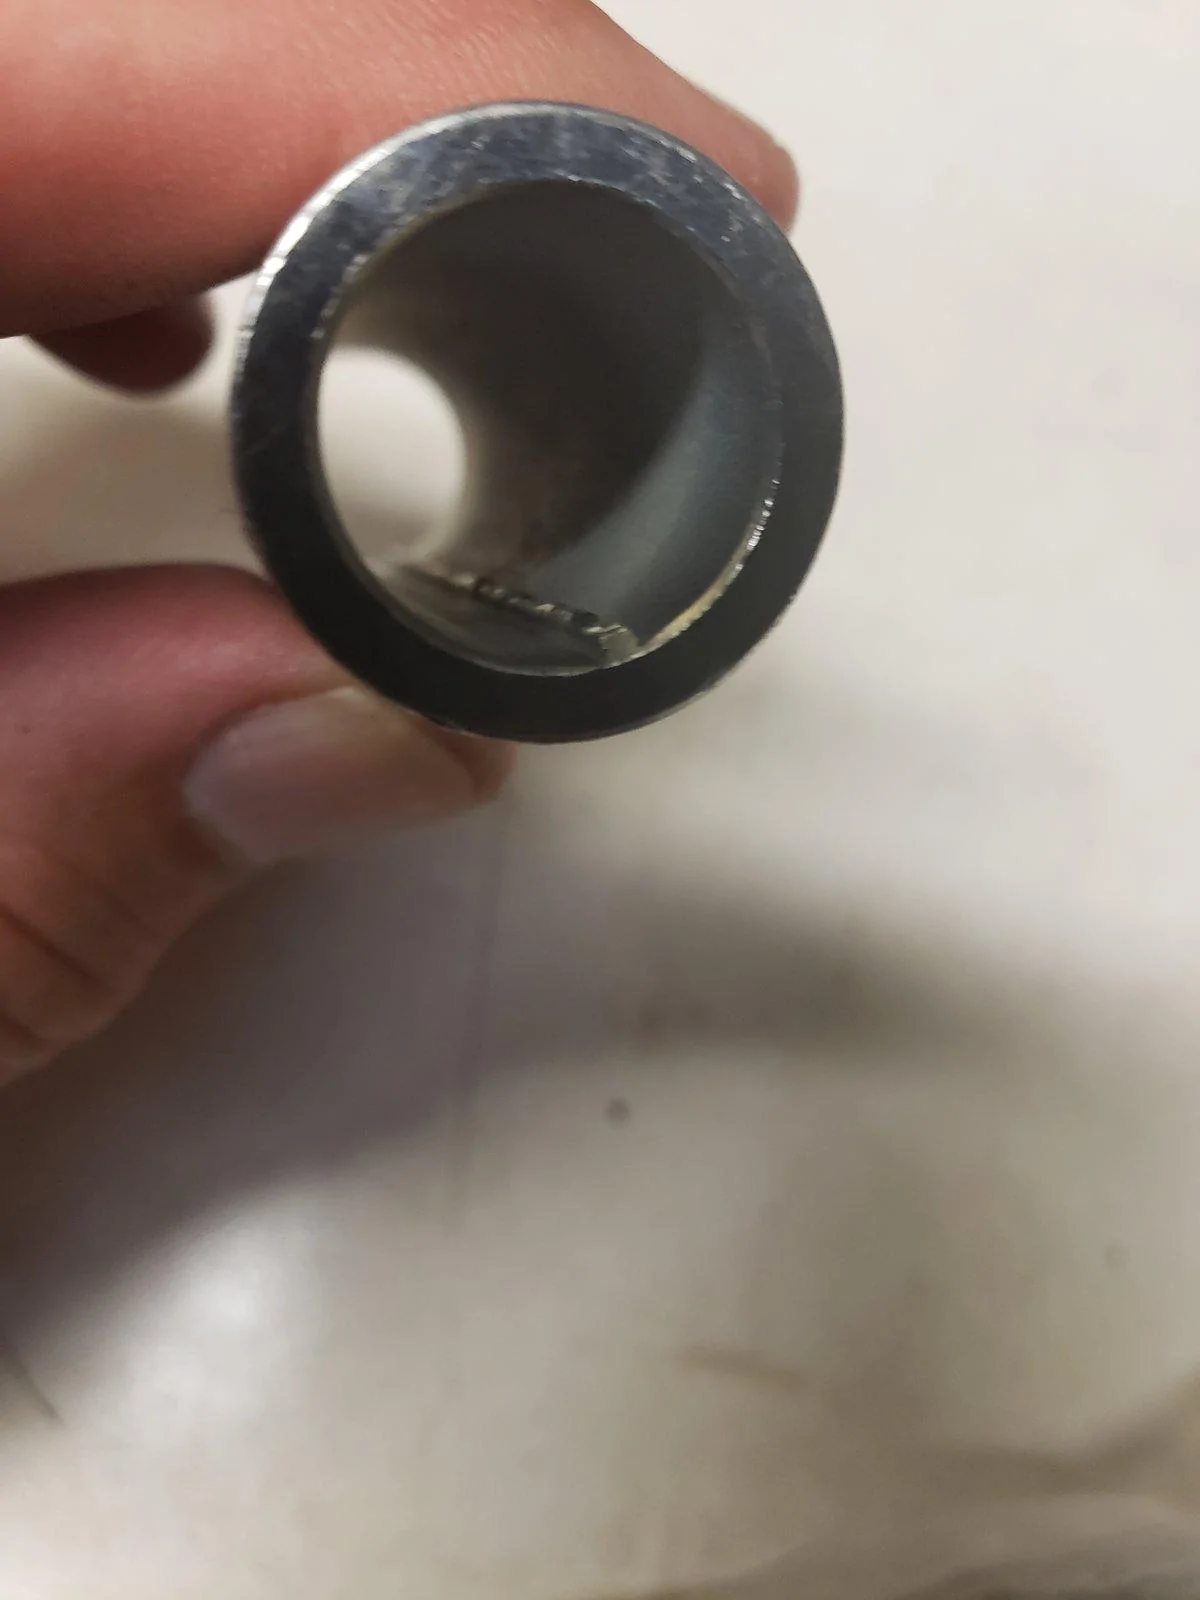
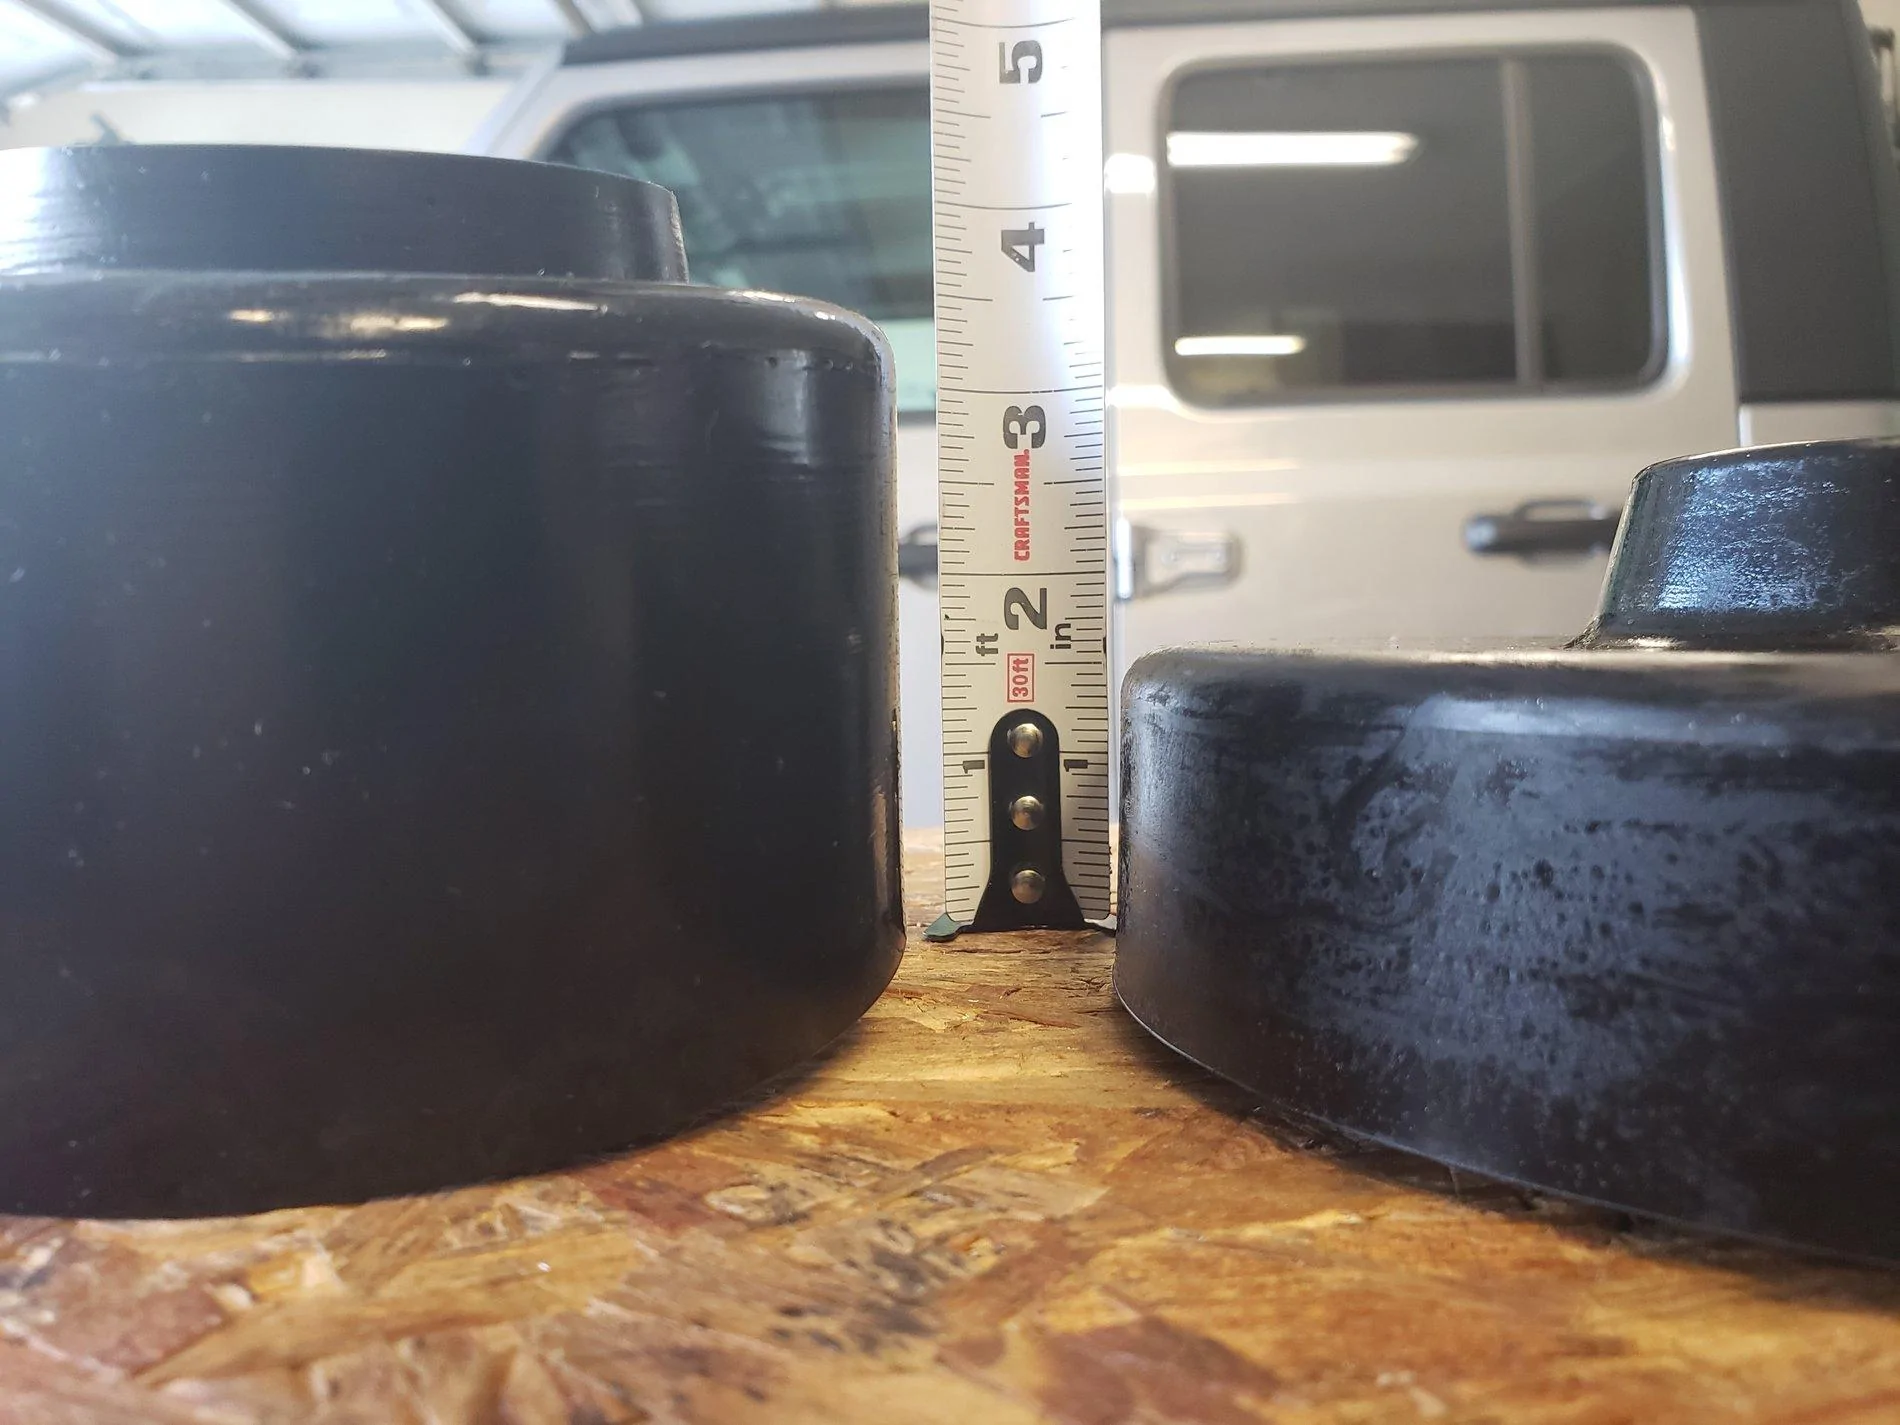
Maybe just me but how the hell do I get 2" lift in the rear with 1 1/2" spacers? I'm reluctant to install cause it looks like it's gonna throw my nose up another 1/2" which is not what I paid for, nor what I want. The front looks like it will definitely give me a full 2" as the existing spacer takes up a little over an inch so replacing it with the provided spacer should be right at 2" gain.
Am I crazy, just being picky or missing something here? So mad cause I wanted to install this weekend but thinking its gonna havta wait till I get clarification on how a 1 1/2" spacer provides 2" of lift.

20200807_192104.jpg


20200807_192432.jpg
Sponsored


Stickyteflon

Active Member
First Name
Sean
Joined
Nov 12, 2019
Threads
1
Messages
41
Reaction score
57
Location
Virginia
Vehicle(s)
2020 Gladiator Rubicon, 2015 Cherokee Trail Hawk, 2019 MX5 RF GTS
Vehicle Showcase
1
I can’t really help w the Mojave part of this but I will let you know I did this exact lift in my driveway this week on my Rubicon. The paper instructions are crap.. there are at least two YouTube vids on installing this lift. I would advise watching them and seeing the tricks to get it installed.

Im happy with the way mine sits but it’s a Rubicon... also if you find a way to drill the holes for the rear shock extension bracket without pulling the rotor let me know. I think I’m going to go without the shock extensions on the rears.
Jeep Gladiator Daystar 2" Lift for Mojave 3E5CEF19-CC21-4B79-B567-ED9CE38E35DA


YouTube links:


OP
OP
wpscheel

wpscheel

Active Member
First Name
Phillip
Joined
Jul 15, 2020
Threads
3
Messages
44
Reaction score
93
Location
Mico Texas
Vehicle(s)
2020 Gladiator Mojave
Occupation
Retired
Yours turned out great and I've seen those videos. Not too concerned with doing the lift but more with the results.
Do you have specifics to how much it was raised front and rear after the install? That's where my concern is given that mine already sits level.
I think the statement that it lifts 2" front and rear is I correct. Actually I'd even be play if it only lifted 1.5" front and rear, as long as they are to same but based on the measurements I'm seeing, that's not possible.
 
OP
OP
wpscheel

wpscheel

Active Member
First Name
Phillip
Joined
Jul 15, 2020
Threads
3
Messages
44
Reaction score
93
Location
Mico Texas
Vehicle(s)
2020 Gladiator Mojave
Occupation
Retired
I also noticed that the sleeves that go into the bushings for the control arms have a ridge along the inside which if the sleeves are in fact the correct size for the bolts, there's no way the bolts will fit without some drilling and/or grinding on my part. Did you experience this as well?

20200807_202935.jpg
 

Stickyteflon

Active Member
First Name
Sean
Joined
Nov 12, 2019
Threads
1
Messages
41
Reaction score
57
Location
Virginia
Vehicle(s)
2020 Gladiator Rubicon, 2015 Cherokee Trail Hawk, 2019 MX5 RF GTS
Vehicle Showcase
1
Unfortunately I had so many other things going on that I didn’t take pre install height measurements vs post.

In regards to those bushings, I noticed that too. Some how by luck of the draw the drivers side bolts zipped right in with my impact wrench. For some reason the passenger side was a pain in the ass. I had to run the bolt in and out in increments to get it to run through the bushing. Since they are greased they just wanted to spin on the bolt after a certain depth. Thankfully I have air tools cause I don’t think I could have done it by hand. If I had to do it again I’d definitely insure I could get the bolt though first. Also pay close attention to what oem hardware vs kit hardware goes where when reinstalling the front shocks and extension. I believe the paper instructions may have it backwards and the vid from cjponyparts is correct else the oem shock bolt will hit the new control arm at the abs/tps relocation bracket. Another thing, you will have to drill a new hole on the drivers side shock mount on the bottom to get the extension to sit flush / correctly. Passenger side was fine. There is not a left or right bracket either. I check and they are identical.
Like I said... there is a lot left to be desired with these instructions.
 

Sponsored

Stickyteflon

Active Member
First Name
Sean
Joined
Nov 12, 2019
Threads
1
Messages
41
Reaction score
57
Location
Virginia
Vehicle(s)
2020 Gladiator Rubicon, 2015 Cherokee Trail Hawk, 2019 MX5 RF GTS
Vehicle Showcase
1
I’m curious to see when you’re done what your axle centering looks like. My front is about 1/16th to 1/8th shifted to the driver side and the rear is closer to 3/16th to 1/4 shift. I’m not planning to add new track bars with those numbers. Just interesting that with a smaller puck in the rear there was a greater geometry change in the rear.

I also Had to adjust the drag-link afterwards to recenter the steering wheel. It was off center by about 15-20 deg.
 
OP
OP
wpscheel

wpscheel

Active Member
First Name
Phillip
Joined
Jul 15, 2020
Threads
3
Messages
44
Reaction score
93
Location
Mico Texas
Vehicle(s)
2020 Gladiator Mojave
Occupation
Retired
Thanks for the insight. I am on hold till Monday when I can talk to someone at Daystar and see what's going on. I am certainly not going to install as it is because given that mine already sits level I do not want to put on a kit that's gonna make it sit 1/2" high in the front especially when I am going to install a bed rack later which will squat the rear even more.
As for the axle shift. I think it has to do with the slight angle difference that the track bars sit which is why there is a difference in the amount of offset you see. If I recall the rear is more level than the front. I had a similar issue with my JKU when I put a 3.5 lift on it. No one else noticed it but I sure did, however it went over 100k miles and I had no issues.
 

Renegade

Well-Known Member
First Name
Zac
Joined
Sep 11, 2017
Threads
38
Messages
3,562
Reaction score
4,693
Location
Signal Mountain, TN
Vehicle(s)
2020 JT
Build Thread
Link
The Daystar 2” kit does raise your Jeep 2” in front and 1.5” in rear. Be mindful that your front flares on a Rubicon/Mojave are actually mounted higher on the body than the rear, So simply measuring a fender gap can be misleading. Drill all the way through from the inside to mount the rear shock extensions. If you don’t use them, you will limit your suspension travel, and your Jeep will use the extra droop these allow. Pro tip- swap out the split-sleeve metal bushings in the sway bar links for solid ones from Lowe’s. You will be able to get proper torque on them without them collapsing.

E8C124FA-2465-400C-80F9-1C74A2CCABA3.png
 
OP
OP
wpscheel

wpscheel

Active Member
First Name
Phillip
Joined
Jul 15, 2020
Threads
3
Messages
44
Reaction score
93
Location
Mico Texas
Vehicle(s)
2020 Gladiator Mojave
Occupation
Retired
Good tips. So I guess I'm stuck figuring out what to do for that extra 1/2" lift in the rear.
Anyone have suggestions?
 

Deleted member 24880

Daystar makes a 0.5” spacer for the rear I think. Maybe you can stack that with the ones you got in the kit equaling the 2” Your looking for. don't forget there is a 1/2” rake from the factory so my guess is the kit will actually level the truck front to back as you have it. No experience with this kit but just what I have learned during research and other threads. If you have free time to install it I would just do it and see how it look. You can always raise the rear a 1/2” if you don’t like it.
 

Sponsored

OP
OP
wpscheel

wpscheel

Active Member
First Name
Phillip
Joined
Jul 15, 2020
Threads
3
Messages
44
Reaction score
93
Location
Mico Texas
Vehicle(s)
2020 Gladiator Mojave
Occupation
Retired
Thanks all. I am going to get the 3/4 spacer on its way to add if needed. My thinking is this... I currently like the stance but I will be adding a 120lb deck lid in coming months so the extra 1/4" will probably get eaten up to bring it back to stock orientation but just 2" higher all around. I'll install the basic kit and then add the 3/4. Since the are both Daystar and both have the same protruding center knob they should nest together and hold their position, especially with a little added help of some epoxy if this is the final solution.
I'll post some pics along the way when it happens.
 

Renegade

Well-Known Member
First Name
Zac
Joined
Sep 11, 2017
Threads
38
Messages
3,562
Reaction score
4,693
Location
Signal Mountain, TN
Vehicle(s)
2020 JT
Build Thread
Link
Thanks all. I am going to get the 3/4 spacer on its way to add if needed. My thinking is this... I currently like the stance but I will be adding a 120lb deck lid in coming months so the extra 1/4" will probably get eaten up to bring it back to stock orientation but just 2" higher all around. I'll install the basic kit and then add the 3/4. Since the are both Daystar and both have the same protruding center knob they should nest together and hold their position, especially with a little added help of some epoxy if this is the final solution.
I'll post some pics along the way when it happens.
I’ve not seen anyone stack rear spacers on a JT yet. I’m not sure it’s going to be the same as stacking front spacers. The front has the bump stop tube to hold everything in place. The rear doesn’t. I would be careful about that. You might just try to get a 1-piece rear spacer or springs the correct height.
 
OP
OP
wpscheel

wpscheel

Active Member
First Name
Phillip
Joined
Jul 15, 2020
Threads
3
Messages
44
Reaction score
93
Location
Mico Texas
Vehicle(s)
2020 Gladiator Mojave
Occupation
Retired
I've read it's been done, within reason, on other forums and other vehicles.
It sure looks like they are made to be nested together the way they are made. The Daystars all have the protruding knob in the center that sticks up and they also have a void of the same shape and size on the bottom so if they are stacked they cannot slip or shift. I figure if I mock it up and test fit and the height is what I want, before bolting it all back up I'll take them back out and expect them together for good measure essentially creating the size that I want.
I'm no engineer but I don't see how this is not just as safe as buying a full 2" (actually 2 1/4") spacer block, but i do value your opinion. Thanks

20200809_064427.jpg
 

Moe_Fugga

Banned
Banned
First Name
Jason
Joined
Jan 1, 2020
Threads
16
Messages
817
Reaction score
1,357
Location
GA
Vehicle(s)
2020 Gladiator
So, is the Mojave level from factory or is there just less rake than the standard ~1.5 inches? The AEV spacer kit is 2 inches front and rear from what I’ve read. I would return the Daystar kit, being that you’re so apprehensive, and get the AEV. The idea of stacking spacers to me just sounds cheap, rushed, and wrong. That truck has one of the best suspension setups on the market. Don’t ruin it man!
 
Last edited:
OP
OP
wpscheel

wpscheel

Active Member
First Name
Phillip
Joined
Jul 15, 2020
Threads
3
Messages
44
Reaction score
93
Location
Mico Texas
Vehicle(s)
2020 Gladiator Mojave
Occupation
Retired
So based on Moe and Renegades comments I have done some re-measuring and I hadn't taken into account for the raised front fenders, but yes, there is still a significant amount of take front to rear, with the amount depending on where you choose to measure. To satisfy my curiosity and with the assistance of some jack stands and hydraulic jacks, I mocked up 2" lift at front axle and 1 1/2" at rear and the difference looks acceptable (top is factory, bottom is lifted).
I will go ahead and install the lift as it comes (after getting better bushings on Renegades recommendation) and we'll see how it goes. Hopefully I can aquire the the parts and do the labor sometime this week. I will keep y'all posted on the progress/results.
Thanks for the input.

20200809_140833.jpg
Sponsored


Top