Sponsored
OP
OP
chorky

chorky

Well-Known Member
First Name
Chad
Joined
Feb 26, 2022
Threads
158
Messages
3,058
Reaction score
3,183
Location
Montana
Website
www.youtube.com
Vehicle(s)
'06 TJ GE, '22 JTR
Build Thread
Link
Occupation
Forester
I would like to pick your brain some more on your build and share what I have as well... I'm more active on the forum in my signature. I only visit this site every once in a while but do like it for the sheer volume of information.
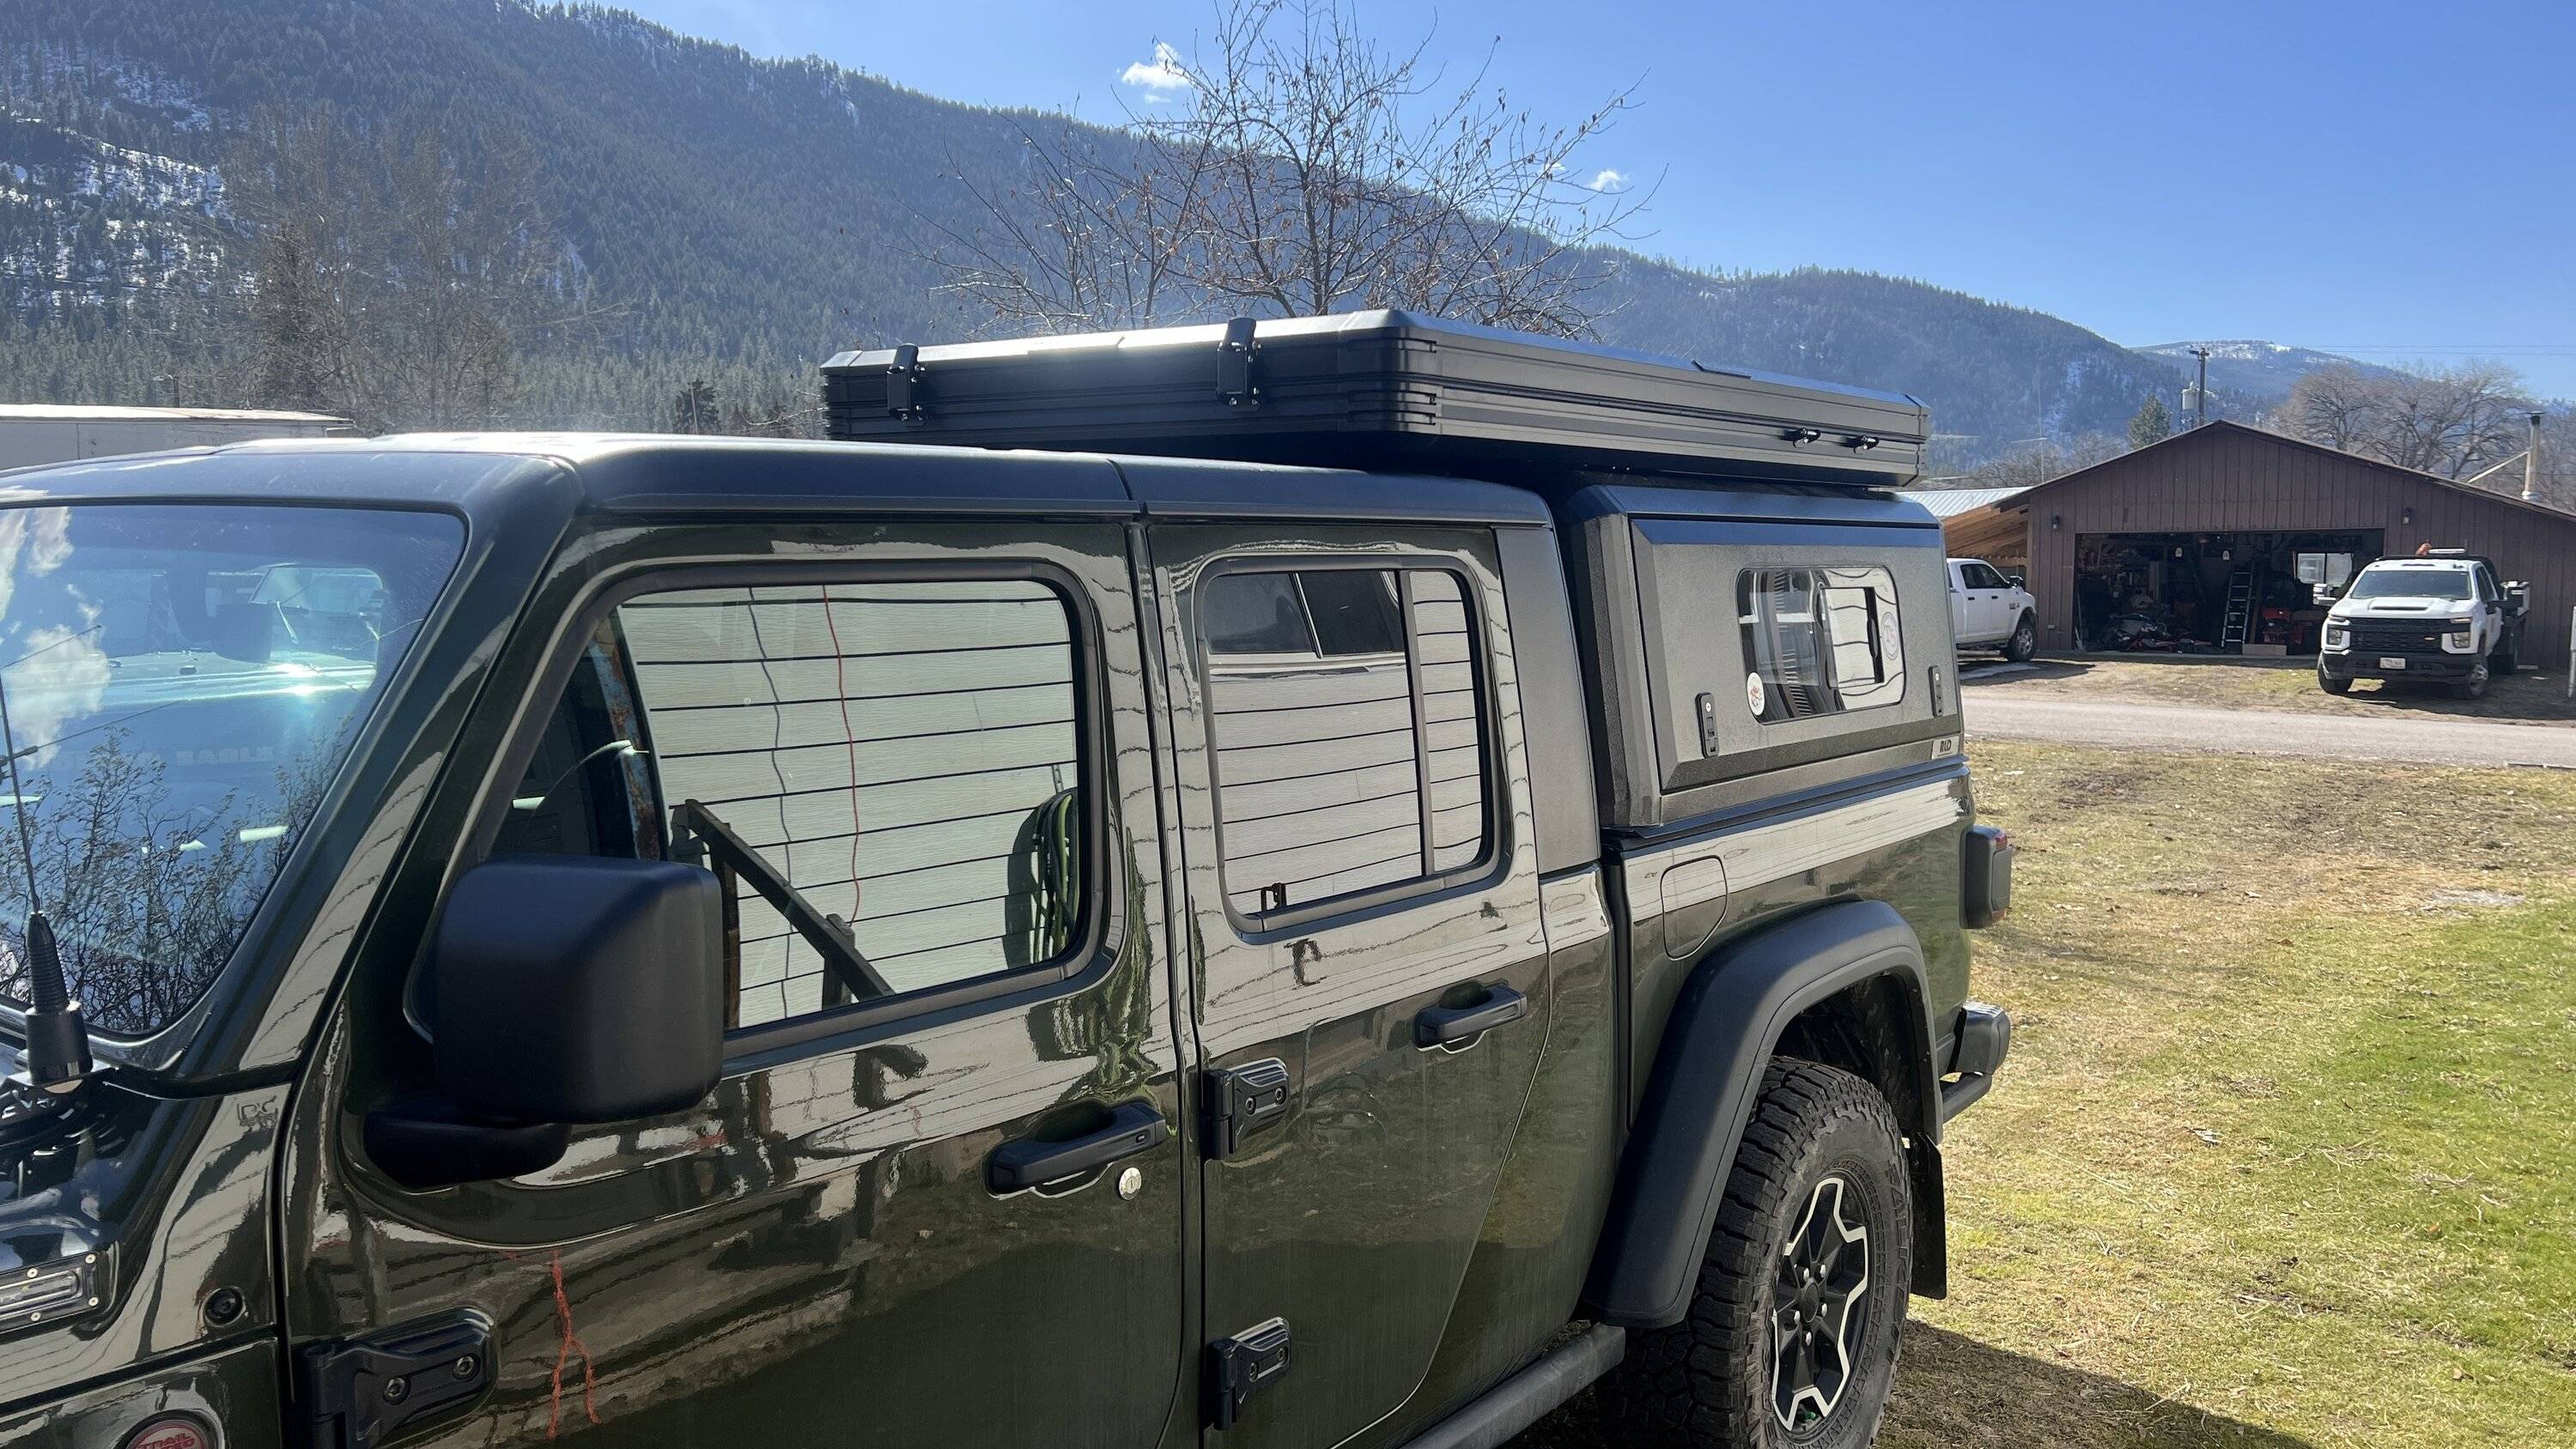
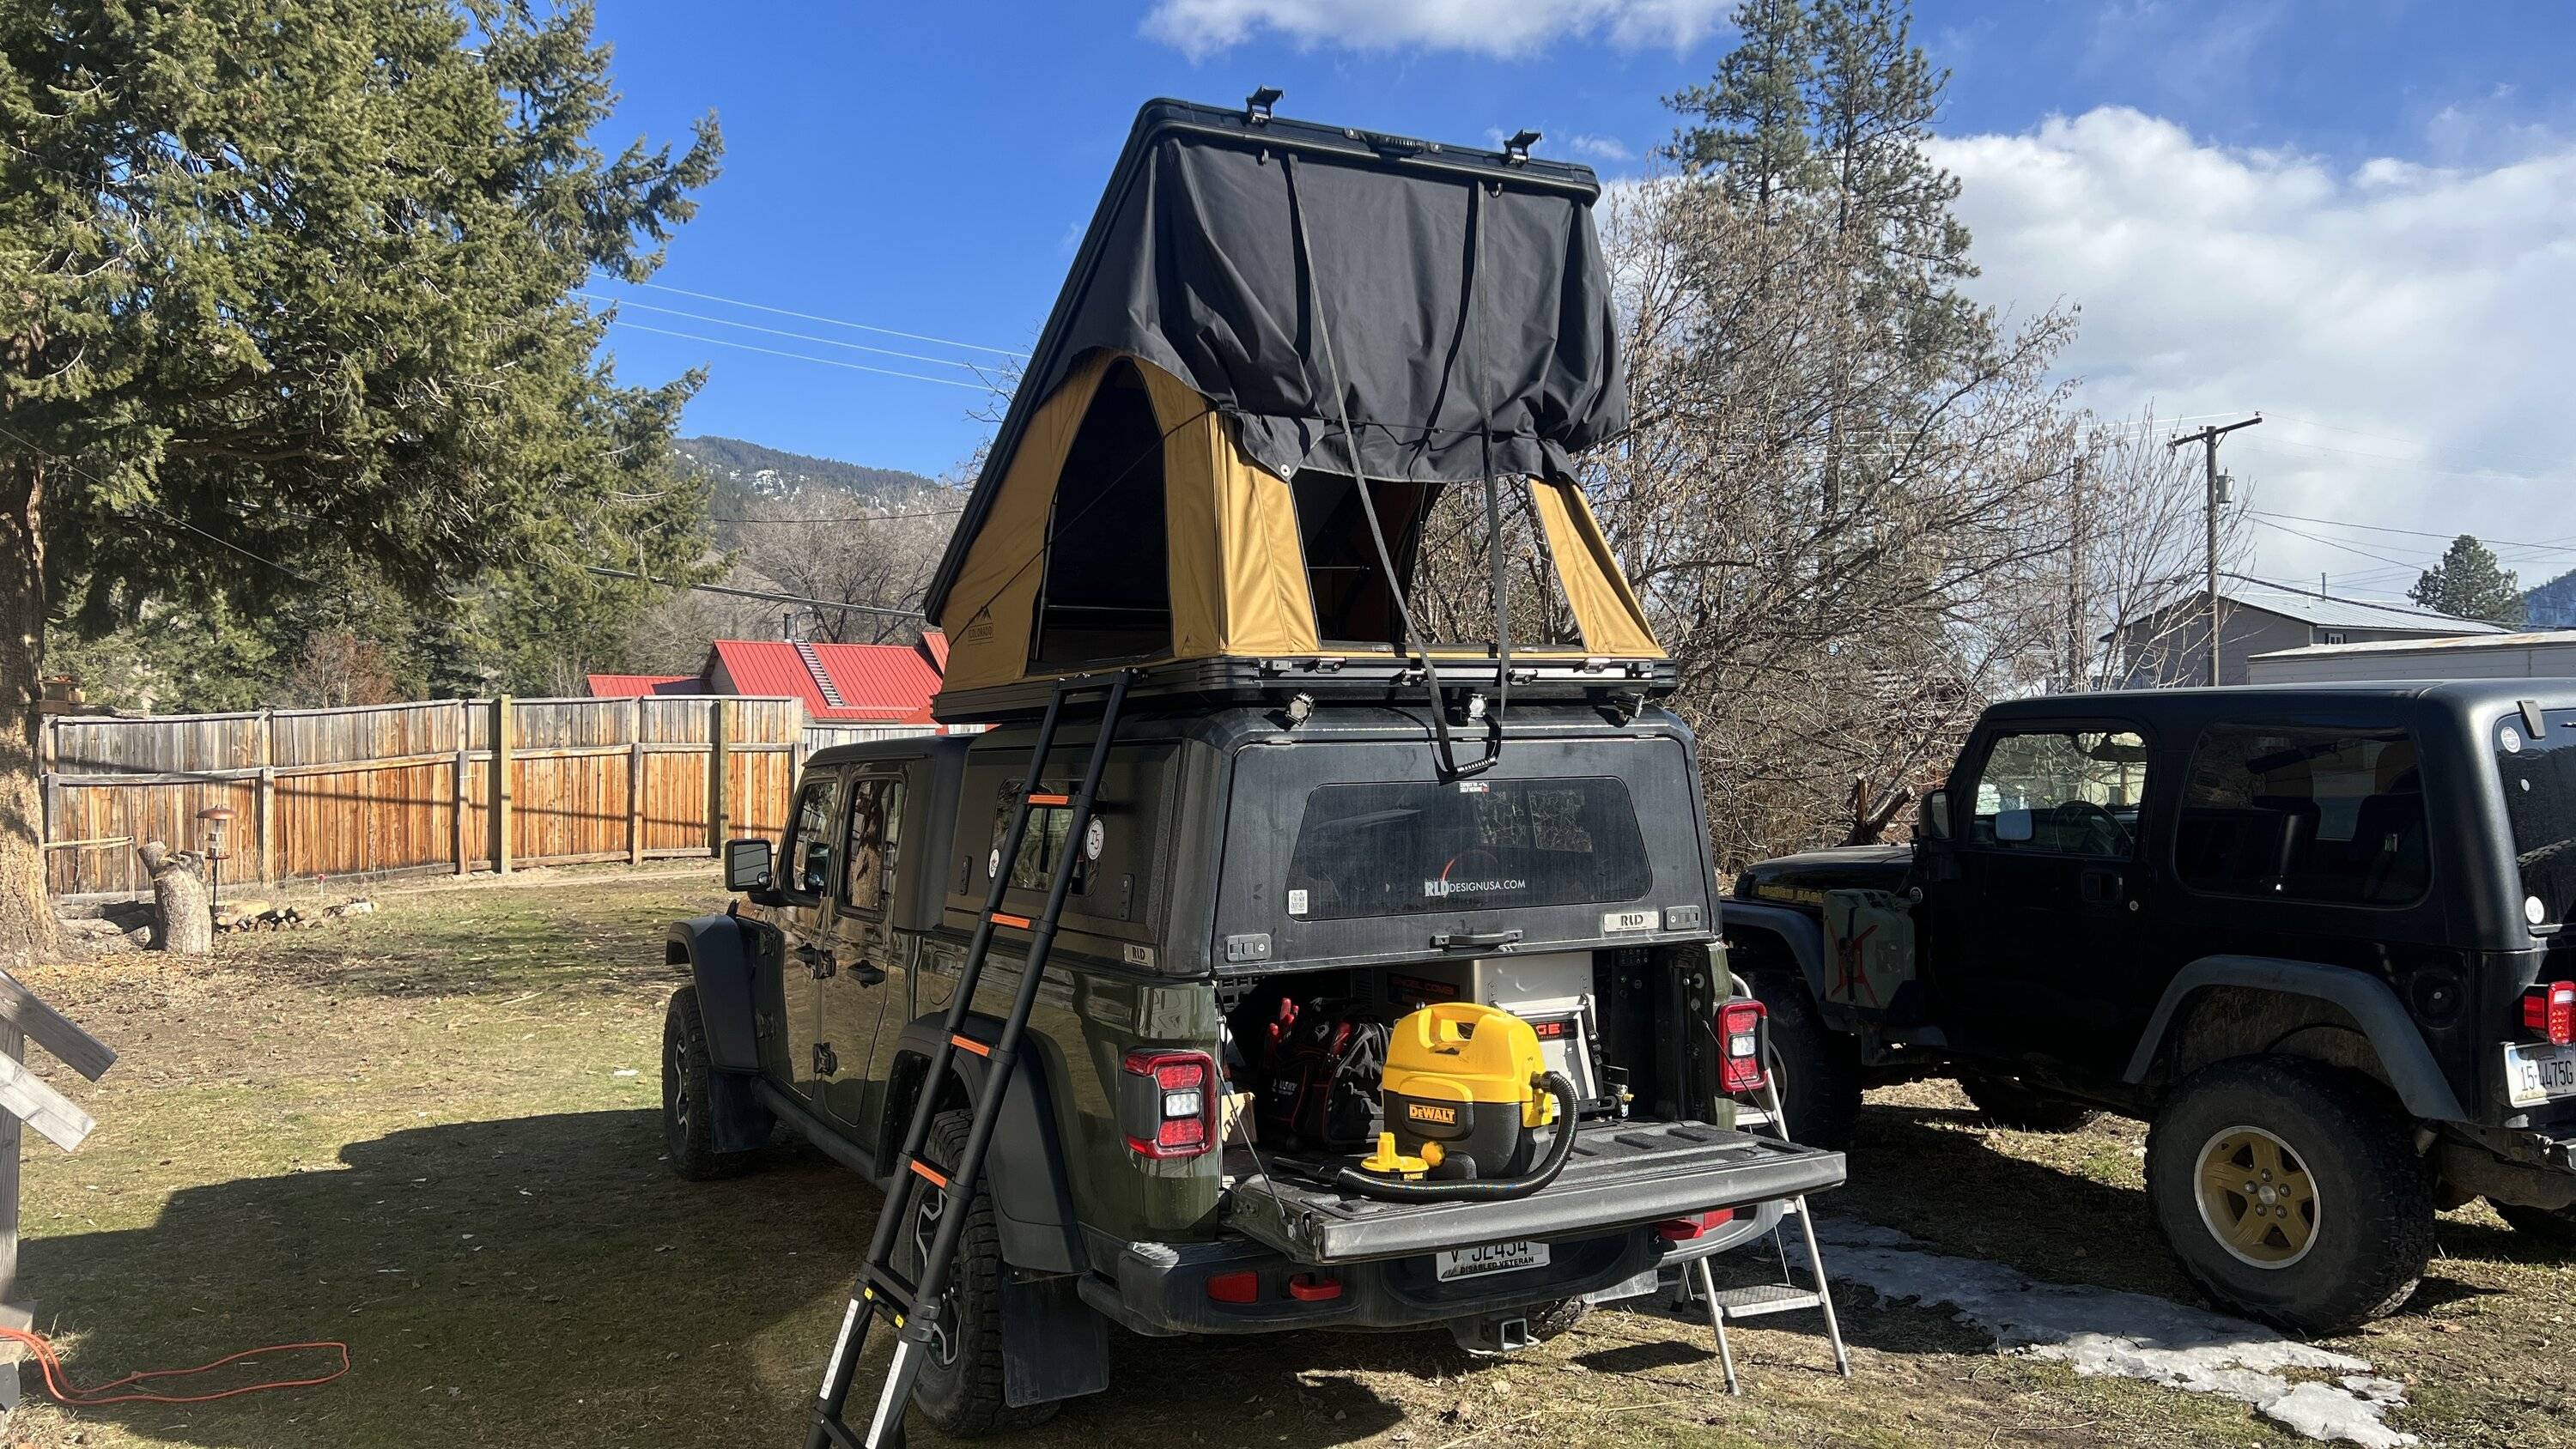
As for power, I always build a lot. Have an overlander Suburban with a 600HP Supercharged LS riding on 37's and 4.56s. Have a 600+ HP Duramax on a 6" lift and 37's with a real locker. Only used to tow things, not serious off-roading. Just picked up a new Ram 3500 Cummins which is pretty sporty as well. With all those, this Jeep seems a bit thin in places. Nevertheless, I think Jeep is on to something with this JT platform. I will continue to develop it until I start bumping into some limitations.
Sure thing feel free to shoot me a message. Theres a ton of really great info here but theres other sources as well! Thats pretty cool you have your other site for more detailed write-ups but its nice to share with a few communities with there being so many!
Sponsored

 
OP
OP
chorky

chorky

Well-Known Member
First Name
Chad
Joined
Feb 26, 2022
Threads
158
Messages
3,058
Reaction score
3,183
Location
Montana
Website
www.youtube.com
Vehicle(s)
'06 TJ GE, '22 JTR
Build Thread
Link
Occupation
Forester
OP
OP
chorky

chorky

Well-Known Member
First Name
Chad
Joined
Feb 26, 2022
Threads
158
Messages
3,058
Reaction score
3,183
Location
Montana
Website
www.youtube.com
Vehicle(s)
'06 TJ GE, '22 JTR
Build Thread
Link
Occupation
Forester
Today I finished the fridge install, continuing off of post #34. Since the slide was installed, and now recently the electrical and switch pro's was finished, I felt good about putting the fridge in. I did not want to put it in before the electrical panel, because....well why?

Originally I was going to get an ARB fridge as I assumed they were maybe a little better built than others considering their reputation. Previously, in my travel trailer and now in the basement, I had used a snomaster LP65. As good as it was for the years I used it, and now that it is a second freezer in the basement, I didn't want another snomaster, or to use this one. For one, it is way too big and heavy for just 2-4 day trips. And I realized it pulled WAY more amps than advertised. My 2 6v deep cycle batteries on the trailer could only run that fridge for 3 days before it wouldn't work anymore. And that's just not acceptable since those batteries were substantial.

However, after reading some input from a few other forum members here, I ended up deciding on an Engle 45 Combi. This was just the right physical size that I was looking for, at only 5 pounds heavier than I set my arbitrary limit to, and has a great reputation. I didn't realize until having some detailed technical discussions with Engle that these fridges are used to transport organs, and other highly important drugs. I know they have been around a very long time, and use a rotary style compressor which is supposed to be quieter and pull less power. So I pulled the trigger - after all they are all about the same price anyway.

And happy I did! I'm pleased with the size, weight, internal layout, and especially the controls. it is simple, and still despite bing a Japanese product, has a ferenheight temperature readout. They are also simple compared to others. Simple as in only the freezer temp can be controlled, and the fridge is designed to be the standard fridge temperature range. This just makes things simple IMO. I immediately hooked it up in the house off of 110 and let it run for a couple weeks (this was probably back in December or January) and it is WAY quieter than the snomaster. Time will tell of its reliability, ease to repair if needed, and actual power consumption, but hopefully my expectations are remain fulfilled after this summer.

My only concern now, is that hopefully being outside all the time it will be ok. I fully intended to install it and leave it - forever...unless it needs repairs or I must remove it for another reason. So - I opted to throw it in today knowing the next week will be below freezing with night temps in the teens. So that should be a good first test - I dont think we will be having any more -20 degree temps this winter.

My original intention was to just strap it down like any other normal human. But...knowing me, I made the mistake of noticing the feet of the fridge seemed to match well with the open cutouts of the slide base. So that's great. Now the feet still had real estate - but I didn't like the idea of them only being half way supported and just a strap or two that can loosen up. So, thinking about it, I figured - why not just bolt it to the base directly! It would be more secure and more theft proof anyway....right? So I took the feet off, took more measurements and decided to drill.
Jeep Gladiator Destination Unknown - 2022 JTR journal IMG_0111


With the feet off, I picked up these rubber washers from the hardware store to at least help lessen the hard bumps and blows and vibrations just to prolong the life of the compressor - I'm sure hundreds of hours of potholes and washboard roads isn't good for it anyway. And they are certainly softer than the feet which were just hard plastic. Now after getting the front bolts in I realized I messed up - measured 1 inch wrong. Oops.... Forgot to measure twice. But wait! This turned out to be a good thing! Because I had to physically remove the base from the slide to bolt the fridge on, what would happen if I had to remove it? With the front holes like up perfectly, the rear holes were just inside the large open cutouts. So I thought - well perfect, lets use some washers, so if I do need to remove it it then I can just loosen the bolts, and it will slide right out after removing the front bolts instead of having to remove the whole base. So....sometimes mistakes turn out to be mistakes on purpose.
Jeep Gladiator Destination Unknown - 2022 JTR journal IMG_0112

Jeep Gladiator Destination Unknown - 2022 JTR journal IMG_0113


With it all bolted in, I ended up using the straps anyway, just because...
Jeep Gladiator Destination Unknown - 2022 JTR journal IMG_0115


Plugged it in, secured some wire....and we are in operation. It is outside and on as we speak just since it was inside, to get it to cool off even though it's probably 28 out now. The low temperature cutoff is -5 outside ambient temperature if I remember correctly. I am very happy with how this turned out. The placement and location is perfect. The switch panel and volt gauge is perfect. Super happy with how this build is going so far. Also, just simply ecstatic that I won't have to worry about soggy food. For all my life I have absolutely despised using coolers and ice even with dry ice because it always results in everything getting soaked. So this is money well spent and a very nice upgrade. Now I need to do some functional tests to see if the numbers I calculated by estimate in my electrical spreadsheet are accurate or if I will need other power solutions.
Jeep Gladiator Destination Unknown - 2022 JTR journal IMG_0116

Jeep Gladiator Destination Unknown - 2022 JTR journal IMG_0114
 
OP
OP
chorky

chorky

Well-Known Member
First Name
Chad
Joined
Feb 26, 2022
Threads
158
Messages
3,058
Reaction score
3,183
Location
Montana
Website
www.youtube.com
Vehicle(s)
'06 TJ GE, '22 JTR
Build Thread
Link
Occupation
Forester
Lift time!

Well…time to order anyway. There are a lot of great options and great companies. Of course there are the premium options, and the basic options. But an important factor to consider is your individual use case. I cannot stress that enough. Time and time and time again, reading various online discussions, people seem to flat out ignore individual use cases when discussing lift options. I have done significant reading for quite some time and believe I picked the best option for me. Other people’s options may be very different – but there use case or desired function is also likely different.

Ordered items
  • AEV 2.5 Dualsport RT with standard duty springs and Bilstein 5100’s
  • Steersmarts front and rear adjustable track bars – standard duty version with clevite bushings
  • Steersmarts sector shaft and track bar brace
  • Teraflex progressive bump stops
  • Teraflex rear control arm relocation brackets
  • Grim brake line kit (if needed)

I chose the AEV kit because it offers most of what I want and nearly all of what I do not want, with compromises of course but that’s to be expected with anything
  • Using existing OEM control arms making future replacement cheaper and easier as bushings wear out
    • I did not want to deal with adjustable control arms or worry about what various control arms are made/coated with in concern with corrosion from road salts
    • I have adjustable control arms on my TJ, and while great for dialing in most of your geometry it comes with the negative of finding people who know how to work on such items – which seems to get less and less each year – I wanted to maintain the ability for any shop to be able to replace an arm in the event one were to fail in the future
  • Keeping OEM style clevite bushings for maximum reduction of NVH
    • OEM bushings provide the best NVH reduction of all the available options. At the cost of maximum flex – but keep in mine that maximm flex and hard core off road is NOT my goal.
    • Polyurethane bushings or Johnny Joints
      • I did a lot of exploring and reading about bushings (https://www.jeepgladiatorforum.com/...ings-in-track-bars-anyway.68046/#post-1115409) and determined that for me, at this point in life, factory style clevite rubber bushings are the optimum option. This is a VERY important topic that I think most people overlook or assume is not a big deal because “it’s the best lift possible”. That is highly subjective and there is no ‘best’ lift for all situations. NVH is a big concern of me considering the terrible NVH issues on my ’06 TJ with Johnny Joints
  • Lowering front control arms to keep them relatively level with the ground for better ride quality
    • This is the only way to achieve factory style geometry. Yes you can adjust caster (not sure if camber can be adjusted on these) with adjustable control arms. But what you cannot adjust with those is the angle of the control arm in relation to the frame and vehicle as a whole
    • Longer control arms for large lifts are fine, or if one is doing significant hard core rock trails on a regular and consistent basis, but steeper angle control arms results in NVH transmitting more directly into the frame/body than if arms are parallel. This is widely known weather someone wants to admit it or not. Yes, at the cost of potential clearance issues, but as discussed here, it’s really not as big of a deal as many make it out to be (https://www.jeepgladiatorforum.com/forum/threads/relocation-brackets-vs-long-control-arms.61582/) for my use case.
  • Progressive rate spring’s to handle my particular loadout (standard duty springs designed to support up to 400 pounds over GVWR, with a HD option if needed). Springs of other manufacturers can also be used if one really wants to hone in on ride quality for their specific use
  • Rear track bar relocation bracket to correct geometry and adjust roll height
Steersmarts standard duty track bars and sector shaft brace
  • I settled on these for two primary reasons
    • OEM style clevite bushings for maximum reduction in NVH
    • E-coating underneath the typical powder coat
      • Their e-coating is similar to OEM style electronically charged coating which is optimum for corrosion resistance as compared to just a powder coat, and is more consistent with OEM style
      • Powder coating cracks and chips easily. Once the coating is cracked or chipped, water/salt easily penetrates and begins oxidizing and rusting the steel. I personally have never had powder coat last longer than 6 months before the inevitable crack/chip and rust within a year.
  • Sector shaft brace is also e-coated for optimum corrosion resistance. Based on recent videos it is also thicker and stronger with a sealed bearing for minimum maintenance as compared to other options
Teraflex progressive bump stops
  • I admittedly know nothing of these, and have found very little information on them. Their description states they are a high density foam similar to OEM but with a progressive compression rate. They are also 1.5” longer than stock. Intuition says they would operate somewhere between a standard bump stop, and a hydro or air filled high speed bump stop. The intent is to never plan on needing them for my use, but should that need present itself, they will hopefully perform better than the stock option – and at only 115 bucks it’s a cheap option to try
Teraflex rear control arm relocation brackets
  • Though not entirely necessary, these adjust the rear upper control arm to prevent steep pinion bearing to drive shaft angles. In theory this will further reduce NVH and/or binding when the suspension is further drooped. Considering there are some reports that the AEV lift nets higher than advertised, this will be a conservative approach to ensuring long life for the drive shaft. If nothing else it will make no change and just be added weight.
Grim brake lines
  • The AEV lift with standard duty springs, depending on weight, may or may not be at the limit of the factory brake lines. If, I find that I need the HD springs due to excessive weights, I will certainly need longer brake lines. These will be installed if found to be needed, and if not needed then not used of course. AEV does not say lines are needed for their lift but I do believe their lift, depending on total loadout, is at the limit of the factory lines. Hopefully I will not need these and can return them.
So the AEV kit is at the center of this lift option. And I just want to highlight again the purpose for my choosing this kit is to primarily have higher rated springs, with the added benefit of a little more lift. I am not interested in 3+ inches of lift height, I am not interested in maximum articulation for hard core rock crawling. So there is no need to start an argument of (well XX lift gives you more articula…..that is not my purpose of lifting). This lift, with 35” tires and armor, should be plenty sufficient for the 90% of my real world use (not dream world), will work good enough for the 5% of harder trails I may do a couple times a year, and should be successful for the 5% chance of tackling bucket list trails such as MOAB and the Rubicon. Of course, time will tell the true result. But, it is also thousands of dollars cheaper than other lift options, and significantly easier in a world where it is becoming increasingly difficult to find competent people to work on aftermarket items.

It sounds like parts will take up to 30 days to get here, so stay tuned as a few projects between now and then may occur.

Jeep Gladiator Destination Unknown - 2022 JTR journal Screenshot 2023-03-21 at 12.17.50

Jeep Gladiator Destination Unknown - 2022 JTR journal Screenshot 2023-03-21 at 12.18.10

Jeep Gladiator Destination Unknown - 2022 JTR journal Screenshot 2023-03-21 at 12.18.28
 

Turnswrench

Well-Known Member
First Name
Bowman
Joined
Mar 10, 2023
Threads
1
Messages
389
Reaction score
976
Location
Palmer, AK 99645, USA
Vehicle(s)
2021 80th Anniversary, 2023 Rubicon
Build Thread
Link
Occupation
Start Up Strategist
🥳 Love it!
 

Sponsored

JT1

Well-Known Member
Joined
Nov 13, 2020
Threads
4
Messages
448
Reaction score
378
Location
Oklahoma
Vehicle(s)
2021 Gladiator Willys
Lift time!

Well…time to order anyway. There are a lot of great options and great companies. Of course there are the premium options, and the basic options. But an important factor to consider is your individual use case. I cannot stress that enough. Time and time and time again, reading various online discussions, people seem to flat out ignore individual use cases when discussing lift options. I have done significant reading for quite some time and believe I picked the best option for me. Other people’s options may be very different – but there use case or desired function is also likely different.

Ordered items
  • AEV 2.5 Dualsport RT with standard duty springs and Bilstein 5100’s
  • Steersmarts front and rear adjustable track bars – standard duty version with clevite bushings
  • Steersmarts sector shaft and track bar brace
  • Teraflex progressive bump stops
  • Teraflex rear control arm relocation brackets
  • Grim brake line kit (if needed)

I chose the AEV kit because it offers most of what I want and nearly all of what I do not want, with compromises of course but that’s to be expected with anything
  • Using existing OEM control arms making future replacement cheaper and easier as bushings wear out
    • I did not want to deal with adjustable control arms or worry about what various control arms are made/coated with in concern with corrosion from road salts
    • I have adjustable control arms on my TJ, and while great for dialing in most of your geometry it comes with the negative of finding people who know how to work on such items – which seems to get less and less each year – I wanted to maintain the ability for any shop to be able to replace an arm in the event one were to fail in the future
  • Keeping OEM style clevite bushings for maximum reduction of NVH
    • OEM bushings provide the best NVH reduction of all the available options. At the cost of maximum flex – but keep in mine that maximm flex and hard core off road is NOT my goal.
    • Polyurethane bushings or Johnny Joints
      • I did a lot of exploring and reading about bushings (https://www.jeepgladiatorforum.com/...ings-in-track-bars-anyway.68046/#post-1115409) and determined that for me, at this point in life, factory style clevite rubber bushings are the optimum option. This is a VERY important topic that I think most people overlook or assume is not a big deal because “it’s the best lift possible”. That is highly subjective and there is no ‘best’ lift for all situations. NVH is a big concern of me considering the terrible NVH issues on my ’06 TJ with Johnny Joints
  • Lowering front control arms to keep them relatively level with the ground for better ride quality
    • This is the only way to achieve factory style geometry. Yes you can adjust caster (not sure if camber can be adjusted on these) with adjustable control arms. But what you cannot adjust with those is the angle of the control arm in relation to the frame and vehicle as a whole
    • Longer control arms for large lifts are fine, or if one is doing significant hard core rock trails on a regular and consistent basis, but steeper angle control arms results in NVH transmitting more directly into the frame/body than if arms are parallel. This is widely known weather someone wants to admit it or not. Yes, at the cost of potential clearance issues, but as discussed here, it’s really not as big of a deal as many make it out to be (https://www.jeepgladiatorforum.com/forum/threads/relocation-brackets-vs-long-control-arms.61582/) for my use case.
  • Progressive rate spring’s to handle my particular loadout (standard duty springs designed to support up to 400 pounds over GVWR, with a HD option if needed). Springs of other manufacturers can also be used if one really wants to hone in on ride quality for their specific use
  • Rear track bar relocation bracket to correct geometry and adjust roll height
Steersmarts standard duty track bars and sector shaft brace
  • I settled on these for two primary reasons
    • OEM style clevite bushings for maximum reduction in NVH
    • E-coating underneath the typical powder coat
      • Their e-coating is similar to OEM style electronically charged coating which is optimum for corrosion resistance as compared to just a powder coat, and is more consistent with OEM style
      • Powder coating cracks and chips easily. Once the coating is cracked or chipped, water/salt easily penetrates and begins oxidizing and rusting the steel. I personally have never had powder coat last longer than 6 months before the inevitable crack/chip and rust within a year.
  • Sector shaft brace is also e-coated for optimum corrosion resistance. Based on recent videos it is also thicker and stronger with a sealed bearing for minimum maintenance as compared to other options
Teraflex progressive bump stops
  • I admittedly know nothing of these, and have found very little information on them. Their description states they are a high density foam similar to OEM but with a progressive compression rate. They are also 1.5” longer than stock. Intuition says they would operate somewhere between a standard bump stop, and a hydro or air filled high speed bump stop. The intent is to never plan on needing them for my use, but should that need present itself, they will hopefully perform better than the stock option – and at only 115 bucks it’s a cheap option to try
Teraflex rear control arm relocation brackets
  • Though not entirely necessary, these adjust the rear upper control arm to prevent steep pinion bearing to drive shaft angles. In theory this will further reduce NVH and/or binding when the suspension is further drooped. Considering there are some reports that the AEV lift nets higher than advertised, this will be a conservative approach to ensuring long life for the drive shaft. If nothing else it will make no change and just be added weight.
Grim brake lines
  • The AEV lift with standard duty springs, depending on weight, may or may not be at the limit of the factory brake lines. If, I find that I need the HD springs due to excessive weights, I will certainly need longer brake lines. These will be installed if found to be needed, and if not needed then not used of course. AEV does not say lines are needed for their lift but I do believe their lift, depending on total loadout, is at the limit of the factory lines. Hopefully I will not need these and can return them.
So the AEV kit is at the center of this lift option. And I just want to highlight again the purpose for my choosing this kit is to primarily have higher rated springs, with the added benefit of a little more lift. I am not interested in 3+ inches of lift height, I am not interested in maximum articulation for hard core rock crawling. So there is no need to start an argument of (well XX lift gives you more articula…..that is not my purpose of lifting). This lift, with 35” tires and armor, should be plenty sufficient for the 90% of my real world use (not dream world), will work good enough for the 5% of harder trails I may do a couple times a year, and should be successful for the 5% chance of tackling bucket list trails such as MOAB and the Rubicon. Of course, time will tell the true result. But, it is also thousands of dollars cheaper than other lift options, and significantly easier in a world where it is becoming increasingly difficult to find competent people to work on aftermarket items.

It sounds like parts will take up to 30 days to get here, so stay tuned as a few projects between now and then may occur.

Jeep Gladiator Destination Unknown - 2022 JTR journal Screenshot 2023-03-21 at 12.18.28

Jeep Gladiator Destination Unknown - 2022 JTR journal Screenshot 2023-03-21 at 12.18.28

Jeep Gladiator Destination Unknown - 2022 JTR journal Screenshot 2023-03-21 at 12.18.28
I'm on 3.5" clayton springs and I have full droop + on the factory front brake lines. You won't need the grimm ones unless you just want spares.

On the rear, I can't remember if the AEV kit with the bilsteins will allow enough rear droop to unseat your coil springs. If it does, get some limiting straps, and you have a great place to mount them on the terraflex brackets.

Parts list looks awesome! Congrats.

Does that AEV kit include a rear trackbar relo bracket? If it does, good. It makes a huge difference in the way the rear of the truck behaves on-road.
 
OP
OP
chorky

chorky

Well-Known Member
First Name
Chad
Joined
Feb 26, 2022
Threads
158
Messages
3,058
Reaction score
3,183
Location
Montana
Website
www.youtube.com
Vehicle(s)
'06 TJ GE, '22 JTR
Build Thread
Link
Occupation
Forester
I'm on 3.5" clayton springs and I have full droop + on the factory front brake lines. You won't need the grimm ones unless you just want spares.

On the rear, I can't remember if the AEV kit with the bilsteins will allow enough rear droop to unseat your coil springs. If it does, get some limiting straps, and you have a great place to mount them on the terraflex brackets.

Parts list looks awesome! Congrats.

Does that AEV kit include a rear trackbar relo bracket? If it does, good. It makes a huge difference in the way the rear of the truck behaves on-road.
Right on that is very helpful with the brake lines thank you!!

Yeah the AEV kit does come with a rear track bar bracket - but I figured it would still be good to get the adjustable one just to fine tune things. I'm not really sure how it will sit with varying loads.... so I think getting an alignment done when it is sitting with its 'normal' daily load will be best. I would assume it might need a touch of fine tuning - but that's just my OCD talking lol.

That's interesting about the potential unseating of the rear springs. I didn't think of that - maybe that's a potential due to the teraflex brackets? I would think it wouldn't be an issue but also not sure of the extension lengths of the shocks compared to the springs.

Than's I'm really looking forward to having a couple more inches of clearance and getting rid of the Rubicon bounce.
 
OP
OP
chorky

chorky

Well-Known Member
First Name
Chad
Joined
Feb 26, 2022
Threads
158
Messages
3,058
Reaction score
3,183
Location
Montana
Website
www.youtube.com
Vehicle(s)
'06 TJ GE, '22 JTR
Build Thread
Link
Occupation
Forester
I also, on a whim, called up some coworkers since working from home today and got this thrown on around lunch. I was tired of it sitting in the middle of my living room and my house is not very large.

First impressions - it fits prfect!! The width, height, length is all what I imagined. Some initial discussions can be found here https://www.jeepgladiatorforum.com/...ado-nimbus-rtt-installed-review-photos.67678/

Here are some things I like about this tent and why I chose it.
  • All aluminum
  • Aluminum honeycomb baseplate and roof - strong and light
  • removable mounting brackets - more info below
  • solid gasket around the outside edge to seal out water when closed
  • Canvas material is THICK
    • heavy, yes, but more durable, quieter, and less light intrusion
  • Clamshell hybrid operation
    • I really like this the most because it is easy for one person to open and close, yet it still offers more room up front than a traditional tent with the front on hinges. Even some such as the Alu-Cab are tight up front because they are on a hinge. Those styles may be more 'secure' but its not like anybody plans to drive with it open or camp in 60 mph winds
    • I also like how the hinges and struts are on the inside. Yes there are negatives (below) but, it allows the items to stay clean and dirt/dust/water free which in my area with winter ice can be a big deal
  • Sleeping pad
    • it has a 2" foam pad like most tents - and sure I might add a blow up option in the future, but for now it is plenty comfortable and my body doesn't sink through to hit the hard alum bottom at all - not yet tested in cold temps
  • color
    • minor sure, but I really LOVE the fact the fabric is a brown/tan color instead of grey, or some bright orange. it just blends much better, especially considering my Jeep is green
  • Removable canvas
    • now this is a big one. The canvas is removable - well....sorta. Let me explain. The top of the canvas where it meets the roof is zippered in to another piece of canvas which is riveted like normal. Now, the bottom, by design, is also supposed to be zippered in. Unfortunately, mine is not. I did contact the company about it and they were actually surprised. maybe I got a one off? Maybe there was a supply issue? Who knows! I am most certainly very irritated about that as that is one very specific reason I wanted this tent instead of others - but, the canvas is still removable so its not the end of the world.
  • Catchphrase - they put the same on their tent via a bonded aluminum panel as on their website. Maybe dumb to some people. But “Life is a Beautiful Ride”. And I really like this because it is a subtle reminder whenever you open/close the tent to kinda step back once in a while among all the crazy hustle and bustle of, everything going on in the world and realizing that, no matter your situation - there is always some bit of beautify in life to be seen and to not let that slip by. So when I saw this plated to all 4 sides of the tent, it just made me smile.

Here are some things I think could be better.
  • Weight - it is heavy at 171 pounds. But...I don't see how it can be any lighter and still be substantially robust
  • Seal - I don't have a great picture but where the shells come together is a rubber seal to prevent water intrusion. It's decent but not great. I did see somewhere on FB someone had issues with leaks driving interstate speeds in a rainstorm I think it was. But I'm sure any tent would have that problem. The seal isn't perfect because it does sit on top of the canvas flap that is used to prevent water (from rain or snow) from getting past the mating point of canvas-to-aluminum (most tents have this type of flap over the mating point). But still, I am concerned here because, for my situation, the tent will be a permanent mount - meaning I won't be taking it off in the winter - most likely. So I will have to come up with a solution for this somehow and already have a relatively simple idea that just requires some thin 5" rubber that will wrap around the whole tent.
  • Seal of materials - the inside of the tent has a light layer of RTV all around any mating surfaces and points of various brackets and materials. This is no doubt to prevent water intrusion. However, I was disappointed to see the exterior mating surfaces of brackets and things NOT coated in RTV. Maybe because it is not UV stable? I dont' know. So I added RTV anyway just because I did hear of one instance somewhere on FB where someone complained about leakage - but I think that was in some serious winds and a crazy rain storm. I'm sure all tents have some spot that lets a little water in in a crazy storm. But - I would have expected or hoped that during manufacturer, RTV would be placed on all mating surfaces so that as components are assembled they are inherently sealed. However, my personal level of quality far surpasses nearly anything on market today so there is that - thanks OCD......
  • Internal hinges/struts
    • I am not really sure how this can be improved - possibly placing an additional 'loose hanging' layer of canvas between the hinge and the outer canvas portion? This can cause the canvas to be pinched. Since there are no sharp edges on the hinges I don't expect any immediate damage, but over time this can cause wear - how much wear, well only time will tell, but hopefully it lasts at least 5 years before any sort of problem presents itself
  • Not all items delivered as designed
    • maybe 'supply' issues, who knows. Company is aware, hopefully it won't be an issue in the future - below is an example
    • Canvas adhering to the tent - this one is actually pretty annoying and arguably the second most important con right below weight, and the person I spoke with at 4X4 Colorado was kinda confused as to the situation. The tent is designed for the cavas to be zippered in - not bonded or riveted like many others. From pictures and the one or maybe two videos you can find of this tent, the top and bottom of the canvas zips into other canvas flaps that are riveted into the tent body. The top of the canvas, as in my picture, shows the zipper. The bottom however, does not have one. I specifically like this very aspect of the tent significantly. But, there could have been who knows the reason the change. 4X4 Colorado wasn't aware and said the last batch had the zippers - and also that I was the only one who called about this specific topic. So.....supply chain? I mean we all have heard of various Gladiators arriving without certain items that they were supposed to have - due to 'supply chain' issues. This is very annoying to me - not so annoying that I would go through the hassle of returning or exchanging, but certainly annoying enough to complain about and list as a pretty significant con as the original design was to have the whole thing zippered in. But not the end of the world because if I do have to remove the canvas for repair in the future - it's gonna be a pain in the butt no matter how it goes about and is going to require more involved processes than just unzipping and sewing in a patch - I mean 10 years from now who knows if this company will still be around - hopefully....and by then who knows if anyone will even want to or know how to sew in a canvas patch or just make a new surround entirely. So....if the hinges cause wear that is, in my opinion, premature, then it will become a problem for sure and I will be contacting the company regarding it to figure a solution. But my expectation, and hope, is that won't be a need for at least 5 years - by then, my medical situation might not even allow me to camp anymore anyway.
  • Rain fly - the rain fly (black portion) on mine did not have the plastic see through 'stylight' as shown in the pics on their website. But, honestly, that doesn't matter to me. And really I'm kinda glad because every plastic type window I have ever experienced degraded and turned yellowish over time. So I would prefer to just not deal with that anyway. A con because not as shown, but not really a con for me specifically because I'm glad it's not there.
  • Light - there is an integrated LED light which is neat. It has 3 or 4 brightness levels, but even the brightest is really not super bright though. It is wedged into some C chanel toward the front of the tent. I think it would be far better to have 2 LED strips on the sides instead the one in the front where theres the least amount of space. However - that's where, for me, my head will go - so it will work ok. Removing this and putting in another option on each side instead of the one up front will probably be my first modification
  • Weight - did I say weight already? Gonna say it again. It really is a big downfall. But honestly, at 160 pounds for a fiberglass option from smittybuilt, or 160 pounds for the Falcon 2 from Roofnest with tent fabric - I think an extra 11 pounds is ok. If 11 pounds is a make or break situation for somebody, then theres a bigger problem with the RTT option as a whole and they need to go back to the drawing board. It would be a bucket list item to do the Rubicon trail some day - but the honest reality is 95% of the time I will be 'camping' via forest service roads, which around here are all graded roads, and the other 5% will be in some 4x4 situations but not nearly hard enough to be worried about tipping. If you see the things Matt at Ozark Overland Expeditions and Brad at Trail Recon have done - I really don't plan to be in those hard core situations often at all because they are rare in my area and I would have to drive 2 days just to get to a trail like that anyway. Now if Alu-Cab would have made their clamshell more of a 4 sided lift hybrid like the Nimbus (the one I have) or James Broud, then I might have gone with Alu-Cab because it is noticeably lighter at 110 pounds - then again, $4,000 for their tent is EXCESSIVE. However, the compromise there would be tent fabric and no side channel from the extruded aluminum as they appear to use a one piece stamped aluminum which specific holes for mounting their specific options - so any other accessory would require drilling through the tent - which is just not cool. Now as compared to some people running the Alu-Cab camper, pushing 460 pounds just for the camper itself - at 346 pounds canopy and tent combined, I am still over 100 pounds lighter than that option. Even for those running the Alu-Cab tent or the GoFast platform tent - I'm willing to bet once they add in their lithium batteries, and side shower, and side awning (which I don't have), and and and other overloading items - I would argue I might still be below weight of a lot of those folks. Not saying this is a 'better' option. Just a different option. Still - I would be ecstatic if it weighed only 100 pounds or less.....but that's just not going to happen even with a cheapie full canvas tent like Smittybuilt that weighs 138 pounds - for a basic true to the word tent.
Ok time for the install....
 
OP
OP
chorky

chorky

Well-Known Member
First Name
Chad
Joined
Feb 26, 2022
Threads
158
Messages
3,058
Reaction score
3,183
Location
Montana
Website
www.youtube.com
Vehicle(s)
'06 TJ GE, '22 JTR
Build Thread
Link
Occupation
Forester
So the install went very smooth. It helps when one does hours and hours of research and calculating and factoring beforehand of course. I made multiple measurements and decided on how I wanted it mounted before even receiving the tent.

So, like most tents, this one had bars on the bottom that would mount to cross bars on a roof rack. however, my situation is a little different. Because RLD was RLD (and I say was because I am about 90% confident they closed shop) they decided in their wisdom to make proprietary mounting points for their proprietary cross bars. Well, their cross bars are HUGE, and heavy, and way expensive, and also not accessible at the moment. So I decided long ago whatever tent I would settle on would need to mount directly to the canopy.

This has several pro's and some con's.
Pro's
  • Lower profile - you don't have a heavy tent sitting on top of tent mounted bars, on top of cross bars, on top of a canopy - thats just terrible anyway
  • Less weight - no need for cross bars, and bars on the tent means shaving at least 10 pounds, probably closer to 20 depending on the bar's you opt for
  • Less likely to steel - because the mounting nuts/bolts are now hidden, somebody can't just come along and unbolt it and take it
  • And it looks like it is all one piece
  • Wider mounting for a more secure mount
    • the bolts I put in it are at a wider footprint than the bars, plus there is now more physical contact on the bottom of the tent so it is more secure and stronger
Con's
  • Requires permanent modification of the RTT - meaning, you have to drill holes - I was not ecstatic about this, knowing it will void the warranty of the baseplate portion, but really in my situation it was the only way
  • Install - of course requires 2 since it is bolted and my arms aren't 6' long
As stated, I made several measurements before, and found that the outer lip from the extruded aluminum is about 1/2" lower than the baseplate - meaning when the baseplate honeycomb aluminum is sitting on something, the outer edges of the frame extend another 1/2" below. So it was important to take a straight edge, and make sure that there was clearance above the hard top so there would be no impact. Looks like about 1.5" of clearance.
Jeep Gladiator Destination Unknown - 2022 JTR journal IMG_0140


This lip on the bottom side of the tent is also about 1 inch wide. So going back and measuring the ridges on my canopy I found that the 3 ridges up top are about 1-2" high. Additionally, on the back side of the canopy where my reverse lights are mounted (post #10) the ridges end about 2" from the lights - which stick up about 1/4" above the ridges. I thought - perfect, that's where the back end will line up.

And it did!
Jeep Gladiator Destination Unknown - 2022 JTR journal IMG_0191


Also, the front has plenty of clearance - about 1", so my measurements were accurate. This should be plenty enough to allow for any amount of bouncing around. And - no more snow in-between the cab and bed!!!!! As there is about 1-1.5' of overhang
Jeep Gladiator Destination Unknown - 2022 JTR journal IMG_0193


Now that everything was aligned, it was time to do what I was most nervous about - drilling. I knew this was a honeycomb aluminum panel but I didn't know if the honeycomb itself was also aluminum, or fiberglas, or some composite type of material. After talking with my dad, who was a very high level NDT at Boeing - we determined that drilling should not cause any damage. So.....making sure and making sure again it was aligned to the canopy, with coworkers holding it, I started drilling.....

And it went fine. I used the largest washers I could find on the inside of the tent - and the largest washers that would fit inside the ridge of the canopy. Now considering that prior to this, the original mounting bars were attached to the tent via 4 (per bar) tiny 1/4" bolts - I felt like having a total of 6 1/2" stainless with large washers should be sufficient. I did tighten them enough to hear the honeycomb crinkle just a tad and promptly stopped. So they are not tight, but snug - and using lock washers, they should be stable. I am a little nervous here, so time will tell.
Jeep Gladiator Destination Unknown - 2022 JTR journal IMG_0194

Jeep Gladiator Destination Unknown - 2022 JTR journal IMG_0195

Jeep Gladiator Destination Unknown - 2022 JTR journal IMG_0200

In the picture above you can see the tiny holes where the original bolts went through to mount the bars to the bottom of the tent - much smaller than what I am using. I did use RTV to seal up the bottom side of these holes to prevent water intrusion but will seal these up this weekend probably.


And with that - it is installed. Simple! I really wanted to take advantage of the nice day today since we are expecting weather potentially the rest of this week, and I really wanted to see if there will be any leaks - so I actually do hope that it just dumps snow and/or rain for that purpose. This is also why I removed and left out the anti-condensation mat and the foam mattress.
Jeep Gladiator Destination Unknown - 2022 JTR journal IMG_0196

Jeep Gladiator Destination Unknown - 2022 JTR journal IMG_0190

Jeep Gladiator Destination Unknown - 2022 JTR journal IMG_0197

Jeep Gladiator Destination Unknown - 2022 JTR journal IMG_0199

Jeep Gladiator Destination Unknown - 2022 JTR journal IMG_0201

Jeep Gladiator Destination Unknown - 2022 JTR journal IMG_0202


I am really excited - and cannot wait to go camping. A couple things I do need to figure out - heating source (long term would like a gasoline heater instead of diesel to plumb into gas tank), and how to deal with inevitable condensation - I do not have a garage nor a place to open it out and let it air out when it is cold and condensation builds up inside. So stay tuned for more projects!!
Jeep Gladiator Destination Unknown - 2022 JTR journal IMG_0198
 
OP
OP
chorky

chorky

Well-Known Member
First Name
Chad
Joined
Feb 26, 2022
Threads
158
Messages
3,058
Reaction score
3,183
Location
Montana
Website
www.youtube.com
Vehicle(s)
'06 TJ GE, '22 JTR
Build Thread
Link
Occupation
Forester
Decided to go for a quick little drive today, maybe 35 miles - I wanted to see what the added weight would do since it is sitting up top.

Thus far I am sitting at 650 pounds over stock (including me). Which seems awful excessive. I think the canopy is significantly heavier than the manufacturer specified - theres no way it is only 175 pounds.

But anyway, to my surprise, it rode relatively fine. 70 on the highway with plenty of bad dips and bumps. And including some dirt, rough county roads, and ice. I can certainly feel the weight, but it is less than half as much sway as expected.

One very interesting thing is the Rubicon bounce is much less with the additional weight than it was just last week before the additional tent weight. I find that very odd. The factory rake is nearly gone, so it sits pretty much level now.

No doubt the lift will help with ride quality as this was just on road and rough road stuff. I bet taking it off highway it would feel very under sprung. Figured I would take note though, because I was expecting far worse handling being the weight up high.

oh, and no additional wind noise either! So that's awesome!
 

Sponsored

OP
OP
chorky

chorky

Well-Known Member
First Name
Chad
Joined
Feb 26, 2022
Threads
158
Messages
3,058
Reaction score
3,183
Location
Montana
Website
www.youtube.com
Vehicle(s)
'06 TJ GE, '22 JTR
Build Thread
Link
Occupation
Forester
Installed a minor device to aid in security


Jeep Gladiator Destination Unknown - 2022 JTR journal 22617B0B-5ED7-4058-A8EB-96DC9CA17140
 
OP
OP
chorky

chorky

Well-Known Member
First Name
Chad
Joined
Feb 26, 2022
Threads
158
Messages
3,058
Reaction score
3,183
Location
Montana
Website
www.youtube.com
Vehicle(s)
'06 TJ GE, '22 JTR
Build Thread
Link
Occupation
Forester
The other day I did a functional GMRS test to see real world signal distance despite all the 'specifications' and benchmark testing.

On a particular stretch of 15 miles worth of highway to the next closest town, my dad in the back yard and I would relay to each other as I drove further away calling out mile markers and various landmarks/exit's.

For the most part it is a fairly straight stretch in a northeastern direction with relatively gradual elevation changes of less than 200'. A little more than half way through there is a large bend in the highway to go around a rather large spur of a ridge that juts up probably 700 feet above the normal highway. As I got half way around this signal was still fine. It diminished slightly but signal was being transmitted slightly over 7 miles and up and over two hills probably 400' above the highway. As I immediately rounded the spur, signal dropped - and was not regained again until I was a half mile or so past - as to be expected. Once I hit the next town and dropped off the highway so that the antenna was below the level of the highway of course signal was gone, but returned as soon as I hit the onramp on return.

This test was to be expected - of course I was hoping for further distance, but it is honestly exactly what my expectation was, to loose signal right before the next town.

Also keep in mind, the radio my dad was using was this.
Jeep Gladiator Destination Unknown - 2022 JTR journal IMG_0225.PNG


Now my dad's voice cam in ok, but was decently broken most of the way, and as I got further, I could not hardly hear him but knew he heard me. I also had my squelch up a decent bit since I dislike struggling to make out words. He said my signal was strong until right after the spur as expected, and that there was only background static, likely due to his squelch setting, but without interrupting any of my commo.

So this was a good experiment - not only am I decently satisfied with the MS275 performance, but I am absolutely blown away by how well the Chinese Baofeng radio performed in itself - and it has some cool features as well. So I will likely pick up one as a secondary 'spotting' trail radio.

next will be finding a way to test out the CB, and then on to more functional and complex tests of both radios with flatter, and hillier terrain at different elevations and angles. I also might explore the idea of seeing about putting repeaters in a few locations - but I think that will be way more involved than I would want.


Some great conversations occurred here:
https://www.jeepgladiatorforum.com/...ons-near-a-pillar-or-mid-point-on-hood.62126/

And @Radio Guy was very helpful in the process of deciding mounting options and understanding signals better.
 

Beemer533

Well-Known Member
First Name
Zion
Joined
Oct 25, 2021
Threads
13
Messages
620
Reaction score
700
Location
Upstate NY
Vehicle(s)
2021 JT Mojave
Occupation
Field Engineer
Well yesterday was a fun, monumental, and frustrating day in one.

It was the day of installing the Genesis dual battery kit - but...with problems.

So before anyone says how much I dont need it - the primary reason for me doing this kit was not actually to have a aux battery for camping. That is just a side benefit that works for me being in such a cold environment where an always on board lithium would not last. But the primary reason for me to install this system is to get rid of the factory aux battery, and have nice lugs to attach accessories to. After seeing how many people are having troubles with their aux batteries, and the difficulty it is to replace them - I wanted something significantly easier to replace if needed. The Genesis provides that for me.

And it's a good thing because testing the factory battery and aux battery after removal revealed the larger system battery was sitting at 12.5v and the aux was already at 12.3v. Granted I dont drive a ton to commute, and it has been sitting a lot lately, in the cold, but at less than a year old this is what I was worried about with the factory system.

Removing the factory batteries and tray was relatively uneventful. Although I took careful note to keep in mind where everything is and went as I did not want to have issues reinstalling - well... I did anyway. Being careful, using hand tools, and chit-chatting with a friend who is letting me use his garage, the removal took nearly 4 hours. I can't imagine having to do this every single time to replace the factory aux battery - thats insanity.

Oh and I also saw this - looks like the factory way overtightened the hold down bracket. I have not touched the battery components since purchase.
Jeep Gladiator Destination Unknown - 2022 JTR journal IMG_0225.PNG


You can see that post 4 and 8 are unused in mine. I would assume #4 has something to do with the rear bed inverter and I dont have one, just the in cab version. I labeled all the posts just to make it easier
Jeep Gladiator Destination Unknown - 2022 JTR journal IMG_0225.PNG


Being sure to protect the positive wires as much as possible - I wasn't sure if any of the others were also hot but based on other videos I have seen they seem to not be.
Jeep Gladiator Destination Unknown - 2022 JTR journal IMG_0225.PNG


There was another change sometime half way through 2021. The Genesis video shows there to be 2 bolts and 1 Phillips screw under the distribution panel to remove the box. Mine had a little 7mm bolt instead.
Jeep Gladiator Destination Unknown - 2022 JTR journal IMG_0225.PNG


That tray was unnecessarily difficult to remove. It still boggles my mind this was actually considered a valid design. I know there is the method of going through the fender, but still, batteries are known replacement items - terrible design.
Jeep Gladiator Destination Unknown - 2022 JTR journal IMG_0225.PNG

Jeep Gladiator Destination Unknown - 2022 JTR journal IMG_0225.PNG


Now is when things take a turn and get interesting. The new tray went in relatively 'ok'. Although it still didn't fit perfectly. There must have been even more changes between 21 and 22. There was a bit of a gap at the front of the tray where it uses the two bolts to secure it next to the air box. I was very surprised to learn that Genesis only designed it to use 4 mounting points. So I have a bunch of leftover bolts. I wish they would have designed it to be more secure. I'm sure it is fine, but it could be better IMO.
Jeep Gladiator Destination Unknown - 2022 JTR journal IMG_0225.PNG


This is where my first mistake was made. I got mixed up thinking the factory aux positive needed to remain left off. DONT DO THIS
Jeep Gladiator Destination Unknown - 2022 JTR journal IMG_0225.PNG


Continuing my mistake of storing away the positive cable
Jeep Gladiator Destination Unknown - 2022 JTR journal IMG_0225.PNG

Jeep Gladiator Destination Unknown - 2022 JTR journal IMG_0225.PNG


This was another mistake - after having read about others experiencing issues on various forums due to a change in wiring harnesses sometime between 21 and 22, I mistakenly thought the factory aux negative needed to be attached to the main negative. This caused about 35 minutes of frustration as the negative really did NOT want to go there. I pulled hard - hopefully no strands are broken internally. Eventually it did go, but clearly it was not happy. At this point I knew something just wasn't right. Did Genesis really miss this and not catch that there was a substantial change? Nope...it was all me and my lack of paying attention in excitement of having this system in.
Jeep Gladiator Destination Unknown - 2022 JTR journal IMG_0225.PNG

Jeep Gladiator Destination Unknown - 2022 JTR journal IMG_0225.PNG


After putting the distribution box back in is when trouble began. Now - take note that I misunderstood some things a few times. After covering up the factory aux power cable and getting the new batteries in I realized I was supposed to have kept that and tied it to the main power terminal. So that was fun - these batteries are about 50 pounds each. Then, I realized immediately that there would be difficulty in getting the factory aux negative cable to attach to the main negative cable (which goes on the negative post of the new aux battery). This was an issue because I had read a few places (probably incorrectly) that there was a change in 2021 where the aux negative cable goes to body ground, and back to the IBS instead of the original only going to body ground. So, being under the impression that the factory aux negative needed to go to the main negative, I had great difficulty in pulling out enough wire. Now keep in mind this happened only after I already tripped a code of some sort. Eventually though I got it to work, enough wire was pulled - hopefully without damaging any strands, and the aux negative was placed on the IBS. But....a code was still showing. So I decided to go for a drive, and cycle the engine about 7 or 8 times in case it just needed to clear, but it was still there. After returning home, and doing more reading/watching, I realized there was a major mistake and mixup in information. The factory aux negative in fact does not need to be connected to the top of the IBS, but the factory aux positive wire does need to go to the main positive. So I removed the negative, taped it, and temporarily tied it off to the side, while securing the positive correctly. Time for another test drive.
Jeep Gladiator Destination Unknown - 2022 JTR journal IMG_0225.PNG


I also took the time to disconnect the positive cable from the battery for a few minutes in order to clear the system in hopes that the 'service start/stop' warning would correct itself. And it did. So after another 15-20 mile test drive, the system was functioning well. I even left the ESS on to see if it would work, and sure enough it did - just the same as other methods folks use to get rid of the factory aux battery but keep the factory main battery - such as removing fuse 42 or disconnecting the aux negative. Unfortunately disconnecting the battery this time also caused the radio to freak out and reset, booting back up as if it was just a sport and not rubicon.... It took some more community forum help, and time (until 2am to be specific) for the radio to re-center itself and once again provide all the rubicon features.

So the Genesis system at the moment is functioning. I do need to go back and clean up some wires and find a nice place to tuck the aux negative cable. Hopefully today I can finish getting the G screen installed and possibly wire up the battery charger/tender.

Jeep Gladiator Destination Unknown - 2022 JTR journal IMG_0225.PNG


I must also give thanks to the folks on this forum who helped to resolve the issues by providing great info! Looking back - I could have done it a different way, and kept the factory group 31 size, and put an additional battery or two in the bed. That could arguably be a better way, and cheaper. But this is a sweet system with all the components included, and without a shop my fabrication options are limited and difficult to accomplish. I also like the G-screen option quite a lot, and having the lugs to attach my primary accessory distribution blocks to is cleaner than a bunch of wires on one single lug. Of course keeping all items taken off for every upgrade in the event I want to revert it back to stock form. Given I had a shop, all my tools, and better fabrication options than the current - I would have opted to keep the factory battery, deleted the aux, and fabricated my own system to go in the bed

After some work this morning I will check to see what battery voltages are for curiosity since it is cold, finish cleaning up some wiring, and begin G-screen install and hopefully battery tender as well.
Overall it wasn't a bad install in my experience, but I will agree that pulling out the factory battery try was unnecessarily painful...
 
OP
OP
chorky

chorky

Well-Known Member
First Name
Chad
Joined
Feb 26, 2022
Threads
158
Messages
3,058
Reaction score
3,183
Location
Montana
Website
www.youtube.com
Vehicle(s)
'06 TJ GE, '22 JTR
Build Thread
Link
Occupation
Forester
Today I finished up a little more wiring to connect the battery selector to the switch pro's system. This will allow me to turn the system entirely off (but there is an option for that already), or to select battery 1 (currently the Genesis aux battery) or run off of battery 2 (not used currently) or combine both batteries. This gives me modular ability in expansion in the future to use either another AGM in the bed, or lithium. With AGM I could combine it with the aux battery under the hood in the Genesis system. With Lithium, I can select it so that the house items run on lithium alone, or the Genesis aux battery if lithium is removed. I am currently figuring which way to go as summer plans have already changed requiring me to have battery power for up to 3 days in one spot.
Jeep Gladiator Destination Unknown - 2022 JTR journal IMG_0292
 
OP
OP
chorky

chorky

Well-Known Member
First Name
Chad
Joined
Feb 26, 2022
Threads
158
Messages
3,058
Reaction score
3,183
Location
Montana
Website
www.youtube.com
Vehicle(s)
'06 TJ GE, '22 JTR
Build Thread
Link
Occupation
Forester
I also finished the home made cracking system. I figured on making something like this a while ago, but it took a while to do thanks to a search for parts. I opted to utilize exclusively (except for a couple pieces) stainless steel. Surprisingly it wasn't all that expensive. The first order of business was to install a main air block. I wanted to have a gauge to see what pressures were, as well as a decent way to relieve pressure. check and check....
Jeep Gladiator Destination Unknown - 2022 JTR journal IMG_0294

Jeep Gladiator Destination Unknown - 2022 JTR journal IMG_0299


Second was to determine how to build the system and its functionality. I wanted the ability to air up the fronts and rears at the same time, or independently from each other. For that reason, the cracking system really wasn't for me. So I came up with one chuck going forward, and one rearward - two separate hoses, separated by an air chuck. Also including a pressure gauge, as well as a valve. The valve was important to allow deflation, as well as stop air movement in order to unhook the front.
Jeep Gladiator Destination Unknown - 2022 JTR journal IMG_0295

Jeep Gladiator Destination Unknown - 2022 JTR journal IMG_0296


Overall, it works well considering. I wish I had the right machining tools to make a better product. Surprisingly, the cost of the parts isn't a huge savings as if you got the cracked or one of the handful of other like systems. In retrospect - you would be better off to just buy a built system. The only real benefit here is my house are a custom length... I am happy about having the ARB dual compressor though instead of only the single. from 17 to 35 in 3 minutes, and the rears 5 more to 40 in another 2 minutes including unhooking the front from the tires.
Jeep Gladiator Destination Unknown - 2022 JTR journal IMG_0297


I also was able to reuse the ARB box that the compressor/tank originally came in. It's the perfect size actually, so that worked out really well!
Jeep Gladiator Destination Unknown - 2022 JTR journal IMG_0301
Sponsored


Top