OP
OP
chorky
Well-Known Member
- First Name
- Chad
- Joined
- Feb 26, 2022
- Threads
- 175
- Messages
- 3,466
- Reaction score
- 3,801
- Location
- Montana
- Website
- www.youtube.com
- Vehicle(s)
- '22JTR, '06 LJ, '06 TJ GE
- Build Thread
- Link
- Occupation
- GIS Specialist
- Thread starter
- #76
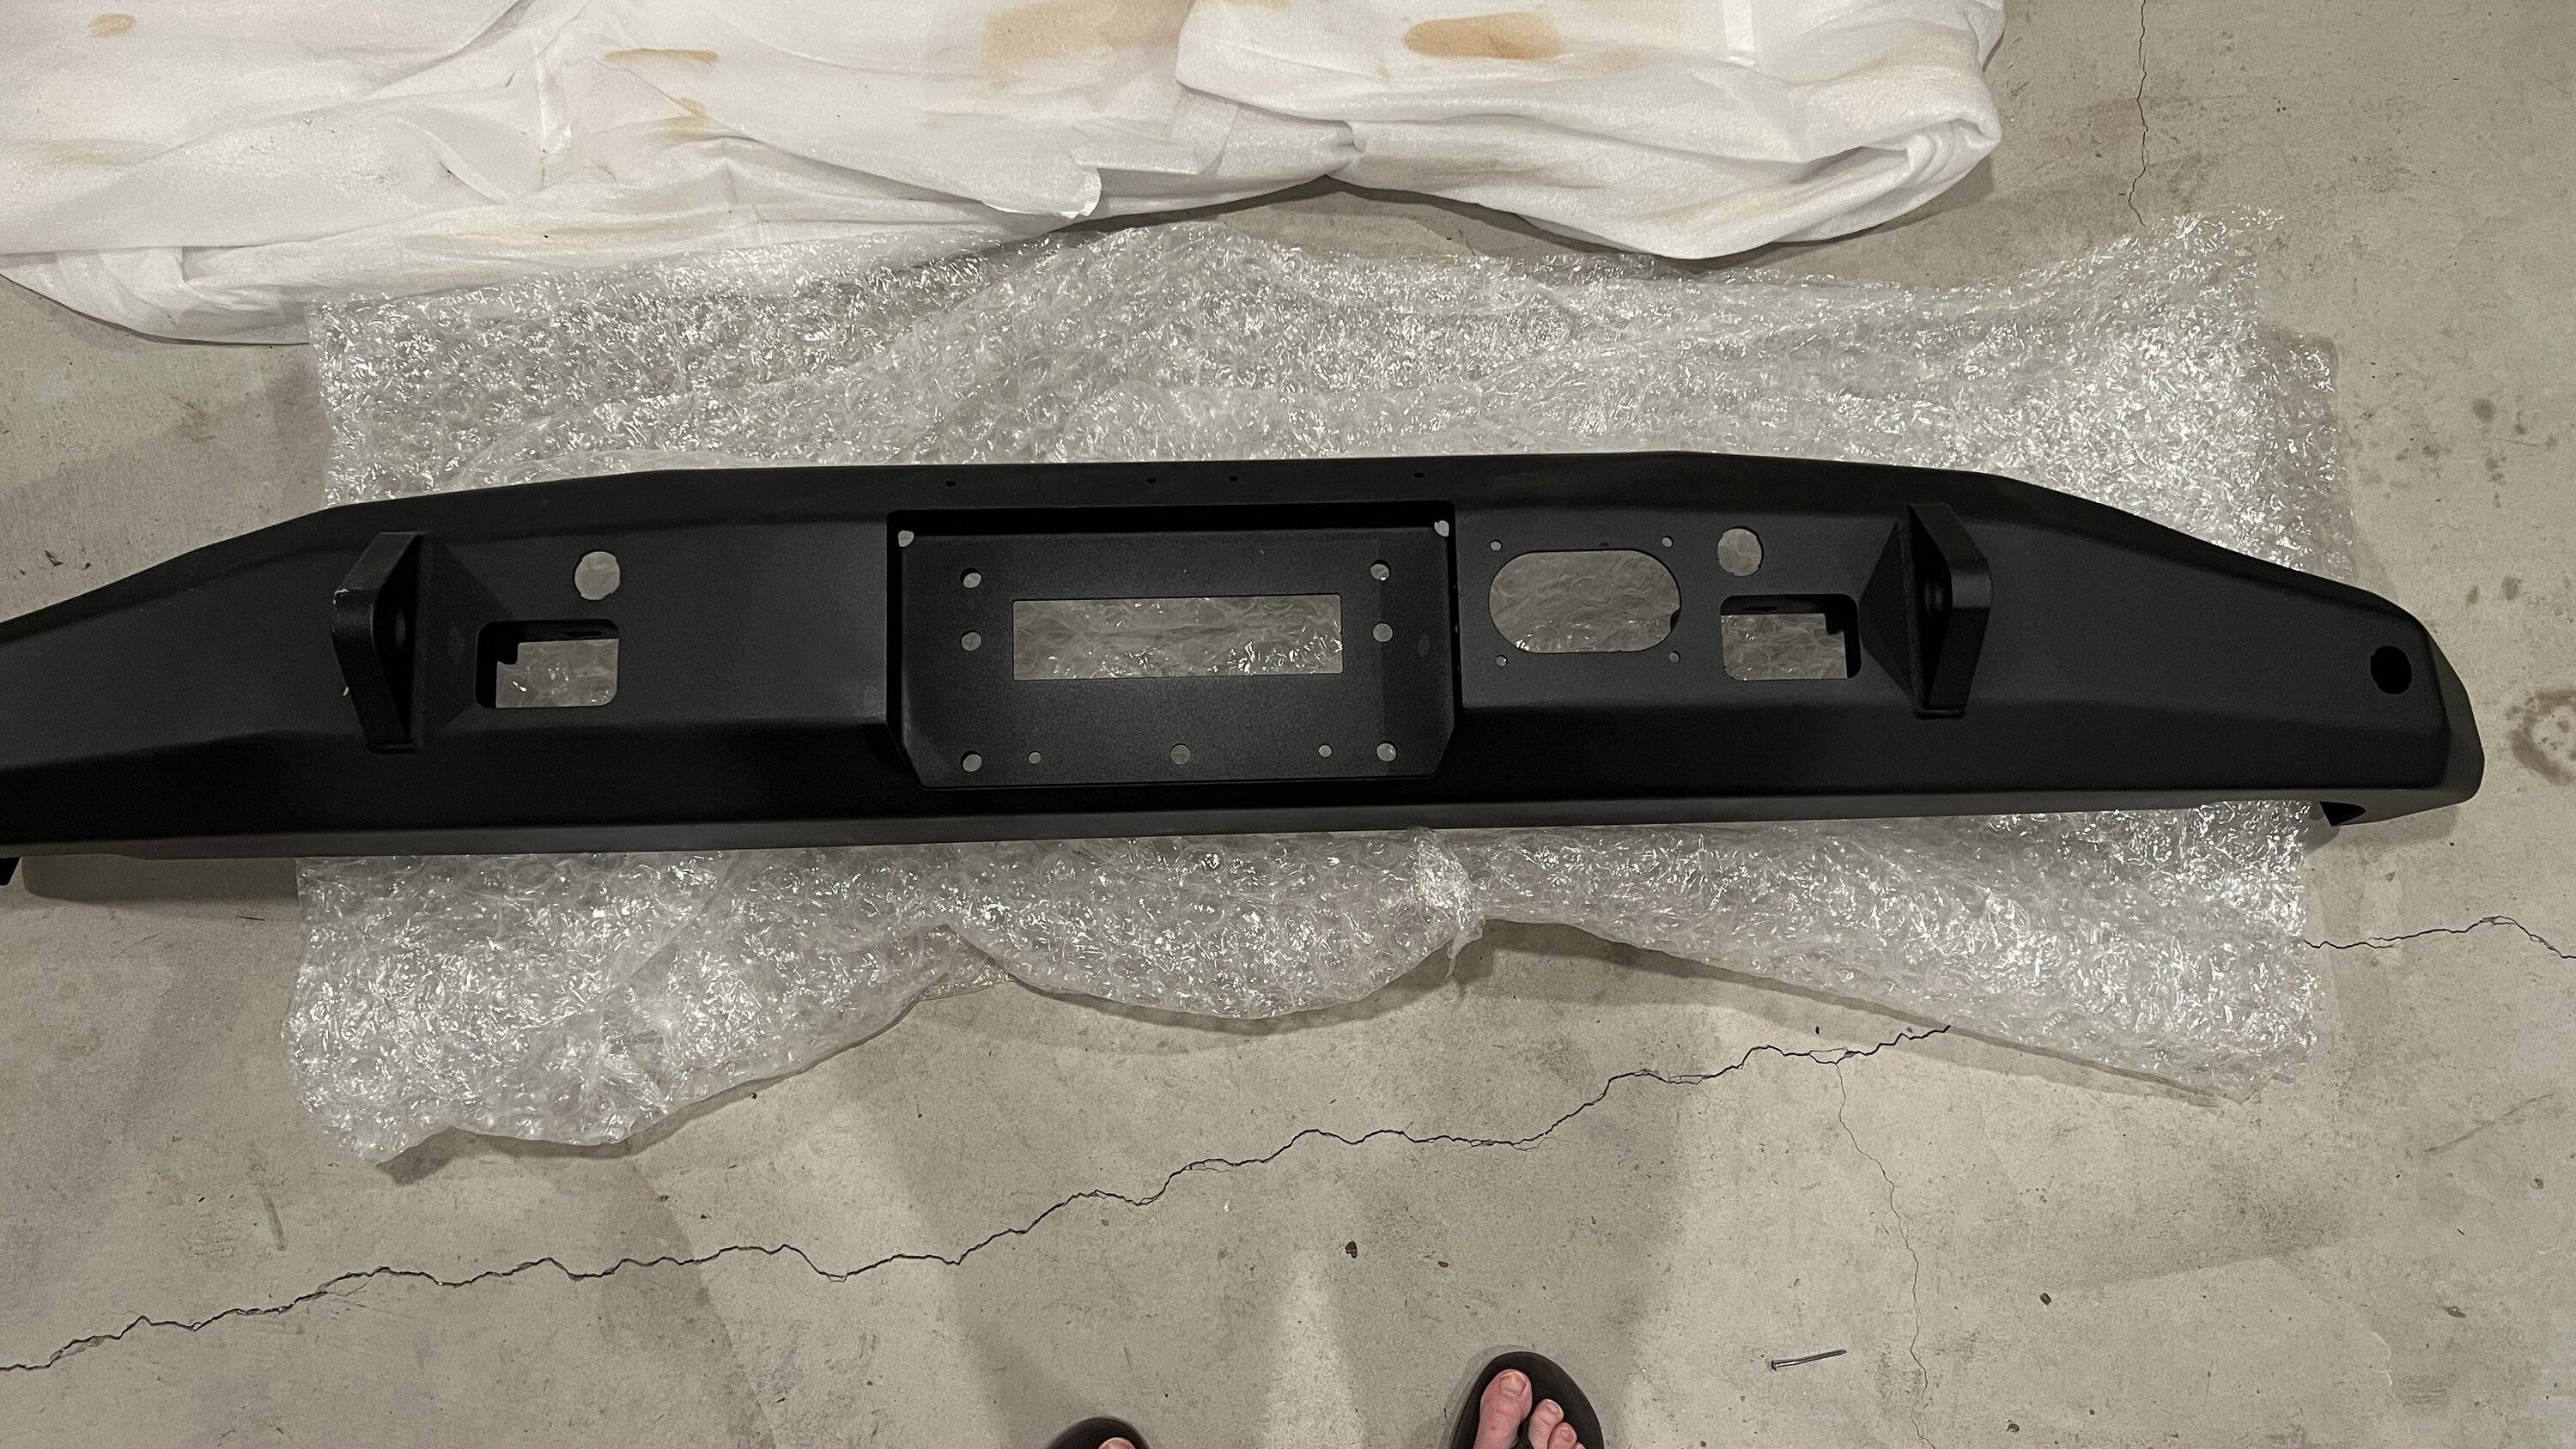
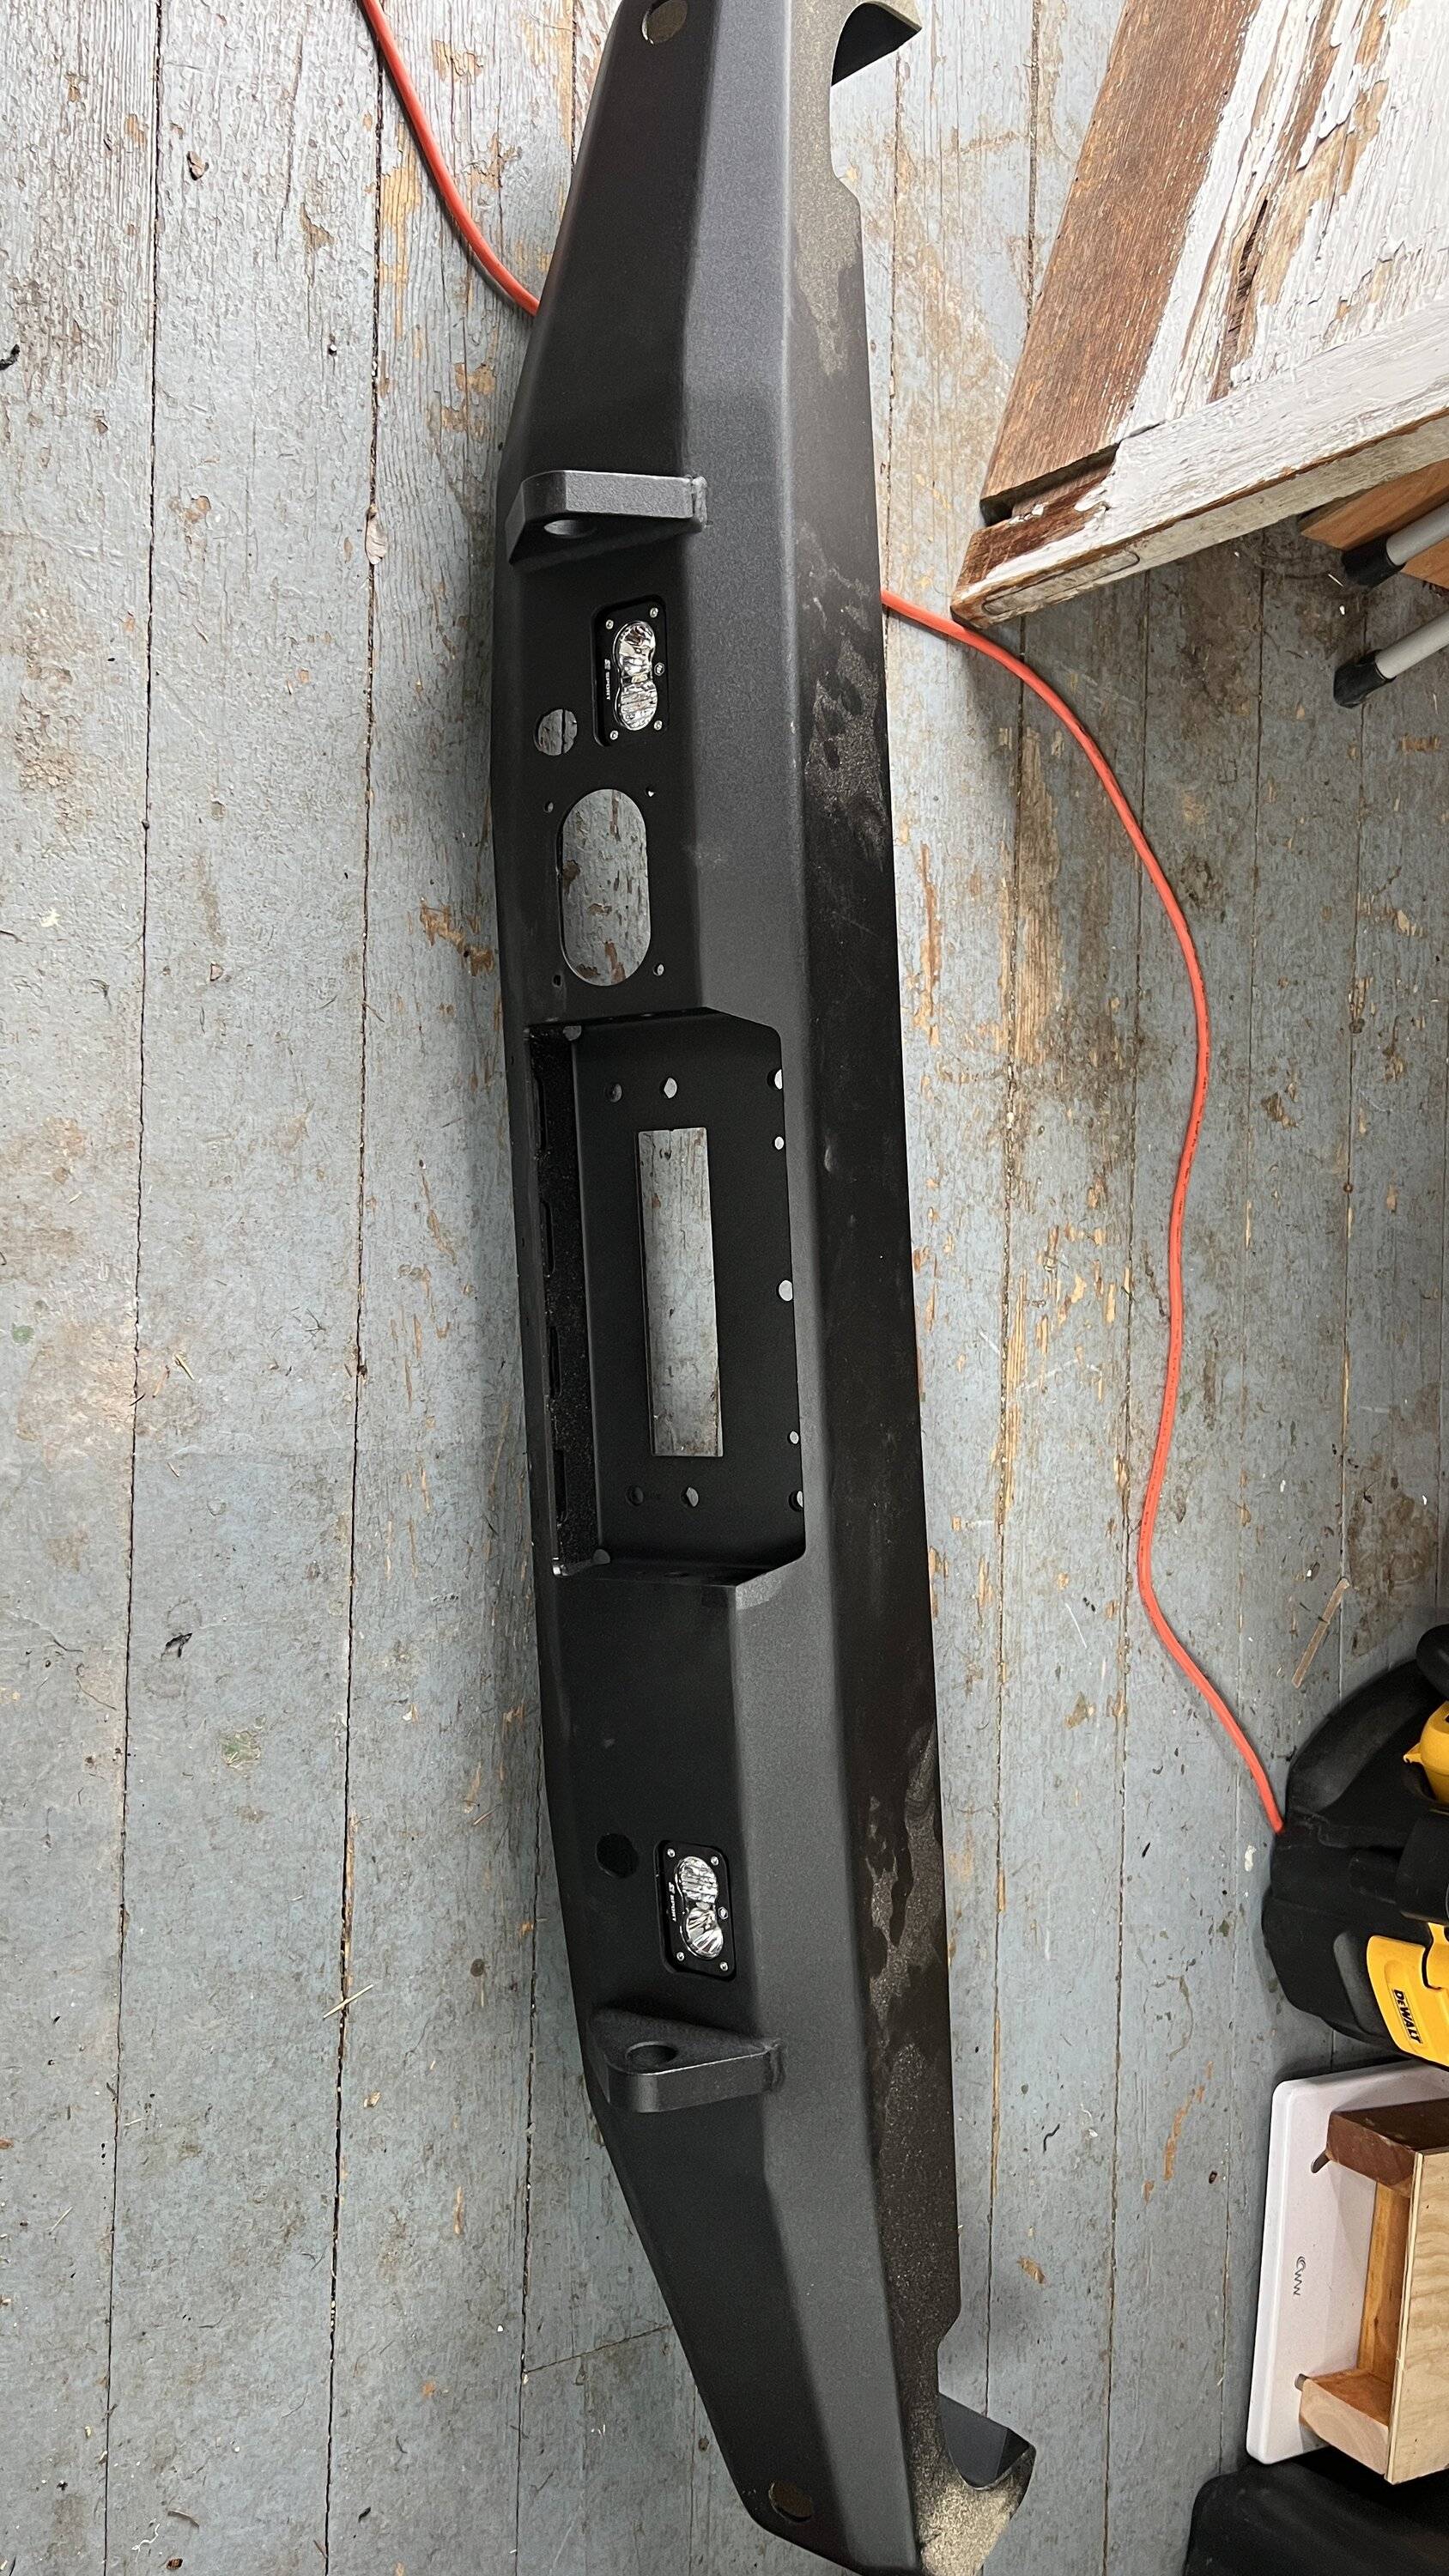
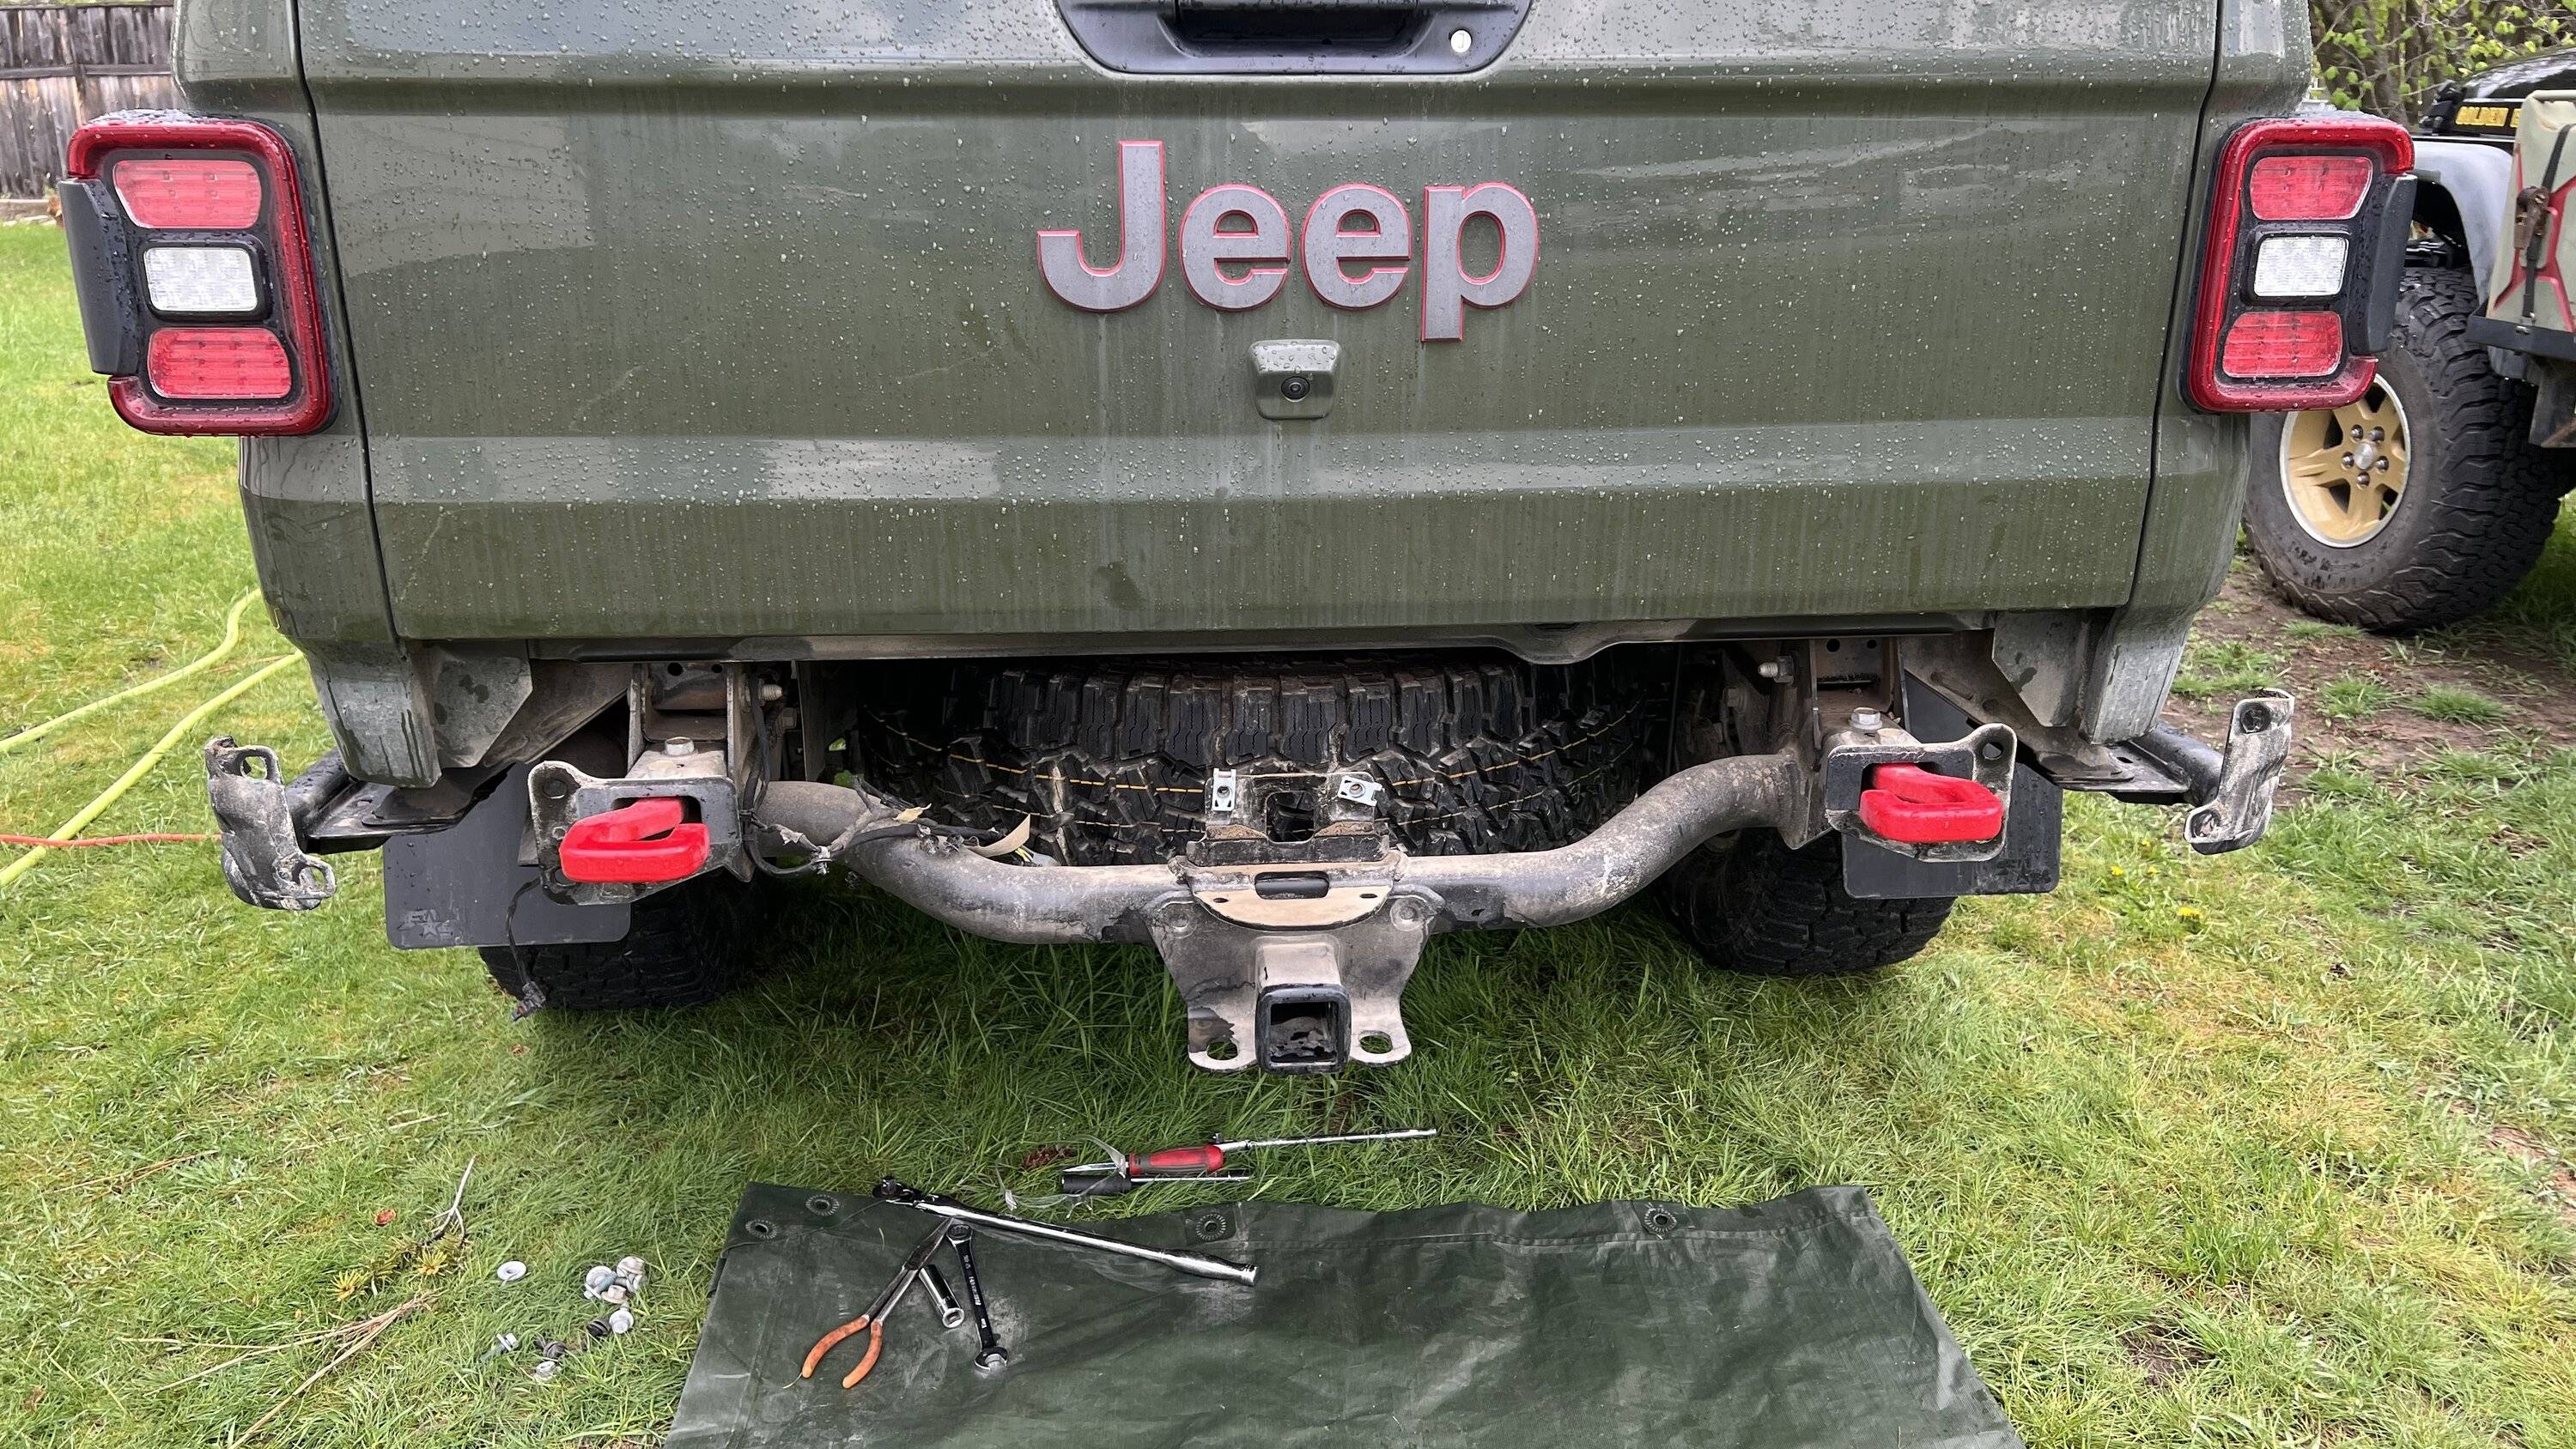
Today I installed the Road Armor Stealth rear winch bumper that I have had in the basement for the better part of 9 months. I didnt want to install it before as I was concerned about additional weight in the back before getting the higher capacity springs in the AEV lift. Although, it turns out that it really didnt cause much additional sag and weight added was minimal.

It started out the other day after installing the skid plates by installing the Baja Designs S2 Pro 'driving/combo' lights in their respective place. Doing so on the vehicle would be difficult. I also worked on making the wiring harness so that they can plug into the wiring I already ran and put in place for them months ago.
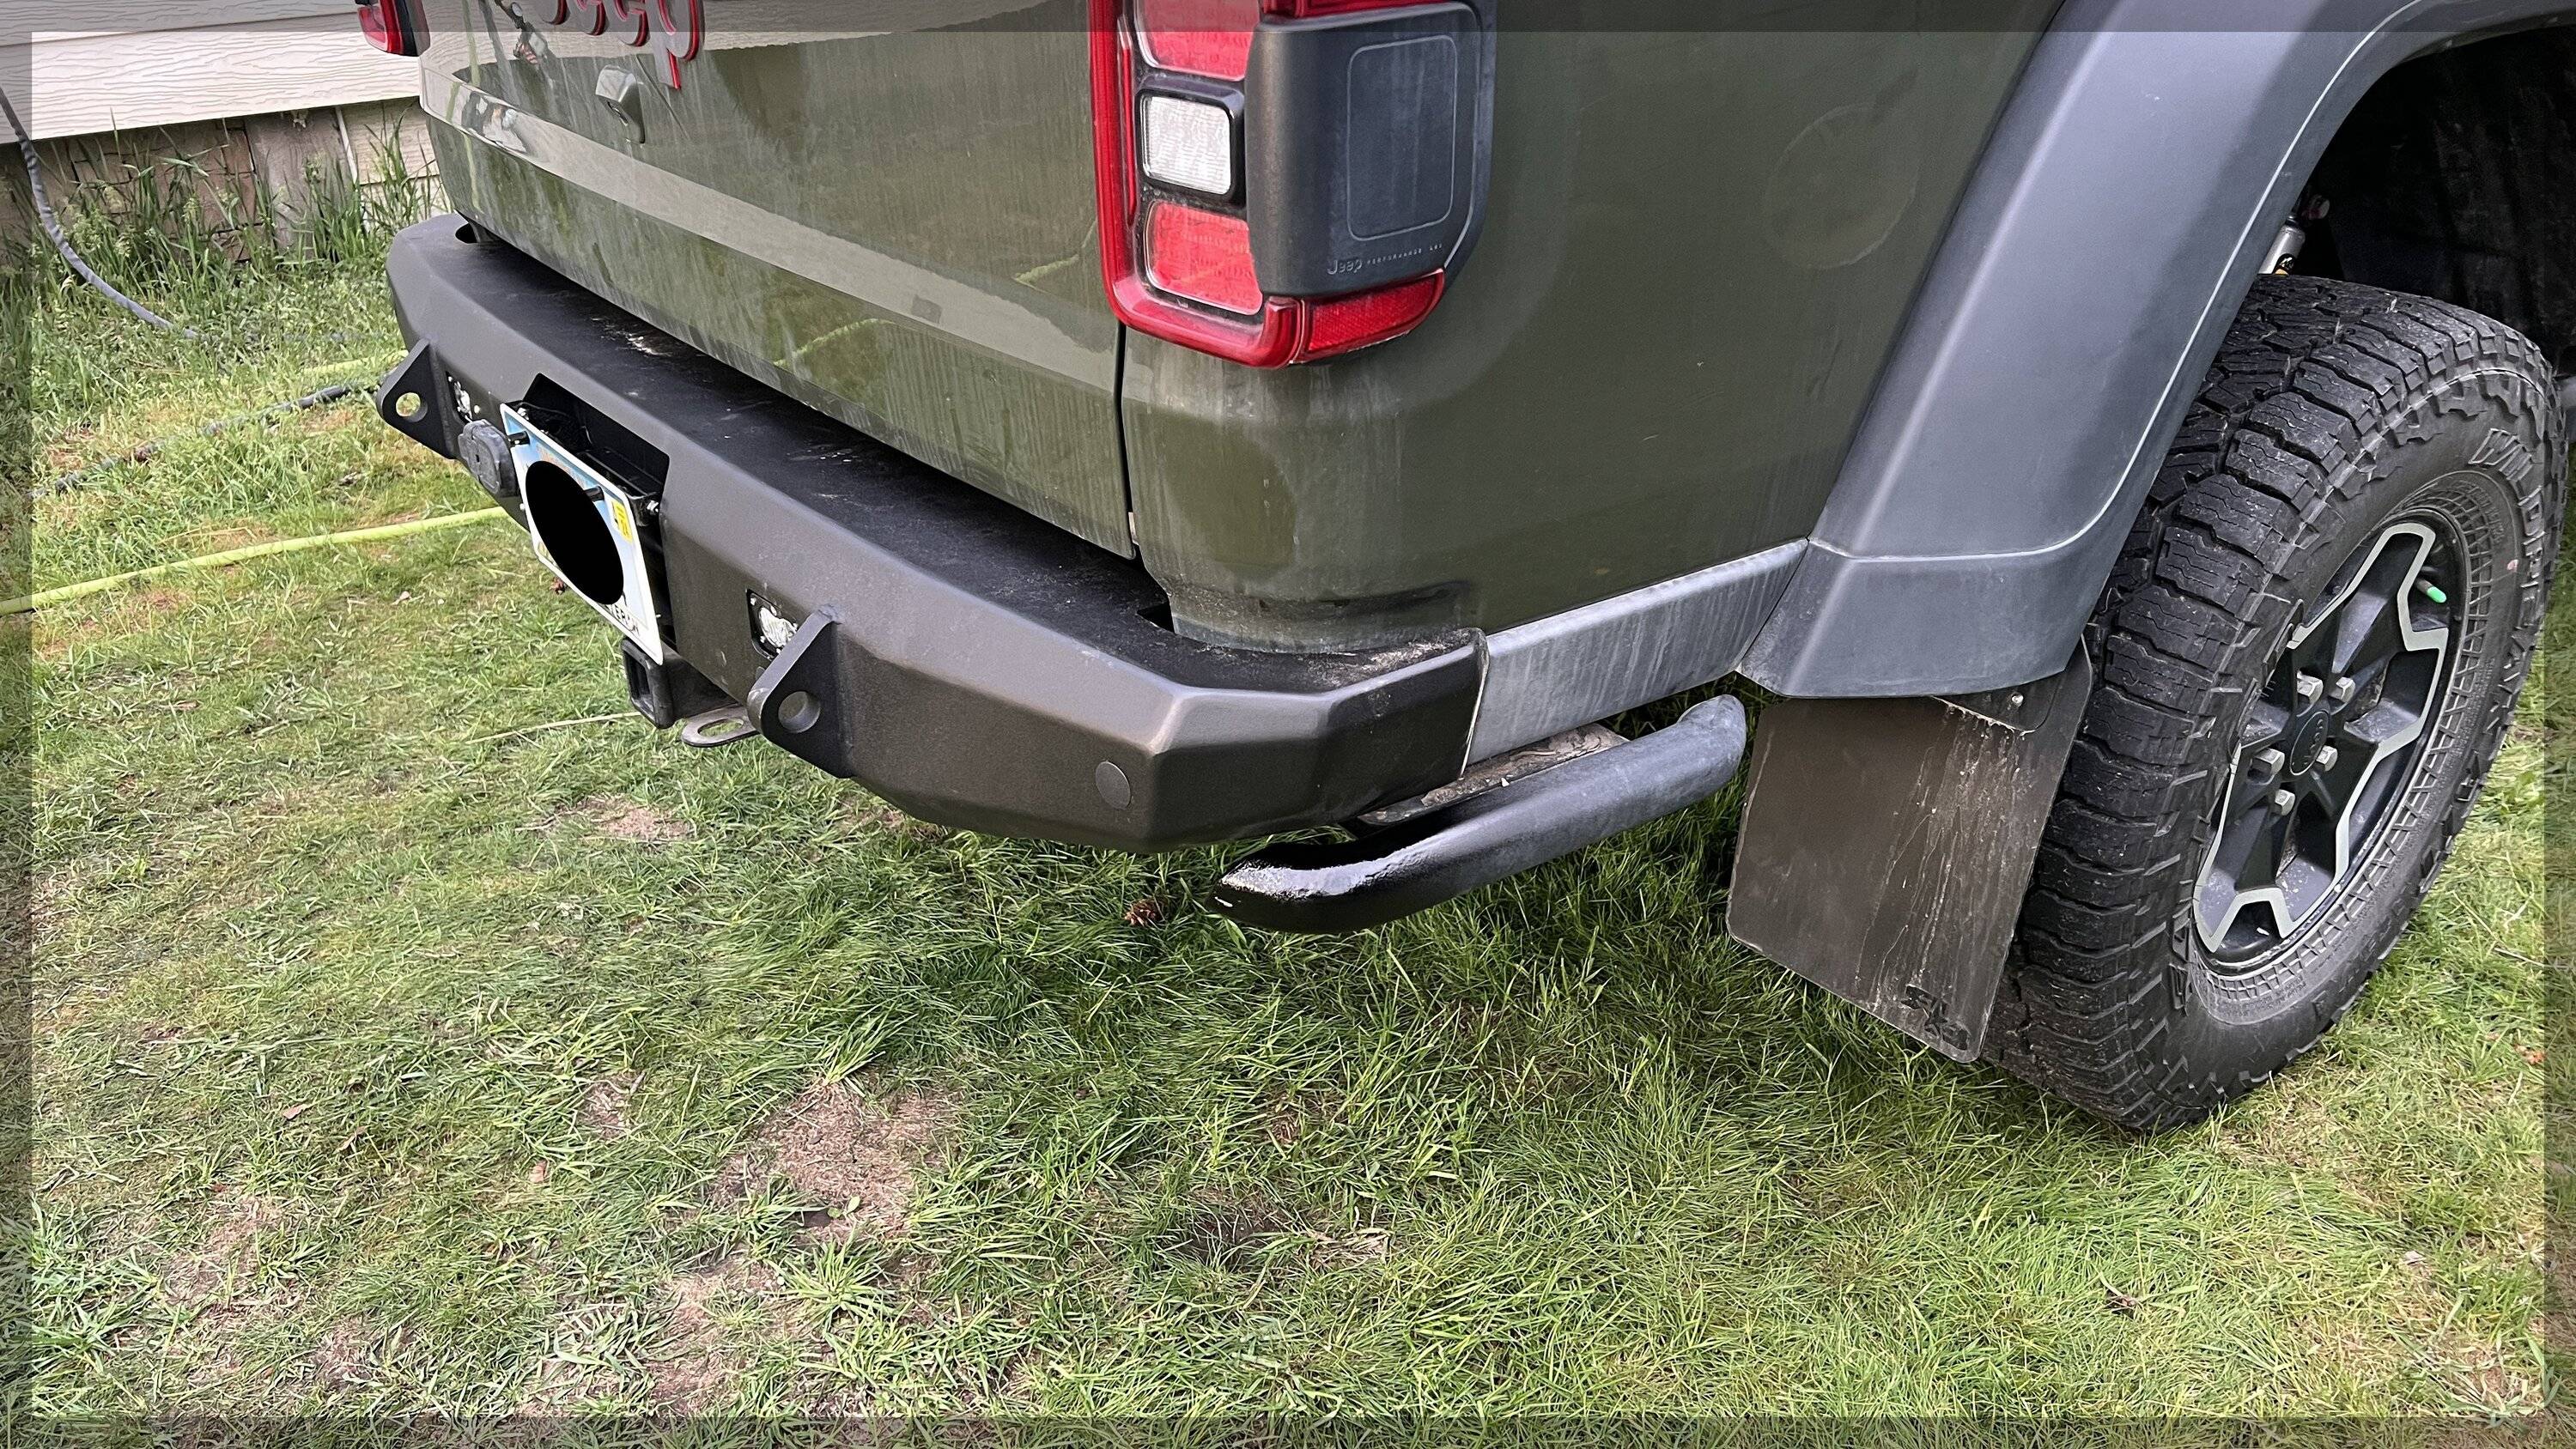
In the picture above you can see I originally had the amber rock lens installed, but it didn't fit right in the holes so I removed the rock guard.

The bumper is spec'ed out to weight 95 pounds. The factory rubicon bumper, bolts, recovery points, and removed brackets from the bed sliders came in at about 44 pounds. So a net gain of 51 pounds. I am happy about this as I expected the factory bumper to weigh much less, maybe around 20 pounds. And I am happy that it is not just a total gain of nearly 100 pounds, considering I will be putting in a winch.
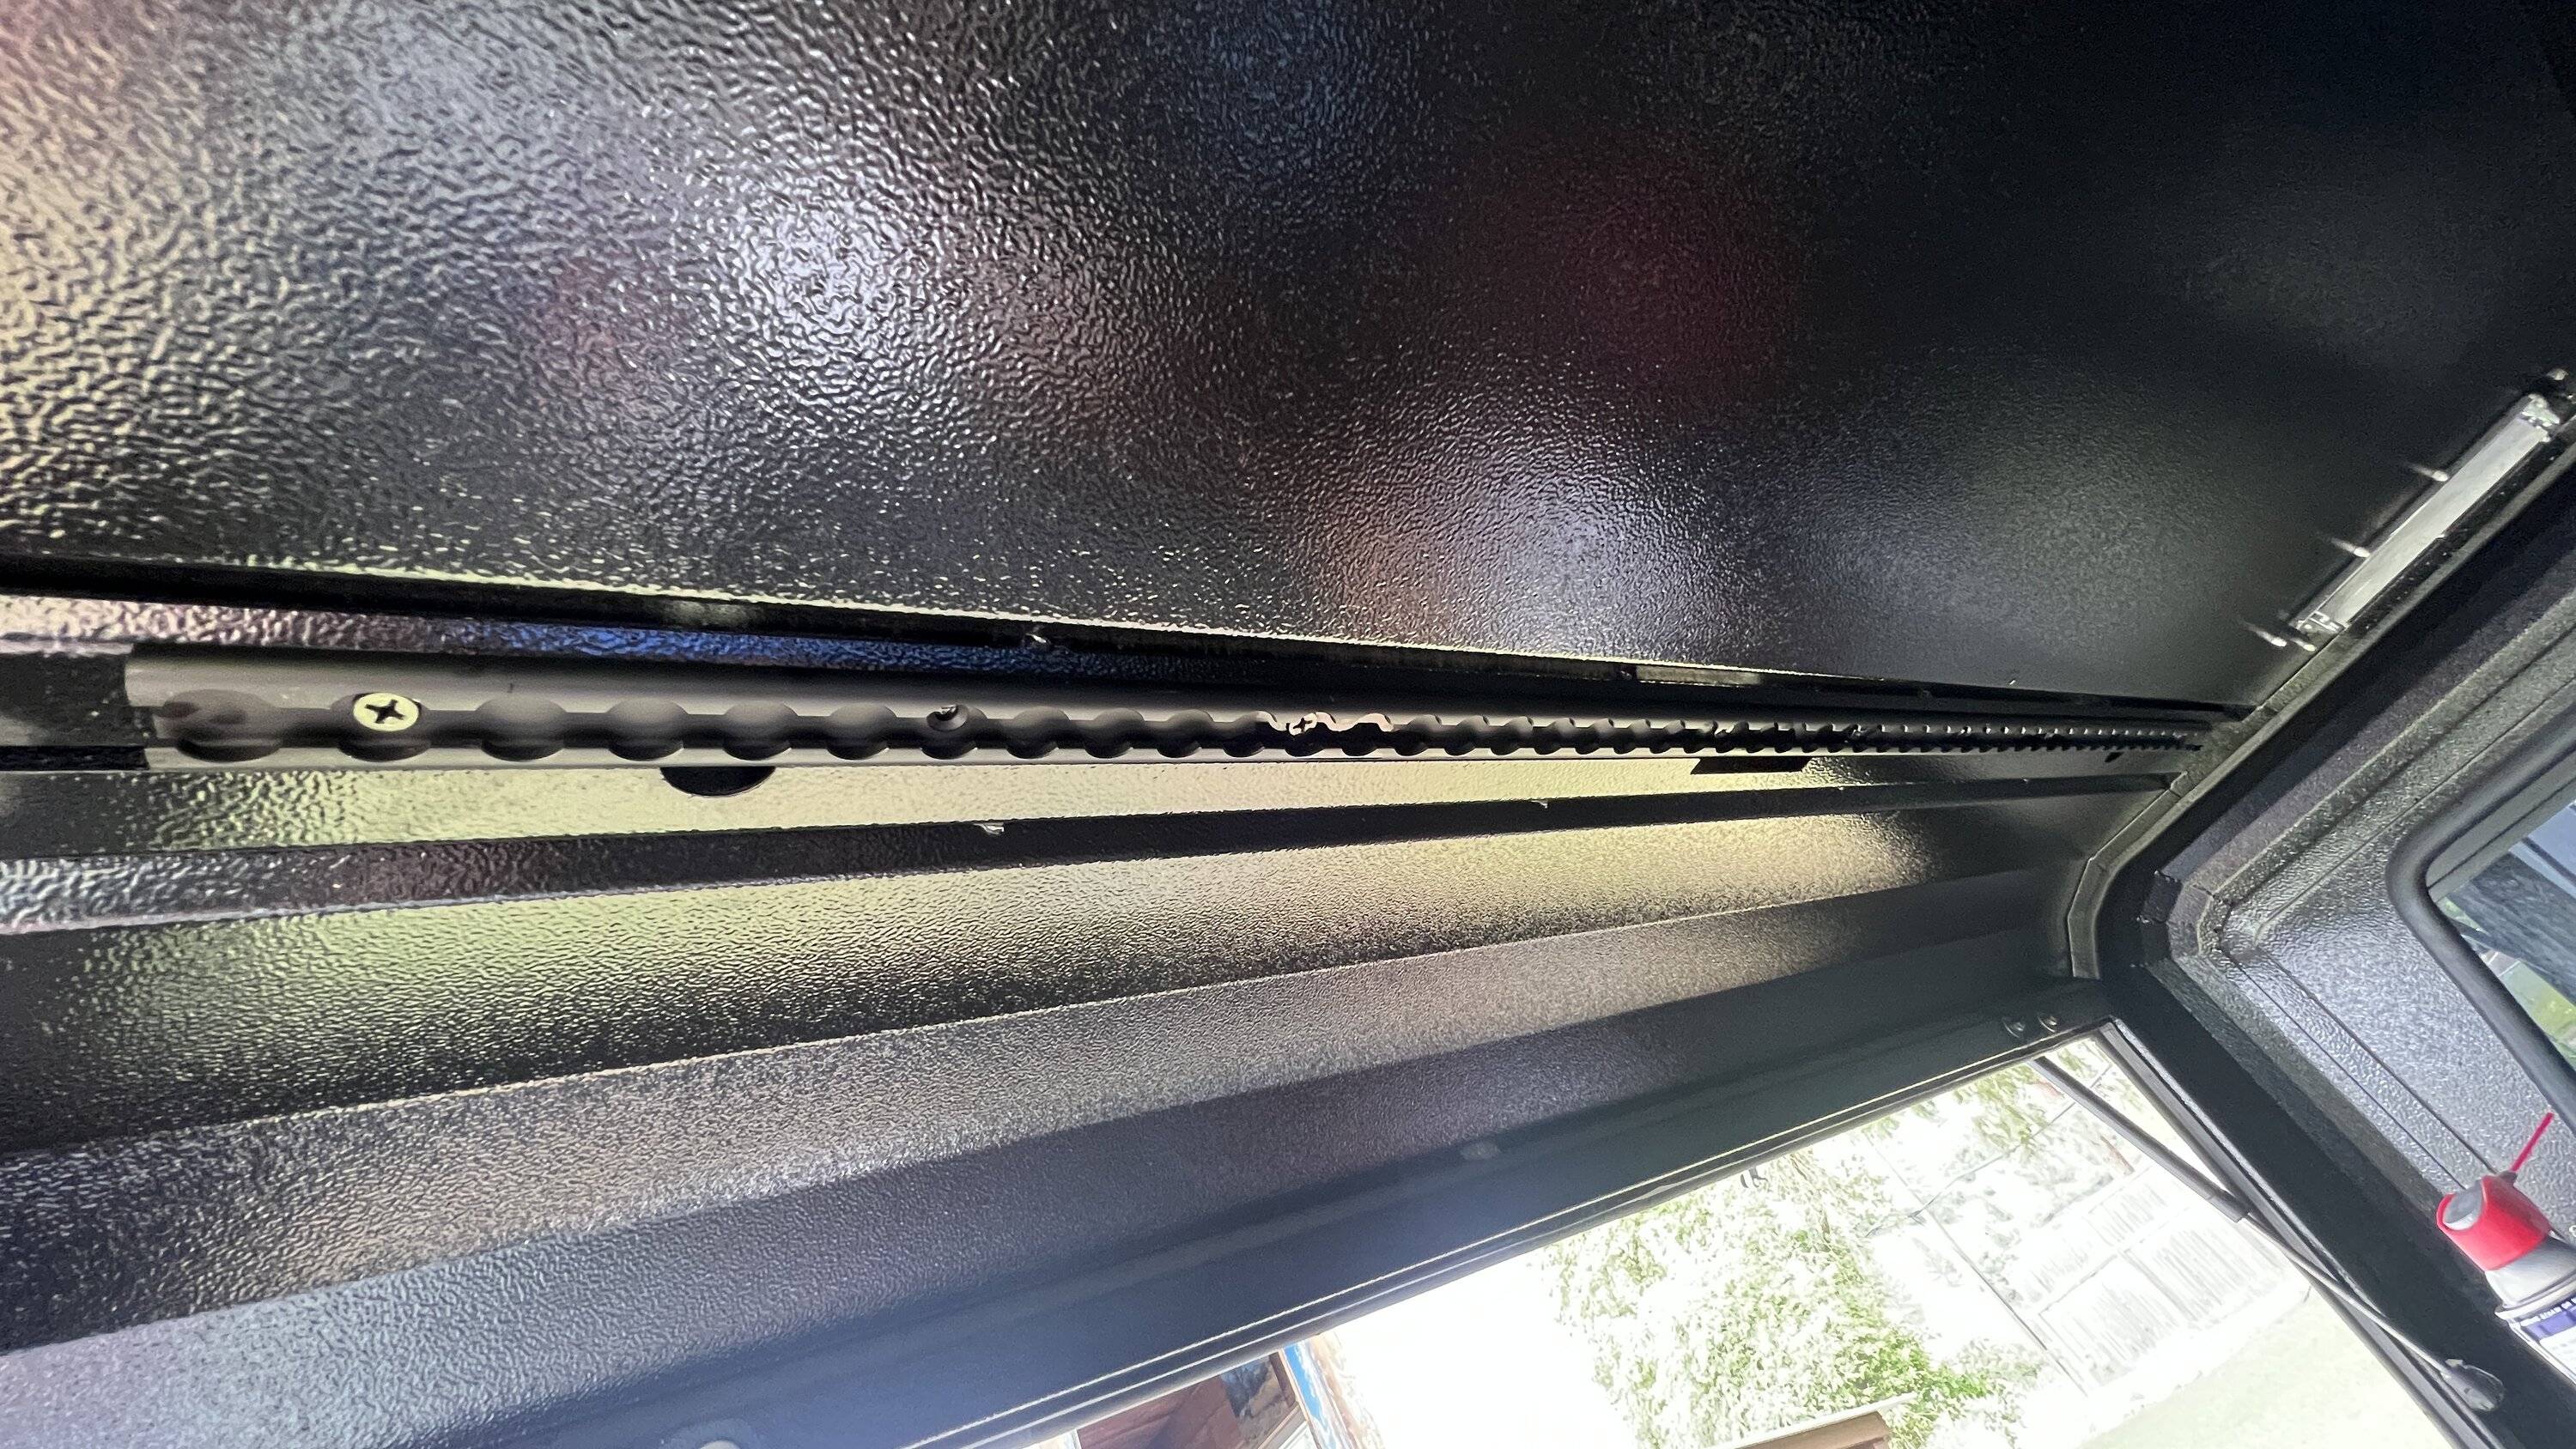
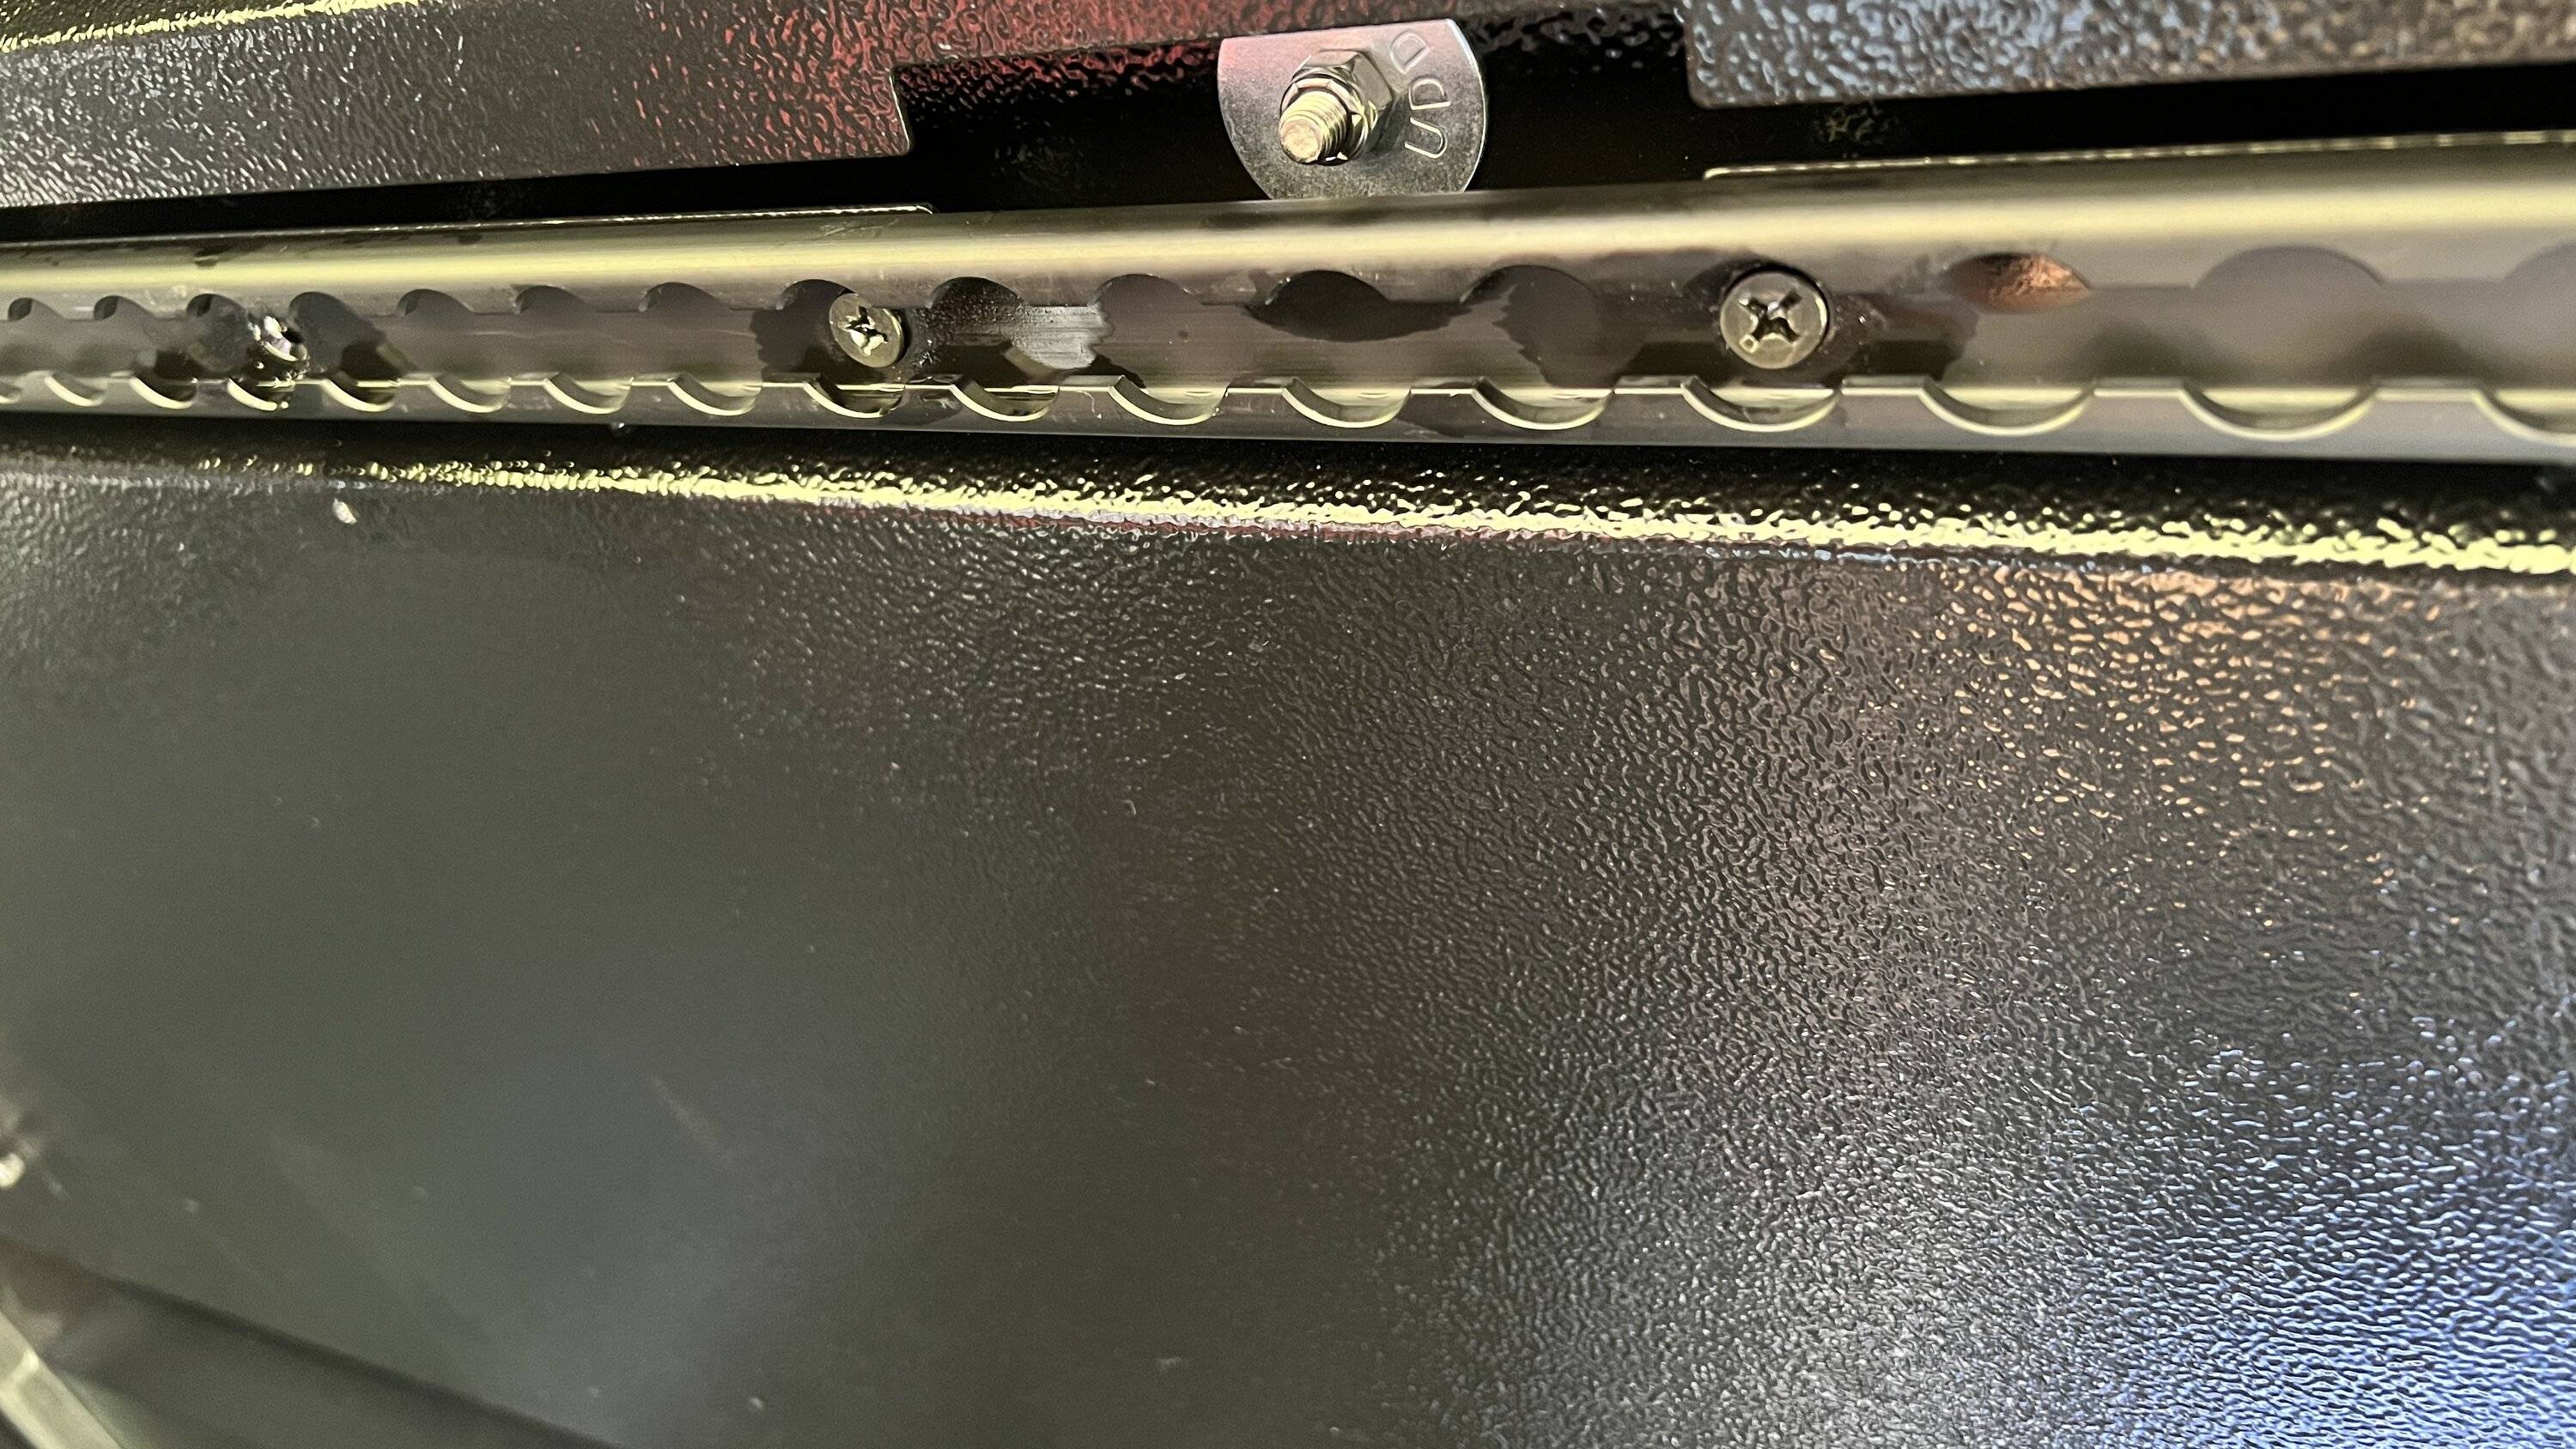
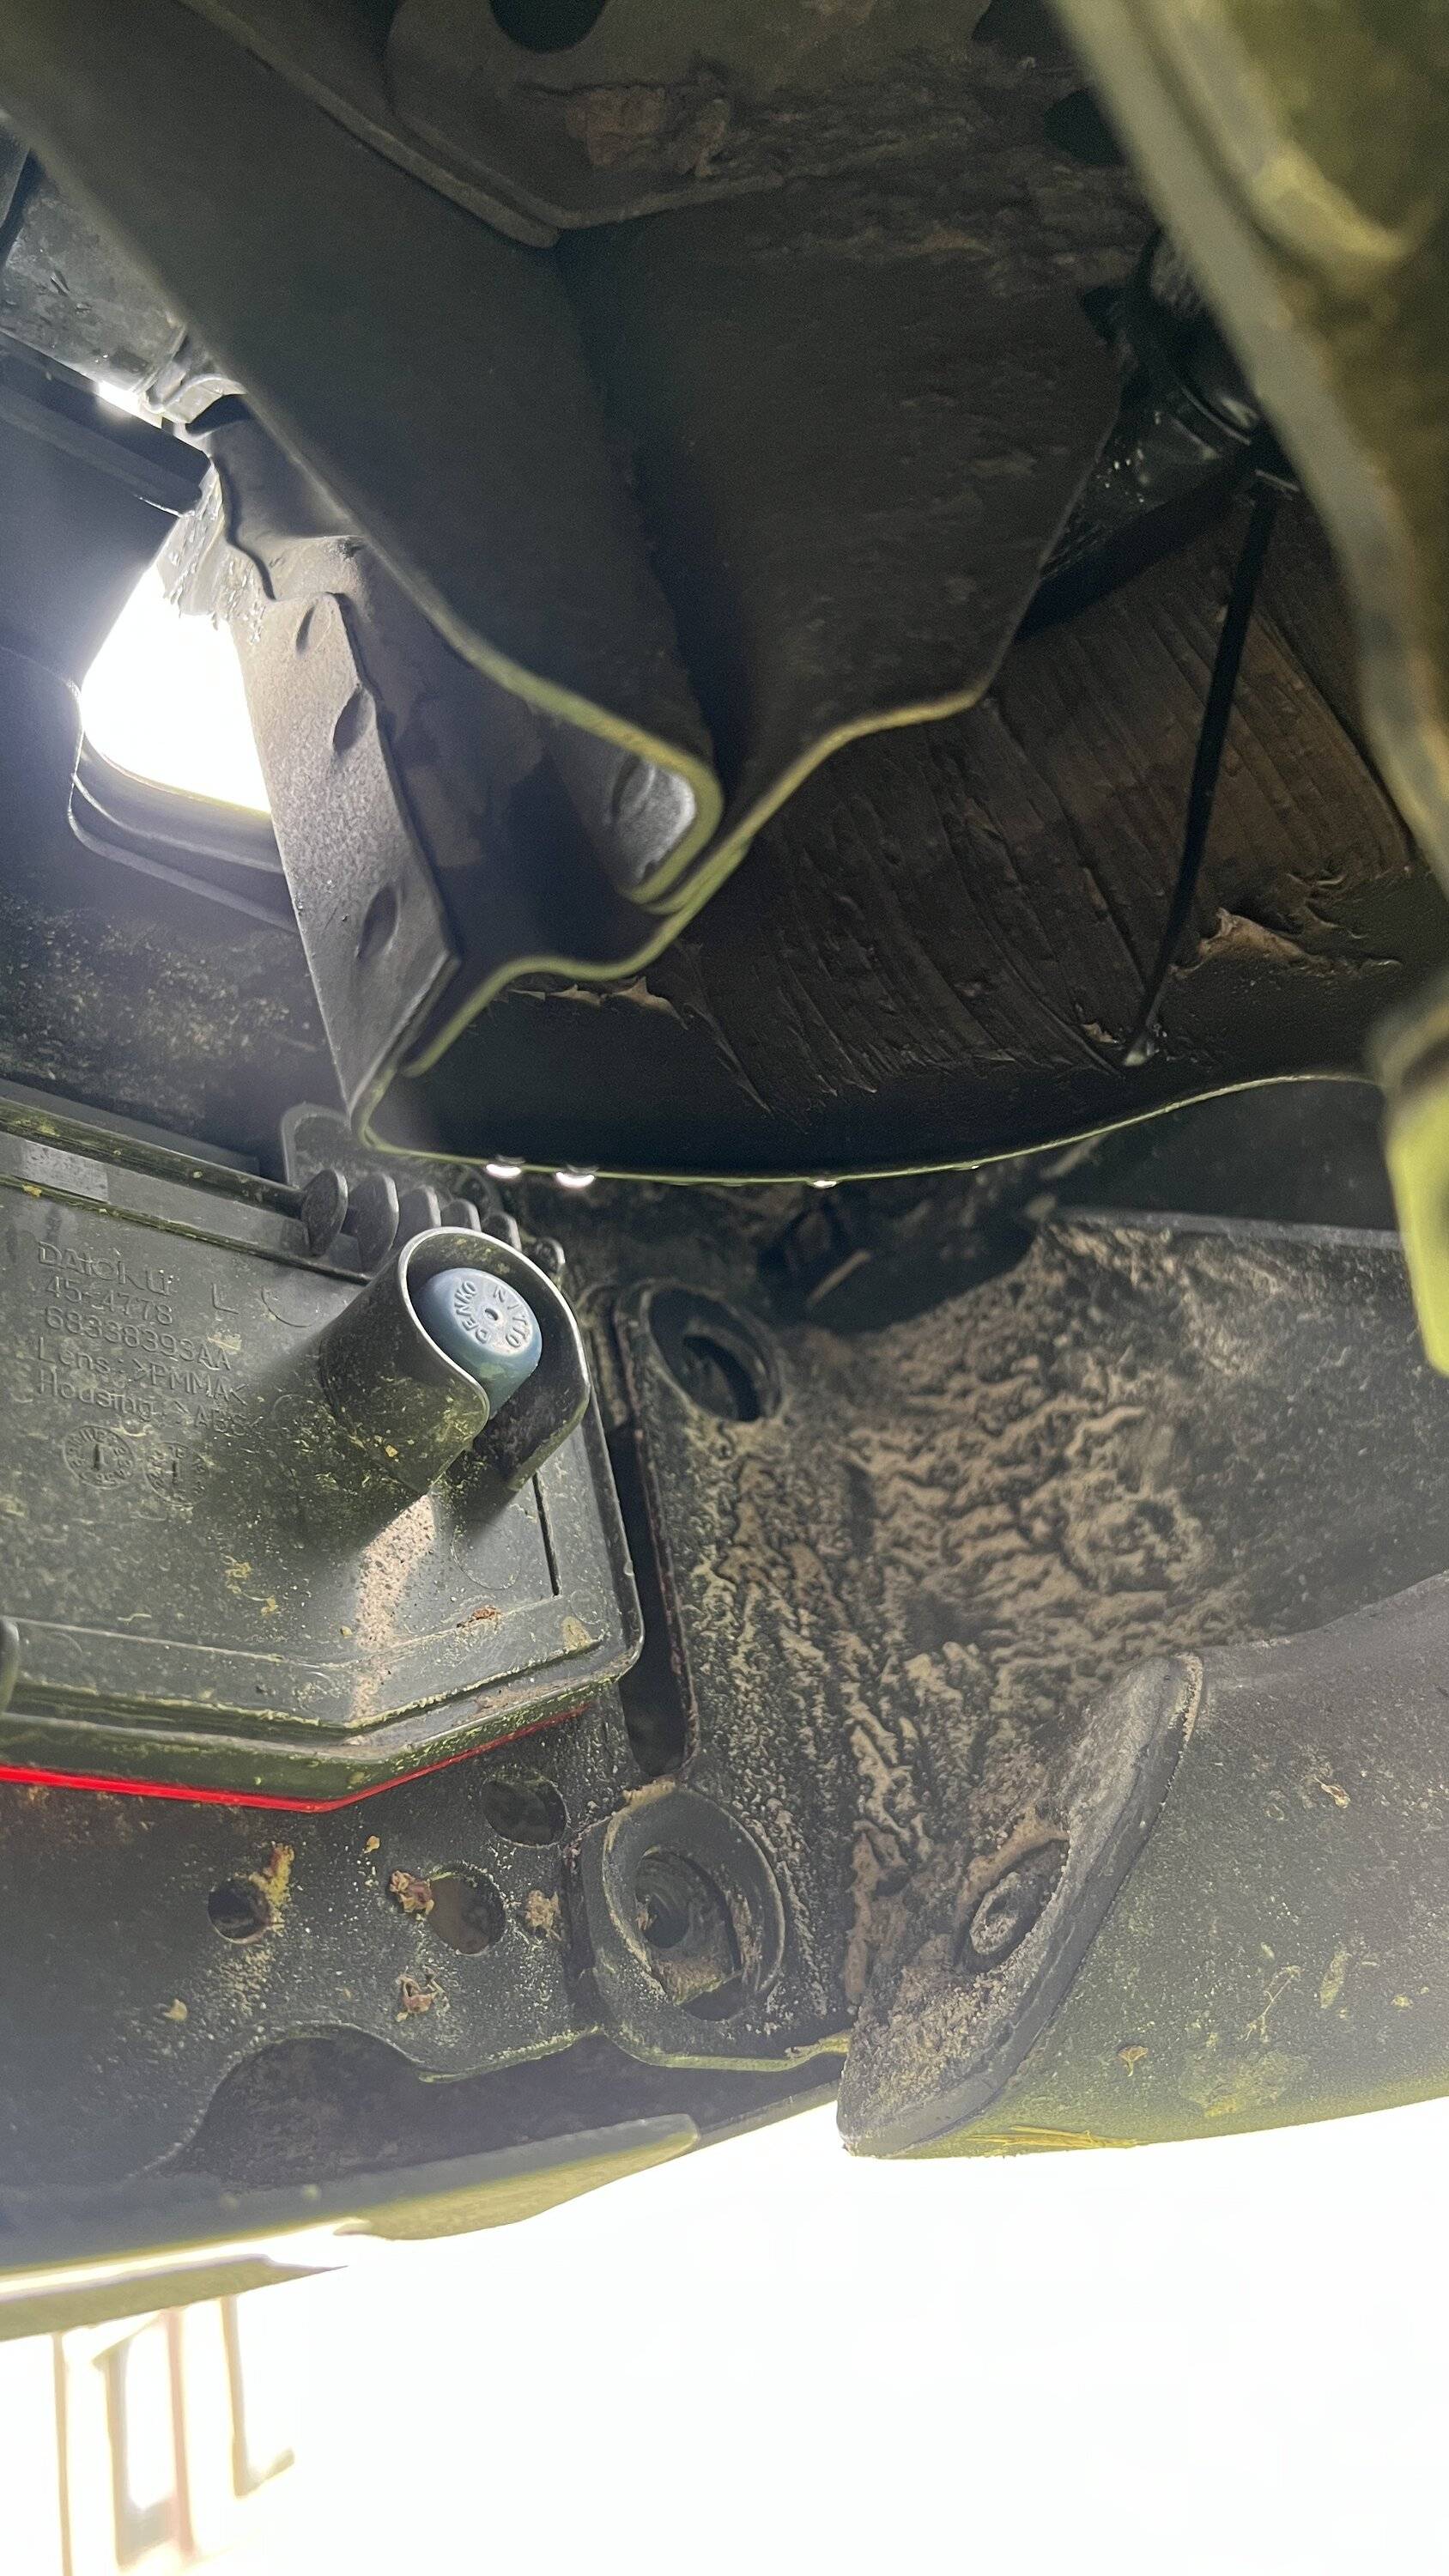
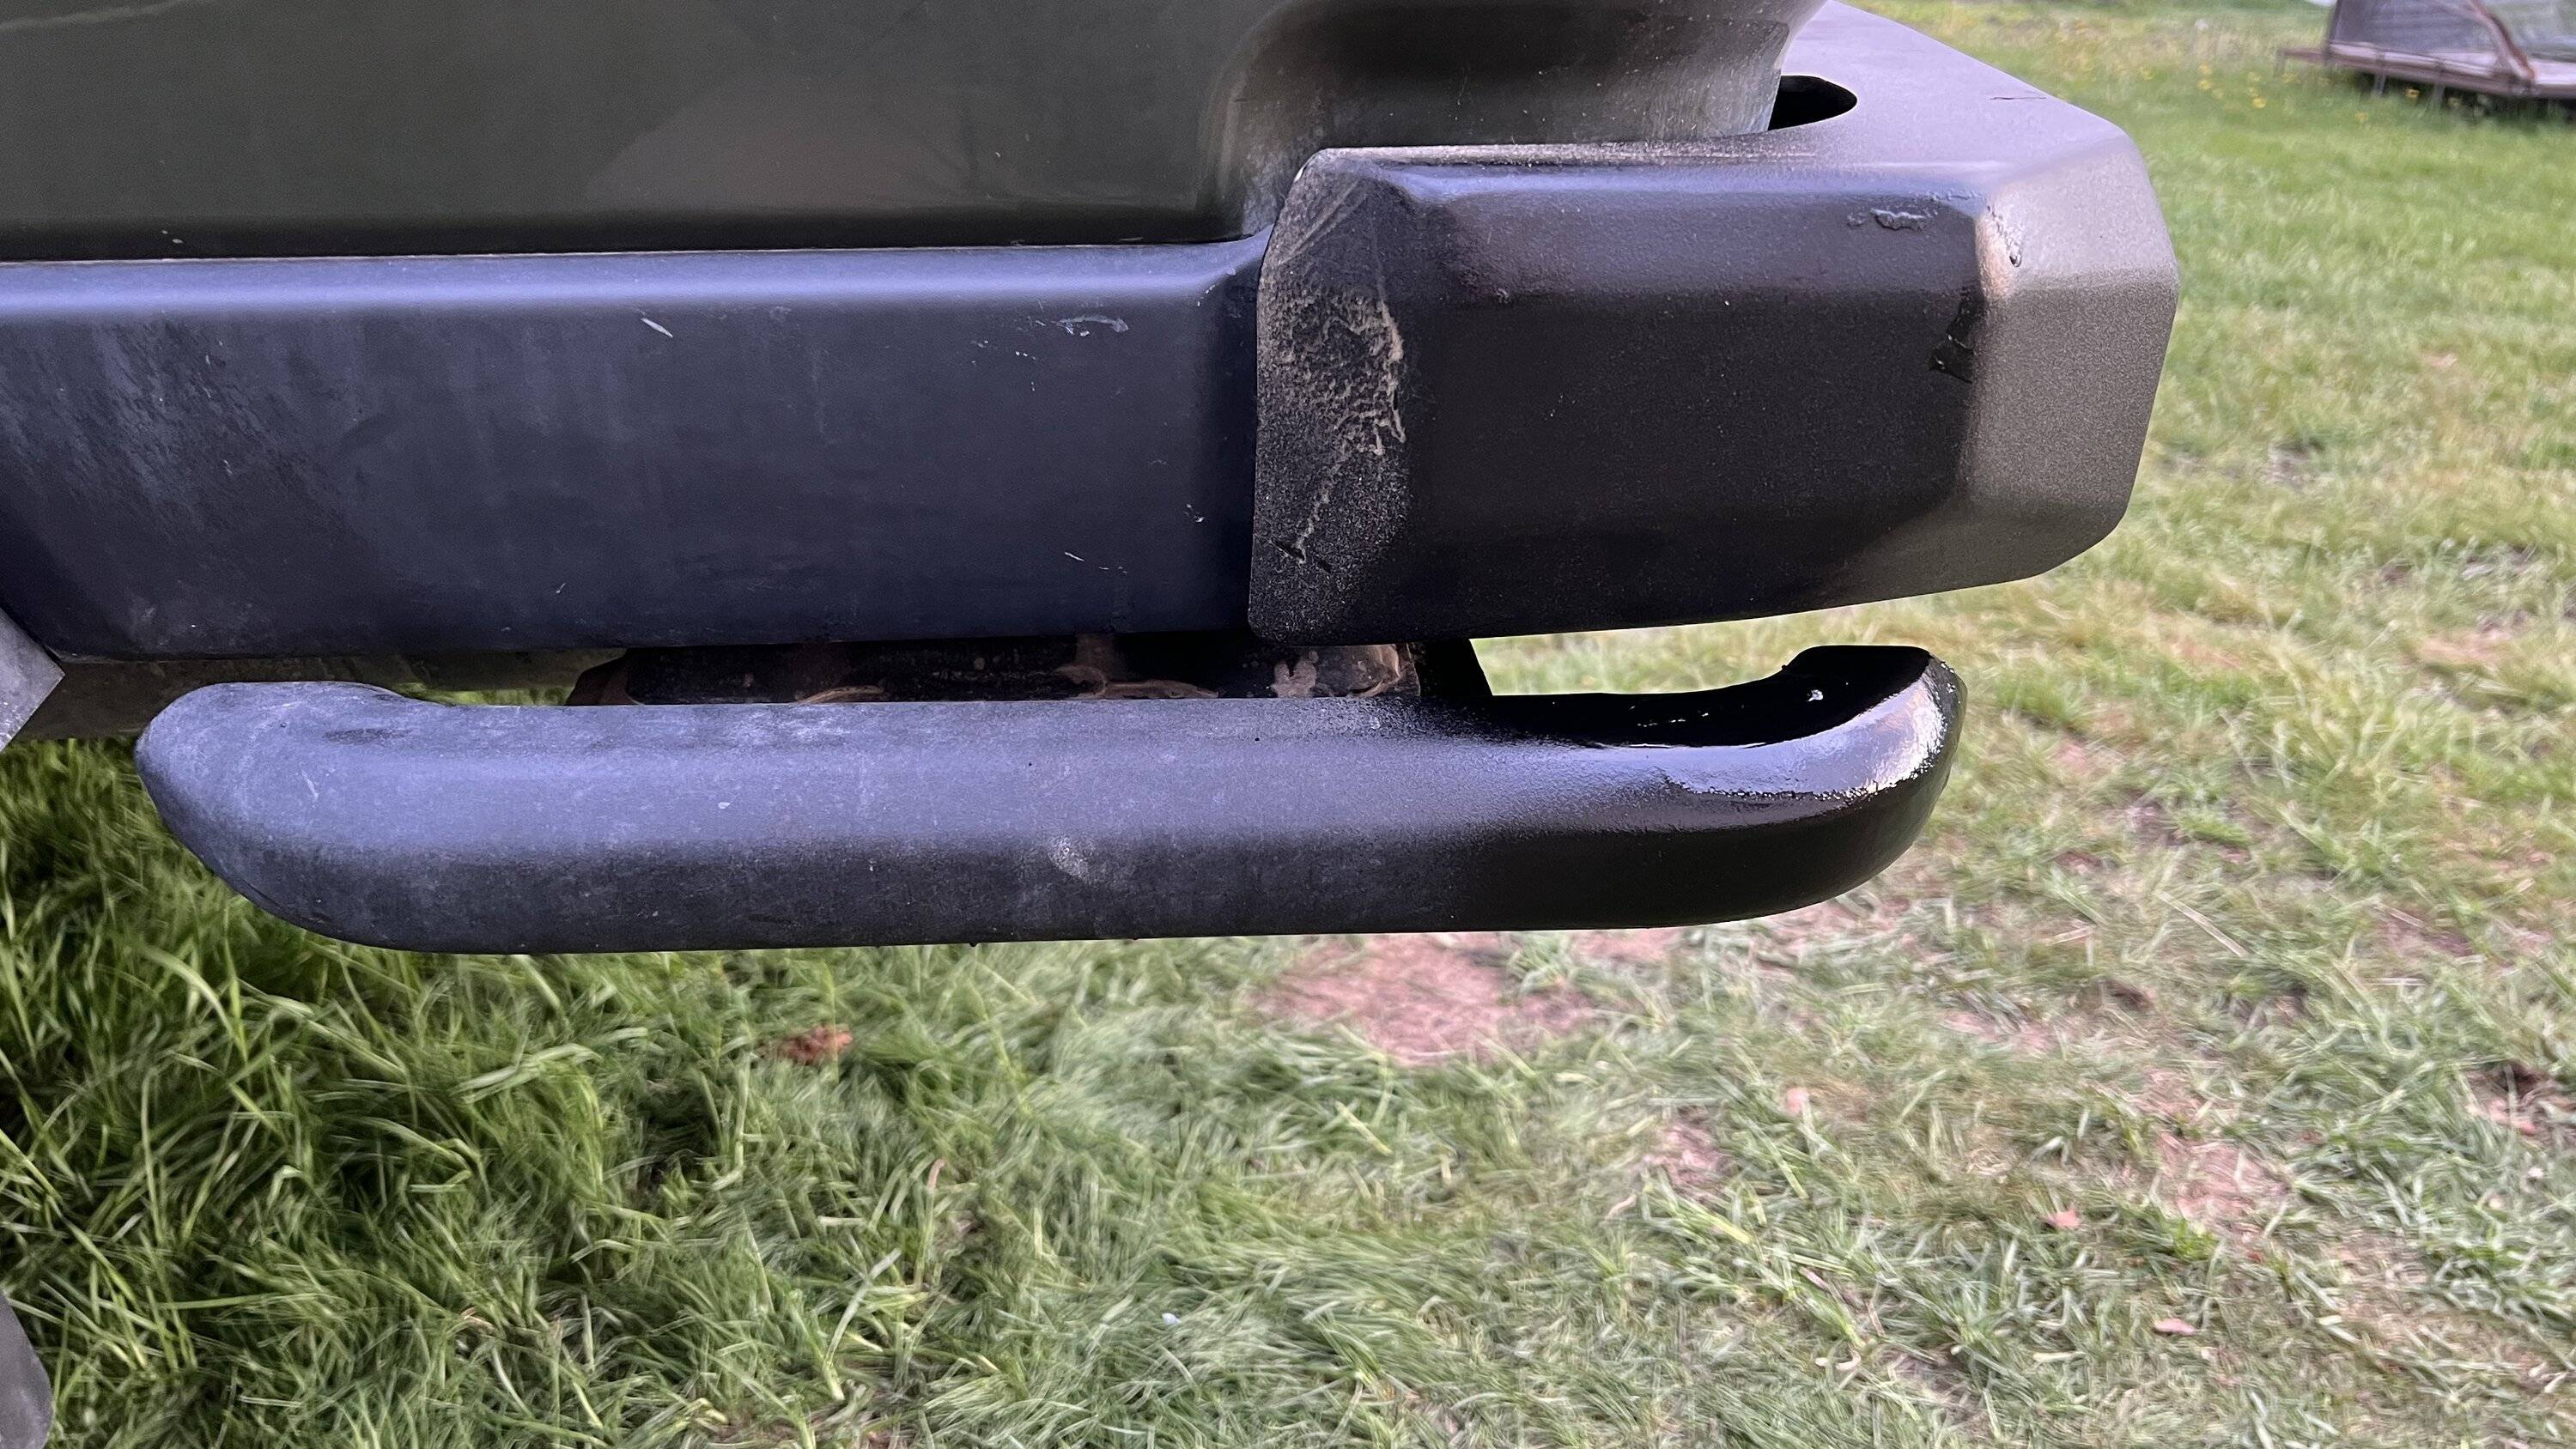
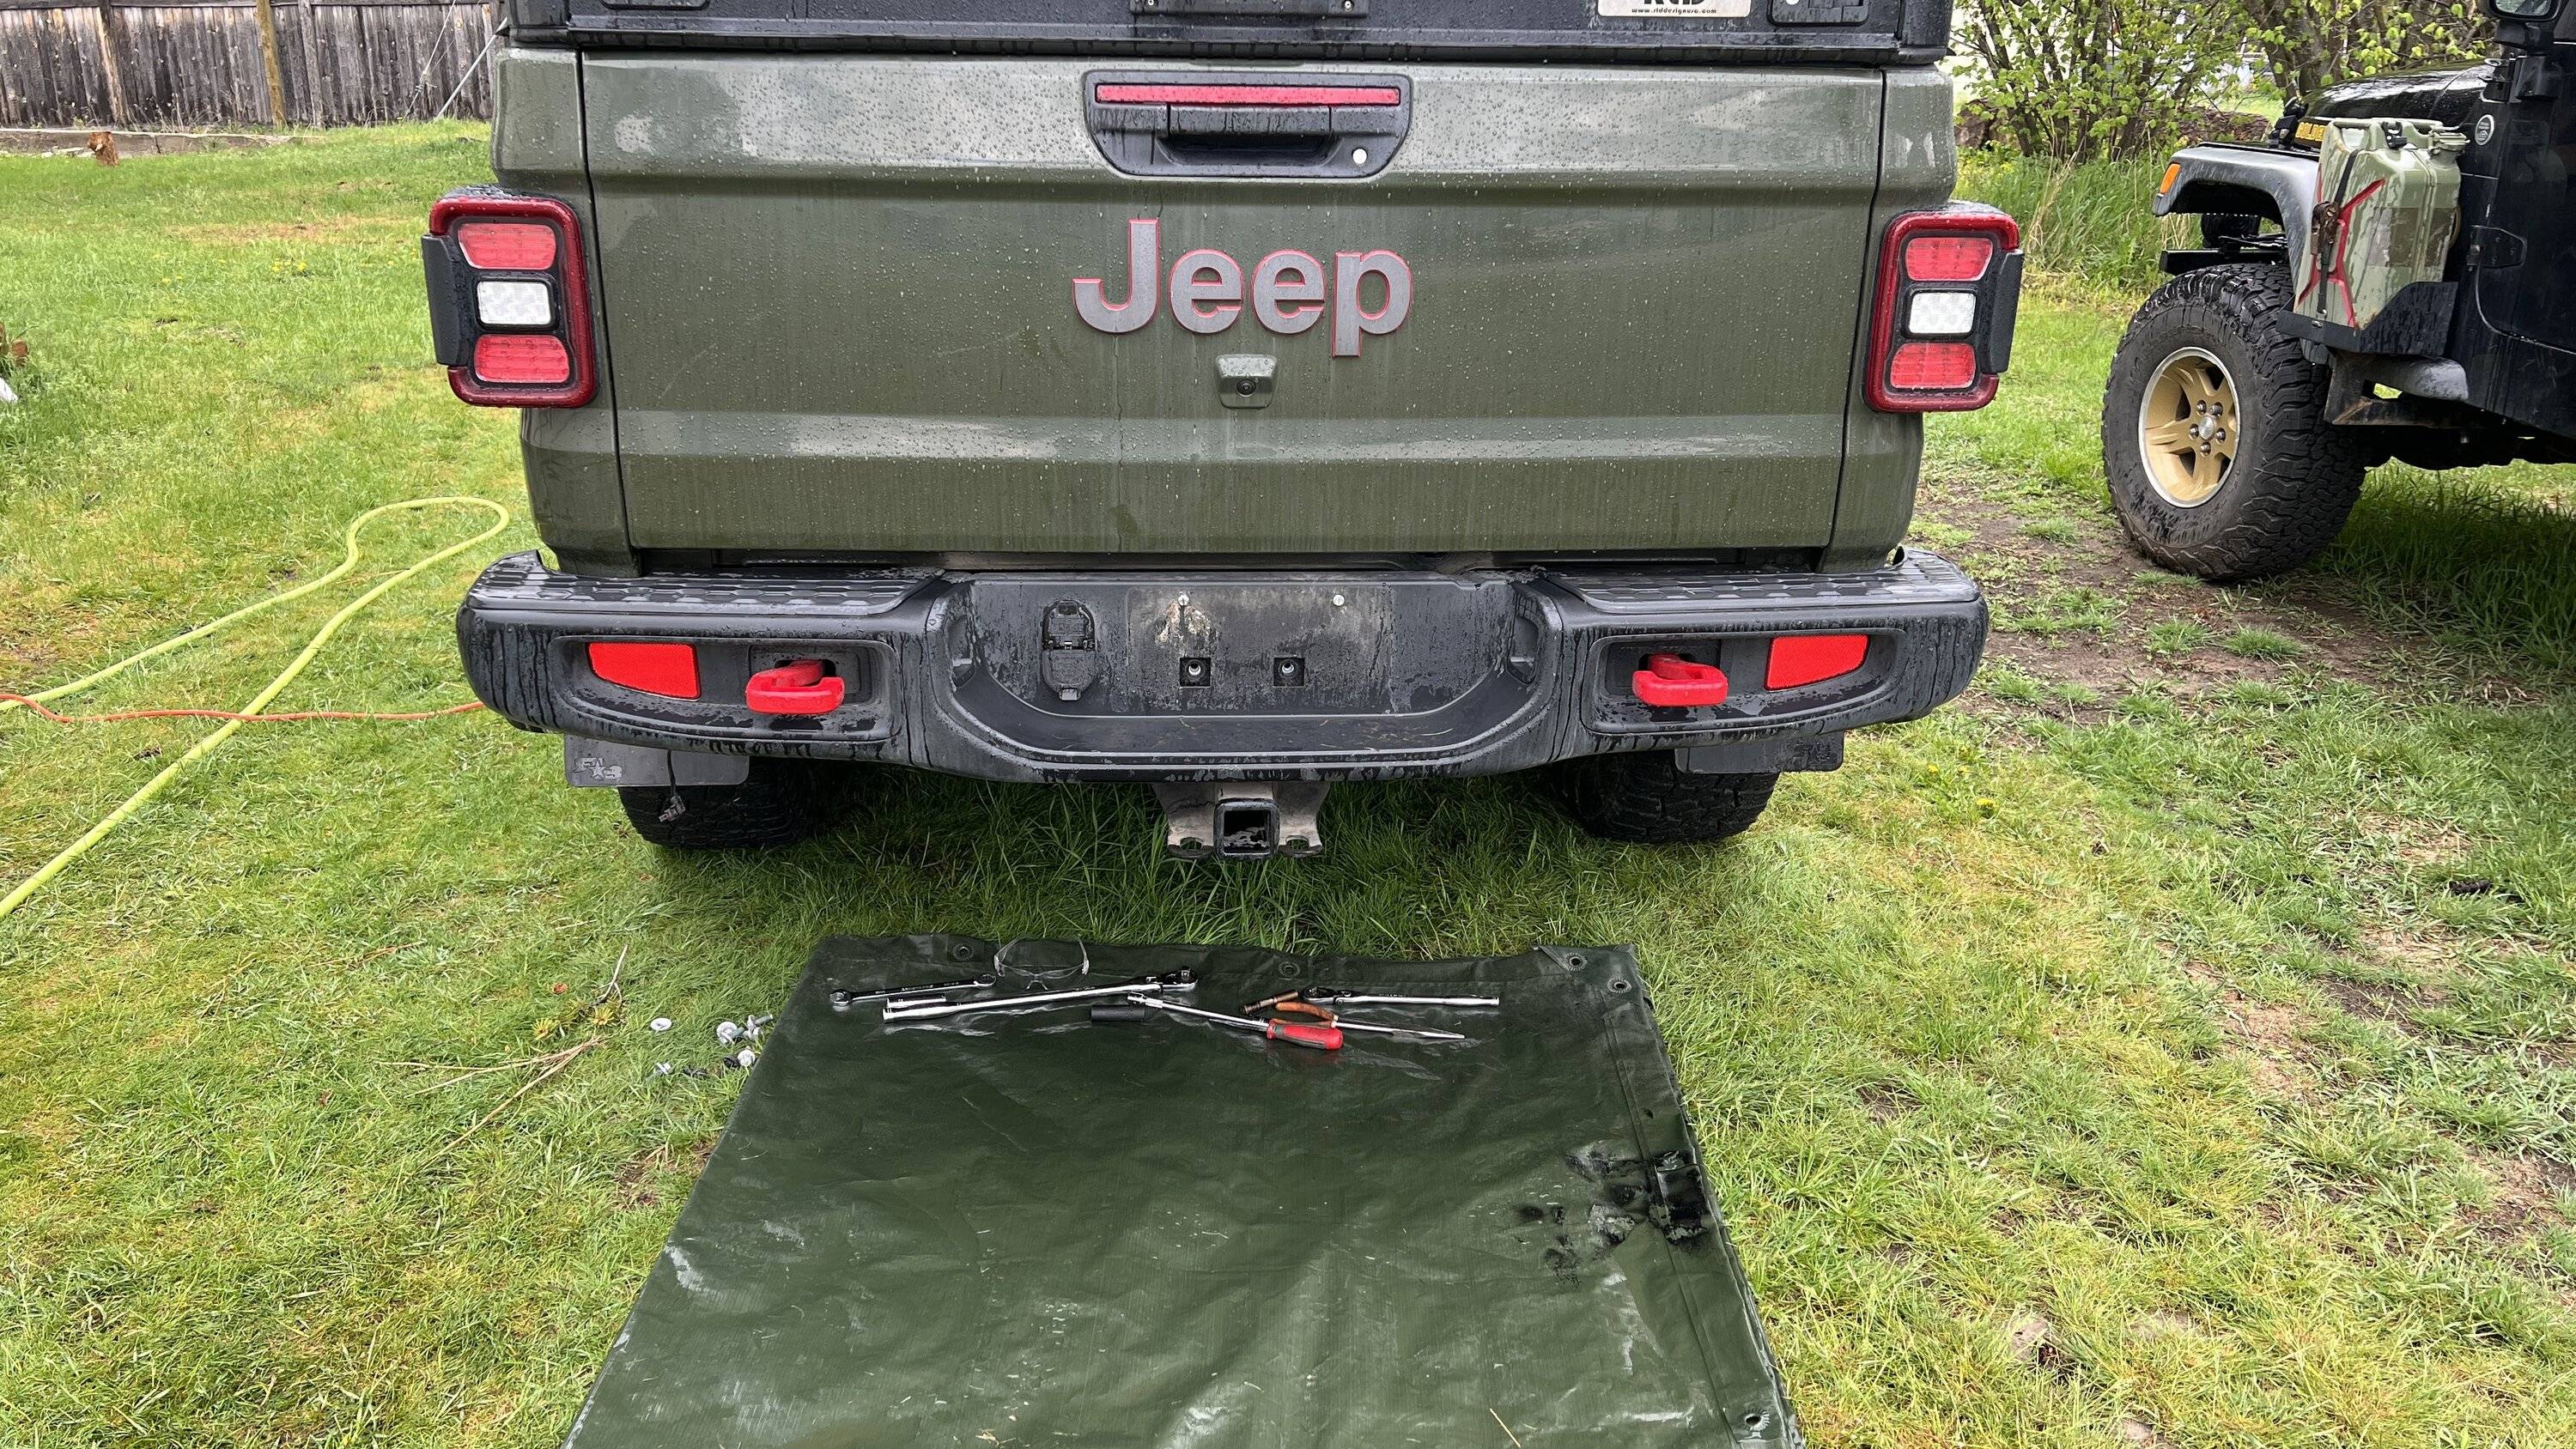
Unhooking the factory harness for the trailer connector and license plate lights went easy enough. But crawling under the back to see what bolts had to be removed revealed the first issue. The Rubicon bed sliders are actually bolted to the bumper itself.
I was a little shocked to see this - but it does make sense with how those sliders need to hold up. I have a feeling this was a change made somewhere between the first version and my 2022. Road Armor, when asked, made no mention of this being a concern and did say the sliders would work with their bumper. More on this to follow. The second thing I noticed, was these bolts were in pretty darn tight, with a healthy amount of blue locktite. It was clear there was a strong connection. Also noticed, was the trailer hitch itself was bolted to the bumper from two bolts hidden under the license plate. And two more torx bolts going through the bottom side of the trailer hitch into the bottom of the bumper. These 4 bolts were not very tight, but snug
Next was the bolts to remove the bumper. I was SHOCKED that there was only 4 - 2 for each side. And very surprisingly, these bolts were SUPER loose. I doubt they were even 25 lb-ft of torque. I could not believe how easily they came off. It must have been a mistake at the factory, and no locktite either.
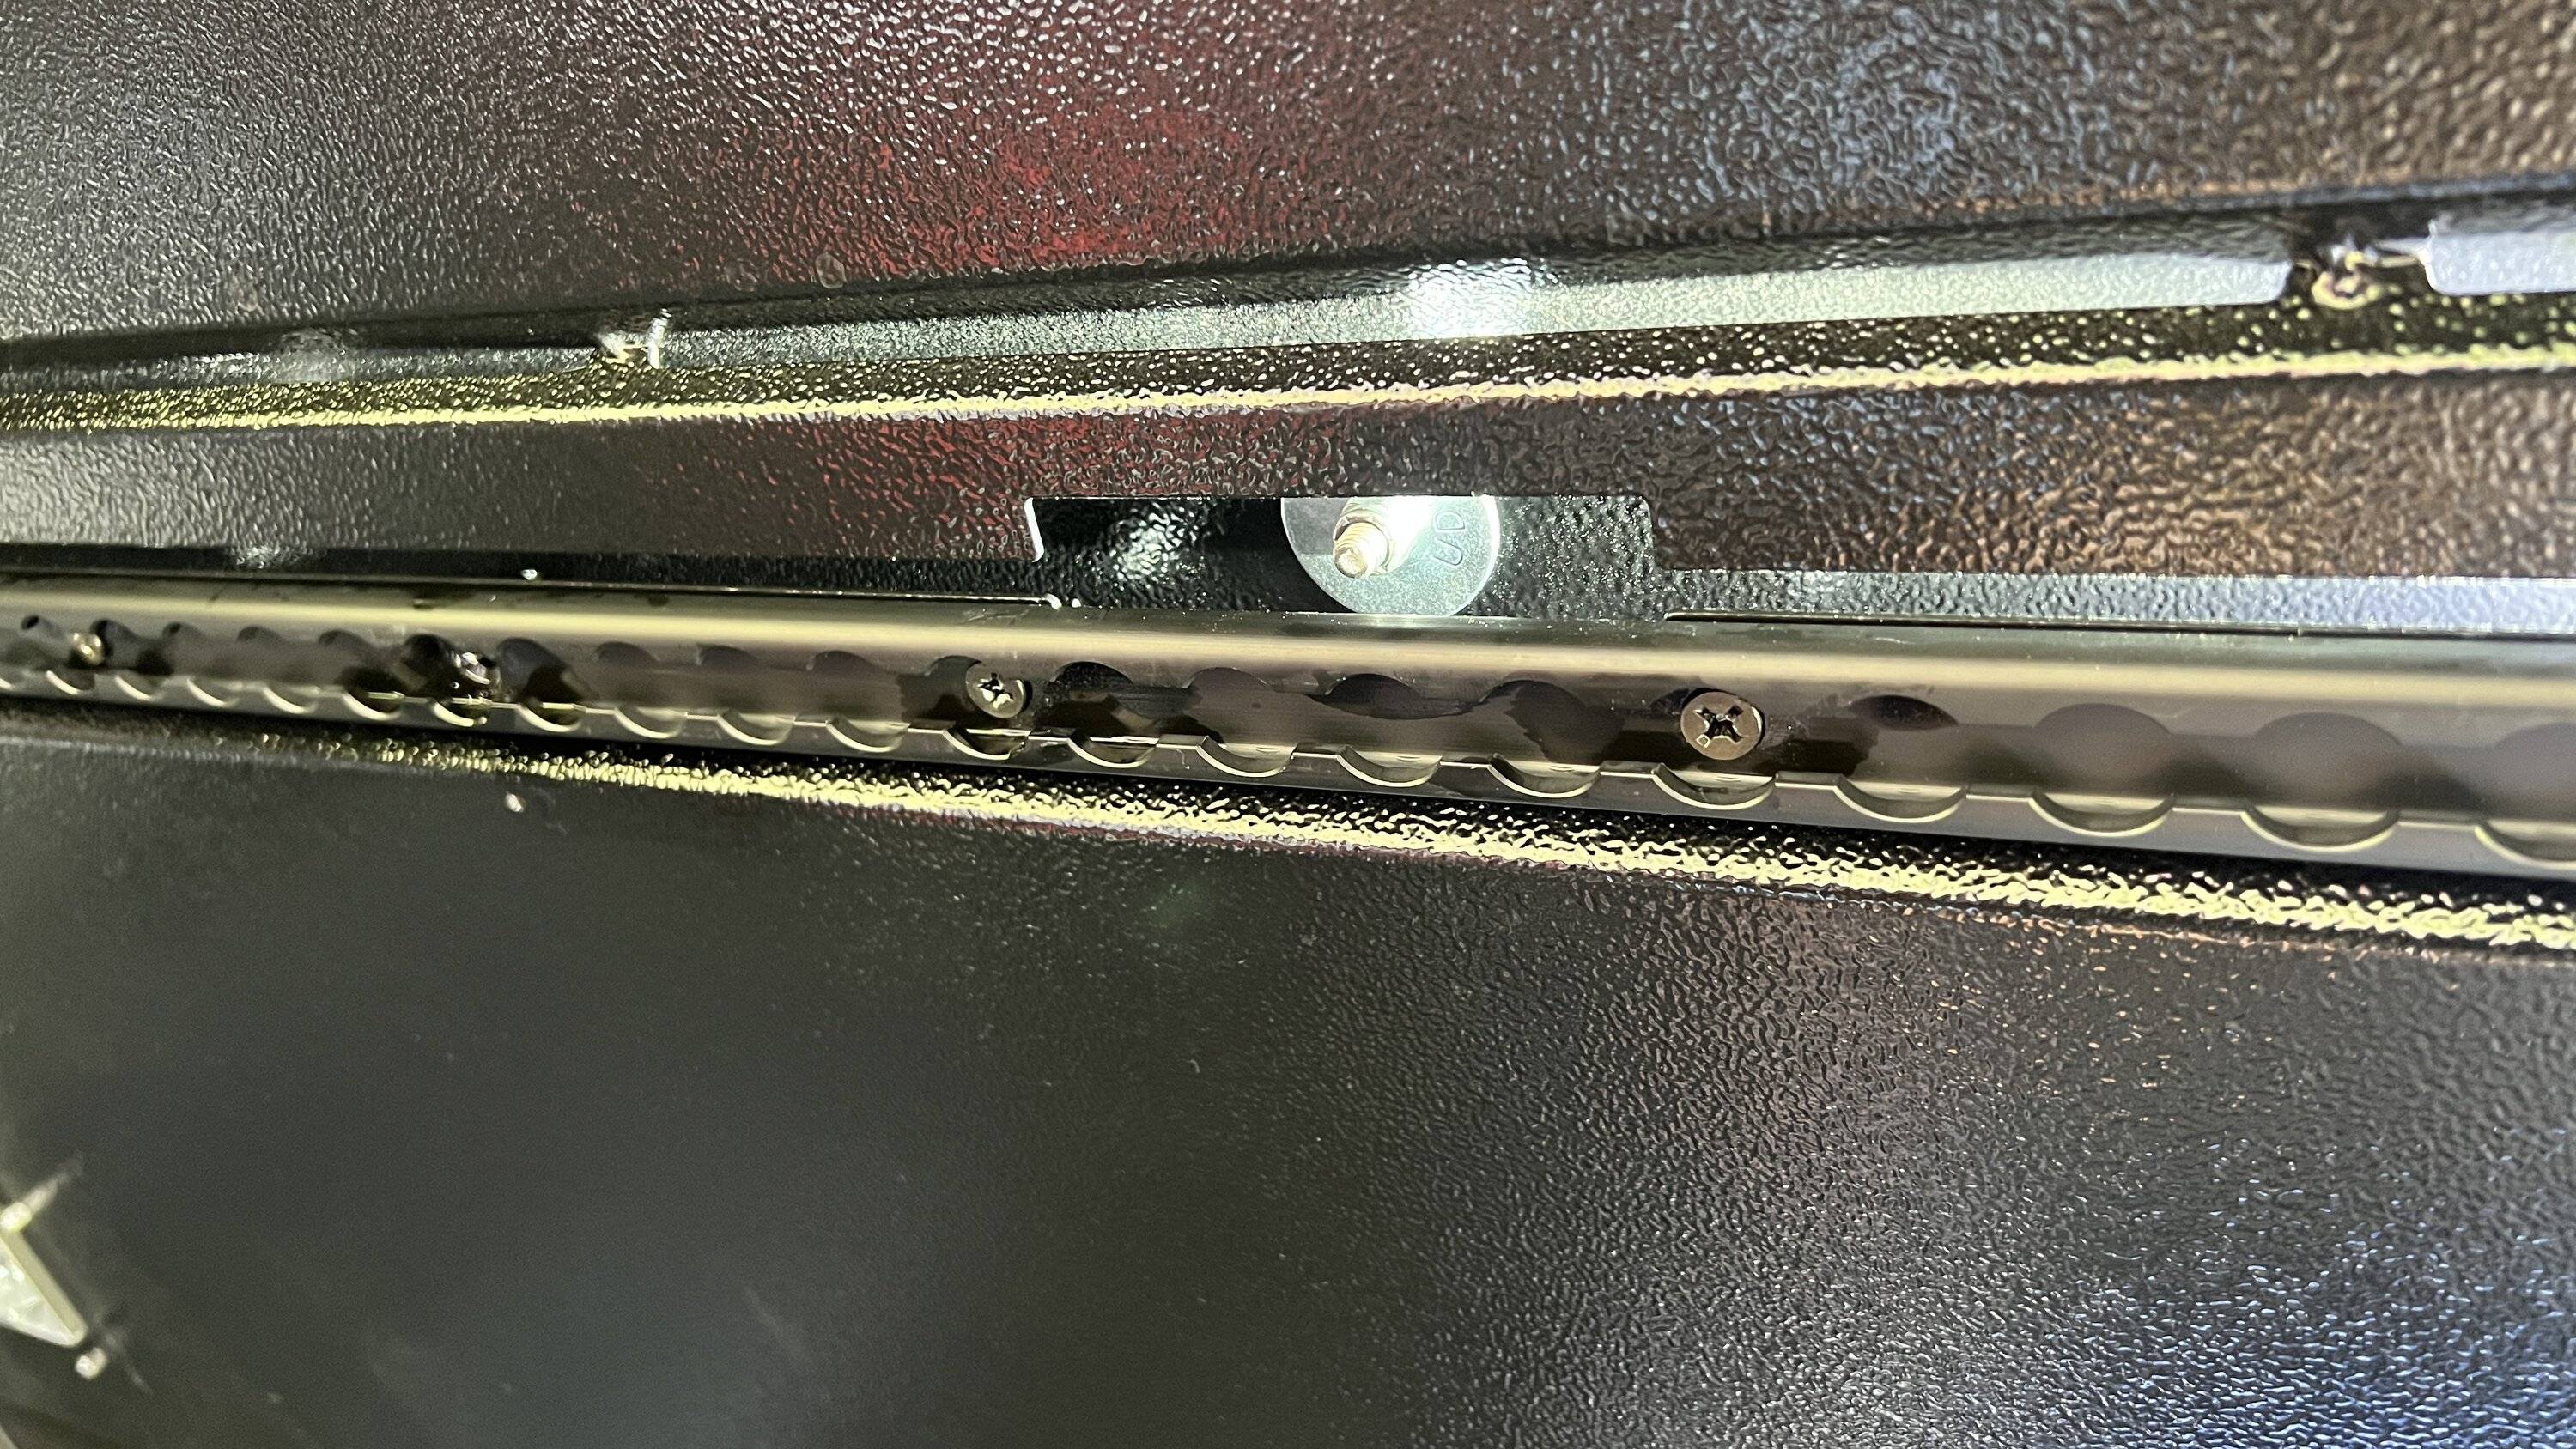
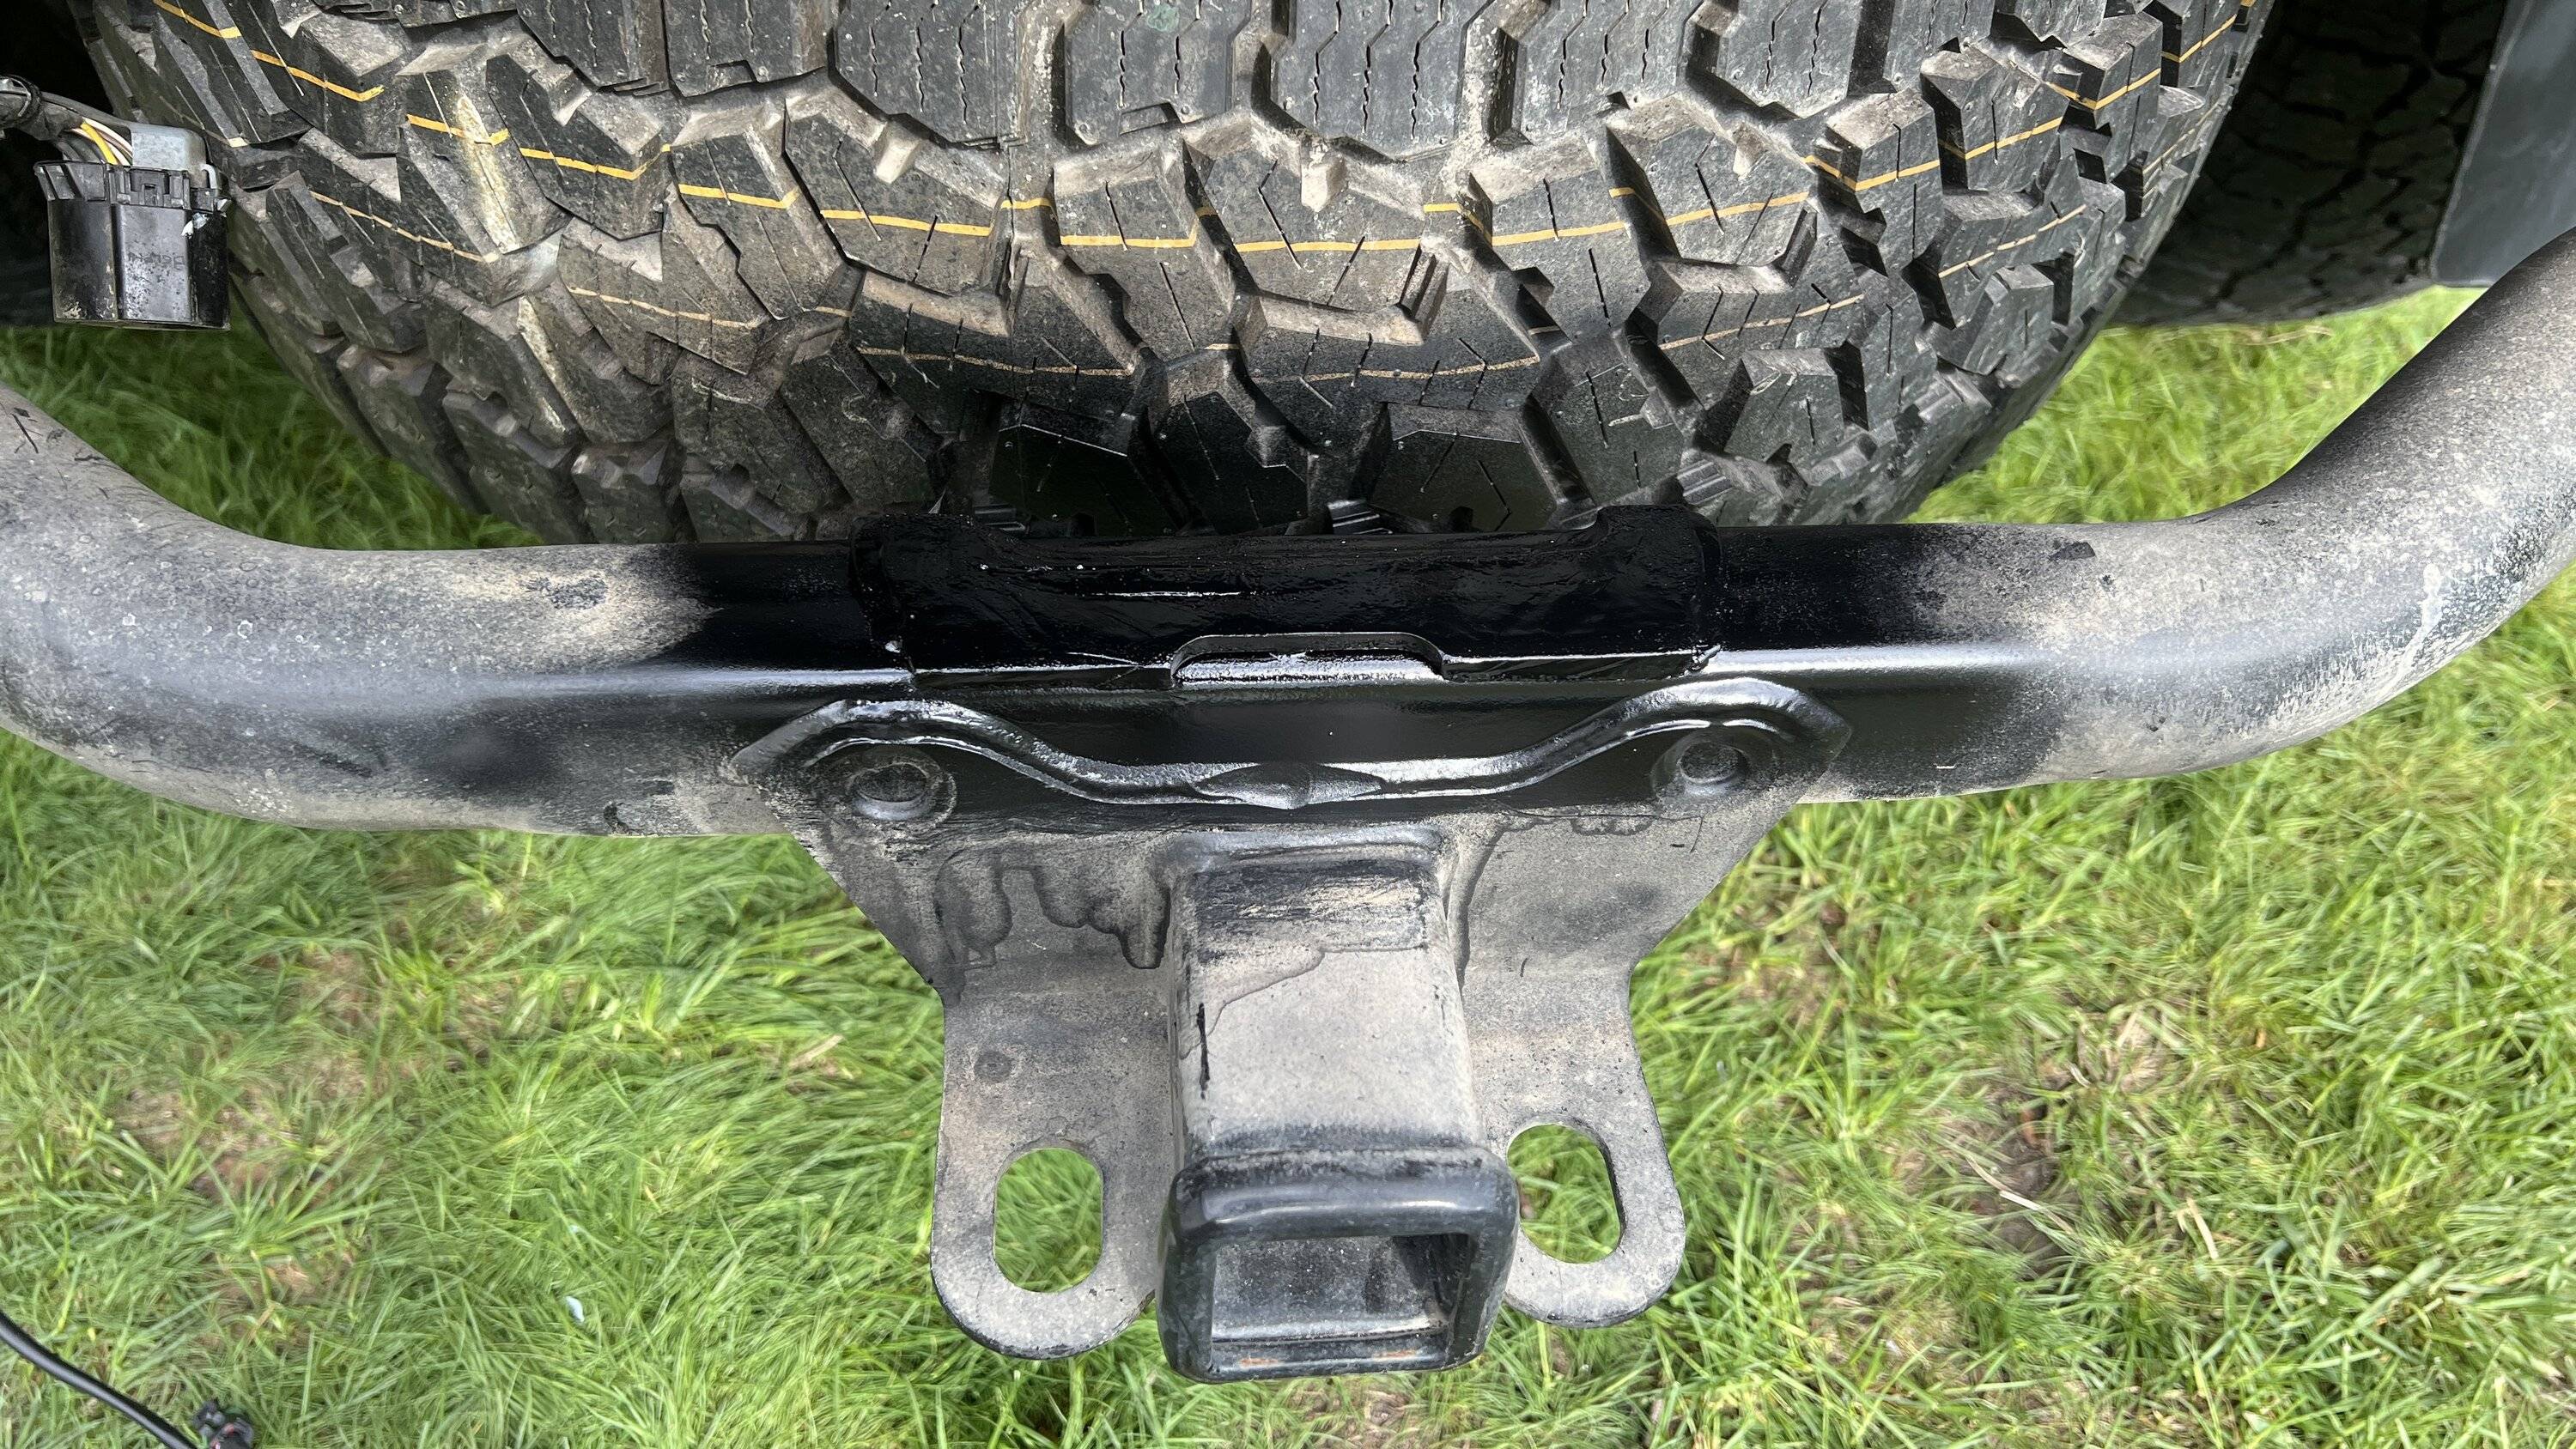
The bumper slid off quite easily, and revealed something very interesting that I didnt catch when unbolting it. The buyer itself was mounted directly to the trailer hitch. And the trailer hitch mounted to the frame. Since when did bumpers not mount directly to the frame?? I imagine this is a design put in place to protect the frame from damage in a collision or hard rock crawling since many people seem to ride down the rear bumper on rocks, and hit the sliders awfully hard. But still....I find this interesting. And it makes me wonder with adding a heavier bumper, and winch, if my towing (or rather tongue weight) capacity is effectively lowered. Here you can also see the brackets that the bed sliders have that mount to the bumper.
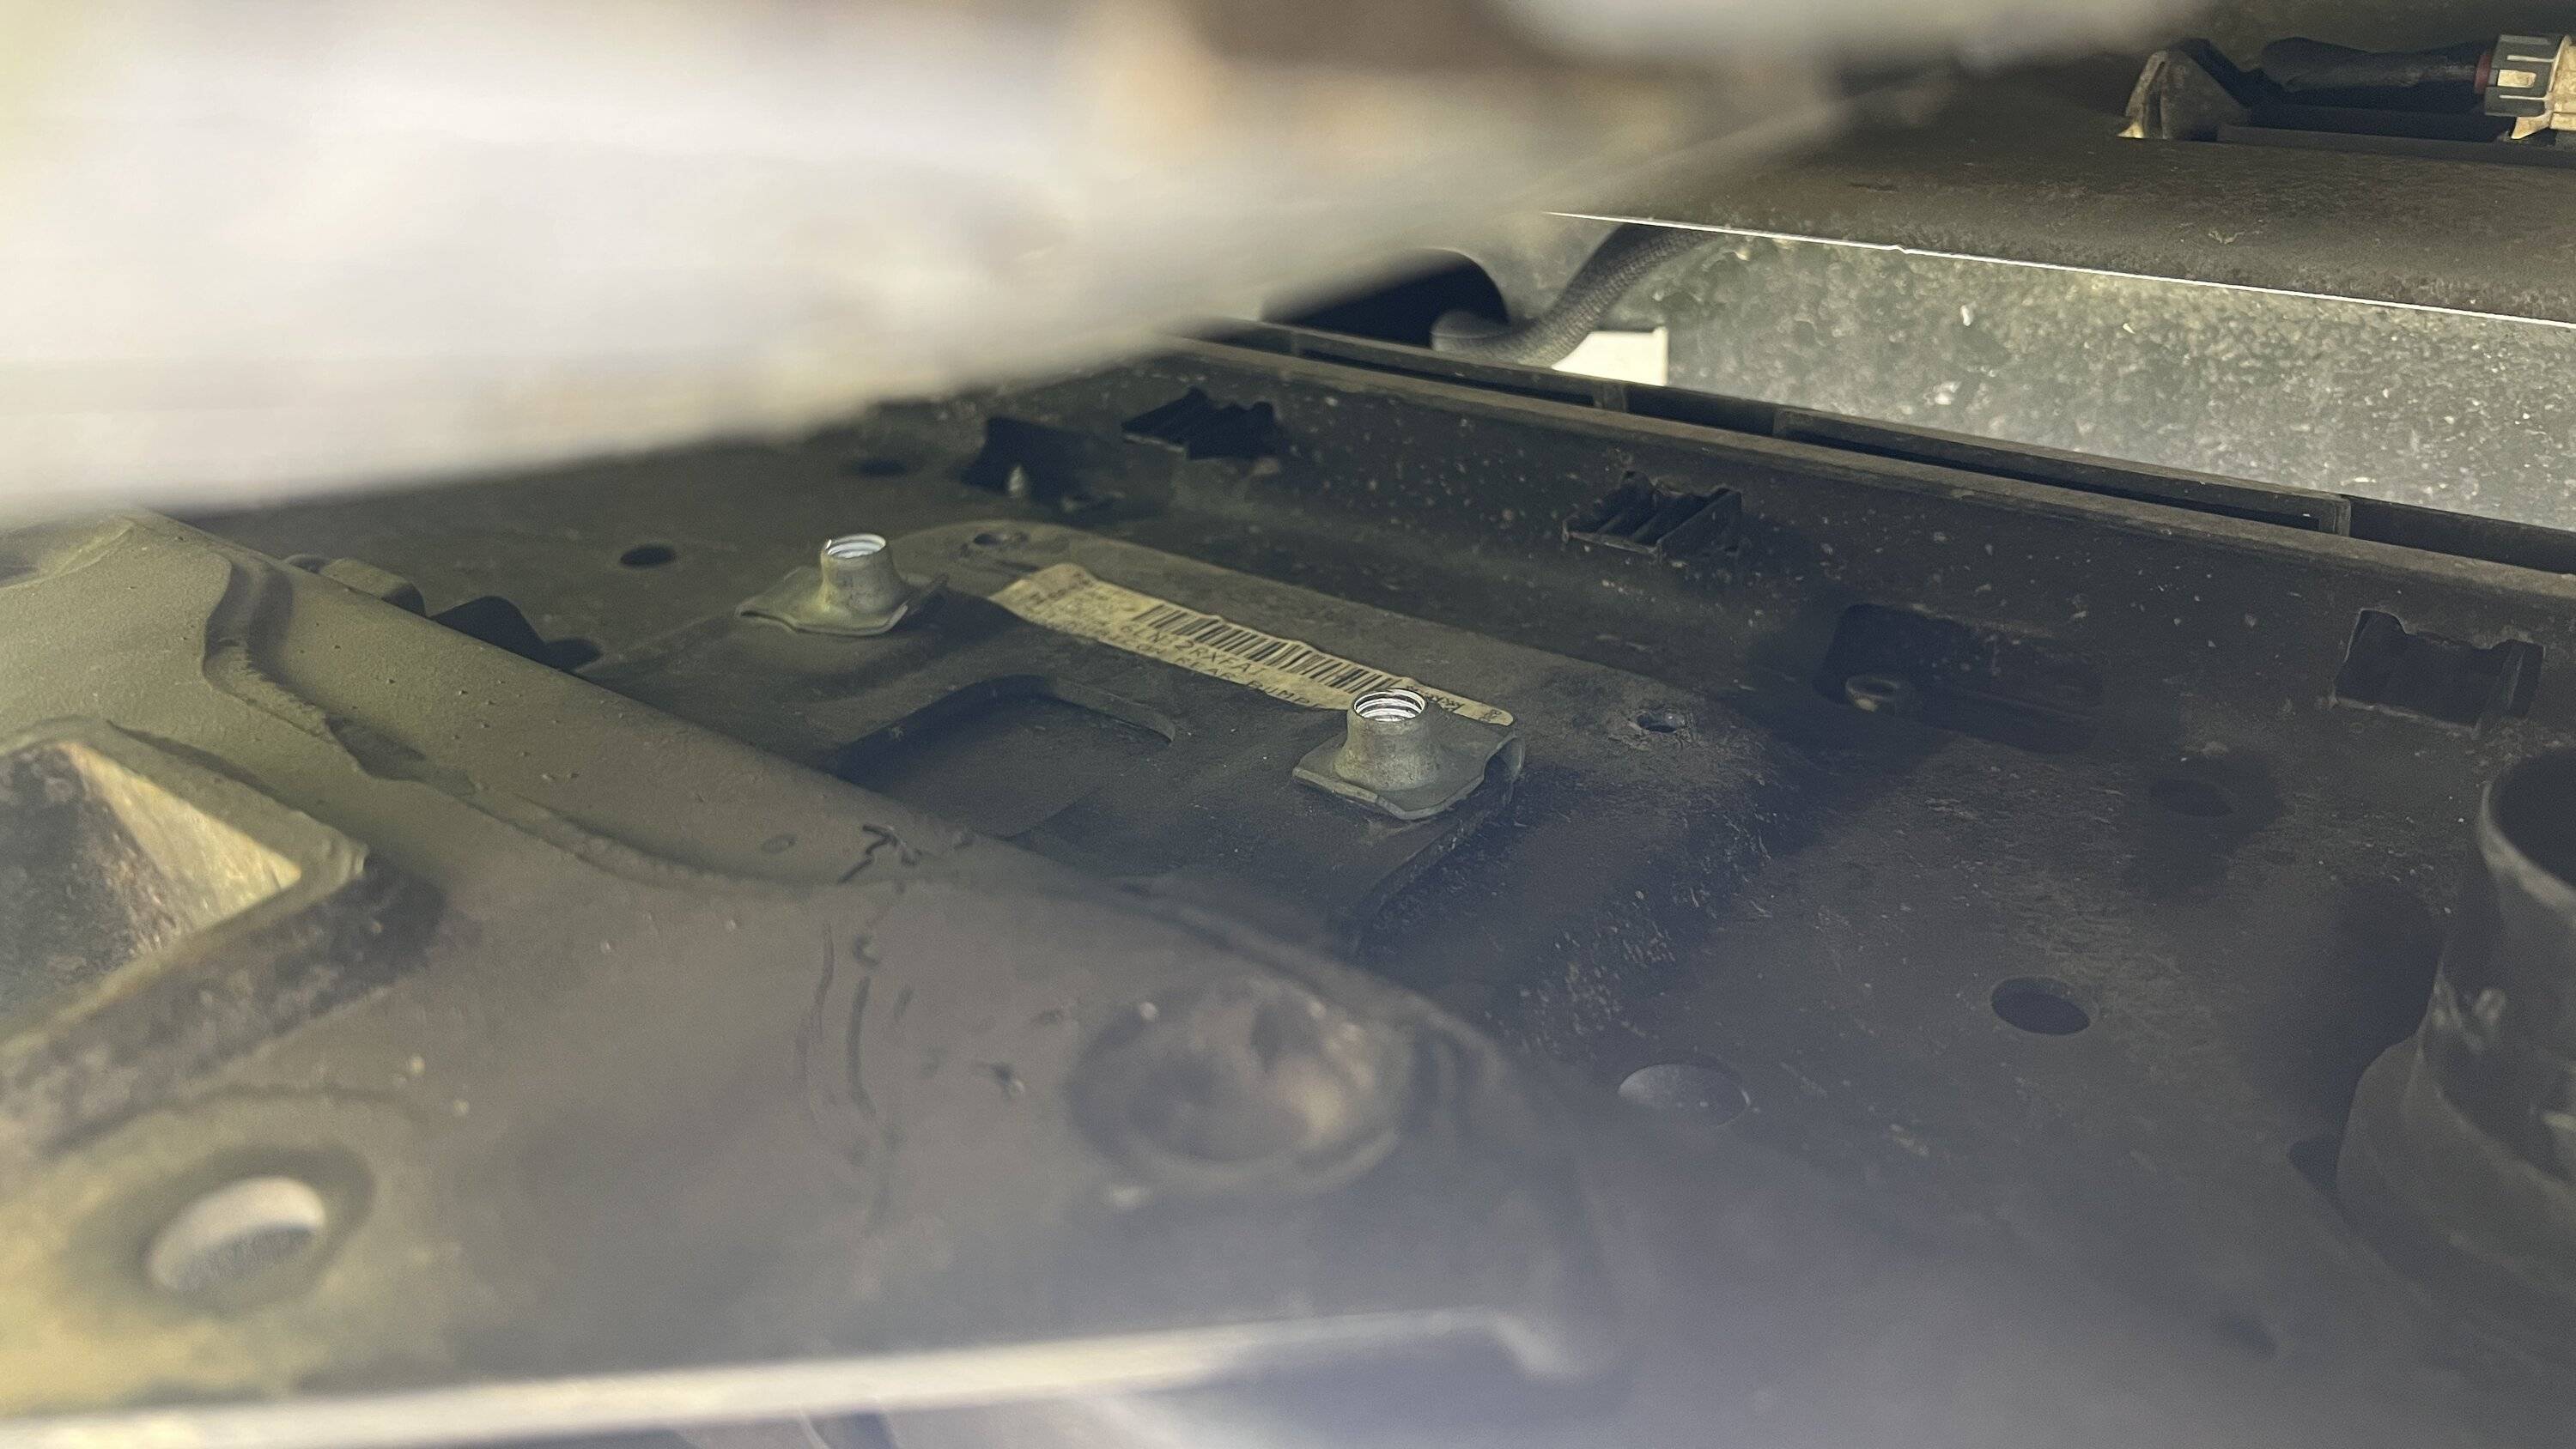
Here is were some fabricating started to happen. You can see in the picture above where the bumper bolted to the trailer hitch by the two bolts behind the license plate, and 2 torx bolts coming up from the bottom. Considering this is a winch bumper I am installing, these flanges had to go. I would suspect they would be removed for other aftermarket bumpers as well. So, with the help of a neighbors cutting tool, I took off the flanges, cleaned them with paint prep, and hit them with two heavy coats of paint. Hopefully it holds for a while before rusting.
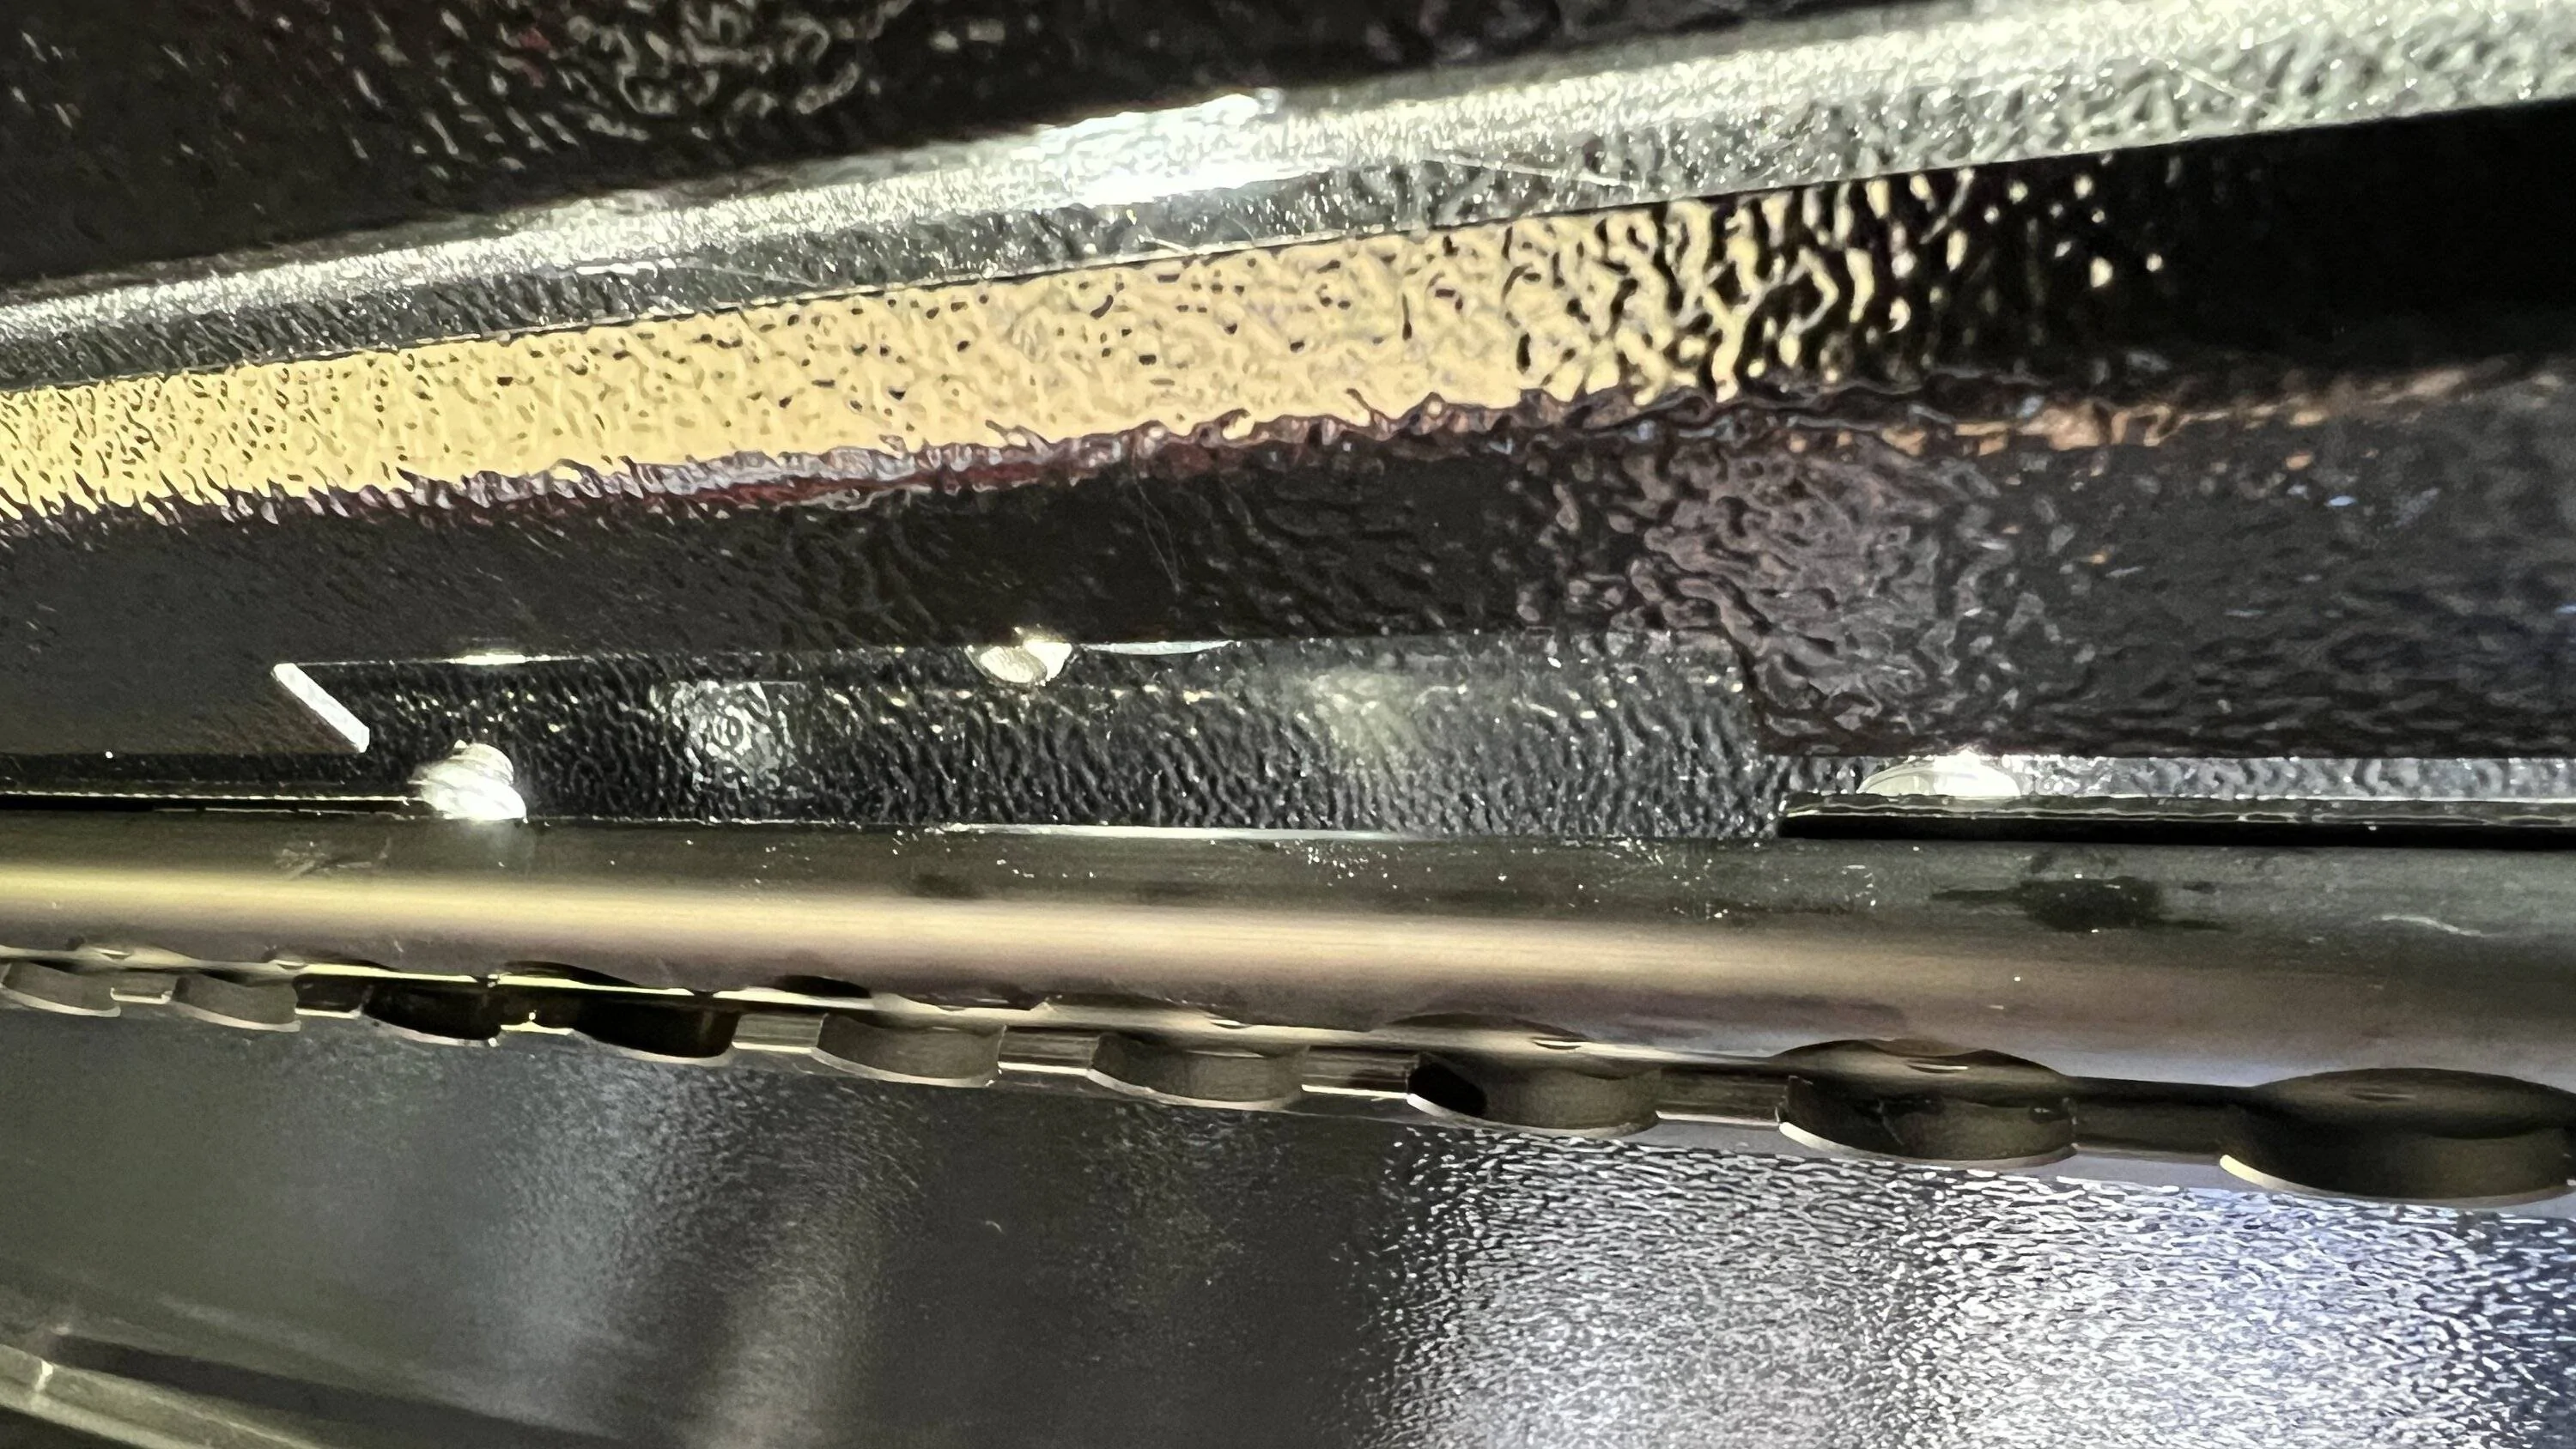
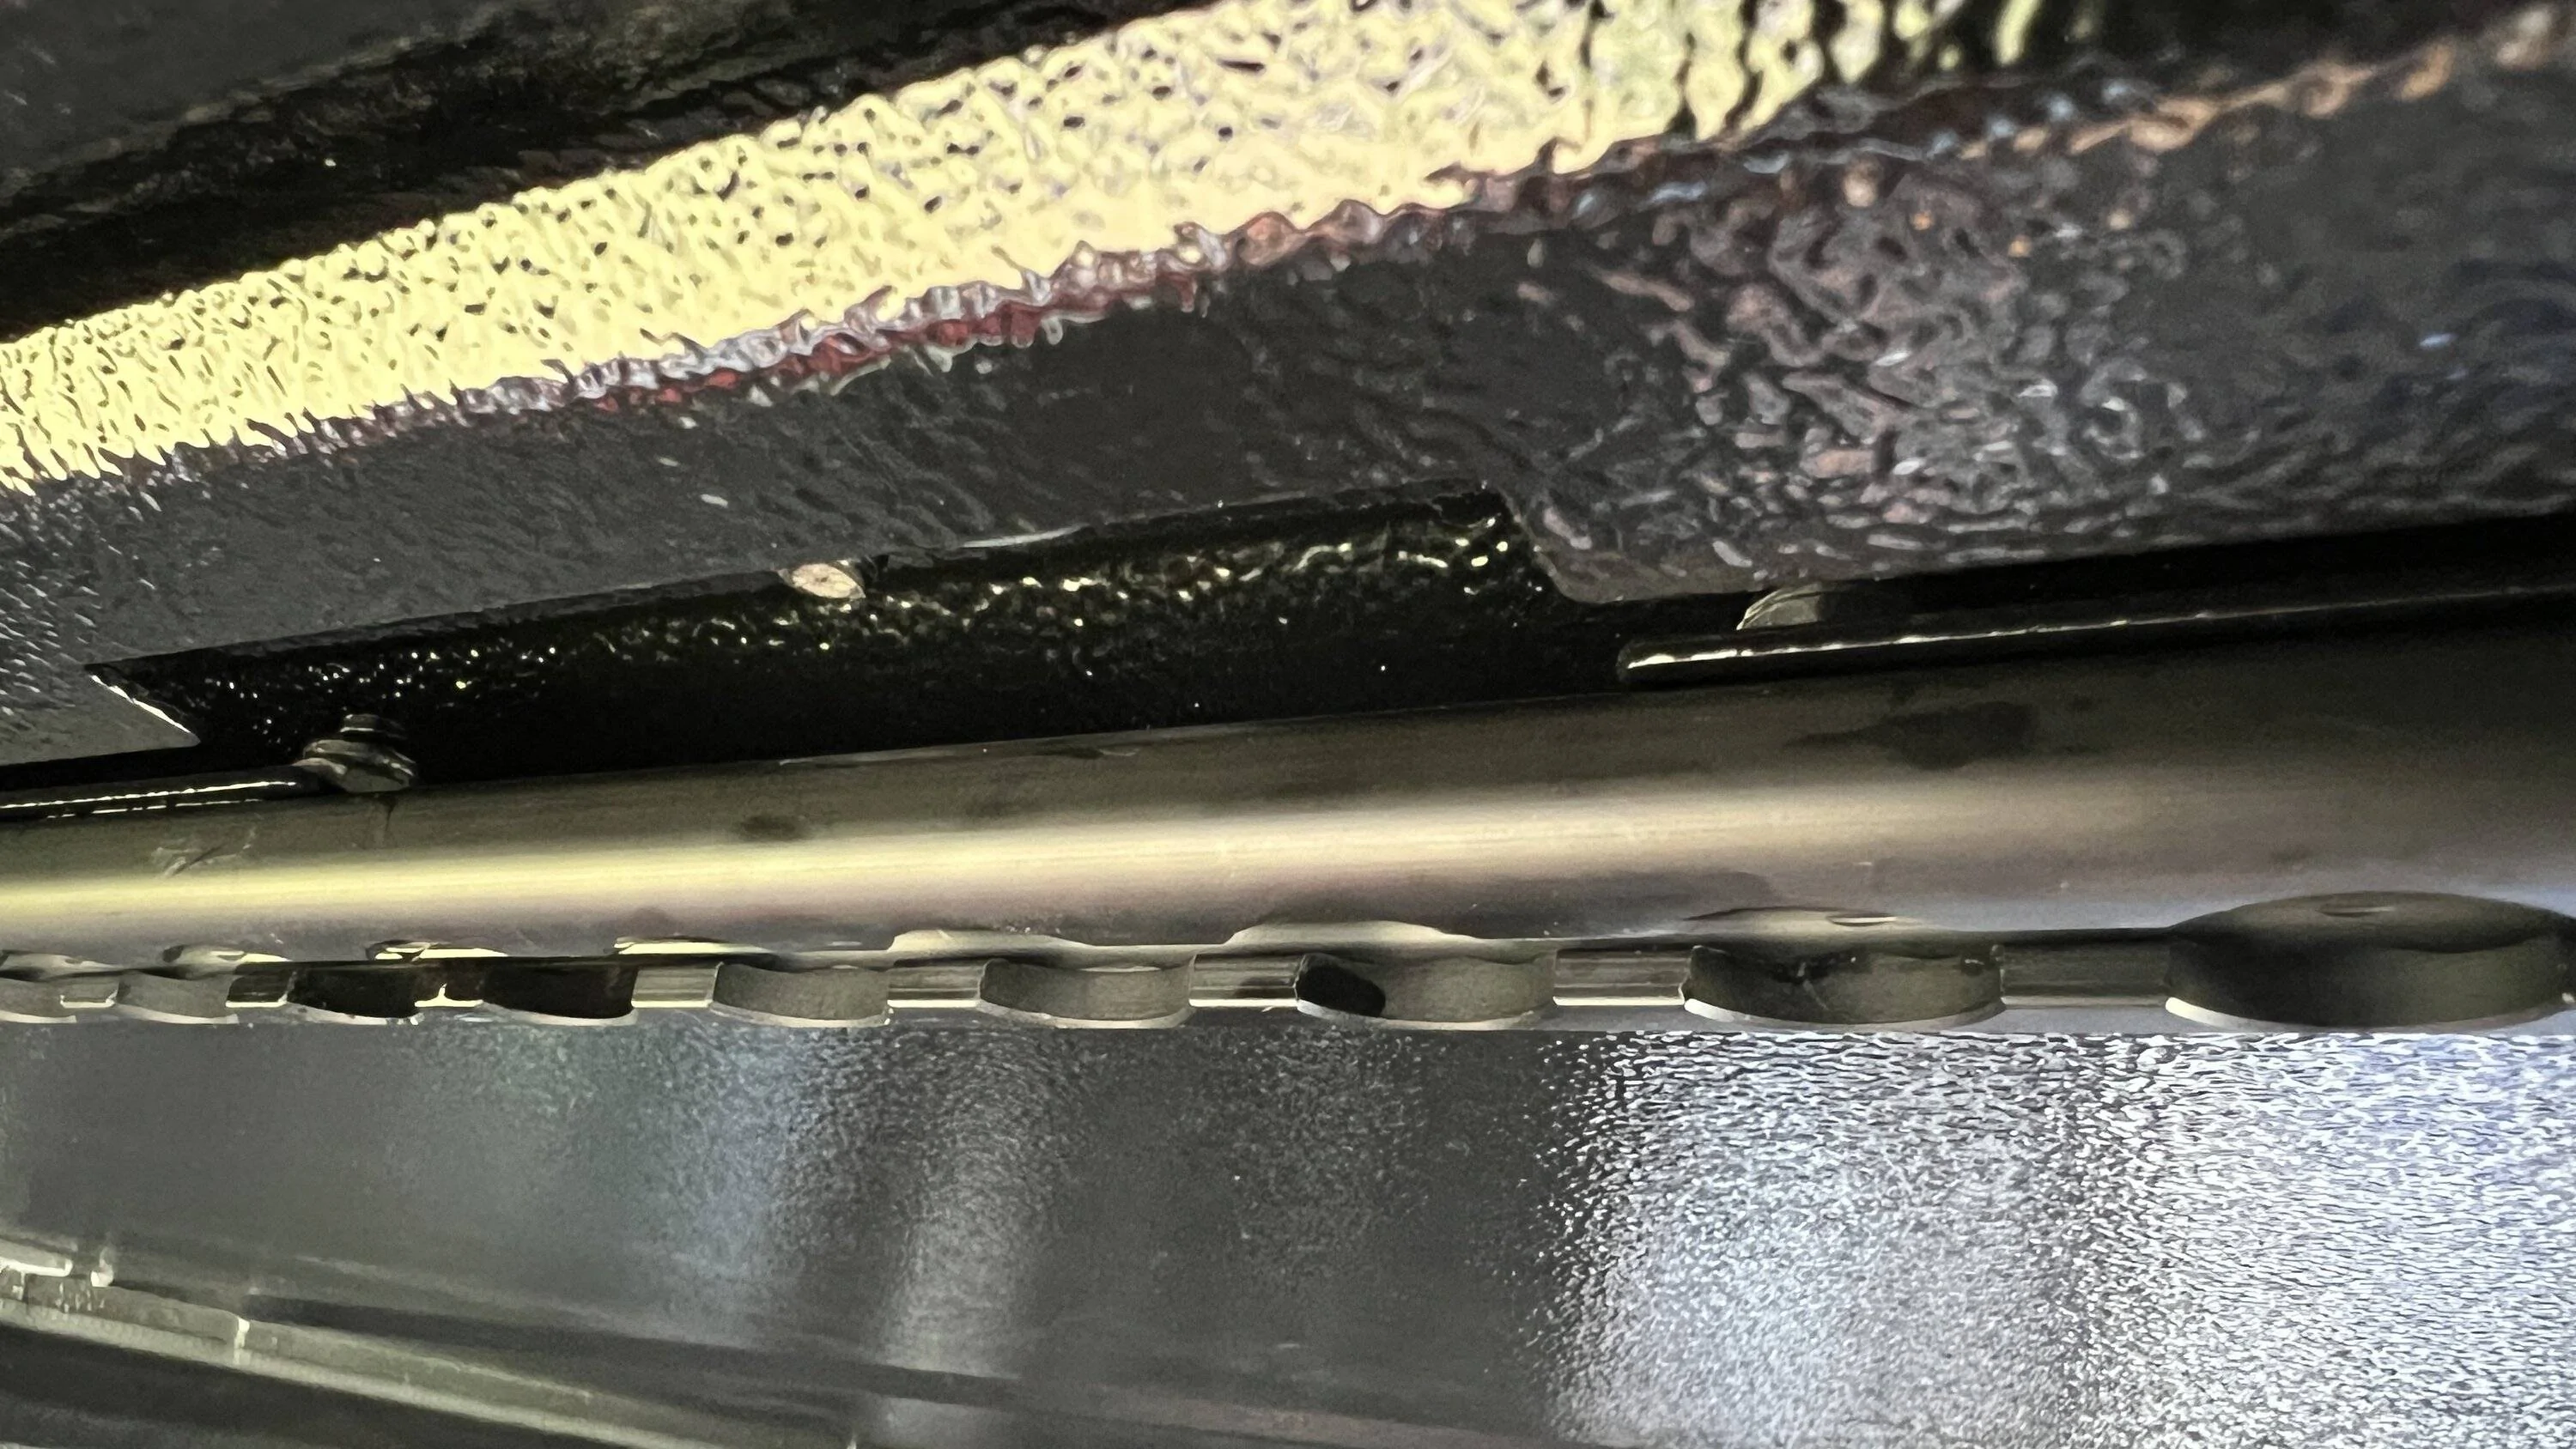
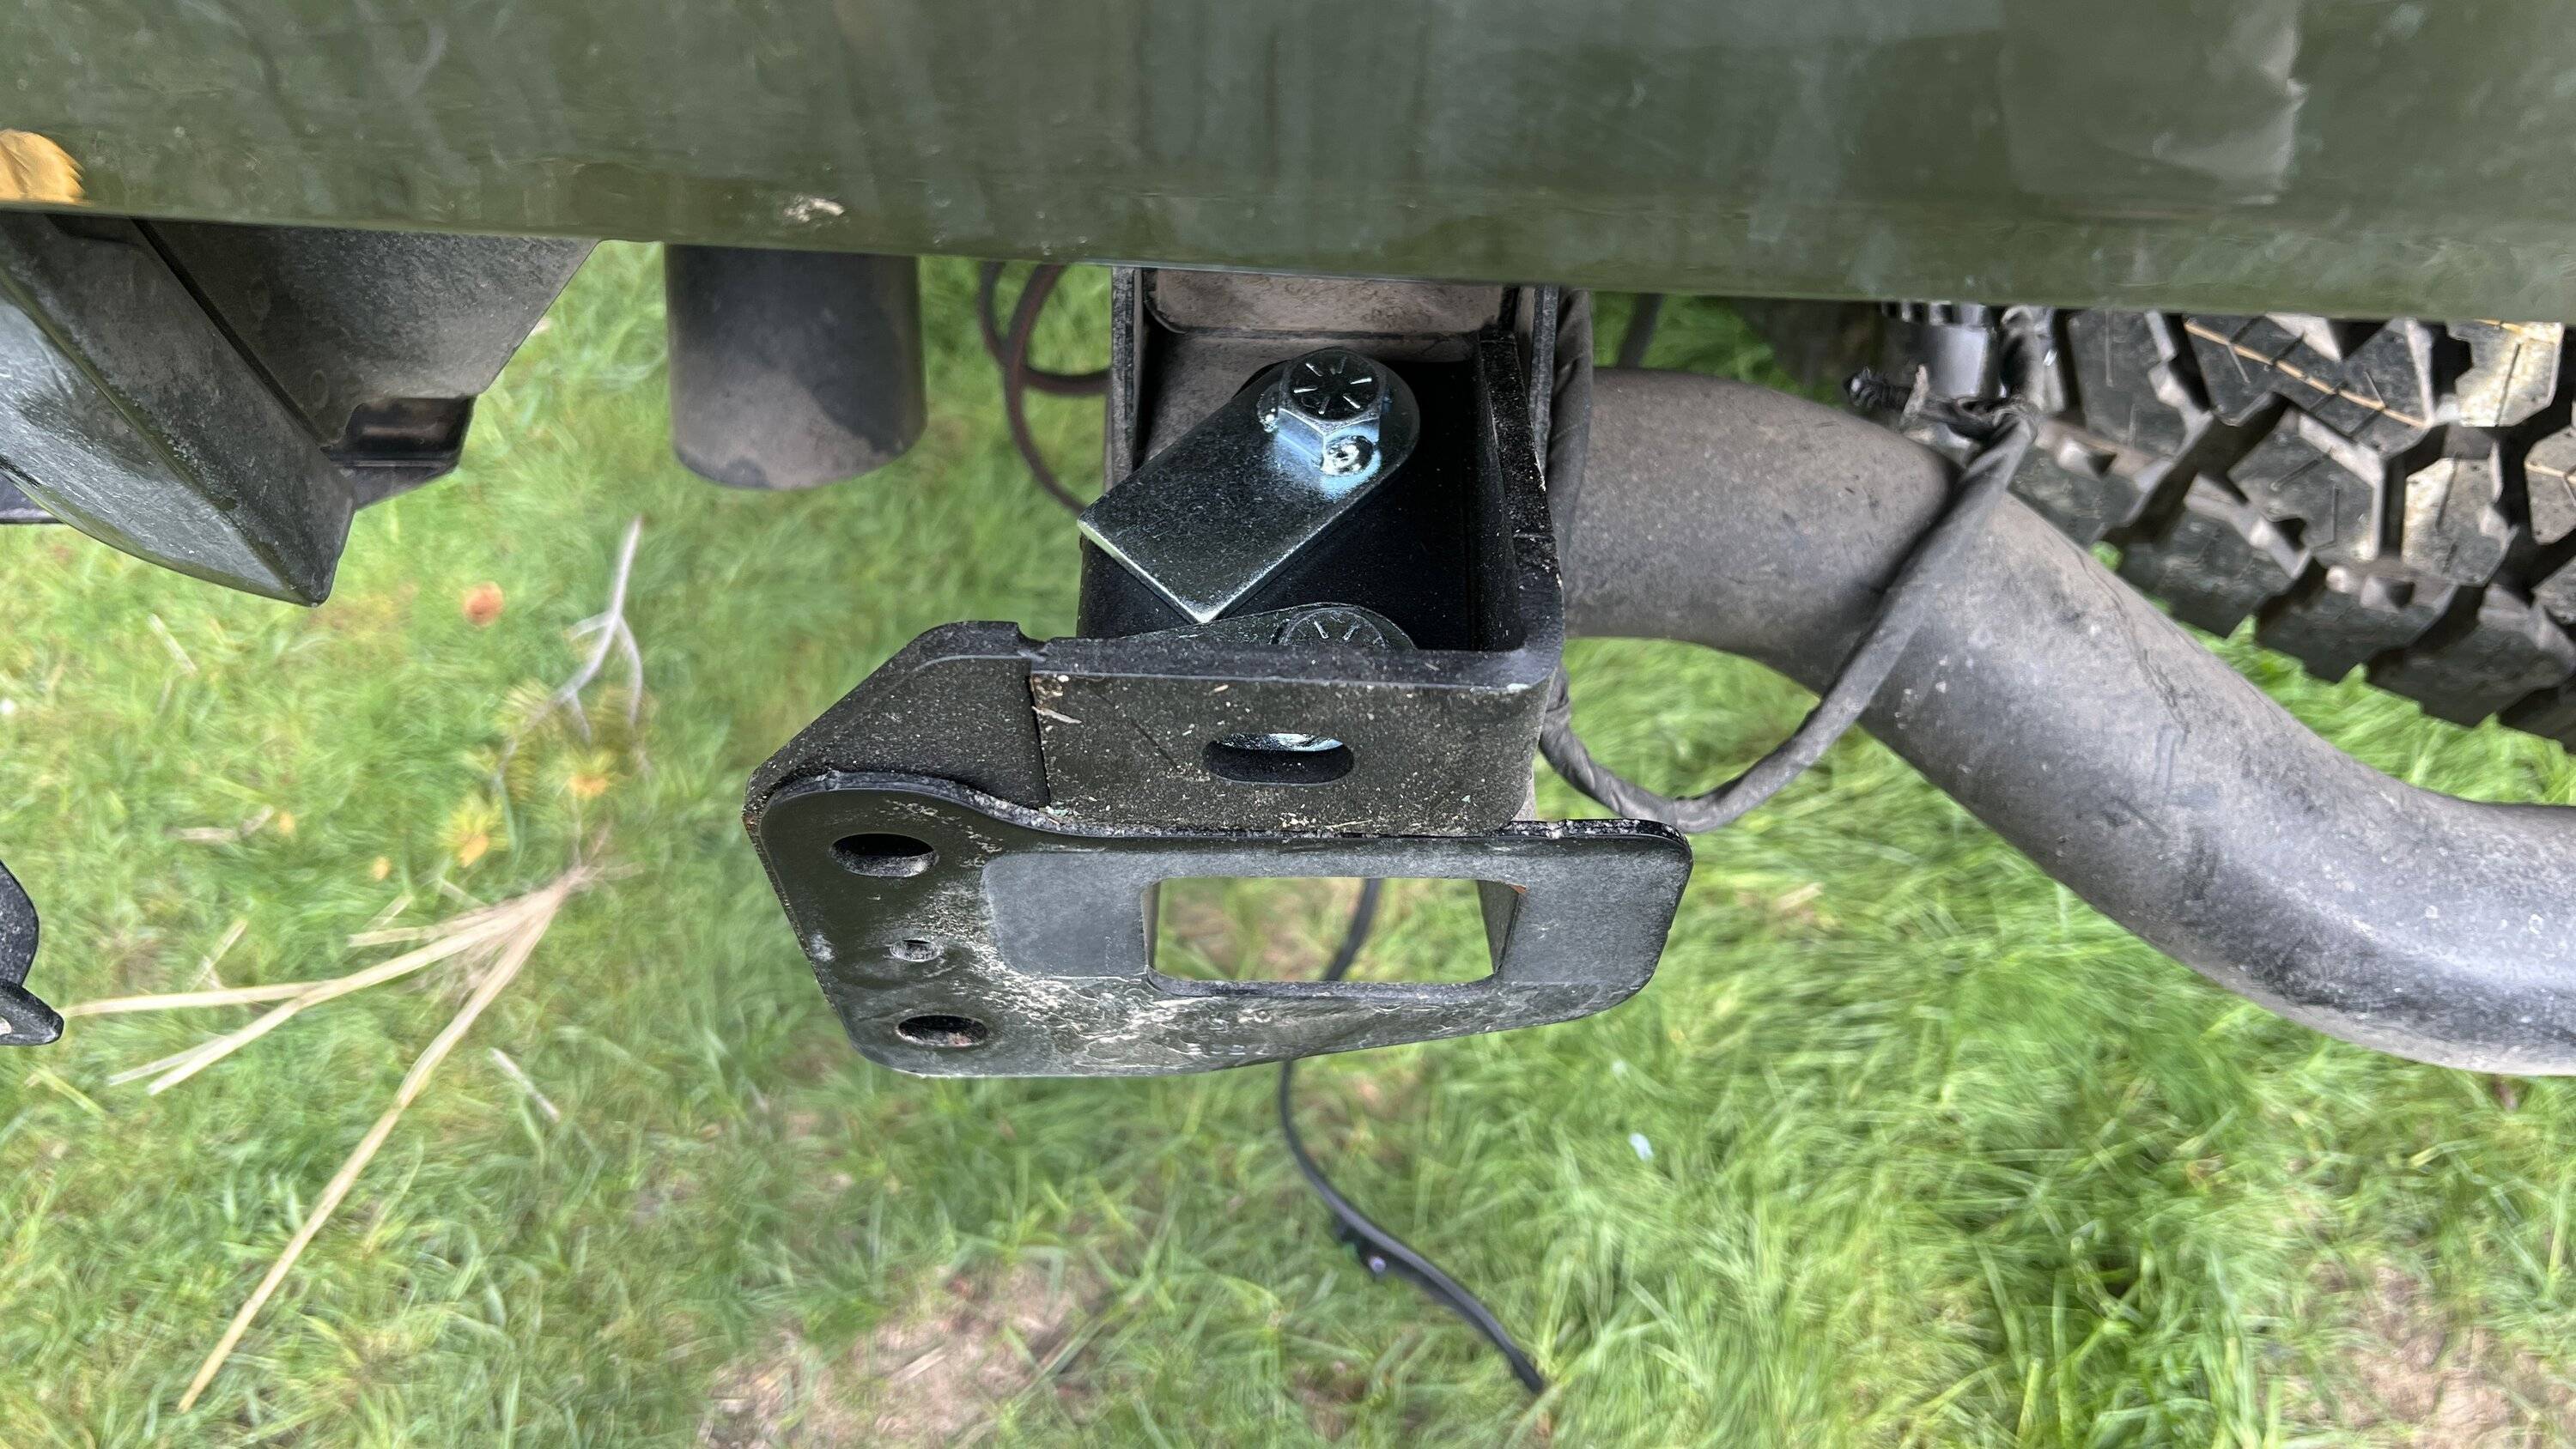
The new bumper came with a few brackets to install. These brackets bolted to the trailer hitch (not the frame remember?) with the same two bolt holes that the tow hooks mounted to. The brackets sit behind and braced up against the factory hitch steel so despite them only being held by two bolts each side, they would literally have to rip the steel of the hitch for the bumper to come off. And the hitch is mounted to the frame with 3 or 4 very large bolts on each side, from under neath the frame and the side, so it's a very solid connection. These brackets allow for three points of contact on each side - much better than the factory 2. Unfortunately that top bolt would prove to be quite difficult to access.
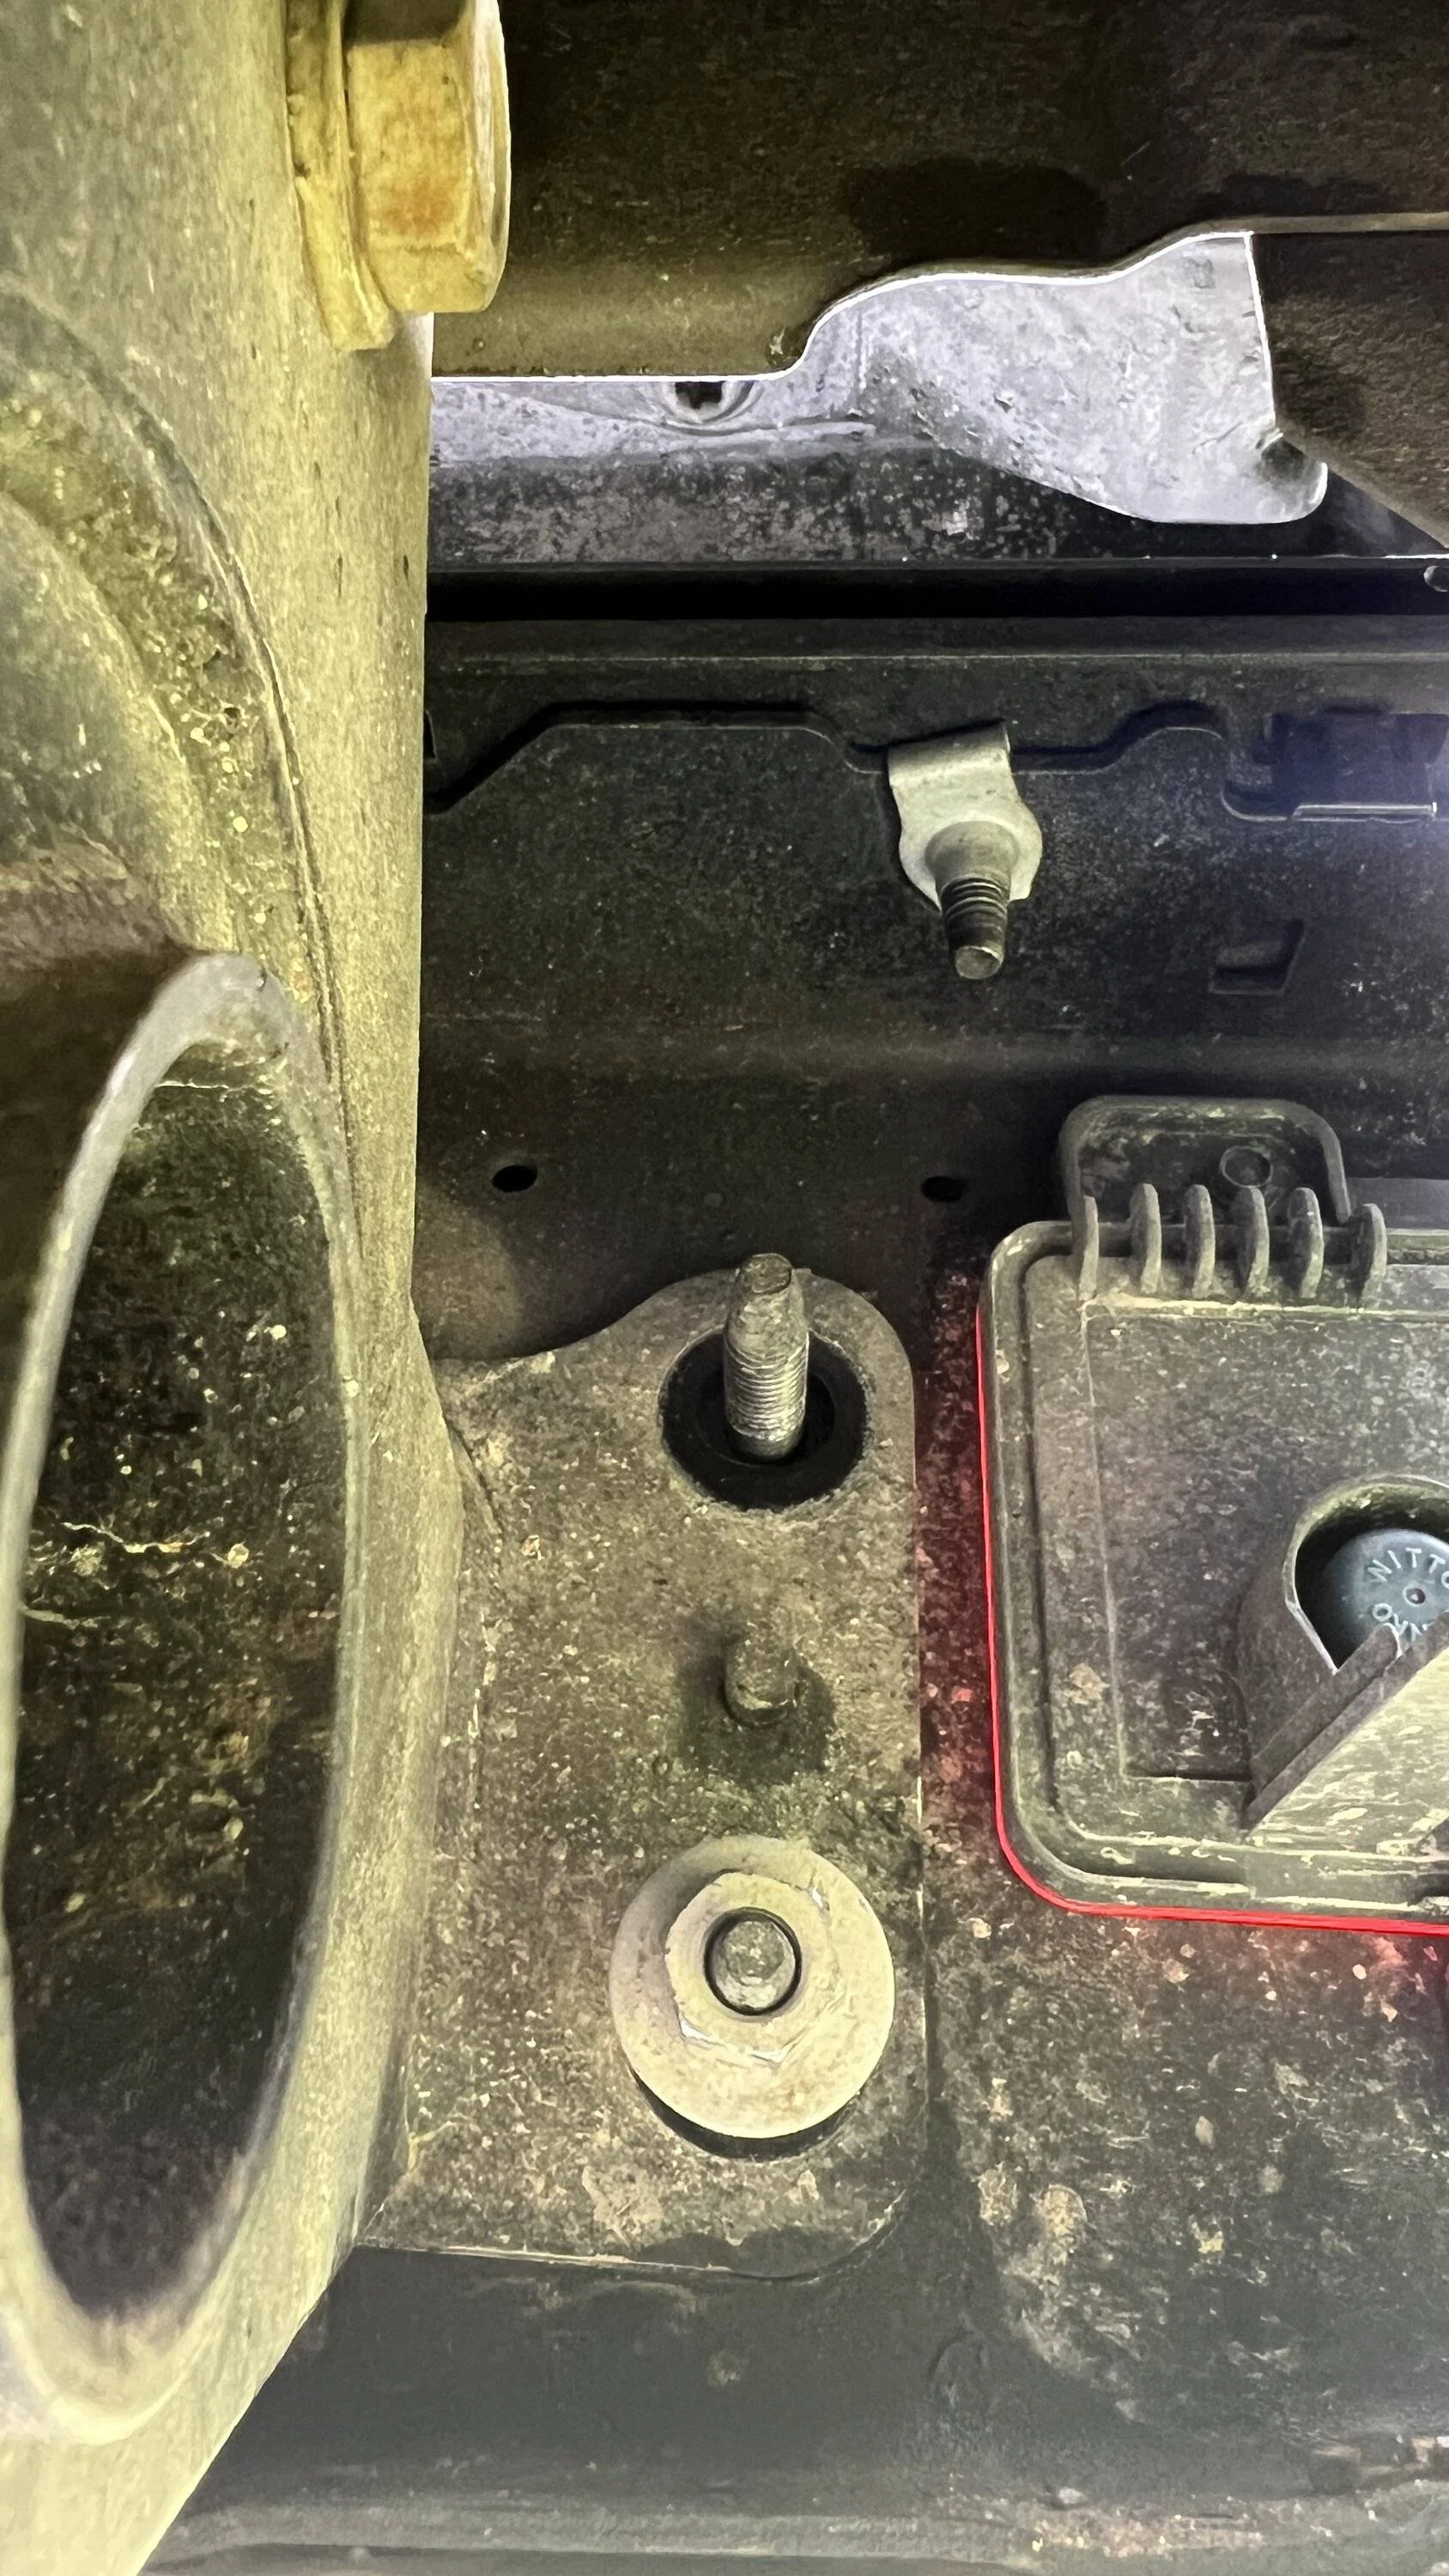
With that, and with putting the bolts in the bumper side with retainer clips, it slid on nice and easily - sorta. Those brackets I mentioned before that the bed sliders bolted into the factory bumper with interfered - significantly. So I removed the sliders, 3 bolts on each side, to figure that out later and slid the new bumper on. Using some references passed along by @azmojave earlier today, I opted to torque the 4 side bolts to 85 lb-ft. The top bolt was in too tight of a spot for a torque wrench, and was only accessible by a shallow socket, with a wobbly joint, and a 6" extension - so any amount of torque wouldn't be very accurate. Considering how loose the factory bumper bolts were, I snugged these down as hard as I could - probably somewhere in the 60 lb-ft territory. All bolts were held on with thick washers and lock washers. The two side bolts I added a dab of blue locktite just to be safe.
Back to the bed sliders. With the same cutting wheel used to remove the flanges - it was simple work to cut away the welds that held those mounting brackets onto the bed sliders. So, after cutting away, paint prepping, and painting, they went back on - with a perfect fit - and saved probably 4 pounds in the process.
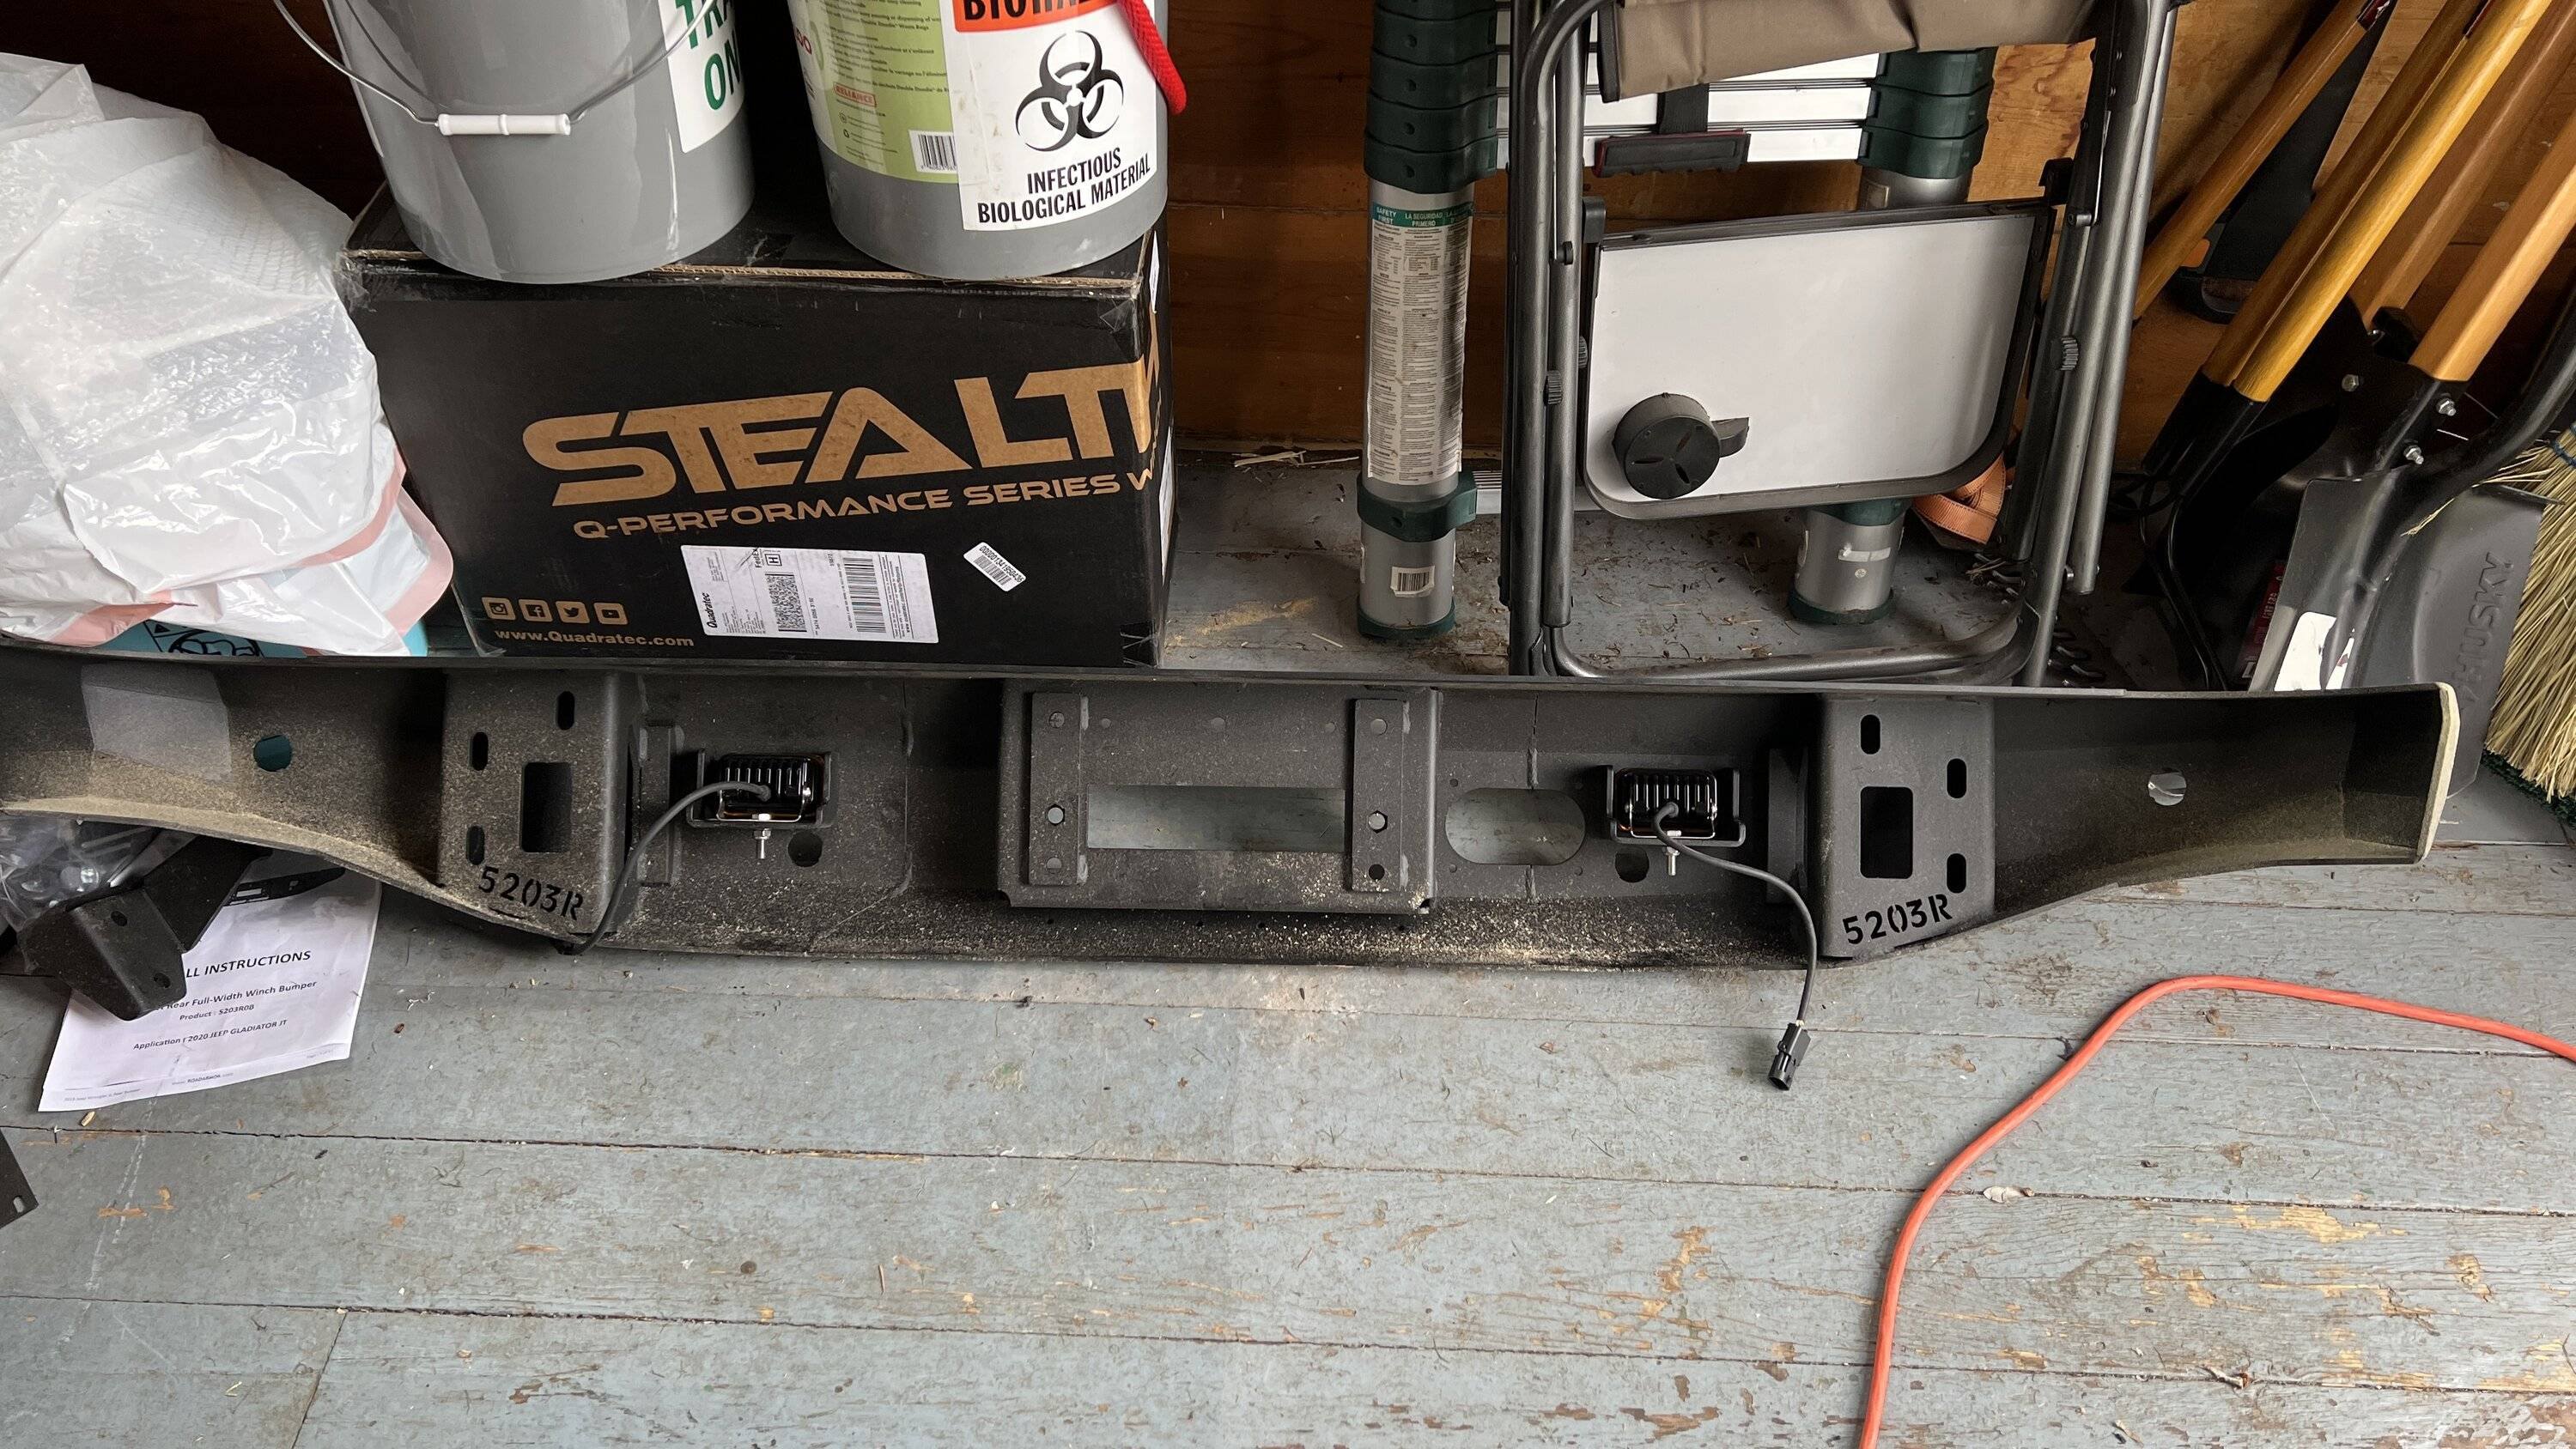
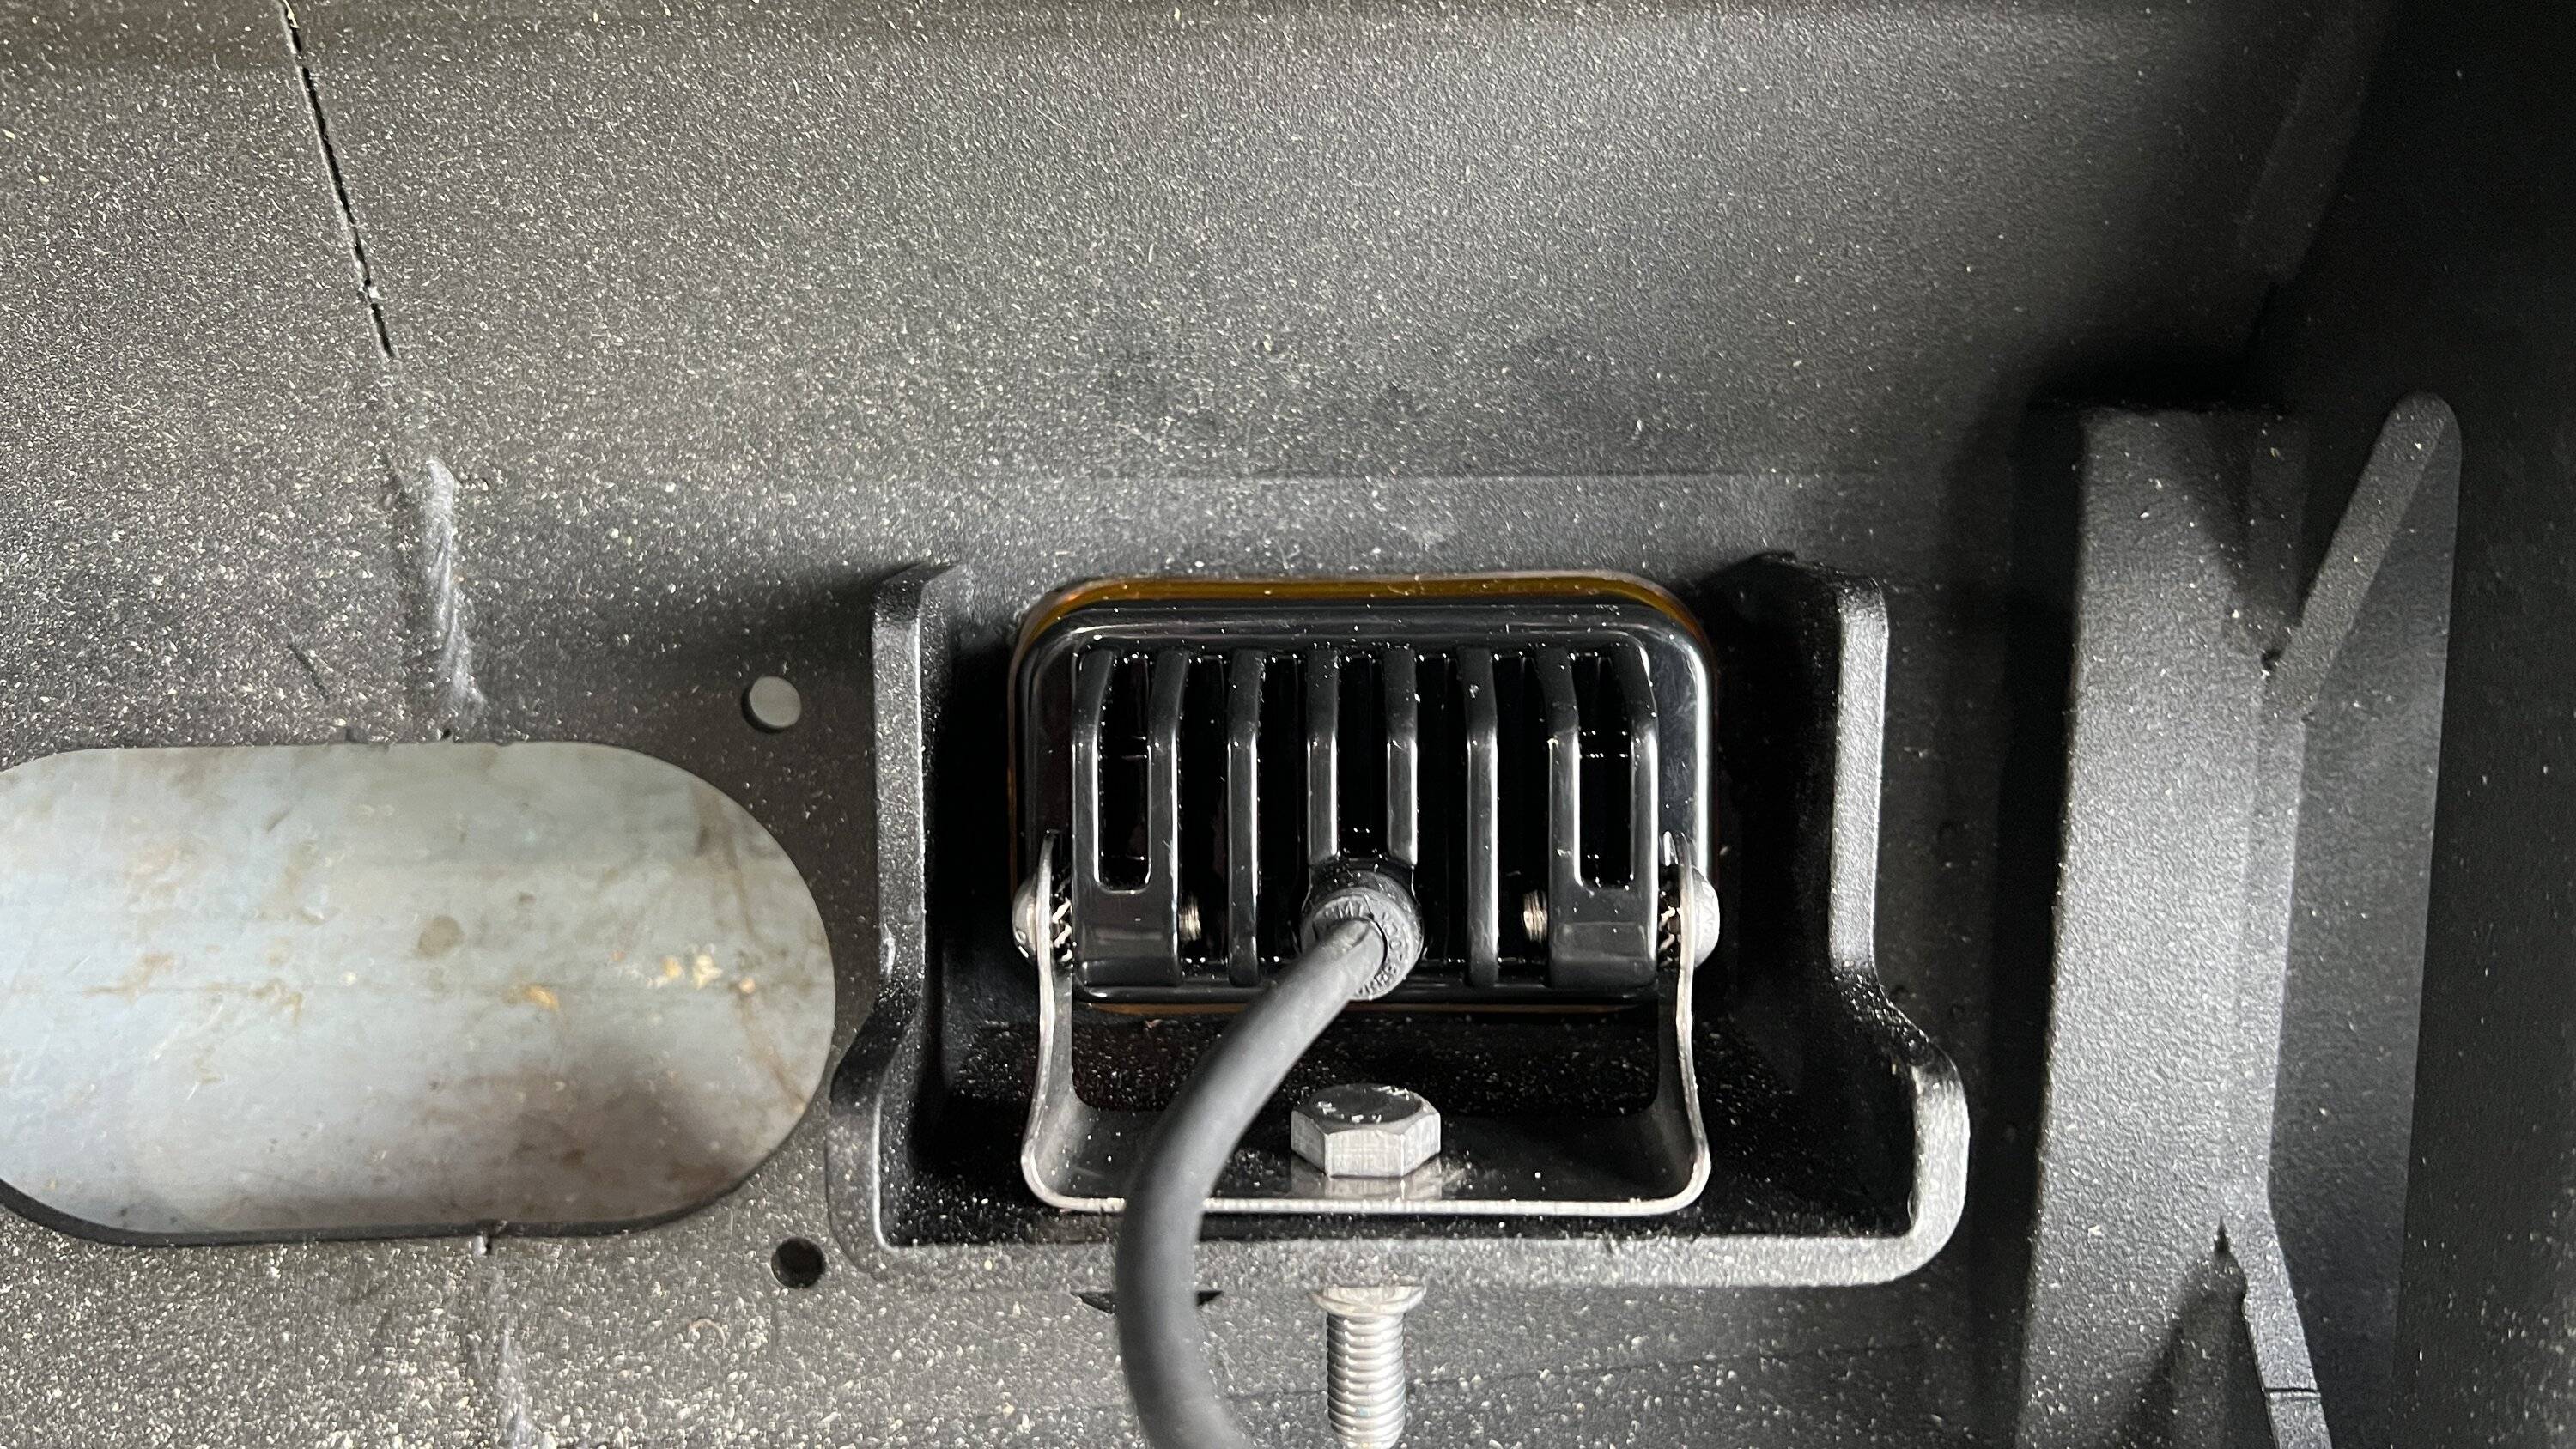
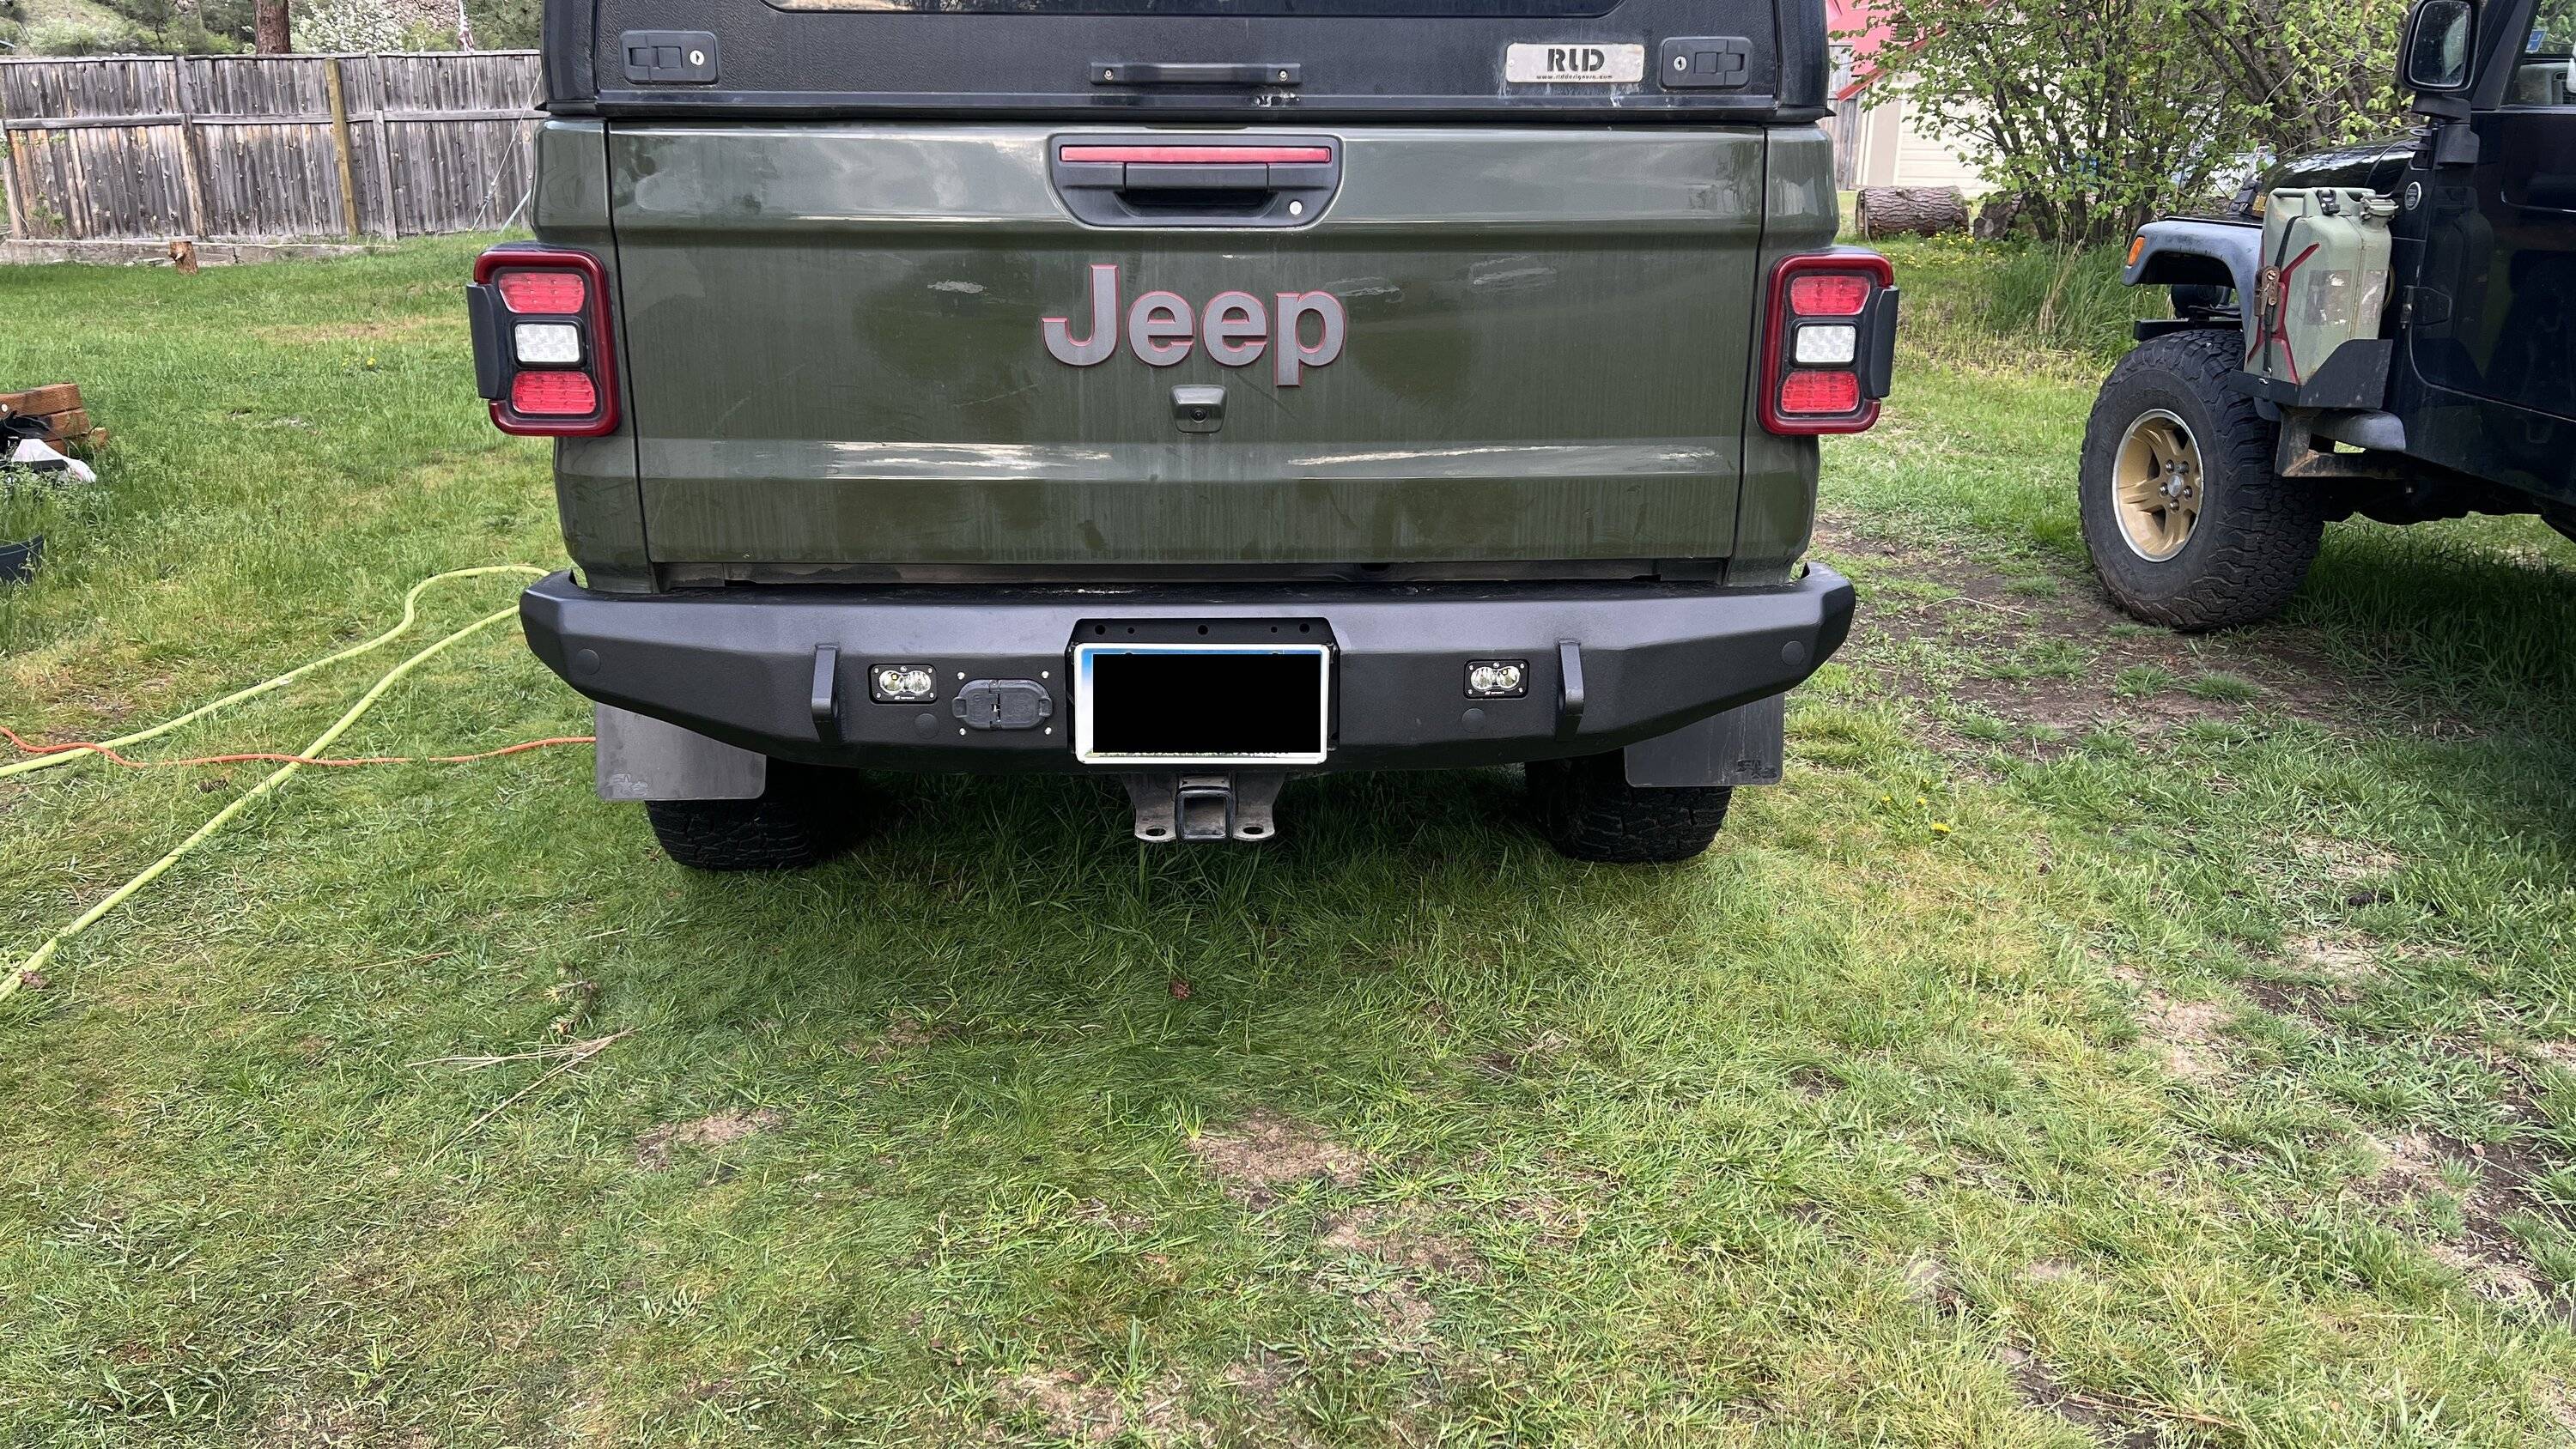
Unfortunately in this process I made a critical error of cutting a harness too short for the aftermarket license plate lights. Note it was the aftermarket light harness I cut, NOT the factory harness - that is in tact and set off to the side currently. So, only one light is working for now until I order a replacement. The Baja Designs S2 Pro lights I had wired up a while ago when running wires for all the bed stuff in the first place, so they were just plug and play after mounting to the bumper itself. They are set to turn on at reverse utilizing a jumper harness from Oracle that ties into the reverse lights and is situated behind the left tail light. I believe I did a writeup of this a while ago. And the three S1 scene lights installed a while ago are turned on by the push of a button on the dash mounted Switch Pros panel talked about several posts ago. The S2 Pro lights are the 'driving/combo' pattern and pair well with the S1's. I will likely be putting in an orange lens for the S2 Pro's.
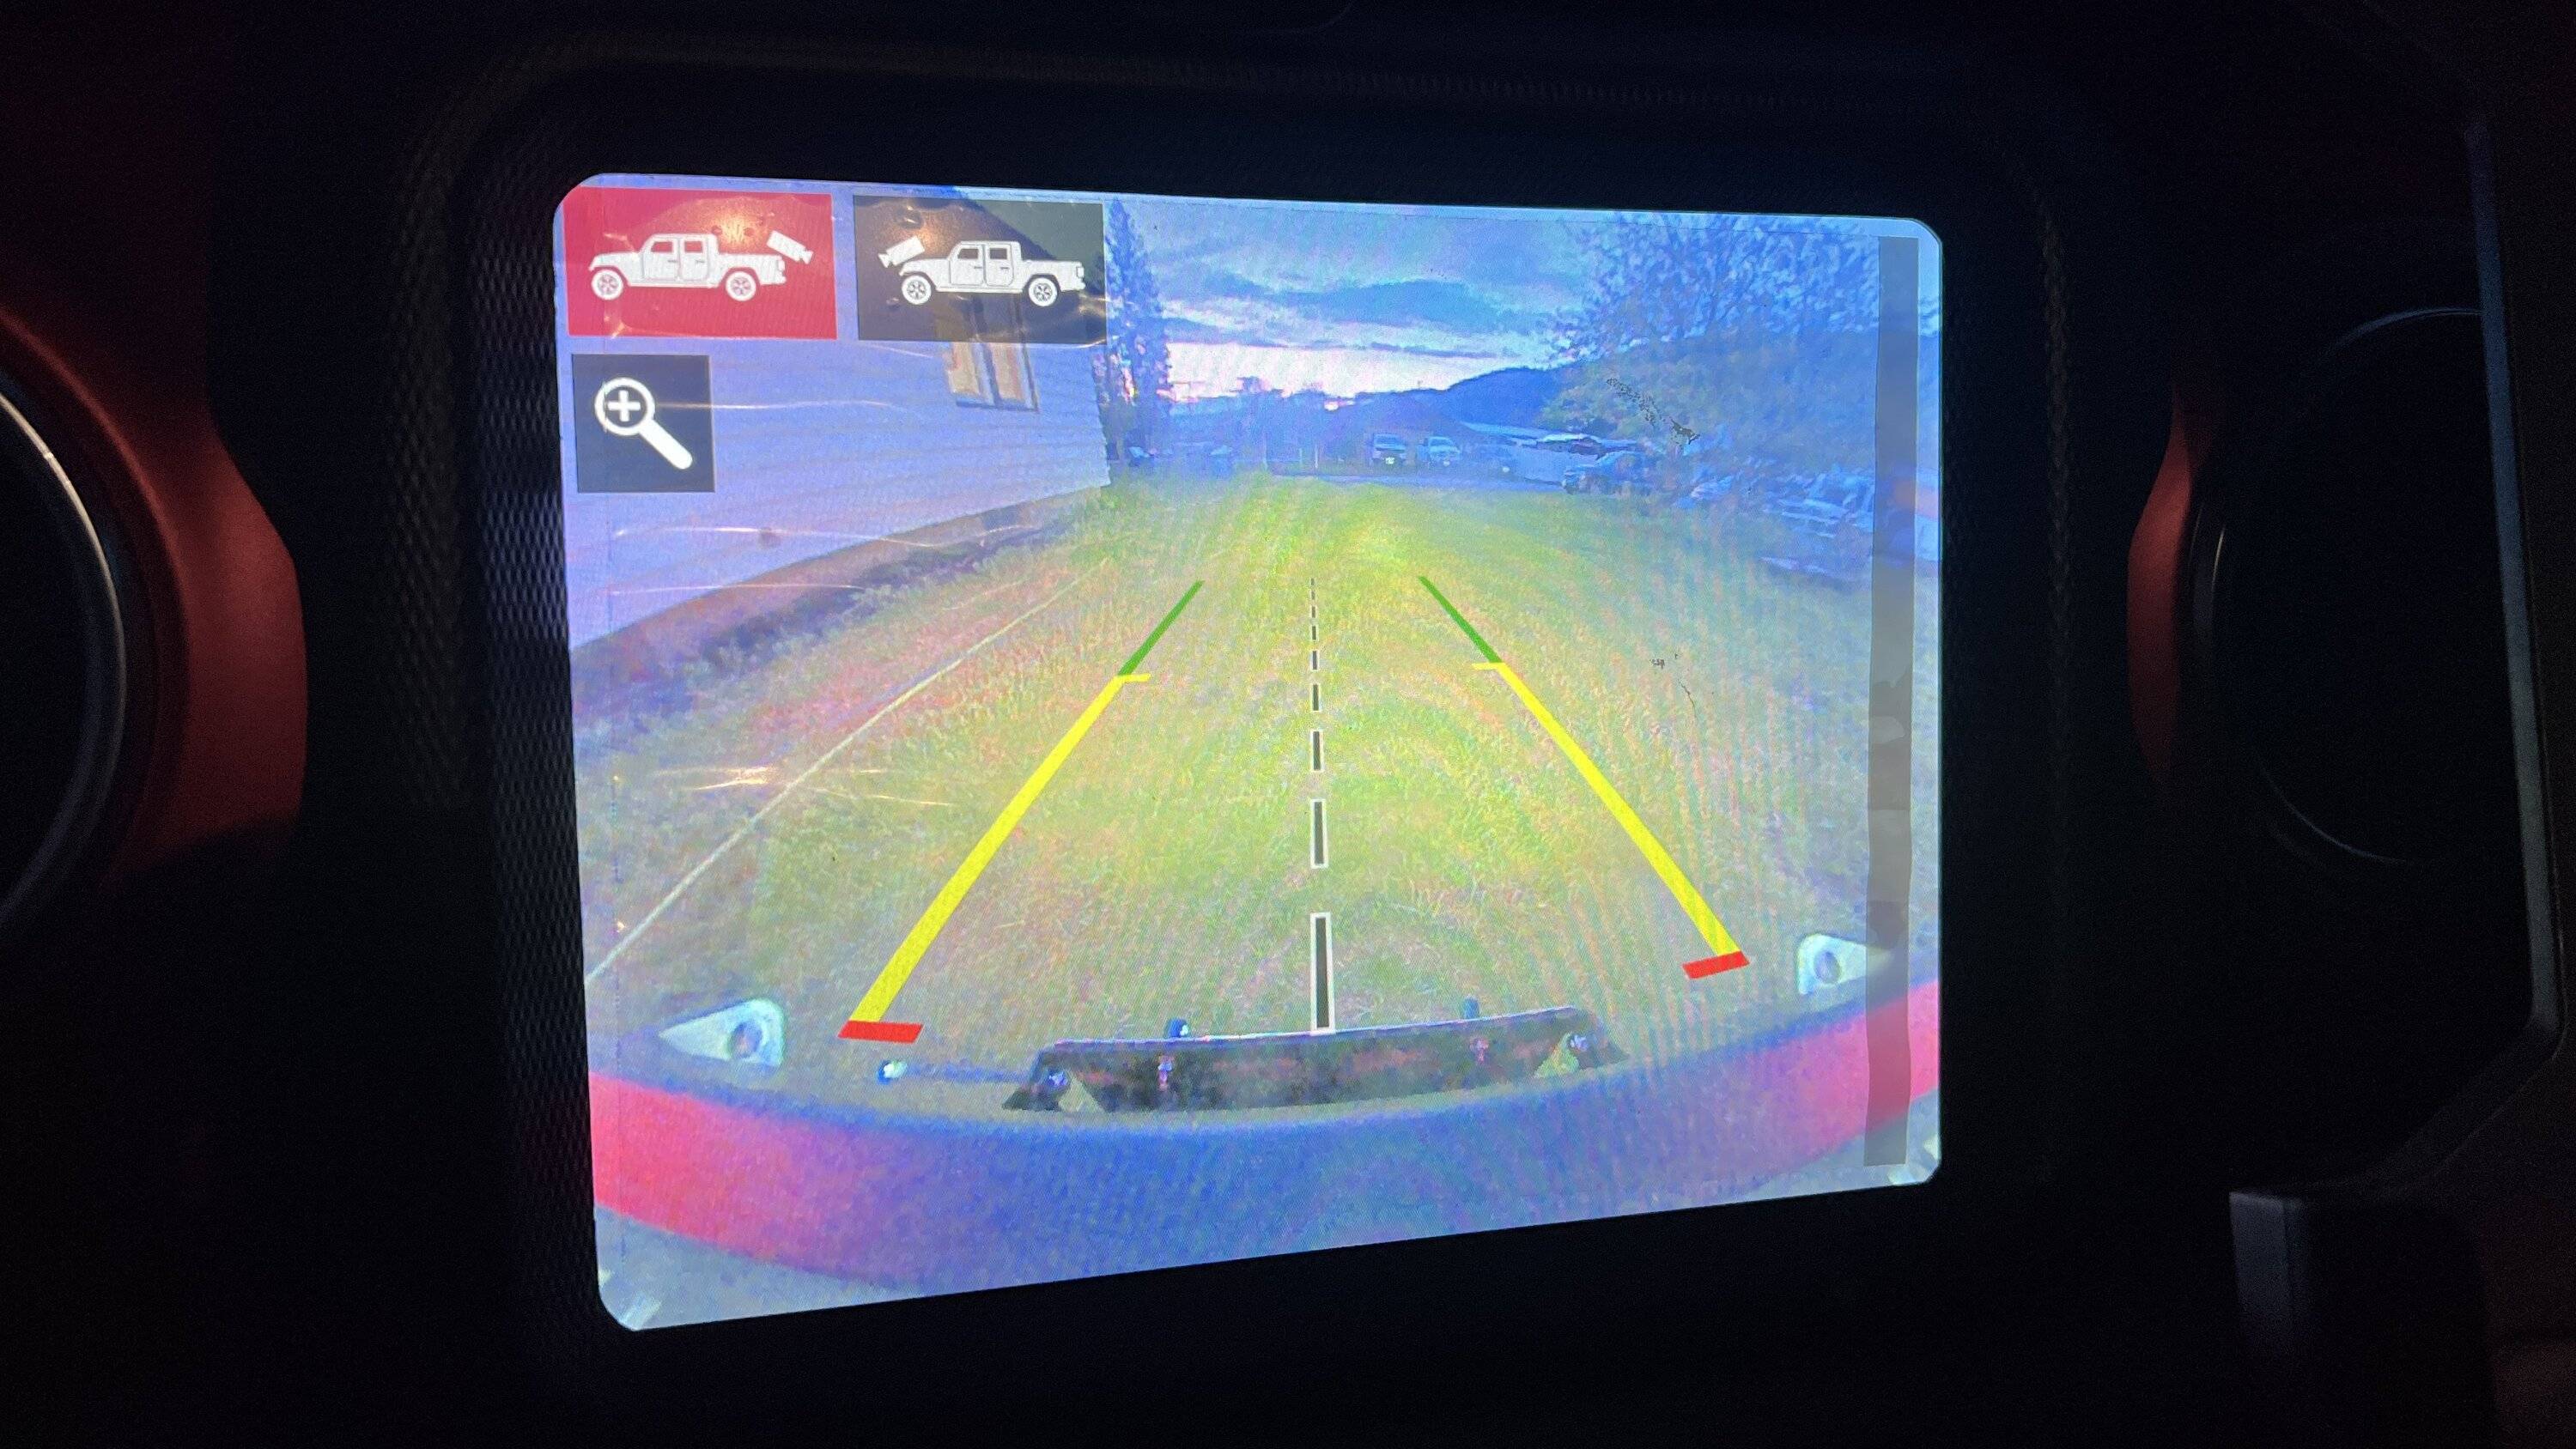
Overall, I am happy with the result. The light locations could be better, but with how it mounts to the frame they're not a lot of different places they could go. They will work plenty good. I will say that mounting lights for the license plate is awkward and not super straight forward. Not really sure though how this could be done any different unless road armor made major changes. It will work fine though. I am looking forward to getting a winch installed! And possibly the best part....I can see through the rear camera very well and without any glare from the factory license light positioning. This last picture is with the reverse lights only and does not include the three rear S1 lights. I think it turned out well, and looks really really good!
Oh and also, it didnt add so much weight that there is any visible sinking of the suspension - another great bit! The only concern is how well the powered coating will hold up. My luck with powder coating is it is pretty terrible stuff and doesn't last long, leaving the steel under it ready to rust within 6 months.
It started out the other day after installing the skid plates by installing the Baja Designs S2 Pro 'driving/combo' lights in their respective place. Doing so on the vehicle would be difficult. I also worked on making the wiring harness so that they can plug into the wiring I already ran and put in place for them months ago.
In the picture above you can see I originally had the amber rock lens installed, but it didn't fit right in the holes so I removed the rock guard.
The bumper is spec'ed out to weight 95 pounds. The factory rubicon bumper, bolts, recovery points, and removed brackets from the bed sliders came in at about 44 pounds. So a net gain of 51 pounds. I am happy about this as I expected the factory bumper to weigh much less, maybe around 20 pounds. And I am happy that it is not just a total gain of nearly 100 pounds, considering I will be putting in a winch.

Unhooking the factory harness for the trailer connector and license plate lights went easy enough. But crawling under the back to see what bolts had to be removed revealed the first issue. The Rubicon bed sliders are actually bolted to the bumper itself.
I was a little shocked to see this - but it does make sense with how those sliders need to hold up. I have a feeling this was a change made somewhere between the first version and my 2022. Road Armor, when asked, made no mention of this being a concern and did say the sliders would work with their bumper. More on this to follow. The second thing I noticed, was these bolts were in pretty darn tight, with a healthy amount of blue locktite. It was clear there was a strong connection. Also noticed, was the trailer hitch itself was bolted to the bumper from two bolts hidden under the license plate. And two more torx bolts going through the bottom side of the trailer hitch into the bottom of the bumper. These 4 bolts were not very tight, but snug
Next was the bolts to remove the bumper. I was SHOCKED that there was only 4 - 2 for each side. And very surprisingly, these bolts were SUPER loose. I doubt they were even 25 lb-ft of torque. I could not believe how easily they came off. It must have been a mistake at the factory, and no locktite either.
The bumper slid off quite easily, and revealed something very interesting that I didnt catch when unbolting it. The buyer itself was mounted directly to the trailer hitch. And the trailer hitch mounted to the frame. Since when did bumpers not mount directly to the frame?? I imagine this is a design put in place to protect the frame from damage in a collision or hard rock crawling since many people seem to ride down the rear bumper on rocks, and hit the sliders awfully hard. But still....I find this interesting. And it makes me wonder with adding a heavier bumper, and winch, if my towing (or rather tongue weight) capacity is effectively lowered. Here you can also see the brackets that the bed sliders have that mount to the bumper.
Here is were some fabricating started to happen. You can see in the picture above where the bumper bolted to the trailer hitch by the two bolts behind the license plate, and 2 torx bolts coming up from the bottom. Considering this is a winch bumper I am installing, these flanges had to go. I would suspect they would be removed for other aftermarket bumpers as well. So, with the help of a neighbors cutting tool, I took off the flanges, cleaned them with paint prep, and hit them with two heavy coats of paint. Hopefully it holds for a while before rusting.
The new bumper came with a few brackets to install. These brackets bolted to the trailer hitch (not the frame remember?) with the same two bolt holes that the tow hooks mounted to. The brackets sit behind and braced up against the factory hitch steel so despite them only being held by two bolts each side, they would literally have to rip the steel of the hitch for the bumper to come off. And the hitch is mounted to the frame with 3 or 4 very large bolts on each side, from under neath the frame and the side, so it's a very solid connection. These brackets allow for three points of contact on each side - much better than the factory 2. Unfortunately that top bolt would prove to be quite difficult to access.
With that, and with putting the bolts in the bumper side with retainer clips, it slid on nice and easily - sorta. Those brackets I mentioned before that the bed sliders bolted into the factory bumper with interfered - significantly. So I removed the sliders, 3 bolts on each side, to figure that out later and slid the new bumper on. Using some references passed along by @azmojave earlier today, I opted to torque the 4 side bolts to 85 lb-ft. The top bolt was in too tight of a spot for a torque wrench, and was only accessible by a shallow socket, with a wobbly joint, and a 6" extension - so any amount of torque wouldn't be very accurate. Considering how loose the factory bumper bolts were, I snugged these down as hard as I could - probably somewhere in the 60 lb-ft territory. All bolts were held on with thick washers and lock washers. The two side bolts I added a dab of blue locktite just to be safe.
Back to the bed sliders. With the same cutting wheel used to remove the flanges - it was simple work to cut away the welds that held those mounting brackets onto the bed sliders. So, after cutting away, paint prepping, and painting, they went back on - with a perfect fit - and saved probably 4 pounds in the process.
Unfortunately in this process I made a critical error of cutting a harness too short for the aftermarket license plate lights. Note it was the aftermarket light harness I cut, NOT the factory harness - that is in tact and set off to the side currently. So, only one light is working for now until I order a replacement. The Baja Designs S2 Pro lights I had wired up a while ago when running wires for all the bed stuff in the first place, so they were just plug and play after mounting to the bumper itself. They are set to turn on at reverse utilizing a jumper harness from Oracle that ties into the reverse lights and is situated behind the left tail light. I believe I did a writeup of this a while ago. And the three S1 scene lights installed a while ago are turned on by the push of a button on the dash mounted Switch Pros panel talked about several posts ago. The S2 Pro lights are the 'driving/combo' pattern and pair well with the S1's. I will likely be putting in an orange lens for the S2 Pro's.
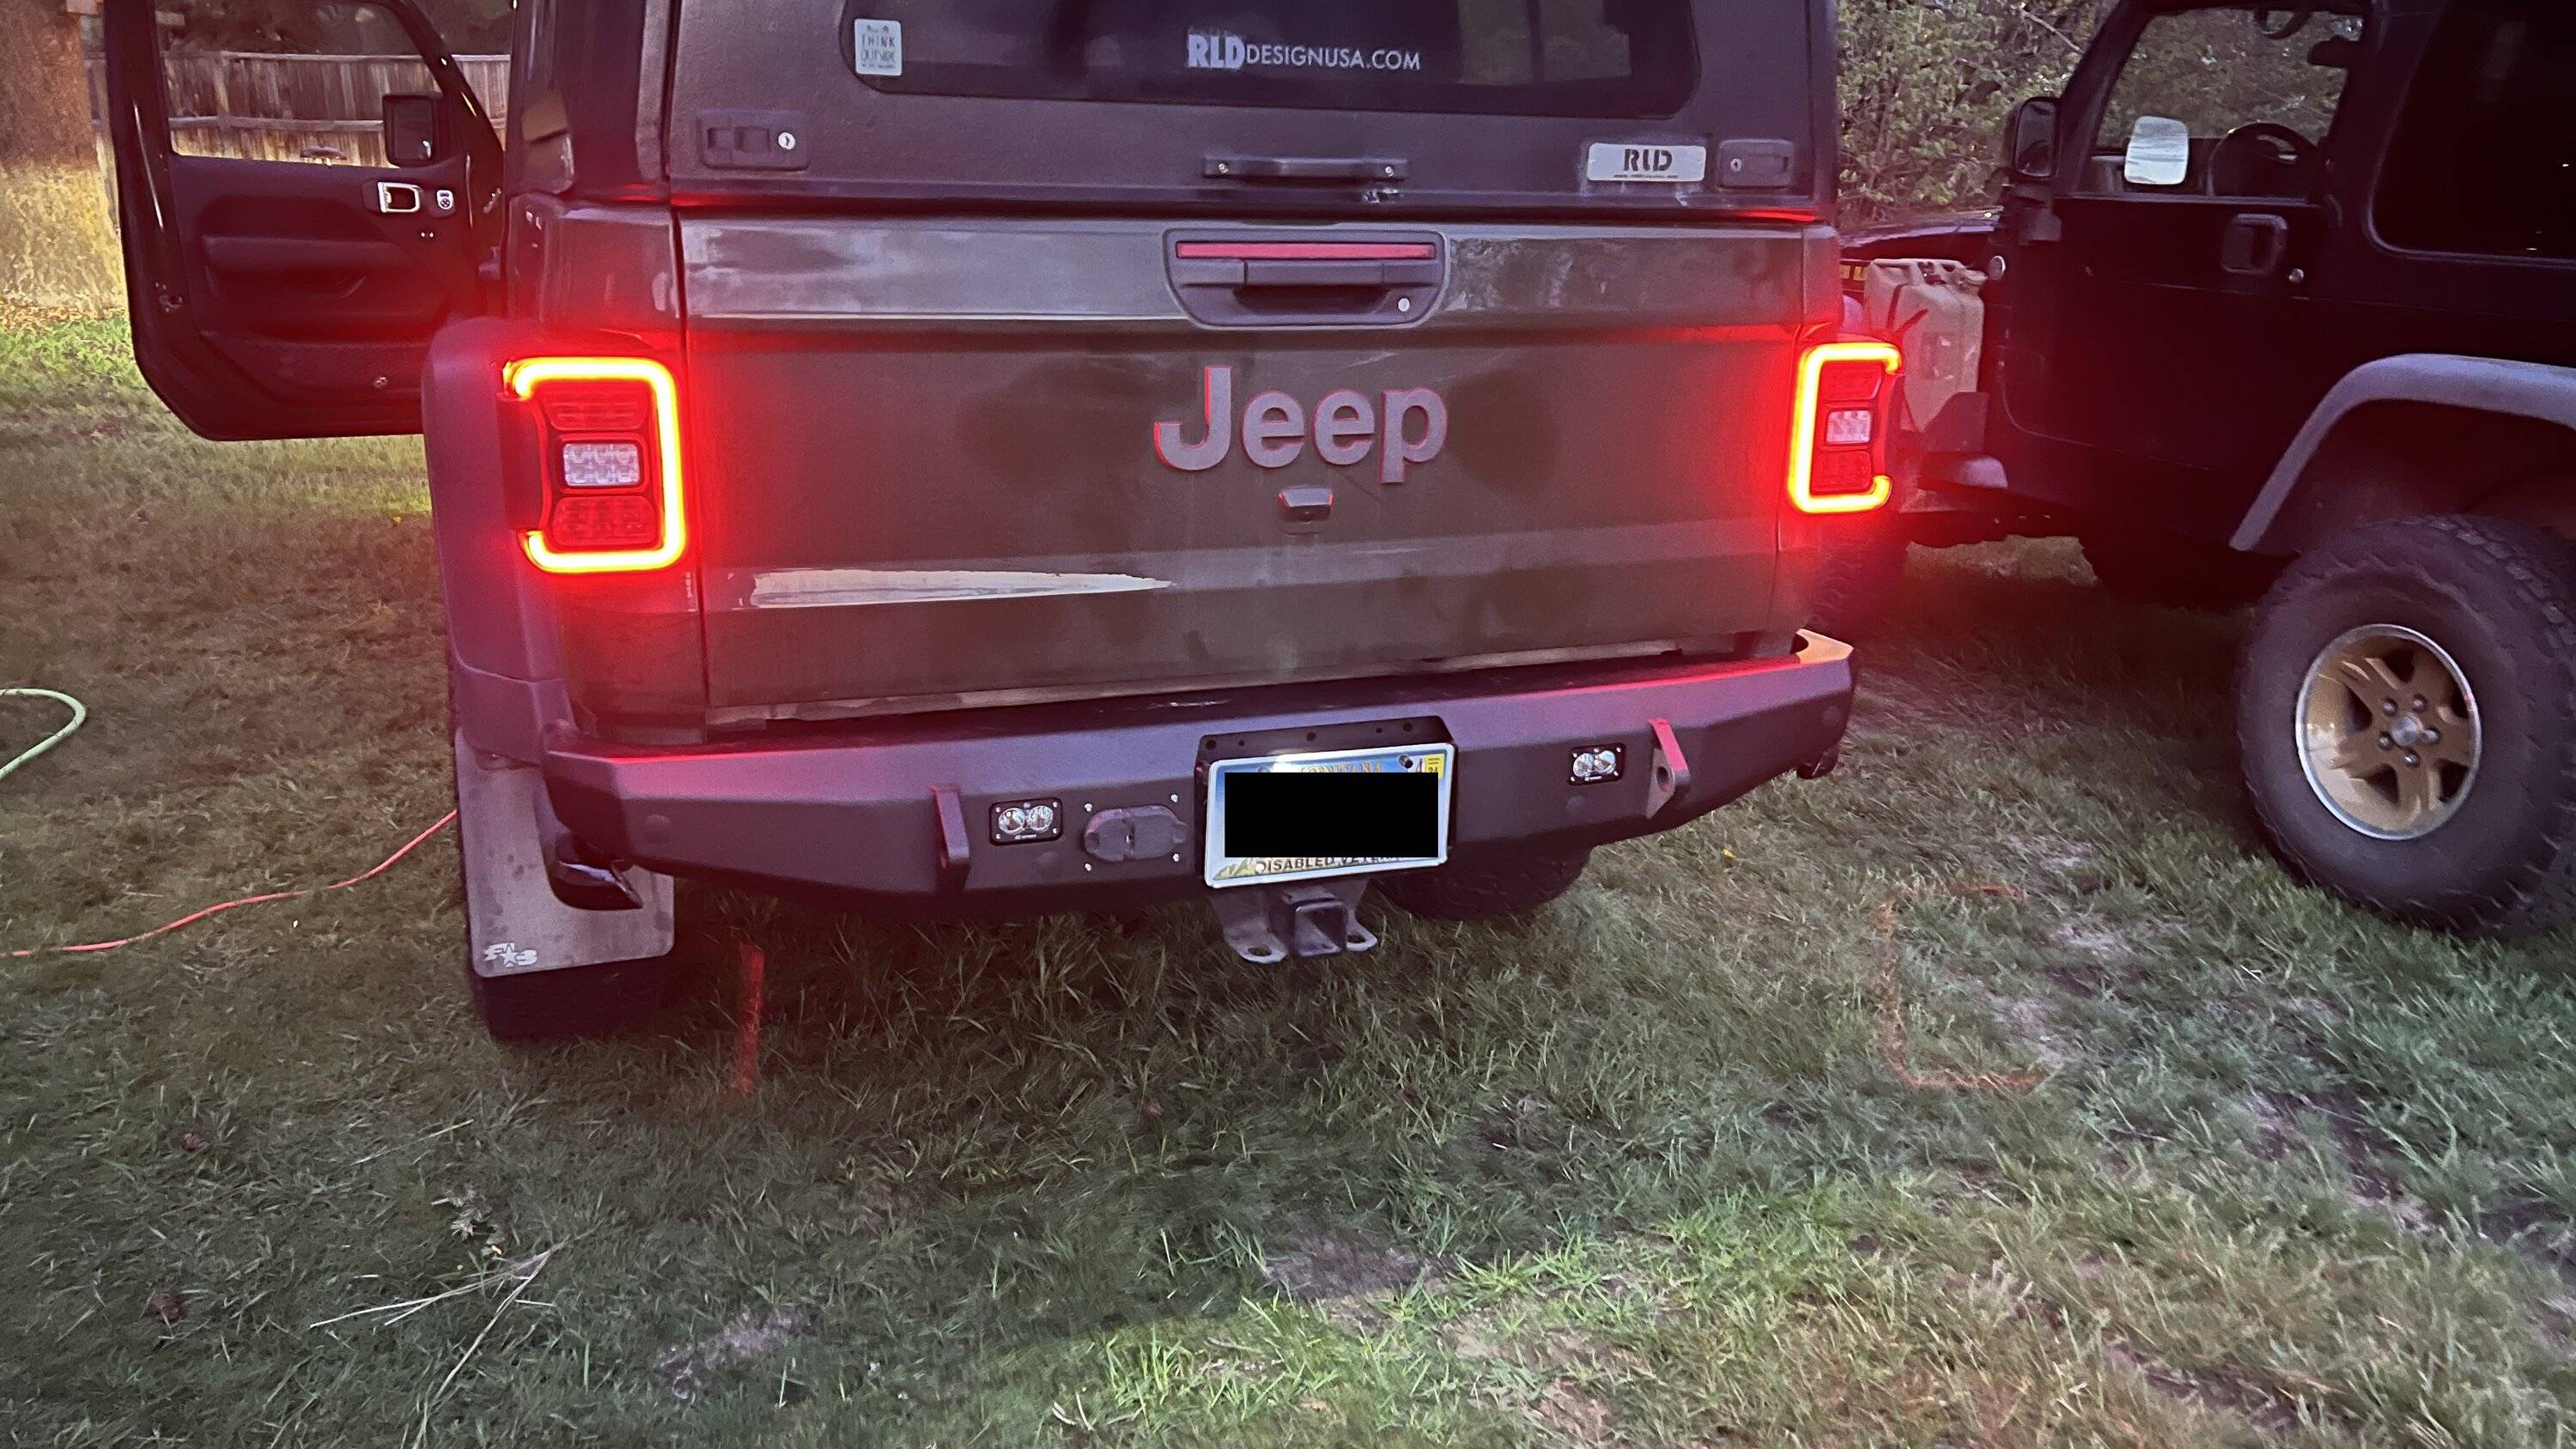
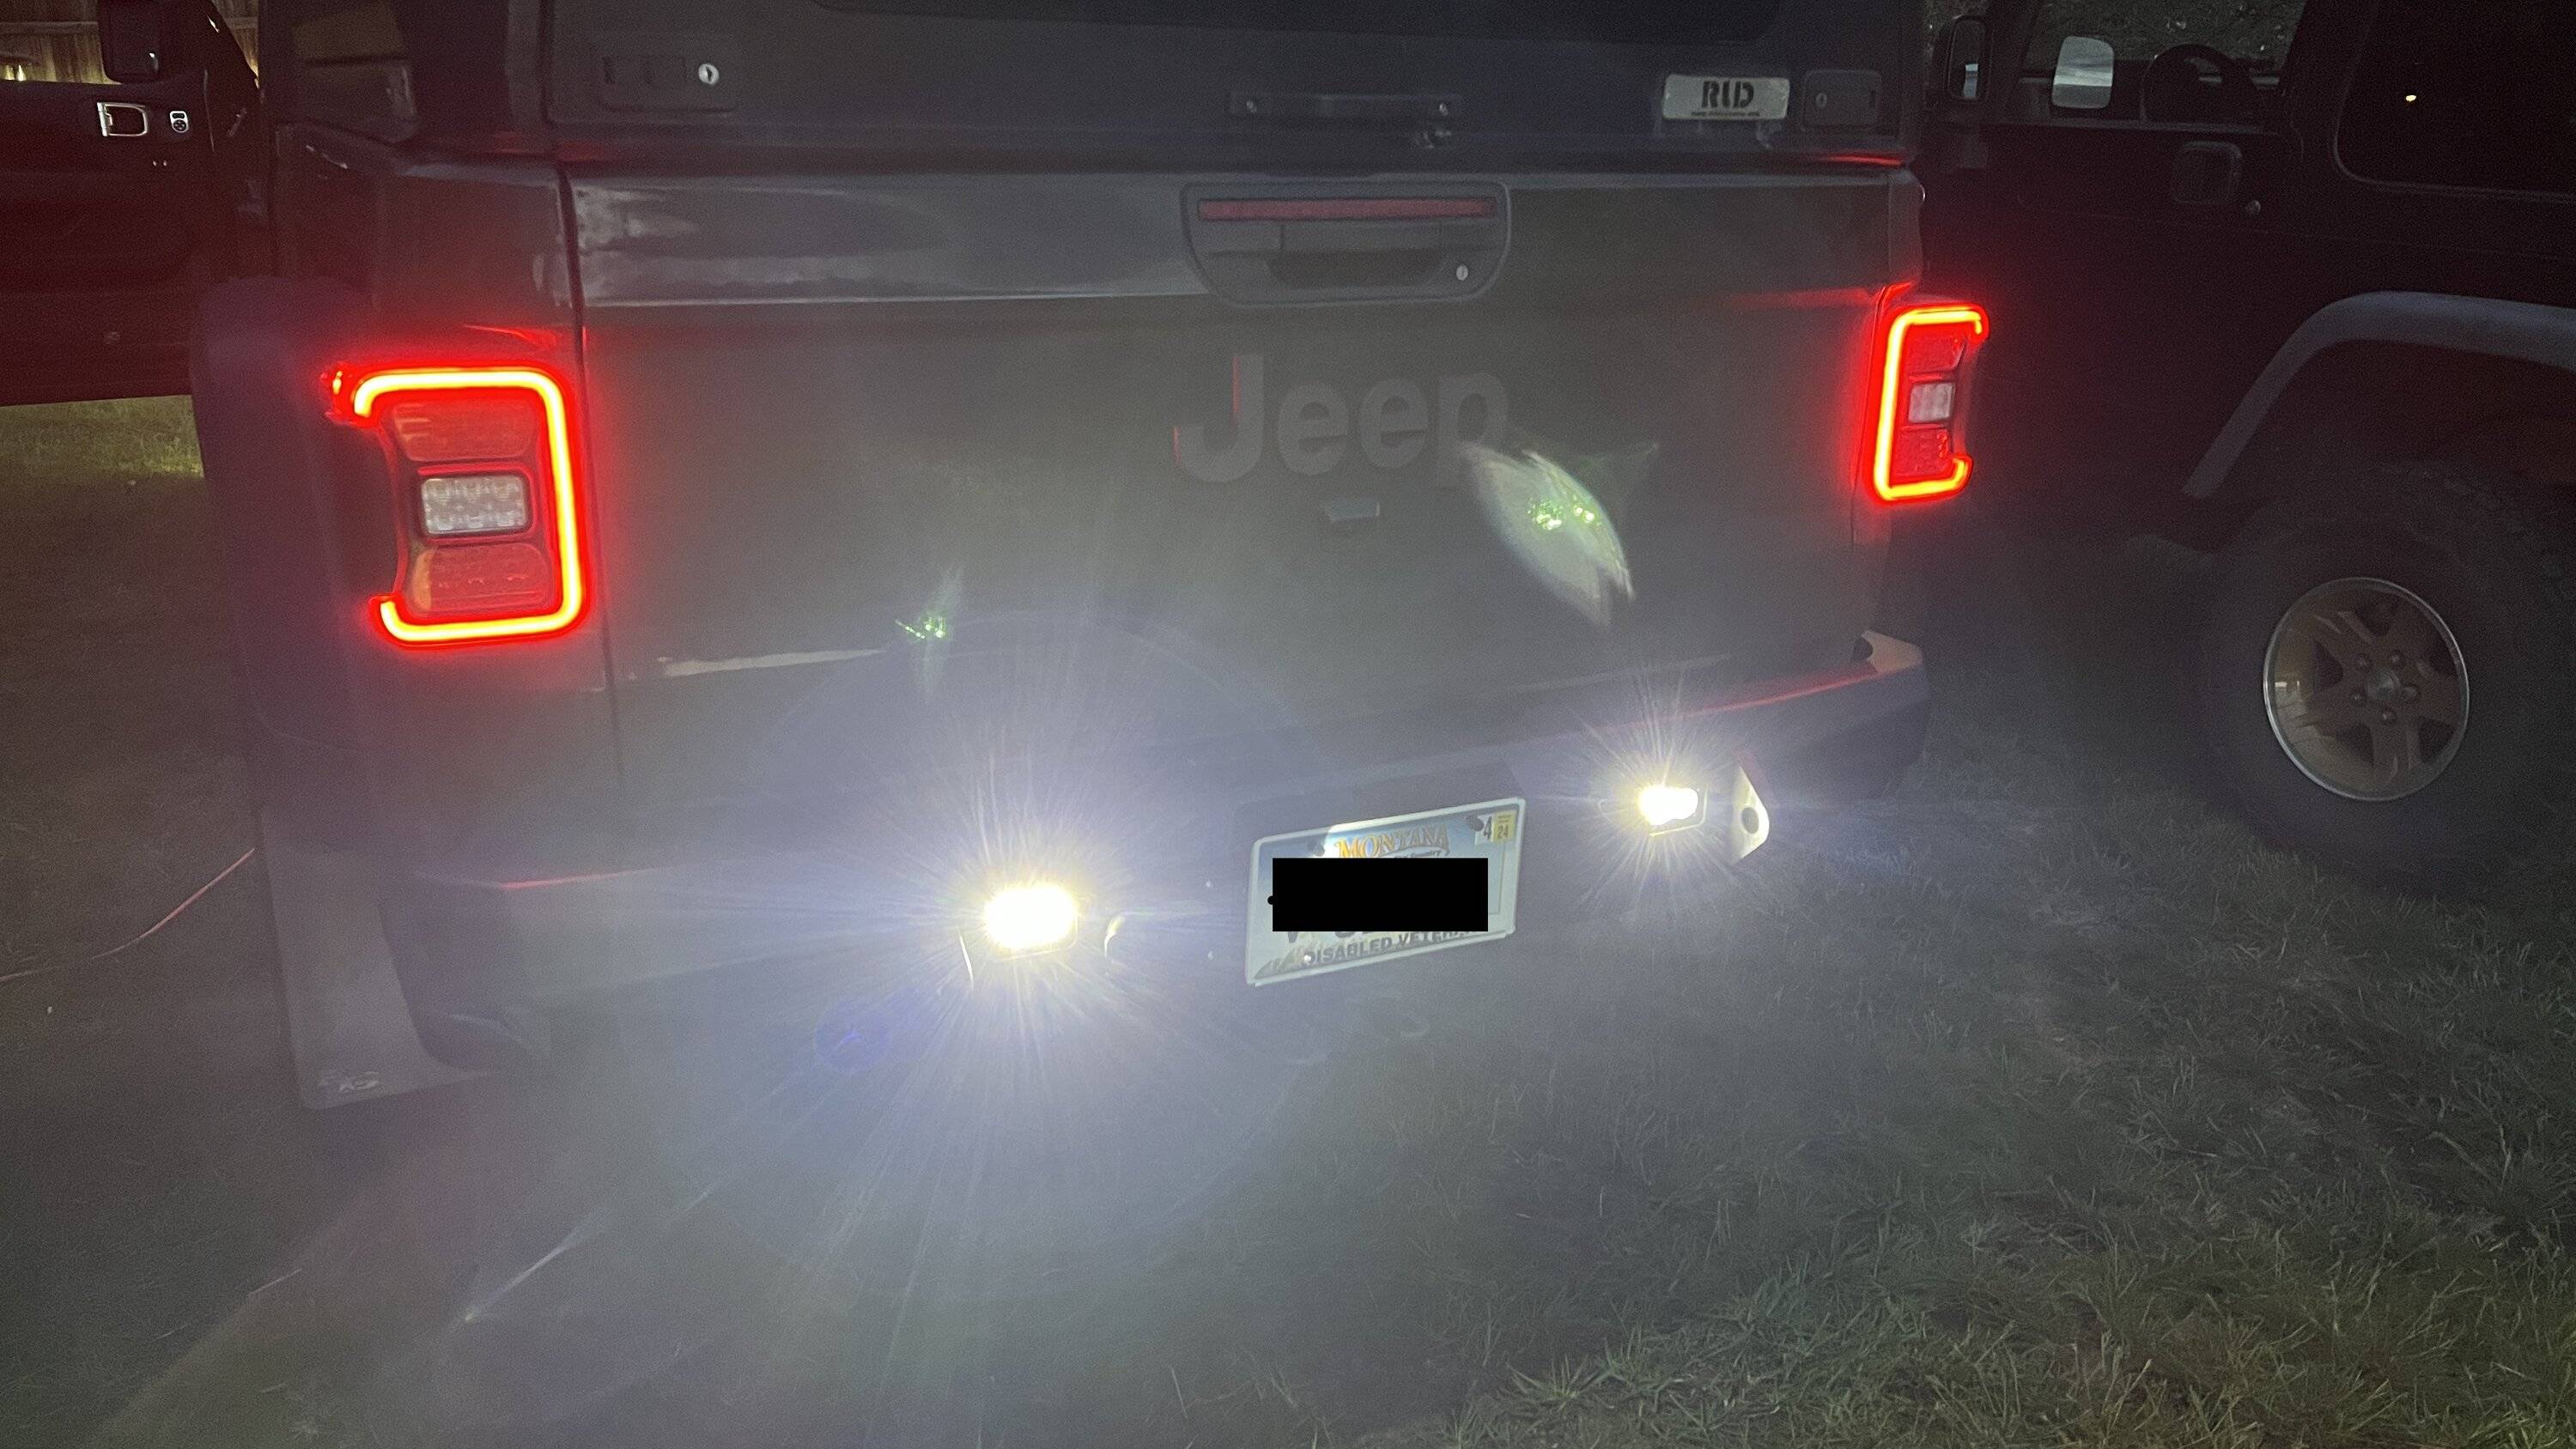
Overall, I am happy with the result. The light locations could be better, but with how it mounts to the frame they're not a lot of different places they could go. They will work plenty good. I will say that mounting lights for the license plate is awkward and not super straight forward. Not really sure though how this could be done any different unless road armor made major changes. It will work fine though. I am looking forward to getting a winch installed! And possibly the best part....I can see through the rear camera very well and without any glare from the factory license light positioning. This last picture is with the reverse lights only and does not include the three rear S1 lights. I think it turned out well, and looks really really good!
Oh and also, it didnt add so much weight that there is any visible sinking of the suspension - another great bit! The only concern is how well the powered coating will hold up. My luck with powder coating is it is pretty terrible stuff and doesn't last long, leaving the steel under it ready to rust within 6 months.
Sponsored