Mopar King
Well-Known Member
- First Name
- Skyler
- Joined
- Sep 9, 2019
- Threads
- 14
- Messages
- 724
- Reaction score
- 876
- Location
- Green Bay, WI
- Vehicle(s)
- 2020 JTR, 2020 JLU, 2022 JLU 392
- Build Thread
- Link
- Occupation
- CFO - Logistics Company
MY HAMBURGER SUPERCHARGER EXPERIENCE - AN INTERMEDIATE MECHANICS REVIEW
I first heard about the Hamburger Supercharger through the Exodus install and review. After watching the install (which seemed simple enough) I did some additional research and exchanged emails with PK at Hamburgers. I planned to do the install myself so the majority of my conversation with PK was:
This is my 5th Jeep, I have done plenty of my own work, lifts and otherwise. Is this something I could self install - Yes.
Do I need any crazy out of the ordinary special tools to handle the install - No.
If I install myself, is the warranty still fully valid - Yes.
I was pretty happy with everything I could find on Hamburger as a company and the 3 year 36k powertrain warranty - I was sold. I ordered placed my order on 5/2.
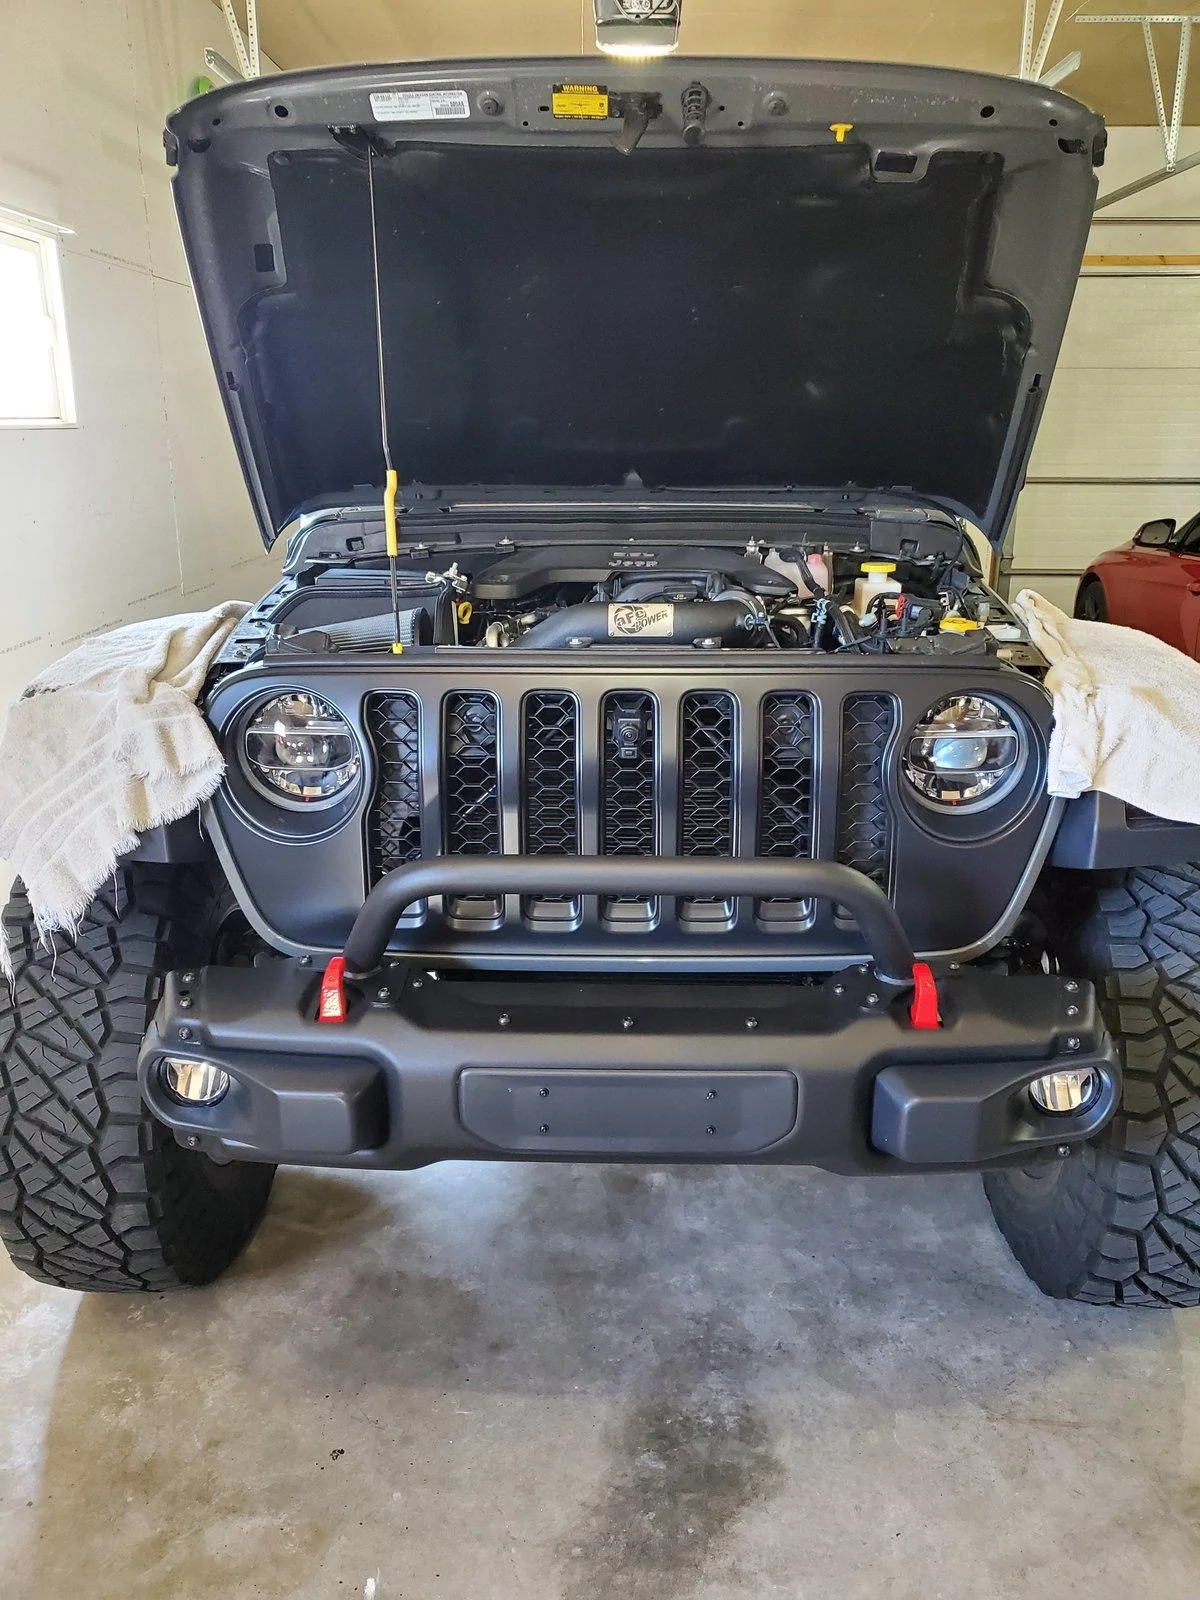
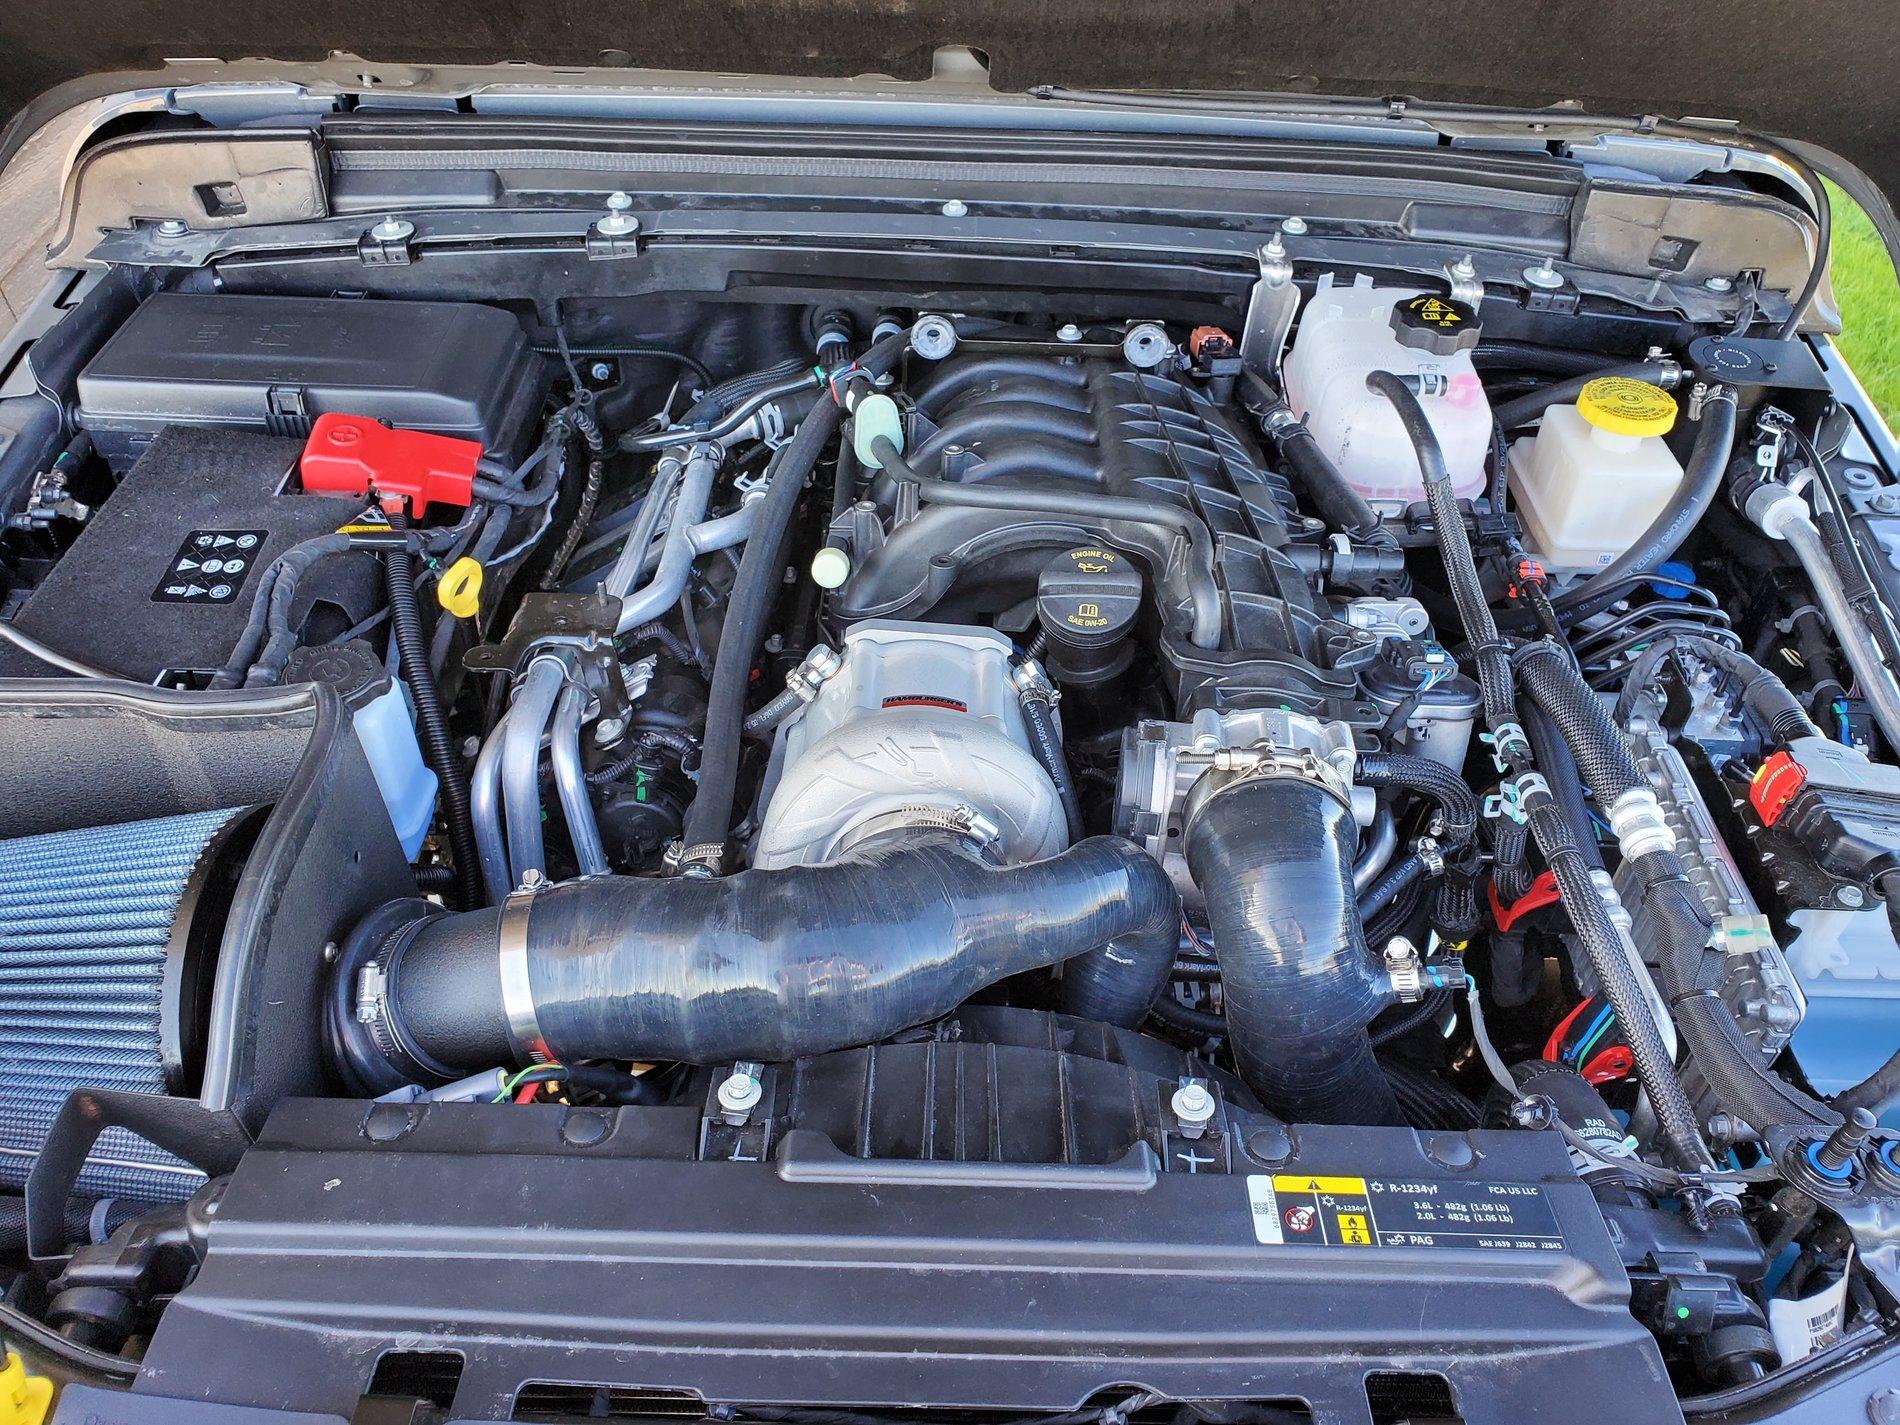
After placing my order I went out and pulled my ECM to send to Hamburgers. They sent a prepaid label to overnight this to them. At this point I had already read over the instructions and watched the videos which they have on their website. I ran into town and bought a few extra things (secondary shop light, ratcheting metric wrenches, inch lb. torque wrench). While I was waiting on my goods to arrive I started to pull apart the basics, removed the grill, engine cover and upper plenum of the intake manifold. I was following the instructions to a T and ran into some issues removing the upper plenum of the intake manifold. We soon realized while their instructions noted 7 bolts to remove but there are actually 8. At this point I was as far as I could go and just waiting on parts. My ECM arrived back to me on 5/7 and the supercharger kit on 5/8 (noteworthy, the UPS guy attempted to carry both large boxes at once and ended up body slamming 1 on the ground.....tiny heart attack) thankfully the boxes were very well packaged! Now I was ready to make a weekend of it!
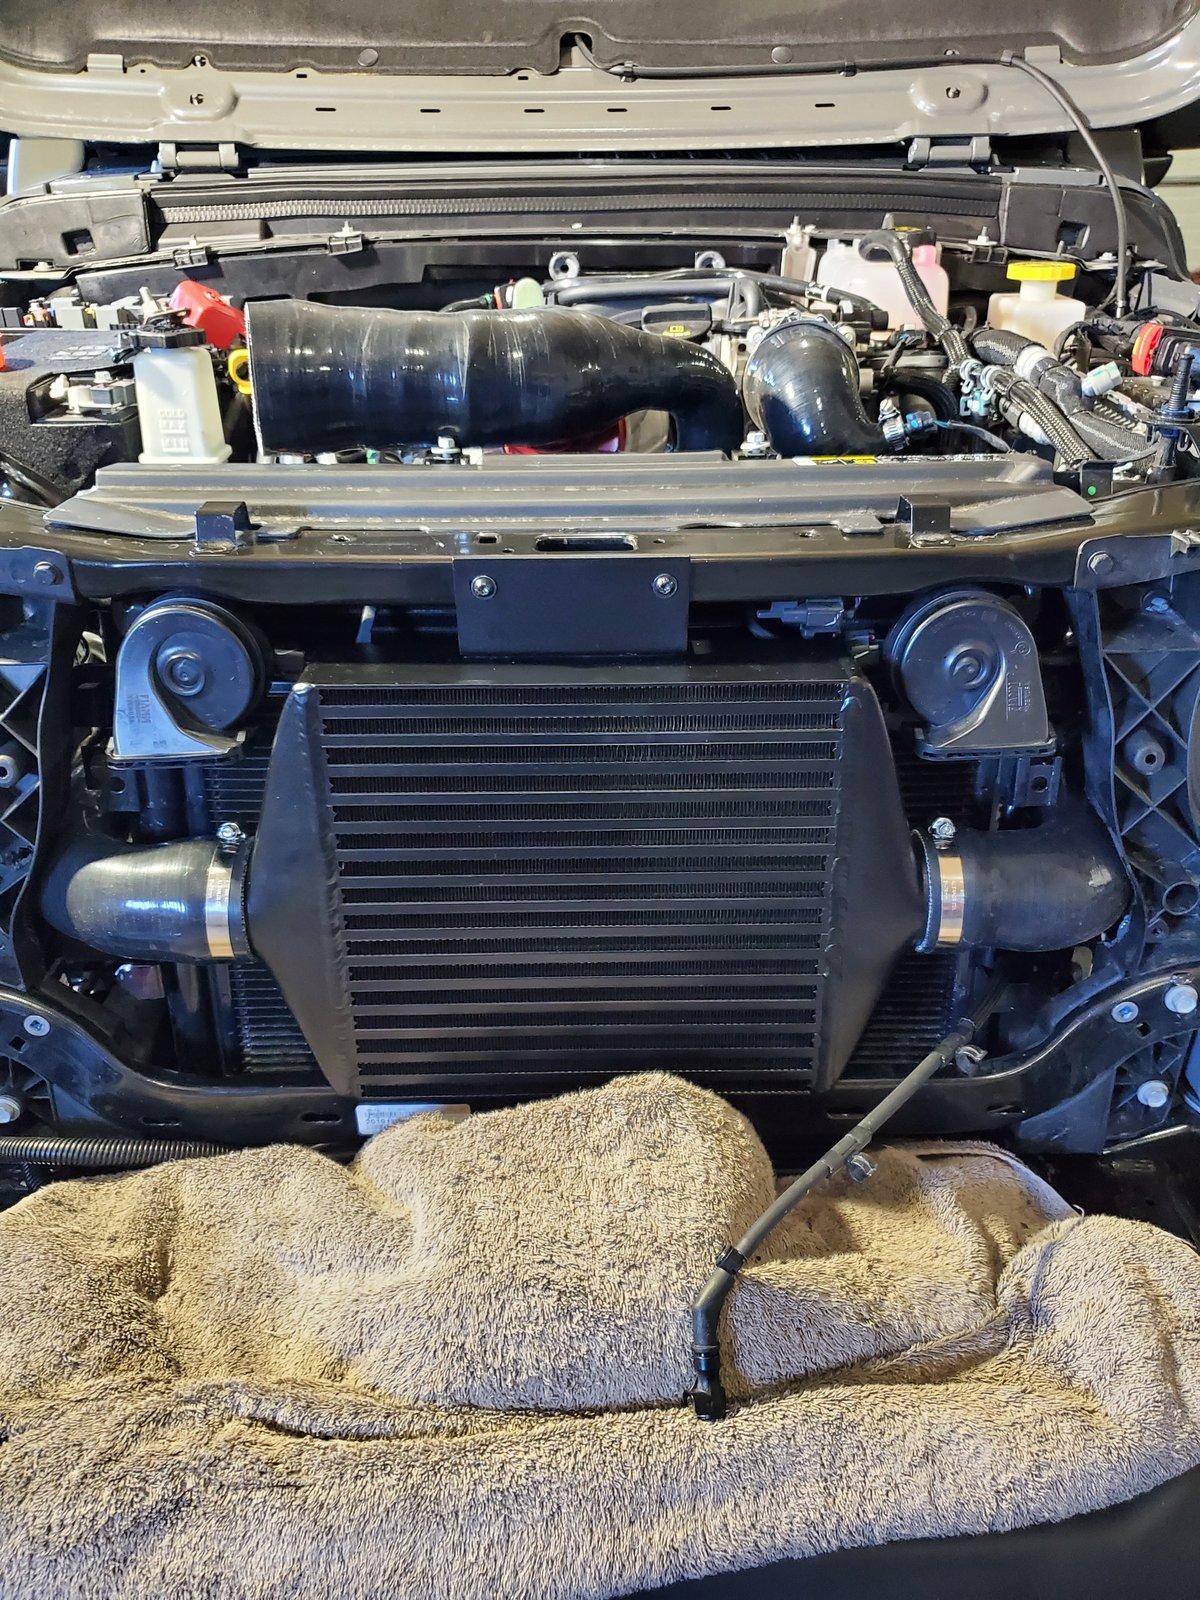
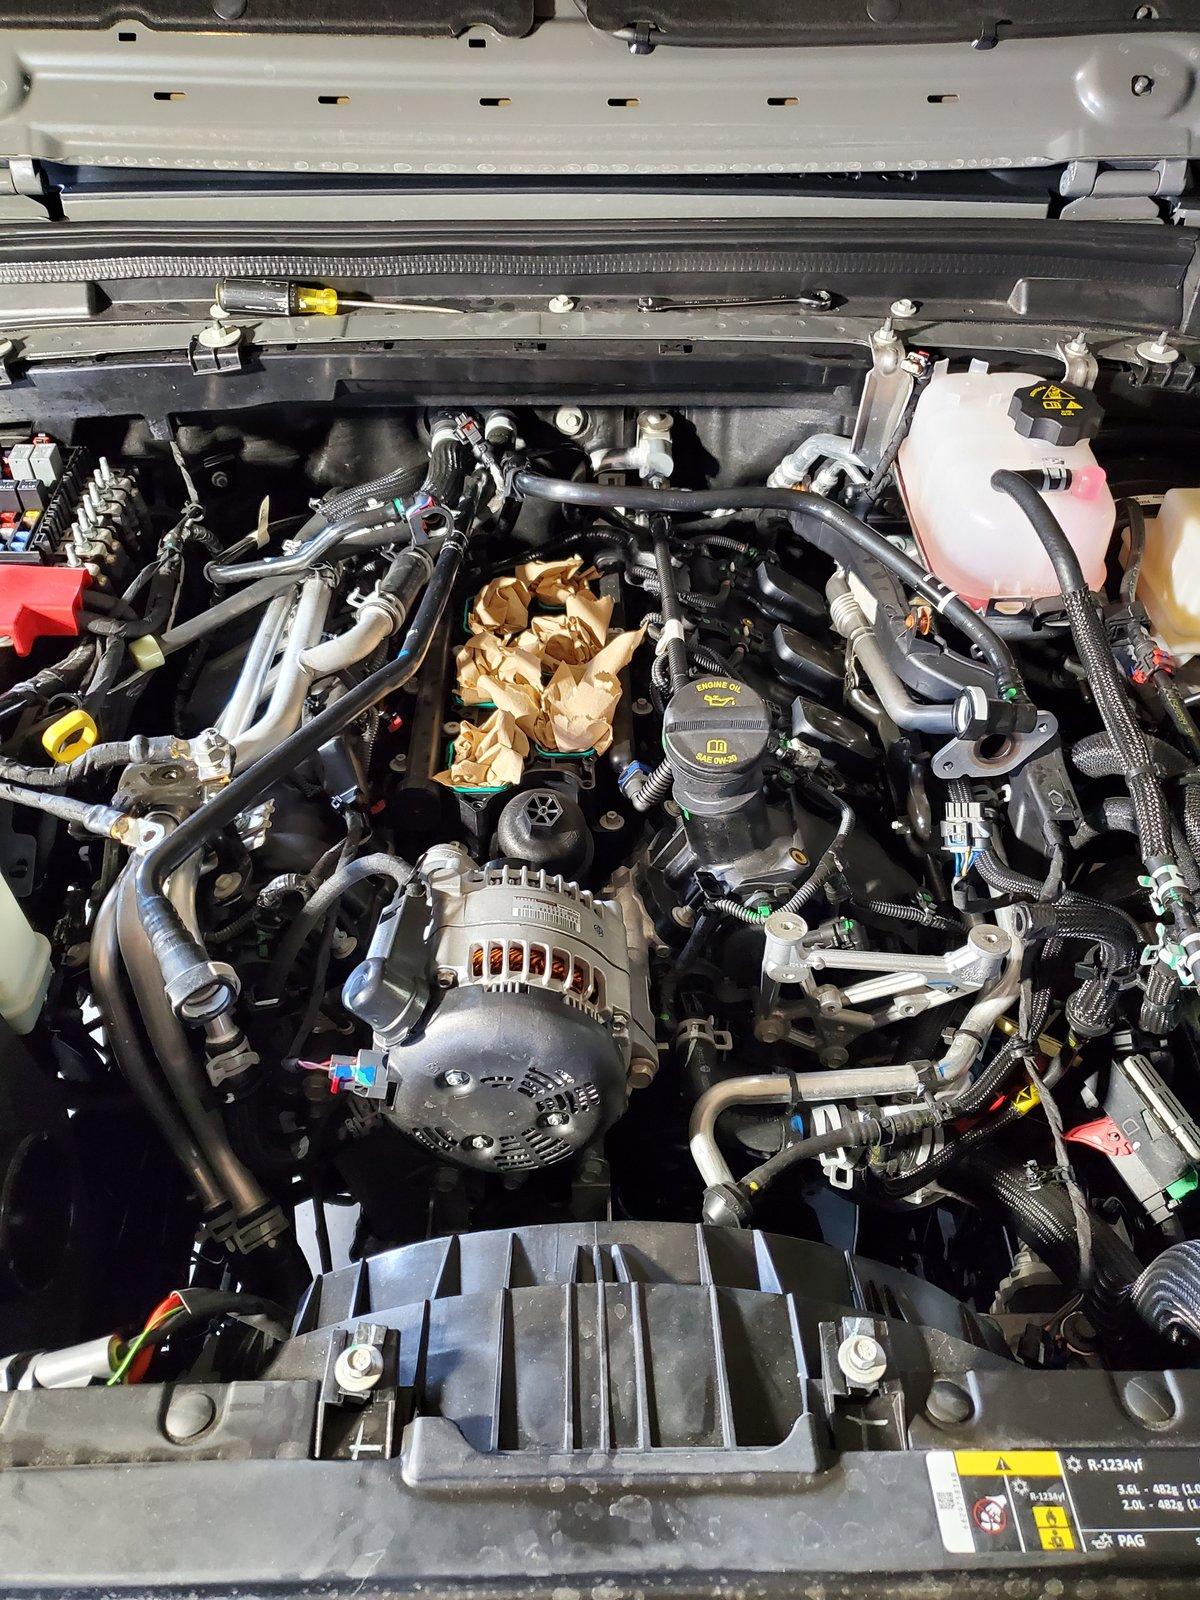
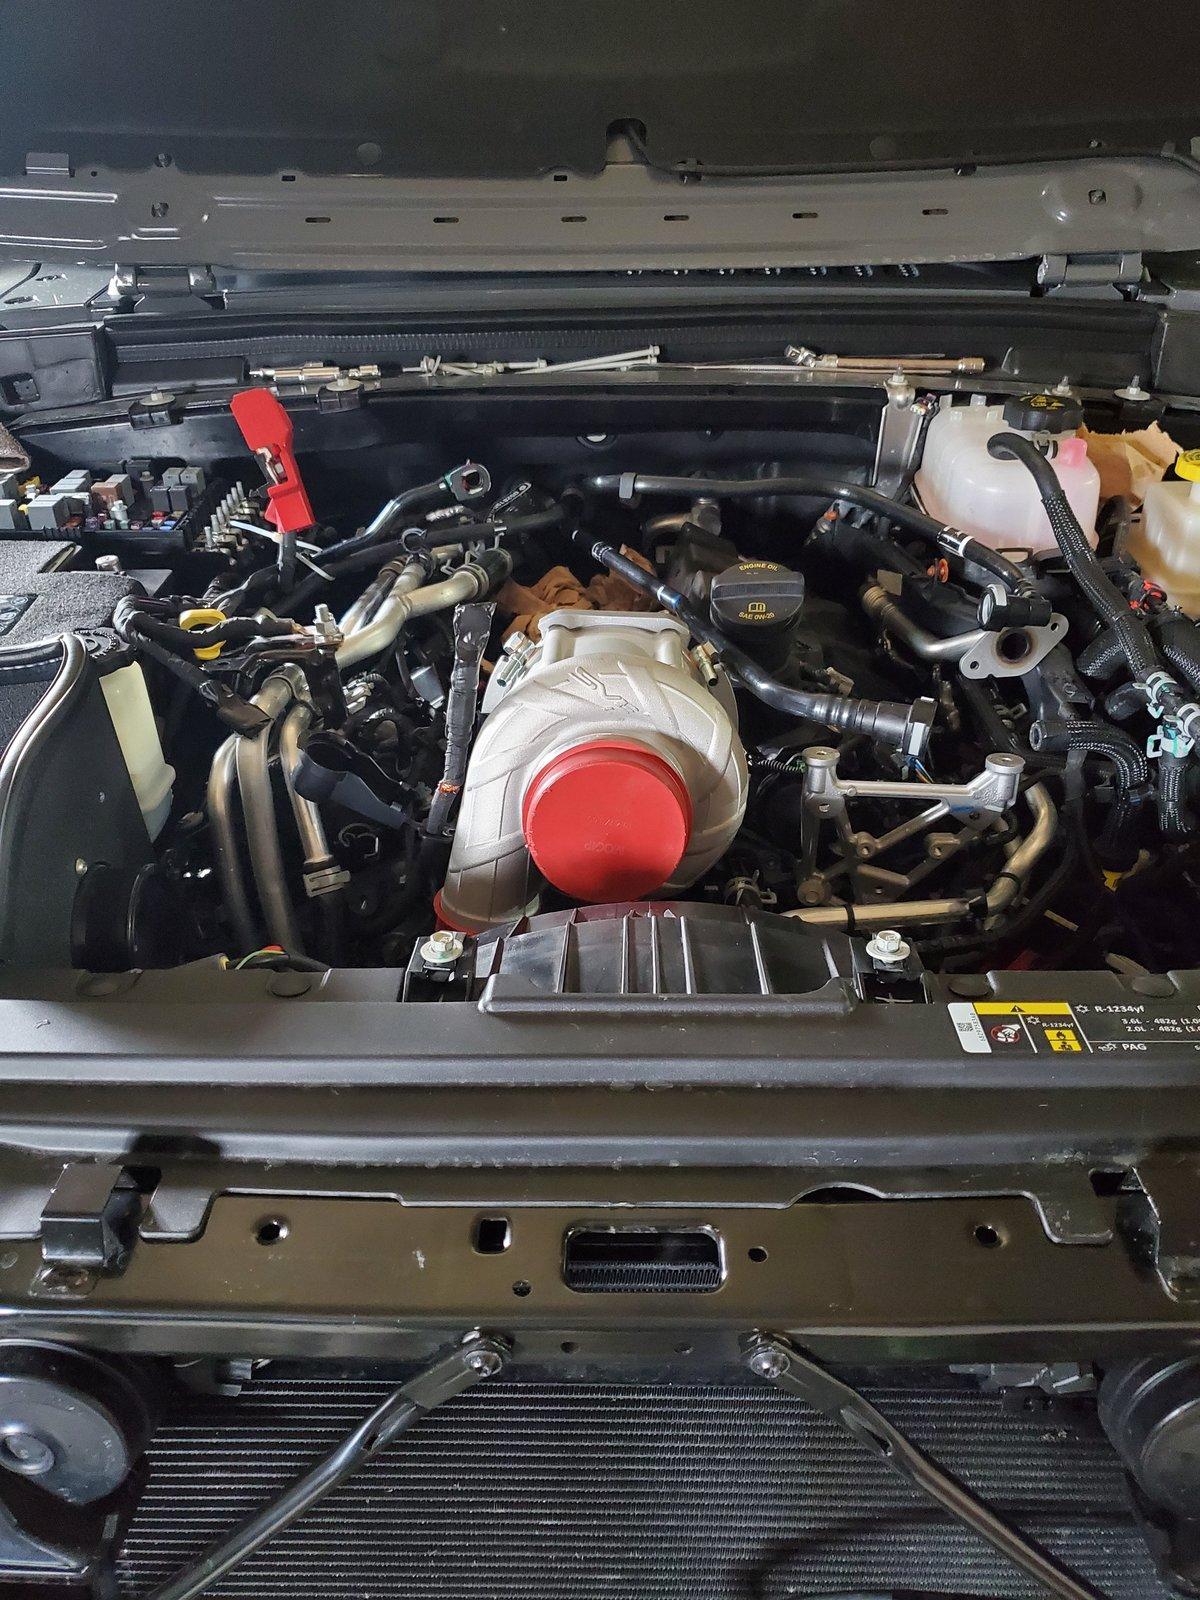
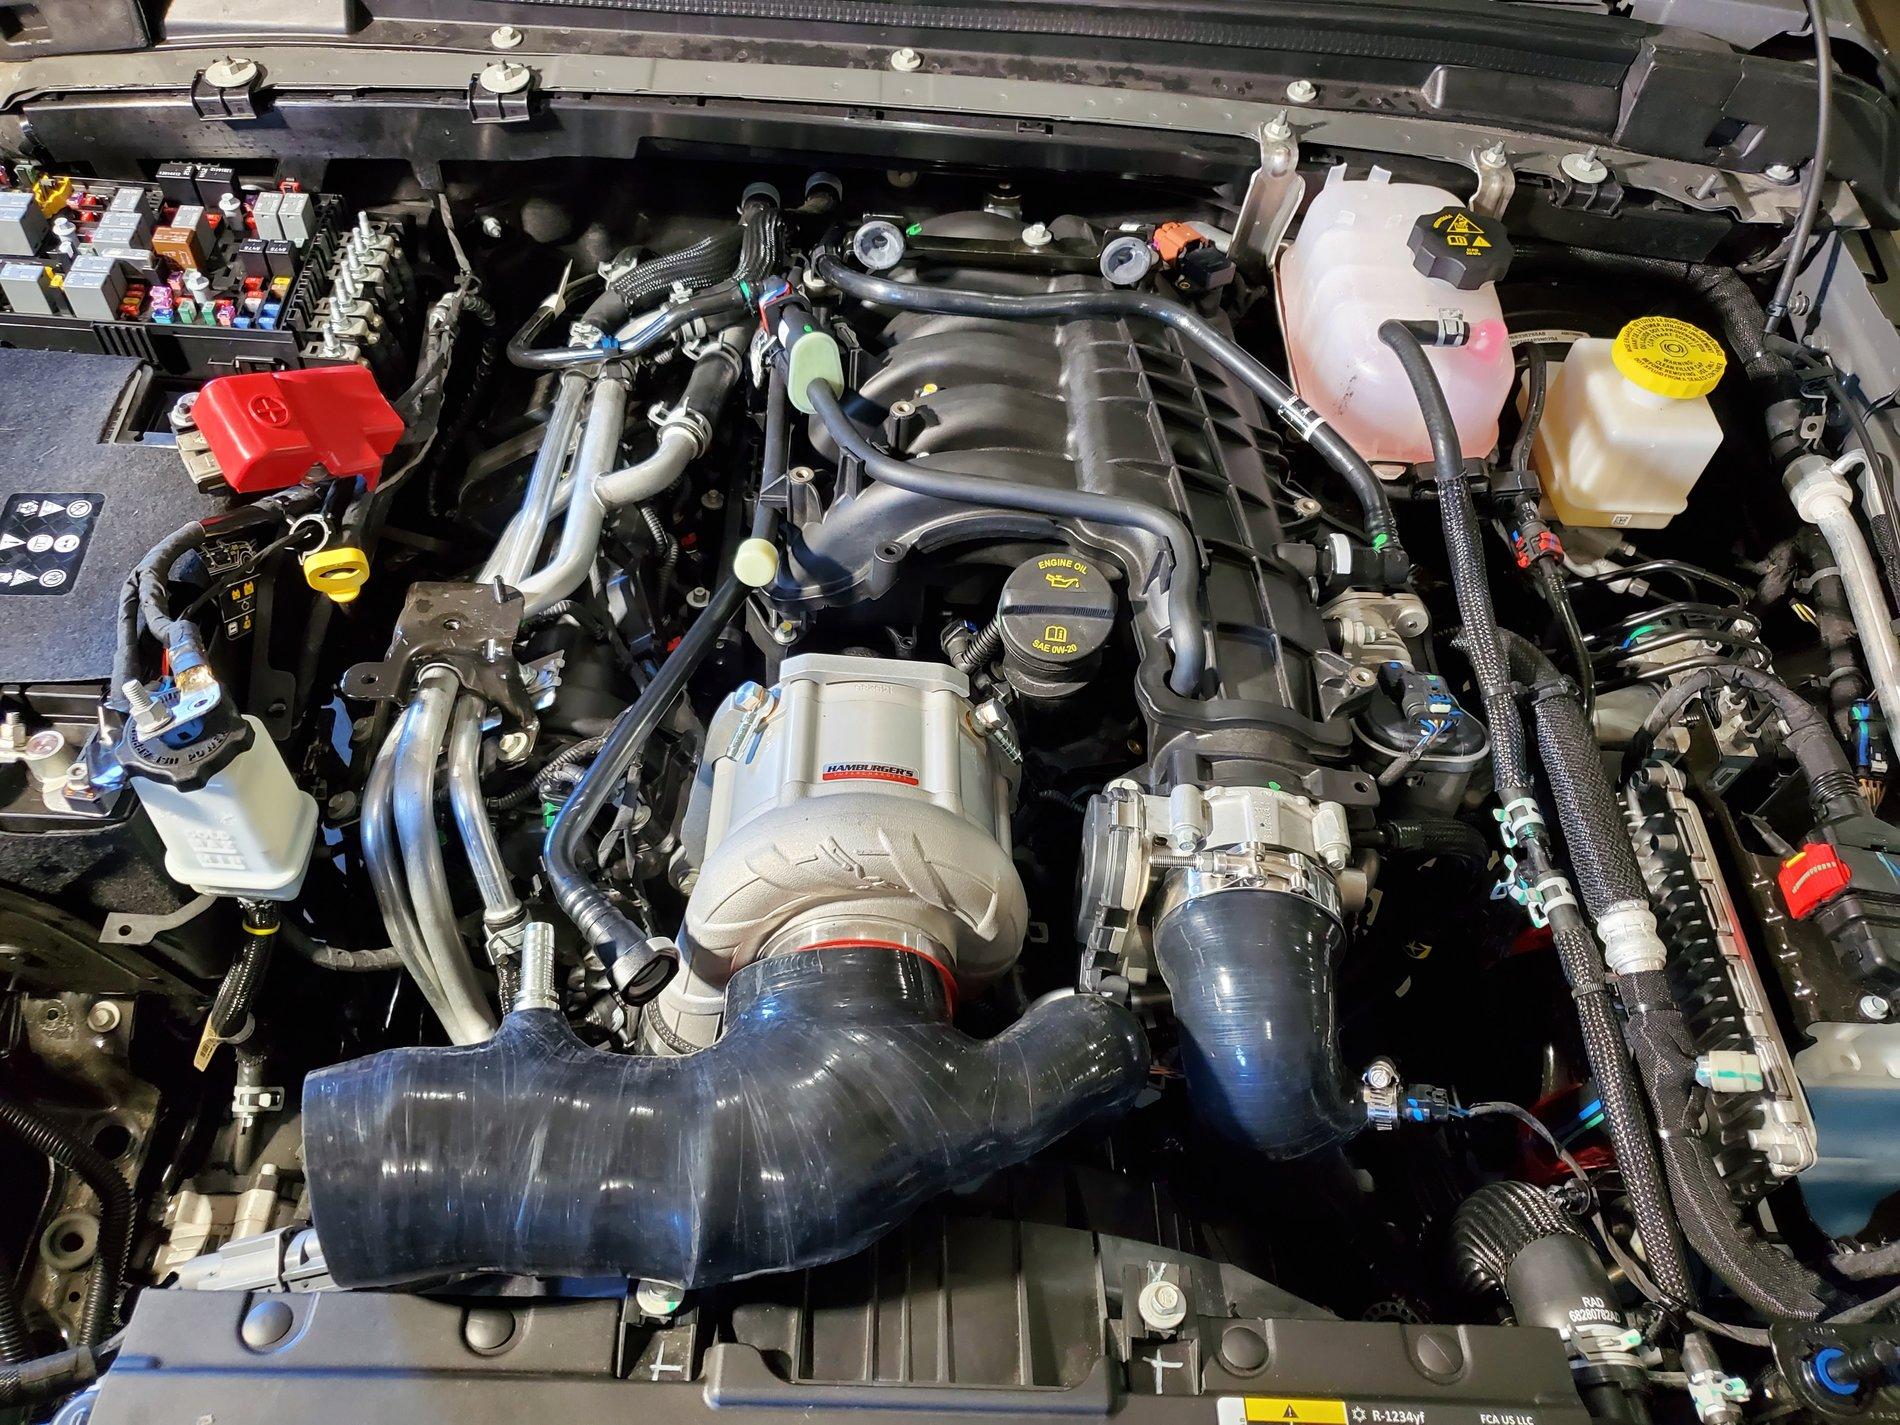
By Friday night.....I was already at a stop. I had changed out the fuel injectors, spark plugs and was re-installing the upper plenum of the intake manifold when "snap". One of the bolts broke off during torque. This was 100% my fault, the new click type torque wrench I bought....doesn't vocally click......it more nudges. I called my friends over at Gandrud Dodge and got a new lower plenum (bolt couldn't be cleanly removed) and bolt overnighted. Aside from that slight mishap, things were going ok. Once I had the intake manifold back together I started moving through the next steps pretty easily. Got the alternator relocated (very nice easy design), supercharger mounted, new alternator wiring in place, and serpentine belt installed. Now it was time to start cutting into the radiator supports. I watched the video again and read over the instructions multiple times. I personally used a small Dremel cutting tool and my air Dremel to make the cuts. I then sanded them down a bit to make sure there were no sharp edges. This part kind of sucked......I cut out as little as possible so had to cut, run the pipes, cut run the pipes until I was happy with the clearance. Once I was happy with this I installed the intercooler and charge piping. I opened up the package with the BOV to find a bunch of extra parts (nothing mentioned in the instructions). I reached out to PK to clarify and it turns out there was just extra junk in the BOV kit. Fast forward a few steps and I was installing the vacuum hose to the BOV. This step includes installing the "pill" in the vacuum line. The pill itself was almost the same size as the outside diameter of the hose. The instructions say it should just slide down but that's sn't the case. It took a solid 10-15 minutes to get the pill worked into the vacuum line a few inches.
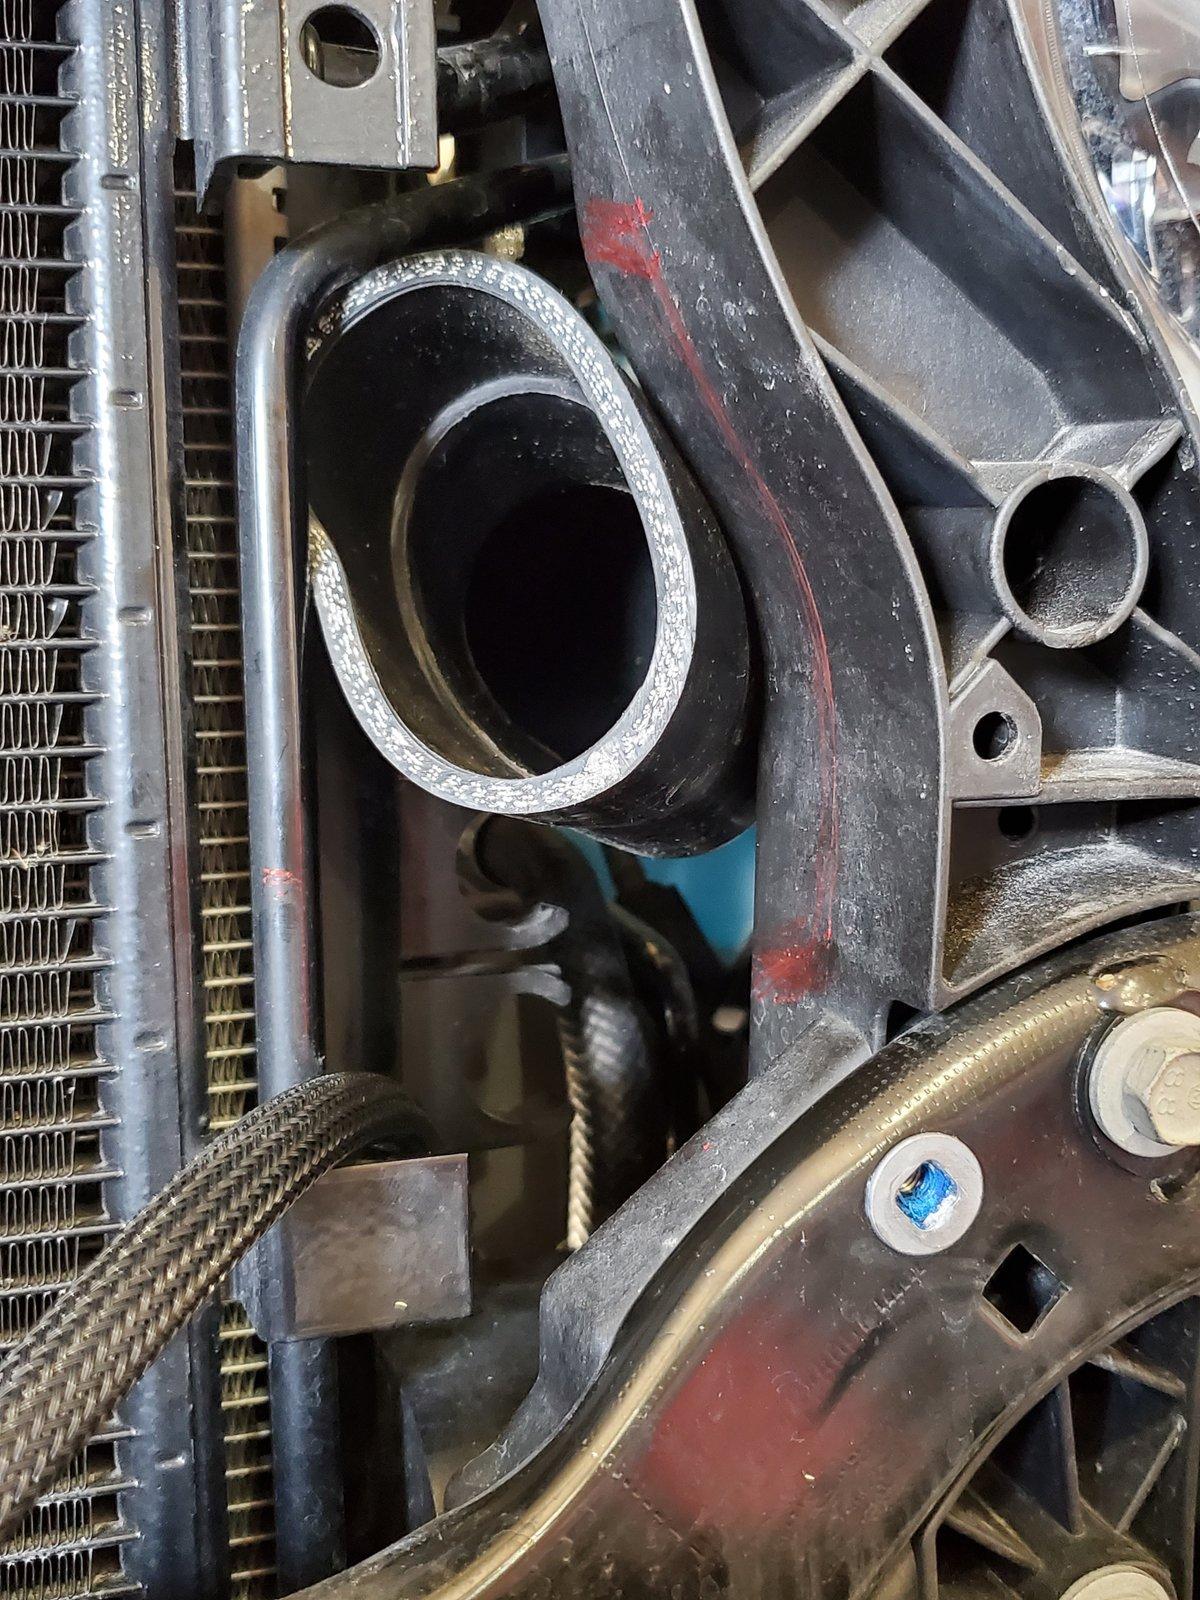
At this point I took a break from the supercharger install to add my new Warn Evo Winch and Factor 55 link. Once this was in place I moved on to the next step installing the cooling fan system. I immediately realized this was going to be a challenge because the winch bracket takes up the space the cooling fan is designed for. I was a bit sour about this part. I don't feel like to many folks throwing a supercharger on their JK, JL or JT are going to be running stock bumpers or no winch. With that being said I would think their secondary cooler fan spot should be the primary. I spent a few hours trying to figure out a secondary location that would work with the parts but couldn't come up with a solution. I watched the video and read over the instructions countless times but the pictures and video just don't do this part any justice. I reached out to the folks at Hamburgers again and got put in touch with Jon who is an engineer. We got to talking and he worked on some brackets/ instructions and helped me through this setback. During this interaction we also realized they hadn't accounted for the trailcam option (which I had) working with the intercooler placement. Jon put together instructions and parts to resolve this issue as well. Worthy of note - he helped me out and had parts shipped with in 24 hours! As soon as those parts arrived it took about 2 hours to get those few things resolved. The trailcam make the supercharger space REALLY tight....I had to cut out more radiator housing and still have some charge pipe rubbing.
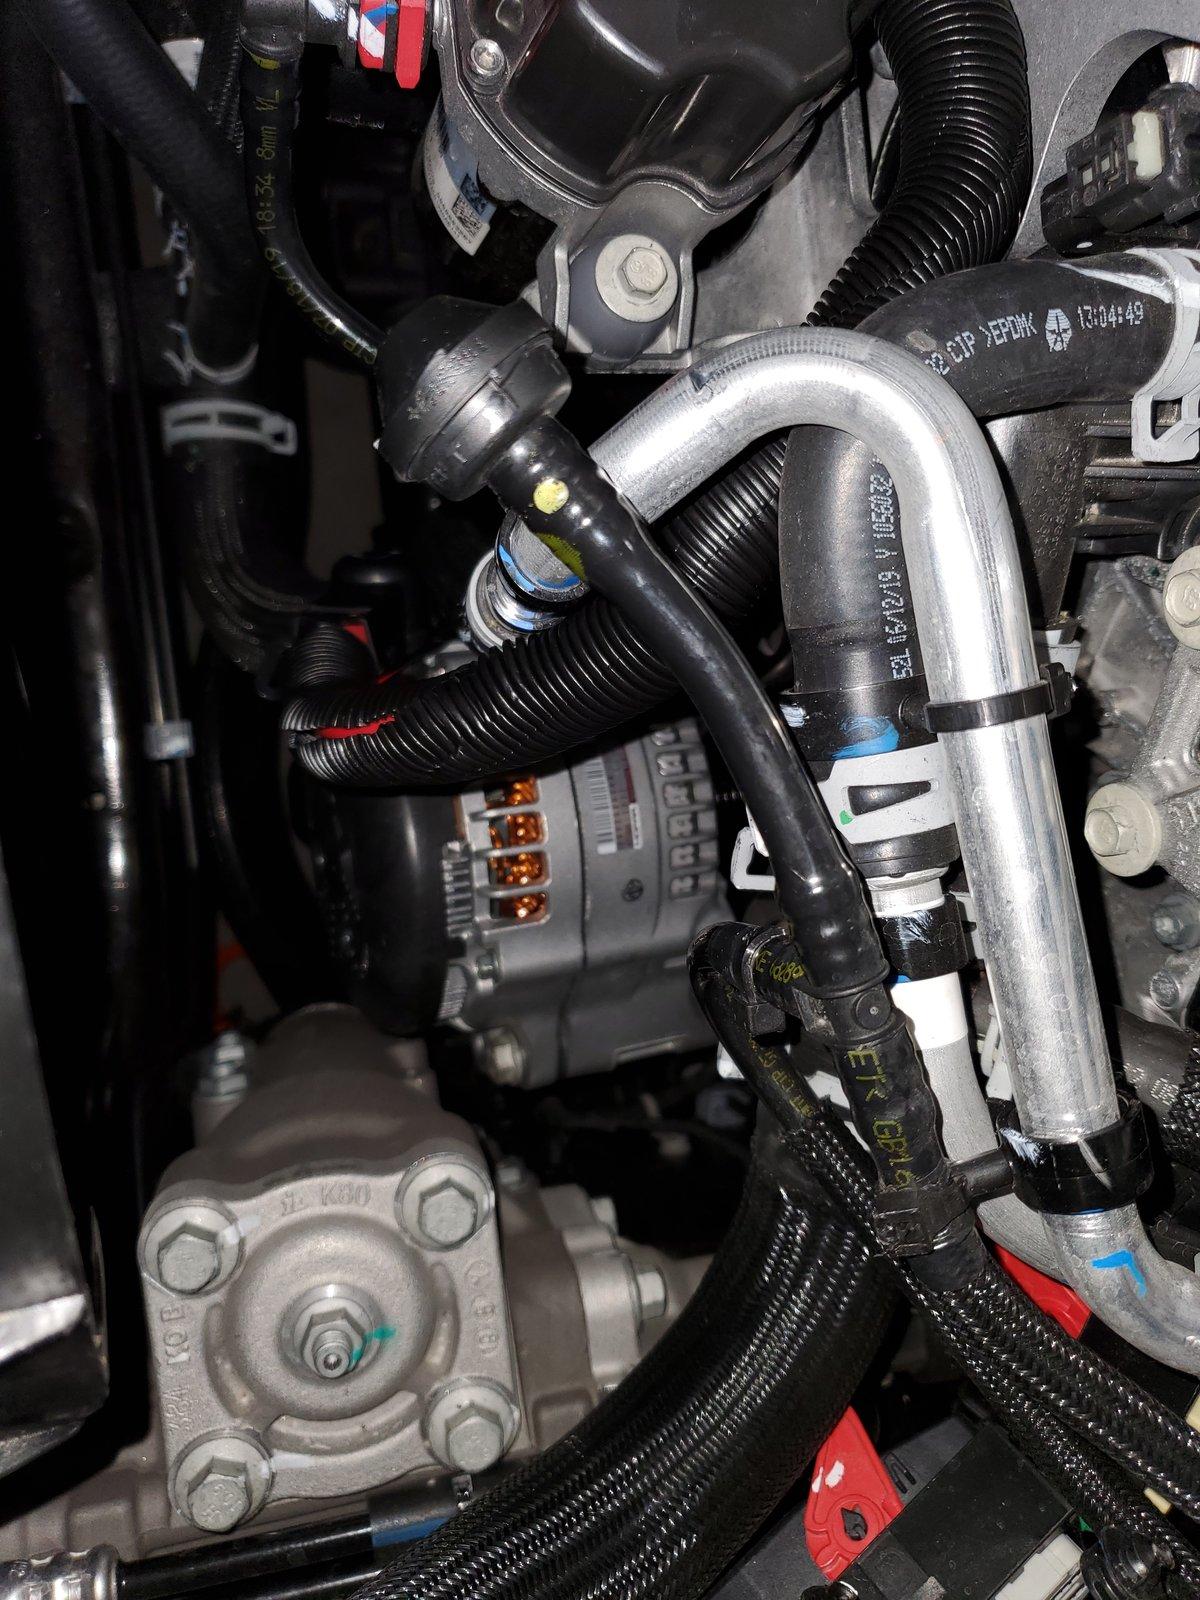
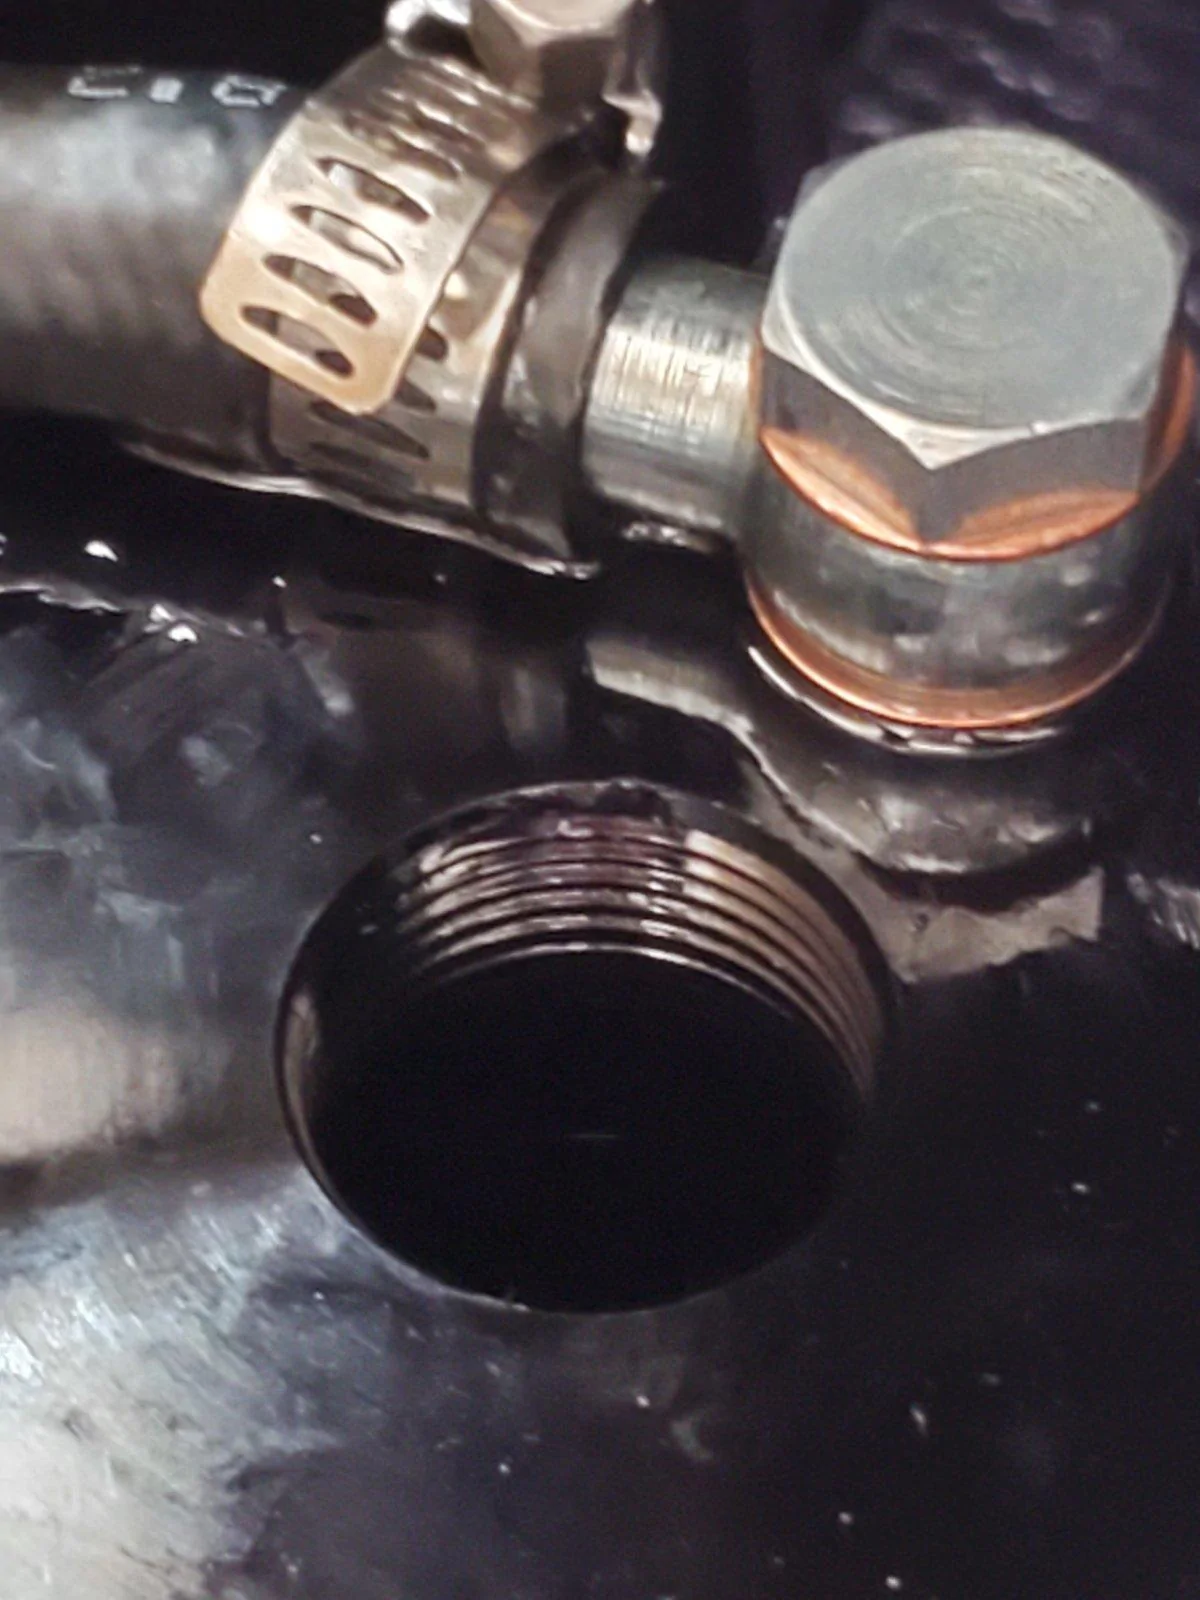
A few steps later and I am working on the install of the traction fluid reservoir. This thing is a MONDO pain in the ass. The instructions indicate mounting in a empty bolt hole on the driver side fender but as it turns out you actually need to remove a bolt and install it there. This made only a 2" difference in placement but gave it the room needed to sit down in its spot. I took the advice given by Exodus and installed all the fittings and lines together before dropping it in. At this point I was able to run all my lines, bled the traction fluid line and installed the catch can. OMG I was ready to start my truck for the first time in 2 weeks! Hopped in bumped the ignition, and the second time it started right up. I let it run for a few minutes and had no issues. At this point my wife jumped in and brought it up to 2500 RPMS for a minute while I added fluid and checked for leaks. I had a small leak coming from the top banjo fitting on my reservoir but nothing else, I was pretty happy. I tightened the clamp on that line a bit more and took it around the block.
It took a few days but I figured out the leak. The banjo fitting was sitting over the reservoir and the hose and clamp were hitting the reservoir itself preventing the banjo fitting from tightening down all the way. I fought with the reservoir a bit and got it turned allowing me to tweak the banjo fitting where the hose and fitting were no longer making contact with the top of the reservoir. During this time I developed a very small leak at the bottom of the catch can and started getting some check engine codes. I am working with Jon at Hamburger to get through these last few things and he said the check engine lights are likely because the throttle body needs to relearn. This will naturally occur over a few trip rotations or I can take it up to a shop and have the throttle body relearned.
All in all I am happy with the product and the install support. These guys were truly there 100% of the way and anytime I had a question or concern. If you are on the fence about buying this that alone should make you feel confident in your purchase. Since installing I have put on a few hundred miles and pulled my 14' trailer with my 2500 lb. Polaris Ranger. The Gladiator was not fighting to pull it, honestly I forgot I was pulling it most of the time because it didn't feel like I was starved of power. Shifting and driving are as advertised.....shifts as smoothly as stock did.
There are a few things I would recommend updating/changing:
1. Have a "tools needed/recommended" for the install. I have two Snap-On boxes full of tools, plus read over the instructions and bought anything I might need prior to starting. I still ended up making a few supply runs.
2. More detailed/corrected instructions. There were multiple parts of the instructions where some additional images and or more detail would have gone a long way for me personally. I have no doubt a dealer or shop who is doing a few of these a month would get along no problem. For the guys doing it out of his/her personal shop or garage for the first time.....it was a light on detail.
3. Noting some after install expectations would be nice. Like mentioning the throttle body needed to be flashed/relearned or mentioning check engine lights would come on while it relearns.
4. Lastly - Maryann in the office is a peach. Today I was told "I personally don’t care if I started your warranty at 1 or 3250" This was because she sent that email before seeing she had received the picture with my mileage for the warranty. Customer care this day and age is huge and I truly believe it makes/breaks companies. Jon and PK were awesome and put in the effort where it really counted. However I just couldn't let go of how rude she was over something so simple.
Anyways, thats it.......sorry it was long winded. If anyone has any questions or wants more information don't hesitate to PM or comment.


I first heard about the Hamburger Supercharger through the Exodus install and review. After watching the install (which seemed simple enough) I did some additional research and exchanged emails with PK at Hamburgers. I planned to do the install myself so the majority of my conversation with PK was:
This is my 5th Jeep, I have done plenty of my own work, lifts and otherwise. Is this something I could self install - Yes.
Do I need any crazy out of the ordinary special tools to handle the install - No.
If I install myself, is the warranty still fully valid - Yes.
I was pretty happy with everything I could find on Hamburger as a company and the 3 year 36k powertrain warranty - I was sold. I ordered placed my order on 5/2.
After placing my order I went out and pulled my ECM to send to Hamburgers. They sent a prepaid label to overnight this to them. At this point I had already read over the instructions and watched the videos which they have on their website. I ran into town and bought a few extra things (secondary shop light, ratcheting metric wrenches, inch lb. torque wrench). While I was waiting on my goods to arrive I started to pull apart the basics, removed the grill, engine cover and upper plenum of the intake manifold. I was following the instructions to a T and ran into some issues removing the upper plenum of the intake manifold. We soon realized while their instructions noted 7 bolts to remove but there are actually 8. At this point I was as far as I could go and just waiting on parts. My ECM arrived back to me on 5/7 and the supercharger kit on 5/8 (noteworthy, the UPS guy attempted to carry both large boxes at once and ended up body slamming 1 on the ground.....tiny heart attack) thankfully the boxes were very well packaged! Now I was ready to make a weekend of it!
By Friday night.....I was already at a stop. I had changed out the fuel injectors, spark plugs and was re-installing the upper plenum of the intake manifold when "snap". One of the bolts broke off during torque. This was 100% my fault, the new click type torque wrench I bought....doesn't vocally click......it more nudges. I called my friends over at Gandrud Dodge and got a new lower plenum (bolt couldn't be cleanly removed) and bolt overnighted. Aside from that slight mishap, things were going ok. Once I had the intake manifold back together I started moving through the next steps pretty easily. Got the alternator relocated (very nice easy design), supercharger mounted, new alternator wiring in place, and serpentine belt installed. Now it was time to start cutting into the radiator supports. I watched the video again and read over the instructions multiple times. I personally used a small Dremel cutting tool and my air Dremel to make the cuts. I then sanded them down a bit to make sure there were no sharp edges. This part kind of sucked......I cut out as little as possible so had to cut, run the pipes, cut run the pipes until I was happy with the clearance. Once I was happy with this I installed the intercooler and charge piping. I opened up the package with the BOV to find a bunch of extra parts (nothing mentioned in the instructions). I reached out to PK to clarify and it turns out there was just extra junk in the BOV kit. Fast forward a few steps and I was installing the vacuum hose to the BOV. This step includes installing the "pill" in the vacuum line. The pill itself was almost the same size as the outside diameter of the hose. The instructions say it should just slide down but that's sn't the case. It took a solid 10-15 minutes to get the pill worked into the vacuum line a few inches.
At this point I took a break from the supercharger install to add my new Warn Evo Winch and Factor 55 link. Once this was in place I moved on to the next step installing the cooling fan system. I immediately realized this was going to be a challenge because the winch bracket takes up the space the cooling fan is designed for. I was a bit sour about this part. I don't feel like to many folks throwing a supercharger on their JK, JL or JT are going to be running stock bumpers or no winch. With that being said I would think their secondary cooler fan spot should be the primary. I spent a few hours trying to figure out a secondary location that would work with the parts but couldn't come up with a solution. I watched the video and read over the instructions countless times but the pictures and video just don't do this part any justice. I reached out to the folks at Hamburgers again and got put in touch with Jon who is an engineer. We got to talking and he worked on some brackets/ instructions and helped me through this setback. During this interaction we also realized they hadn't accounted for the trailcam option (which I had) working with the intercooler placement. Jon put together instructions and parts to resolve this issue as well. Worthy of note - he helped me out and had parts shipped with in 24 hours! As soon as those parts arrived it took about 2 hours to get those few things resolved. The trailcam make the supercharger space REALLY tight....I had to cut out more radiator housing and still have some charge pipe rubbing.
A few steps later and I am working on the install of the traction fluid reservoir. This thing is a MONDO pain in the ass. The instructions indicate mounting in a empty bolt hole on the driver side fender but as it turns out you actually need to remove a bolt and install it there. This made only a 2" difference in placement but gave it the room needed to sit down in its spot. I took the advice given by Exodus and installed all the fittings and lines together before dropping it in. At this point I was able to run all my lines, bled the traction fluid line and installed the catch can. OMG I was ready to start my truck for the first time in 2 weeks! Hopped in bumped the ignition, and the second time it started right up. I let it run for a few minutes and had no issues. At this point my wife jumped in and brought it up to 2500 RPMS for a minute while I added fluid and checked for leaks. I had a small leak coming from the top banjo fitting on my reservoir but nothing else, I was pretty happy. I tightened the clamp on that line a bit more and took it around the block.
It took a few days but I figured out the leak. The banjo fitting was sitting over the reservoir and the hose and clamp were hitting the reservoir itself preventing the banjo fitting from tightening down all the way. I fought with the reservoir a bit and got it turned allowing me to tweak the banjo fitting where the hose and fitting were no longer making contact with the top of the reservoir. During this time I developed a very small leak at the bottom of the catch can and started getting some check engine codes. I am working with Jon at Hamburger to get through these last few things and he said the check engine lights are likely because the throttle body needs to relearn. This will naturally occur over a few trip rotations or I can take it up to a shop and have the throttle body relearned.
All in all I am happy with the product and the install support. These guys were truly there 100% of the way and anytime I had a question or concern. If you are on the fence about buying this that alone should make you feel confident in your purchase. Since installing I have put on a few hundred miles and pulled my 14' trailer with my 2500 lb. Polaris Ranger. The Gladiator was not fighting to pull it, honestly I forgot I was pulling it most of the time because it didn't feel like I was starved of power. Shifting and driving are as advertised.....shifts as smoothly as stock did.
There are a few things I would recommend updating/changing:
1. Have a "tools needed/recommended" for the install. I have two Snap-On boxes full of tools, plus read over the instructions and bought anything I might need prior to starting. I still ended up making a few supply runs.
2. More detailed/corrected instructions. There were multiple parts of the instructions where some additional images and or more detail would have gone a long way for me personally. I have no doubt a dealer or shop who is doing a few of these a month would get along no problem. For the guys doing it out of his/her personal shop or garage for the first time.....it was a light on detail.
3. Noting some after install expectations would be nice. Like mentioning the throttle body needed to be flashed/relearned or mentioning check engine lights would come on while it relearns.
4. Lastly - Maryann in the office is a peach. Today I was told "I personally don’t care if I started your warranty at 1 or 3250" This was because she sent that email before seeing she had received the picture with my mileage for the warranty. Customer care this day and age is huge and I truly believe it makes/breaks companies. Jon and PK were awesome and put in the effort where it really counted. However I just couldn't let go of how rude she was over something so simple.
Anyways, thats it.......sorry it was long winded. If anyone has any questions or wants more information don't hesitate to PM or comment.
Sponsored