roth_nj
Active Member
so im in the middle of trying to install this right now and the square part of the shaft of the bolt wont fit through the eye on the shock?
got fox 985-24-173?
got fox 985-24-173?
Sponsored
You need to order 6510774AAso im in the middle of trying to install this right now and the square part of the shaft of the bolt wont fit through the eye on the shock?
got fox 985-24-173?
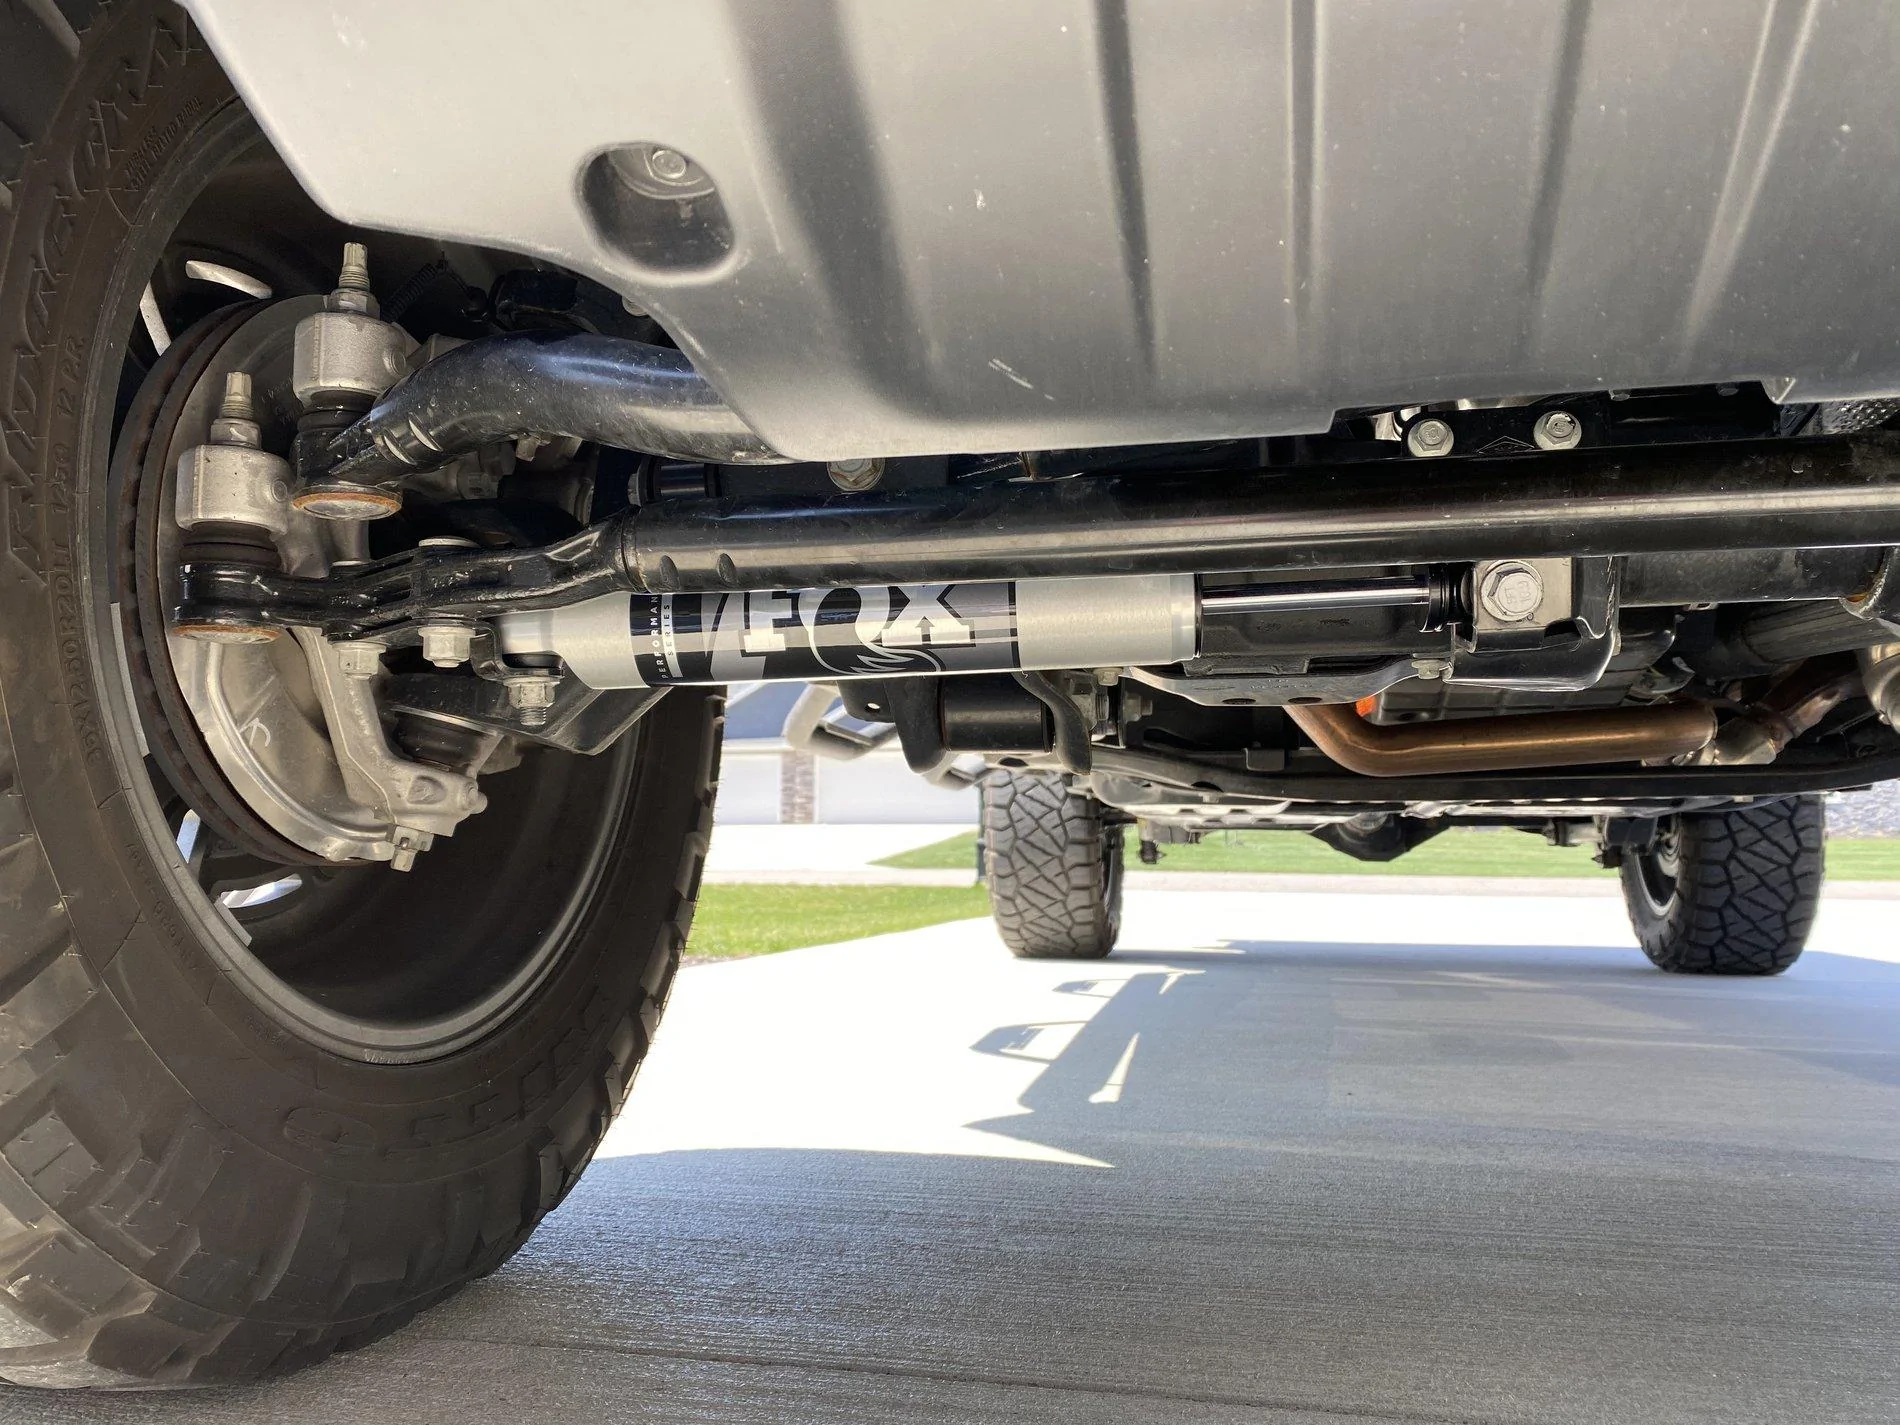
@Clayton Off Road or others in this thread -Good news!
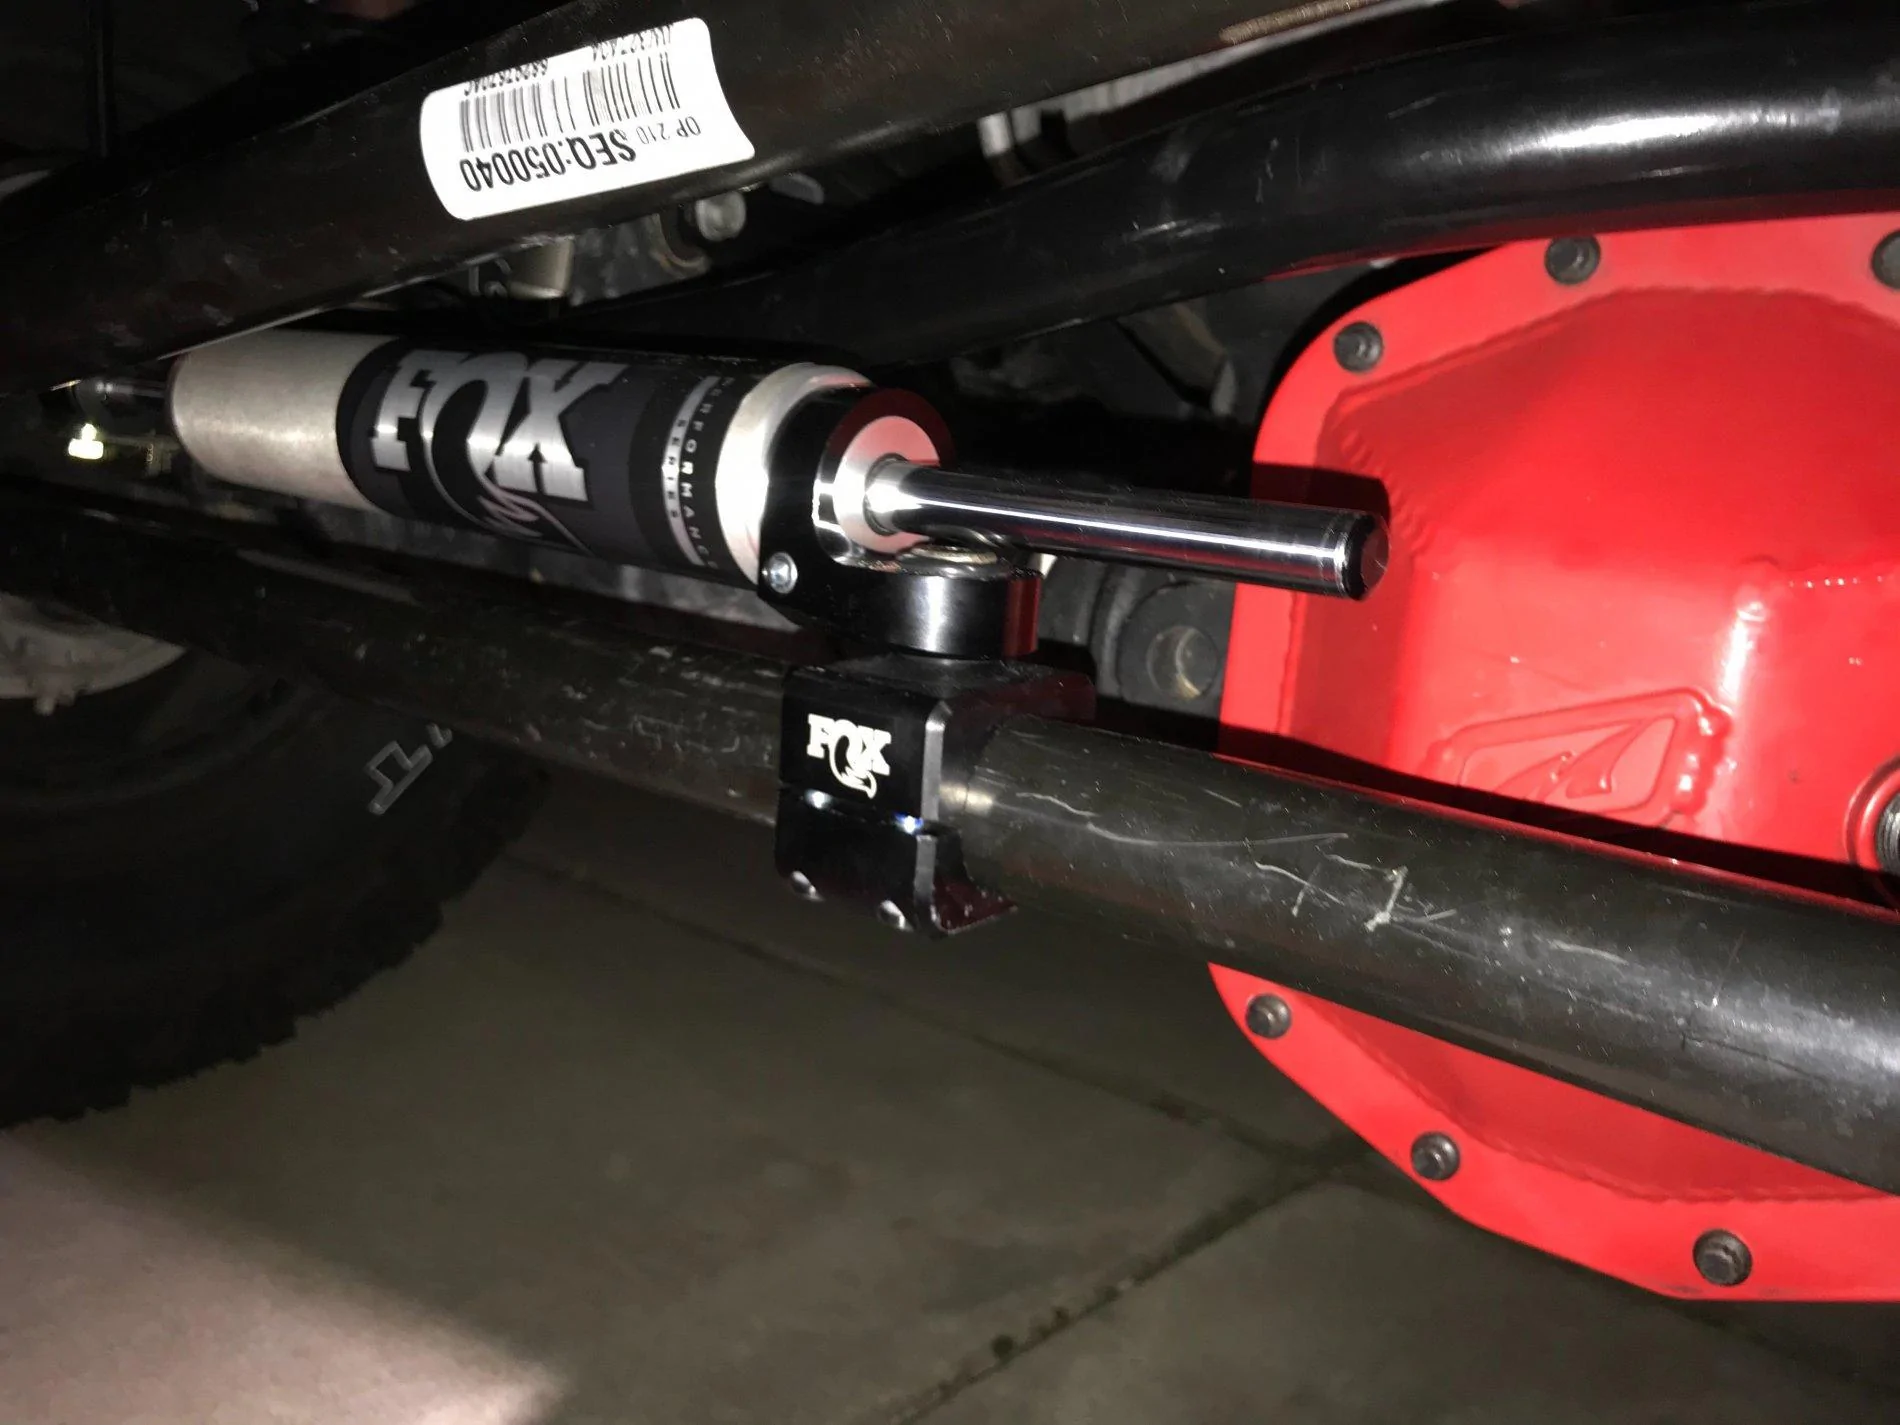
We just tried it out with the steering stabilizer model you have, and it actually does work with just our relocation bracket! I'll leave the product link and some pictures below.
https://www.claytonoffroad.com/prod...bilizer-relocation-bracket-2007-2020-jk-jl-jt


I was told to torque it down to 59 for/lbs??I was reading through the threads the other night and came across a thread regarding this stabilizer. I had written off my JTR steering wobble as just another "Jeep thing". Boy was I wrong. Before this mod, the car would randomly sway on its own. Dart side to side, and I would have to make constant corrections. It was fatiguing. This has made a significant difference! tracks straight, no wobble, no sway, steering feels much tighter too! Note, my car is a stock Rubicon. Those of you with bigger tires, lift, etc will have other gremlins to dial out.
I'll try to do a little writeup for those interested.
I ordered this off amazon:
https://www.amazon.com/gp/product/B07MLB2HBQ/ref=ppx_yo_dt_b_asin_title_o01_s00?ie=UTF8&psc=1
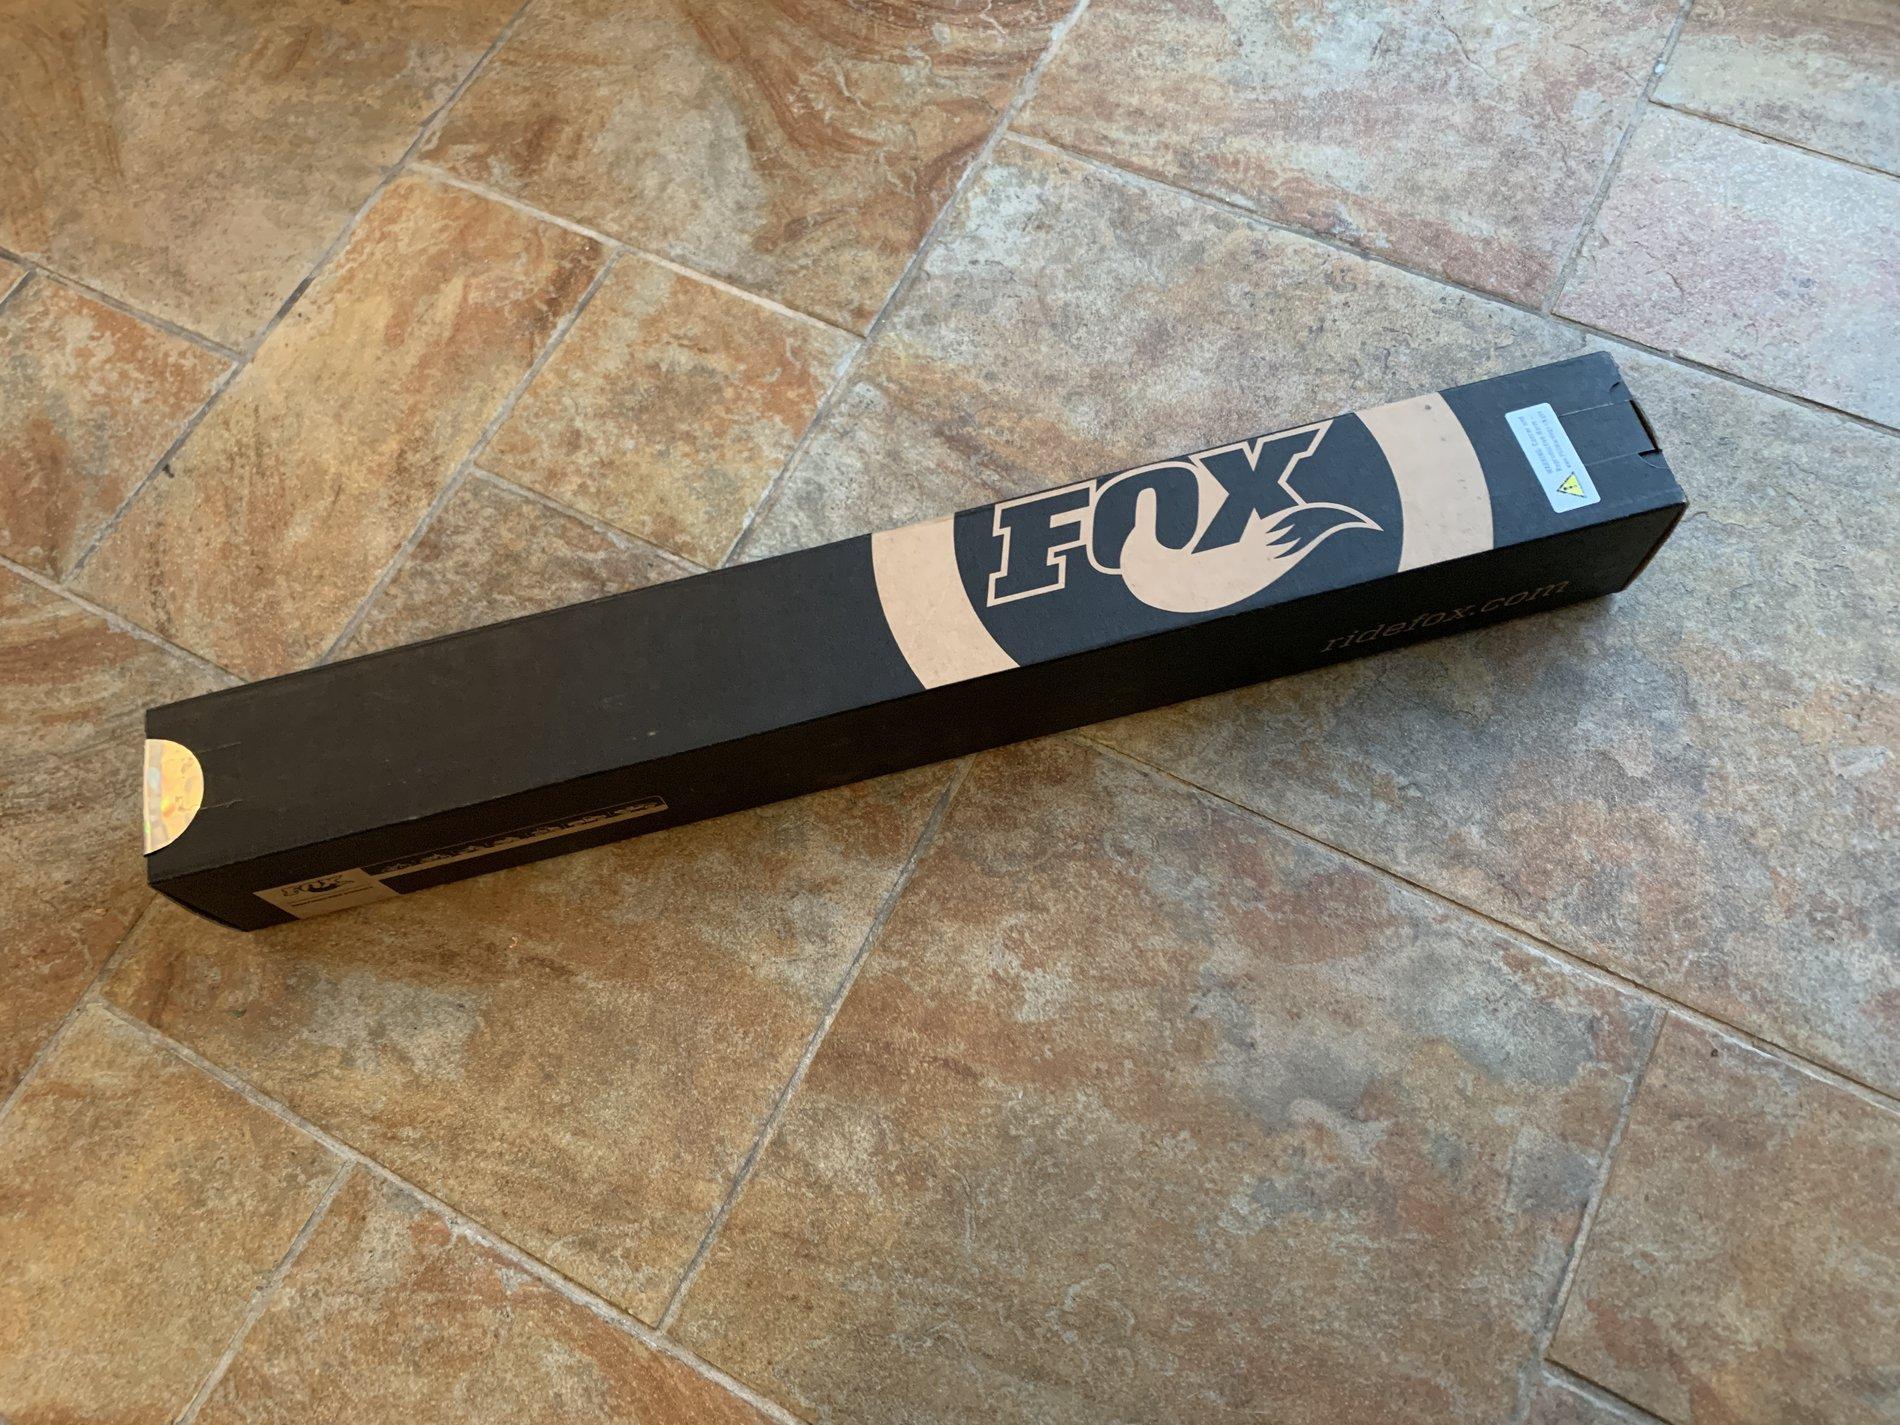
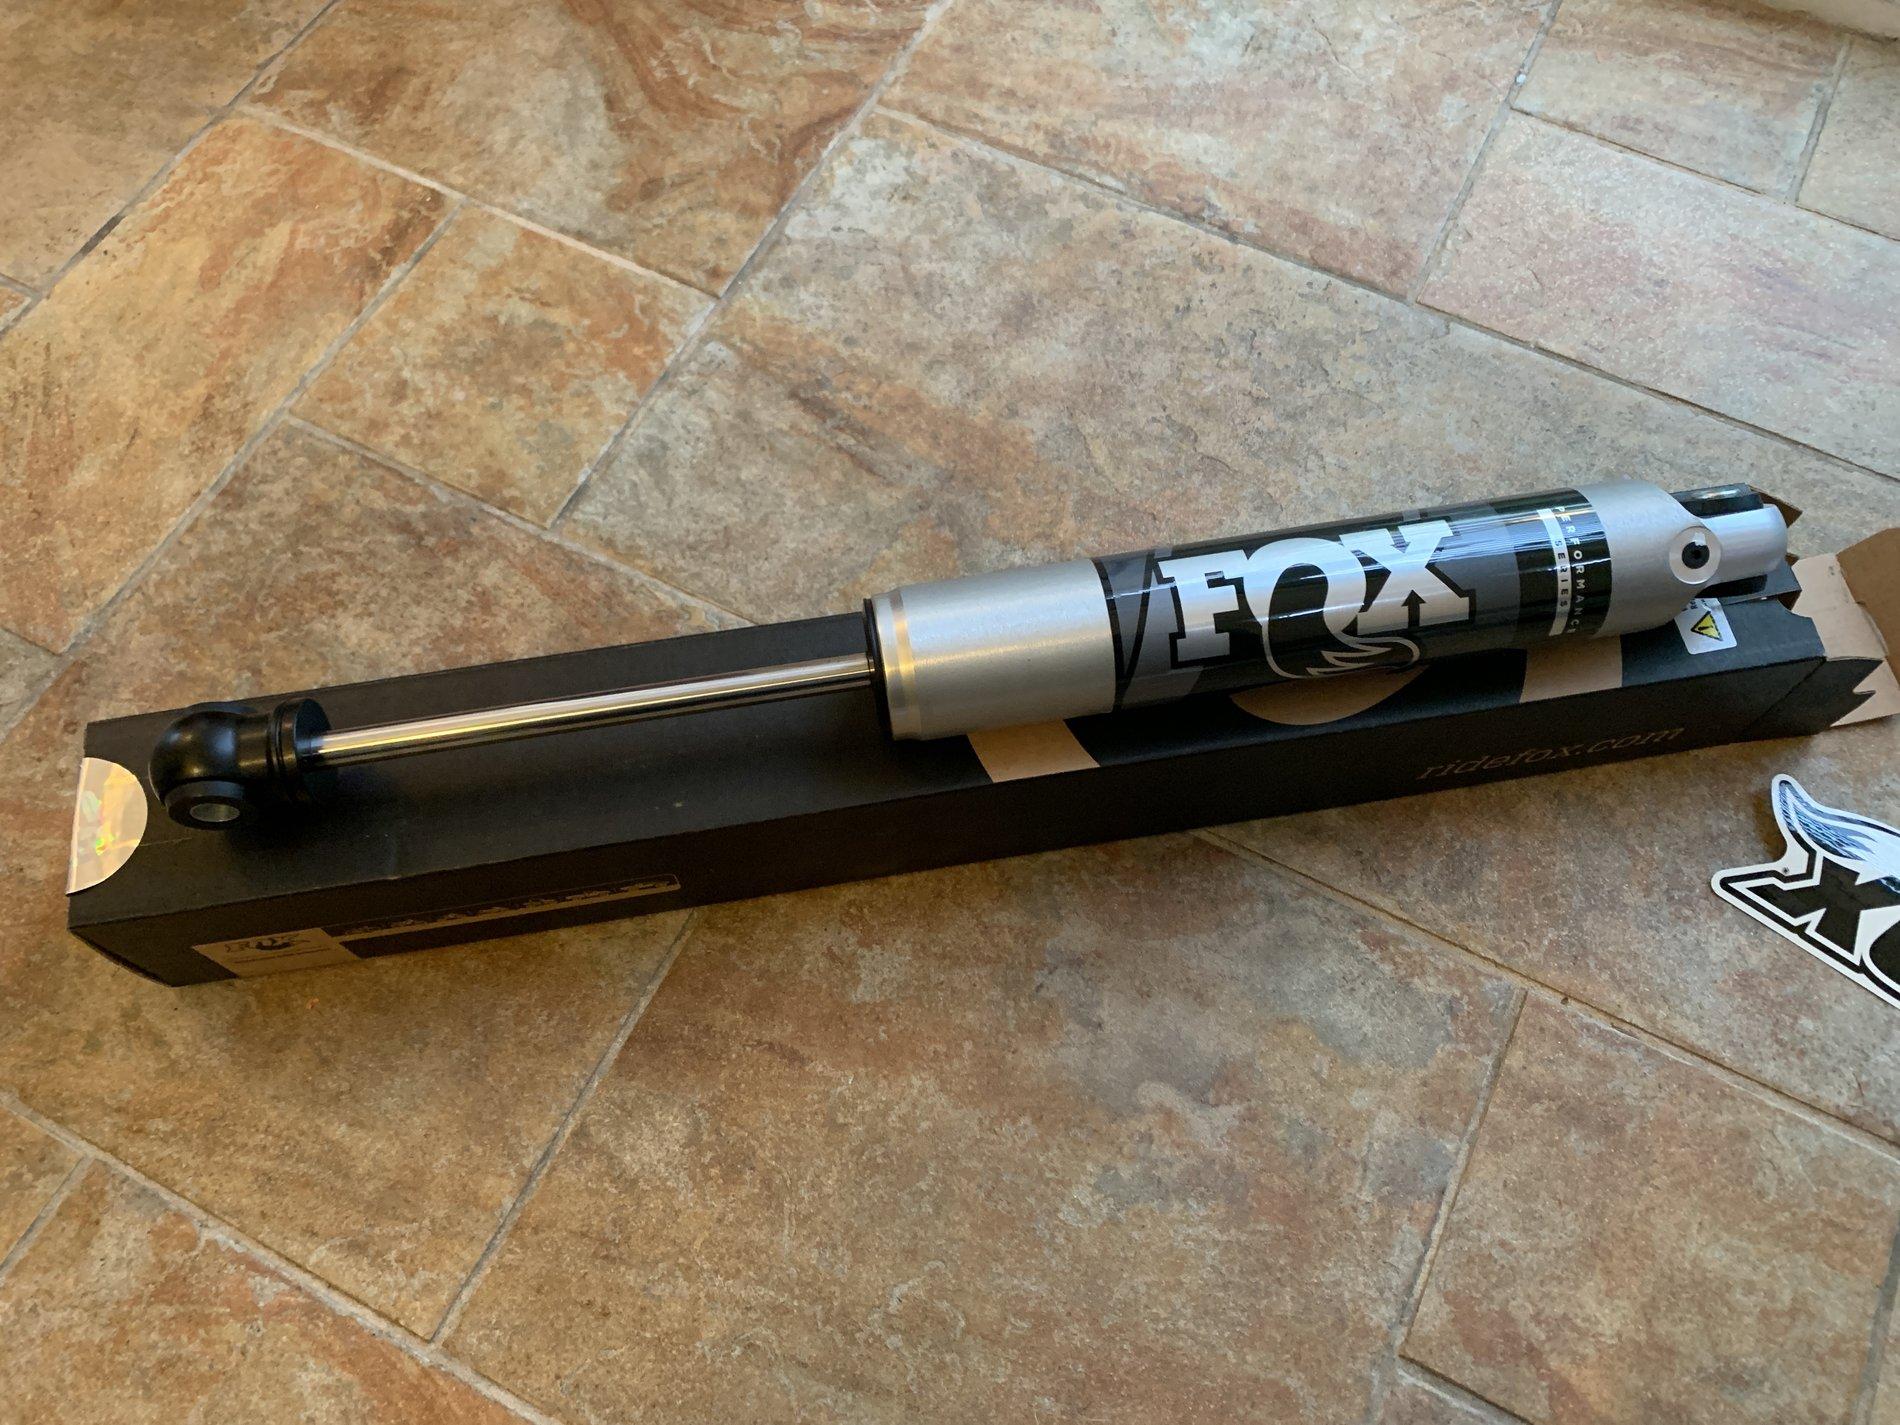
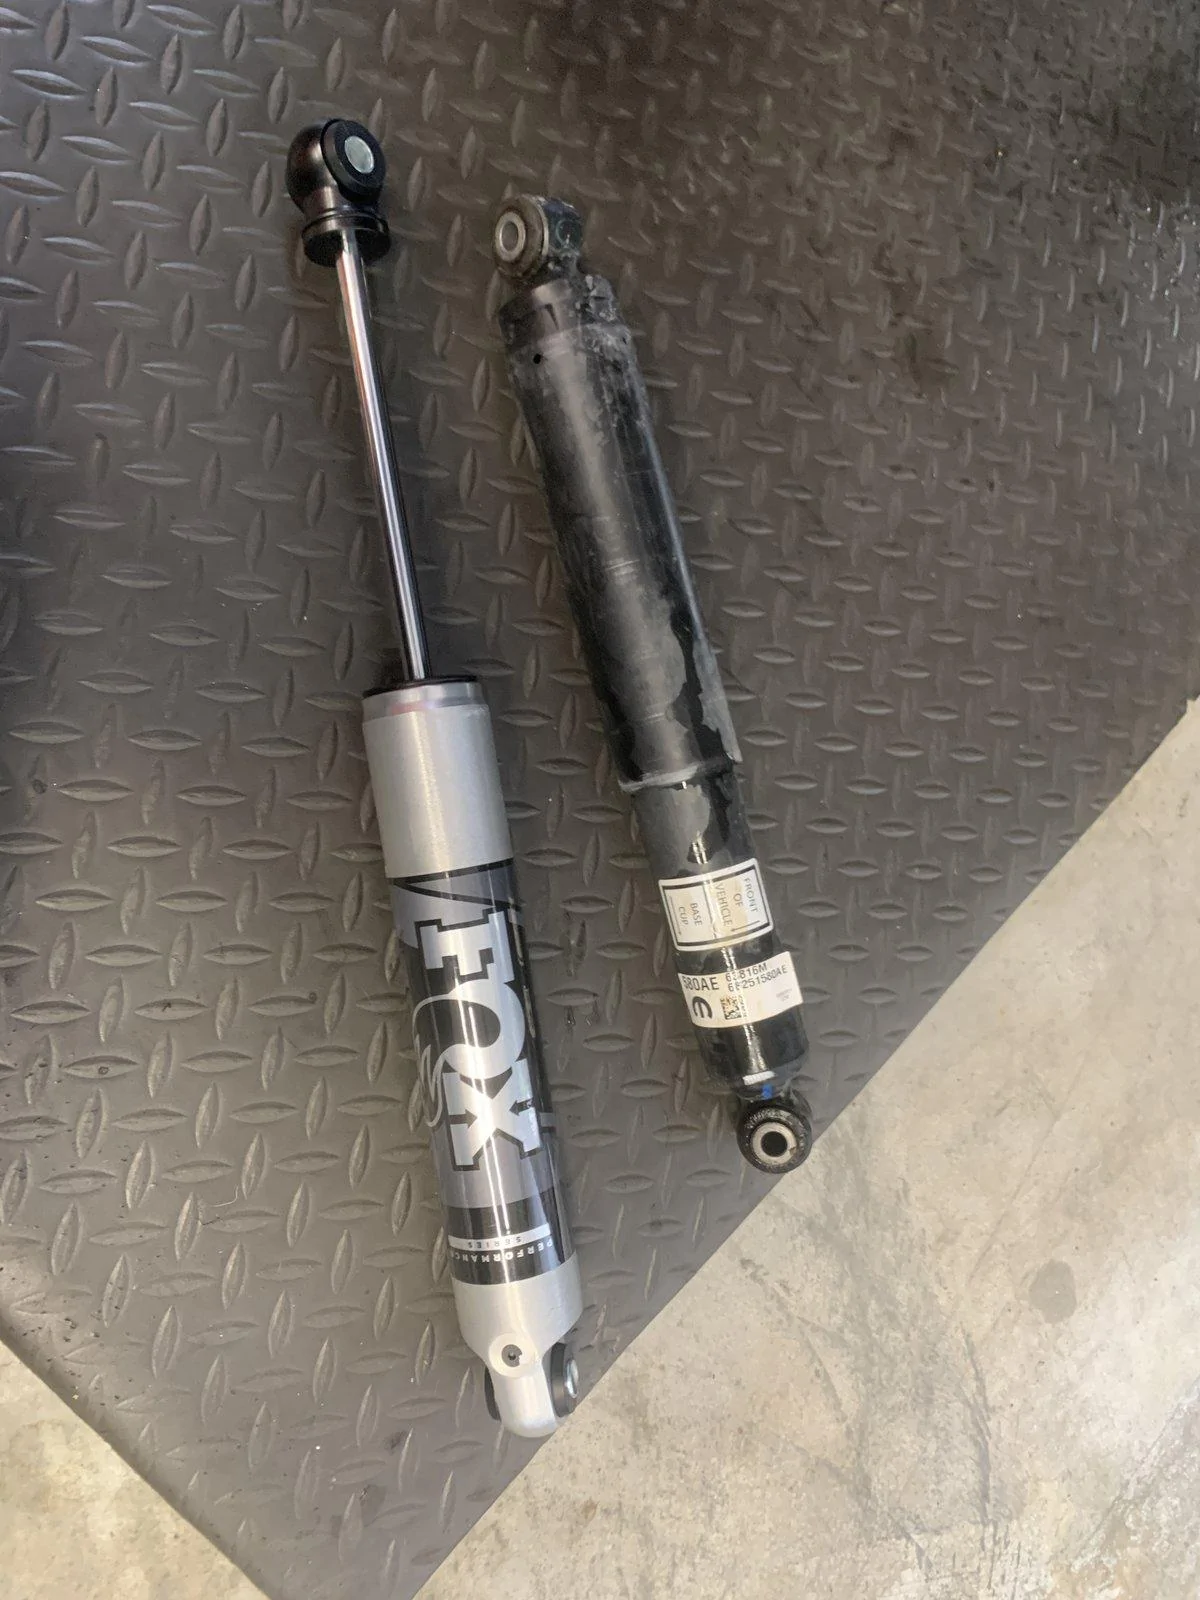
Part number: Fox 98524173 2.0. Theres a cheaper 1.0 version but I went with the 2.0.
Price: 5/5. Was under $200 for such a big difference. I know this is subjective but it was a good deal IMO
Appearance/quality: 5/5. machined aluminum with a brushed finish. Solid ends and rubber bushings with metal sleeves.
Installation: 5/5. Took about 5 minutes. It took longer for my compressor to fill up than the entire install, I ended up using hand tools for it.
Tools required: 19mm socket and driver, torque wrench, large screw driver, rubber mallet (optional)
Installation Instructions:
1. Park your jeep and pull the E-Brake.
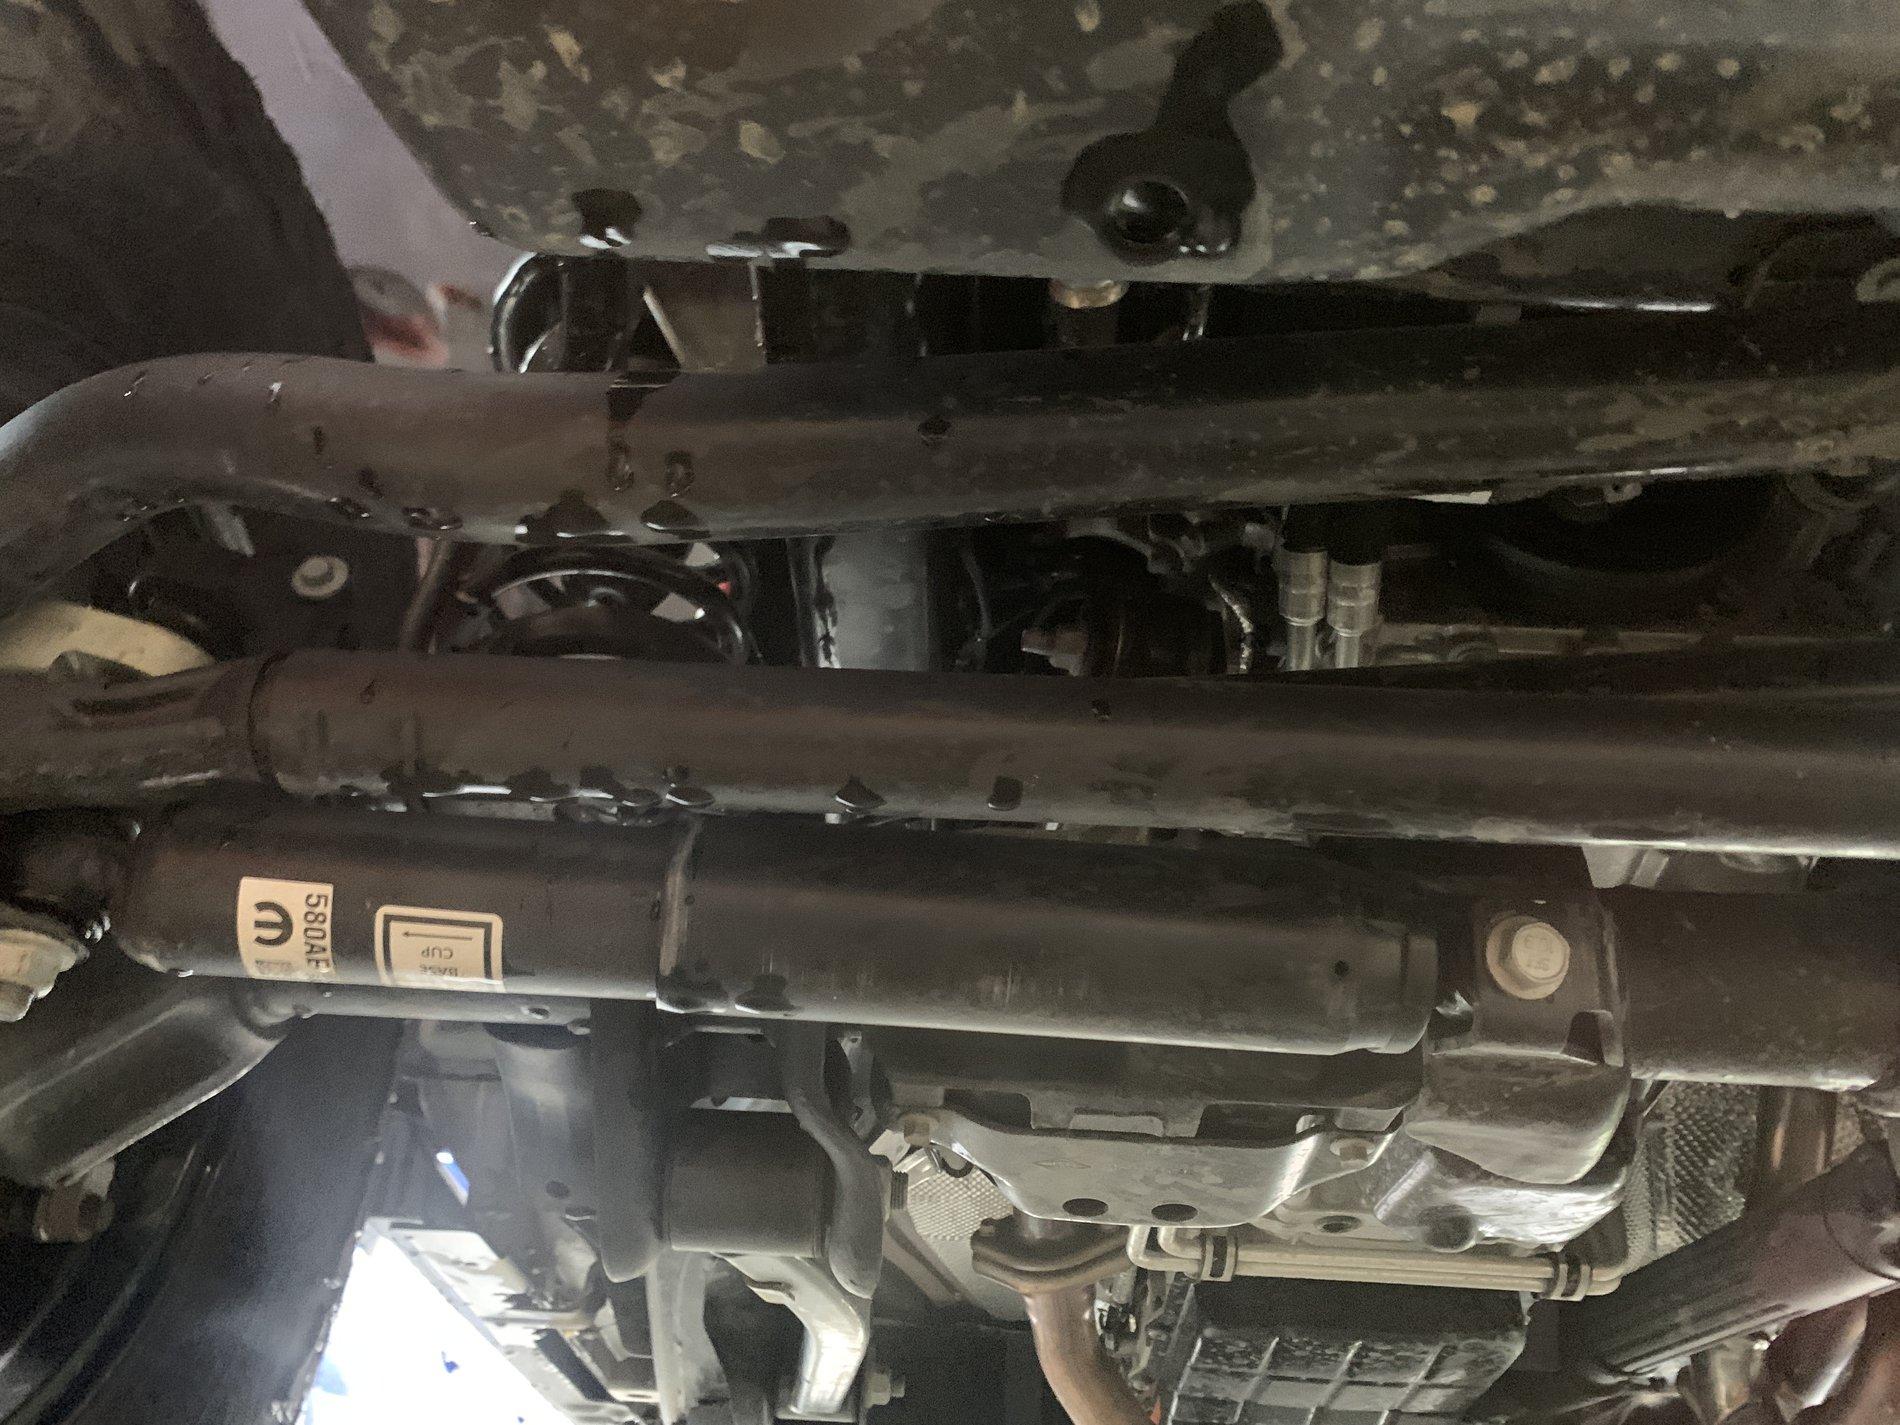
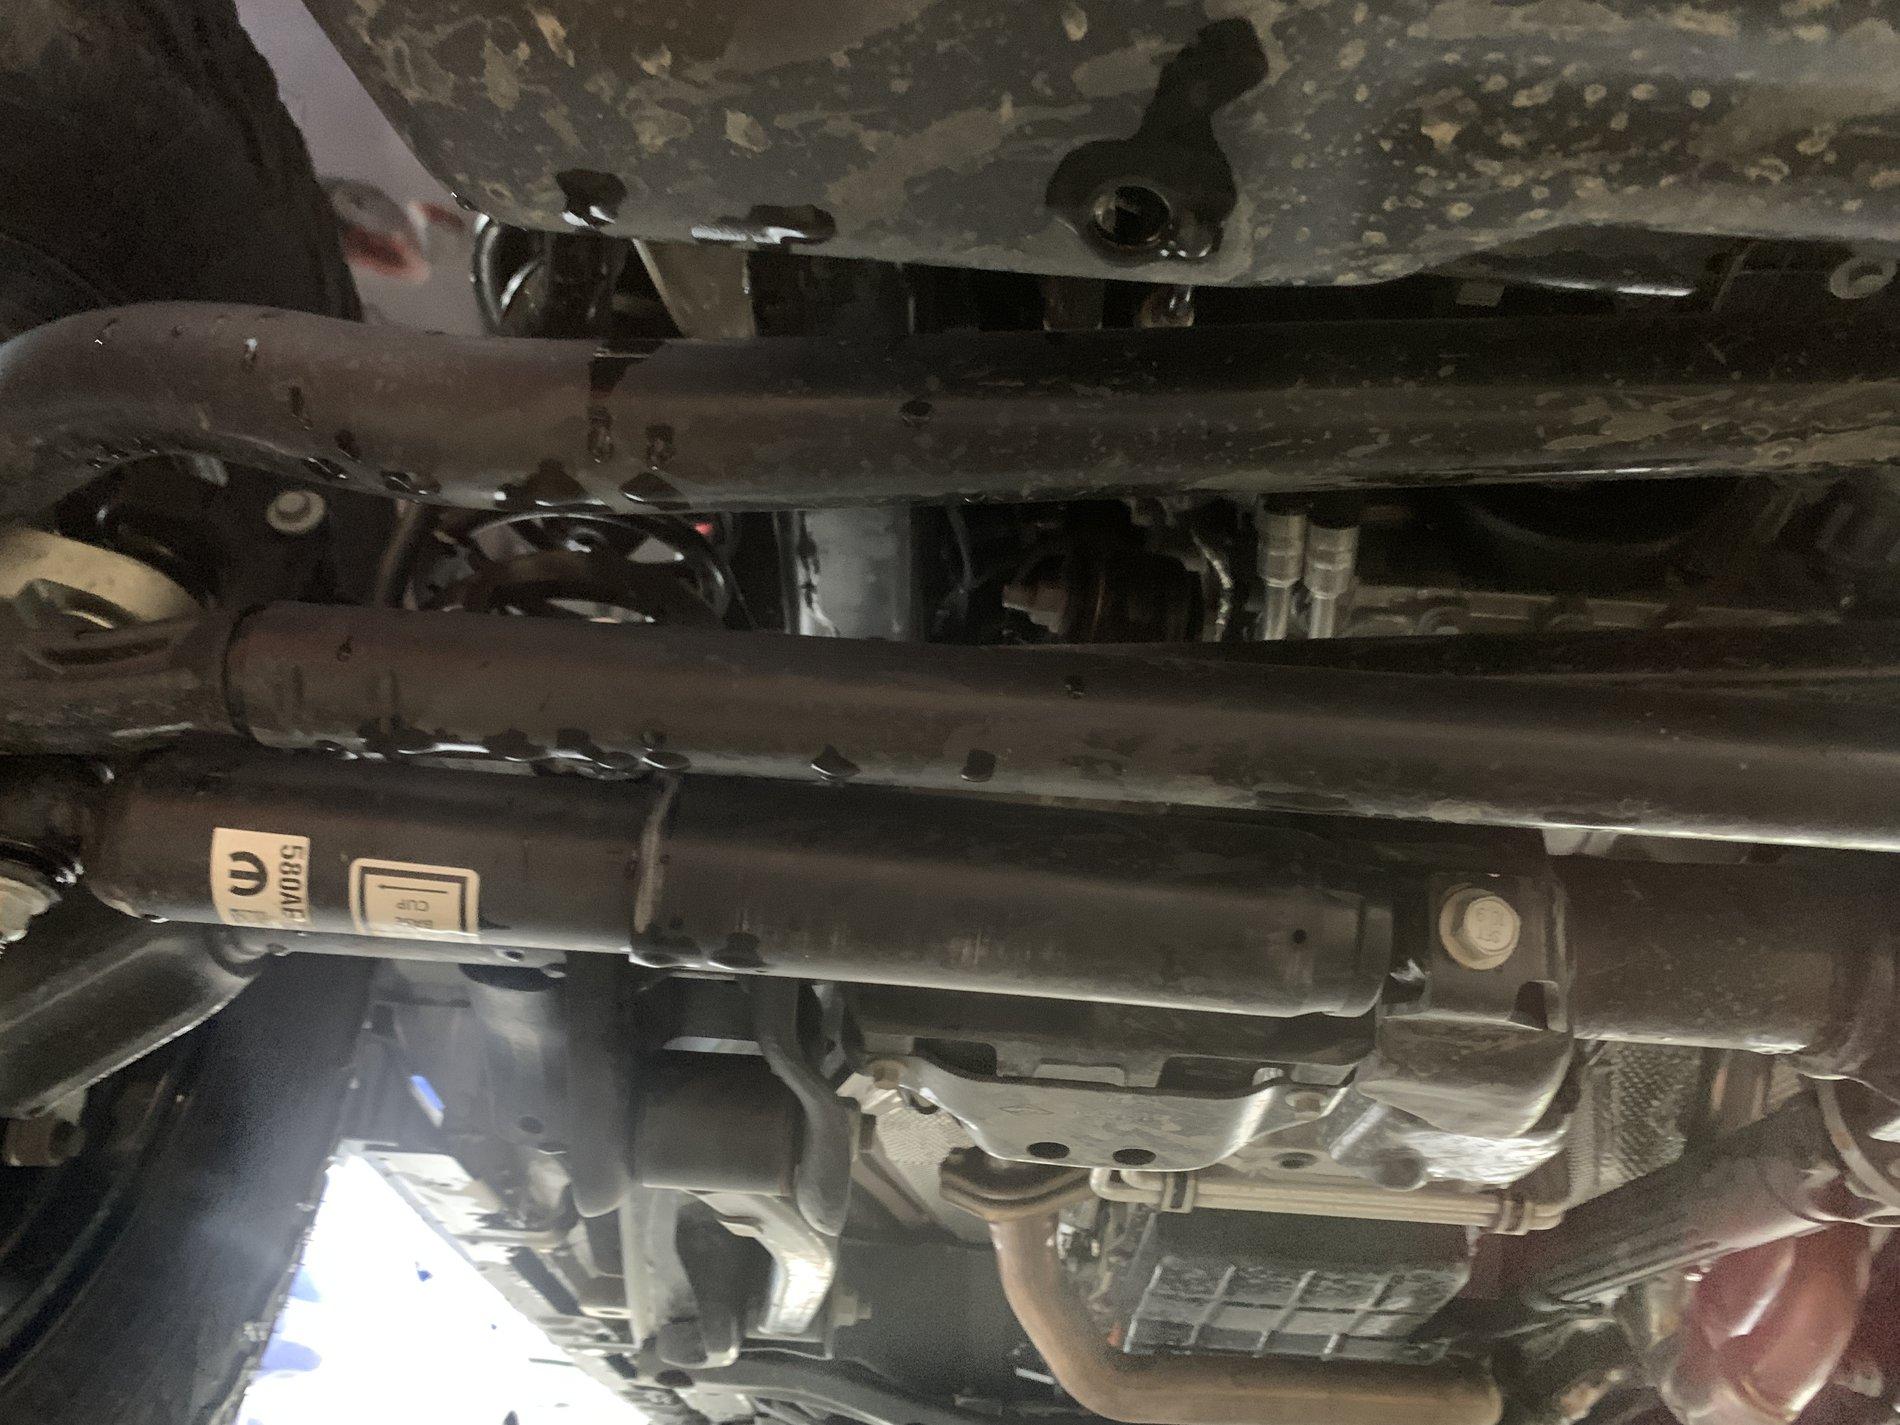
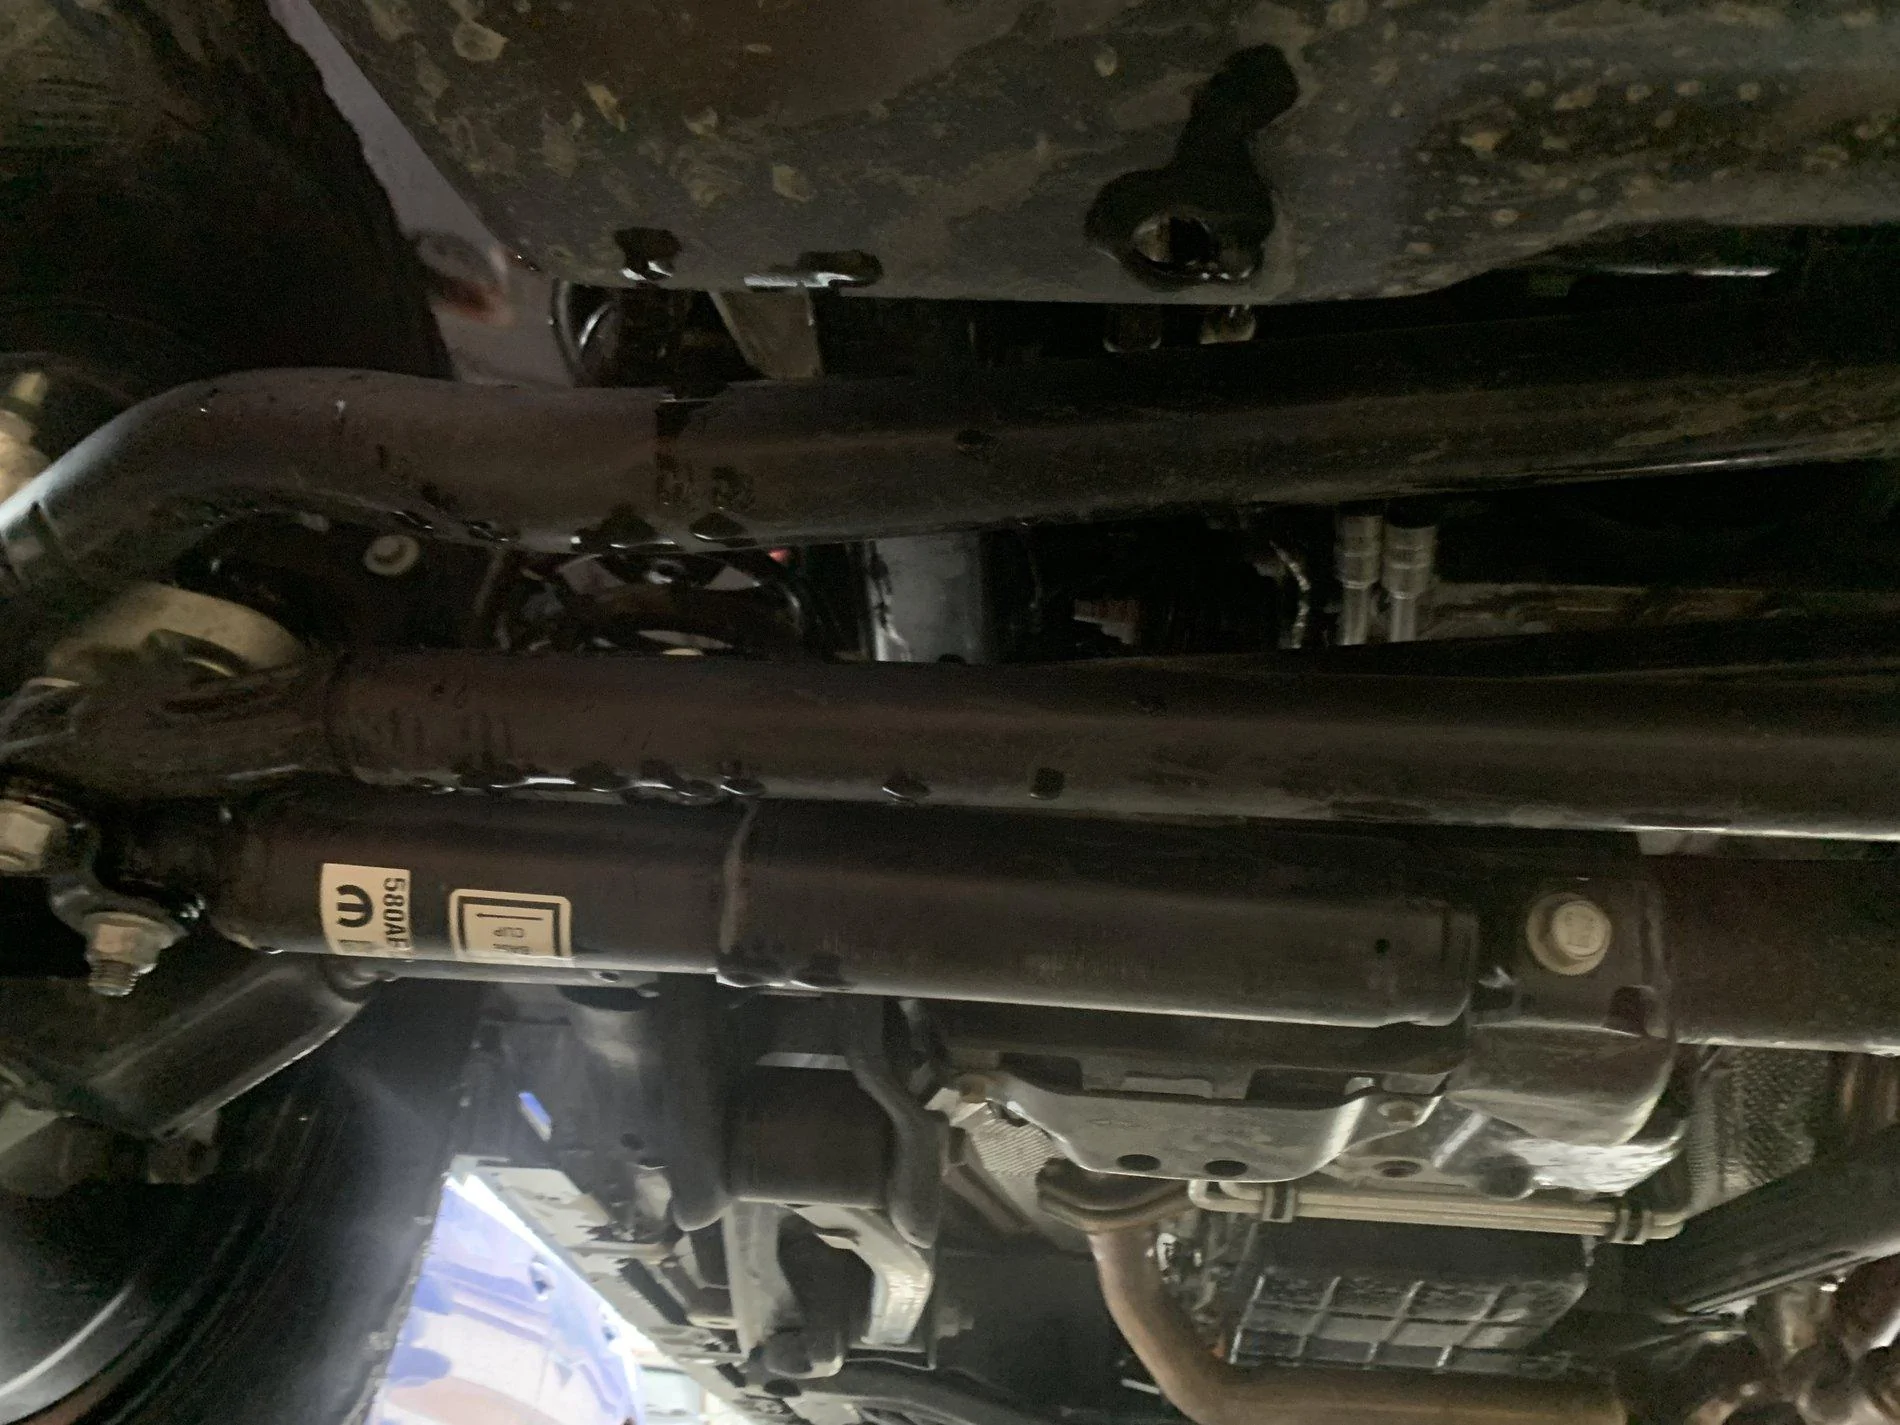
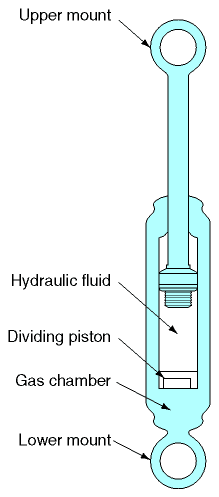
2. Take a photo of your original shock noting the orientation of the upper and lower mount. I've attached a basic diagram showing which mount is which.
3. Use the driver to remove the nuts holding the shock on. The drivers side nut has a tab behind it which you can use. Be careful of pinching, the tab can pinch you. The driver side bolt is a carriage bolt, it has a square shoulder to prevent it from spinning. You will need to put your hand on the head of this bolt and apply pressure to keep the square of the bolt seated and prevented from spinning.
4. Remove both bolts quickly, the shock will slowly decompress making the bolts a bit harder to remove. This is where the mallet comes in handy
5. unwrap and "prime" the Fox shock. Priming means slowly moving the piston in and out 3-4 times the entire length of travel.
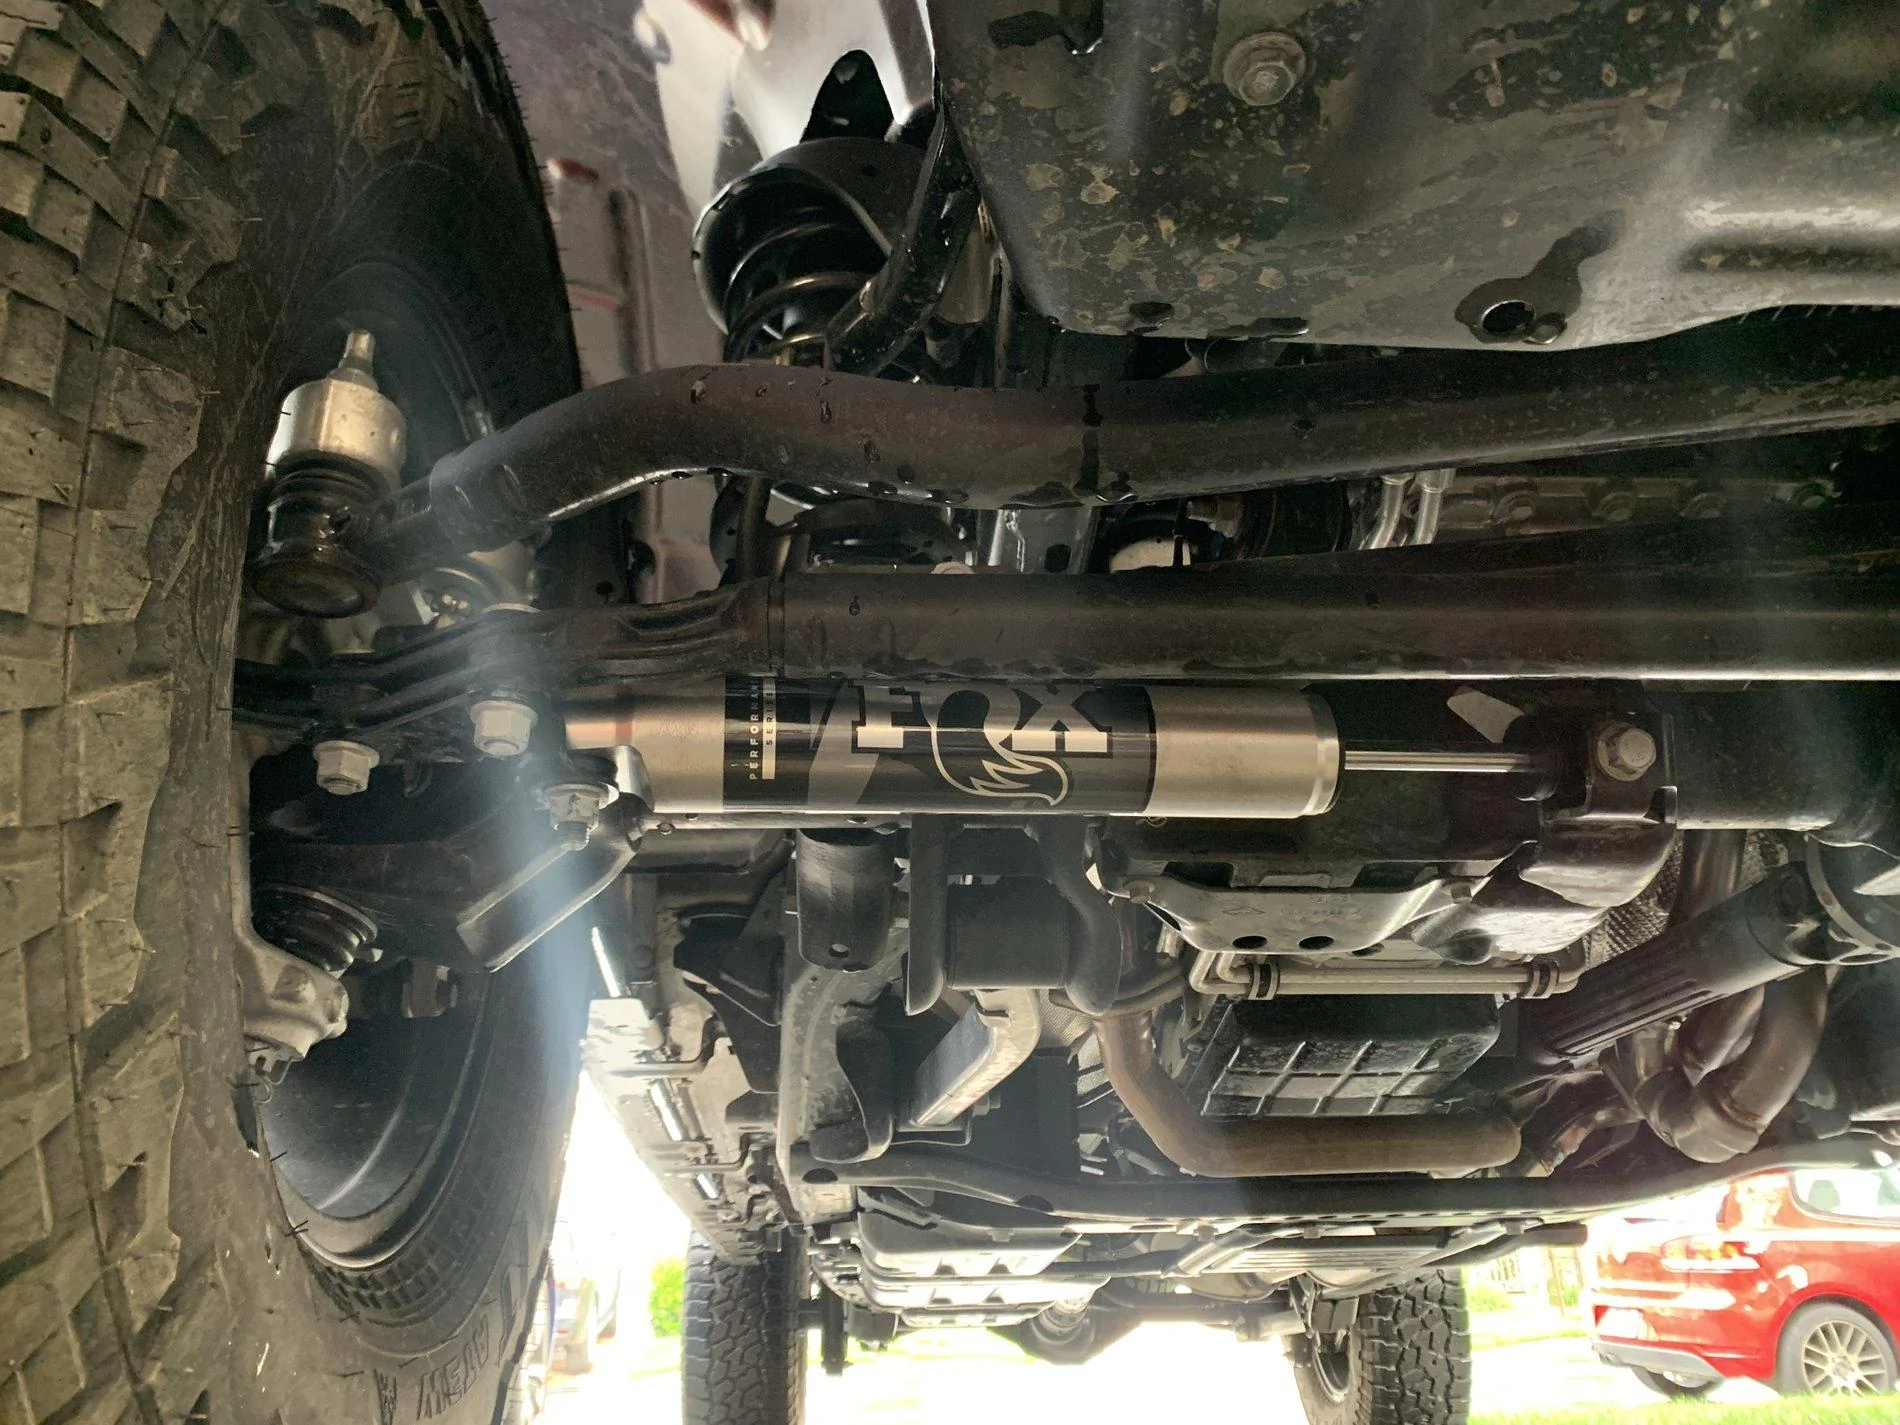
6. I found it easy to lay the old shock beside the new and compress the Fox shock to match the approximate length and eye rotation.
7. Moving quickly, install the upper mount in first, then mount the lower mount.
8. Install the carriage bolt from the top down and hand thread the nut on.
9. If the shaft of the upper shock mount has misaligned, use your screwdriver to pry shock closed to make the holes concentric. If the screwdriver can't be inserted into the hole, you can pry it against the head of the upper shock mount. If all else fails, use your big ol bicep muscles to weasel it over.
10. Once holes are aligned, install the bolt almost all the way in, leaving room for the nut behind it.
11. Hand tighten the bolt against the nut, making sure to hold the tab and being careful not to get pinched.
12. Torque all bolts to 50-in/lb.
13. Hop in and take a test drive. You'll immediately feel a stiffer/tighter feel to the wheel. Your ride should be much more sturdy and wobble free.
Hope this helps!


what torque specs did you use ? I can’t find the torque specs anywhere ???Just installed my stabilizer. Probably the simplest mod one could do to a Gladiator. 10 minute job and that’s with getting tools out and put away. Took a short drive and could definitely feel a difference. Time will tell if there is actually a difference but I’m happy with this $150 mod so far.
Nowhere?I was told to torque it down to 59 for/lbs??
what torque specs did you use ? I can’t find the torque specs anywhere ???
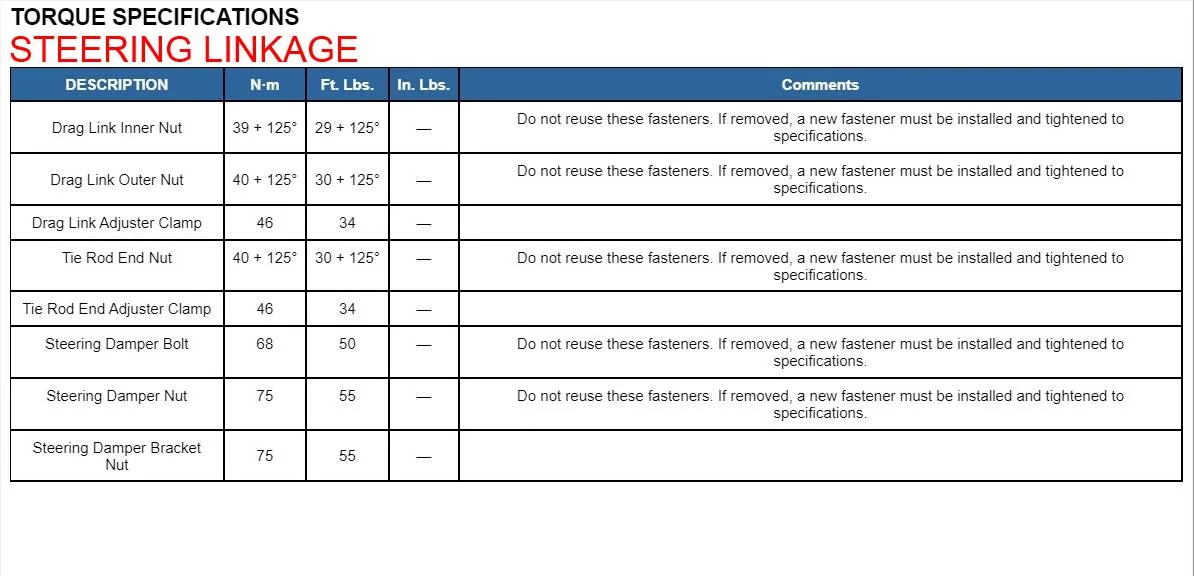
I looked in these forums and online many times. They all have different info. Mine got the good ole 59 ft/lbs because that’s what I found more of.
Close enough. Those specs are from the service manual. That bolt won't know the difference.I looked in these forums and online many times. They all have different info. Mine got the good ole 59 ft/lbs because that’s what I found more of.
lol that’s what I figure!!Close enough. Those specs are from the service manual. That bolt won't know the difference.