Rudyrum
Member
- First Name
- Rudy
- Joined
- May 13, 2020
- Threads
- 1
- Messages
- 5
- Reaction score
- 5
- Location
- Mississippi
- Vehicle(s)
- 2020 Jeep Gladiator
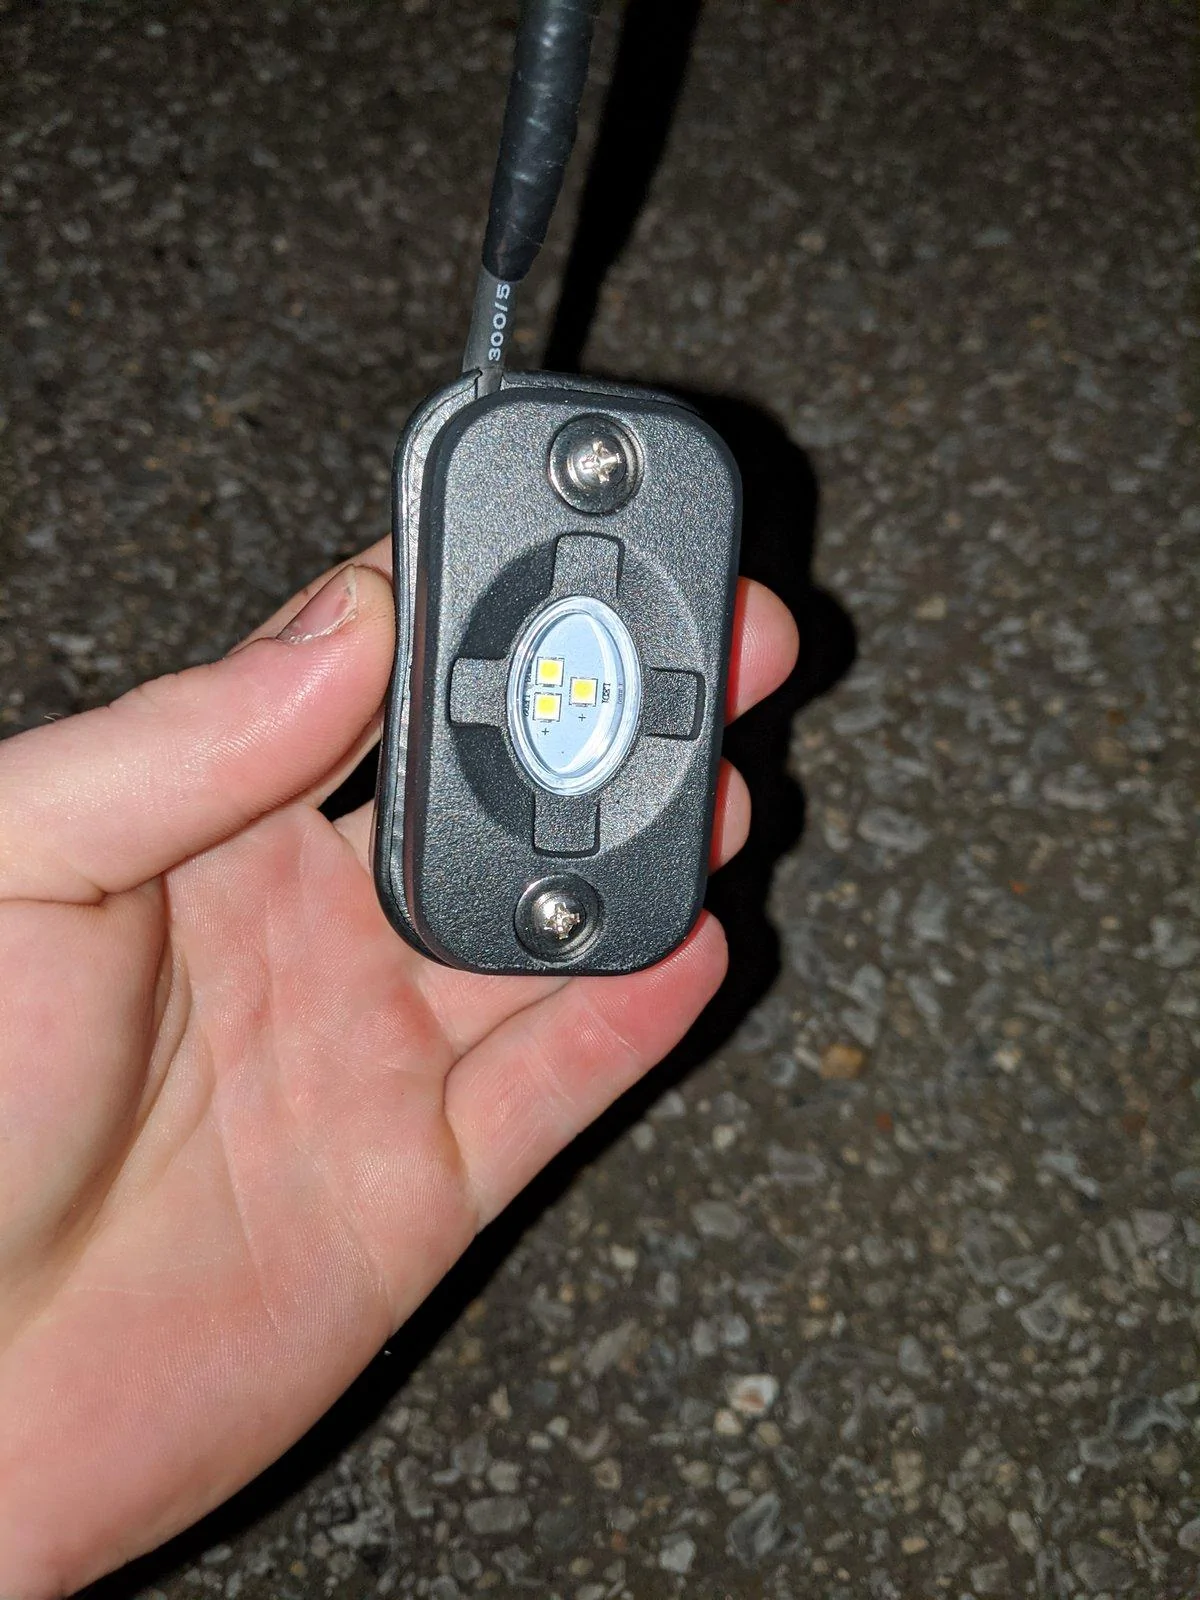
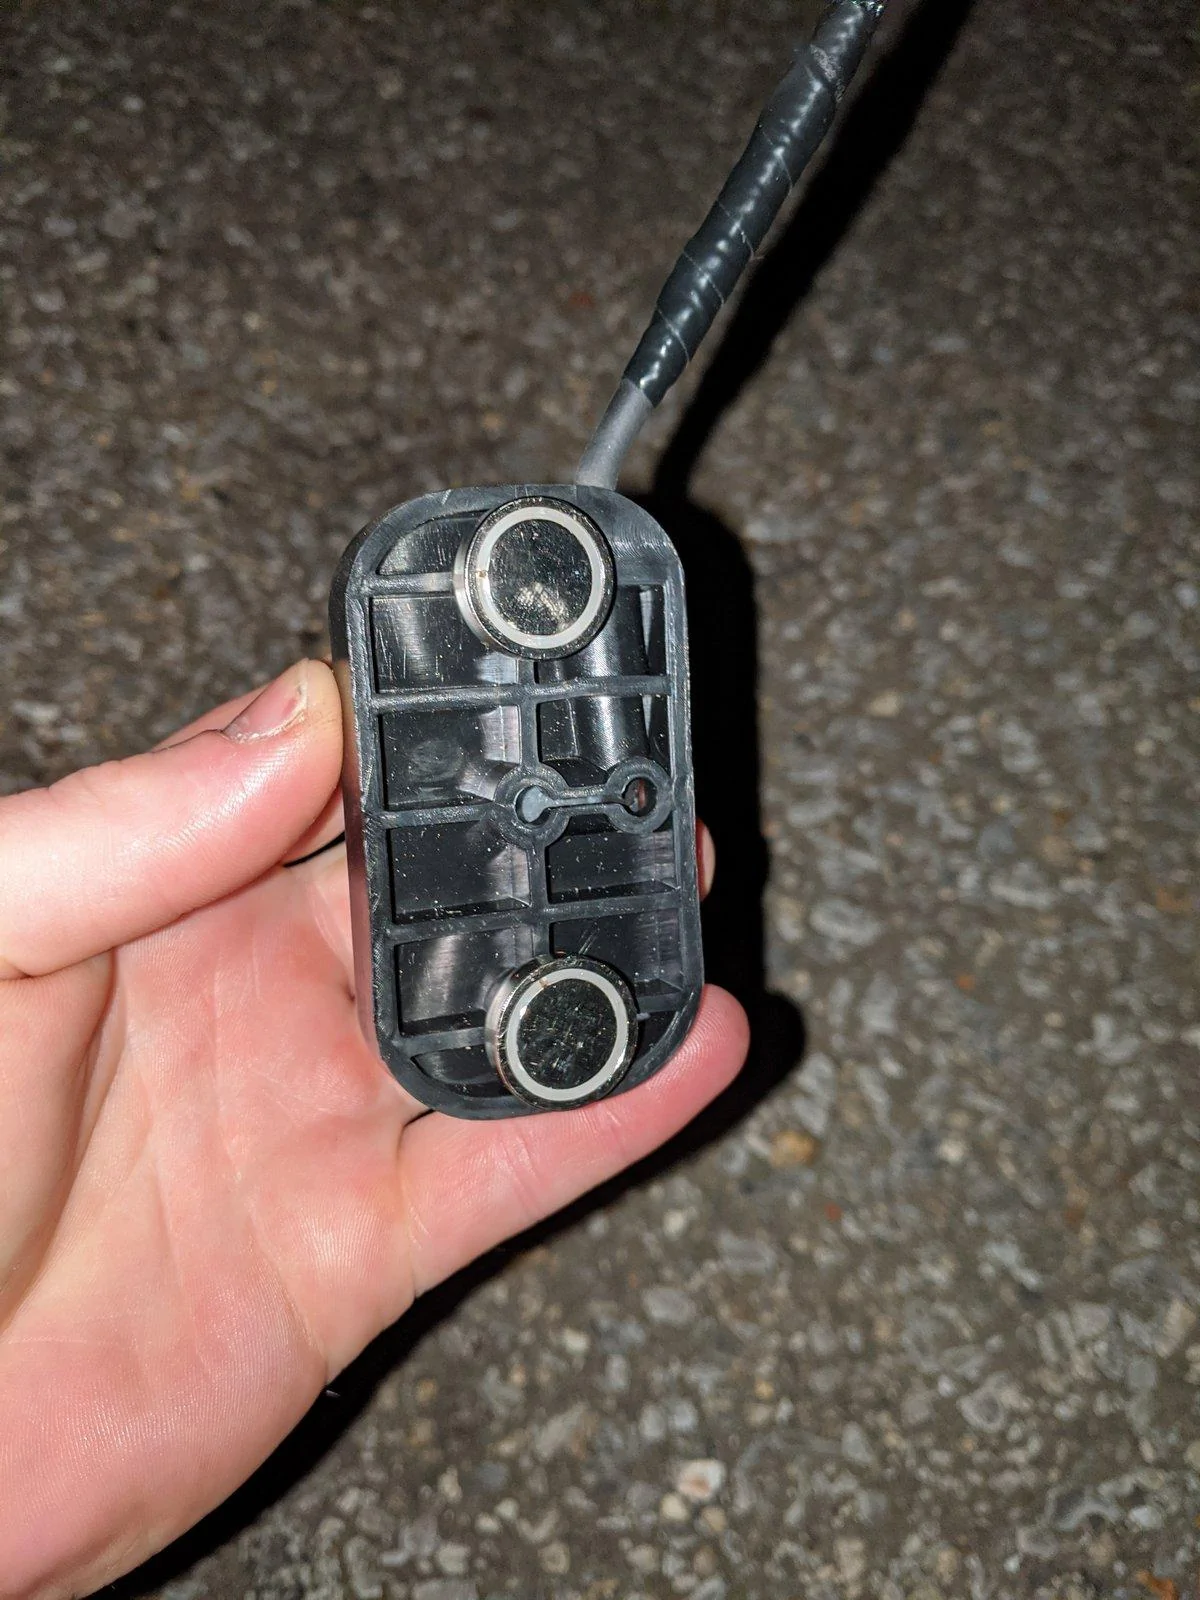
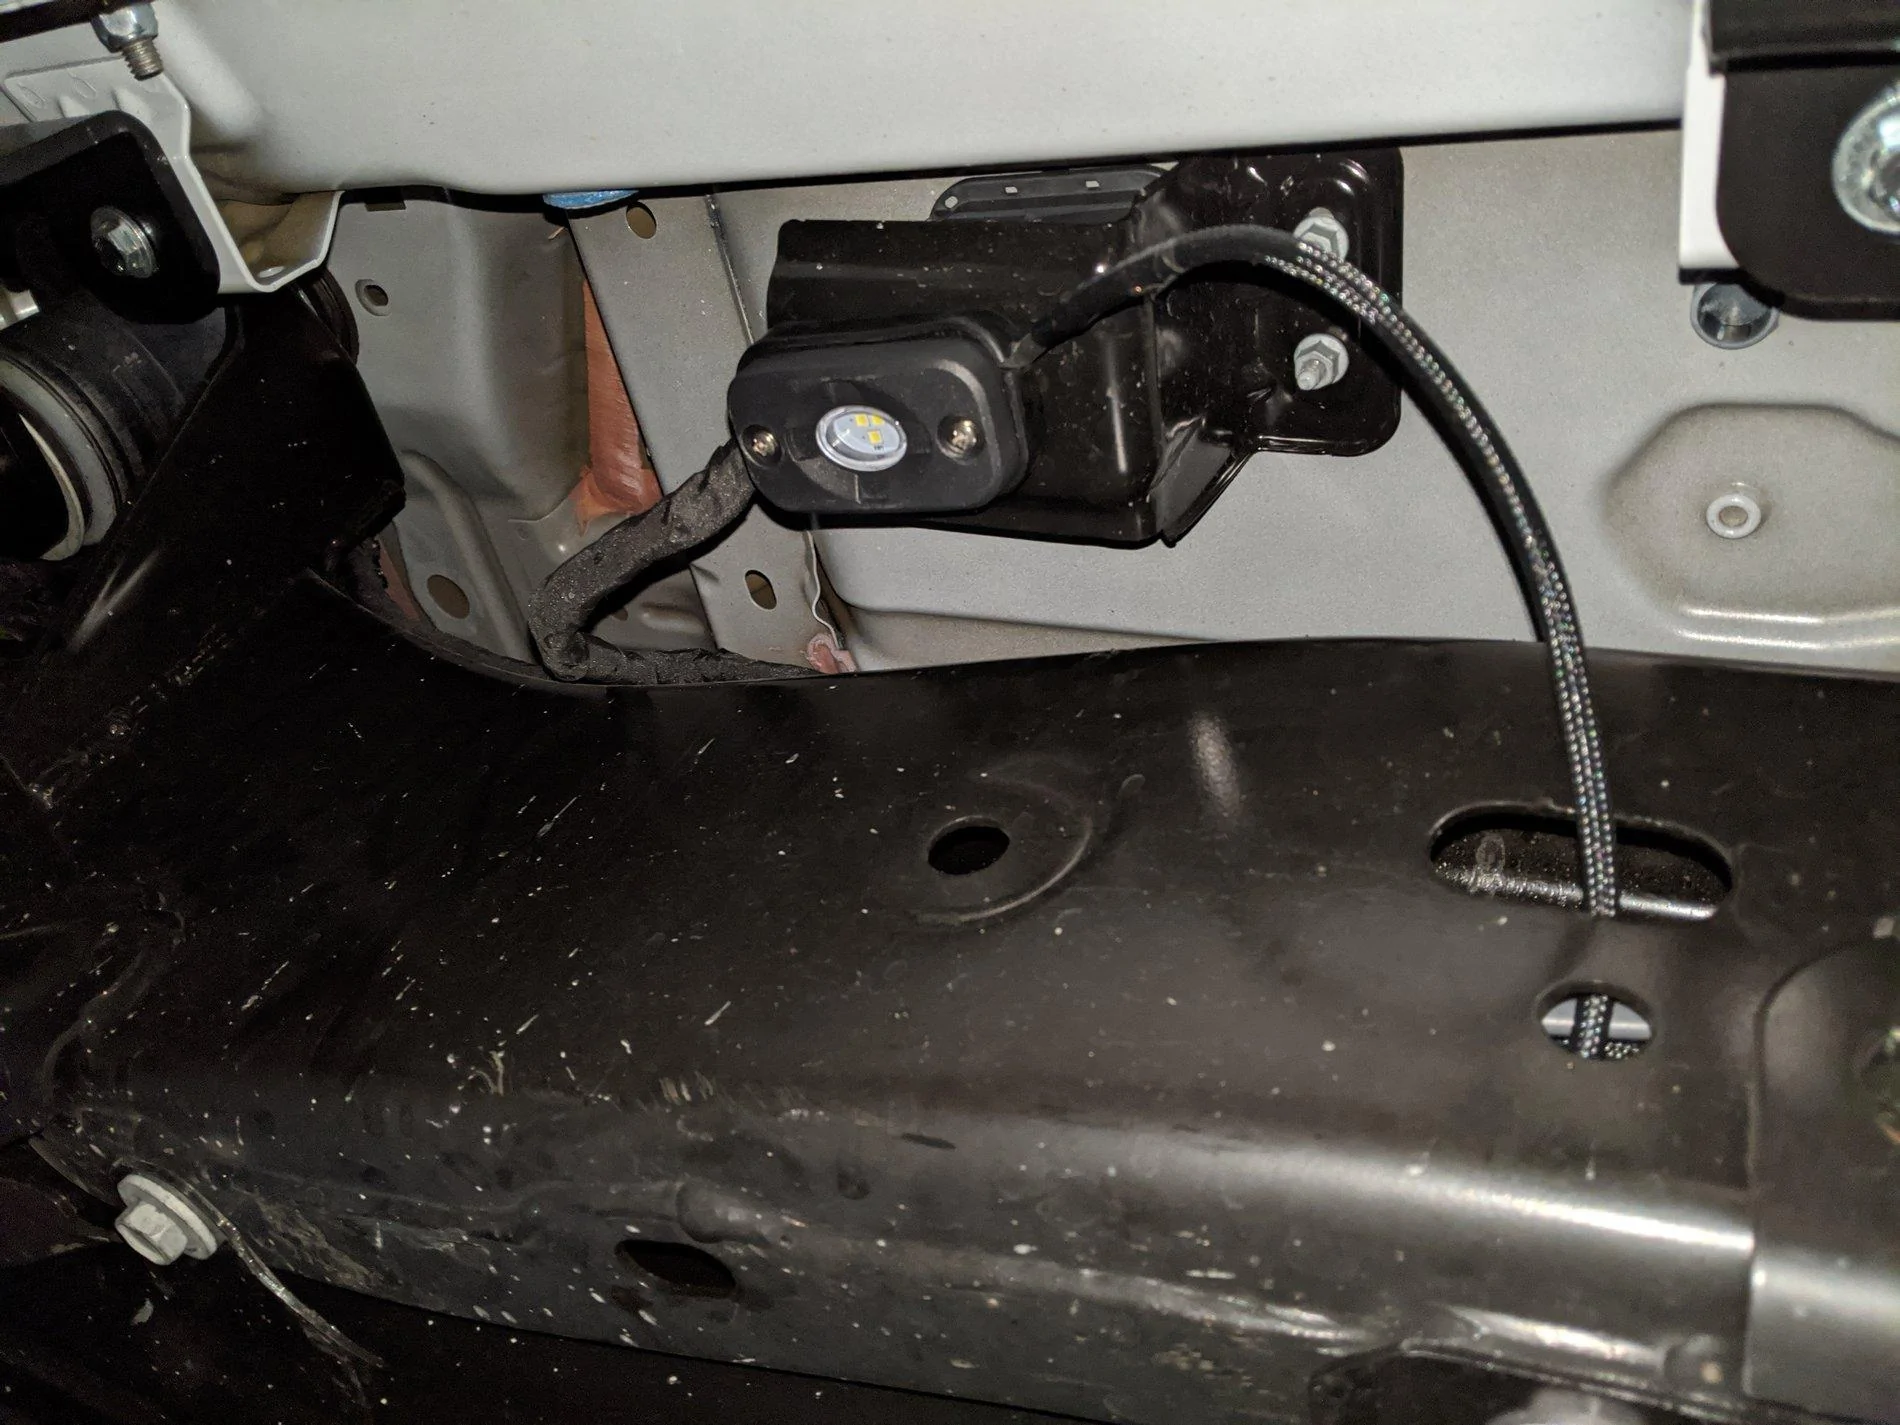
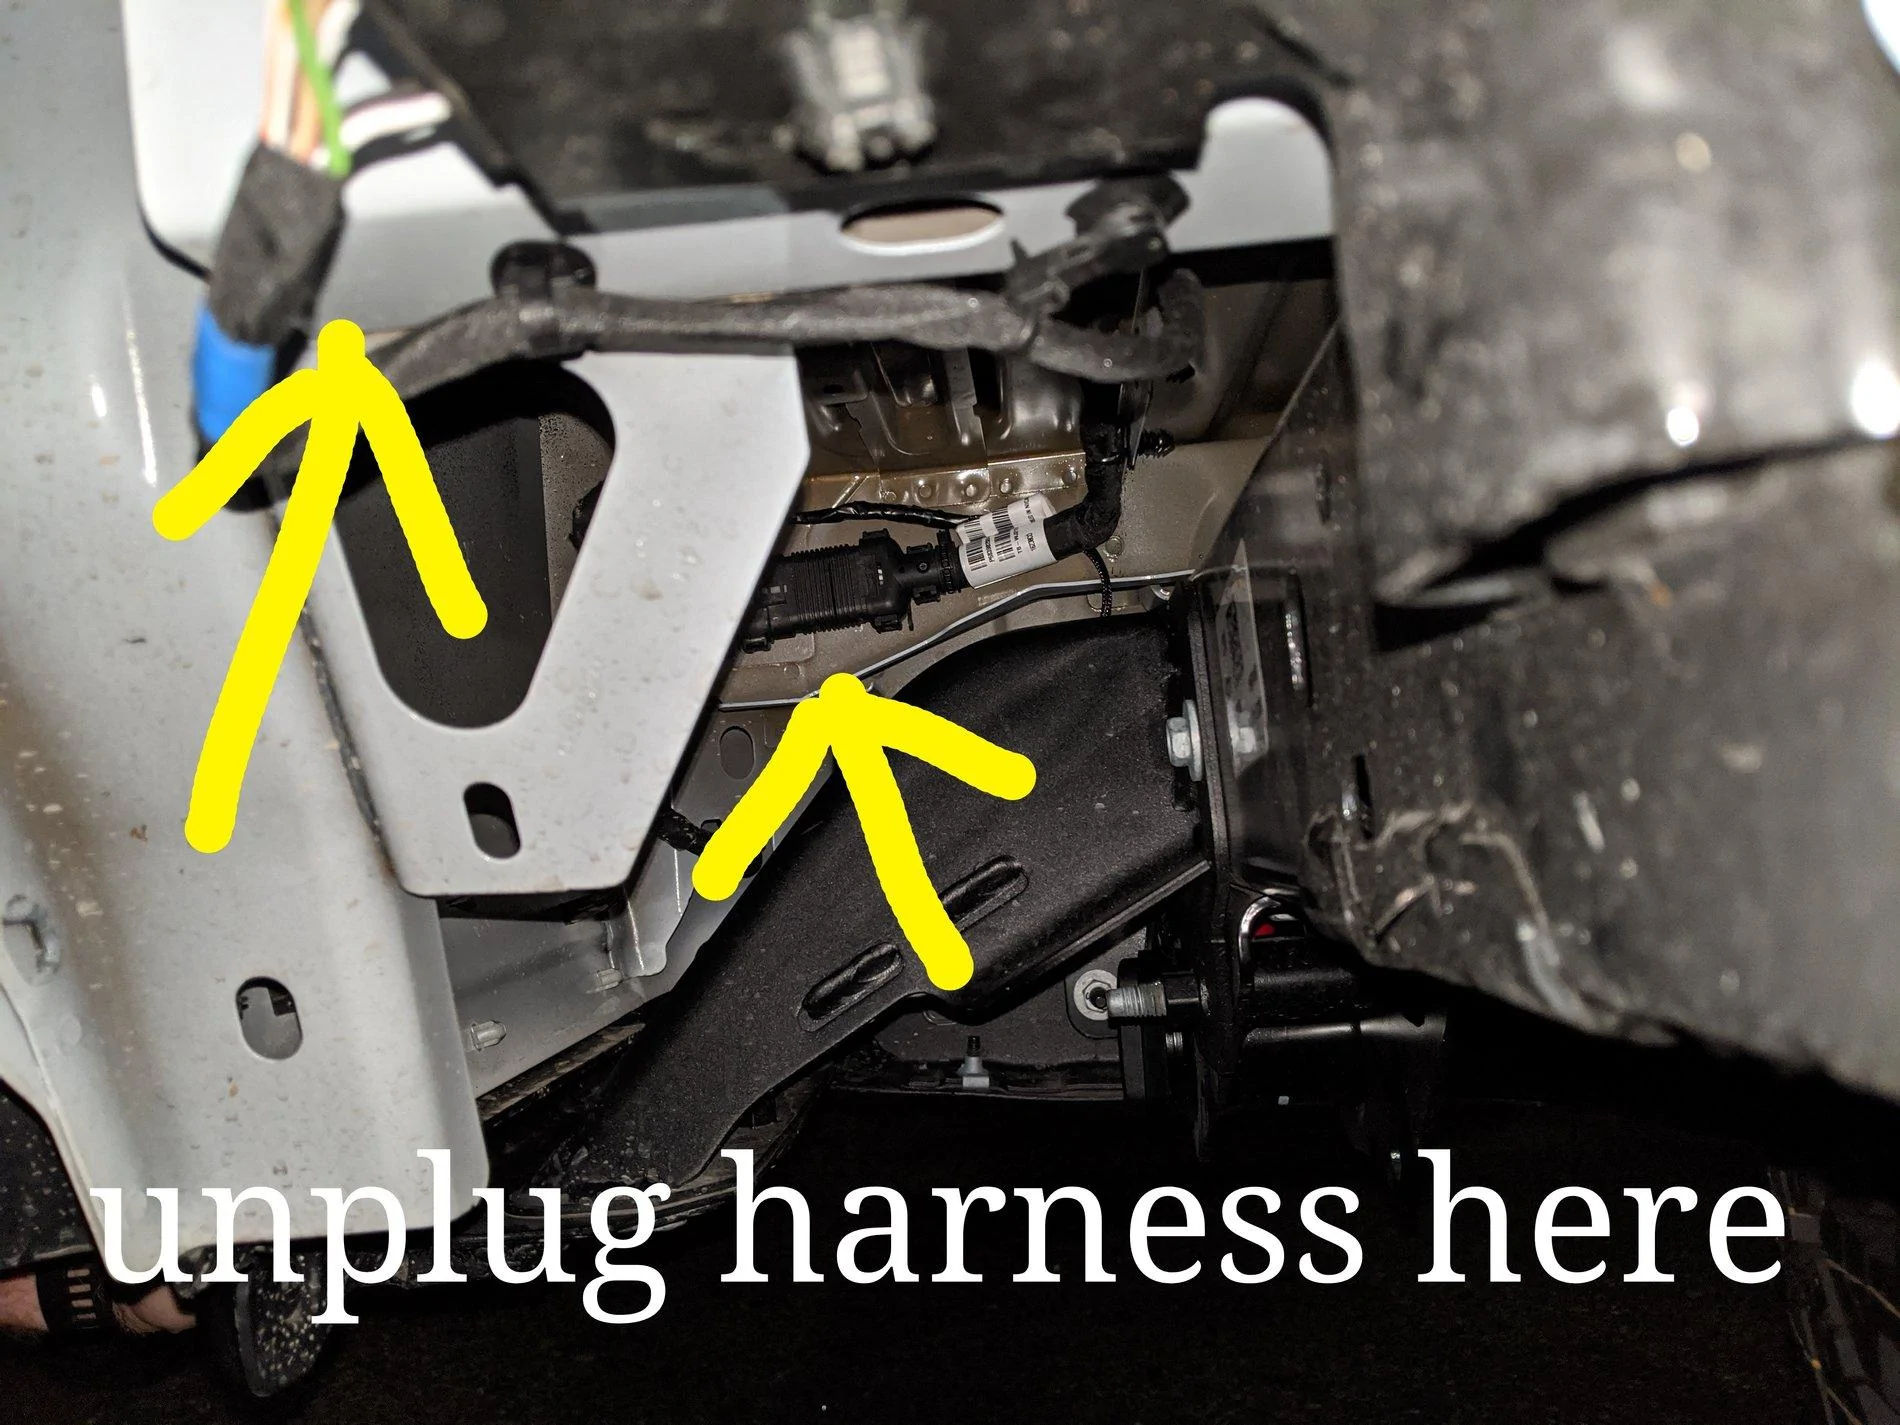
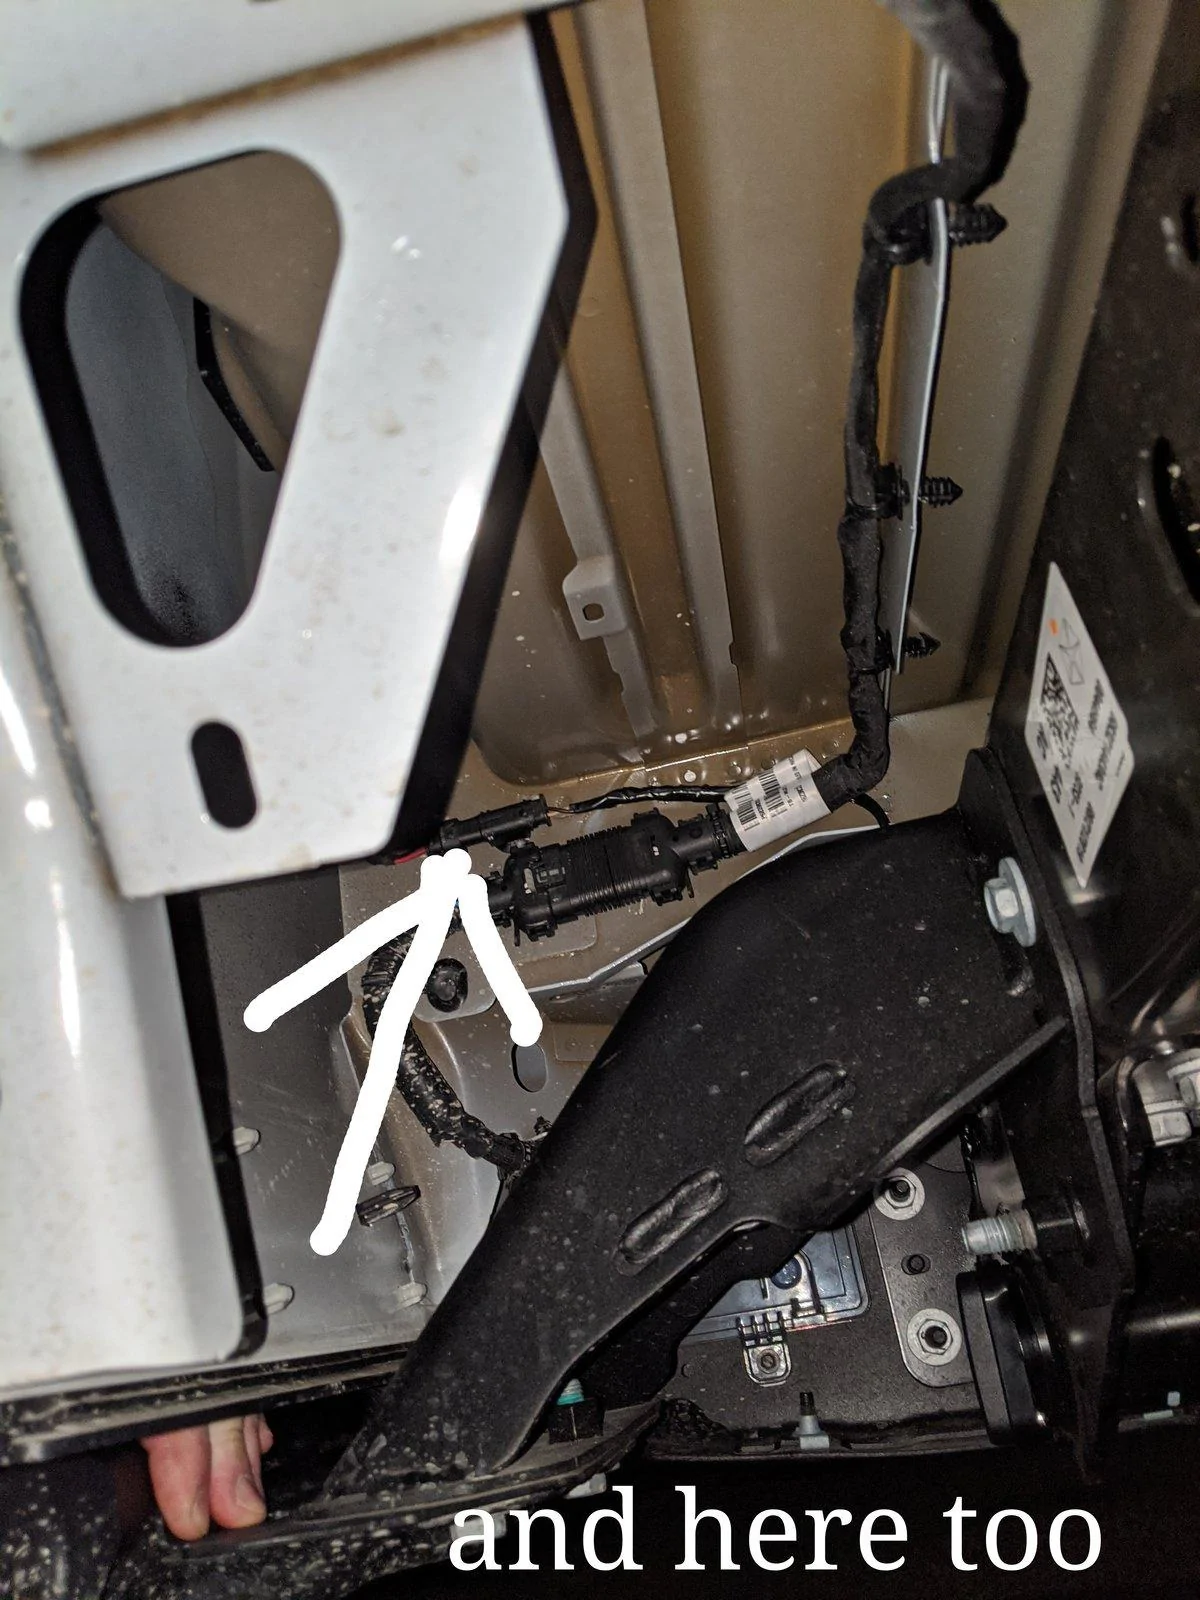
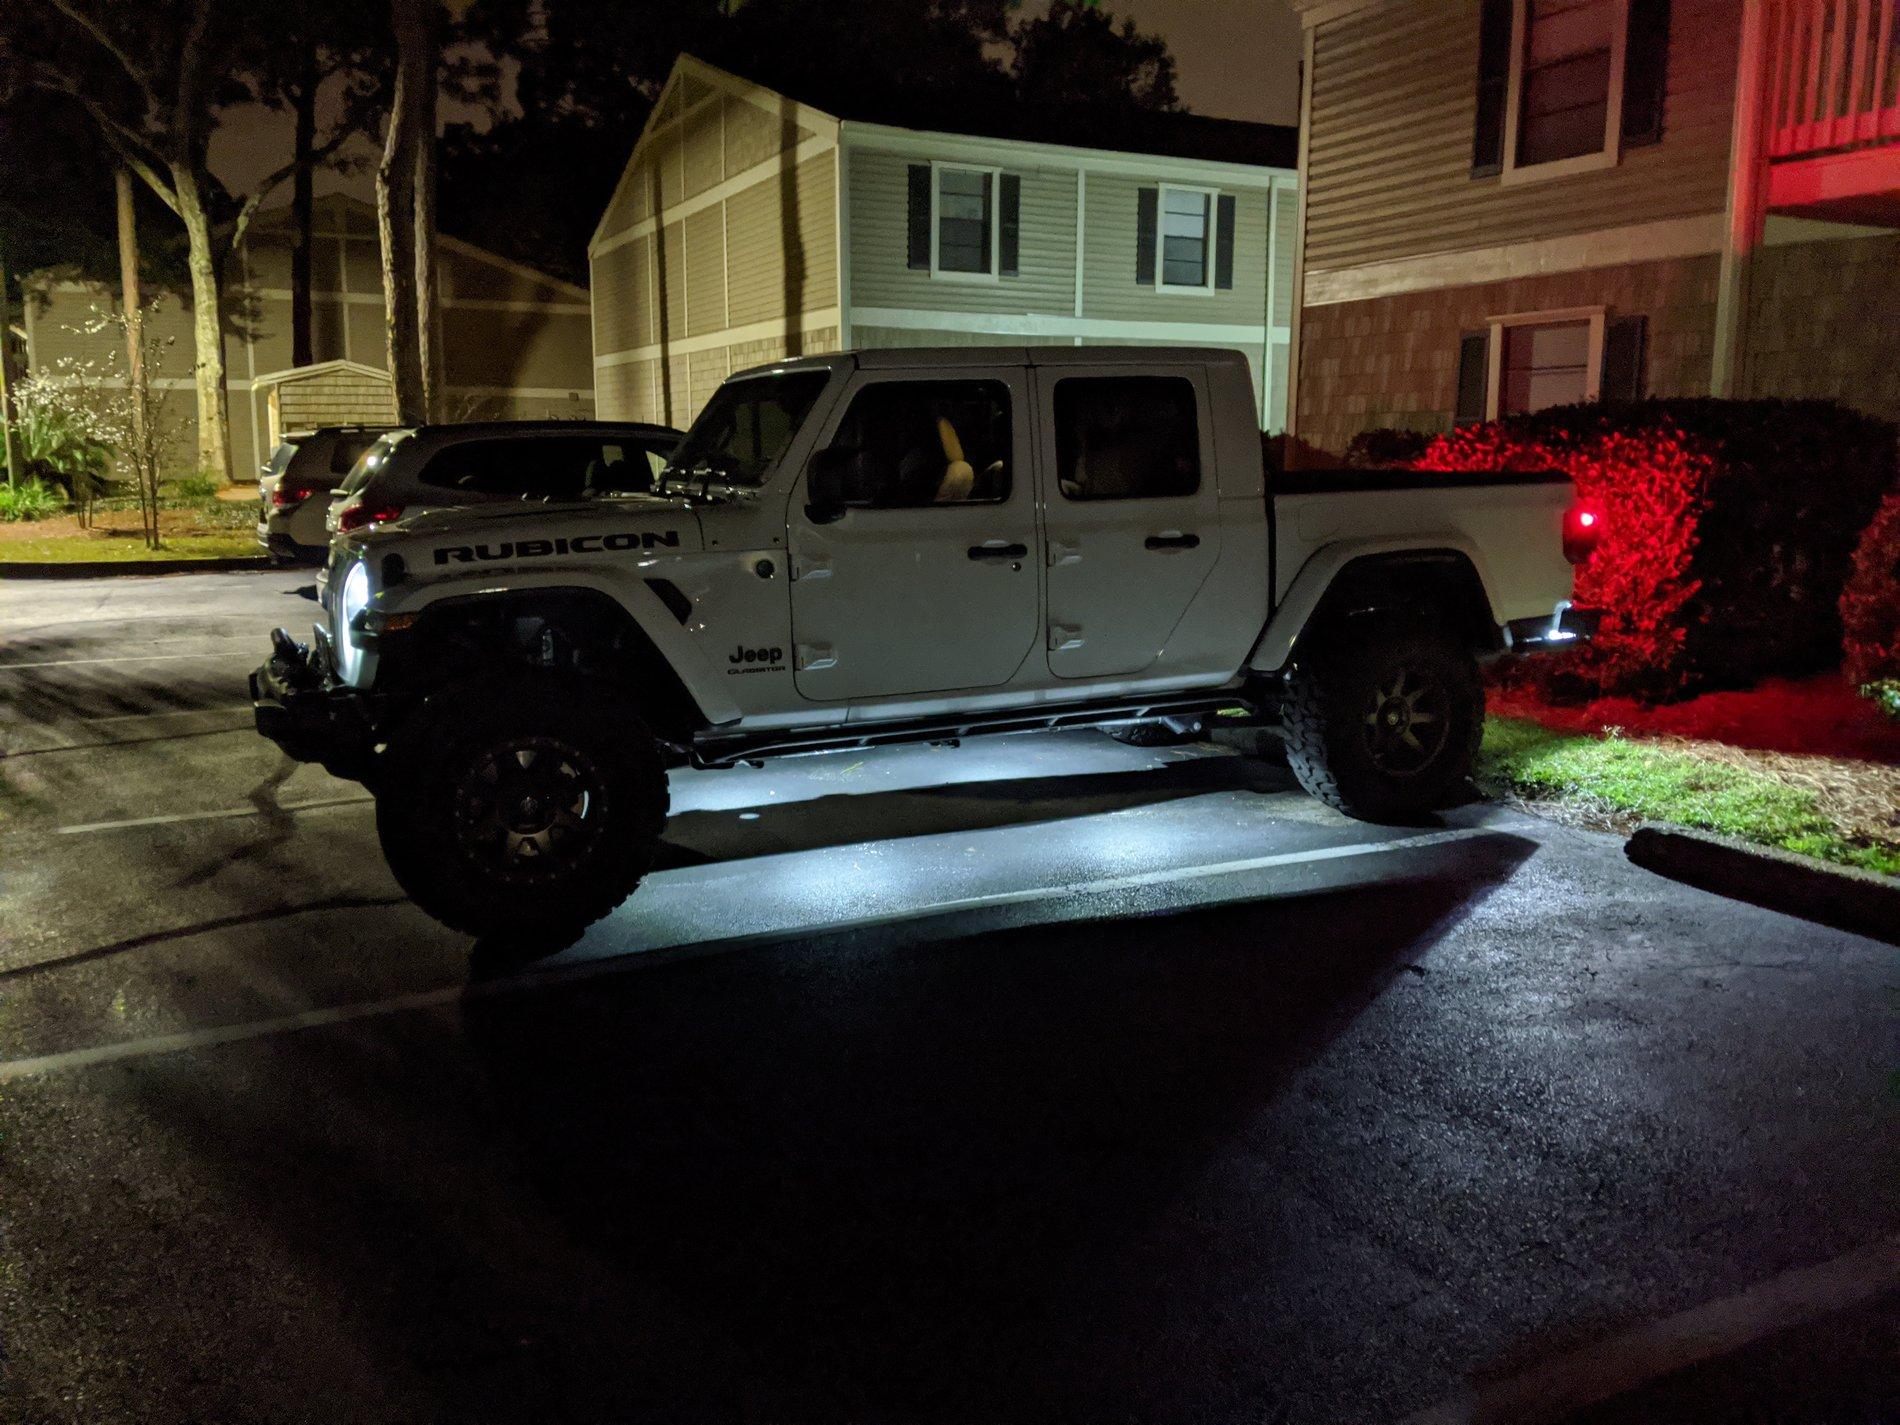
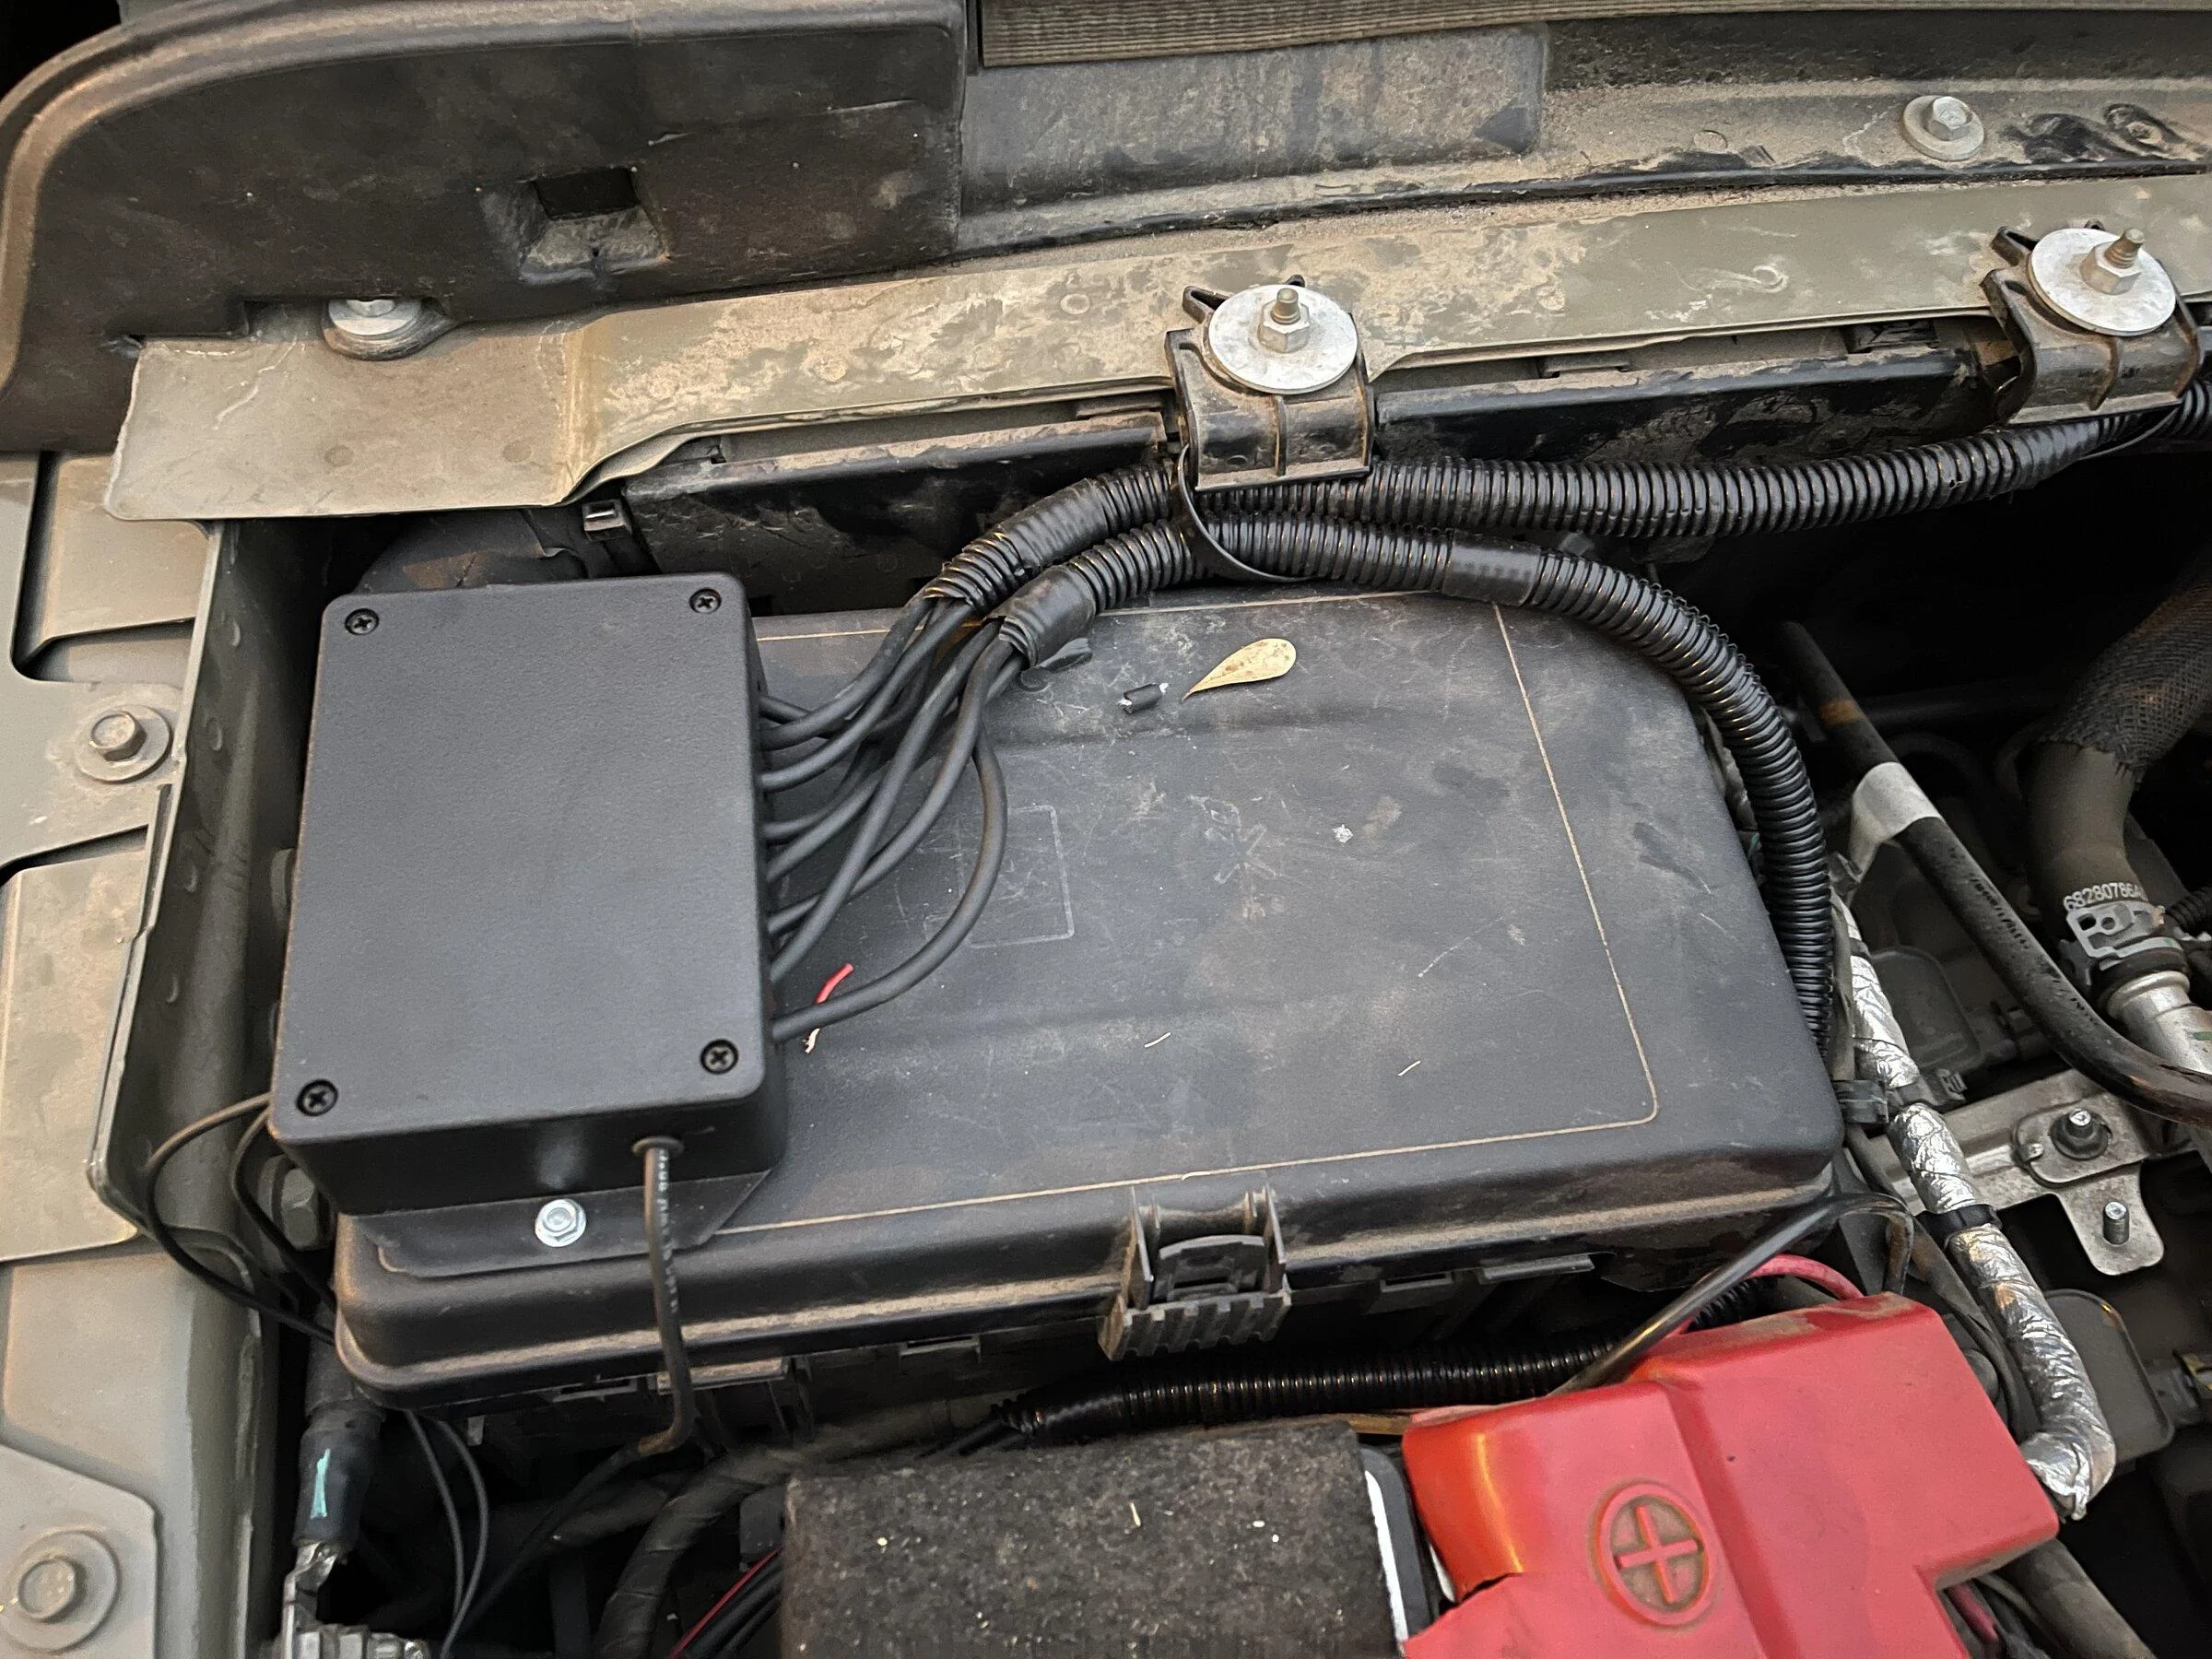
I might be missing it, I've read the thread three times still trying to understand. Did you make a " gang box" that it all ties into or did you just run a main line from battery. Or did you just pull all your power from the reverse , bed lights. I plan on doing this but just with the bed lights. I was going to add a master on off inside cab. For some reason I thought you would need to tie it all together in something like this with main line from battery.
https://www.amazon.com/dp/B07GBST5N...9Y2xpY2tSZWRpcmVjdCZkb05vdExvZ0NsaWNrPXRydWU=
https://www.amazon.com/dp/B07GBST5N...9Y2xpY2tSZWRpcmVjdCZkb05vdExvZ0NsaWNrPXRydWU=
Sponsored