Sponsored

What did you do TO your Gladiator today? [ADMIN WARNING: NO POLITICS, NO GUN TALK]

drewcnit

Well-Known Member
First Name
Andrew
Joined
Apr 26, 2022
Threads
26
Messages
686
Reaction score
1,836
Location
Near Nashville, TN
Vehicle(s)
2022 Gladiator Sport S, Bright White
Occupation
IT Geek and Data Nerd

WILDHOBO

Well-Known Member
First Name
Dan
Joined
Sep 24, 2021
Threads
74
Messages
11,757
Reaction score
17,898
Location
Colorado
Vehicle(s)
2021 Gladiator Rubicon
Occupation
Network Engineer
Vehicle Showcase
1
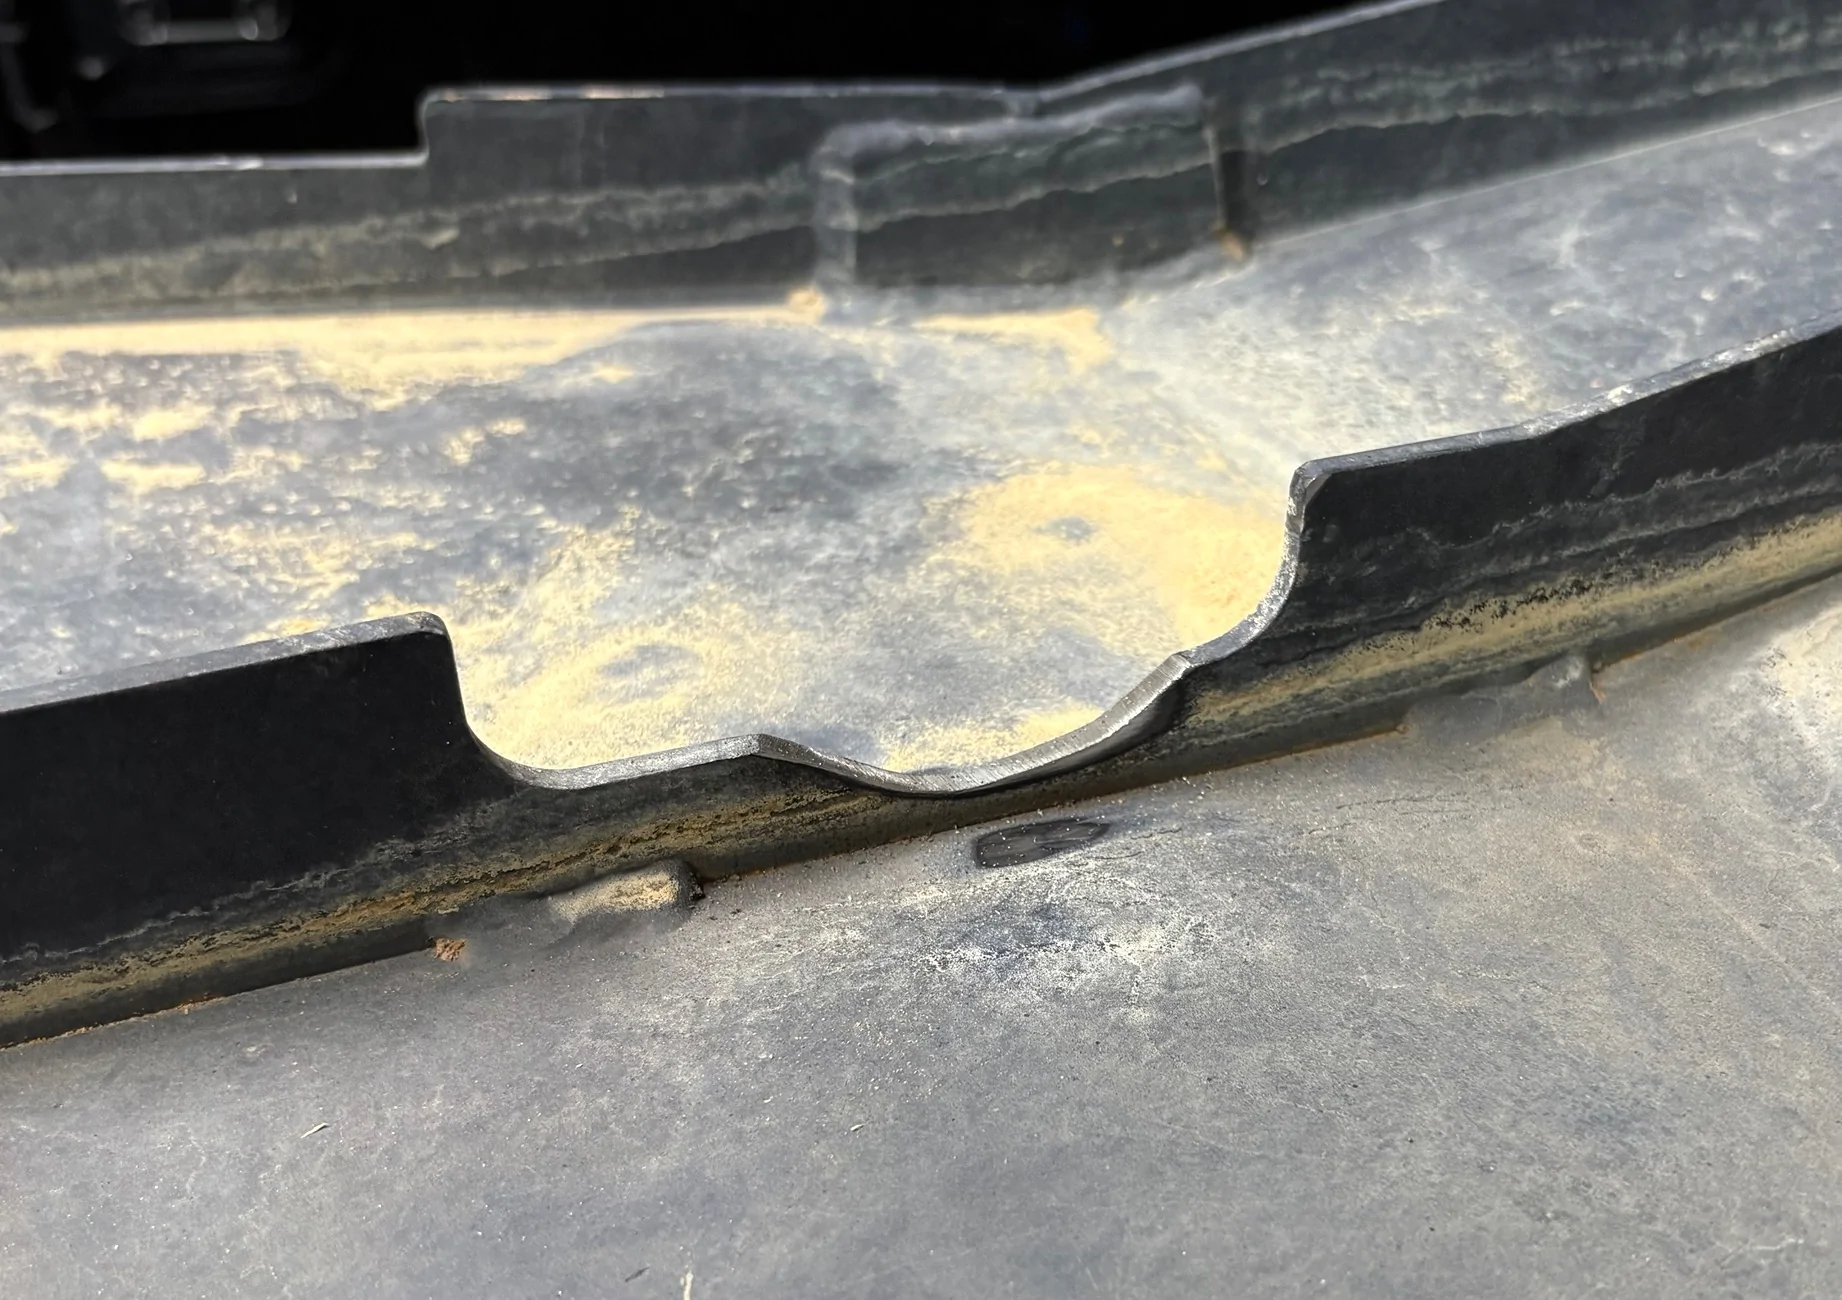
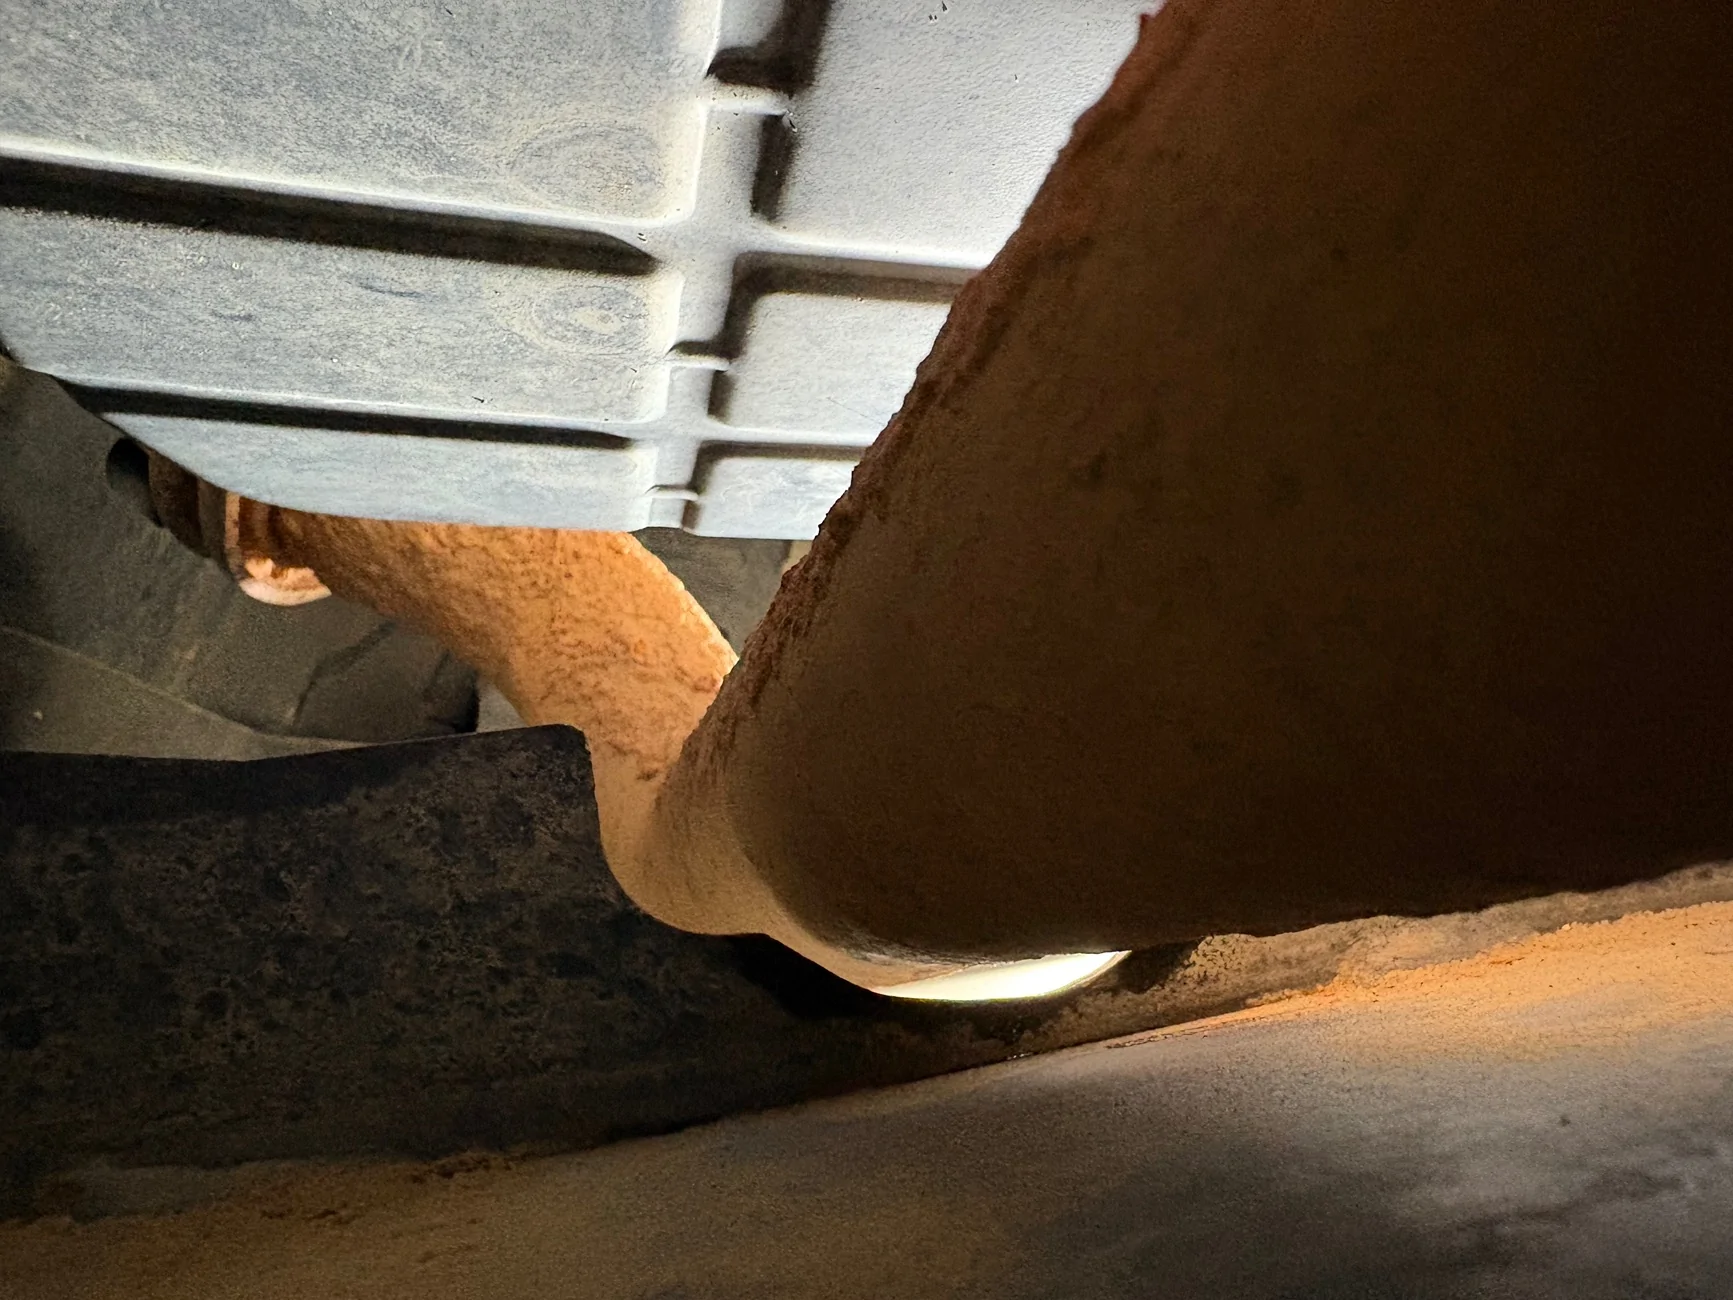
Clearanced the M.O.R.E. engine skid more at the crossover pipe. Had to clearance originally during initial install but always had a rattle when I’d hit large bumps.
IMG_1206.webp
IMG_1211.webp
That crossover is such a PITA. Nice work.
 

Stan H

Well-Known Member
First Name
Stanley
Joined
Oct 26, 2022
Threads
10
Messages
5,517
Reaction score
5,497
Location
WV
Vehicle(s)
Gladiator Rubicon 2021
Occupation
Safety Consultant

Sponsored

WILDHOBO

Well-Known Member
First Name
Dan
Joined
Sep 24, 2021
Threads
74
Messages
11,757
Reaction score
17,898
Location
Colorado
Vehicle(s)
2021 Gladiator Rubicon
Occupation
Network Engineer
Vehicle Showcase
1
Which side of the crossover is that 🤔
Said the person who just bought a small hatchback and can’t find the fuel door.
 

Bandit’s Lair

Well-Known Member
First Name
Jason
Joined
Jul 9, 2025
Threads
33
Messages
2,924
Reaction score
4,812
Location
Southern California
Vehicle(s)
2021 Gladiator Sport S
Occupation
Retired
My foot rest flat on the firewall 😂

17707360089239104312873903033860.webp
You must be blessed with long legs!!! Or huge feet! I can’t even get close. Worked with 813 to get an invoice for a dead pedal. Then within 2 days a fridge died epically and the van decided it wanted to identify as a Ford again so Jeepy money went the way of the dodo.
 

Stan H

Well-Known Member
First Name
Stanley
Joined
Oct 26, 2022
Threads
10
Messages
5,517
Reaction score
5,497
Location
WV
Vehicle(s)
Gladiator Rubicon 2021
Occupation
Safety Consultant
You must be blessed with long legs!!! Or huge feet! I can’t even get close. Worked with 813 to get an invoice for a dead pedal. Then within 2 days a fridge died epically and the van decided it wanted to identify as a Ford again so Jeepy money went the way of the dodo.
6'5" 215 🦾🦿
 

slodsm

Well-Known Member
First Name
Jeremy
Joined
Jan 24, 2026
Threads
2
Messages
71
Reaction score
128
Location
Tyler Tx
Vehicle(s)
2021 Gladiator
Occupation
Cryogenics plant operations
Finally finished my tank for my on board air. Got everything mounted to the front of the bed, using a high amp relay for the main power wire, sunbeam switch to a 90-120 pressure sensor and then pressure sensor to high amp relay.
Pumps up, shuts off, restarts as you’d want.
Gotta run grab a 1/4”npt QD I thought I had already to get my hose in there and I’ll be set.
Jeep Gladiator What did you do TO your Gladiator today? [ADMIN WARNING: NO POLITICS, NO GUN TALK] IMG_1309
 

Sponsored

rharr

Well-Known Member
Joined
May 6, 2021
Threads
29
Messages
2,044
Reaction score
2,806
Location
Tucson, AZ
Vehicle(s)
21 JTRD 3" RKK lift, (former) 95 XJ 5sp 8" lift
Novel time.

Now that my help has left and I've gone back to my day job and had some time to think about some stuff, I wanted to hit on a couple other details and elaborate some on issues we had and overall thoughts on the regear process. I'm sure this is already documented all over the place but I like to put some of my thoughts into a post so I can reference it myself in the future and if it helps anybody else then that's just a positive. I like to type a lot and be verbose so it can come up easy in search results. I still come across my own posts on Toyota forums from 25 years ago.

This is the first time I've been hands on with a regear. I've pulled carriers and messed with shims a bit before, welded trusses, rebuilt axles, etc, but I've never gone through the whole process of a ratio change start to finish myself. I had two experienced people with me.

I have a Rubicon with the M210 front and M220 rear, like I believe all of our JTs do.
We were using Dana/Spicer 4.88 gears front and rear, going from 3.73. No carrier break on these axles, so in terms of parts all you need in theory are the gears and rebuild kits. (more on that)

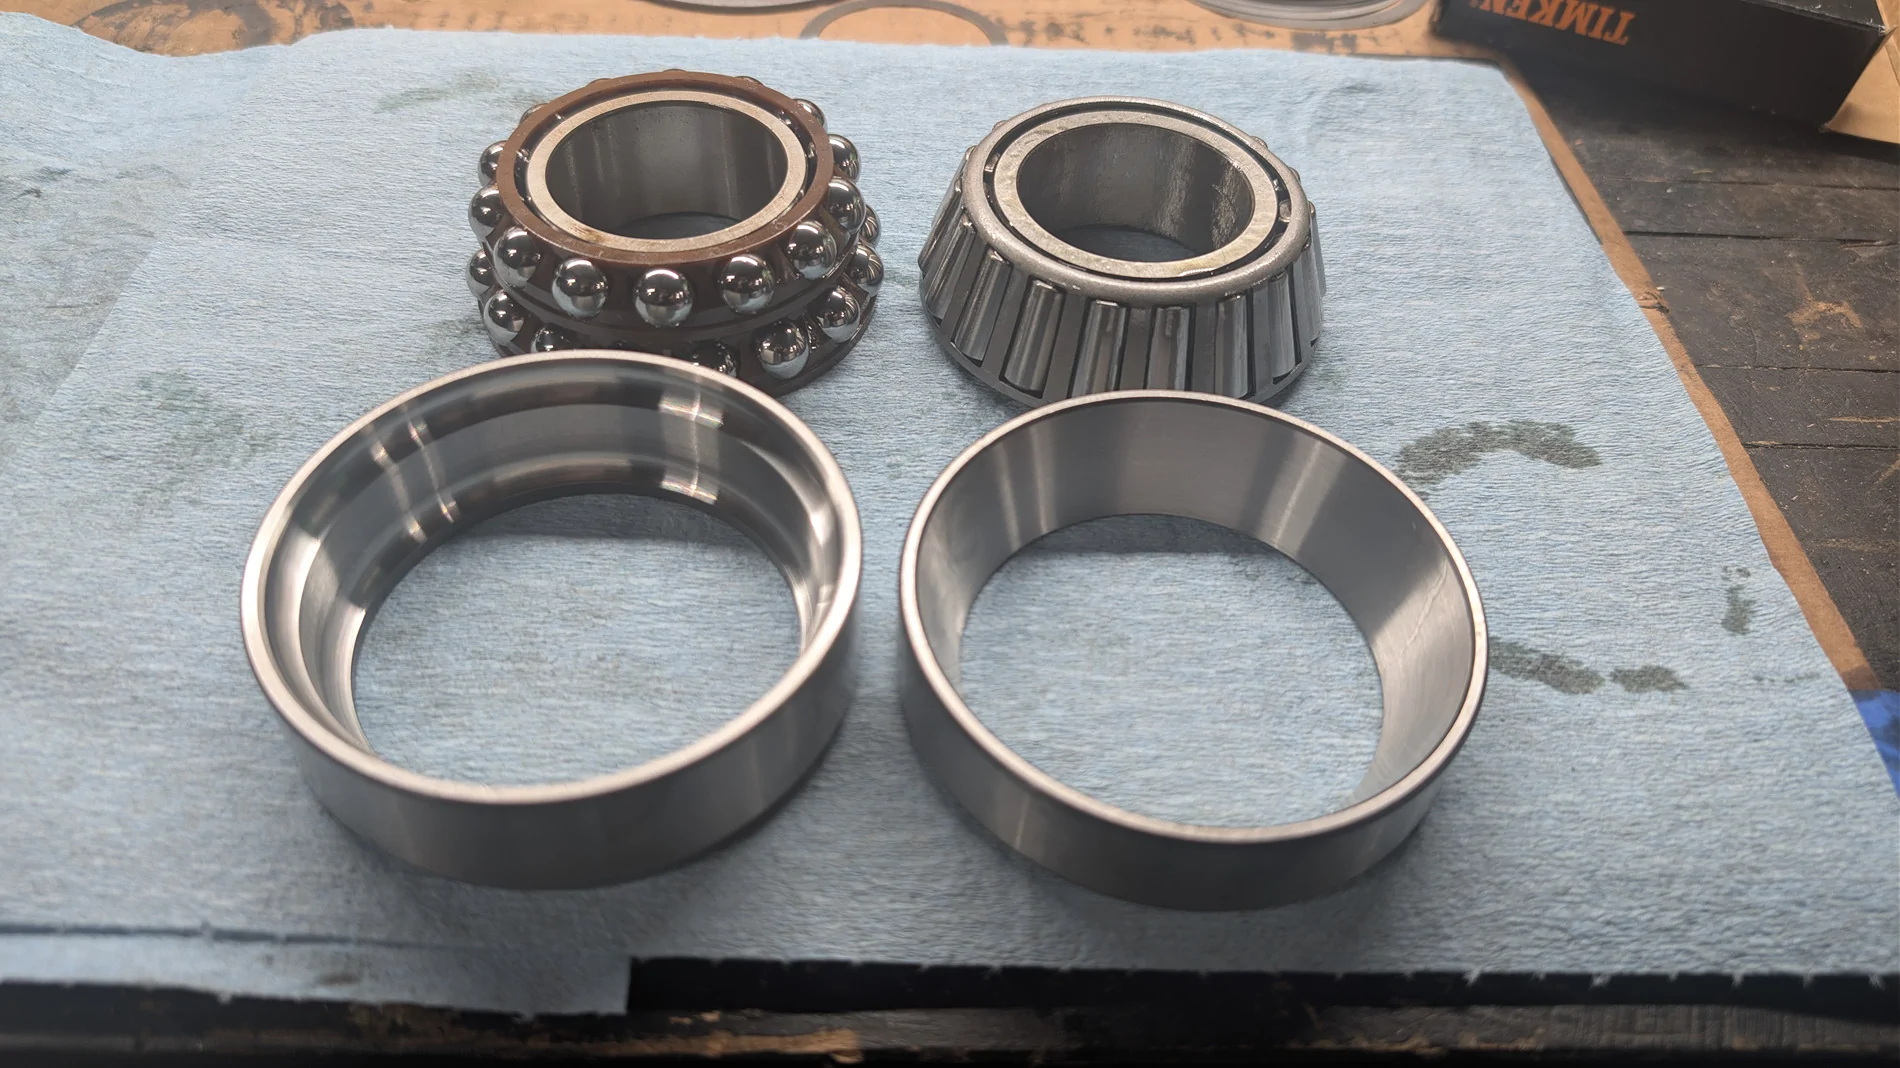
One optional change we made was converting the rear axle pinion bearing from the ball bearing to roller bearing. I've seen discussion about this but we still had a bit of uncertainty going in, so here is a side by side photo of that rear pinion bearing so you can see the difference and how the race is constructed. I've seen talk that the ball bearings can be prone to failure, and at the very least, they're less proven. The fact that they only did a ball bearing in the rear pinion that sees drive all the time and not the front, leads me to believe that it wasn't a change for strength so much as a change for economy. So back to the roller bearing we went, as was the setup in previous generation D44s.

PXL_20260209_111506776.webp


Another change we opted to make was the conversion from a crush sleeve on the pinions to a solid spacer. My experienced friend told me he'd seen people smack the pinion on rocks off road enough to compress the crush sleeve and loosen the pinion in the past, so that drove the decision to go to a solid spacer. You still set up to the same pinion torque to rotate with the solid spacer in theory, but you may really need to mess around with the shims a bit and crank down on the pinion nut to get there. In our case, well over 250 lb-ft on both axles for final setup. We ended up with one or two inch pounds more force than spec to rotate in the rear, but we theorize that's probably about right having gone from the ball bearing to the roller.

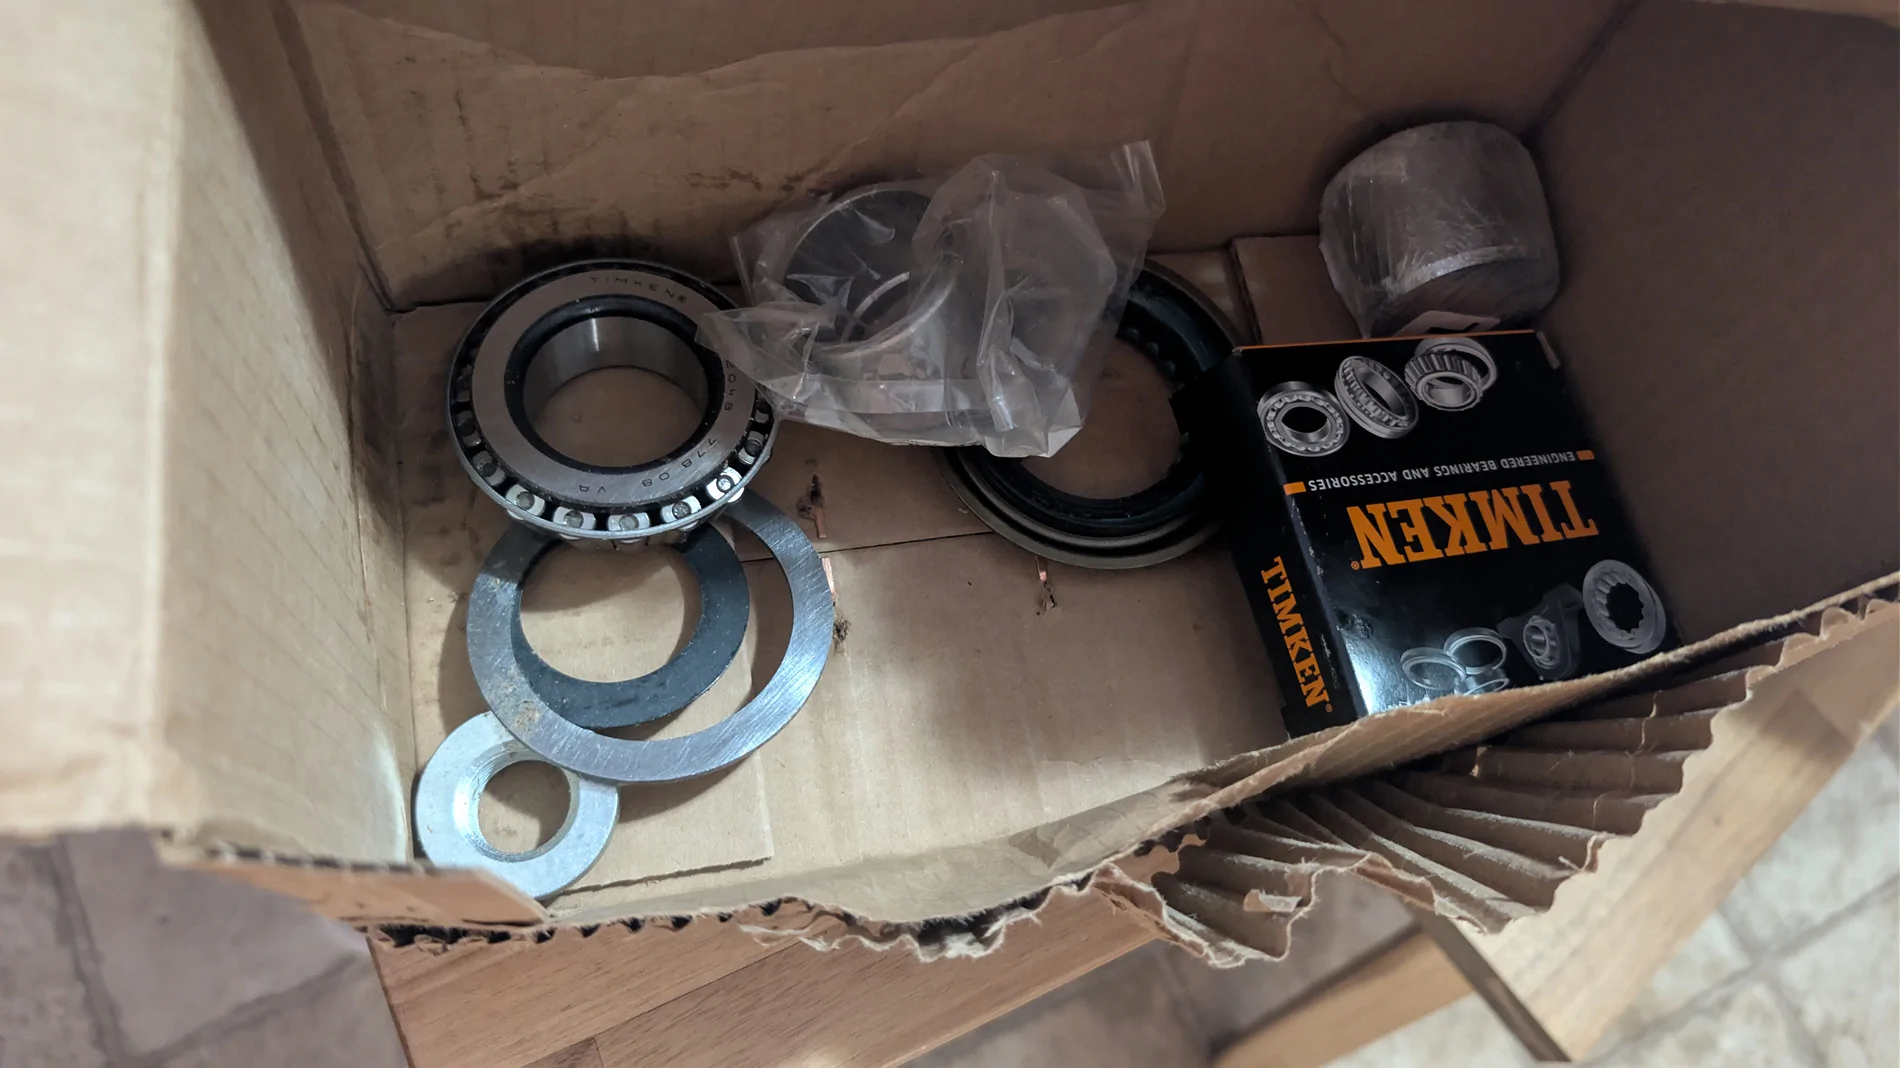
I ordered the conversion kits from East Coast Gear Supply, #D44JL-PBO-CONV and SS-D44JLF

Those parts showed up like this, with the roller itself loose in the box. Not particularly thrilled with that, but it allowed me to get the part numbers off the conversion bearing and buy another one to make a setup bearing anyway.

PXL_20260114_211846218.webp


The specific part numbers for the rear pinion roller bearing conversion are Timken M802011 and Timken M802048, and are quite affordable on RockAuto. If you wanted to do the bearing conversion but not the solid sleeve conversion, you might want to have a stack of pinion shims on hand. See the earlier photo with the bearings side by side and the height difference.

Back to the rebuild kits. 10040478 for the rear, 10040469 for the front. These look like they come with a lot of shims, but they were very inadequate, at least for the front. The shims on each side of the carrier are different sizes, and they come in a not very useful range of thicknesses. I didn't write it down but it was something like some .003, .005, and .010 and nothing else. It wasn't enough for us to get it shimmed right and have a proper preload in the case. I hit up the local off road shop (shout out to Zeus) and in exchange for some Mountain Dew they gave me a stack of shims. These were all largely the same size we already had, I suspect because the good sizes are already on axles somewhere. They confirmed that the shims aren't always consistent in these rebuild kits and sometimes you get a shitty stack. So, we weren't too happy about that.

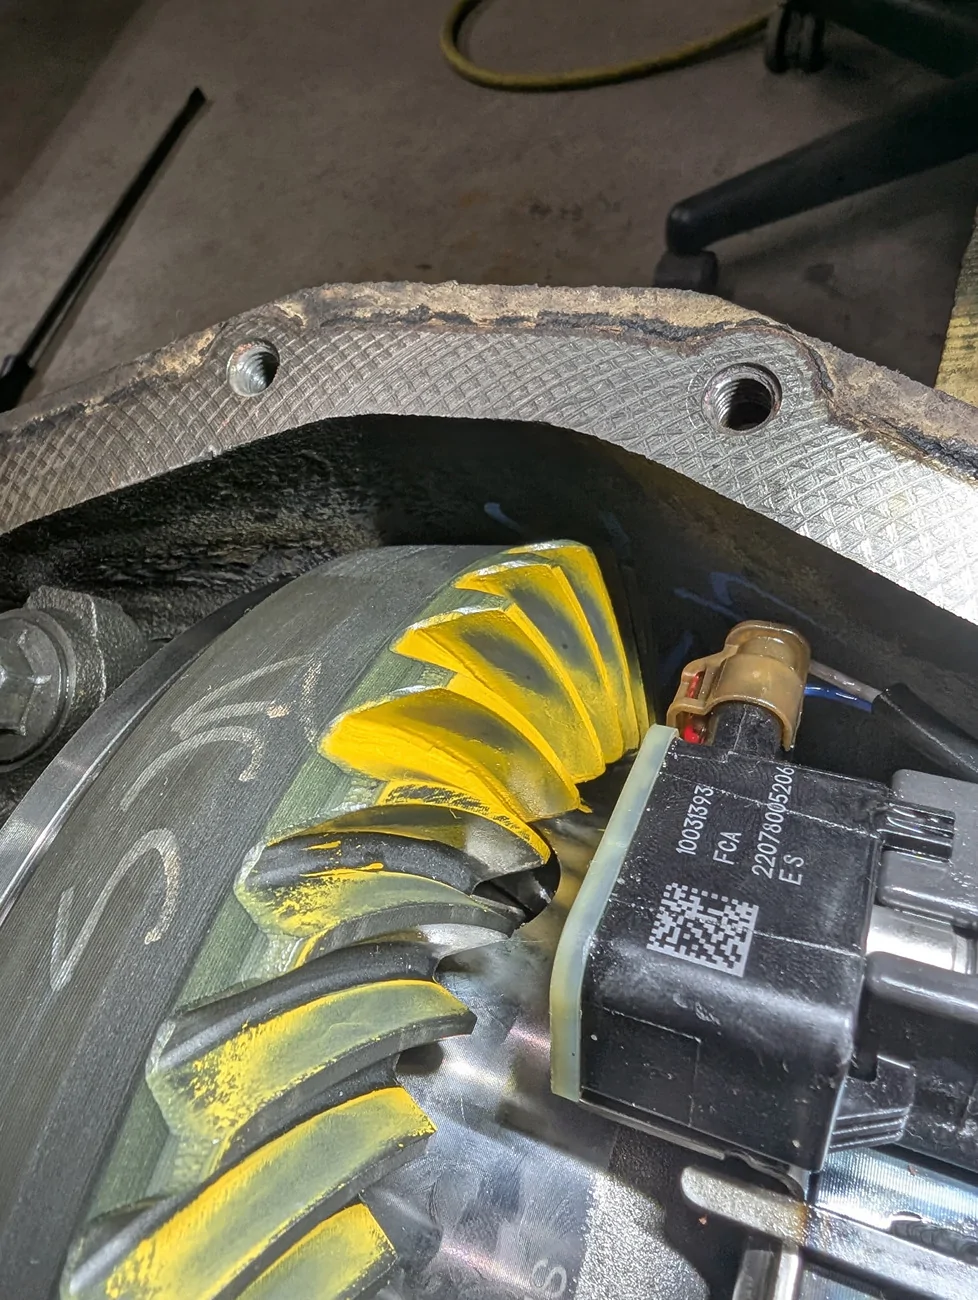
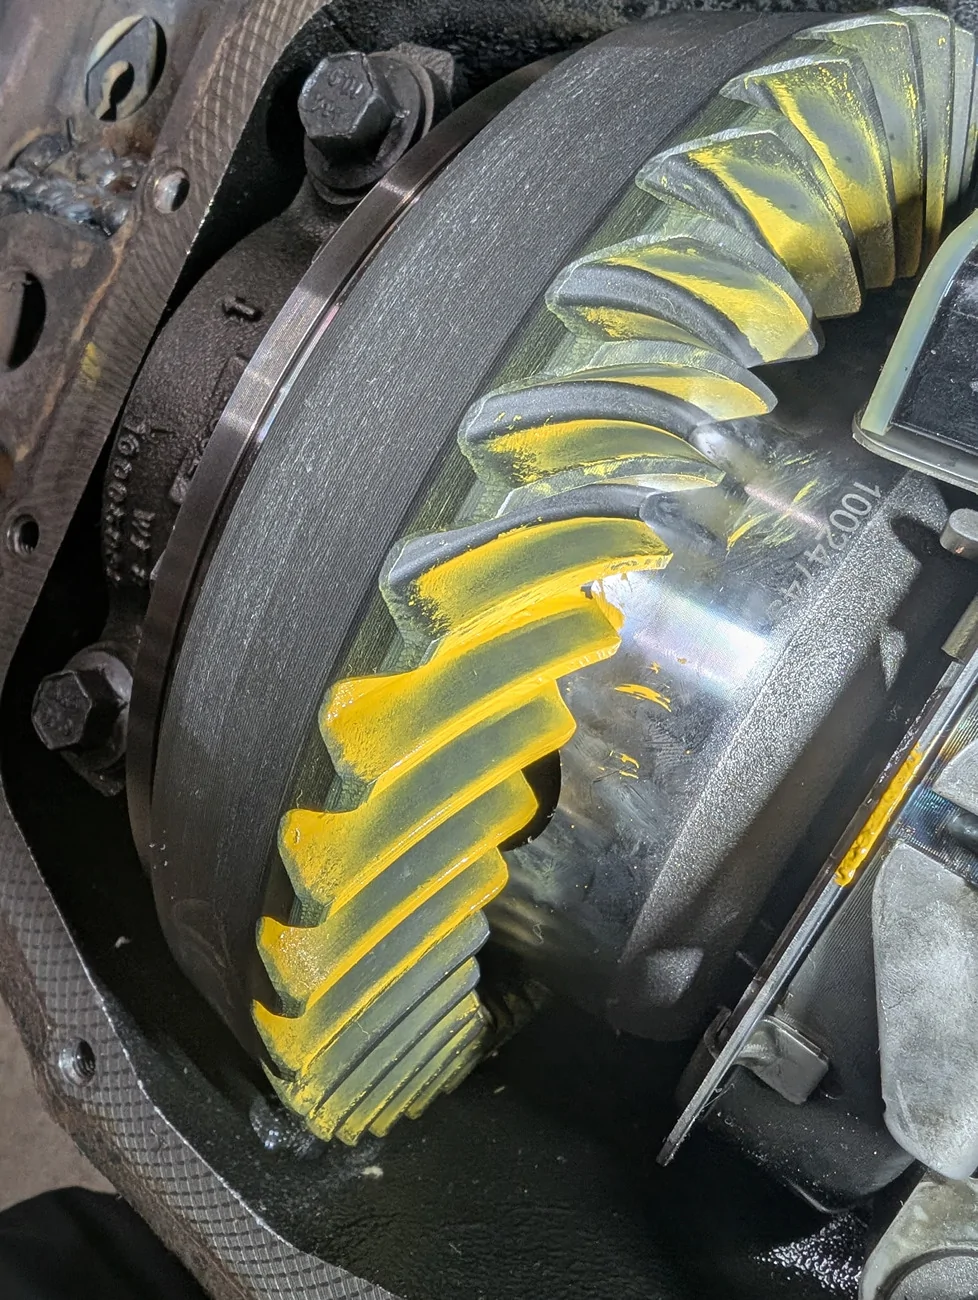
We messed with the front pattern for probably 12 hours, referenced multiple setup manuals, and contacted several professionals we knew in the space to get their input before we called it good enough. We wanted it perfect, but ultimately couldn't get it there and everybody we reached out to concurred that it was acceptable. If I were to do it over I'd spend the money on some more shims. And maybe some shim drivers.

We ended up getting it a smidge better than this but none of us thought to take any pictures.

Front, M210 4.88s:

IMG_20260209_060712.webp
IMG_20260209_060706.webp


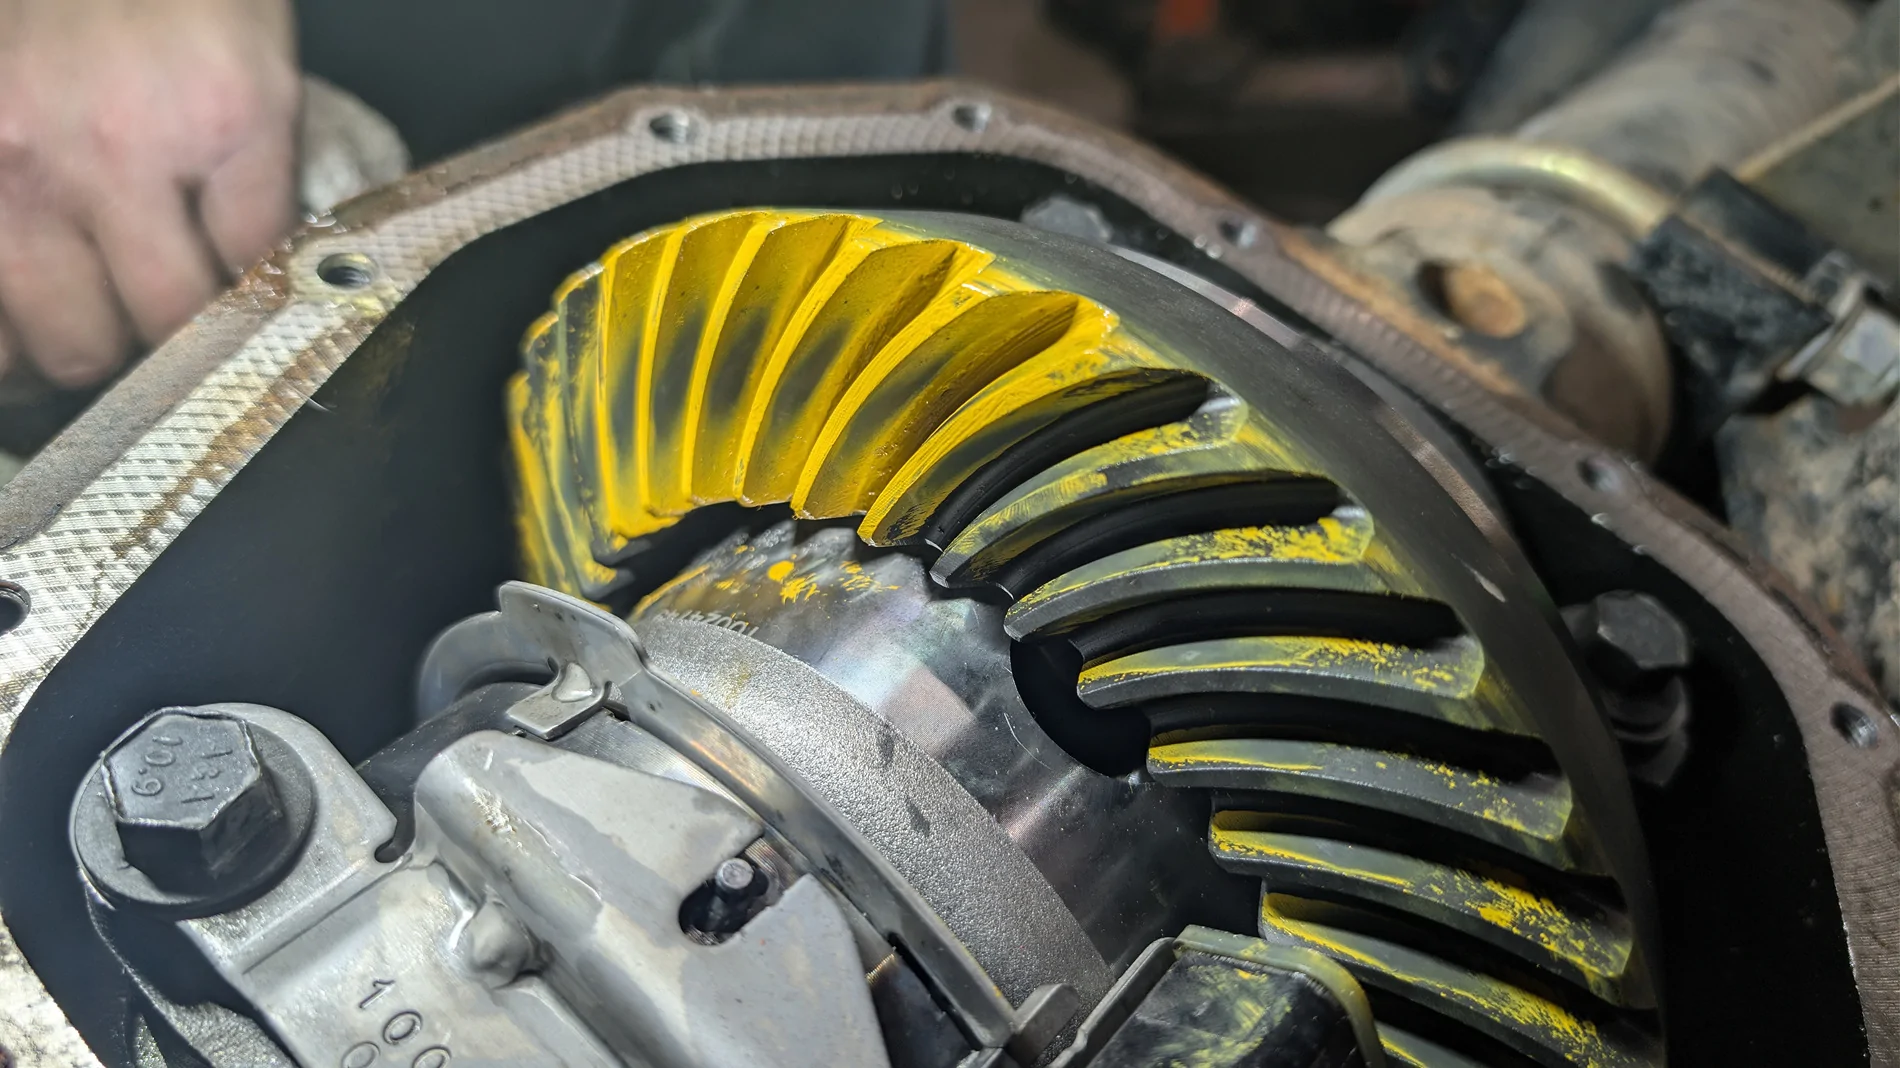
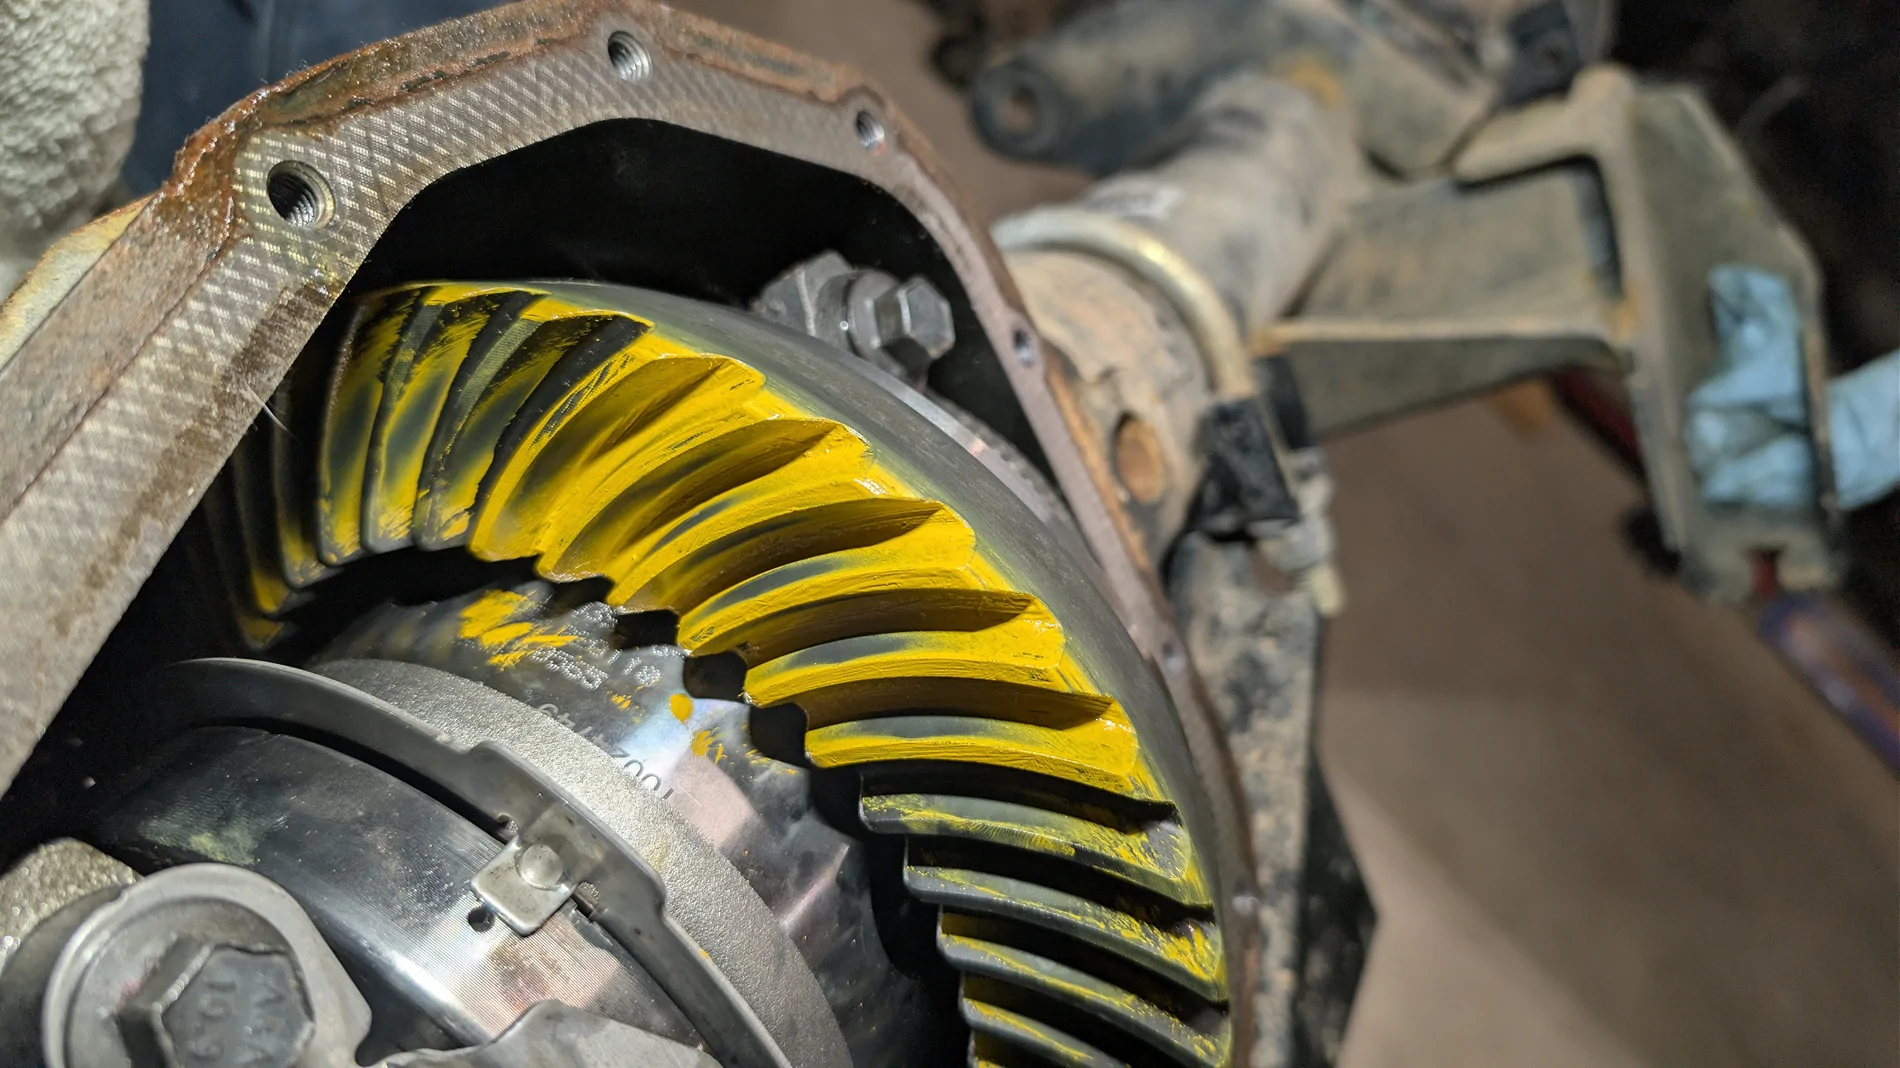
I already mentioned it in a previous post but I'm going to put it in here again so it's in the same place. We dropped the rear in with the same factory shim stack and the pattern was really good, preload was good, backlash was good. After the front axle put up such a fight it was nice to not really have to do anything with the rear. Ultimately, the front end took two days of work and the rear took an hour.

Rear, M220 4.88s:

PXL_20260207_204537315.webp
PXL_20260207_204540598.webp


One more note on that, the Spicer rebuild kits don't come with marking compound, so you'll need that. They do come with some gasket, but the diff cover seals are reusable. We used that gasket on the pinion splines, but the splines are so tight on these pinions it might not even be necessary. An air hammer to get the pinions out was a lifesaver.

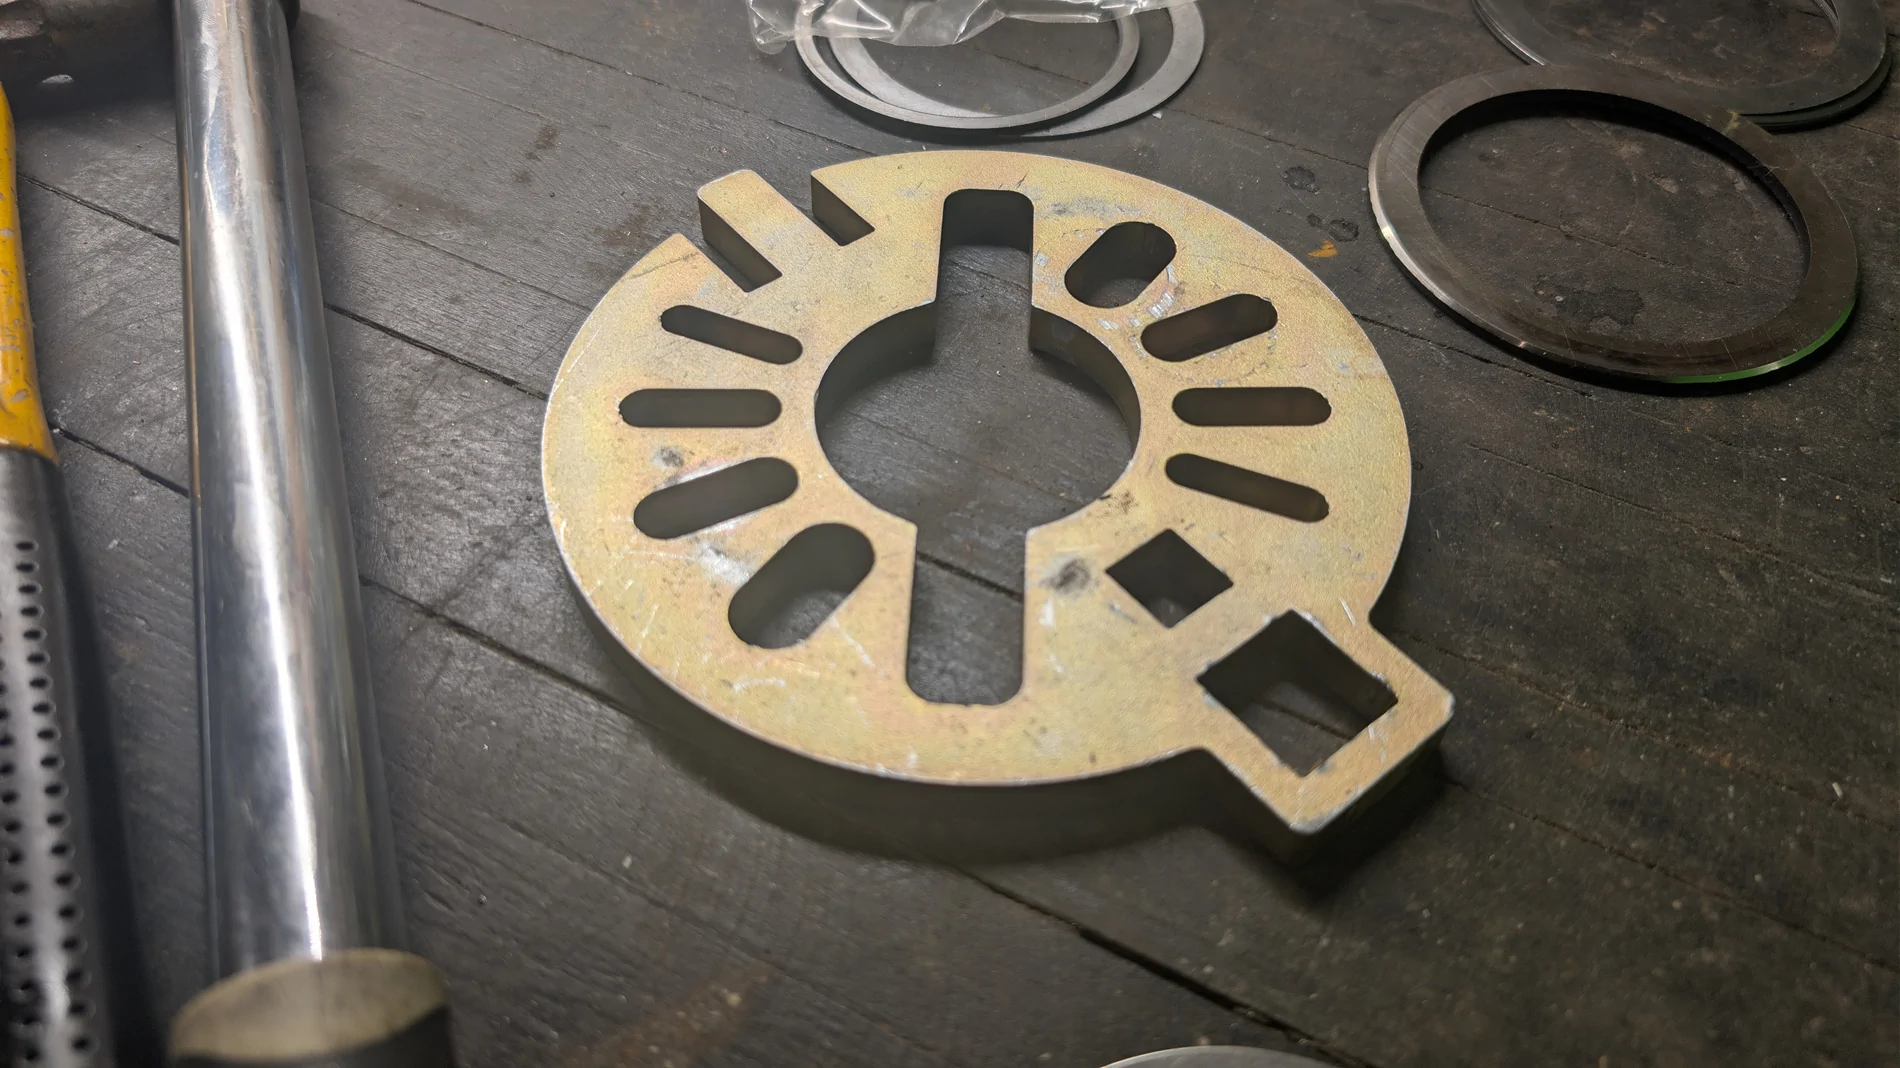
A pinion holding tool was really useful as well. We used this one, which also has a piece for using it to press the pinion out if you'd rather.

PXL_20260209_111638019.webp


We used a Vevor bearing puller as well, though not strictly necessary if you're willing to just cut the bearings off.
Same story with a case spreader. These aren't usually necessary either but with the shitty shim stack selection in the front it came in clutch to get the offset decent and still have a tight fit in the housing.
A shop press is a must have, we used it for both pressing on new bearings and for holding the carrier to tighten the ring gear bolts. I just have a little 12 ton press from Harbor Freight.

Everything else was pretty standard for a regear. I had gotten some seal drivers that were supposed to work on these axles but they didn't fit. The construction of the pinion seals allowed us to just hammer them in with a block of wood anyway, they put up no fight. I had also gotten a race driver set and we ended up just using a punch to drive them in, it was easier to feel what it was doing and see that it was going in straight, imo. Tons of options for a good punch but this was a great length with an oval end and worked beautifully.

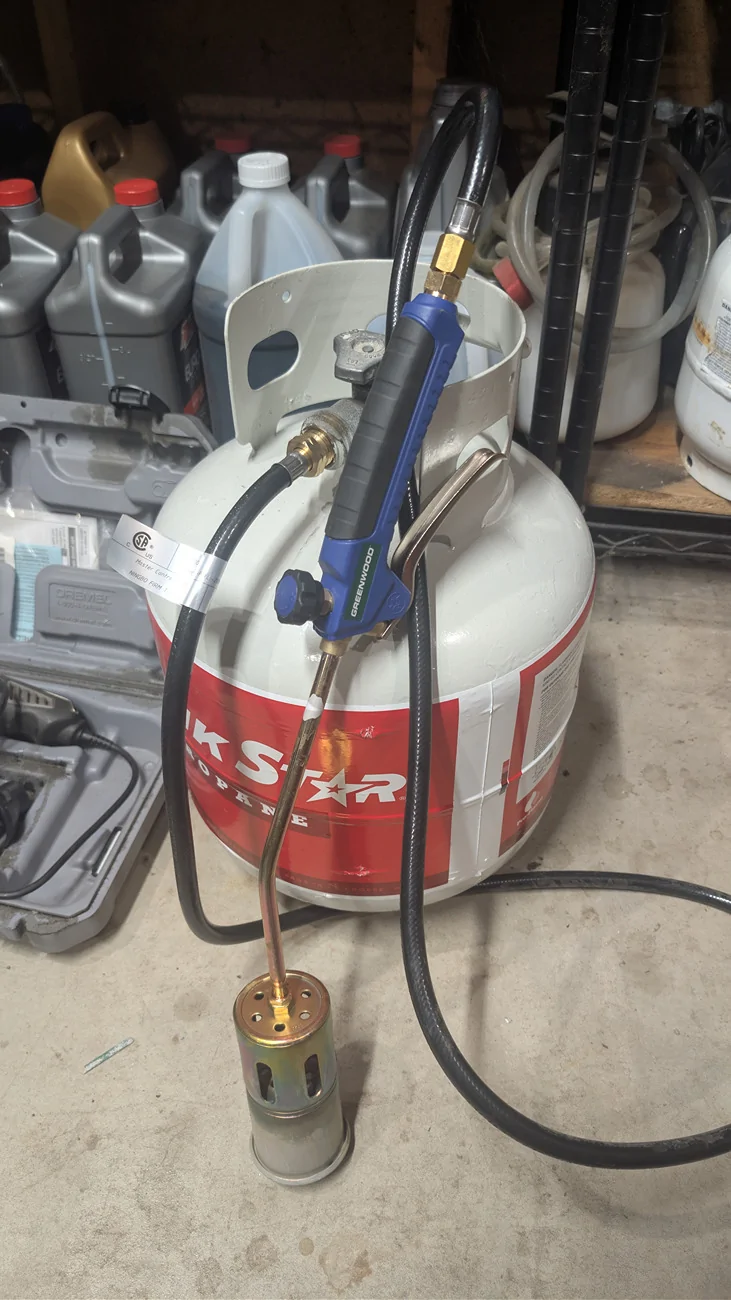
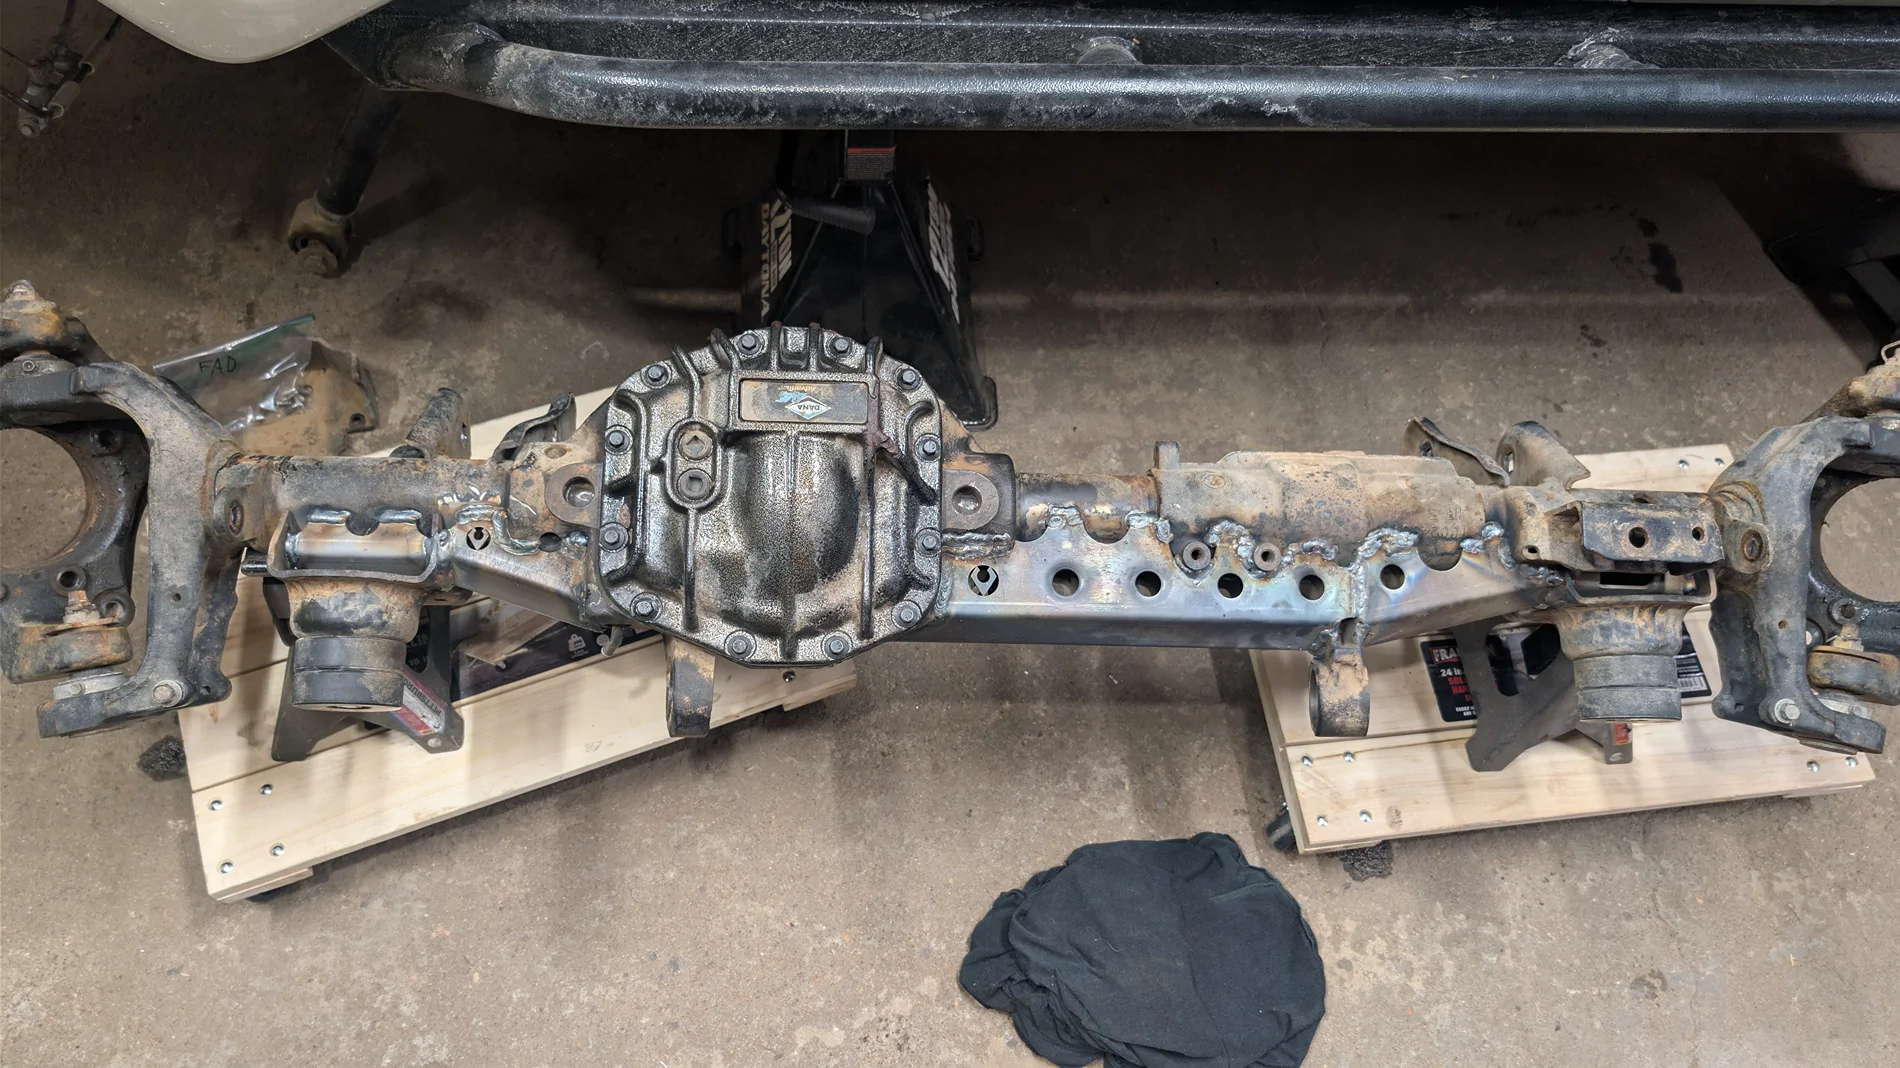
We used a propane torch ($30 at Harbor Freight) and an infrared thermometer to get the whole front axle up to about 300-350° for welding the truss on, and wrapped in a welding blanket afterward. My little Hobart 190 (230v) did just fine. The welds aren't super pretty on the front of the axle but they burned in real nice on the rear (go figure.) Truss is from Artec

PXL_20260209_111553441.webp

PXL_20260209_103742406.webp


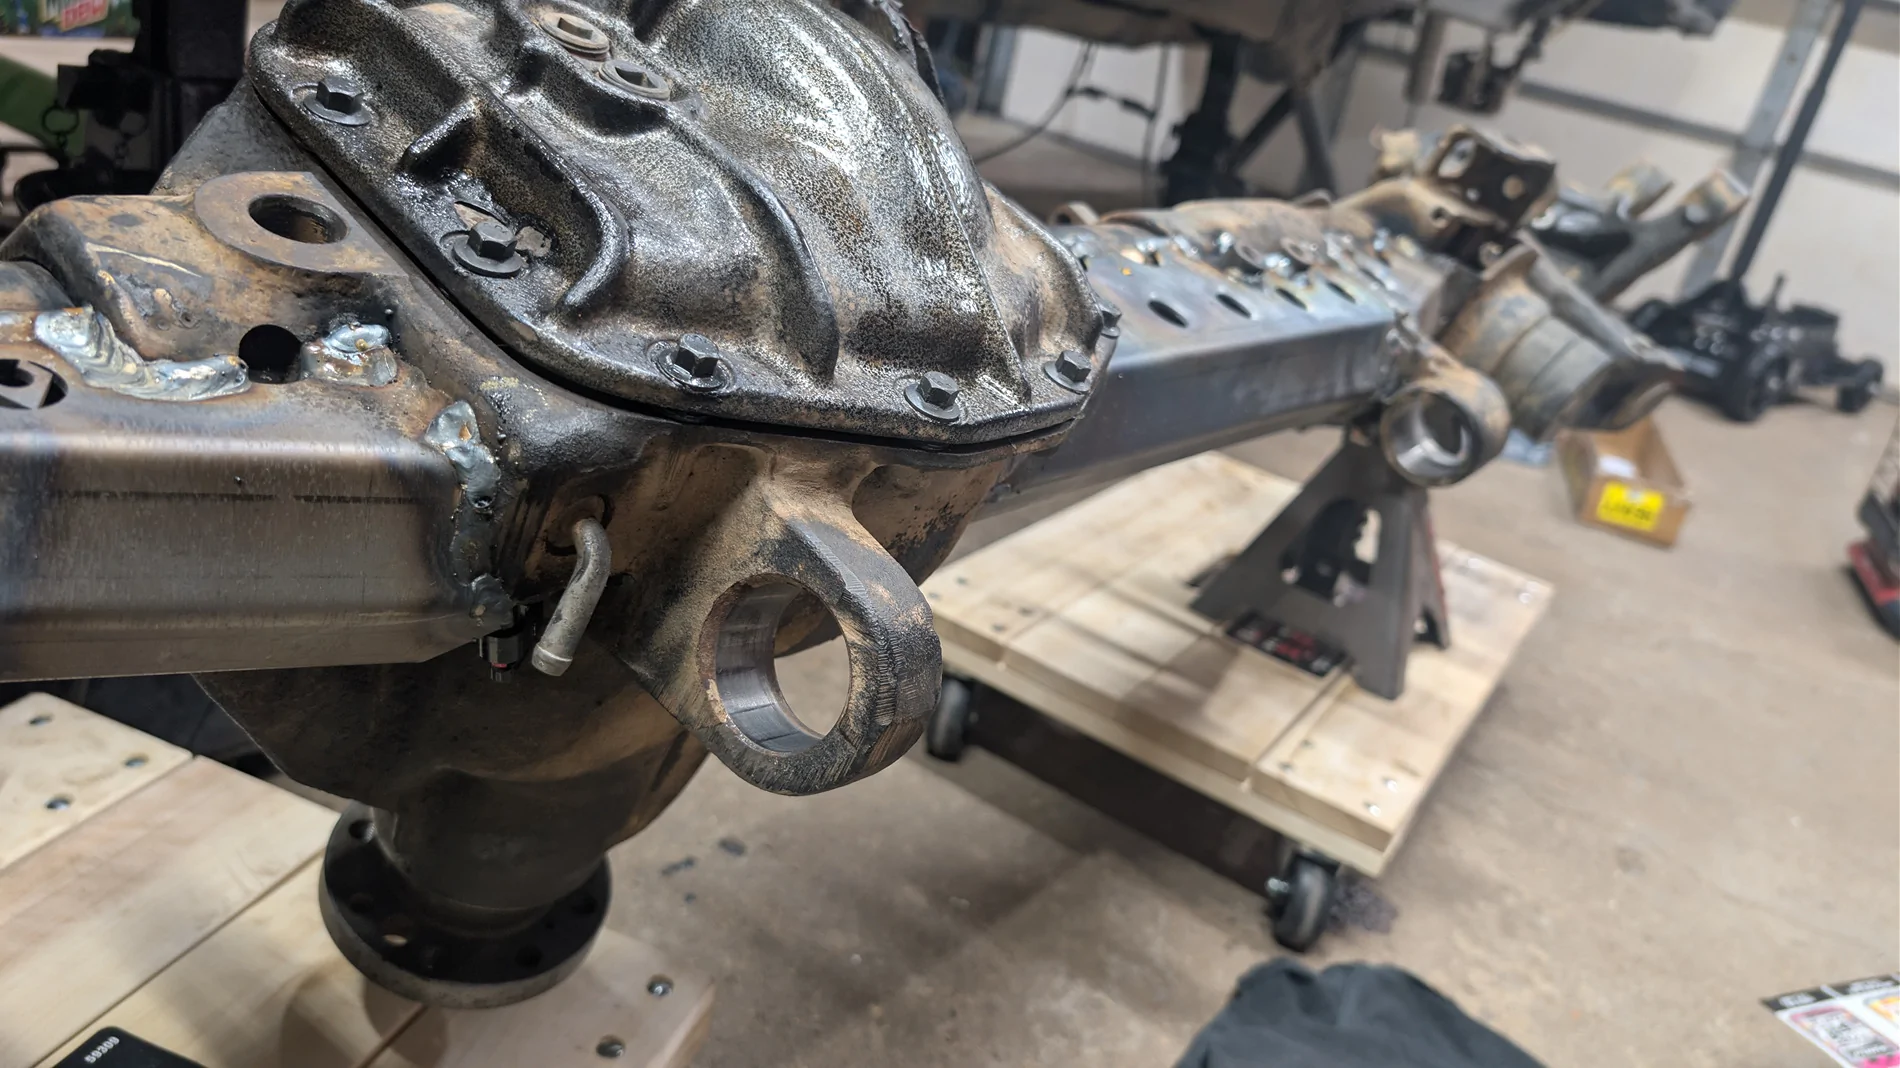
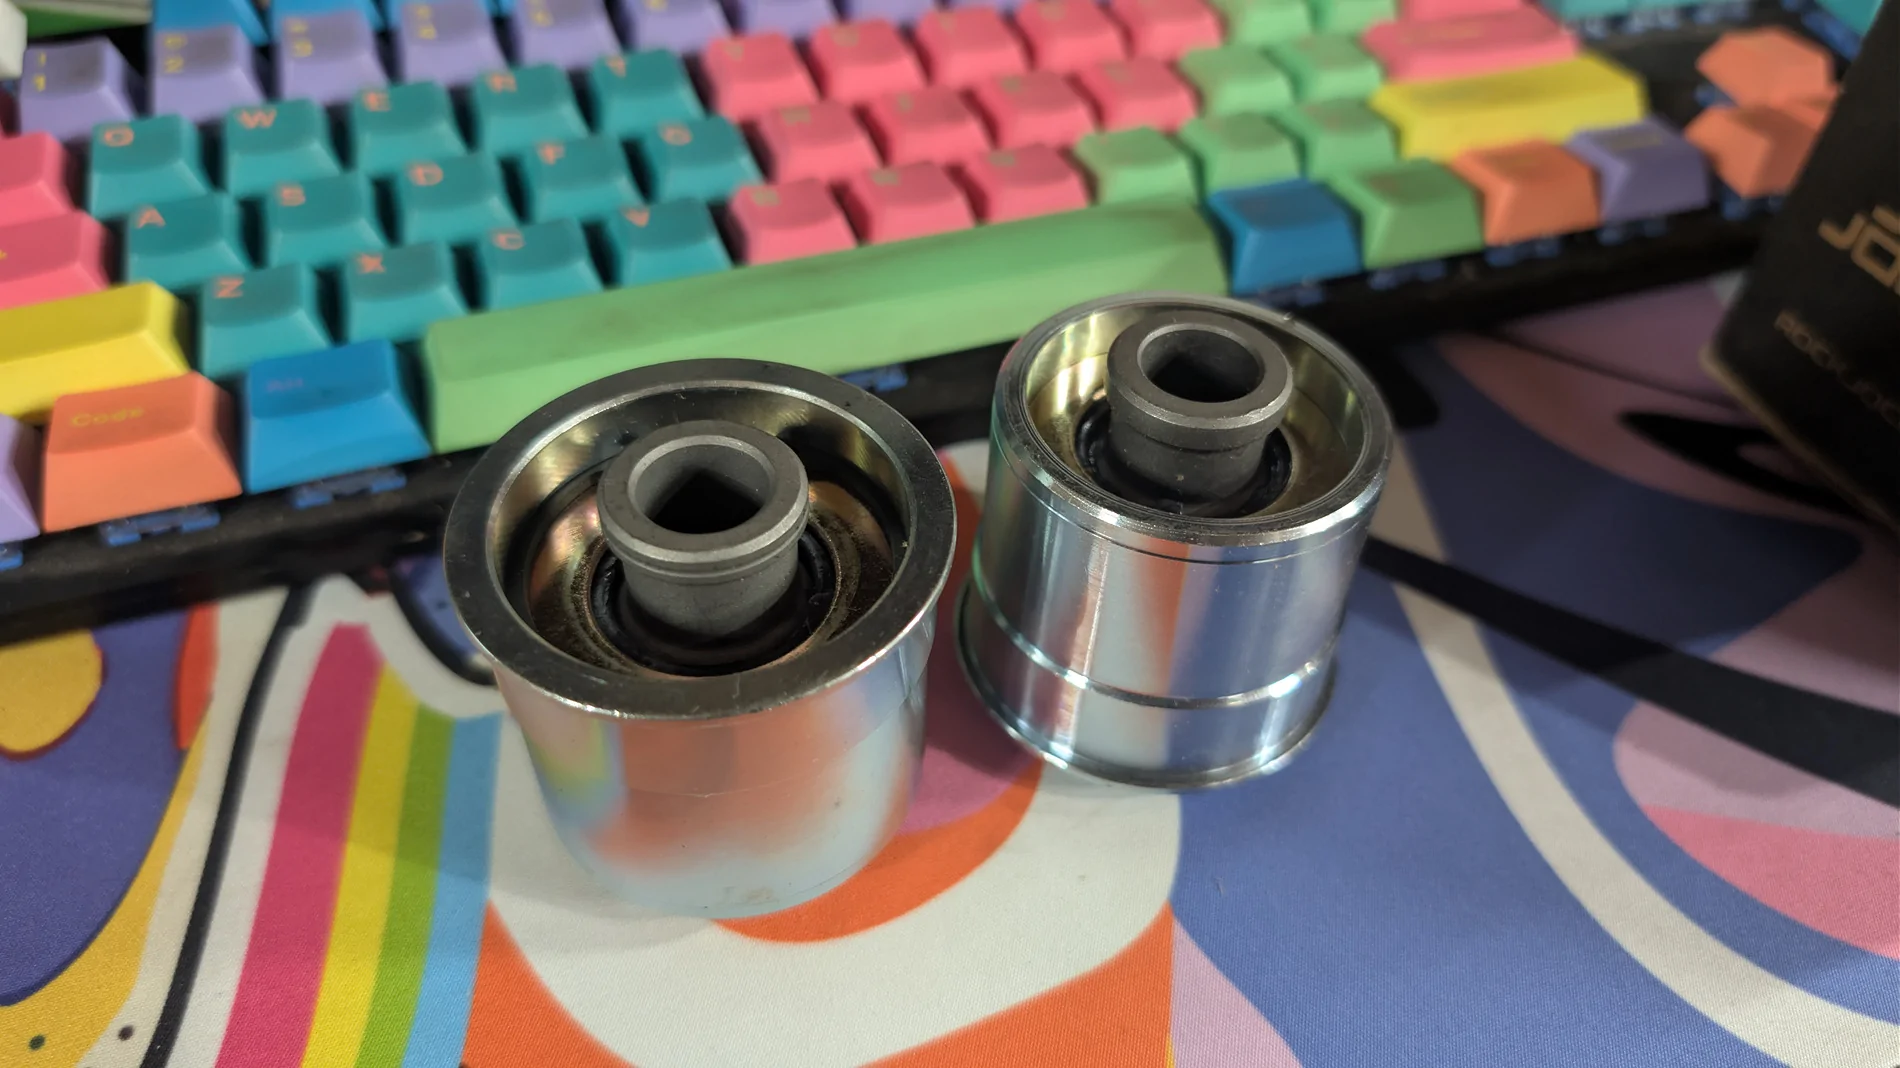
Pressed out the upper bushings on the front axle and will be installing Johnny Joints in their place. I did the same on my TJ back in the day, it really helps to tighten up the front end, imo. Gets rids of that last little bit of reverb feeling. Every other joint on the front is already a JJ.

PXL_20260209_103838324.webp

PXL_20260209_103827553.webp


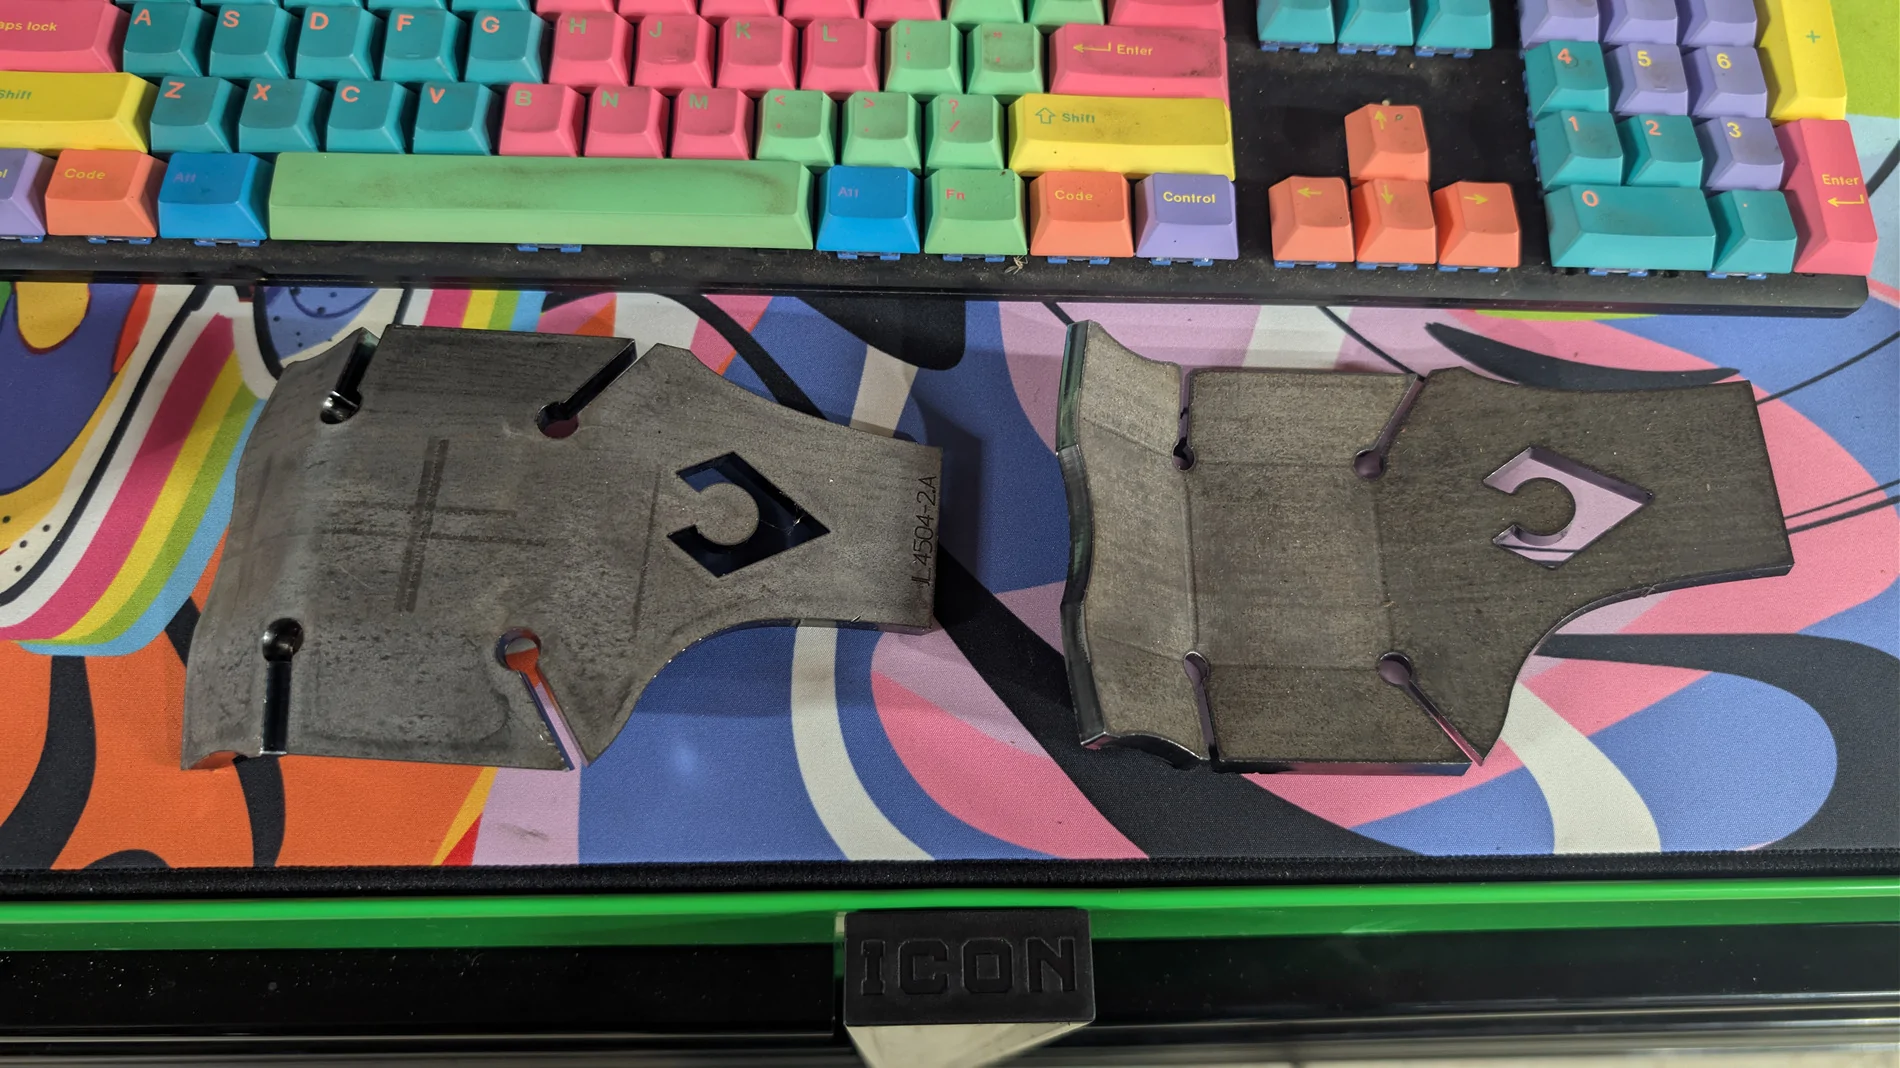
I still have some lower control arm mount skids to weld on, then get some paint on there and throw them back under the Jeep.

PXL_20260209_103911590.webp


I think that's about everything.

Does anybody have any recommendations for anything else I should do while I have the convenience of having the axles out?
Thanks for the write up, that is everything I plan to do as well.

That is disappointing ECGS can't pack a box...

Things to do... Ball joint replacement. Rag soaked in mineral spirits stuffed down the axle tube with a broom handle to clear out trash. C-Braces on the front axle, remount front axle without springs and flex the front to fine tune bump stop sizes and look for other issues?
 

BlueScapegoat

Well-Known Member
First Name
Trevor
Joined
Dec 2, 2018
Threads
14
Messages
1,126
Reaction score
2,738
Location
MN
Vehicle(s)
91 ST185, 04 Ram SRT10, 04 Forester XT, SC'd 05 Rubi, 22 JTRD
Occupation
Air Traffic Controller
Vehicle Showcase
4
Thanks for the write up, that is everything I plan to do as well.

That is disappointing ECGS can't pack a box...

Things to do... Ball joint replacement. Rag soaked in mineral spirits stuffed down the axle tube with a broom handle to clear out trash. C-Braces on the front axle, remount front axle without springs and flex the front to fine tune bump stop sizes and look for other issues?
I was thinking about those braces. It's actually already got Dynatrac HD ball joints and I don't want to remove them, I need to look to see how close those sit to the ball joints and if I can weld them on without risk of messing up the joints. Probably.
 

WILDHOBO

Well-Known Member
First Name
Dan
Joined
Sep 24, 2021
Threads
74
Messages
11,757
Reaction score
17,898
Location
Colorado
Vehicle(s)
2021 Gladiator Rubicon
Occupation
Network Engineer
Vehicle Showcase
1


Top