Zero_Accel
Well-Known Member
- First Name
- Aaron
- Joined
- Oct 27, 2021
- Threads
- 32
- Messages
- 526
- Reaction score
- 1,283
- Location
- El Paso, Texas
- Vehicle(s)
- 2020 Jeep Gladiator Sport
- Build Thread
- Link
- Occupation
- Systems Engineer
- Thread starter
- #1
(Summary at the bottom: Overall rating: 8/10: Feel free to ask any questions!)
The day has arrived, I've lost my marbles and cut open my truck with an angle grinder!

Now I have my reasons for this, as I'll explain bellow. It was so I could do this!
------------------------------------------------------------------------------------
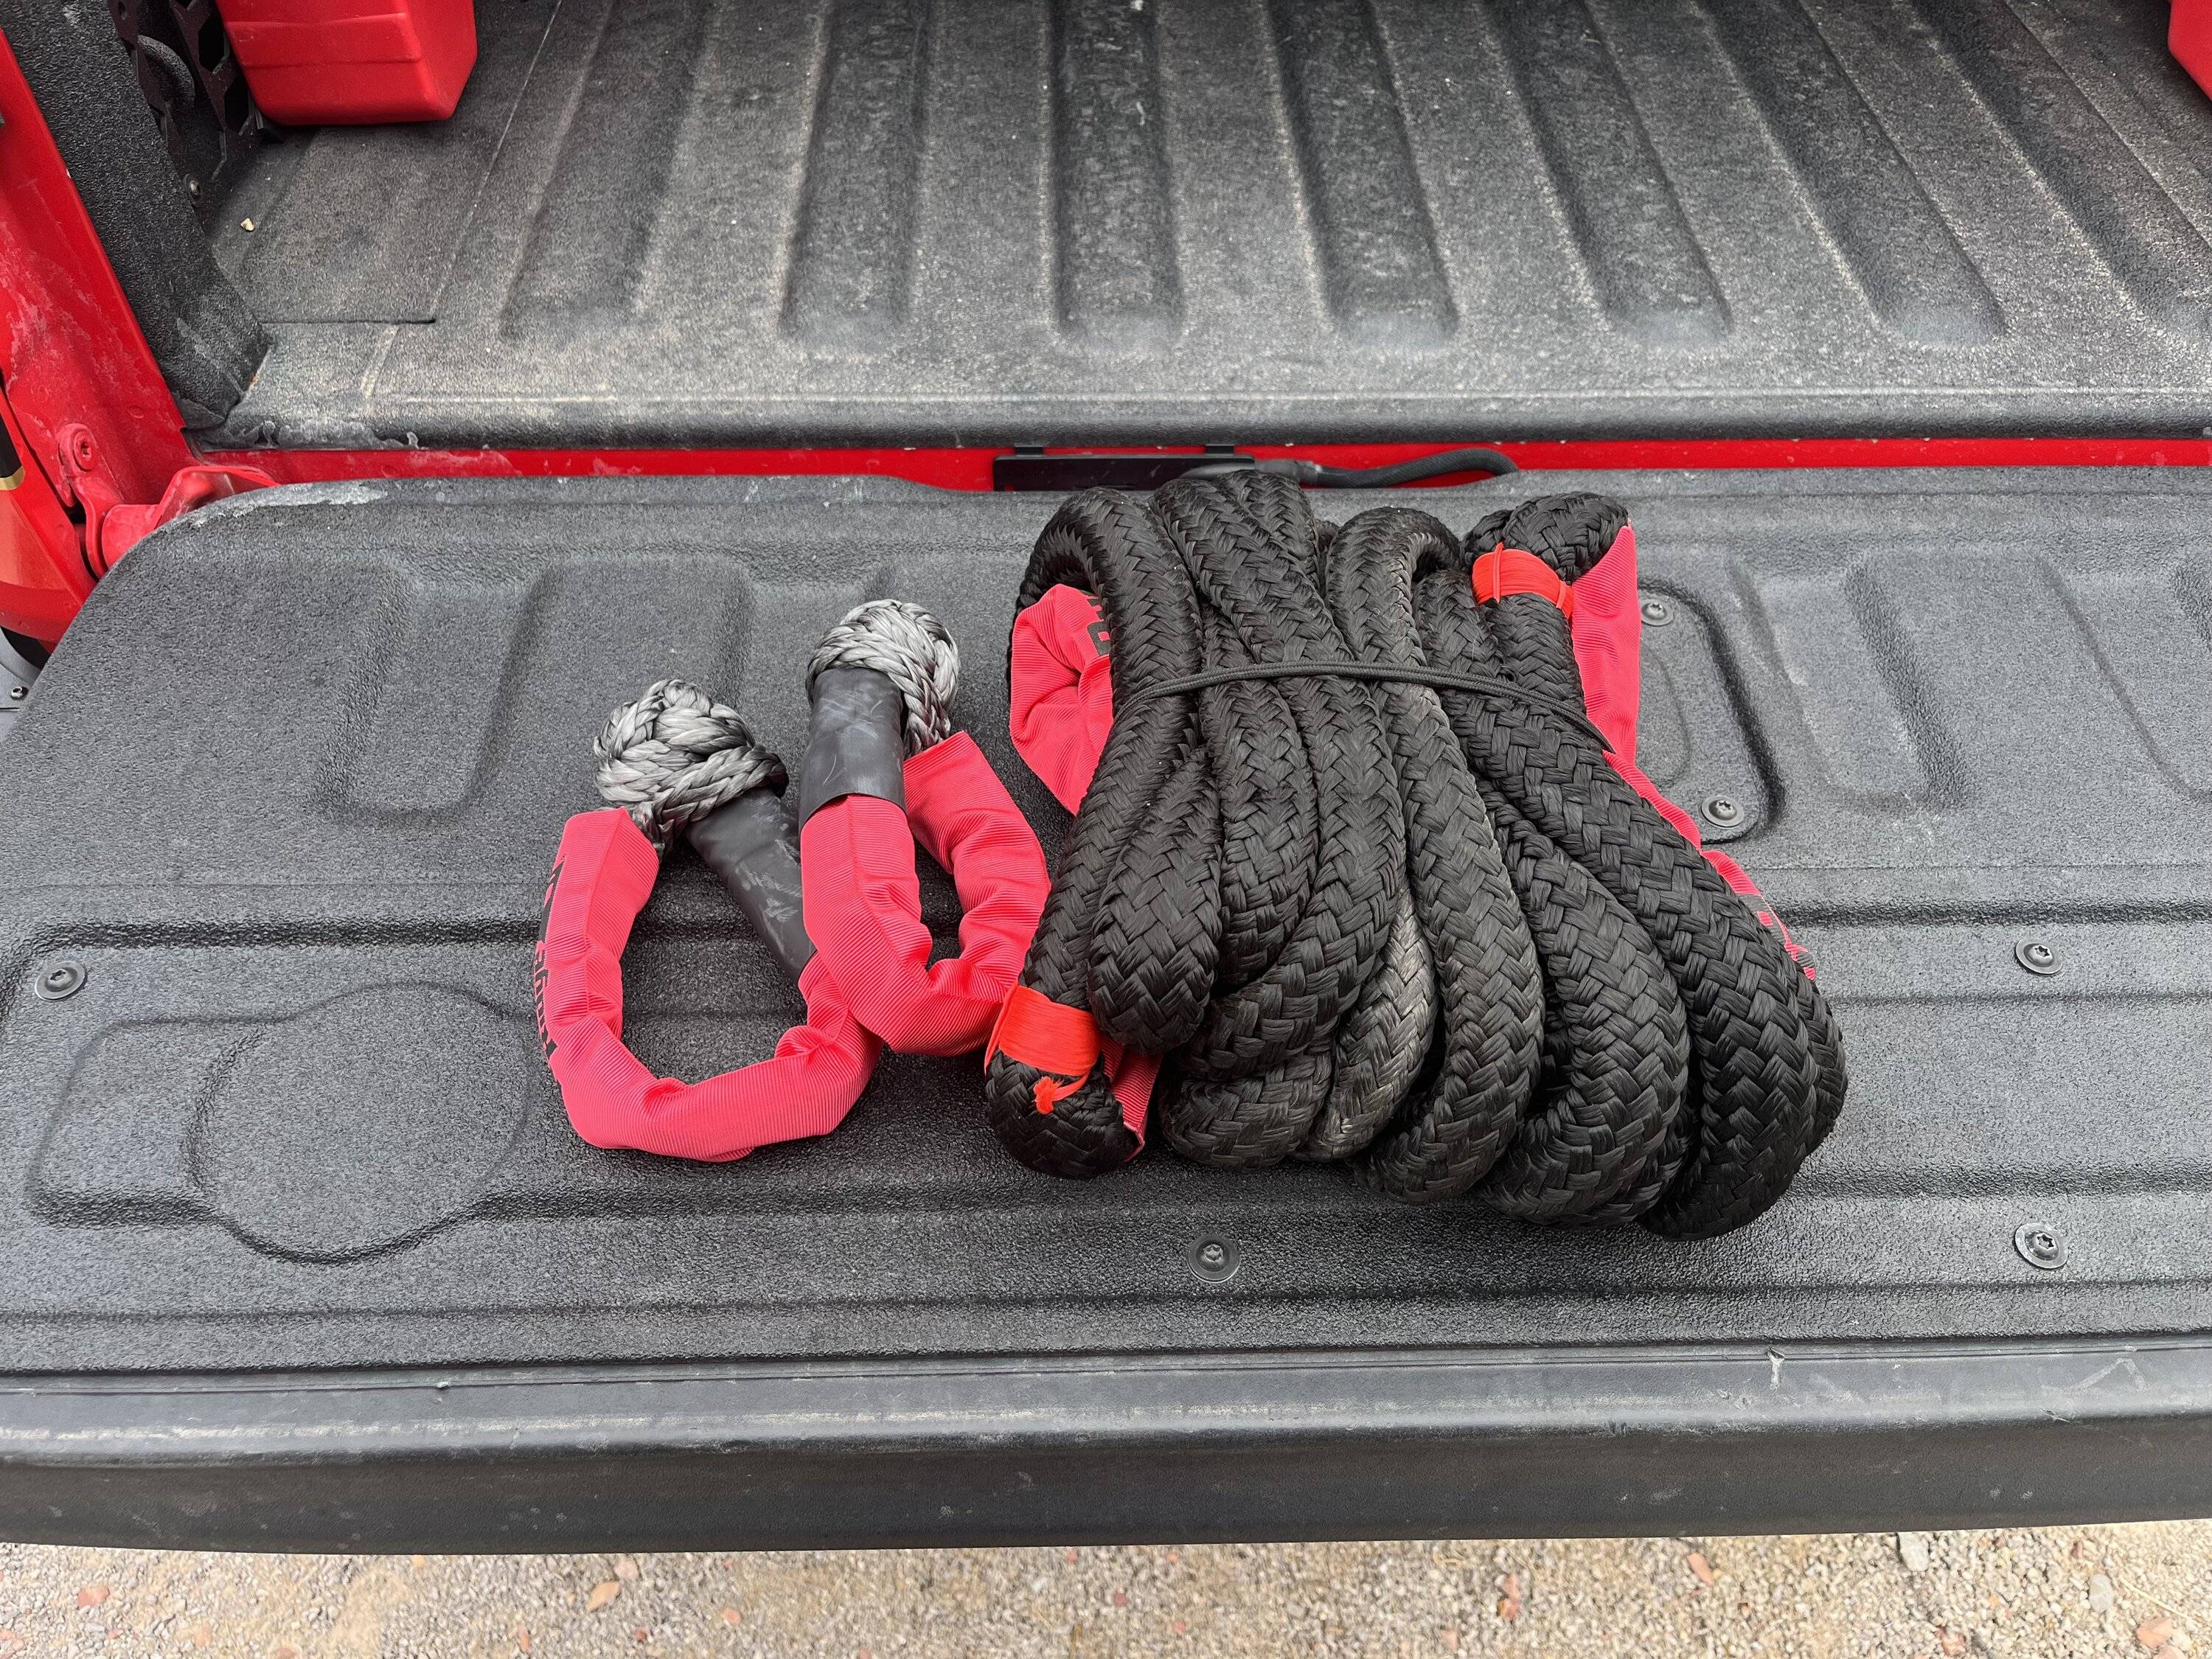
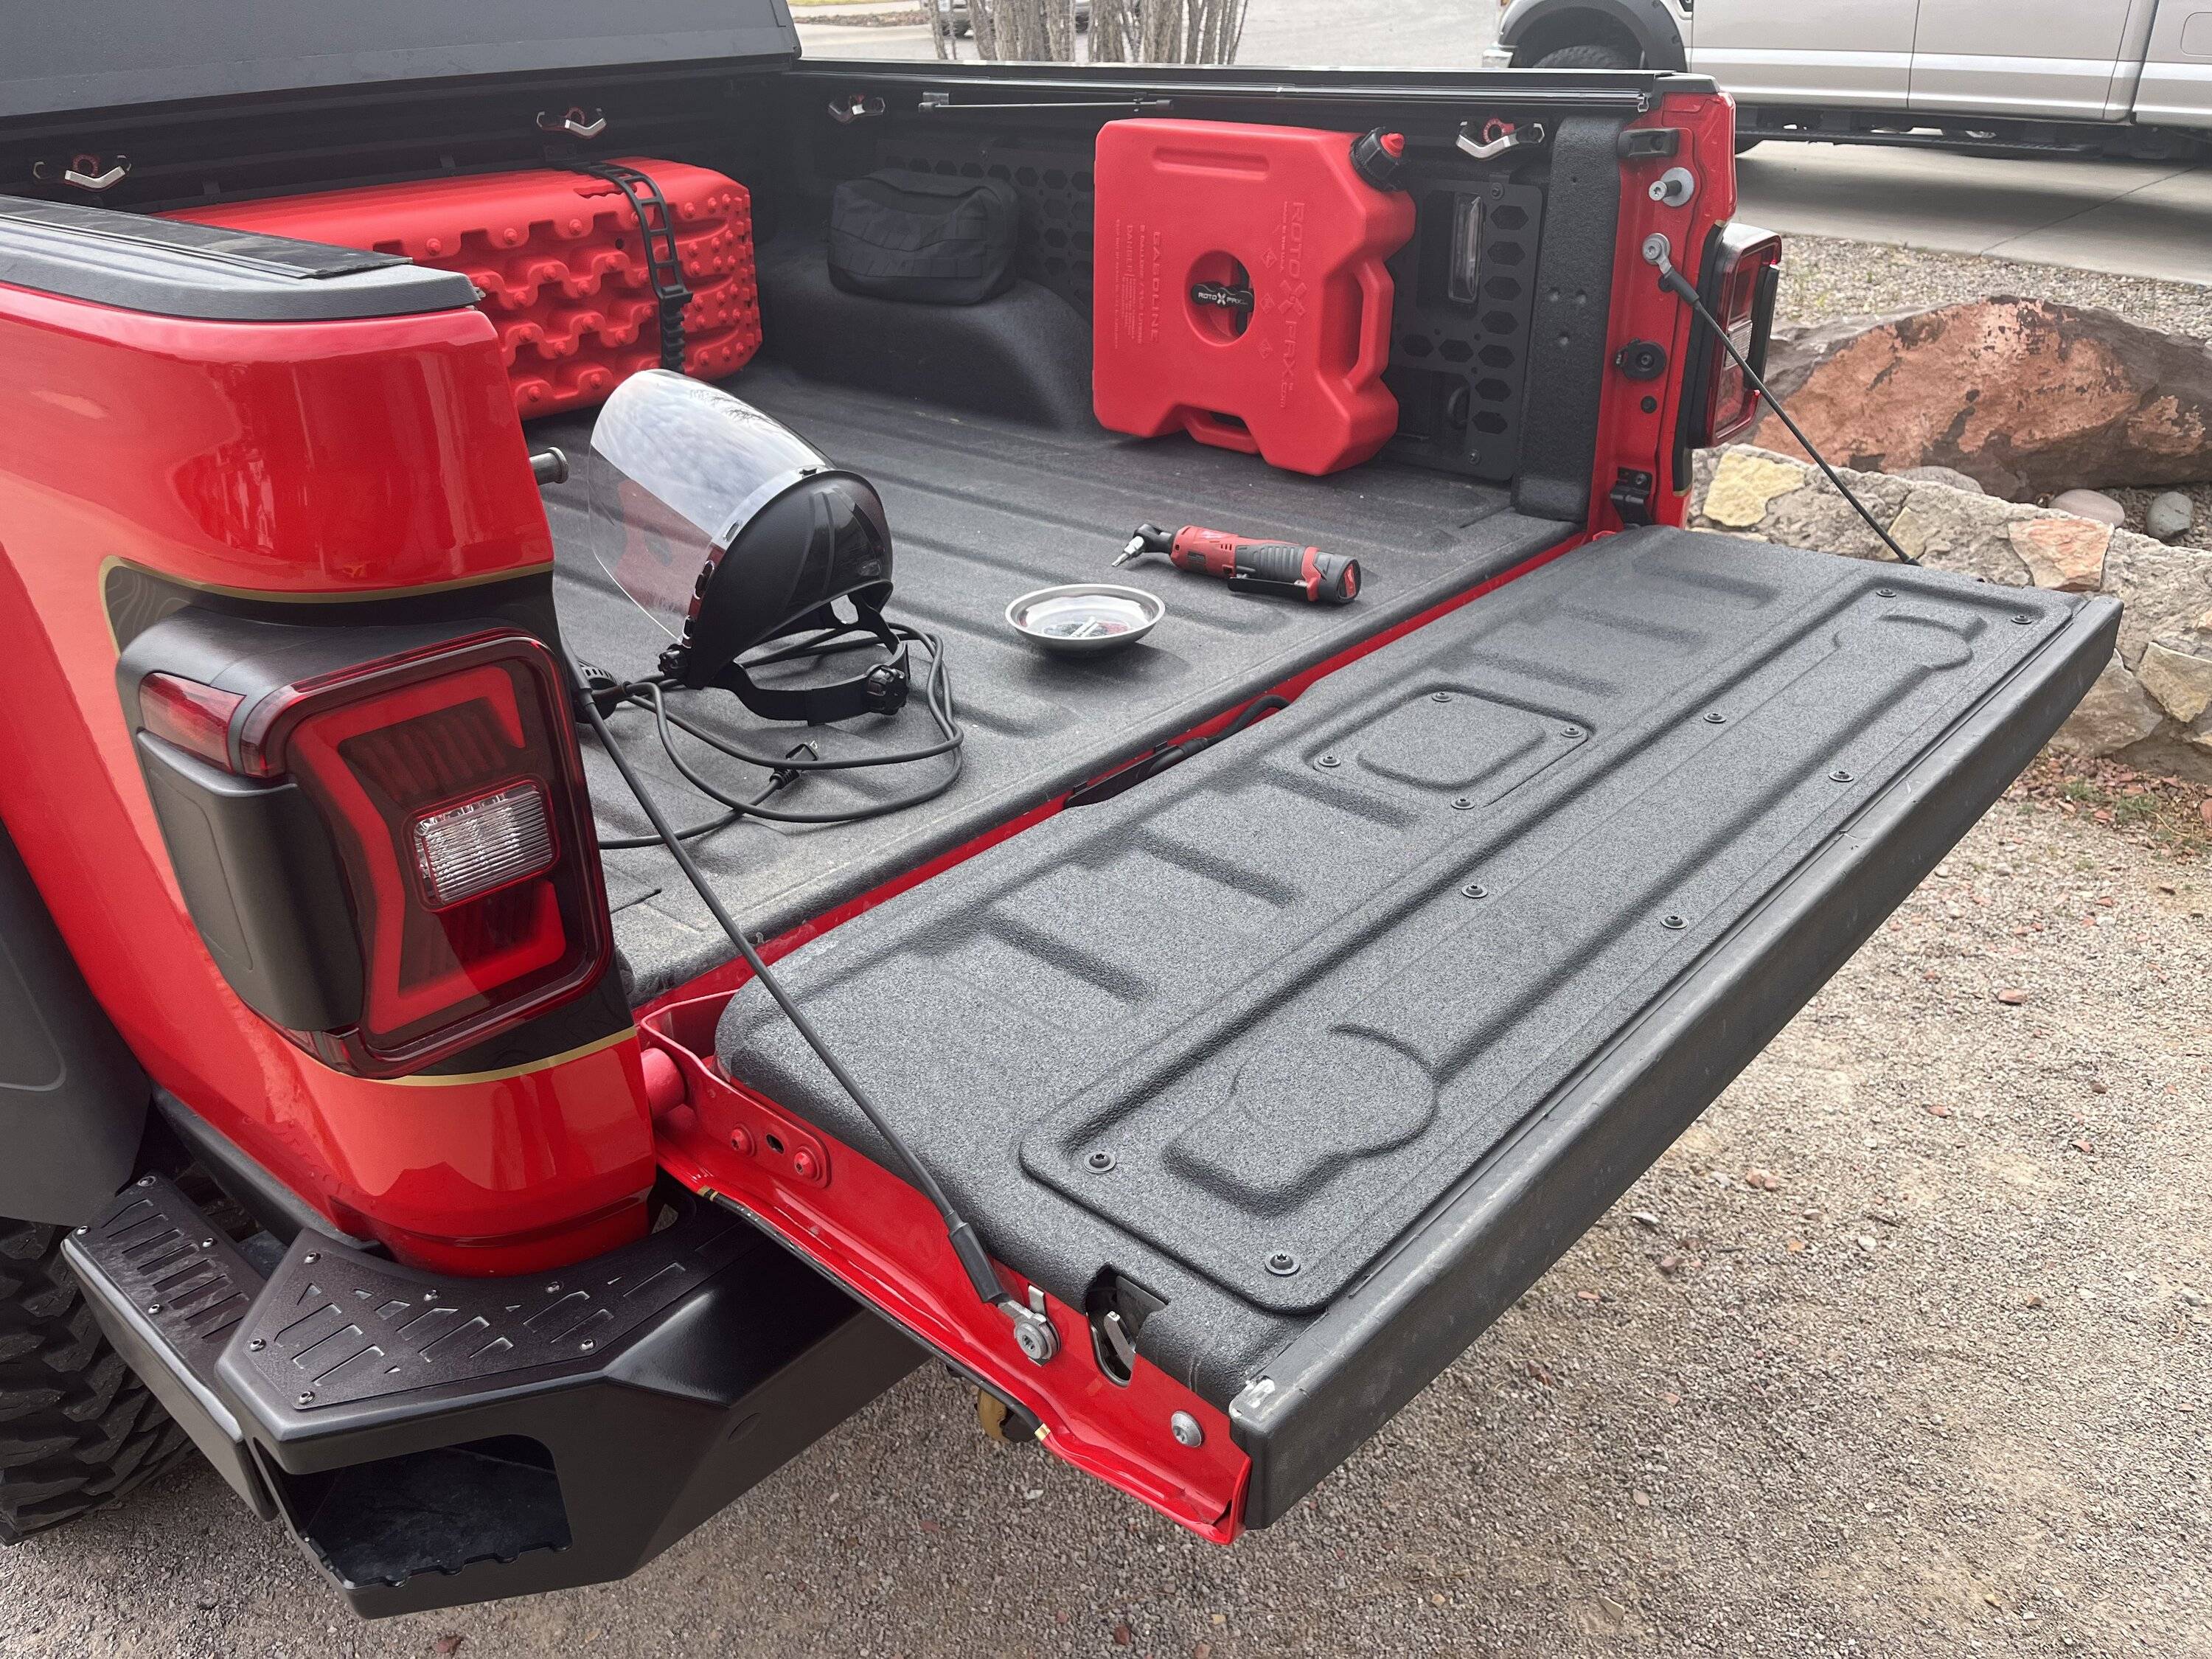
I have a small collection of recovery gear that I use semi-regularly, especially when the weather gets bad. 90% of the time, it's locals who take their street car/truck through the desert as a "shortcut" and get stuck in the soft sand. Because of this, my most used item is my kinetic rope. It's real easy to throw it on a soft shackle, and gently remove most stuck vehicles.
BUT, since it's typically used during bad weather, it tends to get muddy. This was a problem as water soaks into it, and stinks up the cab/gets the back of the seat dirty when it would get stored in the interior storage bins. I wanted to move it to the bed for these reasons, BUT, without having to unbutton it from the typical "molle panel" mount storage.
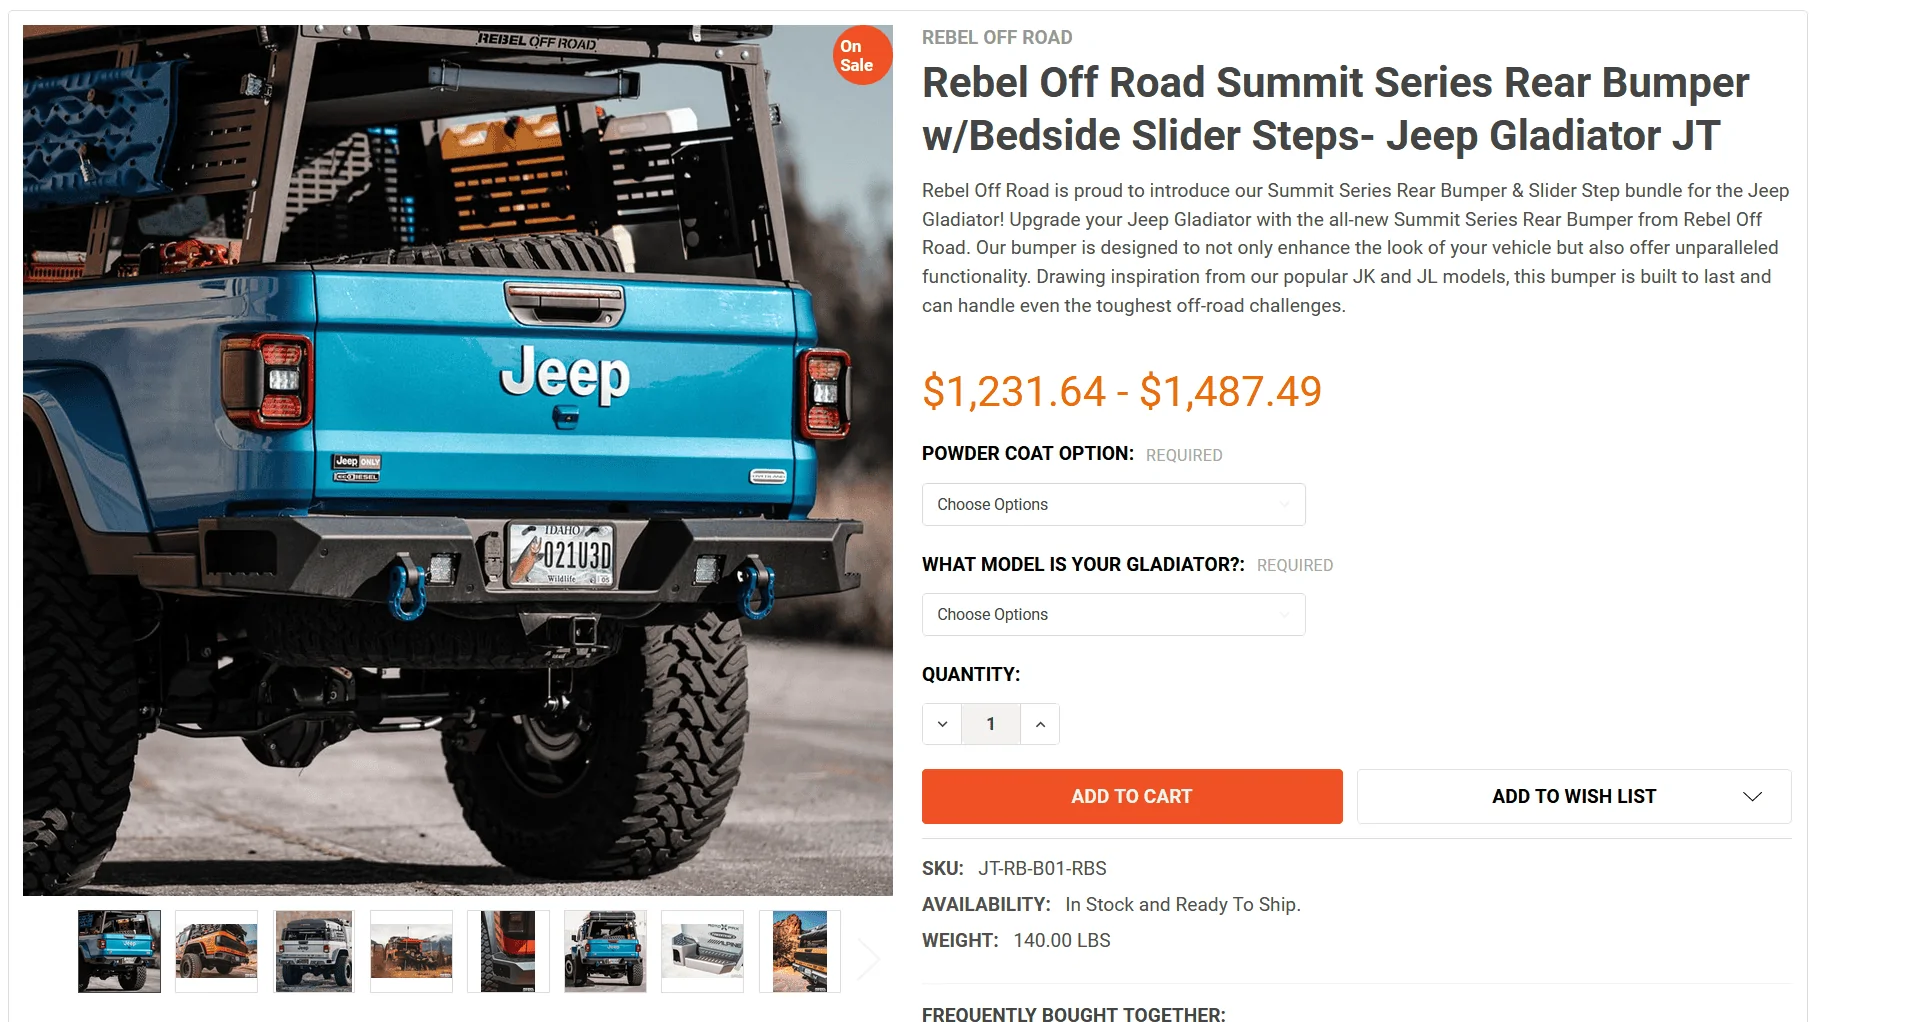
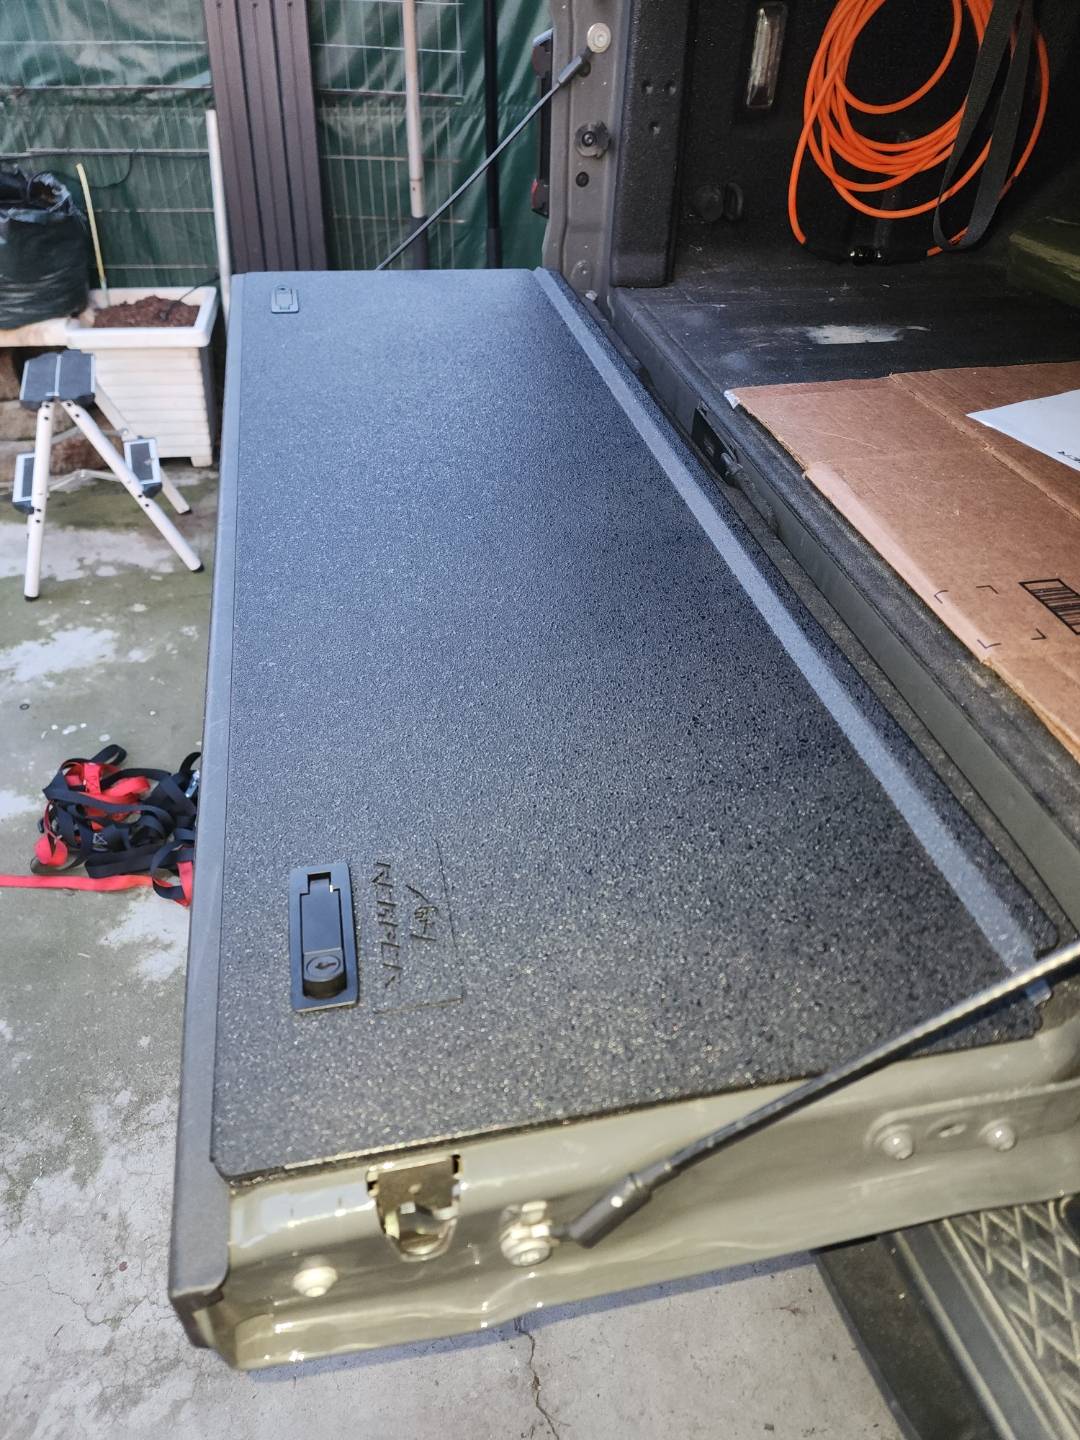
Enter the Reaper Off-Road tailgate box.
I liked this idea because it would give me storage space that wouldn't compromise interior comfort/space (overhead molle mounts), and it would leave me room on my bedside molle panels for "less used" gear, but gear that I want to carry off-road. Plus, this option leaves my recovery gear more accessible than both options, and will allow me to store gear right after it's been used without worrying about getting other items dirty with mud/bog water.
Biggest downside: You have to cut open your tailgate.
Lets begin.
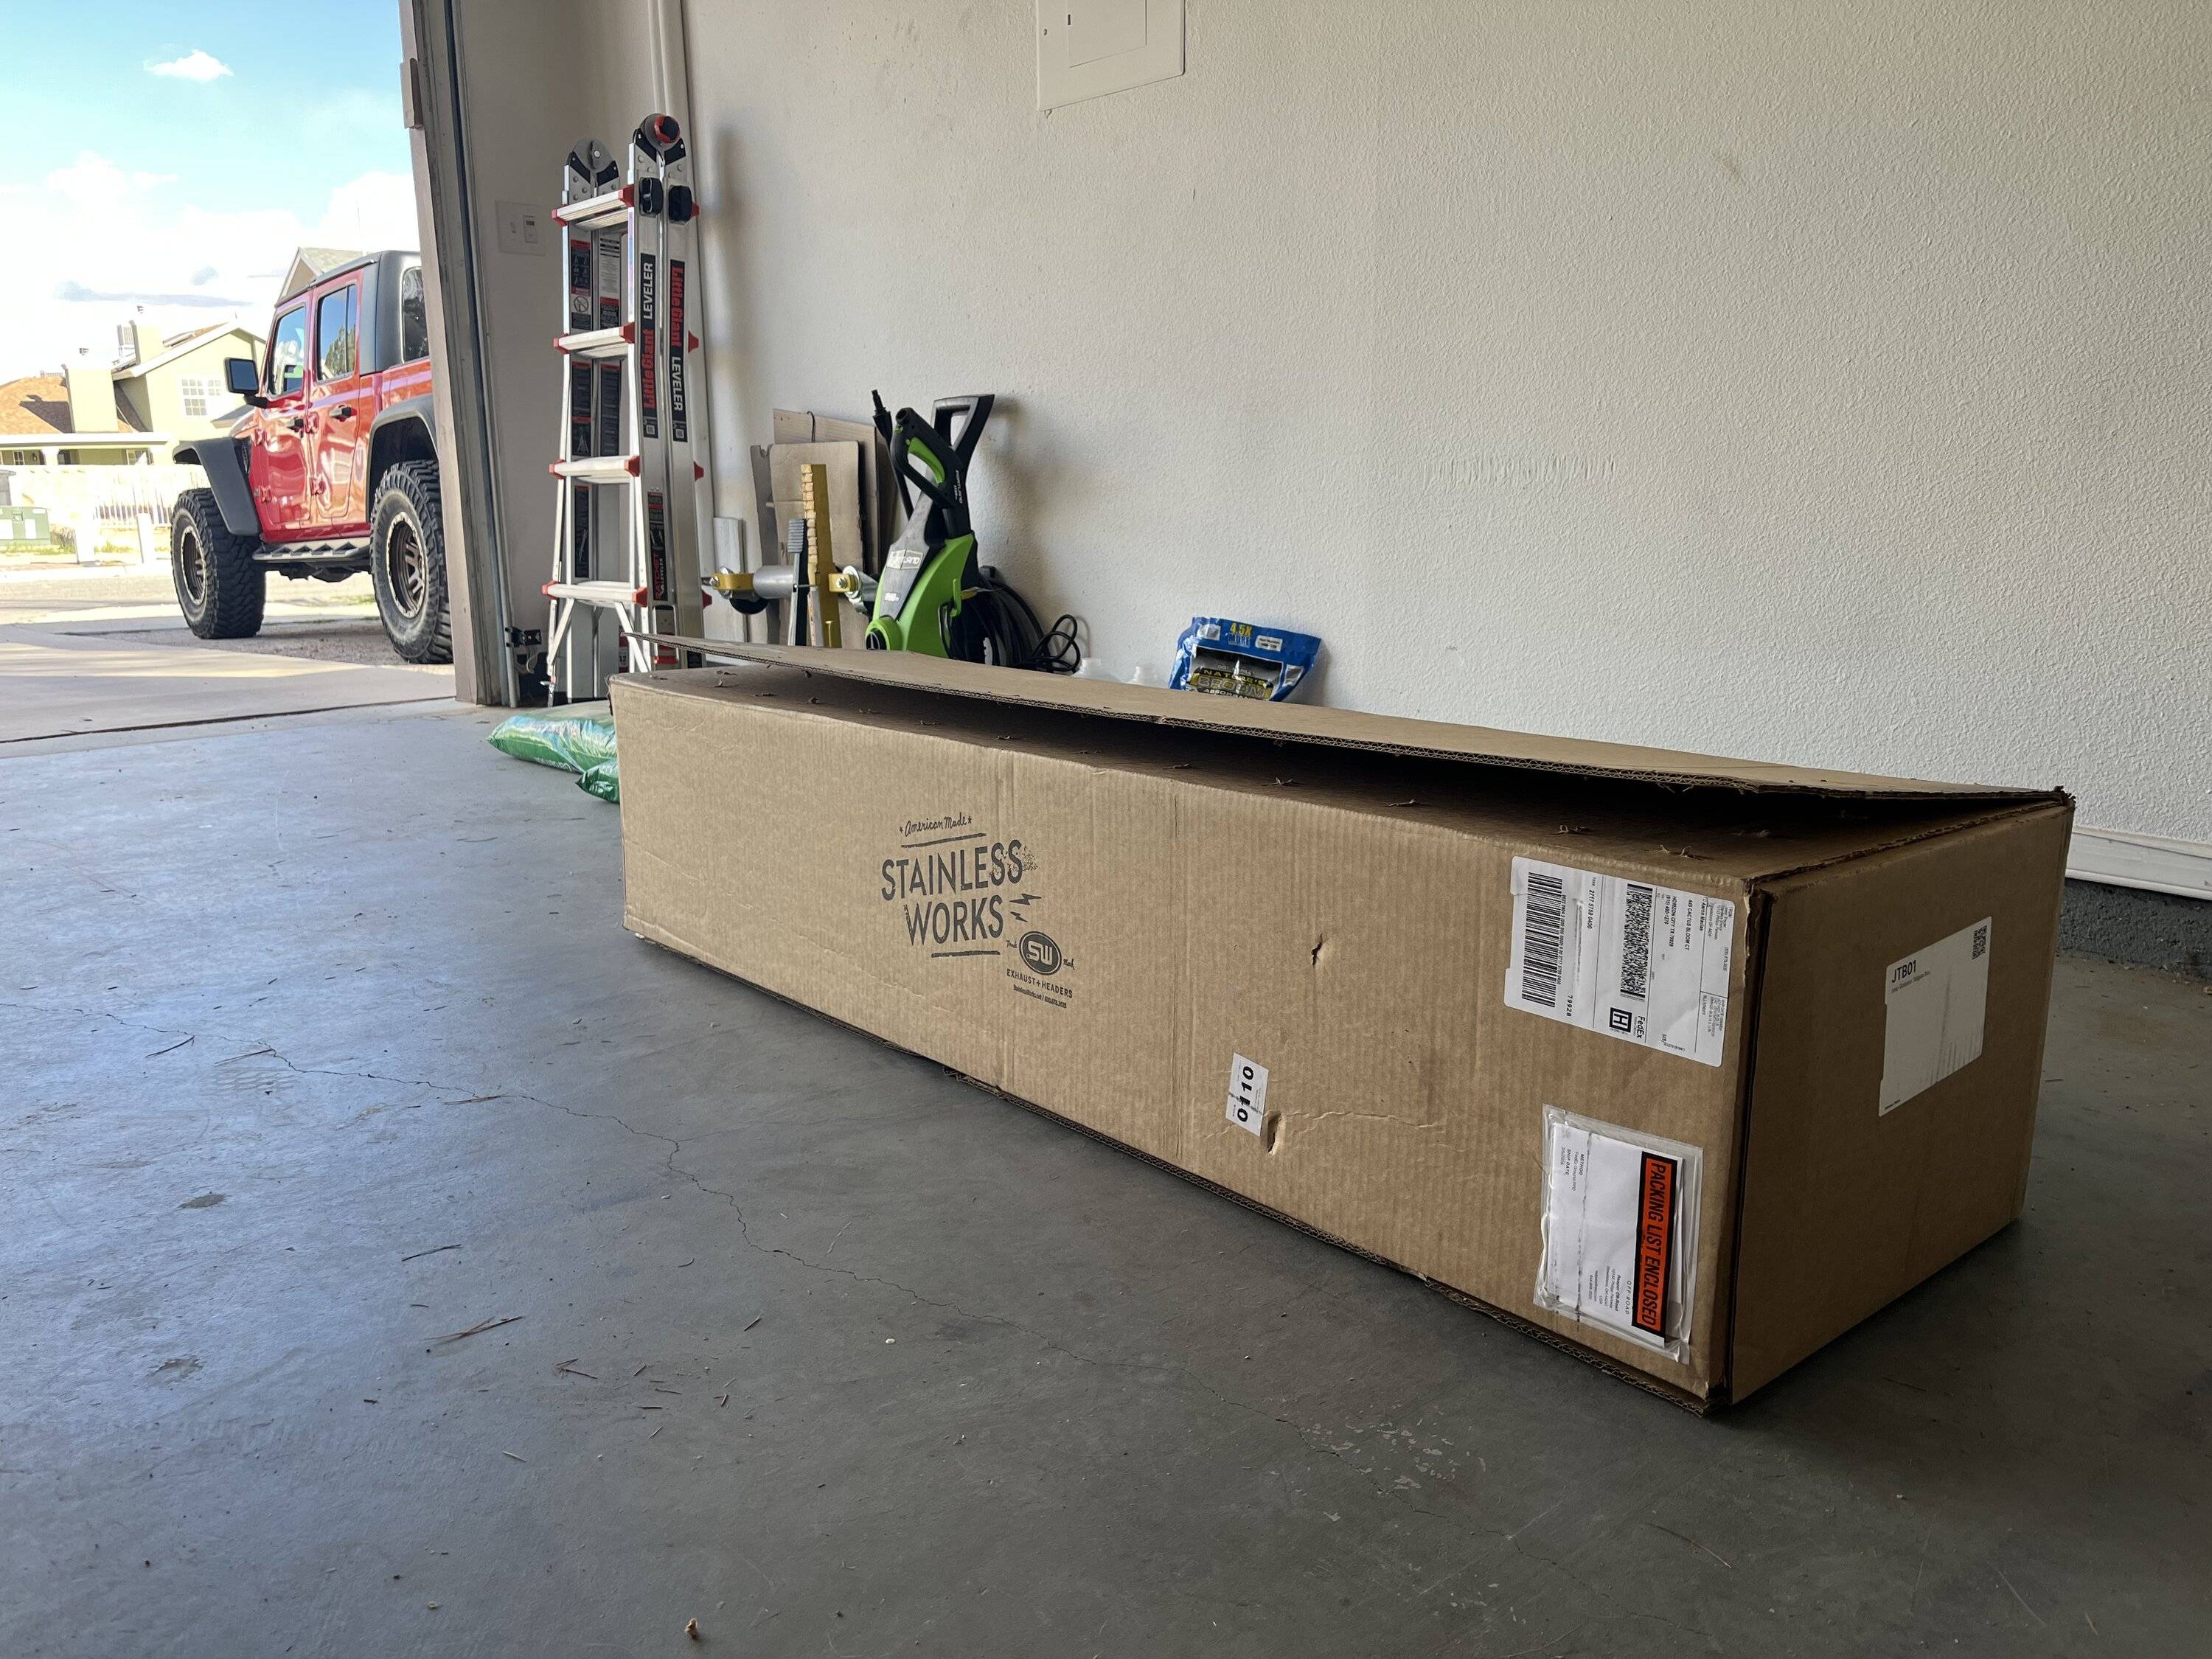
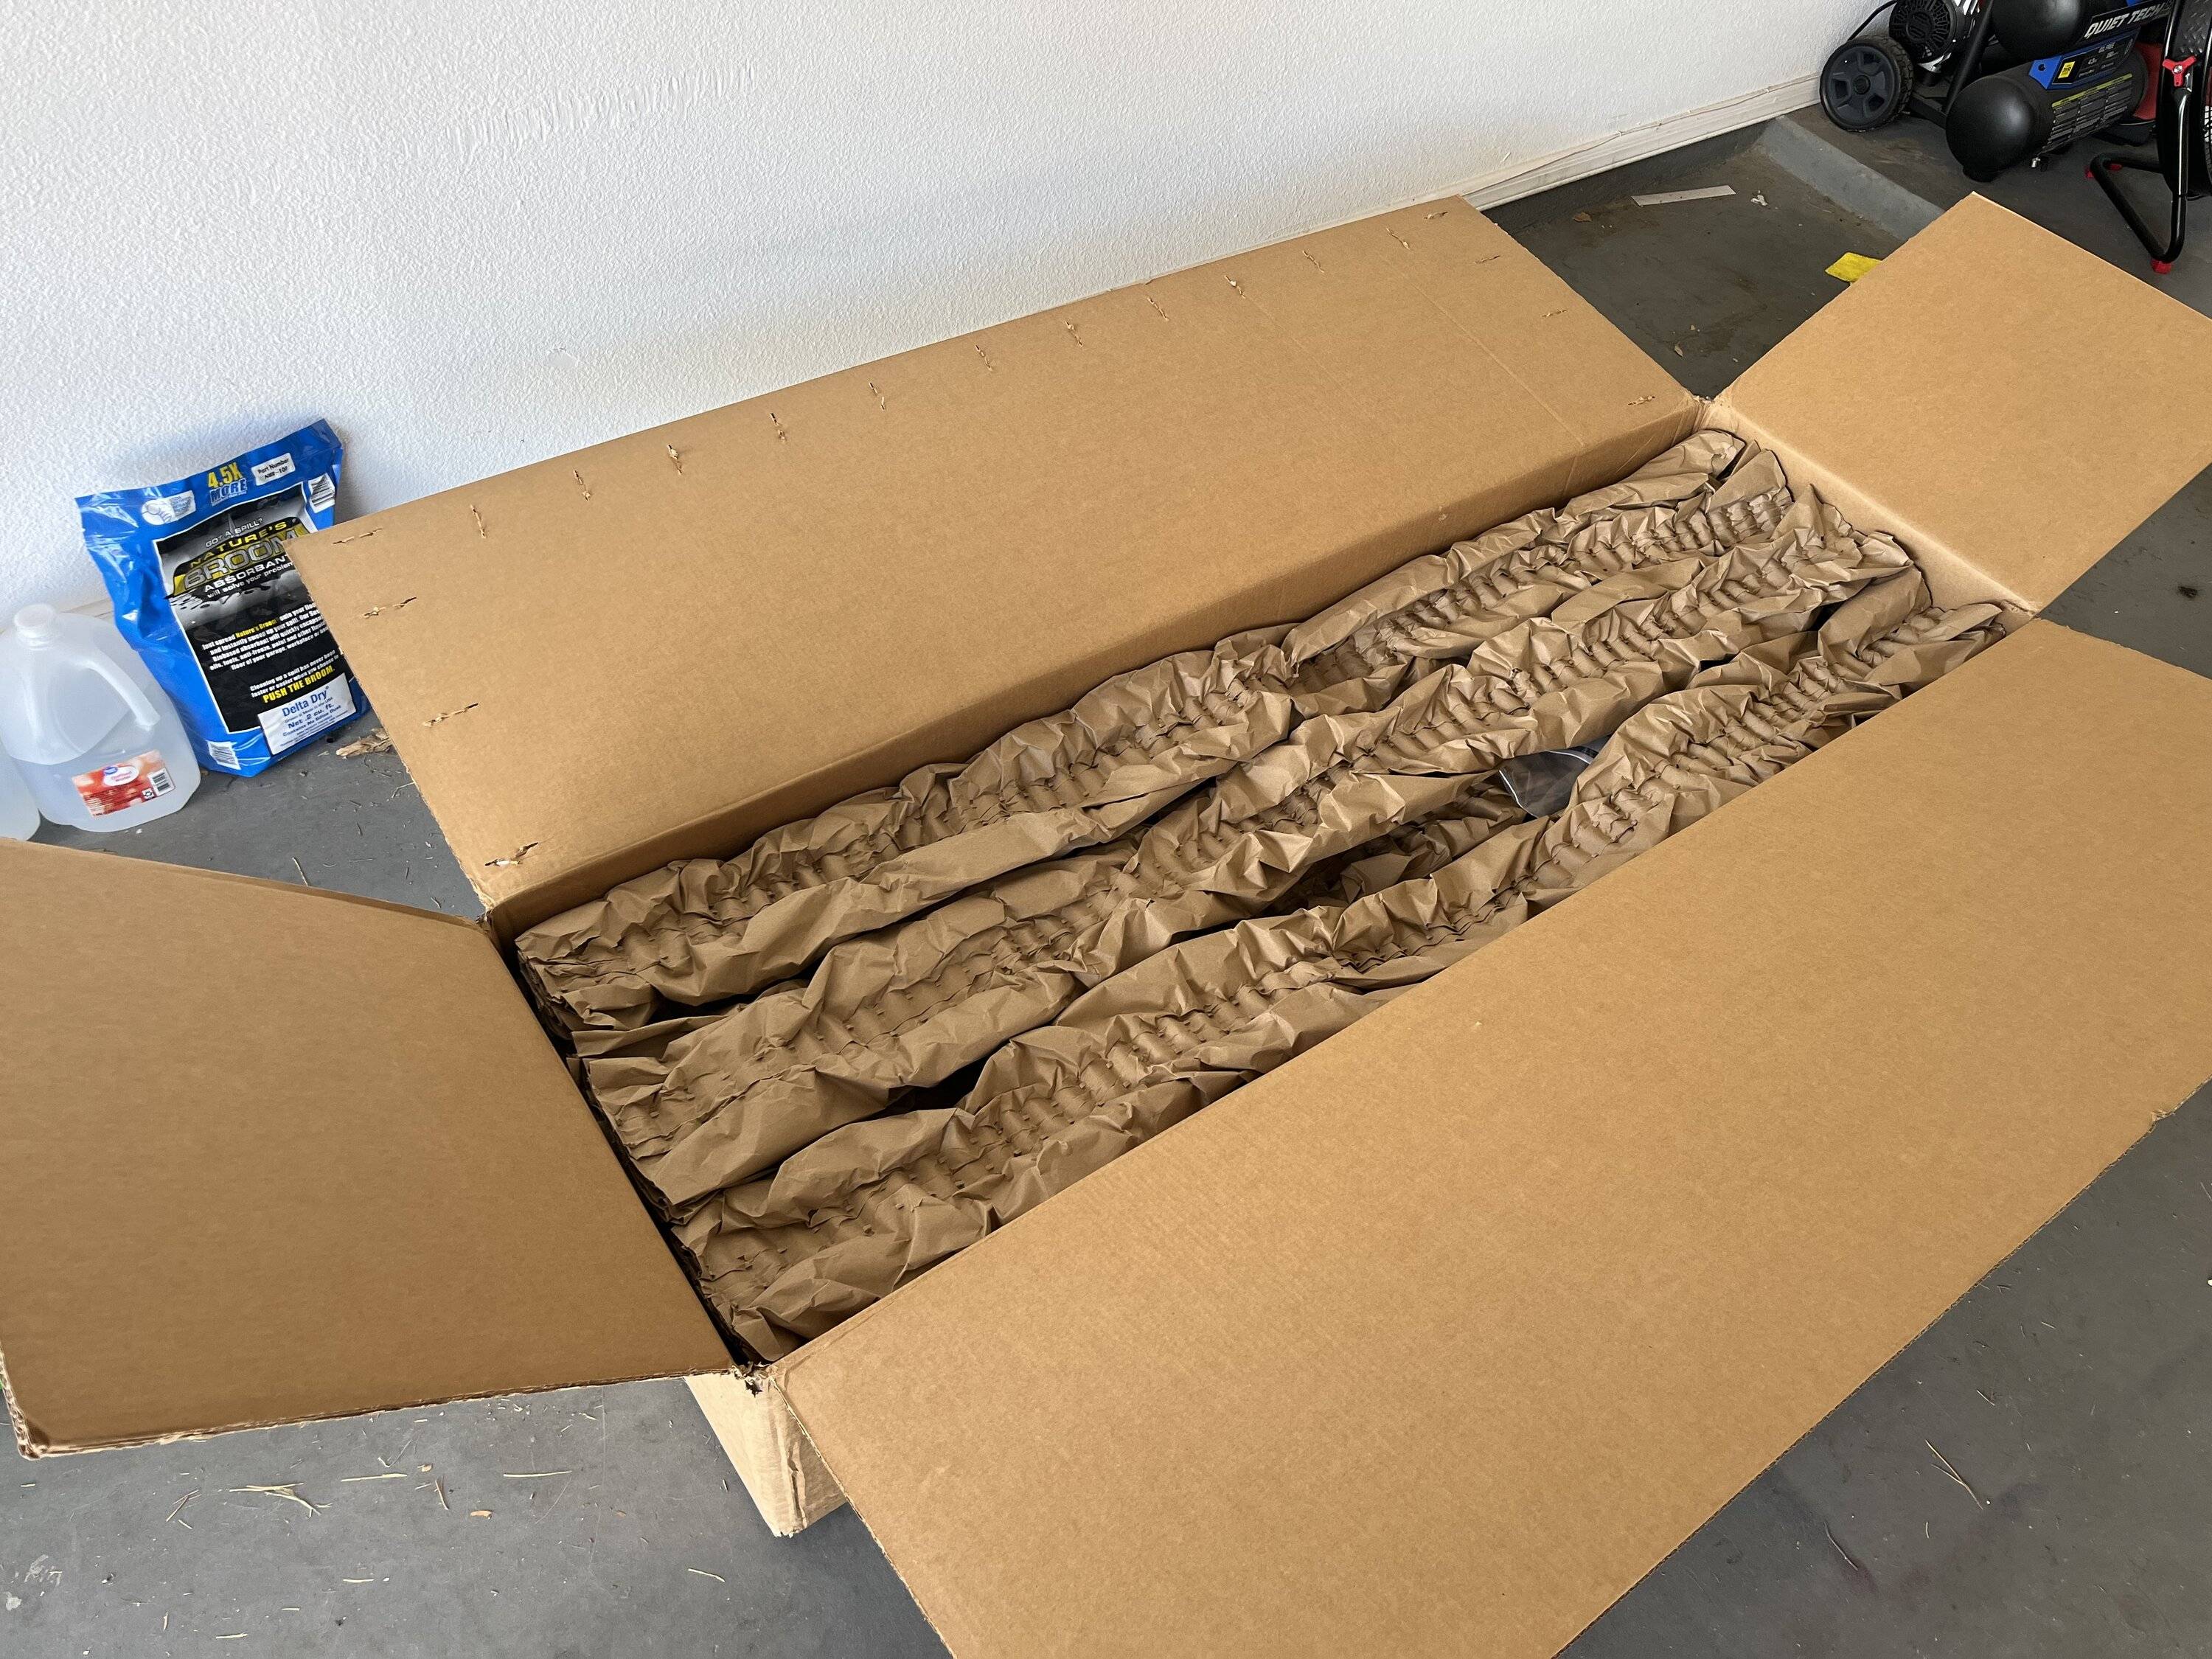
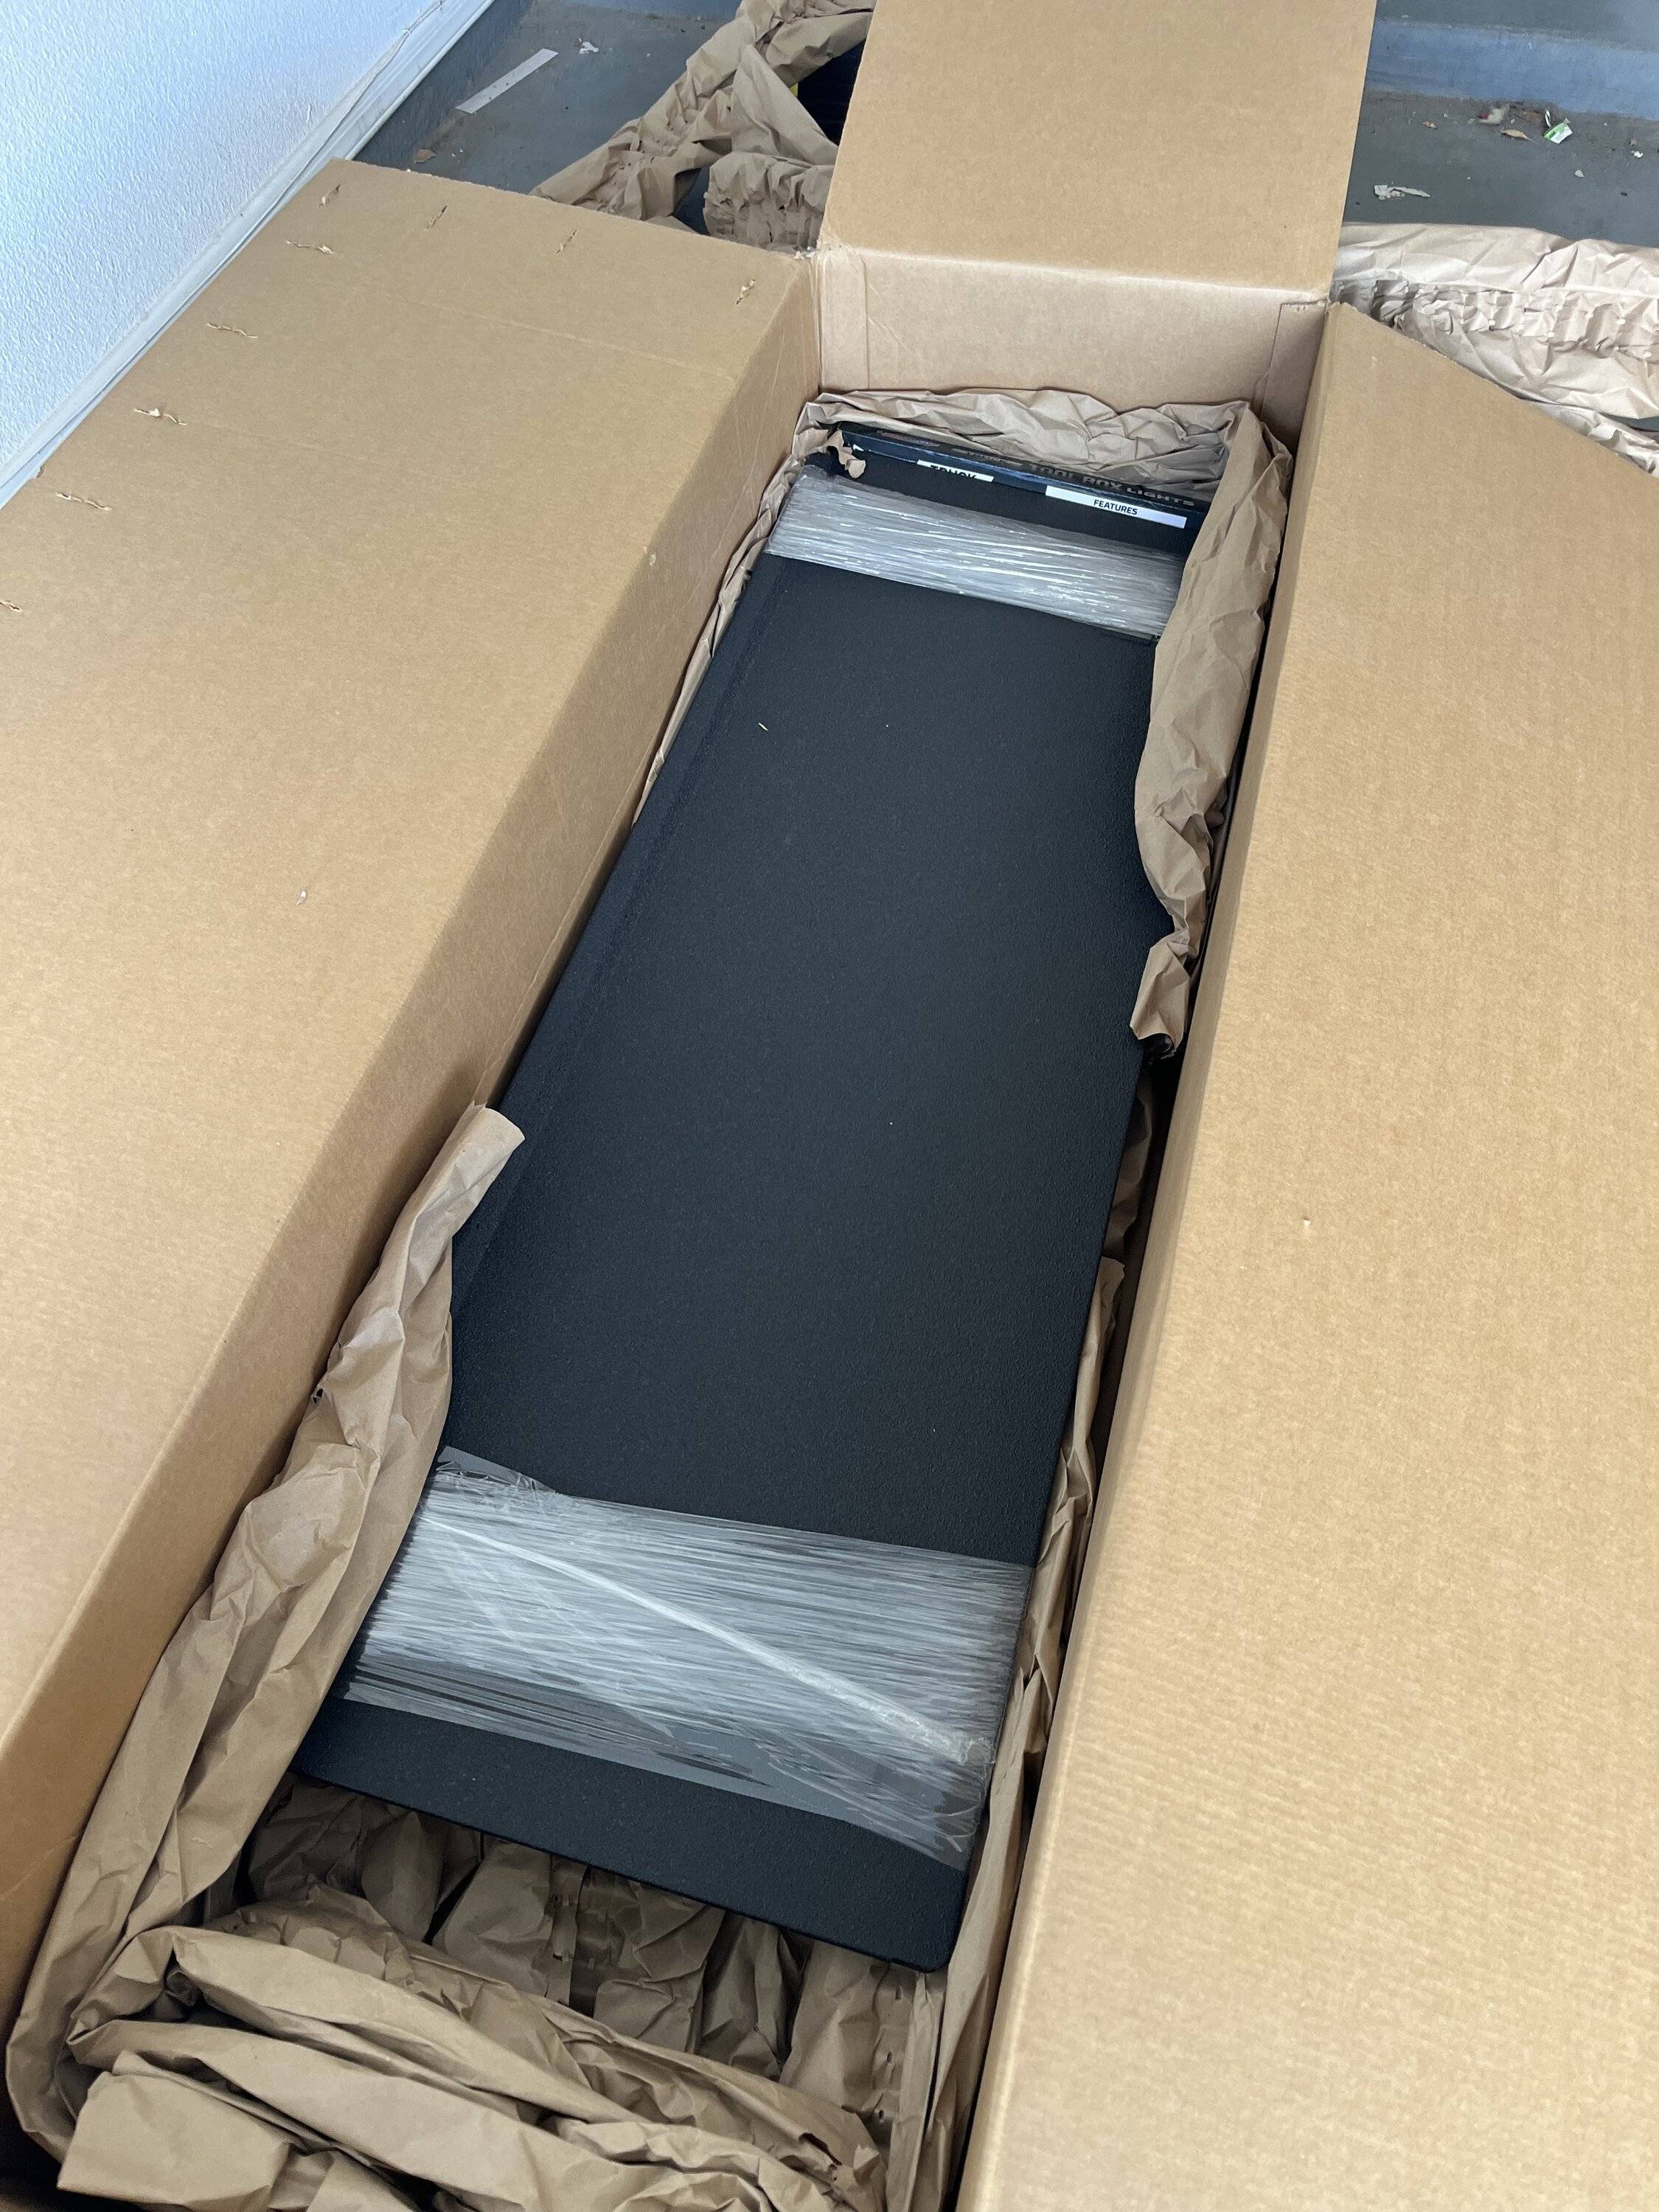
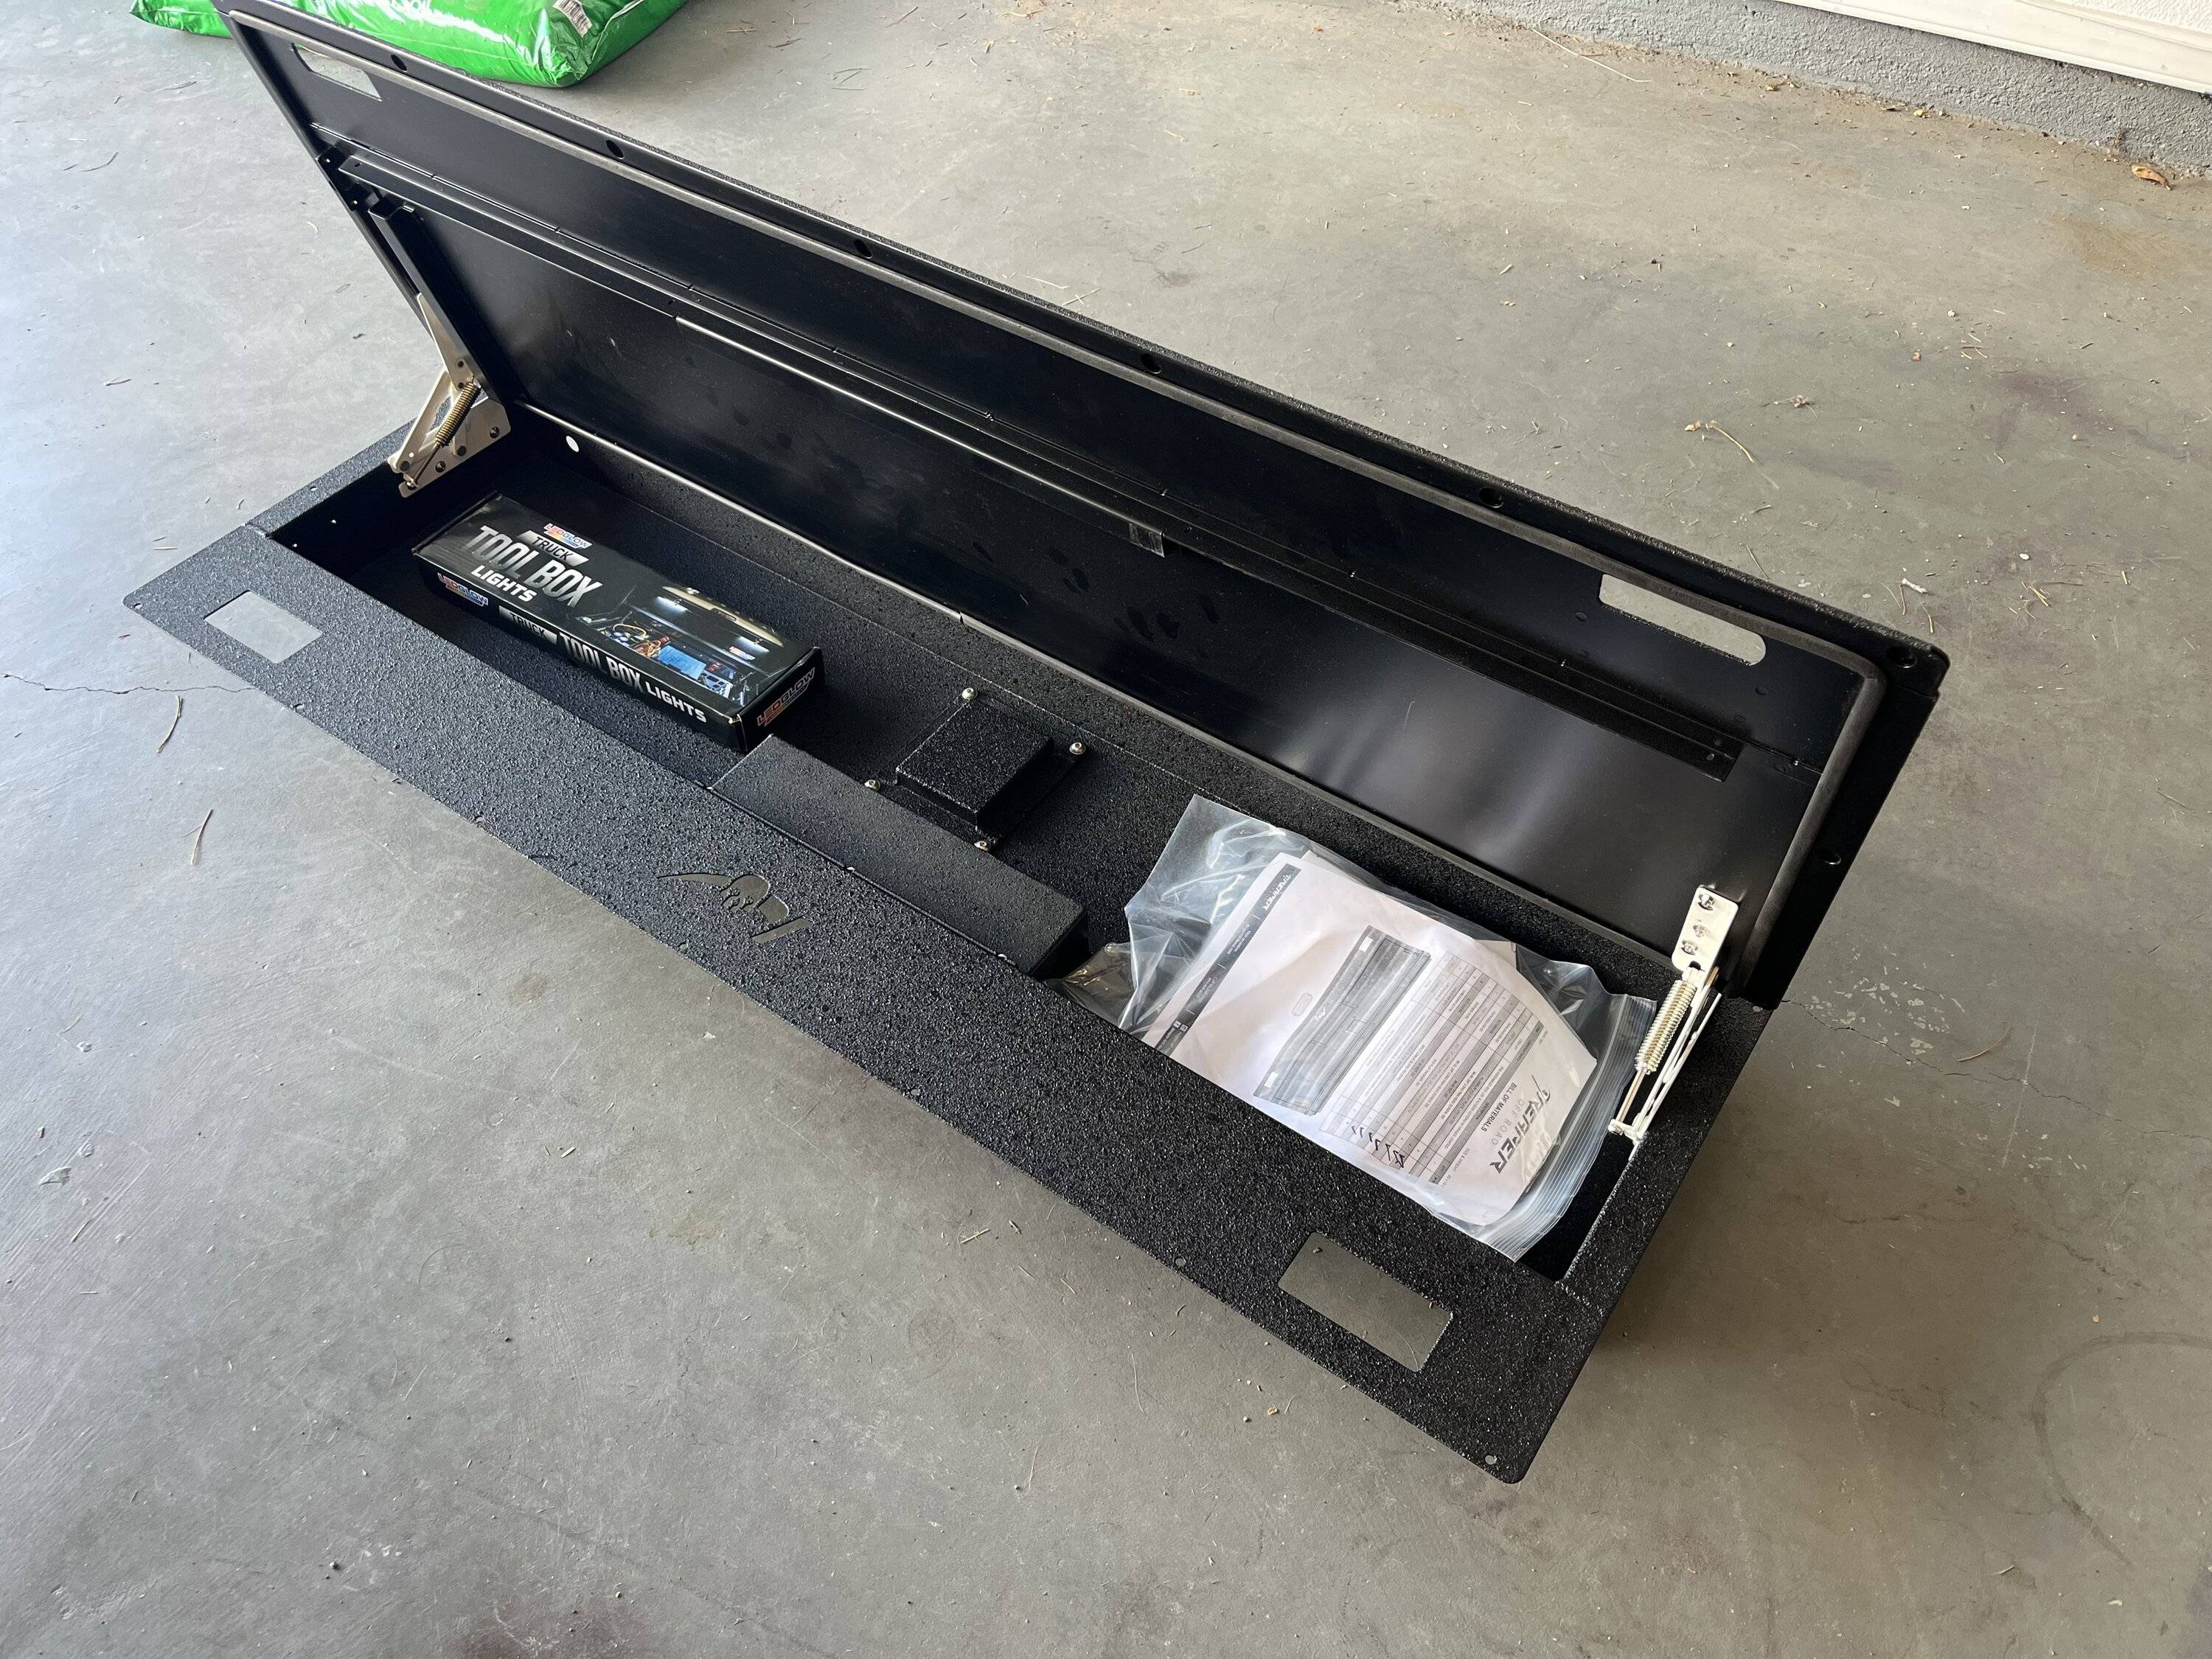
Between ordering the box and it's arrival, it took exactly 7 days. Very happy with how quickly that went, and the condition the box arrived in. It was well packed, with no missing parts or damage of any kind.

Next part was sizing up the box to the truck. I wanted to get a rough idea in my head on how much I had to work with in regards to the cut profile. The reasons for this is this box uses self taping screws to secure it in place. I personally dislike self tapping screws, and opted to order my own hardware, stainless M5 button head bolts, that would be secured via RivetNuts. Thanks to the overhang on the box, I was sure that RivetNuts would work.
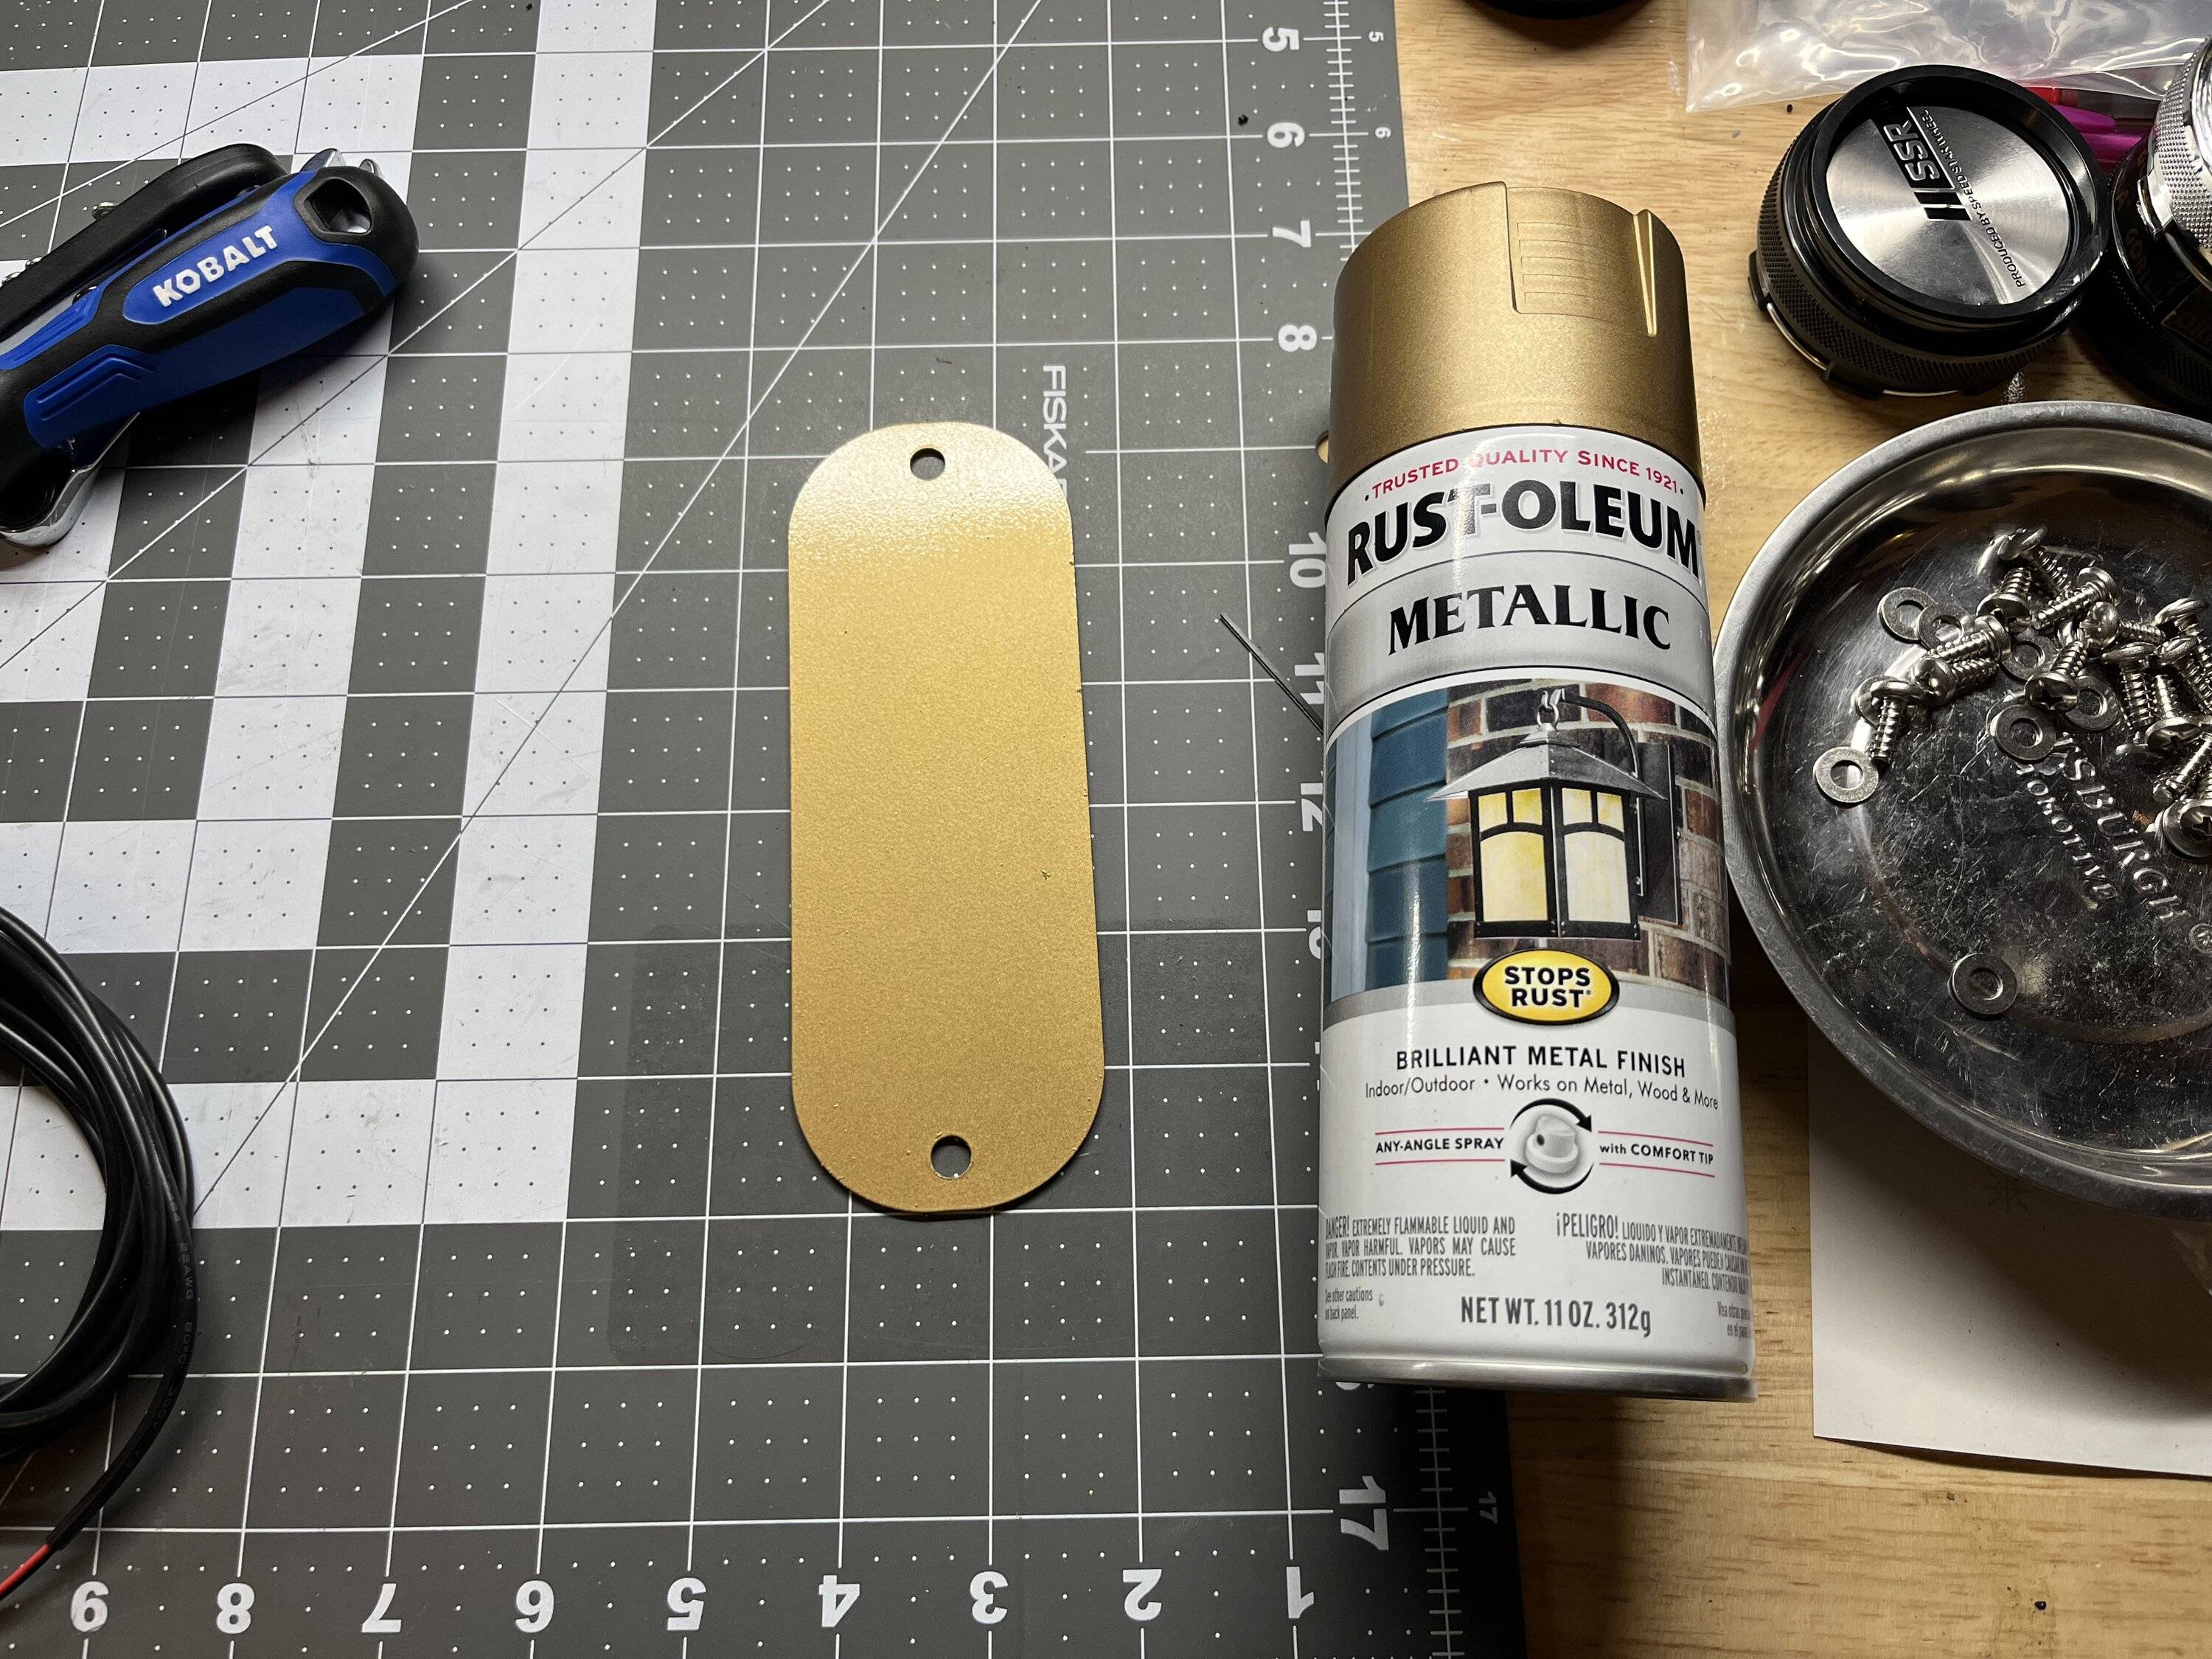
I went ahead and put the box away, as it was delivered later in the day, so I would have to save the actual install for the next day. I took the opportunity to paint the "Accent color" plate for the logo. Painted "392 Bronze", to match my other accents for the truck.
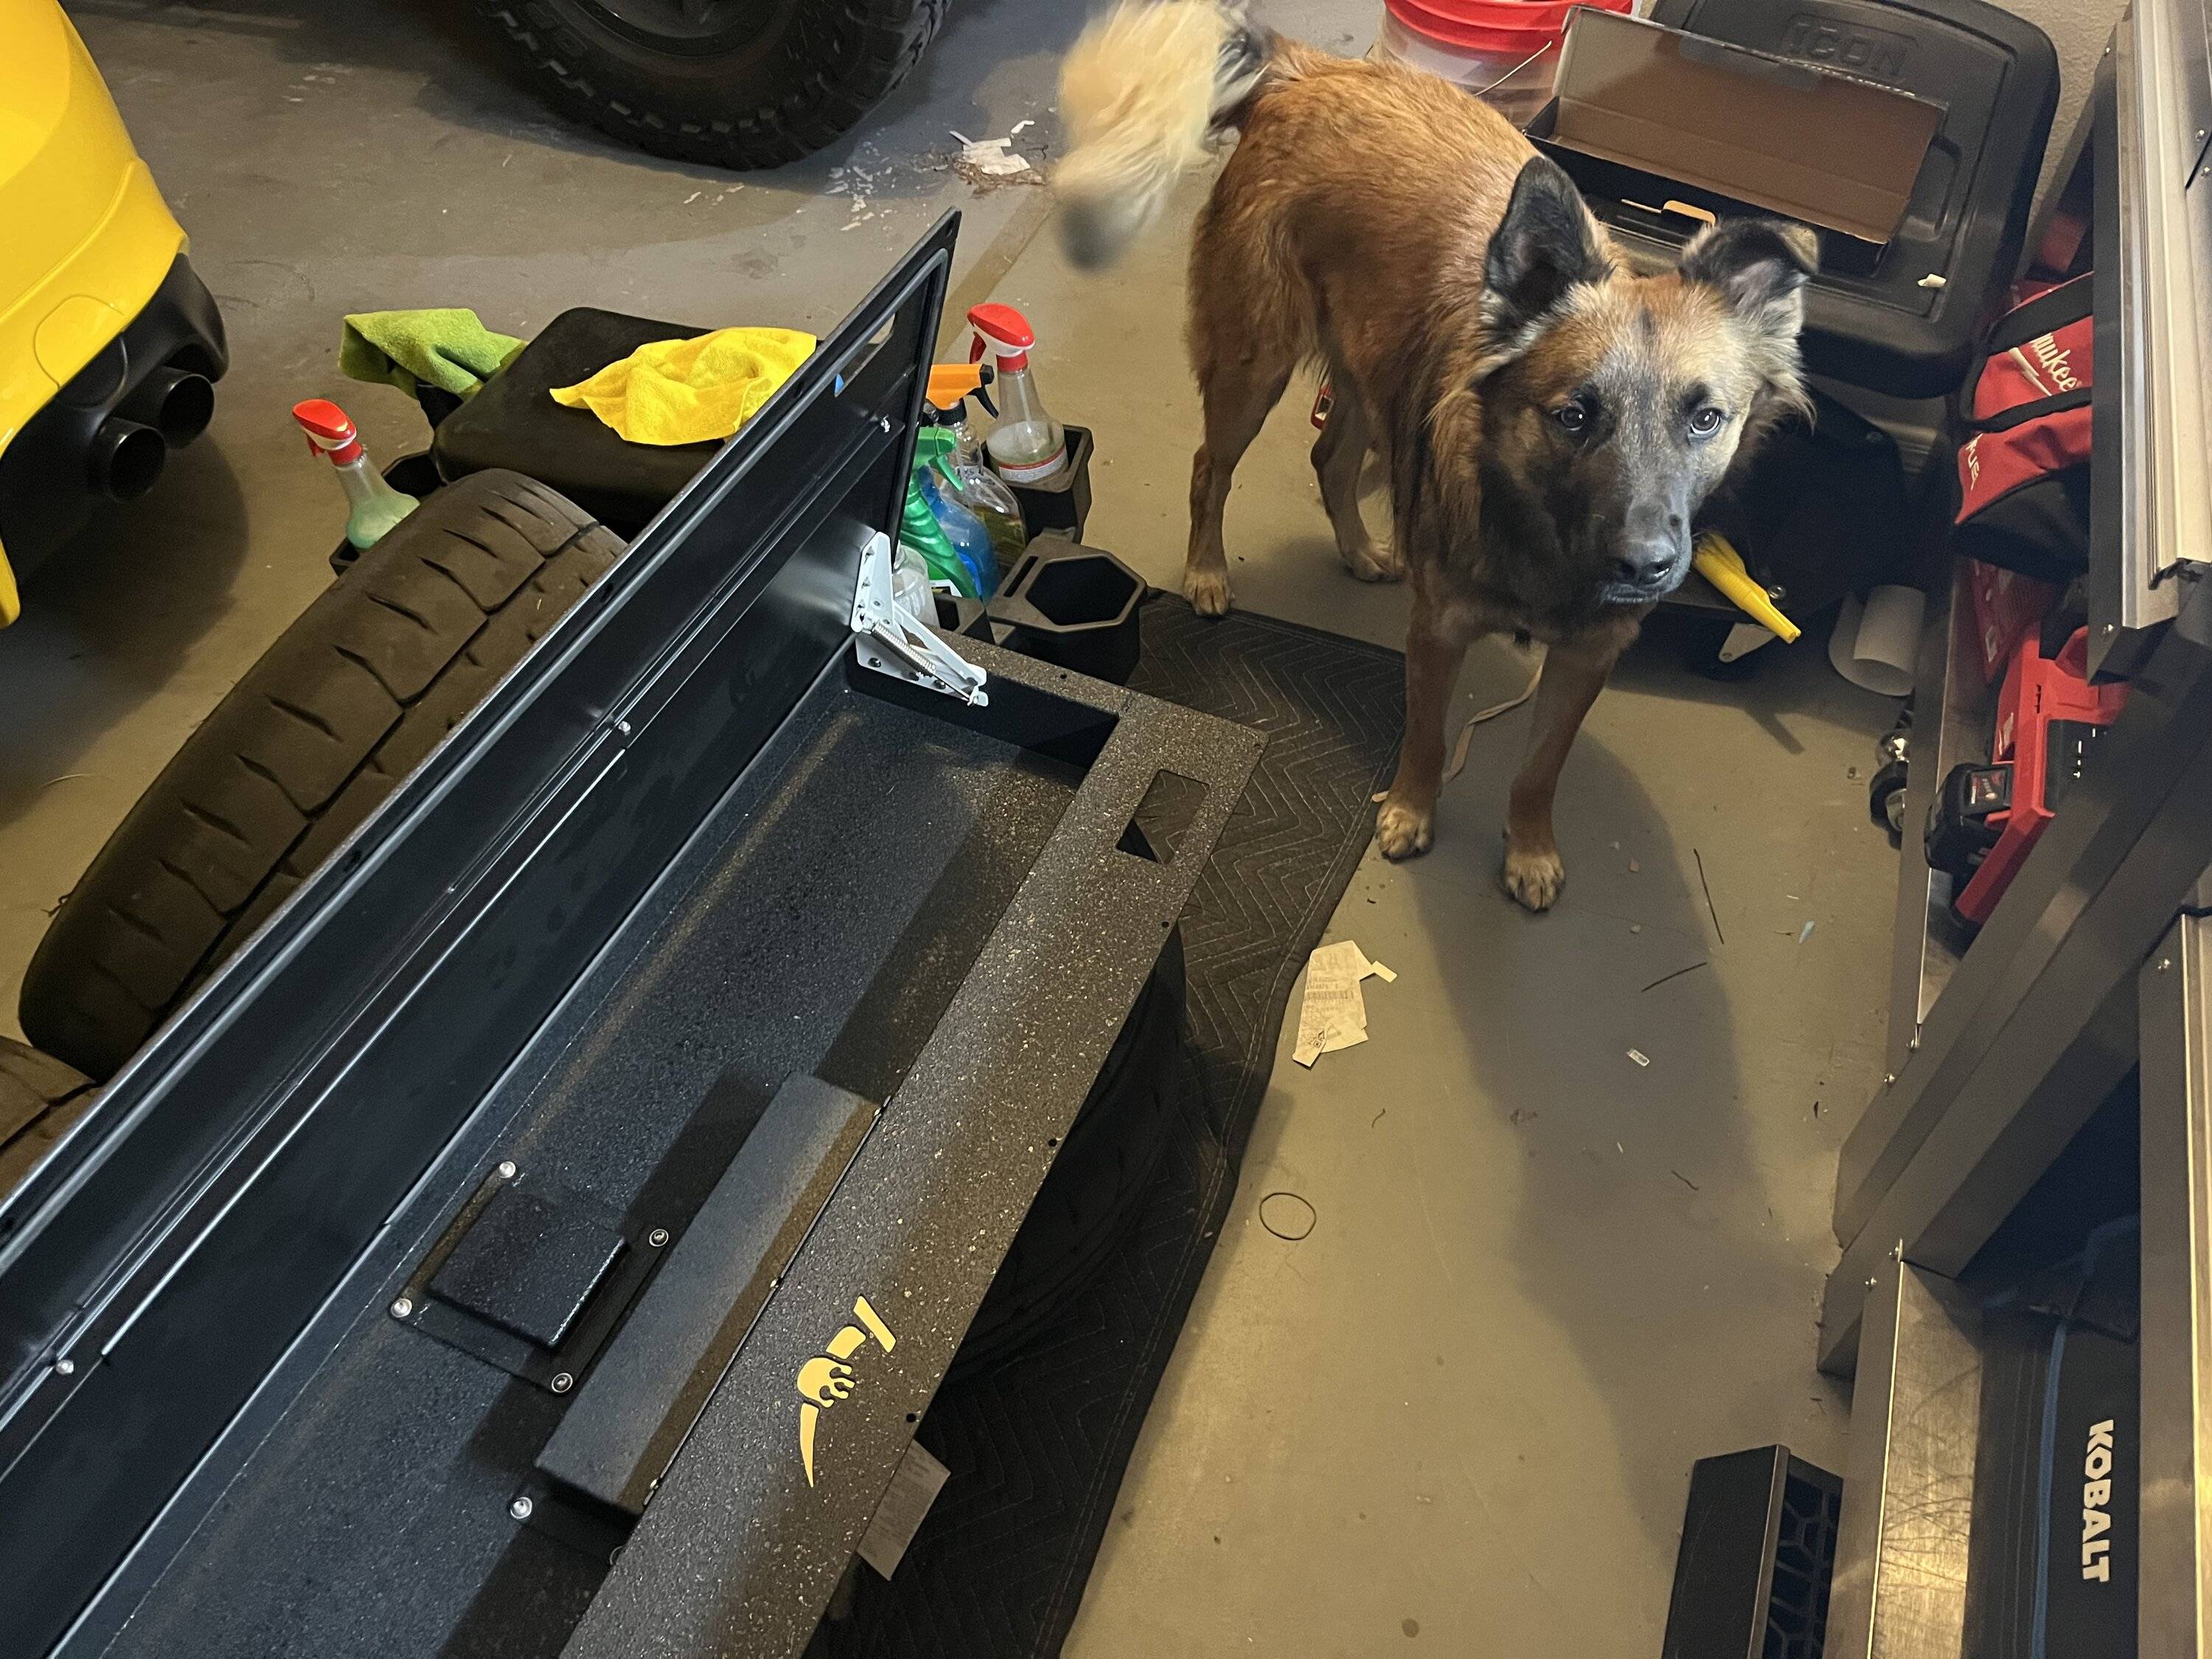
Decided to do early prep by assembling the latches and other parts beforehand. Had to use my track tires as a workbench because my actual workbench was too small for the box. I also pre-assembled the lights for the box.
Bandit, the shop supervisor, did an inspection, and approved.
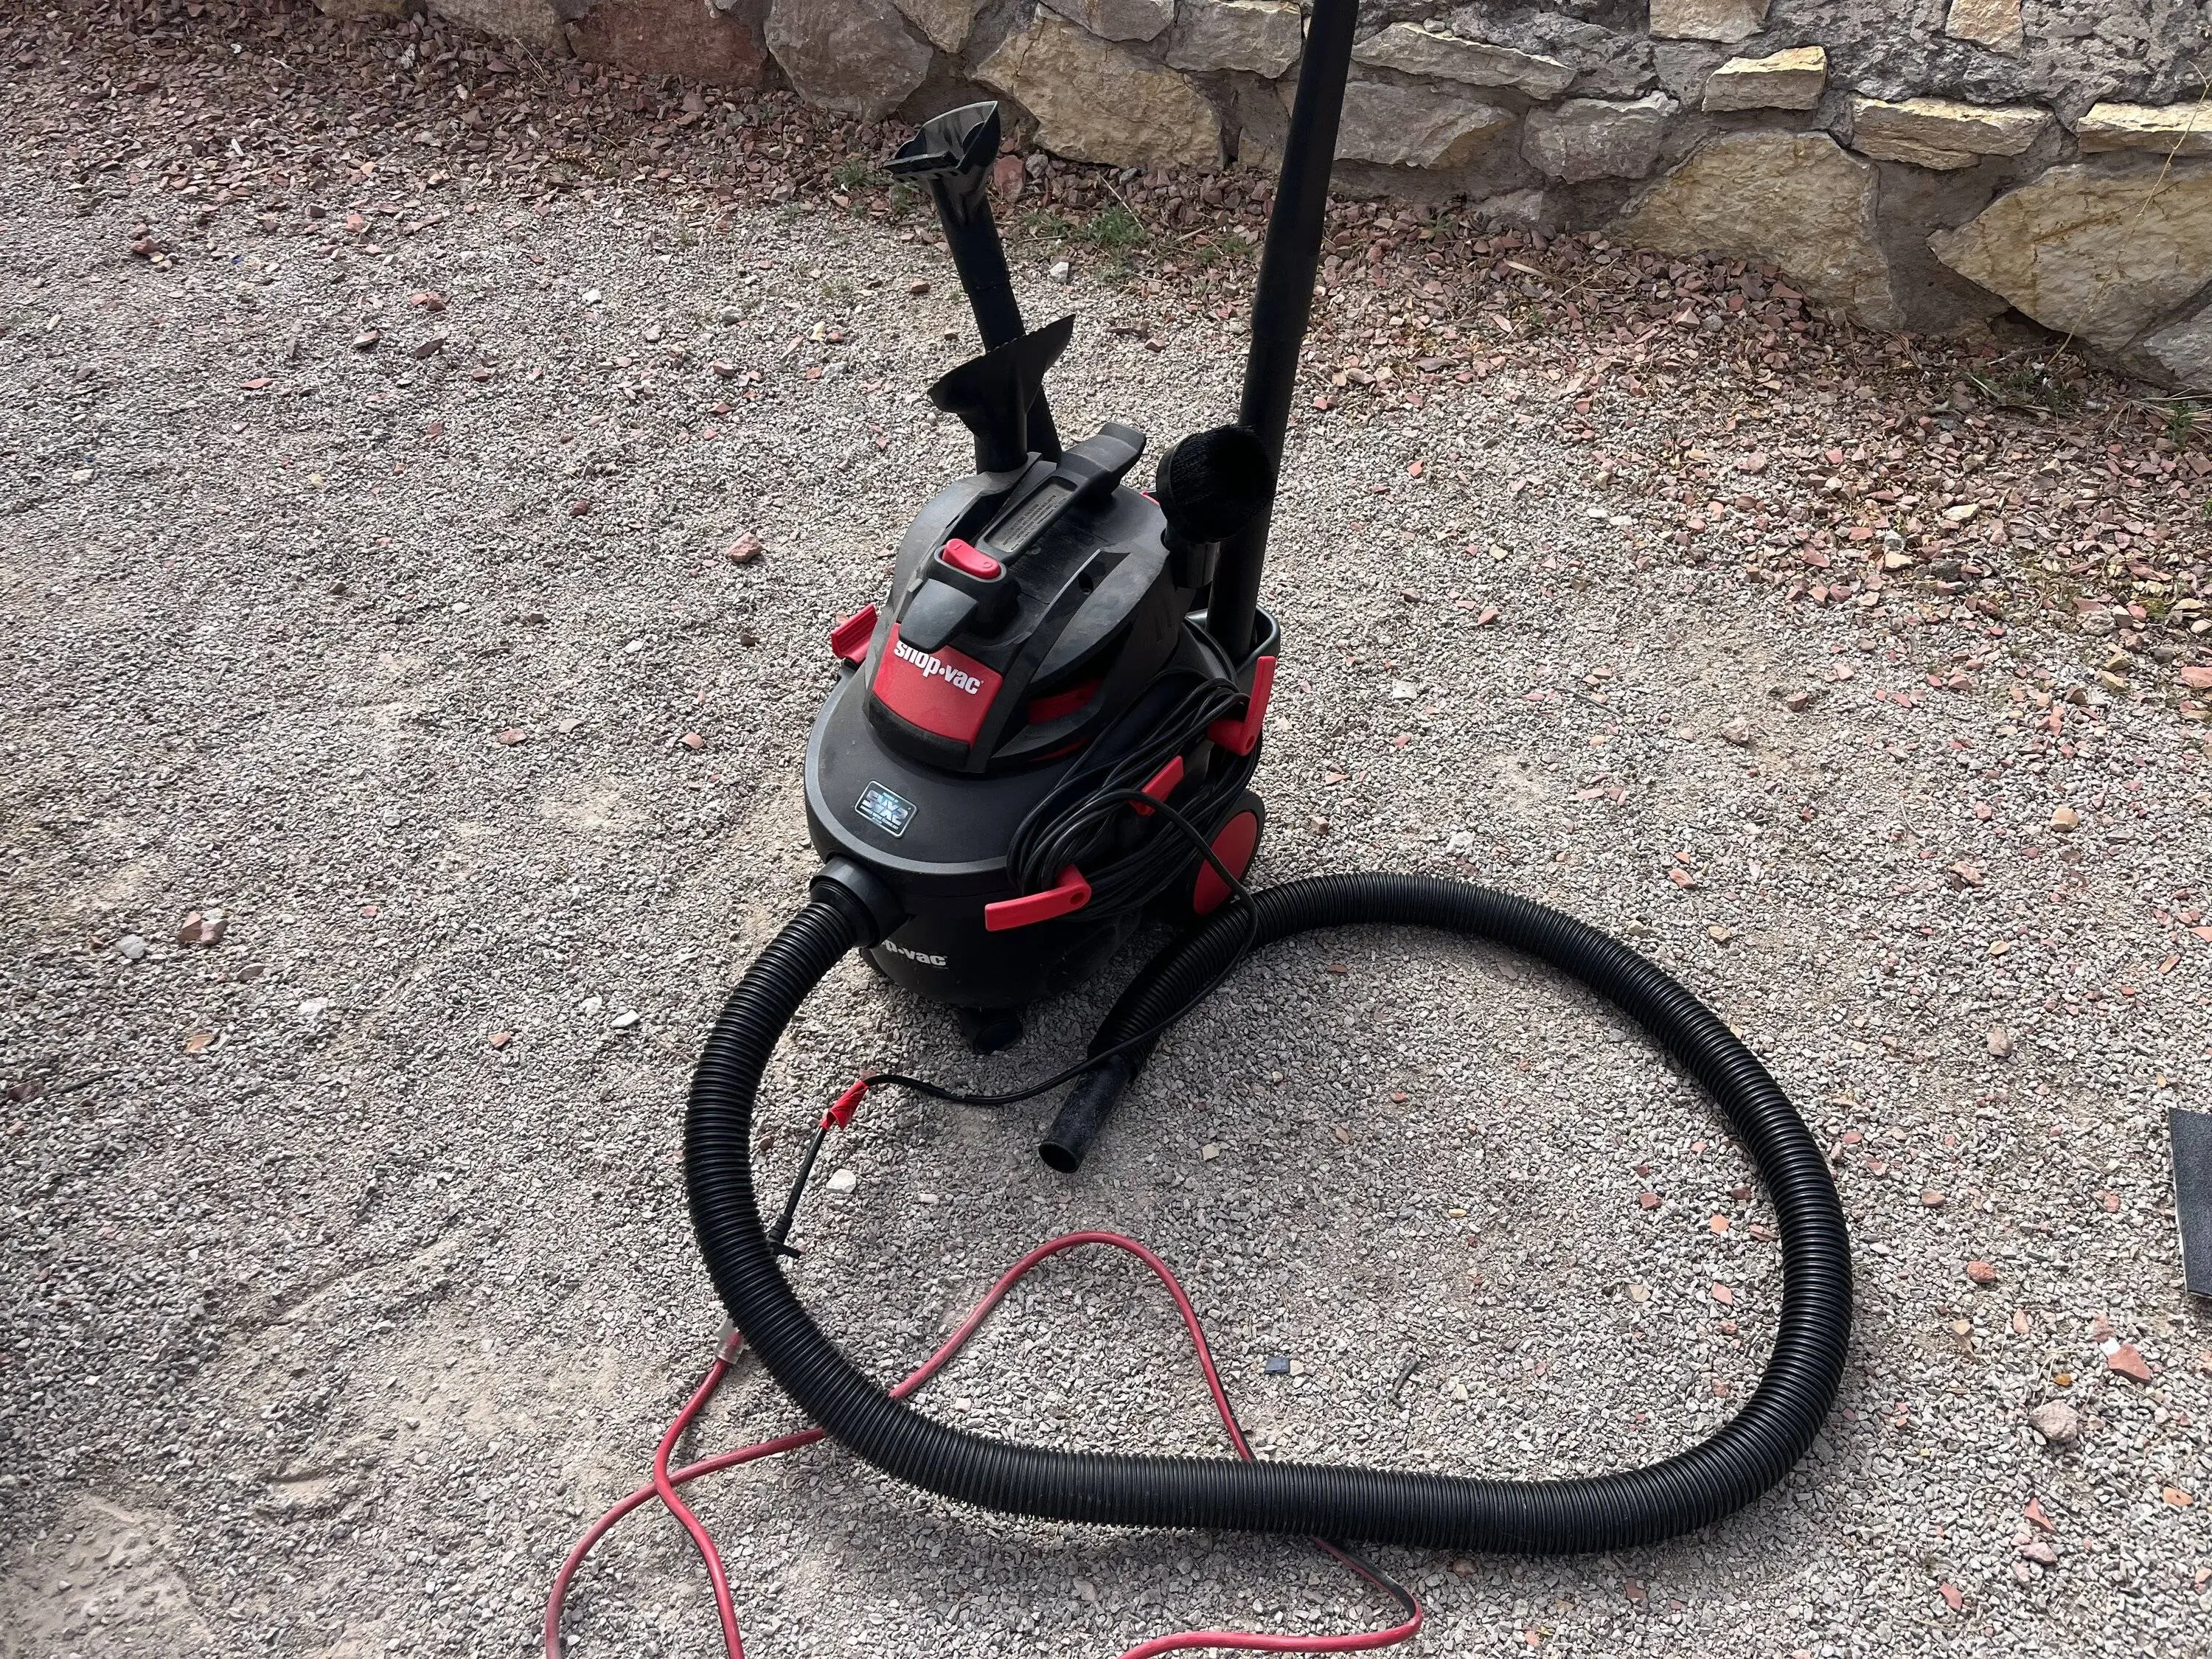
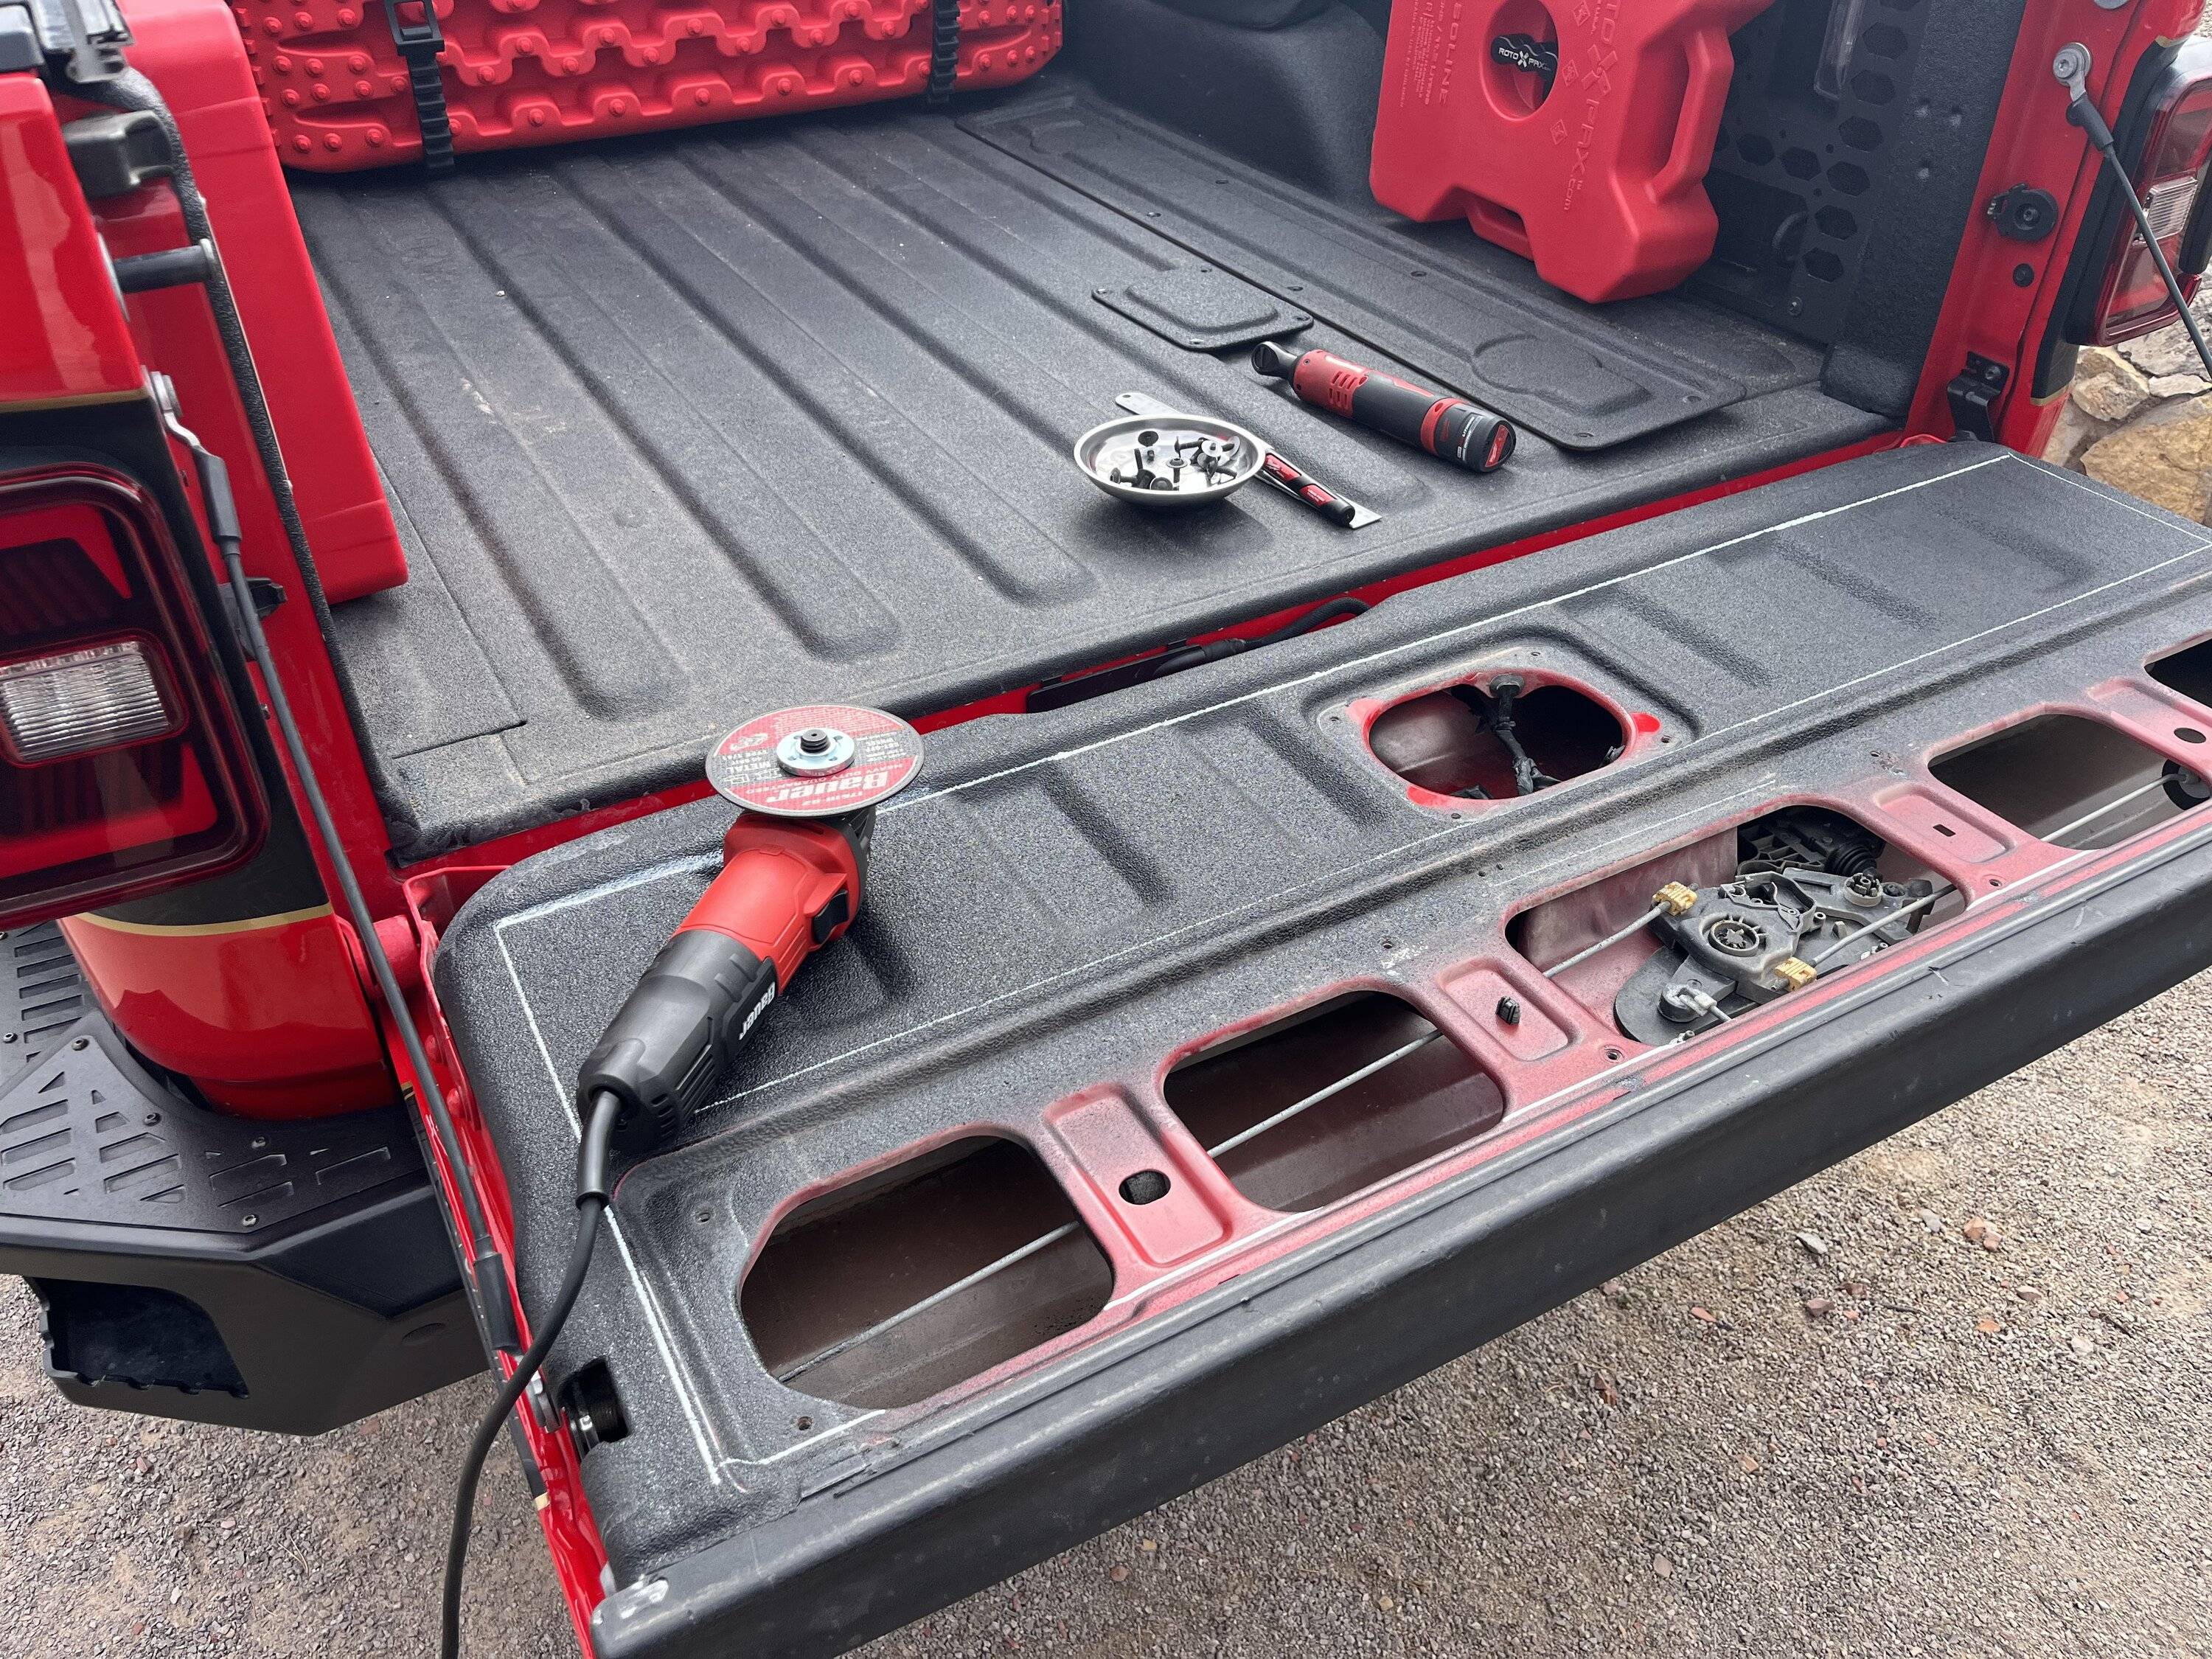
Next day was cutting day. I gathered my tools. A face shield and mask for the aluminum dust and bedliner. The cutoff wheel and ratchet for the box panels. A shop vac. And a paint marker for drawing the outline for the cut profile.
My Milwaukee electric ratchet took off my panels in a snap.
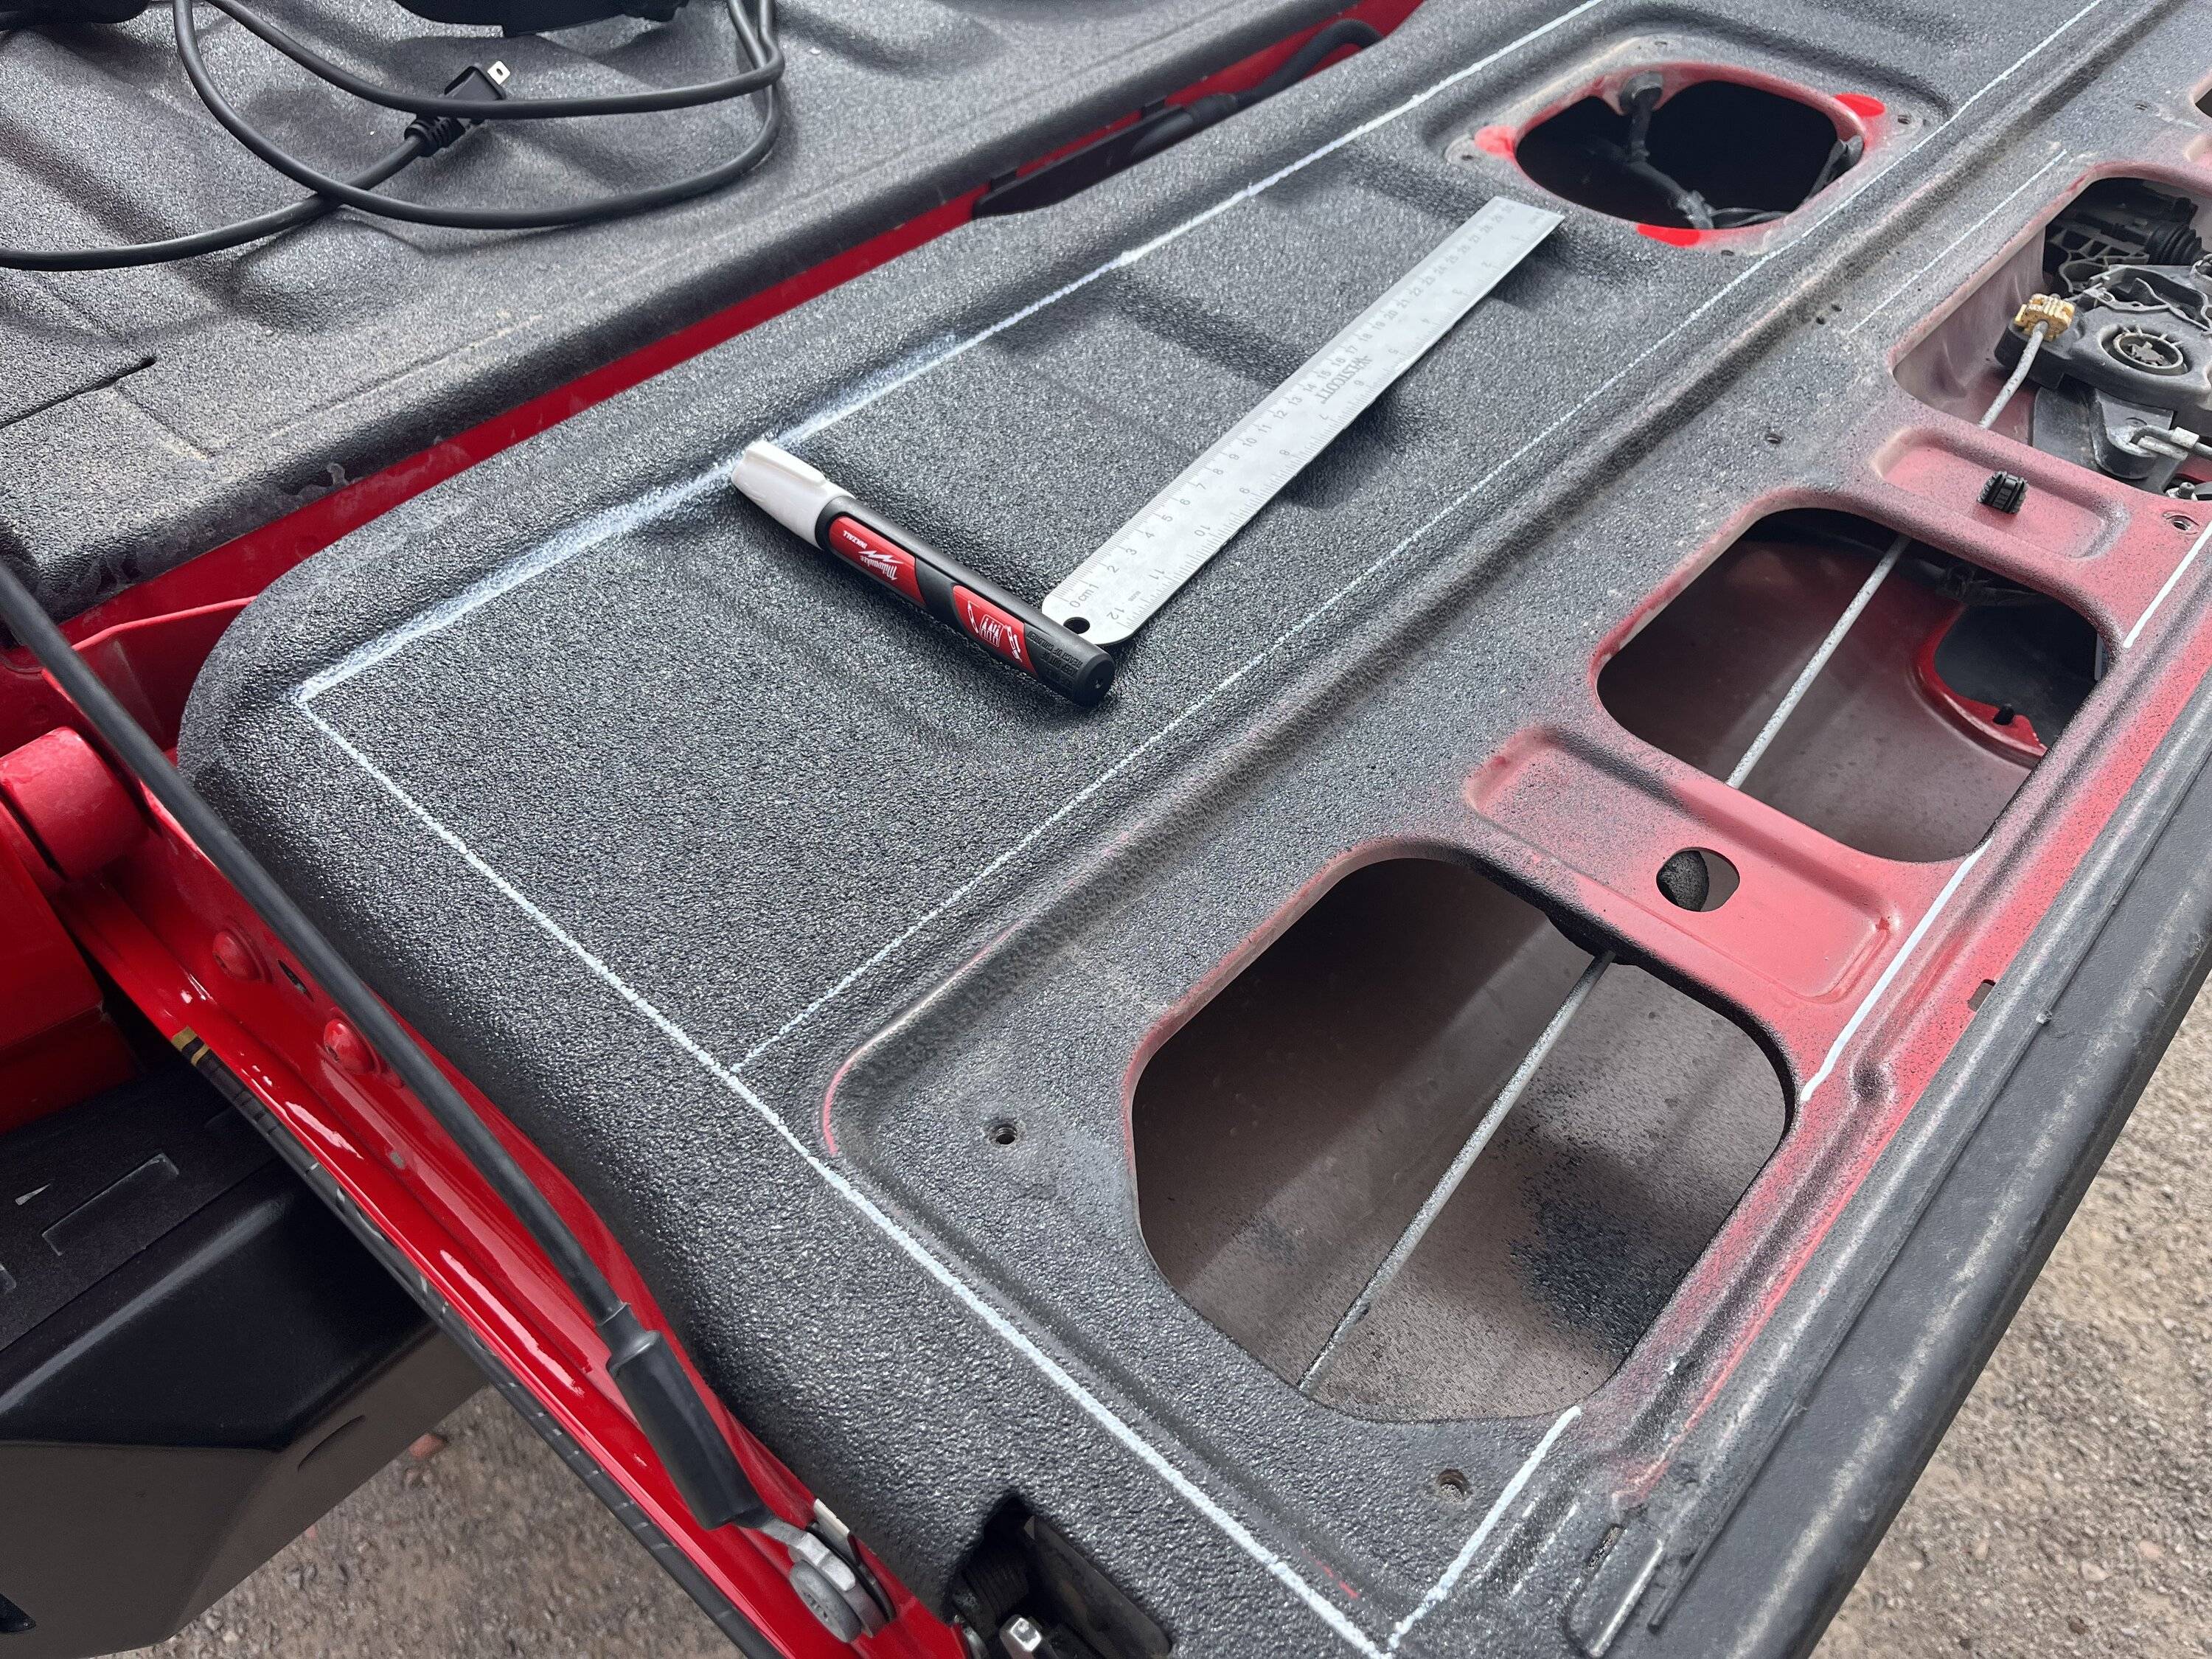
Now I just needed to outline my cut profile. I used a "Liquid Paint" pen, and a ruler as a straight edge. Outlined it per Reapers instructions, minus a few small changes. I opted to only mark the supports at the top of the tailgate vs the straight line Reaper wanted.
No turning back here!
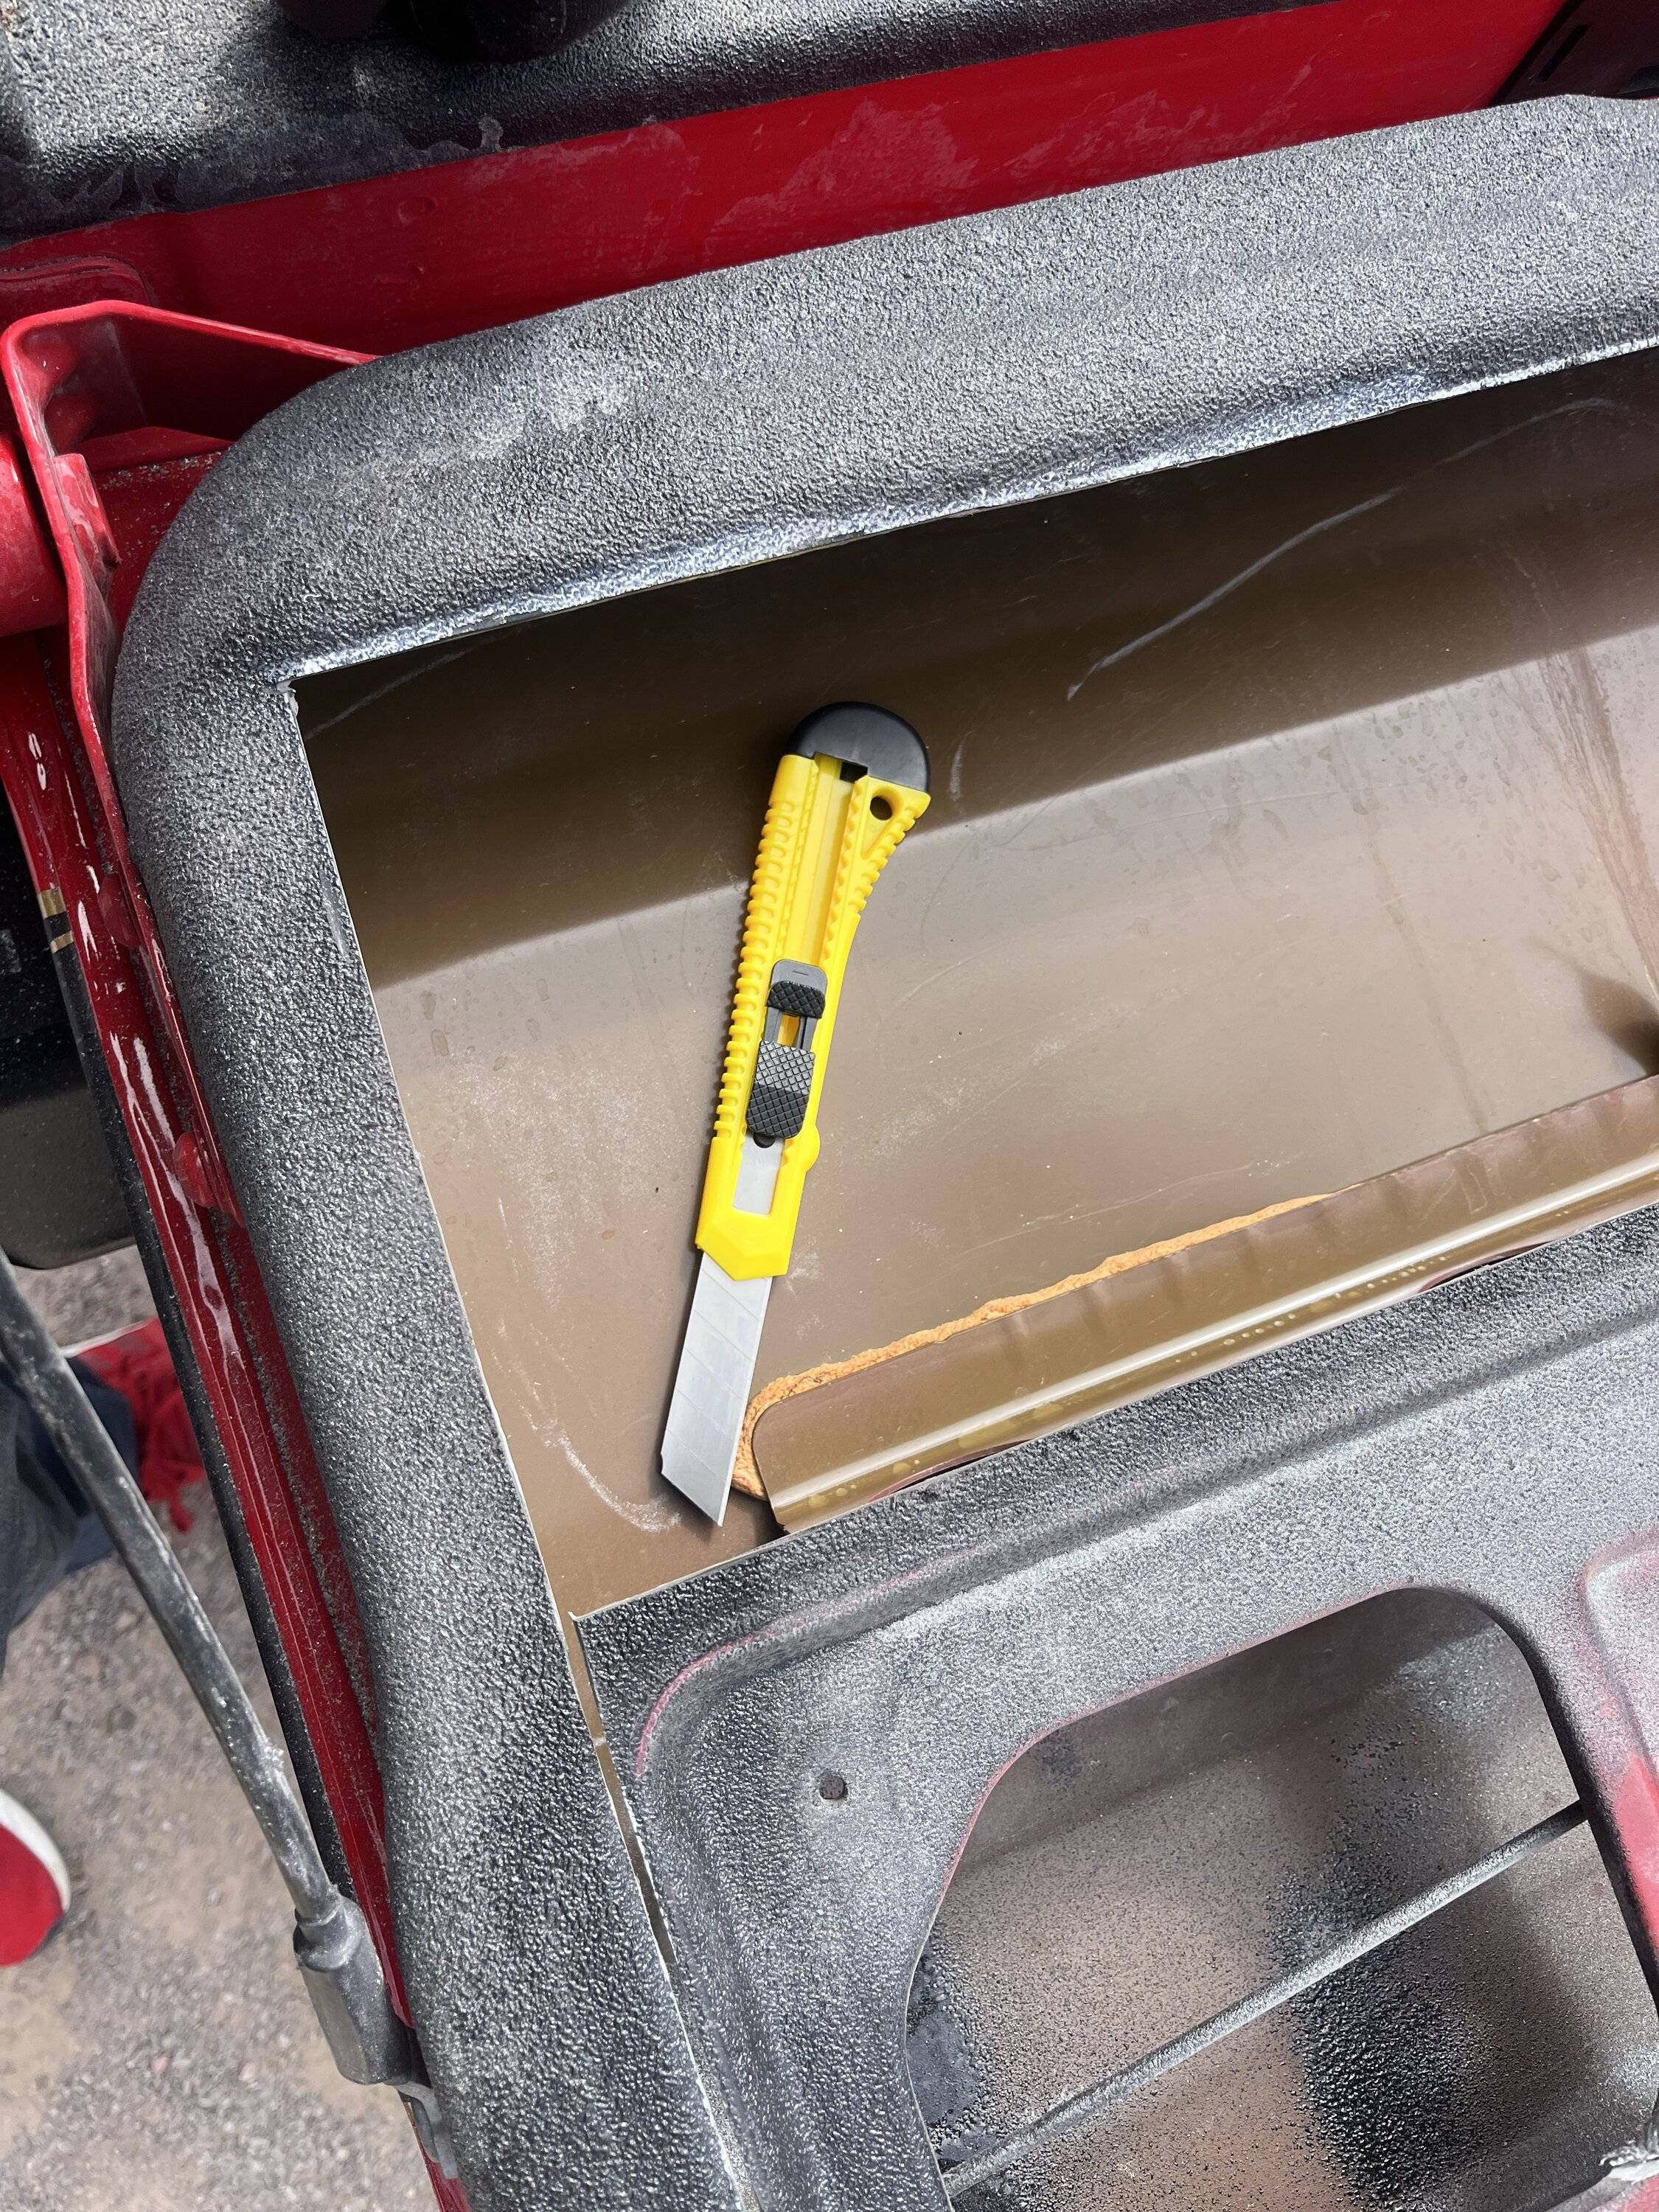
Time for the first cut! The aluminum was no match for 30,000 rpm, and cut smooth. It was very easy to maintain control of the cutoff tool and to not cut too deep. I opted to do all my cuts at once, and I even managed to keep my lines straight!
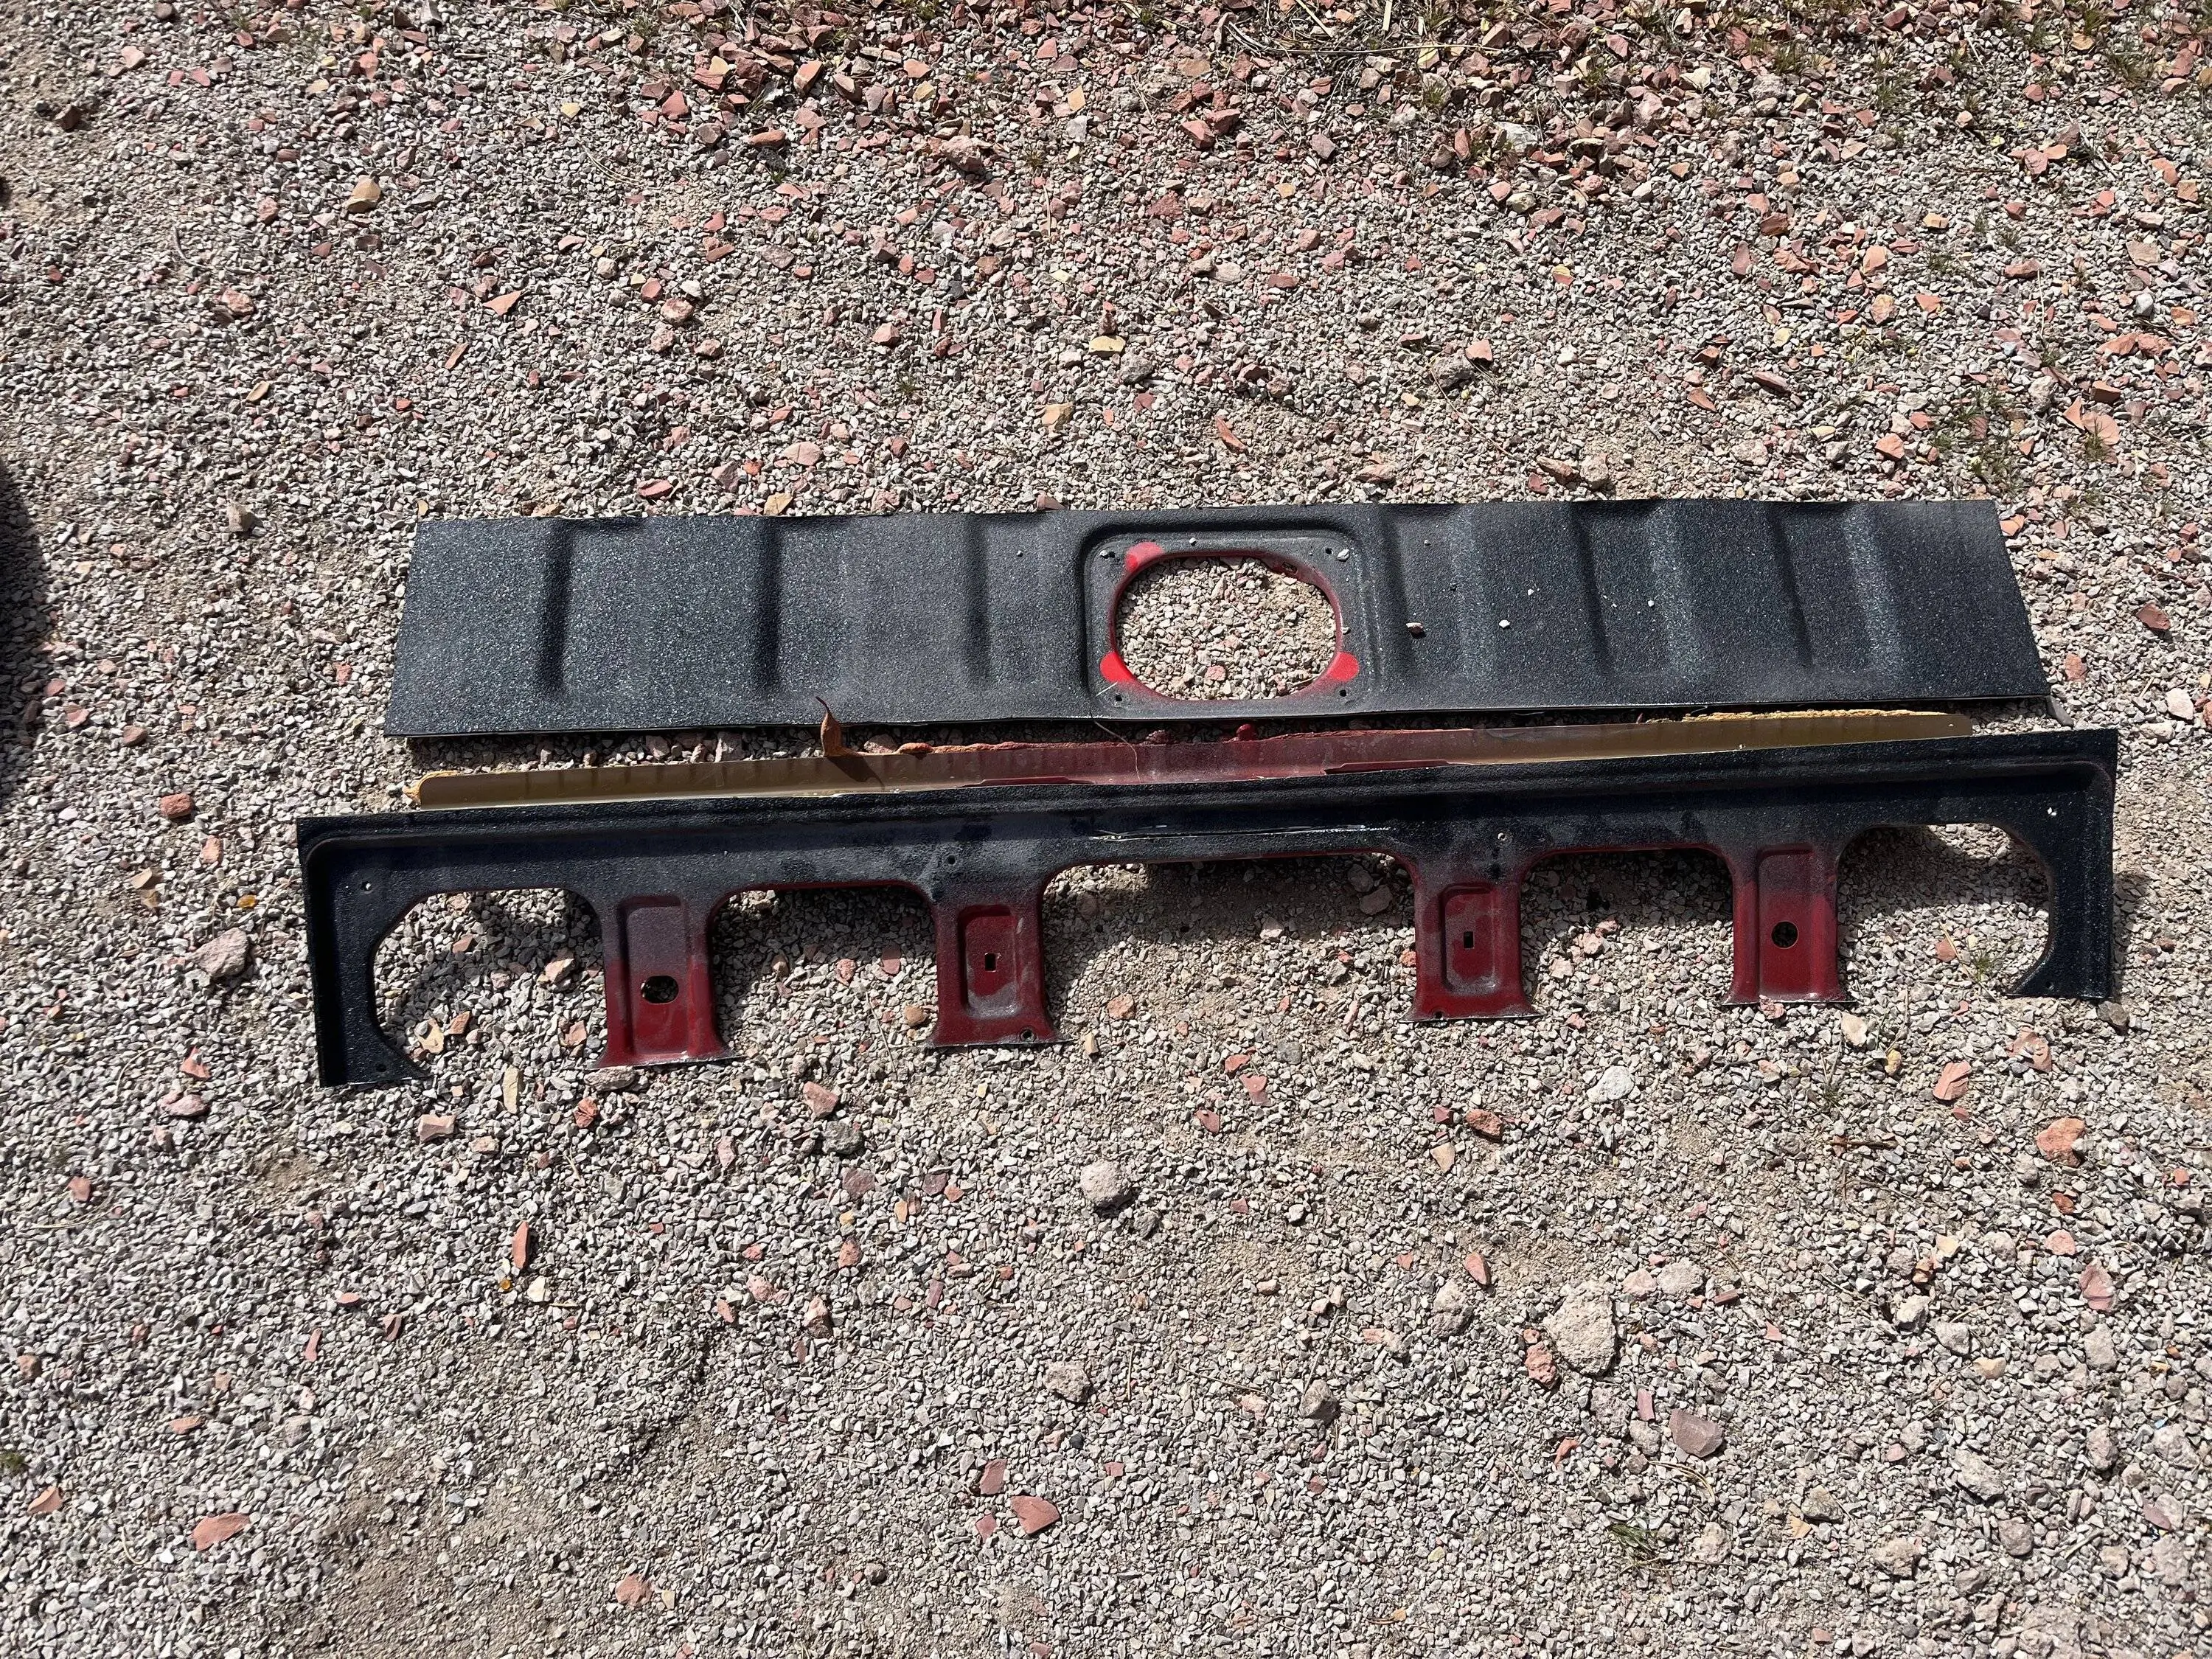
Pulled the top panel and used my shop vac to pull up all the aluminum shavings for the next step. I also grinded the edges smooth with a flap disk in between steps as necessary whenever I needed to reach into the tailgate in that area.
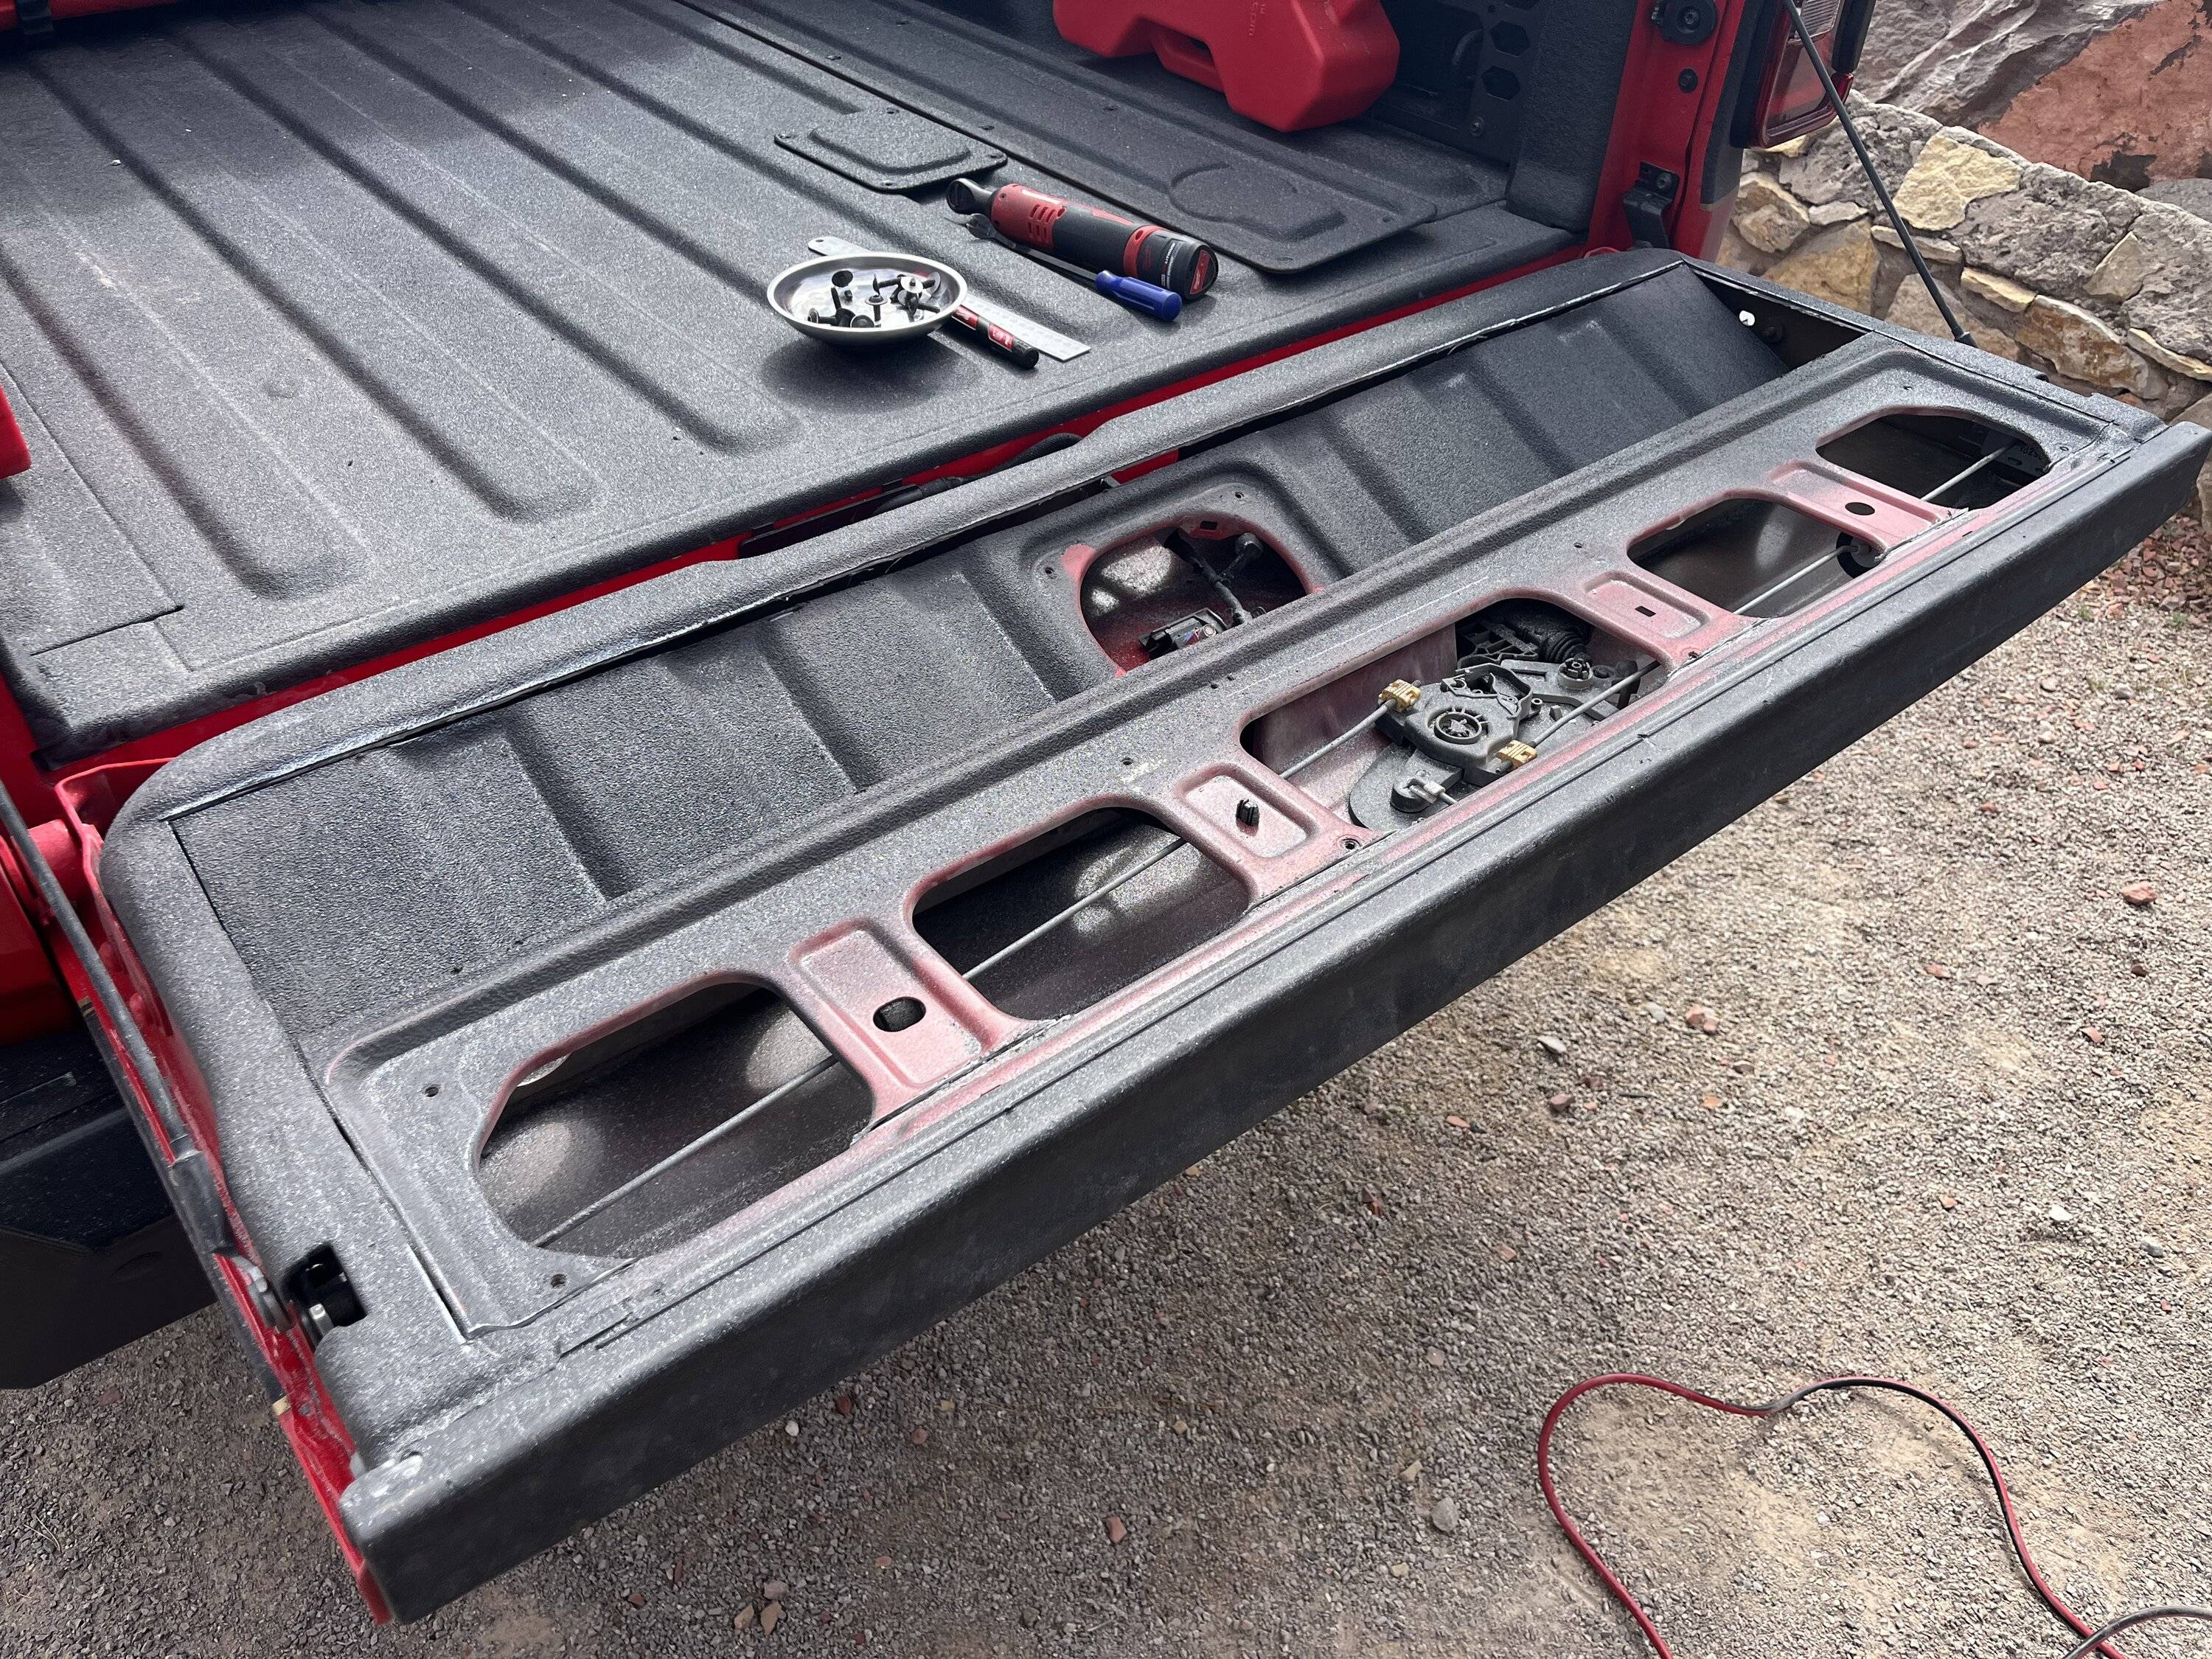
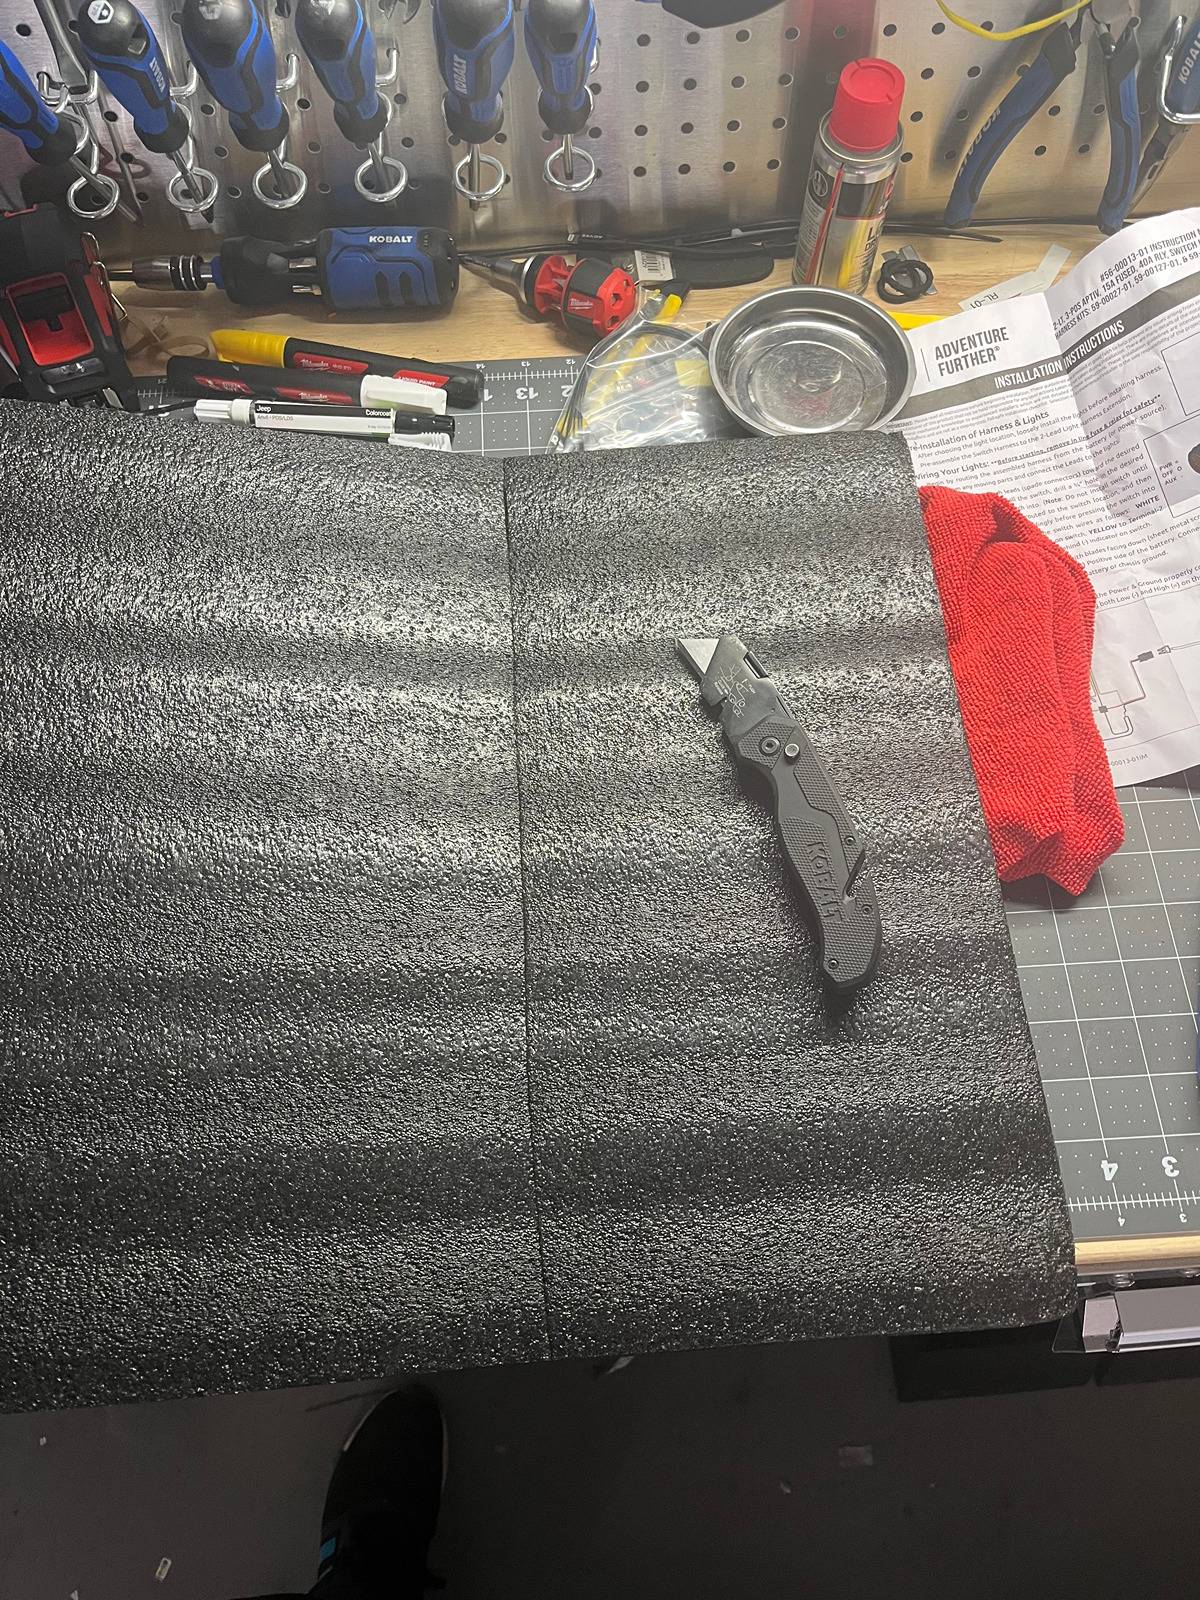
Next was to remove the foam sealant holding what was left of the tailgate skin. A flat blade knife made this easy.
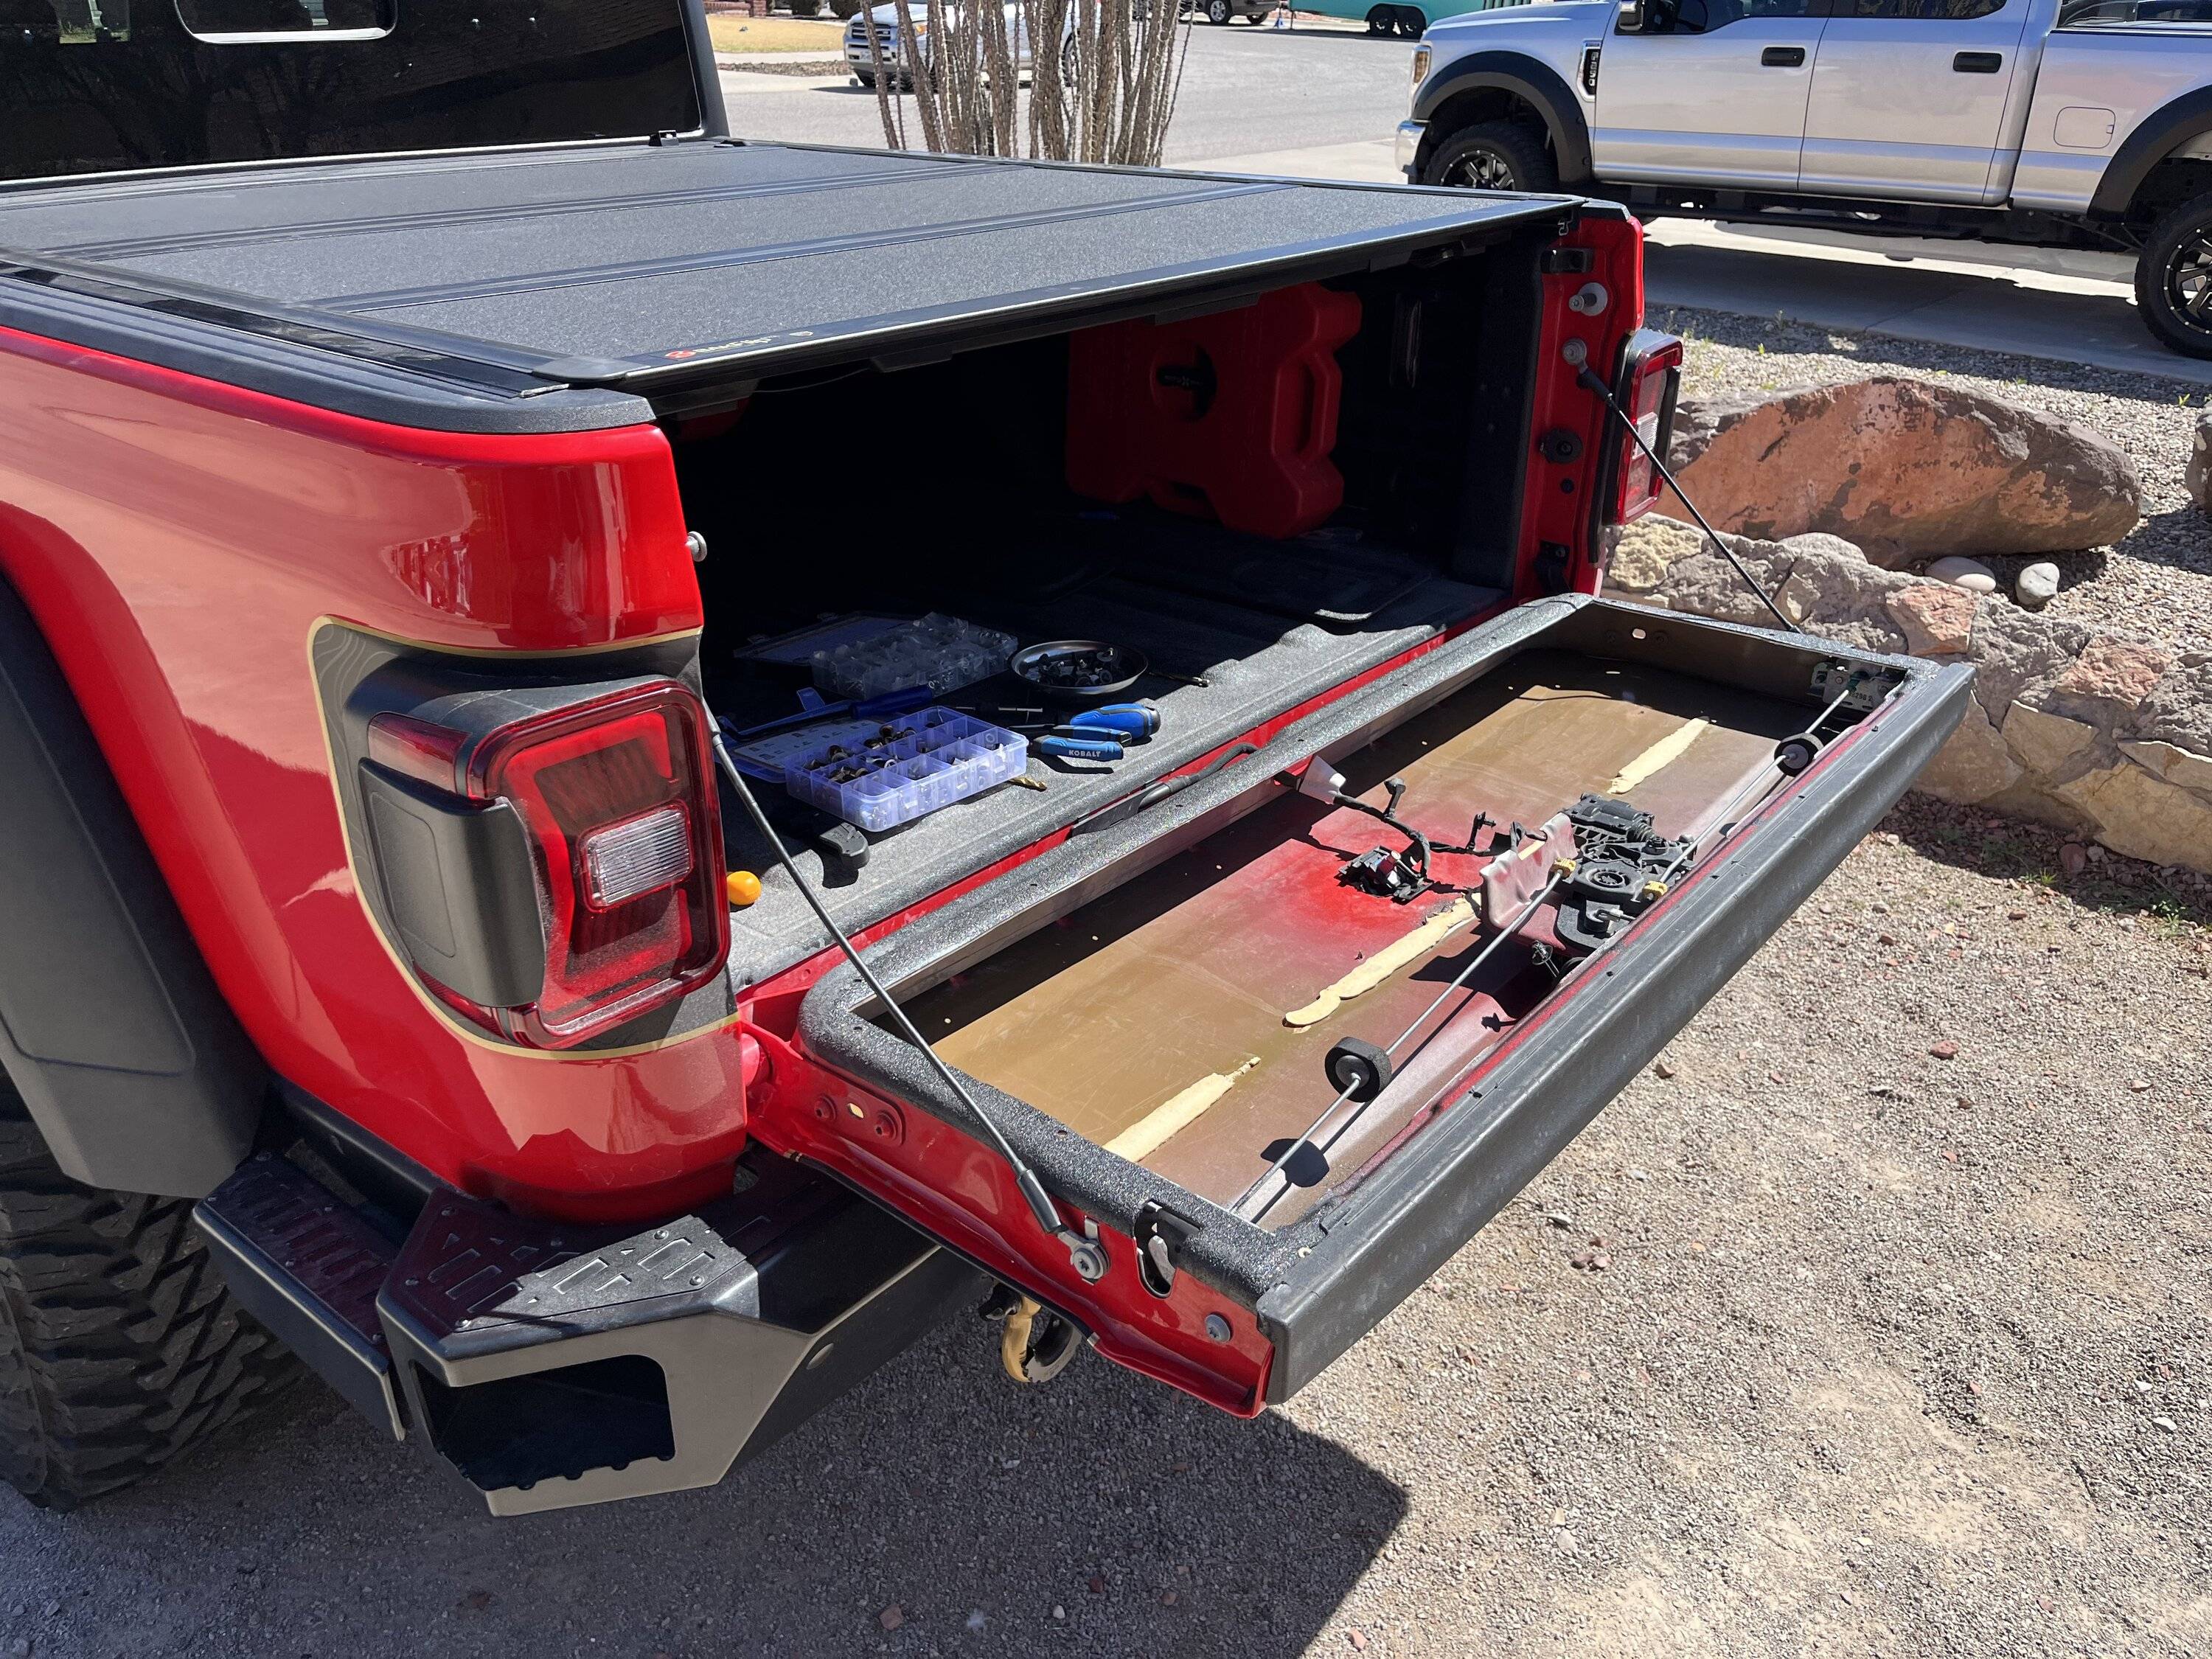
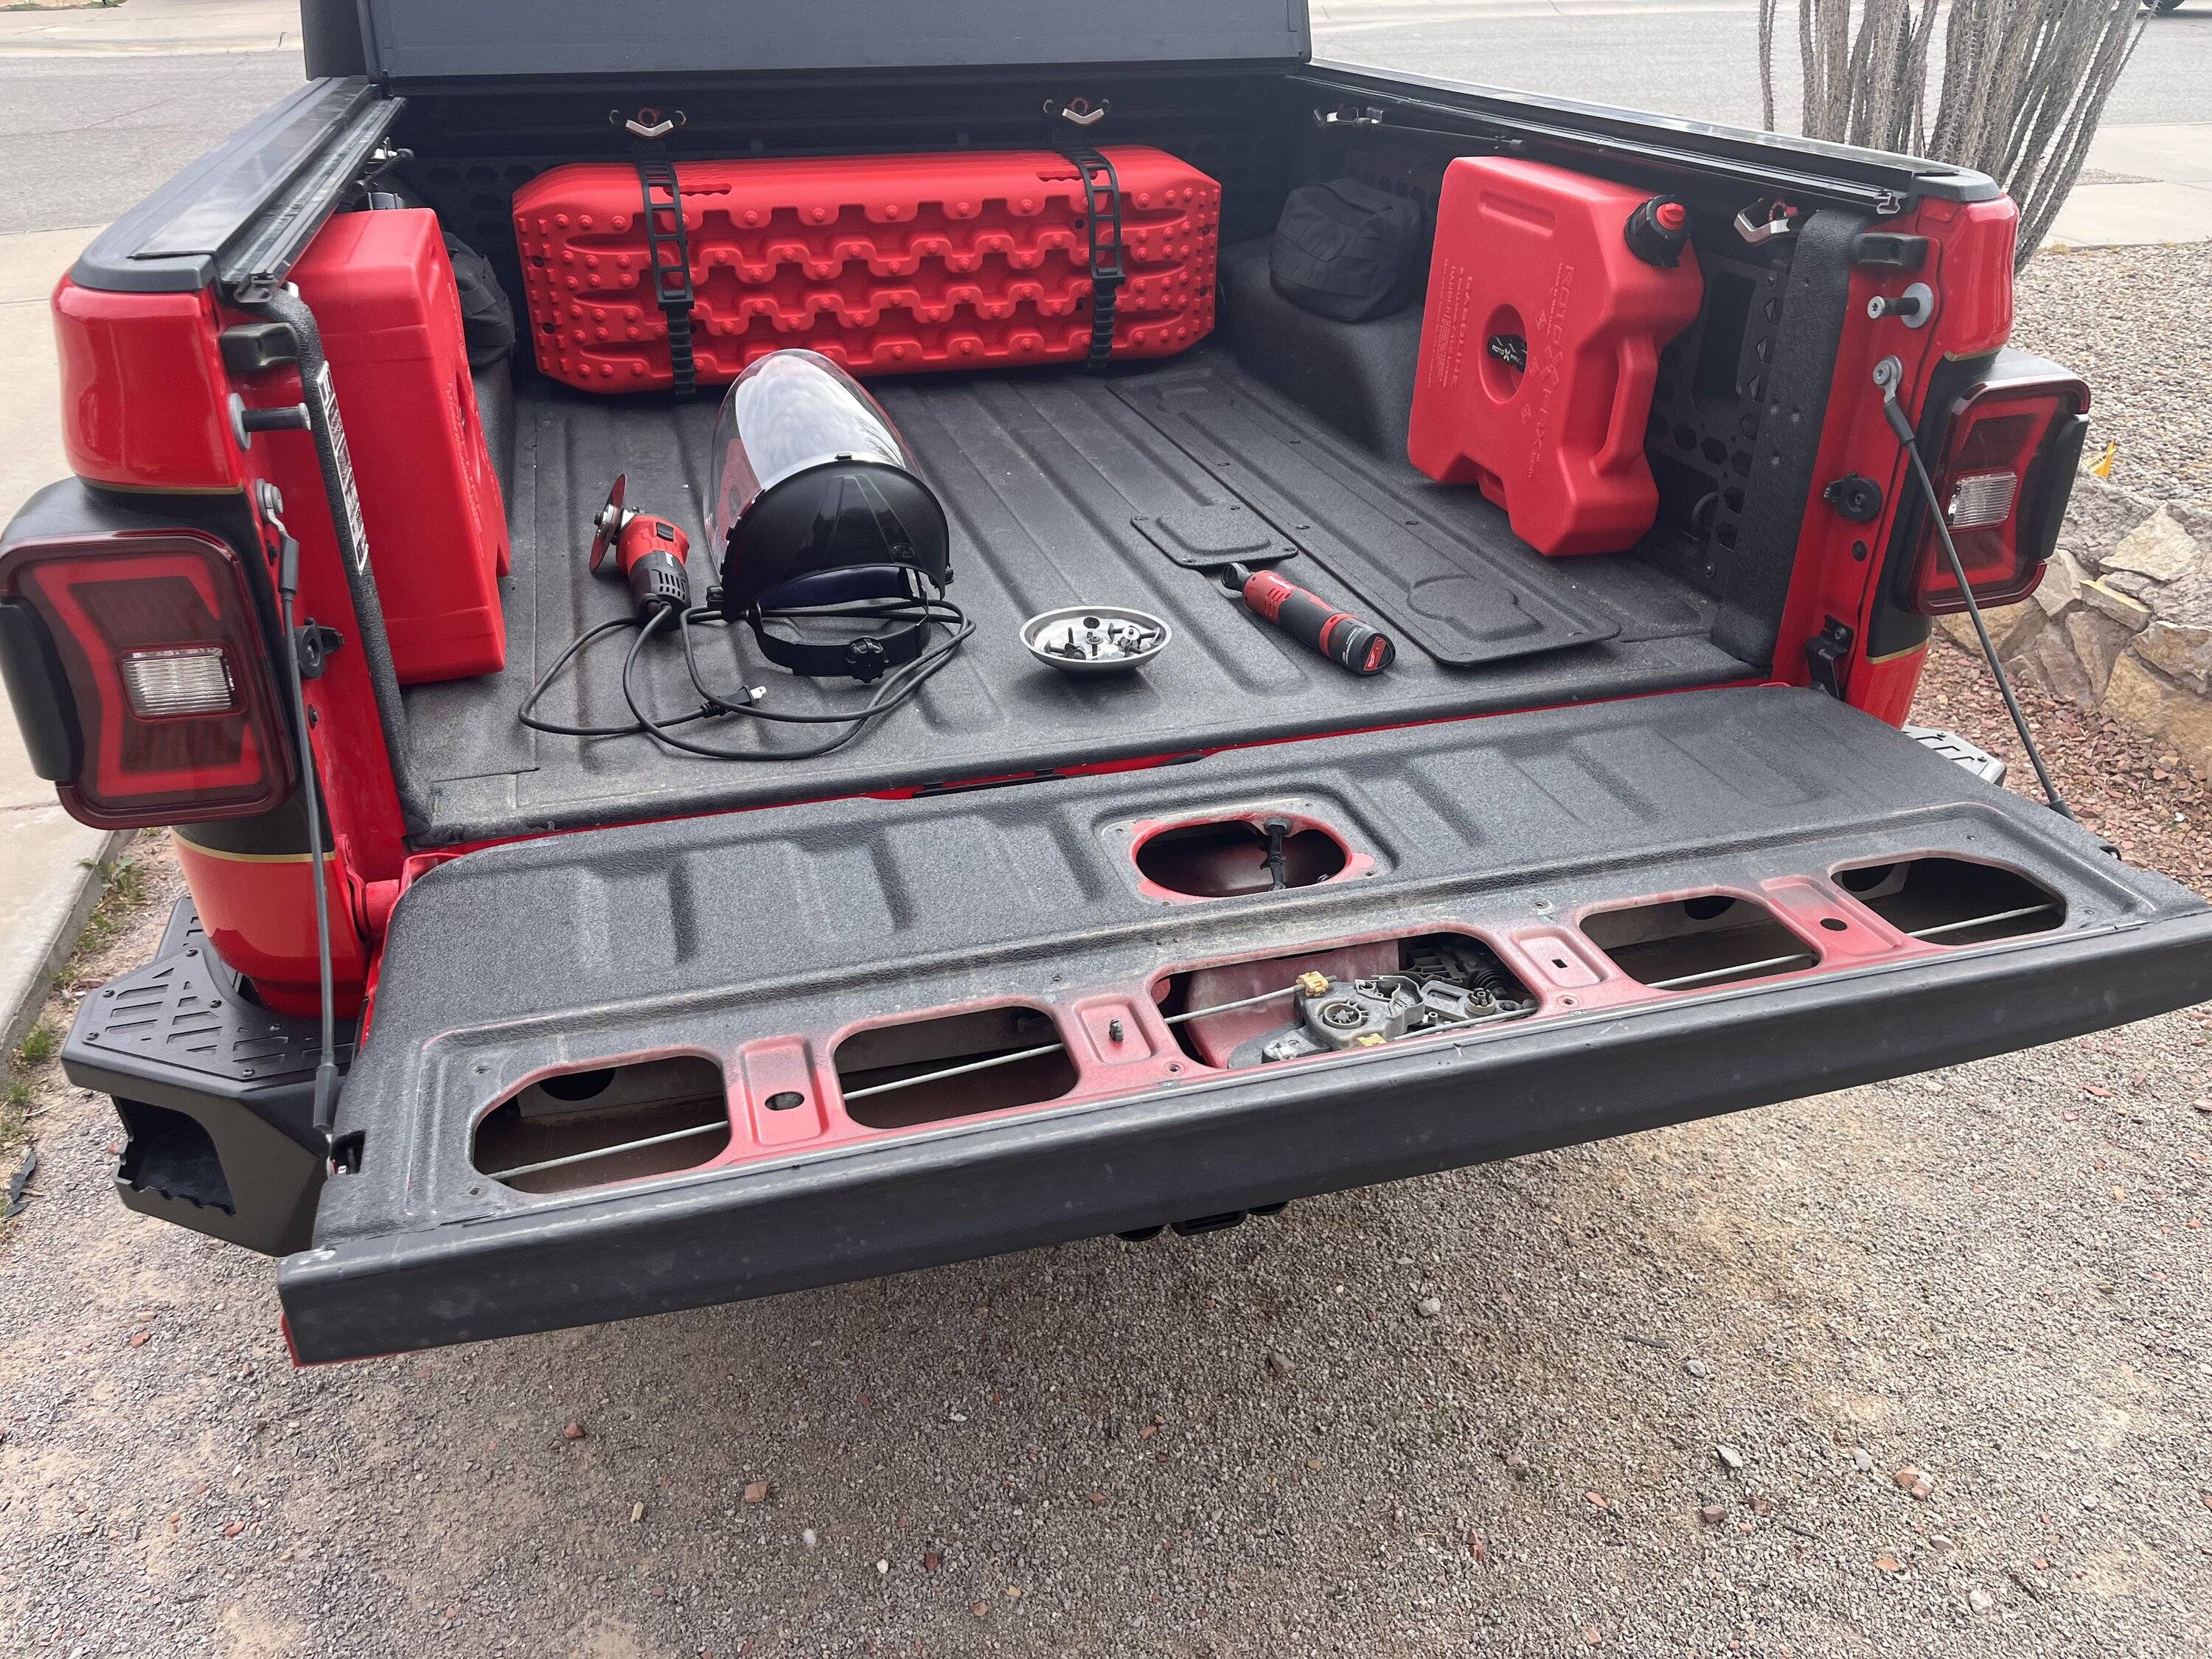
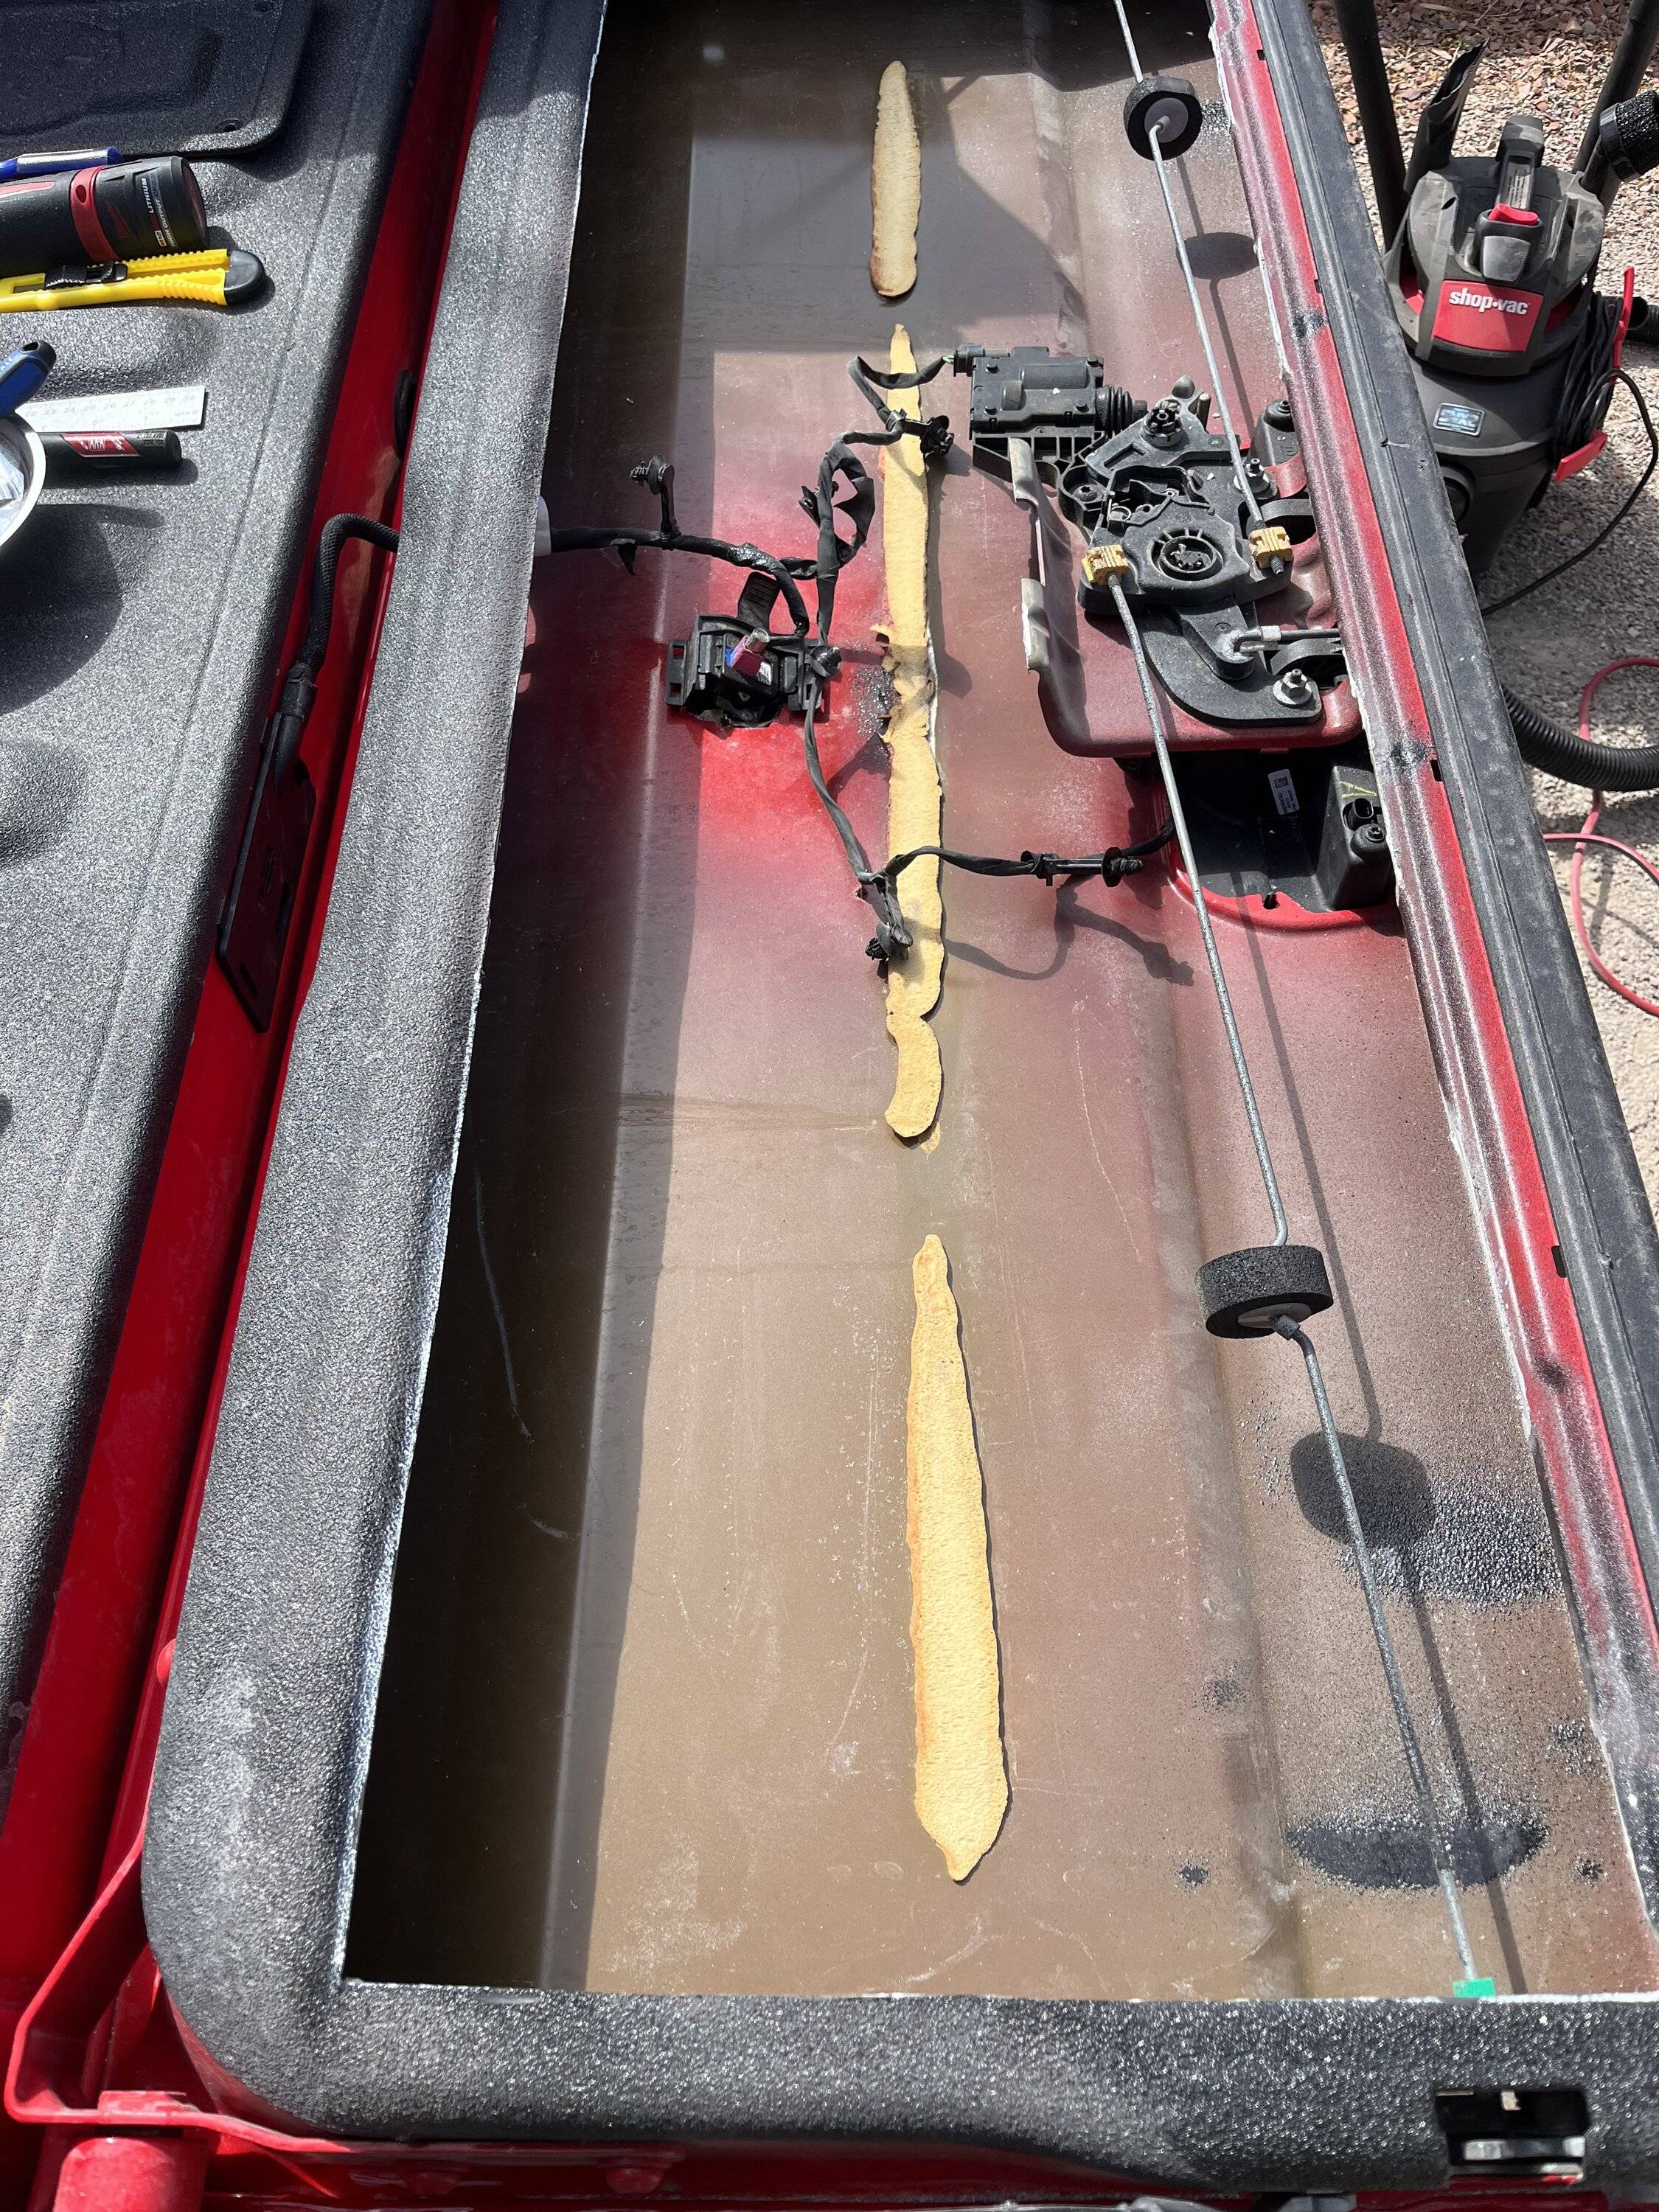
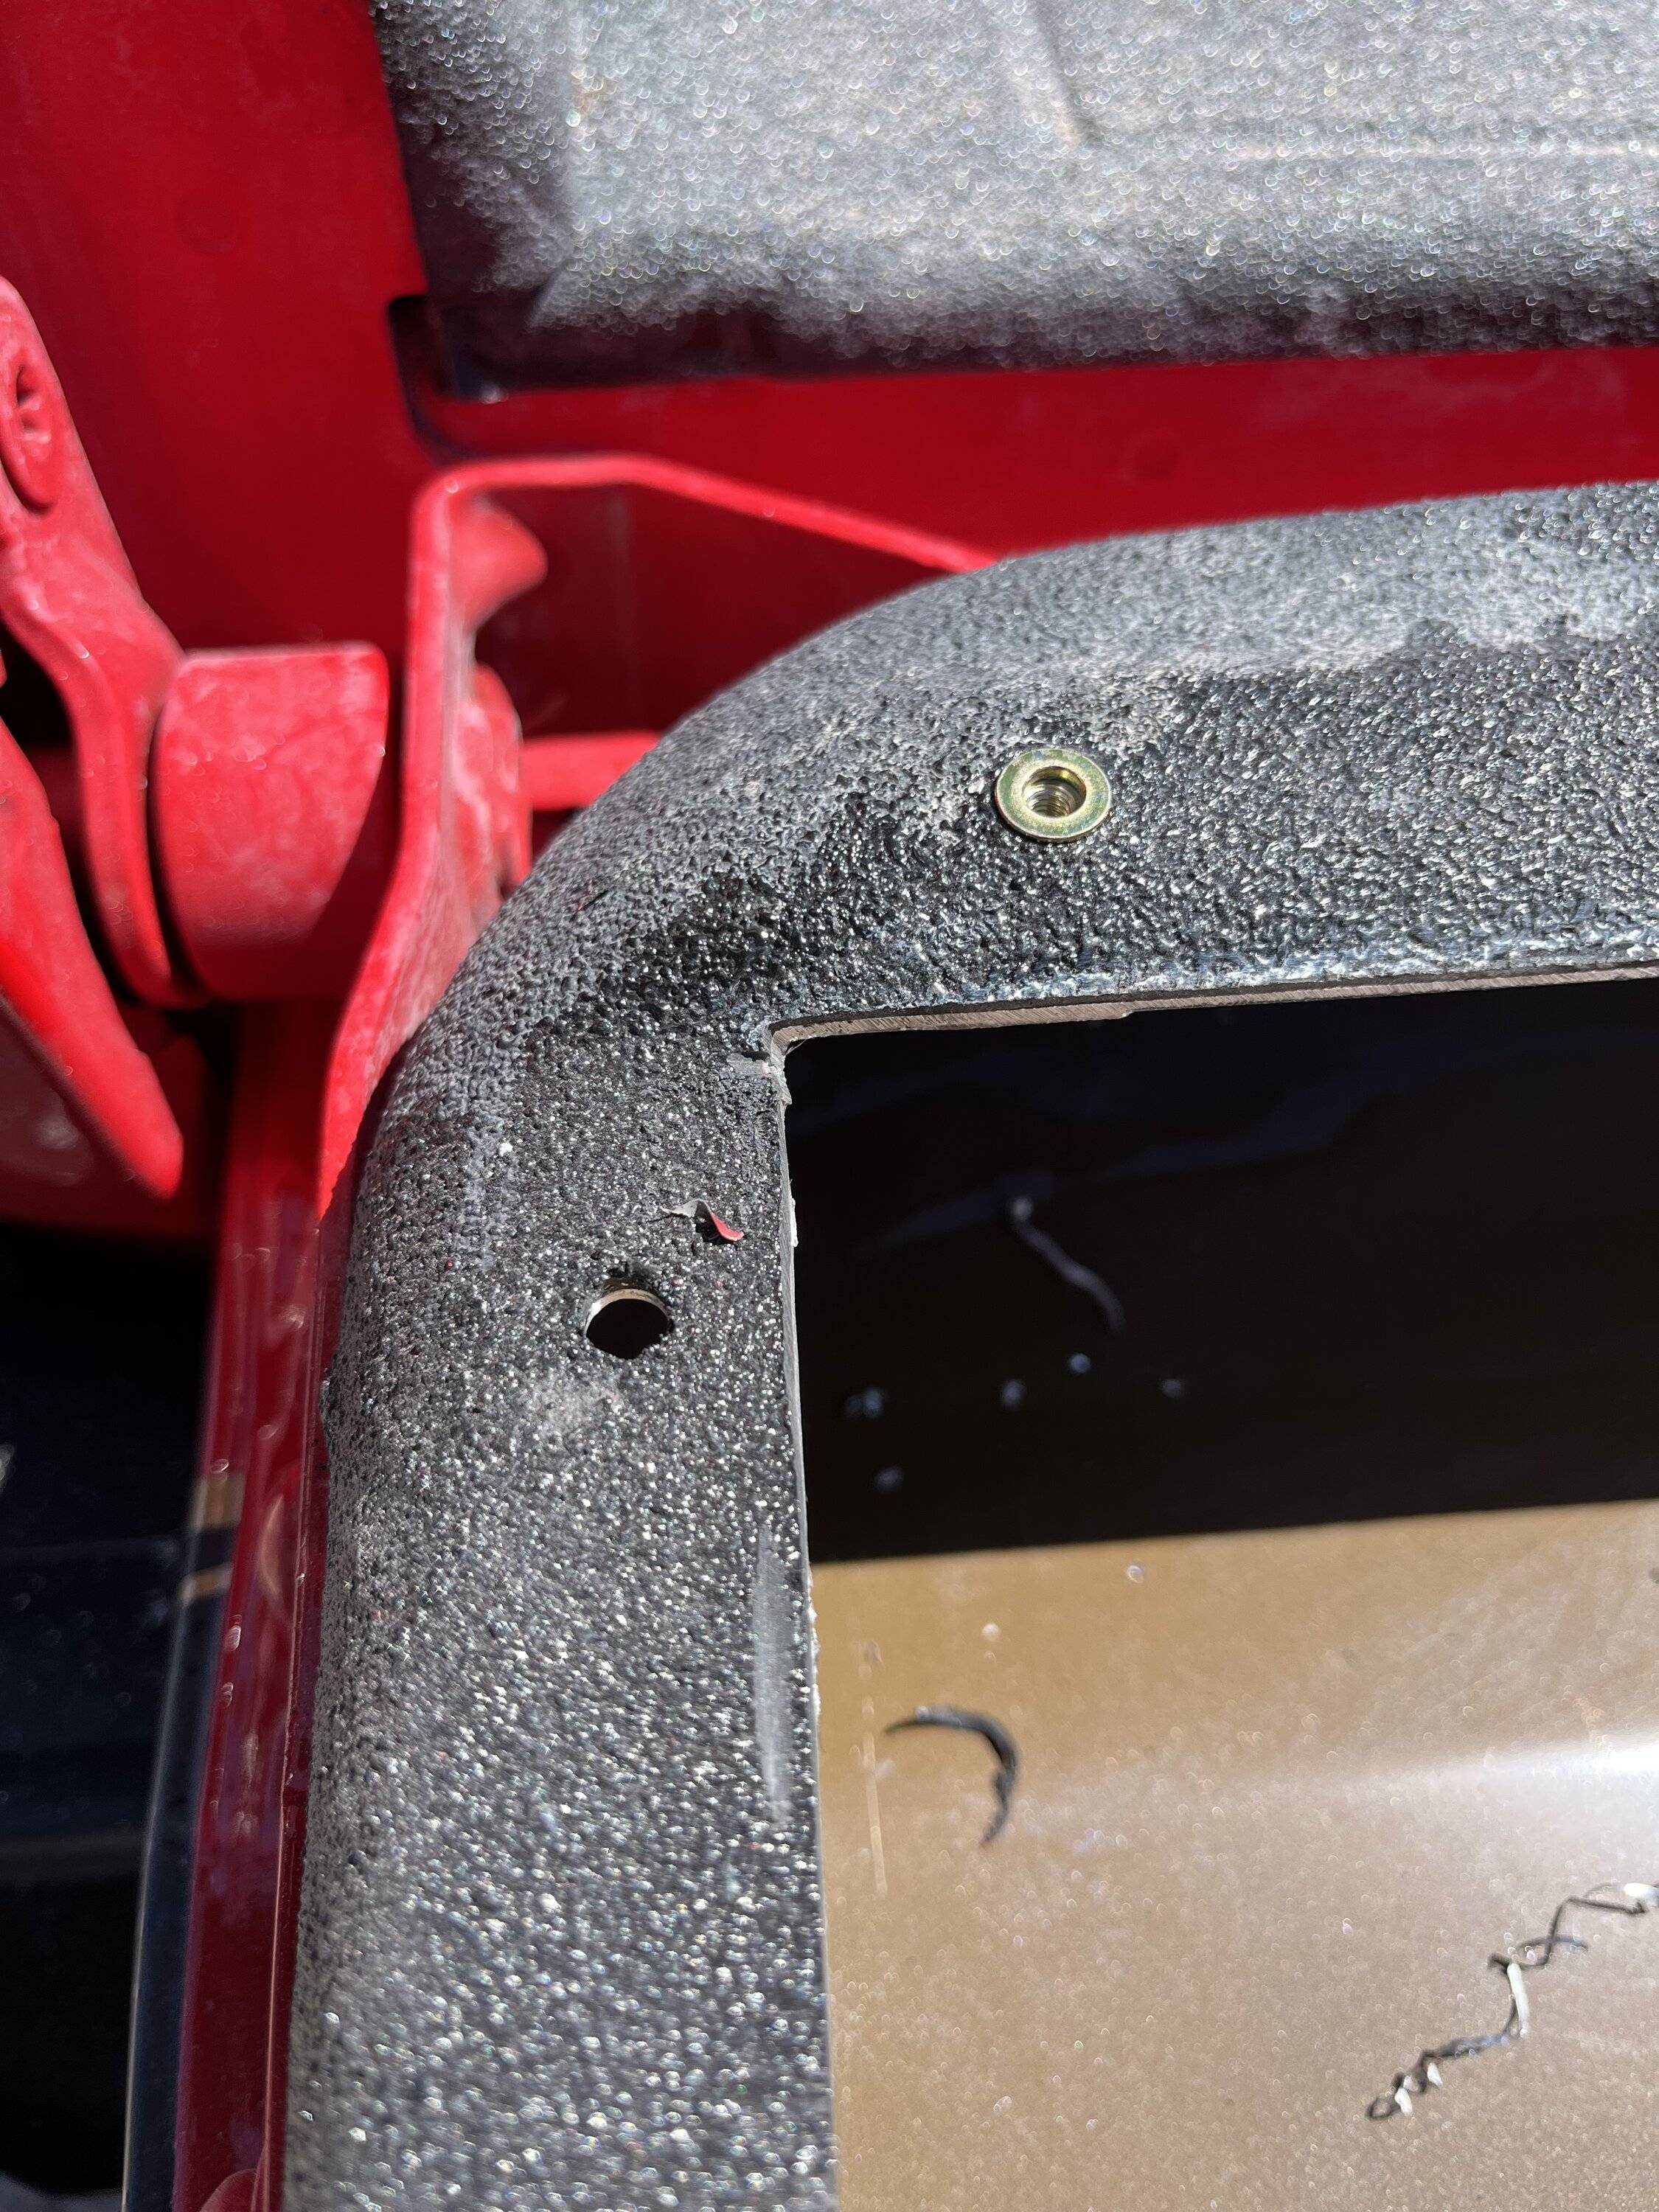
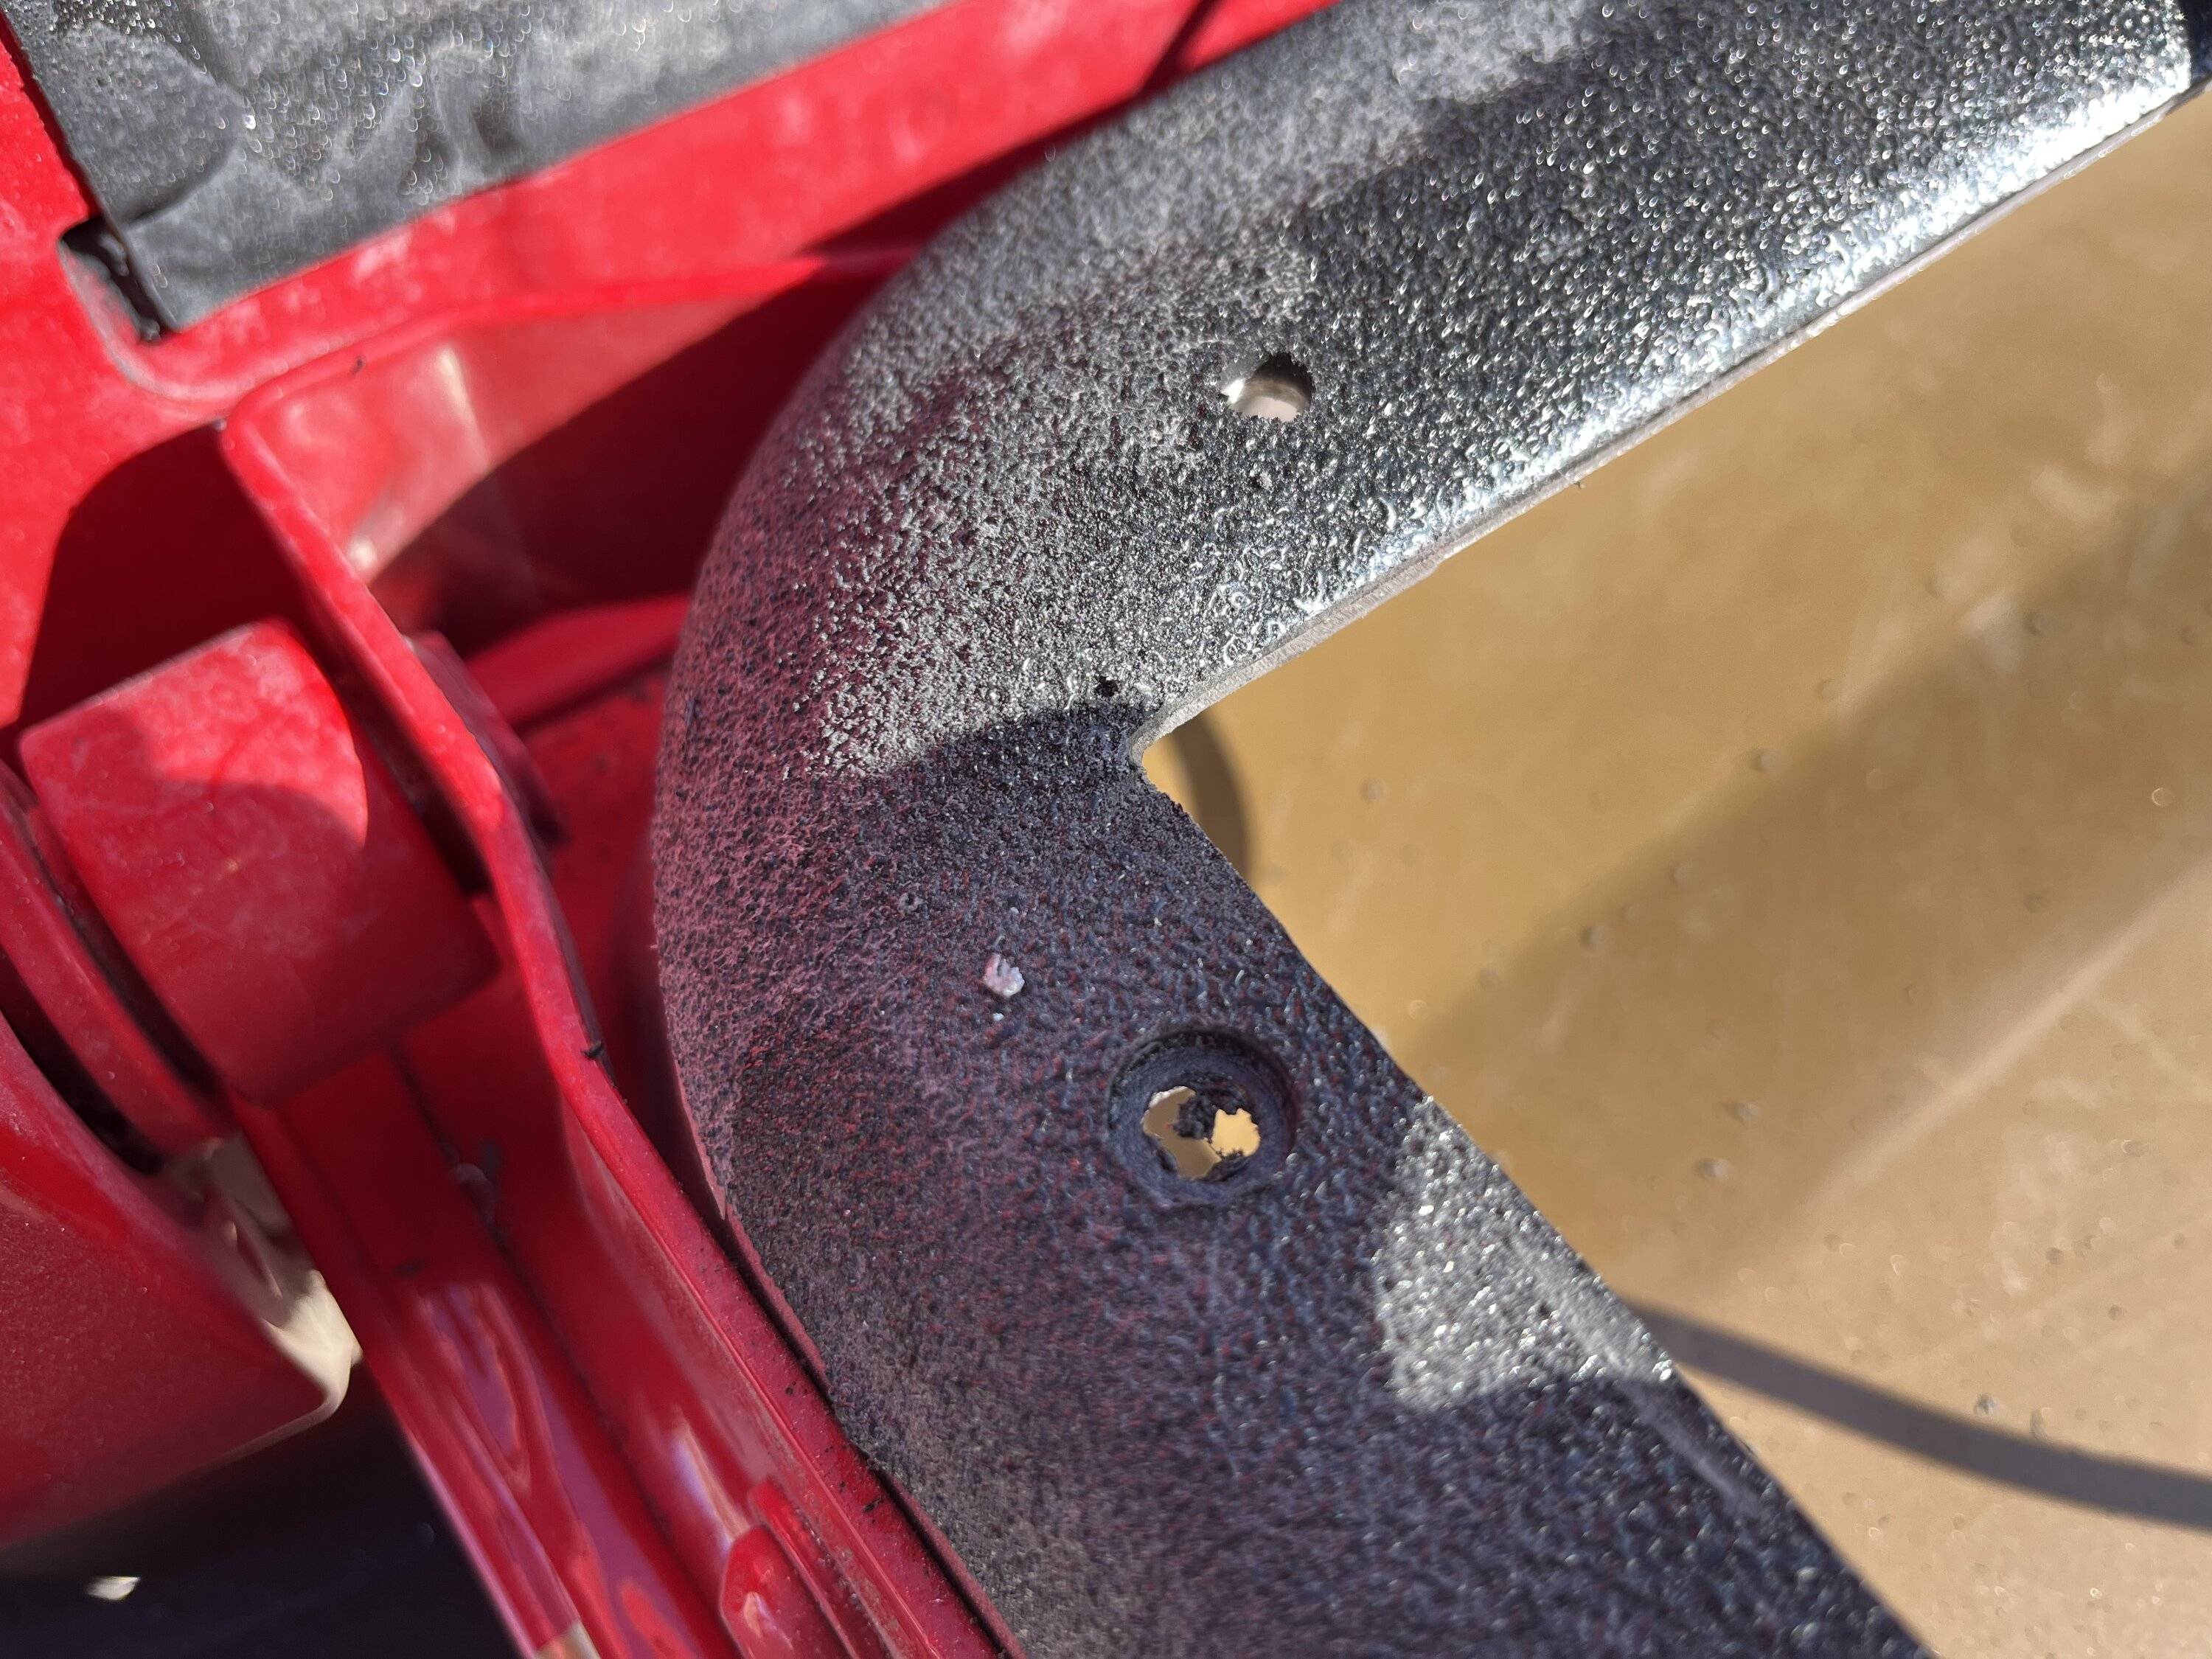
With the adhesive detached, I was finally able to skin the tailgate, behold the remains and my open tailgate box. I took this opportunity to grind my edges smooth. I also tucked the wires for the camera, lock mechanism, and taillight underneath the latch handle support.
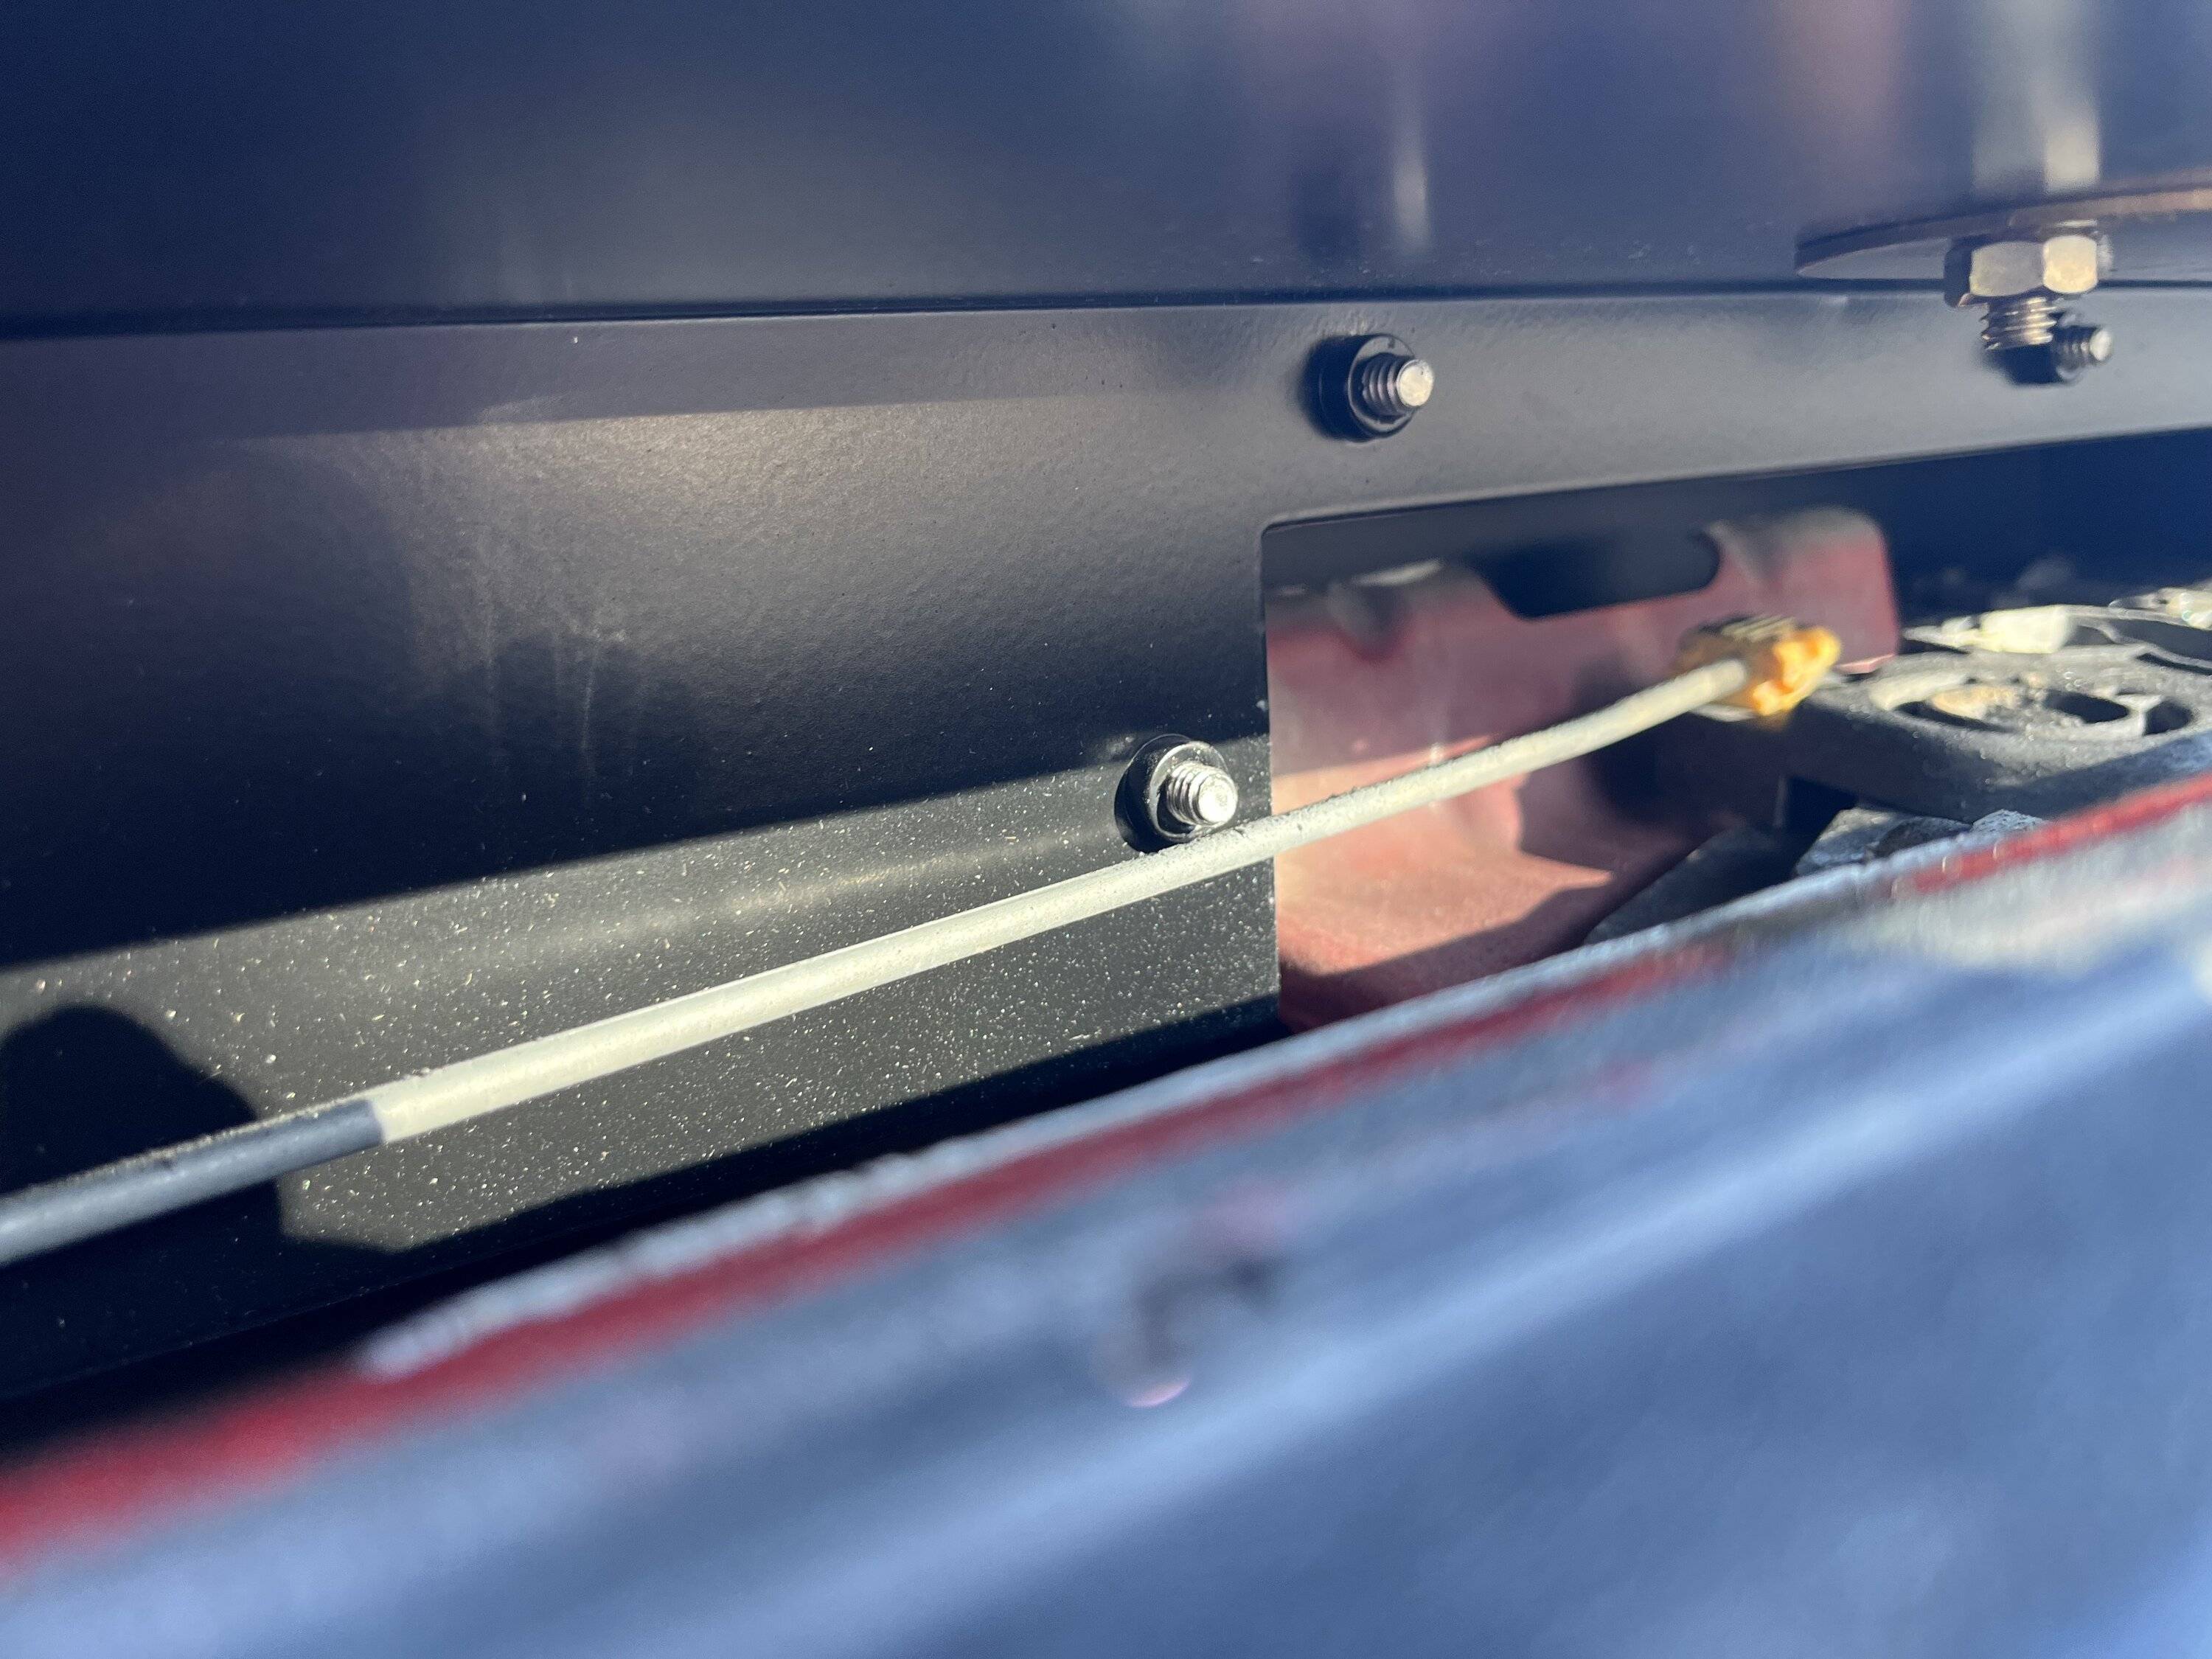
It was at this point I test fit the Reaper box. More or less dropped right in, minus some small interference with the prop rod, which was solved by dropping the front of the tailgate box in first , so I started marking and drilling my holes, using the box as a template.
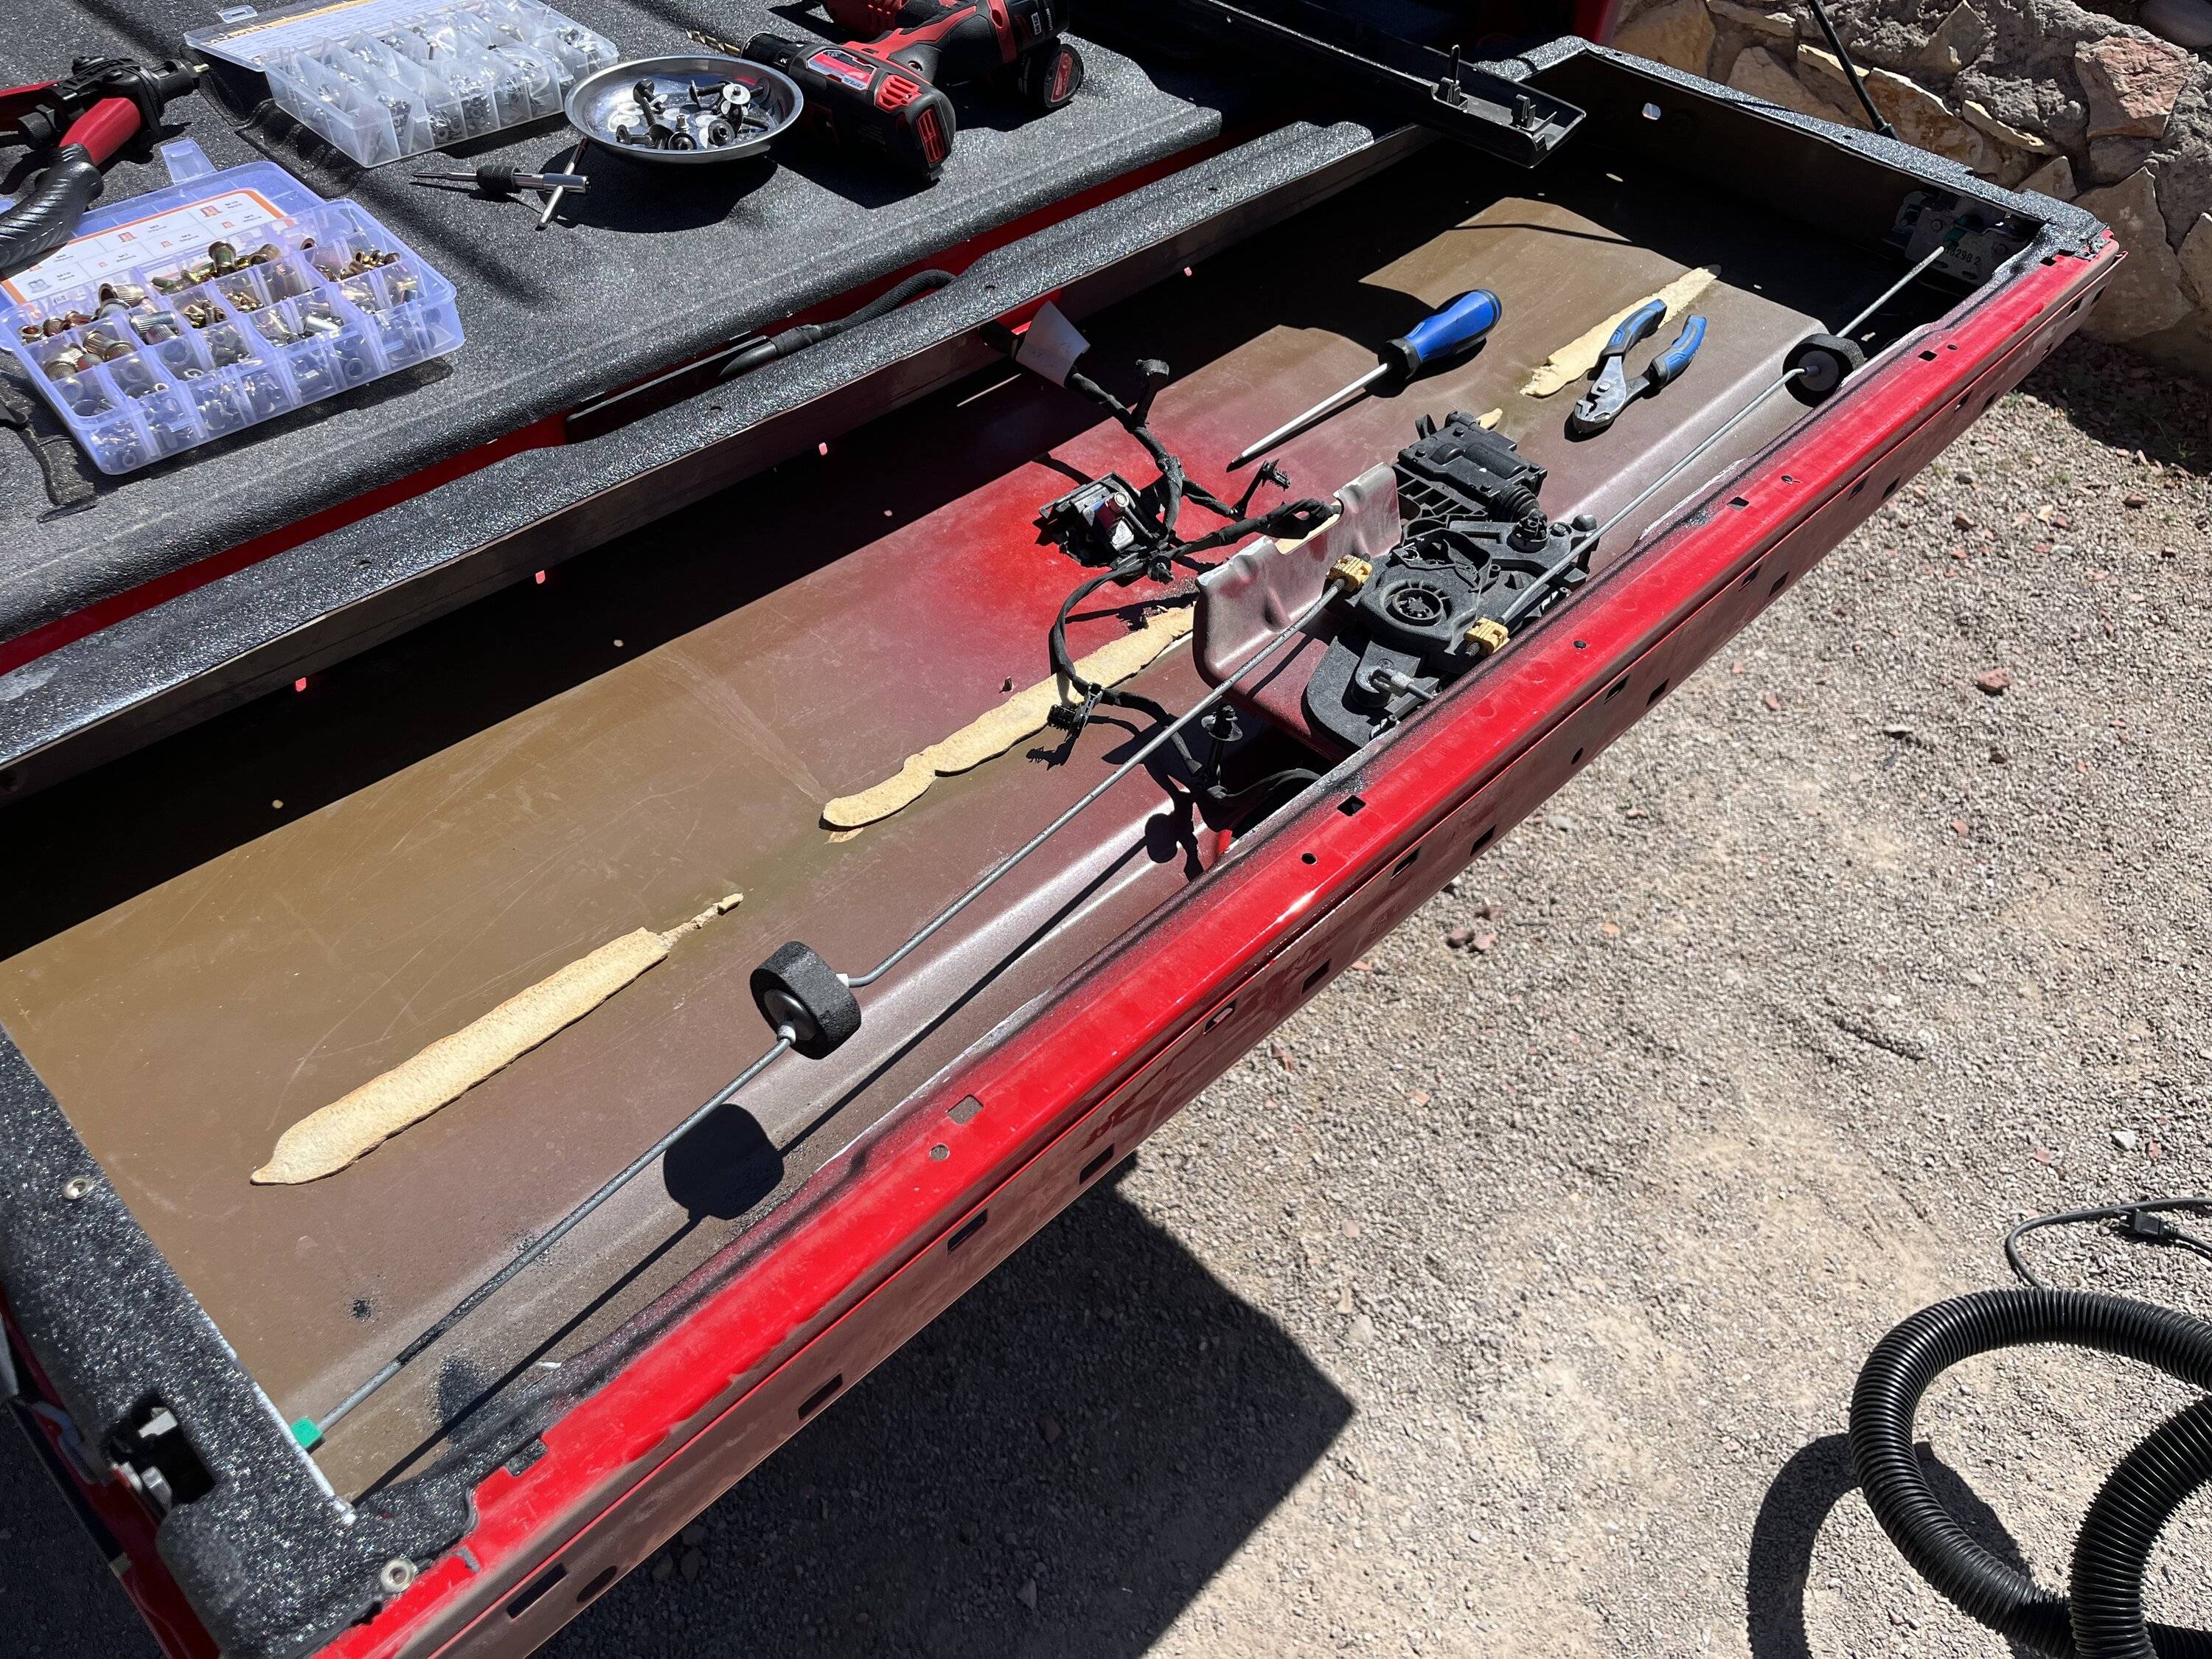
Here's where I had my only issue. Since I wanted to use RivNuts instead of self tapers, I had to remove the box one more time to install them. I thought it was going smoothly, but realized I had a problem. The RivNuts I had weren't able to seat properly due to the bedliner! It was too thick, and the RivNuts were not crushing on the back side of the sheetmetal! You could pop them out by hand.
Luckily I was able to think of a solution. I went into my toolbox and found my Dremel set. I attached a cylinder shapped sanding stone that was approximately the same size as my RivNuts. With the Dremel, I was able to sand down the bedliner until I hit the aluminum surface. With some washers on my RivNut tool, I was able to seat the RivNuts on the sheetmetal through the now counterbored holes, and able to get them to bite properly. I was able to continue with my install. Only took 1 hour to figure that out. ?
Removed the plastic tailgate trim to install the rivets at the top of the bed.
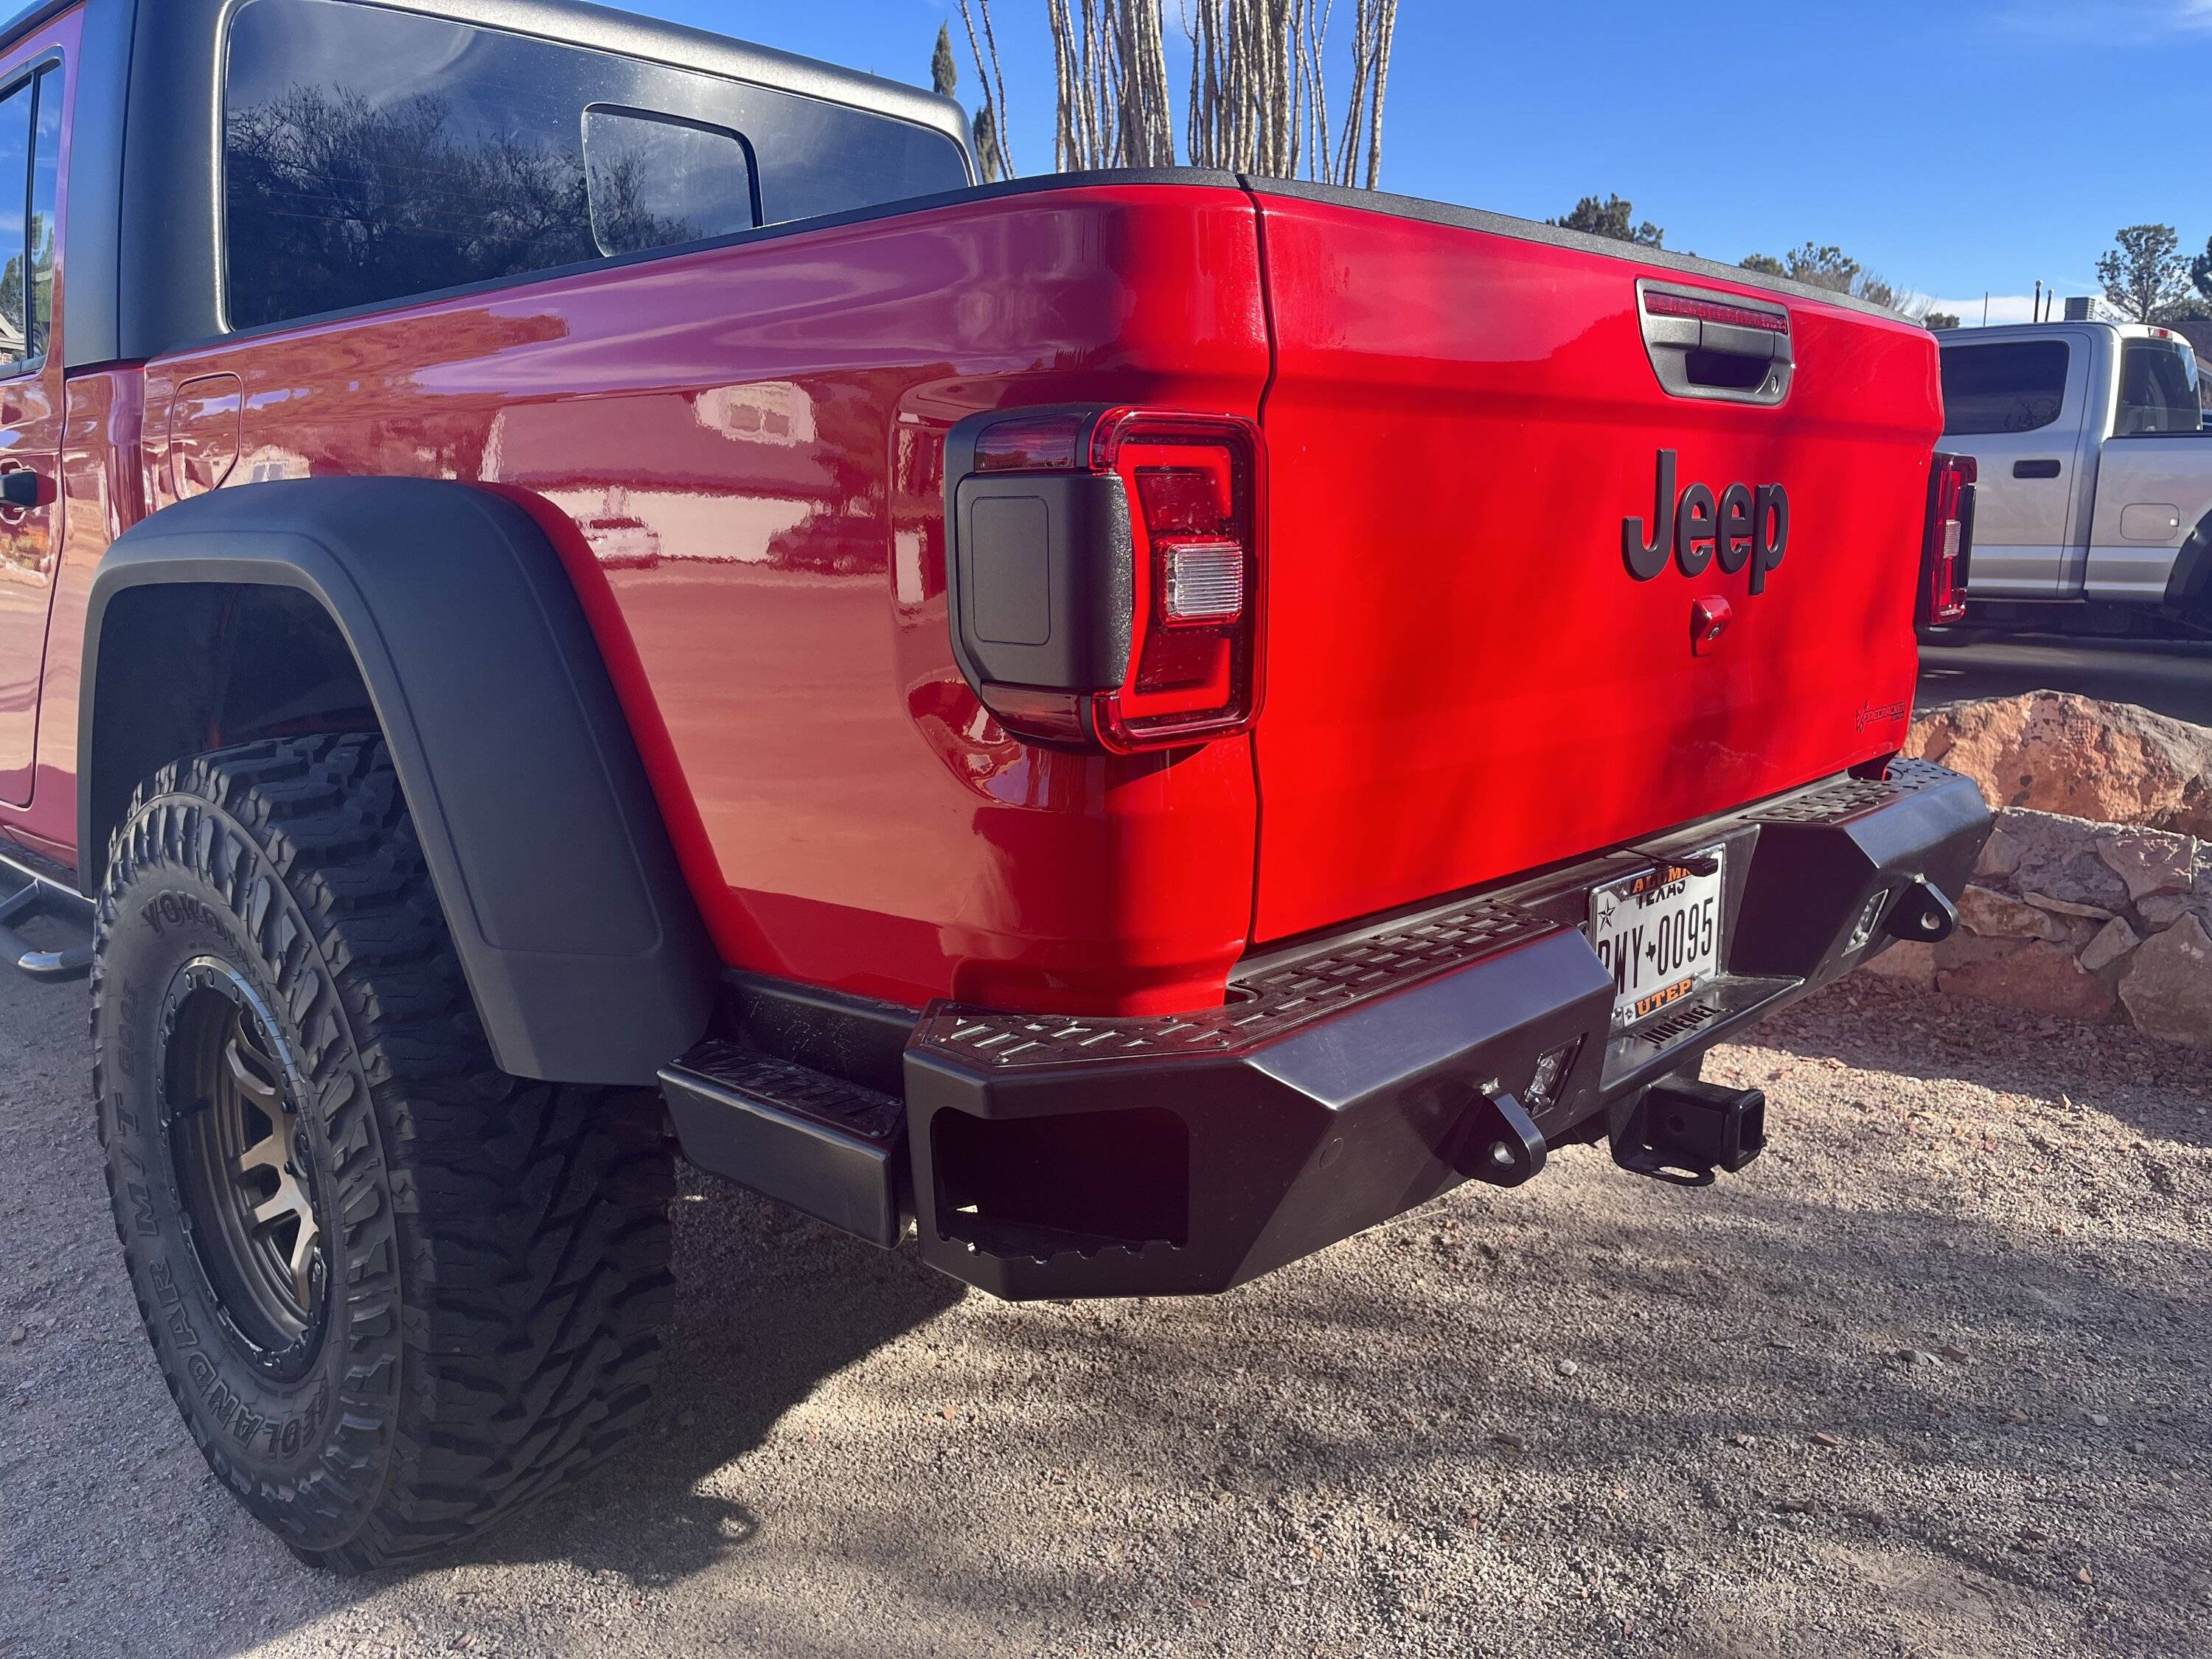
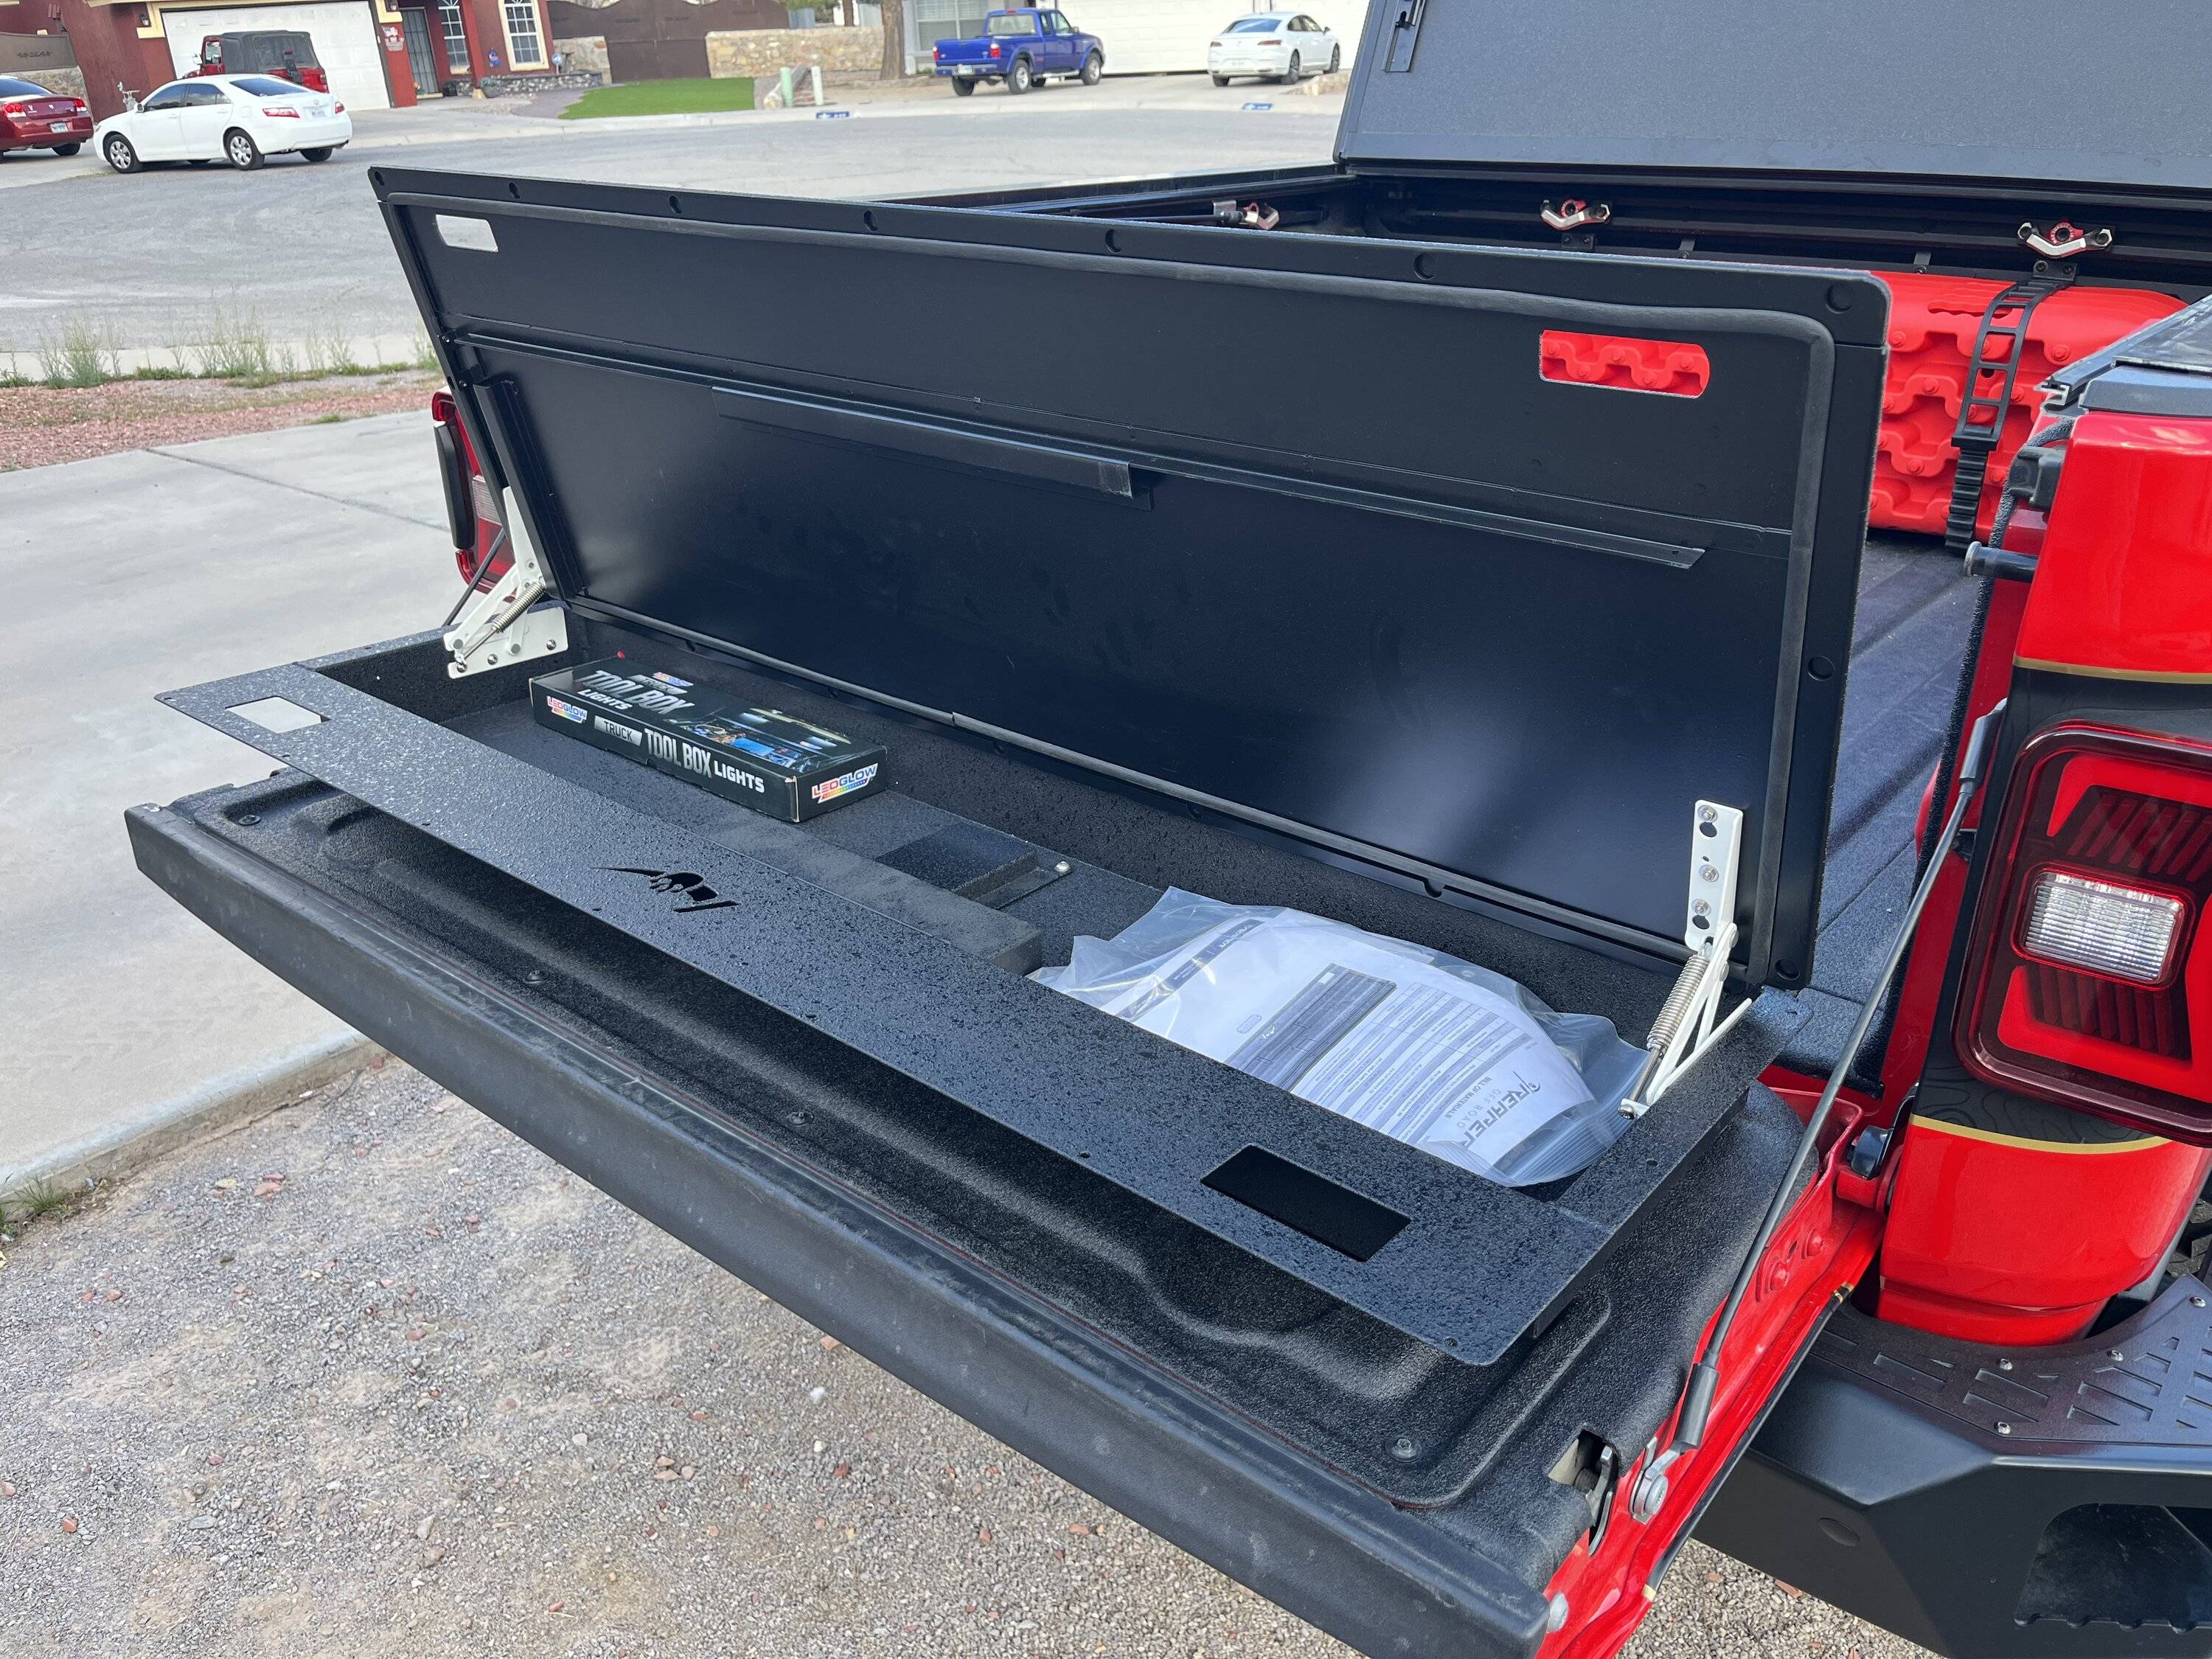
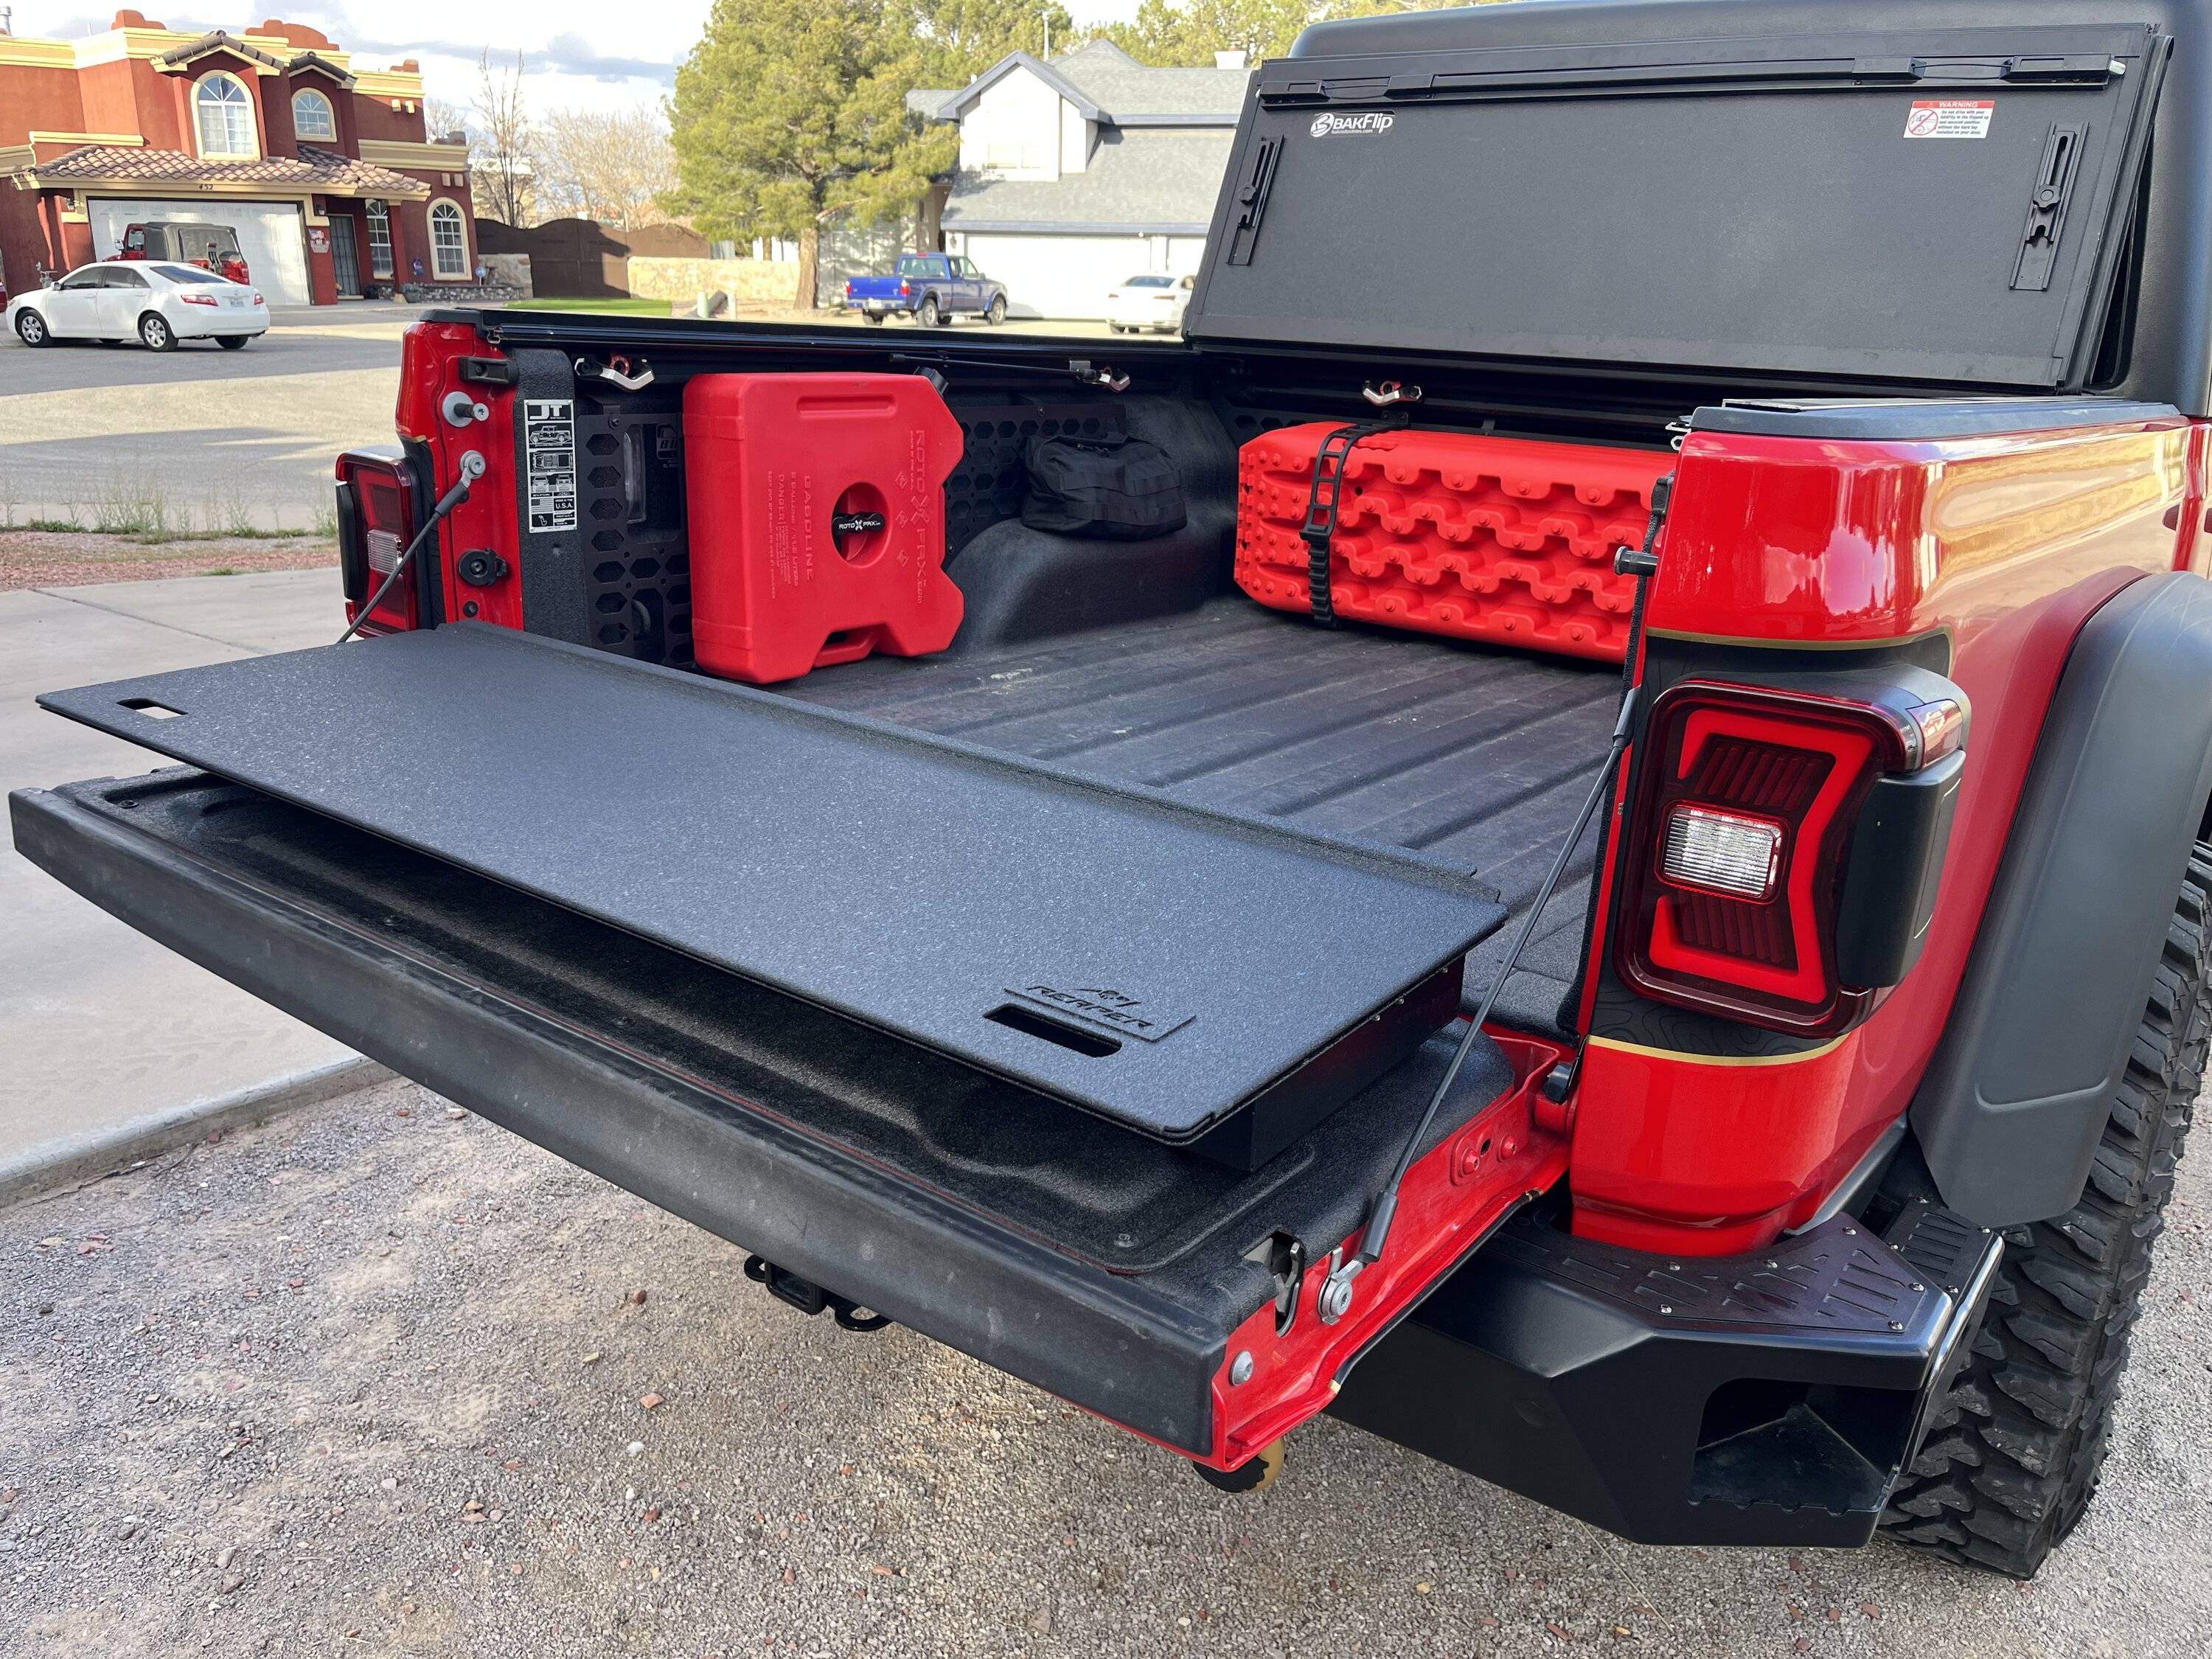
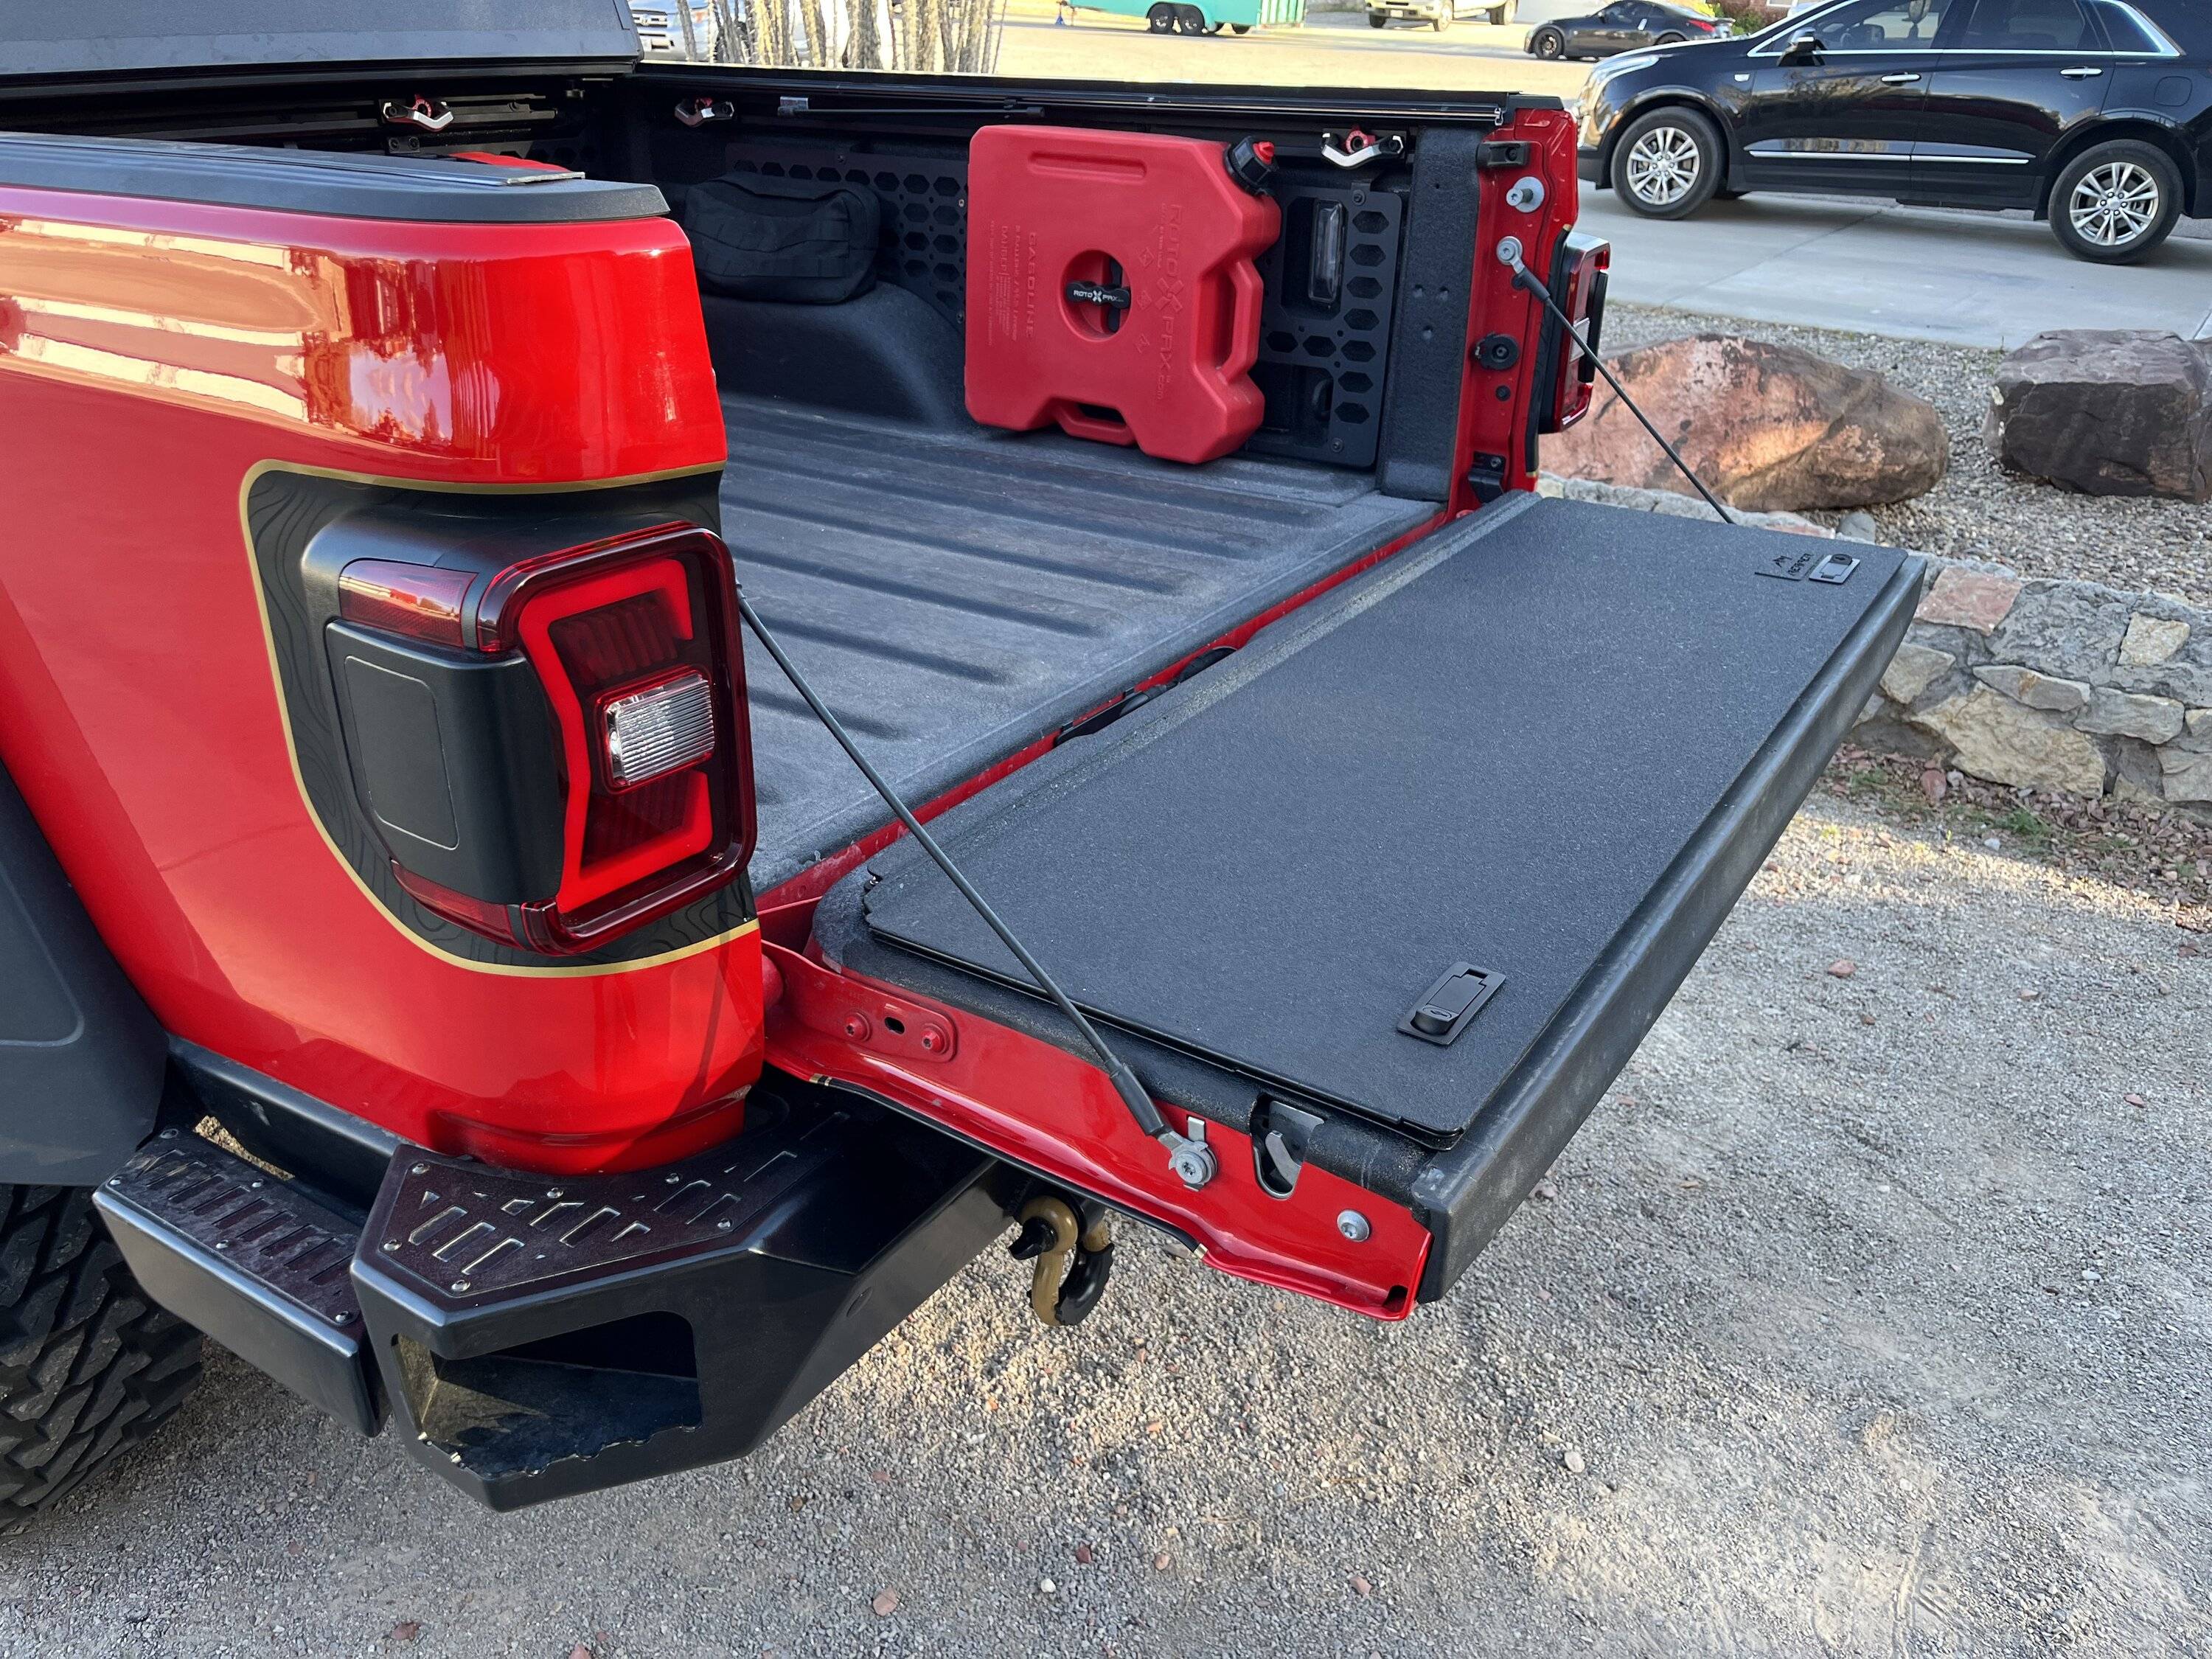
Counter bored and riveted all 20 something holes, and dropped the box in. Fit perfectly!
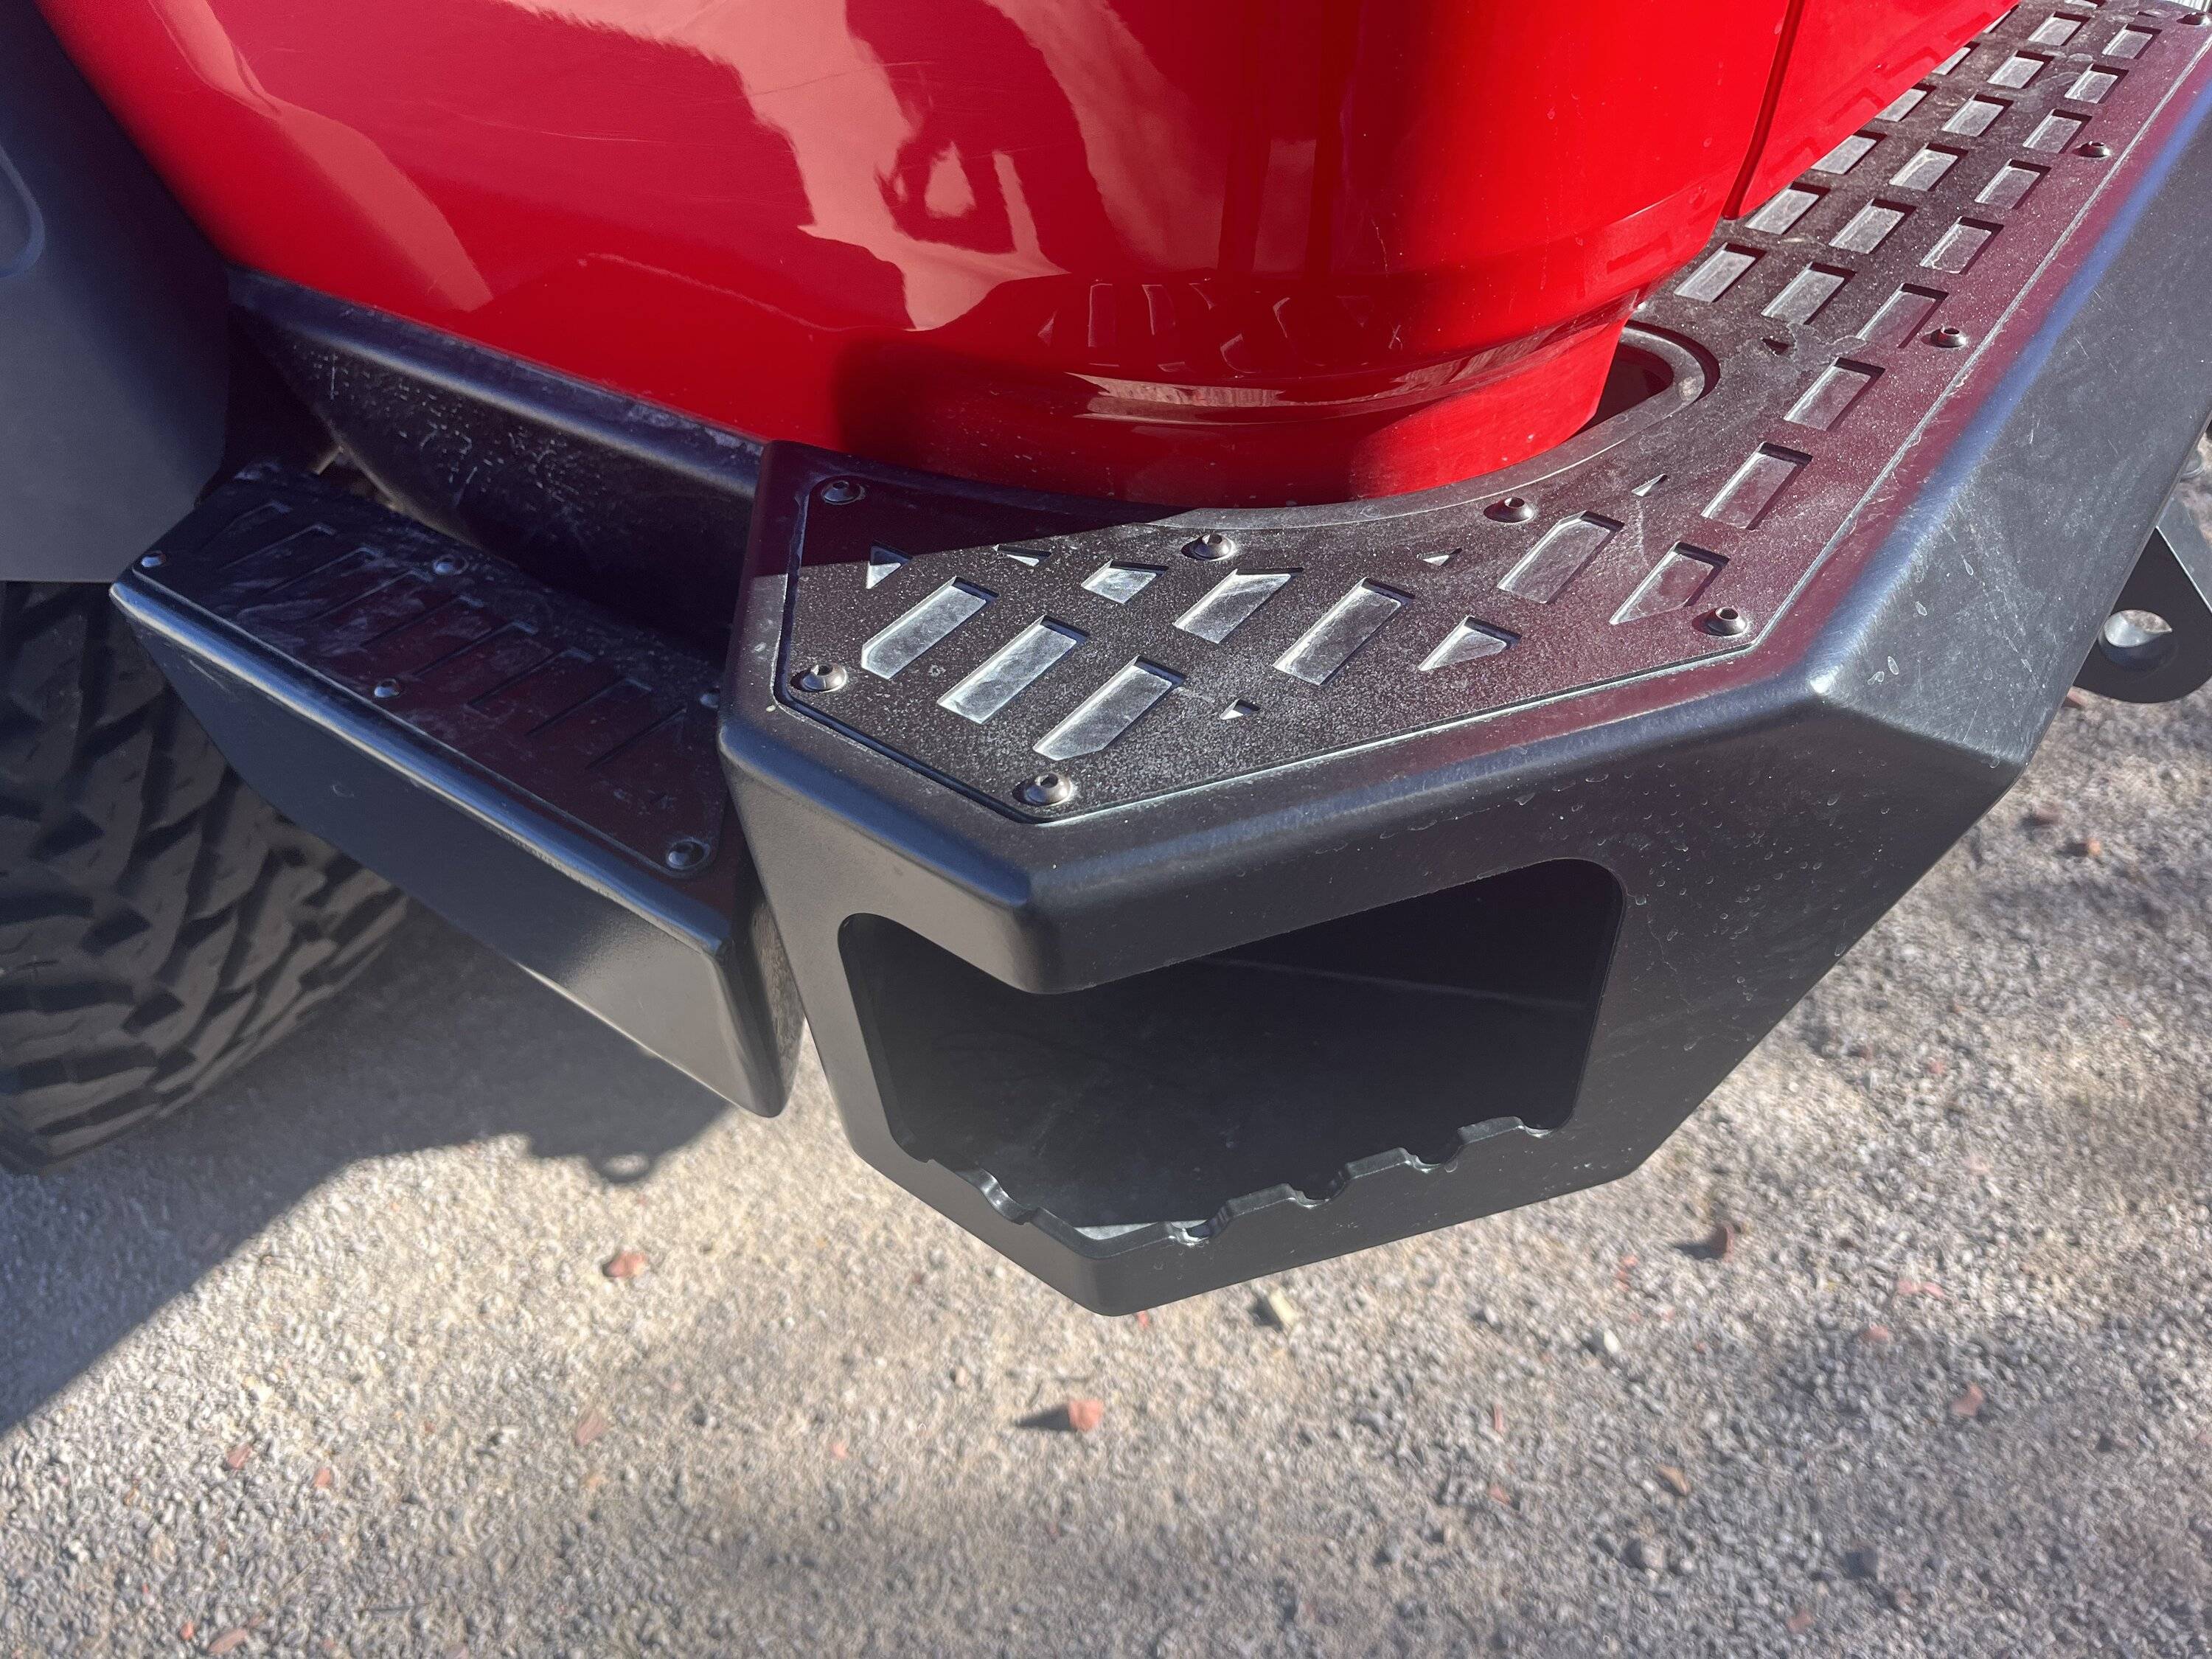
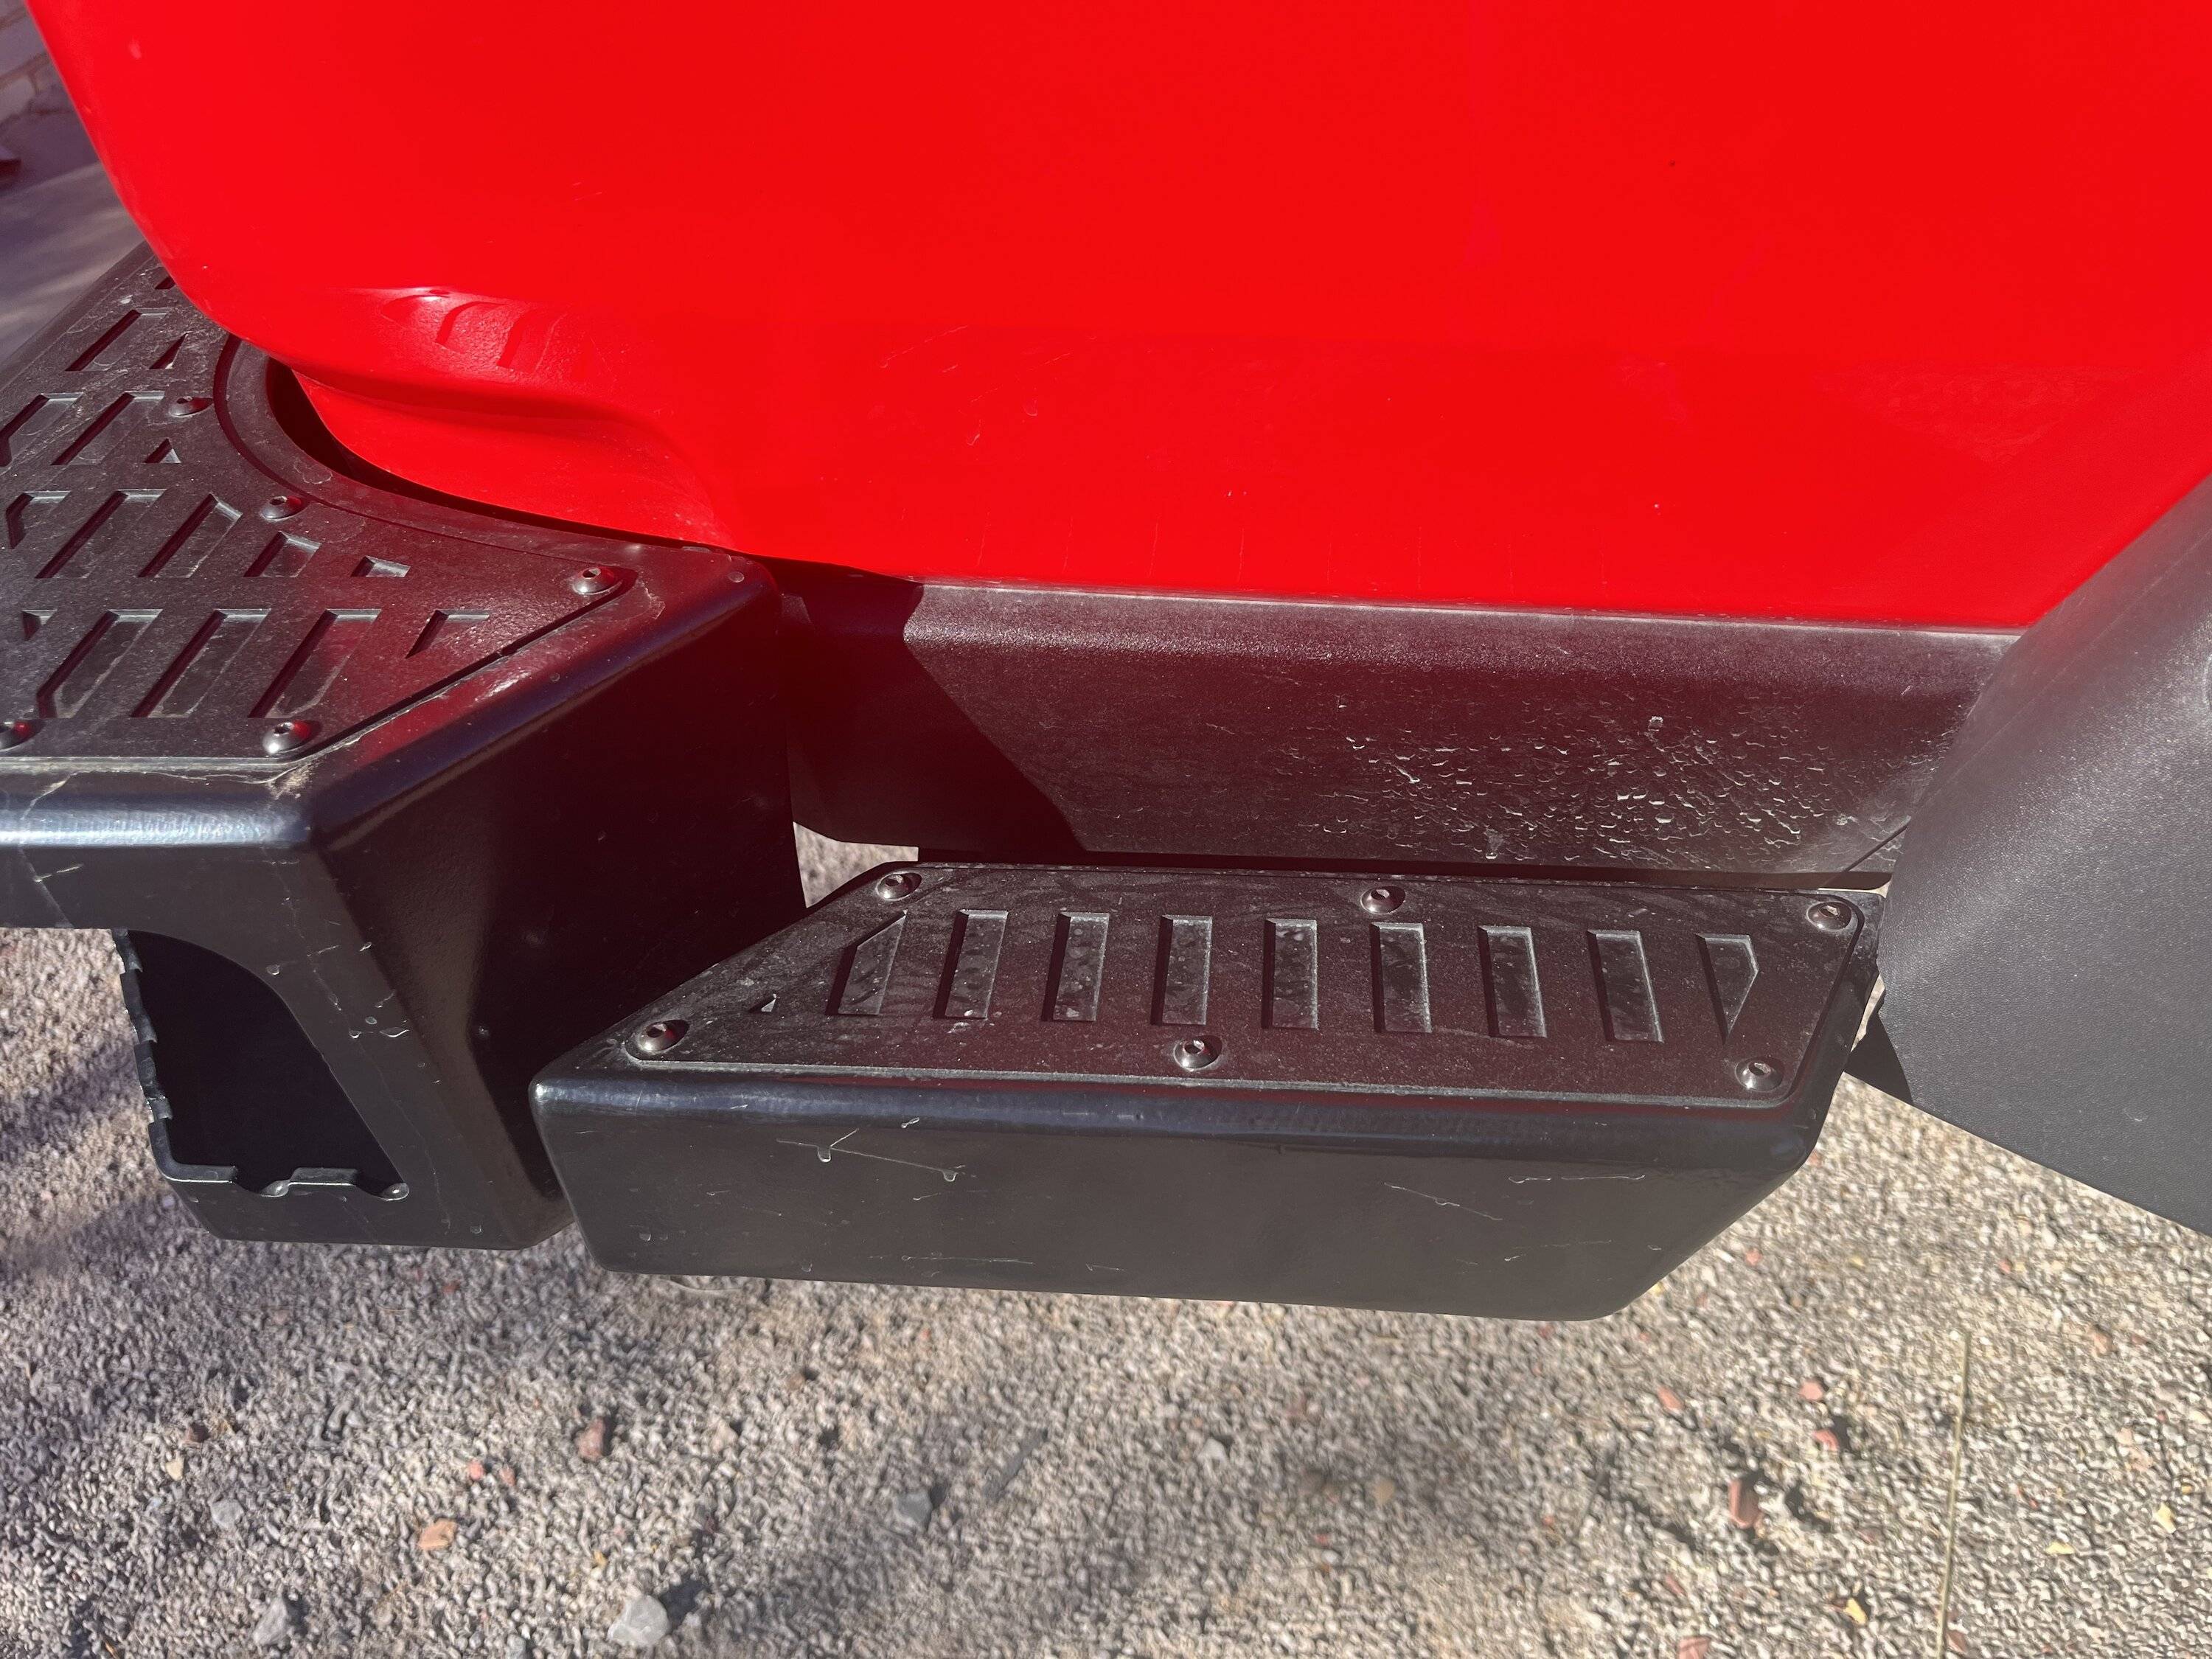
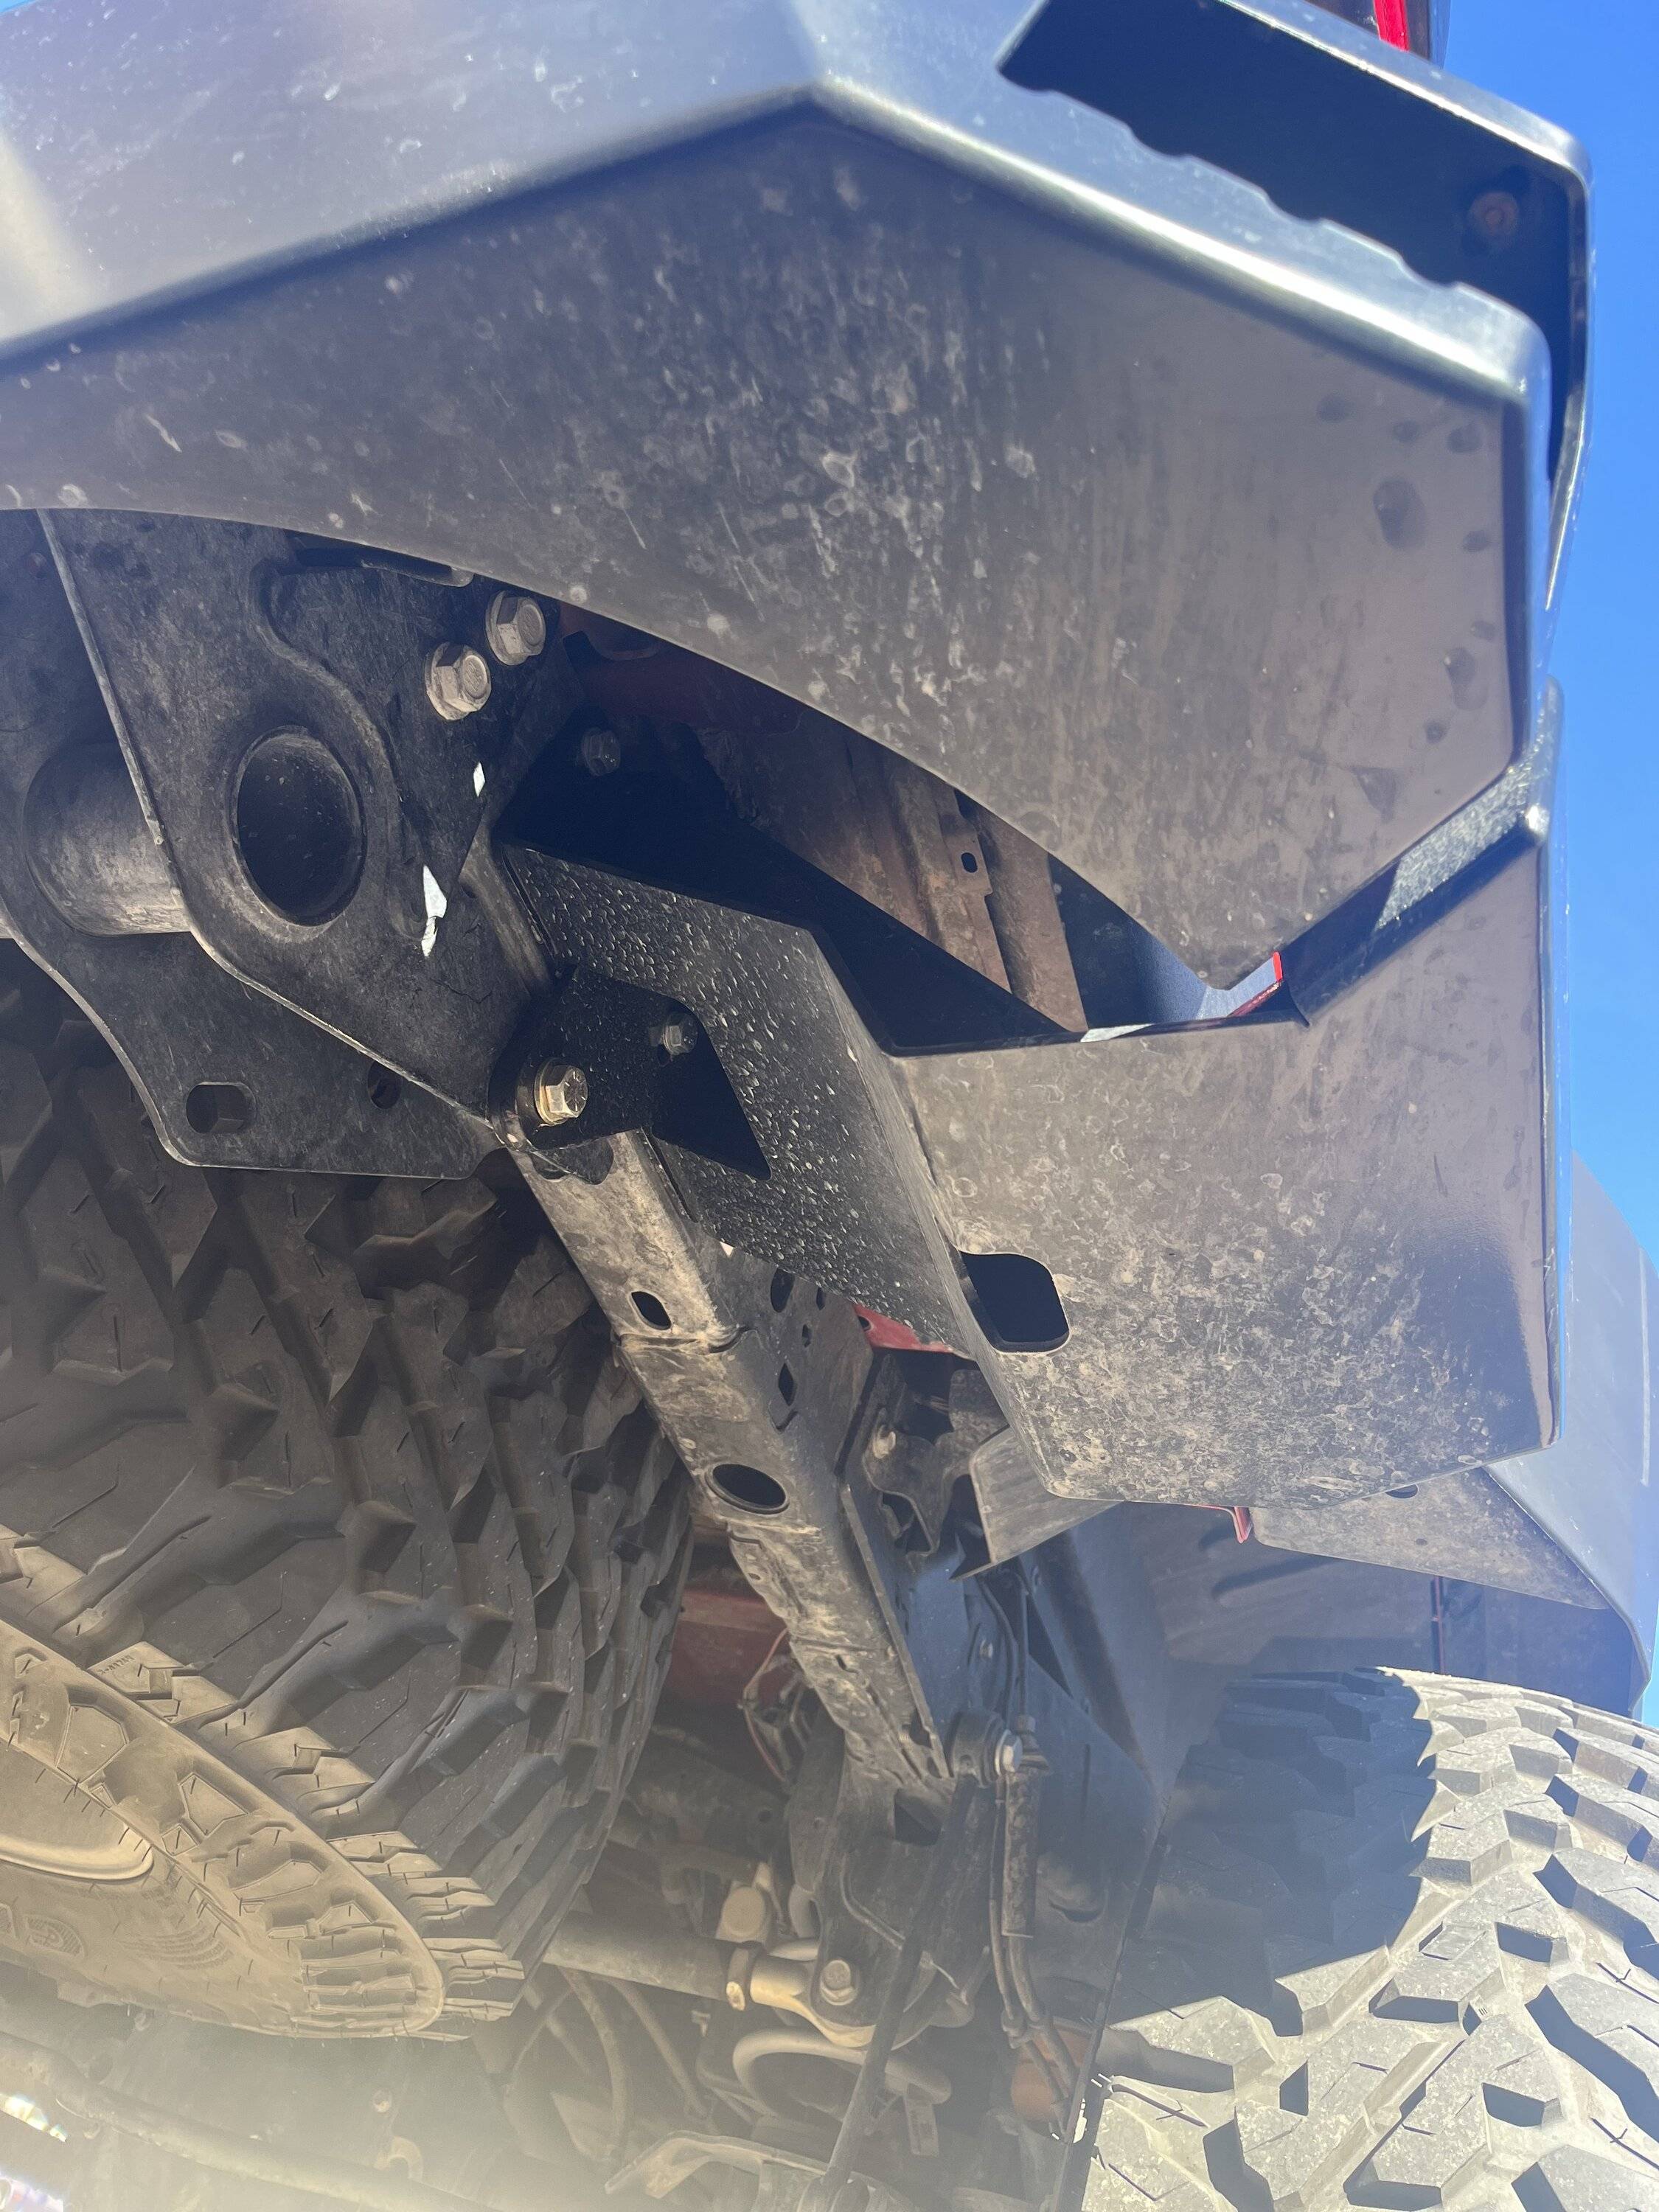
Some detail pics!
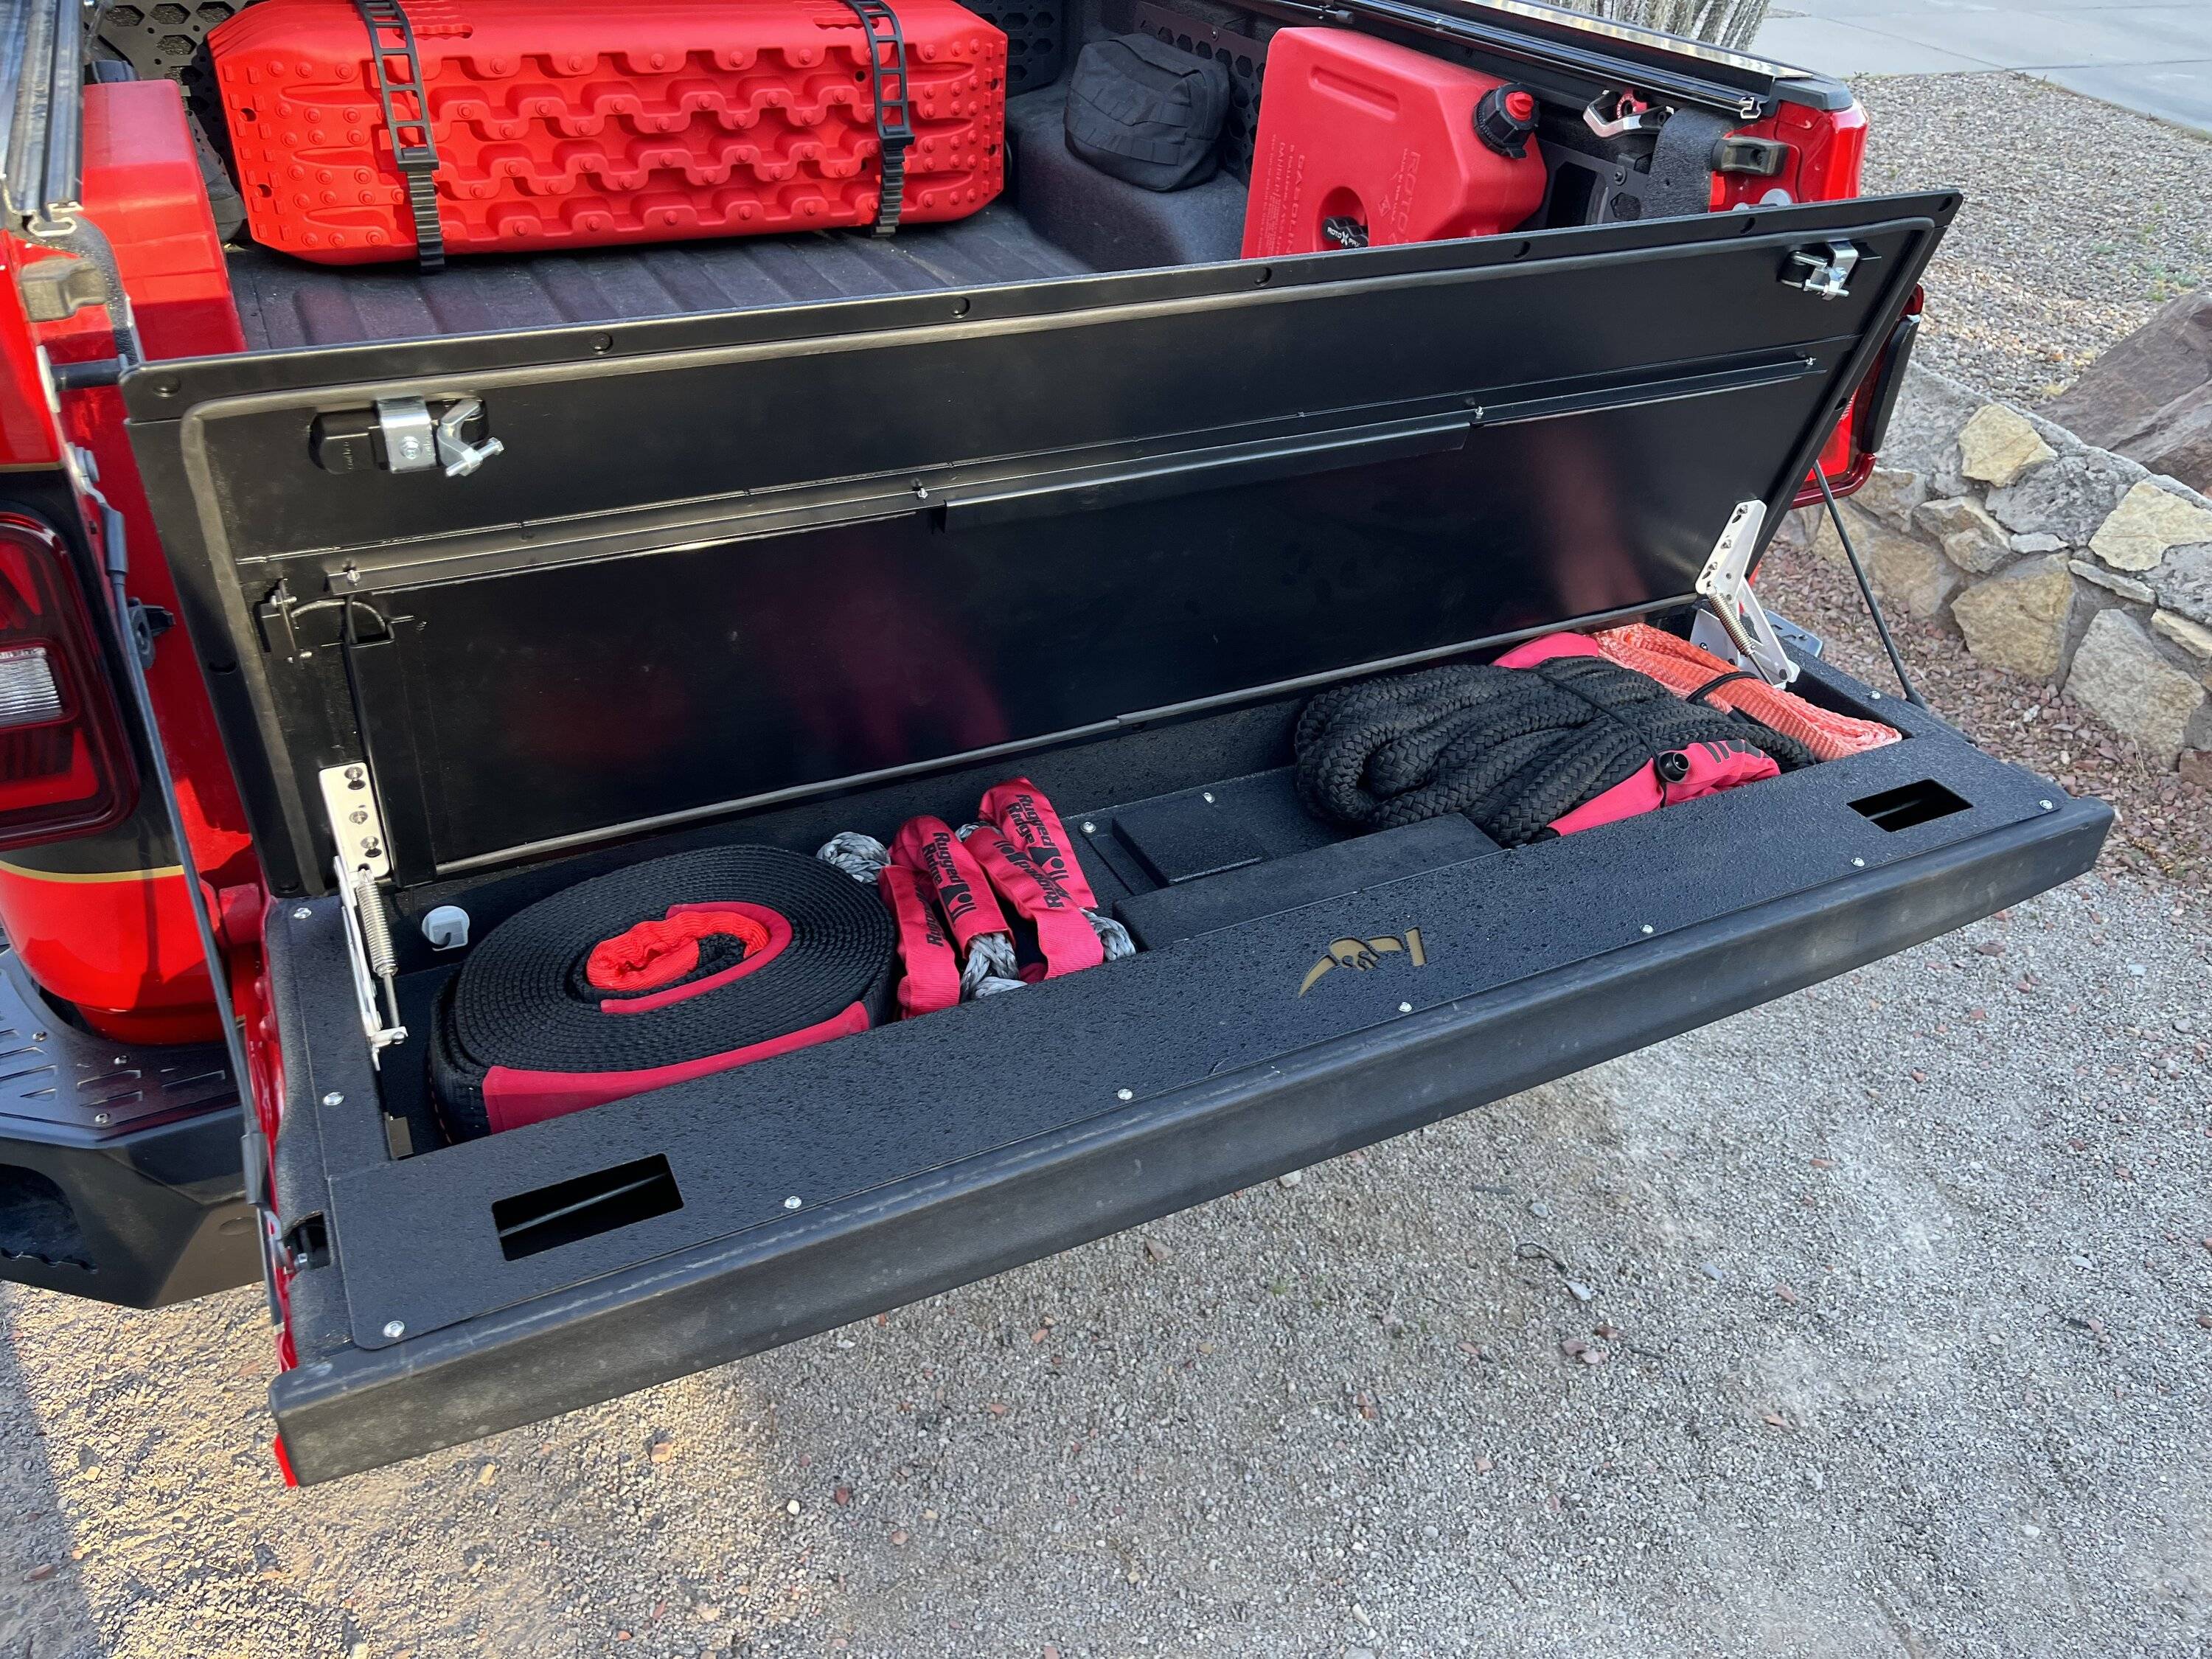
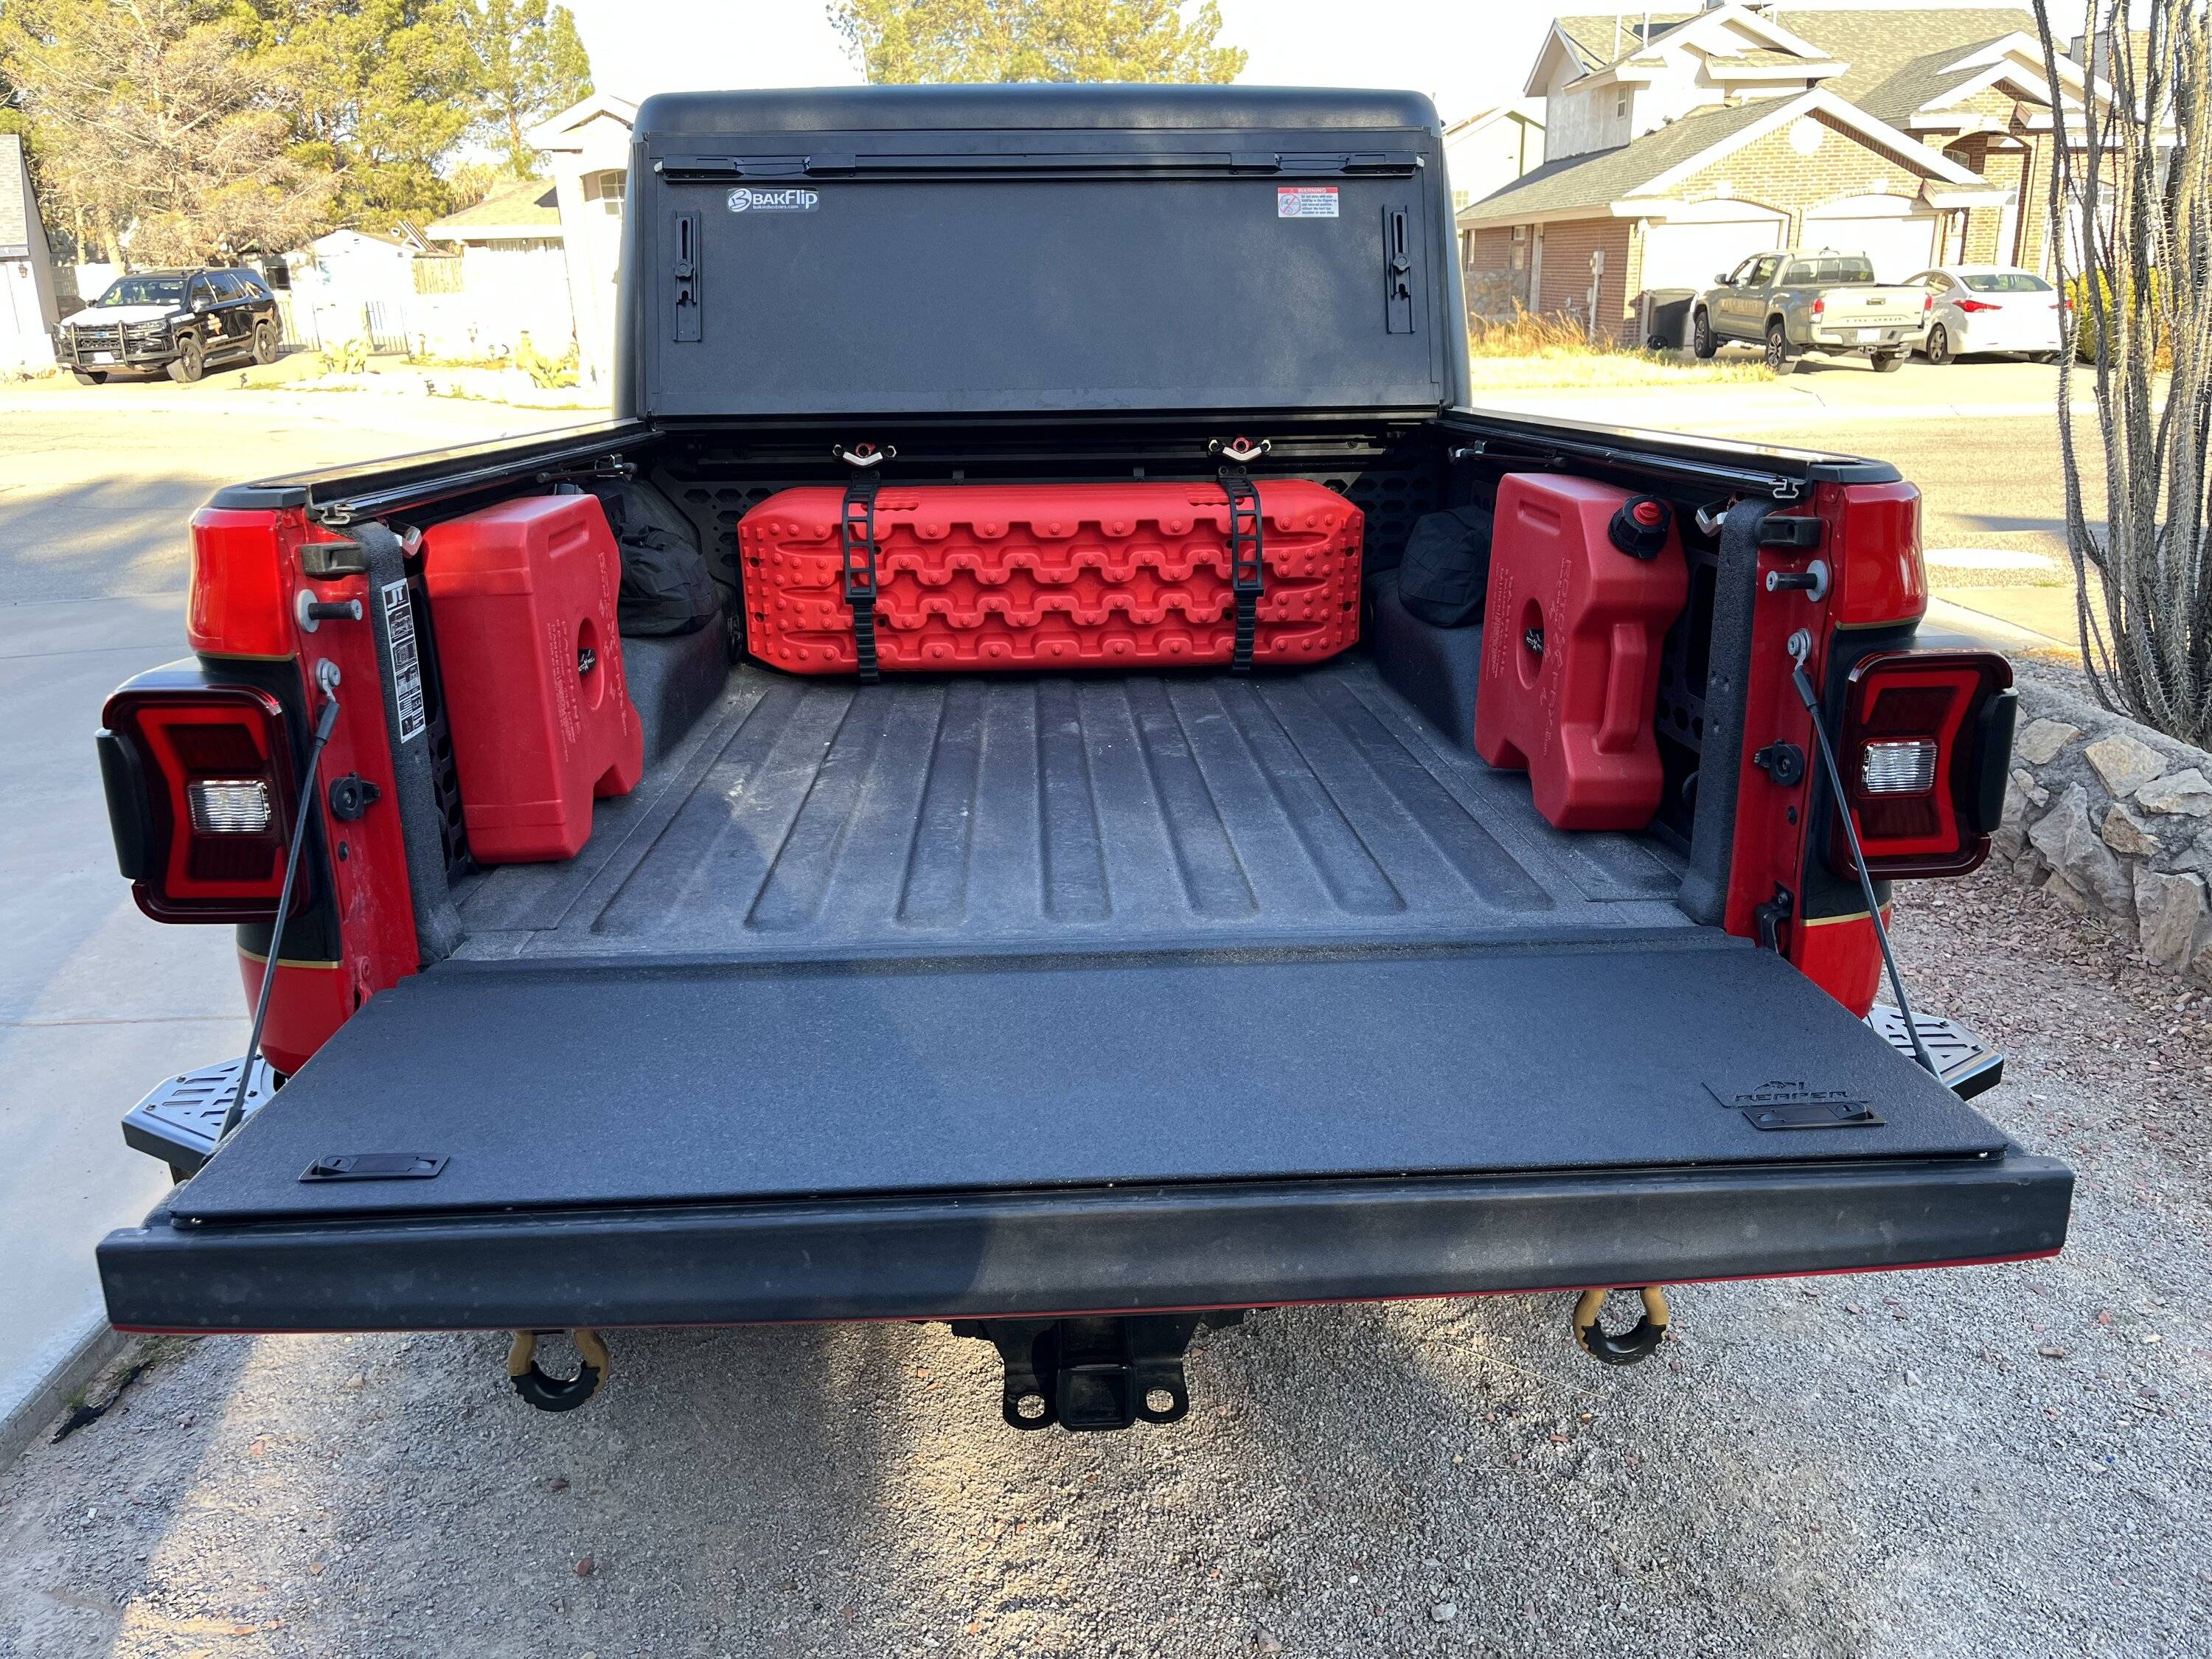
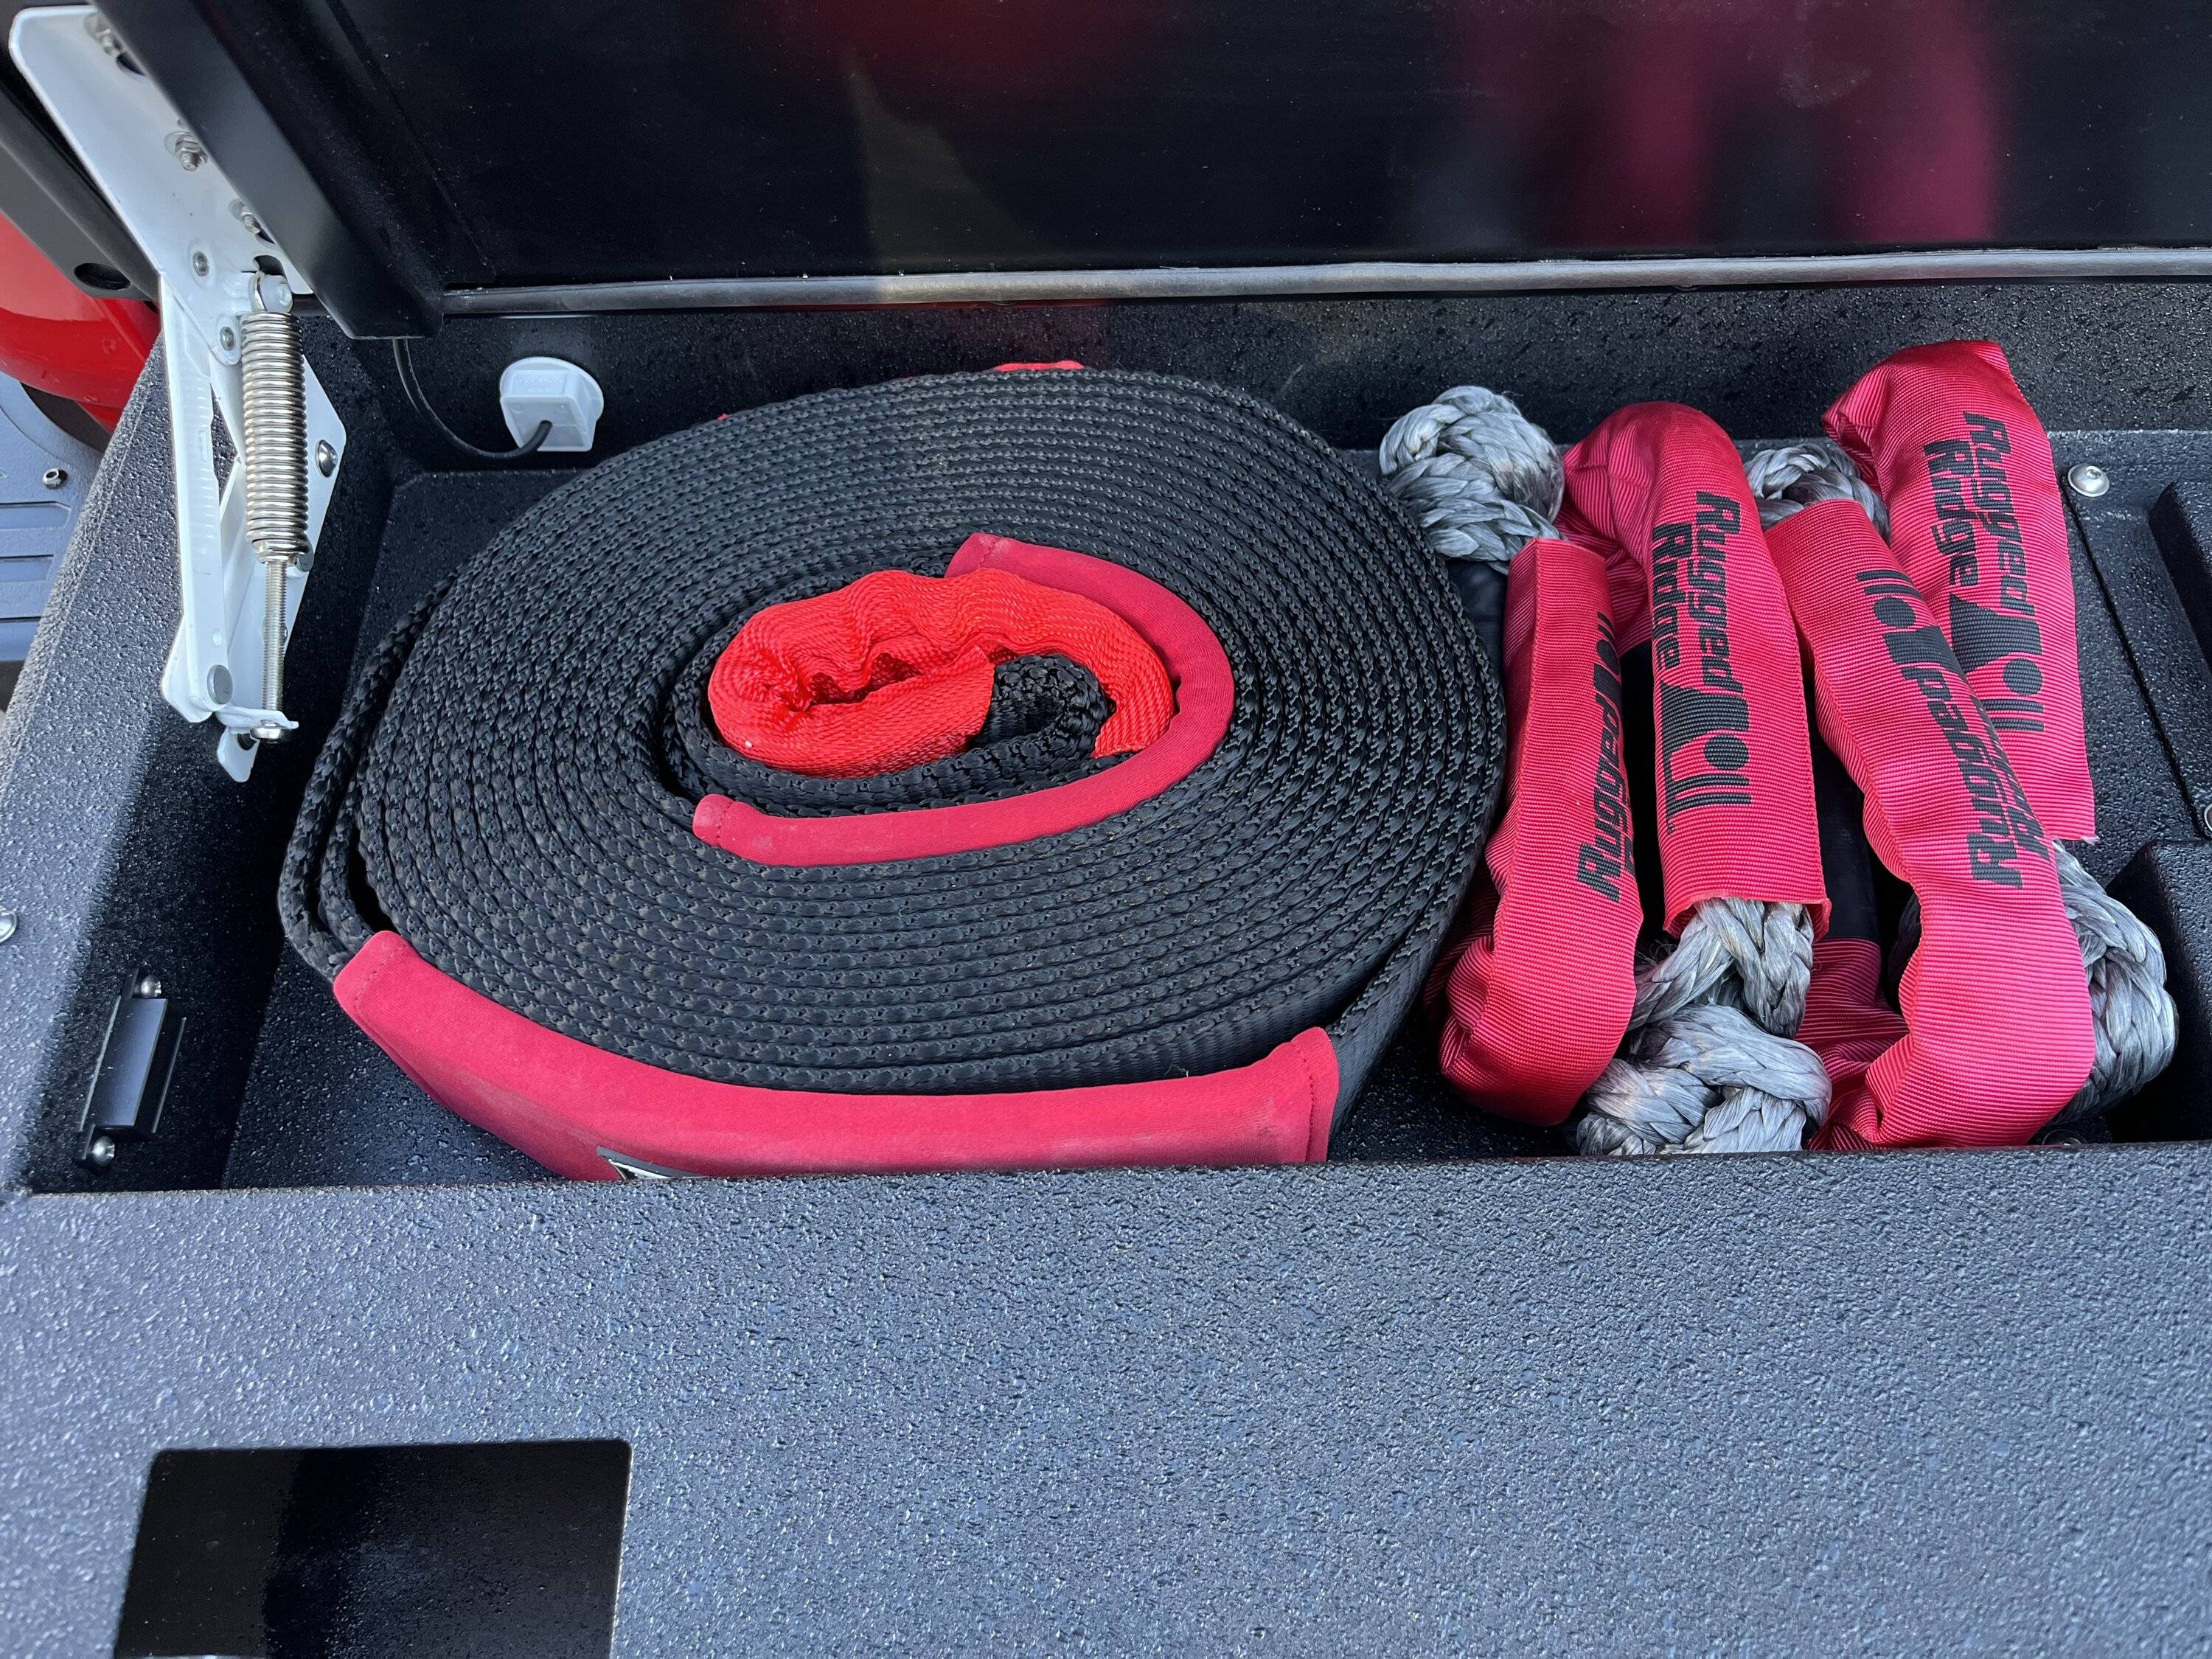
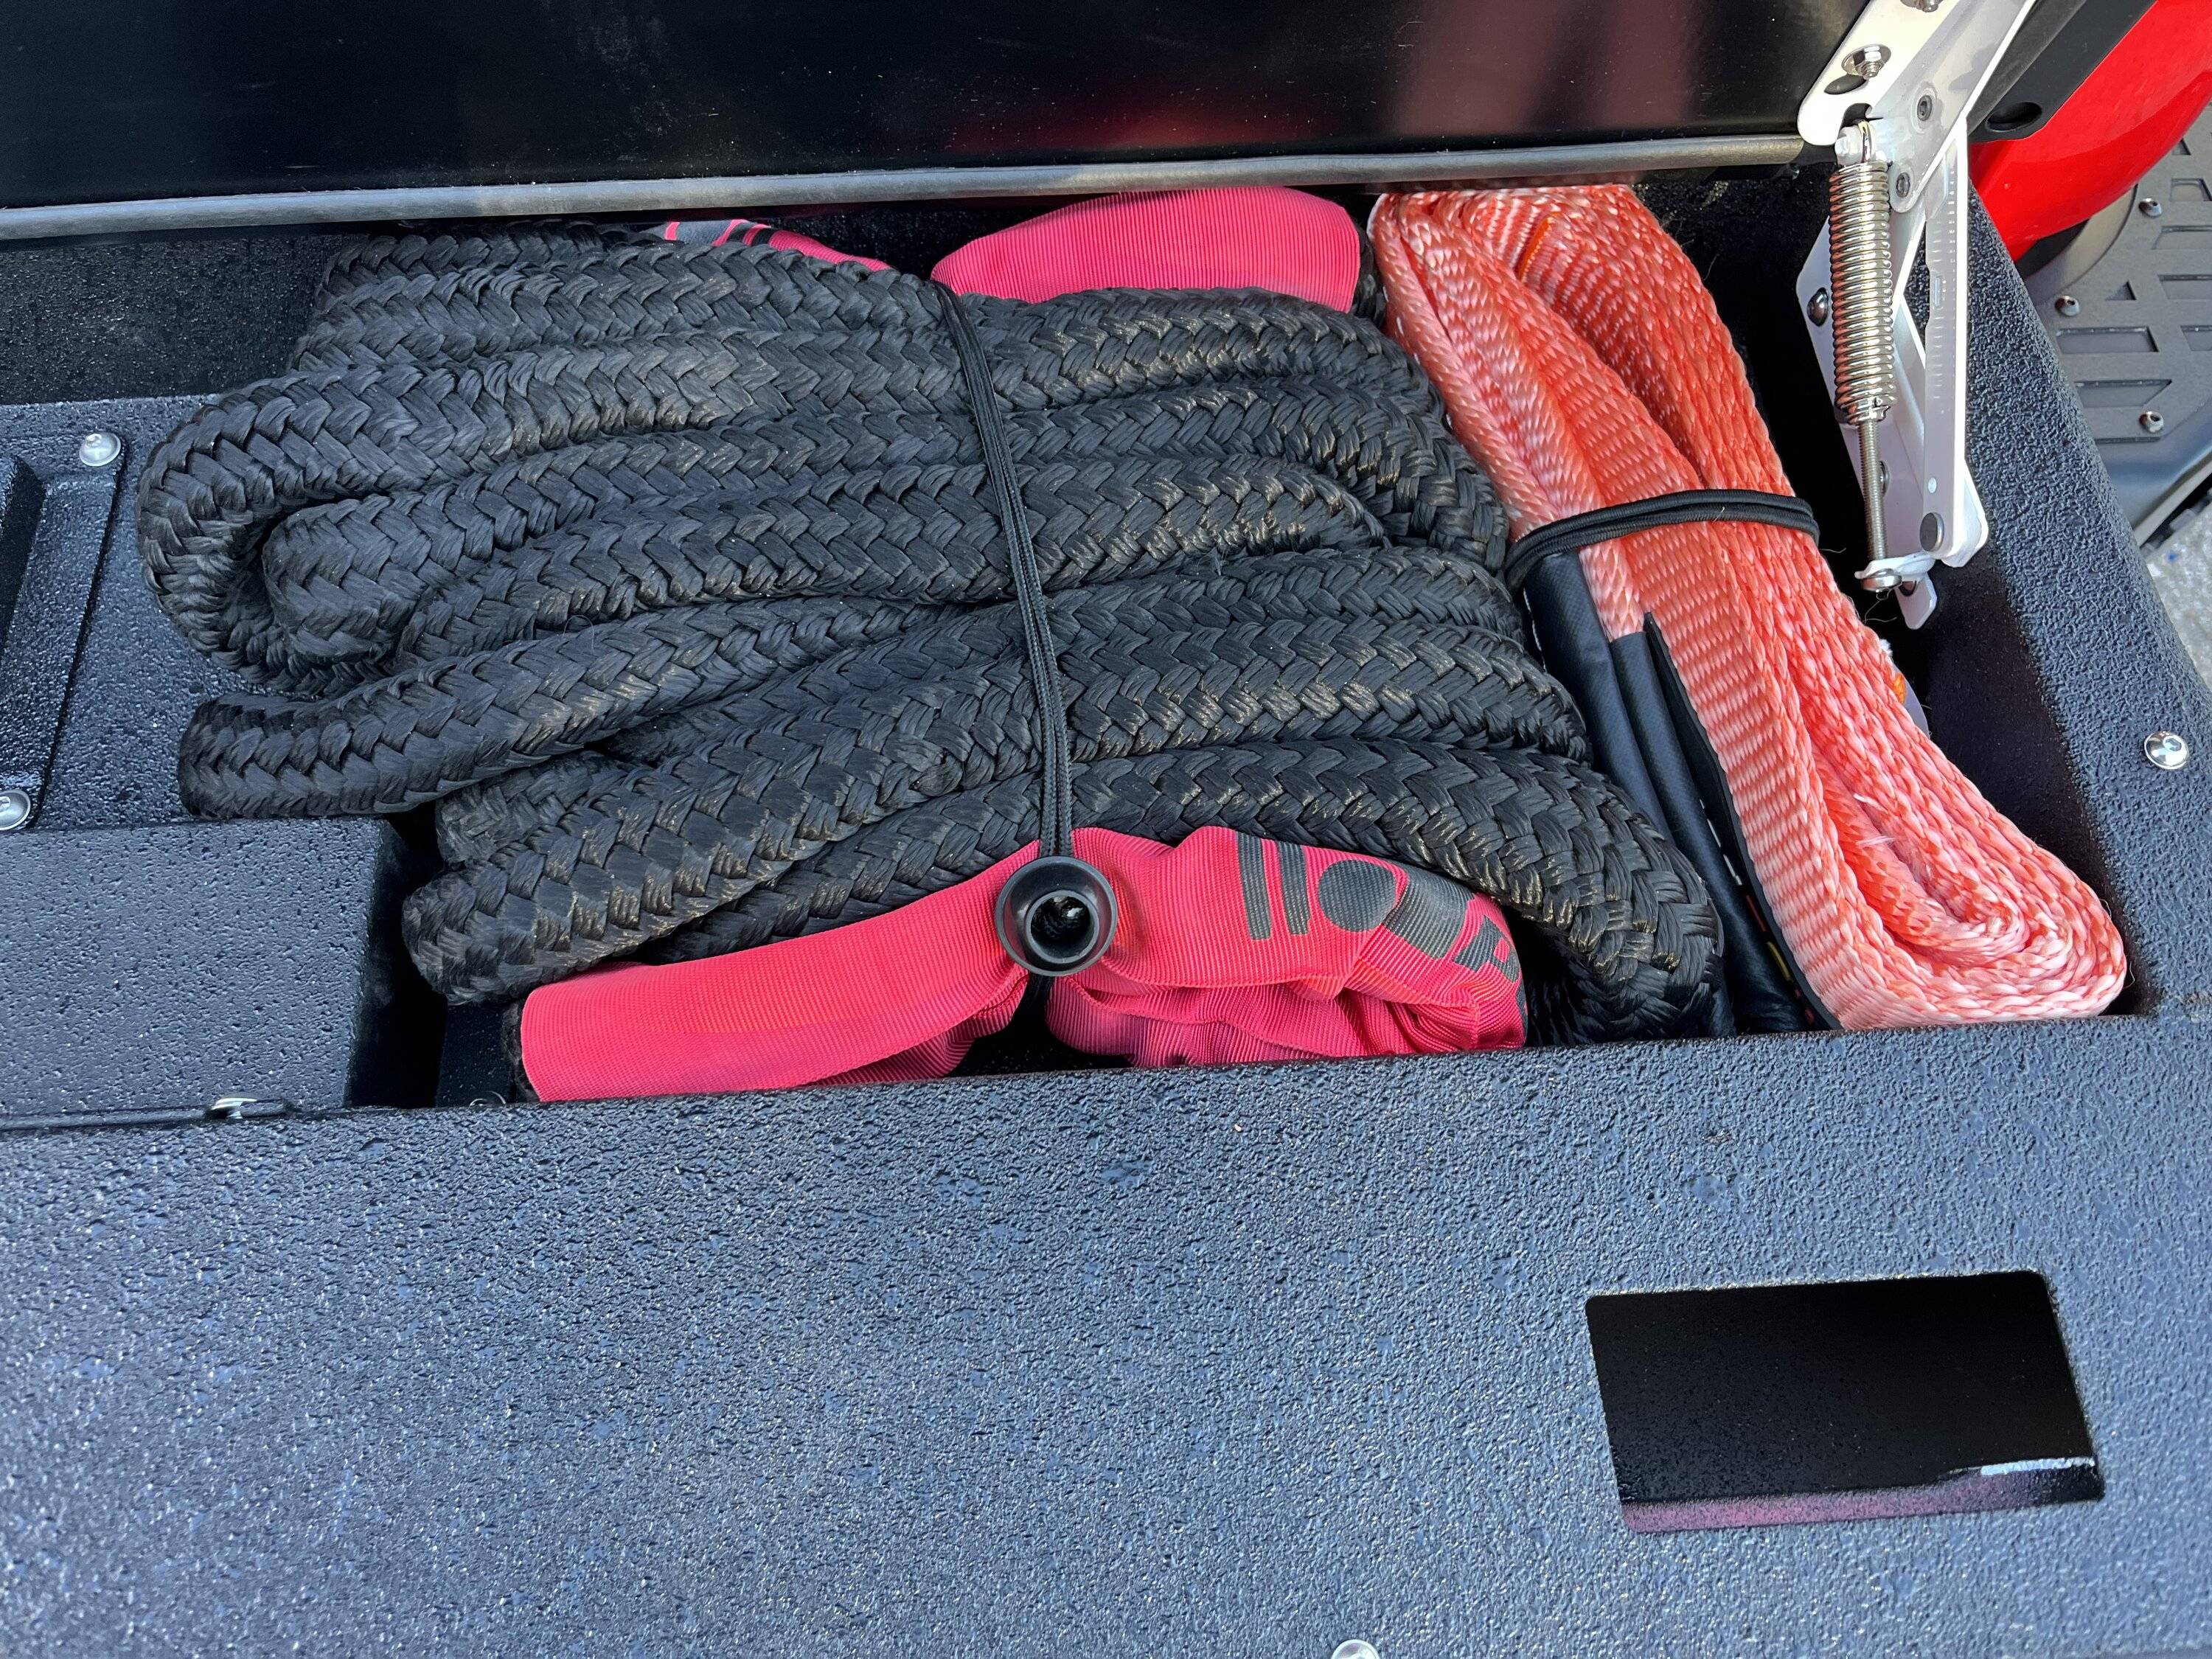
Took all my (soft) recovery gear from the back seat, and placed it in the box. Pretty much filled it up instantly, but it's such a perfect place for these things.
And the overall situation with the tailgate. It's VERY tight, but it does close nicely. I love how well the bedliner matches and blends into everything else.
Notes:
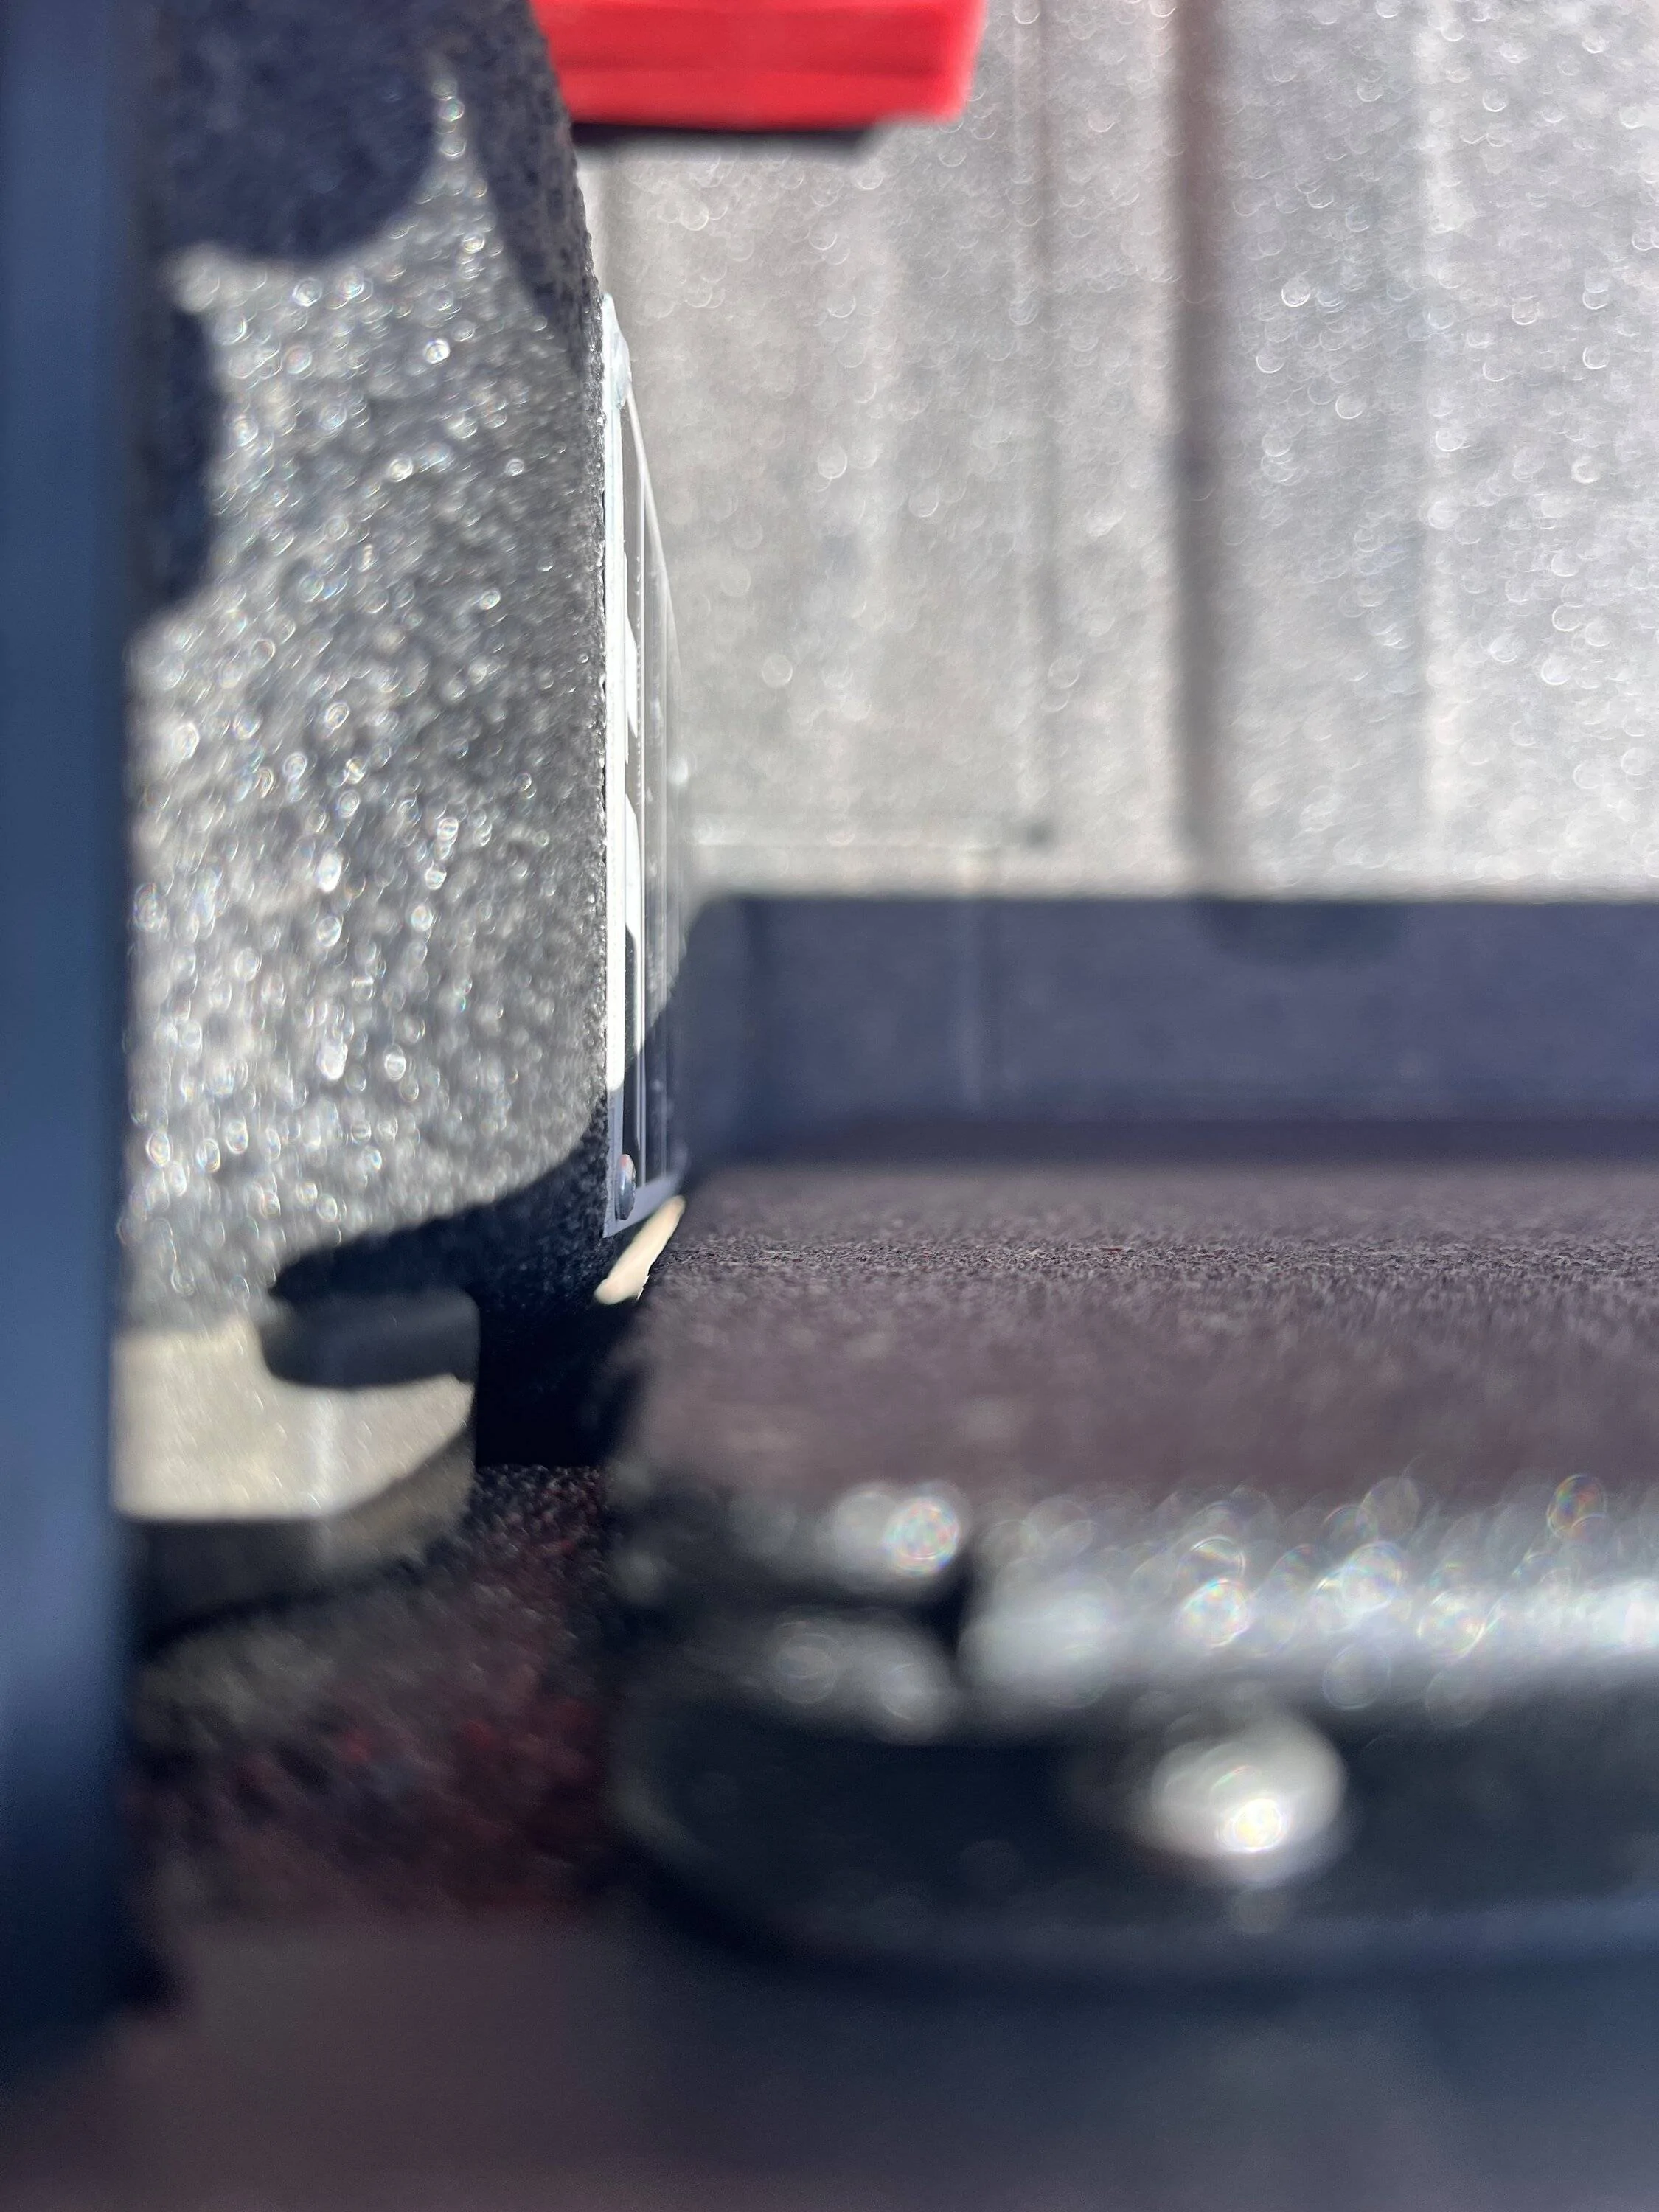
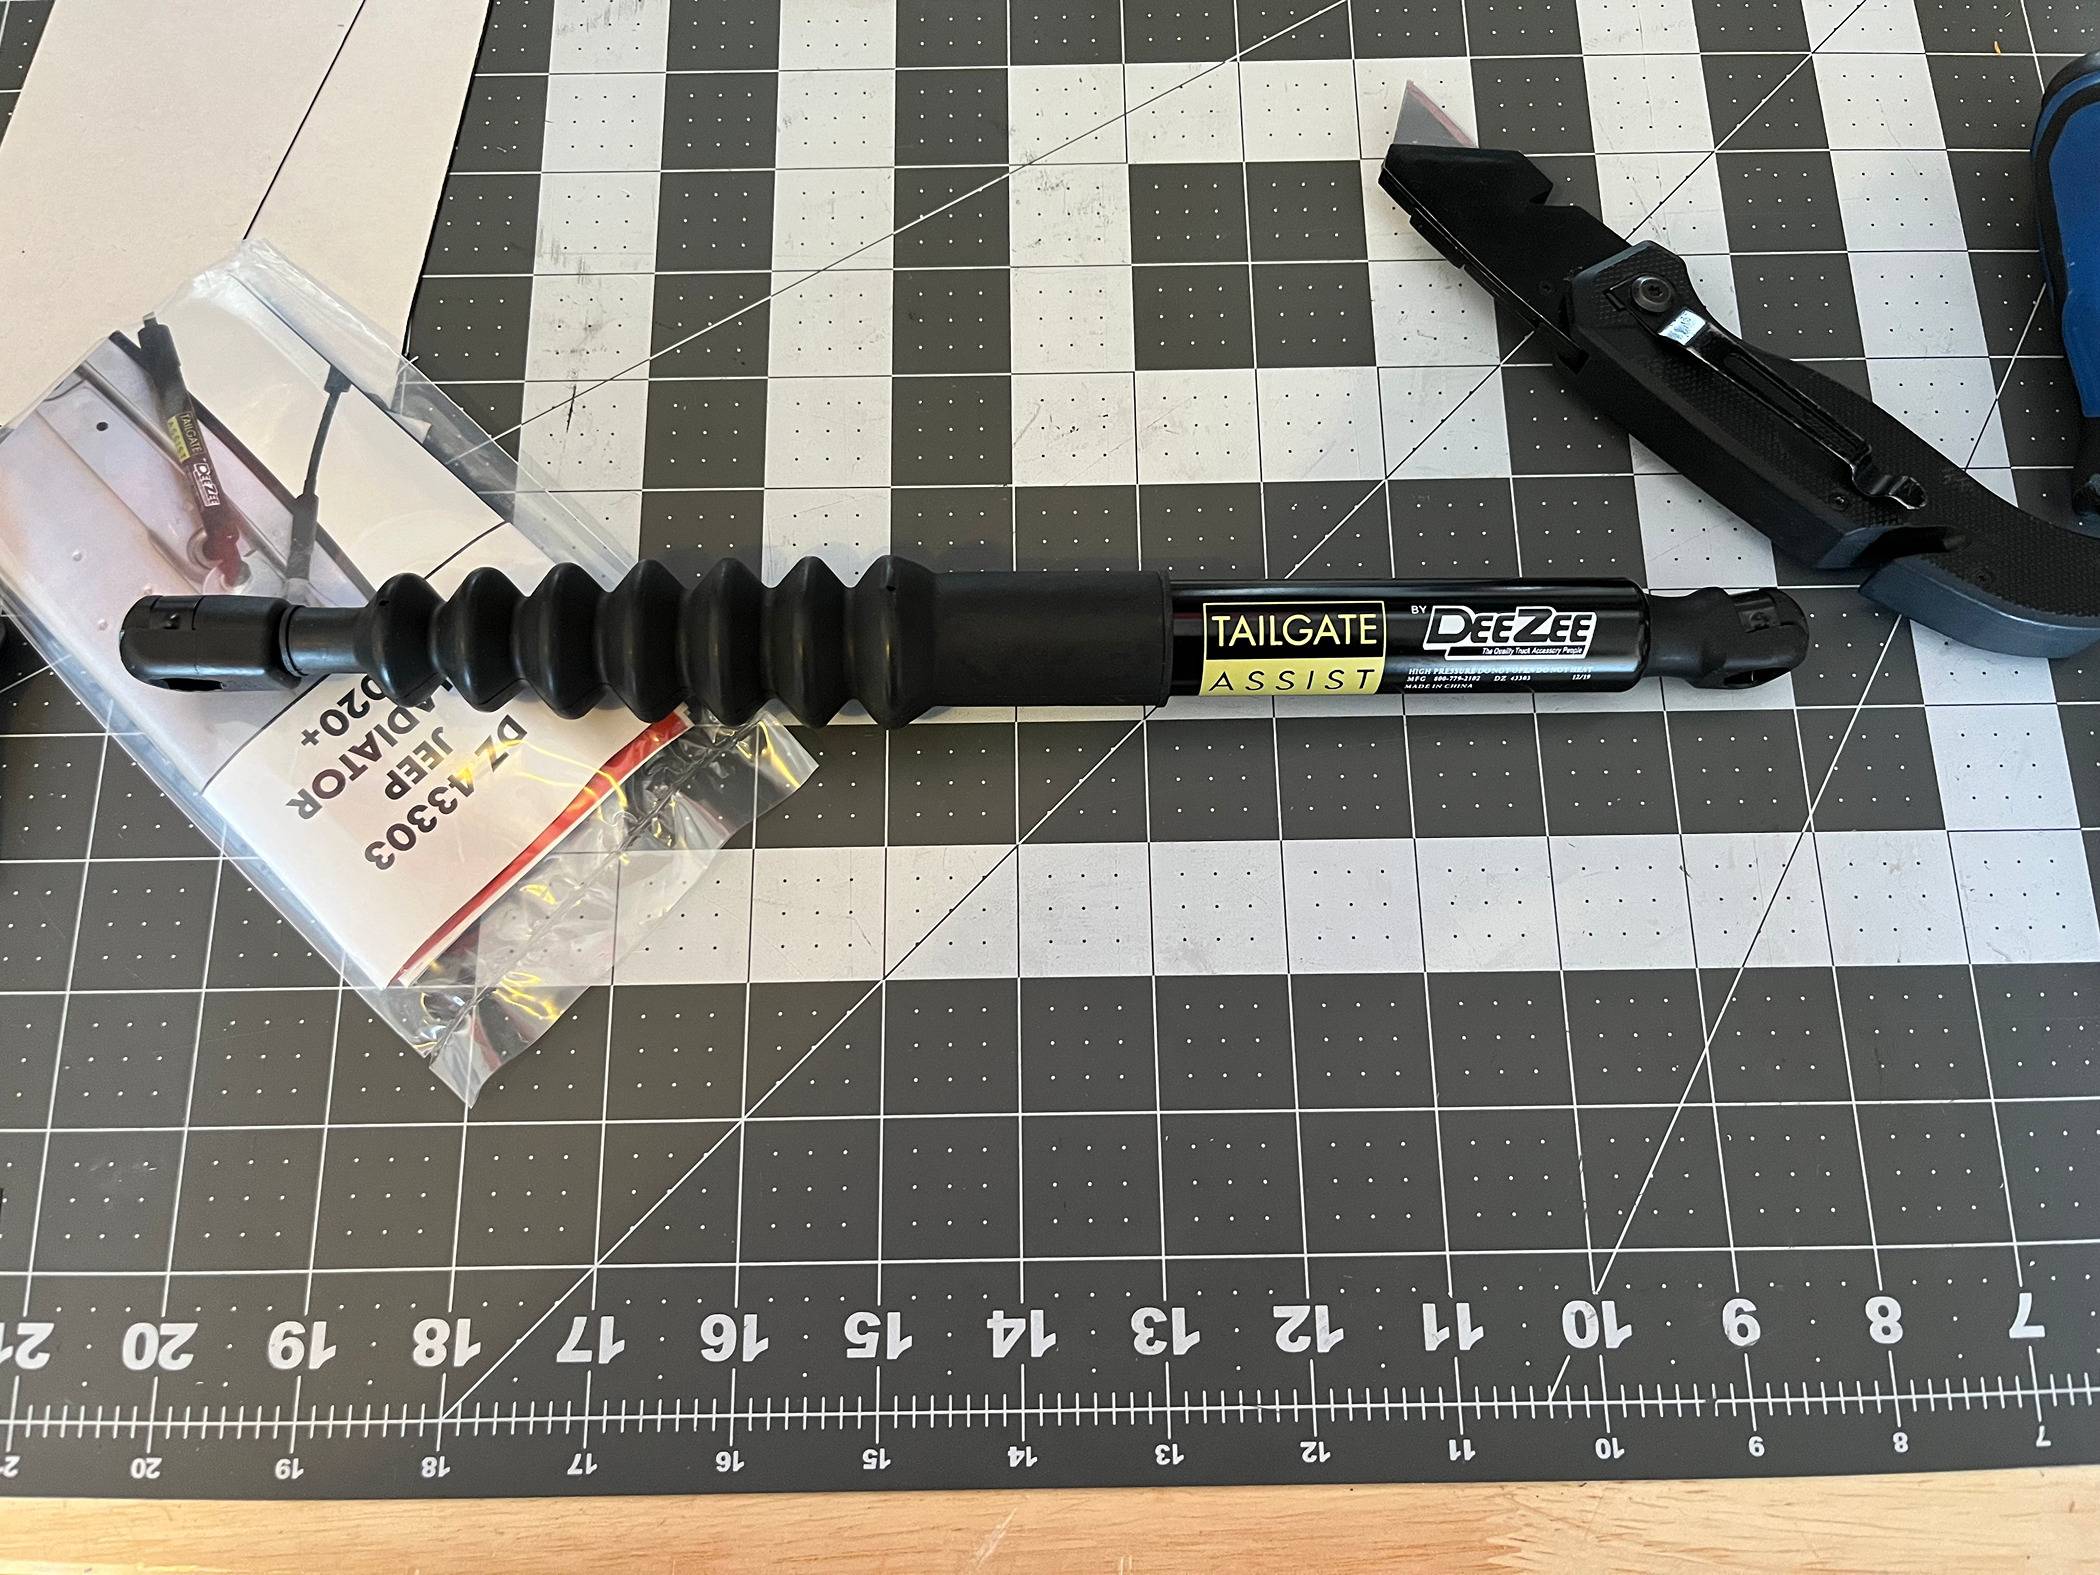
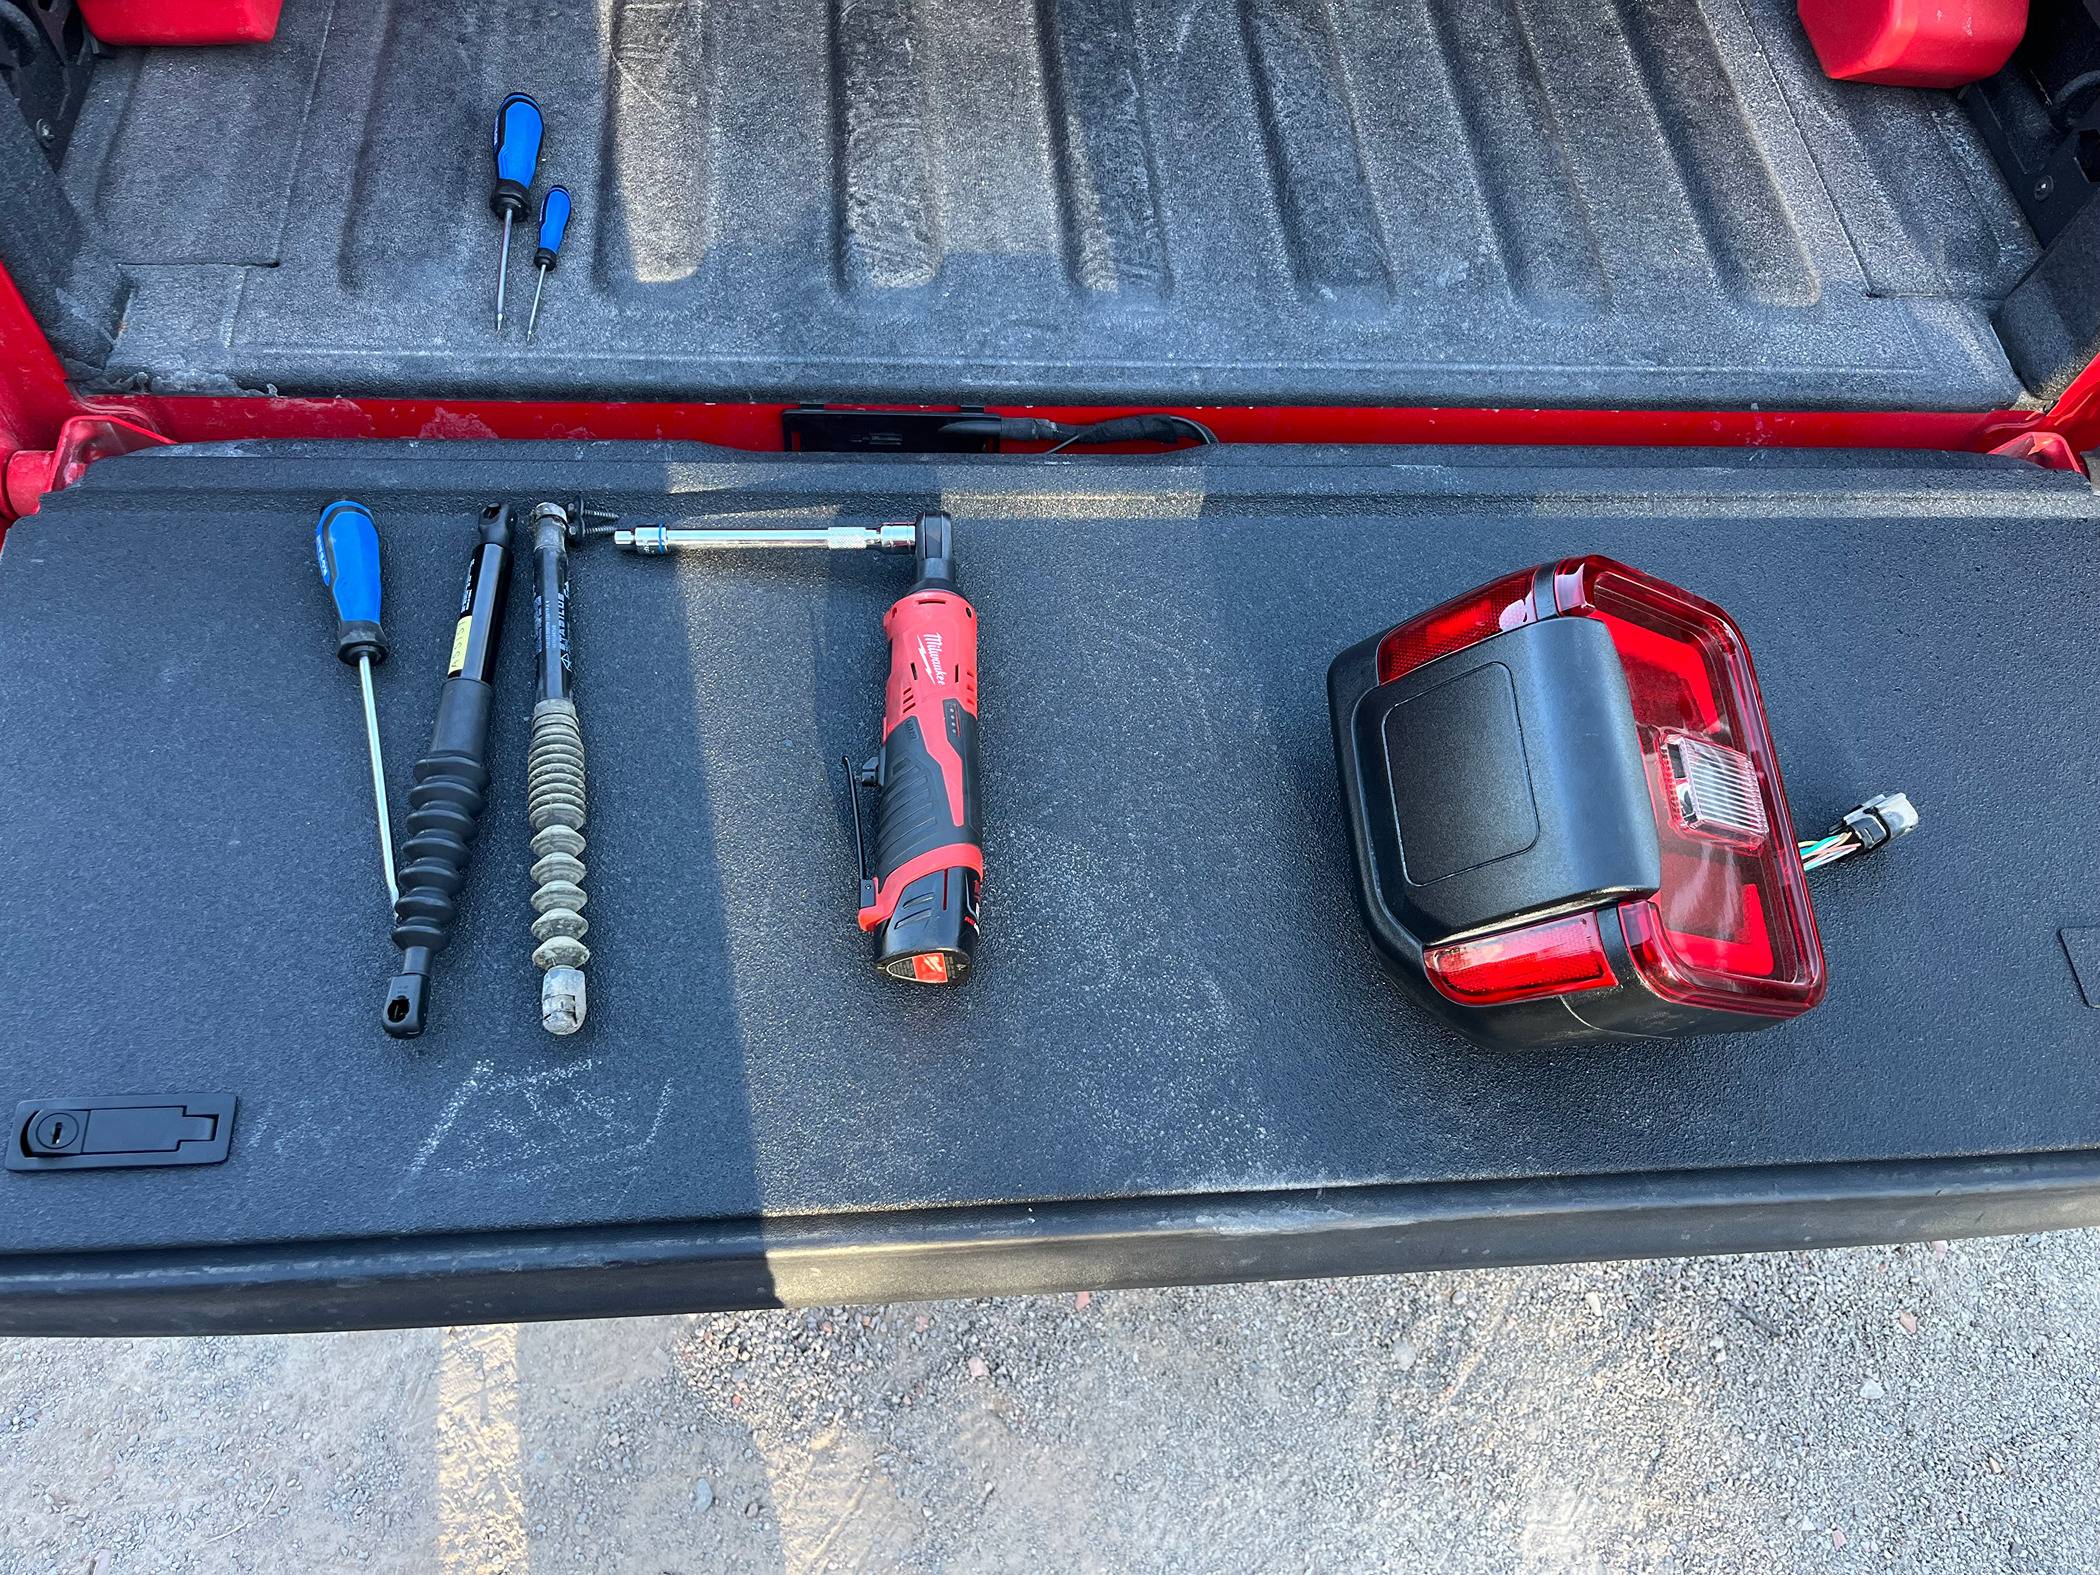
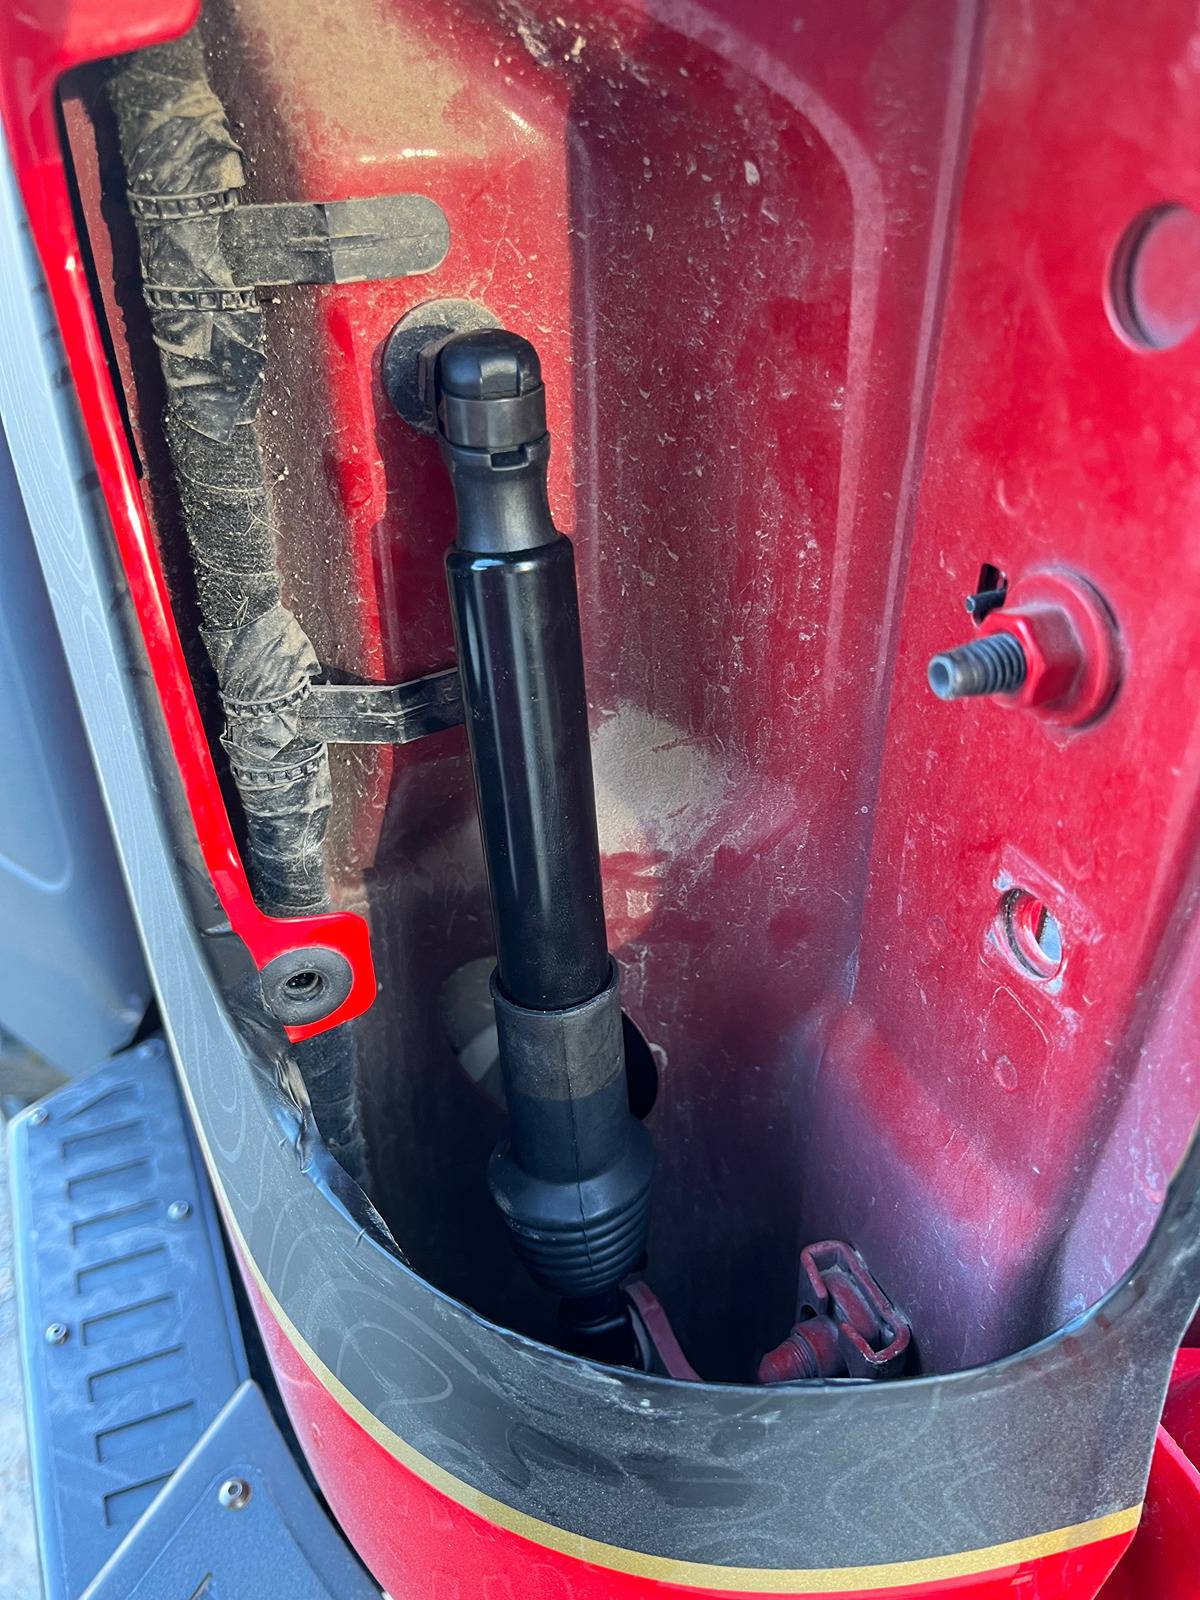
The tailgate with gear, is much heavier, and the stock strut can't handle the weight, so I'll need to look into a stronger replacement.
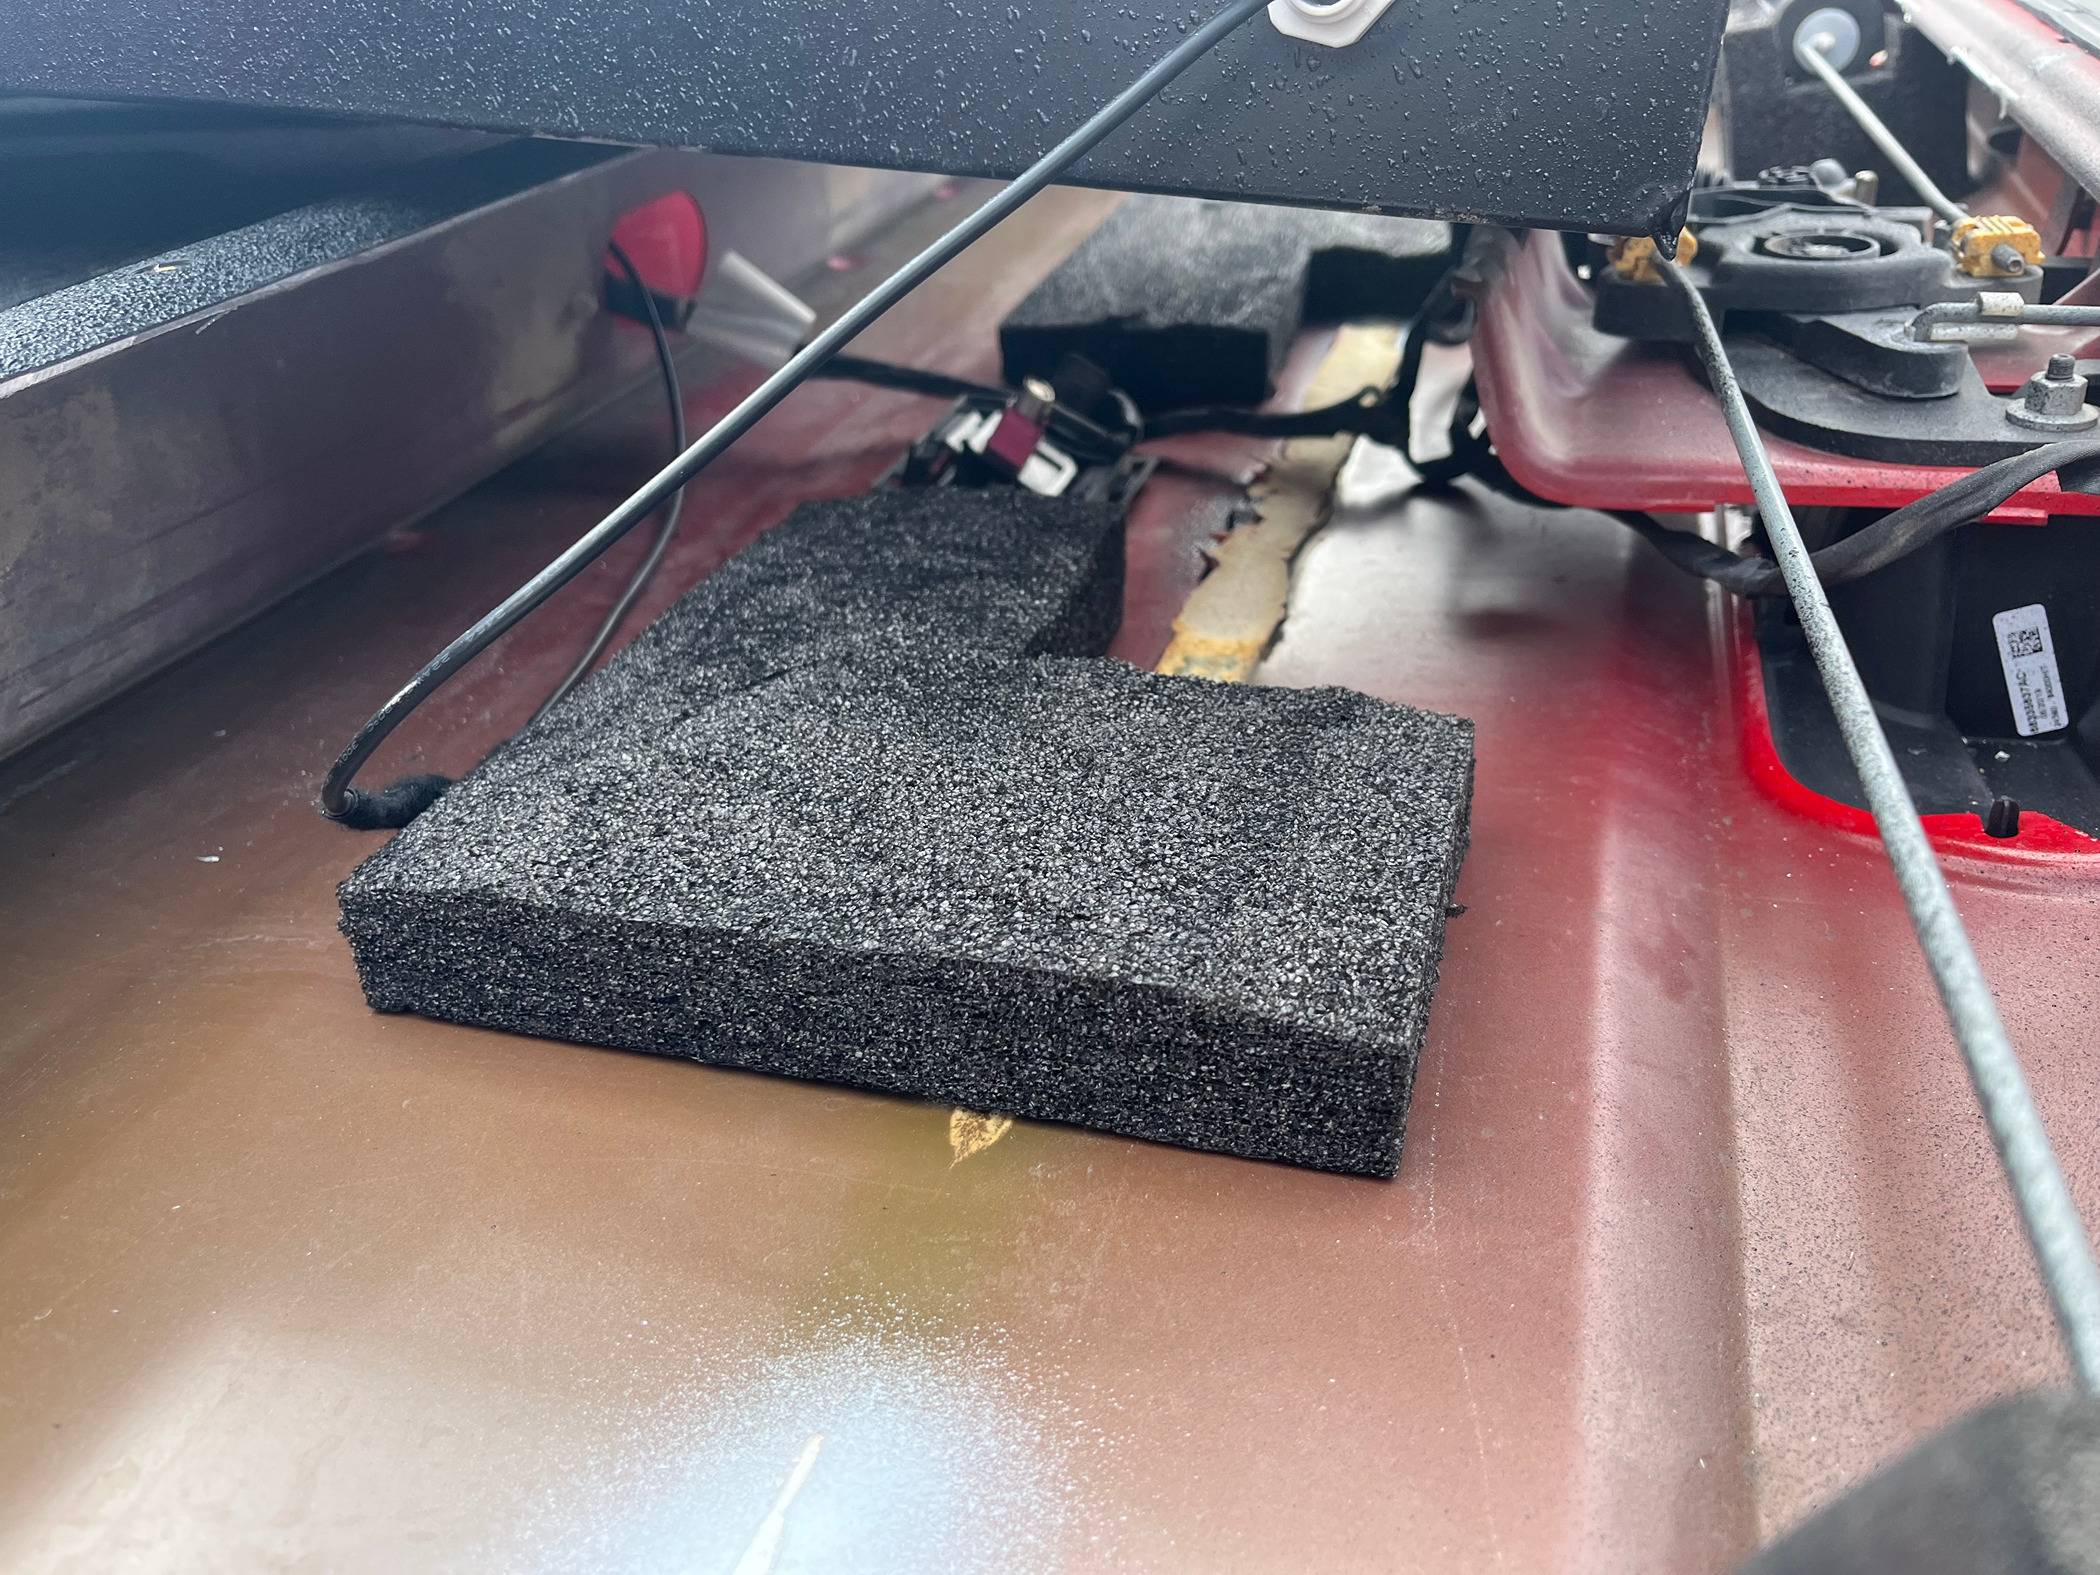
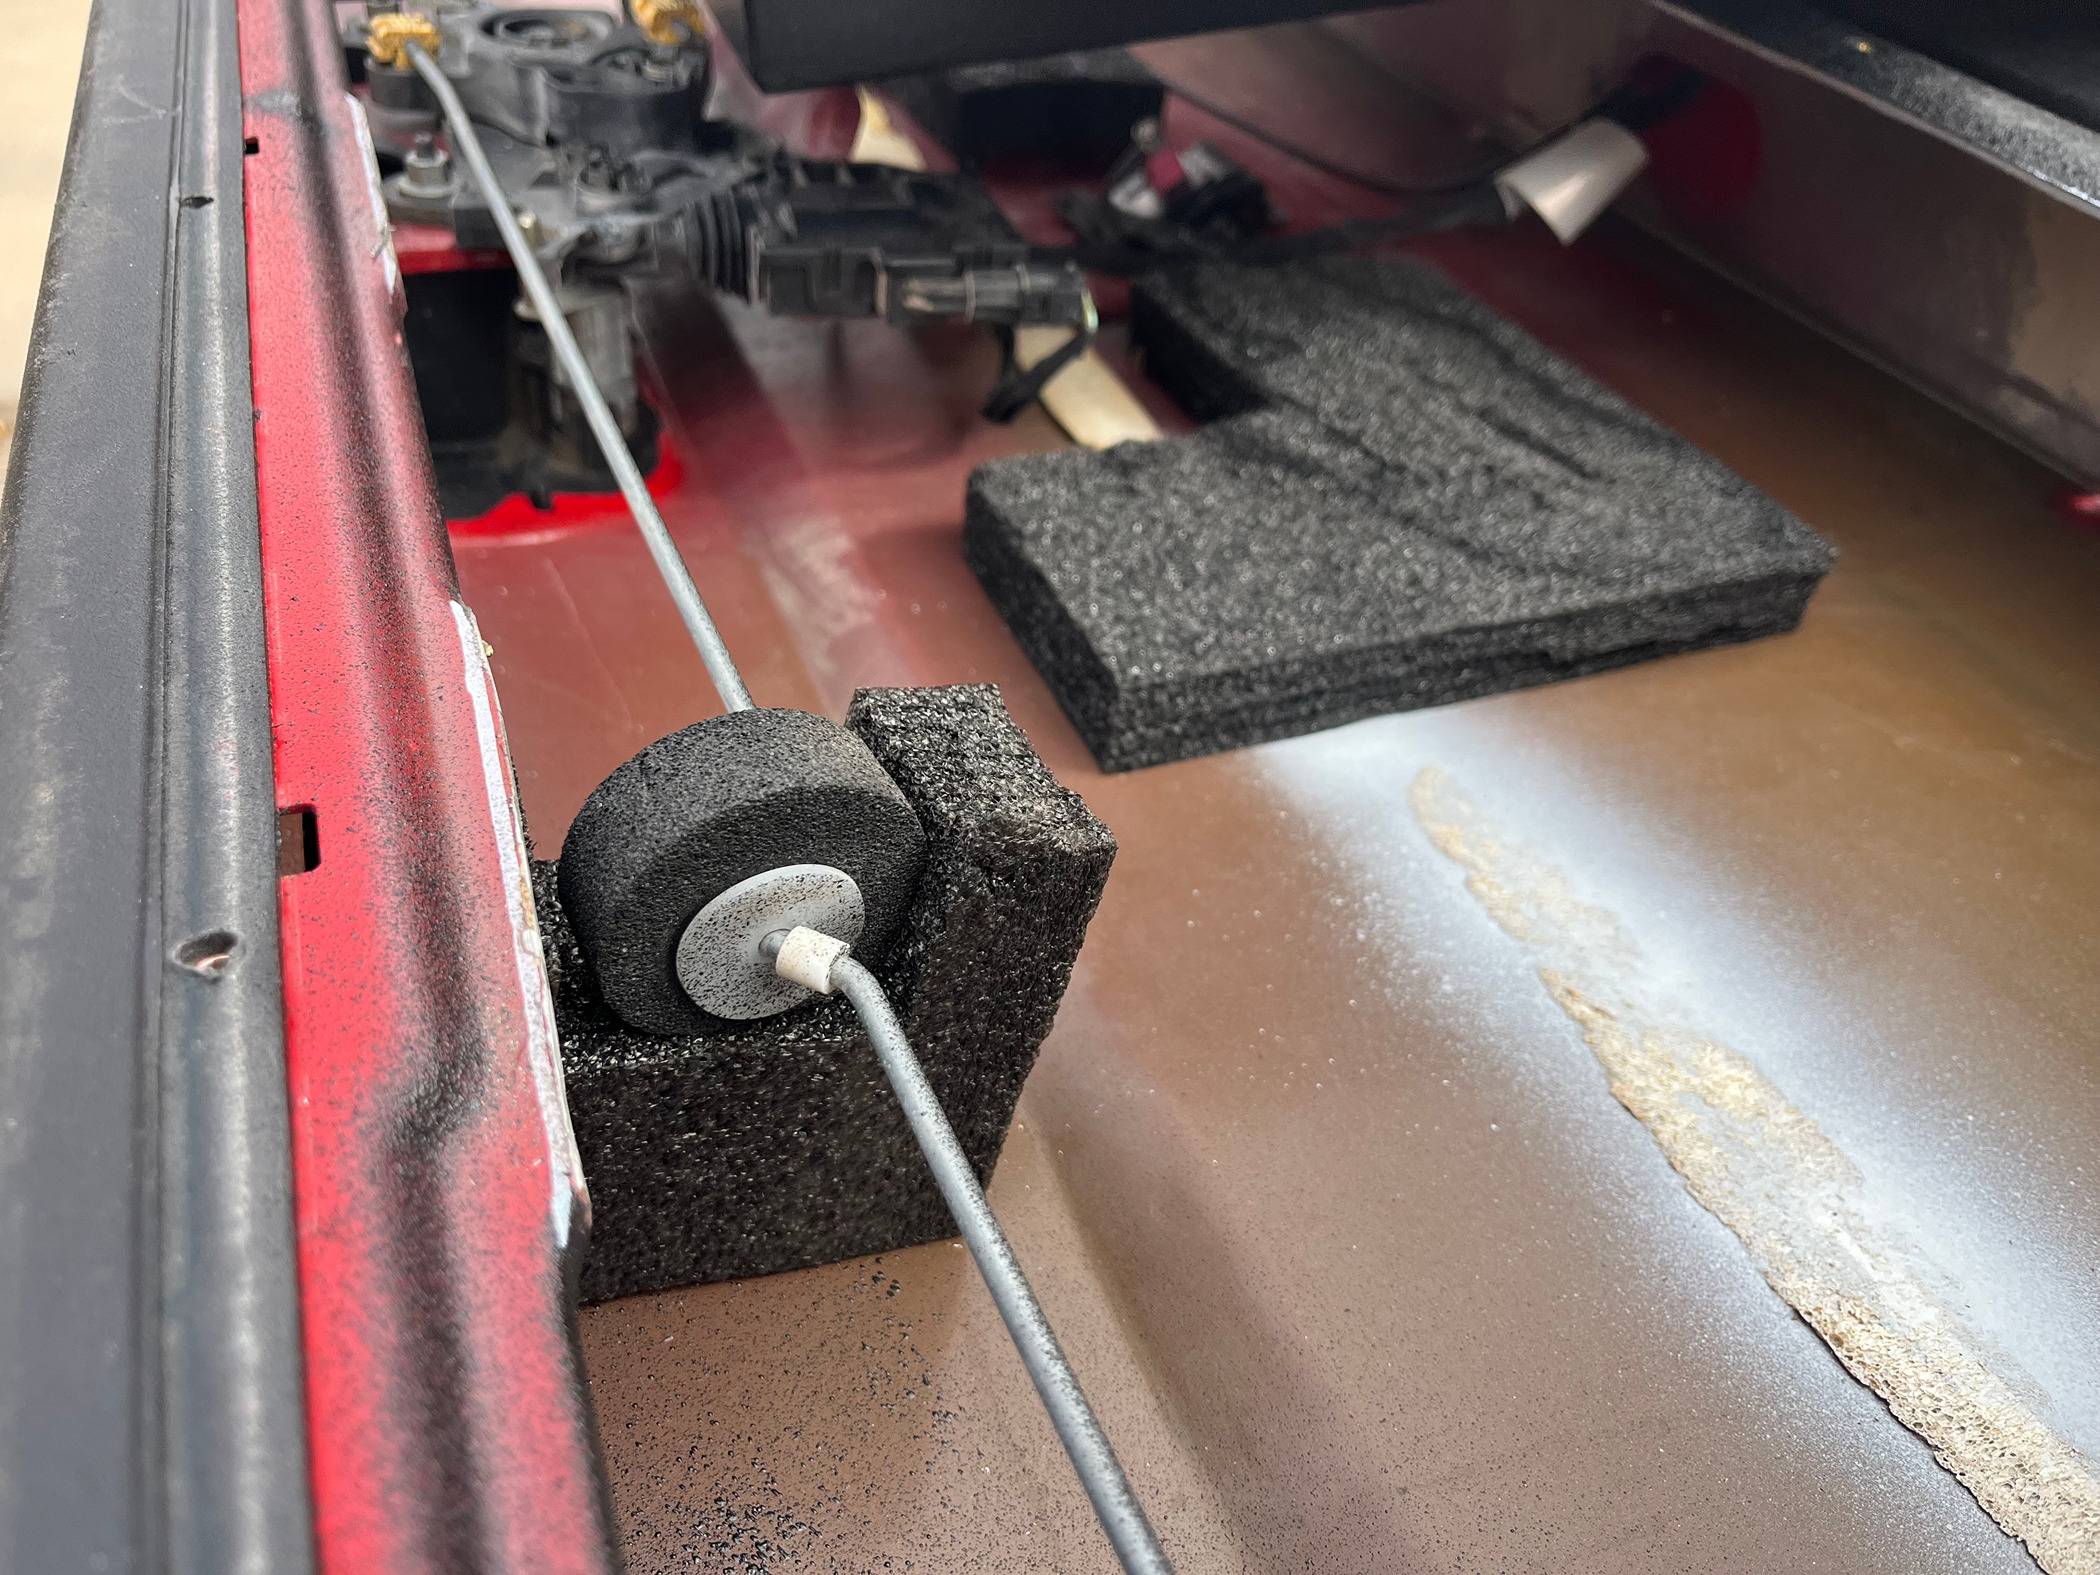
Lost the structure behind the "Jeep" emblem. It is very easy to flex. I'm not sure if it will be a problem, but as long as you don't lean on it, it should be okay. I'm looking into polyethylene foam to fit on the inside of the box and the outer skin to provide more structure. There's a noisy "rattle" as the tailgate rod is free to shake when closing, will also add foam to the foam bumper on the passenger side to remedy that.
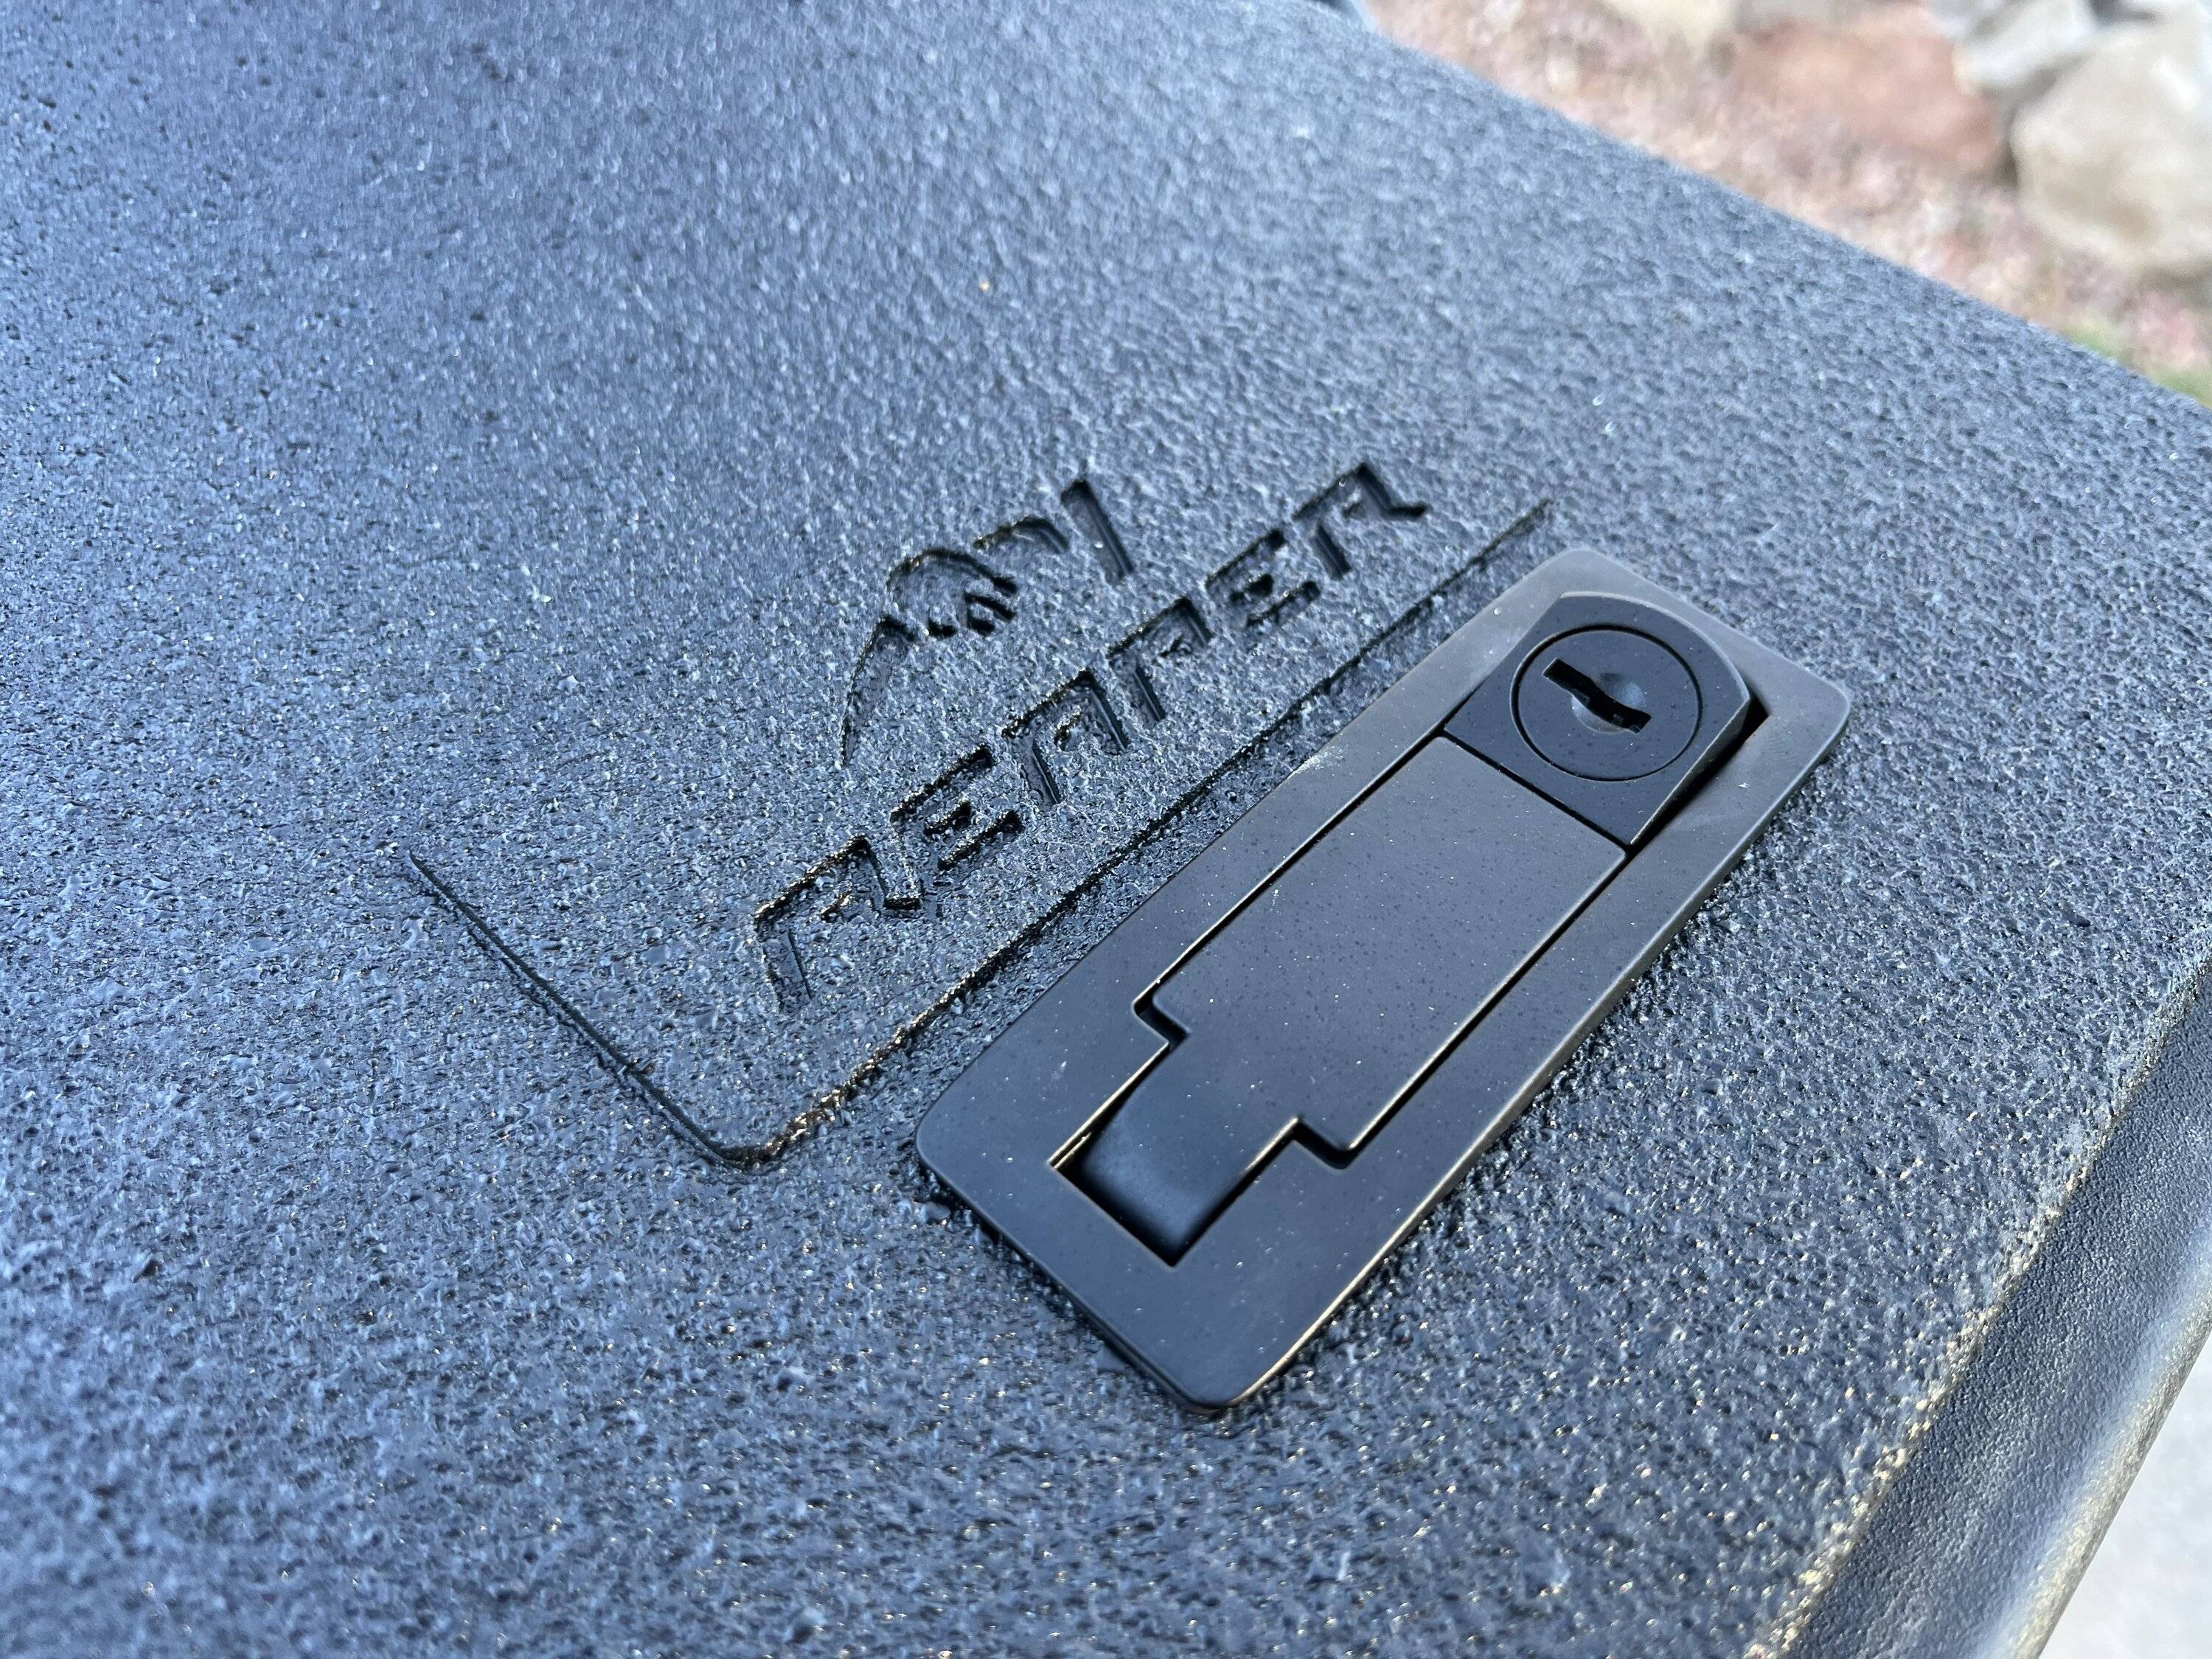
Personally, I don't need it to be keyed, so I took note of the company that makes the latches, SouthCo, and I might just order the non-key version of these latches, that also lay flat as well. Just personal preference.
OVERALL:
Rating: 8/10
I'm very happy with the way it turned out! There's some quirks that I need to sort, but I love the additional space! The cutting itself wasn't bad at all, it's just getting over the fact that I was cutting up my truck was the hardest part. Between the molle panels and this tailgate box, I have the under-seat storage available again, which I will most likely fill up with tools.
Would I do it again: Most likely, if I can sort out those quirks that I mentioned above. If I had to do it again, I would leave it for last on the storage mod list, for the following reason:
It's quite a bit of work and money for what is a small increase of storage. It's also semi-permanent, you'll need to replace the entire tailgate if you have any regrets or have any major issues.
-----------------------------------------------------------------------------
TLDR:
(3/10/2024)
While I'm happy with end result, this mod isn't for everyone. It's quite a bit of work and money for what is a small increase of storage. It's also semi-permanent, you'll need to replace the entire tailgate if you have any regrets or have any major issues.
Rating:
Part quality: 9/10, Install: 7/10, Cool factor: Freaking dig it!
The day has arrived, I've lost my marbles and cut open my truck with an angle grinder!
Now I have my reasons for this, as I'll explain bellow. It was so I could do this!
------------------------------------------------------------------------------------
I have a small collection of recovery gear that I use semi-regularly, especially when the weather gets bad. 90% of the time, it's locals who take their street car/truck through the desert as a "shortcut" and get stuck in the soft sand. Because of this, my most used item is my kinetic rope. It's real easy to throw it on a soft shackle, and gently remove most stuck vehicles.
BUT, since it's typically used during bad weather, it tends to get muddy. This was a problem as water soaks into it, and stinks up the cab/gets the back of the seat dirty when it would get stored in the interior storage bins. I wanted to move it to the bed for these reasons, BUT, without having to unbutton it from the typical "molle panel" mount storage.
Enter the Reaper Off-Road tailgate box.
I liked this idea because it would give me storage space that wouldn't compromise interior comfort/space (overhead molle mounts), and it would leave me room on my bedside molle panels for "less used" gear, but gear that I want to carry off-road. Plus, this option leaves my recovery gear more accessible than both options, and will allow me to store gear right after it's been used without worrying about getting other items dirty with mud/bog water.
Biggest downside: You have to cut open your tailgate.
Lets begin.
Between ordering the box and it's arrival, it took exactly 7 days. Very happy with how quickly that went, and the condition the box arrived in. It was well packed, with no missing parts or damage of any kind.

Next part was sizing up the box to the truck. I wanted to get a rough idea in my head on how much I had to work with in regards to the cut profile. The reasons for this is this box uses self taping screws to secure it in place. I personally dislike self tapping screws, and opted to order my own hardware, stainless M5 button head bolts, that would be secured via RivetNuts. Thanks to the overhang on the box, I was sure that RivetNuts would work.
I went ahead and put the box away, as it was delivered later in the day, so I would have to save the actual install for the next day. I took the opportunity to paint the "Accent color" plate for the logo. Painted "392 Bronze", to match my other accents for the truck.
Decided to do early prep by assembling the latches and other parts beforehand. Had to use my track tires as a workbench because my actual workbench was too small for the box. I also pre-assembled the lights for the box.
Bandit, the shop supervisor, did an inspection, and approved.
Next day was cutting day. I gathered my tools. A face shield and mask for the aluminum dust and bedliner. The cutoff wheel and ratchet for the box panels. A shop vac. And a paint marker for drawing the outline for the cut profile.
My Milwaukee electric ratchet took off my panels in a snap.
Now I just needed to outline my cut profile. I used a "Liquid Paint" pen, and a ruler as a straight edge. Outlined it per Reapers instructions, minus a few small changes. I opted to only mark the supports at the top of the tailgate vs the straight line Reaper wanted.
No turning back here!
Time for the first cut! The aluminum was no match for 30,000 rpm, and cut smooth. It was very easy to maintain control of the cutoff tool and to not cut too deep. I opted to do all my cuts at once, and I even managed to keep my lines straight!
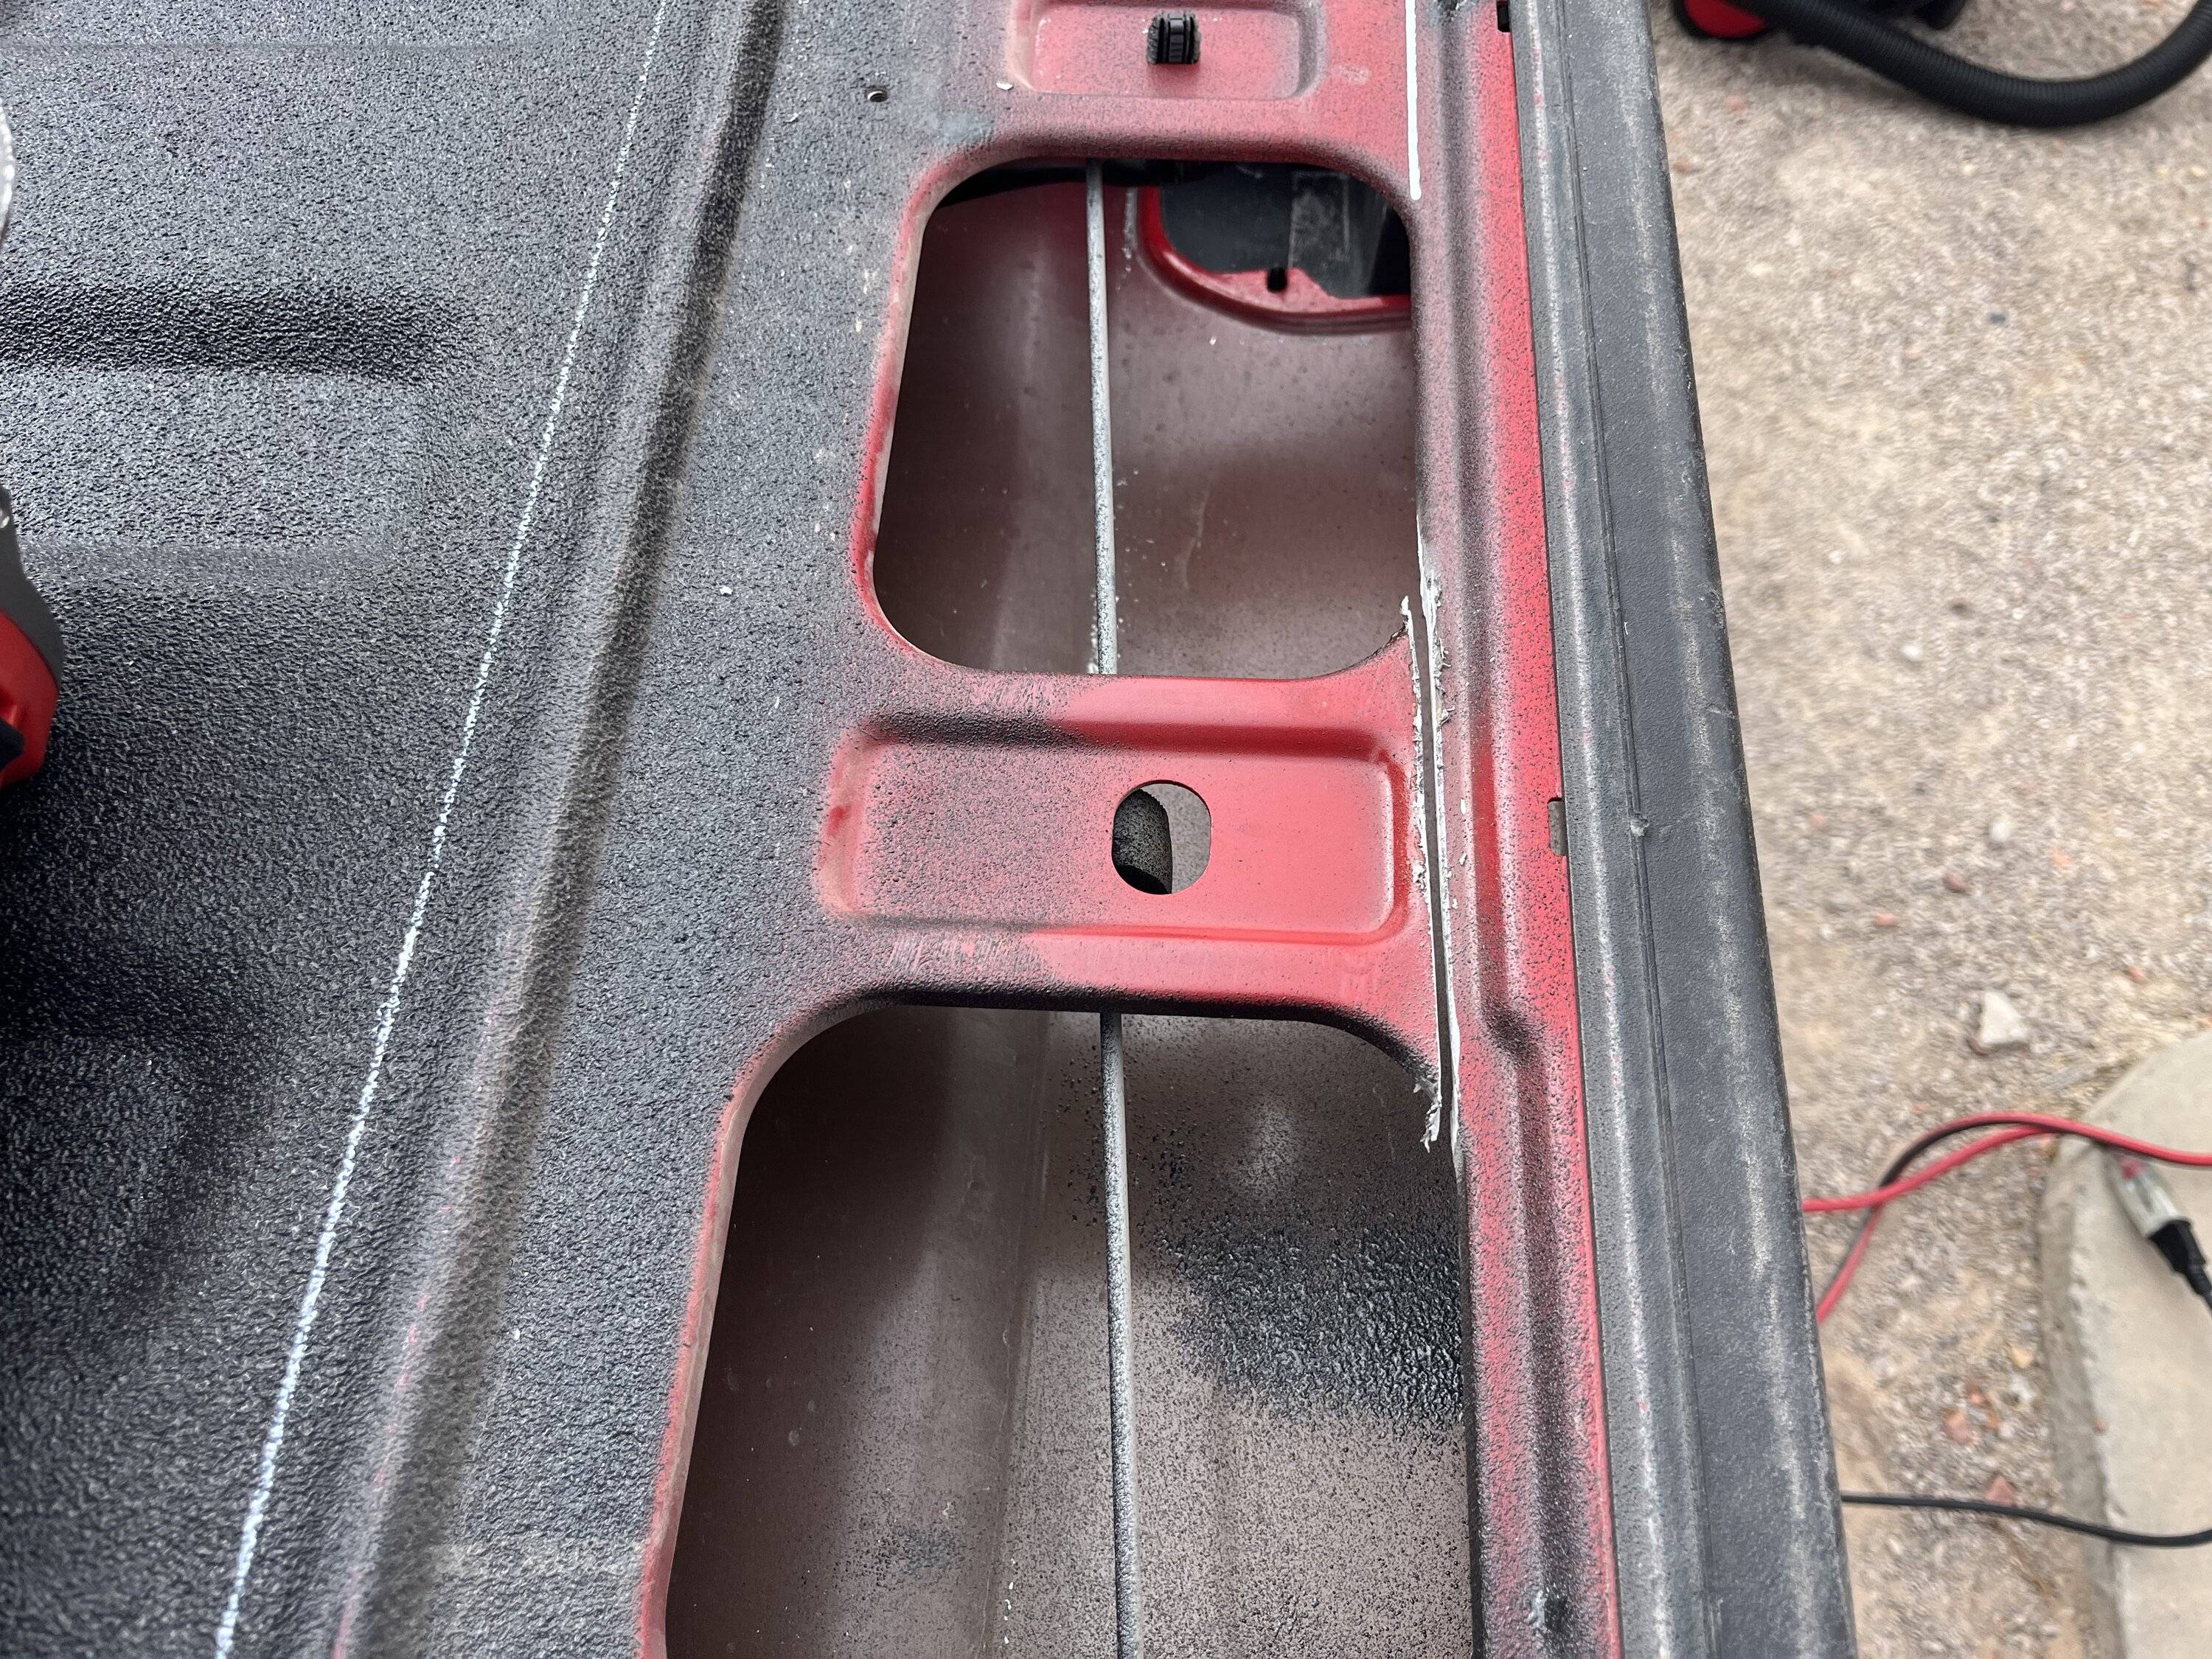
Pulled the top panel and used my shop vac to pull up all the aluminum shavings for the next step. I also grinded the edges smooth with a flap disk in between steps as necessary whenever I needed to reach into the tailgate in that area.

Next was to remove the foam sealant holding what was left of the tailgate skin. A flat blade knife made this easy.
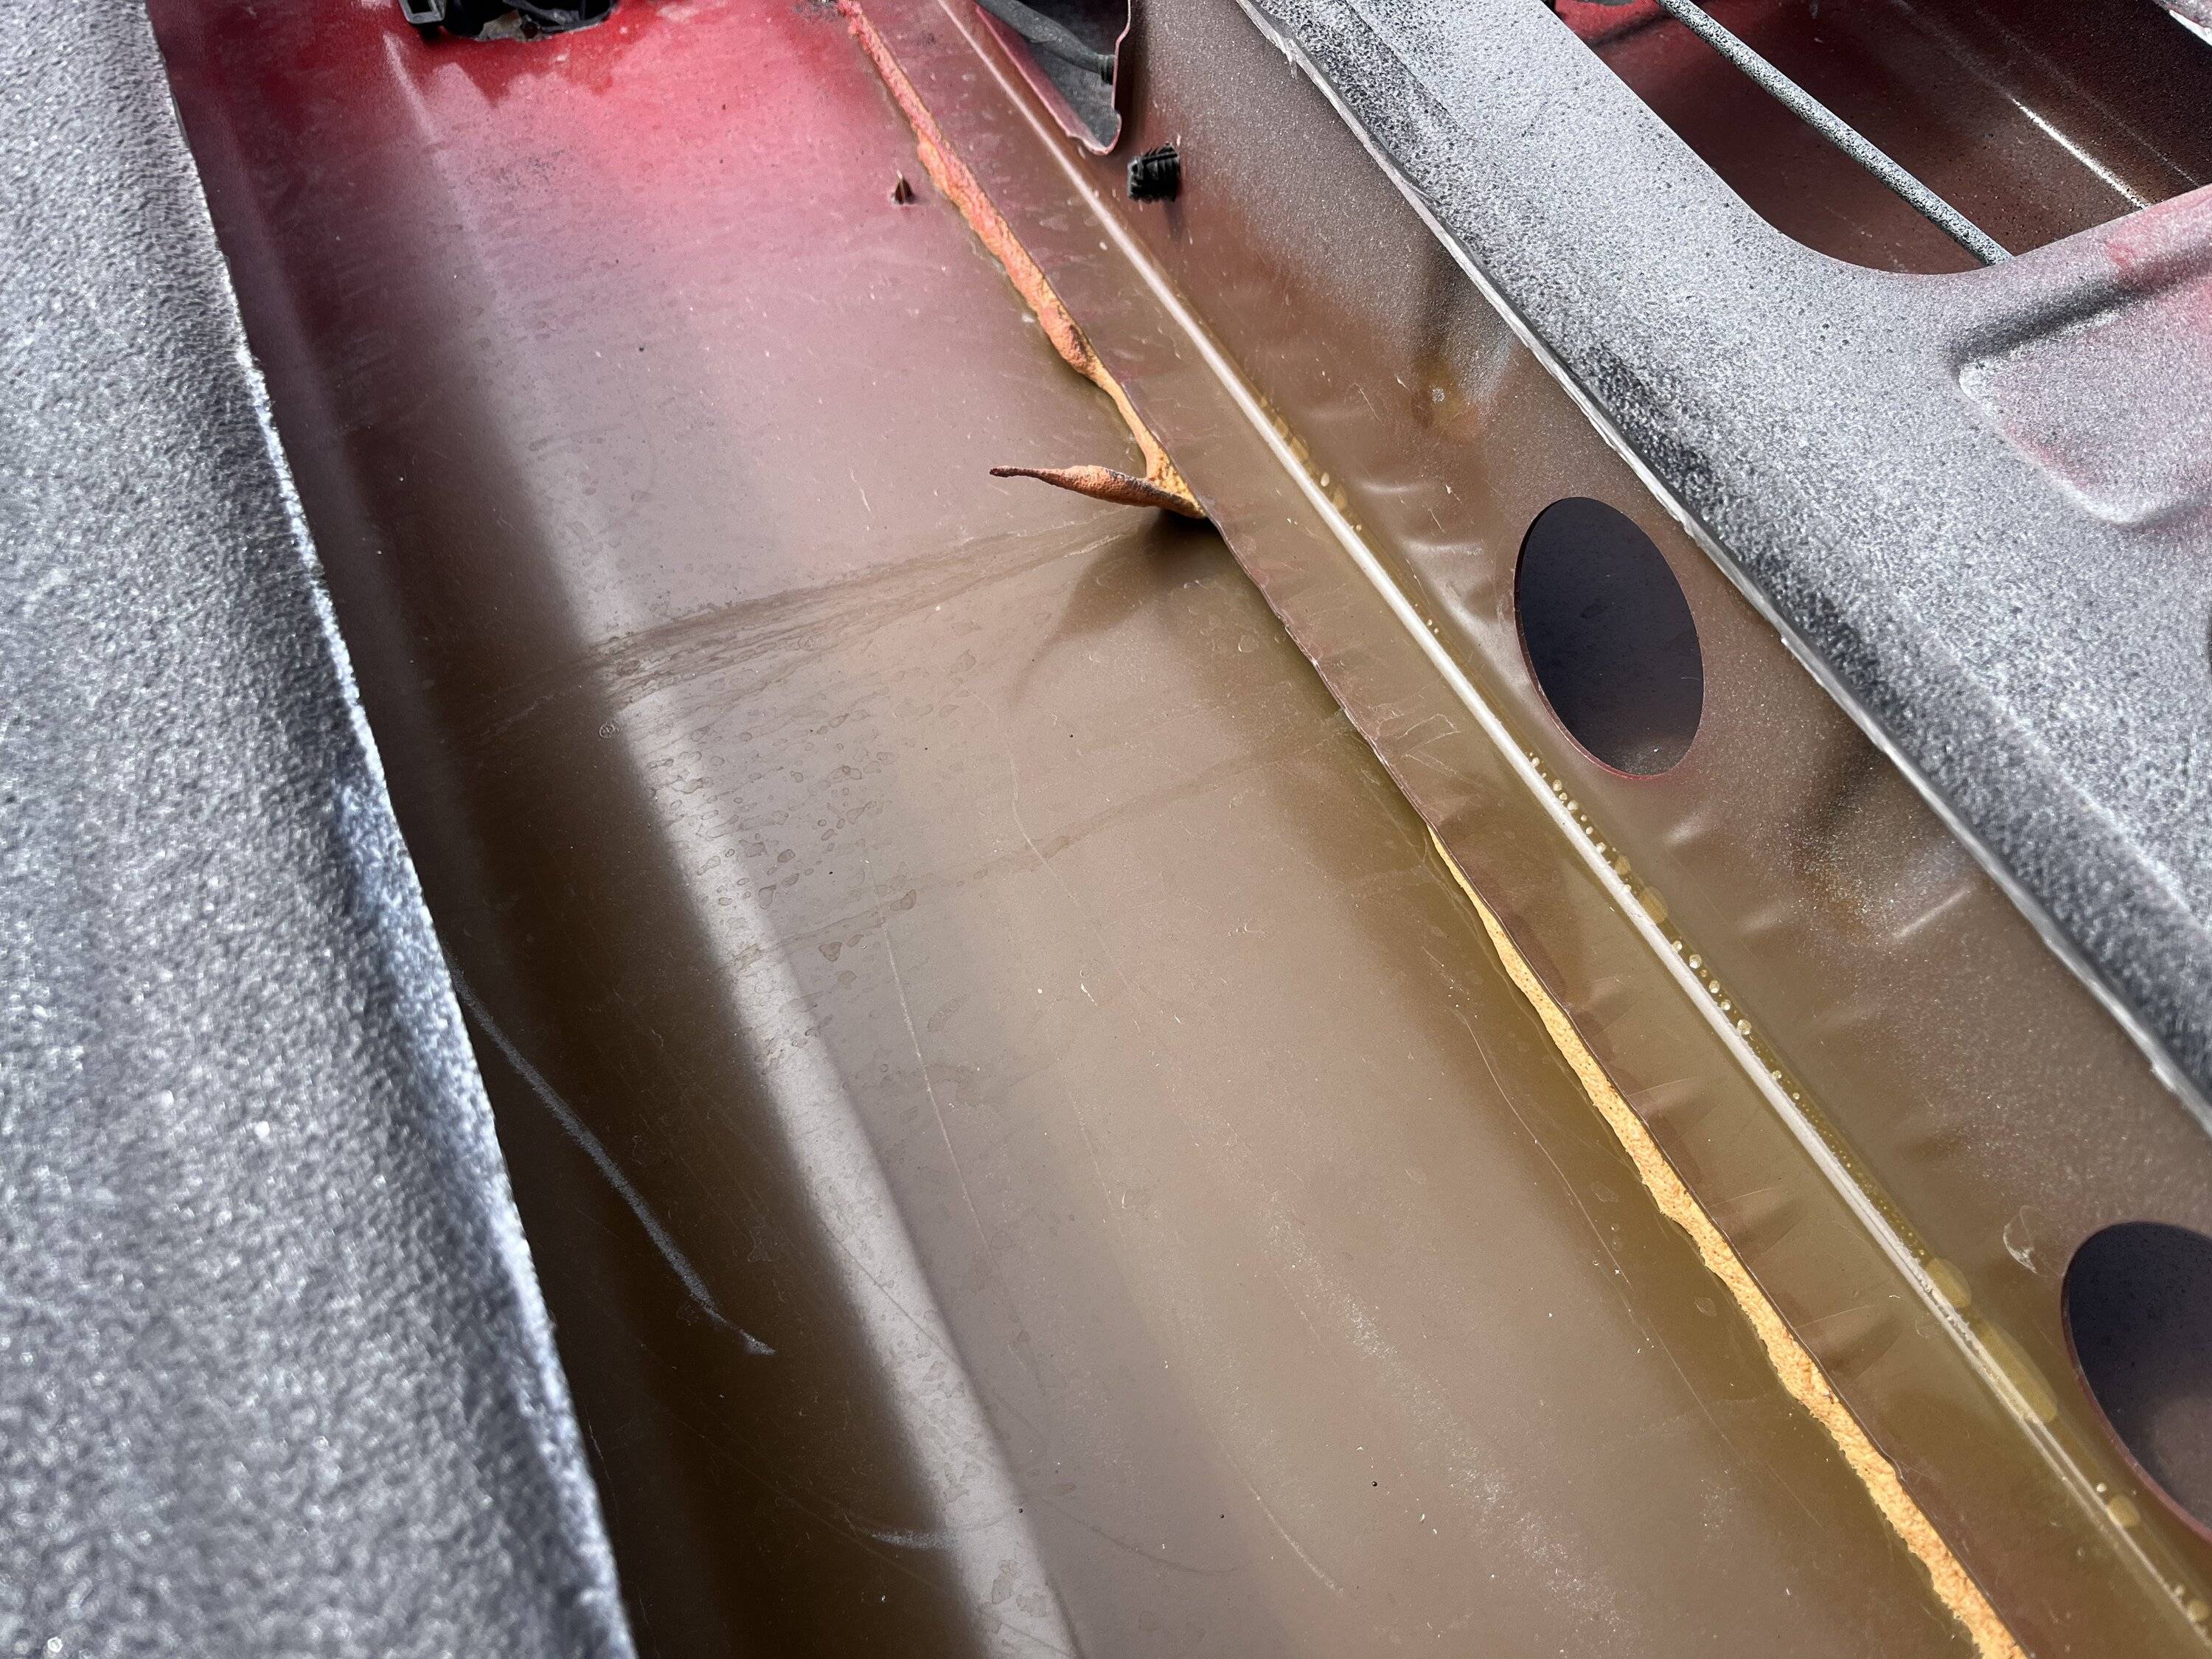
With the adhesive detached, I was finally able to skin the tailgate, behold the remains and my open tailgate box. I took this opportunity to grind my edges smooth. I also tucked the wires for the camera, lock mechanism, and taillight underneath the latch handle support.
It was at this point I test fit the Reaper box. More or less dropped right in, minus some small interference with the prop rod, which was solved by dropping the front of the tailgate box in first , so I started marking and drilling my holes, using the box as a template.

Here's where I had my only issue. Since I wanted to use RivNuts instead of self tapers, I had to remove the box one more time to install them. I thought it was going smoothly, but realized I had a problem. The RivNuts I had weren't able to seat properly due to the bedliner! It was too thick, and the RivNuts were not crushing on the back side of the sheetmetal! You could pop them out by hand.
Luckily I was able to think of a solution. I went into my toolbox and found my Dremel set. I attached a cylinder shapped sanding stone that was approximately the same size as my RivNuts. With the Dremel, I was able to sand down the bedliner until I hit the aluminum surface. With some washers on my RivNut tool, I was able to seat the RivNuts on the sheetmetal through the now counterbored holes, and able to get them to bite properly. I was able to continue with my install. Only took 1 hour to figure that out. ?

Removed the plastic tailgate trim to install the rivets at the top of the bed.
Counter bored and riveted all 20 something holes, and dropped the box in. Fit perfectly!
Some detail pics!
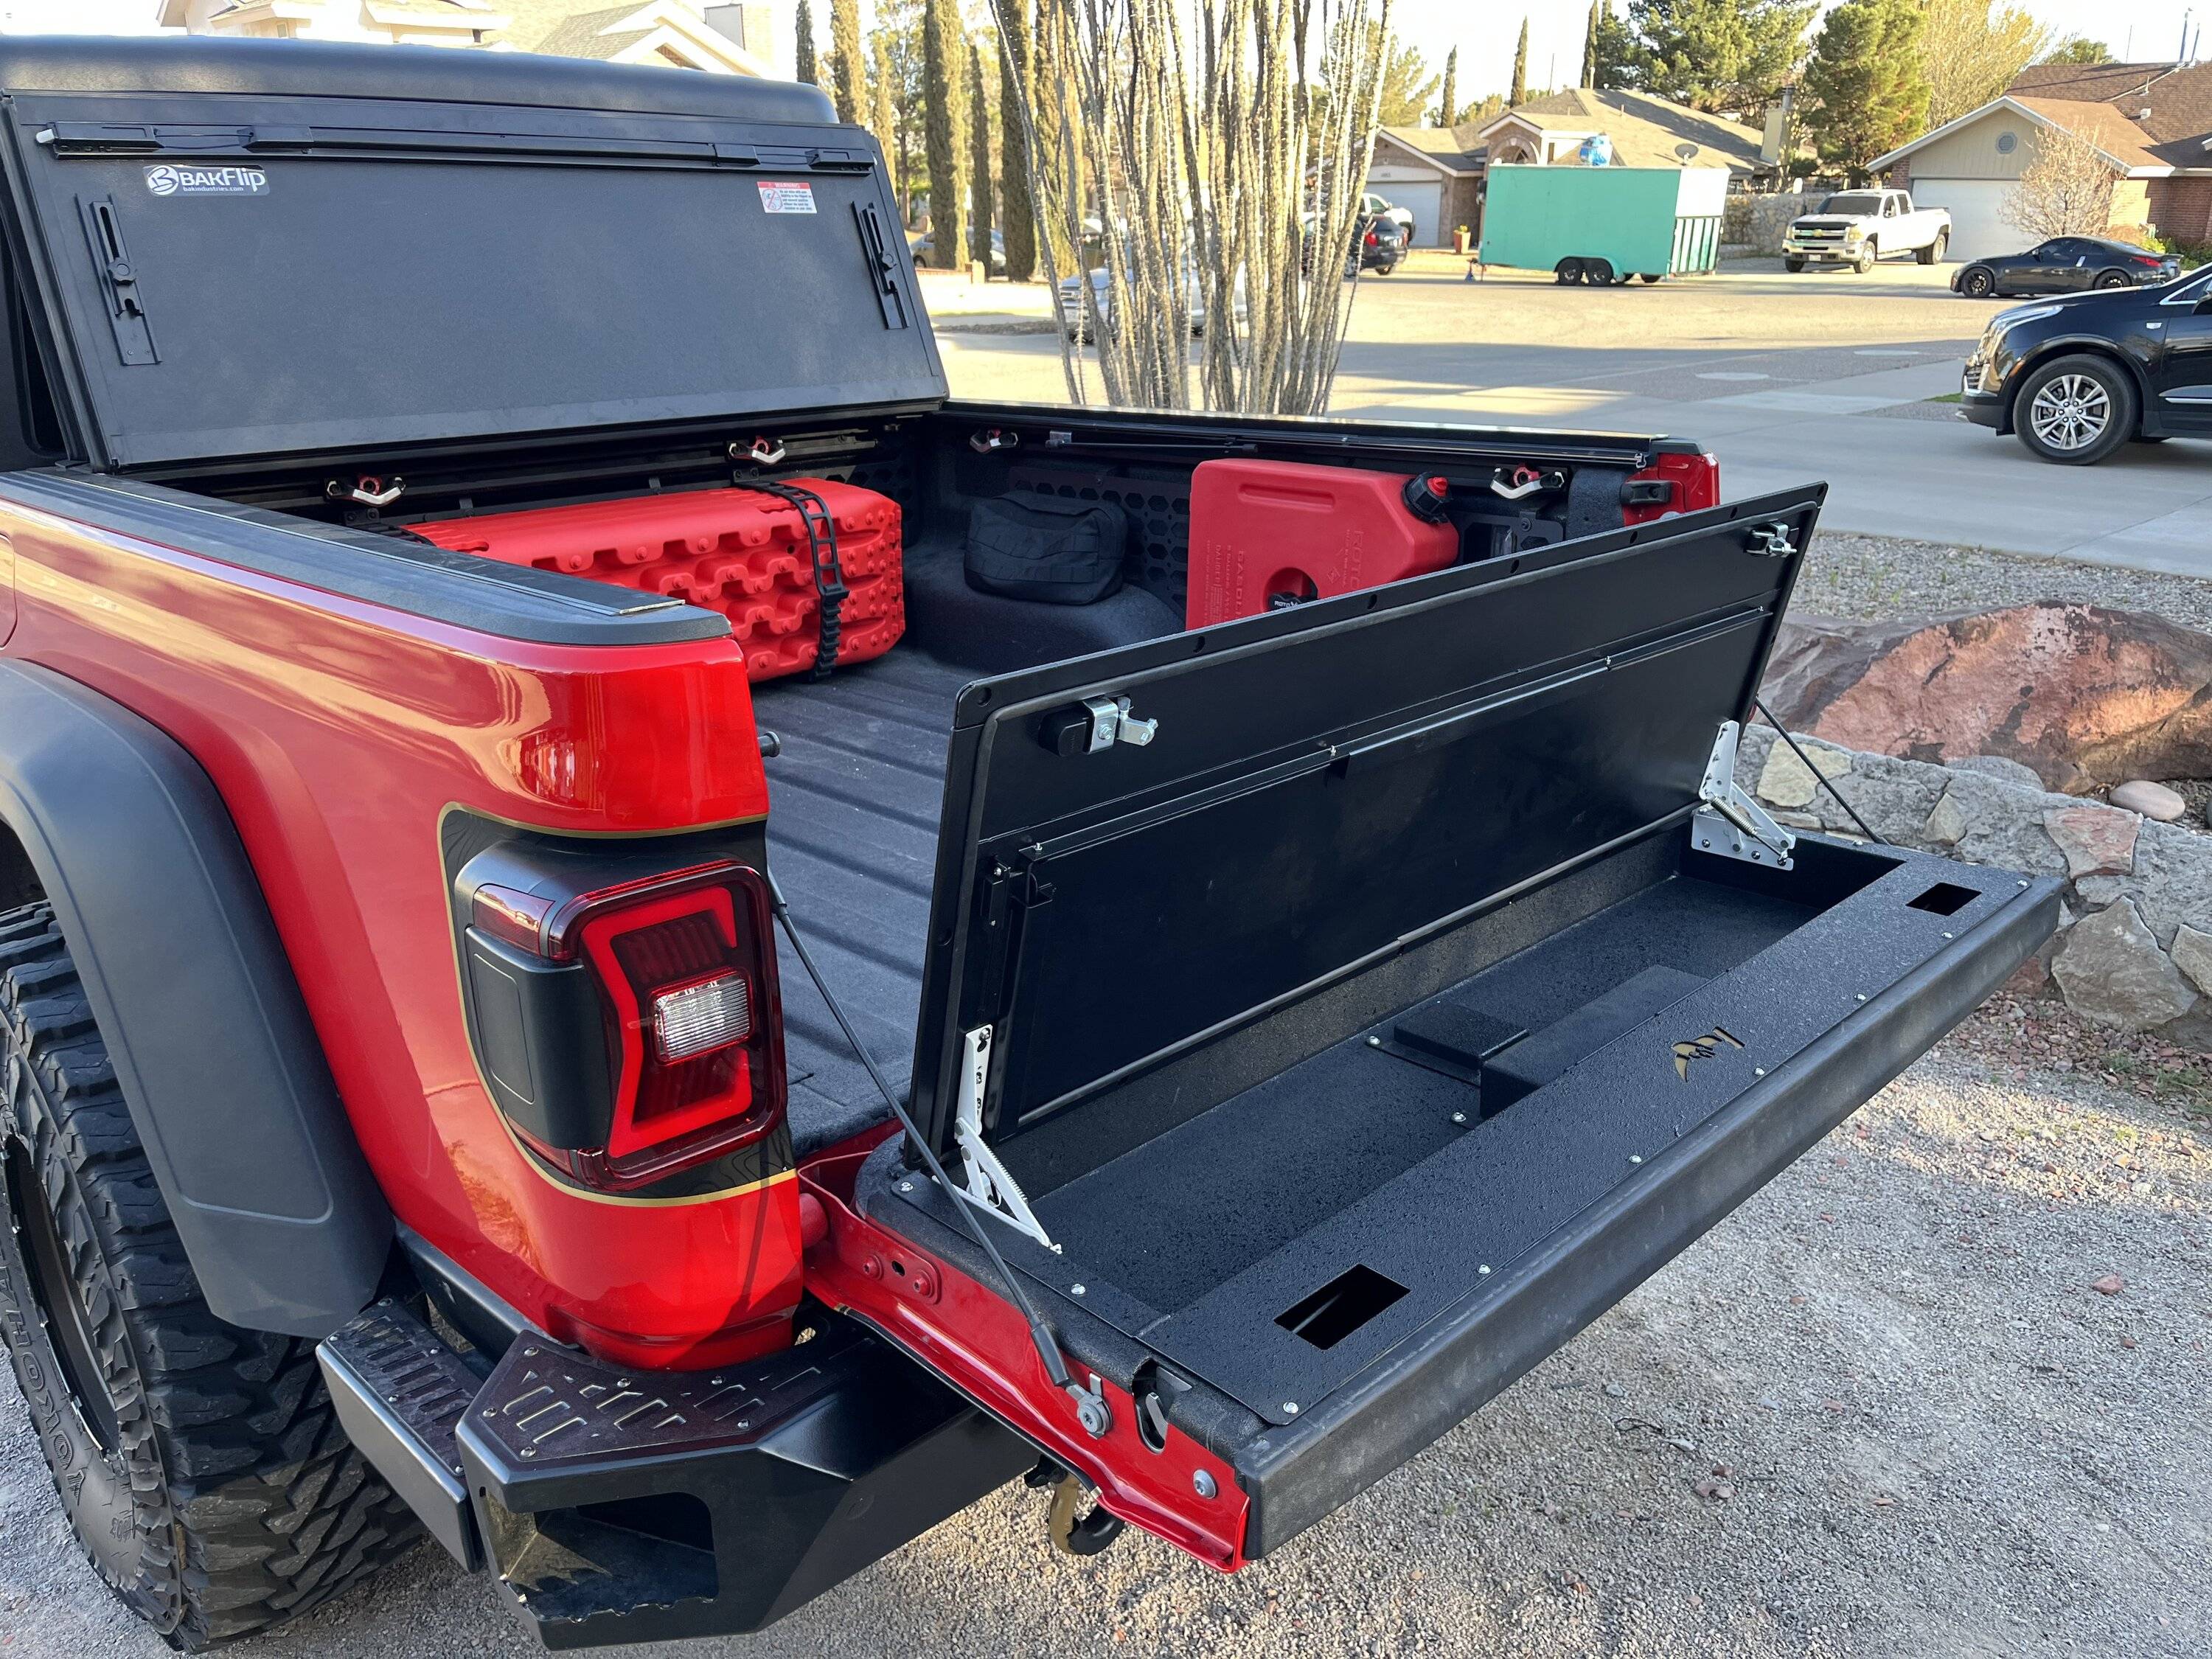
Took all my (soft) recovery gear from the back seat, and placed it in the box. Pretty much filled it up instantly, but it's such a perfect place for these things.
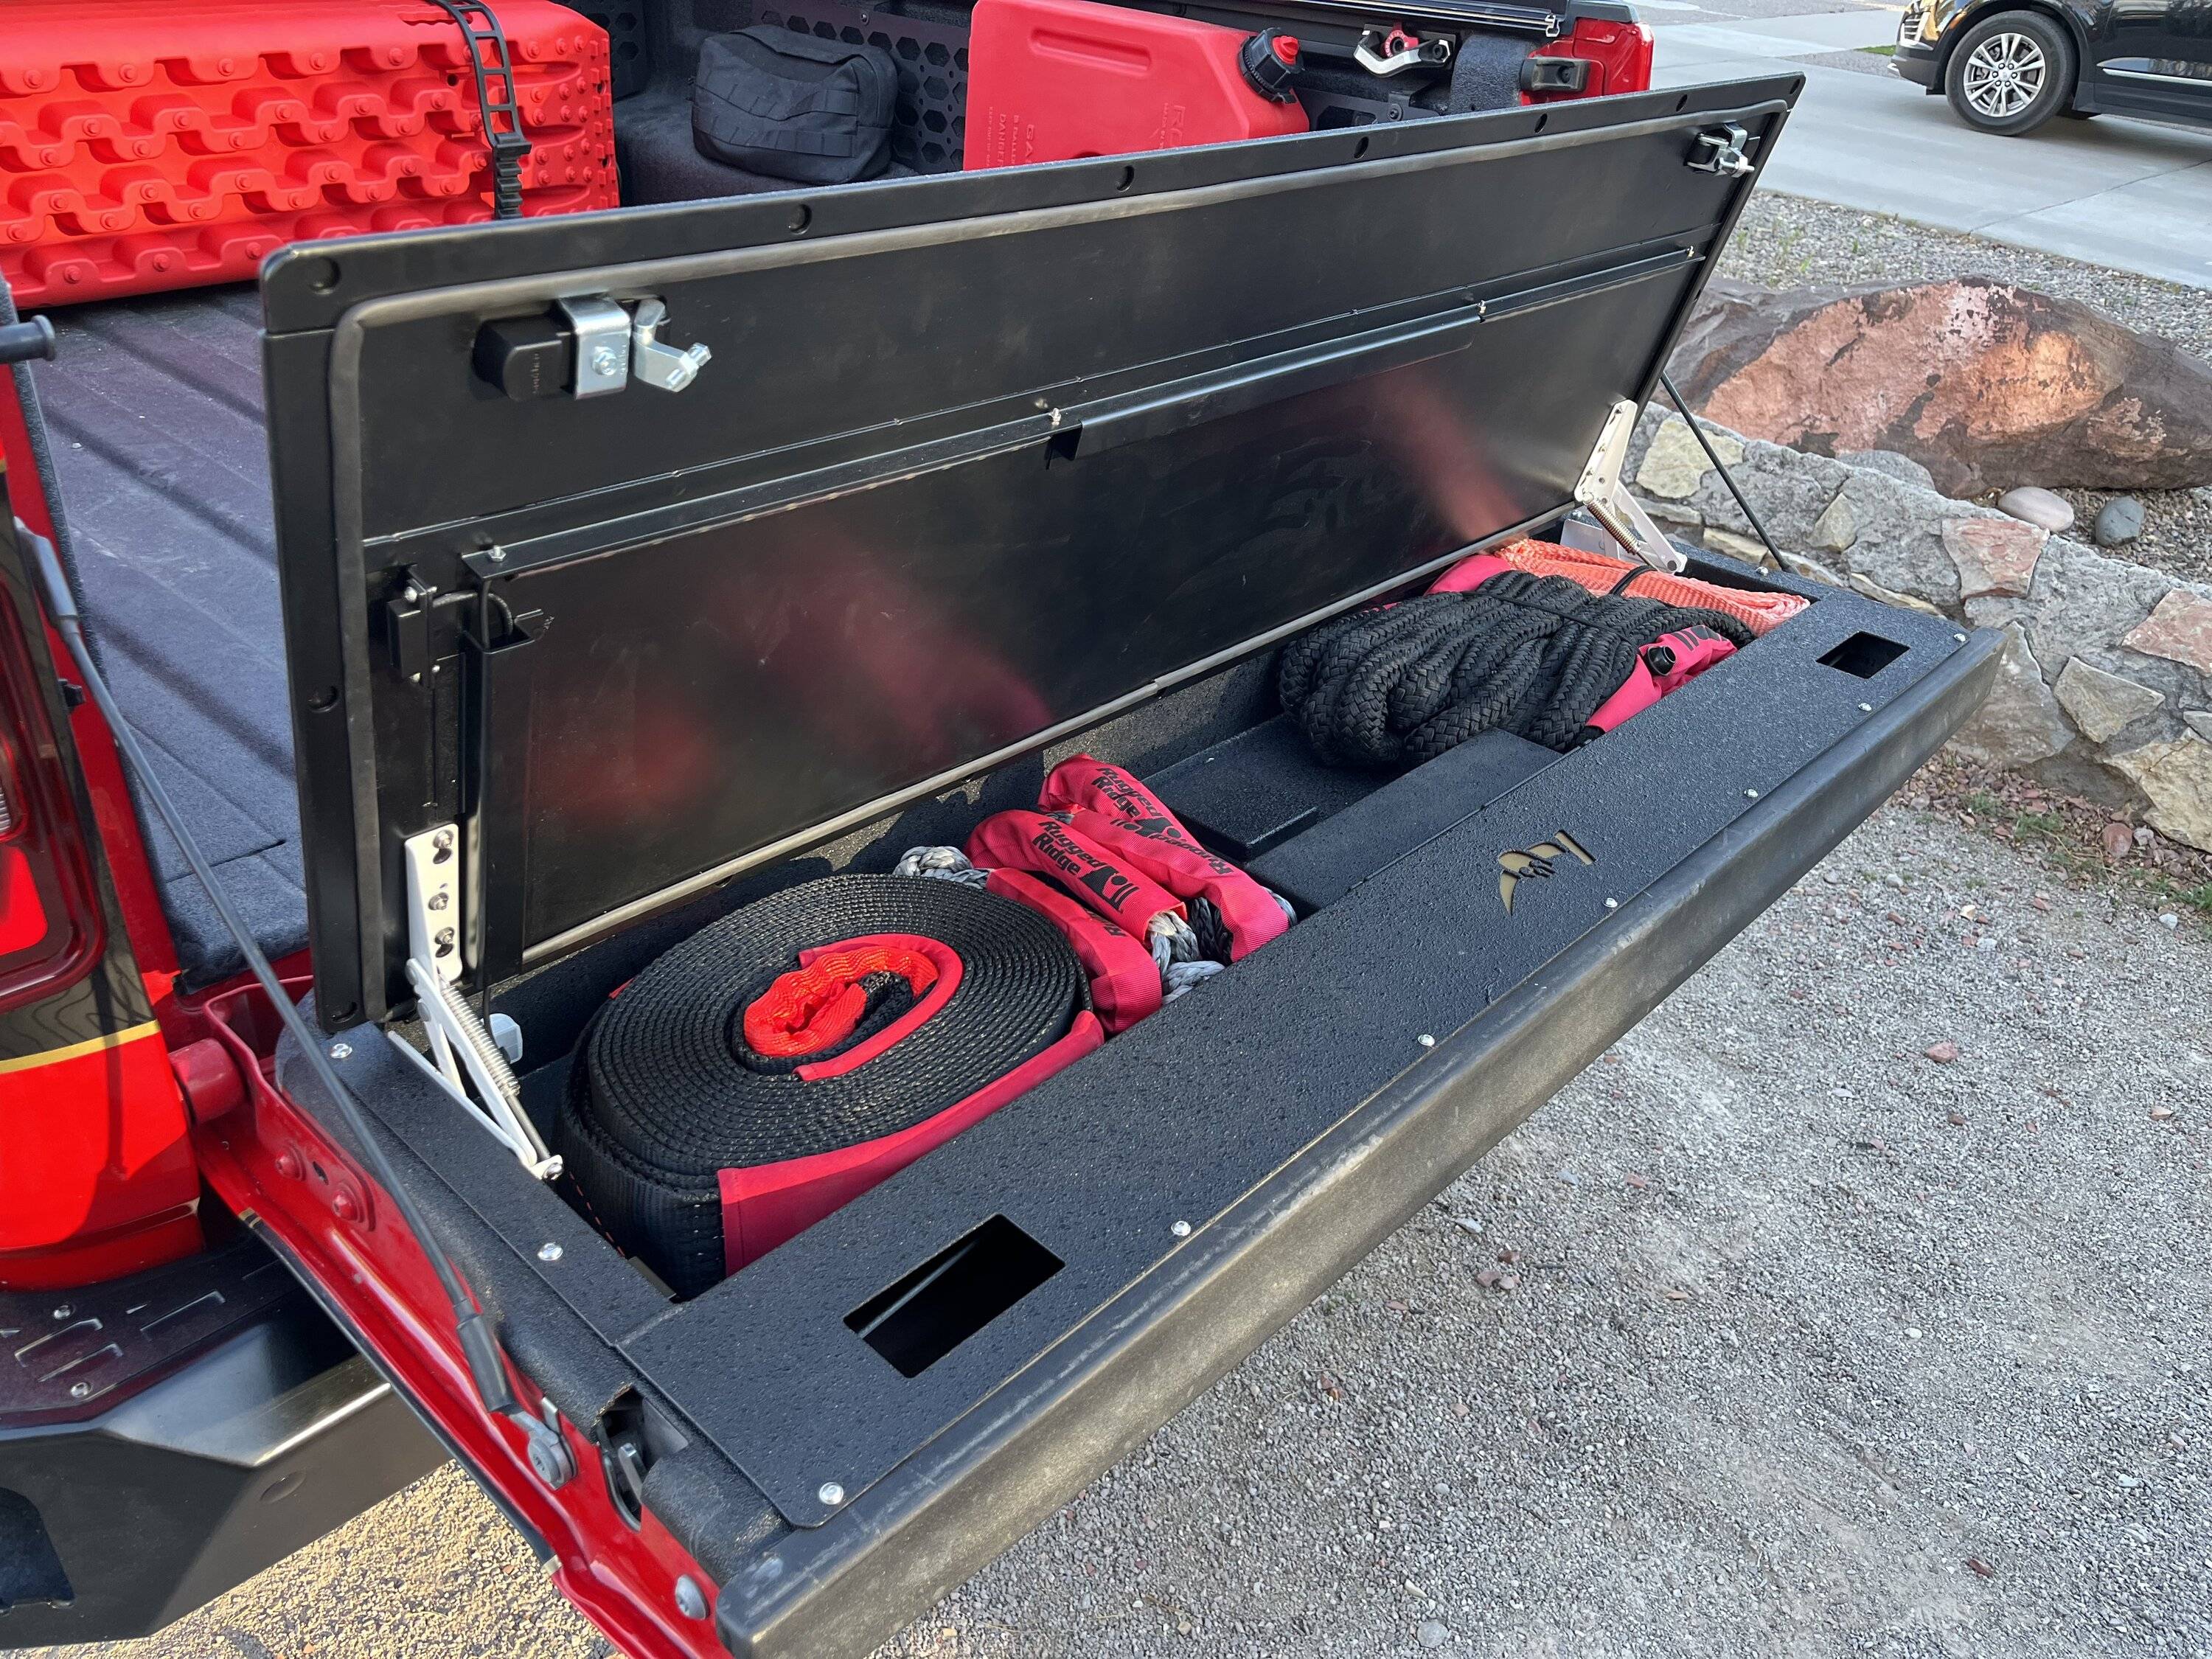
And the overall situation with the tailgate. It's VERY tight, but it does close nicely. I love how well the bedliner matches and blends into everything else.
Notes:
The tailgate with gear, is much heavier, and the stock strut can't handle the weight, so I'll need to look into a stronger replacement.
Lost the structure behind the "Jeep" emblem. It is very easy to flex. I'm not sure if it will be a problem, but as long as you don't lean on it, it should be okay. I'm looking into polyethylene foam to fit on the inside of the box and the outer skin to provide more structure. There's a noisy "rattle" as the tailgate rod is free to shake when closing, will also add foam to the foam bumper on the passenger side to remedy that.
Personally, I don't need it to be keyed, so I took note of the company that makes the latches, SouthCo, and I might just order the non-key version of these latches, that also lay flat as well. Just personal preference.
OVERALL:
Rating: 8/10
I'm very happy with the way it turned out! There's some quirks that I need to sort, but I love the additional space! The cutting itself wasn't bad at all, it's just getting over the fact that I was cutting up my truck was the hardest part. Between the molle panels and this tailgate box, I have the under-seat storage available again, which I will most likely fill up with tools.
Would I do it again: Most likely, if I can sort out those quirks that I mentioned above. If I had to do it again, I would leave it for last on the storage mod list, for the following reason:
It's quite a bit of work and money for what is a small increase of storage. It's also semi-permanent, you'll need to replace the entire tailgate if you have any regrets or have any major issues.
-----------------------------------------------------------------------------
TLDR:
(3/10/2024)
While I'm happy with end result, this mod isn't for everyone. It's quite a bit of work and money for what is a small increase of storage. It's also semi-permanent, you'll need to replace the entire tailgate if you have any regrets or have any major issues.
Rating:
Part quality: 9/10, Install: 7/10, Cool factor: Freaking dig it!
Sponsored
Last edited:


")