OP
OP
cug
Well-Known Member
- First Name
- Guido
- Joined
- Apr 1, 2023
- Threads
- 13
- Messages
- 602
- Reaction score
- 664
- Location
- Christchurch, New Zealand
- Vehicle(s)
- JTR EcoDiesel, Land Cruiser 79, BMW R1250GS
- Build Thread
- Link
- Occupation
- Just keeping busy
- Thread starter
- #271
Again, there haven't been many updates in the last few days, we've been busy with two projects:
1. Rear Door Mosquito Screen
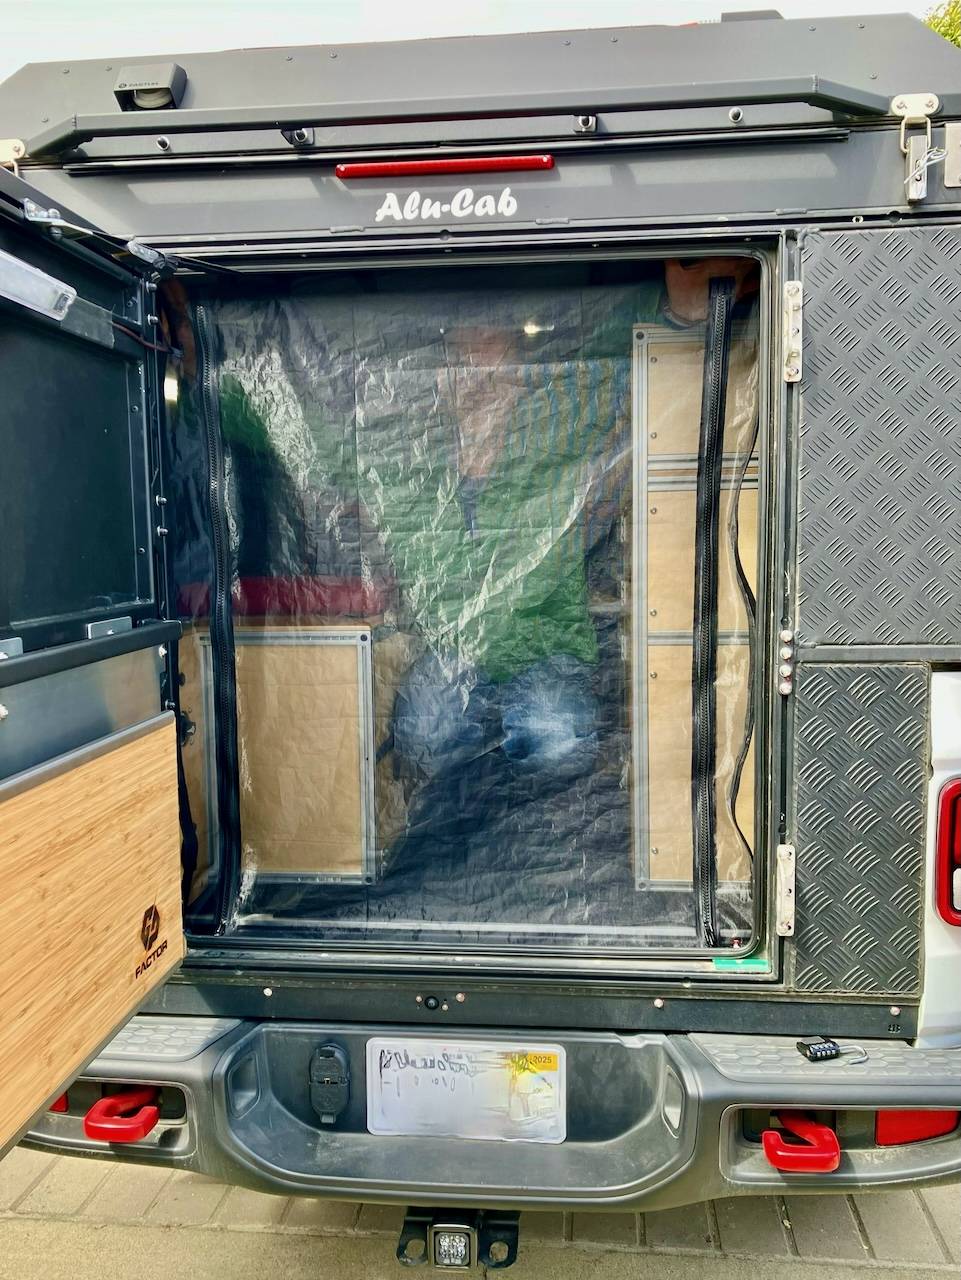
Since the mounting of the original mozzie screen didn't work with our furniture, my wife made our own version of it. The velcro will get attached in slightly different places and it does not have a canvas layer – for which I never saw the point anyways.

Otherwise it works similar to the Alu-Cab mosquito screen: zippers for the middle panel, it drops perfectly into the gab between door frame and bedplate, is attached with velcro at the top and sides, can be rolled up and secured in place when rolled up. The straps to secure it in place don't have velcro, but use "toggles" (plastic thingies that go through a loop to hold the fabric in place, more like a camping tent).
The screen is done, we'll wait with final mounting until we don't have to move furniture around anymore.
2. Various brackets for the rear
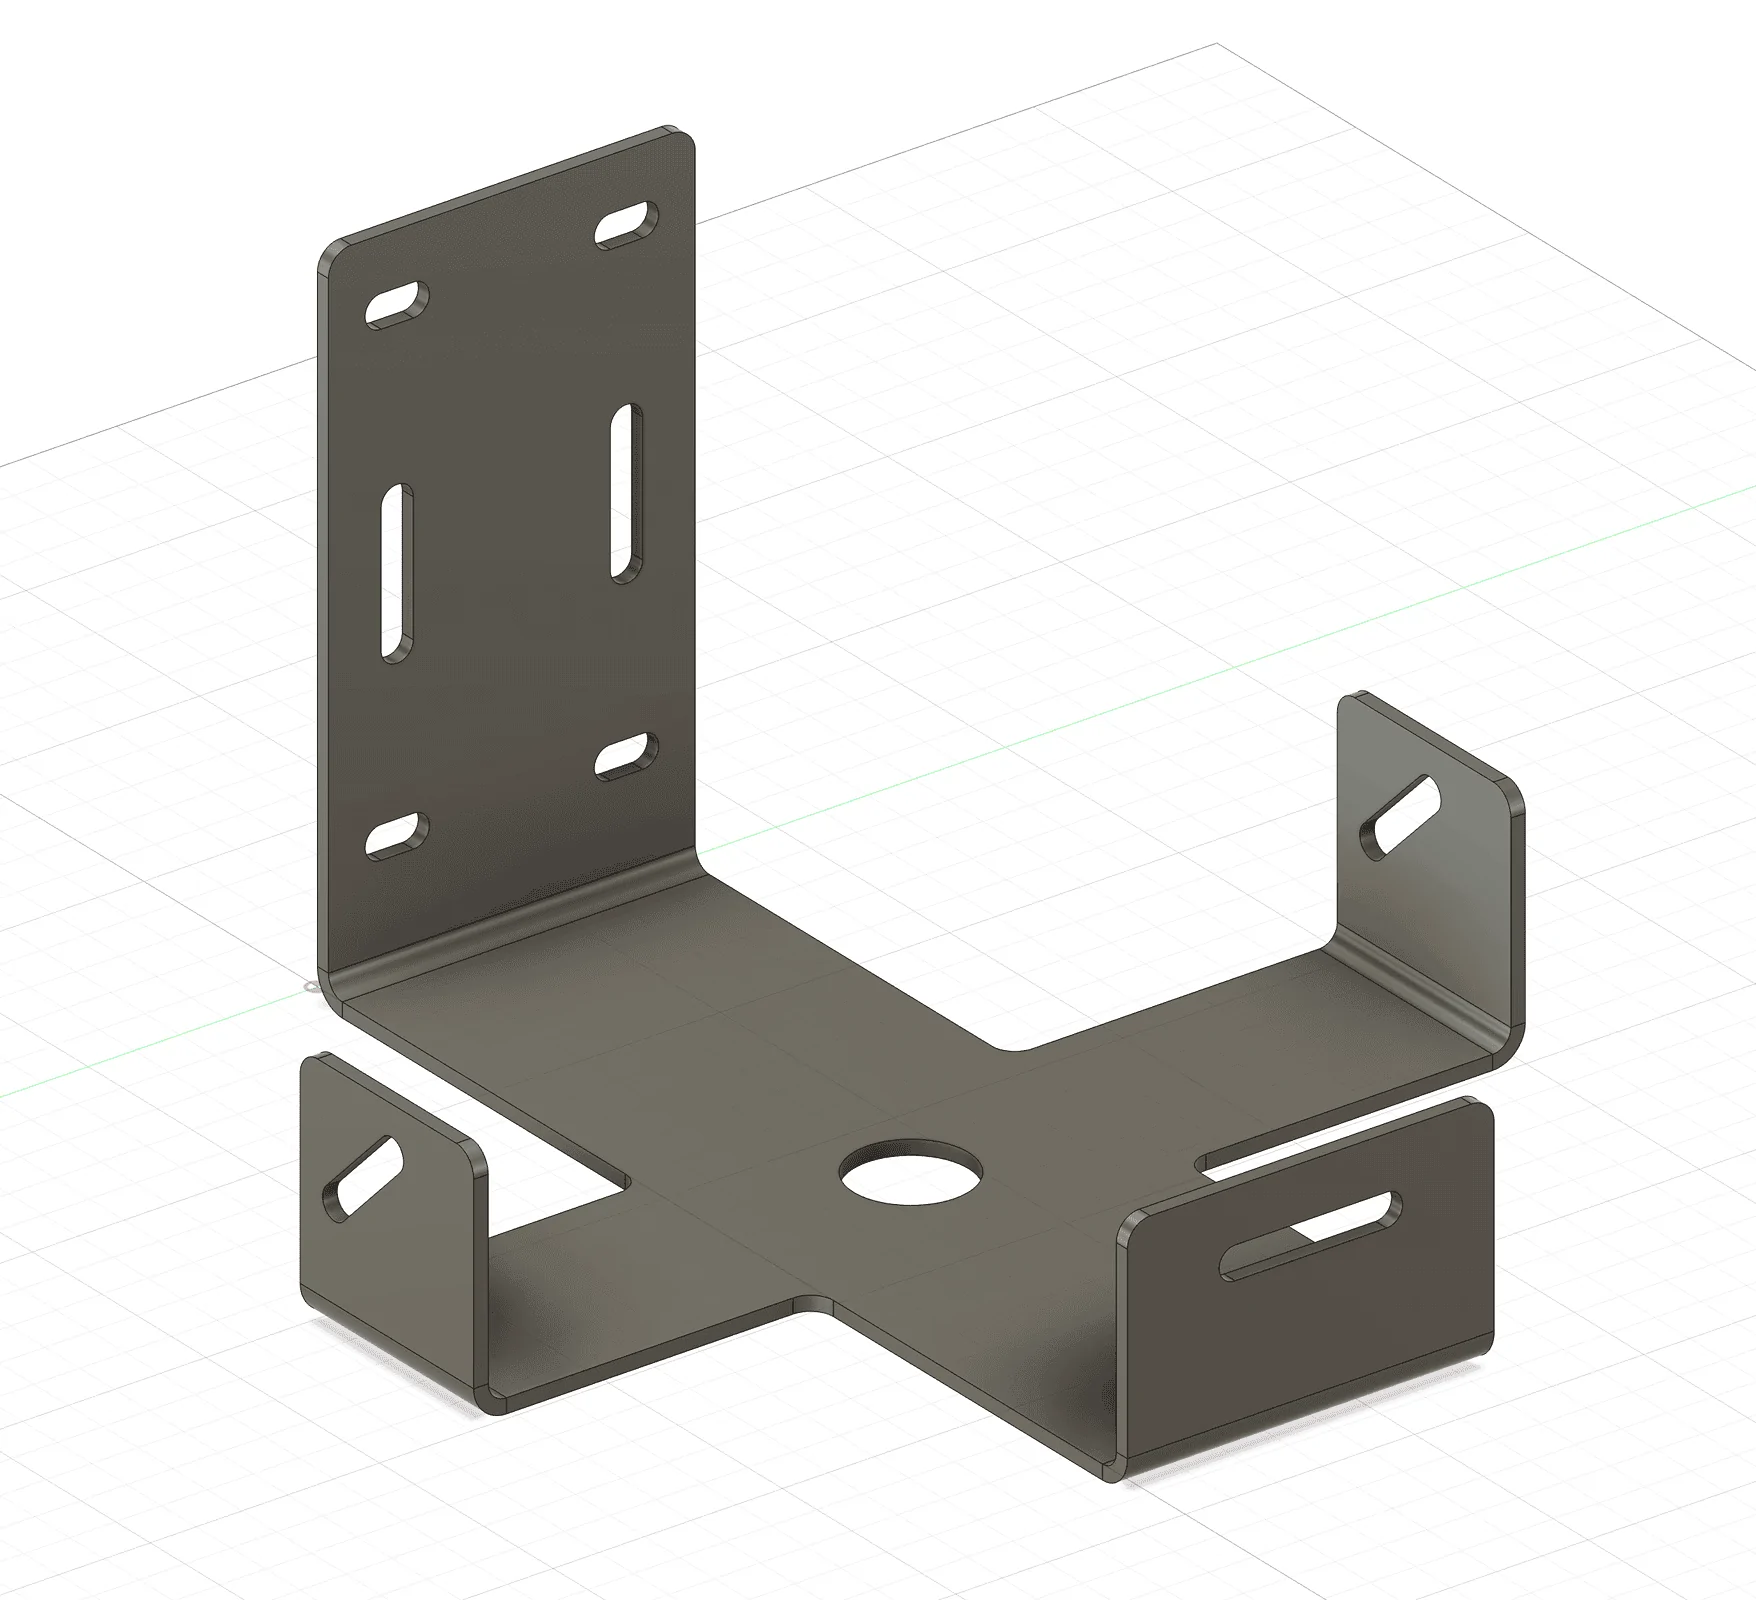
In additon to the various door panel and brackets, I have now also designed a bracket to hold our "trash container". We are going to use a large Bear Vault as our trash can. This needed a way to attach to the outside. Goals were easy removal and secure mounting.
Here's the sketch:

There won't be much if any weight on the rear bend, since the container will be held against the camper with a RokStrap attached to this little bracket:

So, I'm not concerned about stability. The flanges are mostly to conveniently hold the container in place while mounting/unmounting it.
This will all be mounted to the molle panel on the driver's side. The mounting holes are optimized for the hole distances and can be moved slightly left and right for individual adjustment. I've made sure that we can also mount it to one of our own door brackets if we ever wanted to.
This was quite an order for aluminum cutting now:
They also come in raw aluminum, so we can make corrections if needed and then have it powder coated locally.
On that topic, we saw a local powder coating shop yesterday and talked to the owner – they made us a great price if we bring all parts in one go and have only one color to be applied. Perfect, exactly what I was looking for, since powder coating at the online cut-and-bend-place was outrageously expensive.
I can only recommend talking to local fabrication shops, they are generally super nice to work with!
1. Rear Door Mosquito Screen
Since the mounting of the original mozzie screen didn't work with our furniture, my wife made our own version of it. The velcro will get attached in slightly different places and it does not have a canvas layer – for which I never saw the point anyways.
Otherwise it works similar to the Alu-Cab mosquito screen: zippers for the middle panel, it drops perfectly into the gab between door frame and bedplate, is attached with velcro at the top and sides, can be rolled up and secured in place when rolled up. The straps to secure it in place don't have velcro, but use "toggles" (plastic thingies that go through a loop to hold the fabric in place, more like a camping tent).
The screen is done, we'll wait with final mounting until we don't have to move furniture around anymore.
2. Various brackets for the rear
In additon to the various door panel and brackets, I have now also designed a bracket to hold our "trash container". We are going to use a large Bear Vault as our trash can. This needed a way to attach to the outside. Goals were easy removal and secure mounting.
Here's the sketch:
There won't be much if any weight on the rear bend, since the container will be held against the camper with a RokStrap attached to this little bracket:
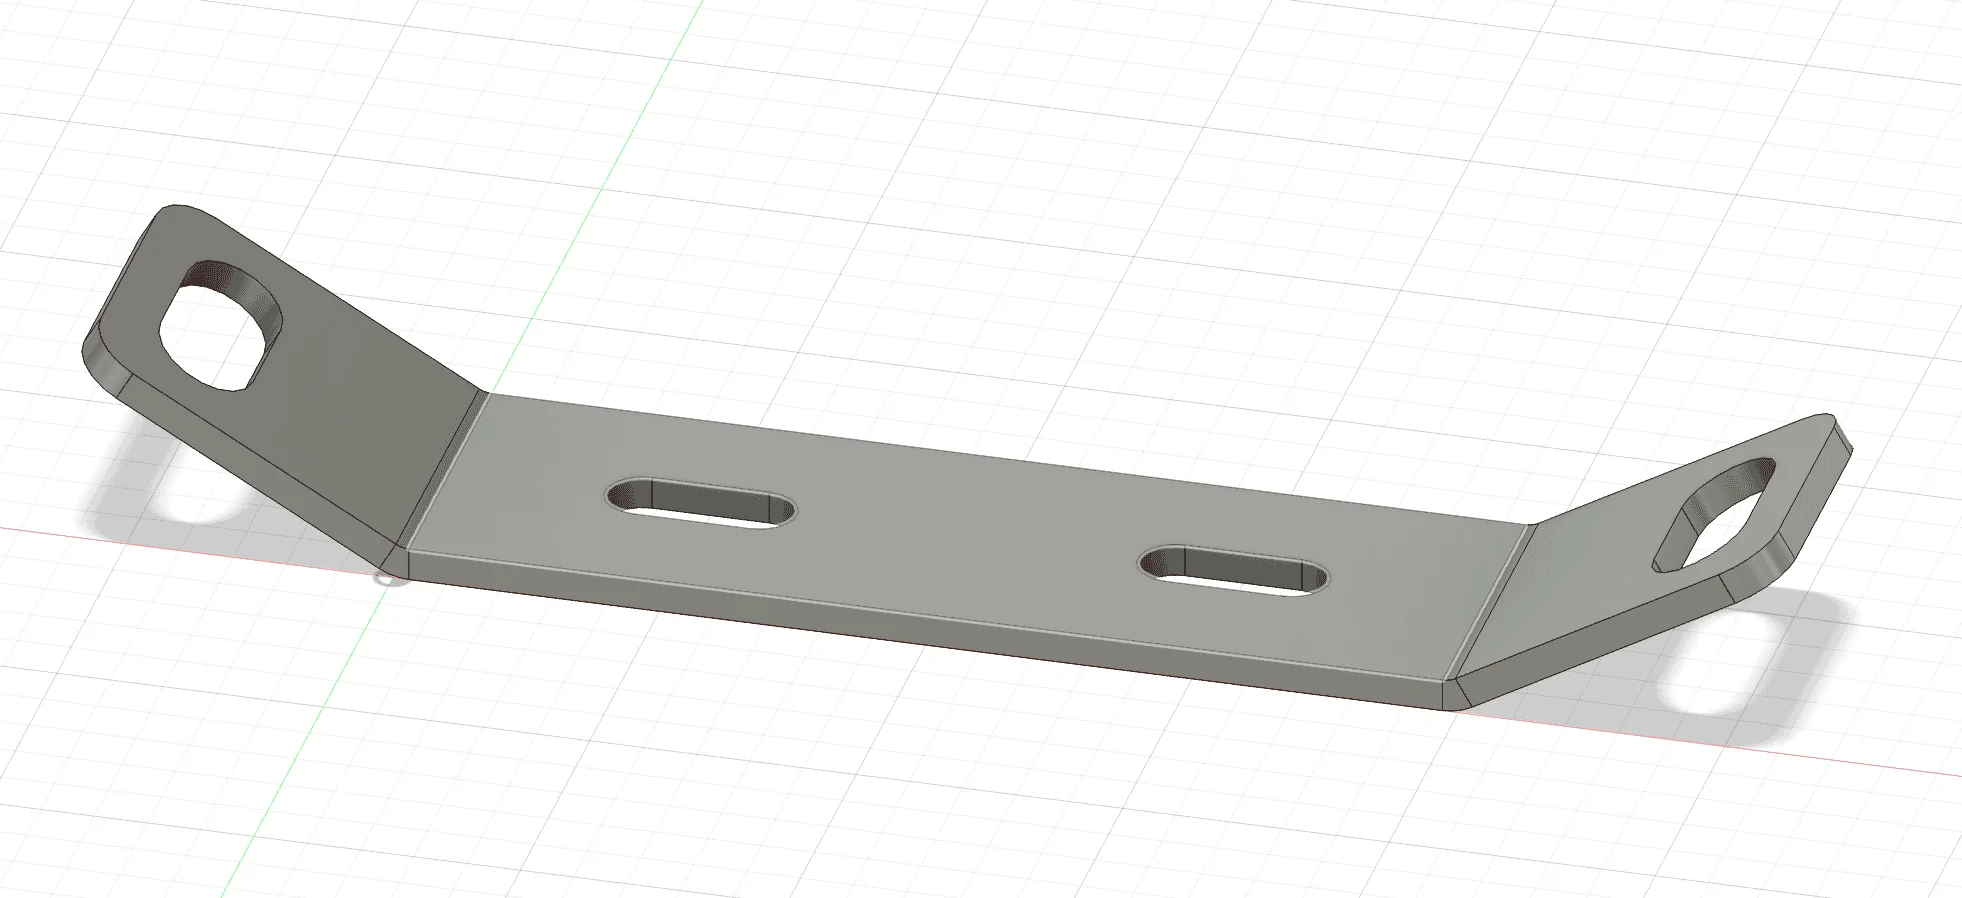
So, I'm not concerned about stability. The flanges are mostly to conveniently hold the container in place while mounting/unmounting it.
This will all be mounted to the molle panel on the driver's side. The mounting holes are optimized for the hole distances and can be moved slightly left and right for individual adjustment. I've made sure that we can also mount it to one of our own door brackets if we ever wanted to.
This was quite an order for aluminum cutting now:
- Bear Container bracket plus strap holder
- Door inside panel for mounting the Redvision display (
shit, I forgot to get the cover for the opening in the GP-Factor panel, need to add this to the order– DONE) - Door inside panel for behind a Last US Bag Half Caddy, to hold insulation in place
- 2x Mounting brackets for between upper two Rhino load bars
- 2x Mounting brackets for between lower two Rhino load bars
- 2x Spacer in case I want to mount upper and lower brackets exactly in line.
They also come in raw aluminum, so we can make corrections if needed and then have it powder coated locally.
On that topic, we saw a local powder coating shop yesterday and talked to the owner – they made us a great price if we bring all parts in one go and have only one color to be applied. Perfect, exactly what I was looking for, since powder coating at the online cut-and-bend-place was outrageously expensive.
I can only recommend talking to local fabrication shops, they are generally super nice to work with!
Sponsored
Last edited: