Blucid
Well-Known Member
- First Name
- Denis
- Joined
- Sep 15, 2020
- Threads
- 4
- Messages
- 112
- Reaction score
- 139
- Location
- Vancouver // Canada
- Website
- teamgf.org
- Vehicle(s)
- 2020 "Bright White" Jeep Rubicon Gladiator
- Build Thread
- Link
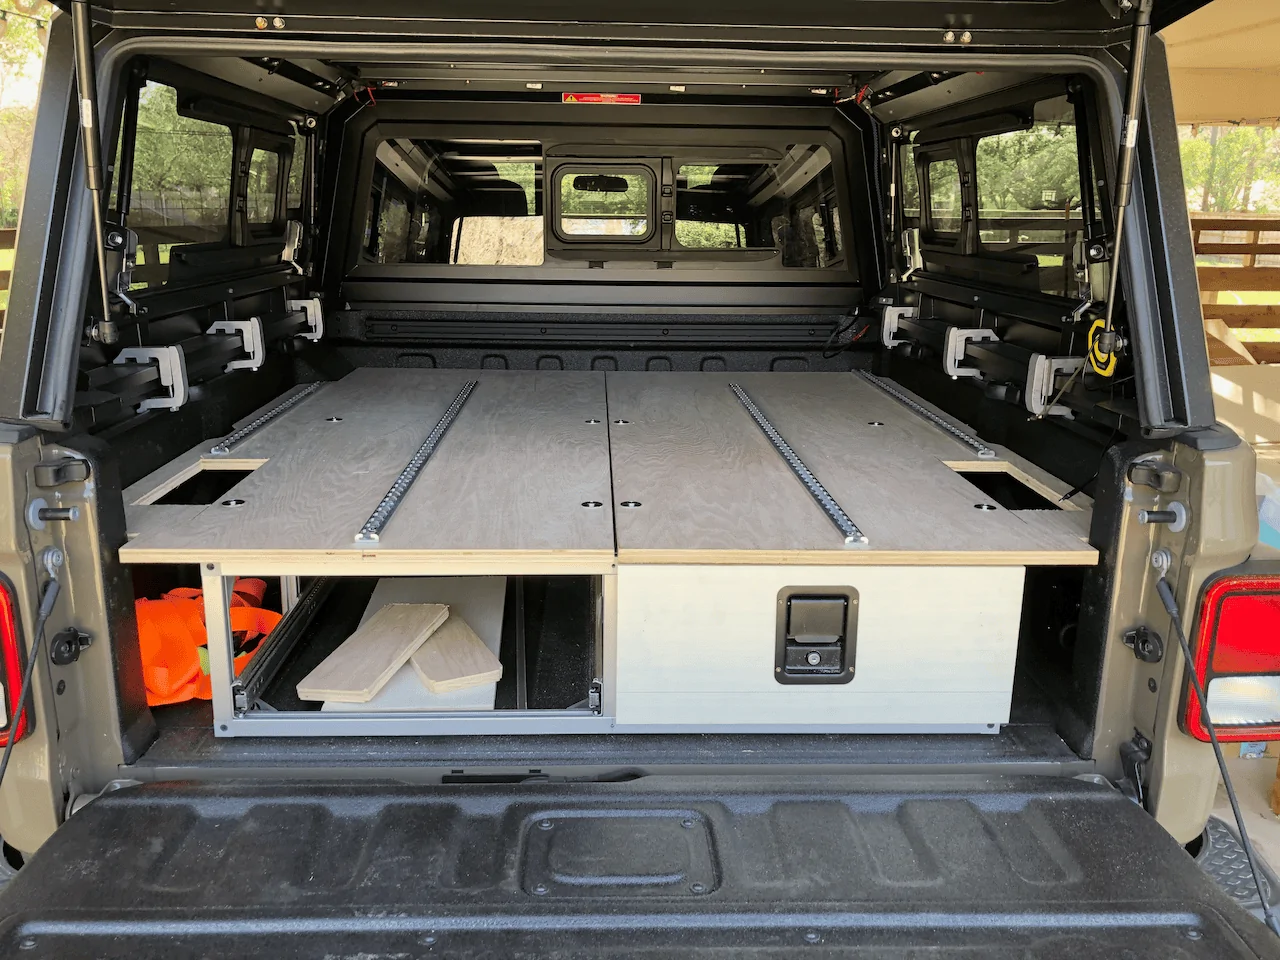
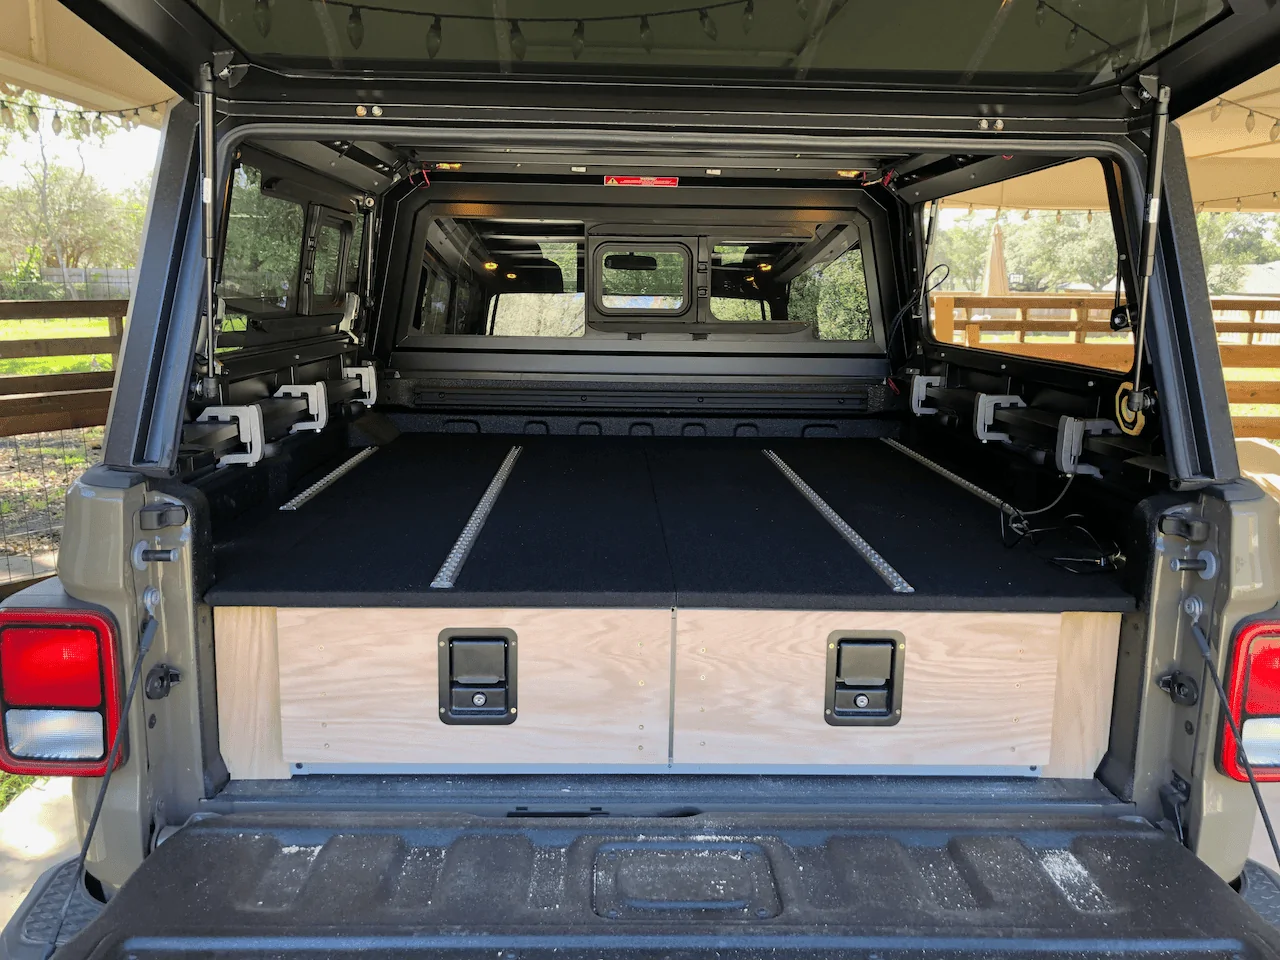
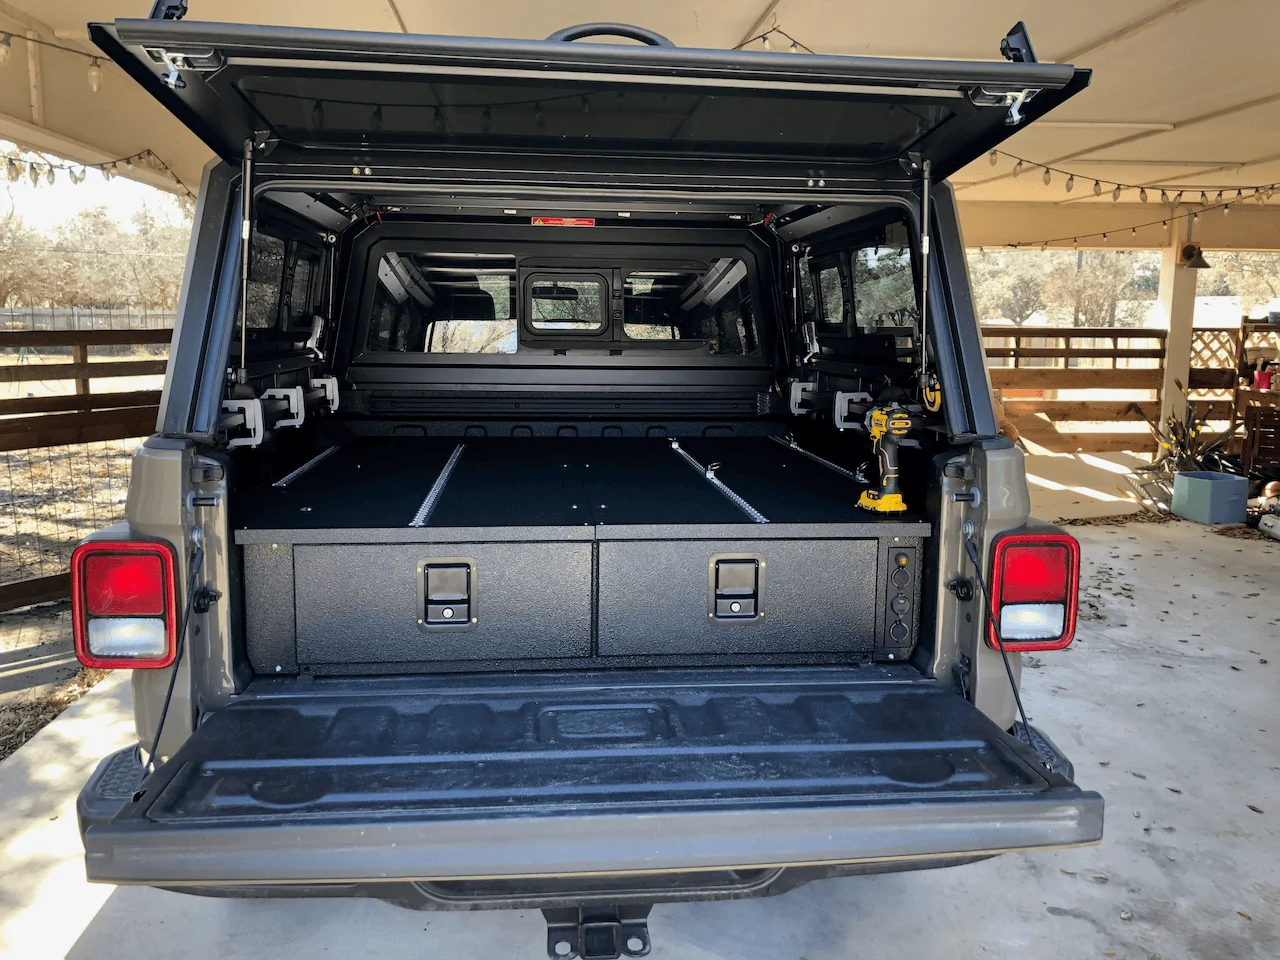
Awesome job, the slides and the finished product looks really great.
Sponsored
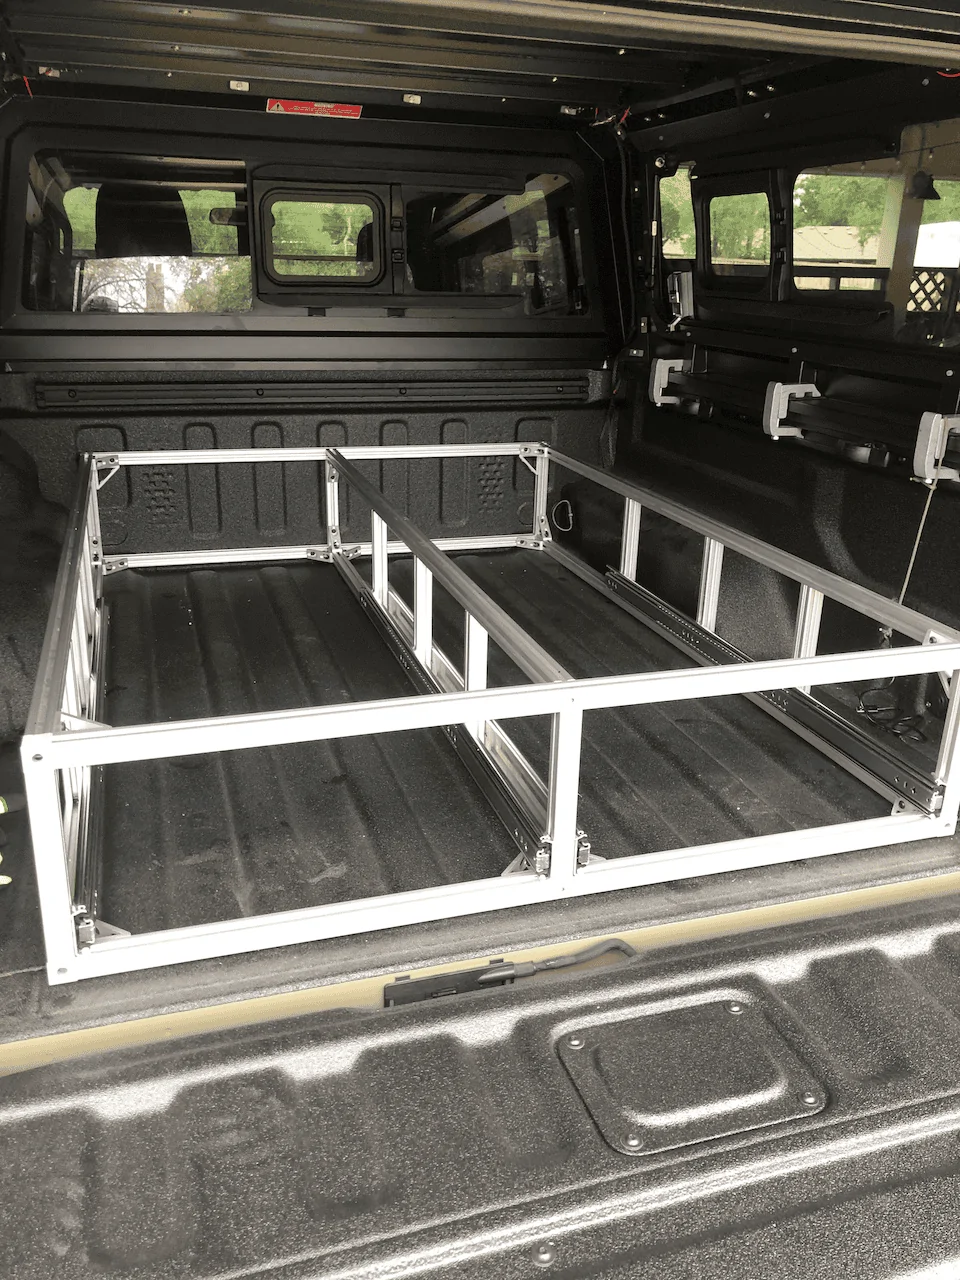
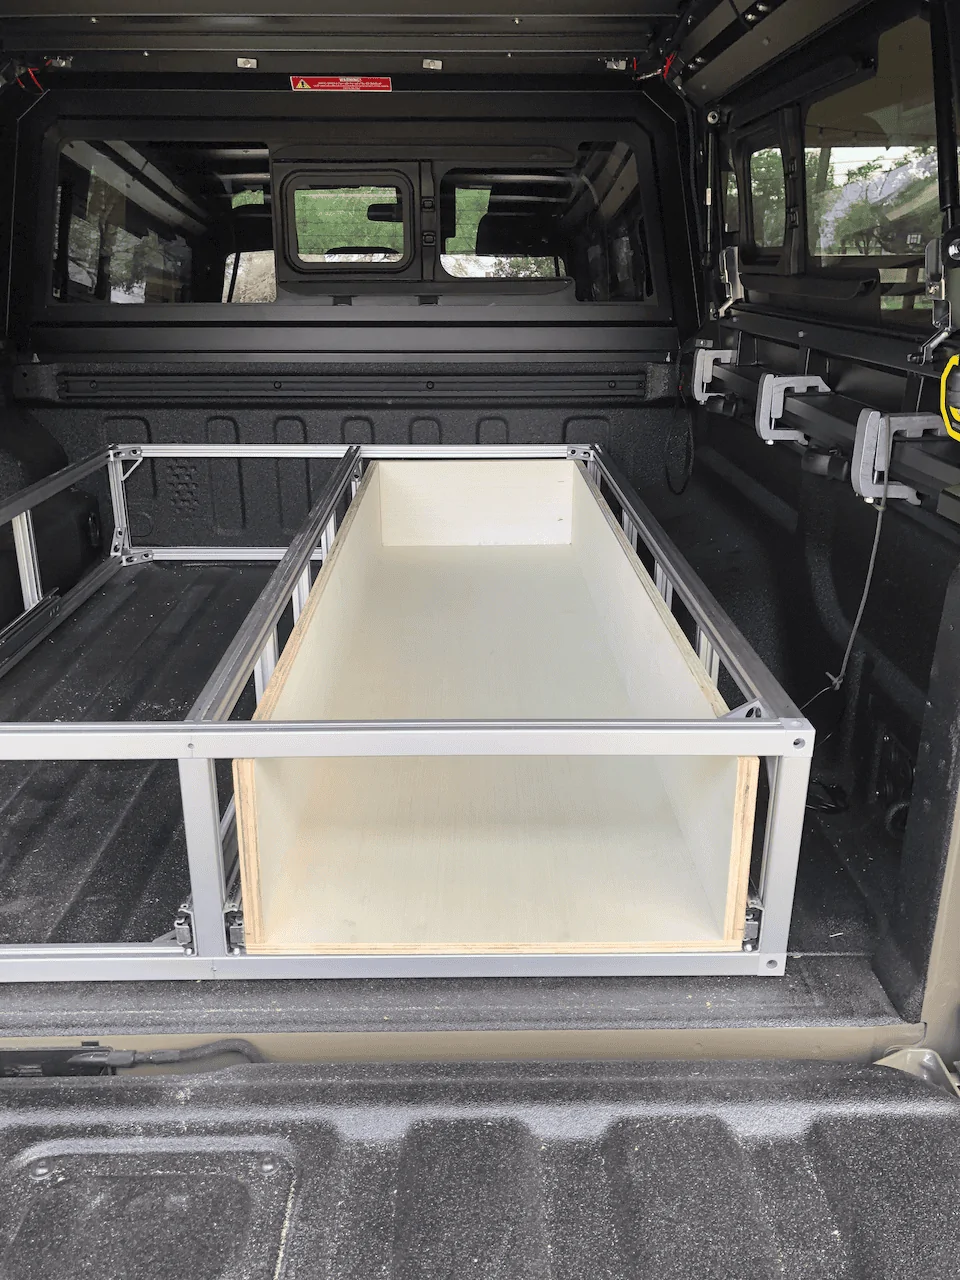
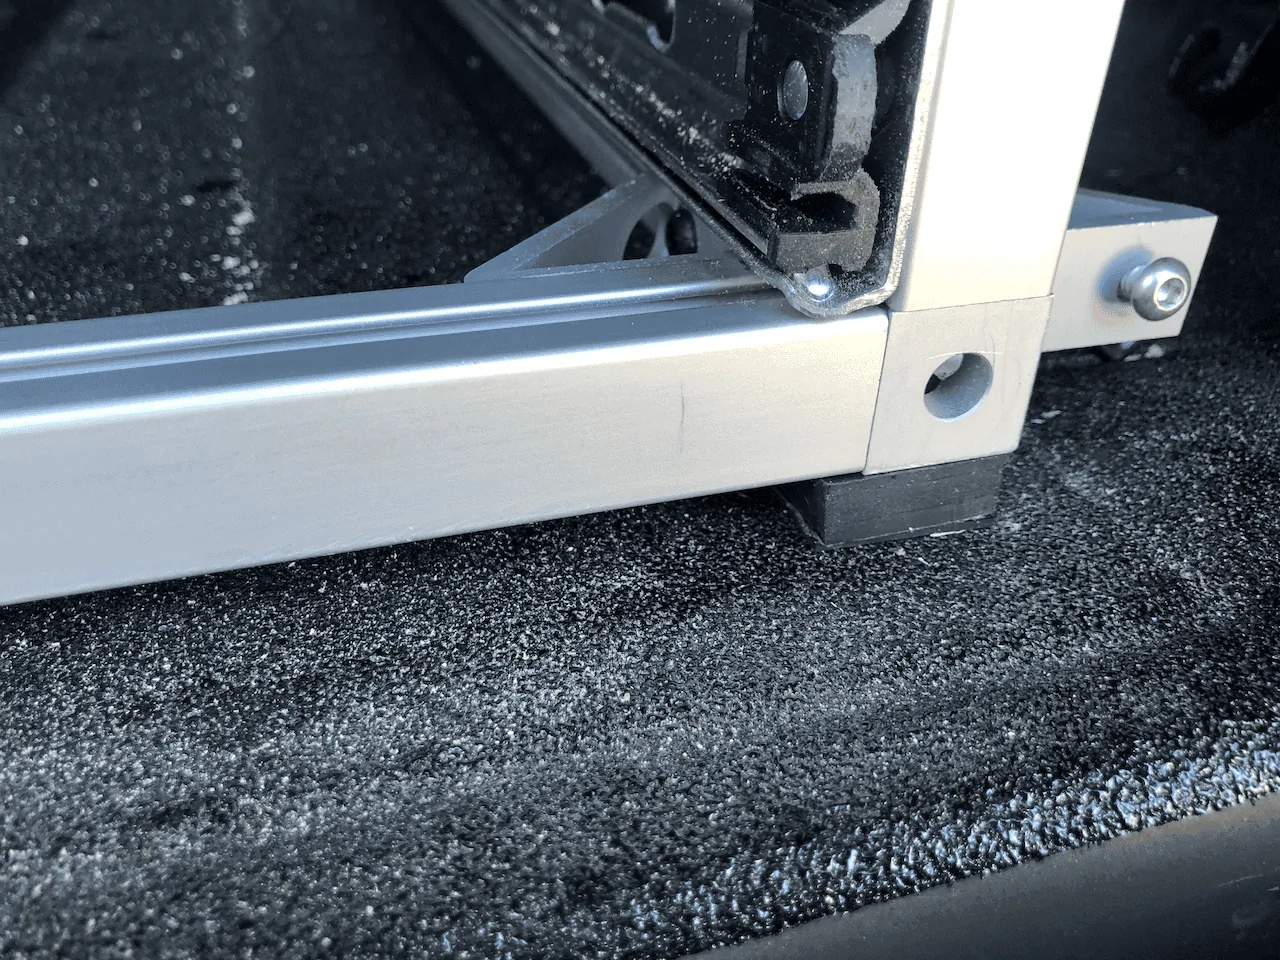
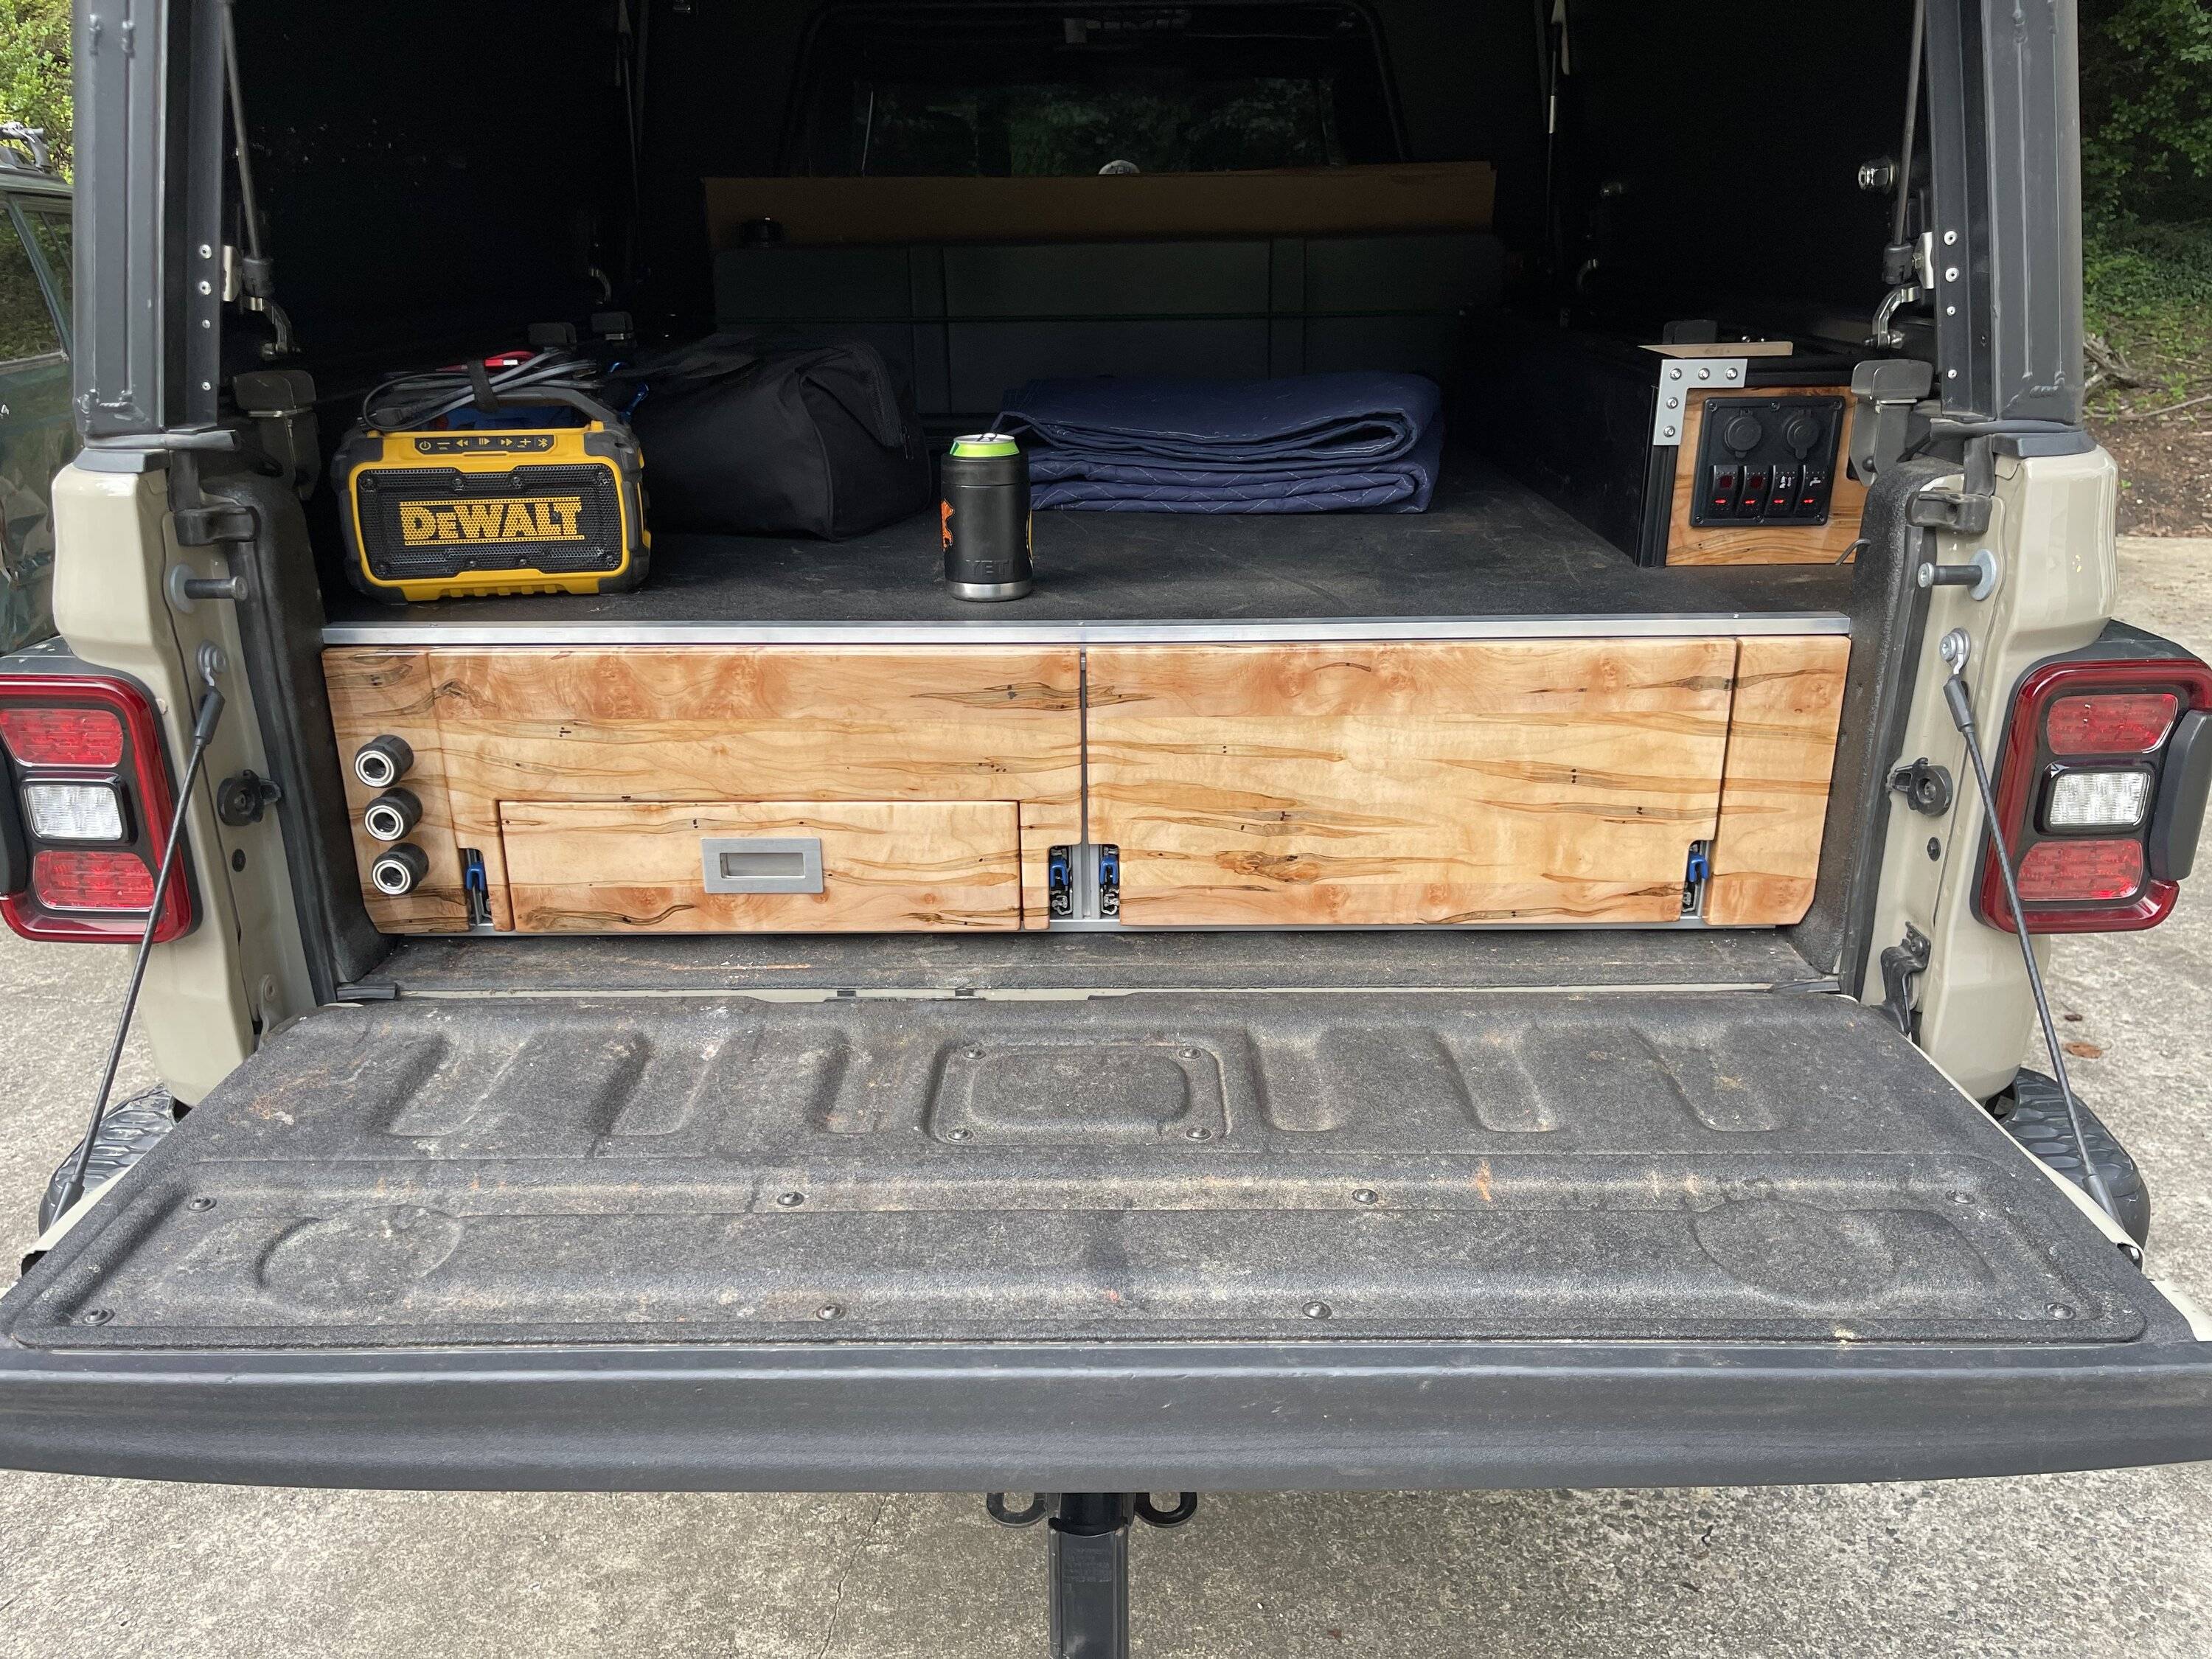
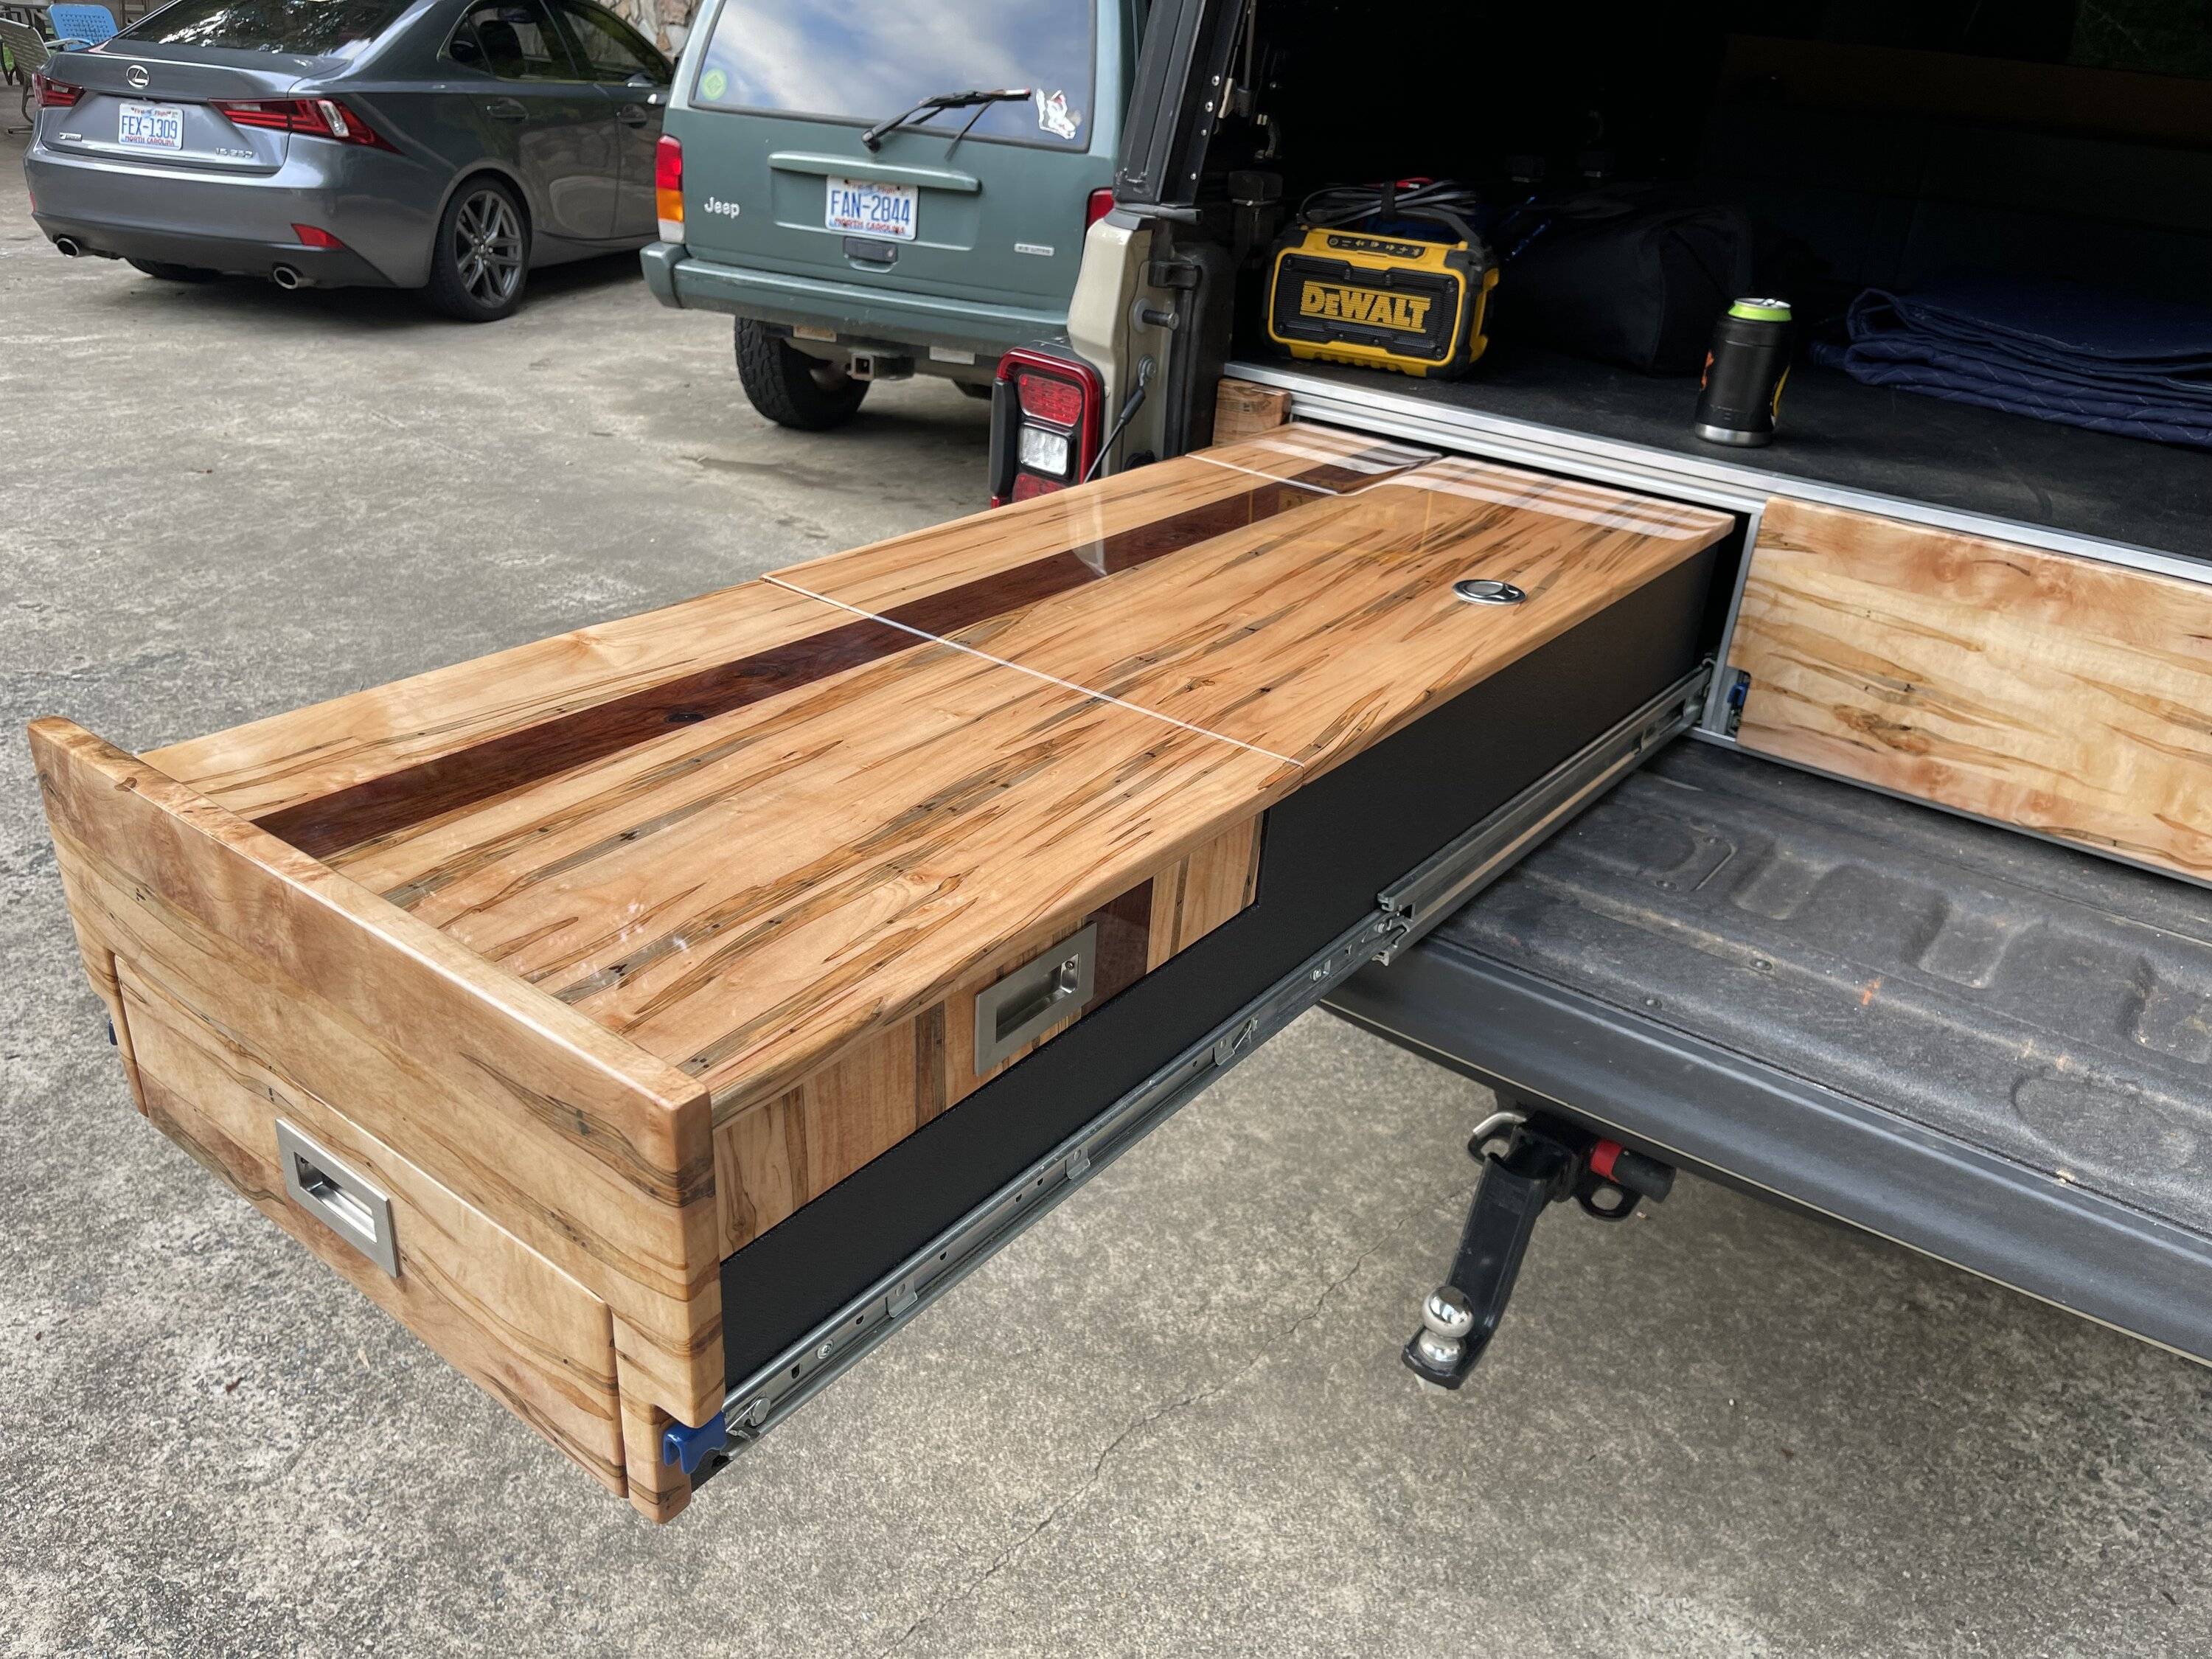
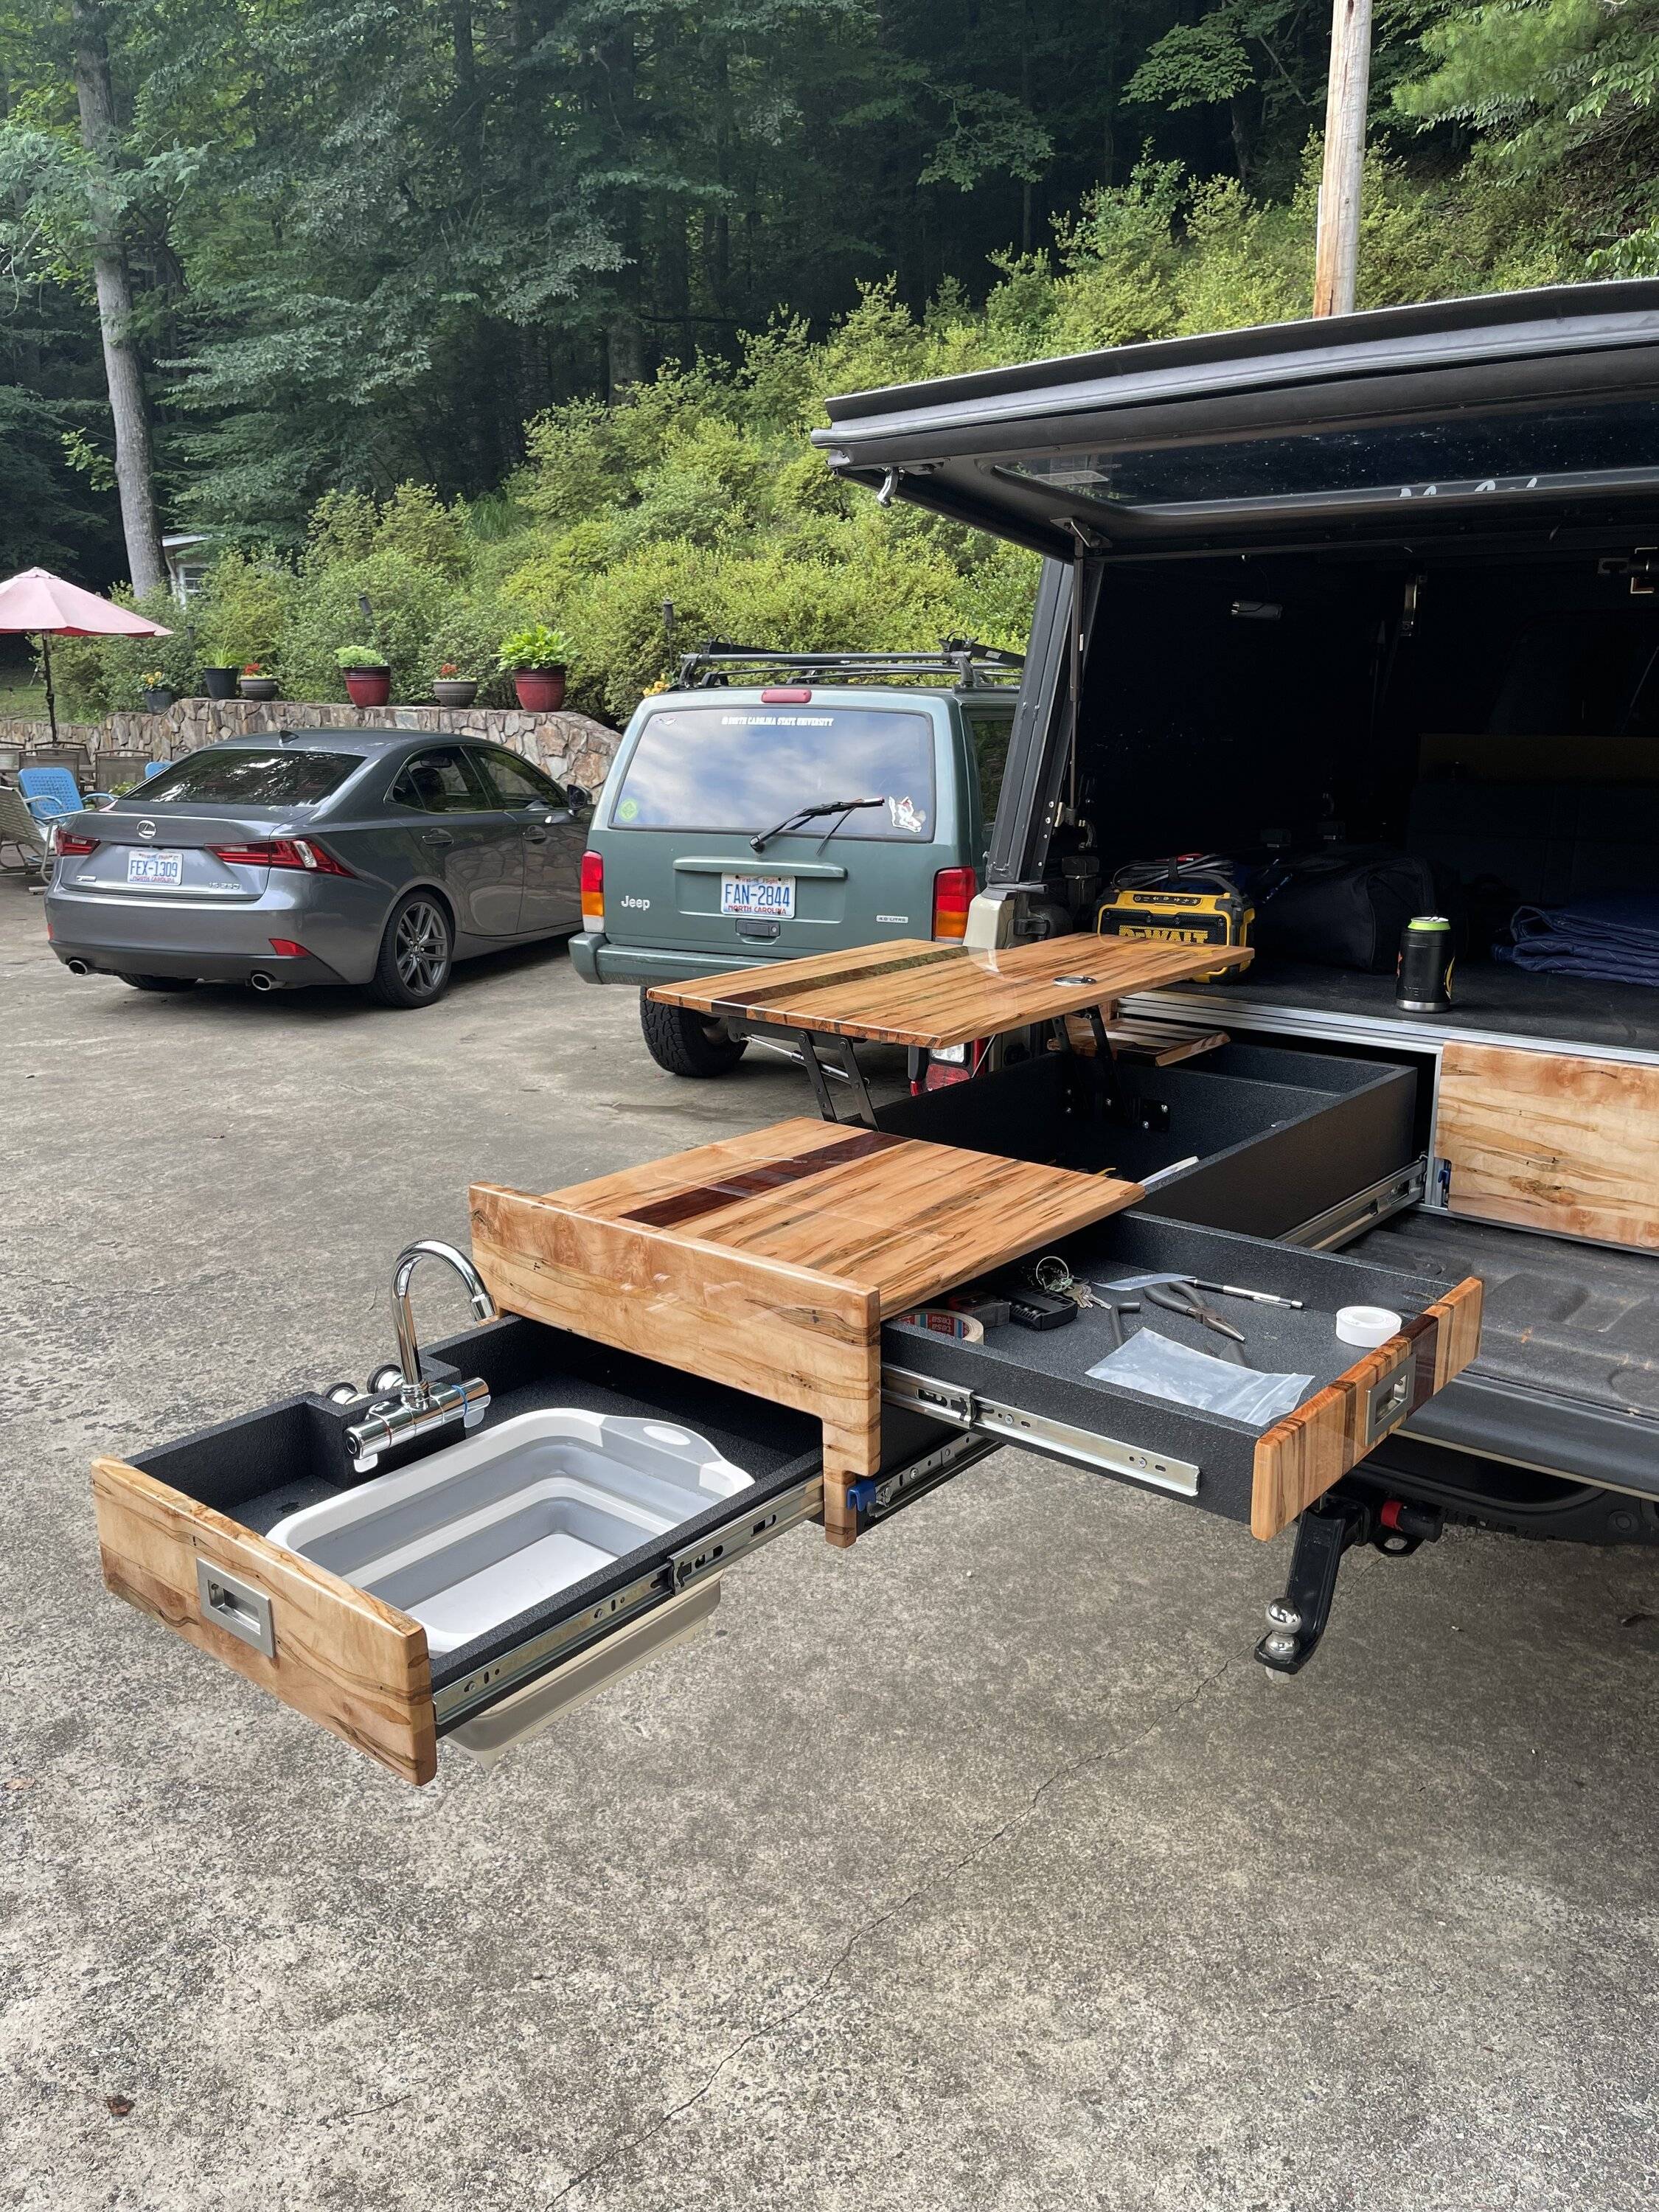
 . Two, I wanted to be able to easily remove the drawers if necessary. Three, I like to do stuff myself
 .
.