ebenenatijr
New Member
- First Name
- Edward
- Joined
- Apr 8, 2026
- Threads
- 1
- Messages
- 1
- Reaction score
- 2
- Location
- New Jersey
- Vehicle(s)
- 2020 Jeep Gladiator
- Thread starter
- #1
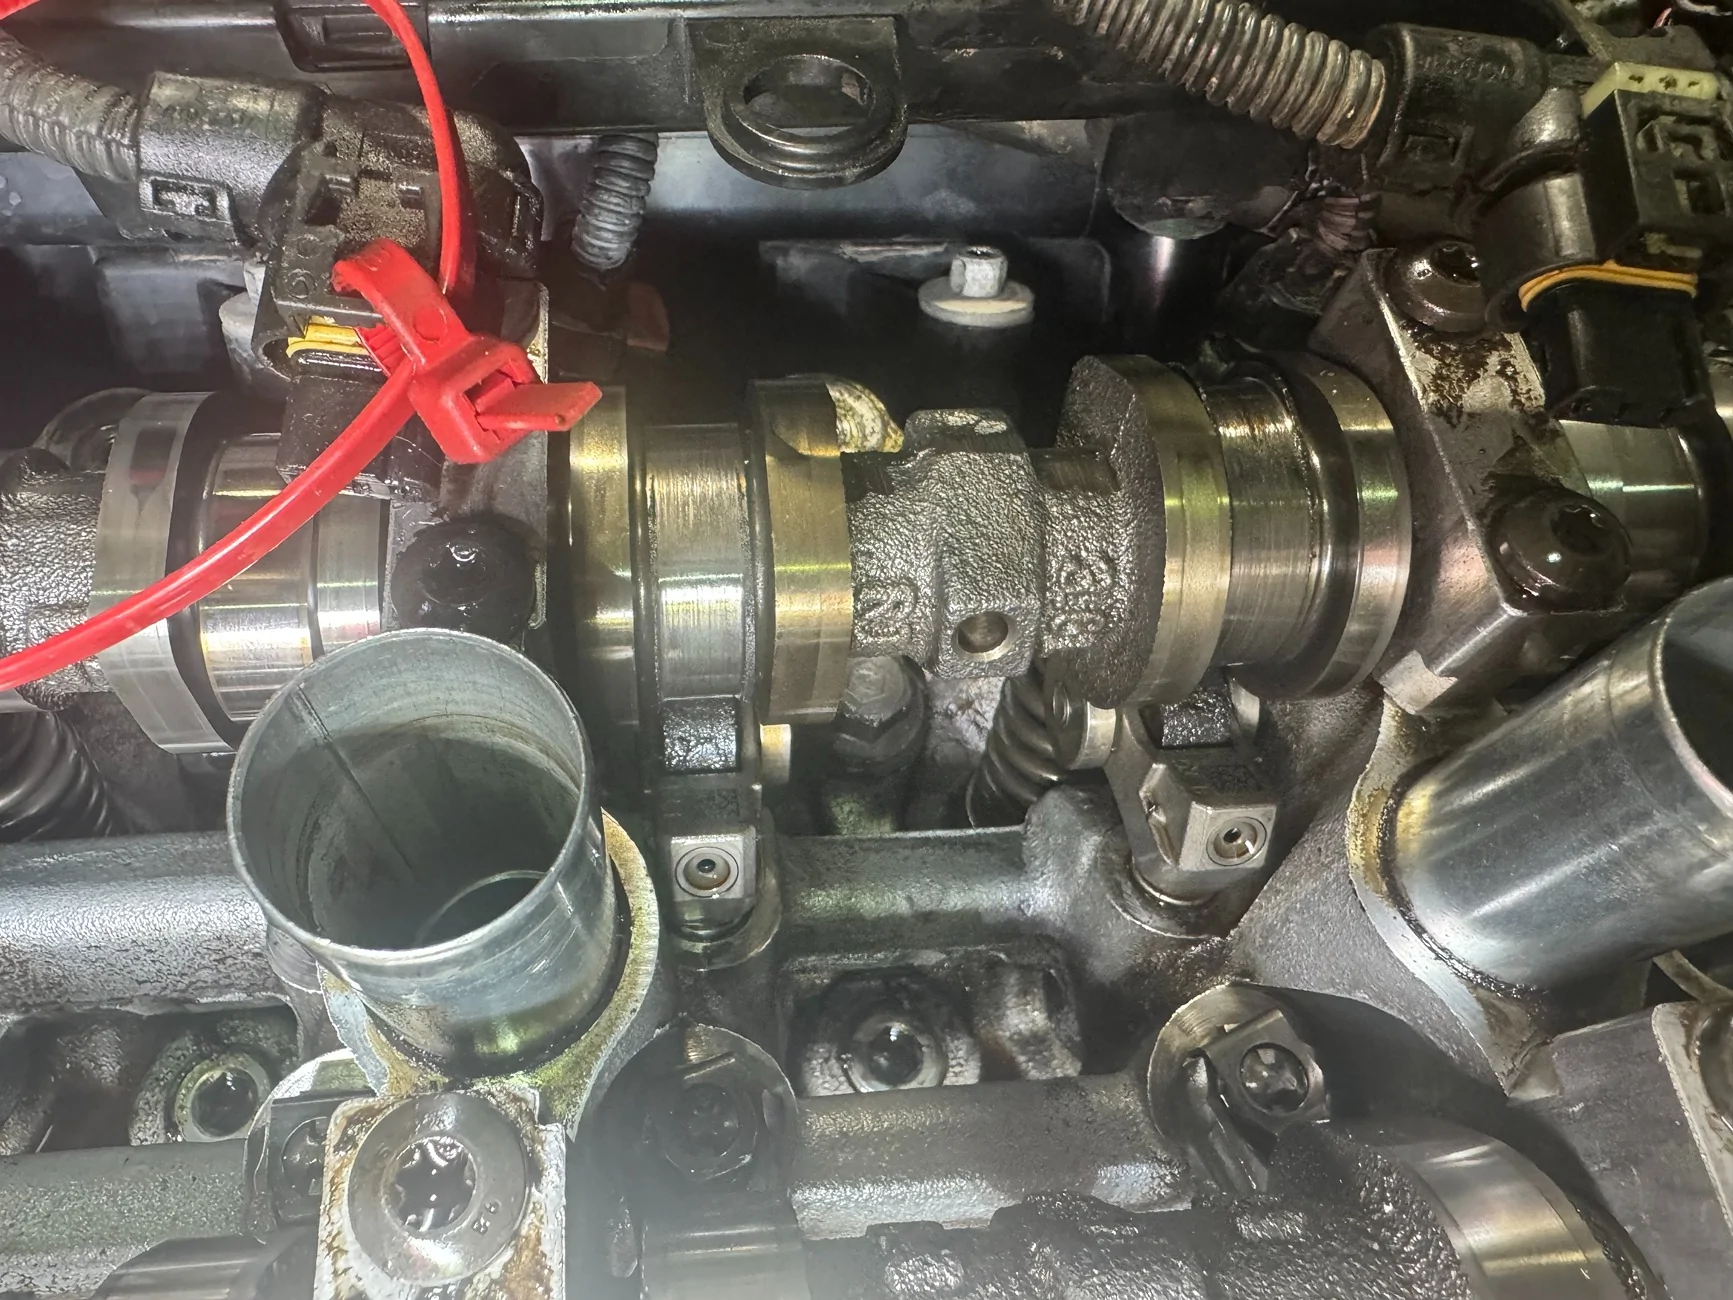
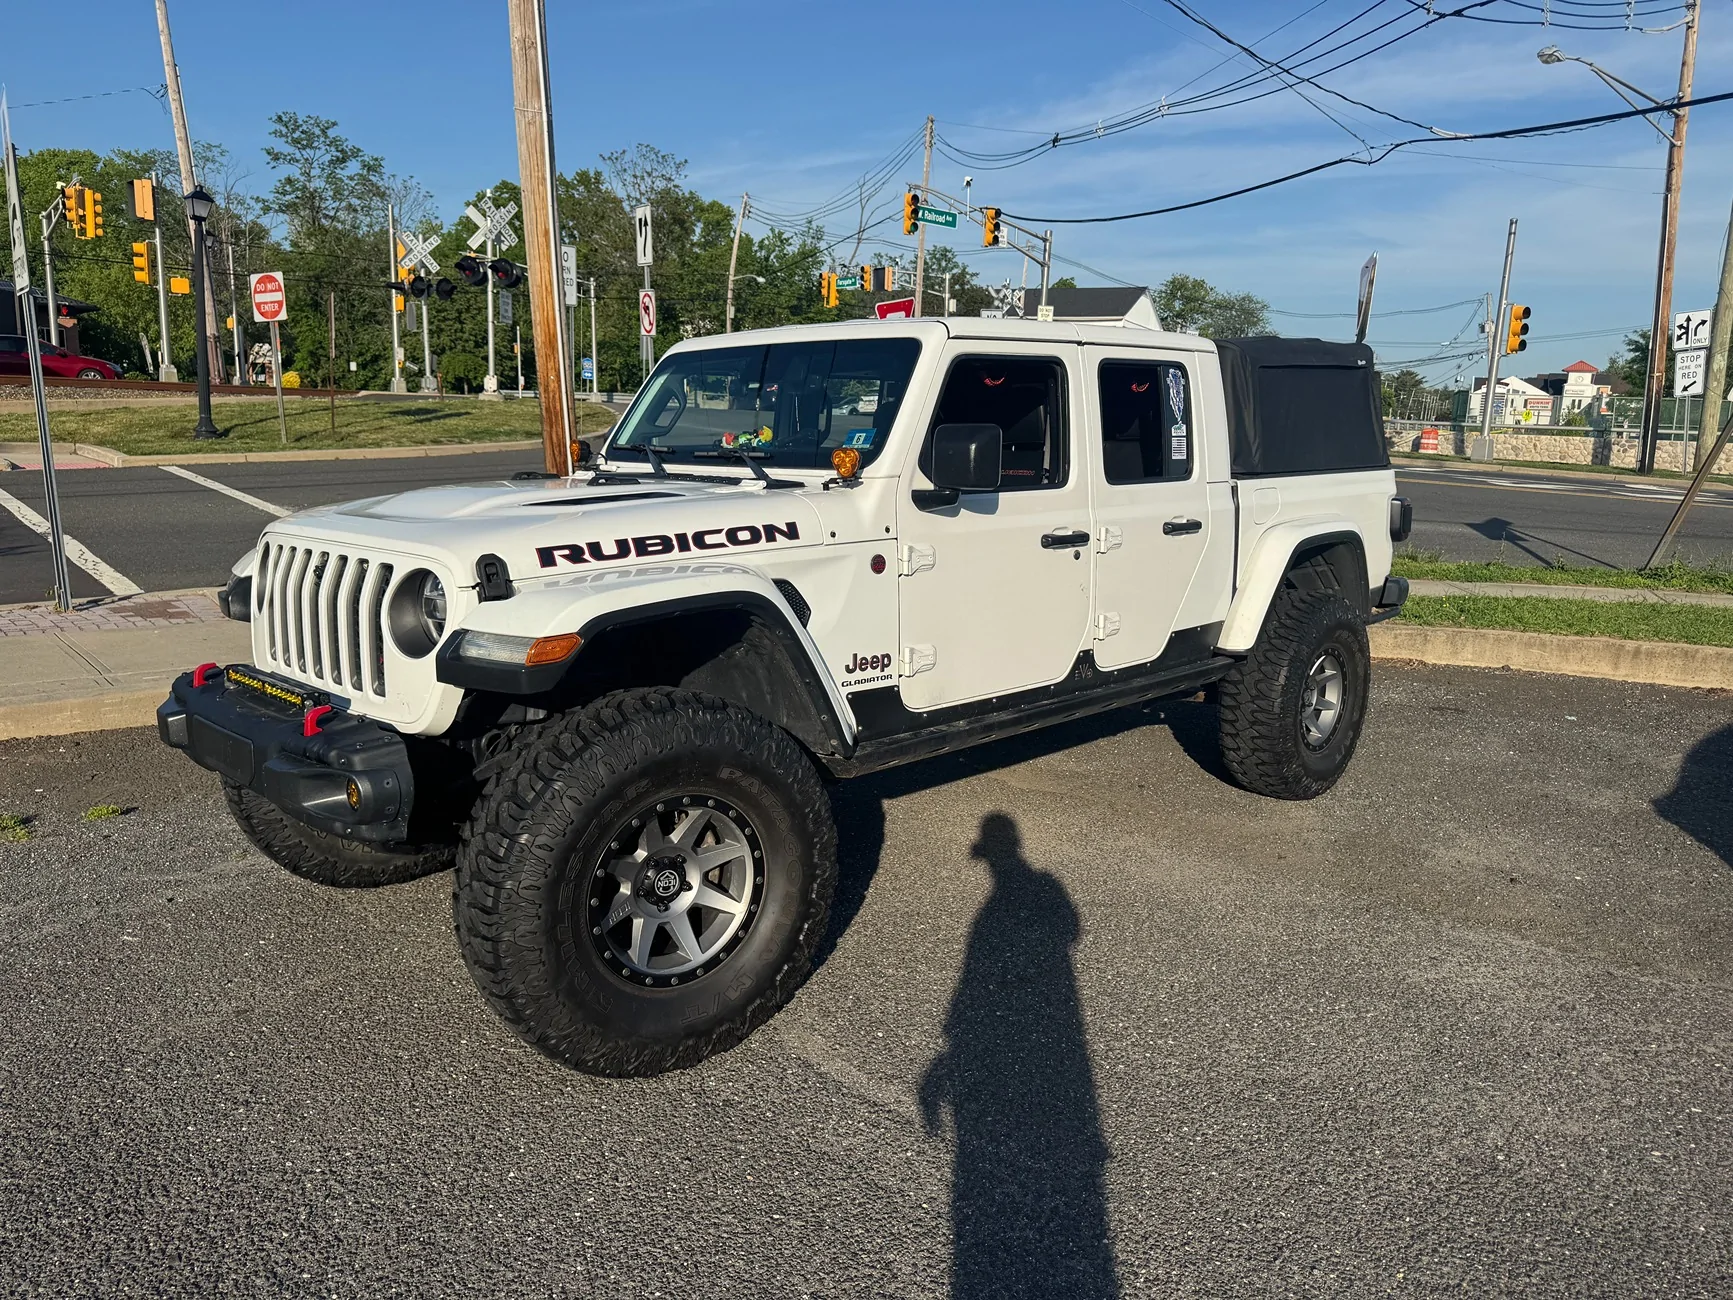
I purchased my 2020 gladiator, Launch Edition Rubicon in June 2025 with around 94,000 miles. In early July Check engine light came on with an engine misfire code assumed it needed plugs and coils. So, I did a tune up along with the oil cooler since I already had the upper intake off. This did not clear the codes. Days later small amounts of white smoke were coming from the exhaust. Leaving a National Night Out car show, the gasket completely blew. Put a bore scope down cylinder 3, full of coolant. Tearing down the engine I also found the right intake cam was worn out on Cylinder 3 & 5.
After much contemplation, I decided to fix it over replacing the motor. I should have listened to those telling me to just replace the motor. Mopar cams were on backorder, so I purchased an aftermarket cam. After reassembly, misfire codes cleared however cam crank misalignment remained. Attempted to diagnose. This lead to opening the valve cover again. Found a crooked tone ring on the new cam. Cam was warrantied but unavailable. So, I received a refund and purchased a Mopar cam. Put that all together along with new phasers and oil control valves. All codes cleared… for two days . Codes came back with vengeance, along with major misfires.
Troubleshooting lead me to potential timing chain issues. Ordered a full timing set. When I disassembled the engine for the 4th time, I found the new cam was already burnt up. One lobe for cylinders 1 & 3 were completely worn out. At this point I was convinced the oil passages were clogged and I waved the white flag and decided to just replace the motor. Timing set was returned minus the BS restocking fee.
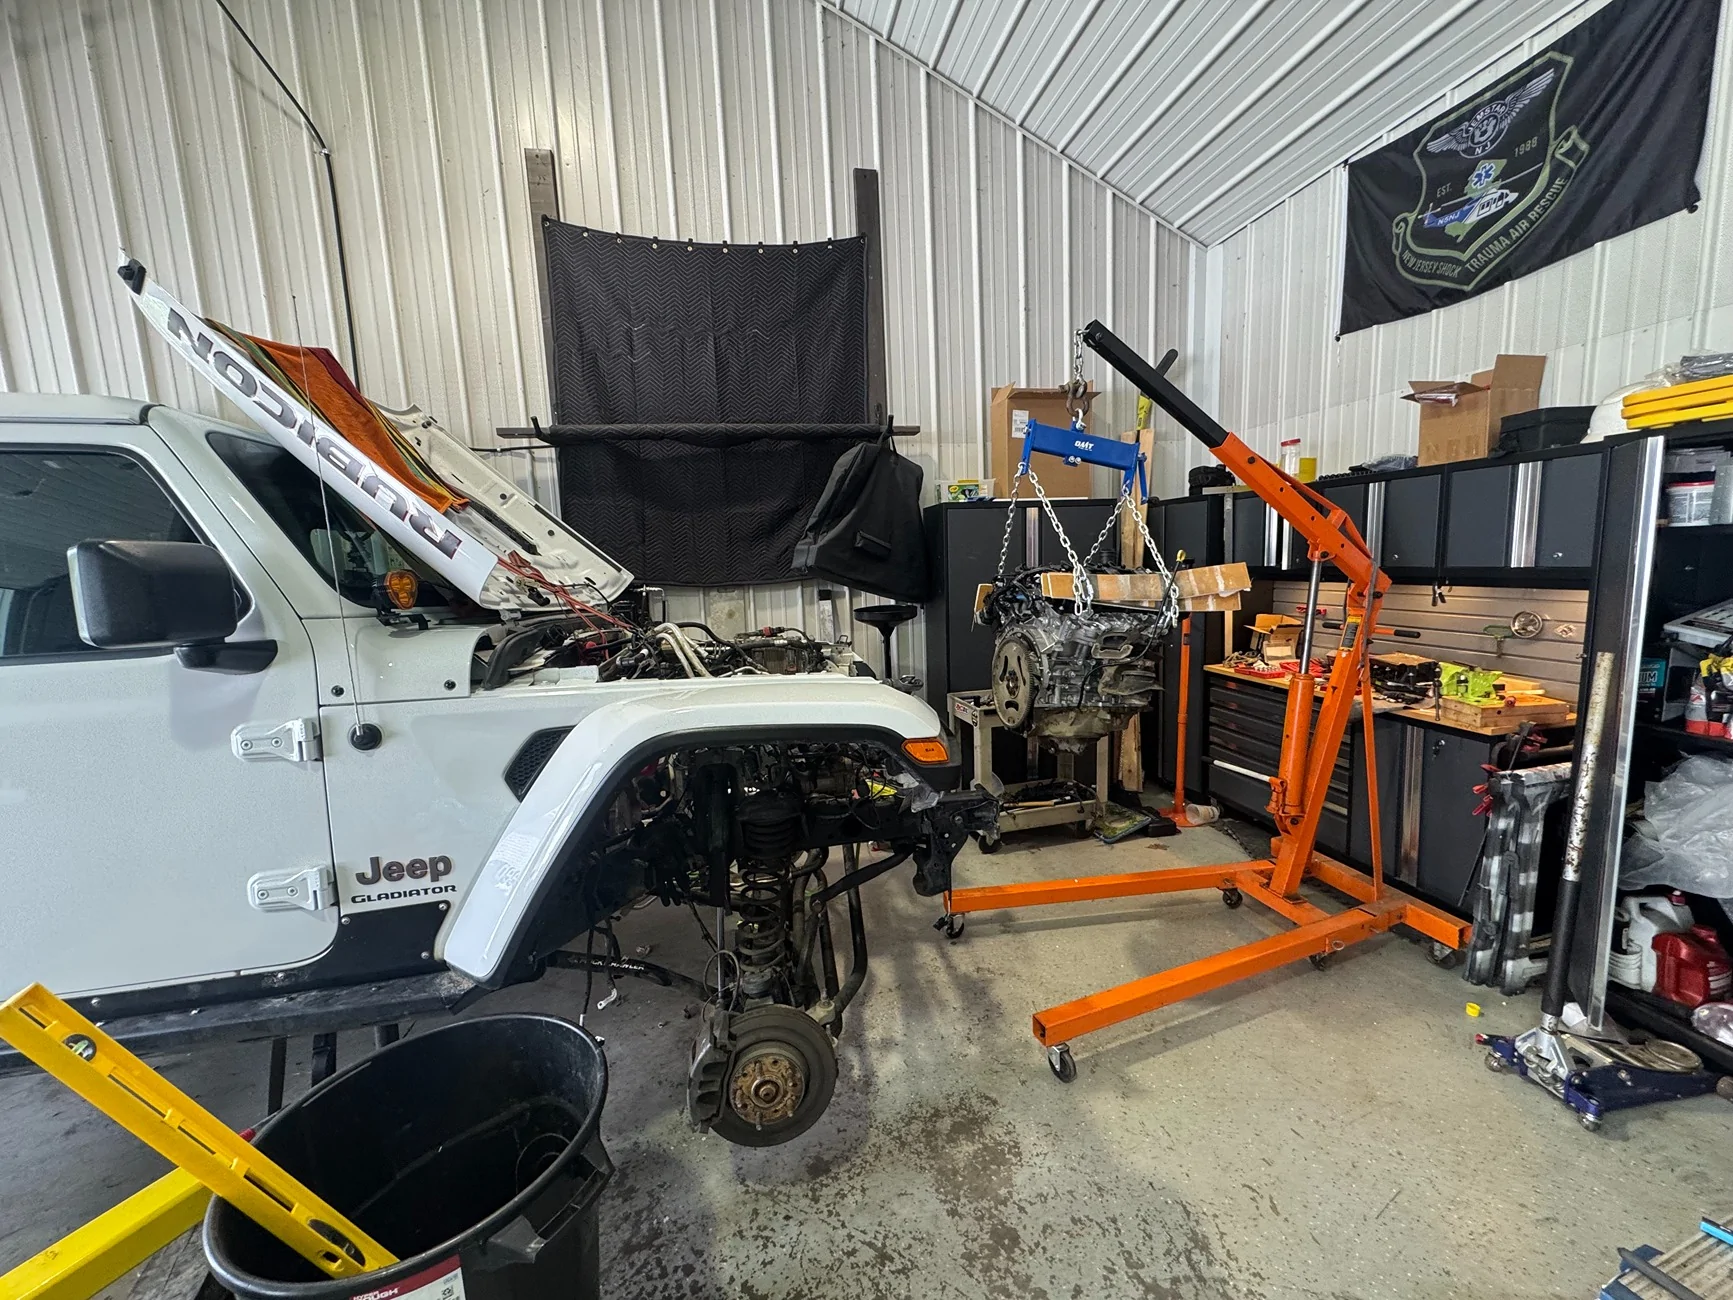
At this point I had already done a lot of research in different options and decided to go with a Fraser ERC remanufactured 3.6. Many people told me to do a Hemi or LS swap. Funny thing they offered their opinion but not their money. The Fraser was about $6600, with extras (more on that later) after core refund. I did all the work myself.
On to the work, like I said I did it all myself, but I took some information and equipment from others. Special thanks to AZ_Adventure_Clicks. His post and side chats were very informative. To my buddy Bill, whether it’s a phone call or equipment as always your there when I need you, thank you.
One of the tips I took from AZ_Adventure_Clicks was to get the Mitchell 1 DIY subscription. This was great gives you step by step what needs to be removed to get the motor out. It also gives you a complete torque spec sheet you can print out and have with you.
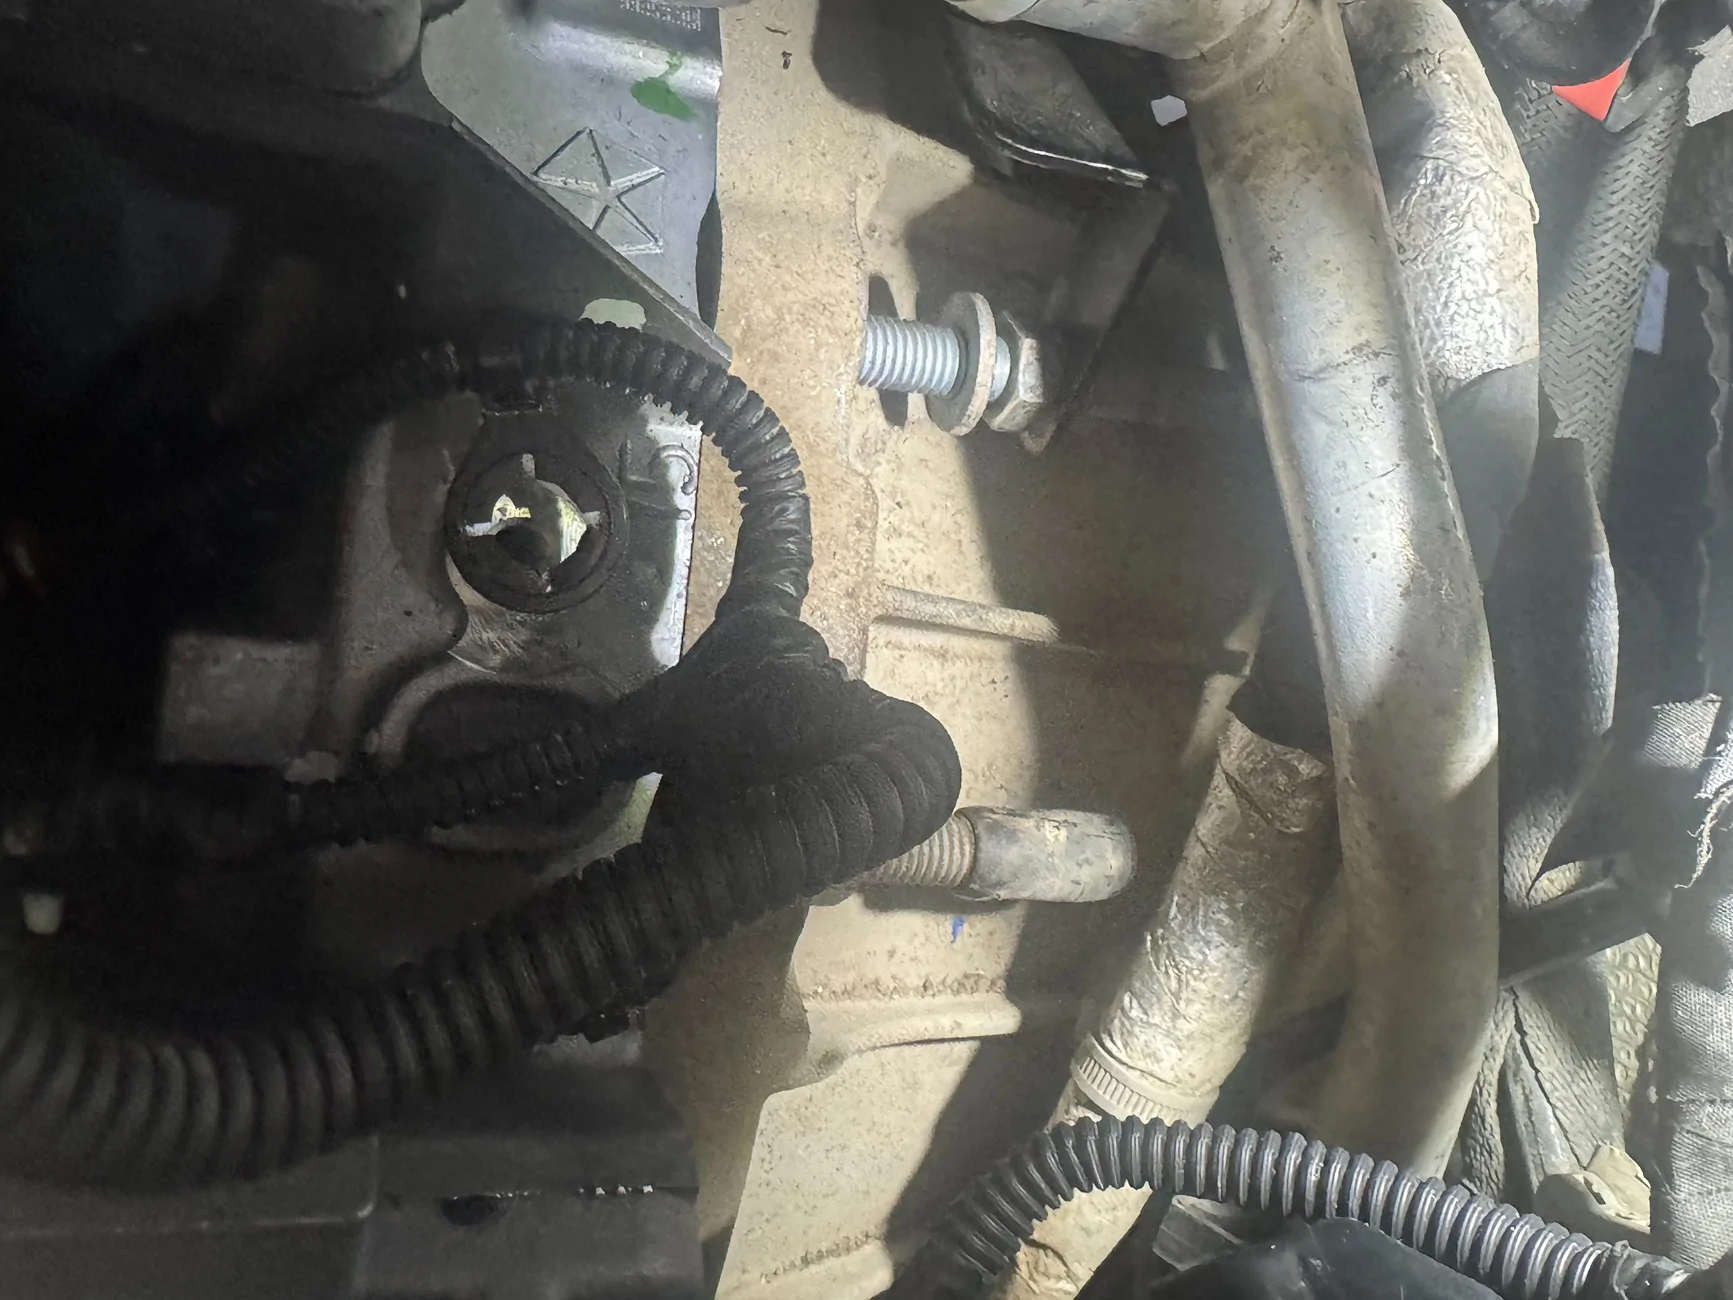
Being this was my 4th time taking it apart, I’ve learned some tricks along the way. I have a lift at my house so that made things a bit easier. I’m on Patagonia 38’, so in the past I used a painter’s platform ladder to work off of. This time I decided to pull the tires to lower it and work from the ground as much as possible. Game changer! Next tip is to pull the front end. Bumper, grill, a radiator assembly. The radiator assembly can be pulled as one with the AC and trans cooler. From there it’s just a matter of pulling parts off. Battery tray and fuse box. I chose to pull the wires off of the z-fuse array and pull the whole fuse tray. The wires are numbers so not hard to reassemble. AZ_Adventure_Clicks post talks about getting to the top 2 bell housing bolts by raising the motor, removing the mounts then lowering the motor to access the bolts. That was my plan until I removed the lower intake and oil cooler. I removed the oil cooler to disconnect the wires below it, not knowing it was its own pigtail harness. In any event that turned out to be a good thing. The top two bell housing bolts are easily accessed from there. I removed all wiring on the motor side leaving it in the vehicle. I also completely removed both cats although I’m not sure I needed to. ***Tip*** the cats sit in a cradle type bracket. Accessing the rear lower bolt is impossible. Remove the top two bolts. Loosen the front lower and use a pry bar to pop it out of the bracket. (You’re welcome). Installing it is just the reverse. Tighten the rear lower, leaving the front loose. Slide it into the bracket, use a block 2x4x2’ of wood to pound the cat into place. Install top two bolts and remember to tighten the front lower bolt.
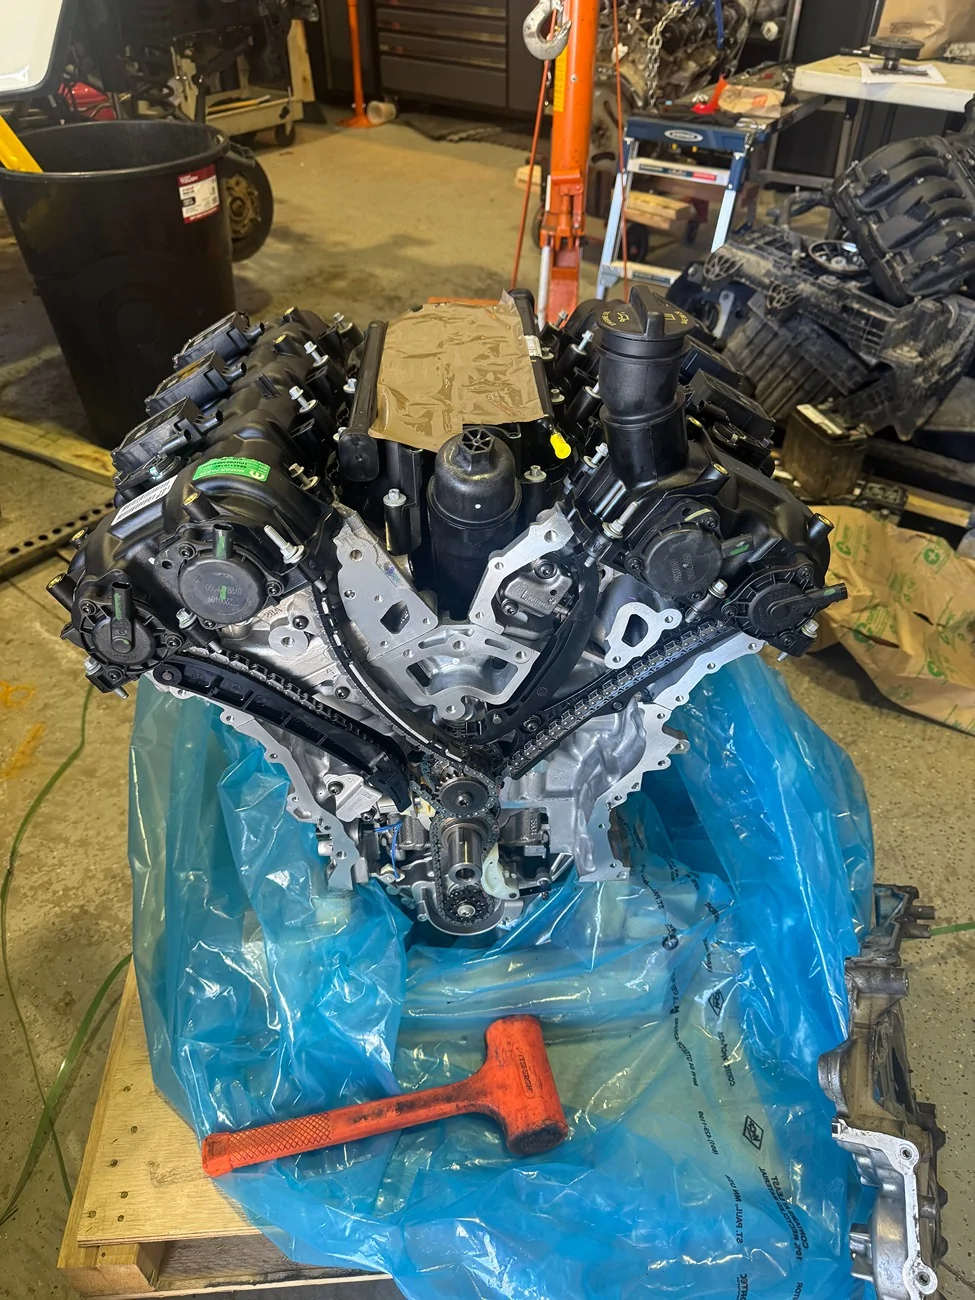
Out with the old, in with the new.
Like I said I opted for a Fraser motor. This was due to the warranty and the fact that they sell and warranty direct to customer and offer residential delivery. 5 years unlimited miles with a 1 year worry free gives some comfort. After speaking with Fraser to get some information I learned the delivery timeframe was only days. Having dealt with lengthy delays in ordering Mopar parts from discount distributers, I wanted to get a clear understanding what I was going to need to order in addition to the motor. I called Fraser back to try and get a list of parts I needed to add to the motor. To my delight I spoke with Peirce in production. He advised me they offer most of the OEM parts through them. Including oil cooler (unfortunately the plastic one), valve covers, plugs, coils, oil pump, lower intake, all VVT components. All this was for a fraction of what I would have paid even from a discount supplier. Best of all it would all already be installed on the motor. So naturally I jumped at this. The installation alone saved hours. The only thing I needed to transfer from the old to the new motor was the oil pick up tube, upper and lower oil pan and flywheel.
I did buy:
flywheel to converter bolts 6x (6511835AA)
flywheel to crank bolts 8x (6503465)
dampener bolt
EGR gasket (4861965AA)
Crossover tube gasket (4893786AA)
Water pump gasket (68214109AB)
Injector / coil harness (68417572AD)
I had extra catalytic converter gaskets from the initial repair.
Prep and installation:
When trying to put the timing cover on I could not get it to line up with the valve cover already installed and torqued. I had to loosen the covers lift them a tiny bit to get the timing cover on. I just used a tube of Permatex in a power gun for the sealant. After the timing cover was installed a resealed and torqued the valve covers. For the oil pan, I temporally attached it with two bolts to protect it during install.
Since I had the motor apart so many times the Coil and injector connectors started to break, losing the white safety clips and 1 needed to be zip tied to stay in place. I decided to replace the harness. Worthy decision. I attached the harness to the new motor while it was on the floor making it simple to make all the connections on the rear on the heads.
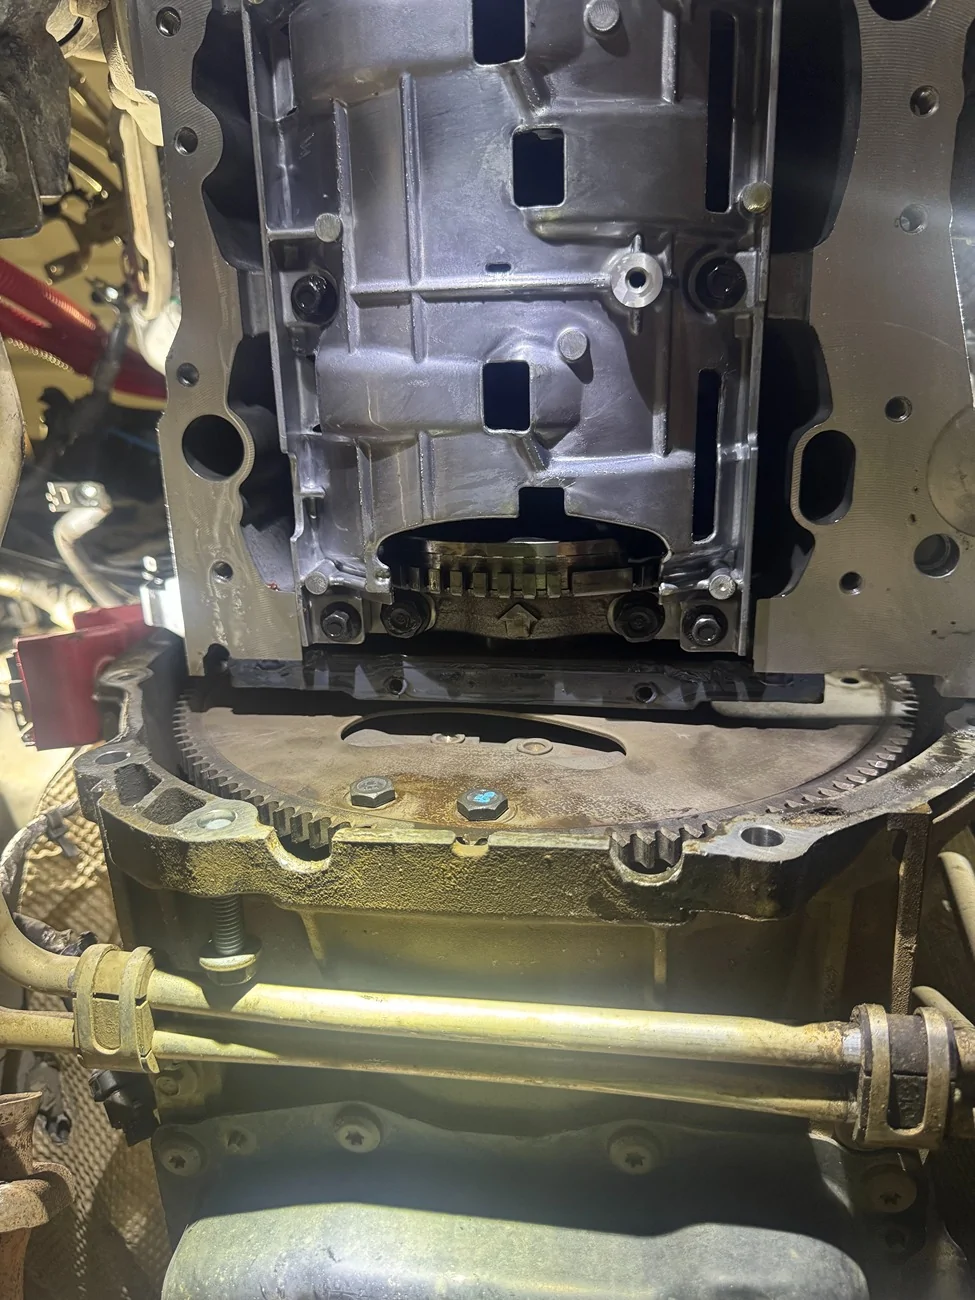
I removed the engine mounts from the frame and loosely attached them to the block. Definitely use an adjustable hoist mount start with the rear angled all the way down. I used a floor jack and block of wood to raise the transmission as high as I could.
My plan for connecting the flywheel to the torque converter was to drop the oil pan and install the bolts from underneath. Planning as AZ_Adventure_Clicks mentioned I positioned the bolt holes in the converter at 6 0’clock.
I lowered the engine into position and could not get the driver’s side to line up. After about an hour I finally realized one of the old alignment pins stayed in the bell housing. The new motor came with alignment pins on both sides. Pulled the motor out and knocked the old pin out. Motor went back in and lined up great. Problem was at this point the torque converter moved and the bolts did not line up, so had to pull the motor back about a half an inch so I can rotate the flywheel apart from the converter. Holes lined back up and bolted. From there it was just reattaching the parts.
Added the Fraser break in fluid and oil, coolant. Held the gas peddle to the floor for one cycle to move the oil. Thankfully Jeep started on first try, no codes.
Hope this helps someone.


After much contemplation, I decided to fix it over replacing the motor. I should have listened to those telling me to just replace the motor. Mopar cams were on backorder, so I purchased an aftermarket cam. After reassembly, misfire codes cleared however cam crank misalignment remained. Attempted to diagnose. This lead to opening the valve cover again. Found a crooked tone ring on the new cam. Cam was warrantied but unavailable. So, I received a refund and purchased a Mopar cam. Put that all together along with new phasers and oil control valves. All codes cleared… for two days
. Codes came back with vengeance, along with major misfires.Troubleshooting lead me to potential timing chain issues. Ordered a full timing set. When I disassembled the engine for the 4th time, I found the new cam was already burnt up. One lobe for cylinders 1 & 3 were completely worn out. At this point I was convinced the oil passages were clogged and I waved the white flag and decided to just replace the motor. Timing set was returned minus the BS restocking fee.
At this point I had already done a lot of research in different options and decided to go with a Fraser ERC remanufactured 3.6. Many people told me to do a Hemi or LS swap. Funny thing they offered their opinion but not their money. The Fraser was about $6600, with extras (more on that later) after core refund. I did all the work myself.
On to the work, like I said I did it all myself, but I took some information and equipment from others. Special thanks to AZ_Adventure_Clicks. His post and side chats were very informative. To my buddy Bill, whether it’s a phone call or equipment as always your there when I need you, thank you.
One of the tips I took from AZ_Adventure_Clicks was to get the Mitchell 1 DIY subscription. This was great gives you step by step what needs to be removed to get the motor out. It also gives you a complete torque spec sheet you can print out and have with you.
Being this was my 4th time taking it apart, I’ve learned some tricks along the way. I have a lift at my house so that made things a bit easier. I’m on Patagonia 38’, so in the past I used a painter’s platform ladder to work off of. This time I decided to pull the tires to lower it and work from the ground as much as possible. Game changer! Next tip is to pull the front end. Bumper, grill, a radiator assembly. The radiator assembly can be pulled as one with the AC and trans cooler. From there it’s just a matter of pulling parts off. Battery tray and fuse box. I chose to pull the wires off of the z-fuse array and pull the whole fuse tray. The wires are numbers so not hard to reassemble. AZ_Adventure_Clicks post talks about getting to the top 2 bell housing bolts by raising the motor, removing the mounts then lowering the motor to access the bolts. That was my plan until I removed the lower intake and oil cooler. I removed the oil cooler to disconnect the wires below it, not knowing it was its own pigtail harness. In any event that turned out to be a good thing. The top two bell housing bolts are easily accessed from there. I removed all wiring on the motor side leaving it in the vehicle. I also completely removed both cats although I’m not sure I needed to. ***Tip*** the cats sit in a cradle type bracket. Accessing the rear lower bolt is impossible. Remove the top two bolts. Loosen the front lower and use a pry bar to pop it out of the bracket. (You’re welcome). Installing it is just the reverse. Tighten the rear lower, leaving the front loose. Slide it into the bracket, use a block 2x4x2’ of wood to pound the cat into place. Install top two bolts and remember to tighten the front lower bolt.
Out with the old, in with the new.
Like I said I opted for a Fraser motor. This was due to the warranty and the fact that they sell and warranty direct to customer and offer residential delivery. 5 years unlimited miles with a 1 year worry free gives some comfort. After speaking with Fraser to get some information I learned the delivery timeframe was only days. Having dealt with lengthy delays in ordering Mopar parts from discount distributers, I wanted to get a clear understanding what I was going to need to order in addition to the motor. I called Fraser back to try and get a list of parts I needed to add to the motor. To my delight I spoke with Peirce in production. He advised me they offer most of the OEM parts through them. Including oil cooler (unfortunately the plastic one), valve covers, plugs, coils, oil pump, lower intake, all VVT components. All this was for a fraction of what I would have paid even from a discount supplier. Best of all it would all already be installed on the motor. So naturally I jumped at this. The installation alone saved hours. The only thing I needed to transfer from the old to the new motor was the oil pick up tube, upper and lower oil pan and flywheel.
I did buy:
flywheel to converter bolts 6x (6511835AA)
flywheel to crank bolts 8x (6503465)
dampener bolt
EGR gasket (4861965AA)
Crossover tube gasket (4893786AA)
Water pump gasket (68214109AB)
Injector / coil harness (68417572AD)
I had extra catalytic converter gaskets from the initial repair.
Prep and installation:
When trying to put the timing cover on I could not get it to line up with the valve cover already installed and torqued. I had to loosen the covers lift them a tiny bit to get the timing cover on. I just used a tube of Permatex in a power gun for the sealant. After the timing cover was installed a resealed and torqued the valve covers. For the oil pan, I temporally attached it with two bolts to protect it during install.
Since I had the motor apart so many times the Coil and injector connectors started to break, losing the white safety clips and 1 needed to be zip tied to stay in place. I decided to replace the harness. Worthy decision. I attached the harness to the new motor while it was on the floor making it simple to make all the connections on the rear on the heads.
I removed the engine mounts from the frame and loosely attached them to the block. Definitely use an adjustable hoist mount start with the rear angled all the way down. I used a floor jack and block of wood to raise the transmission as high as I could.
My plan for connecting the flywheel to the torque converter was to drop the oil pan and install the bolts from underneath. Planning as AZ_Adventure_Clicks mentioned I positioned the bolt holes in the converter at 6 0’clock.
I lowered the engine into position and could not get the driver’s side to line up. After about an hour I finally realized one of the old alignment pins stayed in the bell housing. The new motor came with alignment pins on both sides. Pulled the motor out and knocked the old pin out. Motor went back in and lined up great. Problem was at this point the torque converter moved and the bolts did not line up, so had to pull the motor back about a half an inch so I can rotate the flywheel apart from the converter. Holes lined back up and bolted. From there it was just reattaching the parts.
Added the Fraser break in fluid and oil, coolant. Held the gas peddle to the floor for one cycle to move the oil. Thankfully Jeep started on first try, no codes.
Hope this helps someone.
Sponsored