MrFahrenheit
Well-Known Member
- Thread starter
- #1
After having to go through the process of partially disassembling the rear seat backs to remove the outboard rear headrests (they interfered with my kid's car seats) I figured they had to be a better way. Click this Link to goto the post for how to remove outboard rear headrests. Looking at some part diagrams and comparing the non locking center headrest to the locking outboard ones I decided to try to use the quick removable center headrest sleeves in the outboard locations. I am happy with the results and now I can put my outboard headrests back in when the car seats are out and adults need to sit back there and remove them quickly and easily when the car seats need to go back on.
New Headrest Sleeve:
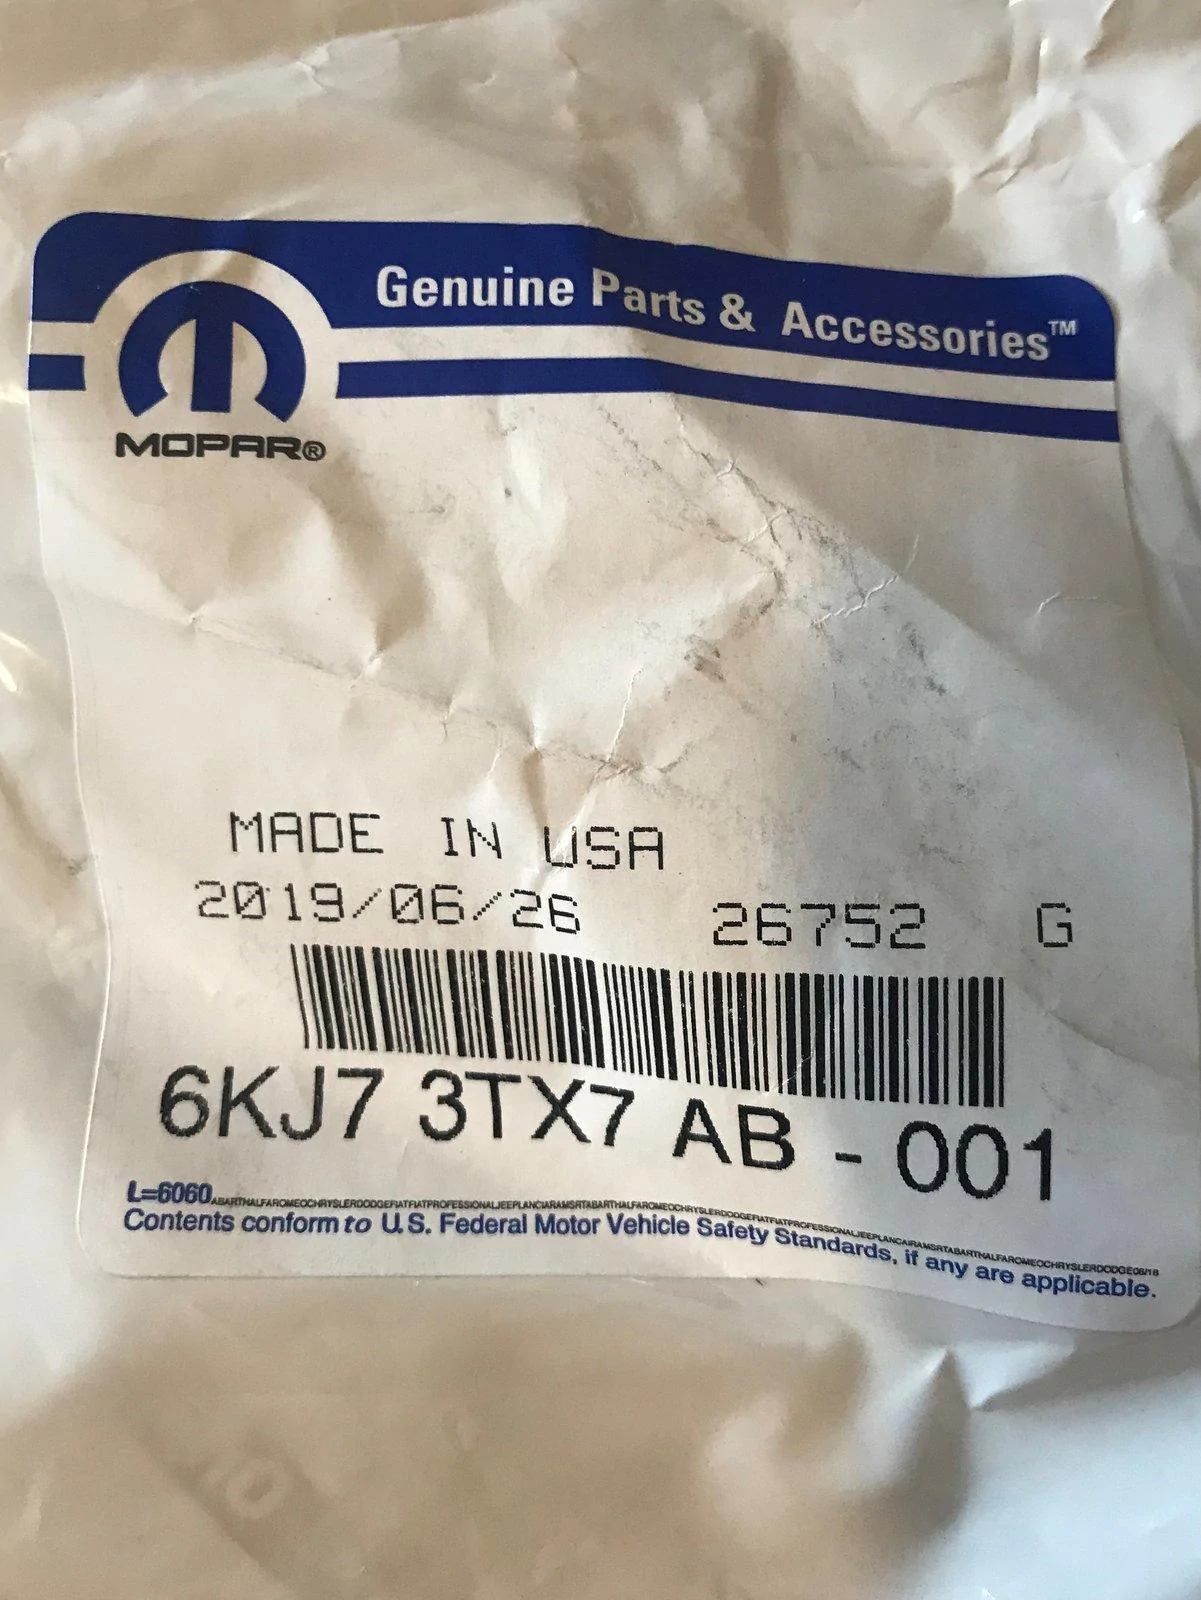
I ordered 4 of this PN: 6KJ73TX7AB - Headrest Sleeve, Center, Non-Locking

In reality, You could probably just order two and use them like the front headrests but I was trying to mimic the center headrest configuration.
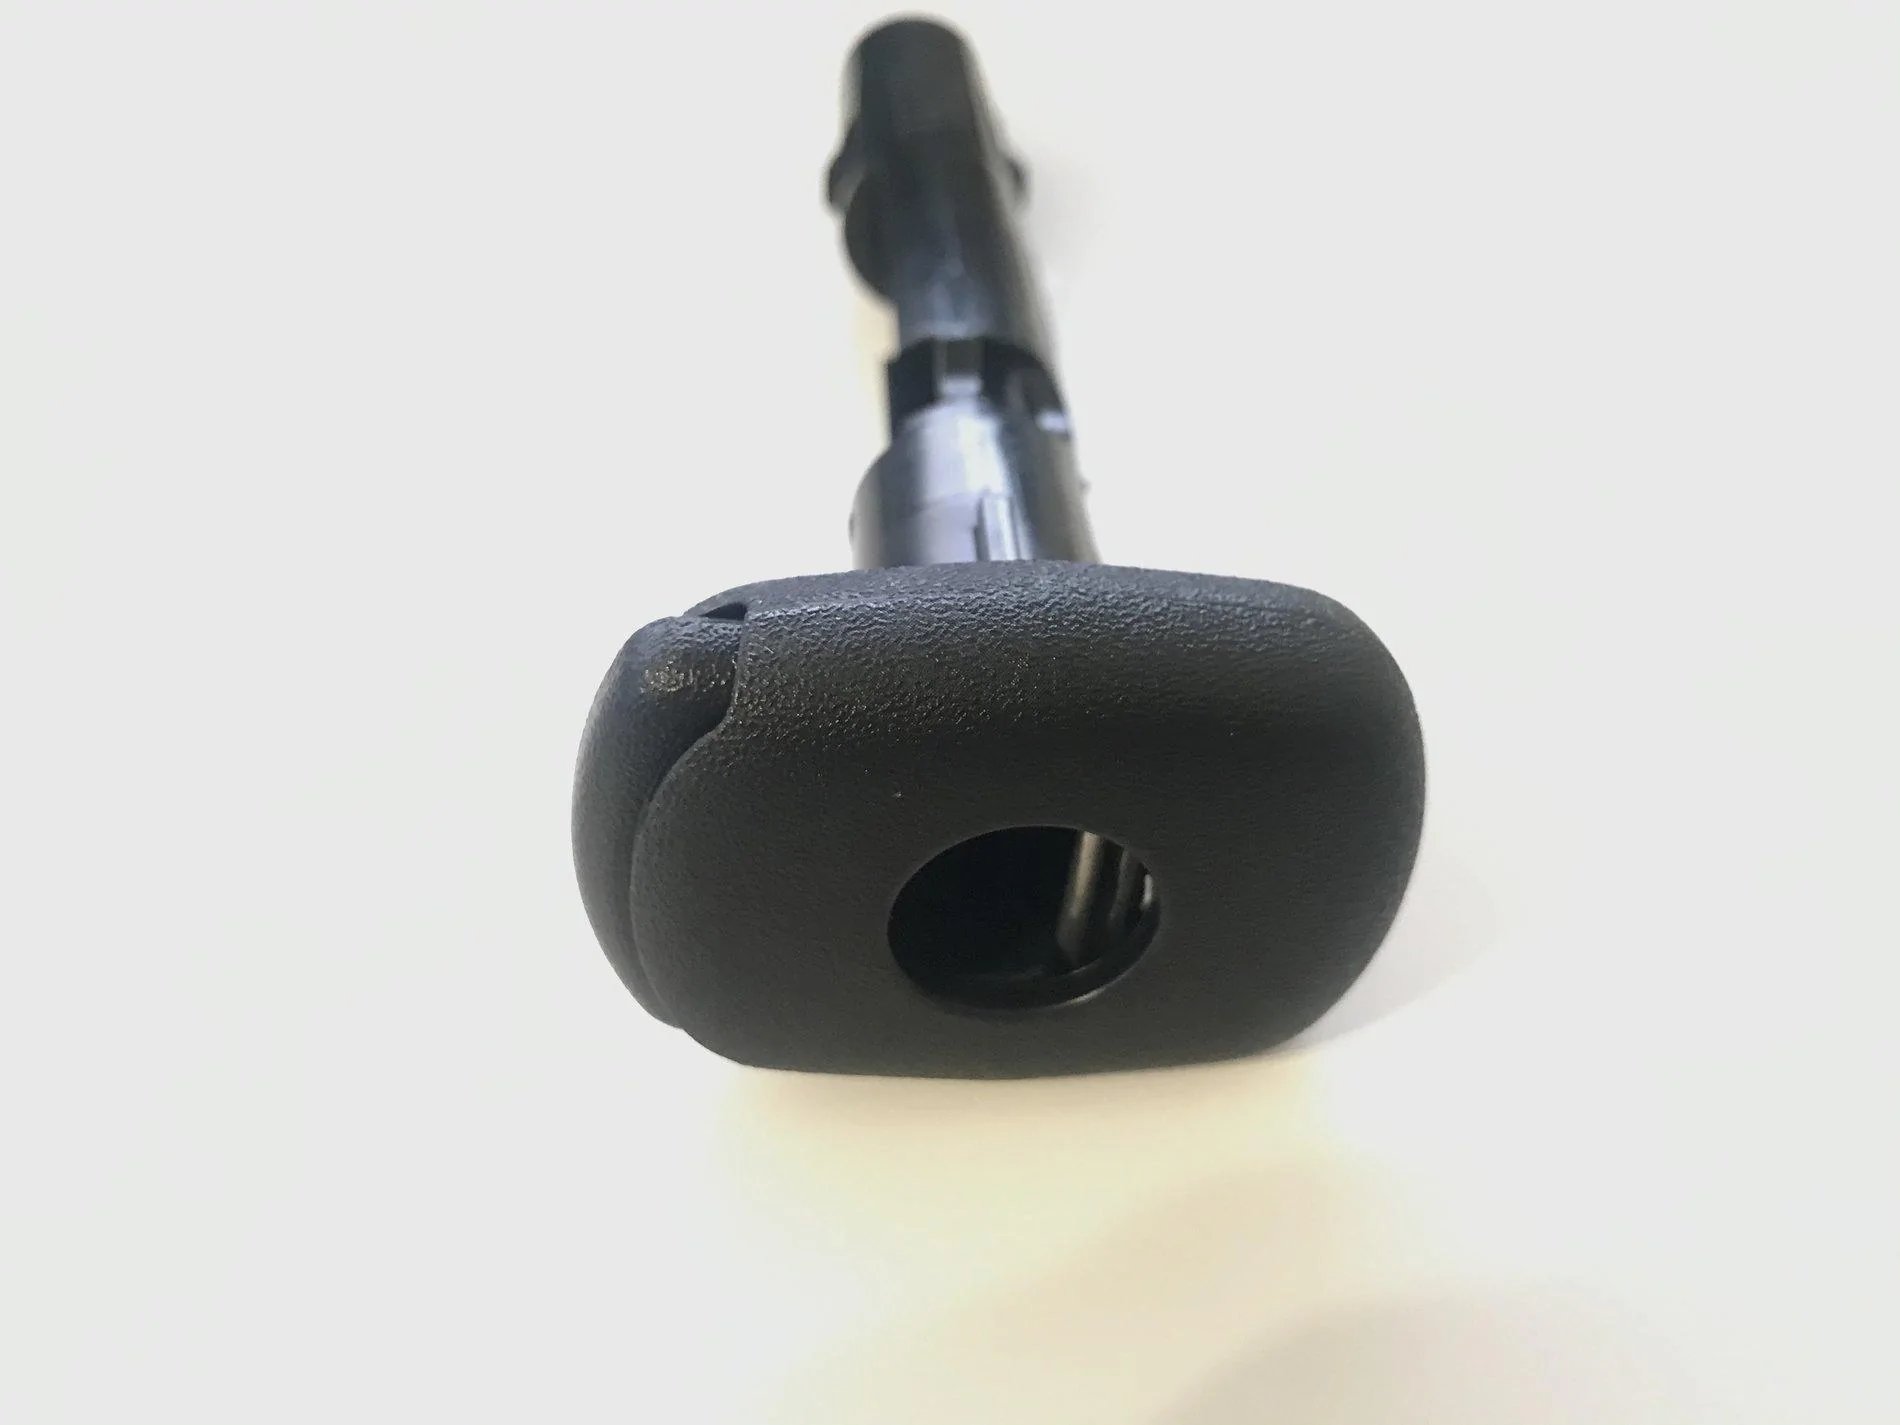
This is what the new headrest sleeve looks like:

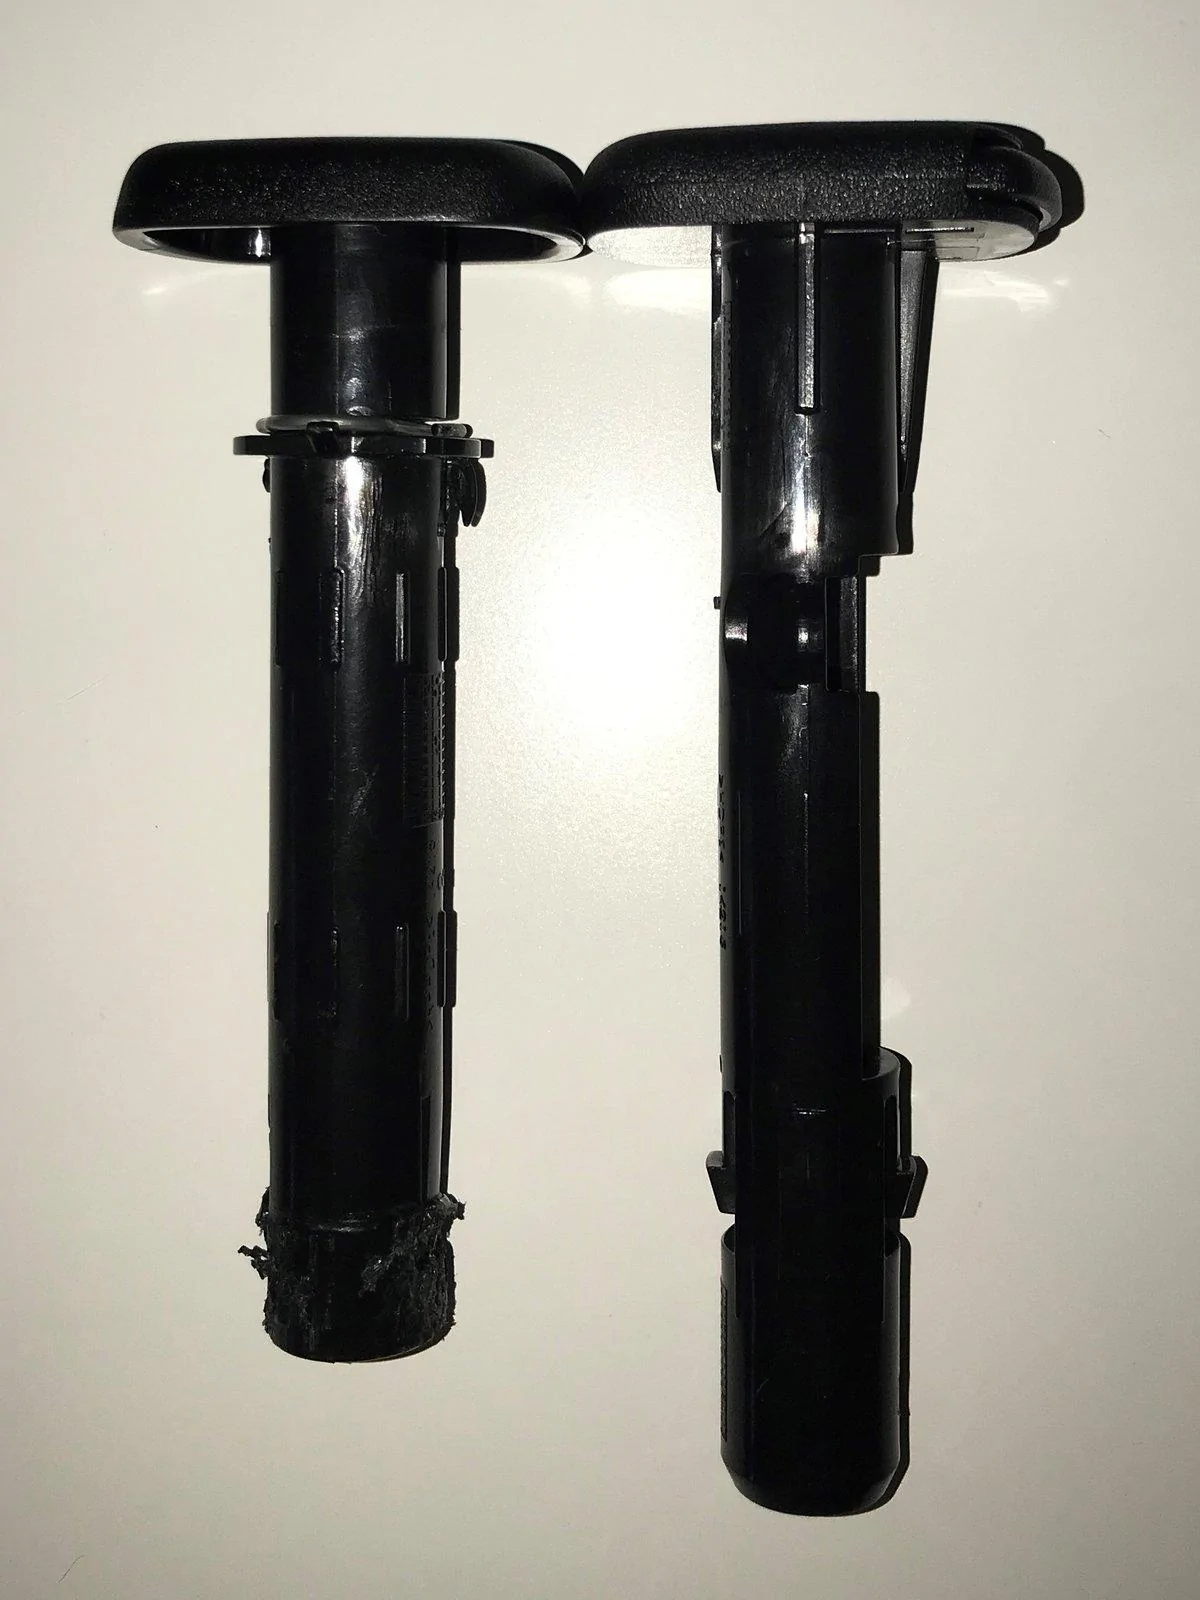
On the left is the original locking headrest sleeve and on the right is the new non locking headrest sleeve. The bottom of my original headrest sleeve is tore up from when I previously removed the outboard headrests.

Replacement Process
1) Follow the outboard headrest removal process outlined in this Link
2) Once the old headrests are out, you can pull the existing headrest sleeve out. It helps to rotate it 90 degrees then it should just slide out.
3) Insert the new headrest sleeve. Take note of what side the slot is cut into the headrest posts and be sure the release buttons face the opposite side so the clip built into the headrest sleeve will seat into the slot on the headrest post.
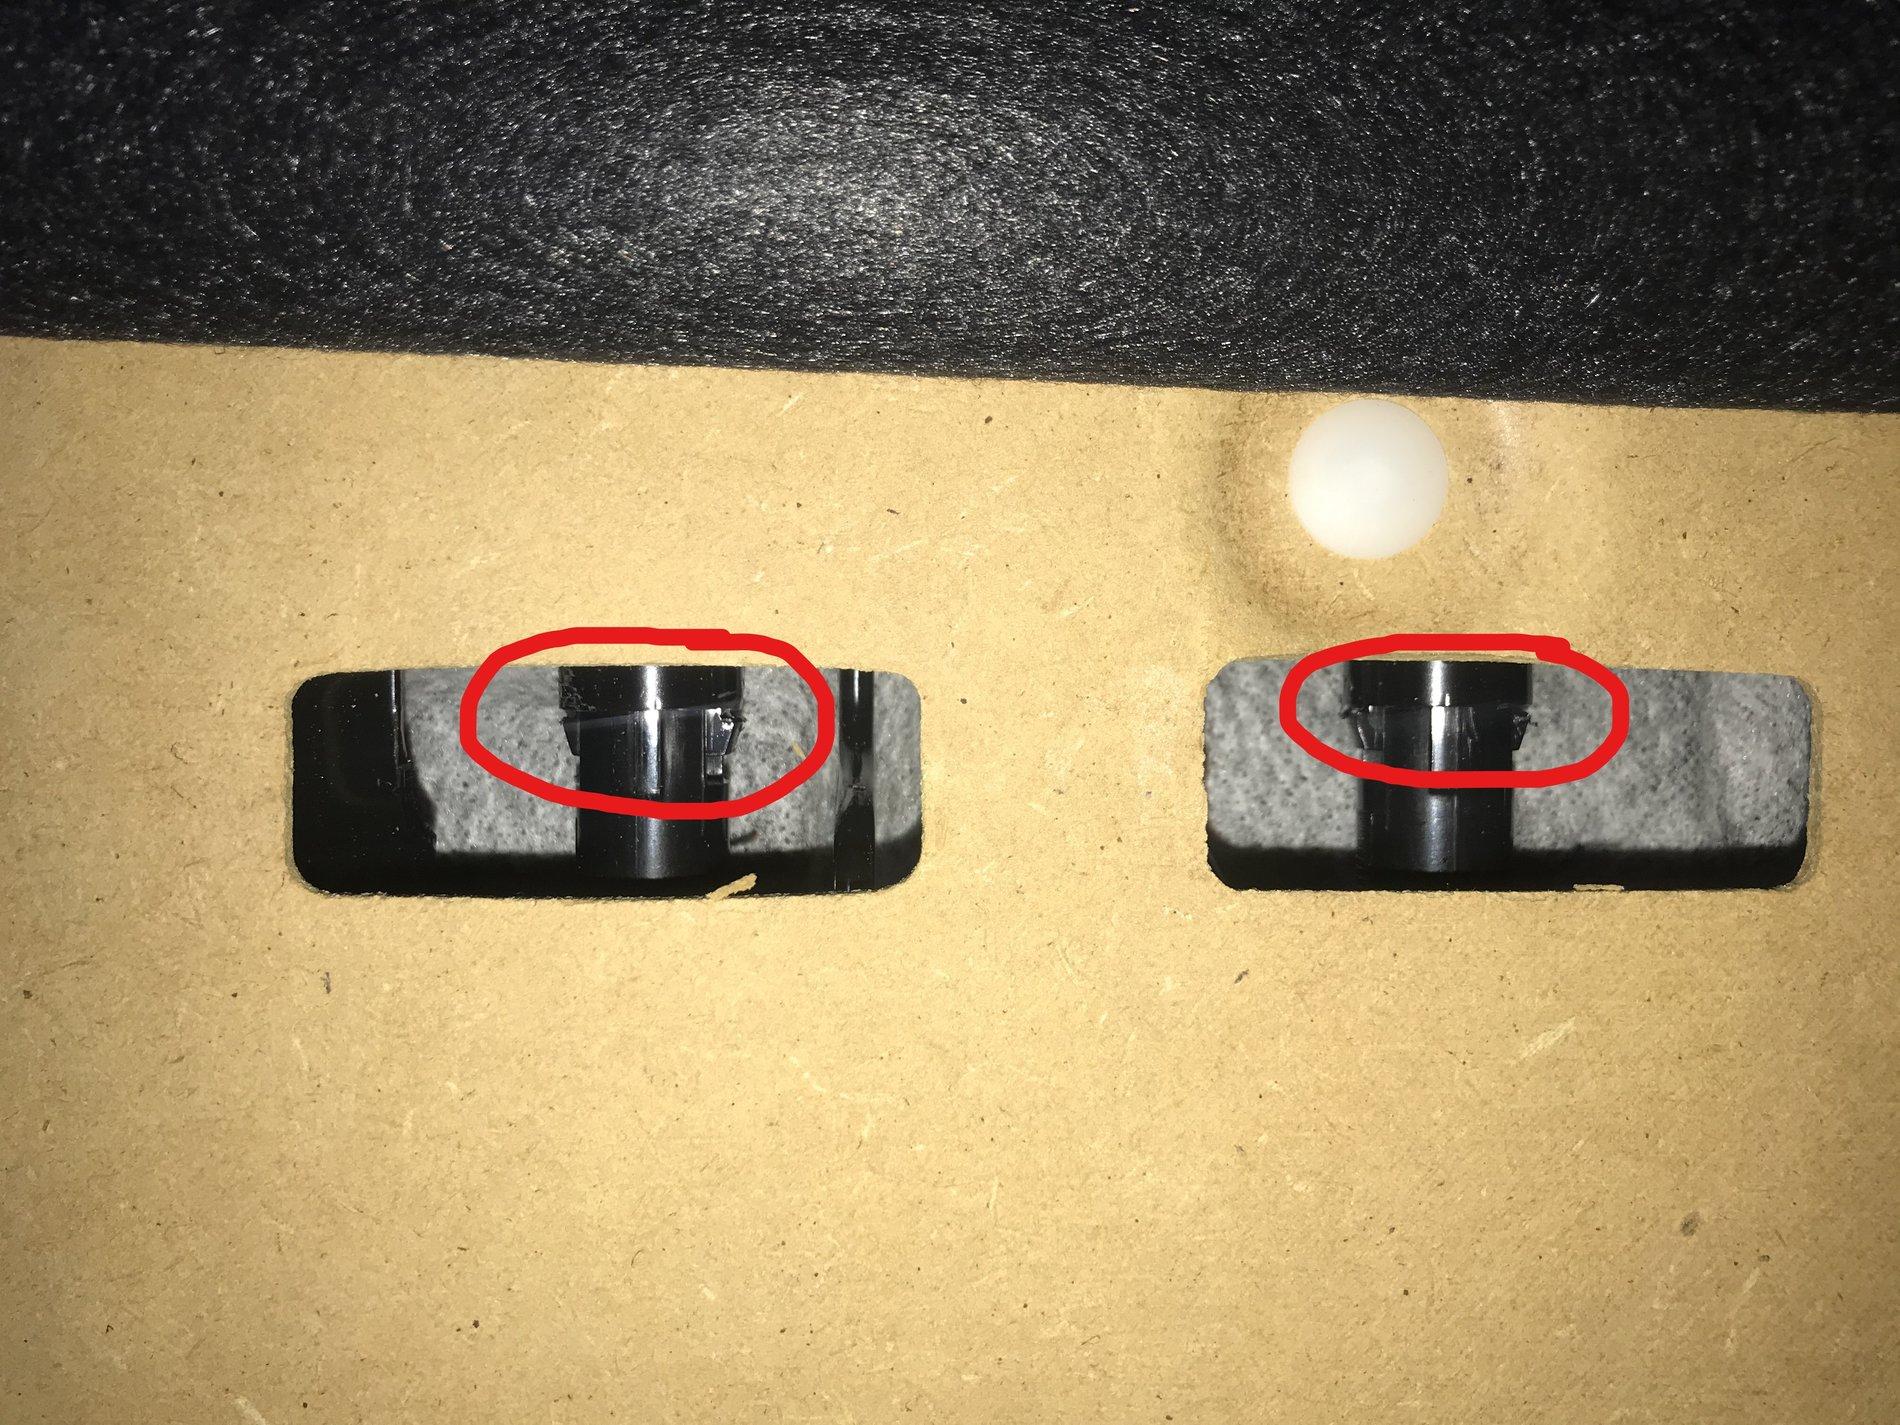
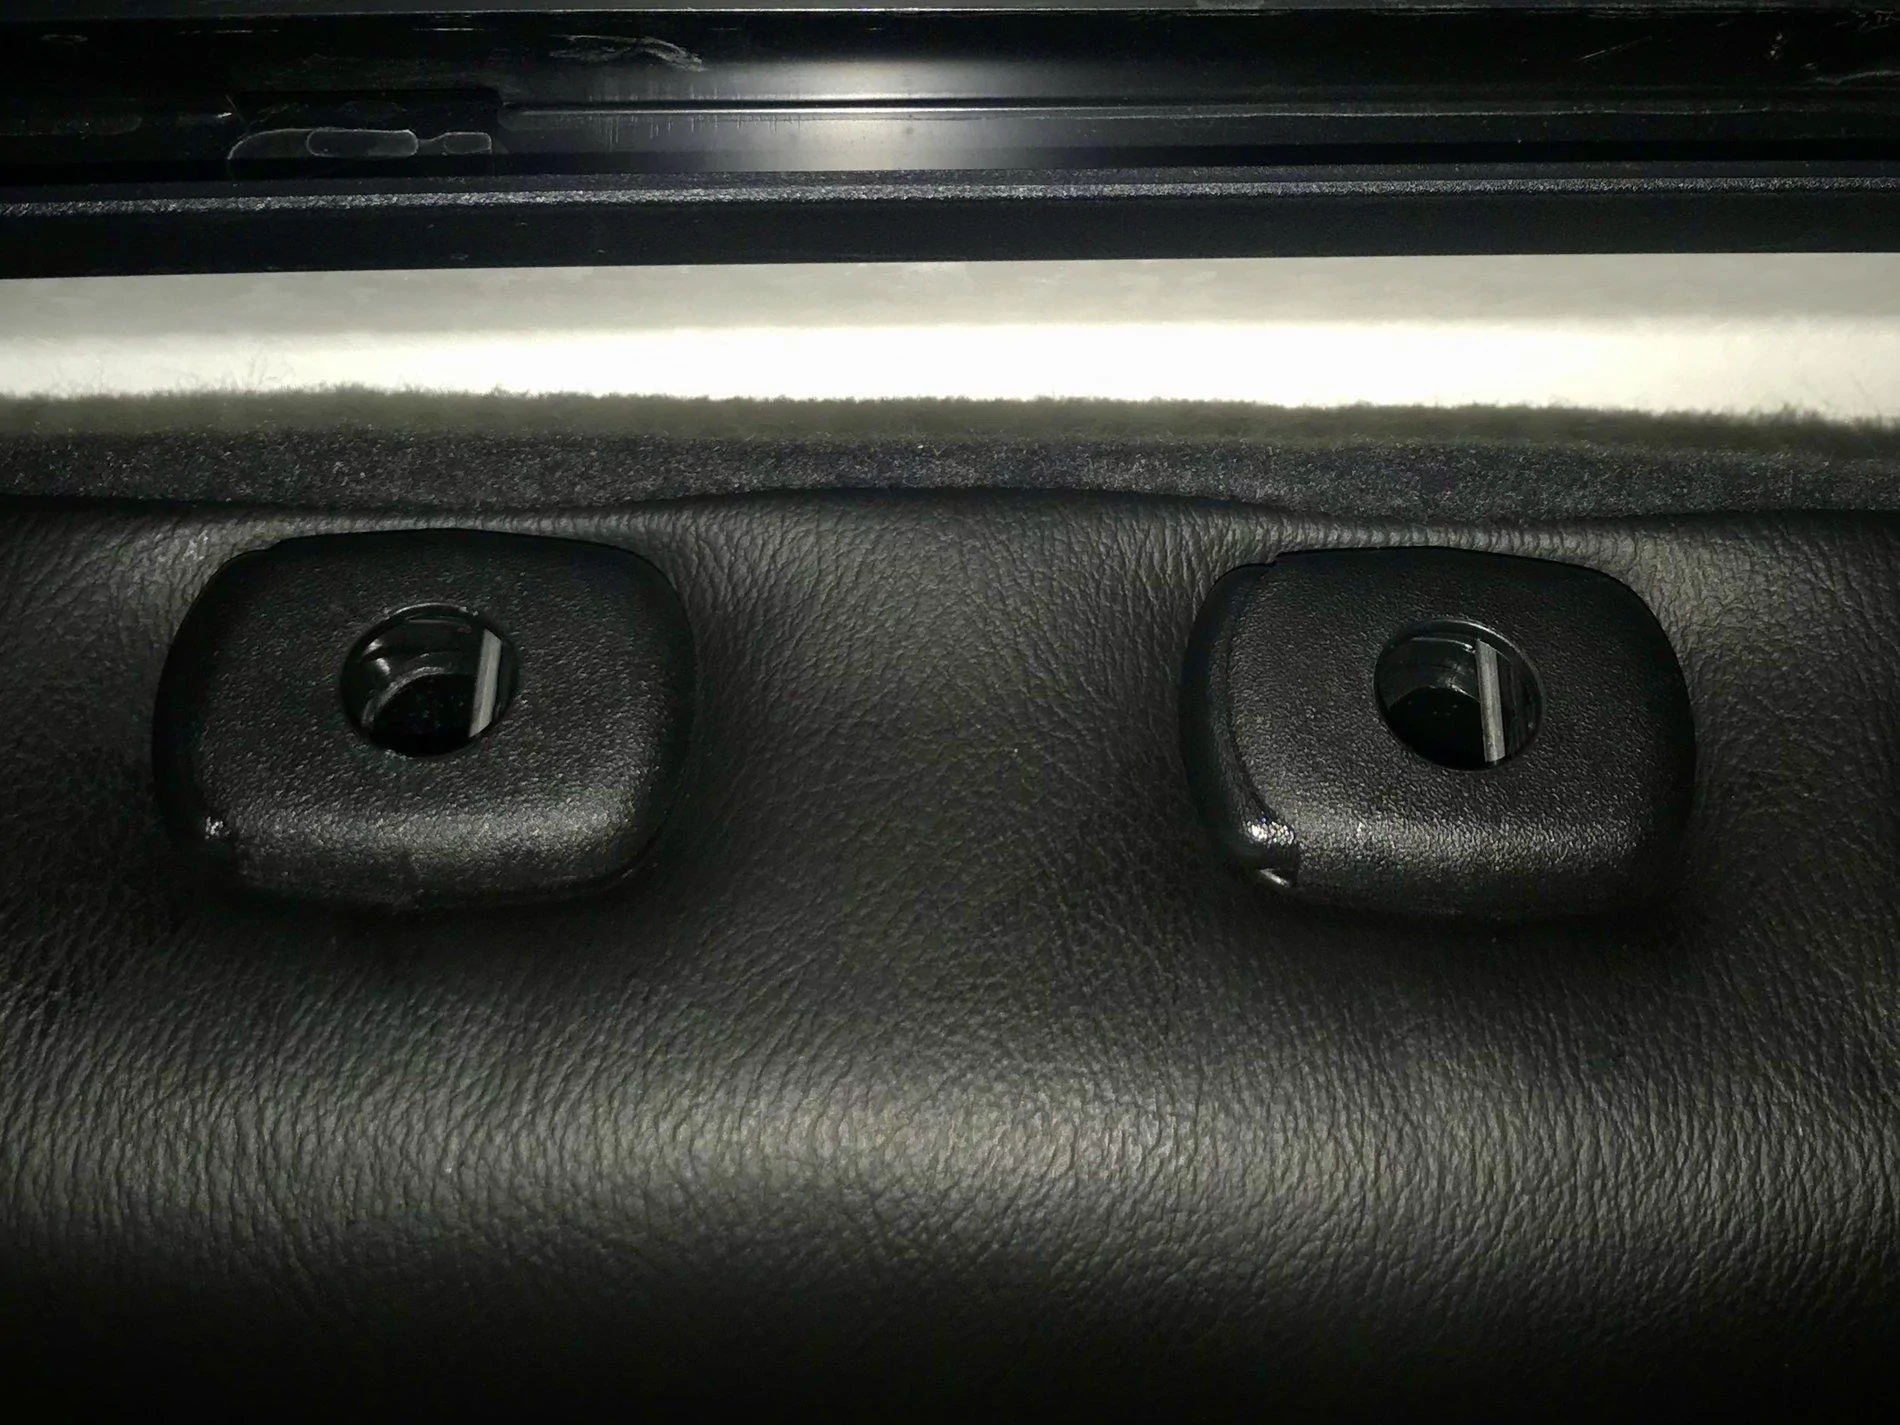
Note: There are clips near the bottom of the headrest sleeve that lock into the seat back. These clips on the new headrest sleeve appear to be just a little higher on the sleeve than the originals. I smacked the sleeve in place with a few good hits with my palm. In the below picture you can see the clips are seated properly into the seat back:
Here is what the non locking headrest sleeves look like installed: You can see the clip that will seat into the headrest post inside the holes on the right.
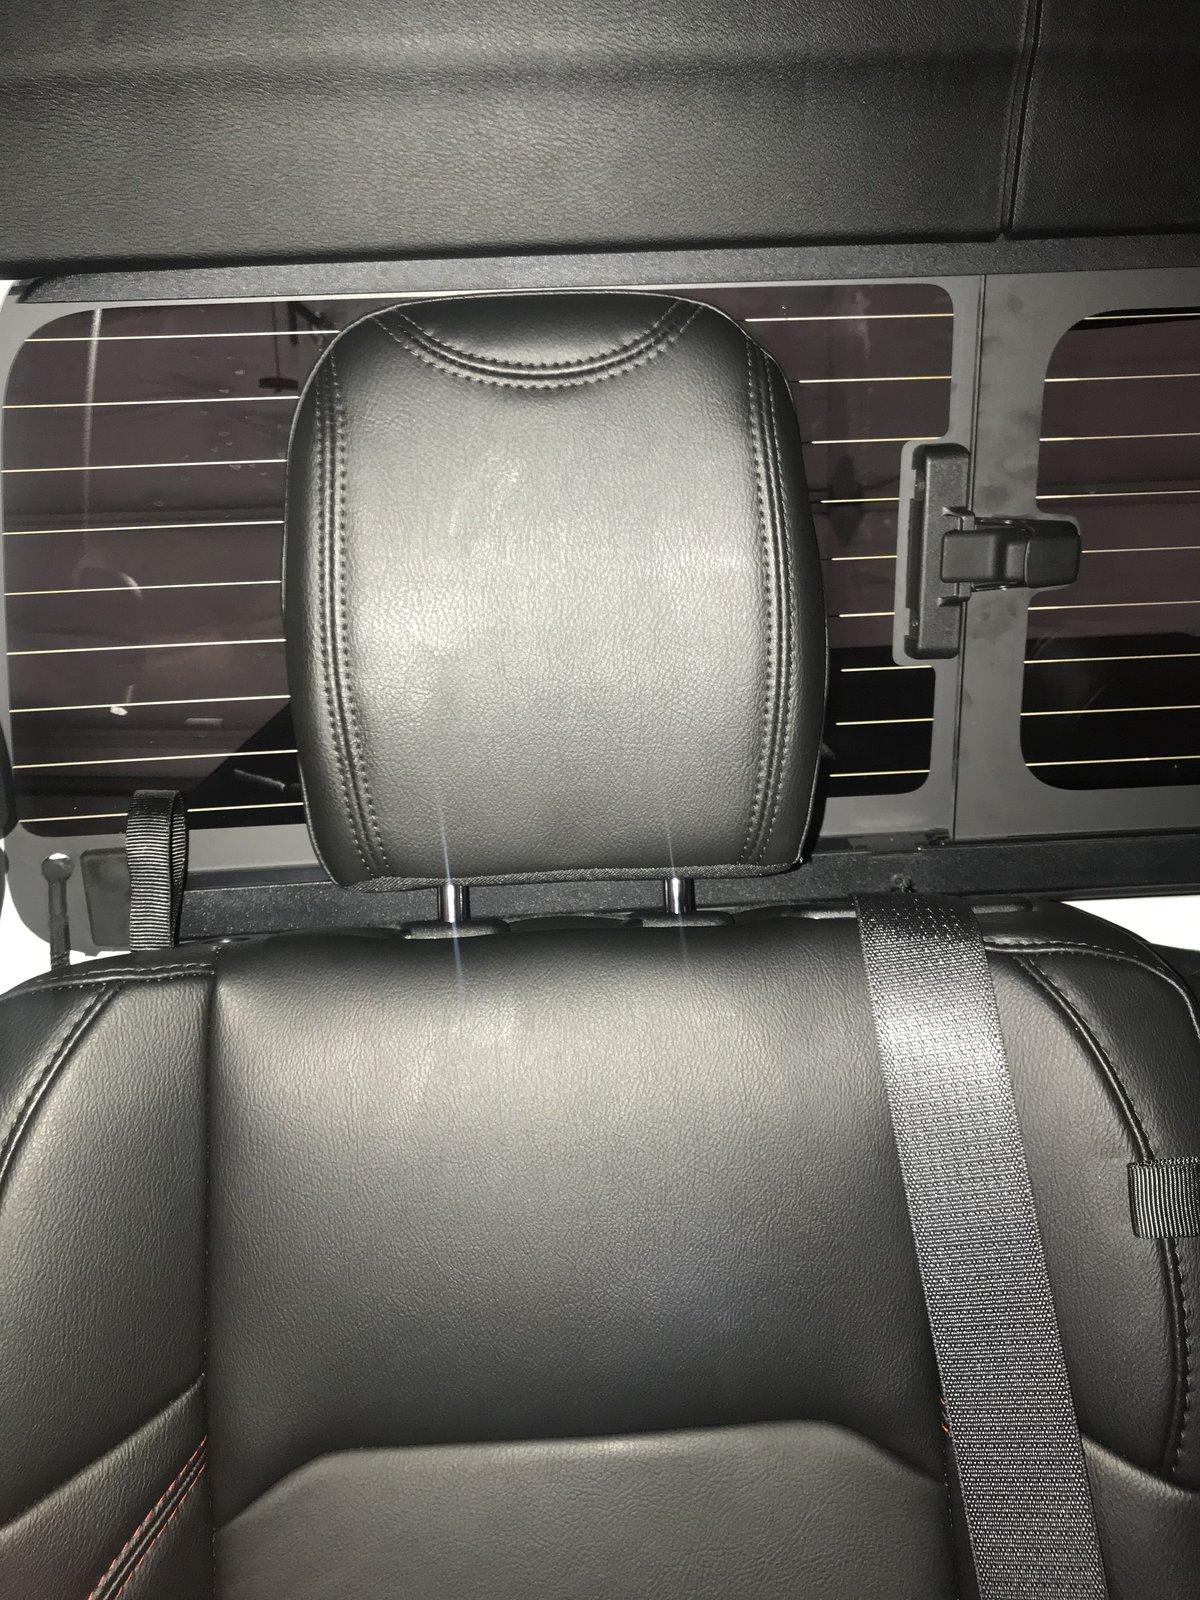
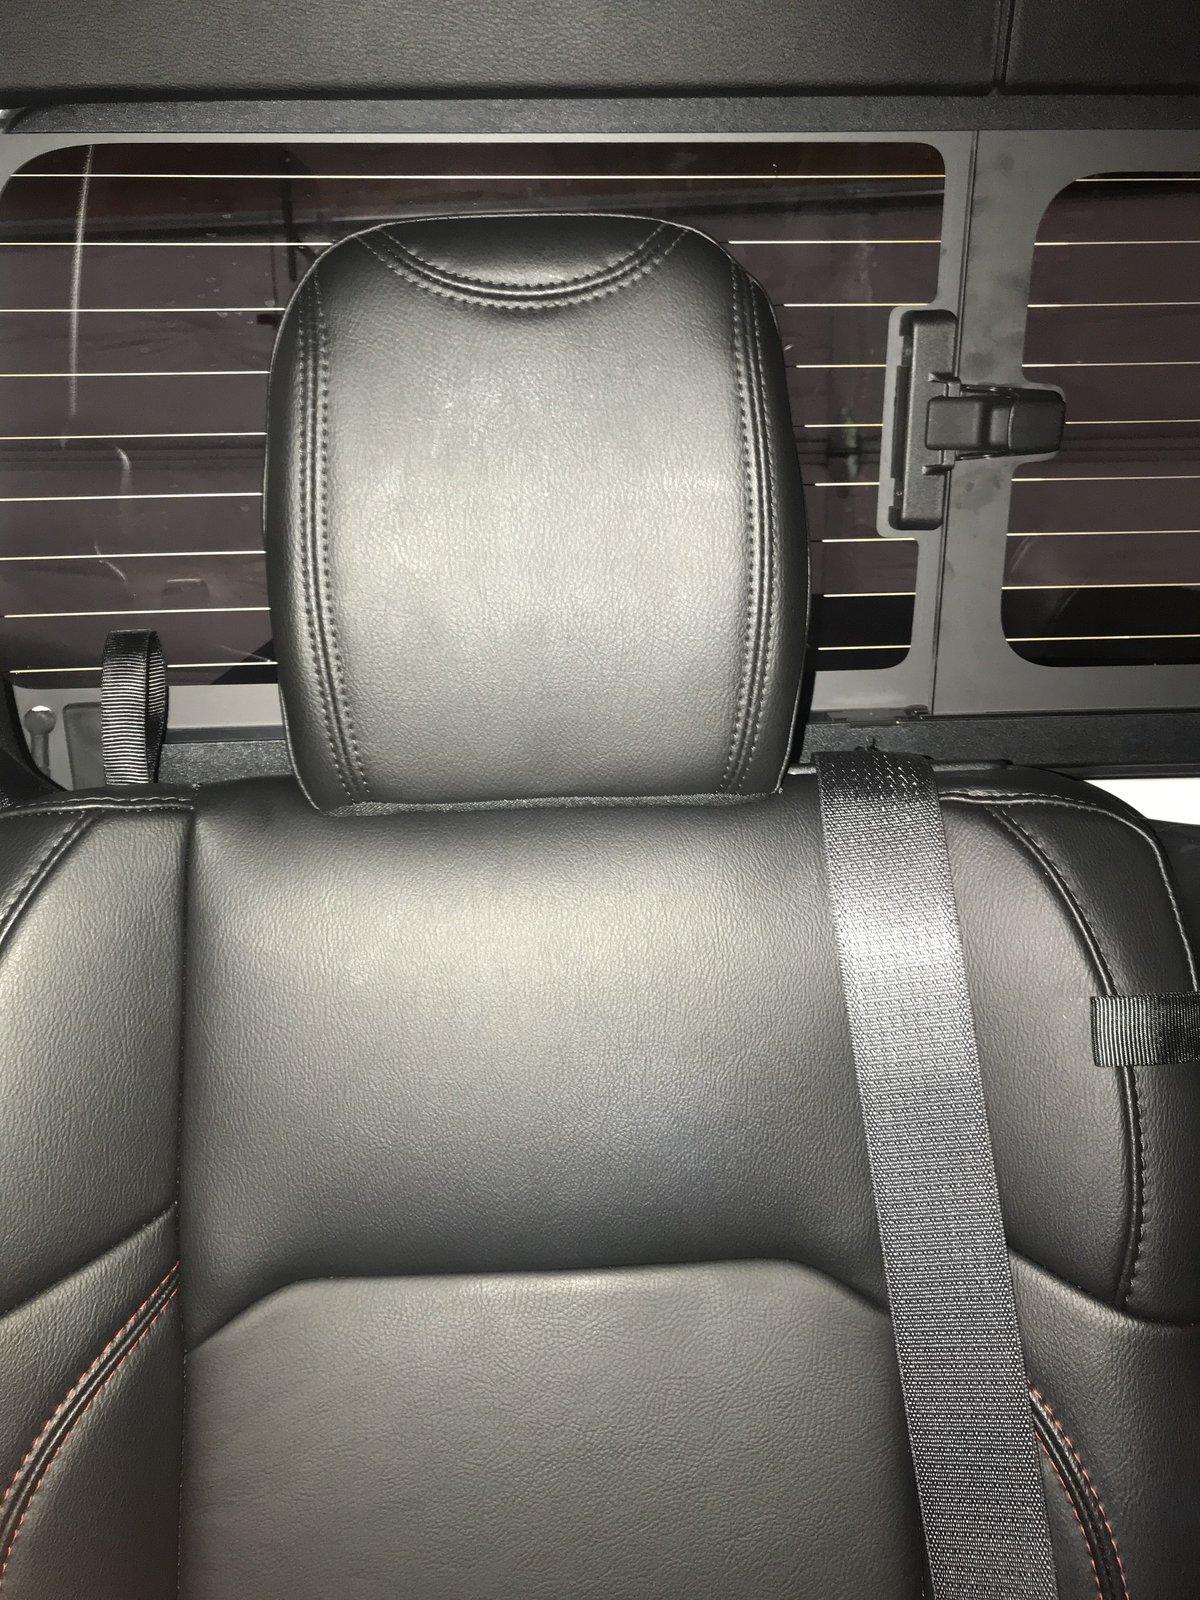
4) Now you can install your headrest as you would normally. It will 'clip' in to the existing headrest post slot about an inch above the seat like shown in the below picture. This was actually a comfortable headrest height for my 6 foot frame.
From here, you can easily push the buttons on the sleeves and remove the headrest or push them and slide the headrest the rest of the way down just like the center headrest works.
I thought about cutting a new slot higher up on the headrest post but thought it would be too hard to push both buttons down to remove it. This is where possibly only using one on each side would be beneficial. If you were to use just one, I would probably pull one of the original headrest sleeves and remove the clip from it so will not lock in place but still provide a proper sleeve for the other headrest post to slide into.
New Headrest Sleeve:
I ordered 4 of this PN: 6KJ73TX7AB - Headrest Sleeve, Center, Non-Locking
In reality, You could probably just order two and use them like the front headrests but I was trying to mimic the center headrest configuration.
This is what the new headrest sleeve looks like:
On the left is the original locking headrest sleeve and on the right is the new non locking headrest sleeve. The bottom of my original headrest sleeve is tore up from when I previously removed the outboard headrests.
Replacement Process
1) Follow the outboard headrest removal process outlined in this Link
2) Once the old headrests are out, you can pull the existing headrest sleeve out. It helps to rotate it 90 degrees then it should just slide out.
3) Insert the new headrest sleeve. Take note of what side the slot is cut into the headrest posts and be sure the release buttons face the opposite side so the clip built into the headrest sleeve will seat into the slot on the headrest post.
Note: There are clips near the bottom of the headrest sleeve that lock into the seat back. These clips on the new headrest sleeve appear to be just a little higher on the sleeve than the originals. I smacked the sleeve in place with a few good hits with my palm. In the below picture you can see the clips are seated properly into the seat back:
Here is what the non locking headrest sleeves look like installed: You can see the clip that will seat into the headrest post inside the holes on the right.
4) Now you can install your headrest as you would normally. It will 'clip' in to the existing headrest post slot about an inch above the seat like shown in the below picture. This was actually a comfortable headrest height for my 6 foot frame.
From here, you can easily push the buttons on the sleeves and remove the headrest or push them and slide the headrest the rest of the way down just like the center headrest works.
I thought about cutting a new slot higher up on the headrest post but thought it would be too hard to push both buttons down to remove it. This is where possibly only using one on each side would be beneficial. If you were to use just one, I would probably pull one of the original headrest sleeves and remove the clip from it so will not lock in place but still provide a proper sleeve for the other headrest post to slide into.
Sponsored