TheDerb
Well-Known Member
- First Name
- Mike
- Joined
- May 26, 2022
- Threads
- 43
- Messages
- 322
- Reaction score
- 771
- Location
- Murfreesboro, TN
- Vehicle(s)
- 1984 CJ-7, 2025 Ford Maverick Hybrid XL.
- Thread starter
- #1
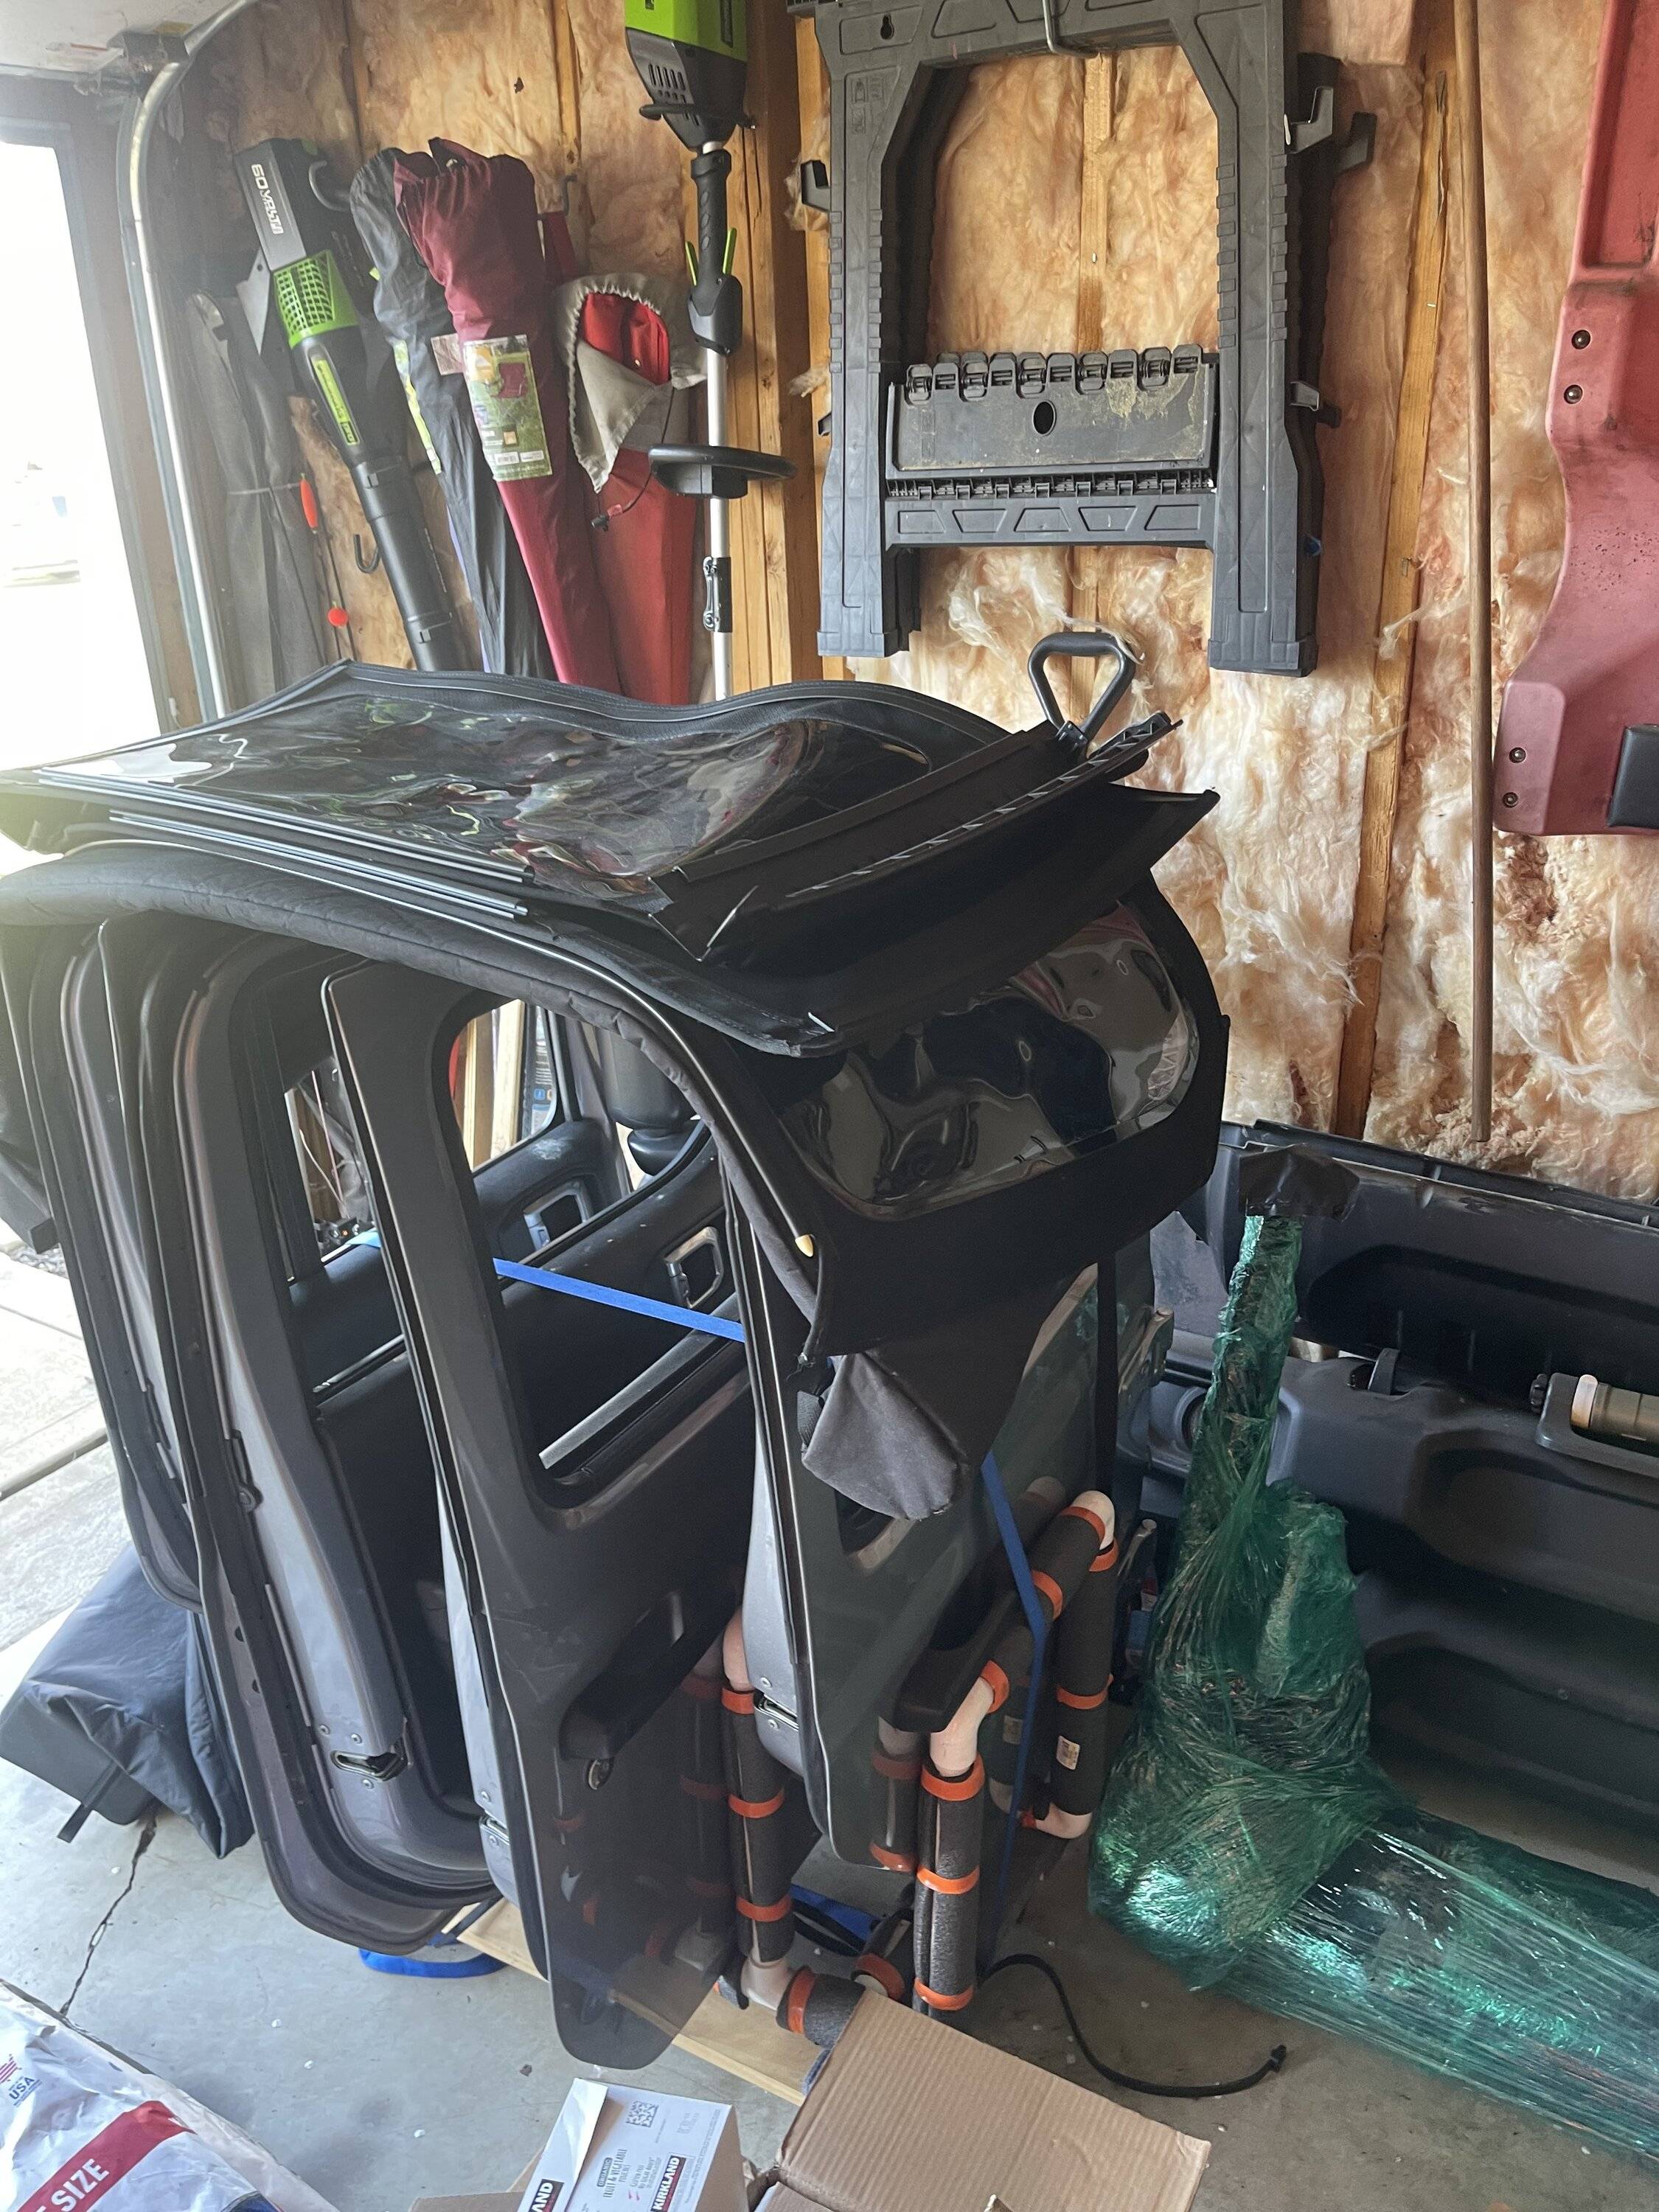
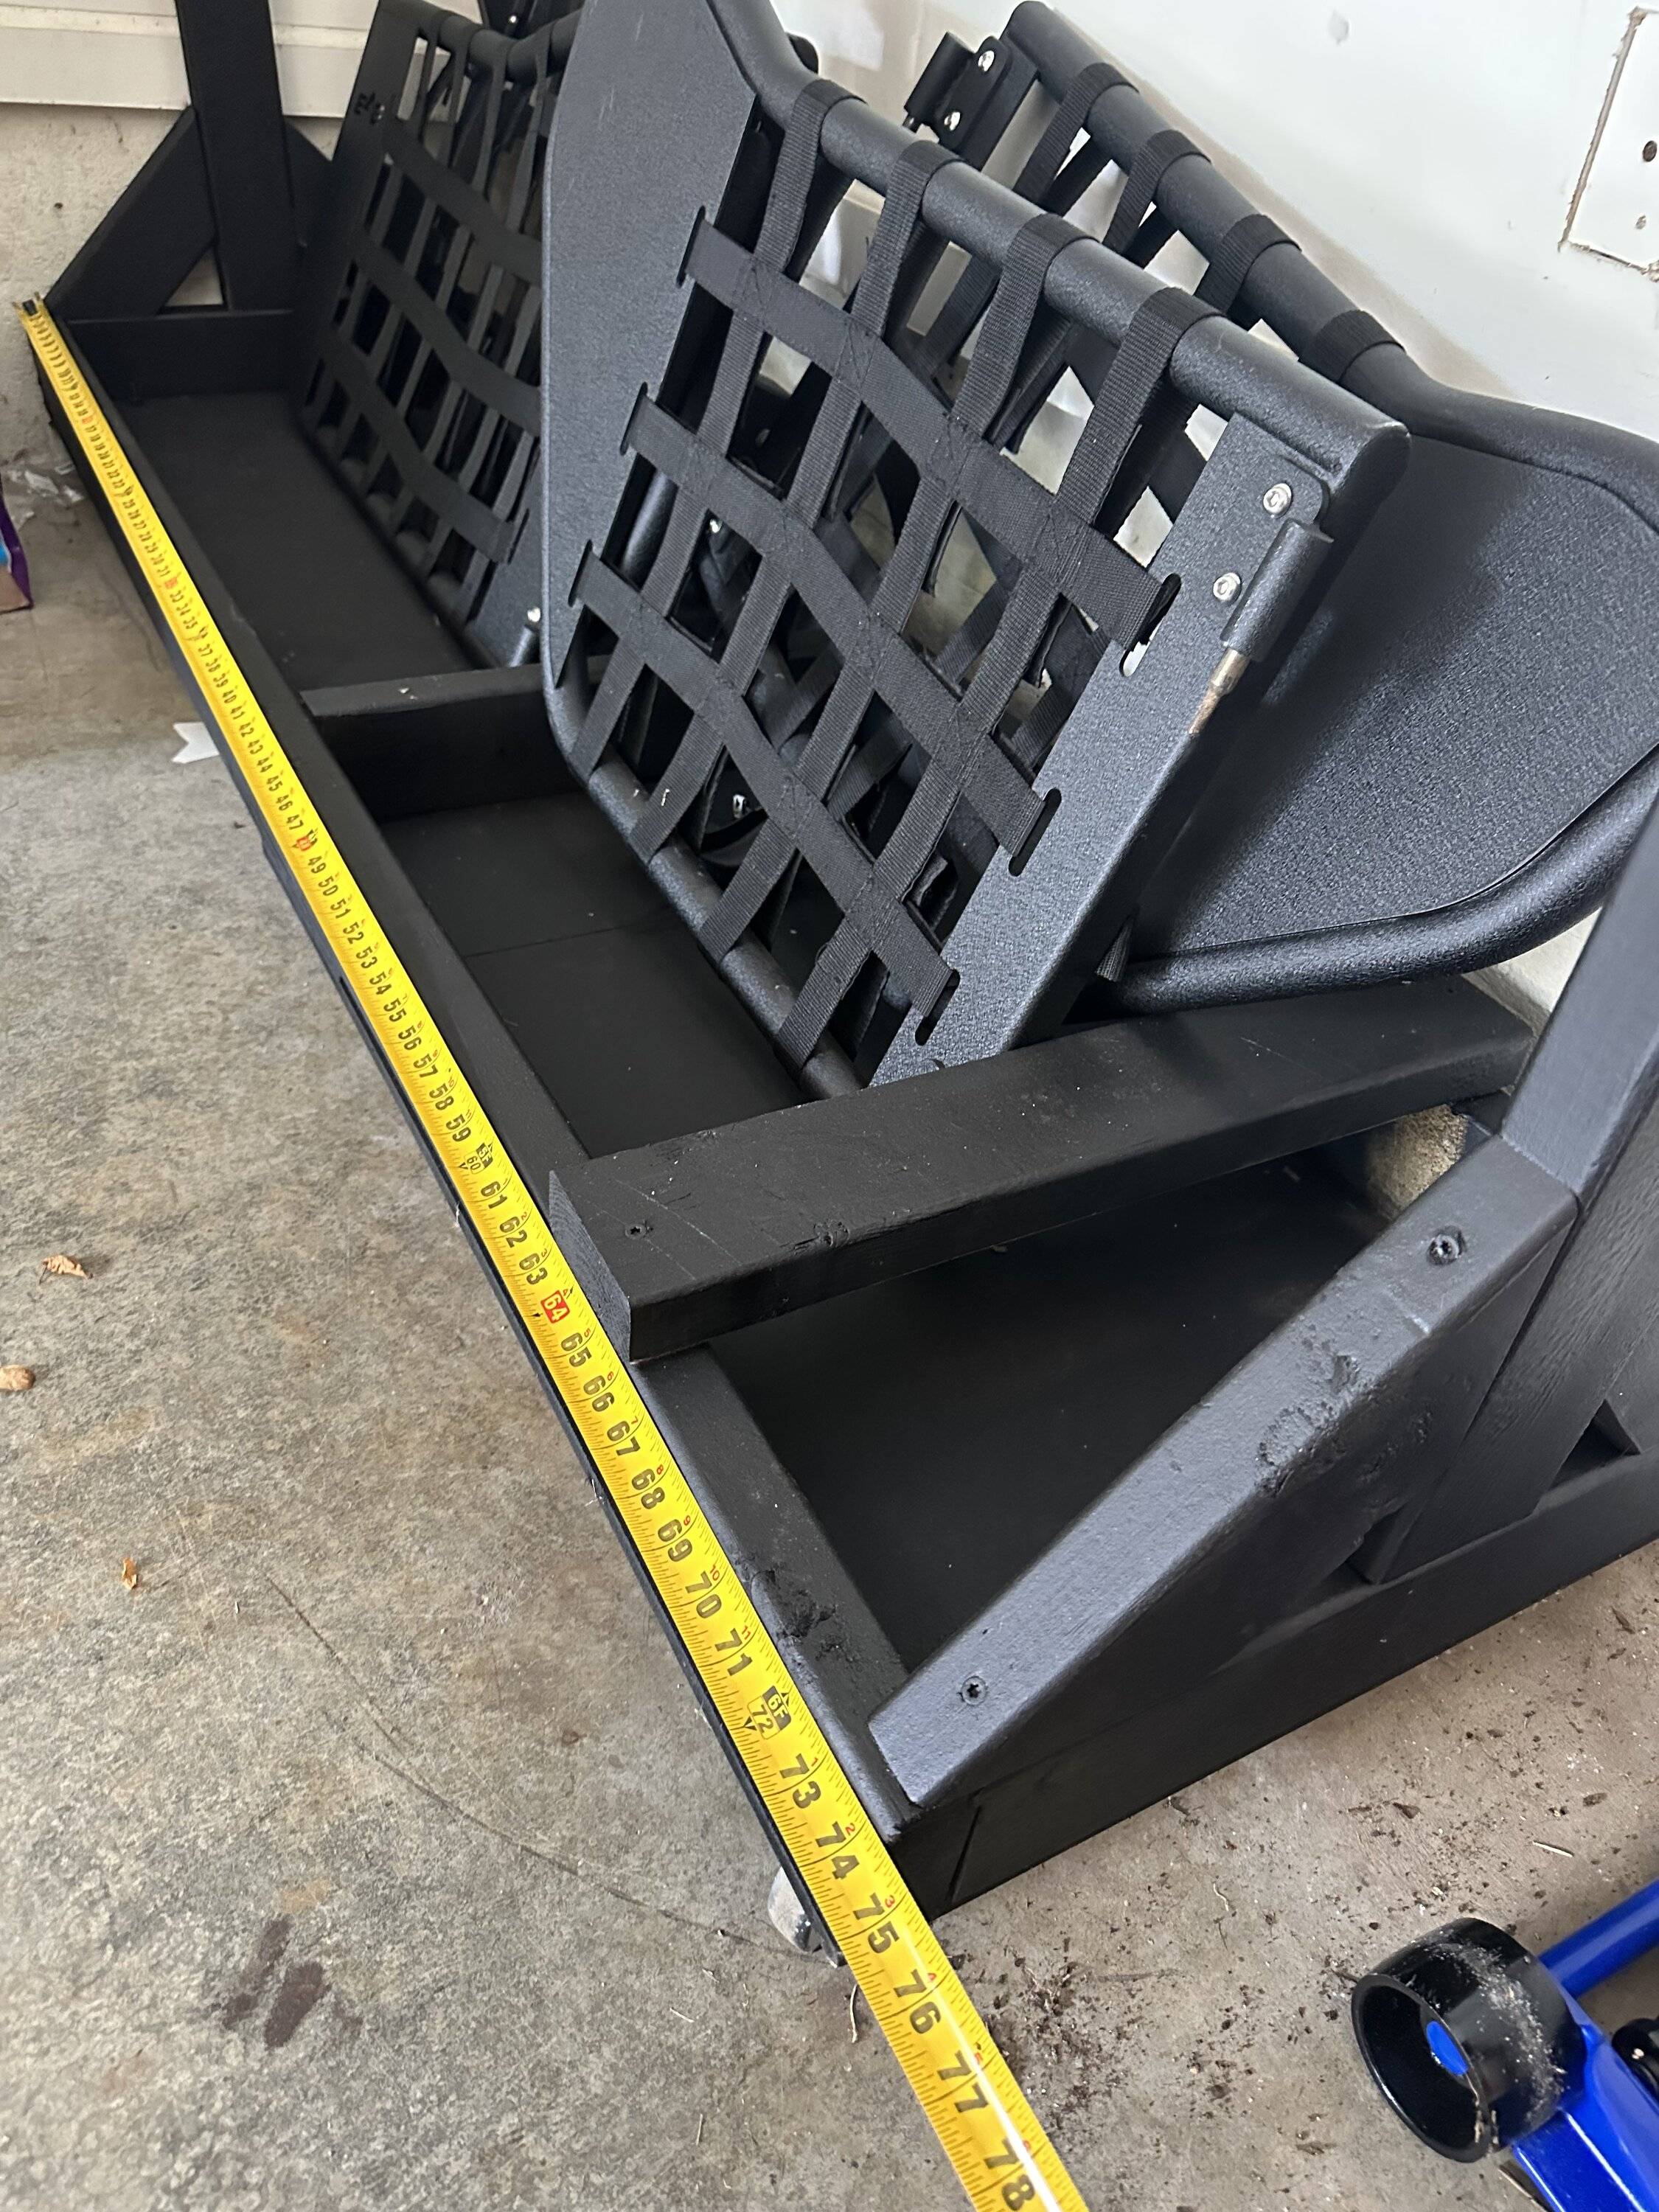
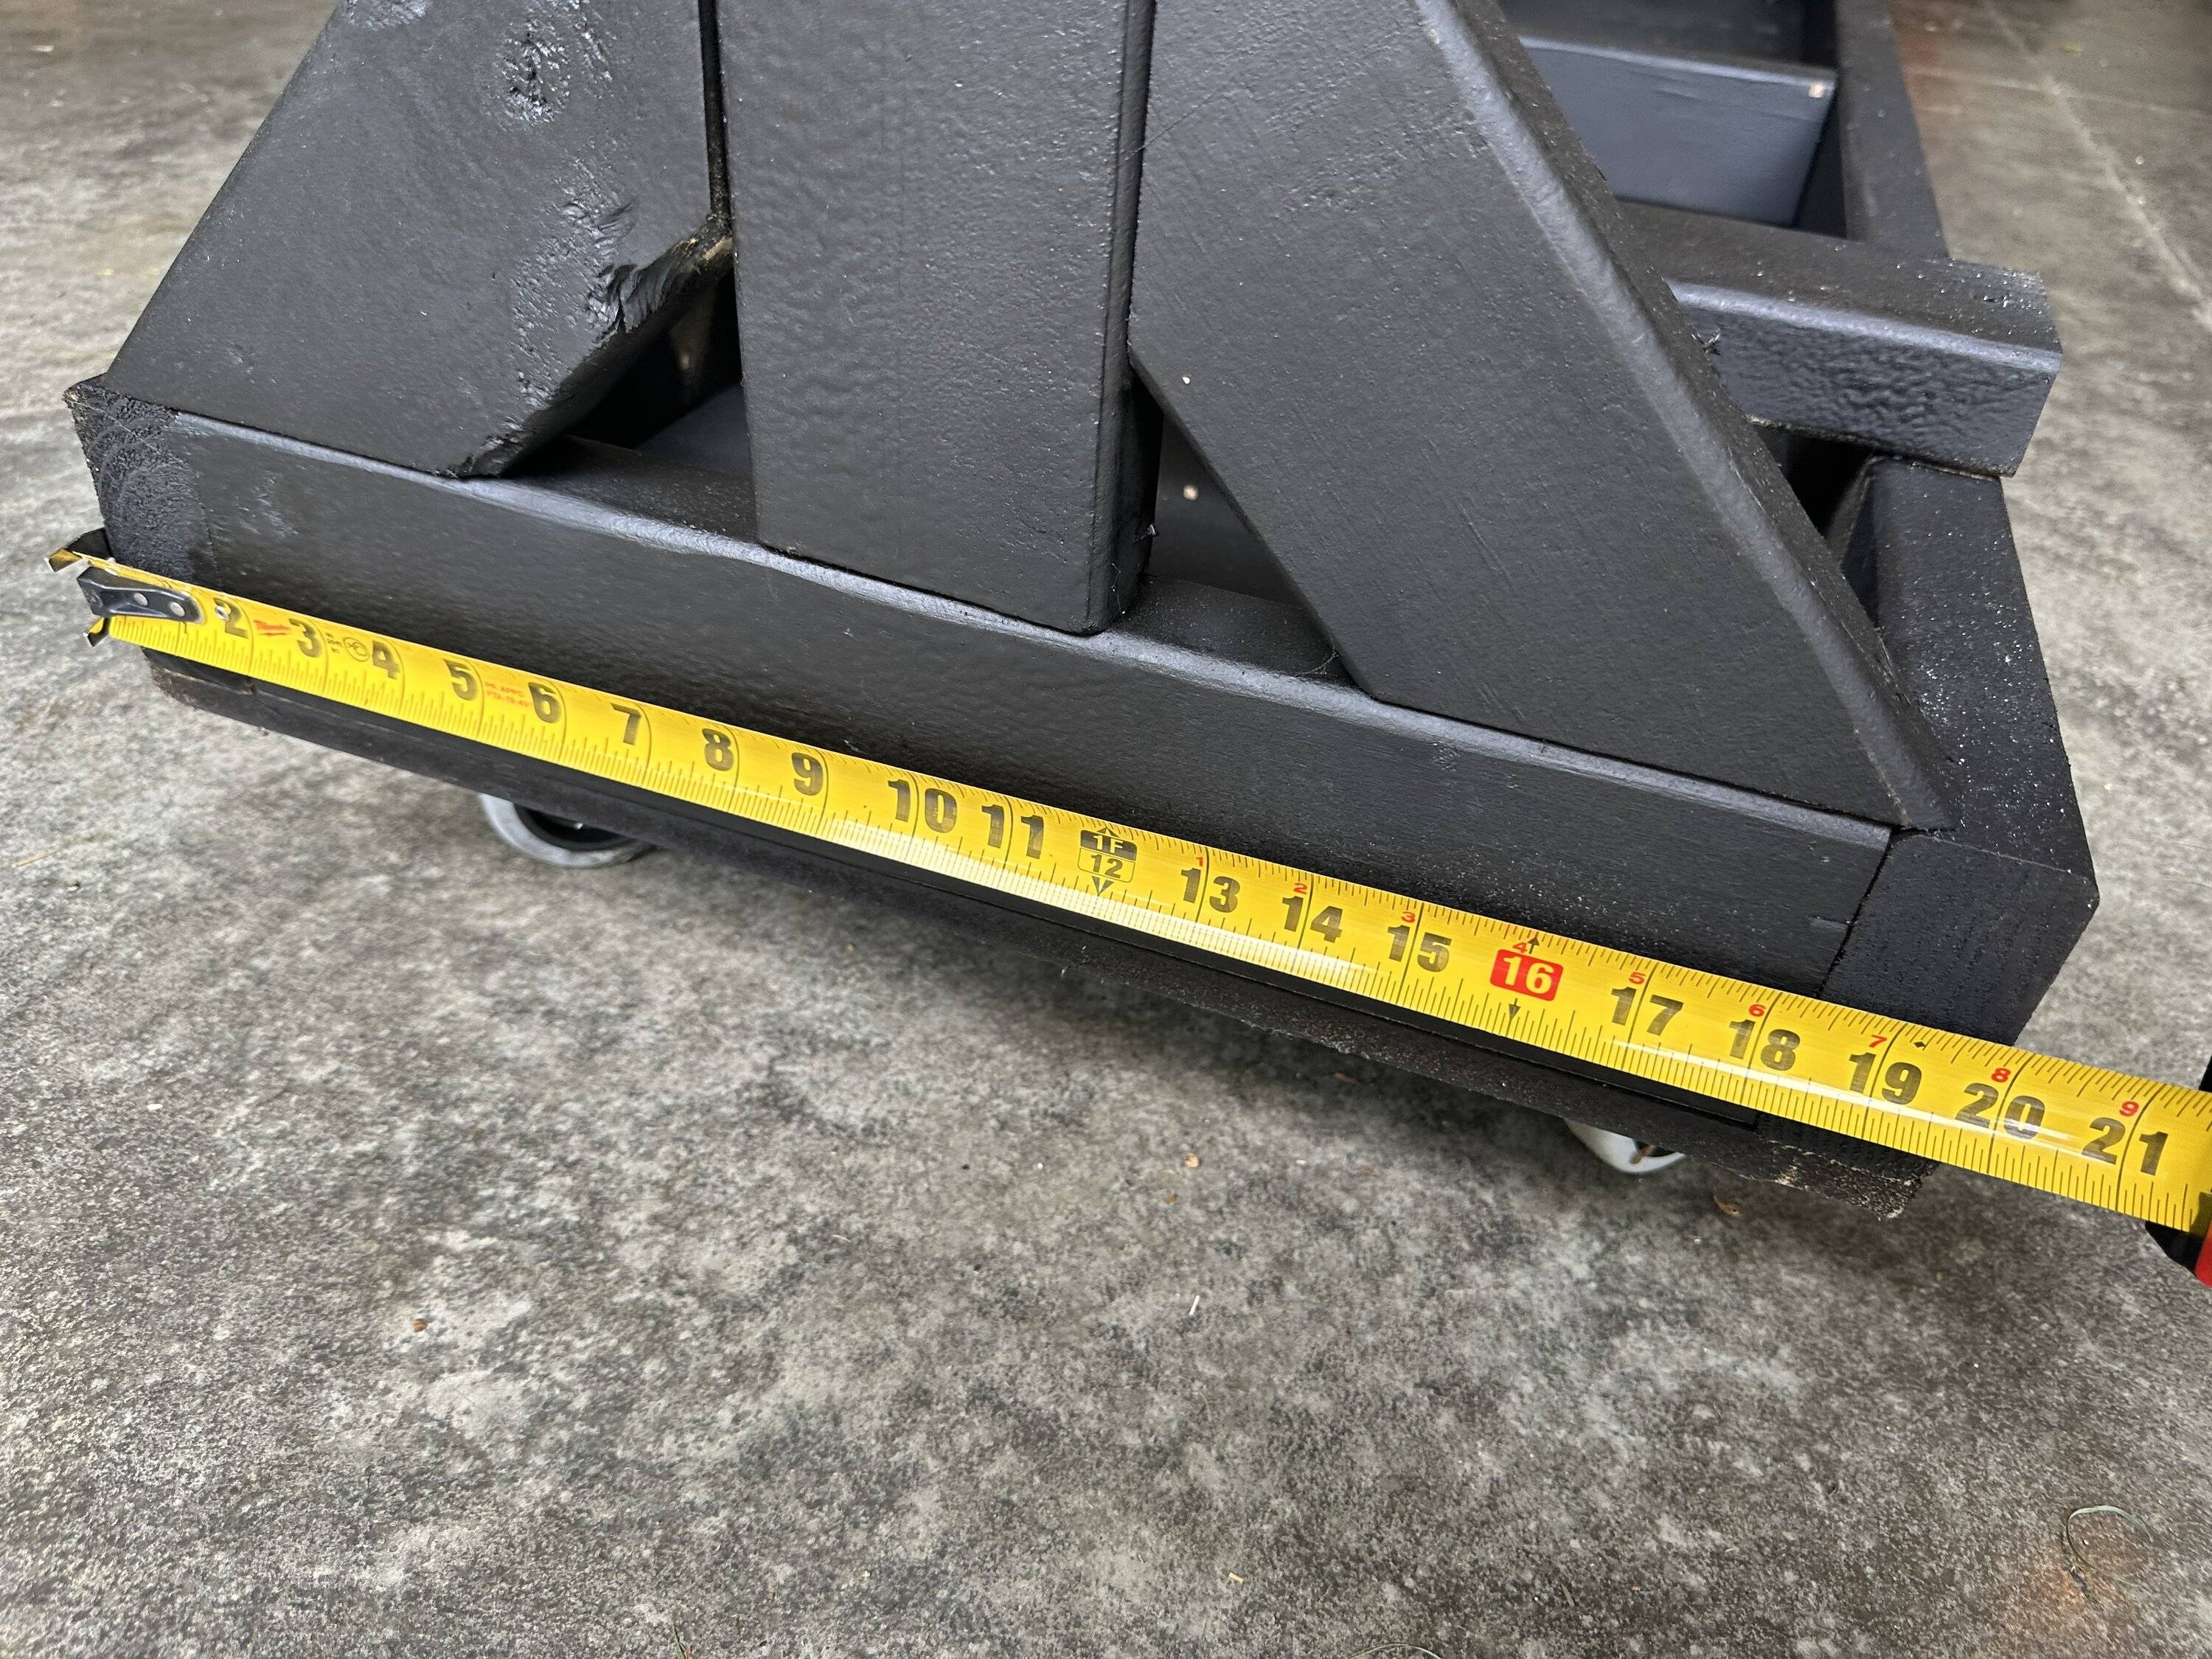
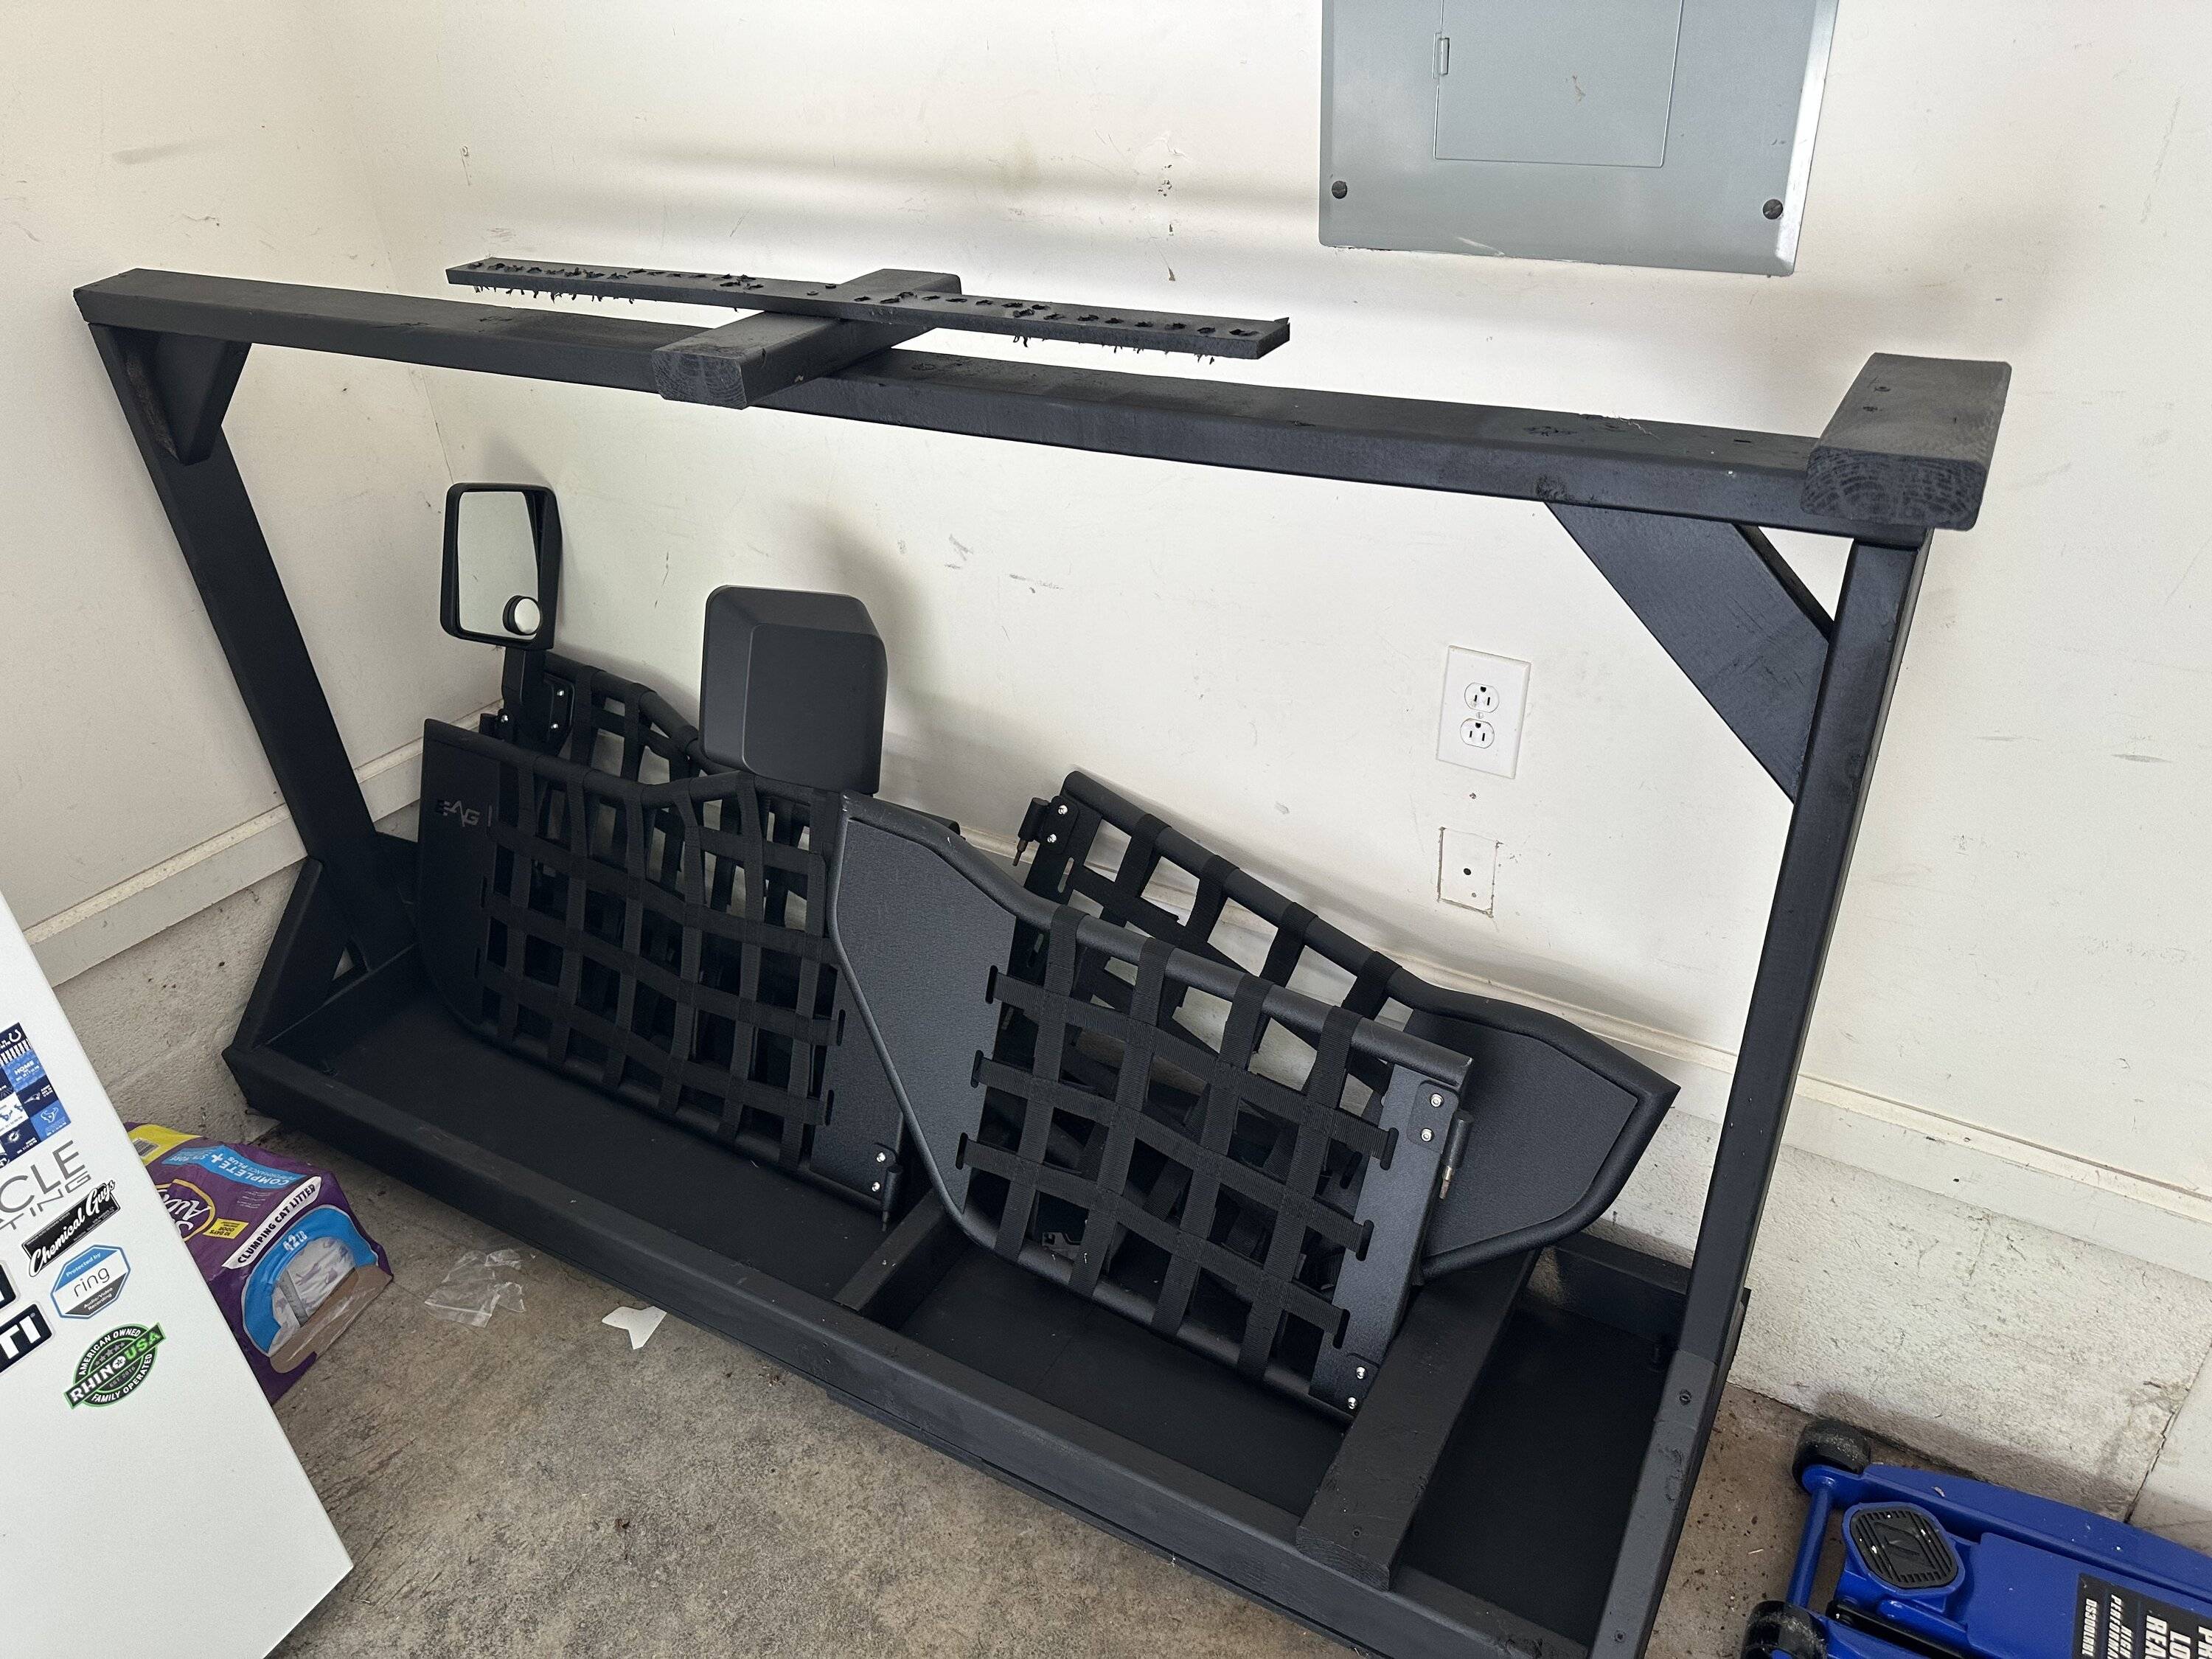
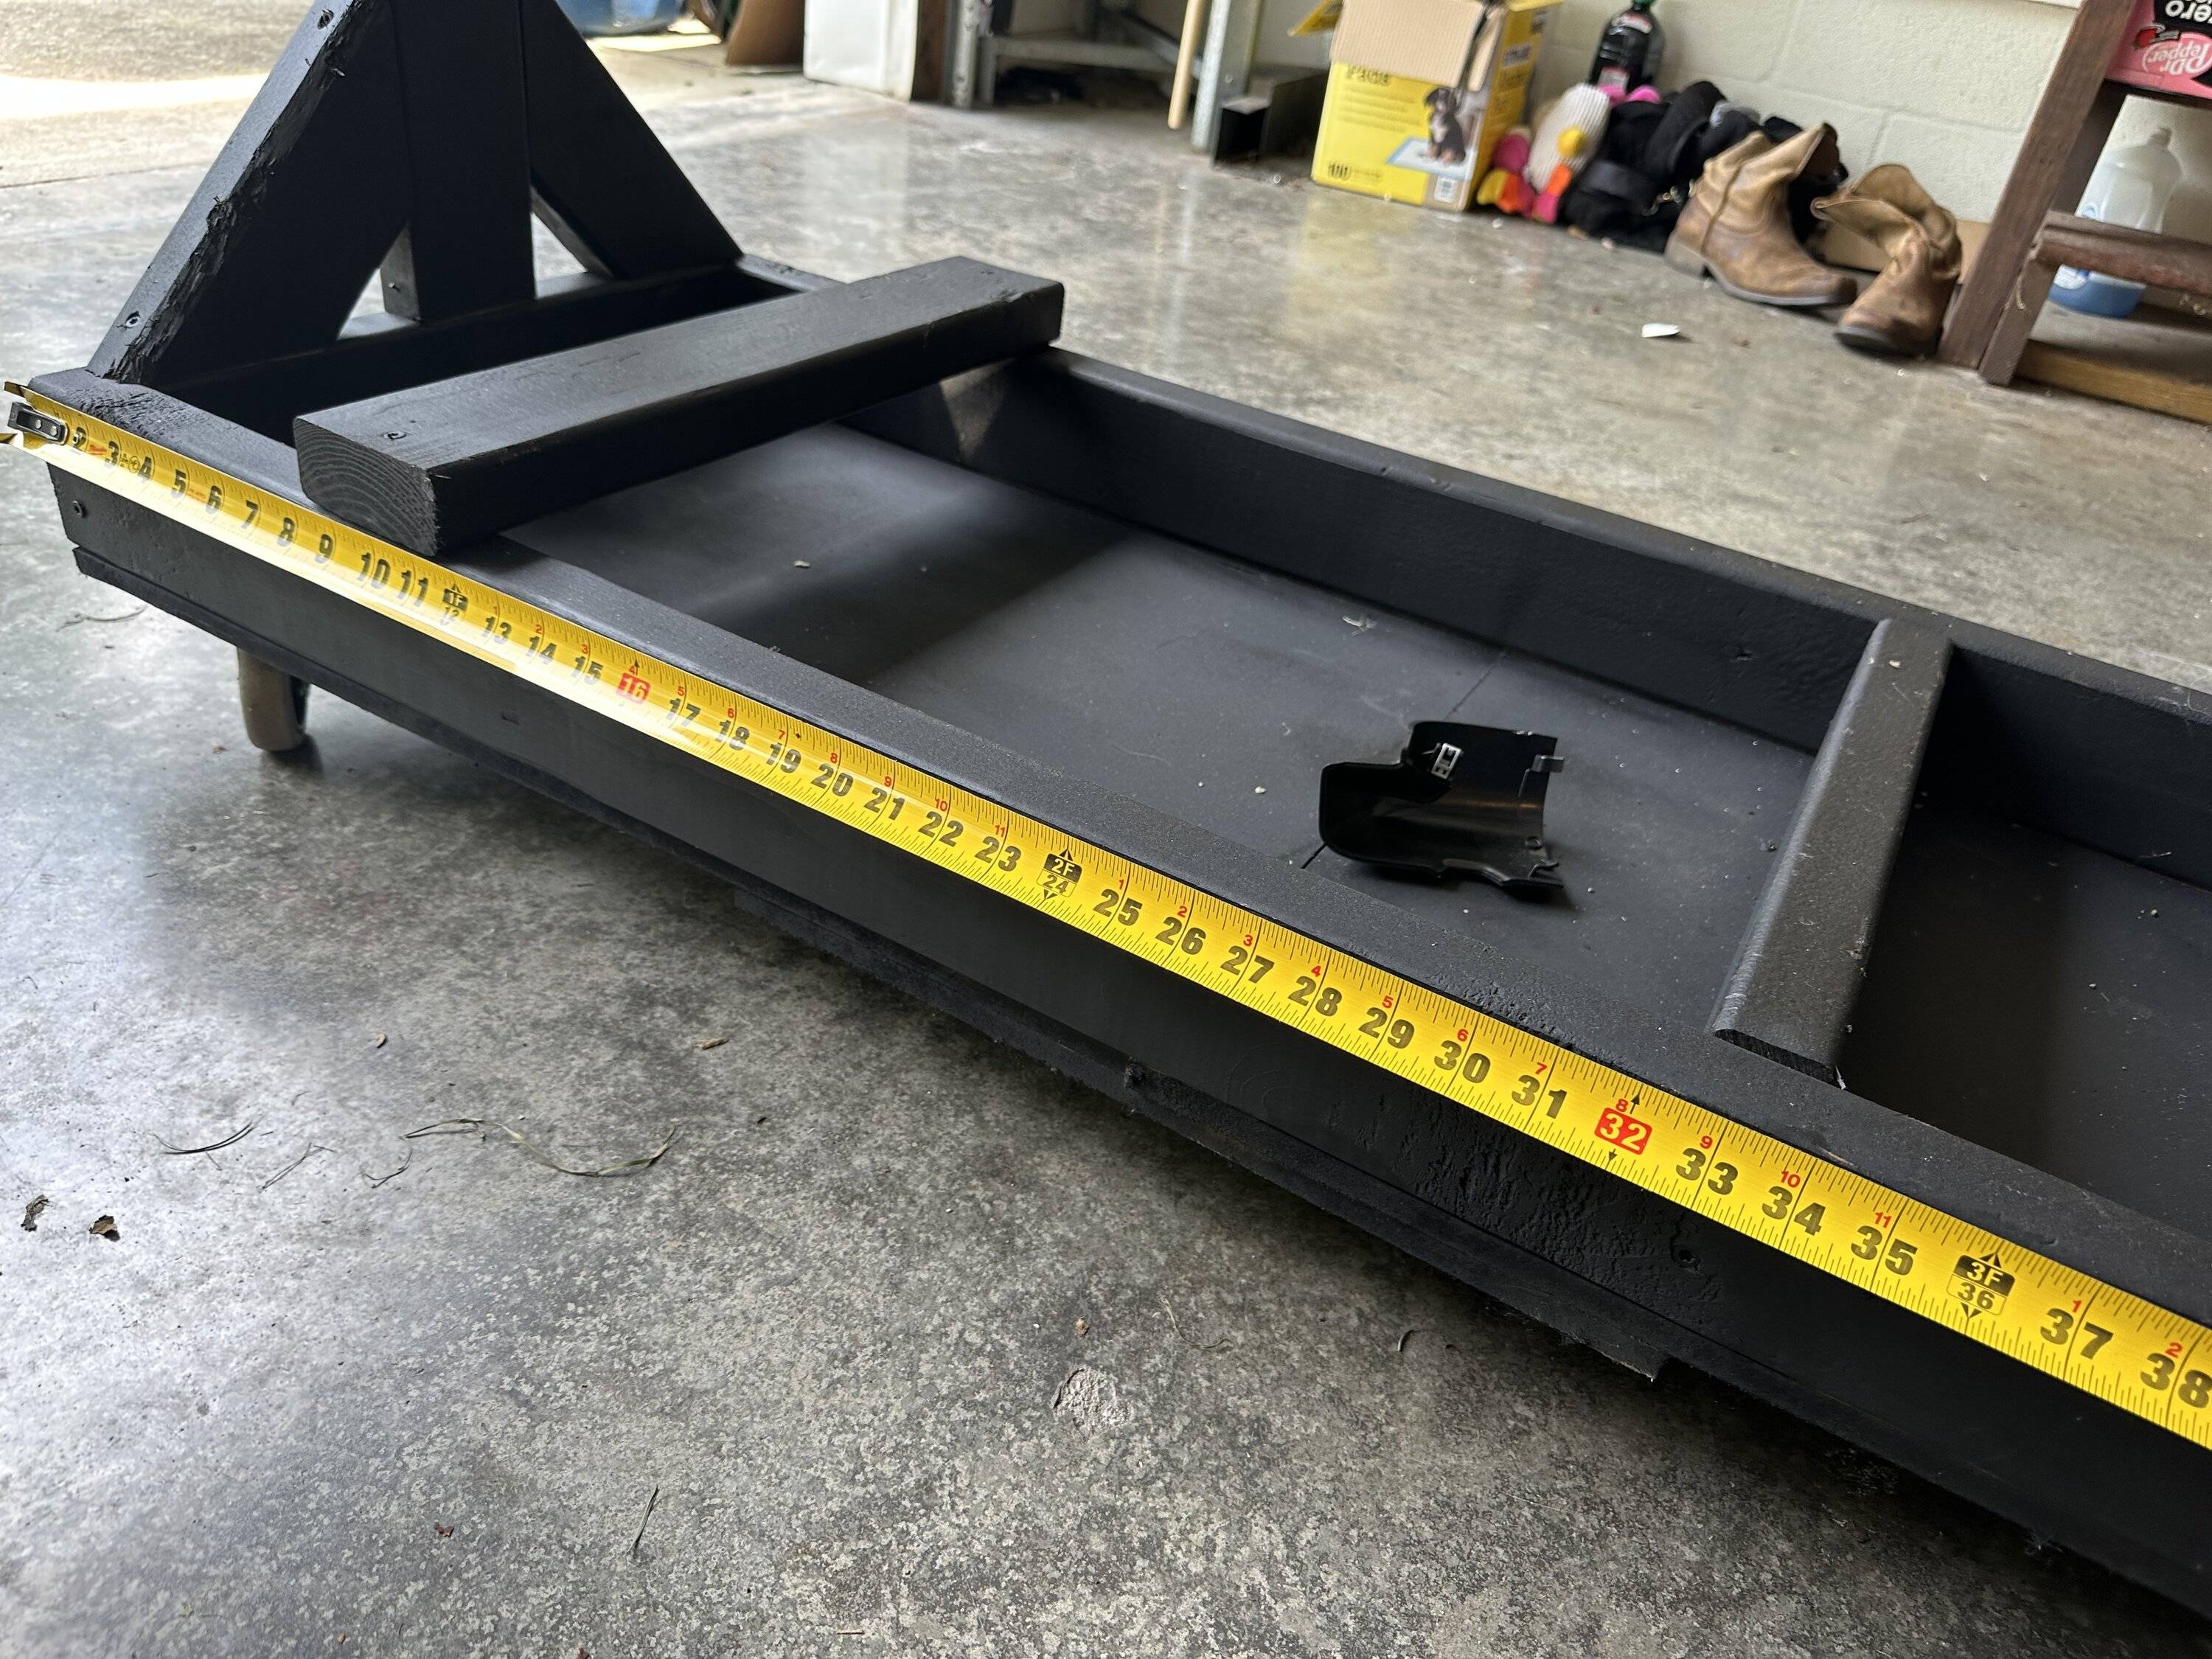
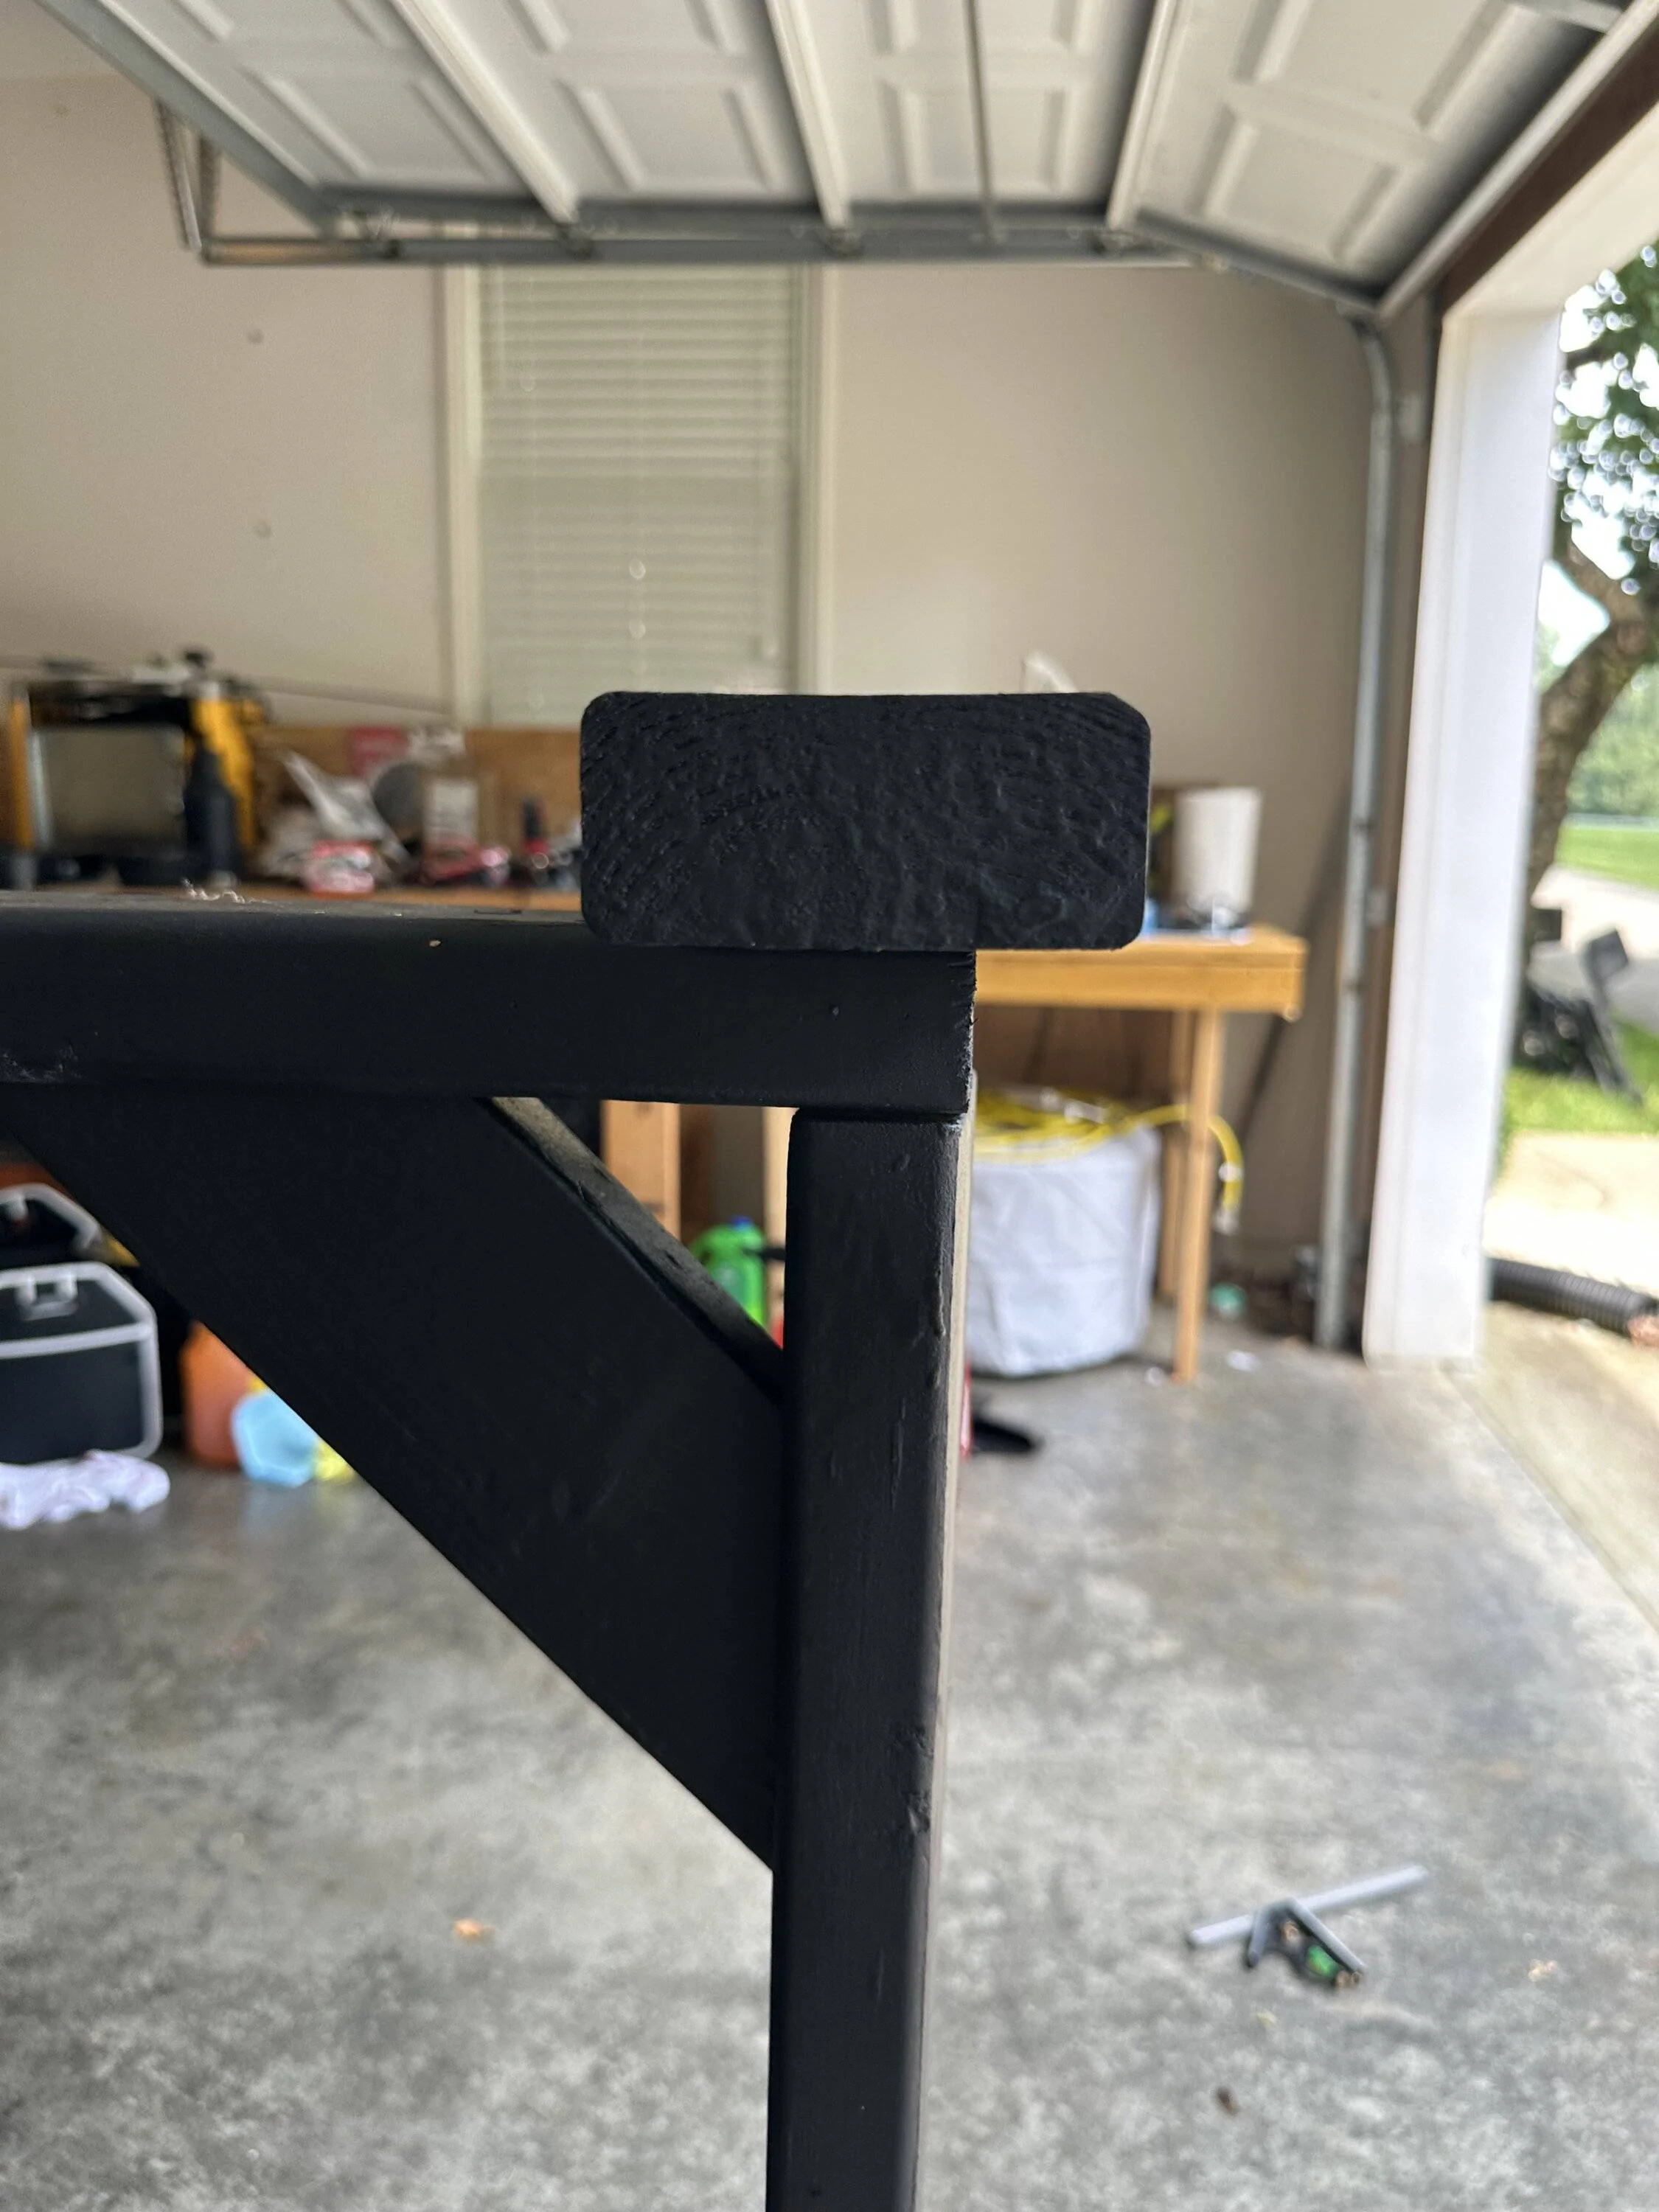
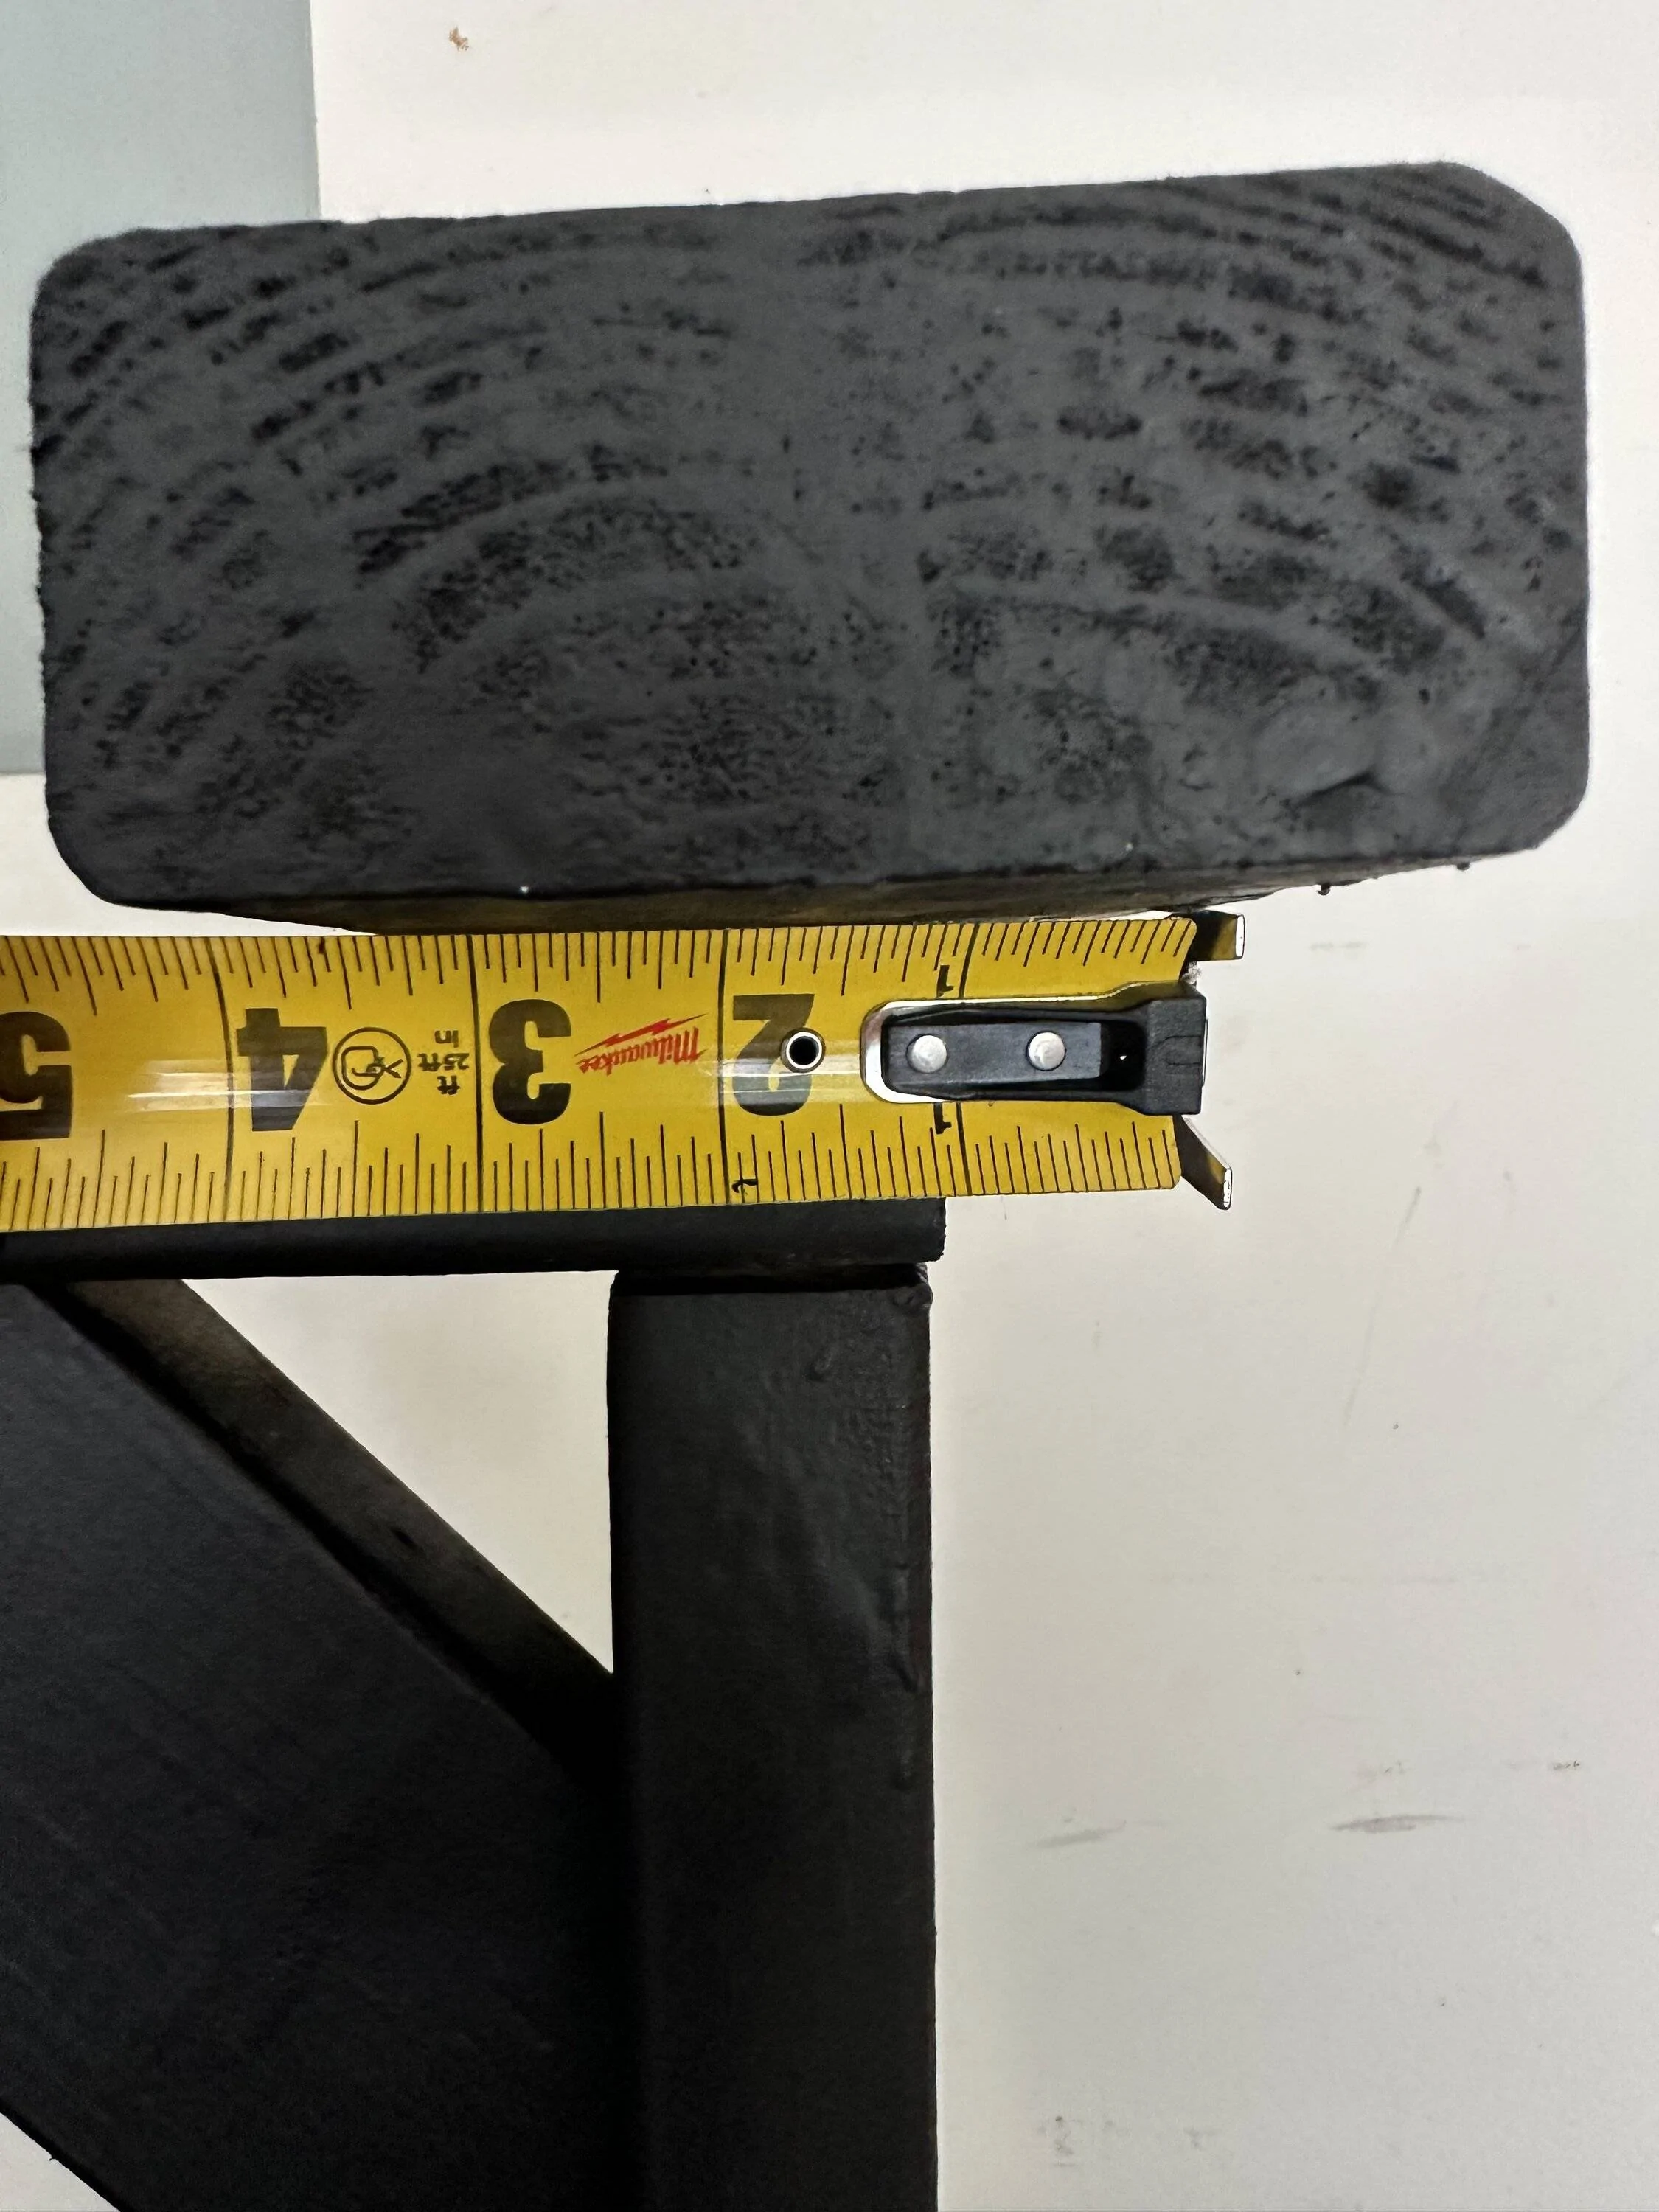
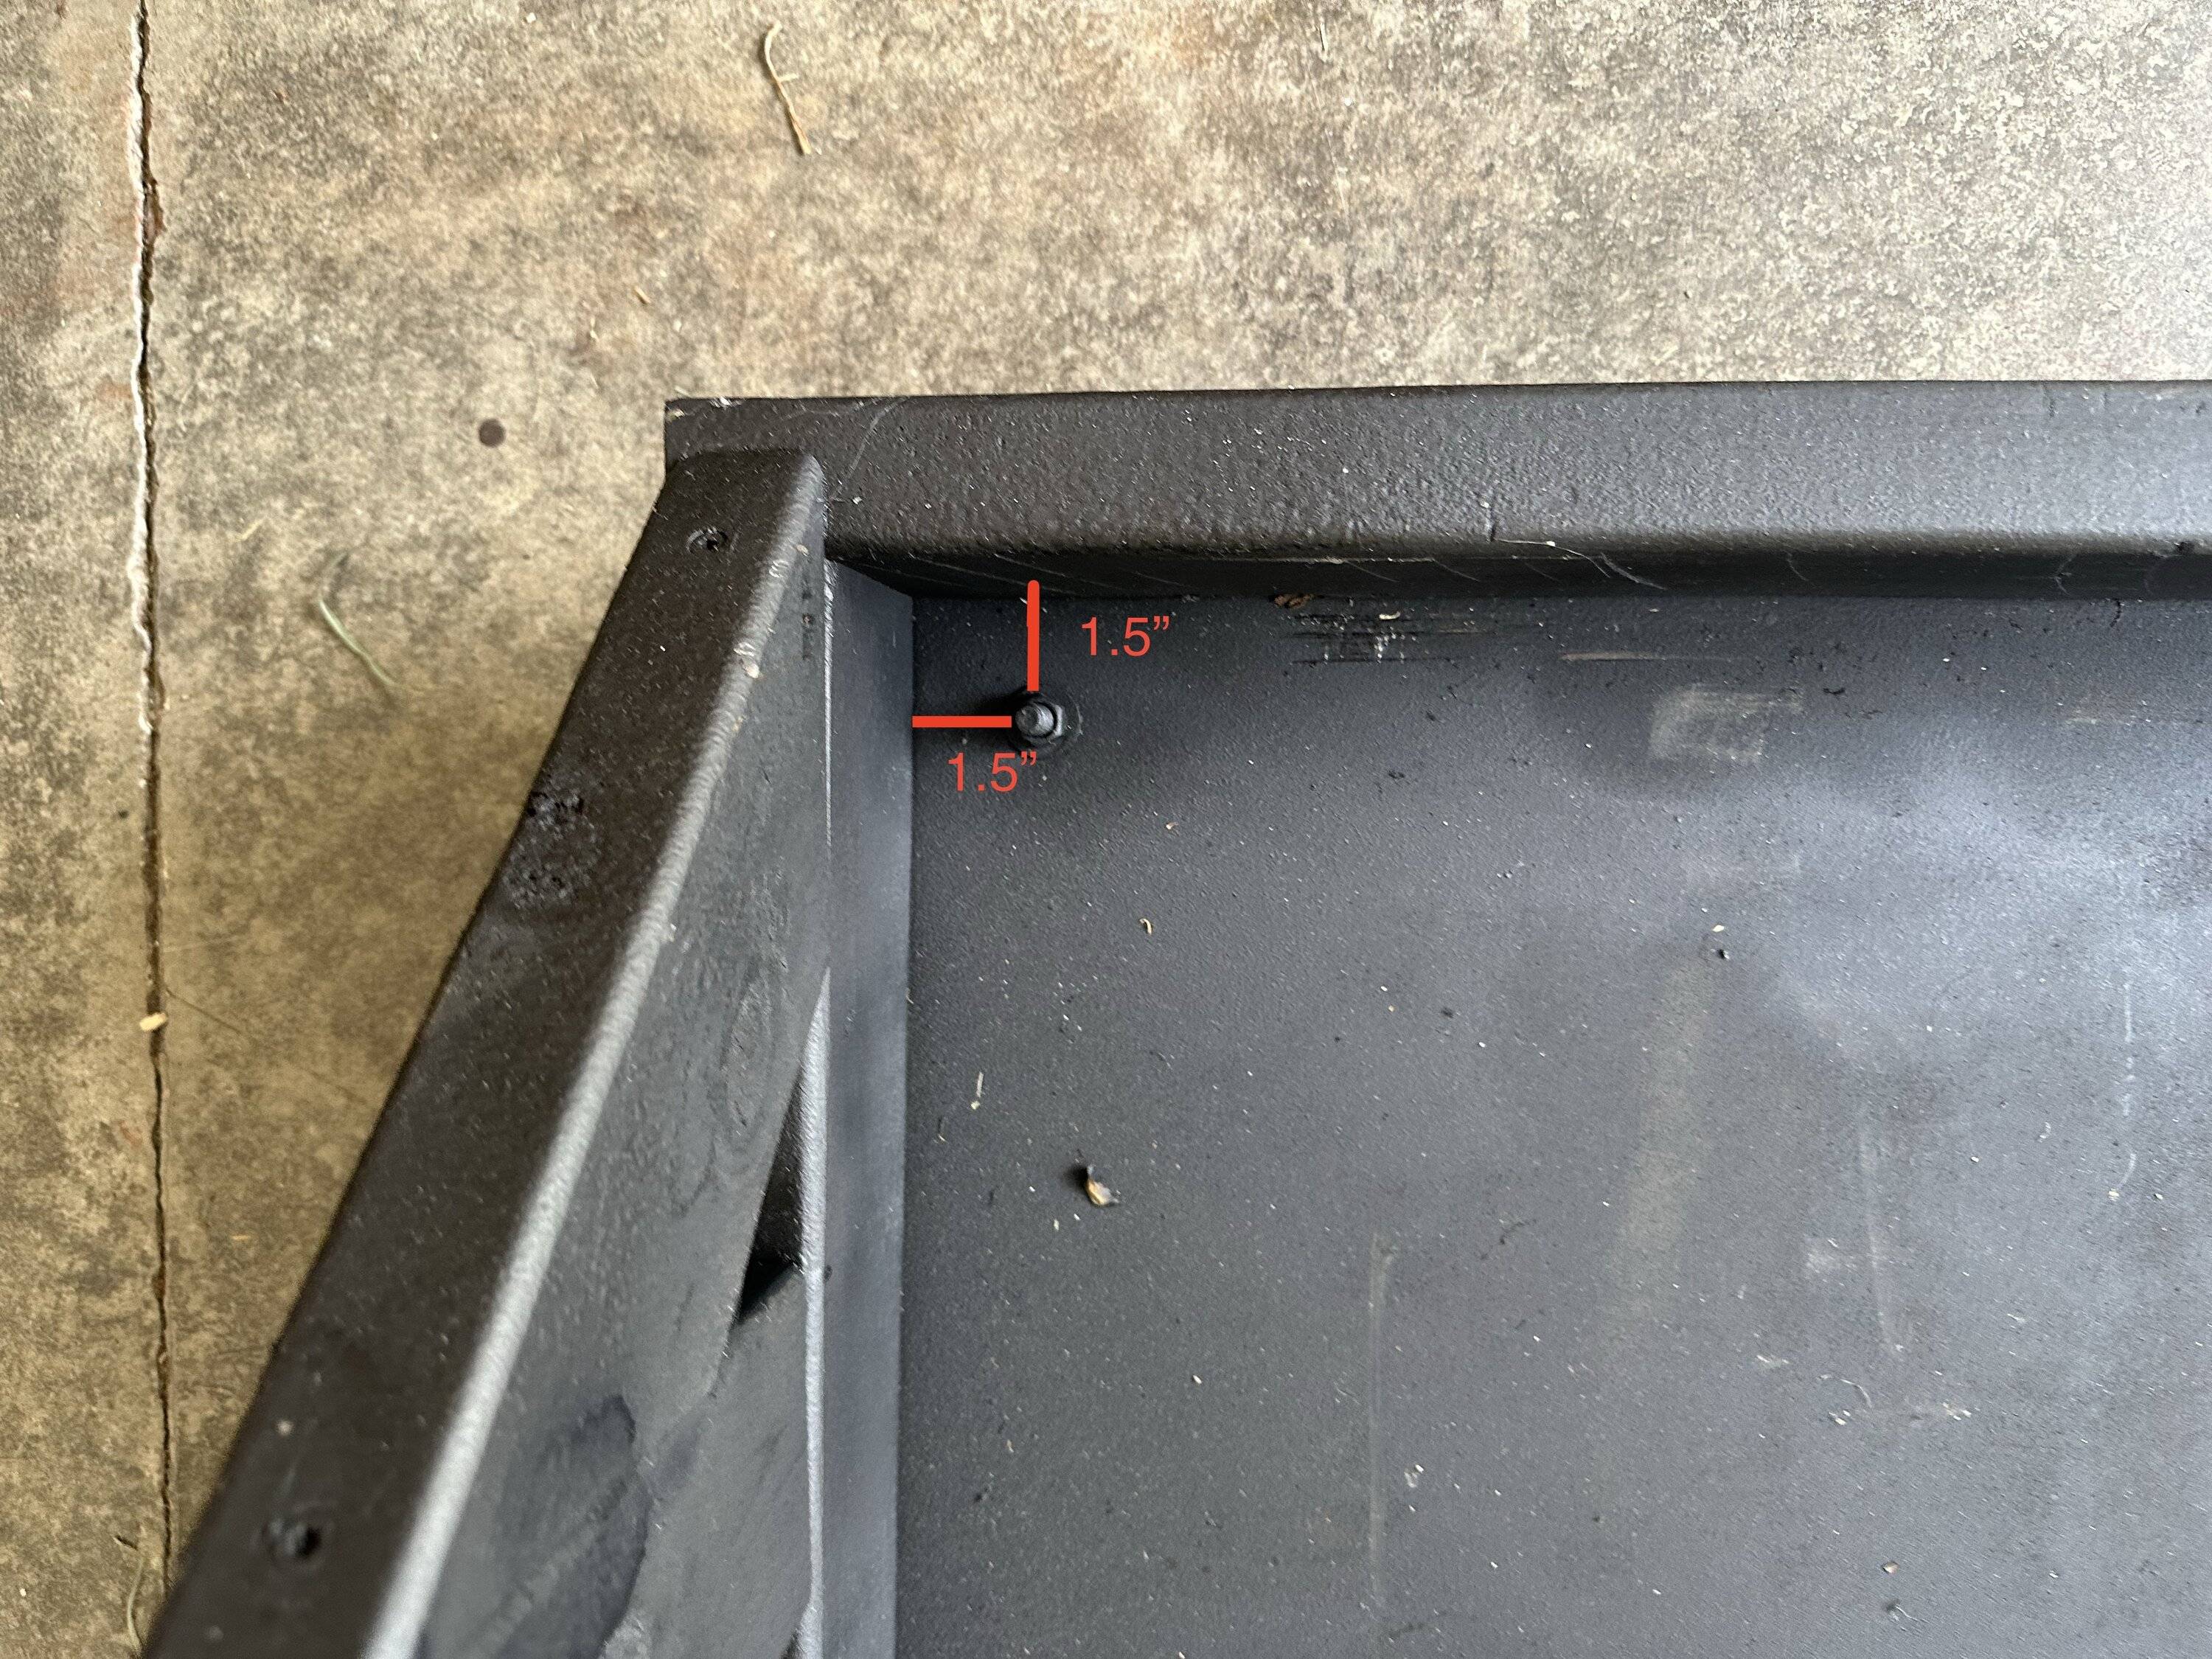
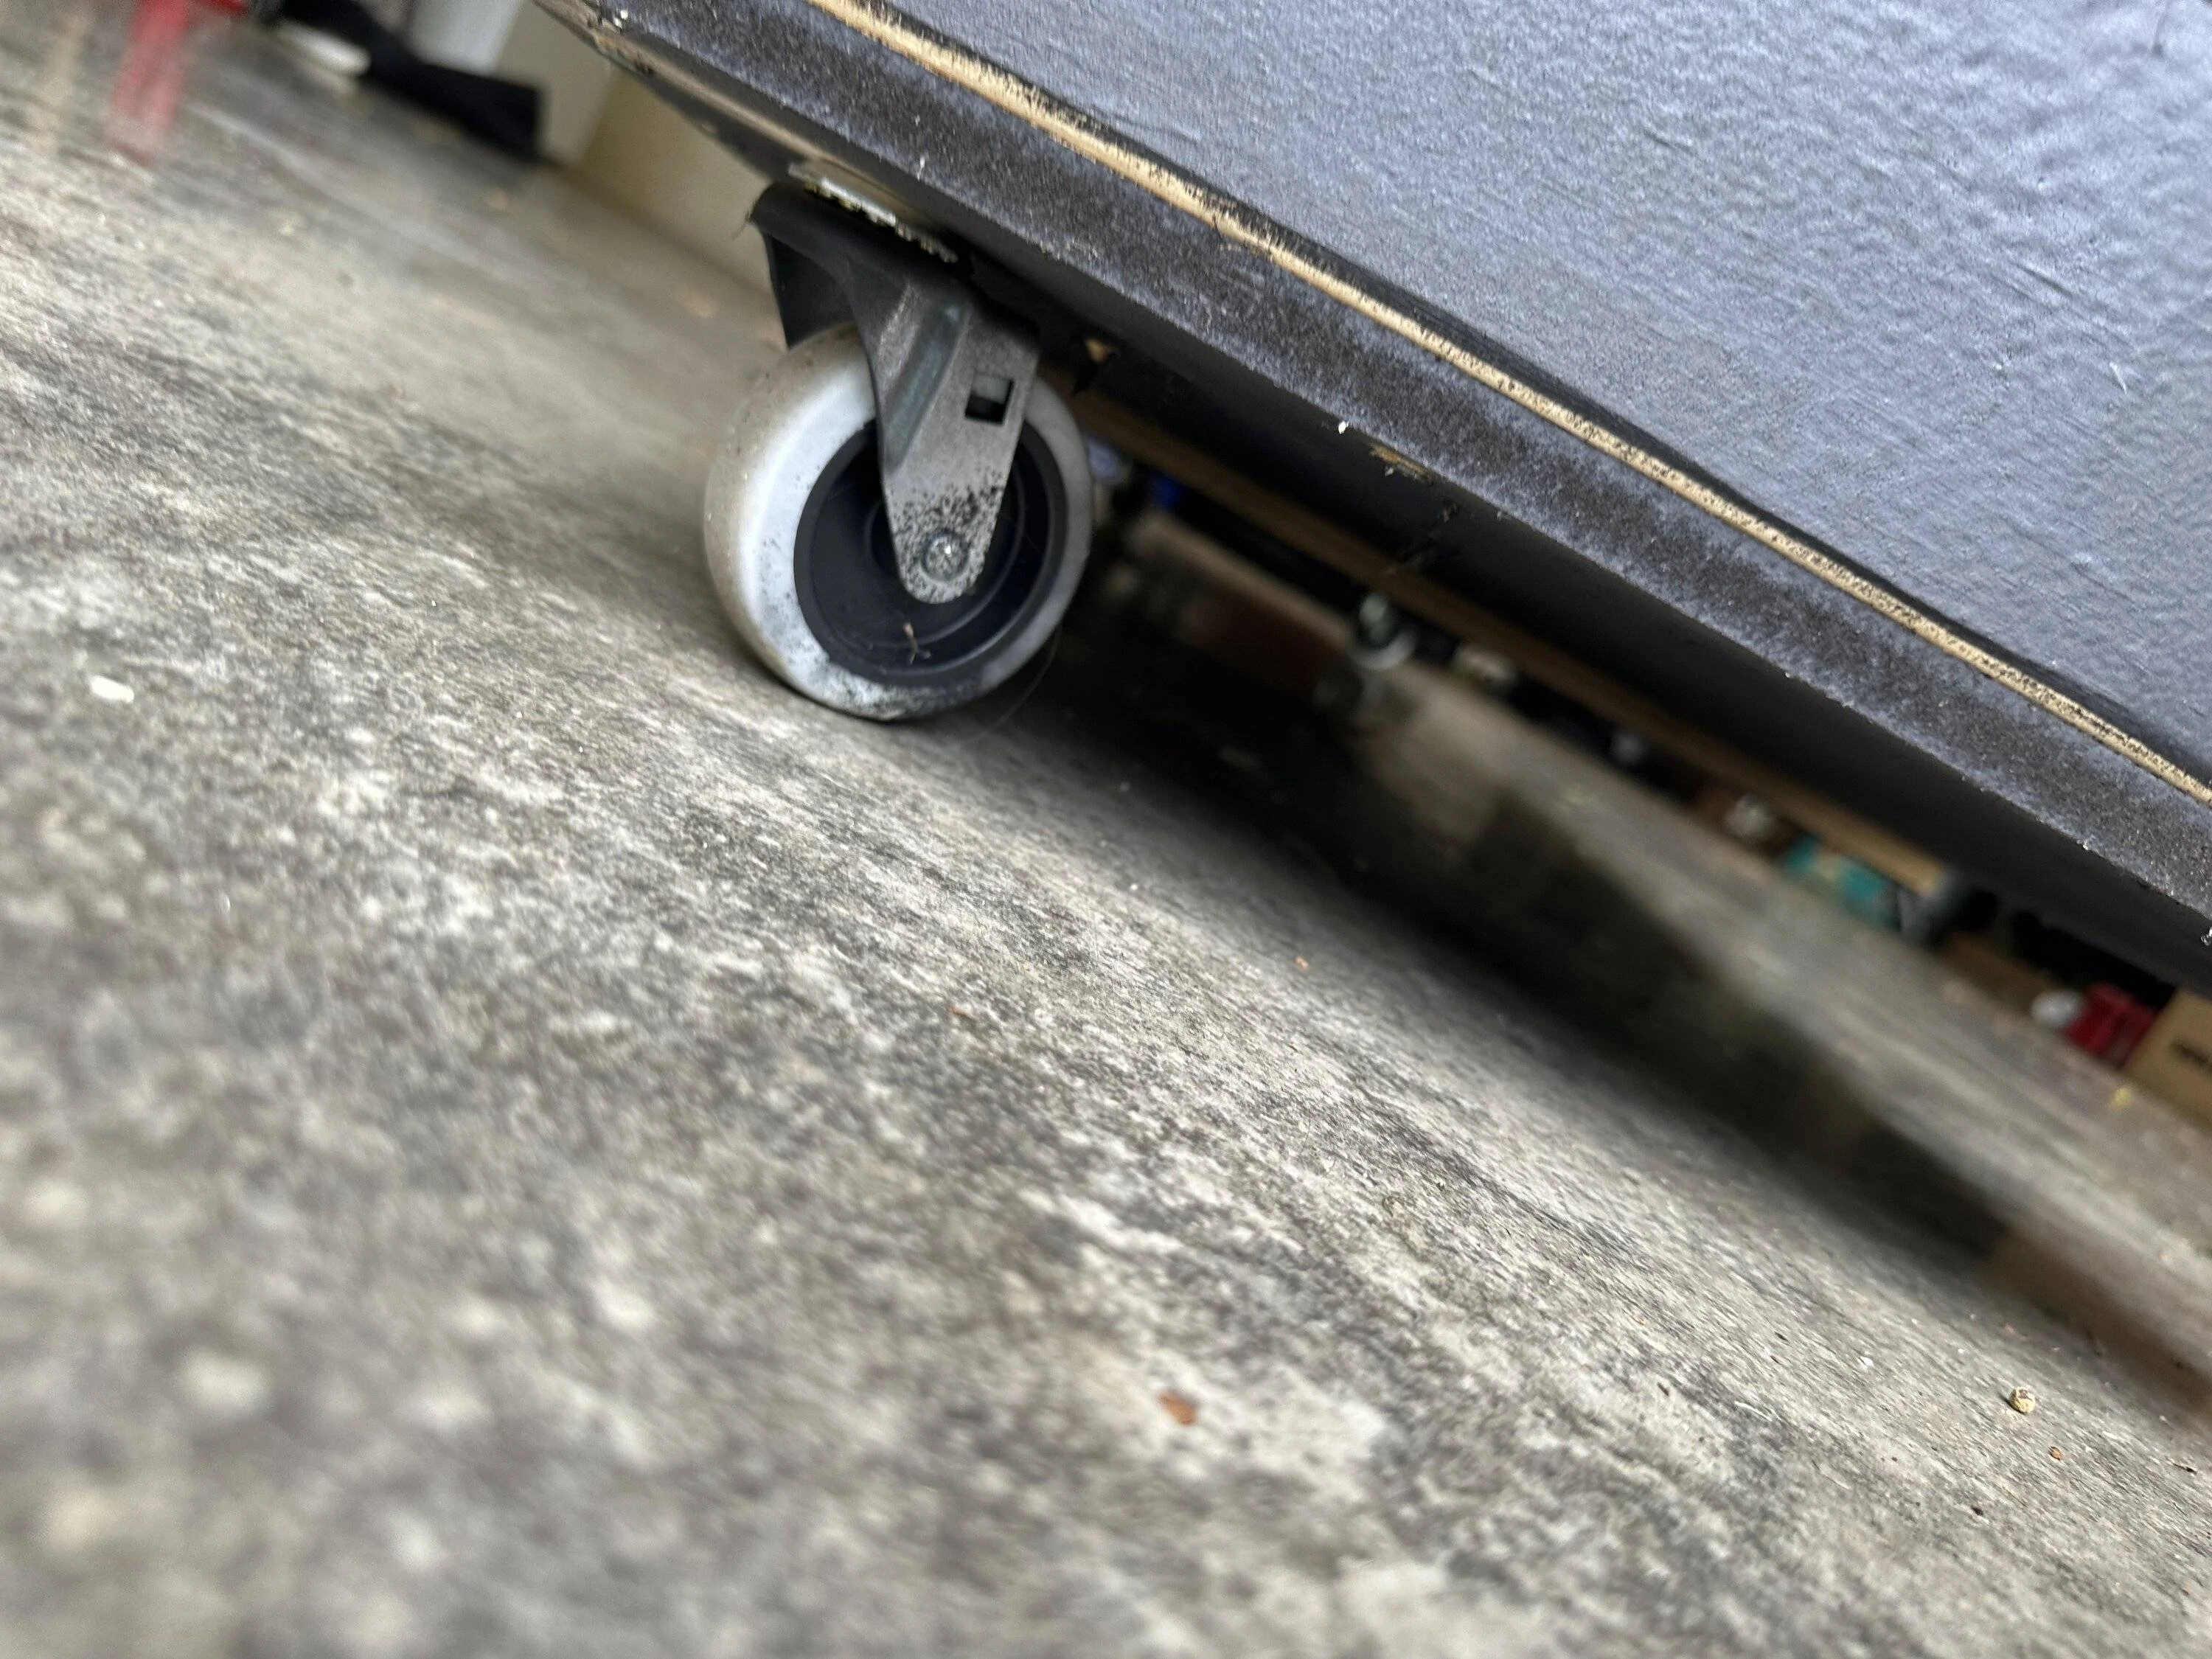
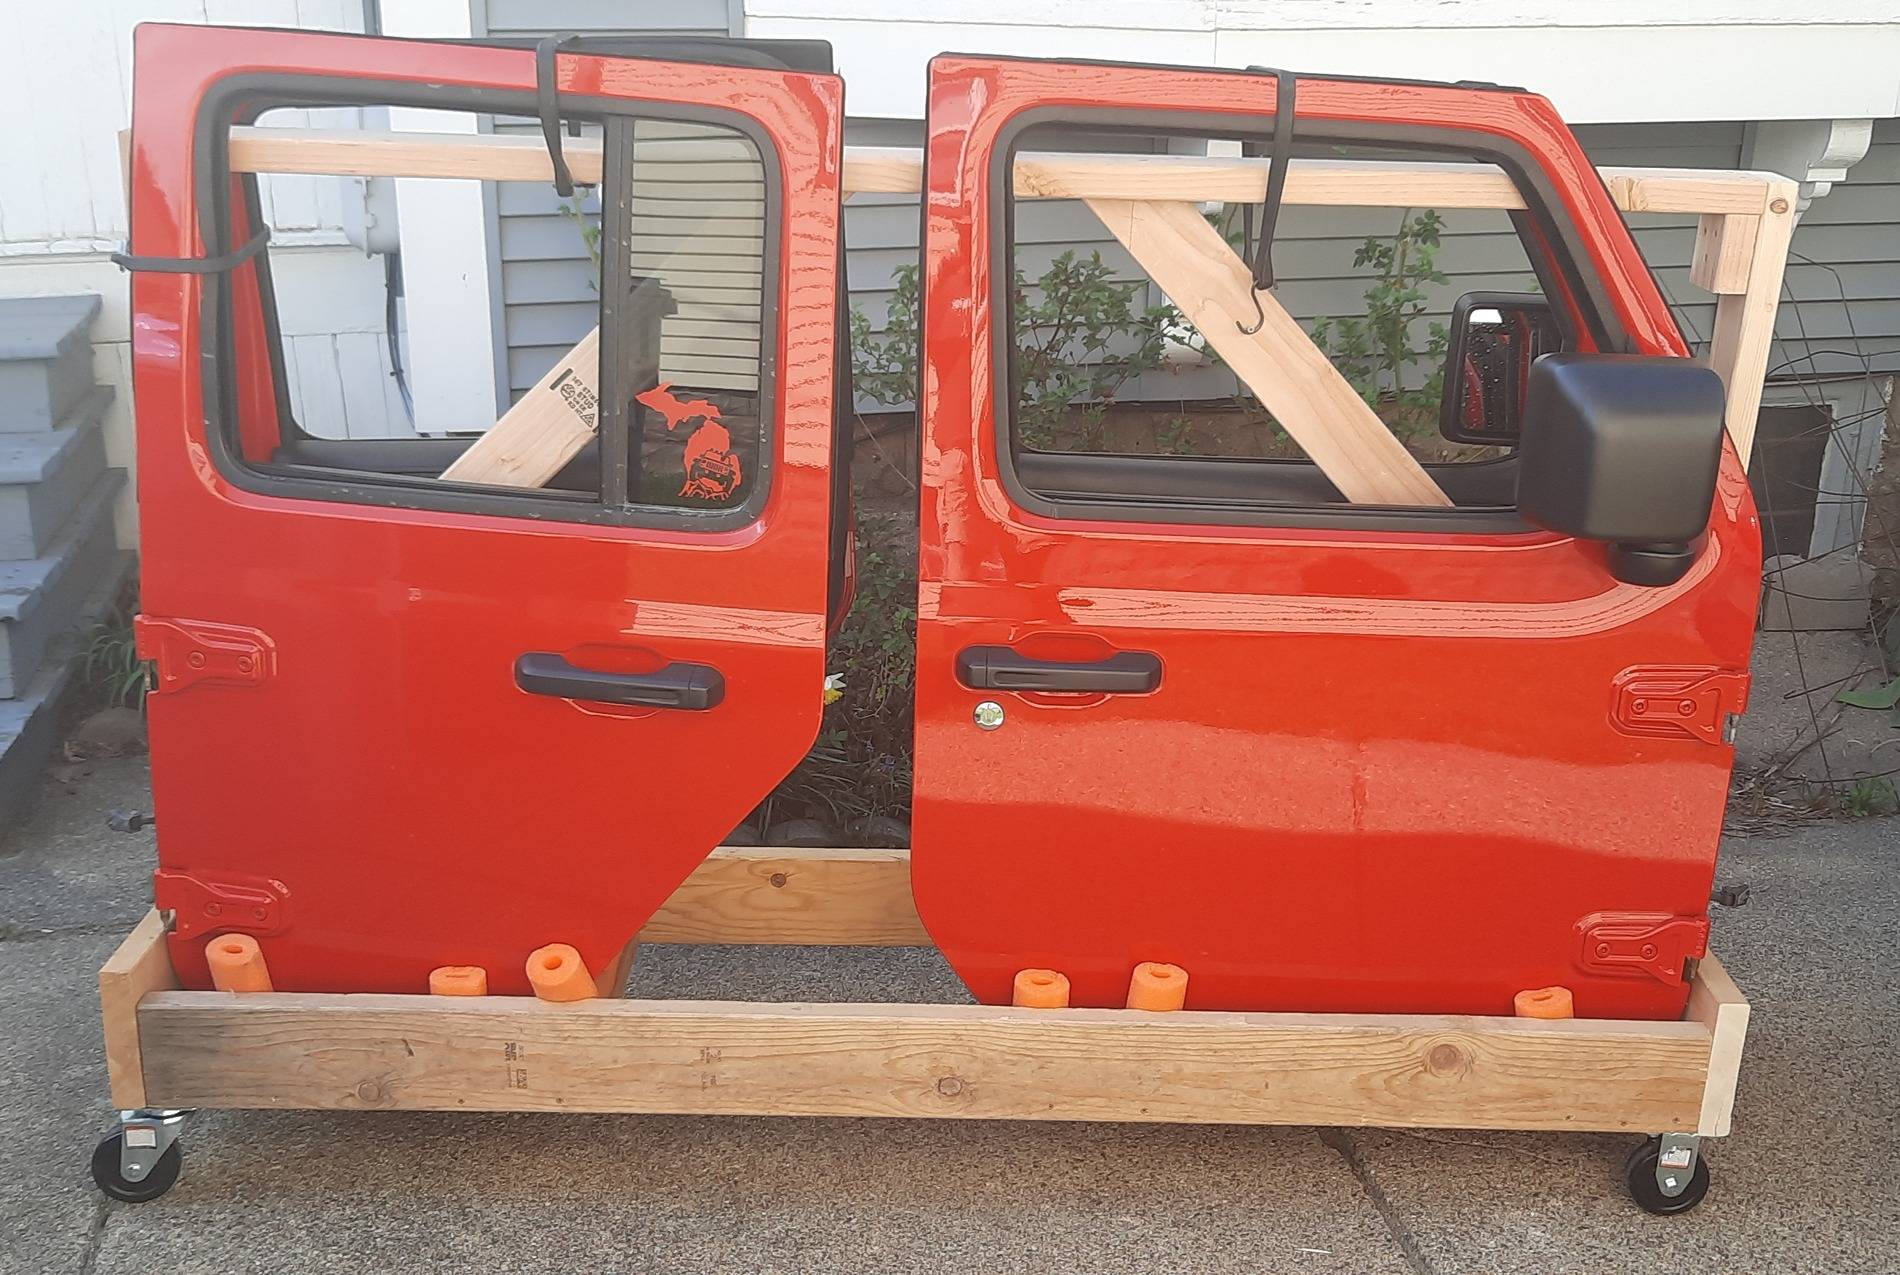
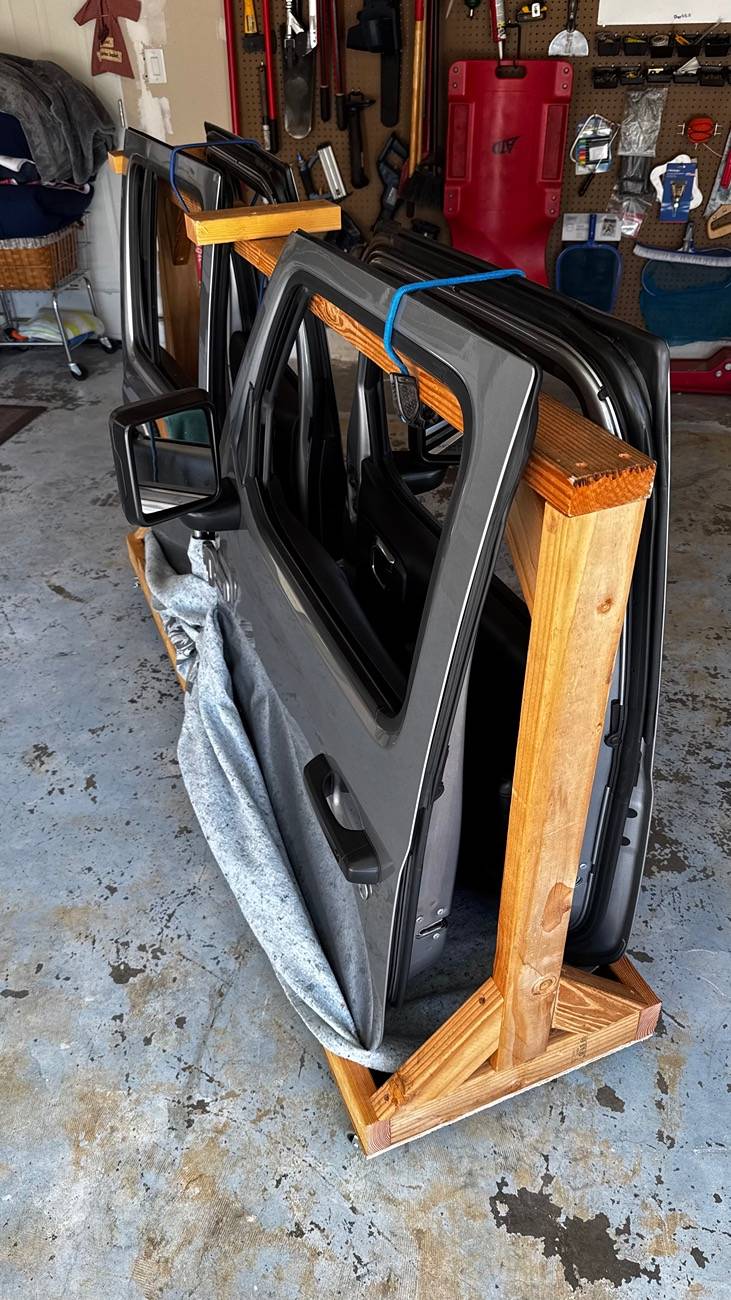
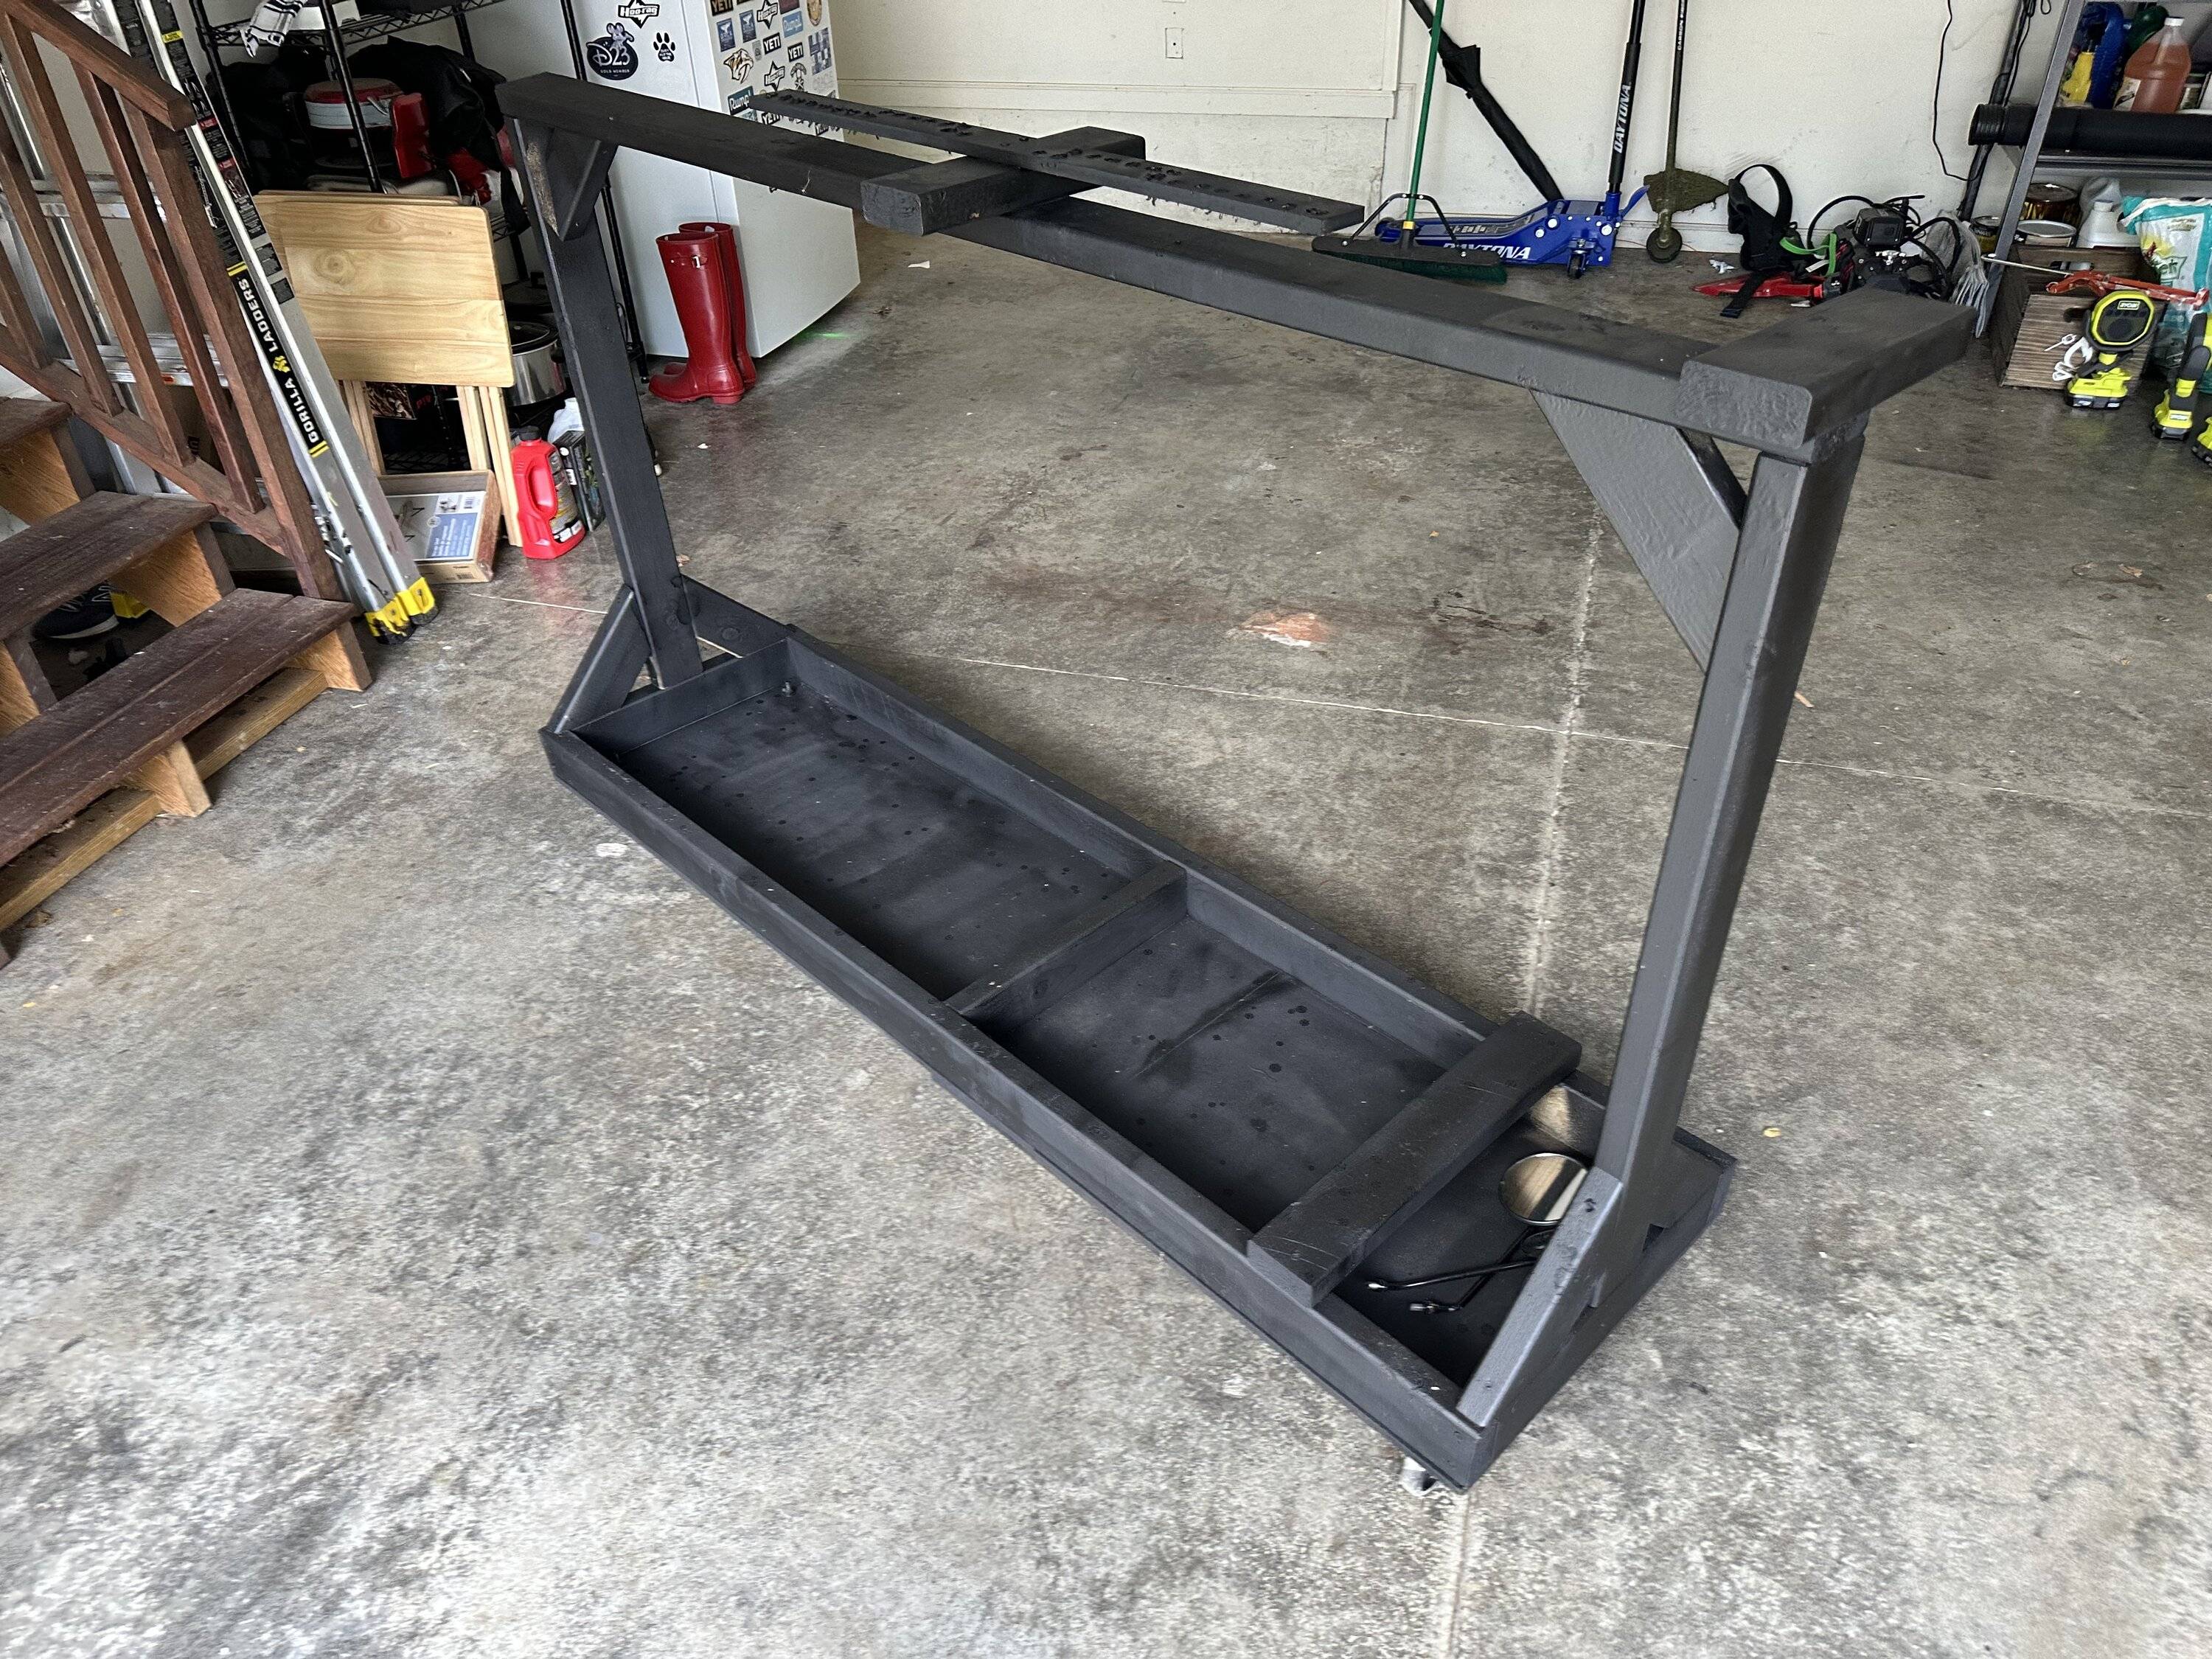
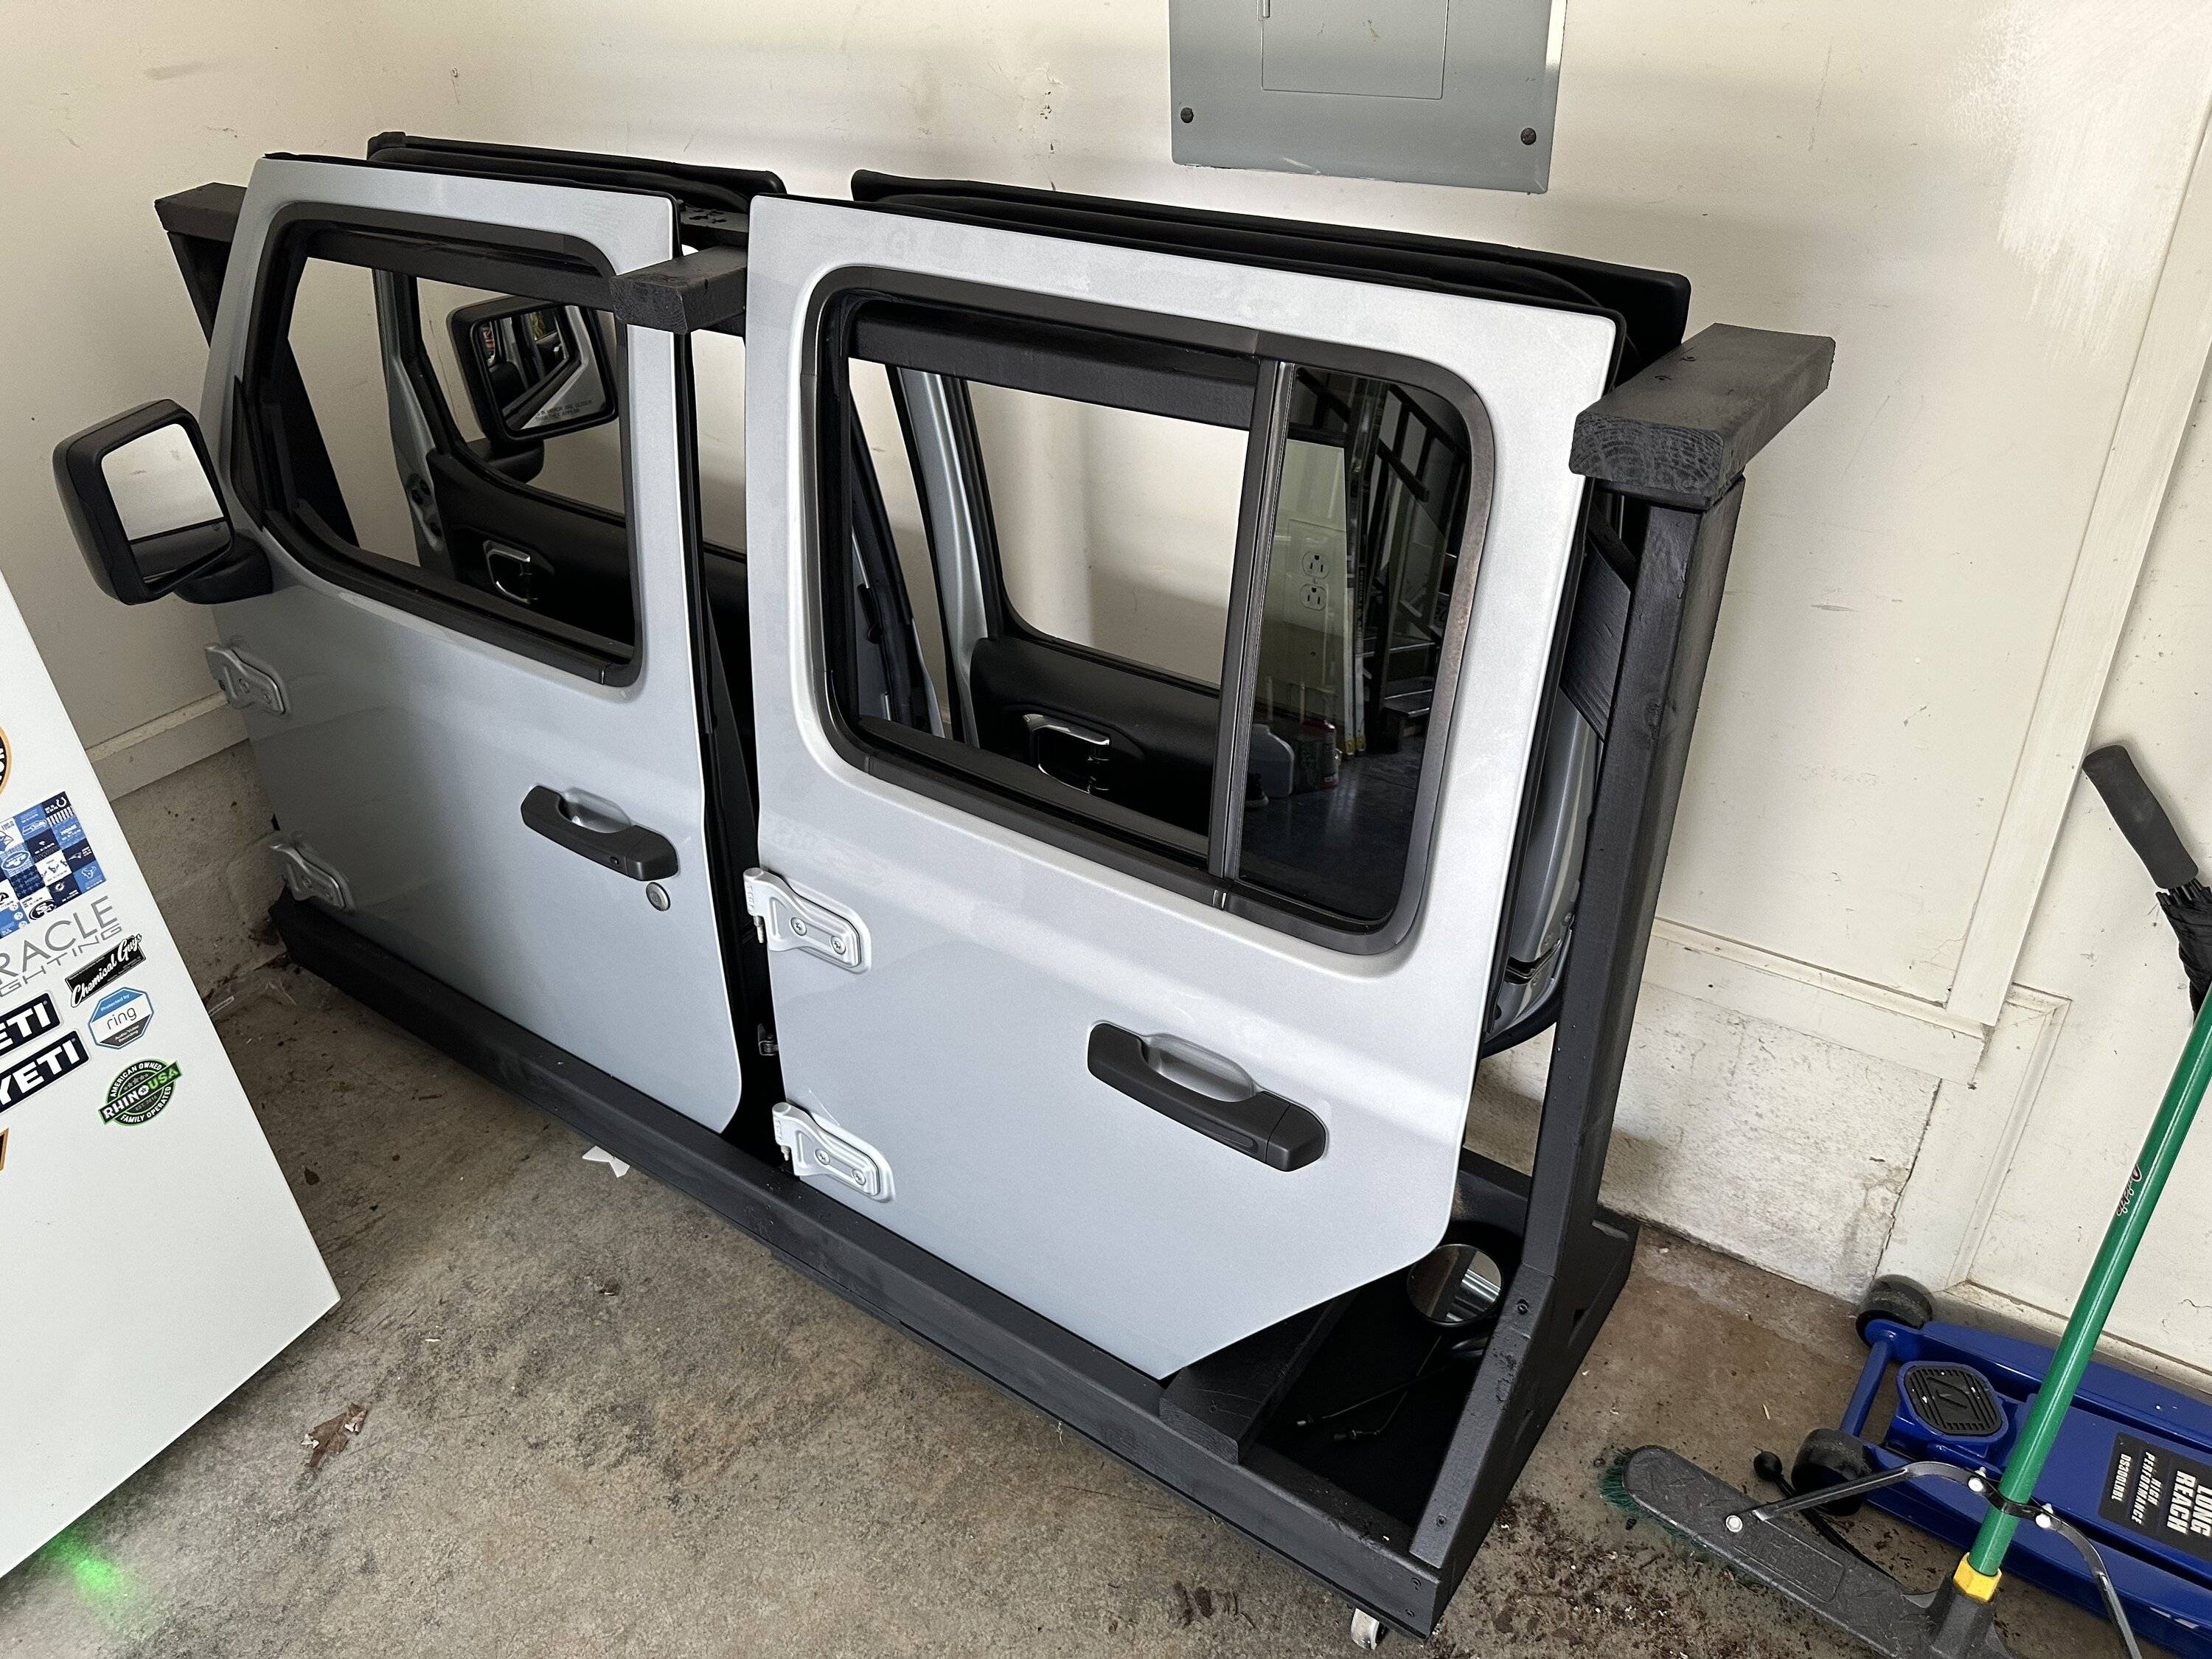
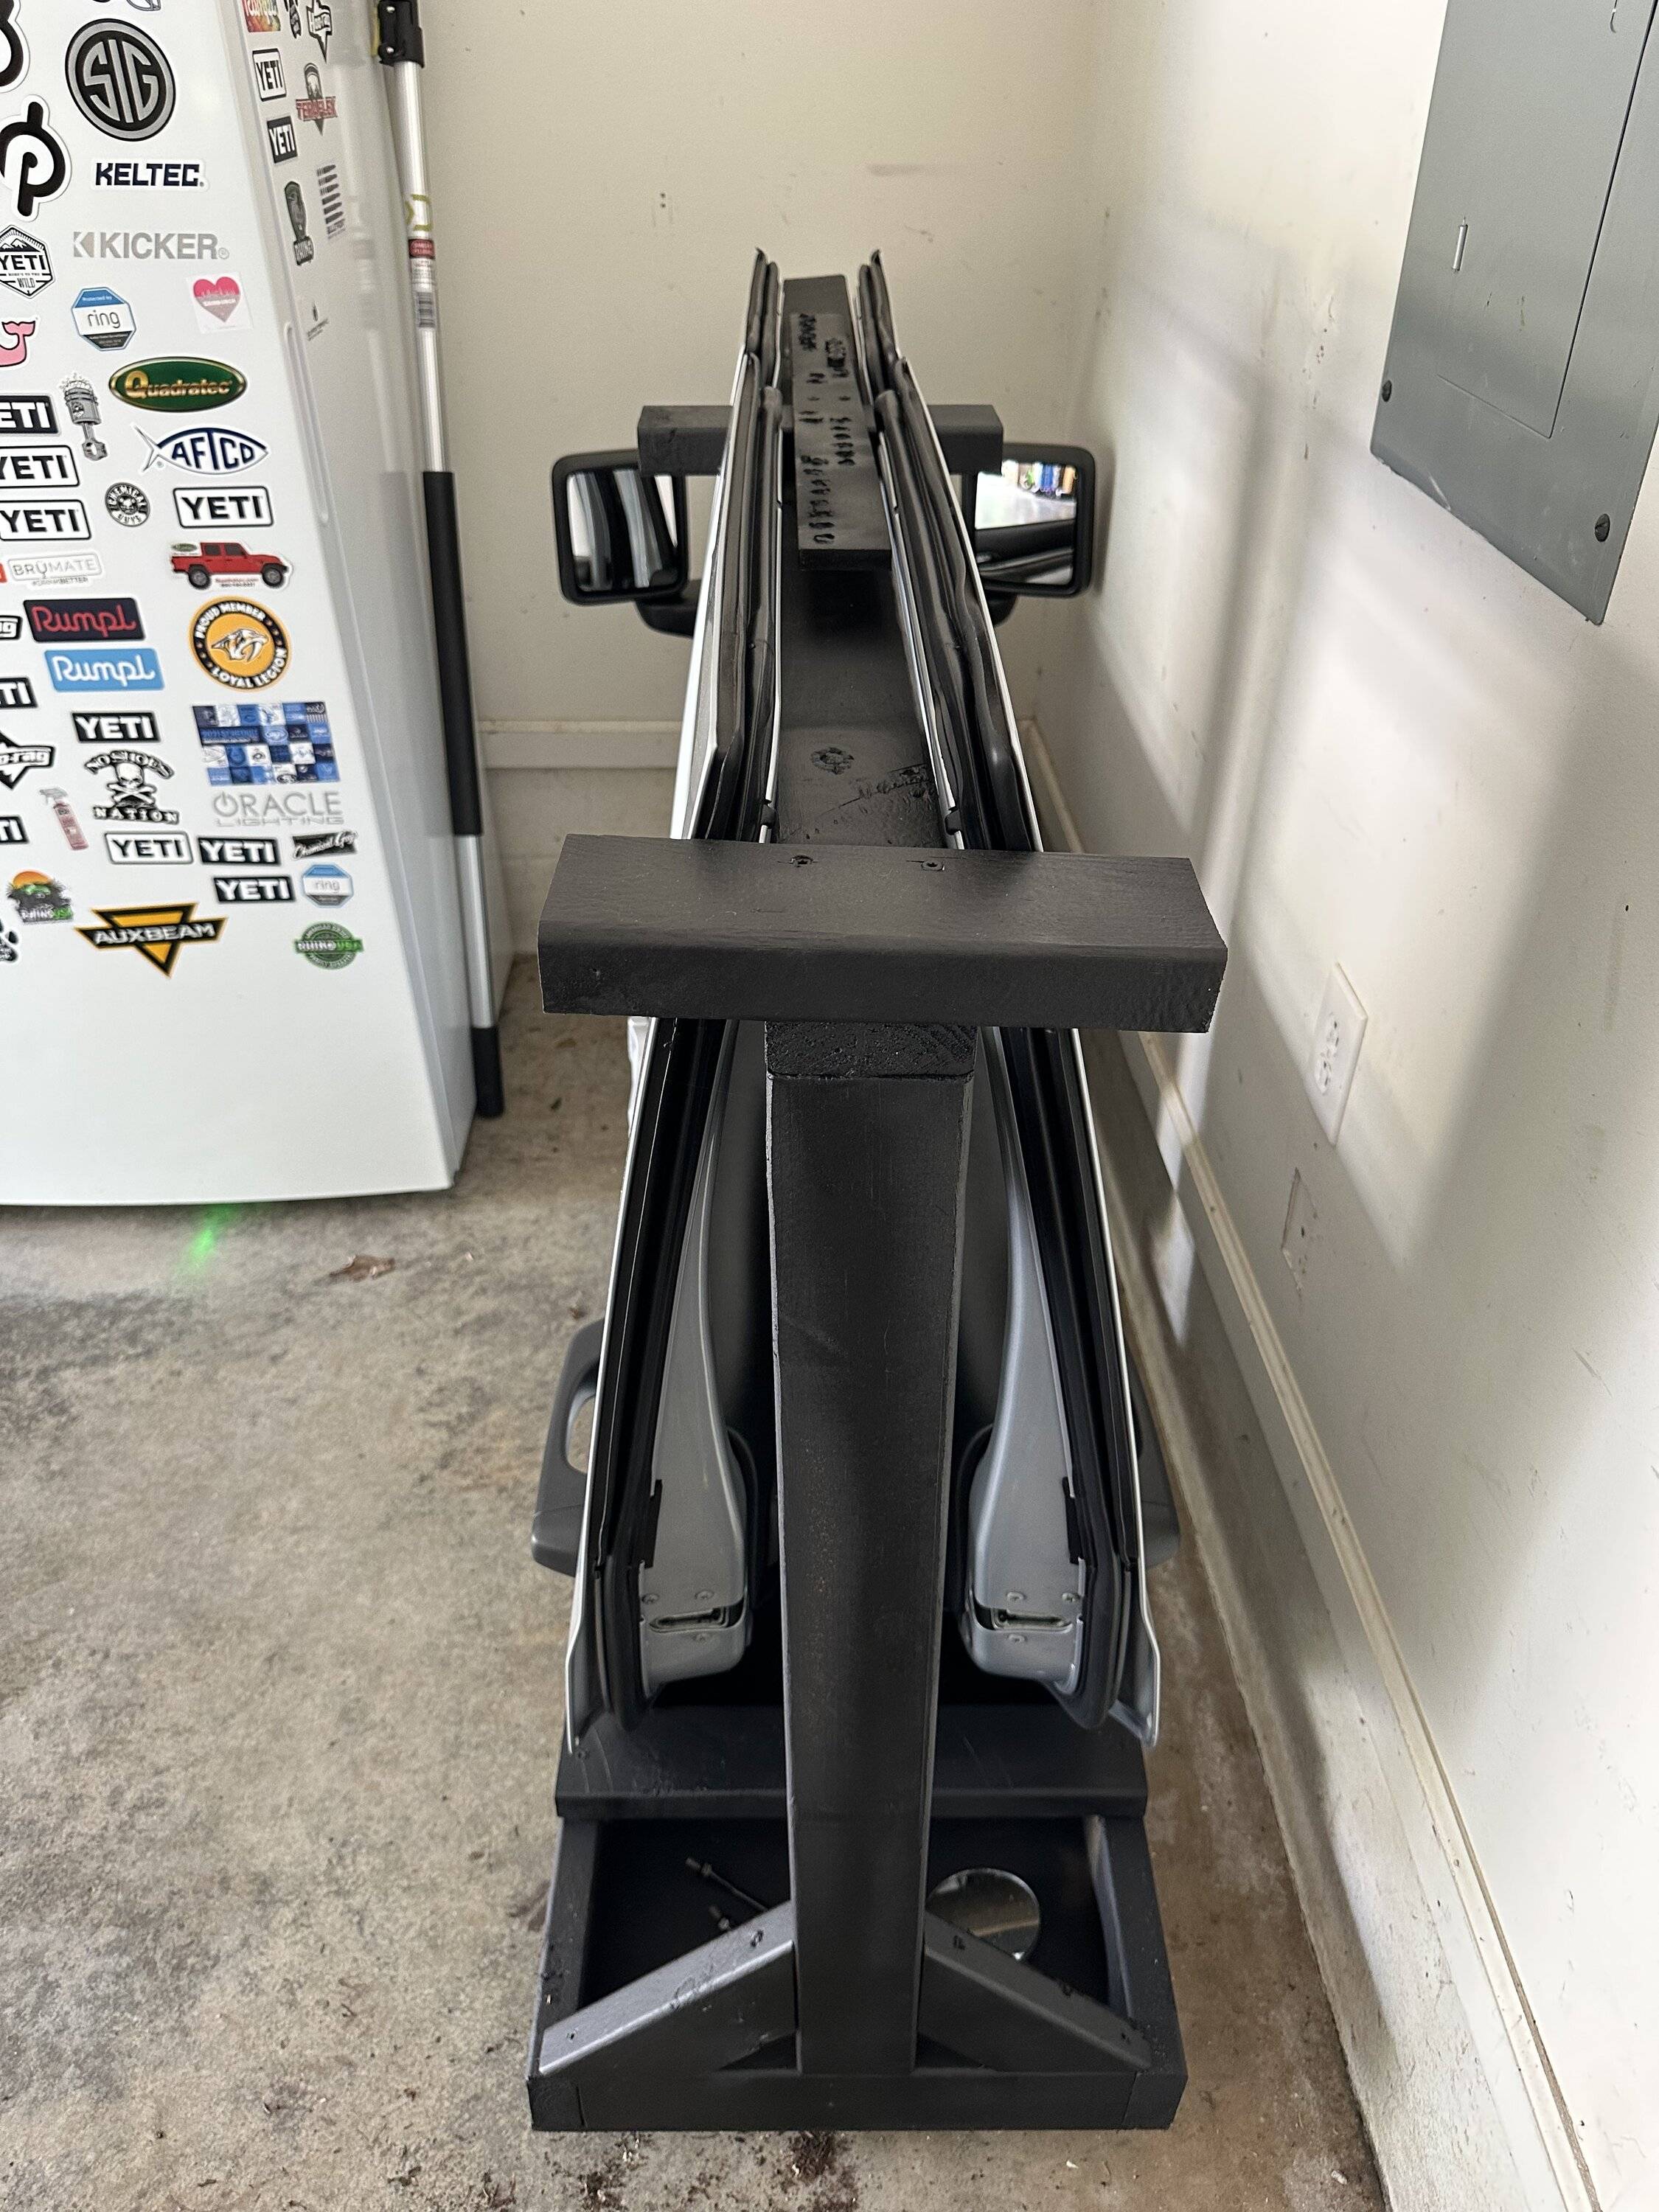
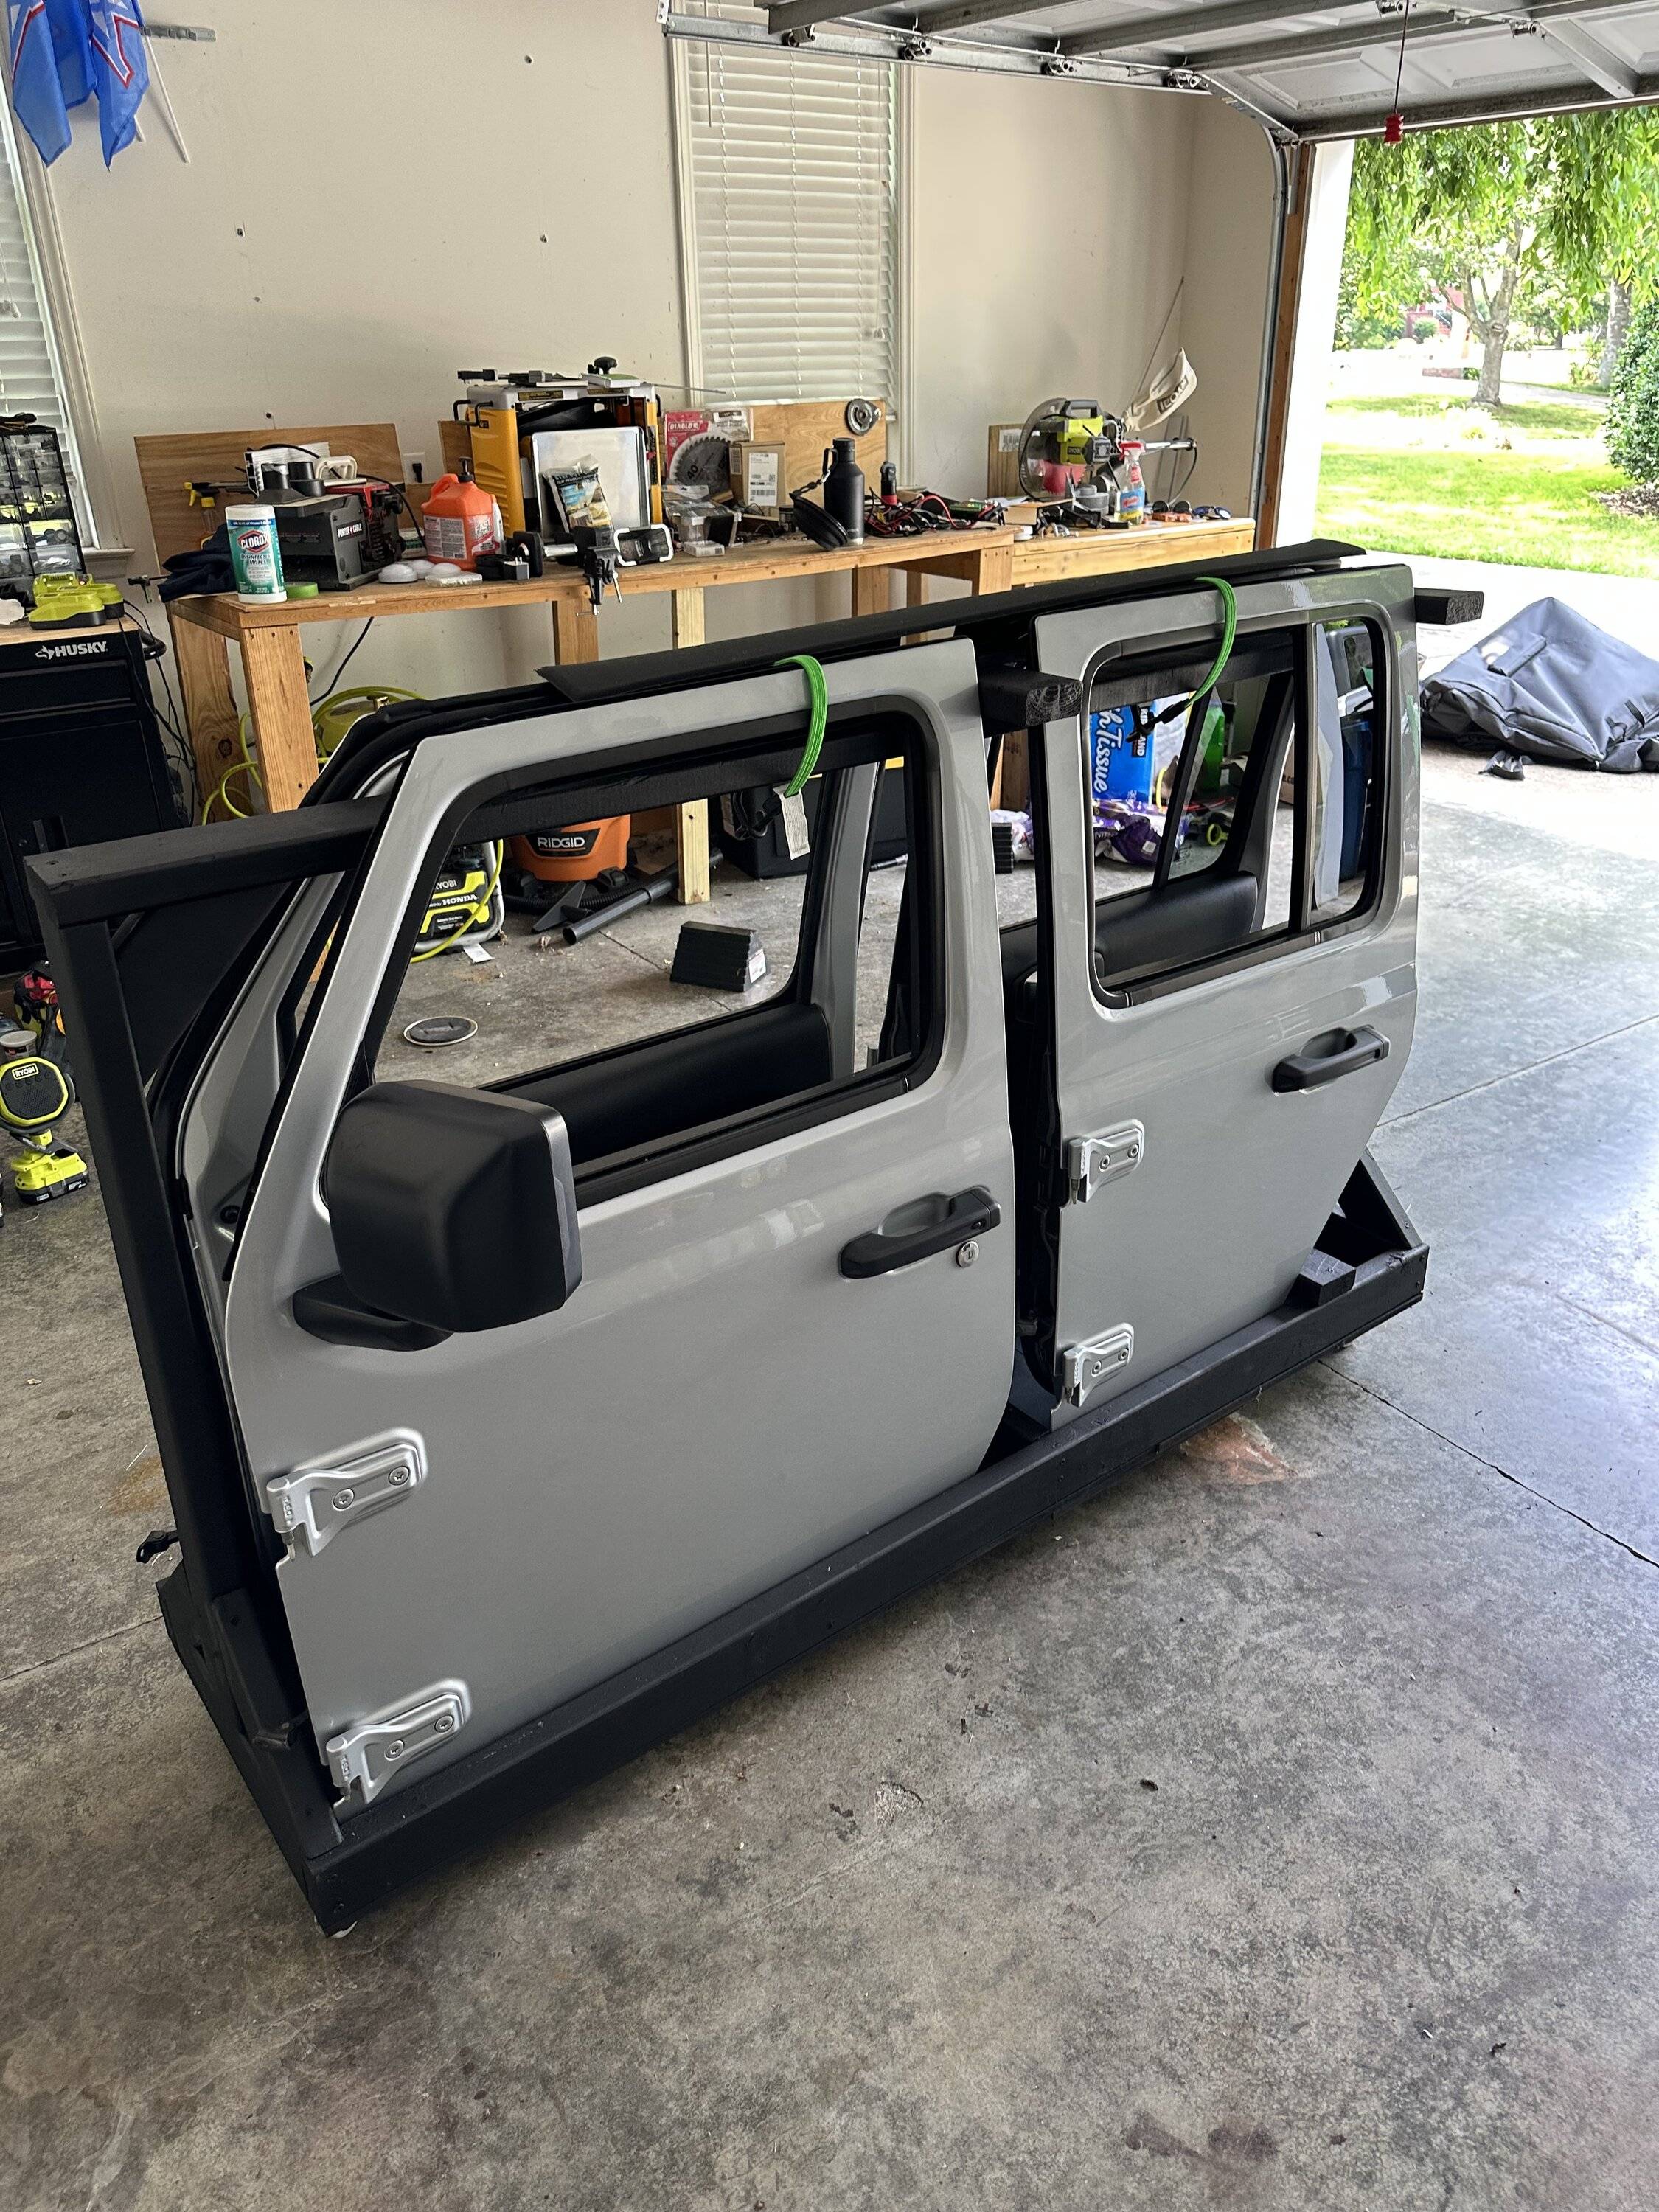
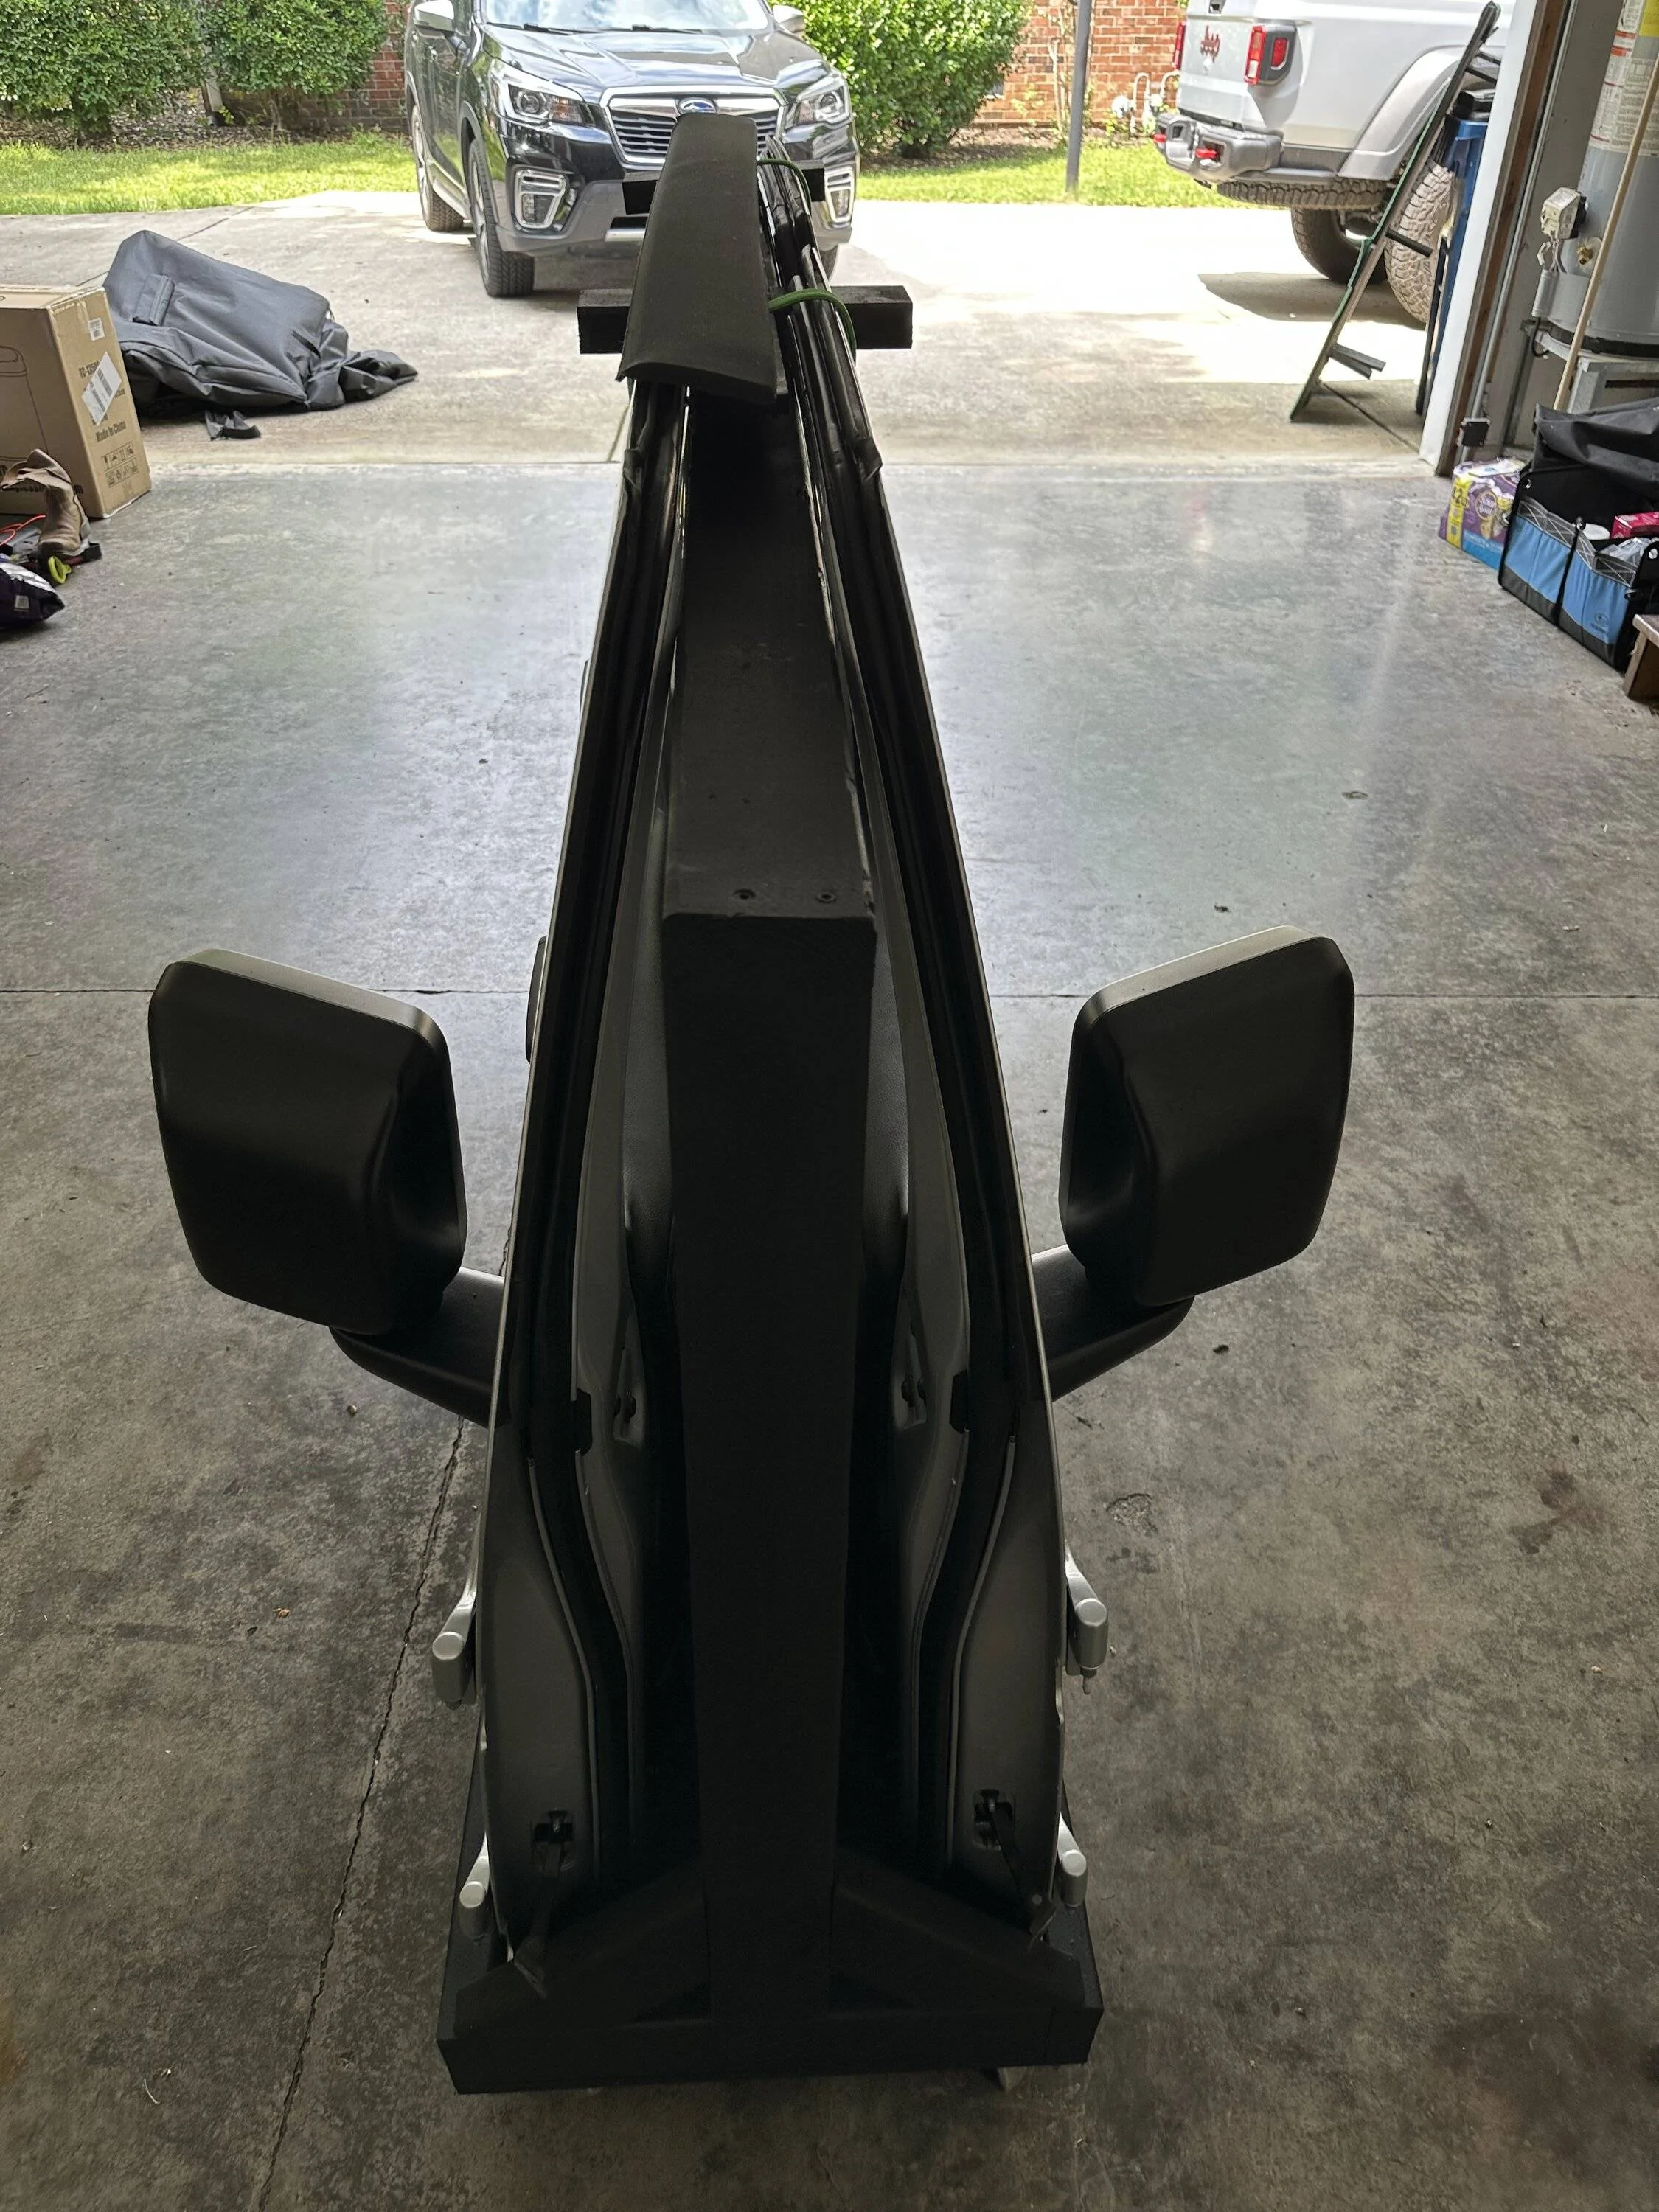
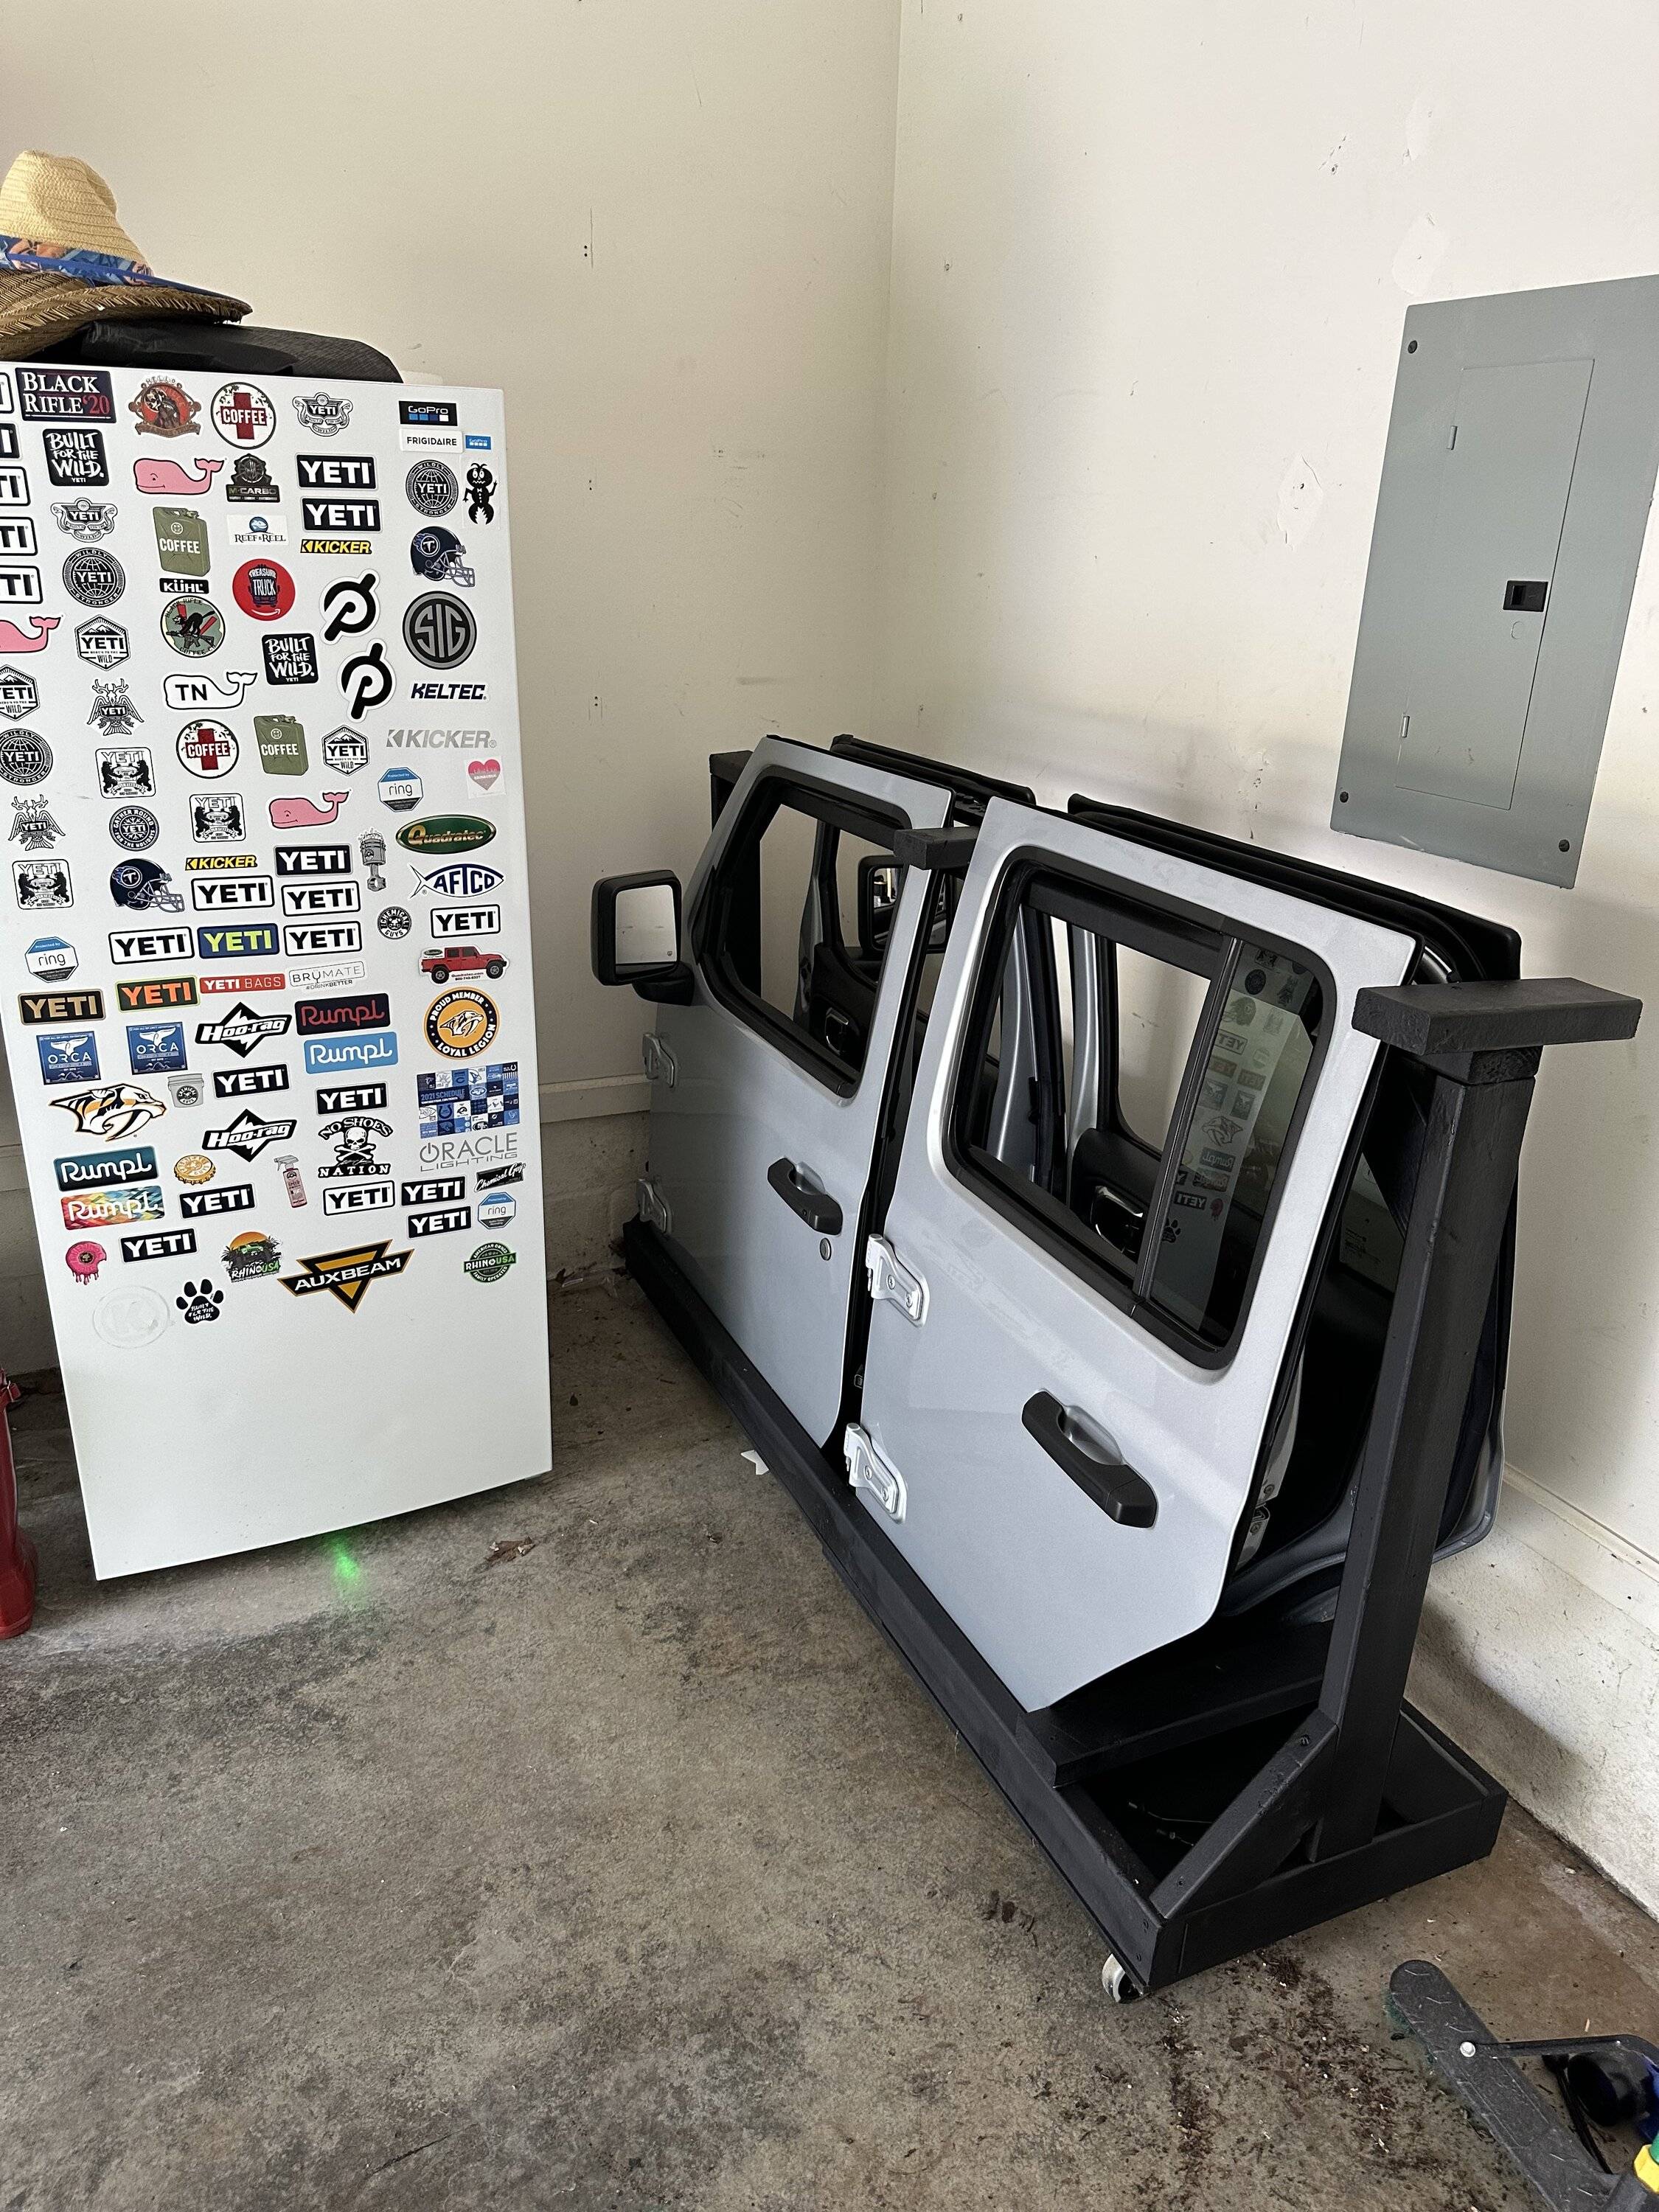
Here is the Door cart I use. I "designed it" to the extent that it needed to be measured. I figured I would share it because it is cheap and easy. Total cost was around $50 including the wheels and the black primer paint.
I like it because it can stay in the garage in front of my wife's Subaru, so it doesn't take up space that would be useful otherwise.


I like it because it can stay in the garage in front of my wife's Subaru, so it doesn't take up space that would be useful otherwise.
Sponsored