Sponsored

Having it all - JTRD sun buggy, trail rig and overlander

MikeVeee

Active Member
First Name
Mike
Joined
Feb 13, 2022
Threads
0
Messages
35
Reaction score
24
Location
Florida
Vehicle(s)
2022 Gladiator Mojave
Occupation
Retired
Honestly, I can’t tell you.

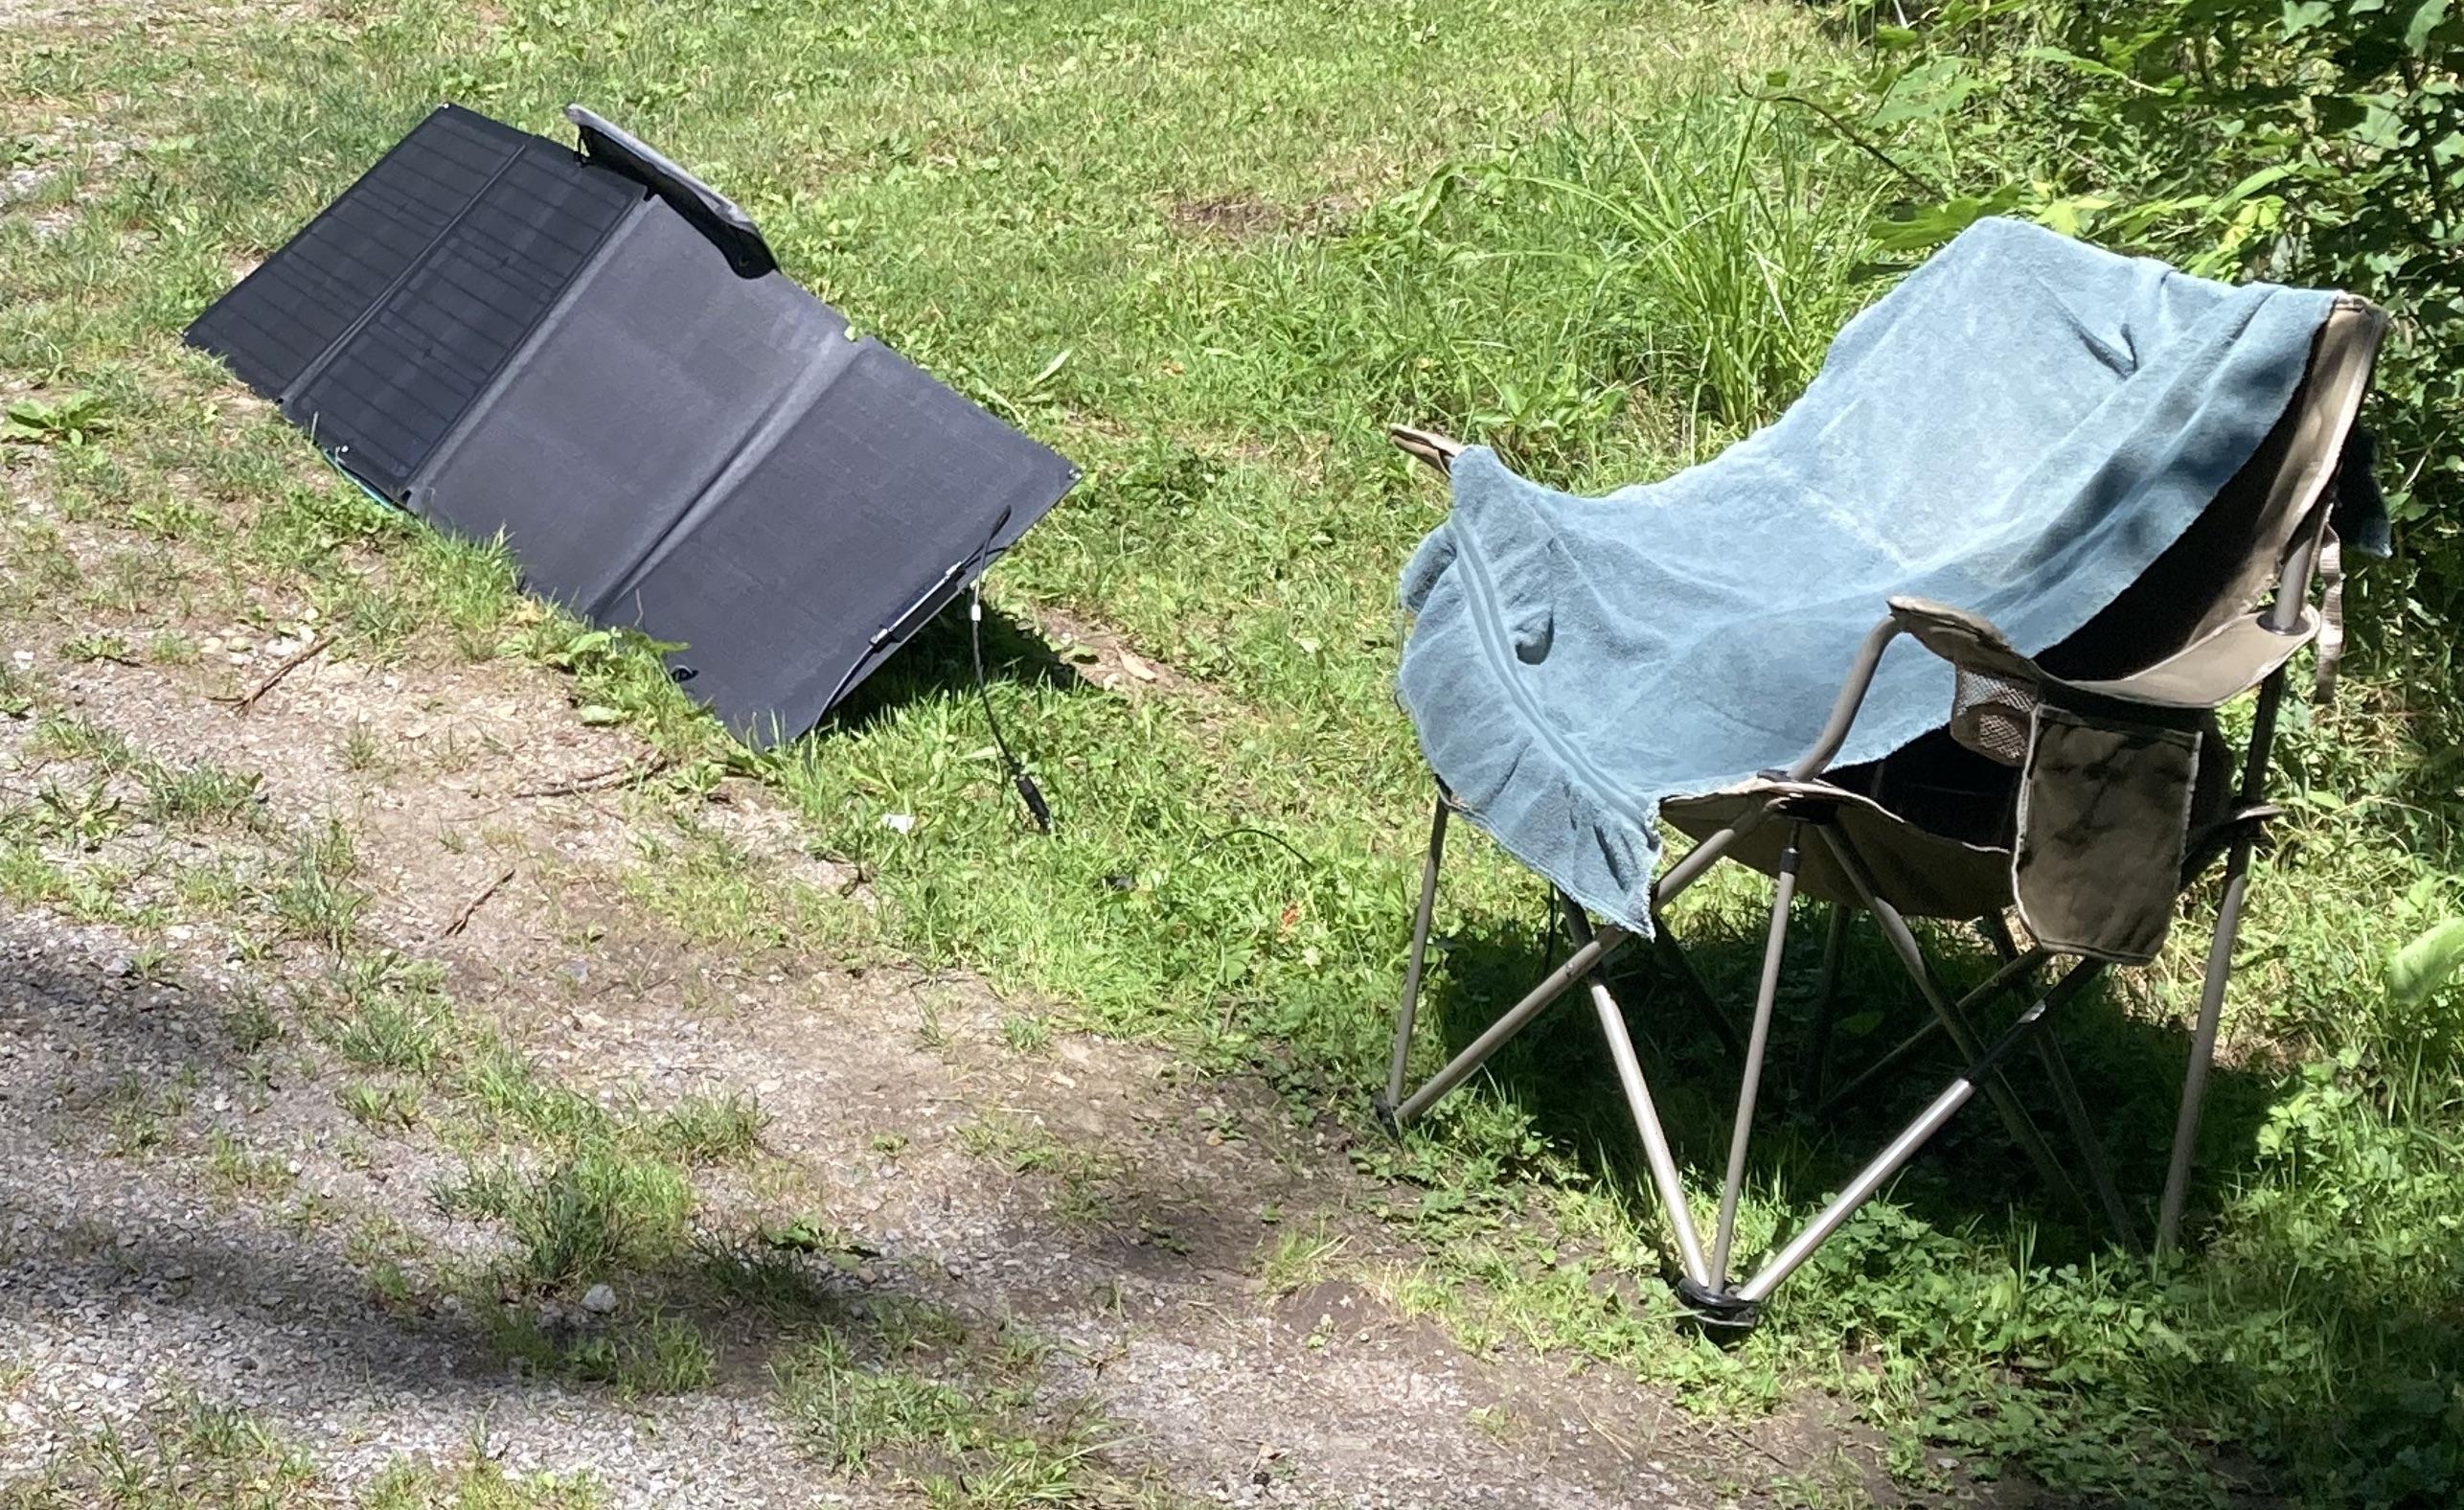
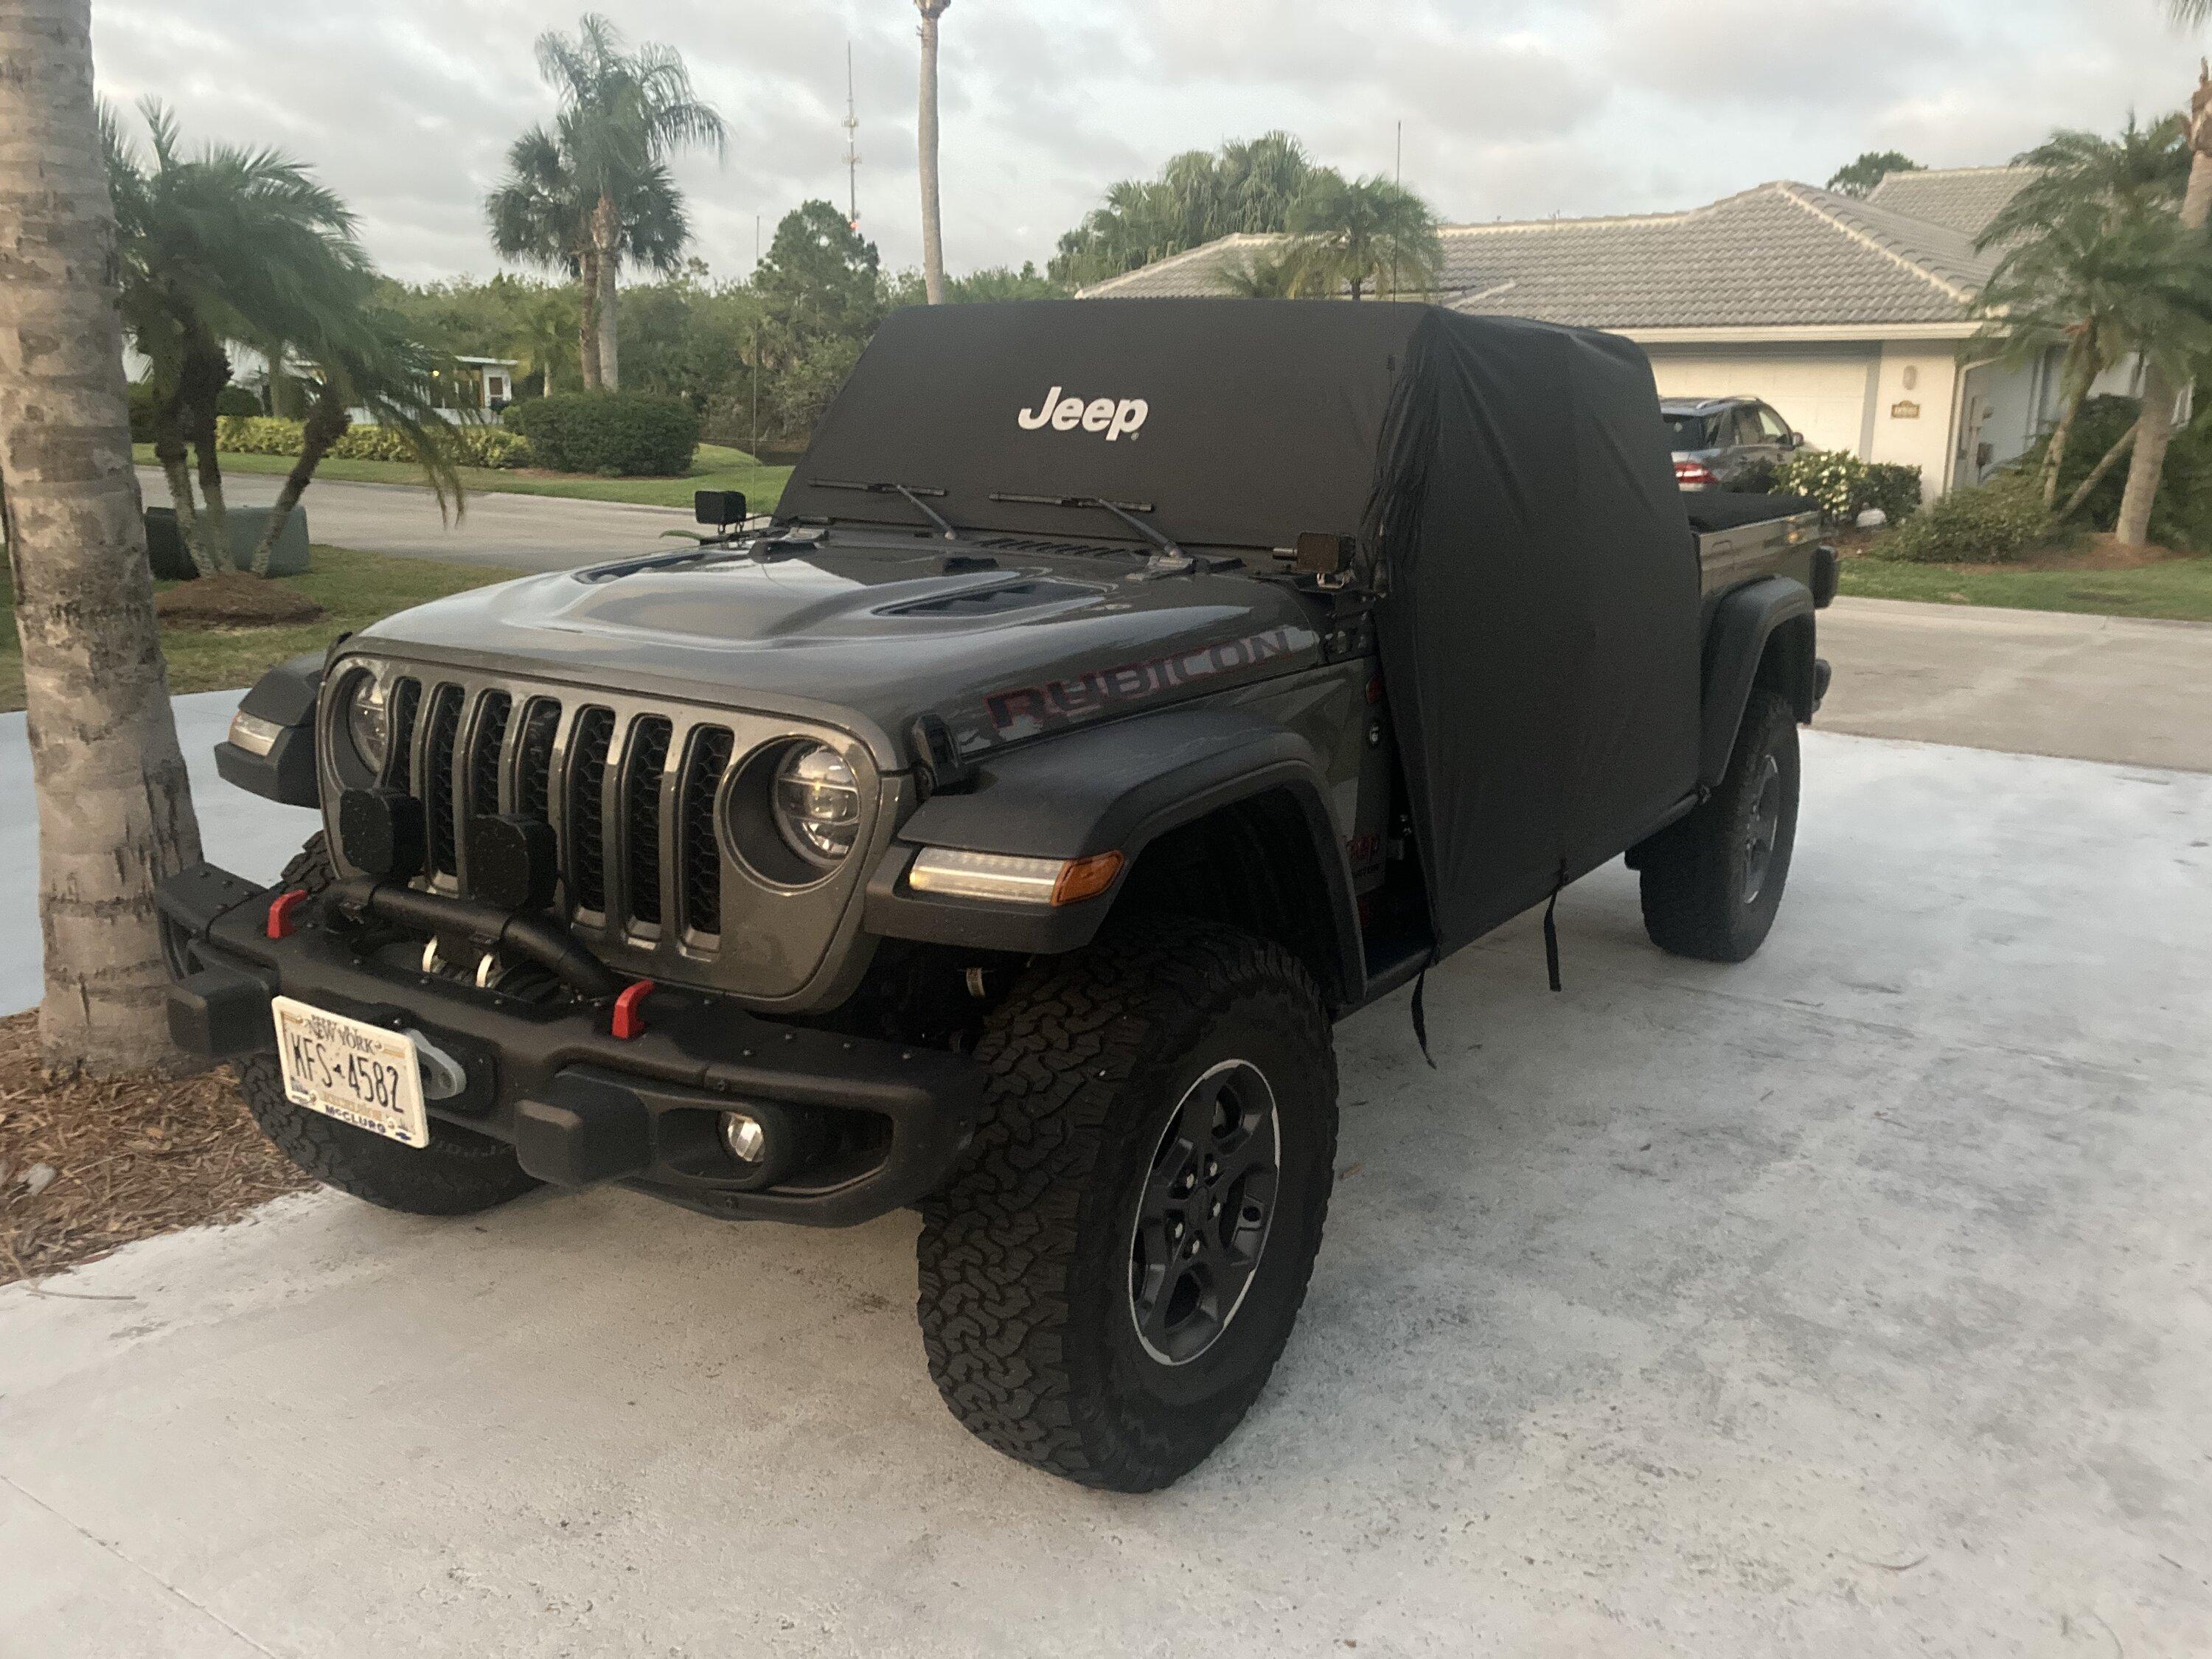
I’m caught in a trap with my sun bonnet. I ordered it from @Quadratec back in November when the sales were on, and planned to install it this spring when the weather got warm. When I got to Florida two weeks ago, I cracked it out and got ready to set it up. The top looks great, but I learned that the version of the sun bonnet @Quadratec sent me, which looks like it was made in 2019, has the wrong size snap studs for my 21 Ruby, so I couldn’t put it on. In spite of weeks of calls and emails, and two separate seemingly sympathetic customer service reps telling me they’d get back to me with a fix, @Quadratec hasn’t done anything to help. In fact, since last Thursday they’ve just stopped answering my calls and emails. Nothing. Just silence.

So the sun bonnet still sits in its box. I’m giving up on @Quadratec, as in forever giving up on them, and just going to source some snaps that will fit on my own after I get back from my trip south.

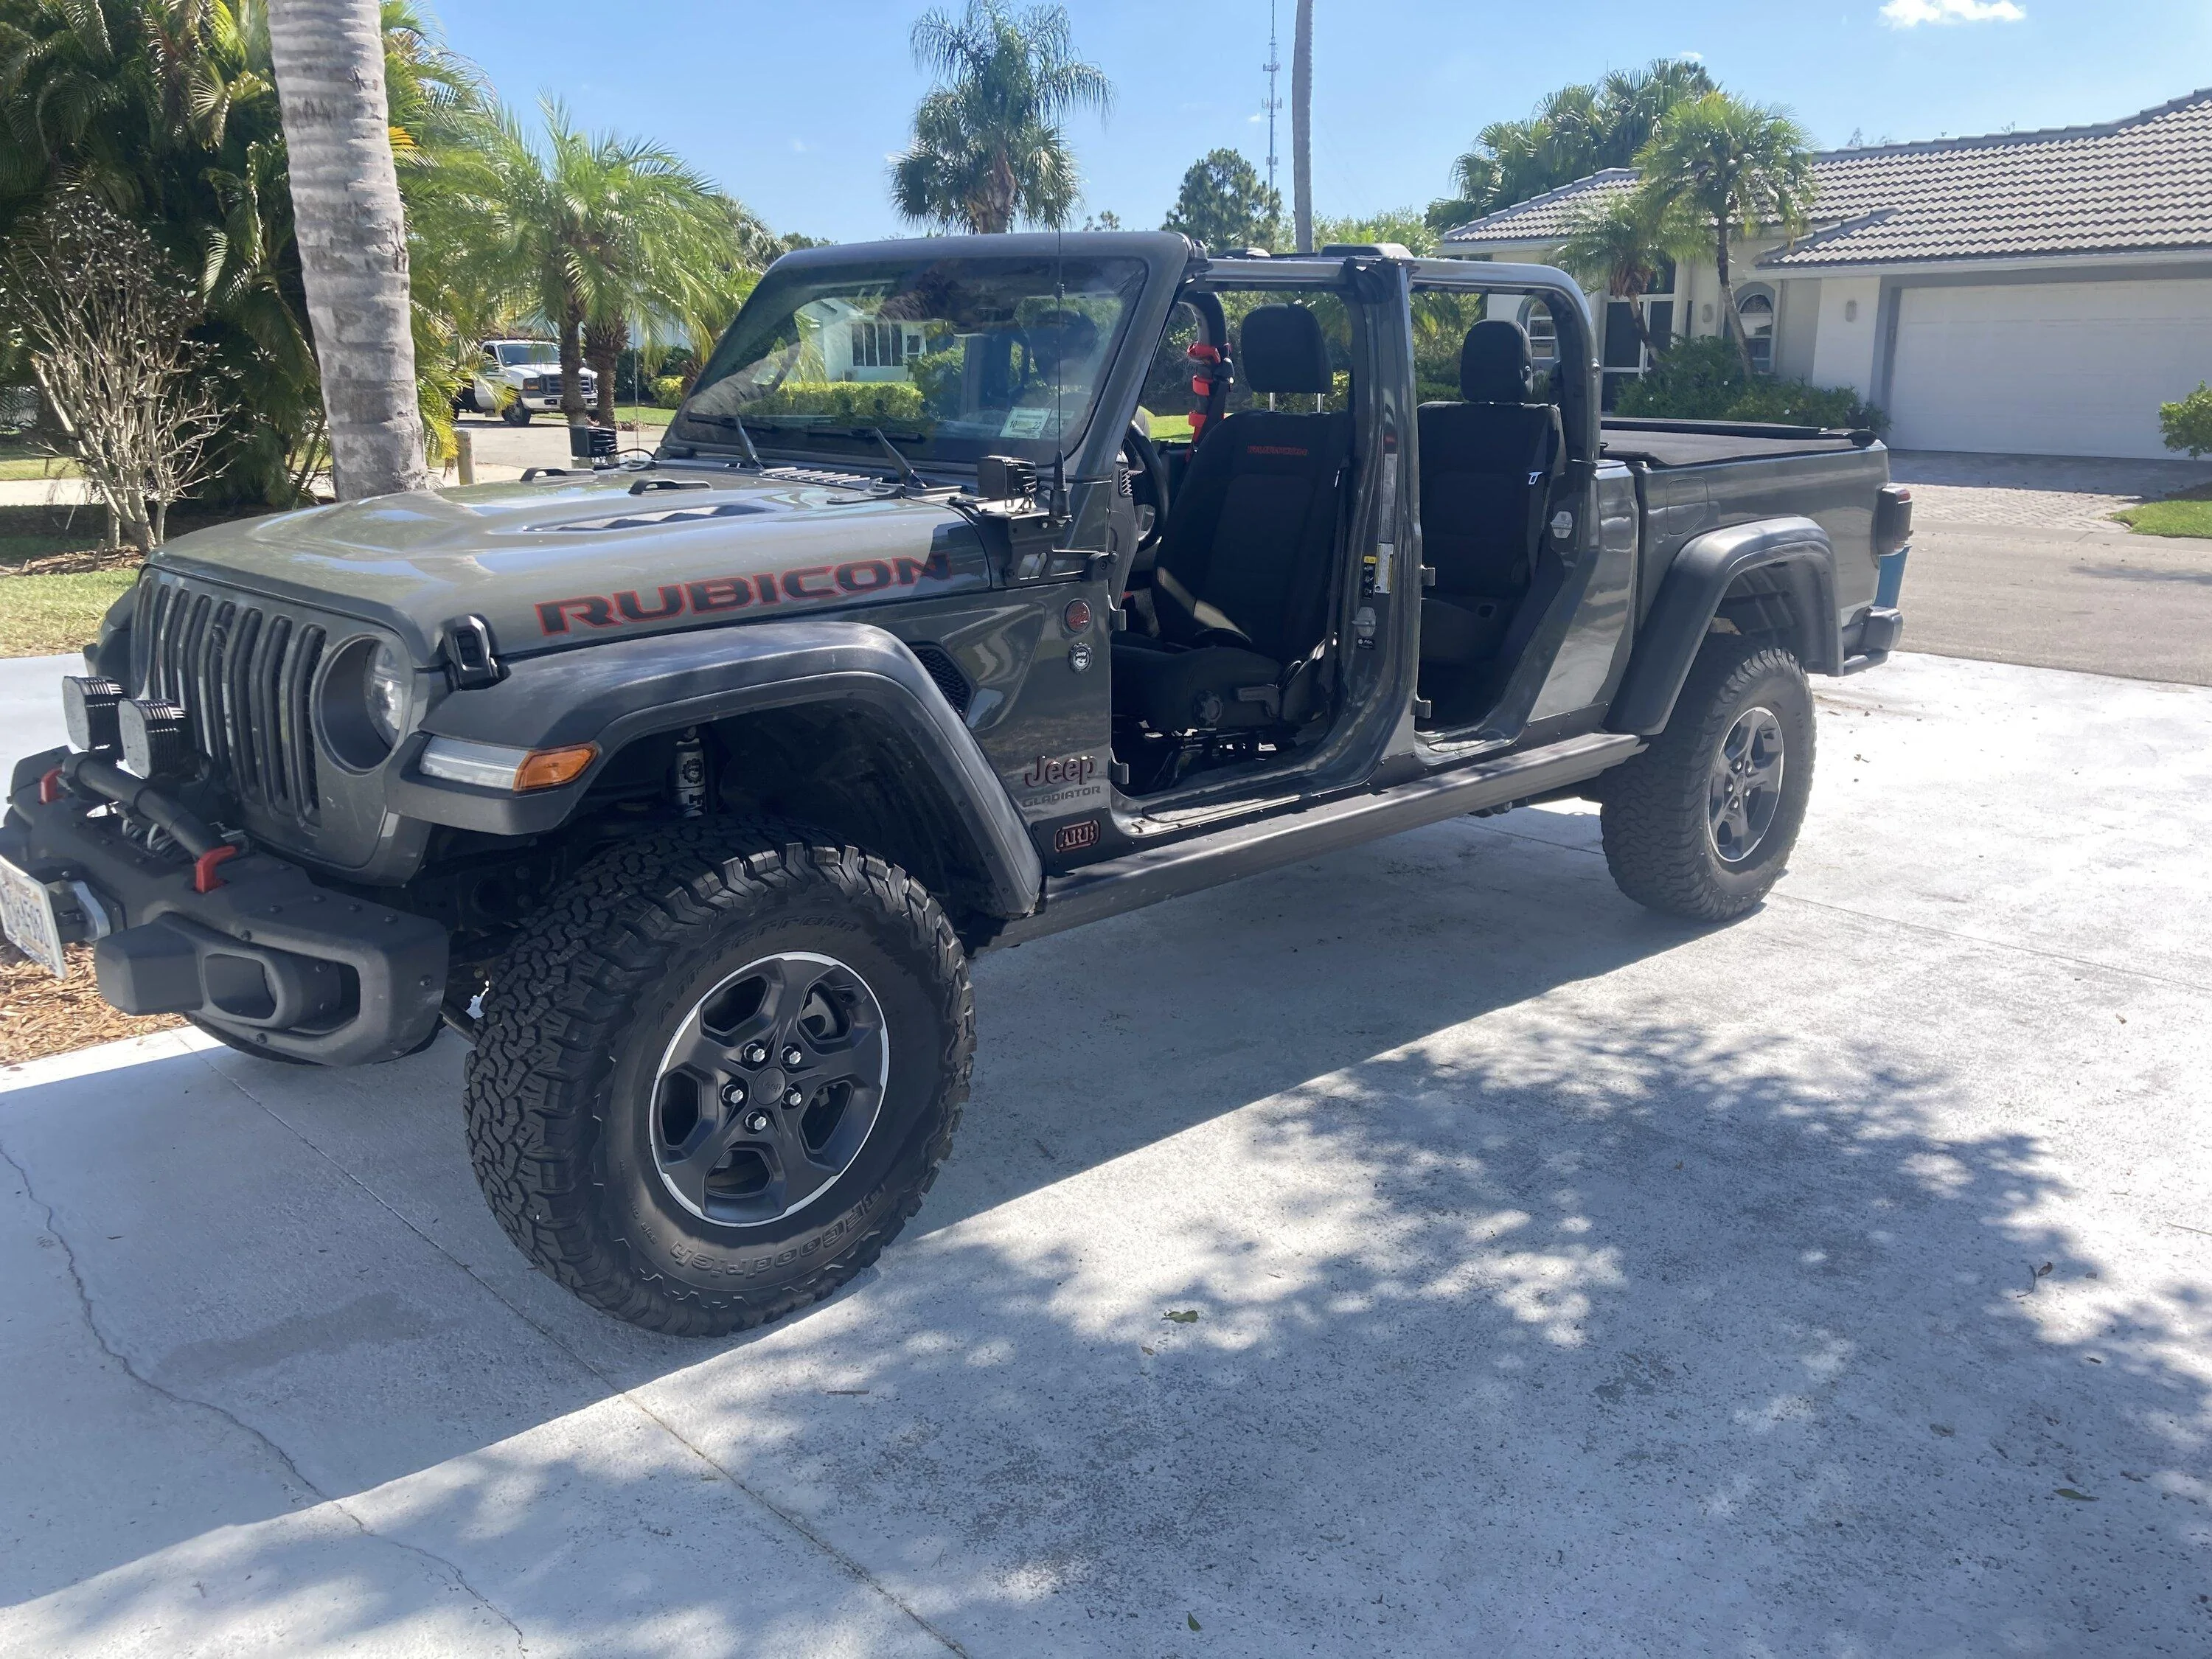
Too bad. I had two weeks driving naked in subtropical heat. That would have been the perfect time to try that sun bonnet.

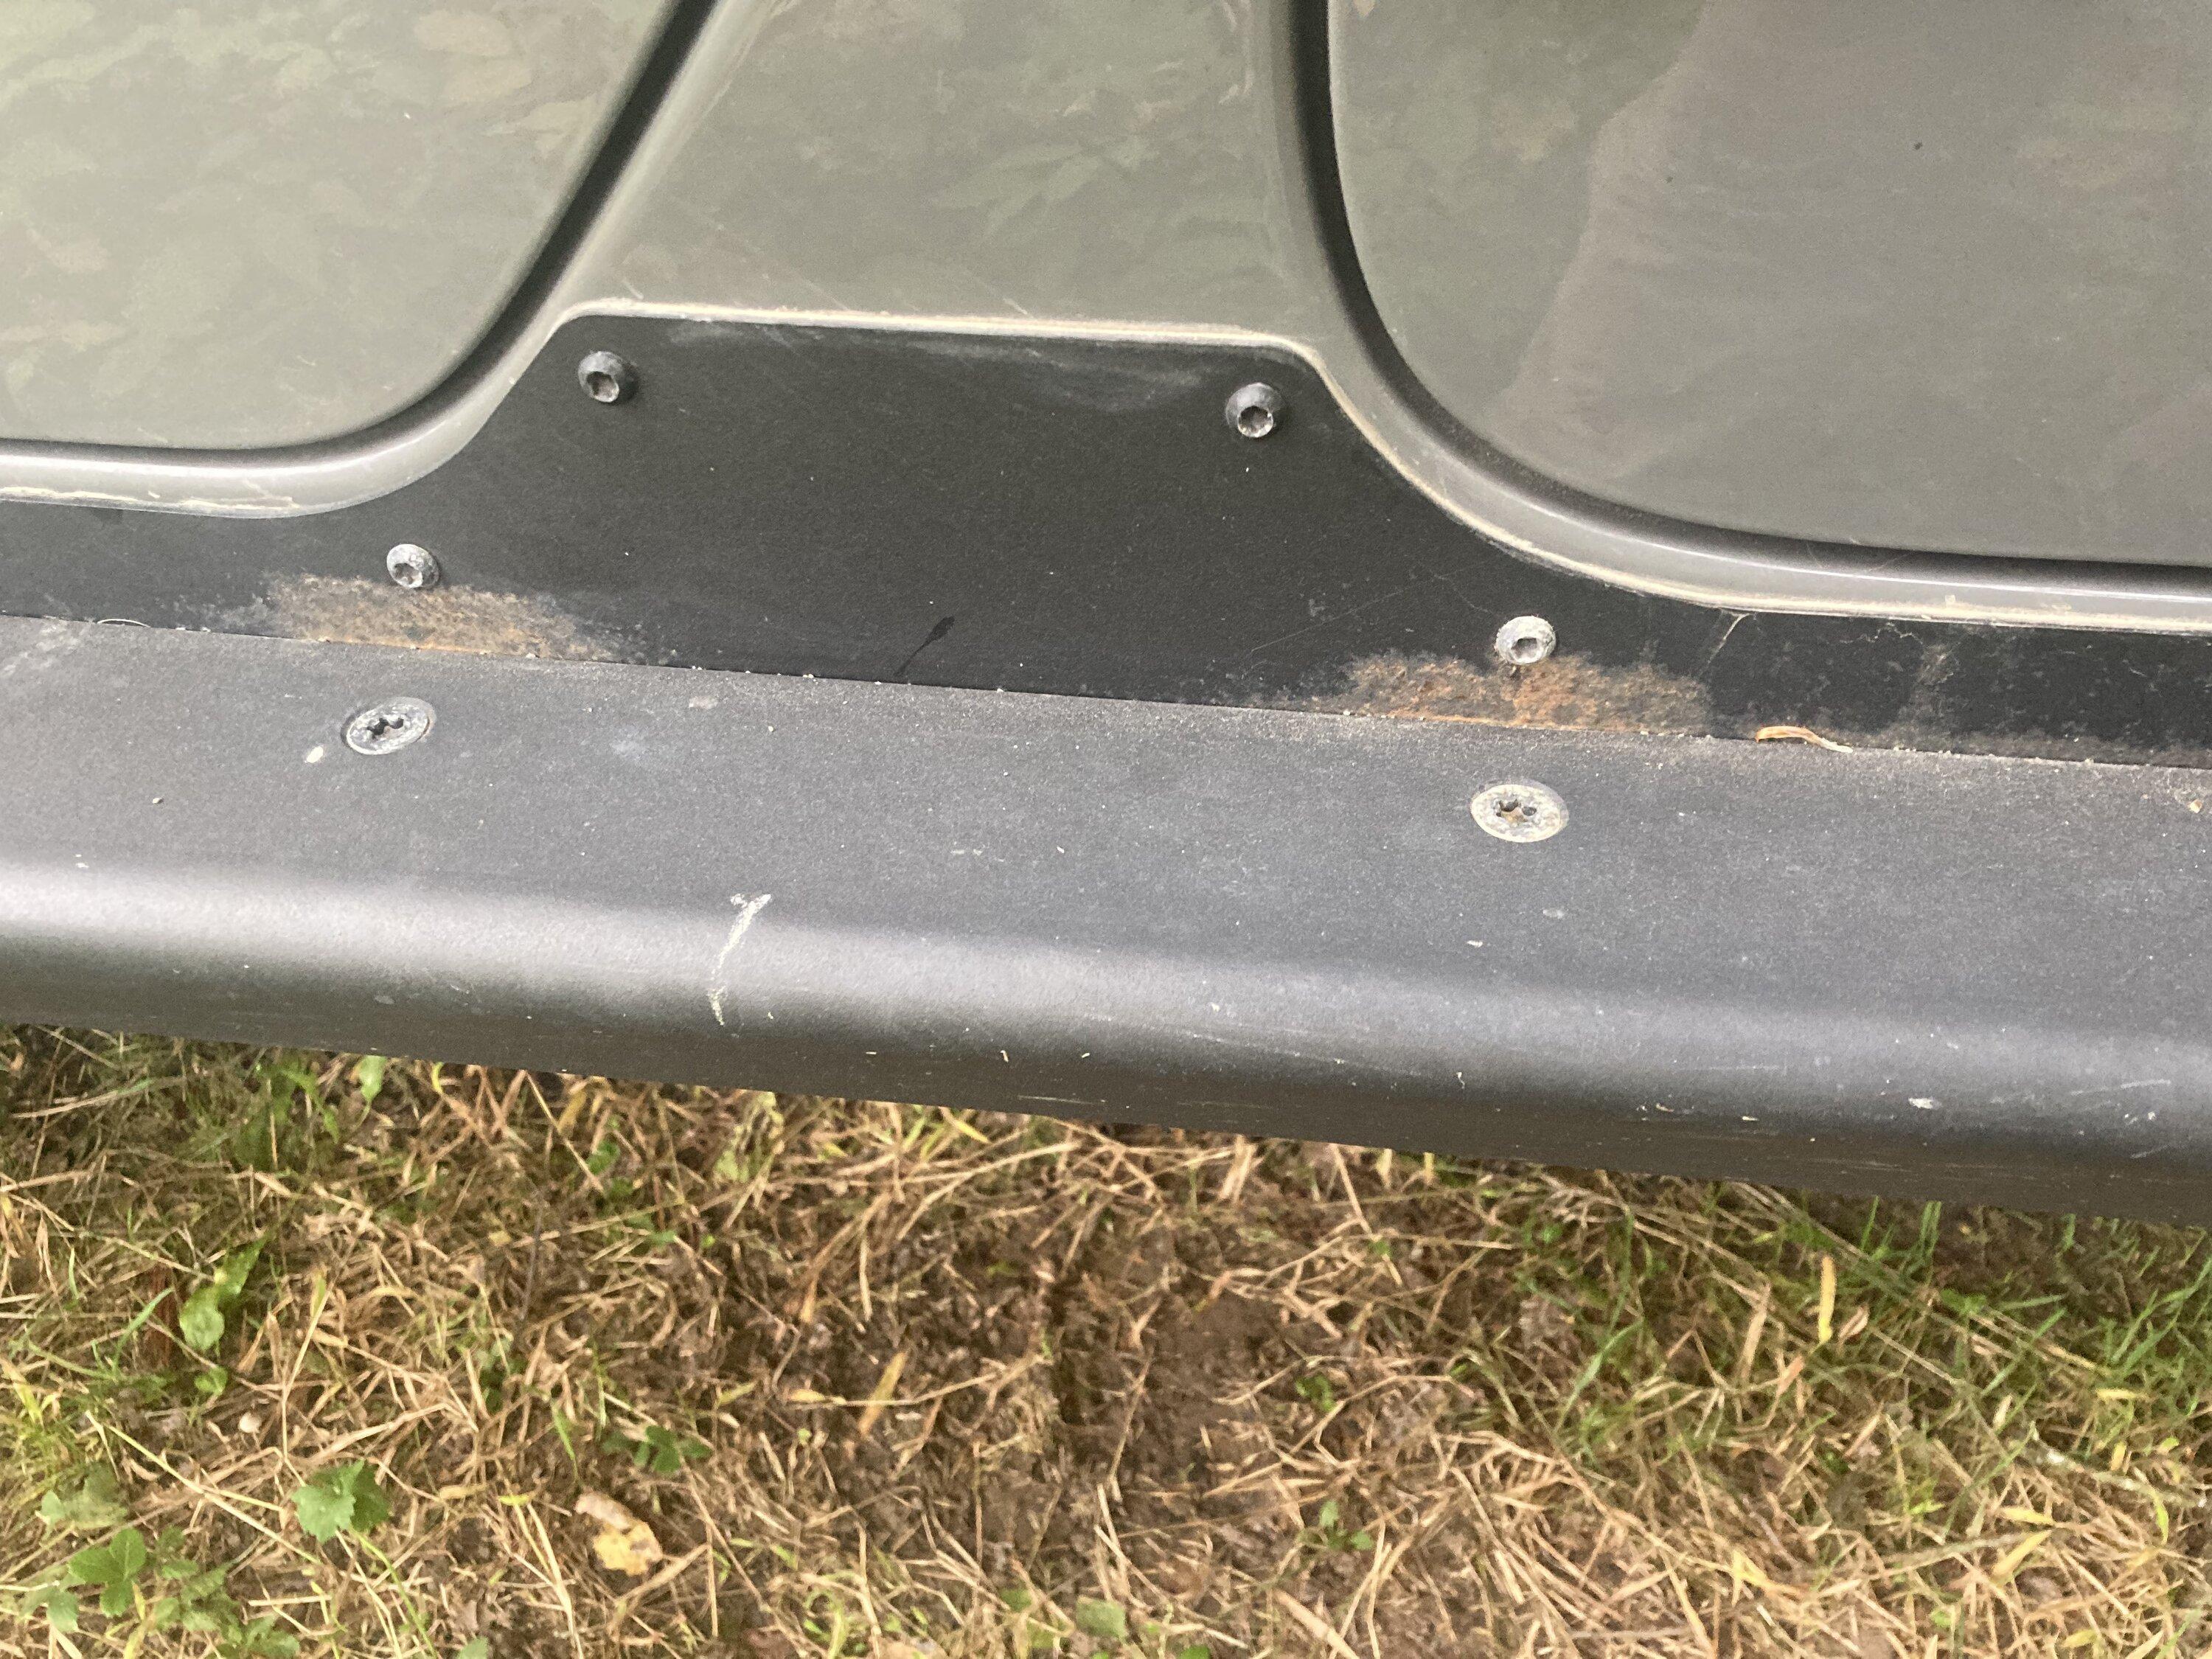
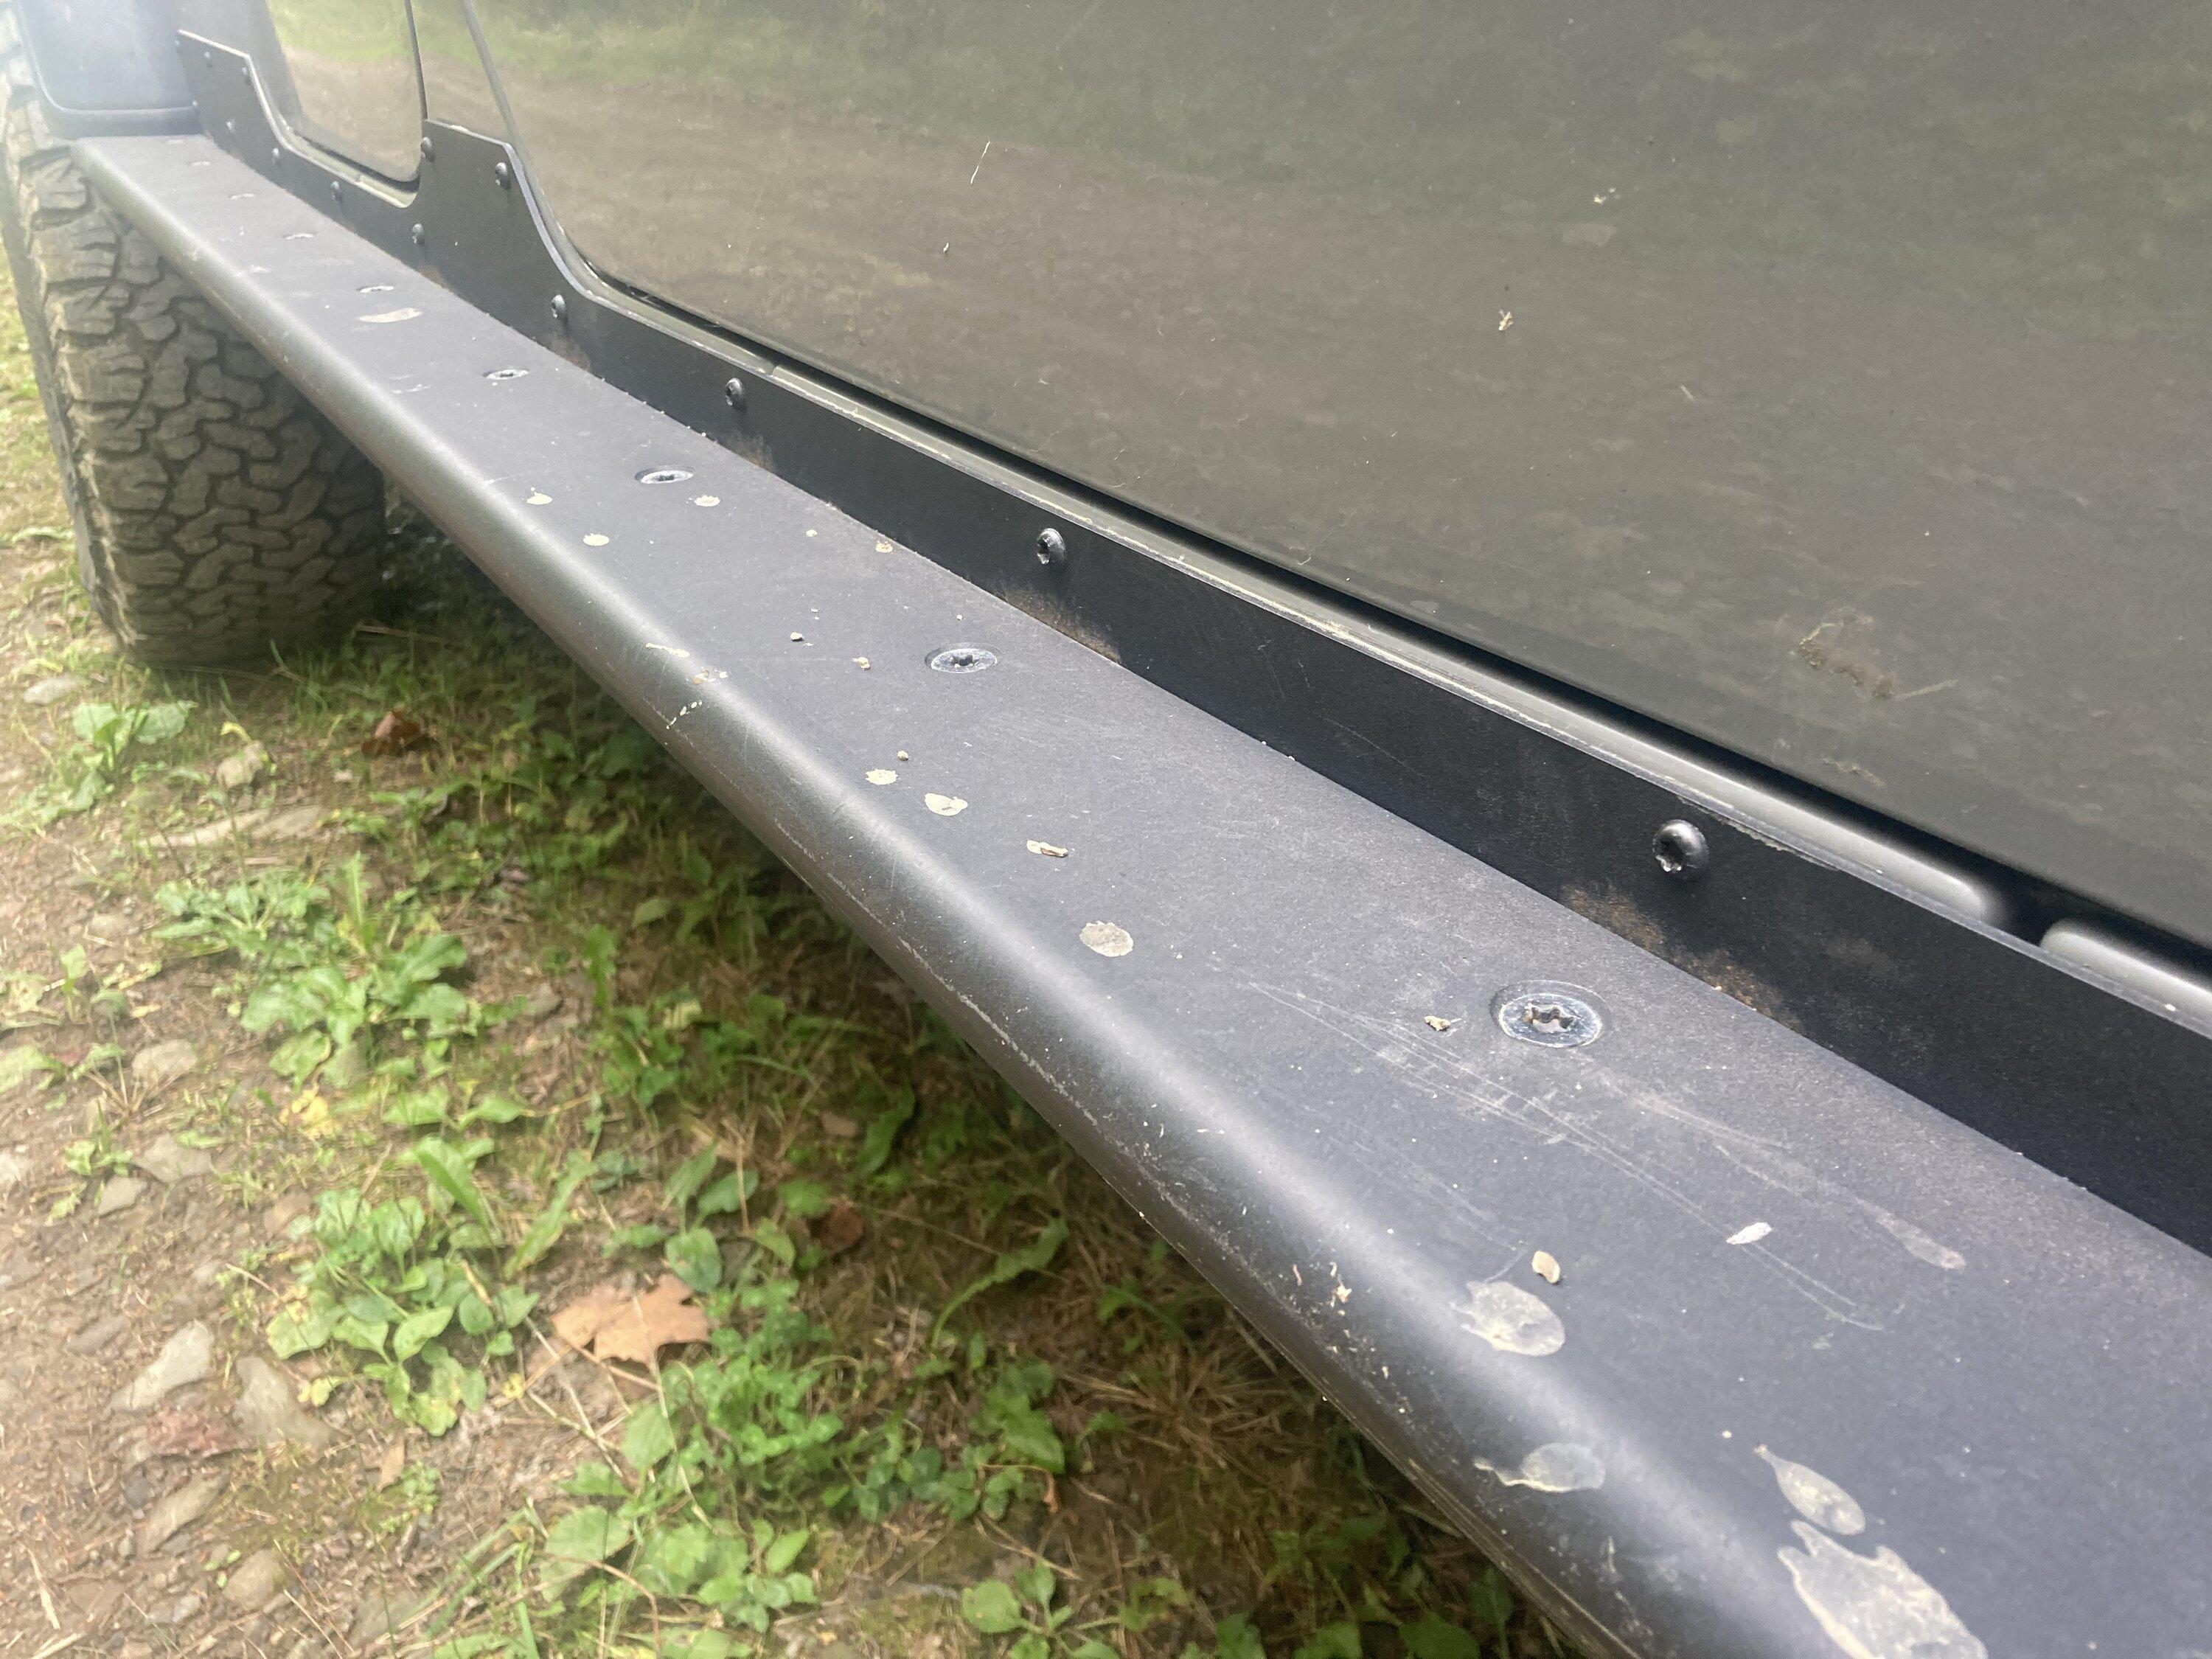
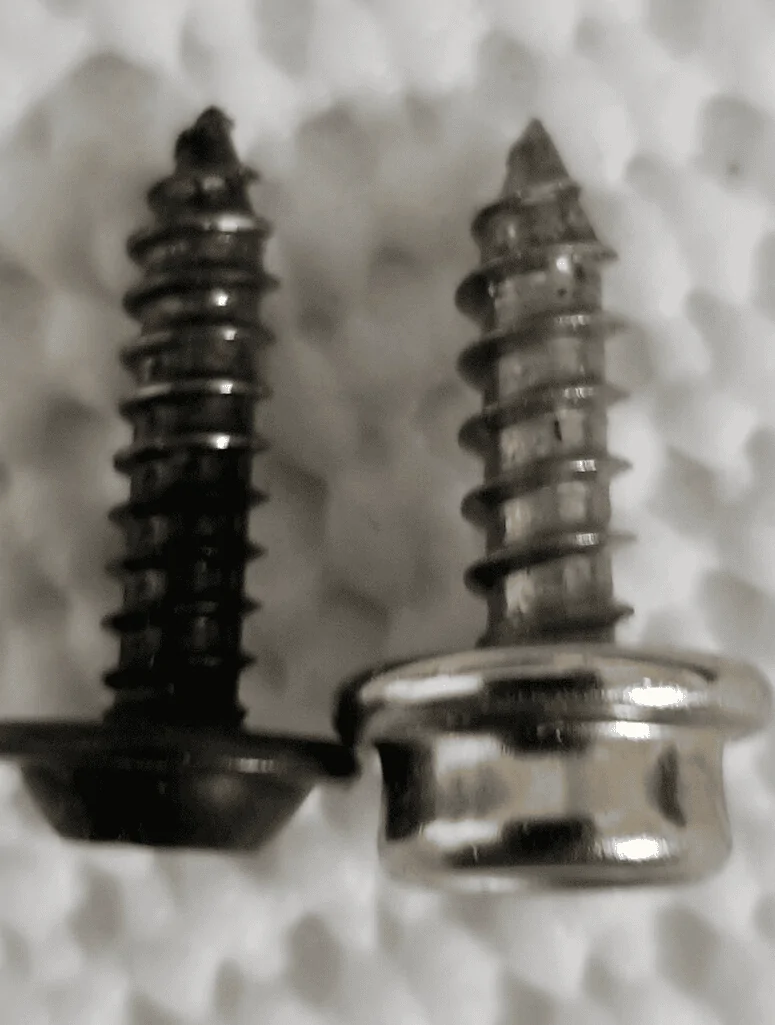
If you are planning on buying one, learn two things from my experience: pick it up from a place you can trust, and make sure they’re selling you one made in the same year as your JT. Apparently the trim screws changed at some point, and you want to be sure you’ve got the right version.
Wow! What a terrible experience! I had a similar experience with quadratec not responding to me asking about a Return Authorization Number for a return. After I didn't hear back for several weeks I just sent the return back to them without one, and thankfully the return was processed without a problem. I think they're severely understaffed.
I had no idea that there were different model years for the top! Thanks for saving me a ton of grief. Let me know what you end up getting or if you get this top installed and what you think of it. Good luck! I'm still researching... And now running around with tube doors with hardtop on, which I like way more than I thought I would.
Sponsored

 
OP
OP
John in the Woods

John in the Woods

Well-Known Member
First Name
John
Joined
Jul 20, 2020
Threads
24
Messages
535
Reaction score
1,117
Location
Blacksburg VA
Vehicle(s)
2021 Gladiator Rubicon Diesel
Build Thread
Link
Occupation
Semi-retired noisemaker
Been way too long since my last update.

On the upside, I spent most of the past 5 months on trips of various kinds -- from 1,000+ mile highway treks to primitive camping, from Vero Beach to the upper Adirondacks. Learned a bit about the rig, and a lot about the gear; what worked, what didn't, and what I think I need to add before I head out for an 6-month solo loop around the US later this fall.

I'll add more details and a few pics soon, but here's the quick summary:
  • Doors off/roof off is heaven. I'm completely hooked. Maximum naked for me.
  • I need to build a portable rack for the doors. I shouldn't keep leaning them on trees.
  • The Mopar cab cover is awesome. Easy to pack. Easy to deploy.
  • The Mopar sun bonnet was a bust. Never found the right screws. Never used it.
  • I'm shopping for a soft top for the dual-top life. Man-bun be damned. I need air and sun, even if it might rain.
  • I like stealth overlanding, but I'm at the packing max. May need a rack or a trailer.
  • Ecoflow River Pro with 110w solar panels power everything I have, unless ...
  • Iceco dual fridge reacts wildly to air temps above 80. Goes from power sipper to utter hog.
  • Silky saw makes an old man look good.
  • Giant camp chairs are a bust. Added an REI at half the size and weight, and more comfort.
  • Goose Gear 60 delete is rock solid, and safely stores a ton of stuff. Stunning.
  • KC Flex Era 4 lights are great, but the covers ain't. Cracked and melted.
  • Coleman tent leaked everywhere until double treated, and vents poorly.
  • Coleman stove was tough, but can't simmer worth a darn.
  • Coleman cot with a few sleeping pads is the way to go for an old guy.
  • Plastic tubs for pantry and gear keeps things dry and safe, but wastes space and suck at roadsides.
  • It rains way more than expected, and I spend much more time inside the tent than I thought.
  • I need an awning, ideally with removable bug screens.
  • Control arm and shock skids just keep clunking, no matter how much I torque them.
  • ARB dual compressors are studs, and the @813 Fabrication & Design rear seat mount is ideal.
  • ARB step sliders look great and are super strong, but they're already showing rust!
  • BFG KO2s never let me down, but started wearing fast after 40K miles.
  • There's always a van that needs to be recovered.
  • I almost never use my radios (GMRS and CB) outside of group trail rides.
  • Things I never use but sleep better because of ...
    • Winch
    • Garmin mini
    • Bear spray
    • Tire repair kit
    • Hi-Lift
    • GMRS handhelds
  • Google Maps is OK, if you download in advance, but I need a serious offroad nav app.
  • 1# propane bottle are silly. I'm going for the 10.
  • I use a hatchet way more than an ax.
  • Cast iron and stainless steel are the way to cook, as long as you don't need to carry them.
  • Blue Ridge Overland bags are worth the money. Easy to use. Still standing two seasons in.
  • One good knife is better than a dozen posers.
  • A good tactical flashlight makes sounds in the trees go away.
  • Blackbeard fire plugs are worth their weight in gold.
  • Stand still for 48 hours and something will nest on the engine.
  • I love NOT having cell service. Two days of anxiety, and then the humanity returns.
  • Camp more. Drive less often. Let the stillness sink in.
  • The Rubicon diesel will calmly crawl over almost anything.
  • People seem super suspicious when you roll into camp. Way more than years past.
  • People are still friendly and amazing, as soon as you get past that first stink eye.
 
OP
OP
John in the Woods

John in the Woods

Well-Known Member
First Name
John
Joined
Jul 20, 2020
Threads
24
Messages
535
Reaction score
1,117
Location
Blacksburg VA
Vehicle(s)
2021 Gladiator Rubicon Diesel
Build Thread
Link
Occupation
Semi-retired noisemaker
Summer 2022 lesson #1: Power

I run with a EcoFlow River Pro power station, which advertises a capacity a little over 700Wh. It's a great little self-contained system, and super easy to fit into the back of my rig. I keep it in the rear footwell behind the driver's seat, and power it from the front DC "cigarette lighter" power socket in the dash. I like the location because it's easy to read with a quick peek in the door, but otherwise out of sight to avoid curious eyes. I plan on adding a Blue Sea power panel to the side of my Goose Gear 60 delete to power it in the future, and run that off the Aux 1 line. That 40 amp circuit should have enough juice to stay on top of the EcoFlow.

The main mission of the EcoFlow is to run my IceCo VL60 dual zone fridge. Talking about power use only, it's a great fridge most of the time. It runs on AC or DC, so I usually plug it in to house power the day before I head out to get it down to temp, and then switch it to truck DC power through the EcoFlow as I head out.

So the main setup then is the EcoFlow plugged into DC in the truck, and the IceCo plugged in DC output from the EcoFlow. At camp I can break out a set of 110W EcoFlow solar panels, and I've been known to plug in lights, radios, and a standard iPhone/iPad/MacBook Pro bundle as needed.

Jeep Gladiator Having it all - JTRD sun buggy, trail rig and overlander cab pack 2

Jeep Gladiator Having it all - JTRD sun buggy, trail rig and overlander ecoflow 2


Other than the fridge, my power needs are light, but I've learned I'm living on the edge a bit and I need to constantly play a game of numbers -- hours driving, hours at camp, hours of sun, fridge temp settings, air temp, and toy time (especially the laptop).

Driving recharge -- When driving, the truck pumps a steady stream of about 80-90W into the EcoFlow. With the fridge plugged in, it charges the power station at a pretty steady 10% per hour.

Solar recharge -- All of my experience has been summertime on the Northeast, but the best I've seen my 110W solar panels actually put out was about 80W, and 70W is more typical. That's even when lined up to point pretty squarely at the afternoon sun. Good sun (fog lifted, trees cleared) tends to run from 11-6 up here, so at an average recharge rate of just under 10% an hour with the fridge plugged in (and a few half-shade hours in the morning and evening) I can recharge the battery about 75 percent on a sunny day.

Fridge drain -- The IceCo fridge has a bit of a dual personality. If it's been cooled on house power and both halves are set to 41 degrees in "eco" mode (what I've come to call typical), it sips power pretty gently. Demand usually tops between 45-50W when the compressor is on, and as far as I can tell with normal use that's not more than about one-third of the time. Overall, it draws down the EcoFlow about 35-40% in 24 hours, so I can go 2 1/2 to 3 days straight off battery power. However ... jack the air temp above the low 80s, or drop one side into pure freezer mode (say set to 10F) and the power use jumps. I've seen it drain the EcoFlow by 40% in just one 8-hour night, when no one was opening it! If the days stays hot and cloudy, the battery is scrapping single digits by the next evening.

Gear drain -- I'm not a photographer or videographer, and I don't fly a drone (I'd love to, if your giving one away), so my gear is mostly table lamps, head lamps, a tent fan, some portable GMRS and CB radios, a Garmin InReach, and the standard Apple stuff. The only thing that can make a dent is the MacBook Pro, which will draw 60W and, when it's low, suck about 15% from the EcoFlow before it's done. All the other gear seems to barely make a dent. The EcoFlow has a ton of ports (1xUSB-C, 3xUSB-A, 1xDC "car" port, 2xDC small plugs, and 3xAC outlets) and for fun I've plugged something into every one and it barely pulled another 20W.

So, on a good day at camp, the sun is shining but the temps are mild, the computer gear doesn't need much and the IceCo is a fridge on both sides. The fridge might need 40% in 24 hours. Lights and radios another 10%, and the solar panels can pump in 75% throughout the day. All good.

But a hot, cloudy/rainy day means the fridge wants all the power in 18 hours or so, and I'm in trouble by the next morning. I've learned to plan trail drives or jumps between camp sites for rainy days, so the truck can recharge things when the sun can't, but I need a 10-hour drive to keep pace. That runs counter to my experience this summer -- I've learned I like to spent 5-7 days exploring a site before moving to the next one, and I like to get the fridge out of the cab before I hit any tough trails.

That means I need more input. My plan is to add another 110W set of solar panels, to hopefully double my sunny day power generation potential next season. If that doesn't do it, I can add to the battery capacity on the EcoFlow (it can double with a plug in expansion). The latter doesn't solve the input/output imbalance, but it buys me more time before a string of sunny days or a stop someplace with house power available might turn the tide for me.

One last recommendation -- If you're using portable solar panels and typically keep the power station beside the fridge in the truck, invest in a few solar panel extension cables. EcoFlow sells a 10' cable for $30, and there might be better deals out there. With a fridge that loves the shade and panels that need the sun, it's definitely worth the investment.
 
Last edited:
OP
OP
John in the Woods

John in the Woods

Well-Known Member
First Name
John
Joined
Jul 20, 2020
Threads
24
Messages
535
Reaction score
1,117
Location
Blacksburg VA
Vehicle(s)
2021 Gladiator Rubicon Diesel
Build Thread
Link
Occupation
Semi-retired noisemaker
Summer 2022 lesson #2: Sun lovers need the soft top

In hindsight, there were a few odd choices I made when I ordered my truck in the summer of 2020. There have been more than a few times I would have killed for the proximity sensor entry thing, usually with bags, boxes or bricks in hand. I still wonder why I didn't get the anchor system in the bed and the outlet back there. They seem handy and cheap. I mean, buying the JTRD was already a pretty deep dive, what's a few extra bucks on a 2% loan?

But most of all, I wish I would have opted for the dual top. Trying to save a few bucks, and because I was not at all in love with the man bun design, I decided to go for the black hardtop only, and wait for a better aftermarket soft top option. It was fun at first while I played the freedom panel in a sack game, but once I made a lift in my garage and got the roof fully off, and popped the doors with it, my world changed. First-time Jeep owner, mind blown. I wanted as much open and naked time as possible.

So I came up with a plan for 2022, when I knew I'd spend May to September on the road. I'd run the hard top on the highway and in prolonged foul weather, popping the panels off whenever I could. In warm weather and prolonged sun, I planned to run door off and topless, with the Mopar sun bonnet at the ready for intense sun or light showers. If the rain gets serious, I picked up a Mopar cab cover to keep things dry.

Two out of three ain't bad.

Running topless and doorless is absolutely amazing. Right up there with effortlessly rolling up a rocky and muddy incline, driving topless with that completely open cab is what separates a Jeep for everything else I've ever driven on earth. I did it absolutely as often as possible, by summer's end even casually putting on hundreds of highway miles stripped naked. I spent years riding year-round on motorcycles in the late '70s and 80's, and running naked in the Jeep is as close as this old man ever thought he'd get to that feeling again.

If rain was coming, and even to keep the curious from touching things at night, the Mopar cab cover was perfect. It's lighter than I expected, packs down small so it's easy to stow (it fits easily in my Goose Gear platform), and after I figured out the right fold when putting it away I was able to lay it out on the tonneau cover and flip it onto the cab in 5 minutes or less, even in the dark.

The problem was the sun bonnet. There were weeks in South Florida and the South Shore of Long Island when I'm sure my oncologist would have been happier had it been on. And there were more than a few times when I was considering a day-long side trip with a little rain in the forecast when knowing I had the solid bonnet would have let me comfortably stay topless. Unfortunately, the sun bonnet I got from @Quadratec came with snap screws that didn't match the roll bar trim screws they're supposed to replace. I asked @Quadratec for help, but they never sorted it out. I reached out to my dealer and to Mopar, and they both told me there was no difference in the screws, in spite of picture I sent them. I even said screw it and took the advice of a few folks here and tried to horse it in there, by hand and with a power driver, and every time the head of the Phillips head snap screw just ripped up. I even tried sourcing snap screws on my own, but couldn't find a match.

I never got the bonnet out of the box, and last week it went back to @Quadratec for a refund (don't worry folks, I replaced the damaged snap screws). Total bust. Burned my scalp a few times and had to re-hard top in case of rain far too many times, and now that fall is here in the Northeast it seems to rain at some point almost every day.

The lesson for me: I should have done the dual top, and had the soft top for a few bucks a month; or then I should have just bought a used twill top (going here for around $1,000 now) rather than spend more than half that for a cab cover I like but can't drive with, and a sun bonnet that never put in an honest day's work.

Yes, I'm searching "soft top" on this forum every day now. I'll keep the cab cover in case of sudden storm when I have everything stripped off, but I plan on running the soft top full time in all weather above freezing, and keeping the top back in that glorious man-bun every minute that mother nature will let me.

Jeep Gladiator Having it all - JTRD sun buggy, trail rig and overlander naked in FLA

The good life.

Jeep Gladiator Having it all - JTRD sun buggy, trail rig and overlander cab cover

The Mopar cab cover stood up to tropical sun and storms up and down the East Coast, and never let me down.

Jeep Gladiator Having it all - JTRD sun buggy, trail rig and overlander IMG_1822.PNG

I borrowed this pic from someone else on this forum who had the same issue. Threads are different, and the Phillips-head snap screws are weaker than the steel inserts they're supposed to turn into, so the snap screws lose every time. Mopar said I was imagining this.
 
OP
OP
John in the Woods

John in the Woods

Well-Known Member
First Name
John
Joined
Jul 20, 2020
Threads
24
Messages
535
Reaction score
1,117
Location
Blacksburg VA
Vehicle(s)
2021 Gladiator Rubicon Diesel
Build Thread
Link
Occupation
Semi-retired noisemaker
Summer 2022 lesson #3: Goose in use

As promised a few months back, here's a little more on the install and use of the Goose Gear 60 delete platform. There's a great step by step on the Goose Gear site, and a funny and useful video on YouTube from Epic Adventure Outfitters, so I won't repeat all that. Bottom line, lots of instructions for something that so easy to install you probably don't need any instructions.

There's a few things I didn't see there, so I'll note them here ...

First, they seem to have modified the platform and mounting hardware. The aluminum channel on the inside edge is slightly shorter (at left in the pic below), but the rear bolts on both sides now have spacer collars for underneath. That lets you crank down on the platform to make sure it's firmly planted, without risking damage to the plywood top.
Jeep Gladiator Having it all - JTRD sun buggy, trail rig and overlander goose 1a

Jeep Gladiator Having it all - JTRD sun buggy, trail rig and overlander goose 1c

Jeep Gladiator Having it all - JTRD sun buggy, trail rig and overlander goose 1d


The other thing worth noting is that the plate for the inner side of the platform seems to be notched specifically for the Mopar rubber floor mats. I was prepared to cut the edge of the mats so I could keep them in, at least on the 40-side that's still in use; but there was no need. I kept the mat in across the entire back. I think it might lift the platform up just a touch, but I like not worrying about anything leaking into the carpet under there.
Jeep Gladiator Having it all - JTRD sun buggy, trail rig and overlander goose 2a

Jeep Gladiator Having it all - JTRD sun buggy, trail rig and overlander goose 2b


On the use side, I was shocked by how much stuff I could pack into this space. I like to run naked as much as possible as well, and it's great to have a locked space to tuck a few loose things from the cab out of sight before heading into a store. Not high security but out of sight, out of mind for the curious with mischievous hands.

Right now, I keep mainly recovery gear in there. All of this fits easily, including the Hi-Lift bag with extra gear, the cab cover, a hitch, and assorted ground cover blankets.
Jeep Gladiator Having it all - JTRD sun buggy, trail rig and overlander goose 2

Jeep Gladiator Having it all - JTRD sun buggy, trail rig and overlander goose 1b


In a previous life I was a carpenter and builder, so I know there's a hefty design and convenience premium on these platforms. The good news is, in this instance, the product exceeds expectations.
 

Sponsored

OP
OP
John in the Woods

John in the Woods

Well-Known Member
First Name
John
Joined
Jul 20, 2020
Threads
24
Messages
535
Reaction score
1,117
Location
Blacksburg VA
Vehicle(s)
2021 Gladiator Rubicon Diesel
Build Thread
Link
Occupation
Semi-retired noisemaker
A quick break from the summer 2022 lessons ...

I've had a few parts sitting on my workbench since last fall. By the time it was time to tackle them this spring, I was convinced they'd be a pain to install and didn't want to risk interrupting my travel plans if things got messy. Good news is, at least for me, these were a piece of cake.

First up was the classic set of Rusty's rear LCA front skids. My passenger side mount was already showing some bruises. As has been mentioned here lots of times, the skids come bare, but paint easily, and they are very hefty. I read and watched everything I could, and here's what I distilled:
  1. Park truck on level ground. In park. Parking brake locked. Do one side at a time to avoid axle rotation.
  2. Remove the nut (a few grunts are to be expected) and back out the bolt. Both of mine came out by hand.
  3. Push LCA down and out of the mount, then tuck the top edge of it just inside the inner mount edge. That gives you the ability to reach into front of the mount.
  4. With the provided nut on your fingertips on the inside (it has teeth on the inside surface to bite the metal), loosely attach the skid with the matching bolt and washer at the front of the mount.
  5. Put the LCA back inside the mount. If nothing moves (mine didn't) it lines up with the frame mount. Rotate the skid up into place. The Rusty's skid has oversized holes and a lot of play. Run the stock bolt back in from the outside, through then Rusty's skid. Toss on the stock nut, leaving it loose.
  6. Use the open end of a wrench to hold the other provided nut inside the upper back of the frame mount, and spin the other bolt and washer in from the outside. If you lay underneath, this is very doable.
  7. Hand-tighten the small provided bolts front and top. There's a little play, so I shoved my skid tight against the from. I figured the first rock will do that for me anyway, so I might as well save one shot to the frame.
  8. Torque the stock LCA bolt. Good luck getting to 190 lb-ft if your nearing 60 and doing this on the ground. Getting old sucks, by the way.
  9. Torque the provided bolts. The nuts dig into the inside pretty well. I didn't get any spinning once snug.
This was way easier than I feared. No axle movement. No issues with hole alignment. No problem getting the inside nuts on with this sequence. They're getting muddy already.

Jeep Gladiator Having it all - JTRD sun buggy, trail rig and overlander Rusty's


The second one up as installing the Synergy steering stabilizer relocation bracket. I already lost a stabilizer trying to follow @Kindafearless through the blues at AOAA, so I know I needed this one. I've avoided messing with the steering setup on this after getting the Mopar 2-inch lift installed at the dealer, since my first taste of death wobble on the way home from AOAA was not fun at all. Still, it needed to get done.

This one, I have to admit, took me longer than expected. The Rubicon front skid hurts when it drops on your chest, and some of these bolts are not easy to reach. Doable, but you might end up playing with ratchet extensions and hand angles.

Stock, there's a bracket that drops down from the passenger-side end of the tie rod and a hefty bracket that mounts to the lower side of the axle about midstream. The relocation not only puts the stabilizer above the tie rod and axle, it flips the function -- now the outside end of the stabilizer is fixed to the axle with a special bolt that replaces the stock track bar connection, and the inside of the stabilizer rides on the tie rod with a provided six-bolt clamping mount. I took time to remove the stock brackets from the tie rod end and the axle, just to keep it clean and save a few pounds. The track bar shifted outward as soon as I pulled out the stock bolt, but a little push up on the frame got it to line up easily. I used a simple approach I saw in a video from a guy I think I'm not supposed to name here, and located the new tie rod bracket by turning the wheels full passenger, then compressing the stabilizer all the way, letting it out about an inch, attaching the smaller end to the track bar post and and using the booted end to locate the tie rod clamp. I snugged it and checked it to full driver as well before clamping it down. By the way, invest in a few 3/8 drive hex bits to tighten the tie rod collar (7/32) and retaining bolt on the track bar post (3/16). With all the hardware close by and the way the bolts point, it was not easy to get a good turn with various handheld hex keys.

One last thing to note if you're an amateur like me: The collars in the ends of the stock stabilizer are a little too small for the Synergy mounts. You have to drill them out to 1/2 inch. With a decent metal drill bit, my 15-year-old DeWalt drill, a few quick clamps, and a little cutting oil, it was far easier than I expected.

Even walking through it slow and taking a bit longer than the instructions suggest, this was very much worth it. You can see where the stabilizer used to sit (enjoy the post-AOAA rock rash) and the new location. Definitely out of harm's way now. If I go to 37s at my upcoming tire change, I may bump up to a Fox stabilizer to handle the added weight. In this configuration, I'm confident that investment will be safe.

Jeep Gladiator Having it all - JTRD sun buggy, trail rig and overlander Synergy befor

Jeep Gladiator Having it all - JTRD sun buggy, trail rig and overlander Synergy after 2
 

Kindafearless

Well-Known Member
First Name
Elise
Joined
Aug 19, 2019
Threads
12
Messages
437
Reaction score
1,098
Location
Virginia
Vehicle(s)
2020 Jeep Gladiator Rublicon
Build Thread
Link
Occupation
Enginerd
A quick break from the summer 2022 lessons ...

I've had a few parts sitting on my workbench since last fall. By the time it was time to tackle them this spring, I was convinced they'd be a pain to install and didn't want to risk interrupting my travel plans if things got messy. Good news is, at least for me, these were a piece of cake.

First up was the classic set of Rusty's rear LCA front skids. My passenger side mount was already showing some bruises. As has been mentioned here lots of times, the skids come bare, but paint easily, and they are very hefty. I read and watched everything I could, and here's what I distilled:
  1. Park truck on level ground. In park. Parking brake locked. Do one side at a time to avoid axle rotation.
  2. Remove the nut (a few grunts are to be expected) and back out the bolt. Both of mine came out by hand.
  3. Push LCA down and out of the mount, then tuck the top edge of it just inside the inner mount edge. That gives you the ability to reach into front of the mount.
  4. With the provided nut on your fingertips on the inside (it has teeth on the inside surface to bite the metal), loosely attach the skid with the matching bolt and washer at the front of the mount.
  5. Put the LCA back inside the mount. If nothing moves (mine didn't) it lines up with the frame mount. Rotate the skid up into place. The Rusty's skid has oversized holes and a lot of play. Run the stock bolt back in from the outside, through then Rusty's skid. Toss on the stock nut, leaving it loose.
  6. Use the open end of a wrench to hold the other provided nut inside the upper back of the frame mount, and spin the other bolt and washer in from the outside. If you lay underneath, this is very doable.
  7. Hand-tighten the small provided bolts front and top. There's a little play, so I shoved my skid tight against the from. I figured the first rock will do that for me anyway, so I might as well save one shot to the frame.
  8. Torque the stock LCA bolt. Good luck getting to 190 lb-ft if your nearing 60 and doing this on the ground. Getting old sucks, by the way.
  9. Torque the provided bolts. The nuts dig into the inside pretty well. I didn't get any spinning once snug.
This was way easier than I feared. No axle movement. No issues with hole alignment. No problem getting the inside nuts on with this sequence. They're getting muddy already.

Jeep Gladiator Having it all - JTRD sun buggy, trail rig and overlander Synergy after 2


The second one up as installing the Synergy steering stabilizer relocation bracket. I already lost a stabilizer trying to follow @Kindafearless through the blues at AOAA, so I know I needed this one. I've avoided messing with the steering setup on this after getting the Mopar 2-inch lift installed at the dealer, since my first taste of death wobble on the way home from AOAA was not fun at all. Still, it needed to get done.

This one, I have to admit, took me longer than expected. The Rubicon front skid hurts when it drops on your chest, and some of these bolts are not easy to reach. Doable, but you might end up playing with ratchet extensions and hand angles.

Stock, there's a bracket that drops down from the passenger-side end of the tie rod and a hefty bracket that mounts to the lower side of the axle about midstream. The relocation not only puts the stabilizer above the tie rod and axle, it flips the function -- now the outside end of the stabilizer is fixed to the axle with a special bolt that replaces the stock track bar connection, and the inside of the stabilizer rides on the tie rod with a provided six-bolt clamping mount. I took time to remove the stock brackets from the tie rod end and the axle, just to keep it clean and save a few pounds. The track bar shifted outward as soon as I pulled out the stock bolt, but a little push up on the frame got it to line up easily. I used a simple approach I saw in a video from a guy I think I'm not supposed to name here, and located the new tie rod bracket by turning the wheels full passenger, then compressing the stabilizer all the way, letting it out about an inch, attaching the smaller end to the track bar post and and using the booted end to locate the tie rod clamp. I snugged it and checked it to full driver as well before clamping it down. By the way, invest in a few 3/8 drive hex bits to tighten the tie rod collar (7/32) and retaining bolt on the track bar post (3/16). With all the hardware close by and the way the bolts point, it was not easy to get a good turn with various handheld hex keys.

One last thing to note if you're an amateur like me: The collars in the ends of the stock stabilizer are a little too small for the Synergy mounts. You have to drill them out to 1/2 inch. With a decent metal drill bit, my 15-year-old DeWalt drill, a few quick clamps, and a little cutting oil, it was far easier than I expected.

Even walking through it slow and taking a bit longer than the instructions suggest, this was very much worth it. You can see where the stabilizer used to sit (enjoy the post-AOAA rock rash) and the new location. Definitely out of harm's way now. If I go to 37s at my upcoming tire change, I may bump up to a Fox stabilizer to handle the added weight. In this configuration, I'm confident that investment will be safe.

Jeep Gladiator Having it all - JTRD sun buggy, trail rig and overlander Synergy after 2

Jeep Gladiator Having it all - JTRD sun buggy, trail rig and overlander Synergy after 2
With an intro like that, I feel like I need to apologize! That was a fun afternoon though :)
 
OP
OP
John in the Woods

John in the Woods

Well-Known Member
First Name
John
Joined
Jul 20, 2020
Threads
24
Messages
535
Reaction score
1,117
Location
Blacksburg VA
Vehicle(s)
2021 Gladiator Rubicon Diesel
Build Thread
Link
Occupation
Semi-retired noisemaker
With an intro like that, I feel like I need to apologize! That was a fun afternoon though :)
You were an amazing trail leader. You challenged me more than once, but always showed me the way through. I learned a ton, and had a blast.

Best steering dampener I’ve ever spent!
 

Blitzinger

Well-Known Member
Joined
Aug 16, 2022
Threads
19
Messages
299
Reaction score
373
Location
New York
Vehicle(s)
None
Love the build. Where about in Ny? I’m in westchester. Have 300 miles on my rubicon I picked up in PA
 
OP
OP
John in the Woods

John in the Woods

Well-Known Member
First Name
John
Joined
Jul 20, 2020
Threads
24
Messages
535
Reaction score
1,117
Location
Blacksburg VA
Vehicle(s)
2021 Gladiator Rubicon Diesel
Build Thread
Link
Occupation
Semi-retired noisemaker
Love the build. Where about in Ny? I’m in westchester. Have 300 miles on my rubicon I picked up in PA
Big Man! Welcome to the JTR world. I'm crossing 47K soon, and love every mile. I do a lot of exploring state forests in Upstate, from the Catskills to North Country to Western NY. Let me know if you're ever up for some trails and mud.

In case you want to stretch your legs and see what the rig can do, among friends with plenty of low-impact options, consider joining a bunch of us at Rausch Creek on the 22nd. Definitely a good way to learn a ton and get a taste of the rig.
 

Sponsored

Blitzinger

Well-Known Member
Joined
Aug 16, 2022
Threads
19
Messages
299
Reaction score
373
Location
New York
Vehicle(s)
None
Big Man! Welcome to the JTR world. I'm crossing 47K soon, and love every mile. I do a lot of exploring state forests in Upstate, from the Catskills to North Country to Western NY. Let me know if you're ever up for some trails and mud.

In case you want to stretch your legs and see what the rig can do, among friends with plenty of low-impact options, consider joining a bunch of us at Rausch Creek on the 22nd. Definitely a good way to learn a ton and get a taste of the rig.

Sounds good! My wife and I started camping for first time in 2020 and ended up going to 7 state parks all over that year. Definitely itching to take this out but now have a 5 month old so it’ll be a little bit before we can do trips.

where about in NY are you? I’m in westchester. I’m having some electrical work done at de Dona in yonkers but always looking for diff shops
 
OP
OP
John in the Woods

John in the Woods

Well-Known Member
First Name
John
Joined
Jul 20, 2020
Threads
24
Messages
535
Reaction score
1,117
Location
Blacksburg VA
Vehicle(s)
2021 Gladiator Rubicon Diesel
Build Thread
Link
Occupation
Semi-retired noisemaker
Sounds good! My wife and I started camping for first time in 2020 and ended up going to 7 state parks all over that year. Definitely itching to take this out but now have a 5 month old so it’ll be a little bit before we can do trips.

where about in NY are you? I’m in westchester. I’m having some electrical work done at de Dona in yonkers but always looking for diff shops
I'm in Ithaca, but I hit every corner of the state pretty frequently. I hope I see you out there, and I'm looking forward to see how you build things out. And congrats on the little one. Mine are in there late 20s and out shopping for their own Jeeps. Keep passing those traditions on!
 
OP
OP
John in the Woods

John in the Woods

Well-Known Member
First Name
John
Joined
Jul 20, 2020
Threads
24
Messages
535
Reaction score
1,117
Location
Blacksburg VA
Vehicle(s)
2021 Gladiator Rubicon Diesel
Build Thread
Link
Occupation
Semi-retired noisemaker
A quick post-summer update on the ARB step/sliders.

I did a quick write up on the install back in January. So far, I love these things. Great step. Great rocker and side protection from fender to fender. They've dropped on and been dragged over a few rocks and trees and come away with barely a mark.

Since the install, the truck has seen very little snow. I'm in upstate NY, but t's in a garage at night and since watching my previous build disintegrate into a rust pile I'm a bit of a fanatic about car washes after salty roads.

So I'm a little bummed about rust and coating bubbling appearing on both sides, everywhere the step/slider bolts to the rocker guard. I'm not sure if it's the screws or a reaction between the metals, but in every spot where the tab from the bottom of the rocker guard goes under the step/slider and bolts to it -- every hole on both sides -- is showing rust. Nothing anywhere else, either under the sliders where they've been scratched or on the rocker guards where they attach to the tub. Not a deal breaker, but something of which to be aware if you're thinking about a set.

Here's a few pics of what I'm seeing ...

Jeep Gladiator Having it all - JTRD sun buggy, trail rig and overlander ARB sliders 1

Jeep Gladiator Having it all - JTRD sun buggy, trail rig and overlander ARB sliders 2

Jeep Gladiator Having it all - JTRD sun buggy, trail rig and overlander ARB sliders 3

Notice it's only where the step/slider attaches to the rocker guard, and not at any of the places the rocker guard bolts to the tub, so I don't think it's something with the overall coating. Just something going on where these two pieces meet.

And although I haven't seen any problem with strength, I did mention when I installed them that it seems like a missed opportunity not to connect the step/slider to the four bolts locations on each side used by the factory rock rails. The ARB sliders use the body mount bolts, and then connect to the rocker guards which as bolted to the tub, but in between those two points are four factory-installed anchor points engineered to support a slider. Why not use them too? It seems even more like a miss when you see how the ARB sliders are within an easy few inches of the factory rock rail bolt mounts. A few tabs and these things would have picked up some added strength.

Jeep Gladiator Having it all - JTRD sun buggy, trail rig and overlander ARB sliders 4


That's about it on these. I'm still very glad I got them. Great service. Great look. And I love that since they go out 3-4 inches from the side, I'm essentially parking-lot ding proof.
 
OP
OP
John in the Woods

John in the Woods

Well-Known Member
First Name
John
Joined
Jul 20, 2020
Threads
24
Messages
535
Reaction score
1,117
Location
Blacksburg VA
Vehicle(s)
2021 Gladiator Rubicon Diesel
Build Thread
Link
Occupation
Semi-retired noisemaker
Summer 2022 lesson #4: Losing the space race

I hinted at this earlier, but I definitely discovered I'm caught in a trap. I like the stealth look. I have no need to appear overlandy to anyone, I just want to get out there and stay out there for a while. I also tried to start out cheap so I could see what I needed before I threw money at it, which meant ground tent, less expensive gear choices and plastic tubs from big box stores to stow gear and food.

Some of it worked. I'm happy with my 12 gallons of water storage that costs me $40 total. The Coleman sleeping cot is sturdy, comfortable and pretty compact; if you don't include the two foam rolls I need to get my geriatric back to keep functioning. The $40 folding Flatpack grill has never let me down as a cooking stove or a small fire pit.

But some of it absolutely didn't. The Coleman 6-person instant cabin leaked badly, needed an add-on rain fly, and a tarp, and two round of rainproofing and seem sealing; and it's massive when packed down. The Coleman propane grill is ok, but has very poor flame control. The "King Kong" chairs I bought are massive and heavy, and not half as comfortable as the 1/4 the size and weight REI Camp Dreamer chair I grabbed midseason for less cash. The Craftsman plastic tubs from Lowes were tough, but they waste space at the sunken tops and tapered sides, and are no joy to access from the back during a rainy rest stop lunch break.

Overall, the biggest problem I kept bumping into was space and access. I was all East Coast, so I never had to be off grid for two weeks at a time, but I'm prepping for some extended travel and I wanted to see how far I could push things. With the gear I had and the stealth space the Gladiator gave me in the back seat below window height and the bed underneath the tonneau cover, it was pretty hard to do. If I'm going to measure journeys in months instead of weeks, I need to upgrade gear, be smarter about packing or find more space -- or all of the above.

And so the research for the next phase begins. I've been grounded by an illness in the family, so I've got plenty of time to read up; and I hope to get started soon. Recommendations on any and all of the issues I mentioned are ver welcome and appreciated. I'll update this as I start those moves, a few of which I already have in mind.

Jeep Gladiator Having it all - JTRD sun buggy, trail rig and overlander bed pack

Typical bed pack for me. There's a little space to still use here, which for largely eaten when I upgraded to two 6-gallon water jugs.

Jeep Gladiator Having it all - JTRD sun buggy, trail rig and overlander cab pack 1

Most the recovery gear ended up under the Goose platform, which itself is buried under the IceCo VL60 fridge. Clothes, med kit, dry food and electronic gear (RiverFlow Pro, solar panels, computer and stuff, lights, comms) take up the rest of the space from the window line down in the back seat.

Bonus Summer 2022 lesson #5: Never finish great with cheap

I'm not a lighting junkie. I'm not out to impress anyone. I have a single set of KC Flex ERA 4 lights on the front bumper, and they are great. Tough units, very well made, and well more than enough light for me on any trail I've driven at night.

But dang, those cheap plastic covers they include are terrible. I put the lights on in winter, about 25 degrees when I went out to test them. The thin tabs made it impassible to remove the covers with gloves on, and when I try to pop them off with my cold fingers, they split right down the center. To their credit, the KC customer service folks offered to send me a new set right away at no cost, but I told him not to worry, since I was sure I'd find another way to wreck them even more.

Turns out I did. After reaching down for the Aux 4 button to turn on my Rigid Dually ditch lights (which have much stronger covers that are much easier to pop off) as I pulled into camp, I accidentally hit Aux 2 and turned on the KC lights with the covers on. I was parked with lights off within 2 or 3 minutes, and when I got out I smelled smoke. Out front were two KC light covers, dripping off the lights like birthday candles. A testament to the incredible lights, and the ridiculous covers.

Jeep Gladiator Having it all - JTRD sun buggy, trail rig and overlander kc oops

I sprayed some black paint on them to mask the dipping yellow, with mixed results at best.


Top